Miniature Garage Loft Furnishings – Phase 6
Continued from: Miniature Garage Loft Furnishings – Phase 5
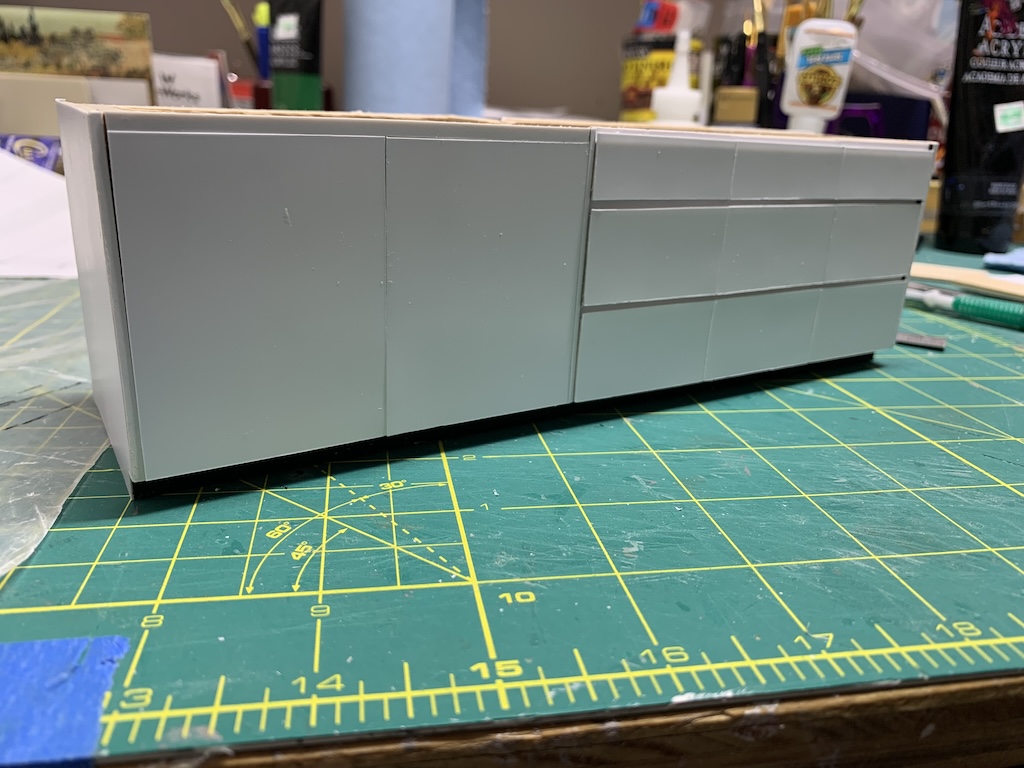
Now I could figure out the countertop dimensions for this finished cabinet.
First was to determine the overall length and width allowing for a 1/8” overhang on all four sides. Unlike the two small cabinets on the wall that I had to ensure the countertops would fit between the tall cabinet and the window frame, I had no limitations on the free-standing cabinet, and its dimensions were an easy determination. But there was one thing I needed to carefully figure out—the placement and cutout for the sink.
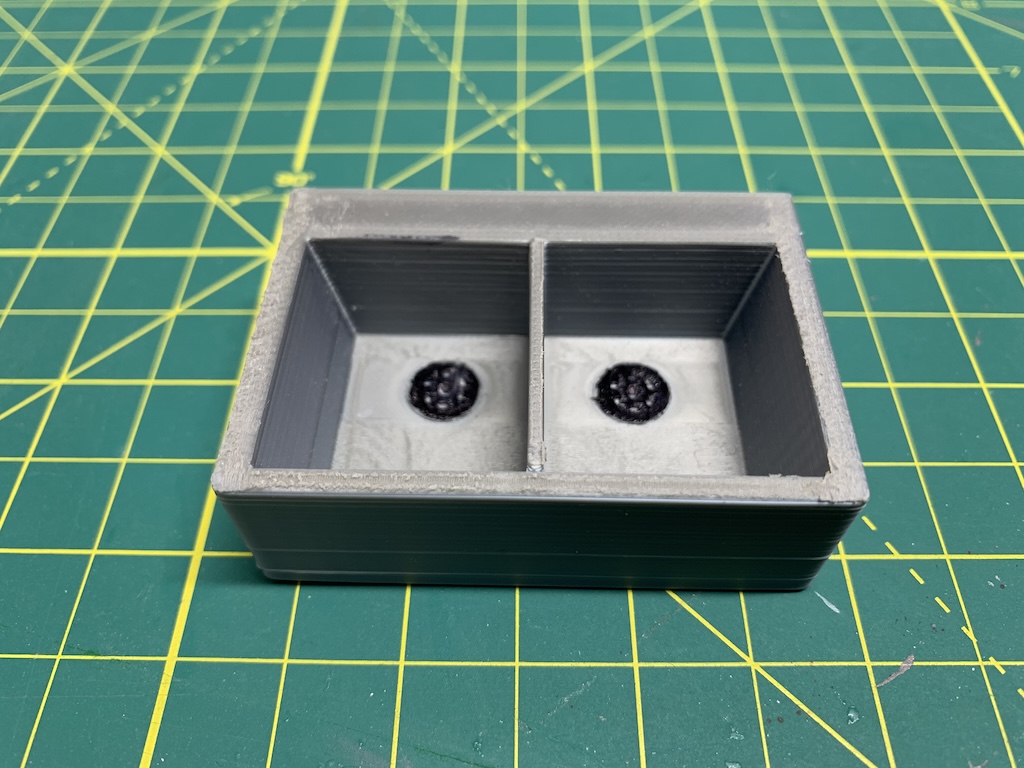
For this I did not need the full length of countertop, just the portion where the sink would go. Using my calipers once again, I measured the internal length and width of the sink my sister 3-D printed for me. My intent was to have a undermount sink where the countertop opening would be flush with the interior sides of the sink. Once I determined the size of the cutout, I then needed to determine where the cutout would be.
To make my cutting easy, I used a 1/32” piece of basswood and drew in the measurements with a pencil before gluing on pieces of 1/8” basswood to model the countertop overhang.
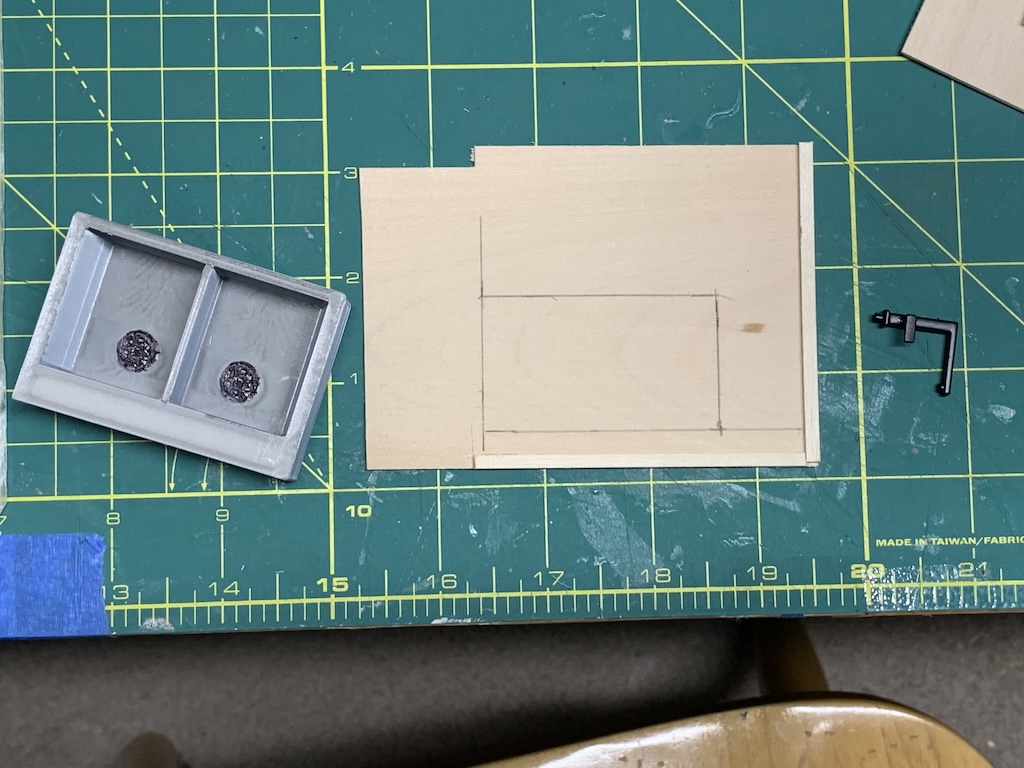
Once I had cut out the rectangle, I then figured where to drill a hole for the faucet to fit into the countertop and then put the prototype together.
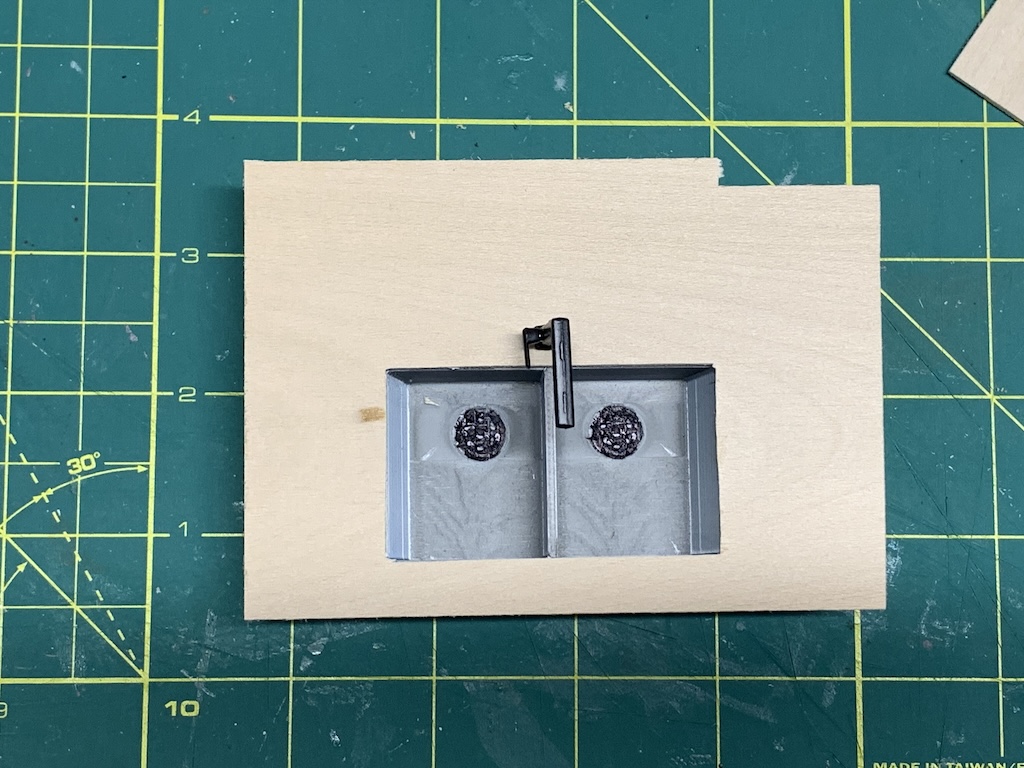
But when I put the prototype countertop onto the cabinet, I saw I had a problem.
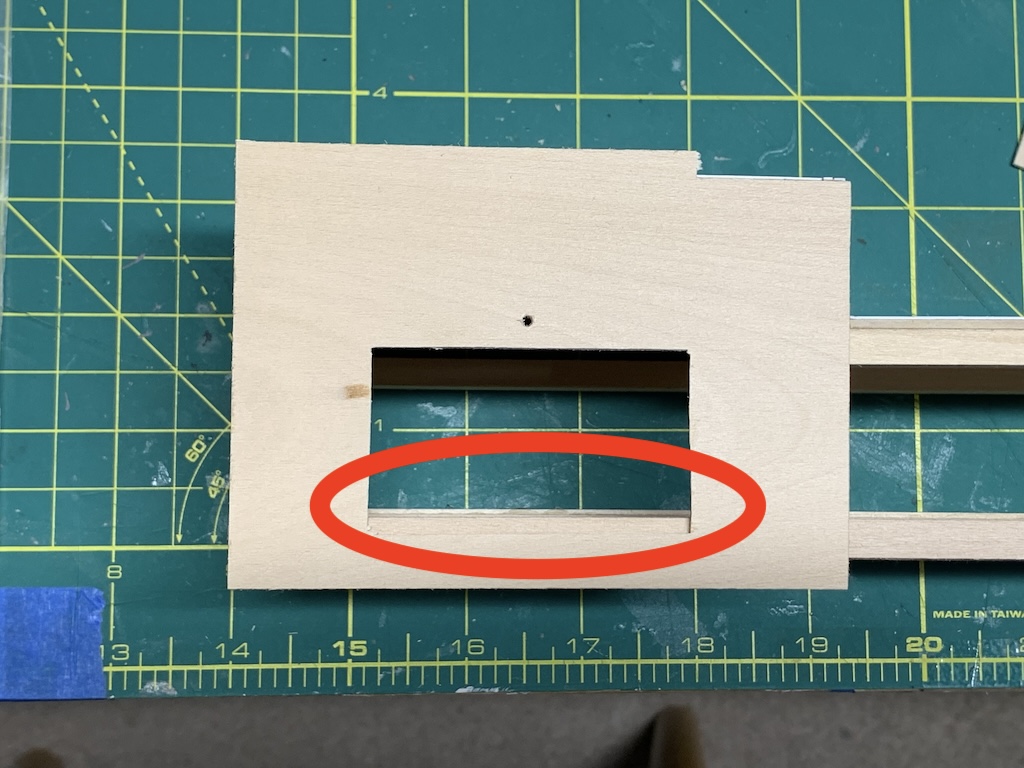
When I added the supports for the cabinet, I did not think about where the sink would be placed. The encircled part of the support will prevent the sink from being dropped below the countertop. I drew a pencil outline and then removed the countertop from the cabinet.
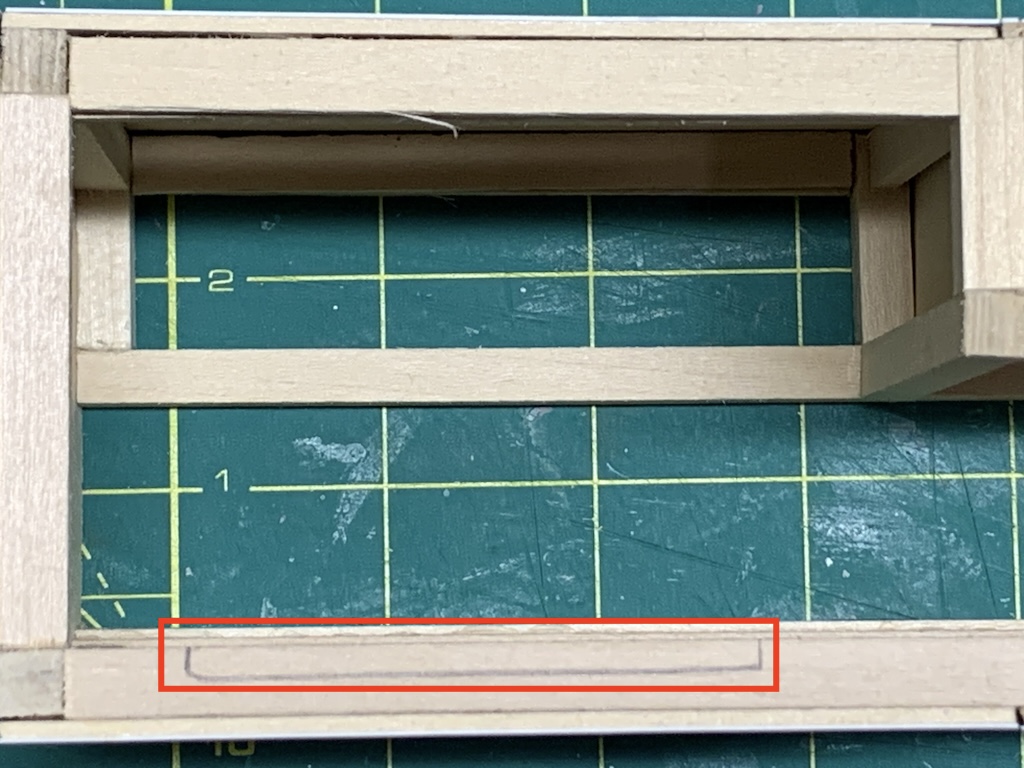
I had two options of fixing this issue. First, I could push the sink further into the countertop, but this would mean the sink would be set in too far from the edge of the countertop. The second option would be to carve out this part of the support that interferes with the sink’s placement. The amount to be carved out would still leave a large part to provide the support so that is what I chose.
But once I carved out that section of the support, held the sink in place and put the countertop onto the cabinet, I had another issue. I failed to remember that the countertop cutout aligned with the inside of the sink, not the outside. To accommodate the sink exterior, I ended up cutting out that entire section of the support.
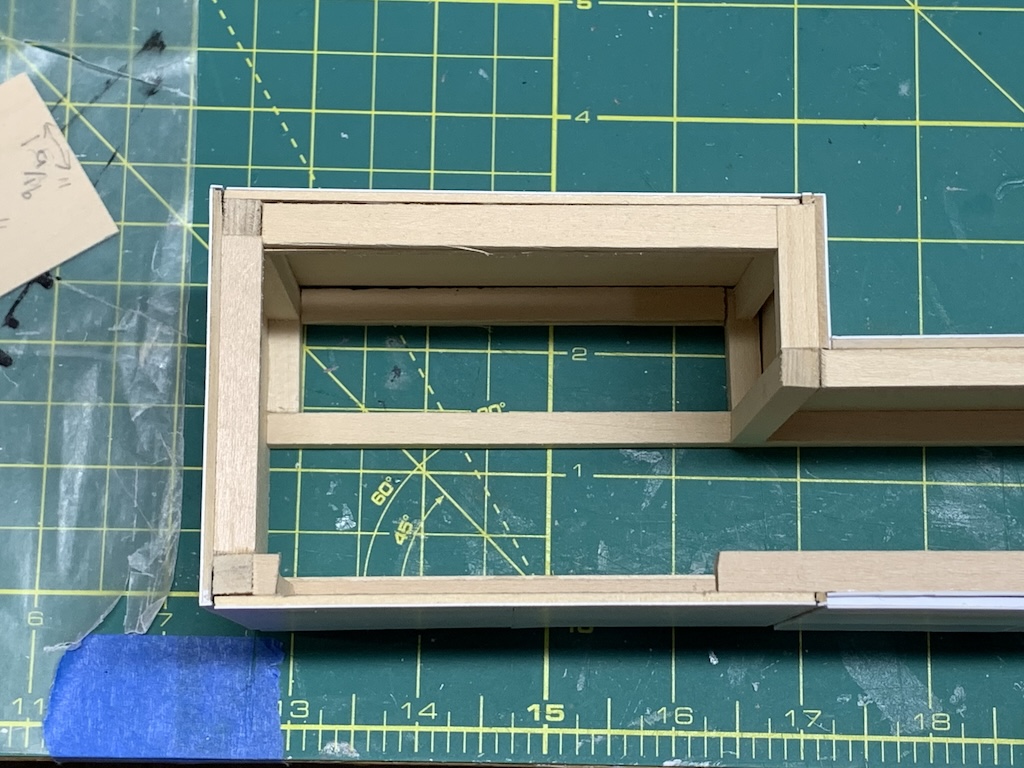
With the sink now able to fit properly, I needed to add some brackets beneath the sink to support it in pace and so pieced together some scrap basswood and glued them inside the cabinet.
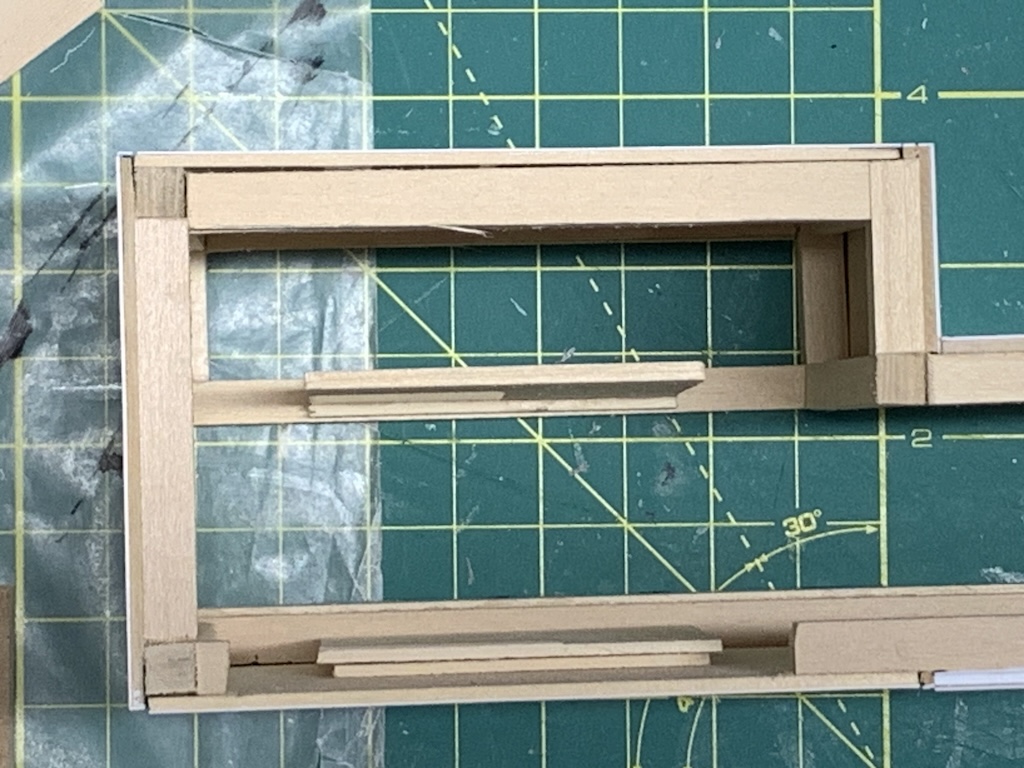
Setting the sink onto the brackets, I could now put the prototype countertop in place.
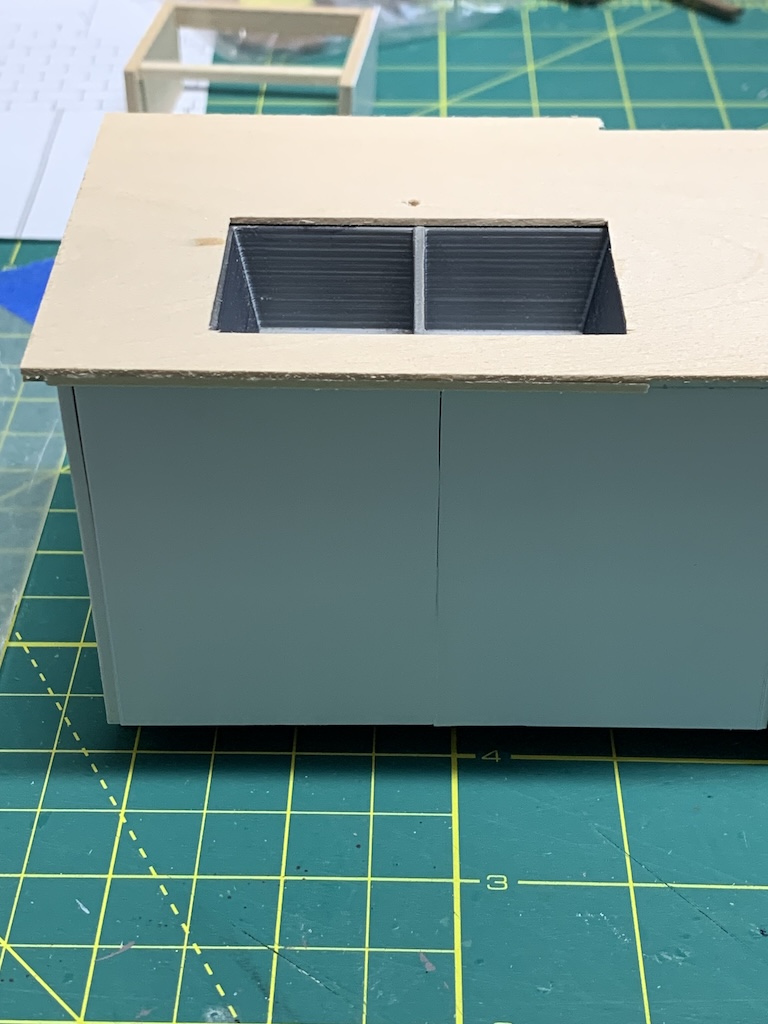
From a top-down view, everything looked good but then when I looked at the sink from the front of the cabinet, I noticed that the middle of the sink did not line up with the center of the cabinet doors below. When I measured with a ruler, I found the center of the sink to be 1/8 of an inch too far to the left. I somehow missed that little detail but thank goodness I decided to build a prototype countertop before giving the measurements to my sister for cutting the acrylic countertop.
Somewhat discouraged with the difficulty this was turning out to be, I resigned myself to make a second prototype countertop. But then I realized this was just a prototype and looks did not matter. So, rather than making a second prototype, I could simply cut 1/8 of an inch from the right side of the cutout and glue it to the left side of the cutout.
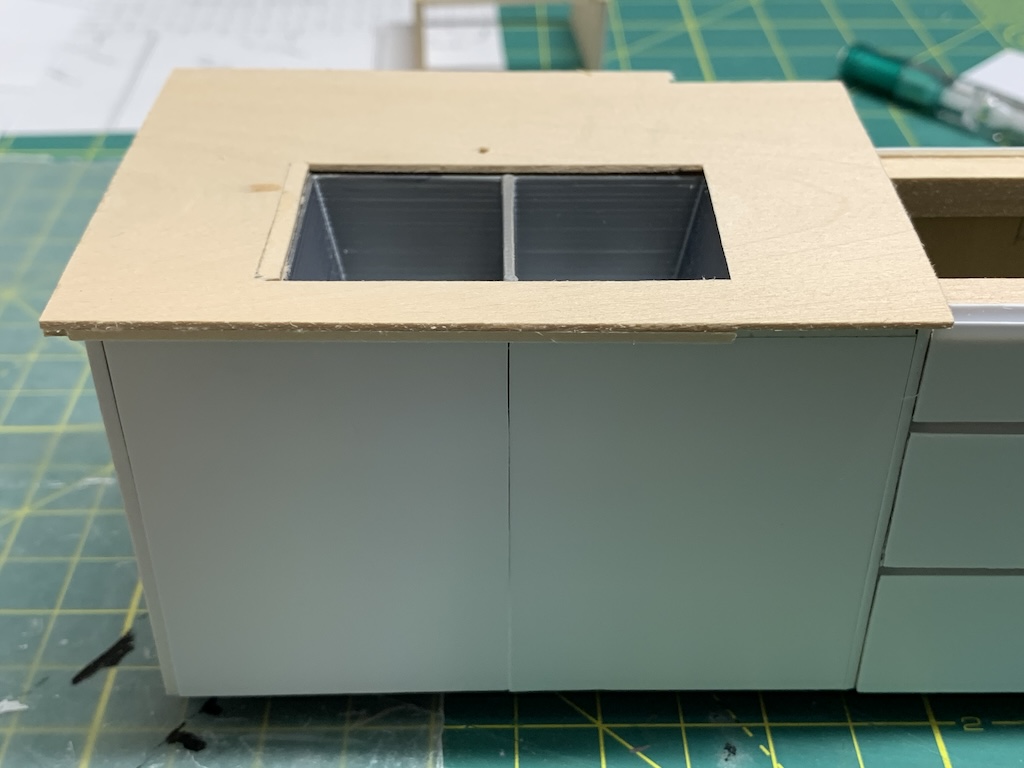
Ah much better! Now I could provide to my sister the correct dimensions for this countertop with confidence. And once she had the time to cut out all three countertops, she could mail them to me to finish off these cabinets.
In the meantime, I decided to return to the cabinets that would hang from the wall.
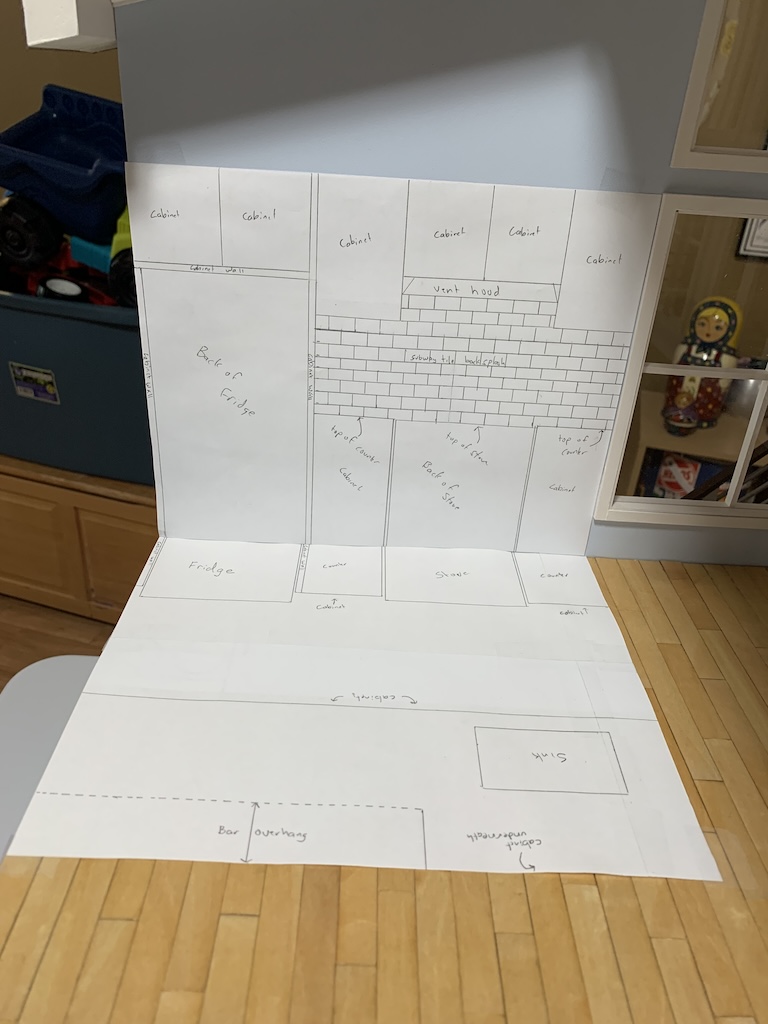
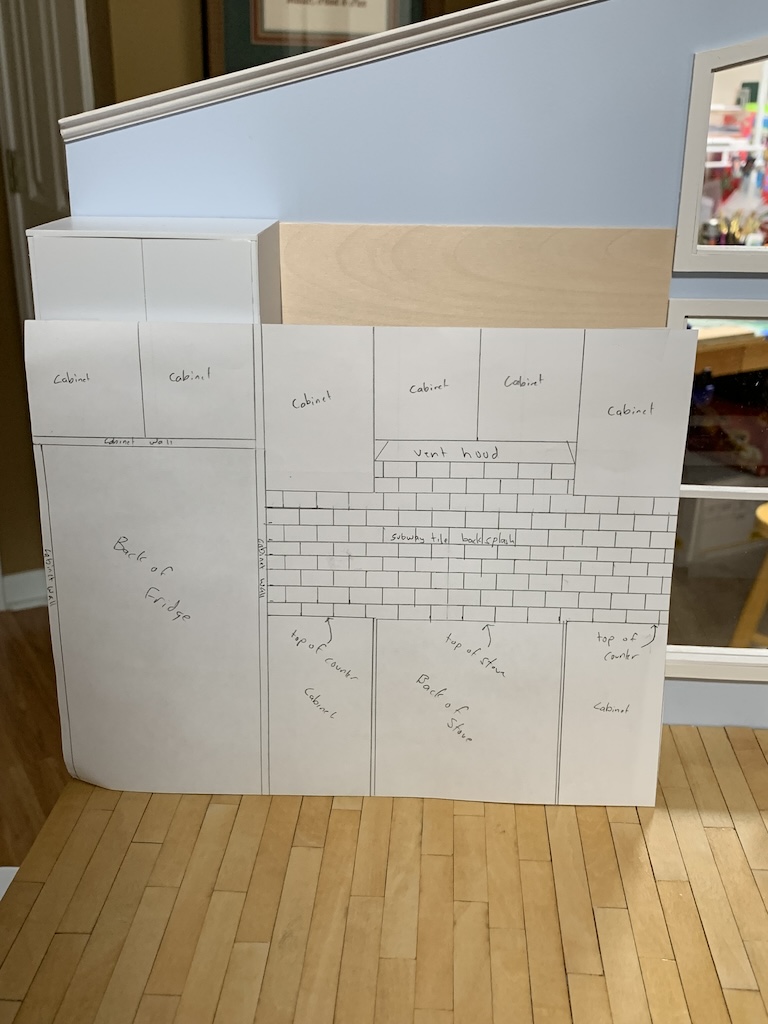
Recall from my elevation drawing I planned to have two single-door cabinets the same width as the cabinets below and a two-door cabinet between them that would span the wall above the stove.
You can also note I plan to include a vent hood above the stove that would fit beneath the center two-door cabinet. I tried finding one online but could not find what I needed. I considered asking my sister to 3-D print one for me, but we would still have to find one just the correct shape and dimensions. Then I realized I could make one myself from basswood and then cover it with the sheet polystyrene which I could paint with stainless steel paint. But to know its correct size, I needed to build the above counter wall cabinets first.
Again, on this wall, I had to ensure that the cabinets fit between the fridge cabinet and the window frame. To ensure that I met this limitation, I decided to cut a piece of 1/32” basswood to serve as the back frame for the cabinets. I measured the cabinet height and width on my elevation drawing and then cut the basswood to these dimensions. When I placed the piece on the wall to ensure it fit flush up to the window frame, it did indeed. But something did not look right.
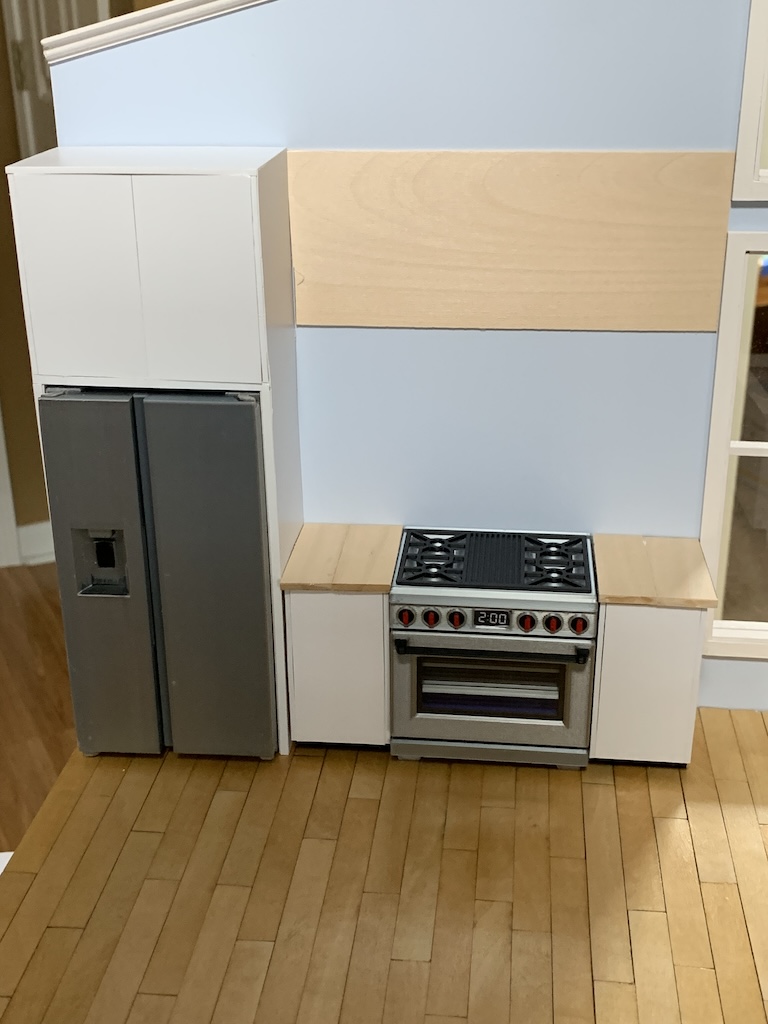
The space between the bottom of the wall cabinets (as defined by the bottom of the 1/32” basswood) and the cabinet countertop looked too tall. I measured this gap and found it to be 3.25” but on my drawing I had this gap (where the subway tile is) to be 2”. Somehow and I do not know how, I had made the cabinet above the fridge 1.25” too tall.
Now what was I going to do?
To be continued after a short break…
Categories


I don’t know. Sounds like it might be time to throw in the towel? (But I know that is not what you did! LOL!) Look forward to your solution to the latest challenge.
Yea I still don’t know how I made that mistake. But I did solve it as you will see.
David, I am confident that you will find a solution. Do you think you will ever figure out how you made the mistake? Everything will look amazing I am sure.
No Betty I could not figure out what I did wrong but since it is fixed now I moved on to tackle other challenges that you will read about.