
Phone Chair – Call Back
It has been a while since I first published a post about building a small miniature chair for your phone to relax in. So if you missed these posts on how I planned and made my first phone chair, you may want to read those before reading this update.
Once I had completed my first chair, I knew that there was opportunity for improvement in how I had assembled the chair. Since that time, I have had the opportunity to make additional chairs to give as gifts, these three being the latest.
And while making these chairs, I did in fact come up with nine improvements to the assembly process:
1) Devising an efficient lay out of the templates on the board to minimize board waste. This is important if you are making multiple chairs; this lay out requires 16 inches of linear board so with two 24-inch boards, you can make three chairs.
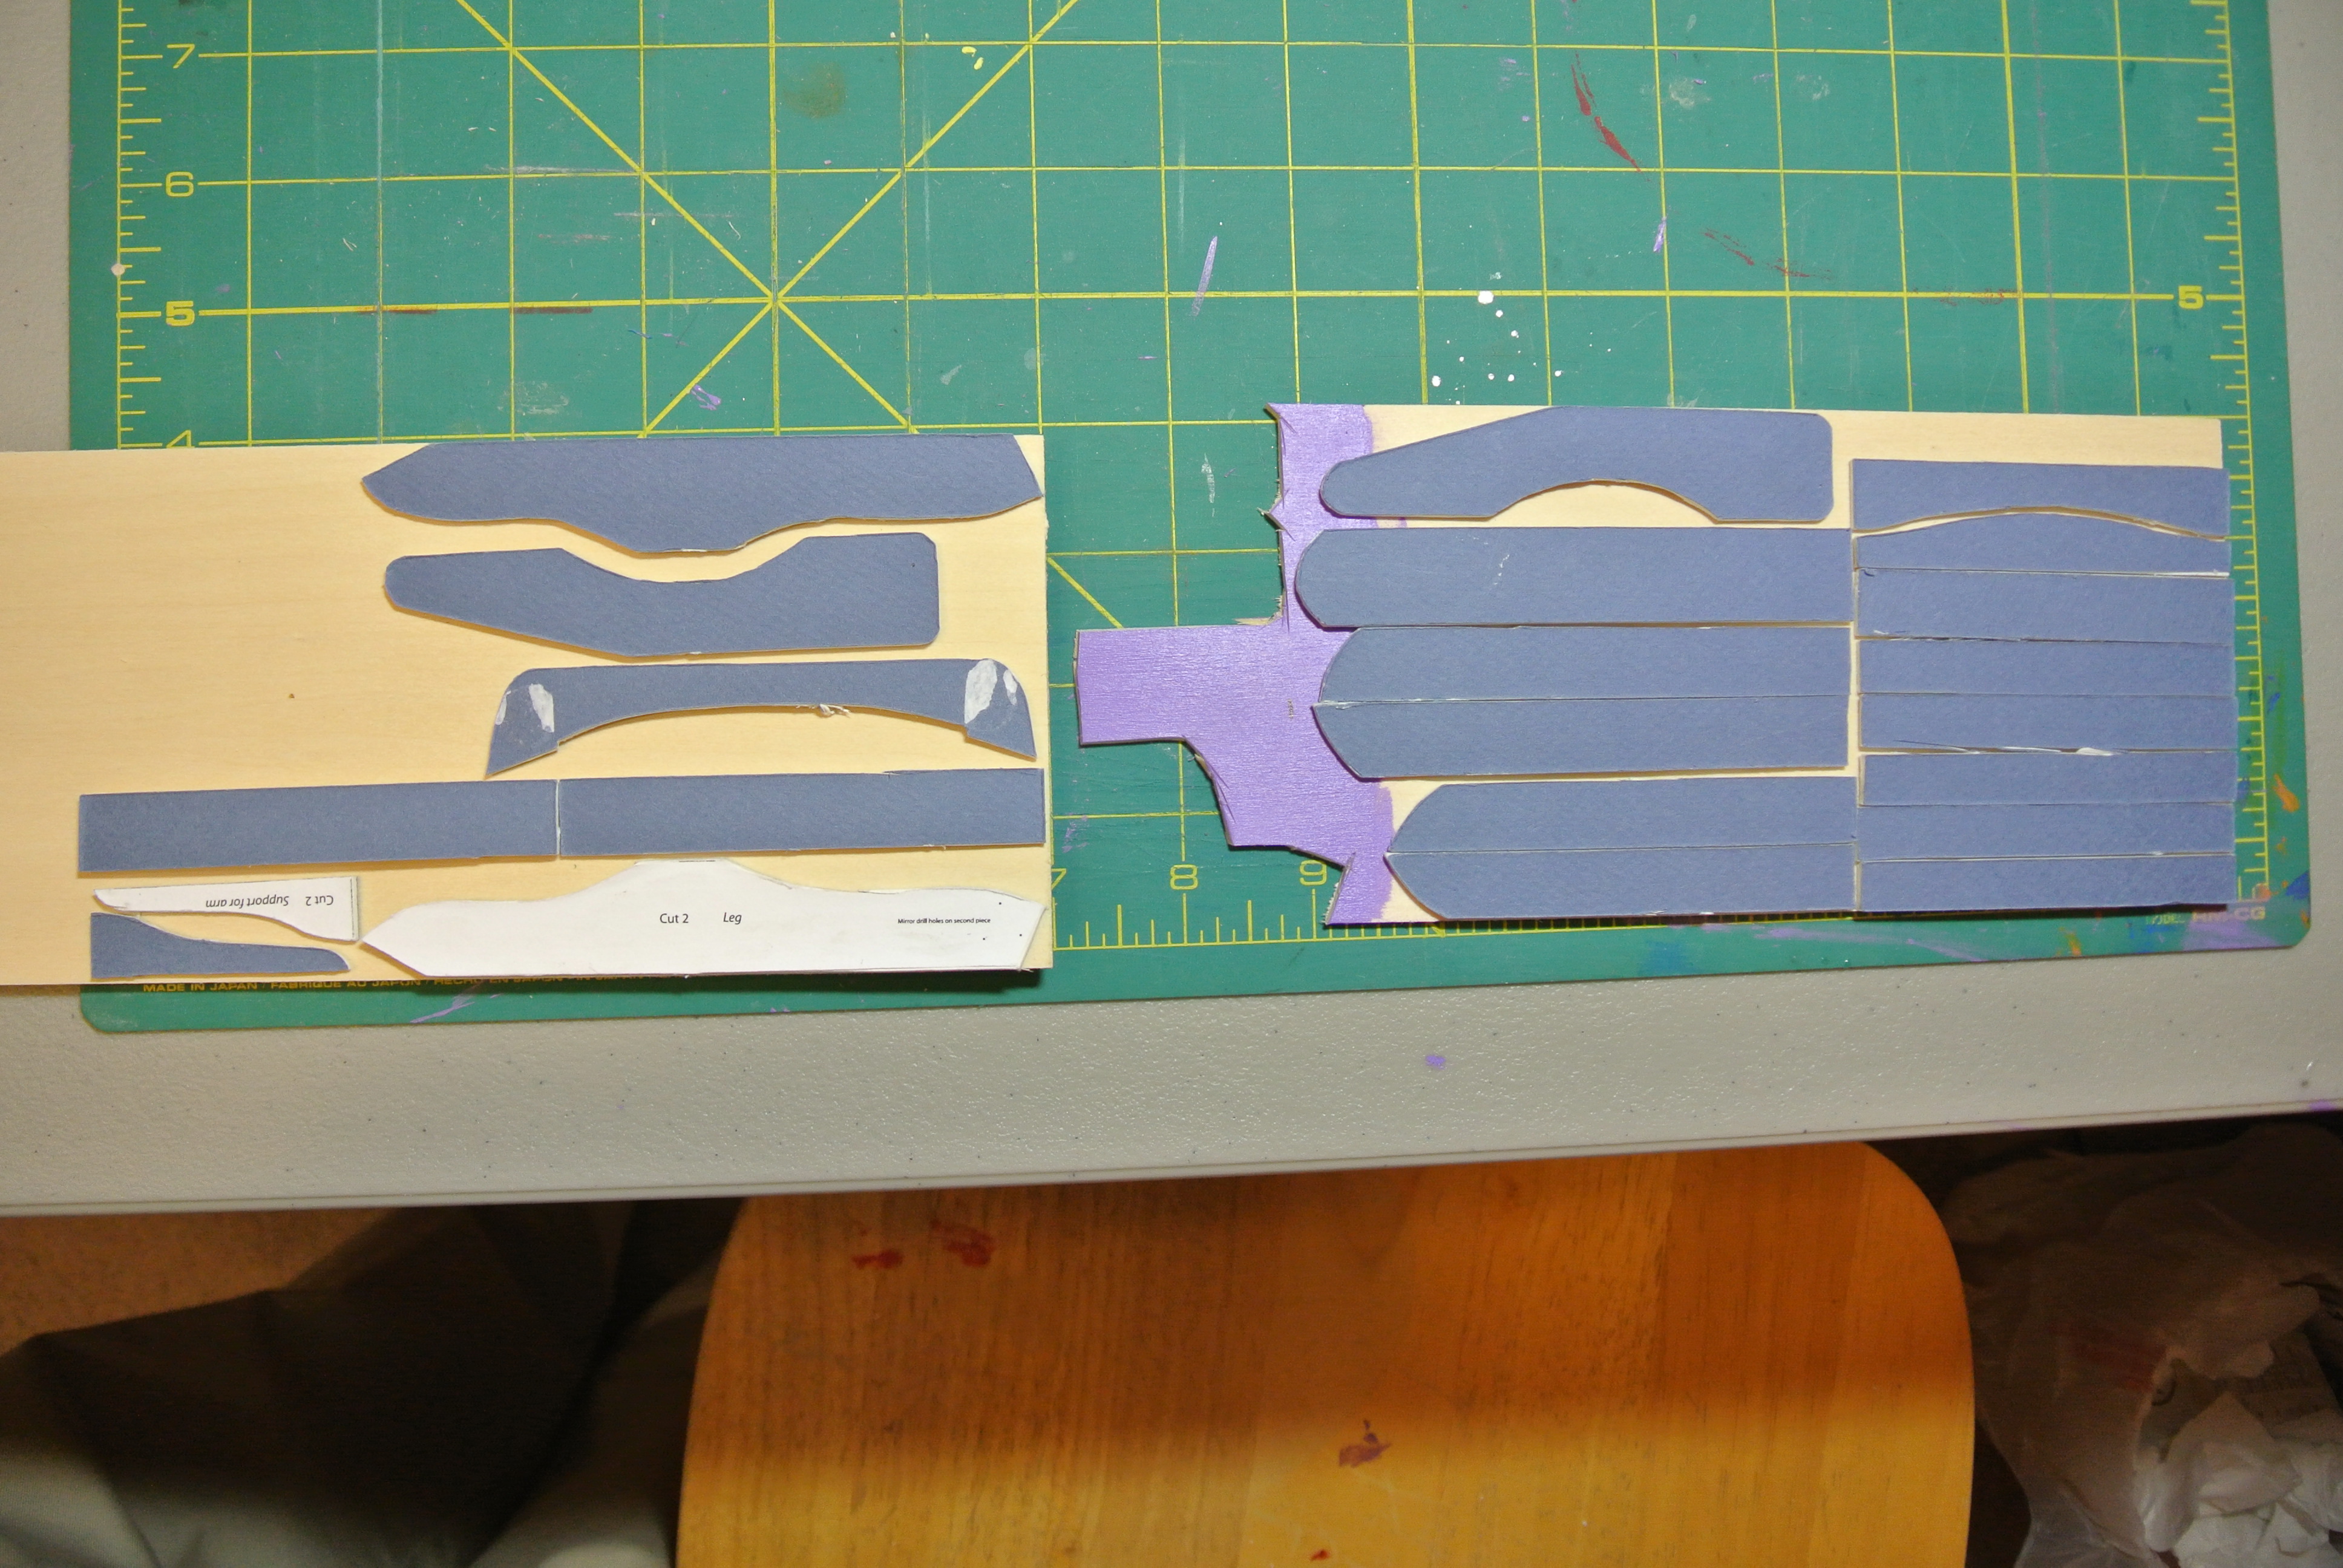
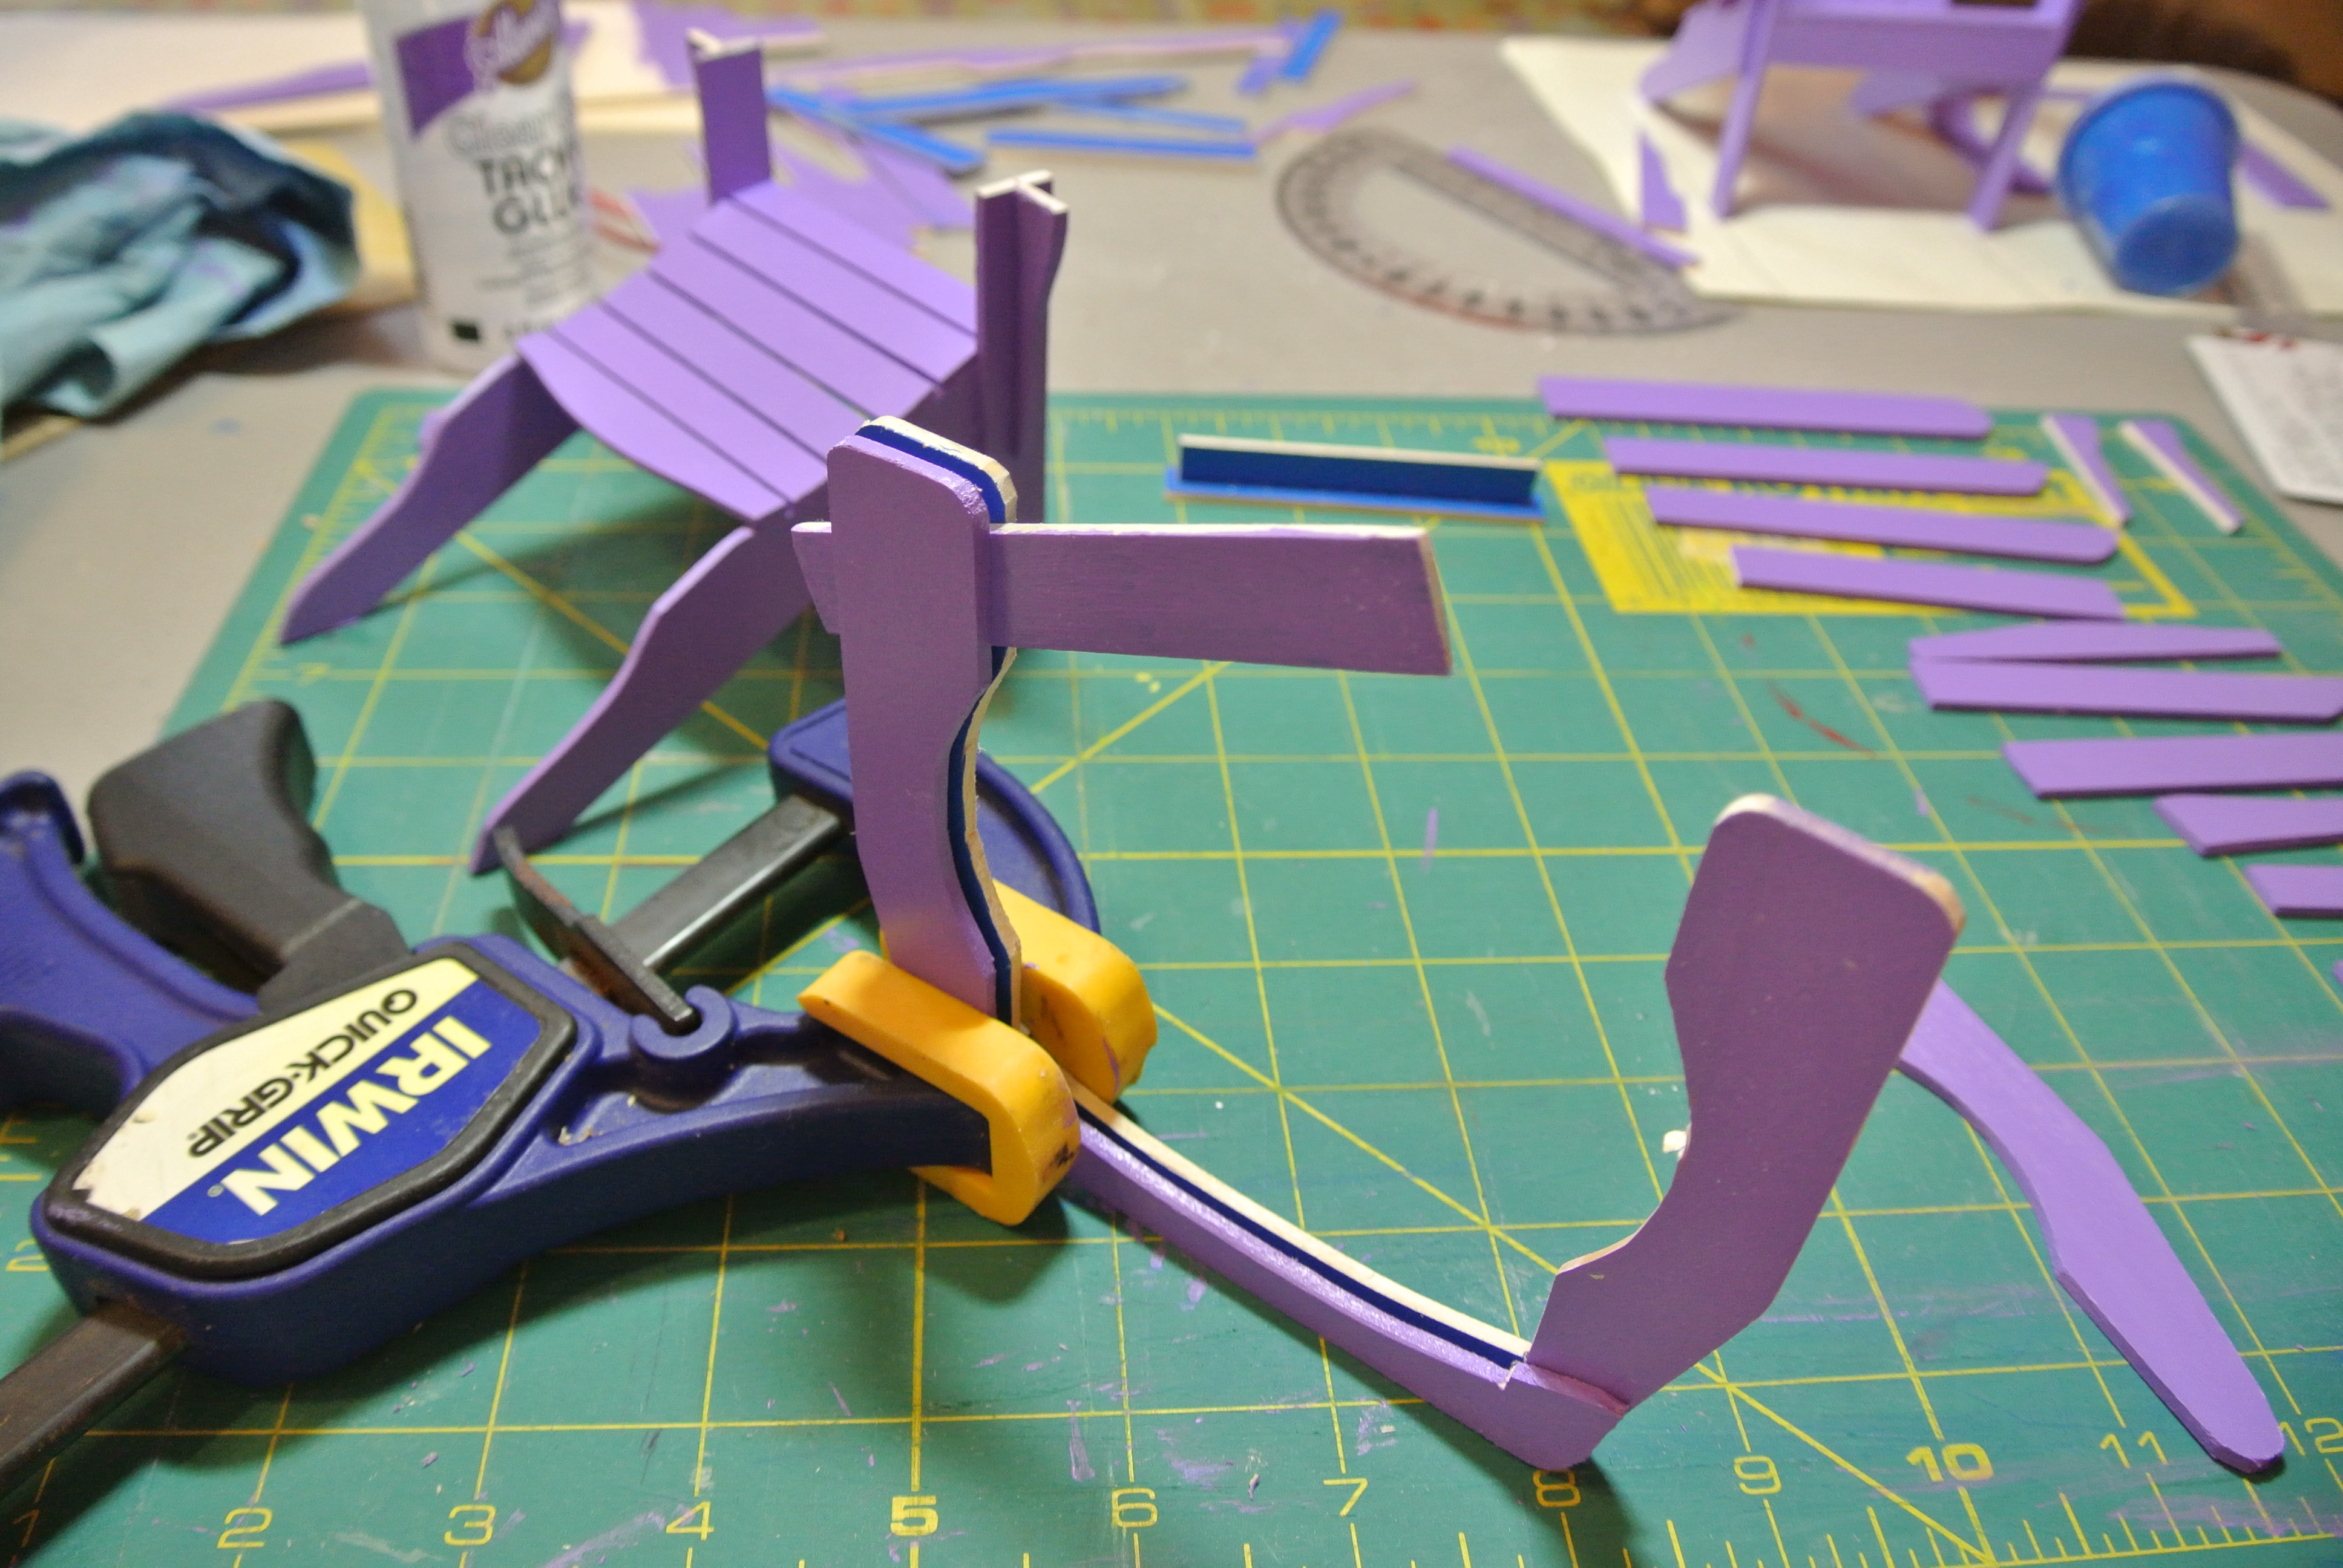
2) Having a template for the leg sub assembly that allows properly aligned gluing. This is very helpful in ensuring that all four legs sit flush to a flat surface so there is no chair wobble.

3) Rather than trying to square up the chair frame before attaching the arms, back and seat pieces, attaching the front cross member and first seat piece to one of the leg sub assemblies.
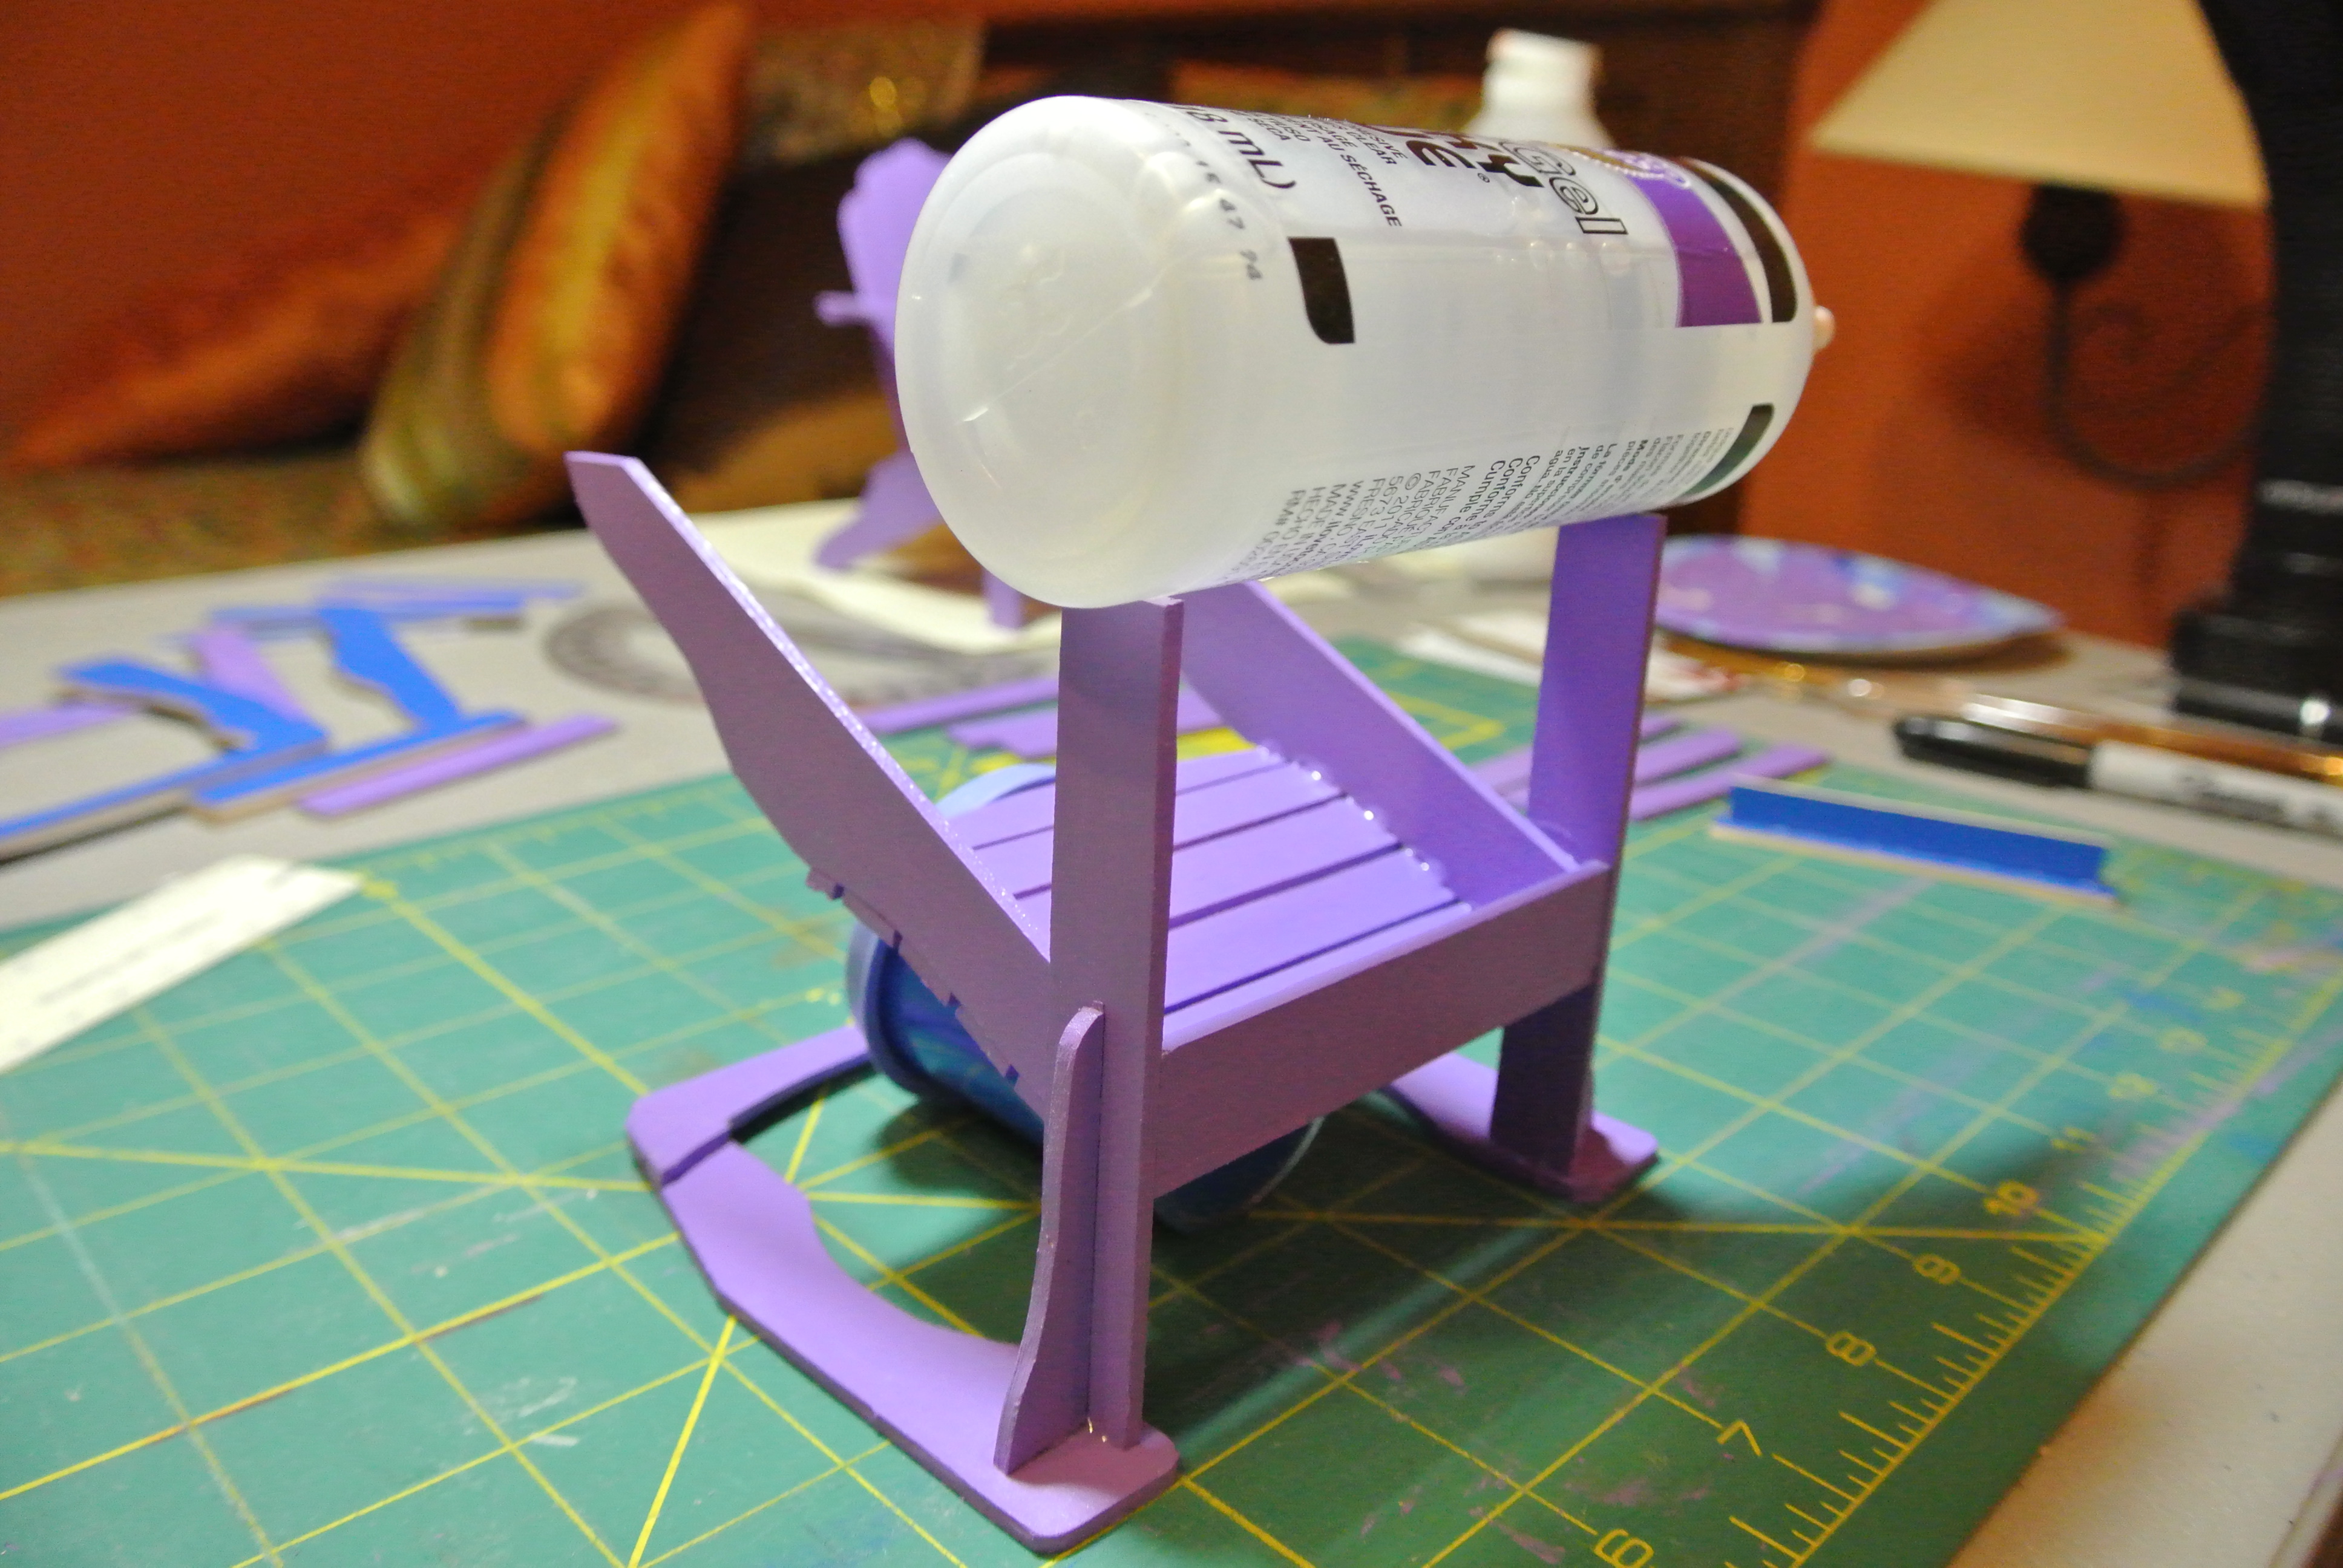
4) Then using a temporary spacer (blue piece), gluing the other leg sub assembly using the glue bottle to apply adequate pressure.

5) Adding additional seat pieces from the front of the chair to the back evenly spacing them with a credit card

allowing a little time for each to dry before adding another

to ensure all of the seat pieces are in true parallel to each other and true perpendicular to the legs.

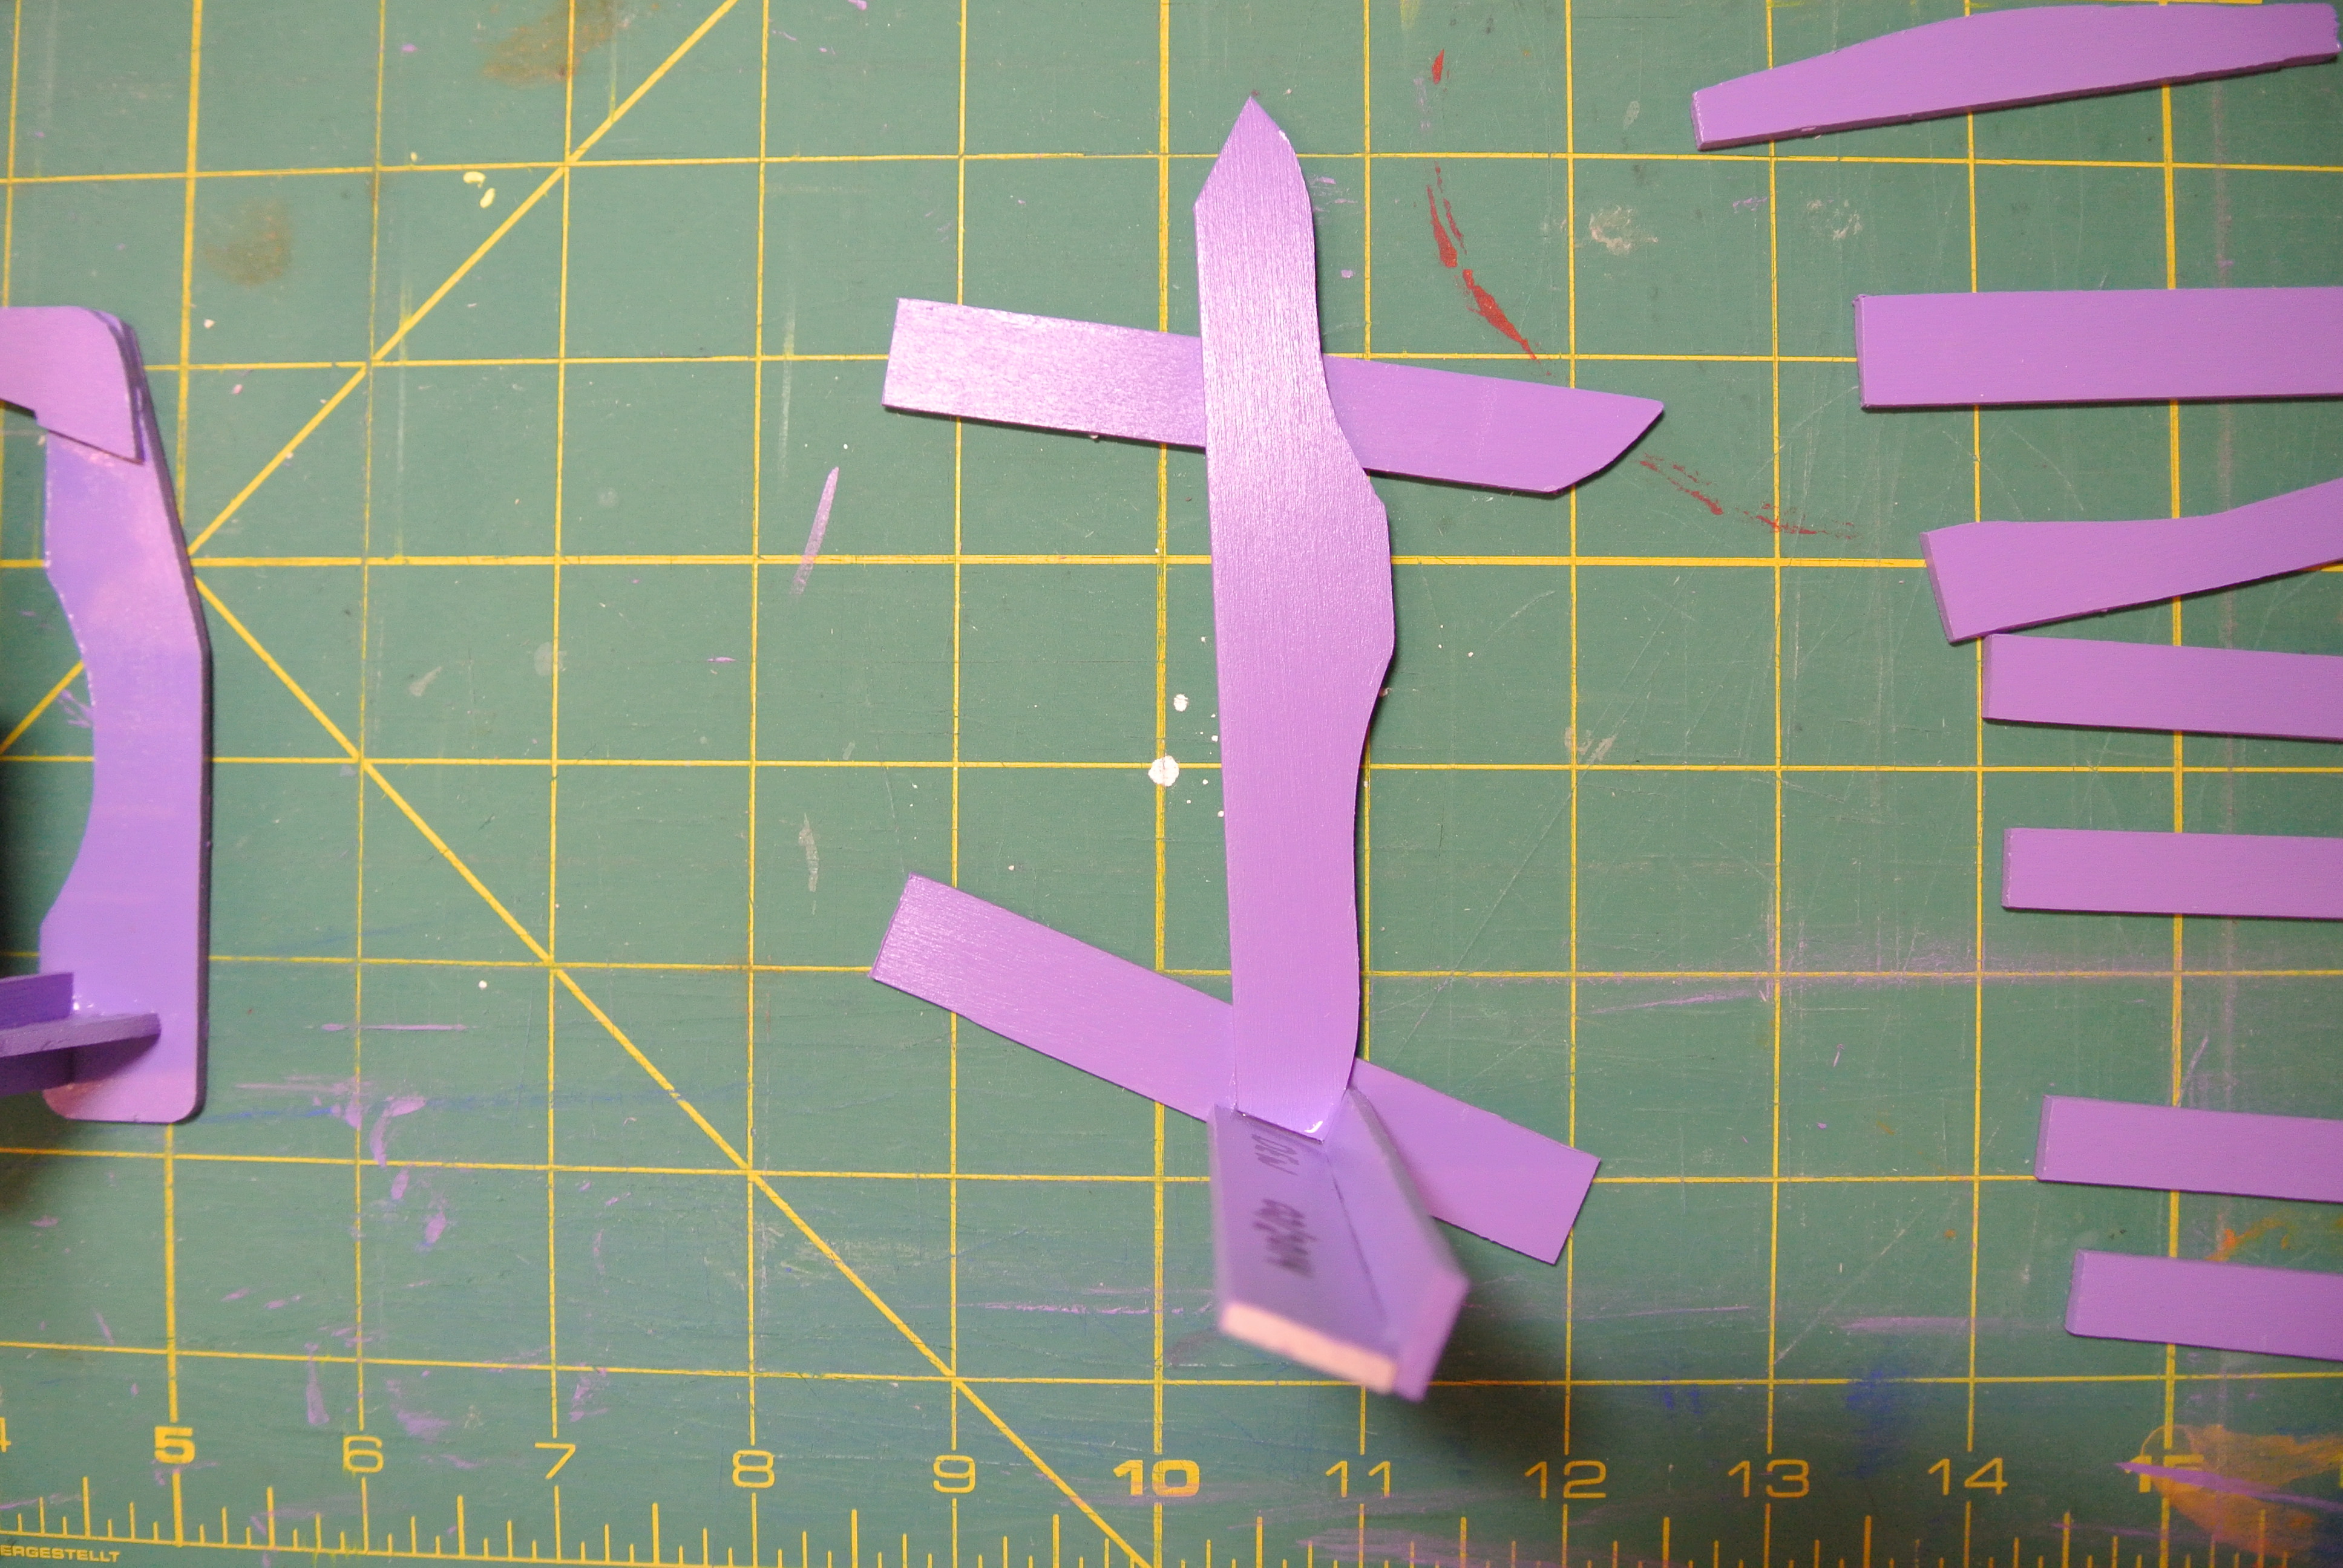
6) Having a template for the arms to ensure they are square. This allows gluing them with a clamp to ensure a strong bond.
7) Gluing the arms to the tops of the front legs again using the glue bottle to provide enough downward force to ensure a strong bond.
8) Gluing one back piece in place making sure it is flush against the inside of the bottom leg and inside of the arm.
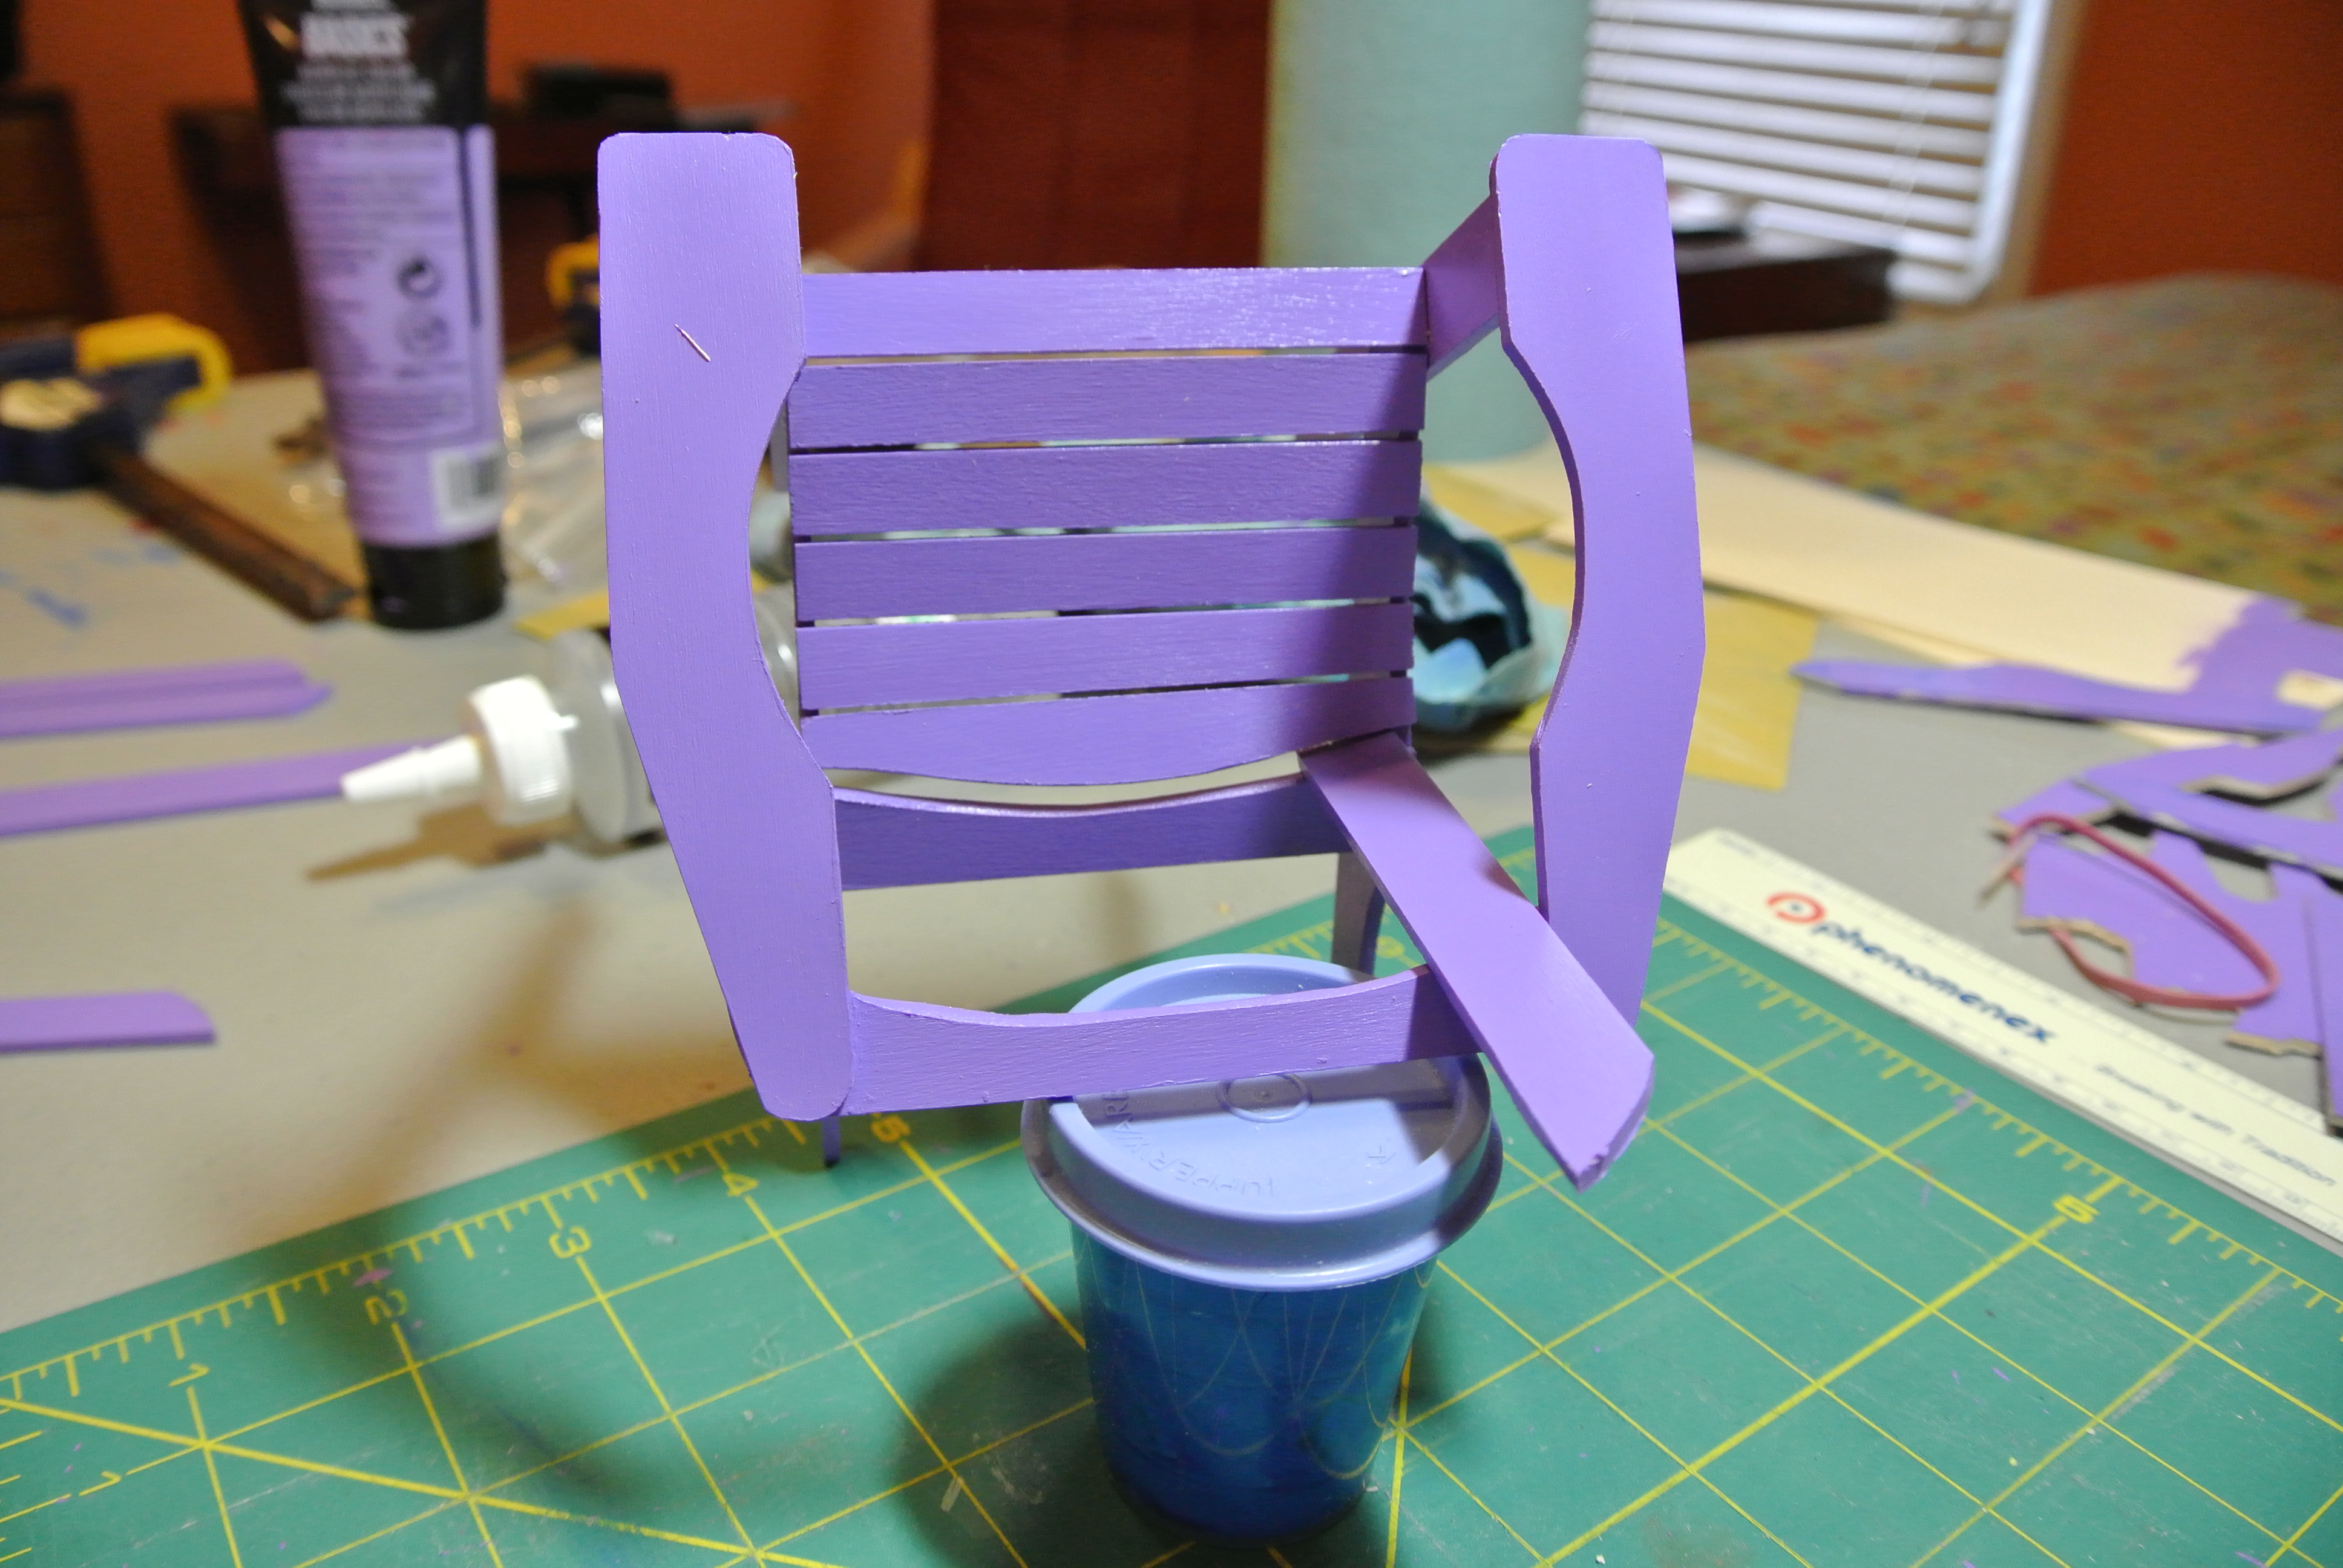
9) Repeating that process on the opposite side, and then spacing the three remaining back pieces evenly between the other two for a finished chair.
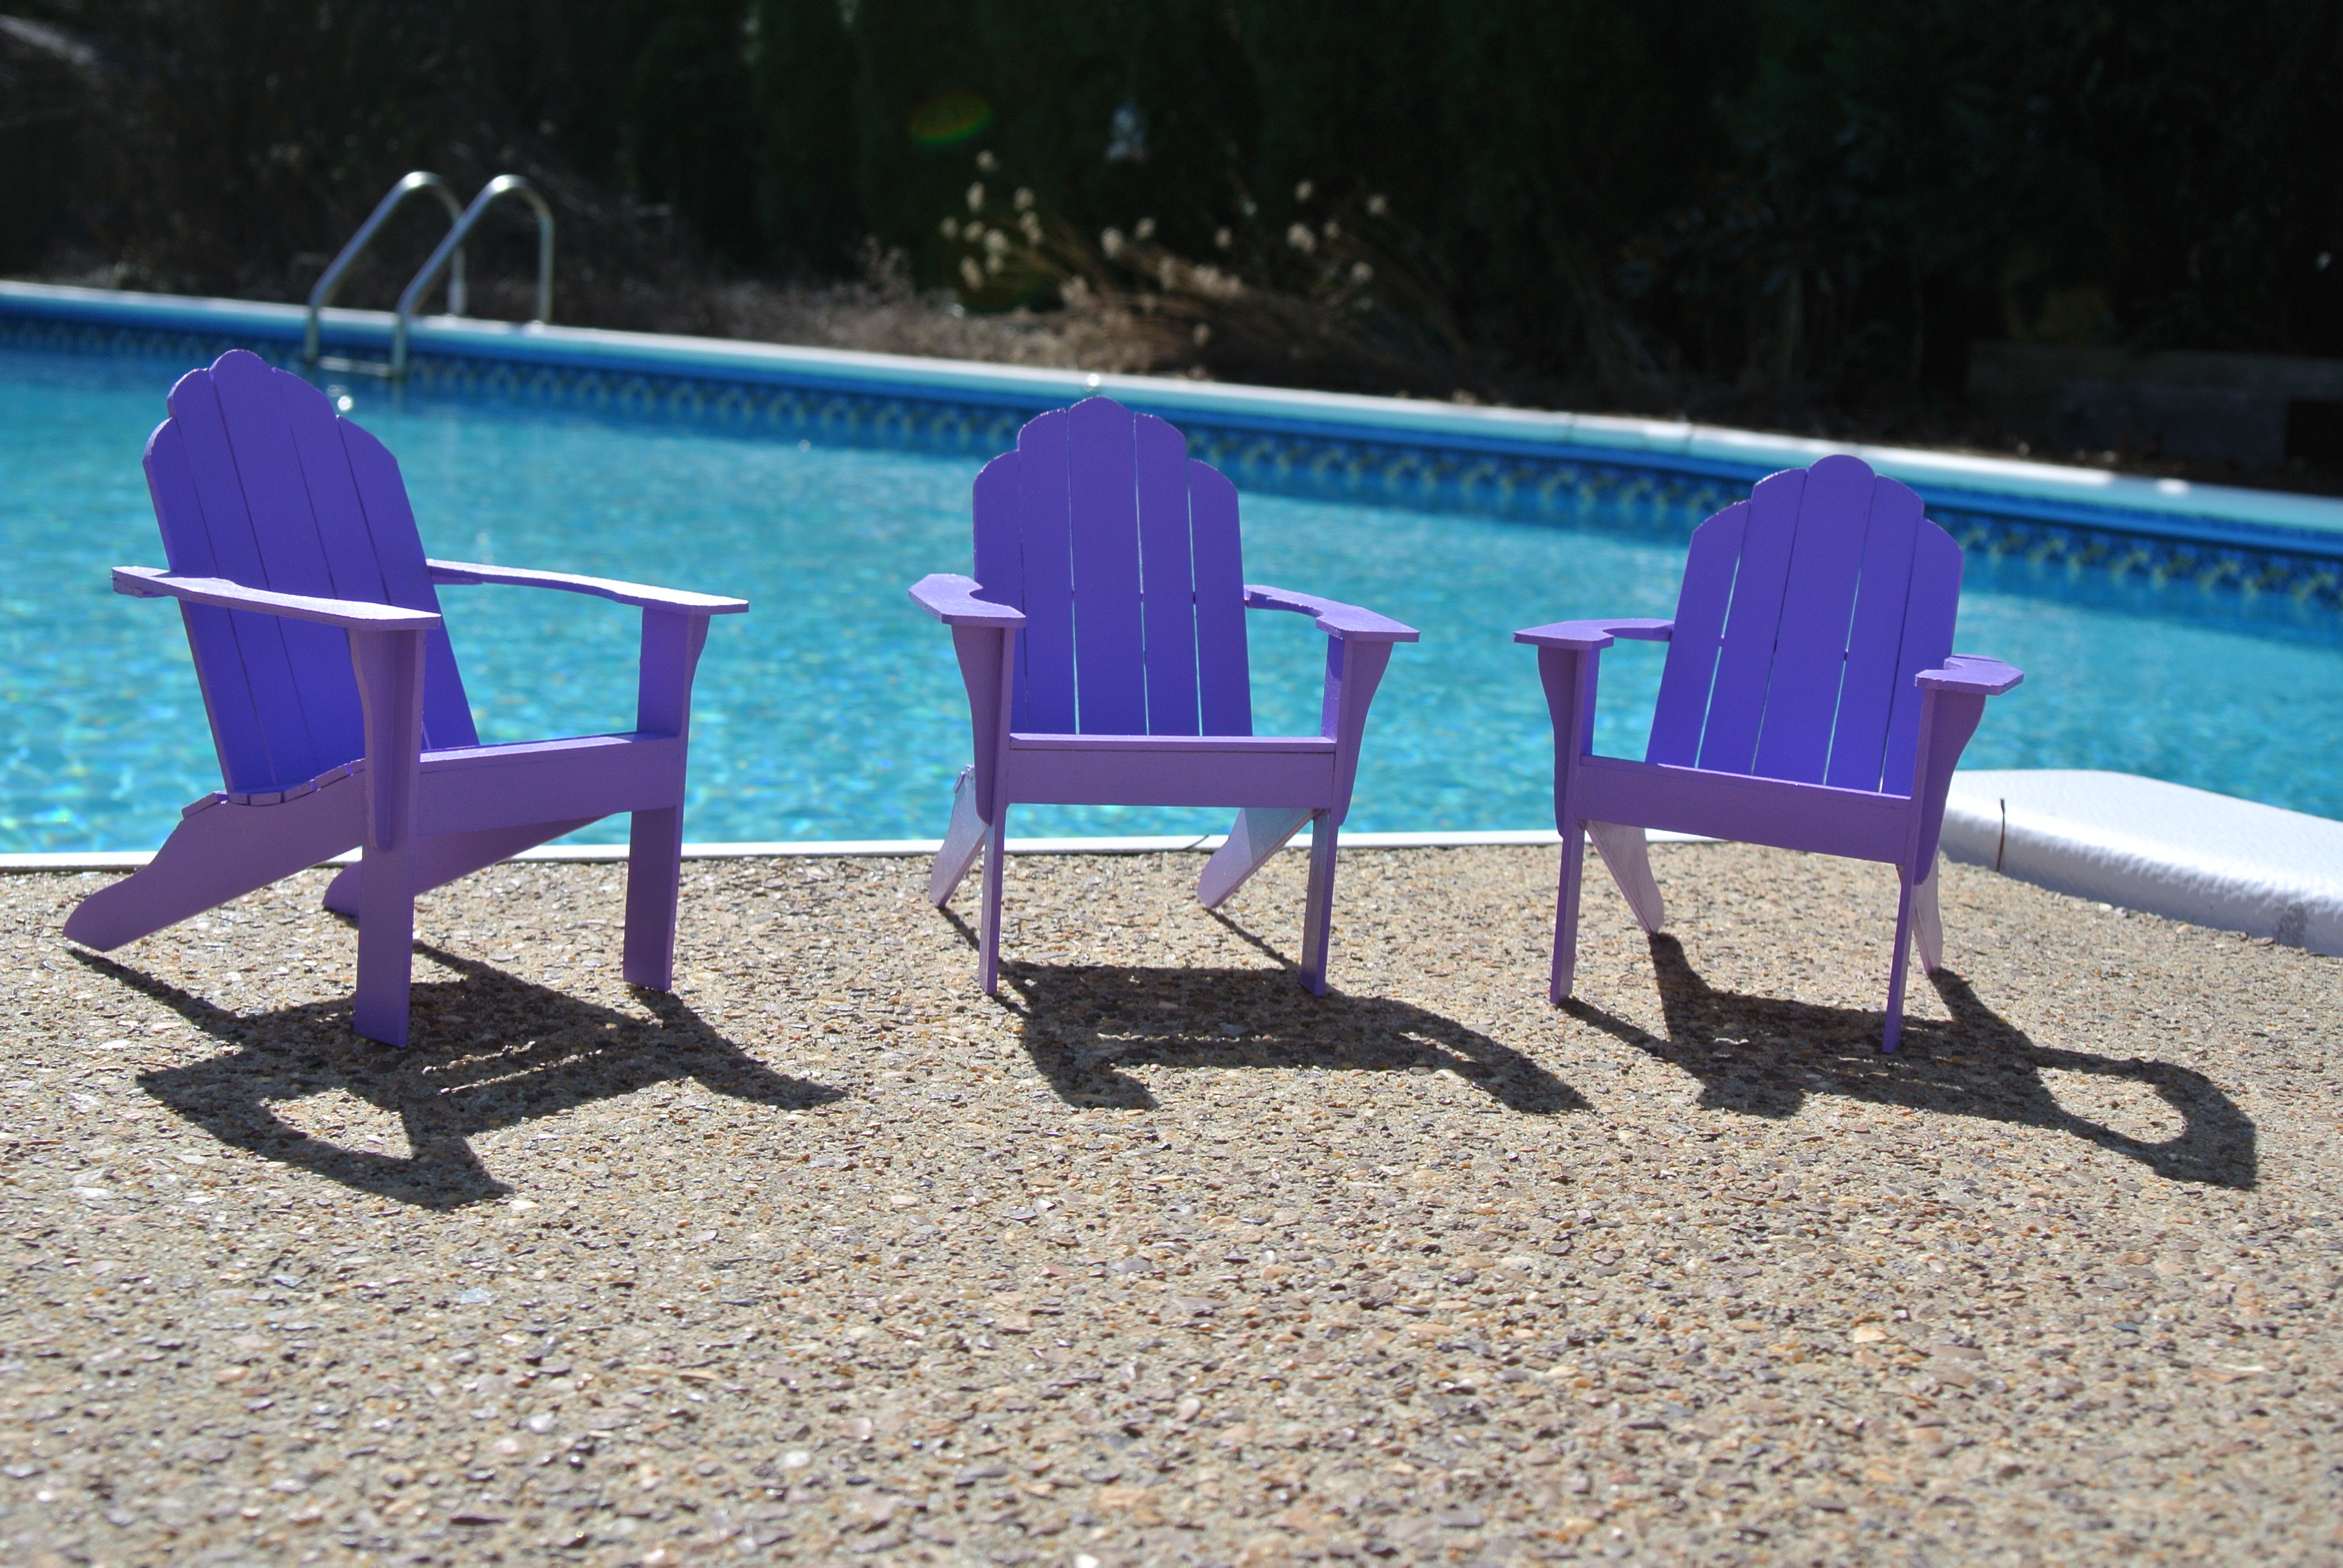
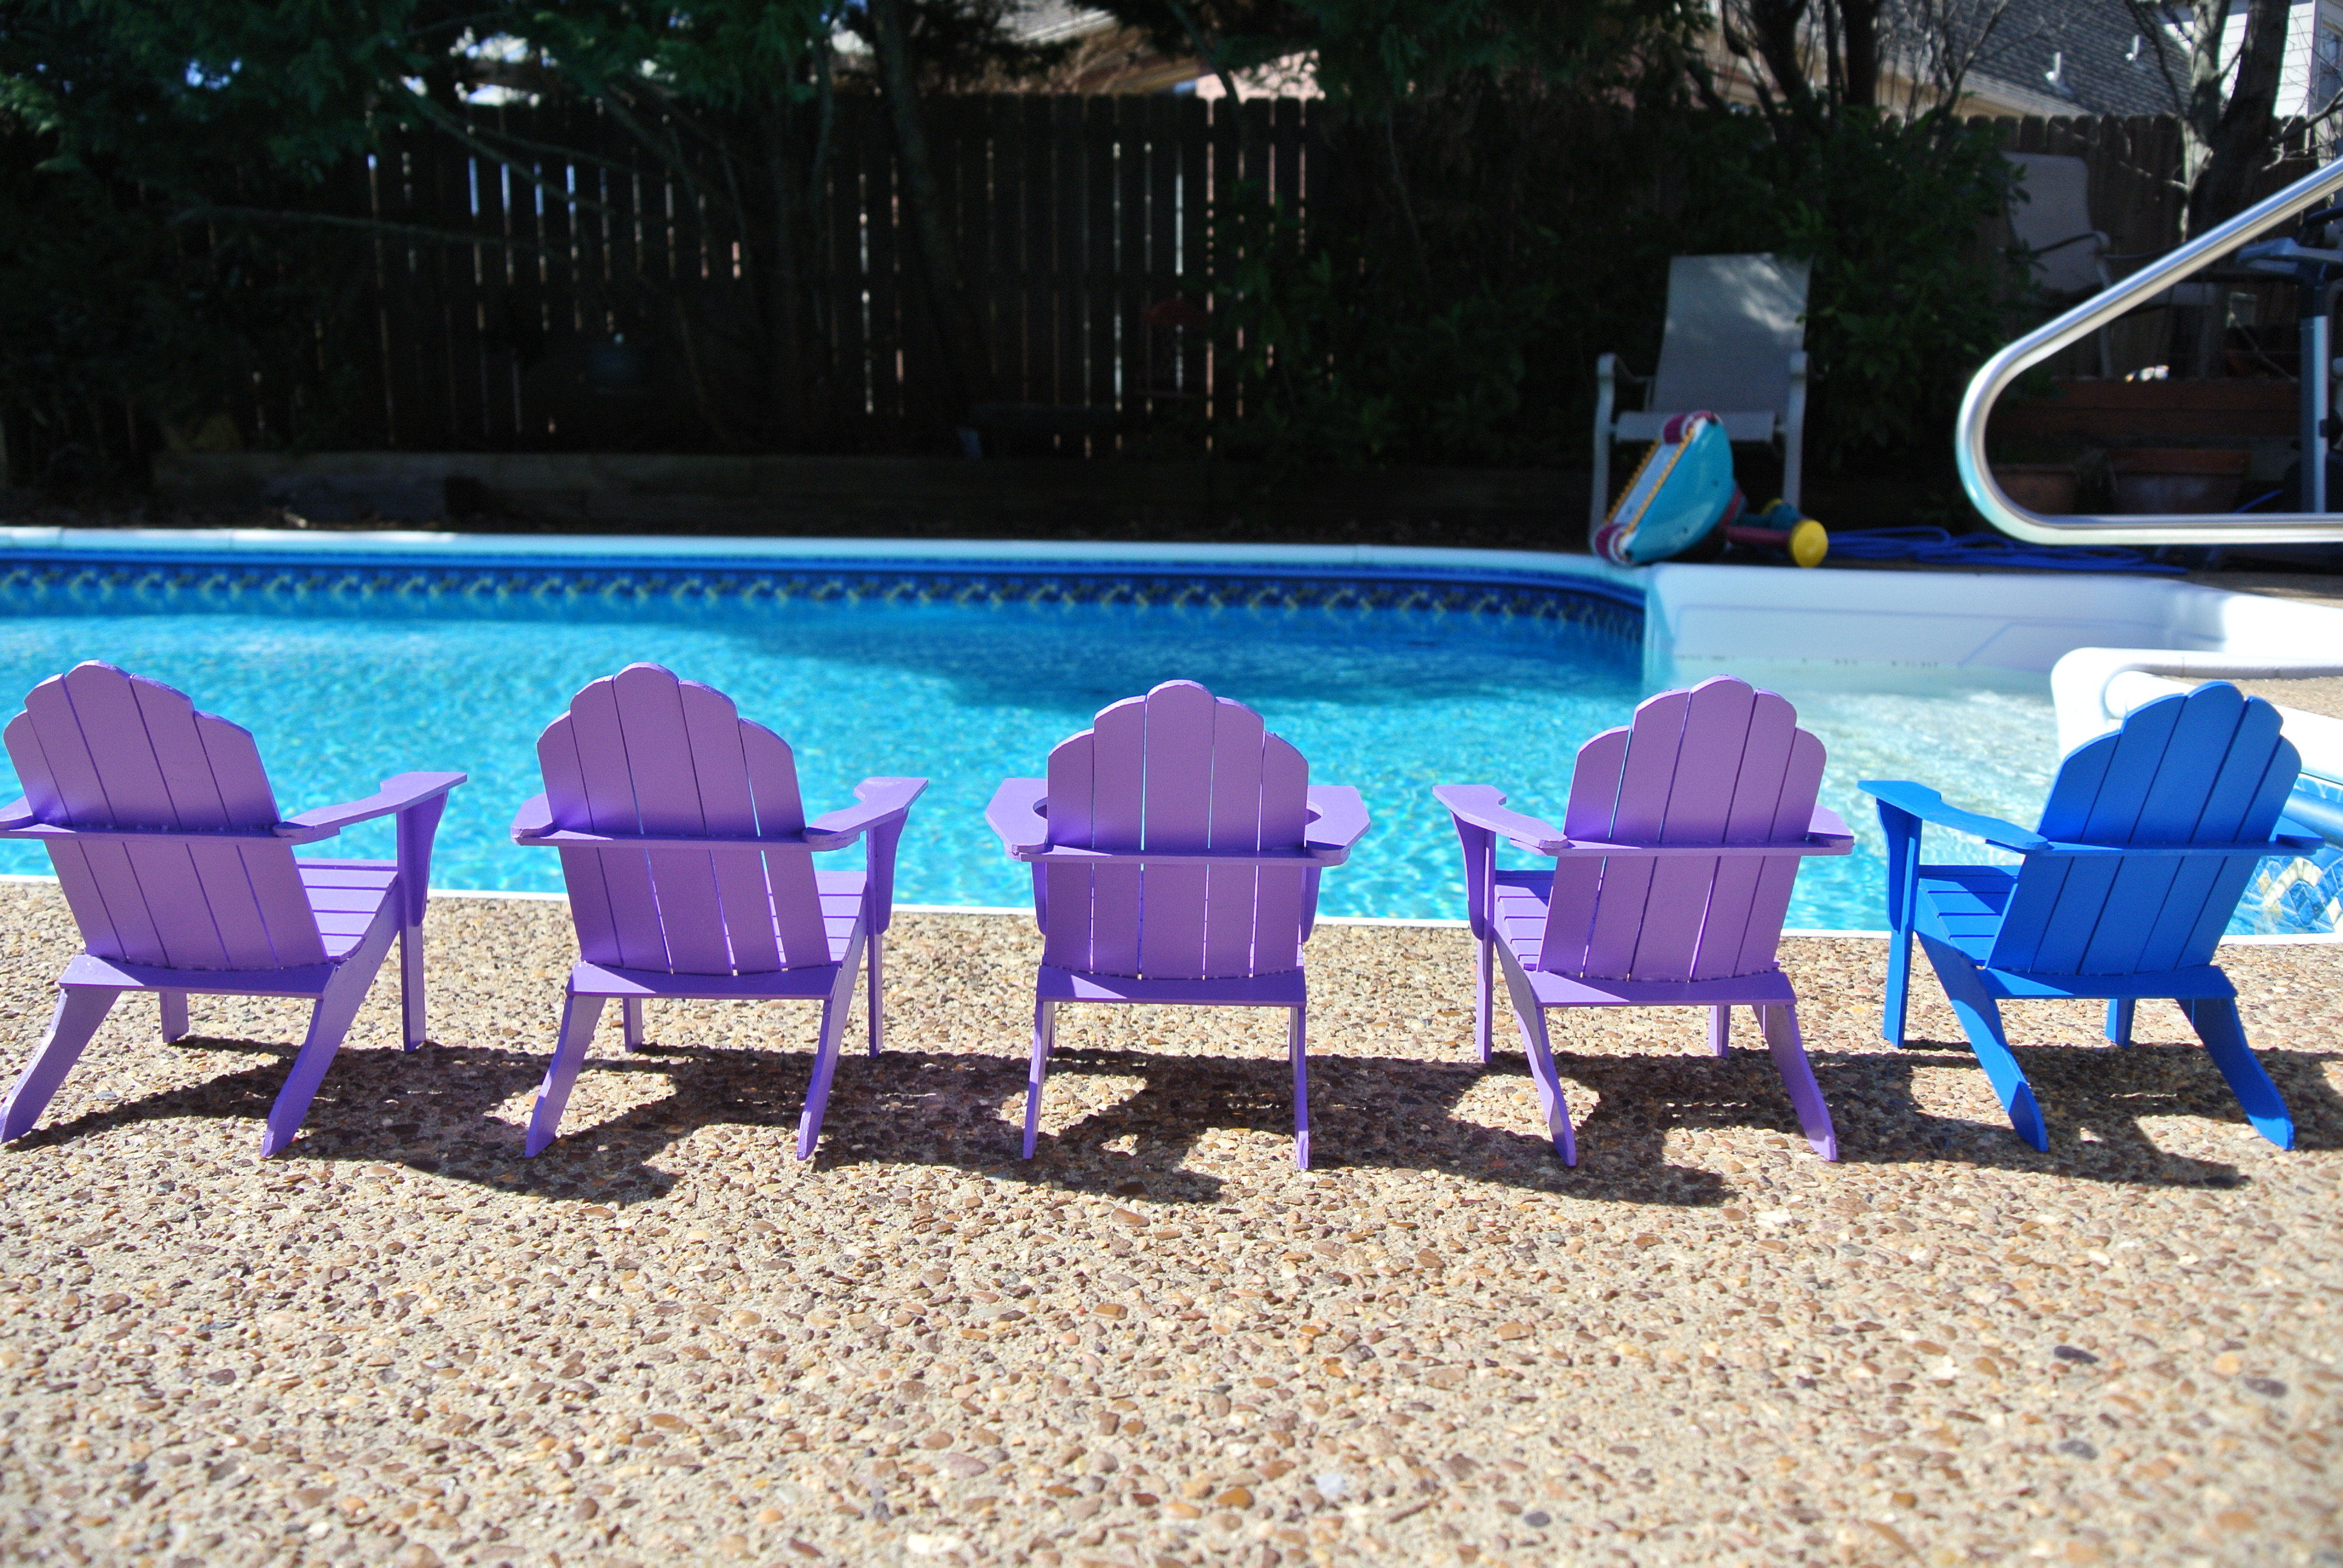
At this point, my miniature chair factory had cranked out six chairs, none of them perfect but each of them unique.
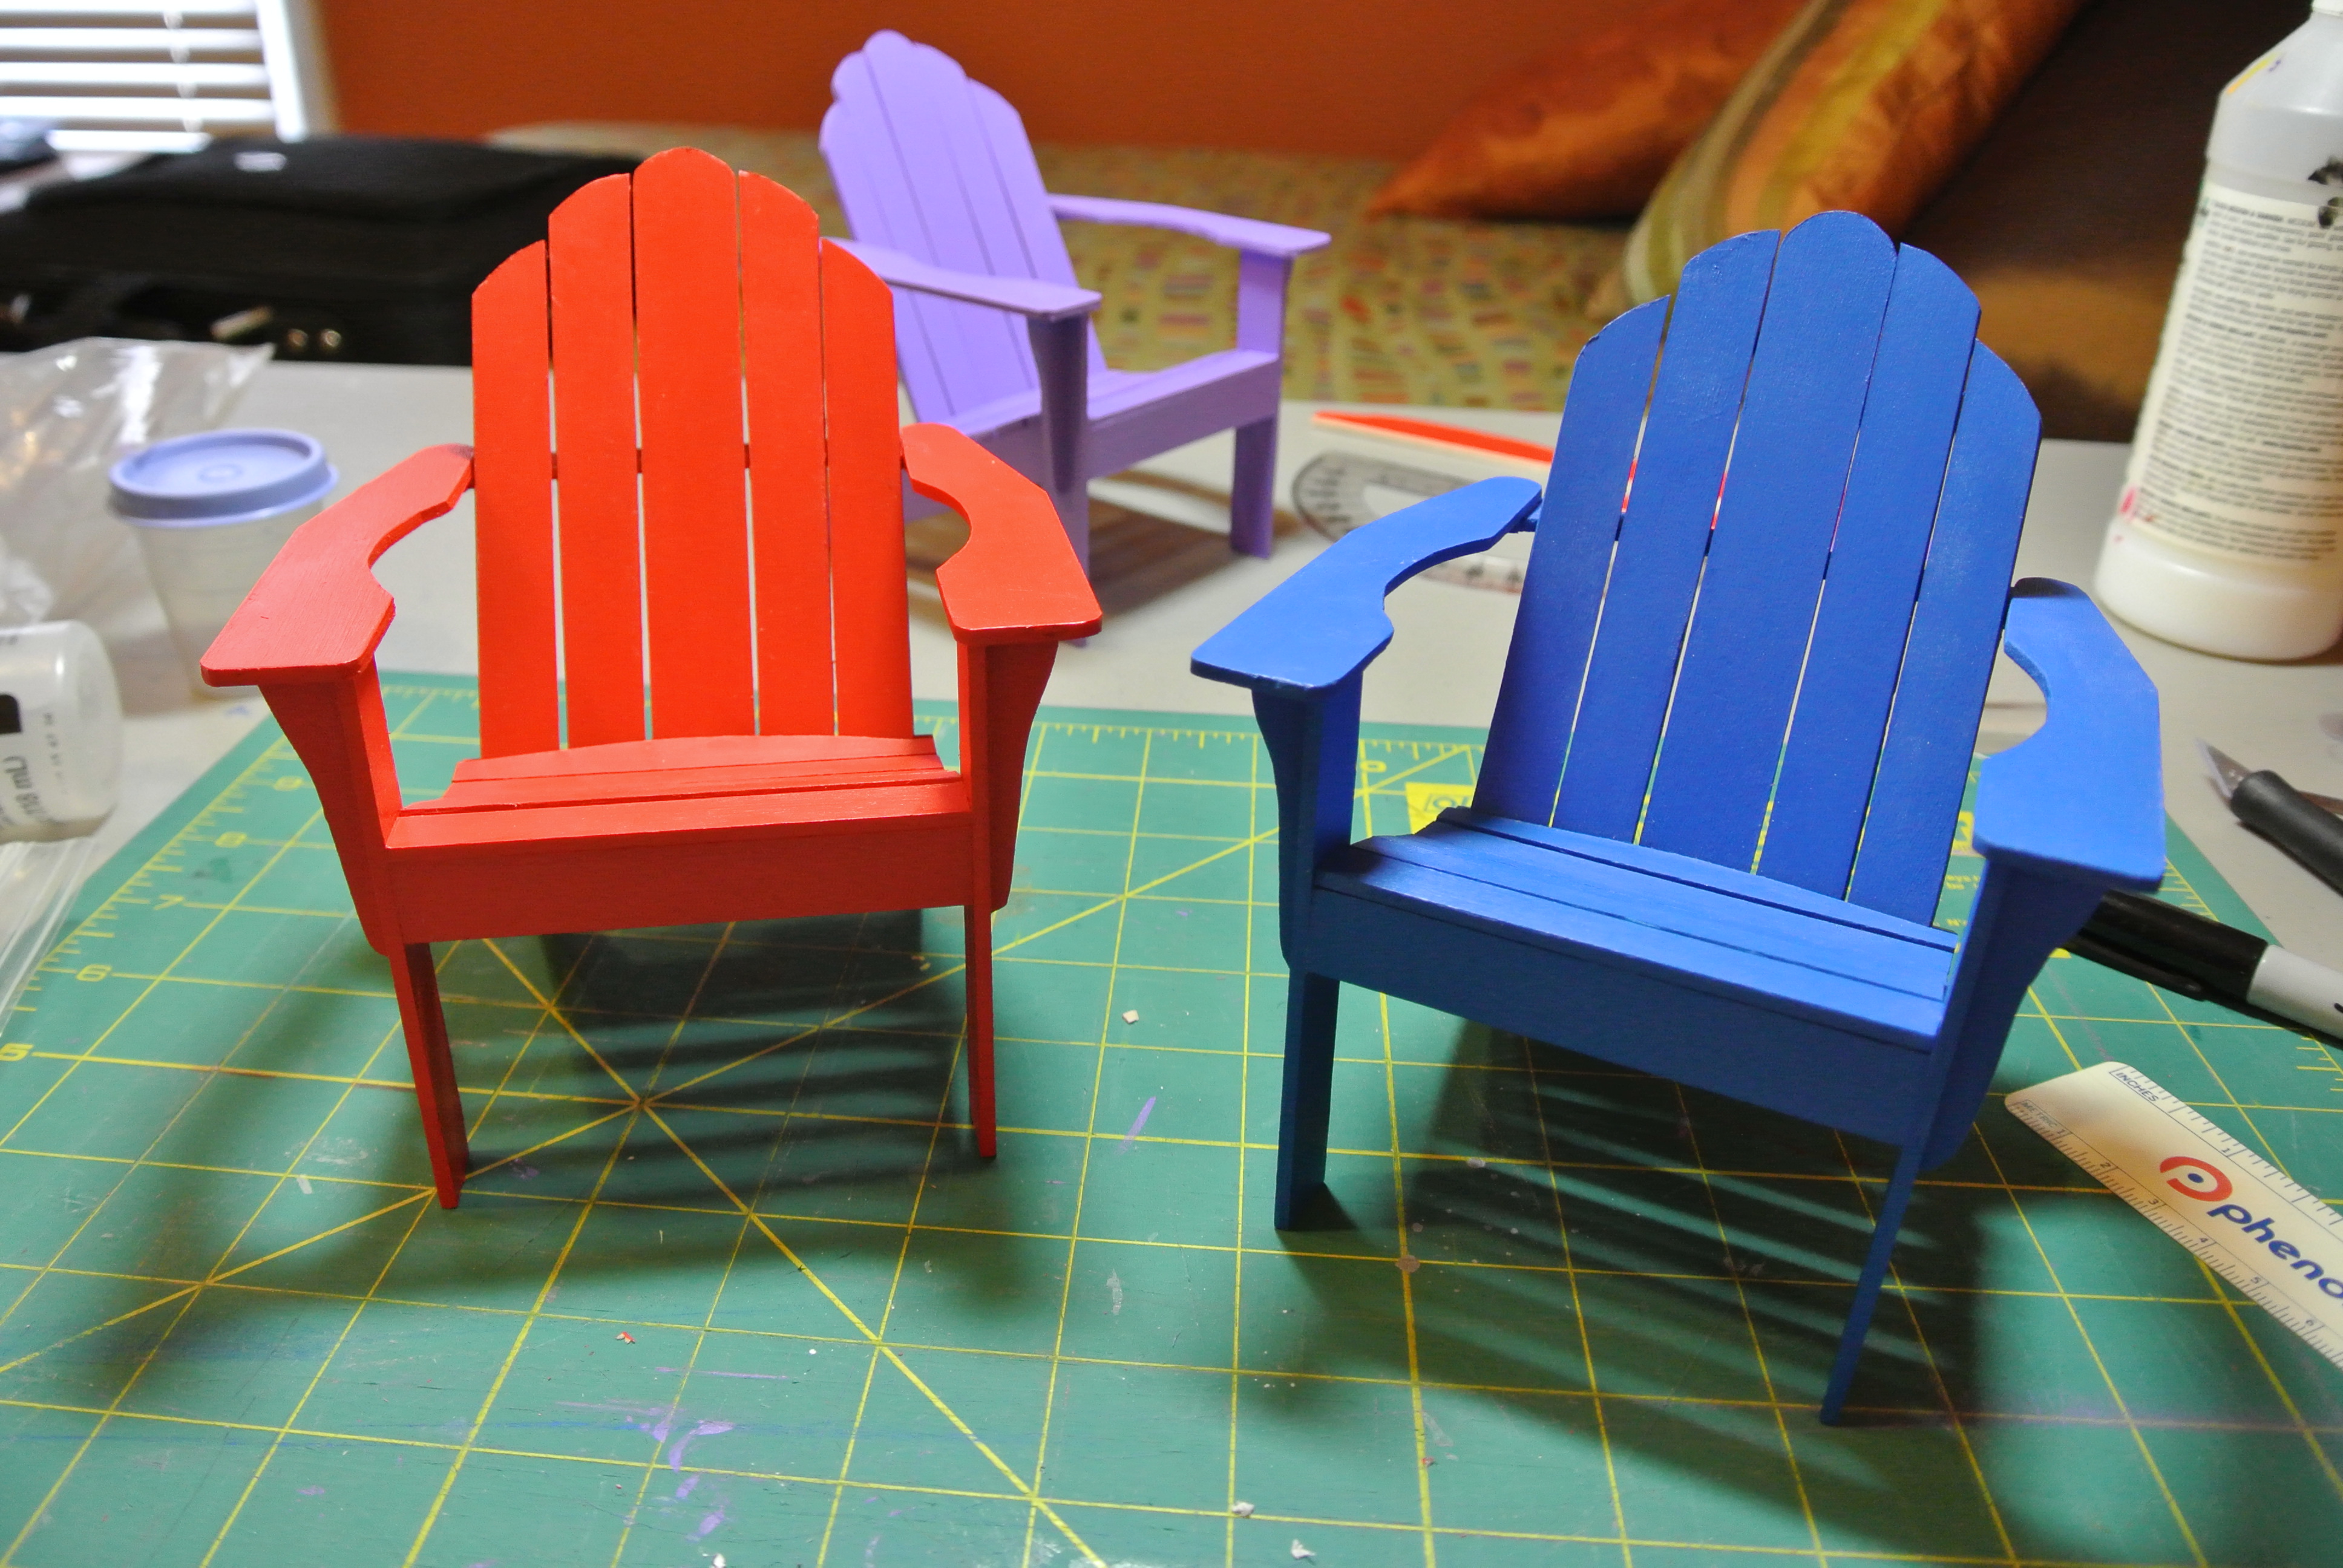
Some of these ideas I unfortunately didn’t realize until after I had finished the sixth chair so before I closed down my factory and retooled for cranking out my next job—the dreaded income taxes—I wanted to try these ideas out on one more chair. As it turned out, until I identified other potential gift recipients, I just needed one more chair. I had recently gotten a work cell phone and so I needed a second chair for this second phone to lounge in while I worked.

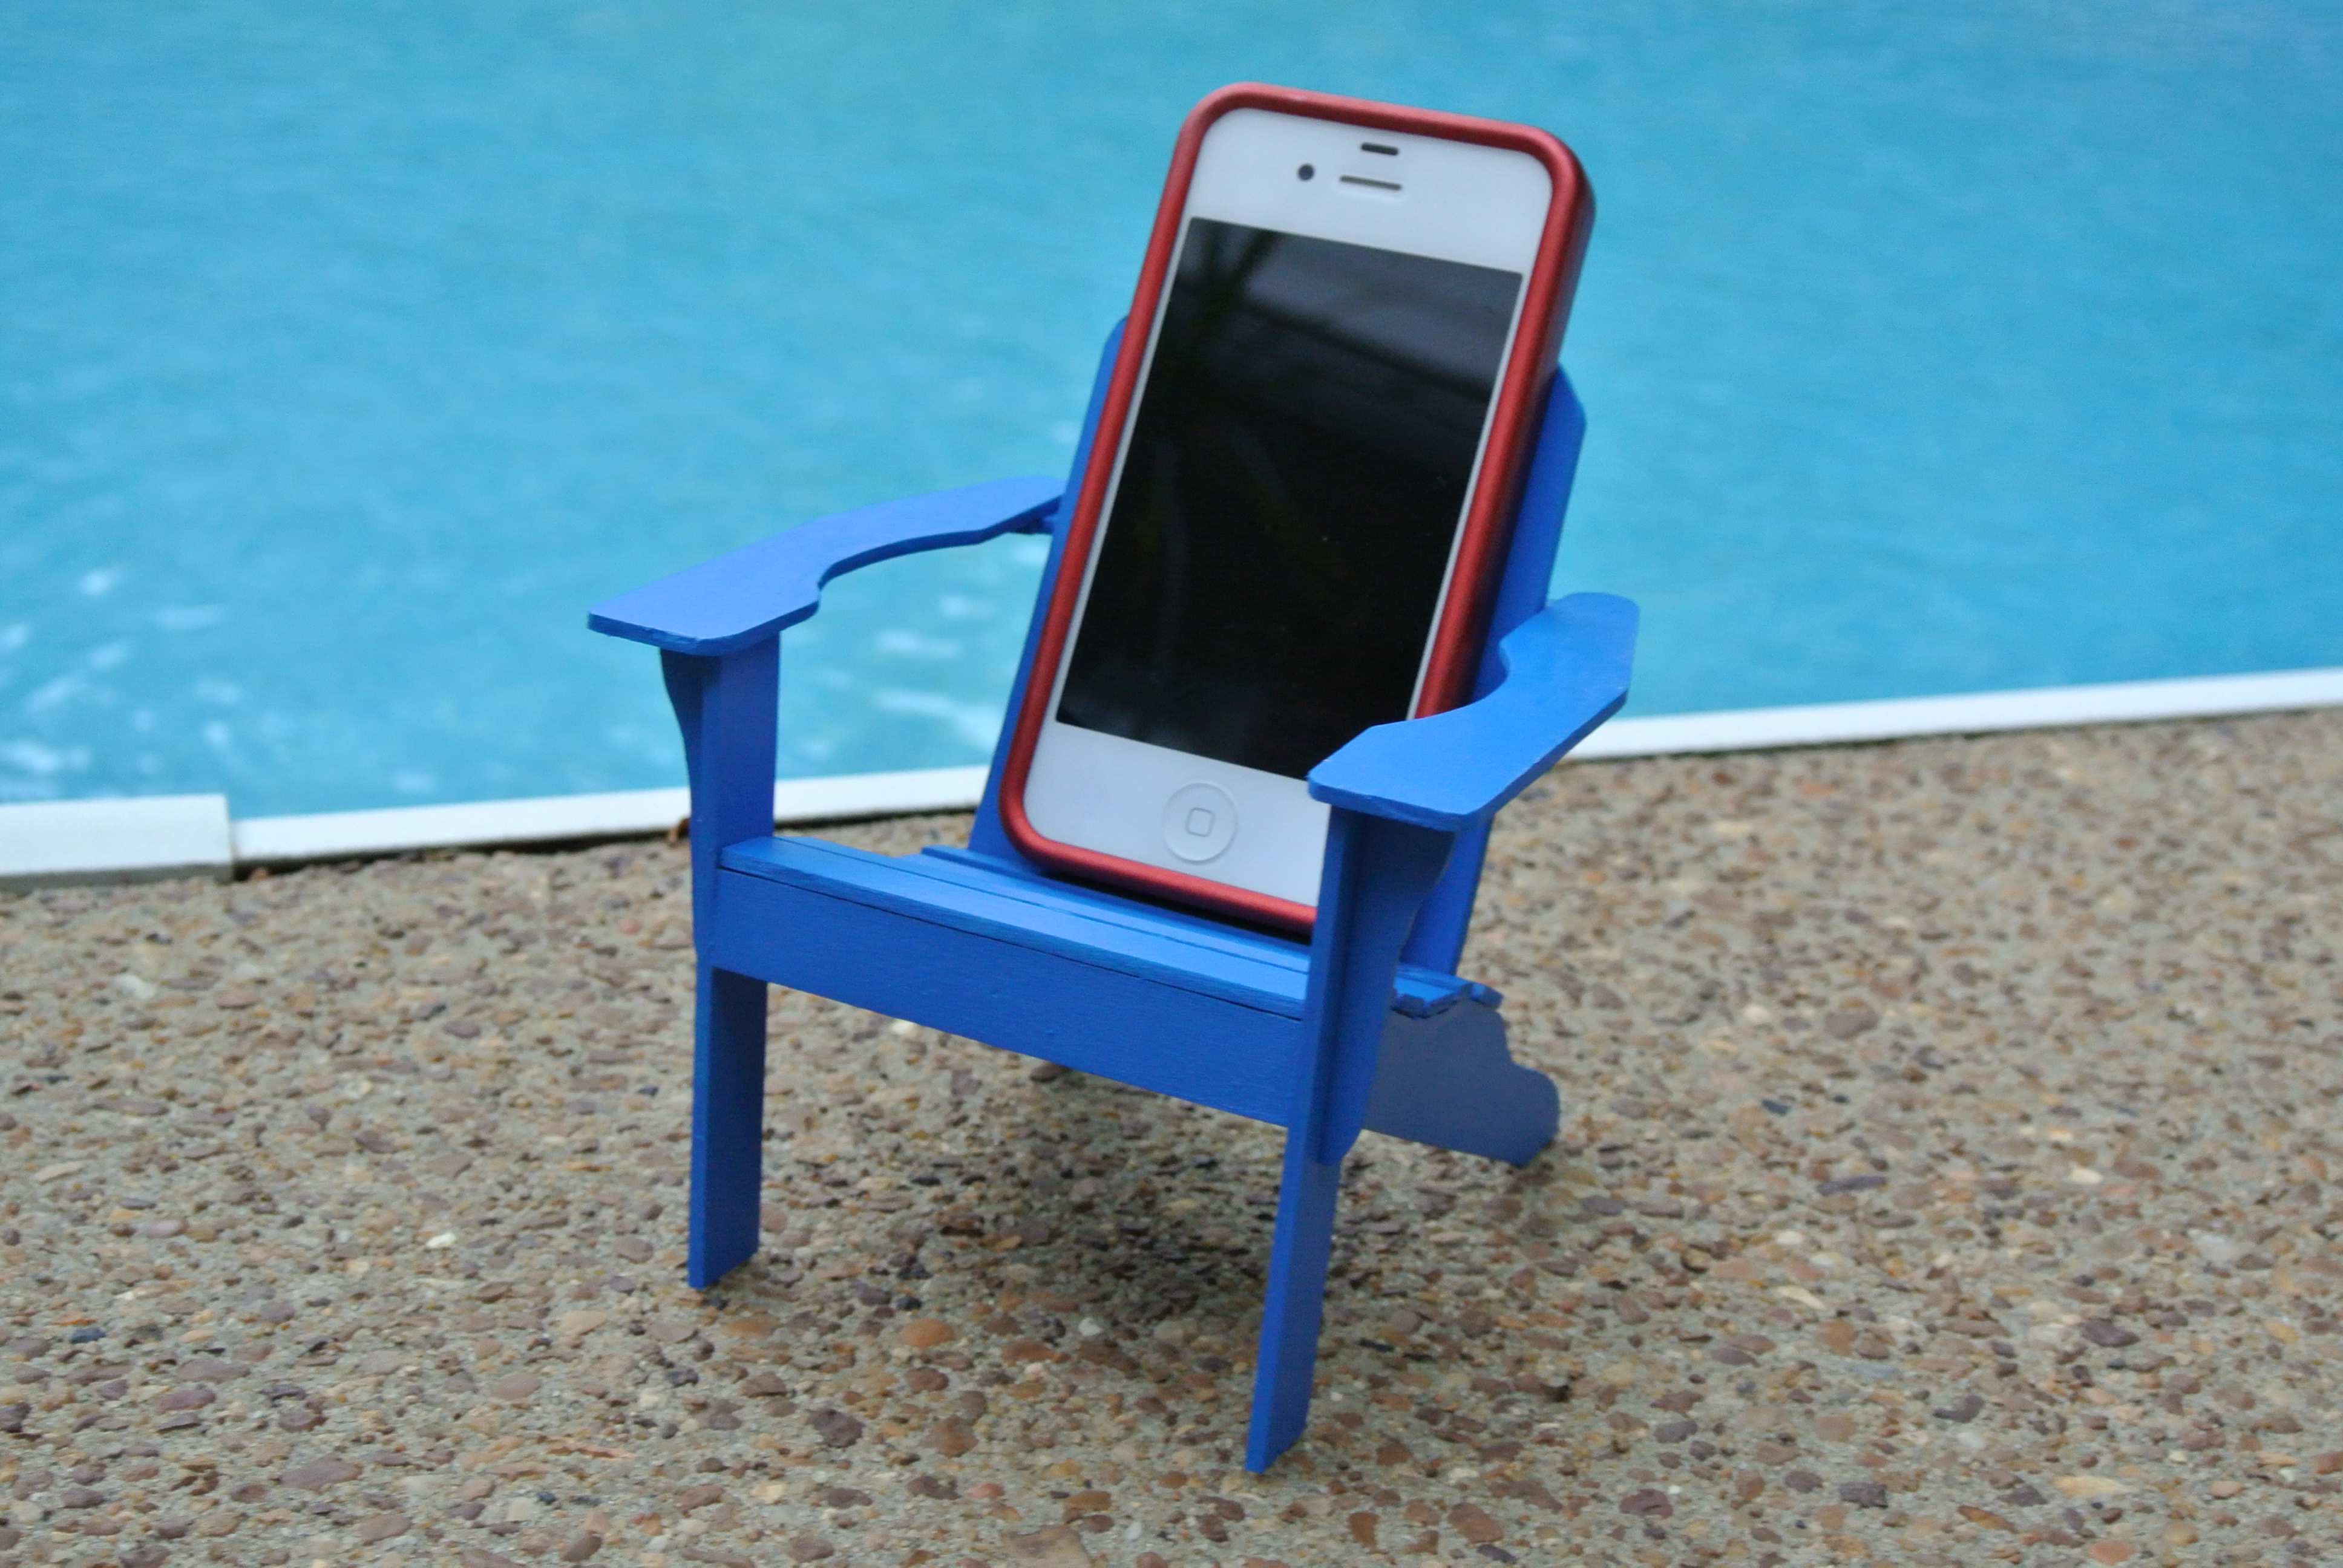
A rare March snow day actually gave me extra time from work to crank this latest chair out, here featured with my first chair…
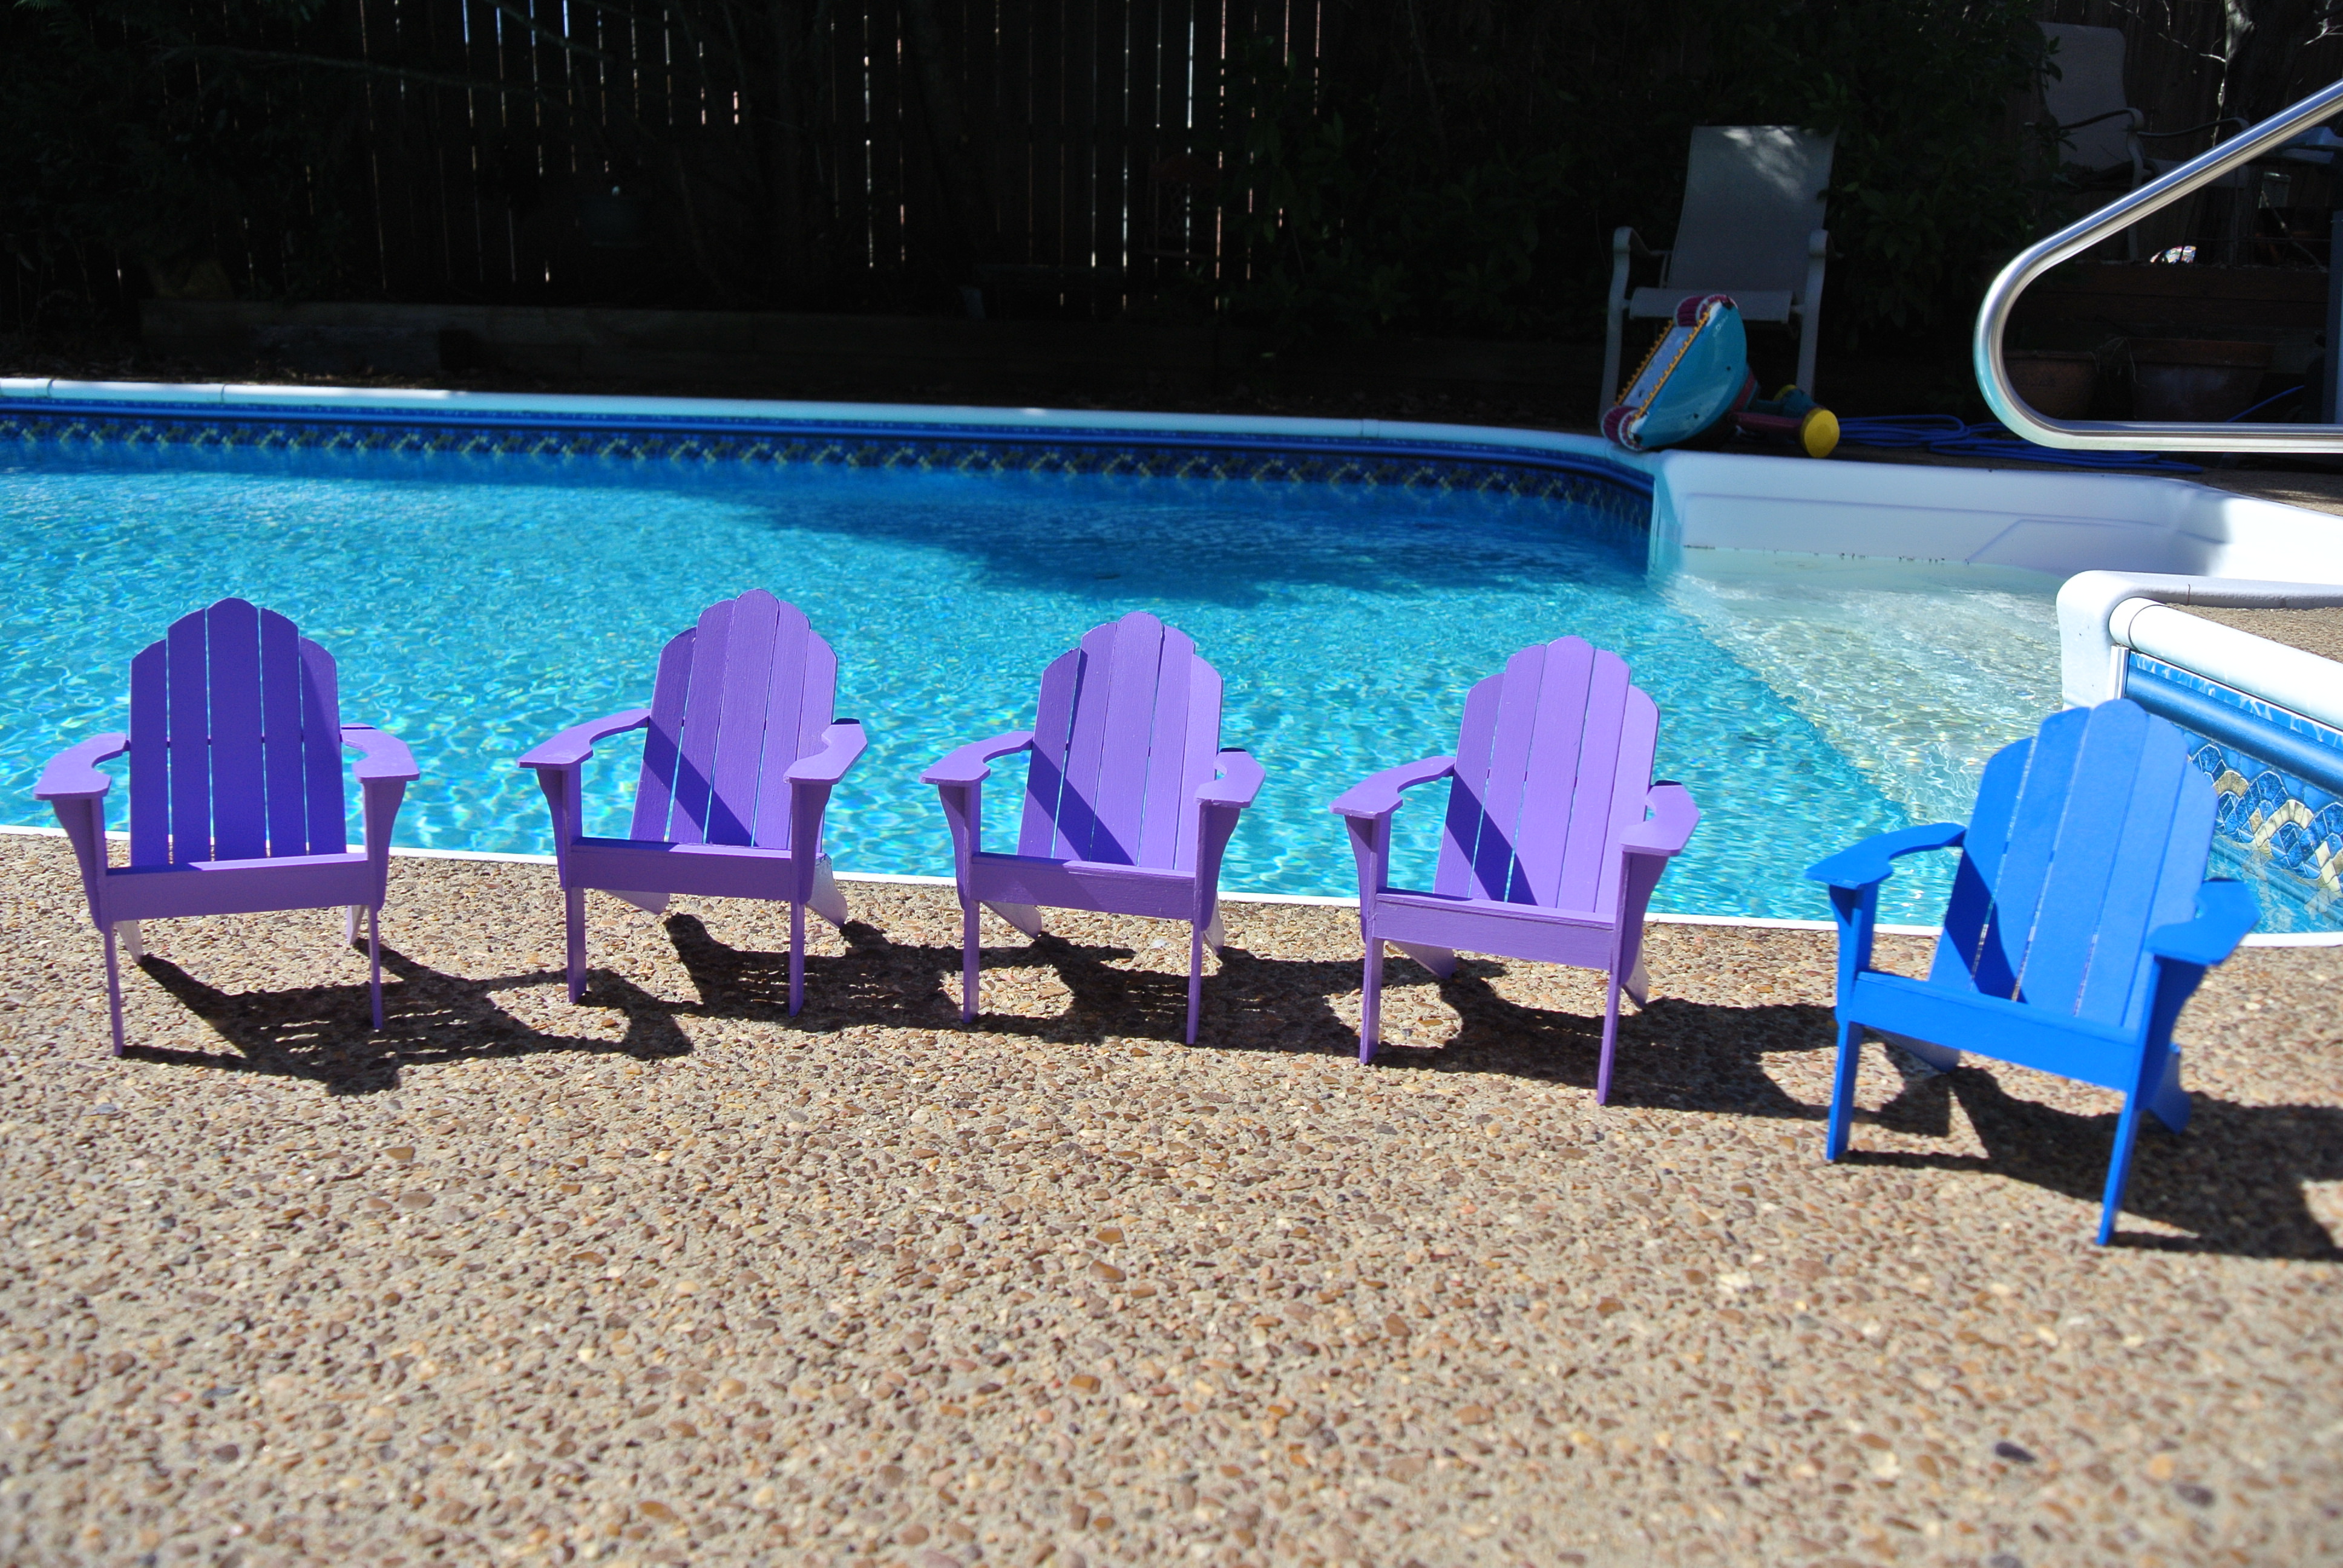
…and less than a week later, sunny days by the pool had returned…
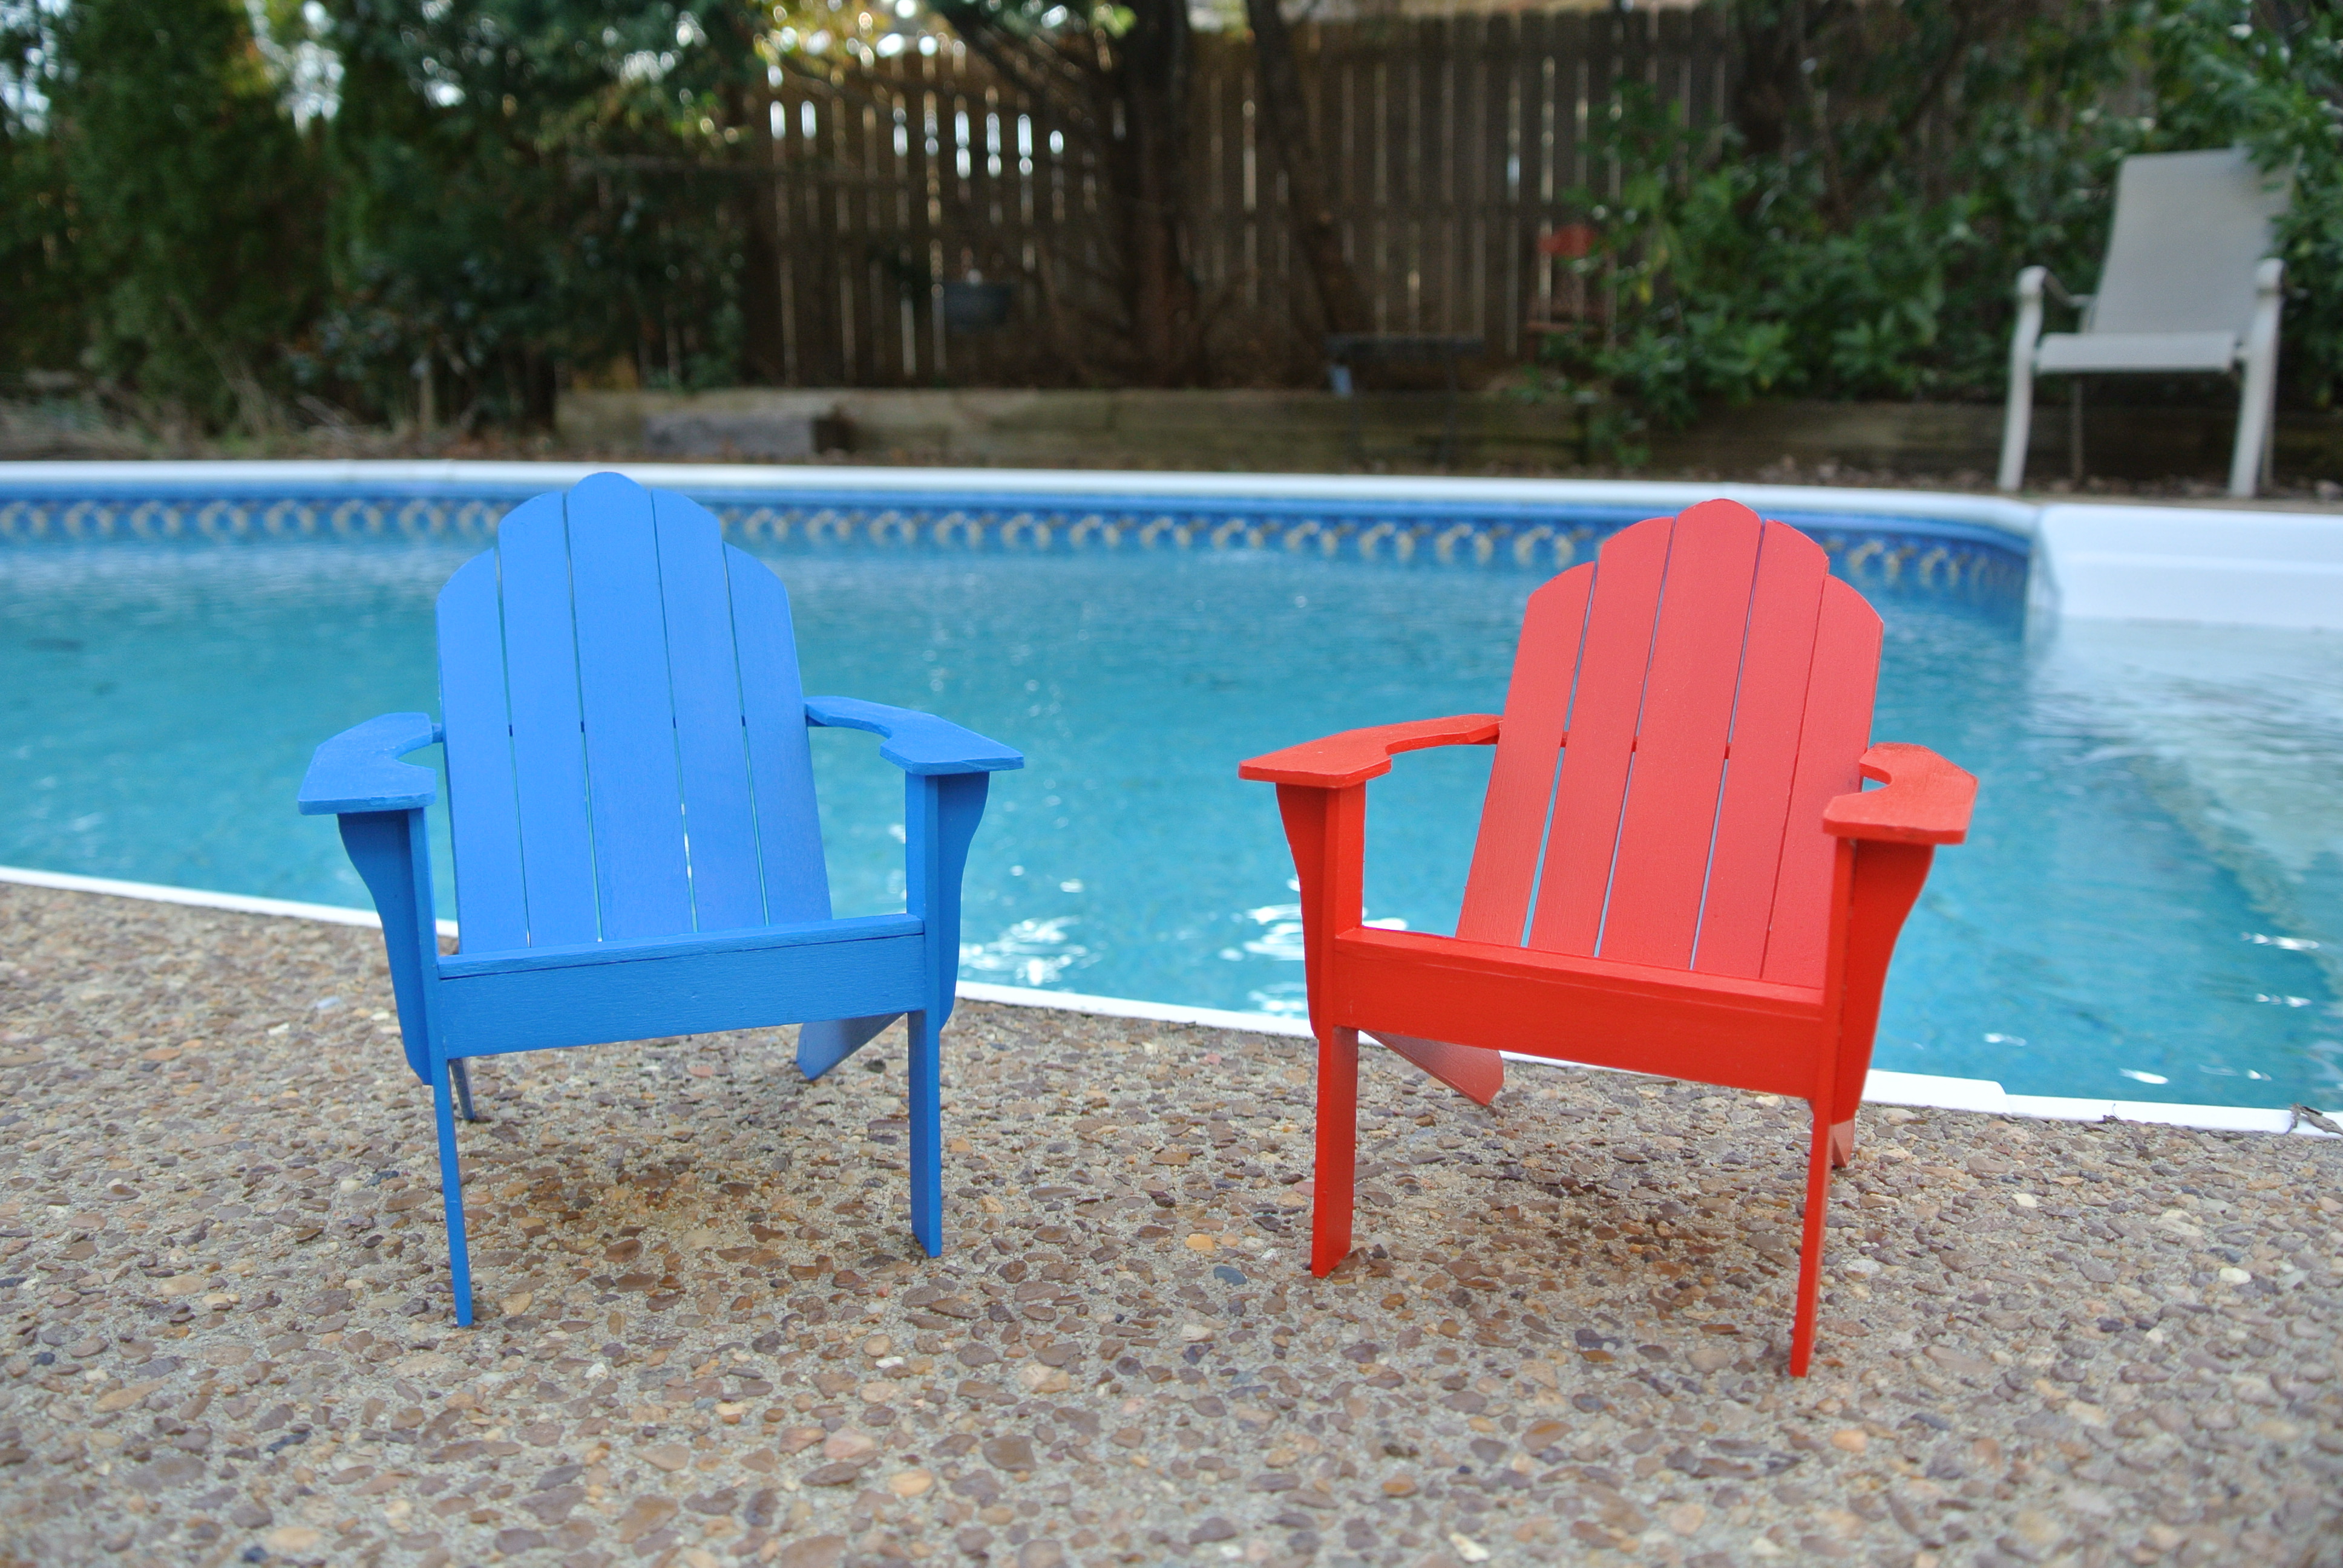
…and my two cell phones jumped at the chance to relax and recharge by the pool.

After building a total of seven chairs, I must admit that none are perfect. This is a tough statement for someone who is a perfectionist and prides himself on making things as perfect as possible. But just as none are perfect, I realize that each is unique and I can recognize the little imperfections that sets each one apart from its sibling chairs. So rather than cranking out replicate copies of mass-produced, identical chairs, my little factory has created a small family of chairs, all recognizable as coming from the same manufacturer, but no two alike. And this thought actually gives me one more idea to try out in the future once my tax job is over and I can retro-fit my factory floor for making more chairs.
Categories

So cute! I love them all! Nothing I make is perfect either, but I kind of love that human touch, that lets you know something was made by hand and not a machine. And, for what it’s worth, I have never noticed any flaws whatsoever in my chair! I love the new orange color too! Great job! PS: I loved seeing your hand in that one picture. 🙂
I’m glad you haven’t noticed any flaws in your chair; I’m just sorry your chair couldn’t also be in the class photo. I see my color photos didn’t come out true in color as that is actually a red chair for my new red phone but I am glad you love them all.
I love this! I skipped through the technical parts but I’m sure your tips would be useful to someone trying to make these chairs or a similar project. Just seeing your unique chair family gathered around the pool is a thrill!
I’ve really enjoyed making these chairs and knowing they were a creation from my own mind. I’m glad you like seeing the family of chairs around the pool as there may be a few small additions soon.
They are darlings!