
Miniature Garage Loft Furnishings – Phase 3
Continued from: Miniature Garage Loft Furnishings – Phase 2
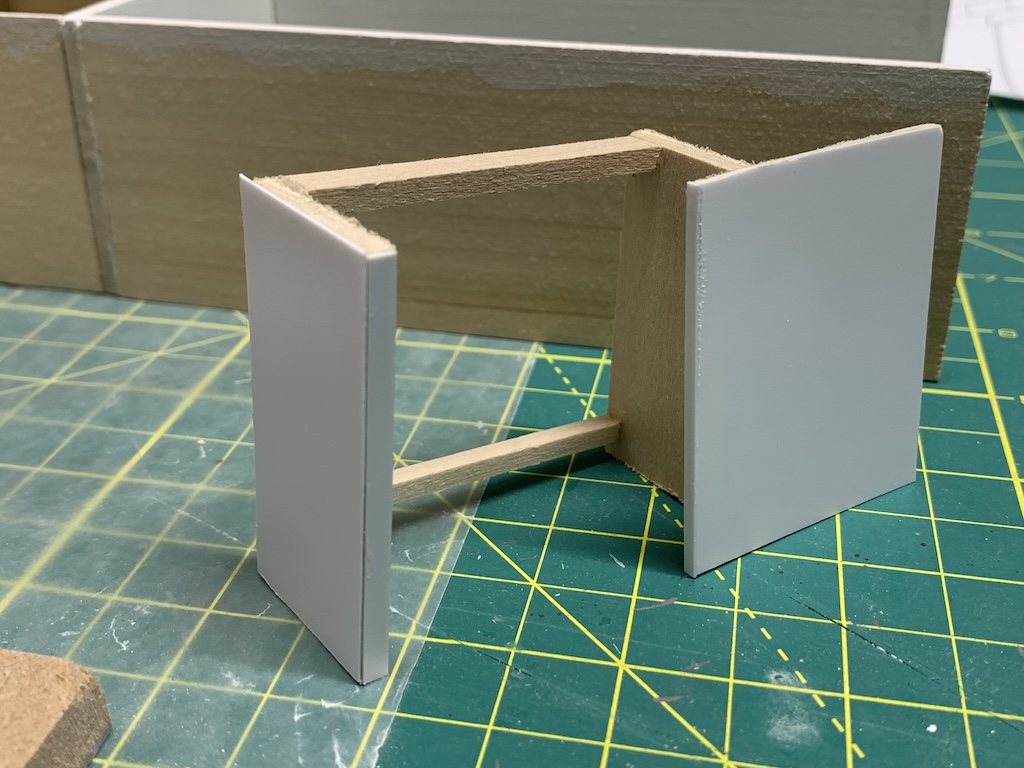
So that meant I would first attach a wide sheet of polystyrene to the side of the cabinet, trim it to the correct size, and then attach the thin front strips.
For the wide side sheets, I decided to use my old reliable double-sided carpet tape. First, I would apply the tape to the side of the cabinet and then apply the sheet to the tape. But properly aligning a much longer and wider sheet than my two test doors proved very difficult and twice I had to rip the entire polystyrene sheet off the cabinet which pulled the carpet tape off as well and mangled the polystyrene sheet. The carpet tape obviously had a much greater affinity for the polystyrene than the basswood. I finally figured out the best way to attach the polystyrene sheet to the carpet tape on the cabinet side was to lay the cabinet front side down on my work surface and then slowly slide the sheet up to the cabinet at an angle and once the front edge of the sheet was aligned with the front edge of the cabinet, then press the rest of the sheet to the cabinet. The last step was then to cut the sheet to match the wooden cabinet.
For attaching the thin strips of polystyrene, I did not think thin strips of carpet tape would hold securely to the basswood and so I decided to glue them on. But polystyrene being plastic, I could not use my water-based hobby glue I typically used to glue wooden parts together. So, I had to buy some plastic glue; something I have not done in years.
Whenever I put together plastic car models, I always hated this glue. First it stunk and if any of it got on the exterior surface, it would mar the finish. So, for applying glue to the basswood, I would run a small line and then dab it with a paper towel to remove excess prior to attaching the polystyrene strip.
The last step was to cut the doors from 1/16” basswood, attach the polystyrene sheet with carpet tape, and then trim the excess polystyrene off. It took a while and a few do-overs, but I finally got the first cabinet done. Setting it in the kitchen I thought it looked very nice.

Moving on, I next focused on the two cabinets that would be on either side of the stove and began by cutting the four sides needed from 1/16” basswood (the notch at the front bottom is for the toe kick).

Using the carpet tape, I attached the wide polystyrene to each side. I then attached a 1/4” X 1/4″ piece of basswood to the inside backs of the sides to give them strength (1/16” basswood flexes very easily). I then needed to figure out how wide to make the cabinets.
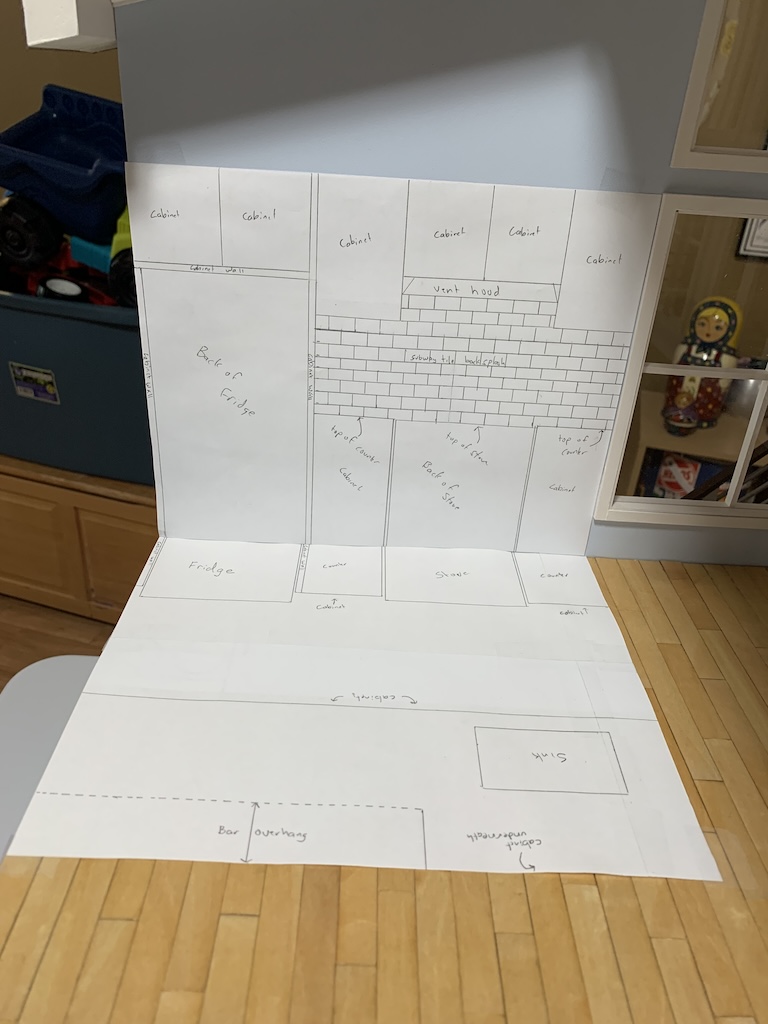
Recall from my floor drawing that my limitation is the window frame. I have to allow for side overhang of the countertops with the closest to the window frame being 1/8”, next to the stove on both sides being 1/16” and zero inches on the cabinet that will butt up against the tall cabinet surrounding the fridge. I cut 1/8” X 1/4” basswood to glue between the two sides to define the cabinet width. It took a bunch of math with adding and subtracting fractions but, in the end, I got it done finishing the cabinet that will be on the left side of the stove.

Using the same approach, I made the cabinet on the right side of the stove. I always paint the toe kick black. But then looking back at the real kitchen, I am modeling, I realized that to show depth on the doors, I needed to paint black where the doors would interface with the cabinet.

Now I could cut the 1/16” basswood for the two doors covering it with the polystyrene sheet and gluing on the thin strips to the front of the cabinets.

When I built my Craftsman style kitchen, I simply cut 1/8” basswood to size and painted it black modeling the full-scale kitchen which had black countertops.
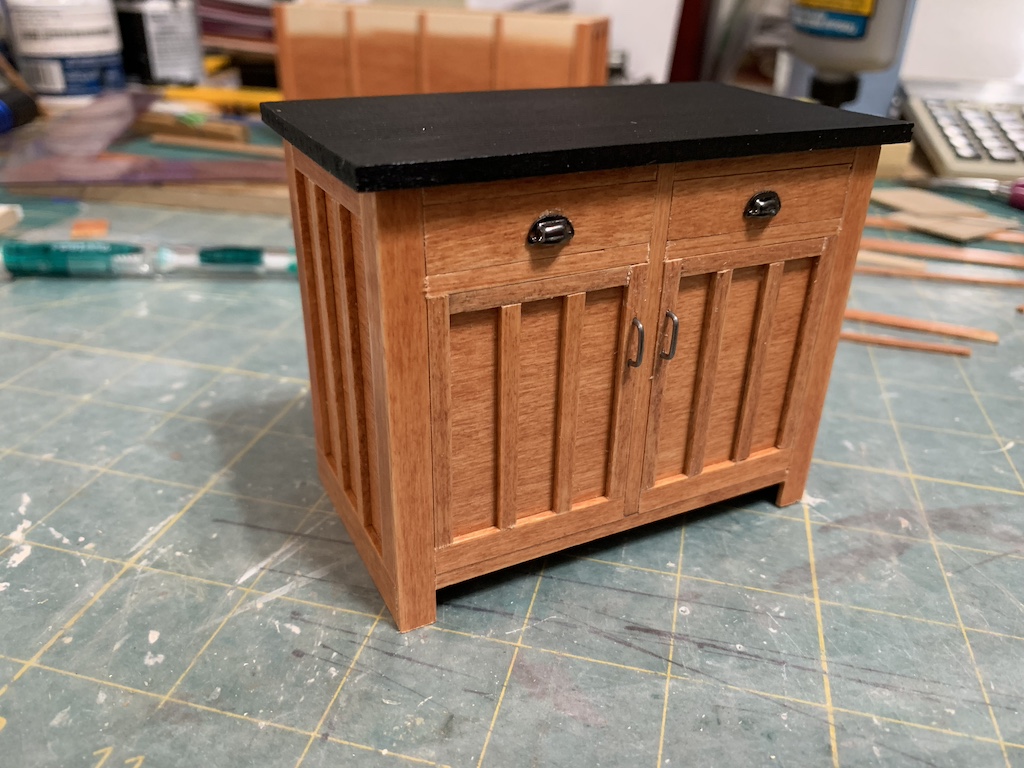
But despite sanding numerous times with progressively finer and finer grits of sandpaper, this countertop still had a bit of a woodgrain look and feel to it. For the smooth modern look, I was trying to achieve for the garage loft, this would never do. In discussing the issue with my sister, she told me she had found some 1/8” acrylic that she could cut with her laser cutter and offered to cut my countertops as well. I just needed to pick out what color.

The one thing I did not like about the full-scale kitchen I was modeling was the white countertops. I knew I wanted a contrast to the white cabinetry. I found what I was looking for at the first website I accessed—a deep blue opaque acrylic. I ordered a piece and had it sent directly to my sister. I would just need to determine the dimensions.
To be sure that I gave my sister exact countertop dimensions for these two cabinets that would fit within my limited space, I decided to cut basswood to the correct size. I cut some scraps of 1/8” basswood I had to the proper countertop depth and then glued them together. I then trimmed the sides down to figure out the correct countertop width, accounting for the correct overhangs I previously mentioned. I got them both right on my first attempt.

The basswood, while only temporary, looks a bit like butcherblock countertops.
One thing you might have noticed on my three finished cabinets is there are no cabinet door handles. This nice clean look was one of the features that attracted me to use this full-scale design. If you have ever been to an IKEA store and looked at some of their cabinets, you would have noticed that many of them do not have handles either.

It is actually a rather interesting mechanism that is included inside the cabinet. You simply push the door in slightly and a pushrod releases and pushes the door out so you can reach inside of it and pull the door open. But another benefit is I did not have to find 1/12-scale modern cabinet door handles.
To be continued after a short break…
Categories

 onecreativescientist
David, your attention to detail is impressive. This kitchen will be so sleek. I wish I could shrink and be in it. I look forward to seeing the blue countertop.
Thanks Betty! Other people have also suggested they could get down to that size also.