
Virtual DIY Bathroom – Restoration (Finding Tiles)
Continued from Virtual DIY Bathroom – Reconstruction (Last Boards)
Today, we return to the COVID-induced, virtual collaboration I had with my brother to renovate the downstairs half-bath/powder room in their 1960-era home. If you have followed the previous installments of this DIY project, you know my brother is on the verge of having a fully functioning bathroom once again. But completion would not be achieved before mastering another task, one which is a nemesis to many DIY-ers—ceramic tiling. My brother had never done tilework and had more than a few fears as he approached this phase. (To emphasize the point, he originally proposed calling this part of the story: “Tile Saws and Thinset and Grout—Oh My!”) My brother had a few choice words throughout this stage of the project, so I’ll let him begin the “G-rated” version of this trial.
– – – – – – – – – – – – – – – – – – – – – – – – – – –
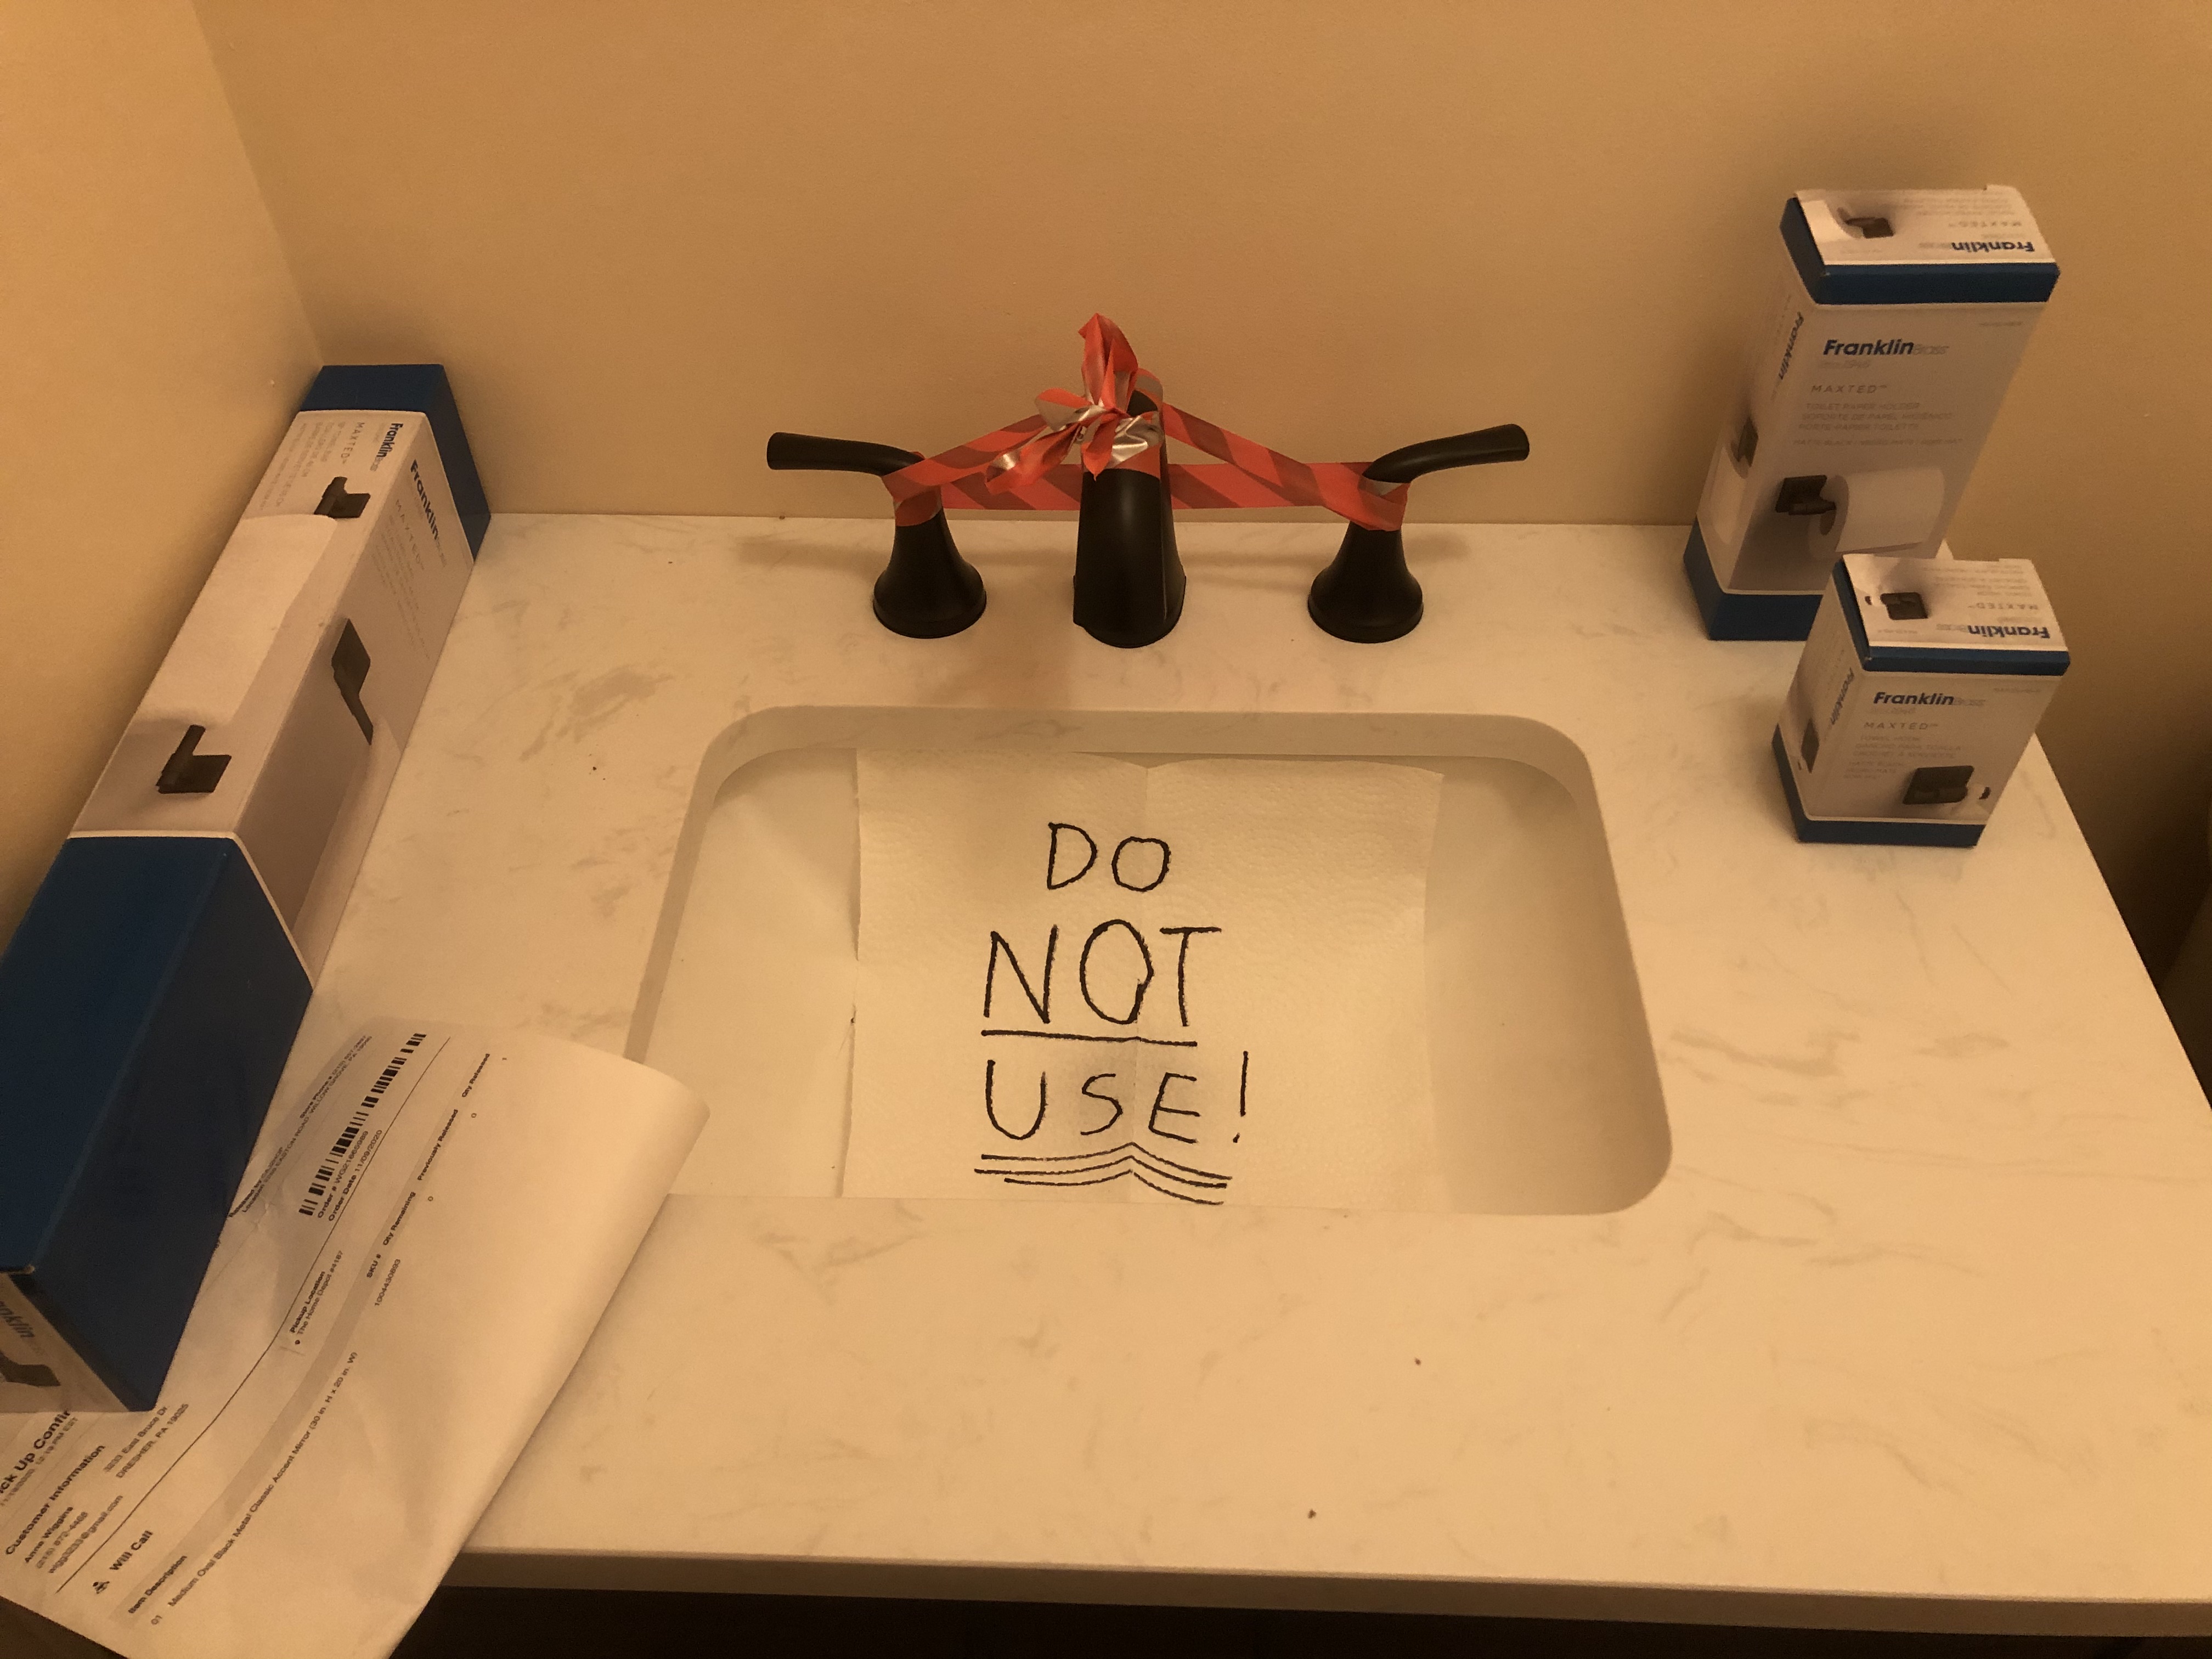
We were still without a “functioning bathroom!” My wife and I, with major help from the carpenter and plumber, had at this point deconstructed and (mostly) reconstructed our powder room. But there was one important aspect of the project that had not yet been addressed, one which kept us from fully utilizing and appreciating our new bathroom. This was the practical need to remedy the problem that originally drove our renovation project: wall damage caused by the lack of a side splash on the old bathroom countertop. You can observe in the Home Depot photo of the new vanity, as we did, the glaring absence of a side splash. Backsplash, yes. Side splash, no.
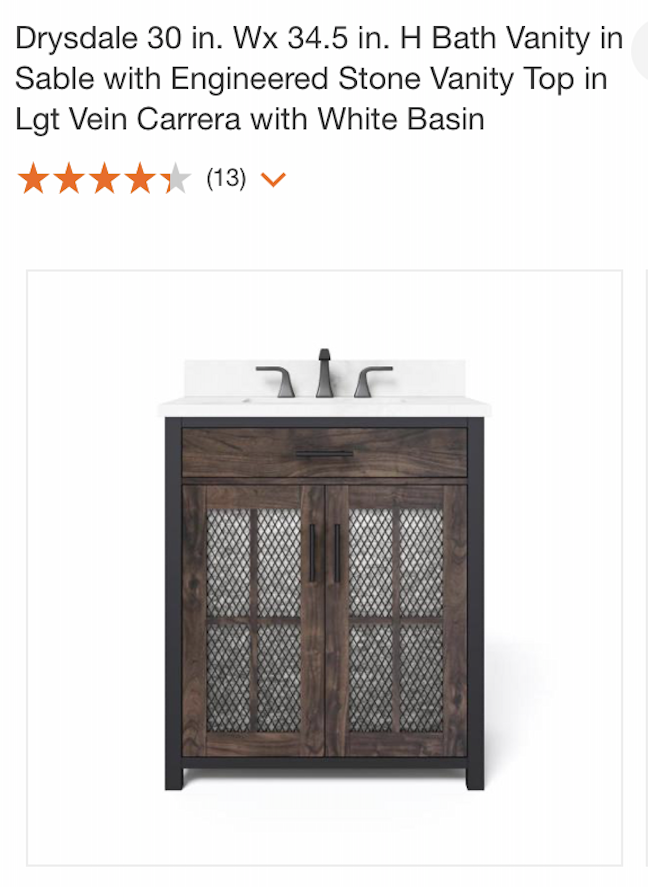
To solve this problem, back when we had originally ordered the vanity, we also special-ordered a separate marble side splash made by a different manufacturer. Based on the sales photo, it appeared to have a color and marble pattern similar to the vanity’s countertop. When we later received both orders, my wife and I first cut open the vanity box and discovered that the backsplash was not attached to the unit but was actually a separate piece. This piece was intended to be attached to the wall, where it met the vanity top, with caulk added to seal the gap, thereby avoiding water damage to the wall. We then opened the box containing the separate side splash we had ordered and immediately saw it was neither the right size nor the right color to match the vanity.
After returning the separately purchased side splash to Home Depot, I pursued what I thought might be a simple solution. I called the vanity manufacturer and asked if I could buy a stand-alone backsplash that I could use as the side splash we needed in our powder room. Unfortunately, I was informed the vanity was manufactured overseas, and the company could not sell an individual piece.
Next, I traveled to several local marble dealers and learned they had no inventory that would be suitable for our needs. In the process, I also realized it is really difficult to match the color and pattern for marble. One particularly helpful store gave me a marble piece they were showing on display and said I could have it to use as the side splash, if it would work. But alas, when I got this piece home, it also turned out to be the wrong size and color.
Somewhere along the way, one of the marble shops (which also sold tile) recommended that I look, instead, into using ceramic tile for the side splash. A brief discussion of this possibility helped me realize that mixing the marble backsplash, which came with the vanity, with a tile side splash would look dreadful. So the conversation shifted to the use of ceramic tiles for both the backsplash and side splash.
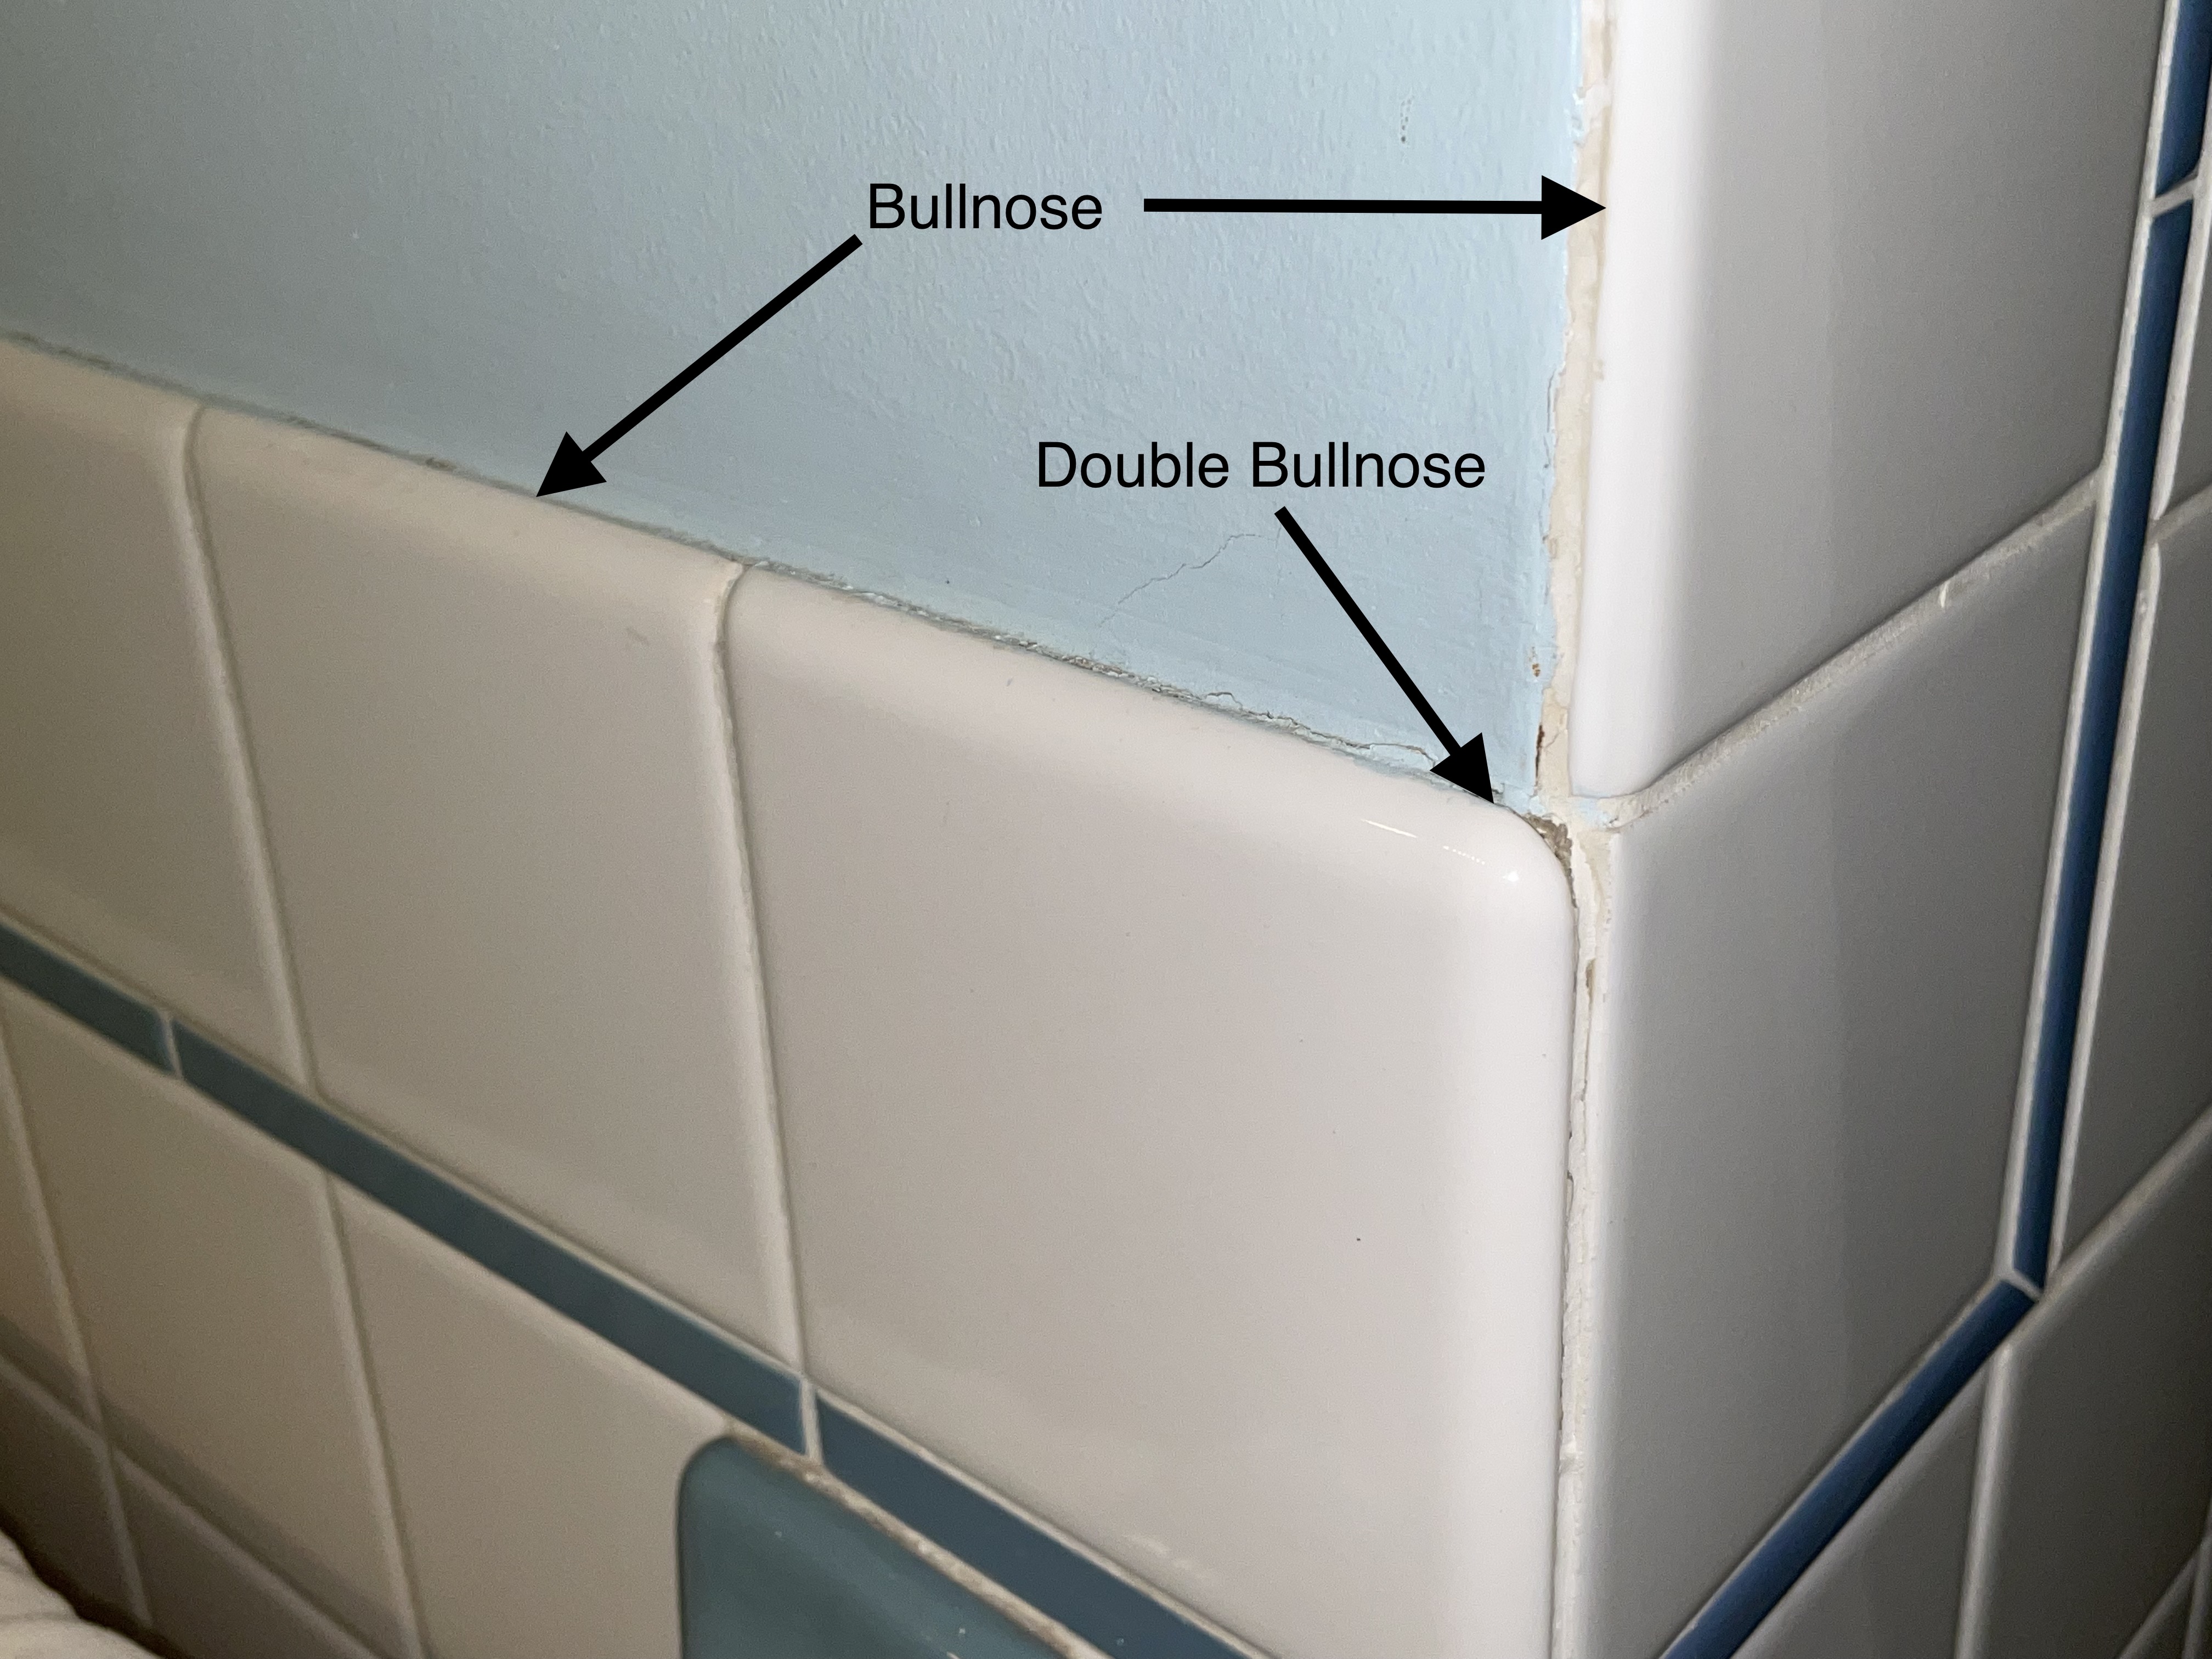
This solution features prominently in the rest of the story and the details of my tile-hunting expedition are burned into my – and my wife’s – memory. For now, suffice it to say that I went to several shops before finding the best tile option. Along the way, I learned the practical meaning of thinset, grout, and caulk, as well as the limited availability of bullnose and double bullnose tile, which we wanted to use to provide a finished edge look. (See the illustrative photo below, taken of one of our other bathrooms.)
In the end, I purchased a “Subway” style of tile, having the product name “Maritime”, in a color called “Tybee Light” (essentially white), with a glossy finish (rather than matte). Although it was of no real importance, I found myself wondering about these inscrutable descriptive titles. Subsequent investigation revealed they are called “Subway” tiles in reference to those “used on the walls of the New York City subway stations in the early twentieth century” (wiktionary.org). Further, the website for the tile manufacturer (Garden State Tile) informed me their “Maritime” collection was inspired by “the charming beach towns of the East Coast,” and were “available in 8 nautical inspired colors,” including “Tybee Light.” The color is apparently a reference to the “lighthouse located next to the Savannah River Entrance, on the northeast end of Tybee Island, Georgia” (wikipedia.org). The Tybee Island Lighthouse is the “oldest and tallest lighthouse in Georgia” (visittybee.com), standing 145 feet tall, with a history dating back to 1736. But I digress.

Returning to the project at hand, I also selected the traditional 3” x 6” size of these “Subway” tiles, to help minimize the number of tiles I would have to place. There were also matching 1” x 6” bullnose trim pieces that I bought to provide that finished appearance at the edges. Although I needed only a few of the bullnose pieces, I had to order a complete box – nearly three times as much as I would use – because it was sold as a “specialty item.” Despite the additional expense, when I finally started the work, it was helpful to have the extra pieces to allow for cutting mistakes.
Finally, at the recommendation of the sales representative, I also purchased 25 pounds (the only size available and way more than I would need) of a premium, rapid-setting grout in an alabaster color. I was told the color of the grout would complement the color of my selected tile (which it did). Naïvely, I thought the grout would be close to white in color (which it was not). Turned out it was actually kind of gray in tint – something that resulted in another change in the work plan later on.
There is one more important point to make. Earlier, I relayed how the carpenter told us during the initial project planning that he did not perform painting or flooring work. When we subsequently mentioned the possibility of using tile for the backsplash and side splash (rather than just installing the single marble piece provided with the vanity), he quickly let us know that he also did not do tilework. Once again, my wife and I realized this part of the renovation project would fall to us. At a practical level, I could understand that tilework might not be all that difficult since it was often part of DIY projects. But my lack of prior experience made me wary of starting the tiling phase, and so I waited, and planned, and then waited some more.
Unlike the flooring phase, when the carpenter needed to return soon afterward and finish his work, there was no timeframe pushing me to finish the tilework. This lack of a deadline was unfortunate as it allowed my anxiety about the tilework to keep growing and kept me from getting started. So the project dragged on and on and on. By comparison, the three days I had taken to complete the flooring made the nearly six months I struggled to complete the tilework feel like an eternity. I imagine the delay seemed even longer to my wife, who nonetheless remained patient throughout, as she waited for me to come to terms with my own fears and limitations when it came to tilework. And, as she said, what else was she going to do? She had no desire to add tilework to her own resumé.
In addition to the tilework, there were a few other finishing touches needed to complete the project and make the bathroom fully usable again. As I agonized over the tiling, I filled my time with a few simpler tasks. These included installing the new air vent…

…and the final floor molding at the corner. (You may recall that the carpenter had left this undone since he wanted to be sure the molding could be cut to the right length, which required having the air vent installed first.)
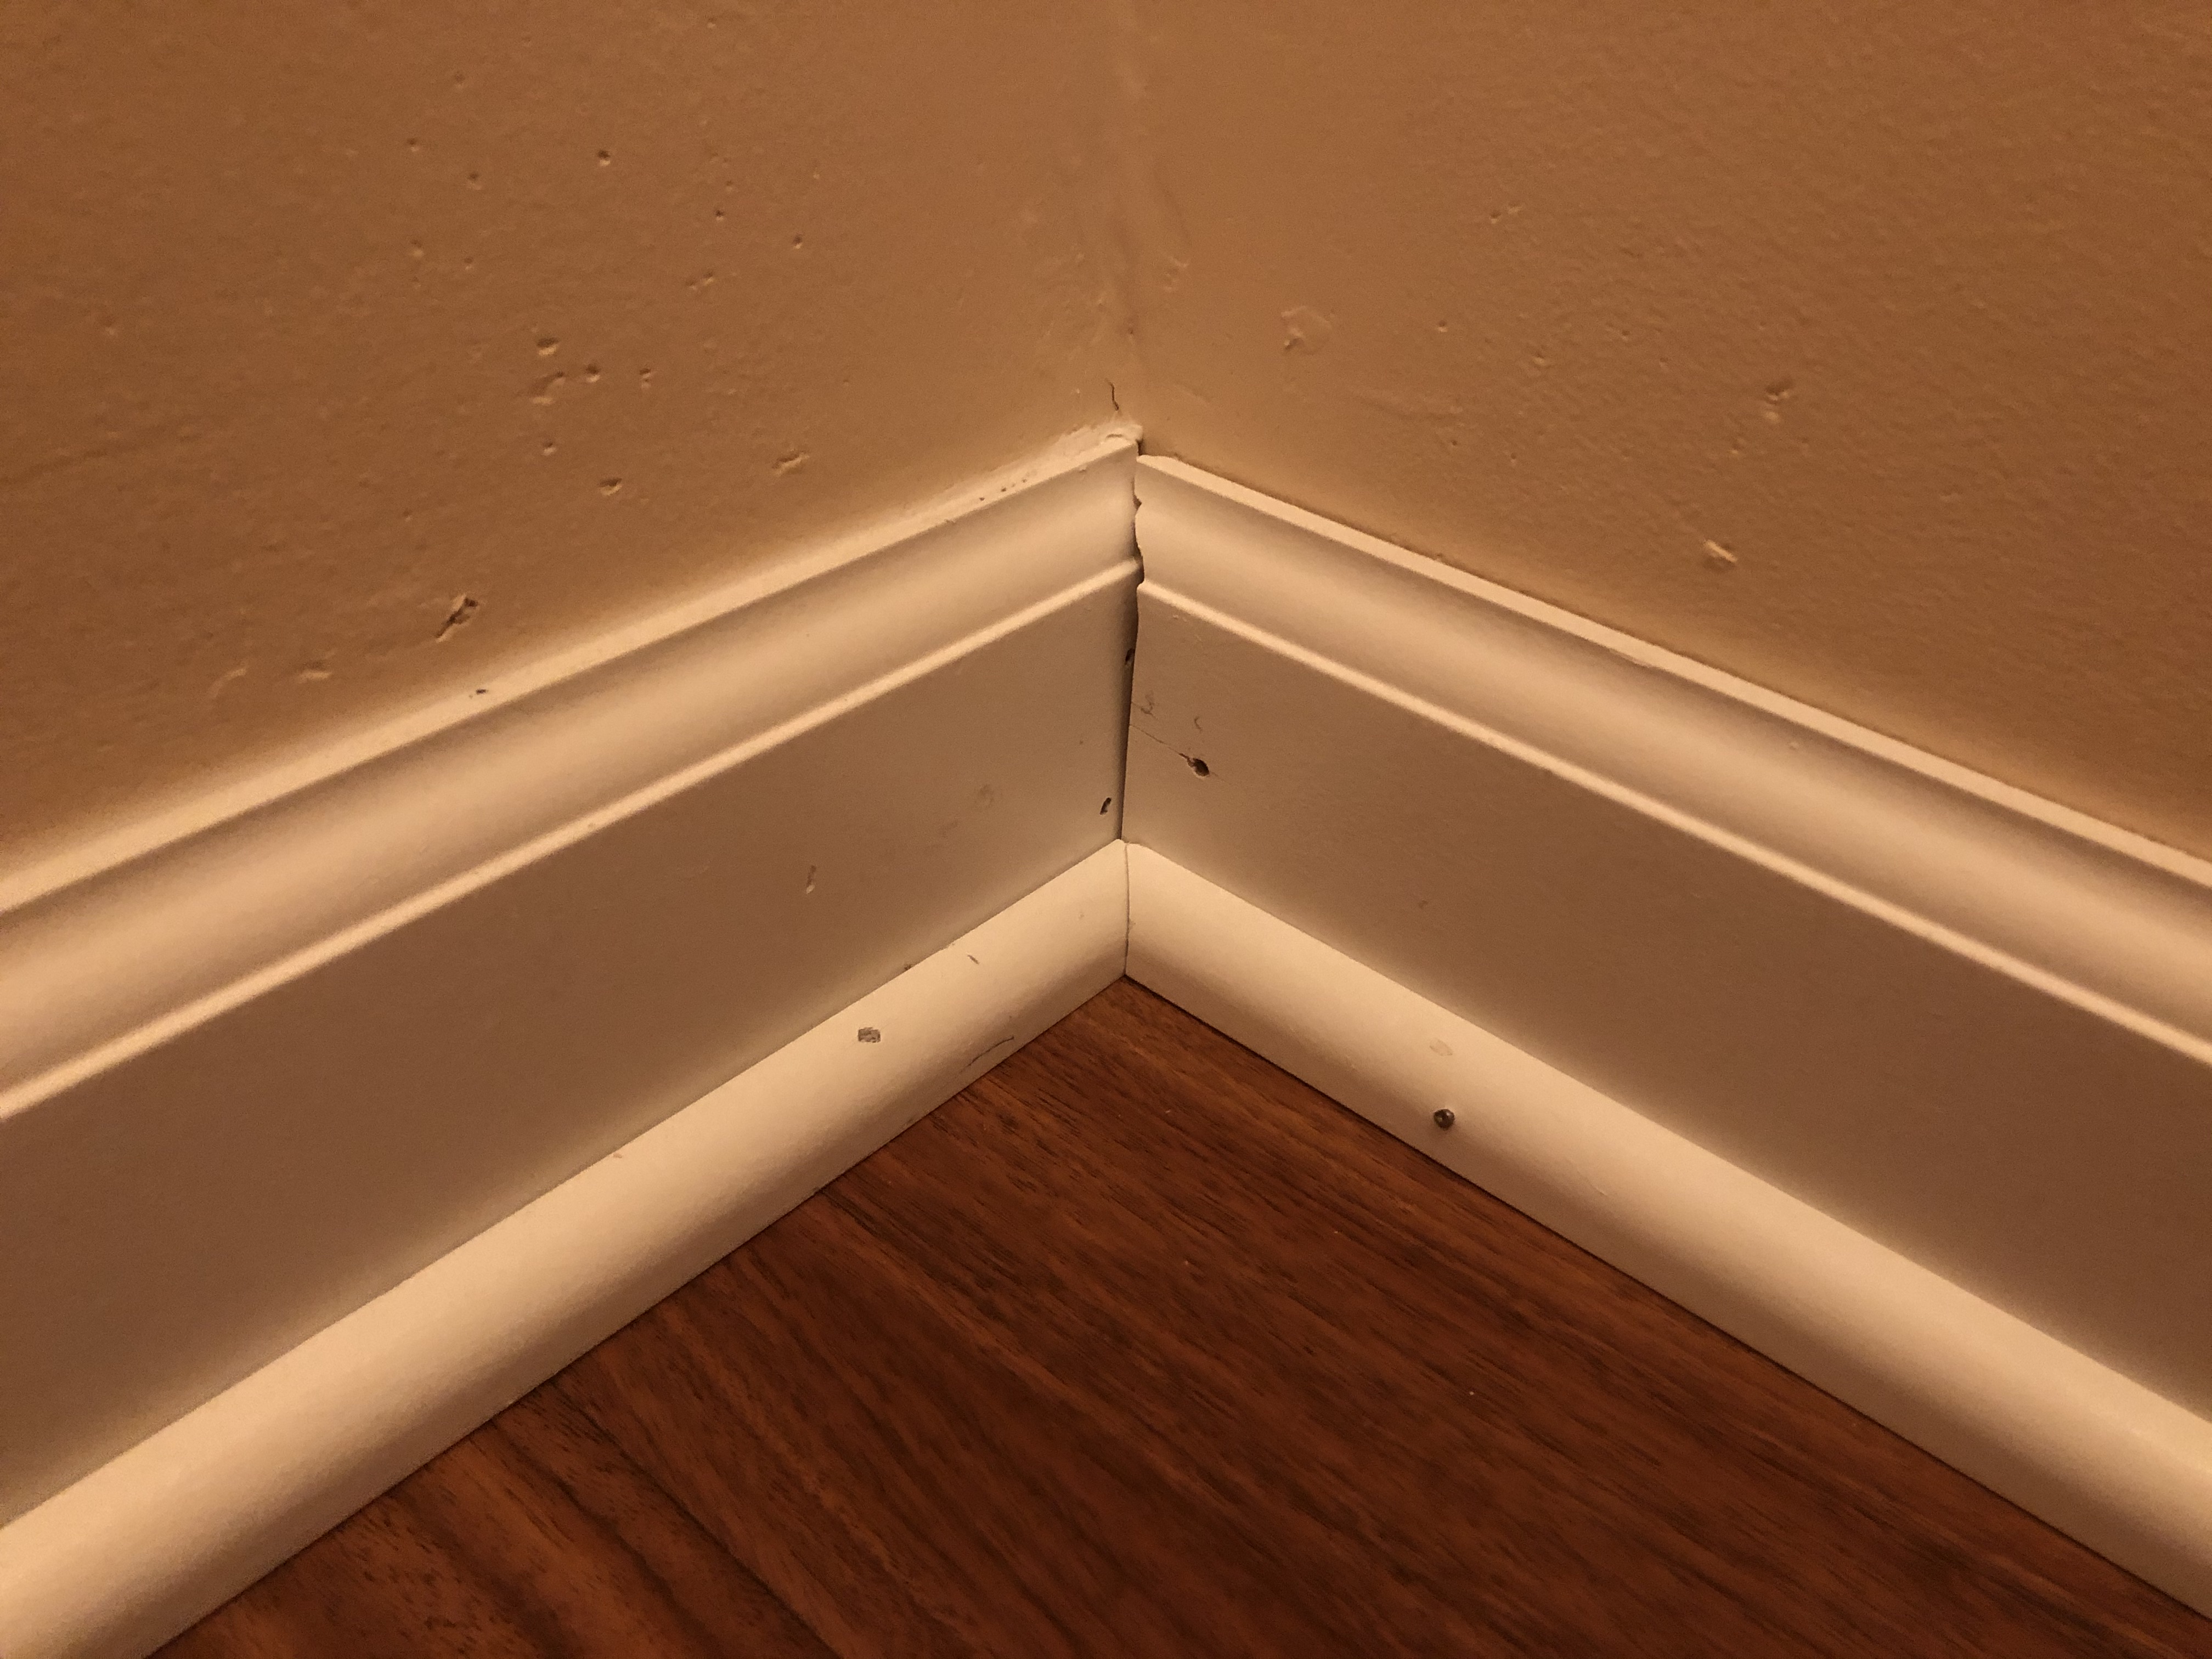
A little wood filler and latex caulk gave the corner molding a reasonably nice, finished look.

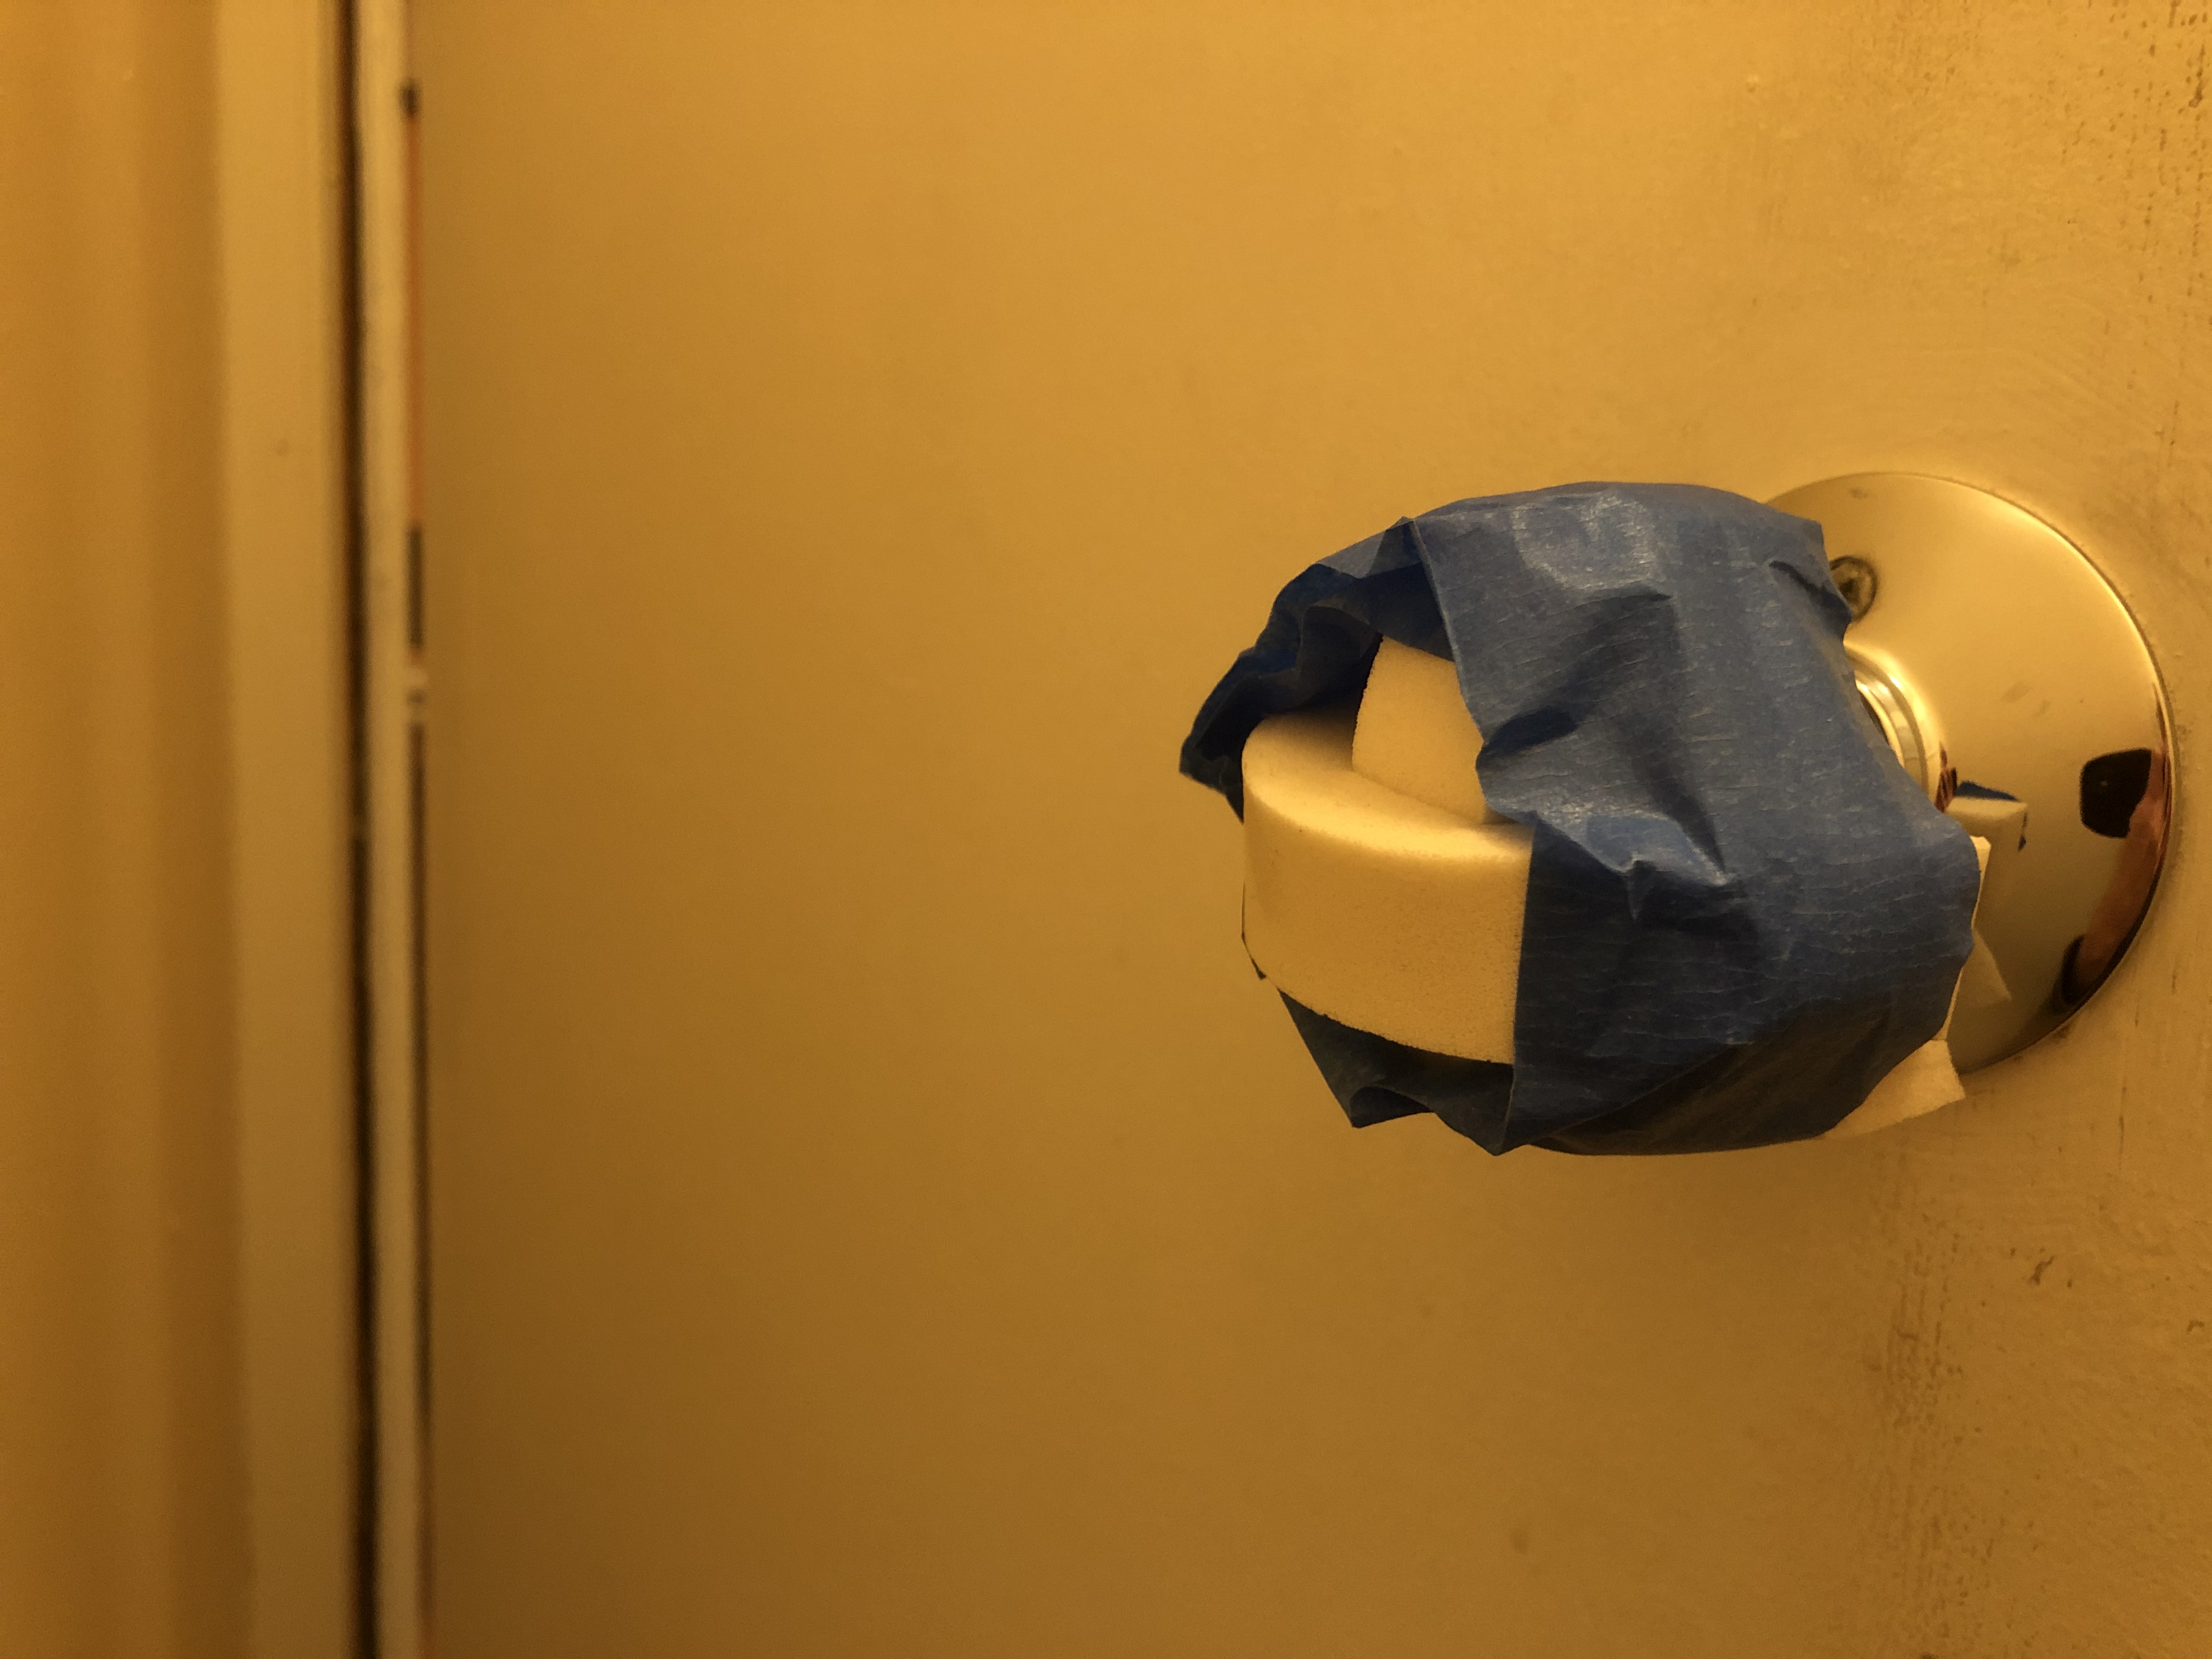
I even added a temporary “cushion” on the doorknob using foam and painters’ tape to protect the wall from damage until I re-installed the door stop.
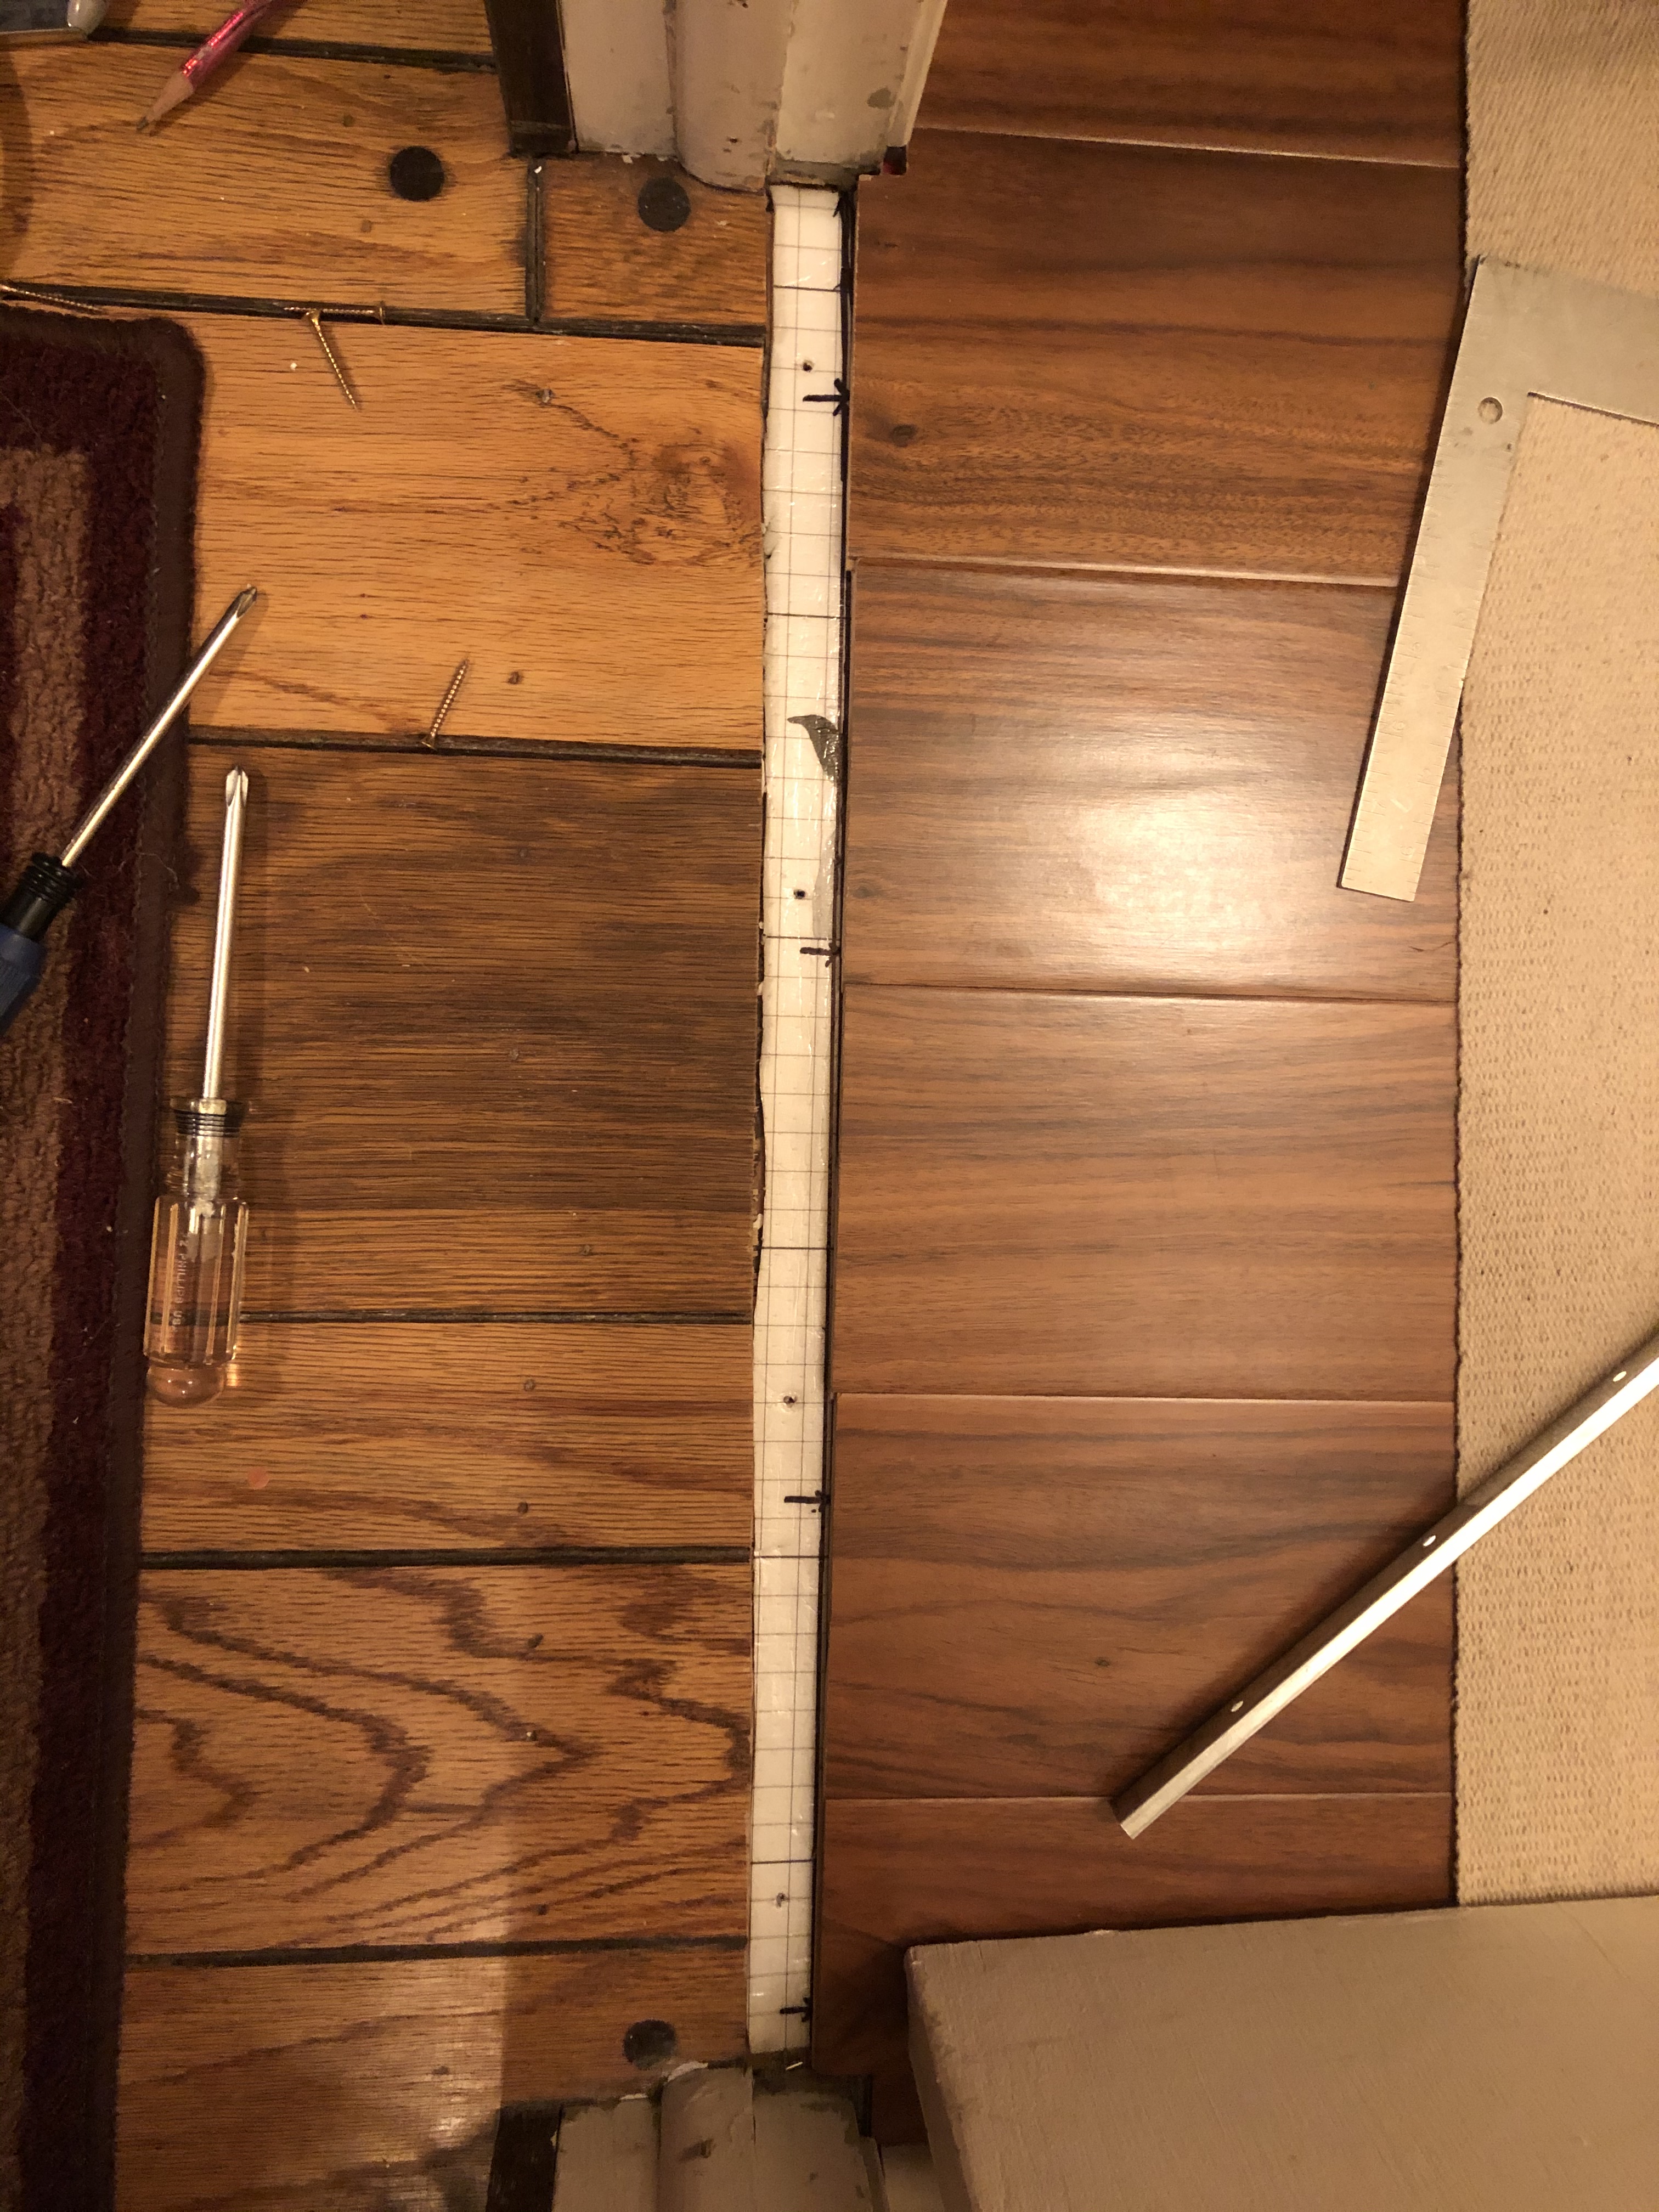
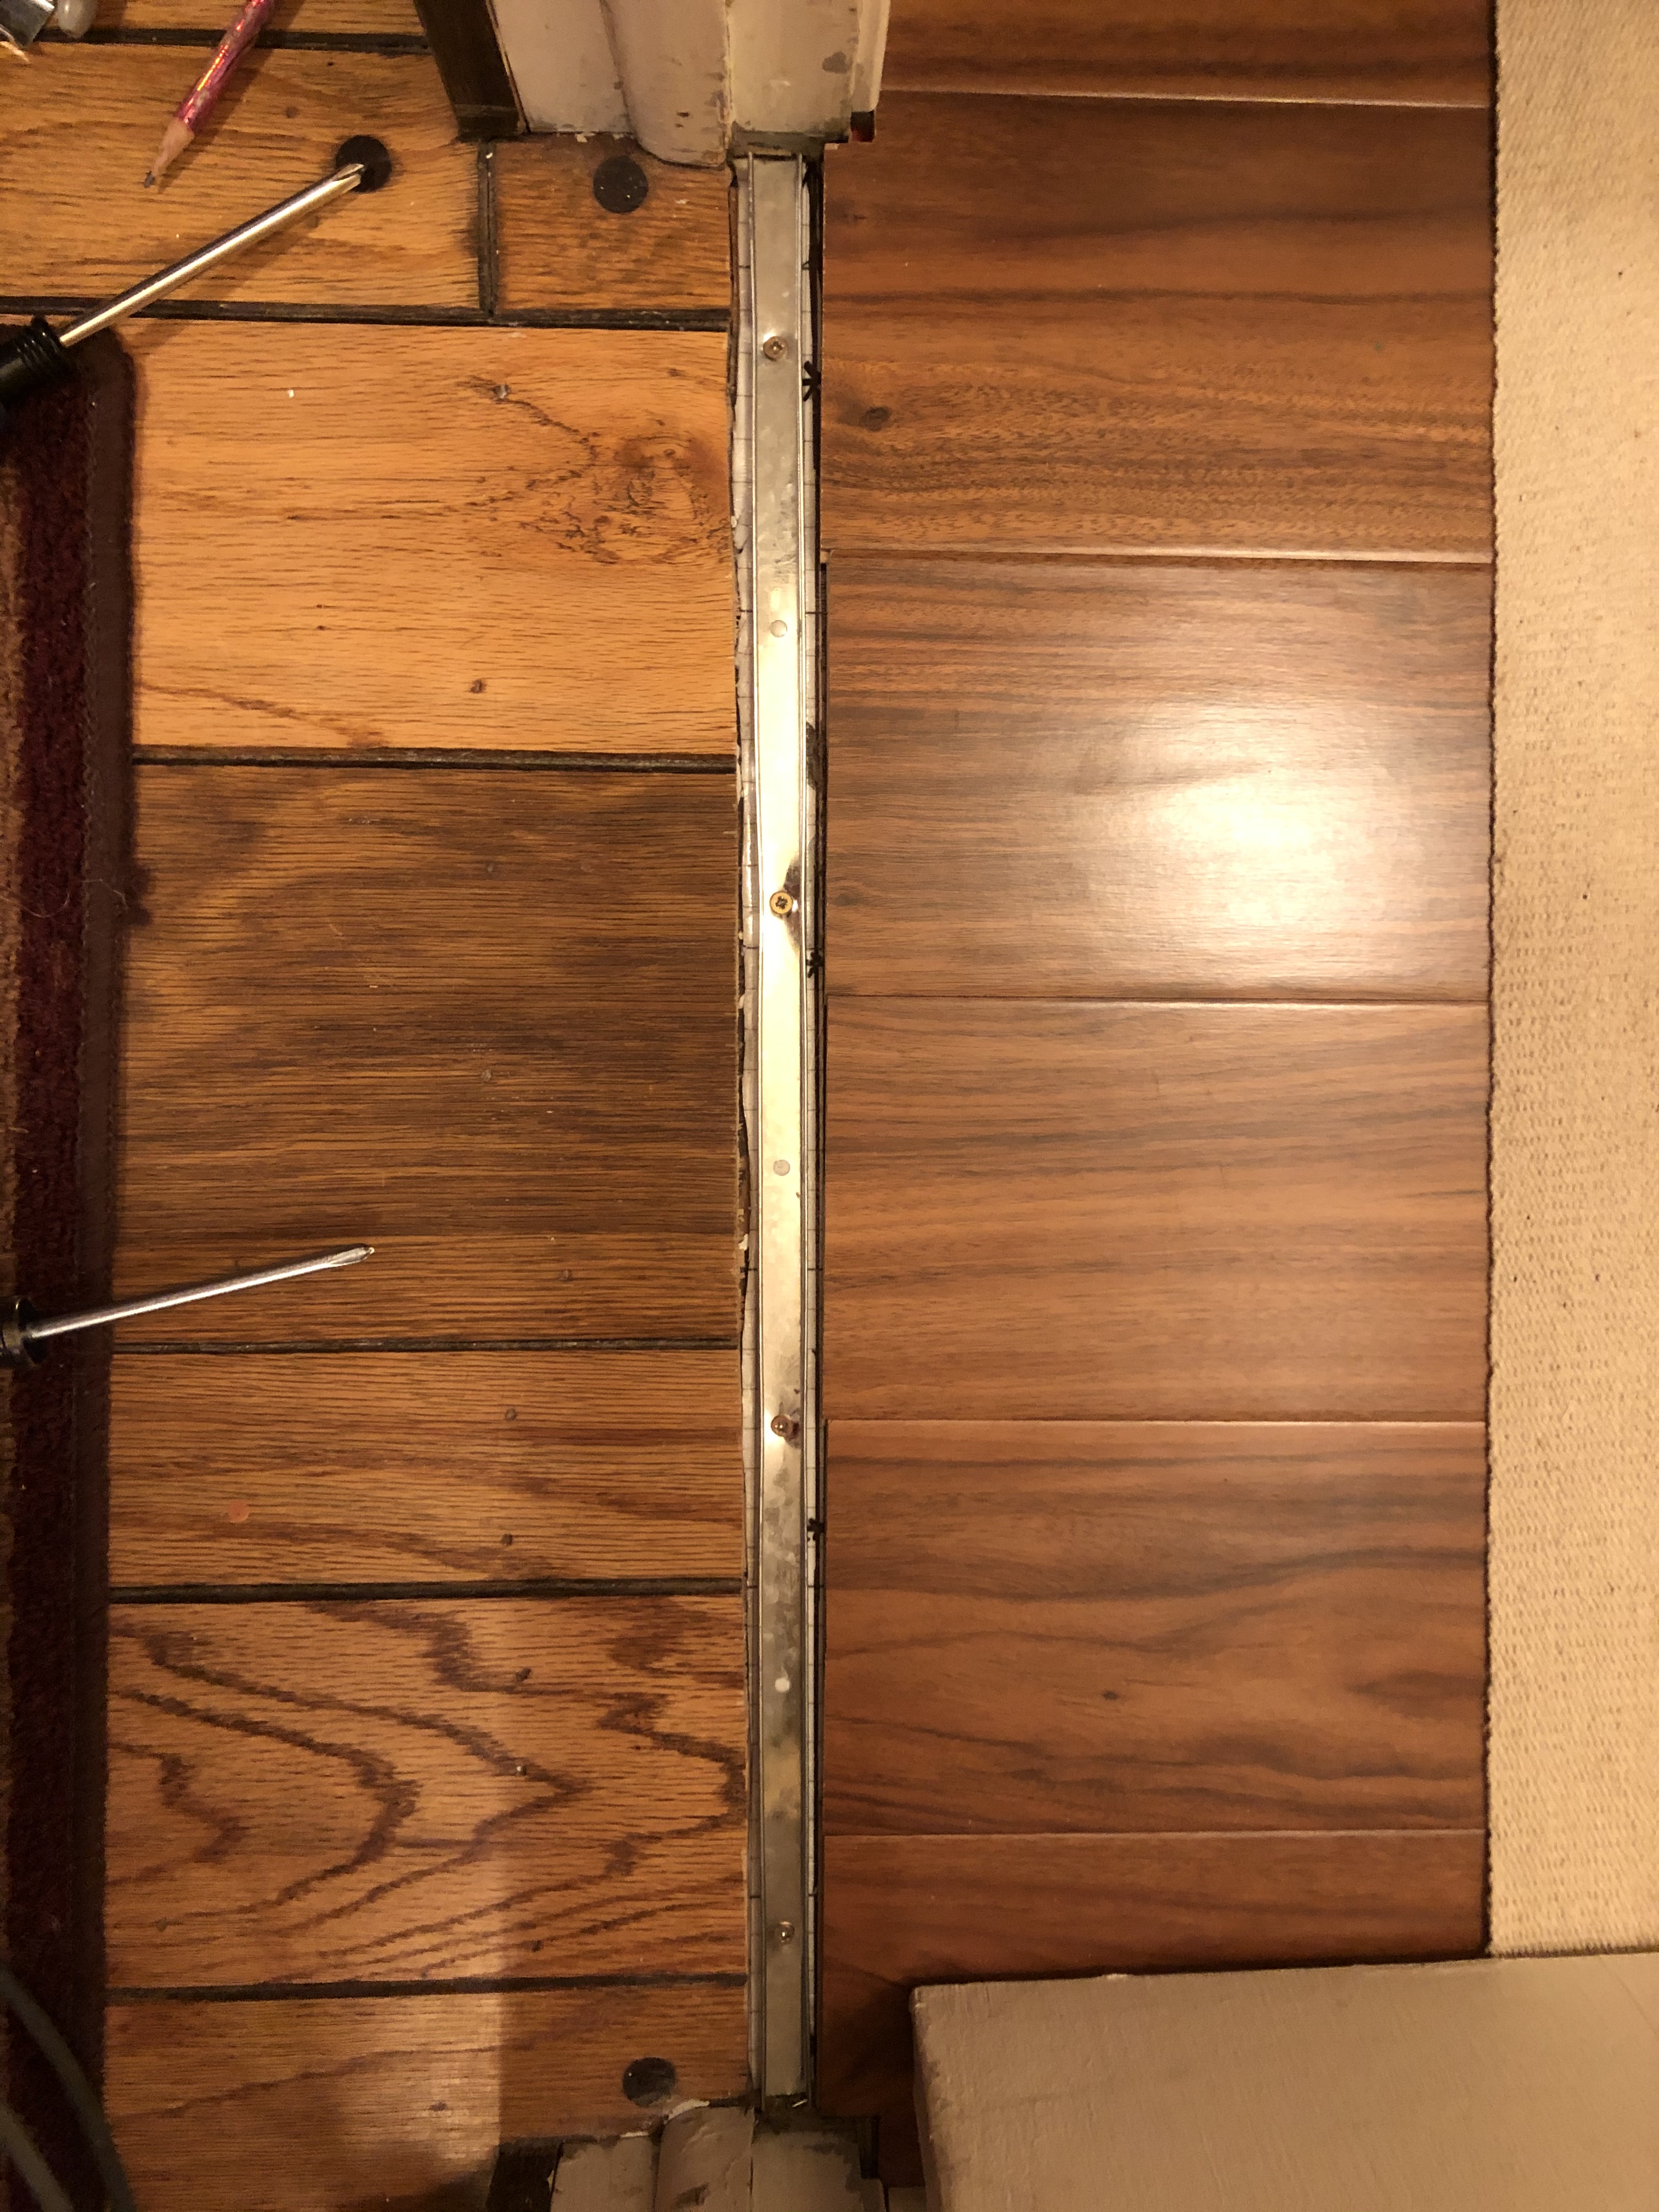
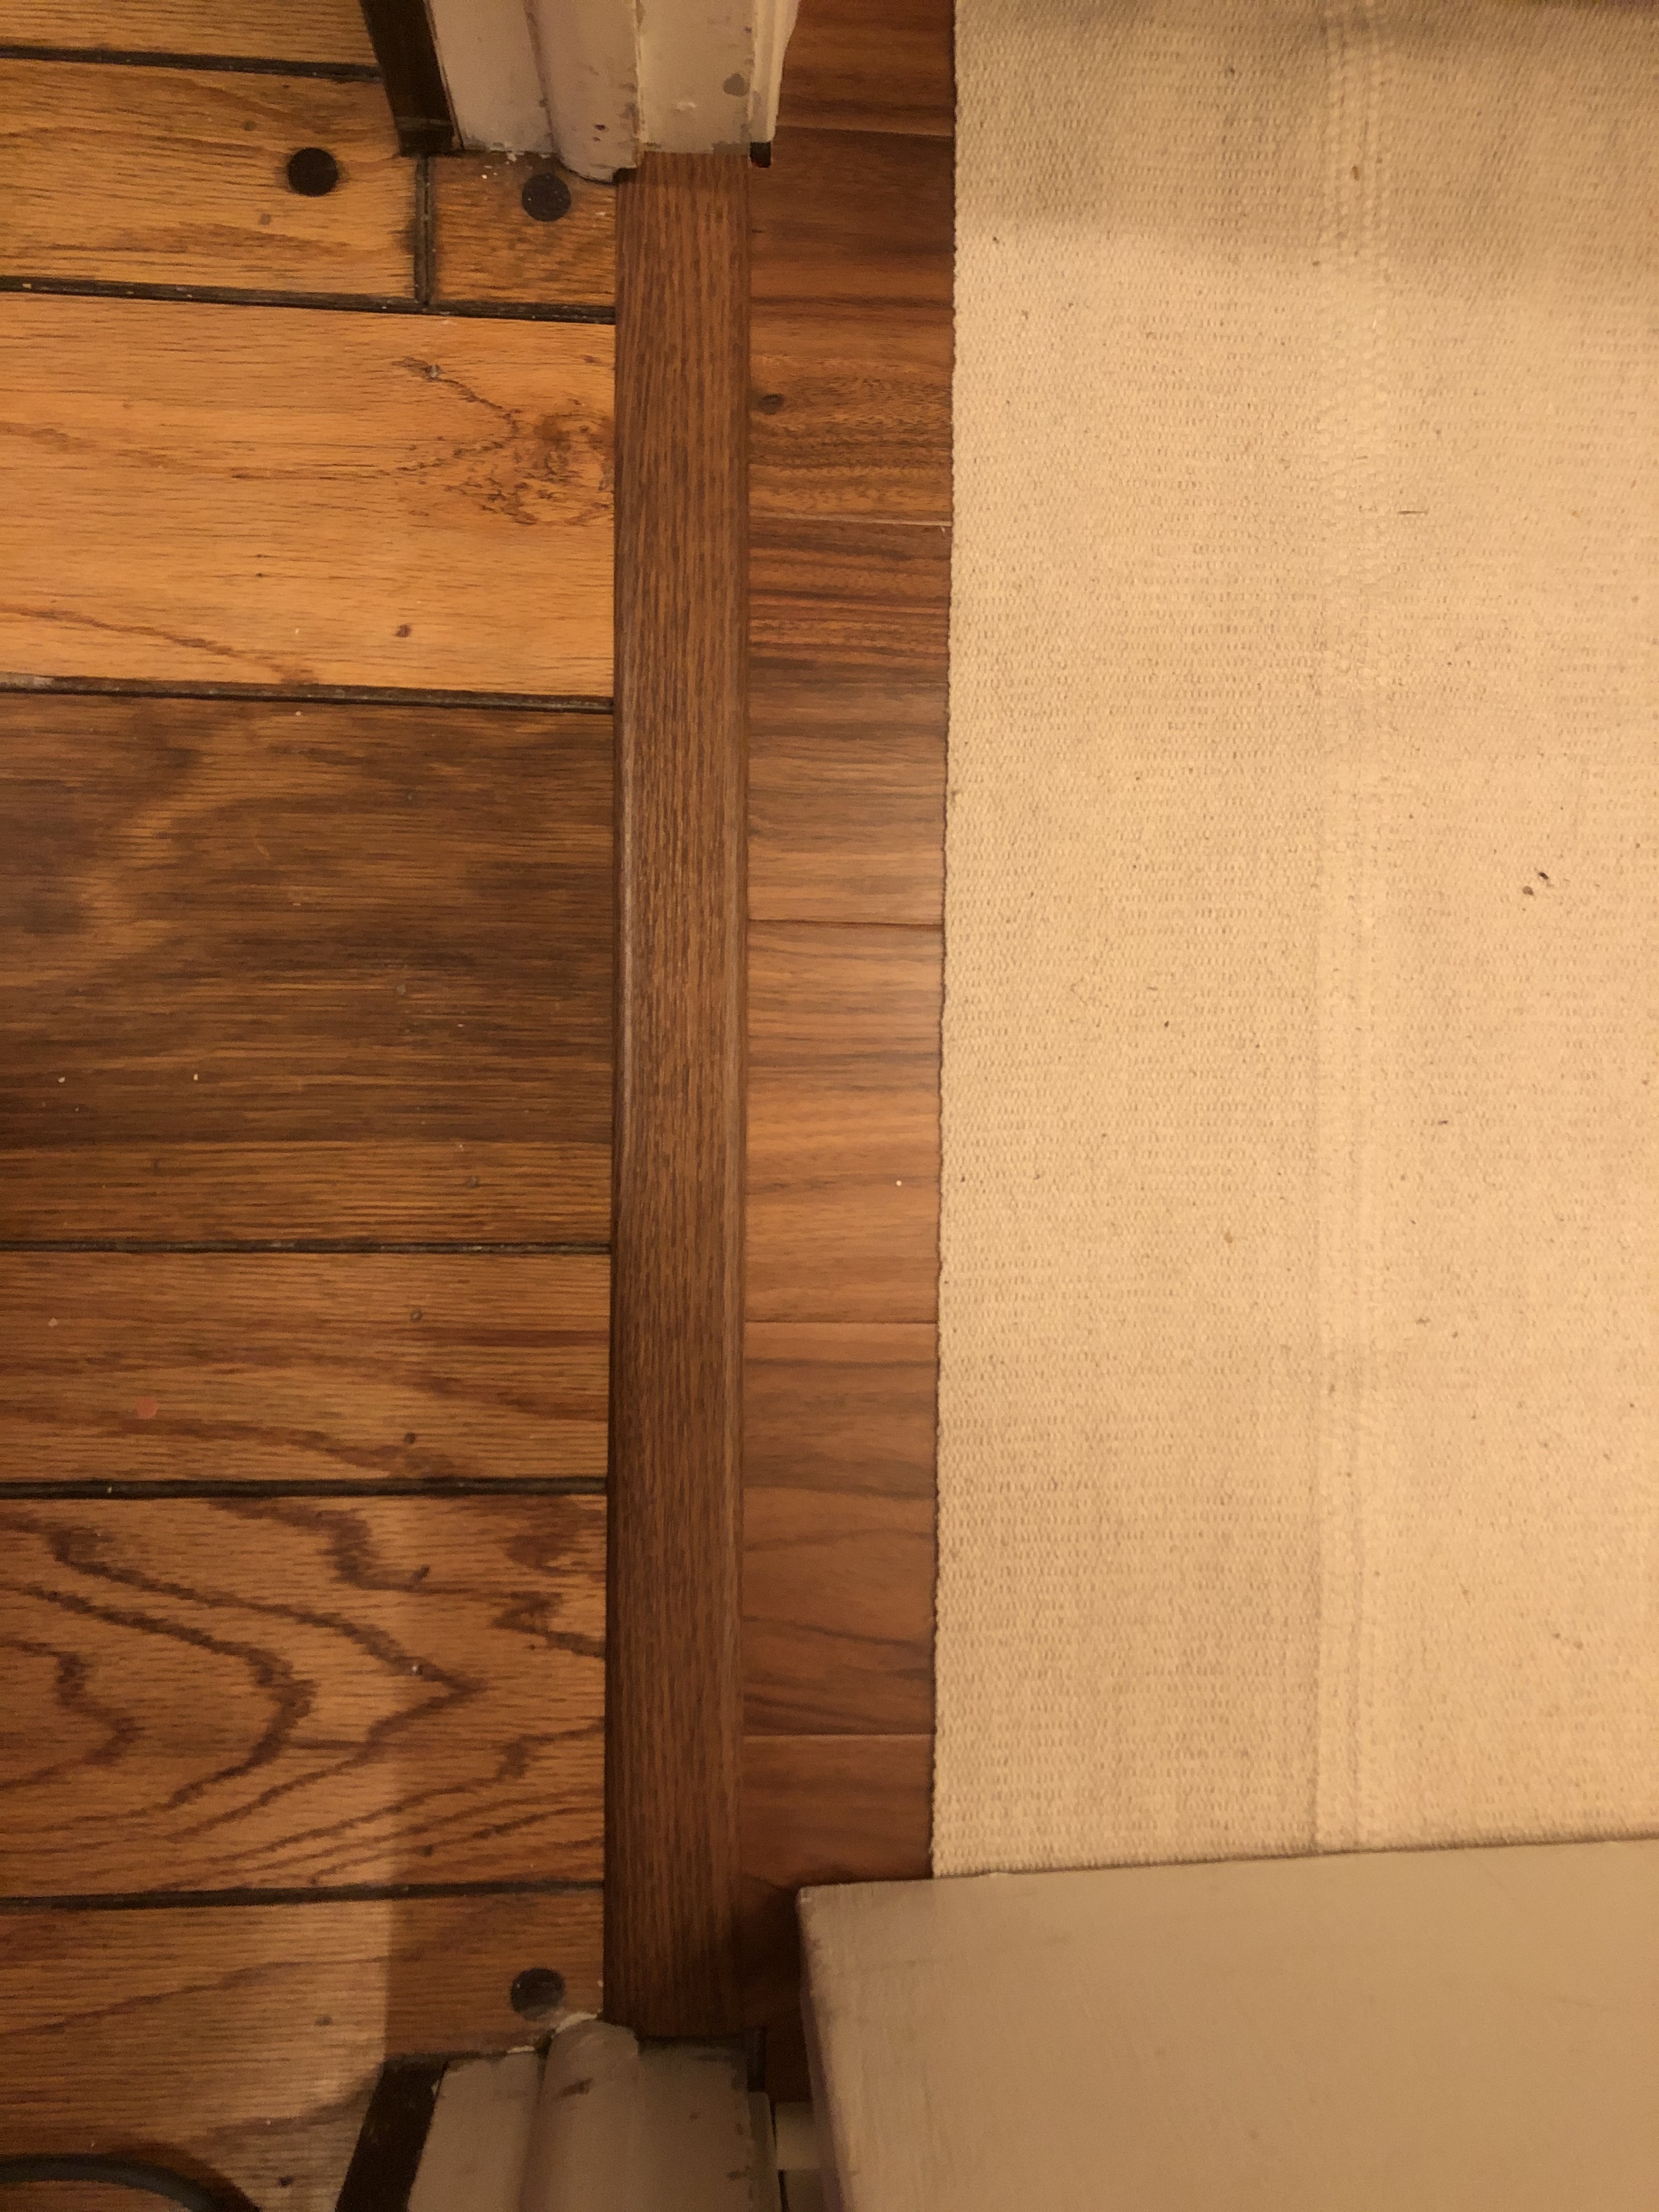
A couple of weeks later, I sent the following message and pictures to my brother to share progress on the floor transition molding…
| One more step in the project. Turned out pretty well. | ||
| Looks nice! | ||
…first, showing the gap between the existing hallway and the new bathroom floors before installing the transition molding…
…then, with the transition track fastened in place…
…and finally, after securing the molding to the track.
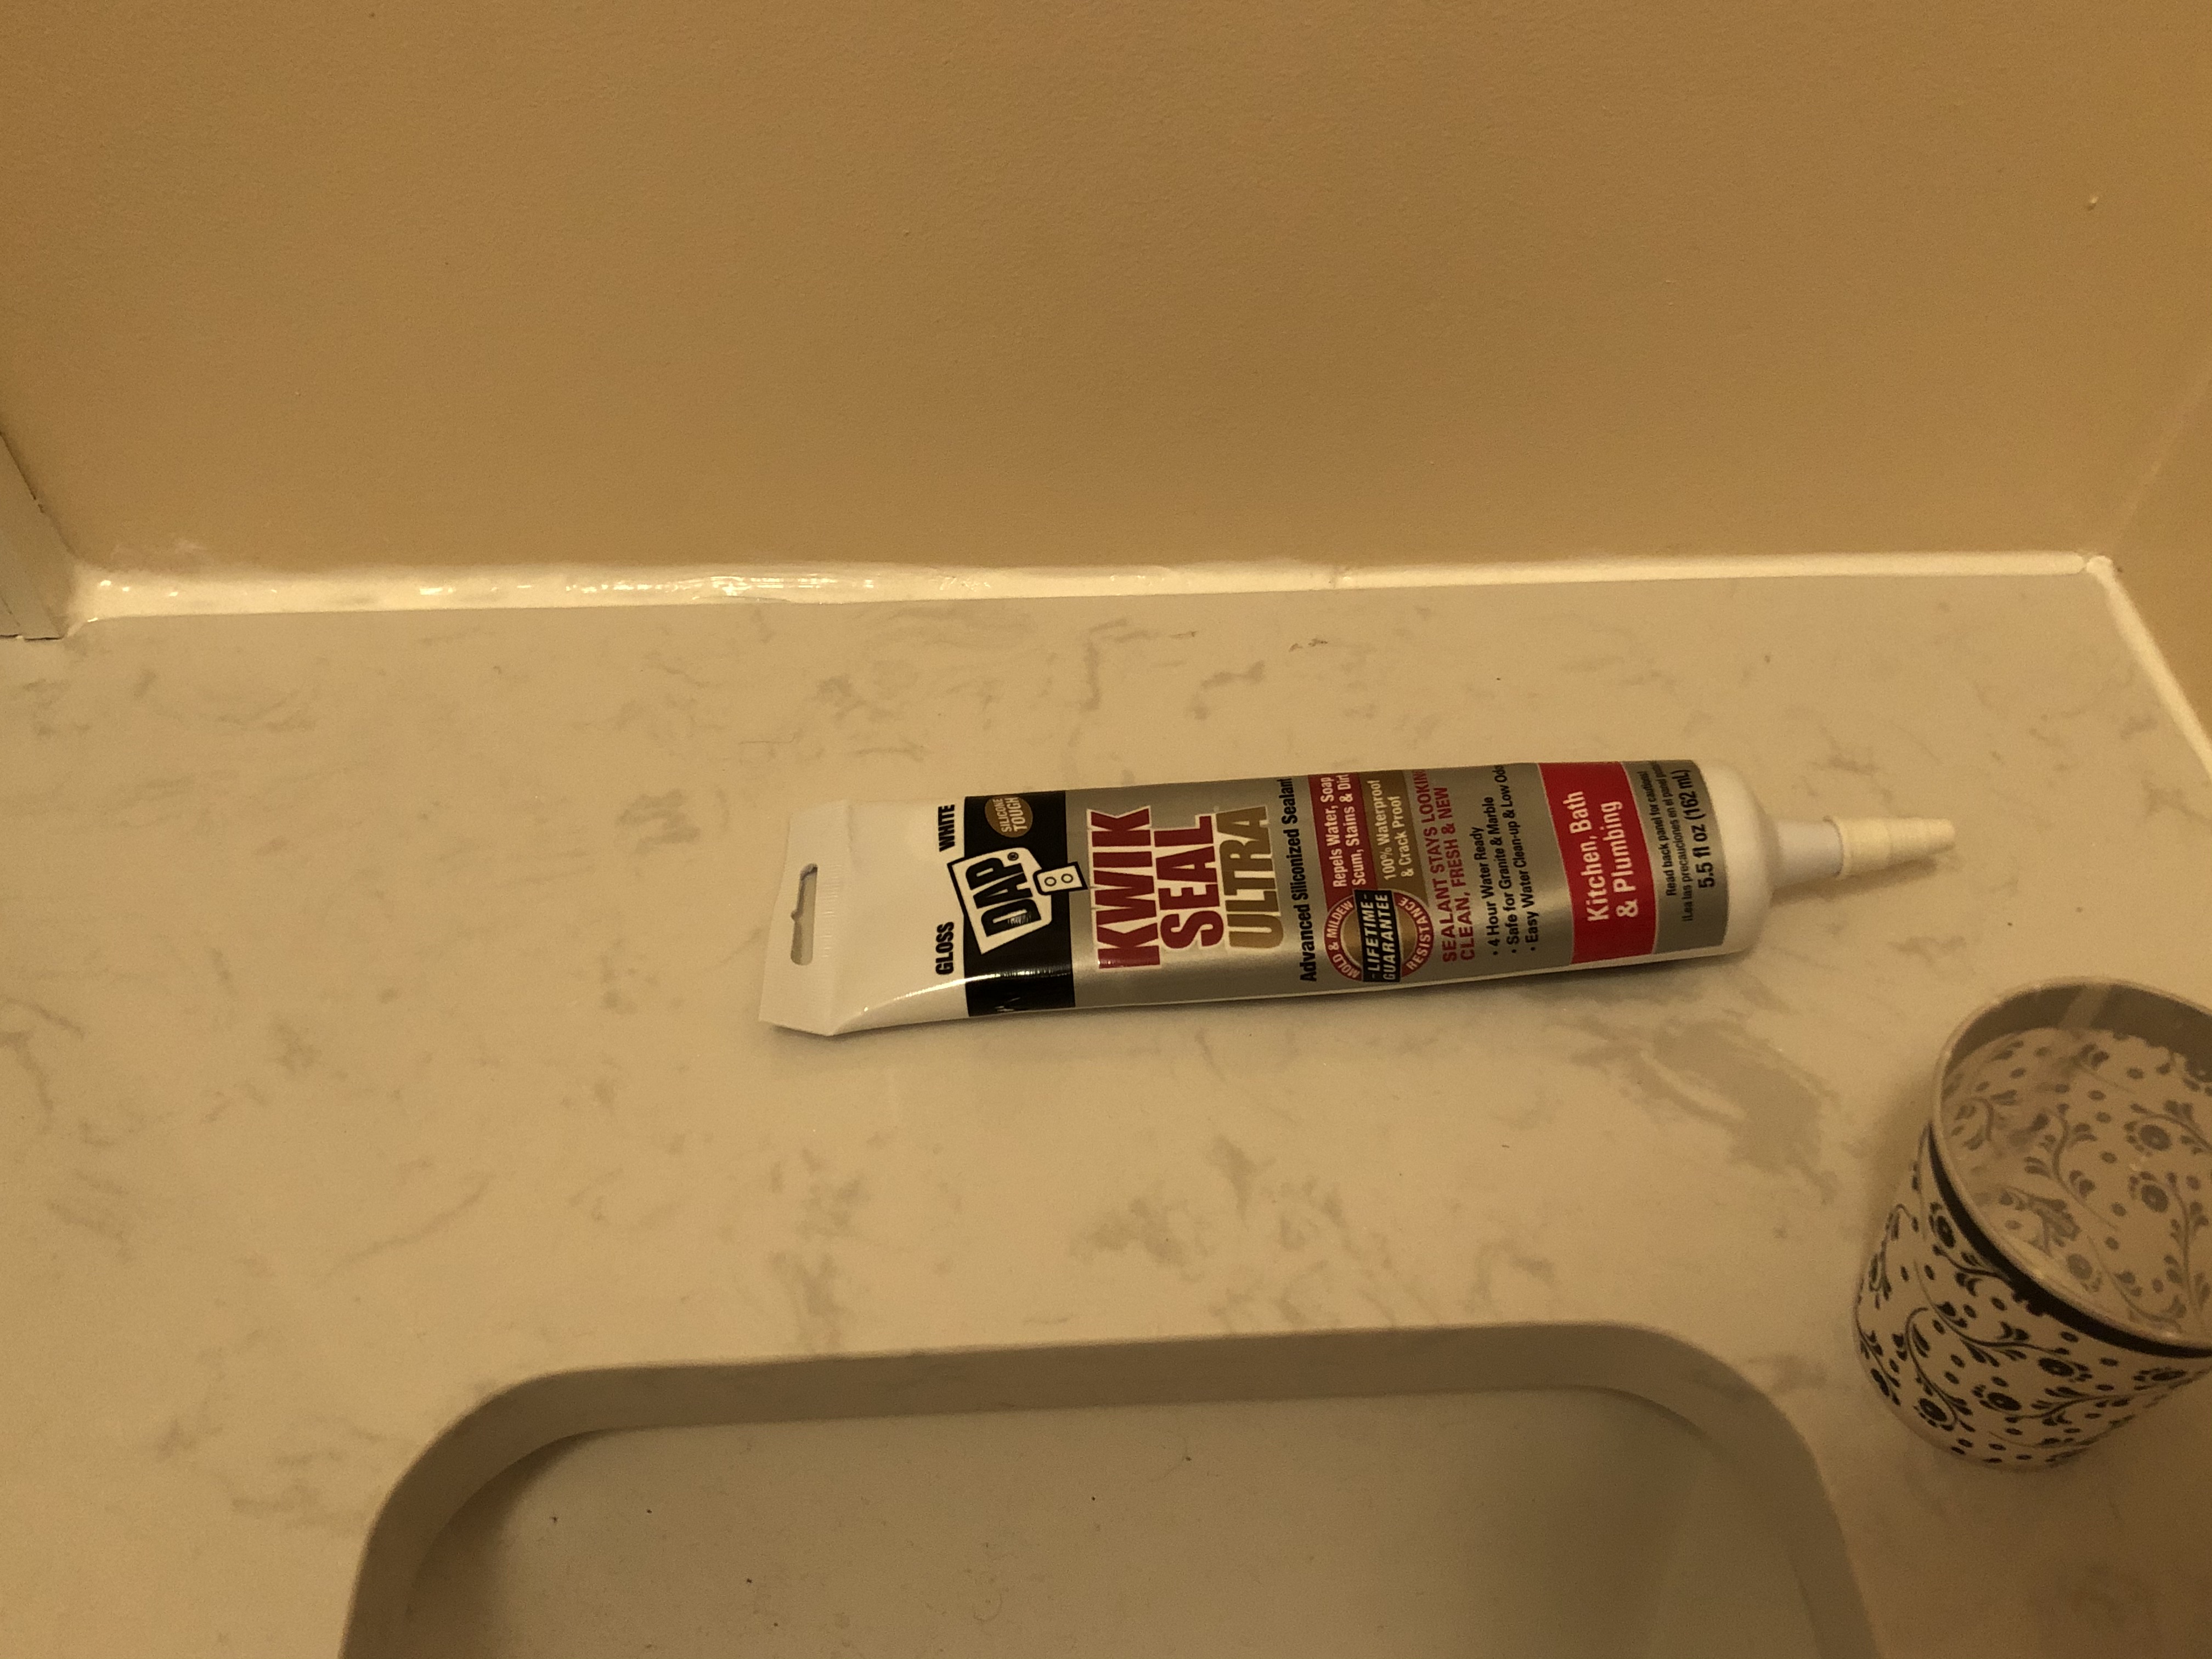
It was another couple of weeks before I sent the following to my brother, showing initial, preventative silicone caulking I had added around the edge of the vanity to fill the gap, intended to help address the water-proofing issue on the side wall.
| Glacial speed making progress on the bathroom… |
Glacial speed indeed! I still had made absolutely no progress on the tilework.
To be continued…
Categories

I love your digressions! Goodness, I’d be nervous, too. The counter Daddy tiled for us required lots of specialty pieces and boasted absolutely no straight angles. Ahh! Looking forward to seeing the finished job! I think you have earned about 50 beers on this project!
And he’s coming to town tomorrow so he can share those with me.
Thanks, Kiki, for the comments and encouragement. It helps to get positive feedback as I contemplate starting my own blog. A few of those 50 beers may also help push me in that direction. Cheers!