
A Miniature Garage Loft – Phase 9
Continued from: A Miniature Garage Loft – Phase 8
Now I was ready to tackle those last two processes: railings and windows.
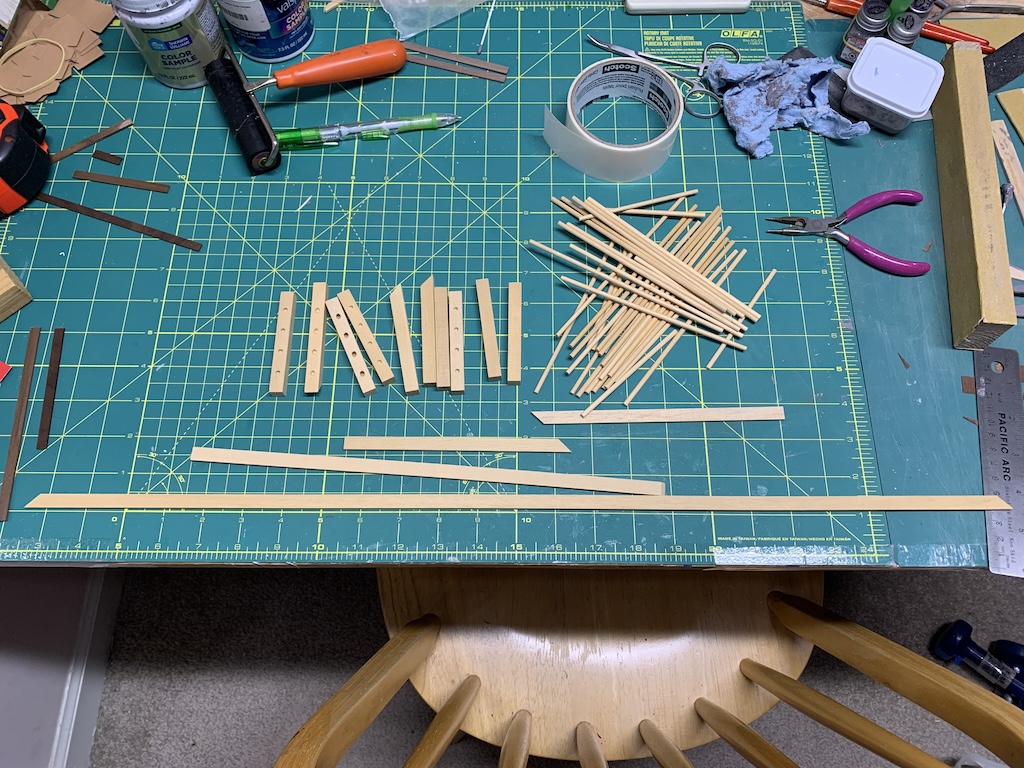
A nice feature of this kit is it came with all the railing pieces precut. The rail posts were predrilled with holes to accept the cables (dowel rods). The dowel rods were precut to the correct length for each part of the railing system. And the top rails were cut to the correct length and angles mitered where necessary.
To finish the rail posts, I considered staining them or painting them.
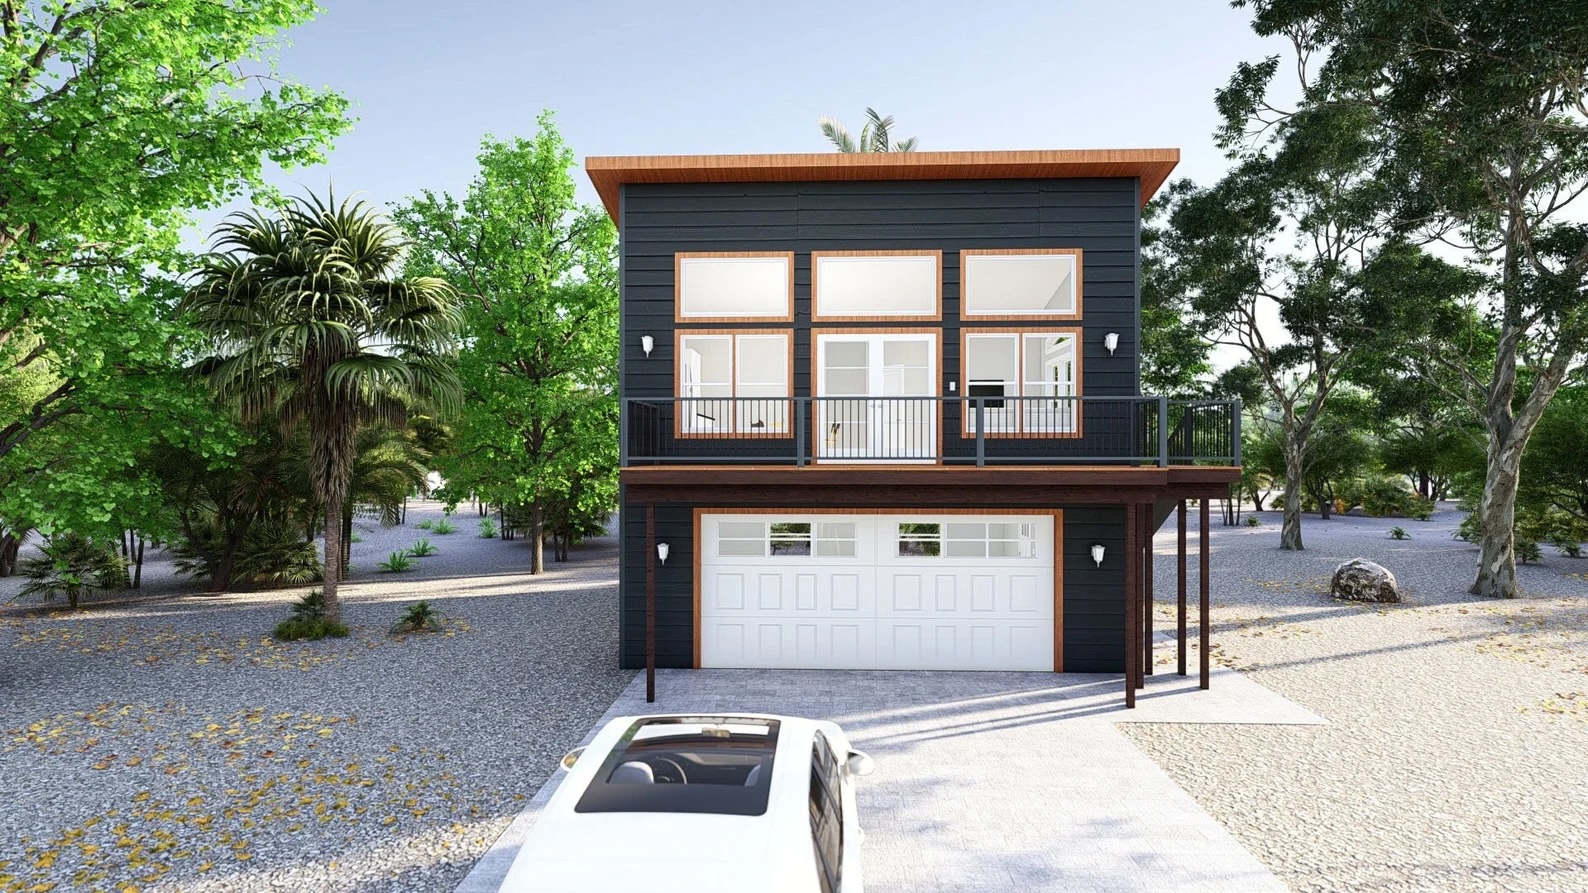
Looking back at that photo of the actual garage loft, their entire railing system was black, and I considered painting my rail posts black. But that would be introducing a whole new color to my garage loft. In the end, I decided to just paint them to match the white deck support posts.
The cables I wanted to paint silver to model actual metal cables and so used the same approach I had previously used with the dowels being rolled between two sponges to which silver paint had been applied.
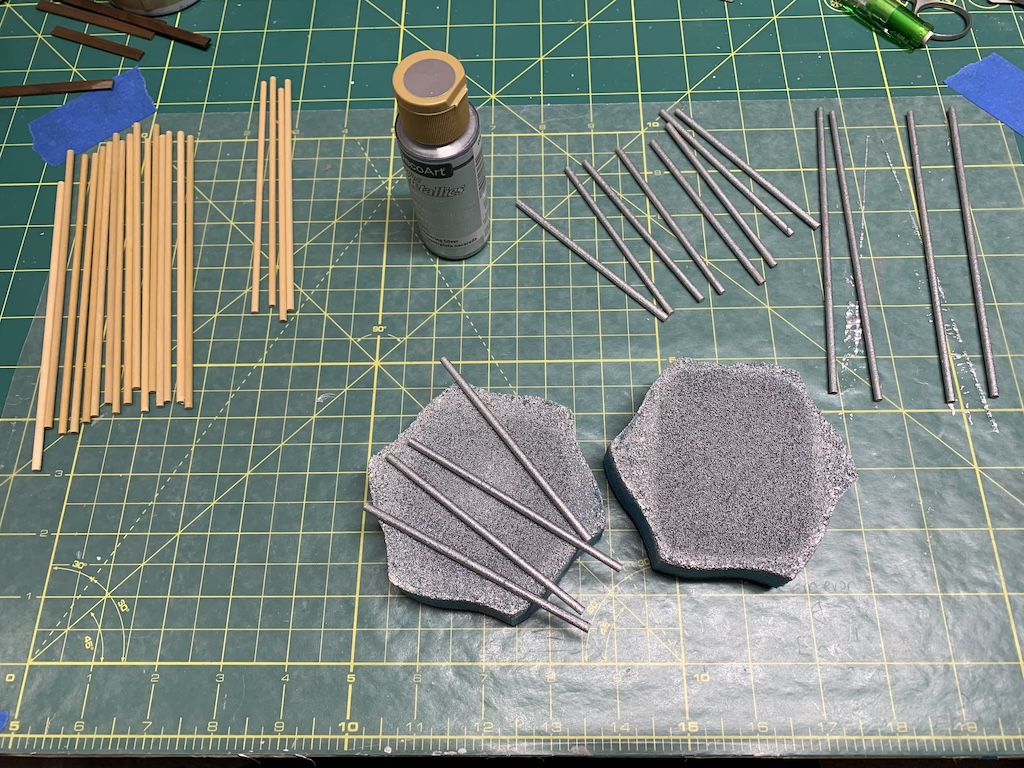
With the dowels and posts painted, I then began to assemble the deck railing system. I found the dowels were an extremely tight fit into the pre-drilled holes in the posts and had to twist and turn them to get them in. Pressing too hard, I actually broke one of the dowels that I had to glue back together. I then figured out a unique assembly technique that allowed me to get the dowels into the posts without breakage.
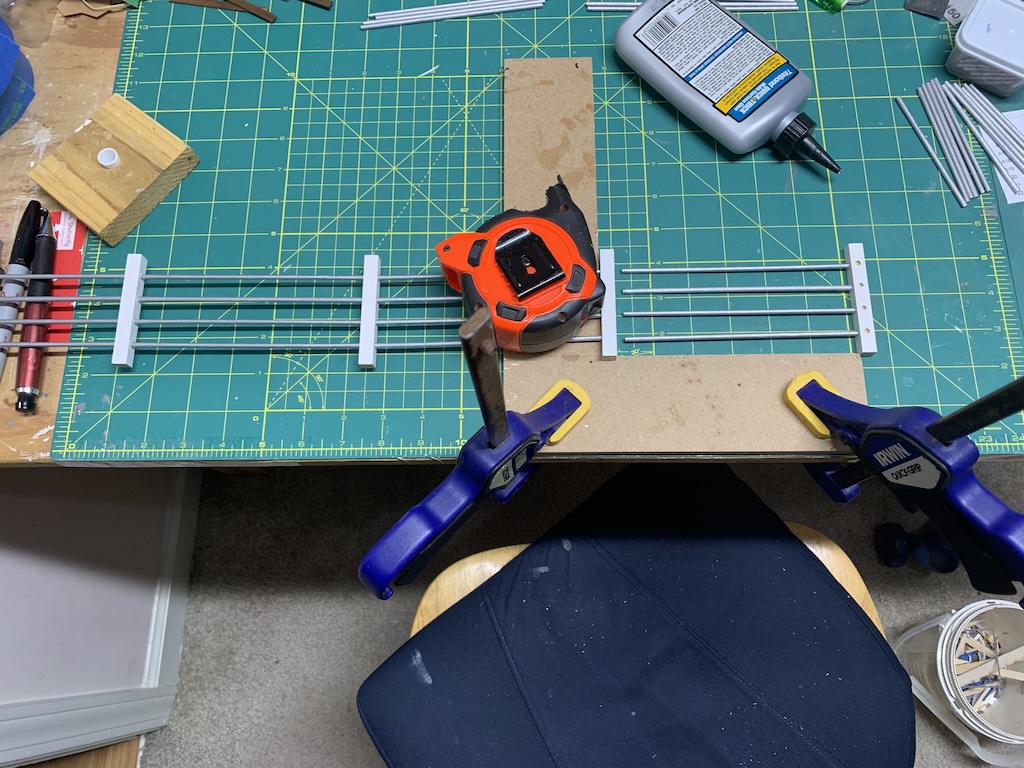
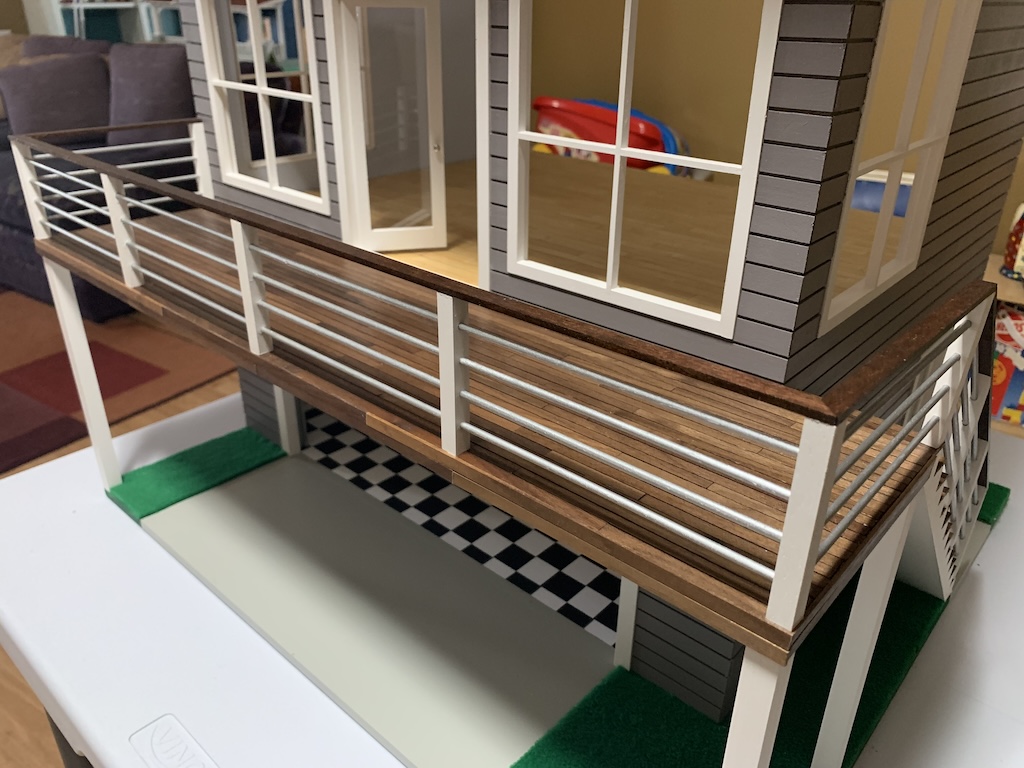
Once I had the three sides of the deck railing complete, I was able to glue it in place. But assembling the railing system down the stairs proved even more challenging as it seemed some of the angled holes in the post were not drilled deeply enough. Eventually I was able to get all the dowels glued in place and the posts glued to the steps.
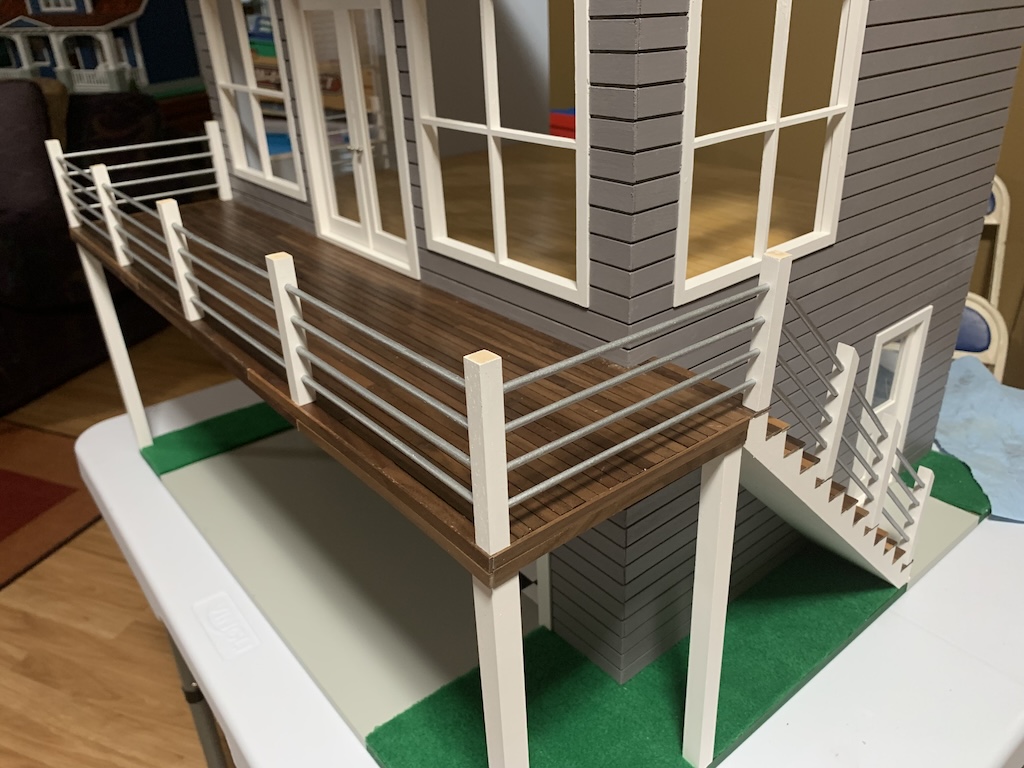
For the top rails, I decided to stain them to match the deck wood using a dark mahogany stain followed by brushing on satin polyurethane for a soft sheen.
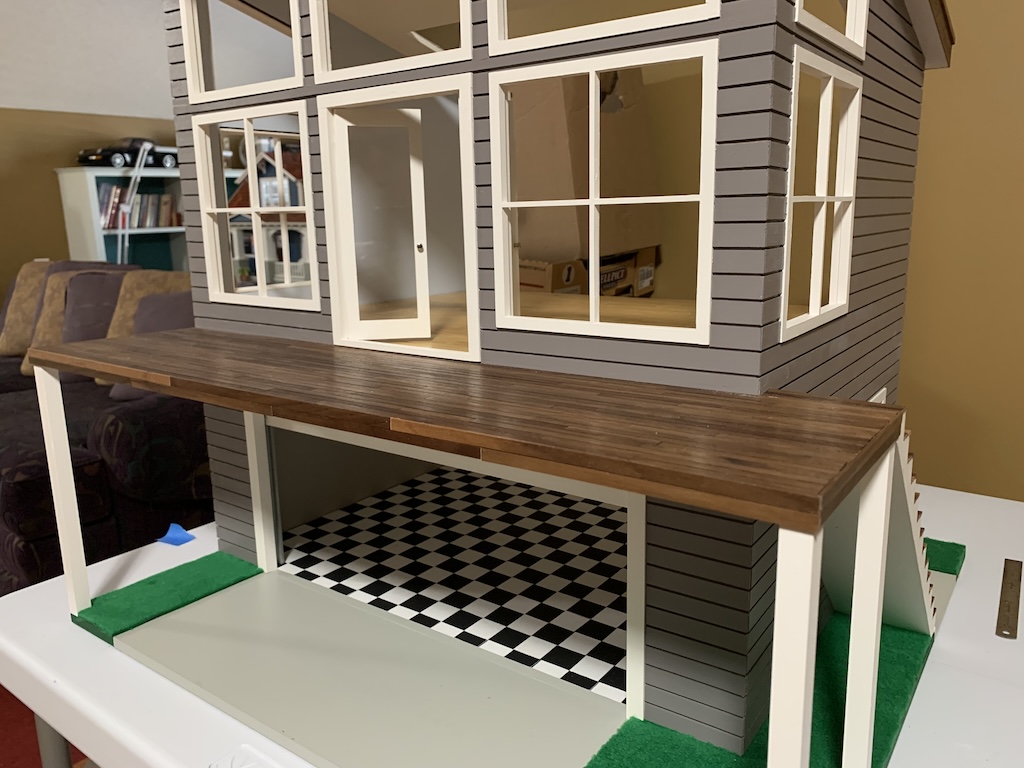
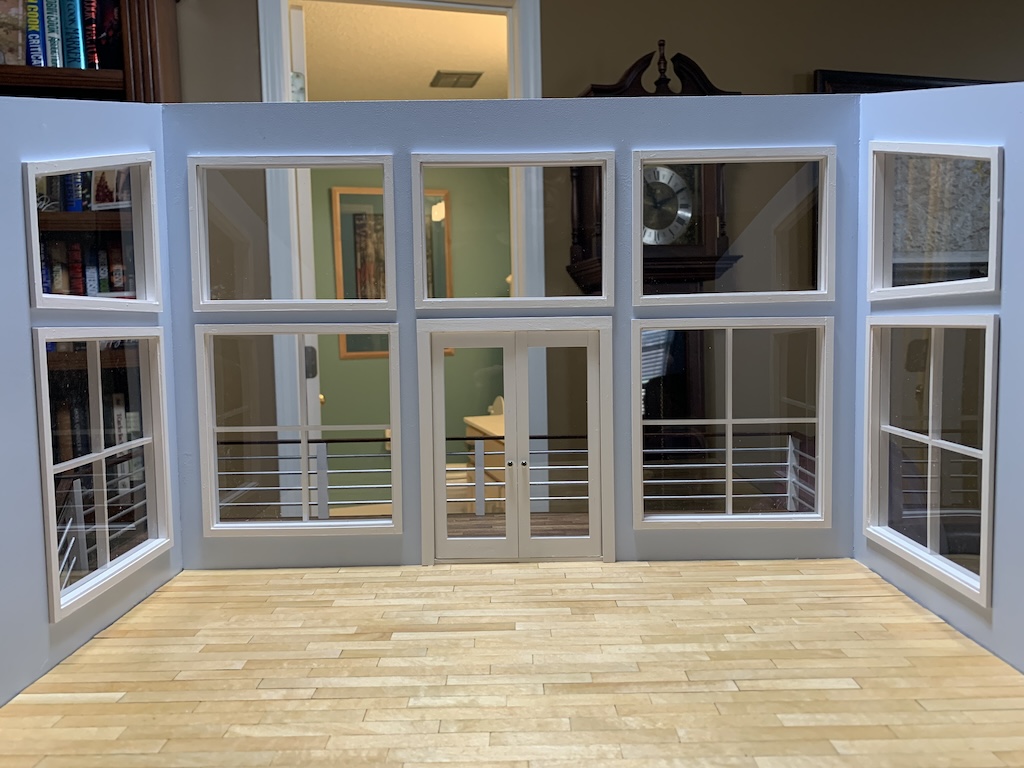
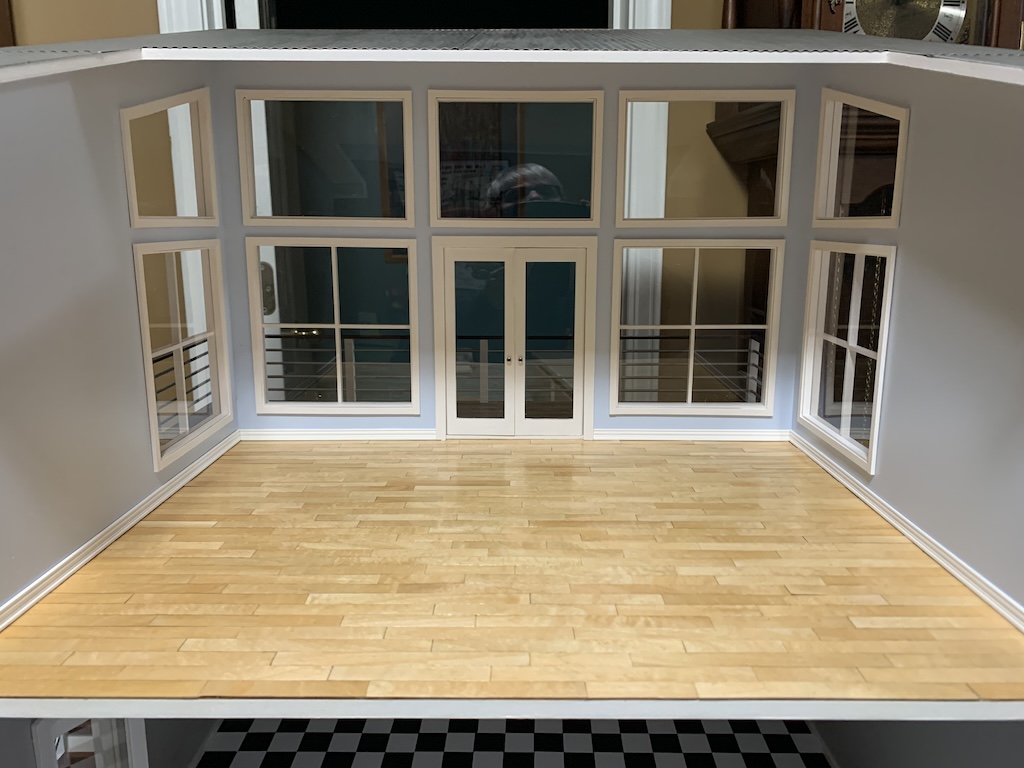
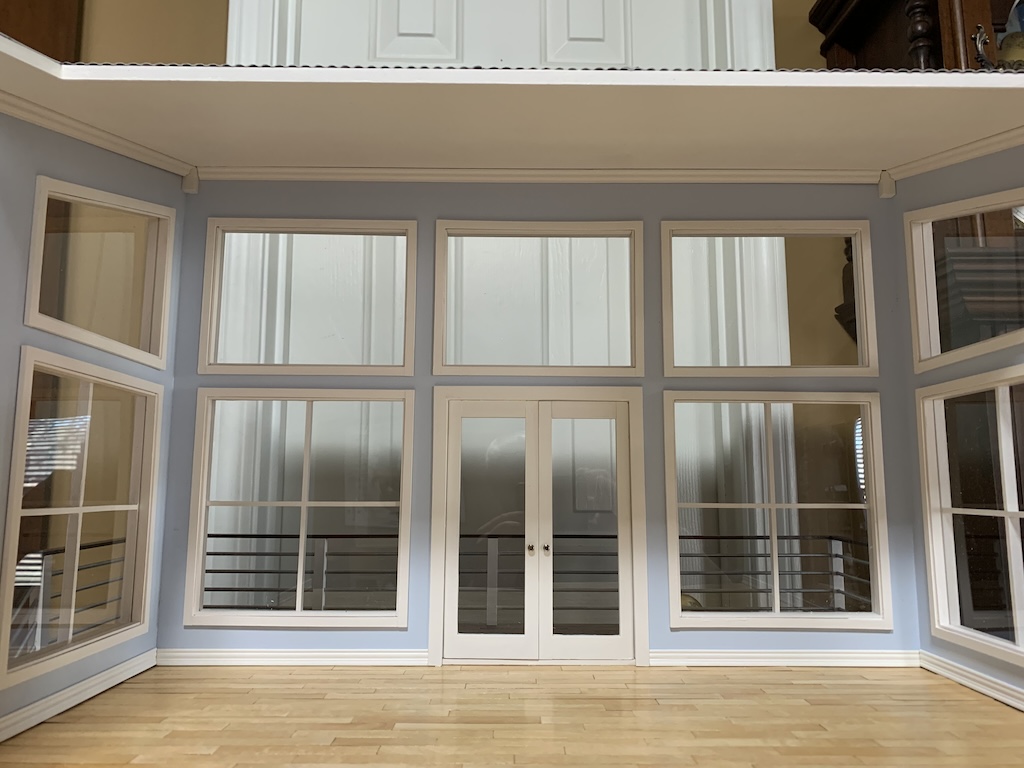
The last step to complete the garage loft was to add the plastic windowpanes and the interior window frames. But unlike the previous doll houses I had built where the windowpane is tightly wedged between the exterior and interior window frames, in this kit, the interior window frames when glued in place did not even come in contact with the windowpane. The instructions indicated to be sparing with the glue as it would show. I tried gluing a windowpane in and sure enough it was an unsightly mess.
So instead, I decided to glue in 1/4″ X 1/16” basswood strips on the inside of all the windows to keep the windowpanes snugly in place without having to apply any glue to the windowpanes themselves (the window on the left has the addition of the 1/4″ strip while the window on the right has no strip and it can be seen that nothing is holding the windowpane in place on that window).
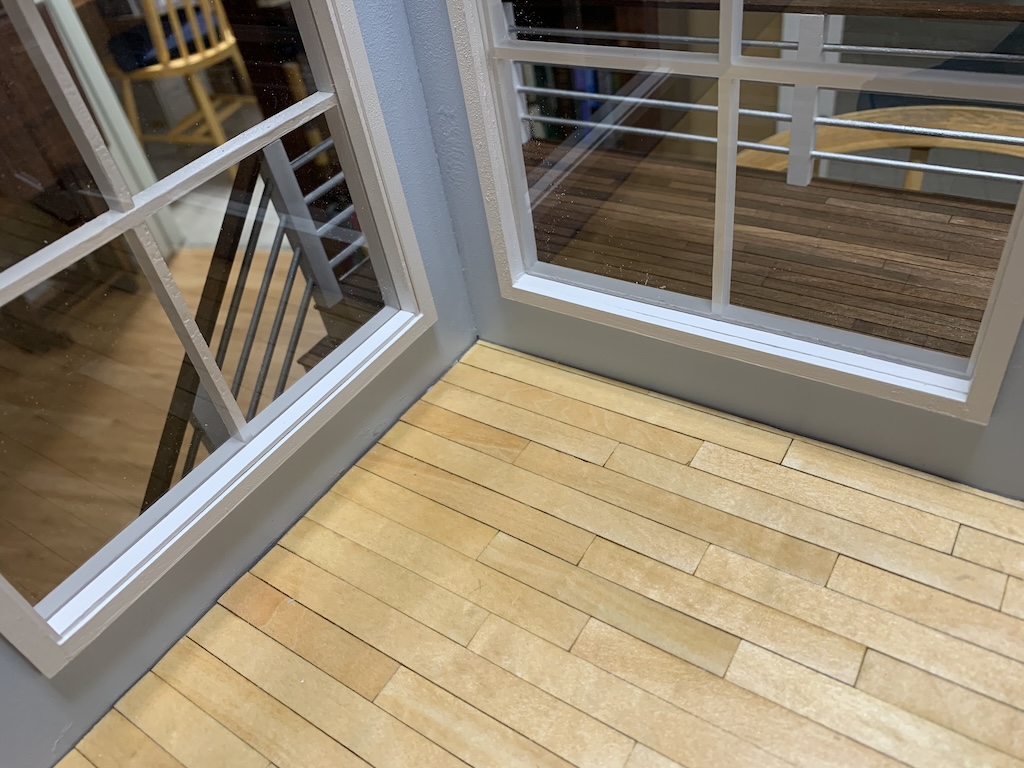
I proceeded to add these strips to all nine windows which, in my opinion, gave the interior windows a more finished look.
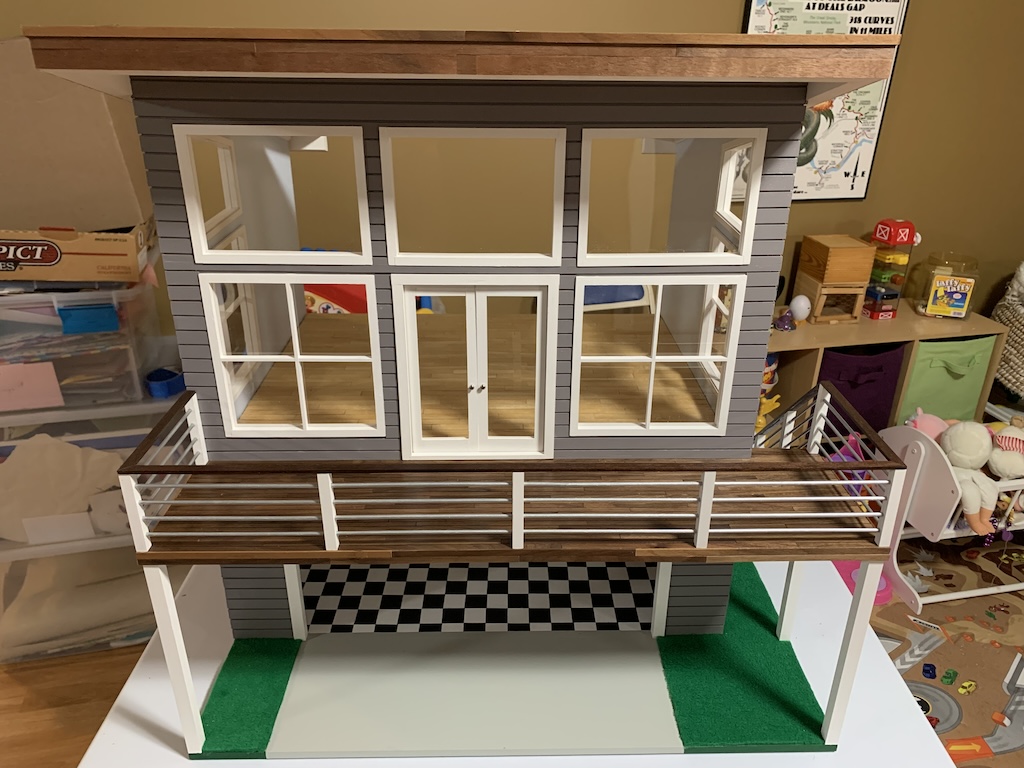
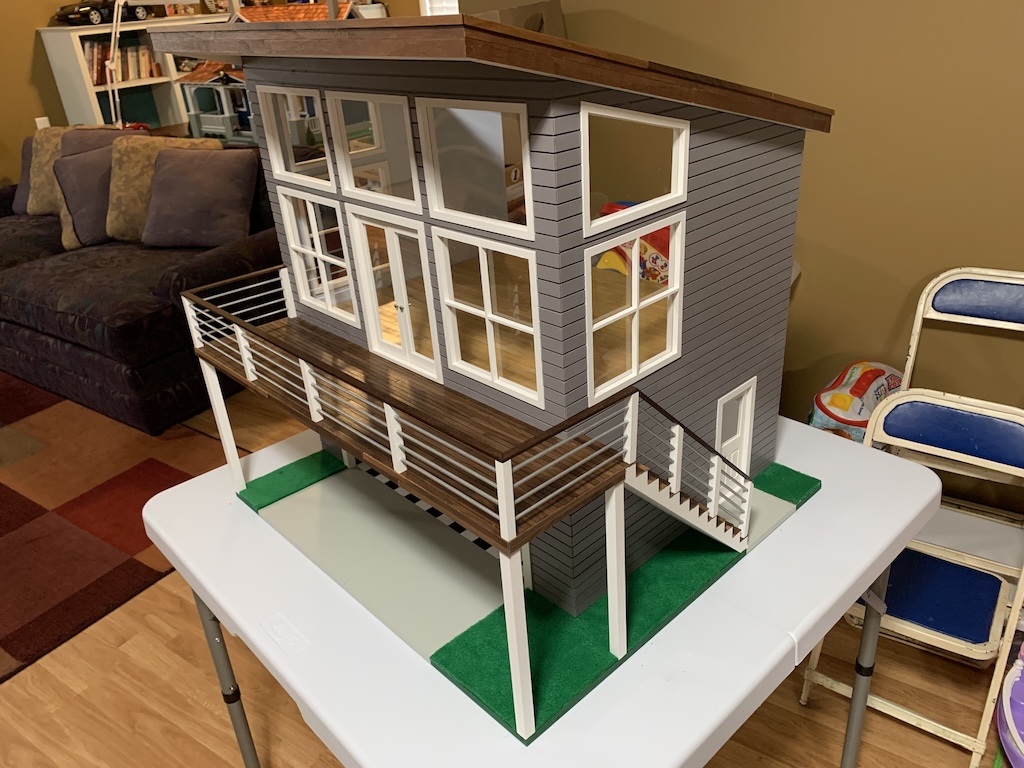
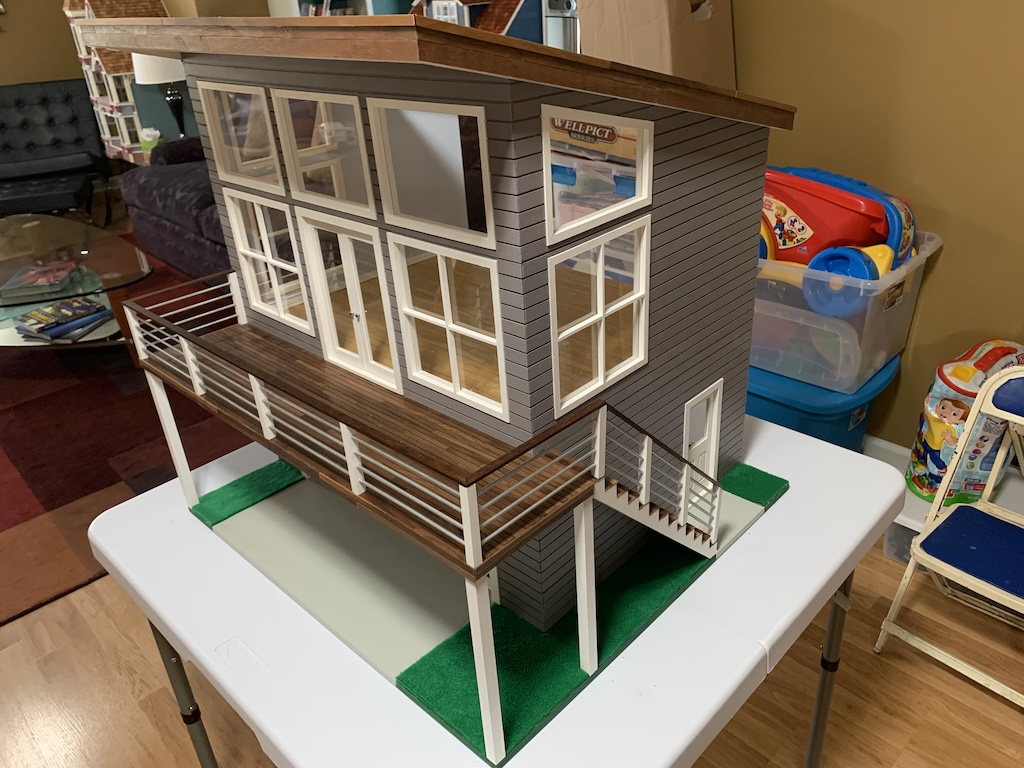
As I stepped back to look at my now finished garage loft, I was most pleased with how it turned out.
But not wanting for my fun to end so soon, I decided to add some additional features to my garage loft.
In all my previous doll houses that I built, I added baseboards which were not included with the kits. These, which came pre-finished in white, I typically purchased at a local hobby shop. But until I figured out the location of my kitchen cabinets which would be flush against the wall, I could only temporarily put baseboards in place.
But one addition I could make was adding crown molding. I had not added crown molding in any of the previous doll houses I built as there were just too many rooms. Since the loft was just a single multipurpose room, I could more easily add those here. Online, I found some unfinished ones similar to the crown molding in our house and painted them white to match the other trim. And to avoid having to cut a 45° angle in one direction and an unknown angle perpendicular to that cut to match the slope of the roof, I added homemade corner ceiling blocks similar to the ones we have in our house where the vaulted ceiling meets the wall.
In the garage, since there were no fixtures that would be permanently attached to the walls, I could proceed to add baseboards. But rather than using contoured milled baseboards like those in the interior of homes, most baseboards in a garage are just strips of wood. These I added having previously painting them the same white trim color.
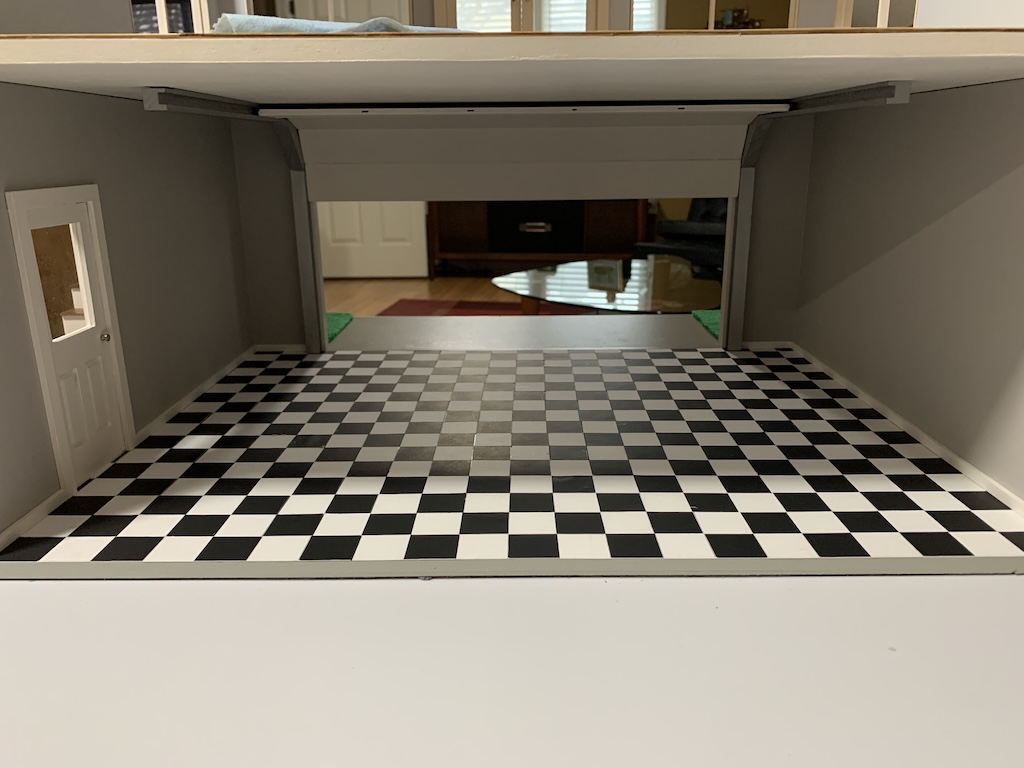
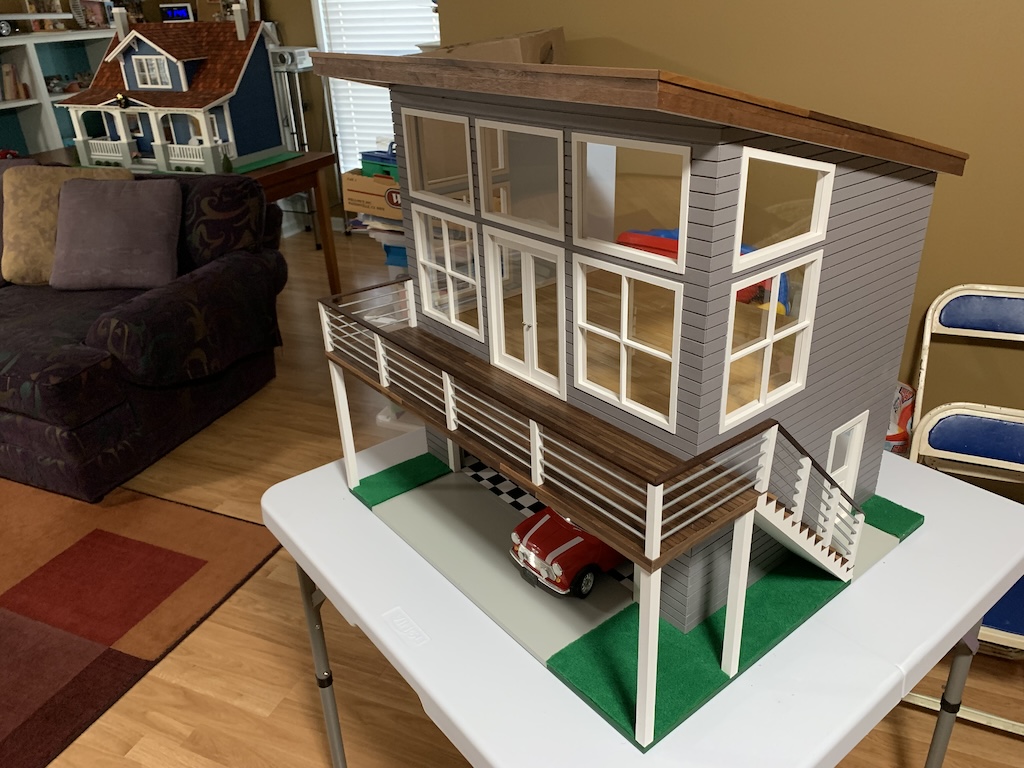
Although the loft was not move-in ready yet since I had not installed a kitchen, the garage was complete and ready to be filled.
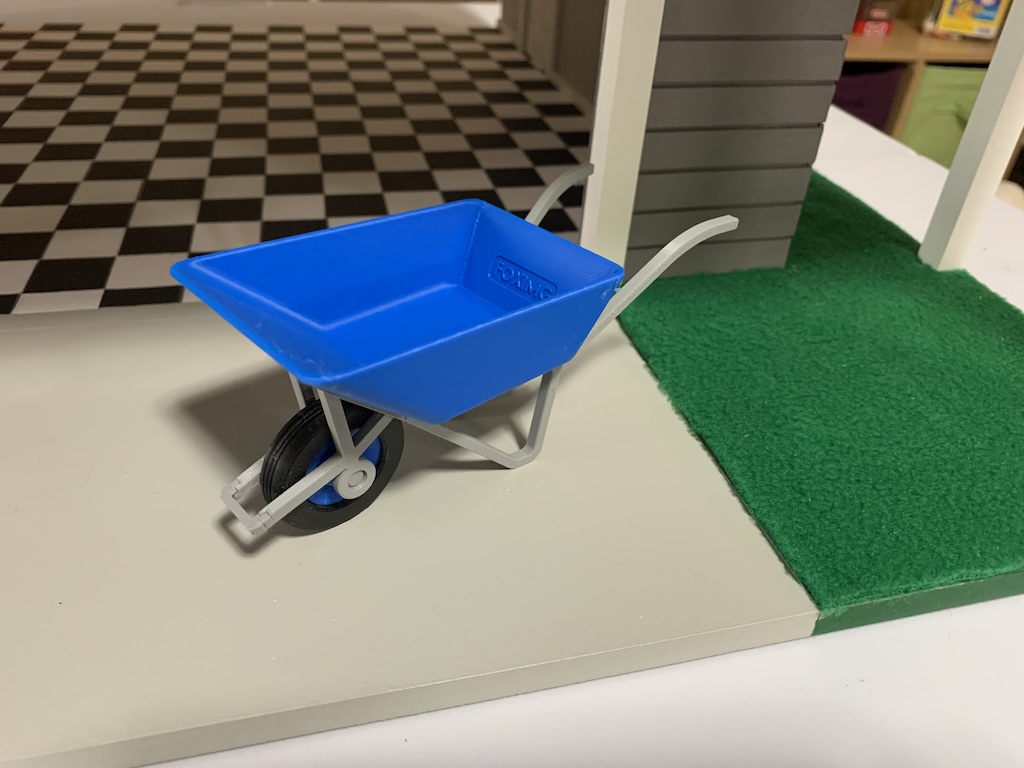
My sister previously 3-D printed some typical items you might find in a garage like a lawnmower with gas can…

… and a wheelbarrow…
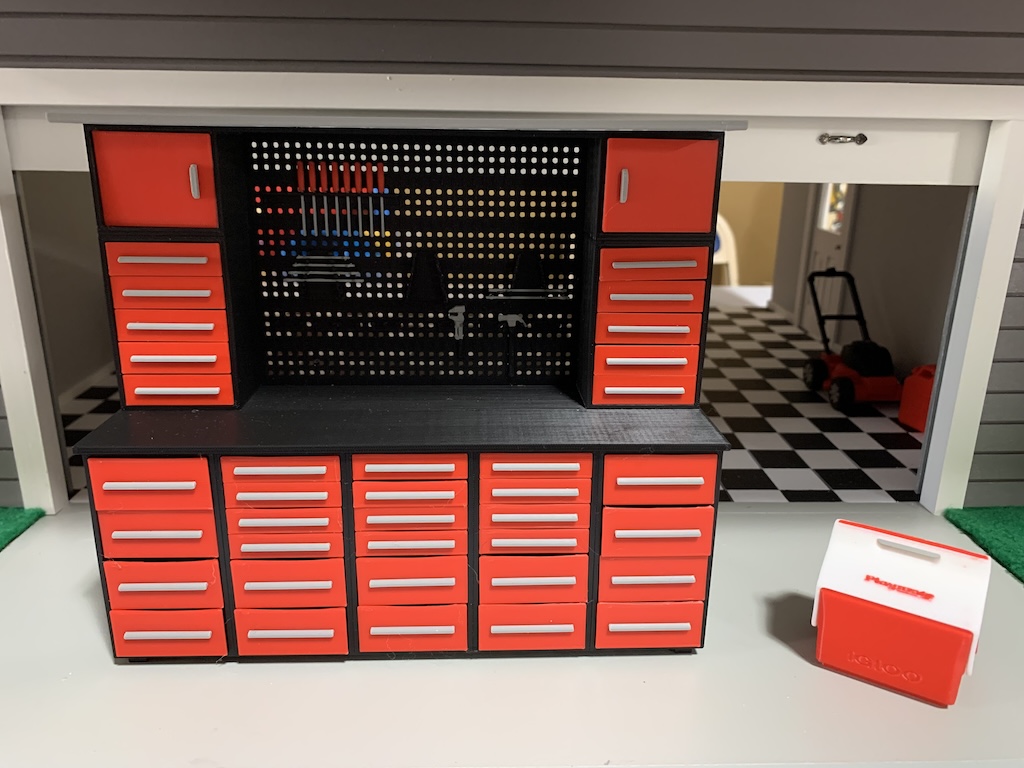
… but the really awesome item she printed for me was a professional-looking work bench, complete with tools, working drawers and a cooler to store those ice-cold adult beverages for hot days while working in the garage.
And with all the many car models I have built over the years, one is actually the same 1/12-scale as the garage loft and so could drive right in…
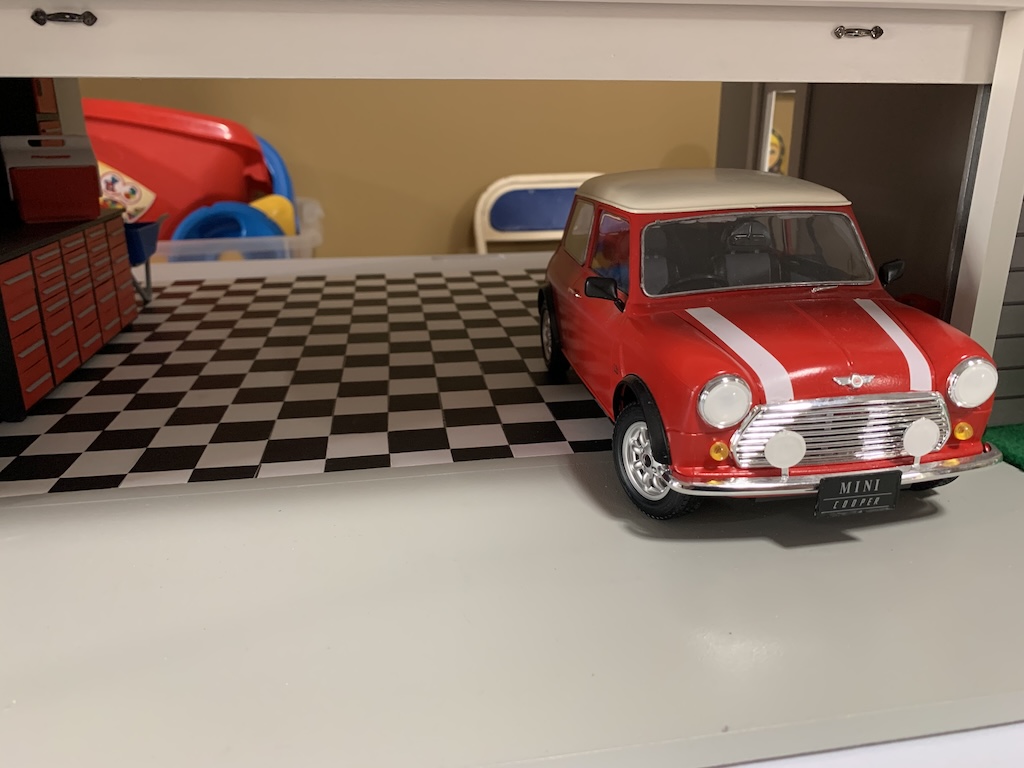
… a miniature classic of the updated Mini Cooper that I bought in 2006, a car I loved to drive as much as my red convertible Miata.

Well, I hope you have enjoyed this series of posts about me building this modern garage loft. While the doll house kit is complete, I still have a kitchen to add which I plan to build myself in a modern style. Once that is done, then the loft will finally be move-in ready, and I can begin to add modern furniture. This I also plan to build with my sister’s help.
Hopefully, creating a modern kitchen and adding modern furniture will result in another series of interesting blog posts for all my fellow miniature enthusiasts out there!
Categories

David it turned out so cute!!! I enjoyed reading it. What will your next project be? Legos or more doll houses?
Thanks, Sis! My next project is yet to be revealed. Stay tuned.
David, I smiled all through this post! All the finishing touches really add to the final product. This miniature is worthy of a museum display! I did wonder what method you used to get the dowels in place without breakage. I’ll remember your added trim when adding the windows, as that is a task I will have to do on my dollhouse. This garage loft is really a unique piece. Extremely well done! All along this series of posts, in my mind’s eye, I saw a red car in the garage. I thought it’d be your Miata, but the Cooper is another excellent choice! I look forward to the future posts about the kitchen!
Thanks, Betty for your most kind praise! I might have been reading at the same time as you and had the same thought as when I came across that paragraph about assembling the railing, I realized I had mostly left the explanation to my photo. What I did was hold the completed railing to the left in the clamped right angle with the tape measure and then push the additional railing section into it aligning all four dowels at the same time.