
A Miniature Garage Loft – Phase 8
Continued from: A Miniature Garage Loft – Phase 7
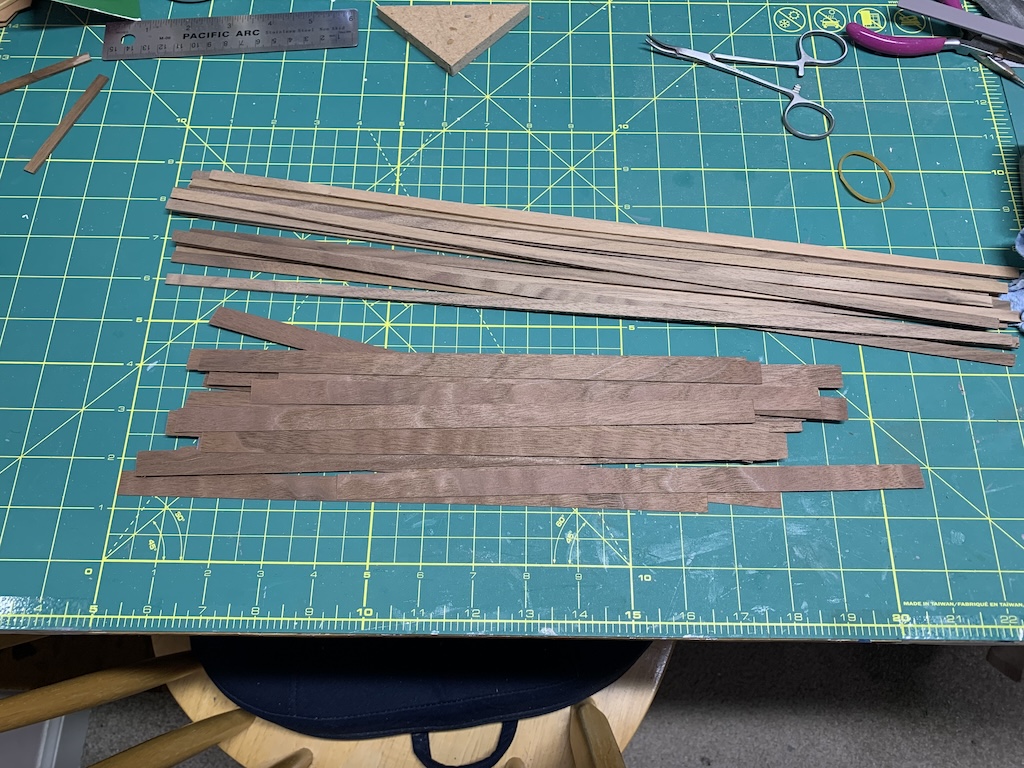
I fortunately had six more strips that I had purchased “just in case” I needed more and after painting and using those on the right side of the loft, I knew I needed even more.
Visiting two of my usual hobby stores, I could only find a single pack of three basswood strips. Based on my usage rate, with the one pack of three I was able to find, I estimated that I would need at least a dozen more 24-inch strips. These I was lucky enough to locate at a model hobby store I love to go to, but don’t often frequent as it is quite distant from my house.
With these additional strips, I was able to add the remaining slats to all three sides before adding the roof.
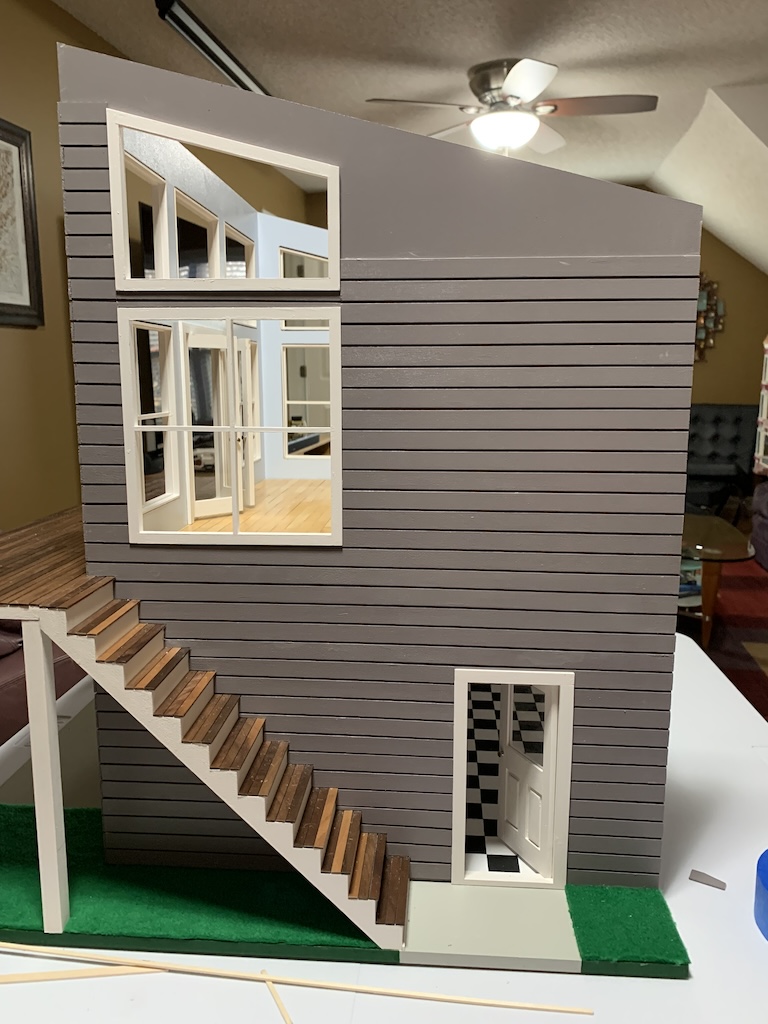
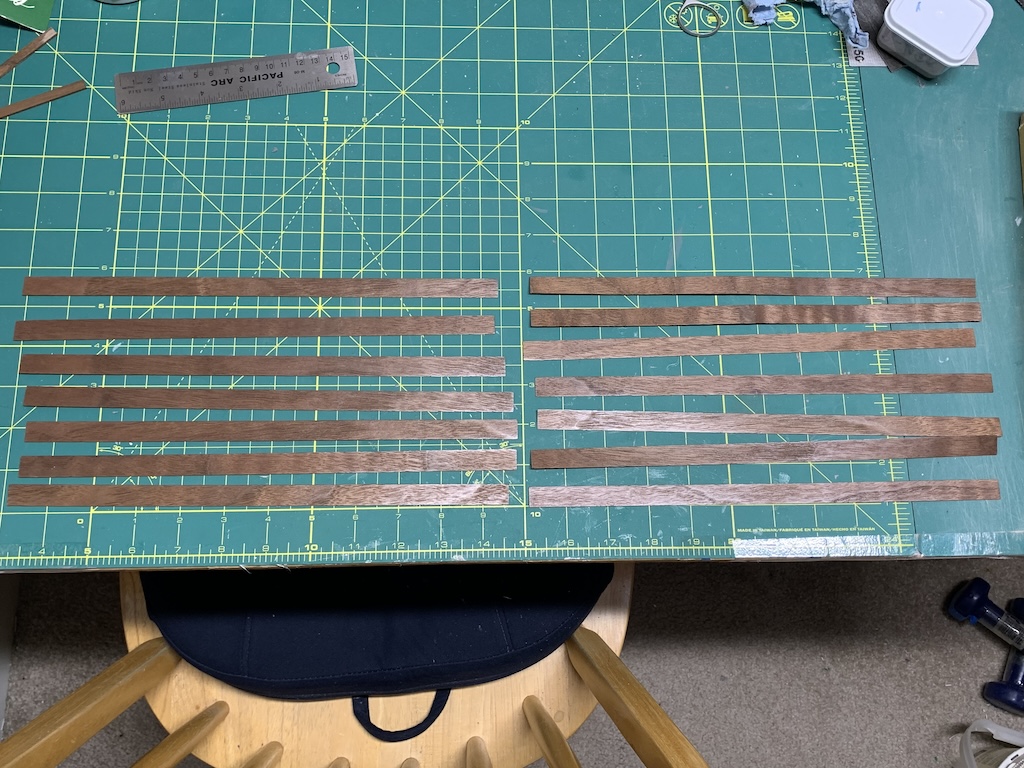
To finish with the slats, I now had to cut ones that would mate with the slanted roof, which I temporarily installed.

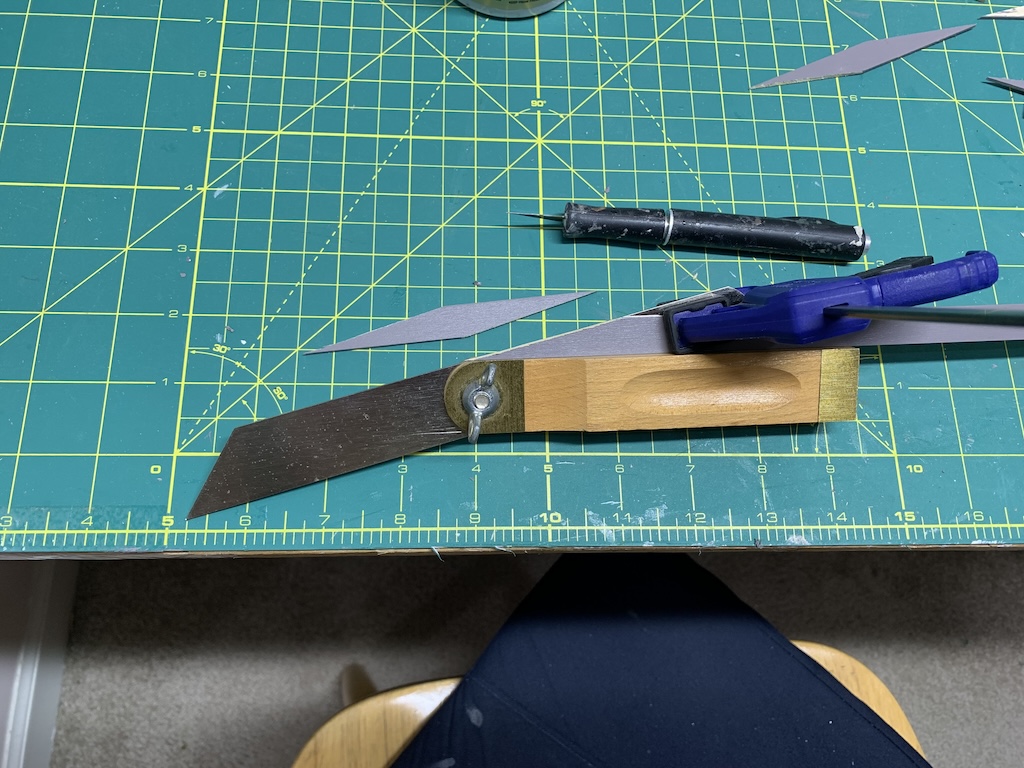
Reading some of the previous challenges that I had faced in determining odd angles to cut for doll house trim pieces, my brother had given me a tool he had that I had never heard of that is used for measuring and transferring the correct angle needed to cut—a sliding bevel—specifically his Stanley Angle Finder.
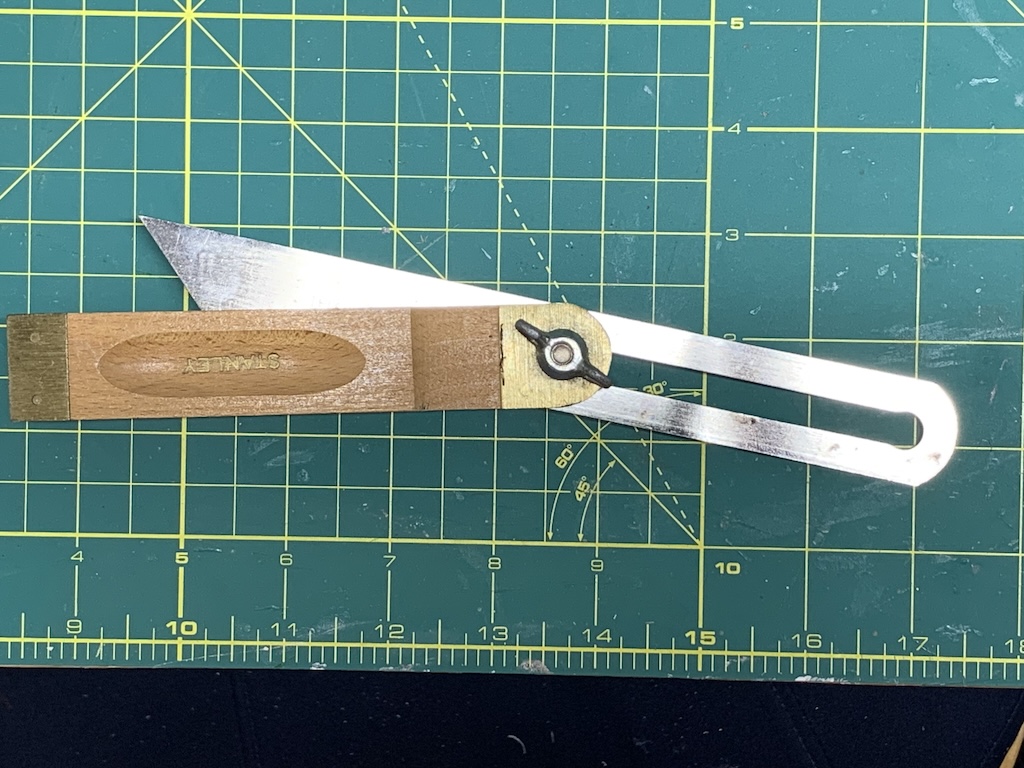
Not knowing exactly how it worked, I watched a video that explained its use in the full-scale world. I was not sure how this technique would work in my 1/12-scale world, so I played with it some to come up with an approach I thought might work. I lined up the wooden handle with the topmost slat and then adjusted the blade to be flush with the bottom of the slant roof, locking the nut in place to retain the angle. I then clamped a short piece of leftover slat to the blade and then cut the slat along the bevel blade with an X-Acto knife.
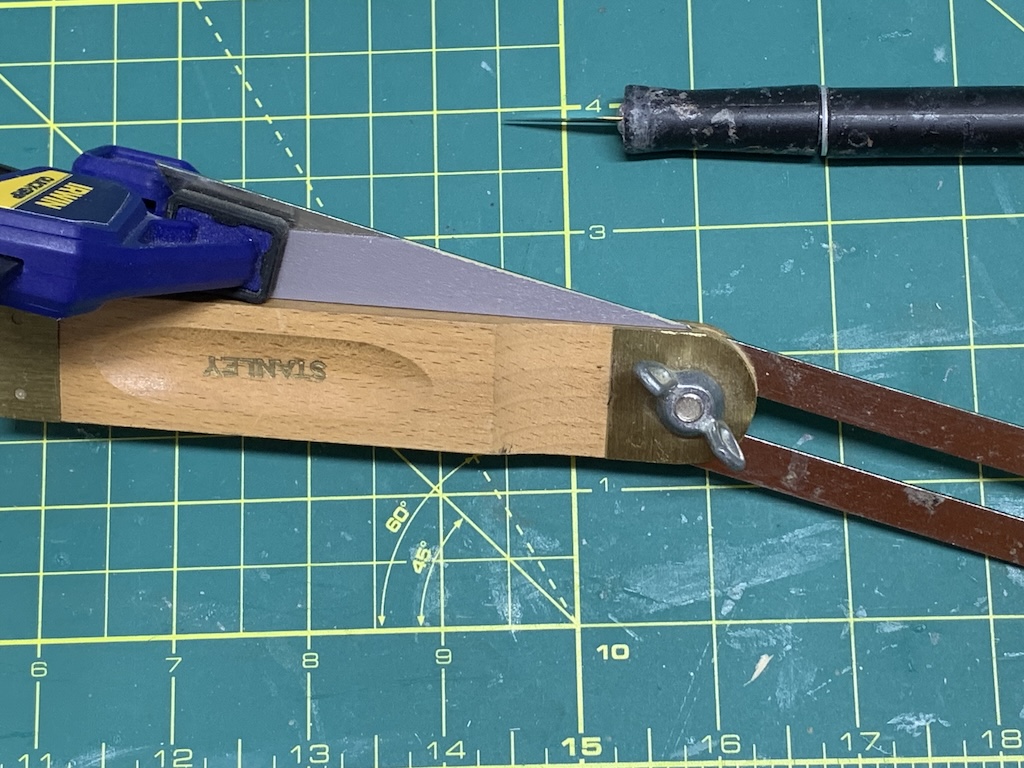
I then taped some spare pieces to the right side of the loft to see if the angle I cut matched the angle of the roof and BINGO, it did!
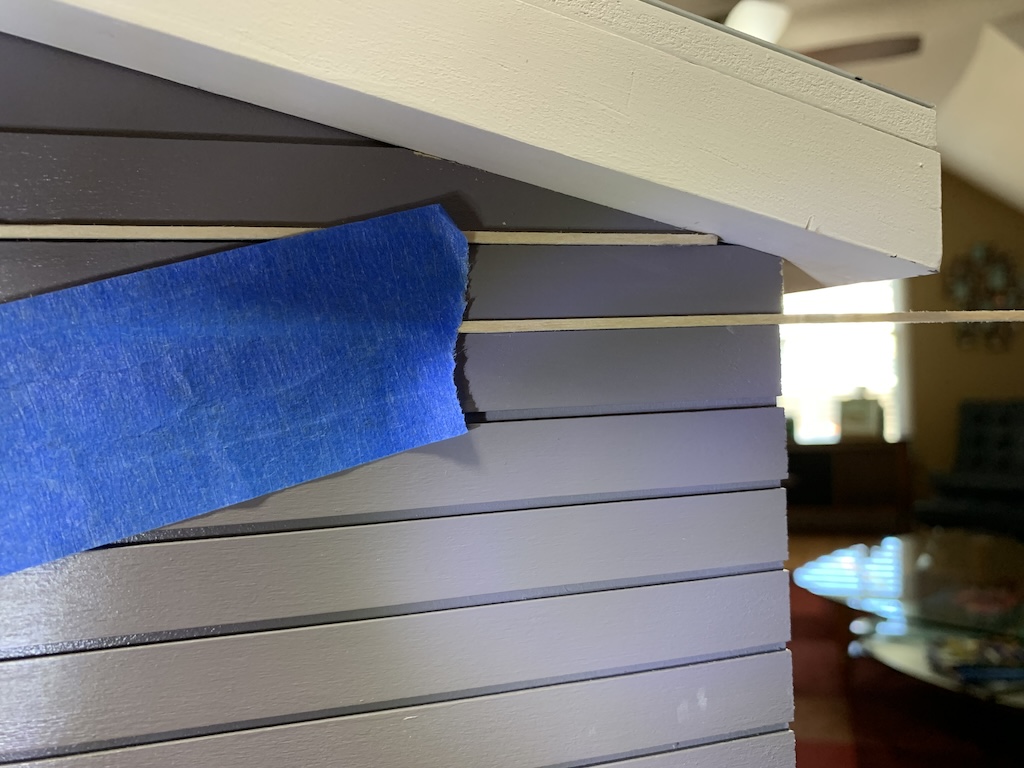
With this handy tool, I was able to cut the remaining slats to mate with the slanted roof on both sides of the loft.
In fact, I dare say had I not had this tool, finishing the slats would have been a tremendous challenge with a lot more recuts to get acceptable results. This tool was particularly helpful for those cuts between the roof and the top window where I had to cut both the top and the bottom of a short piece of slat. So, Bro, thanks so much for hearing my pain cutting odd angles on my last doll house and offering this tool to me! It made a huge difference!
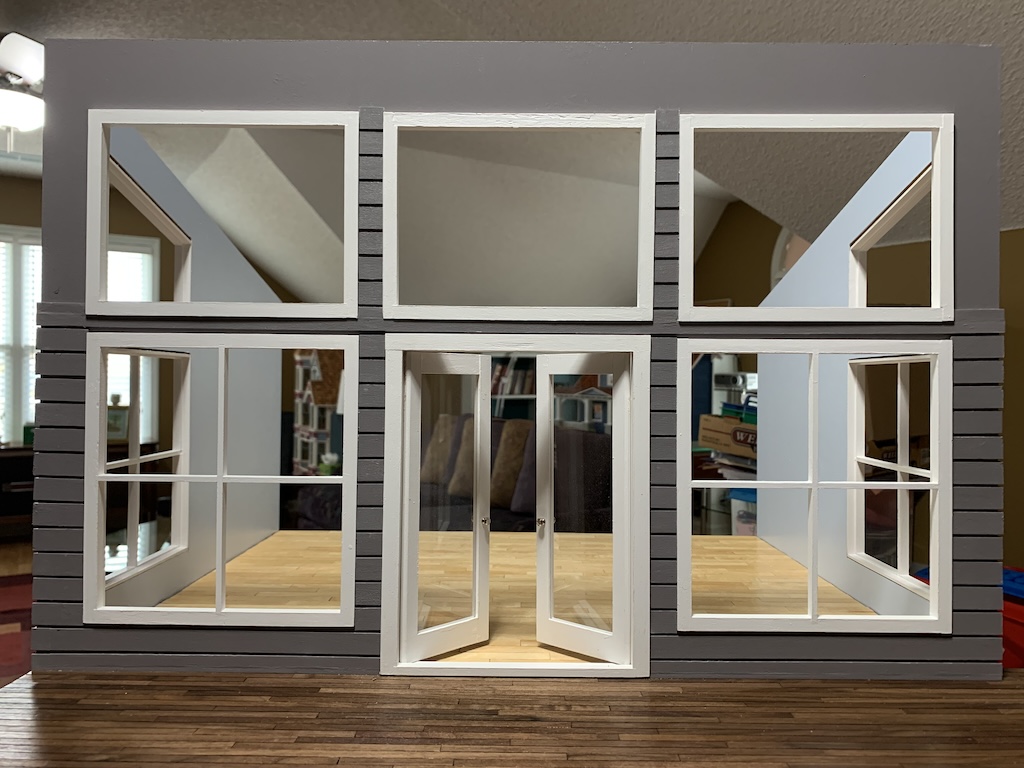
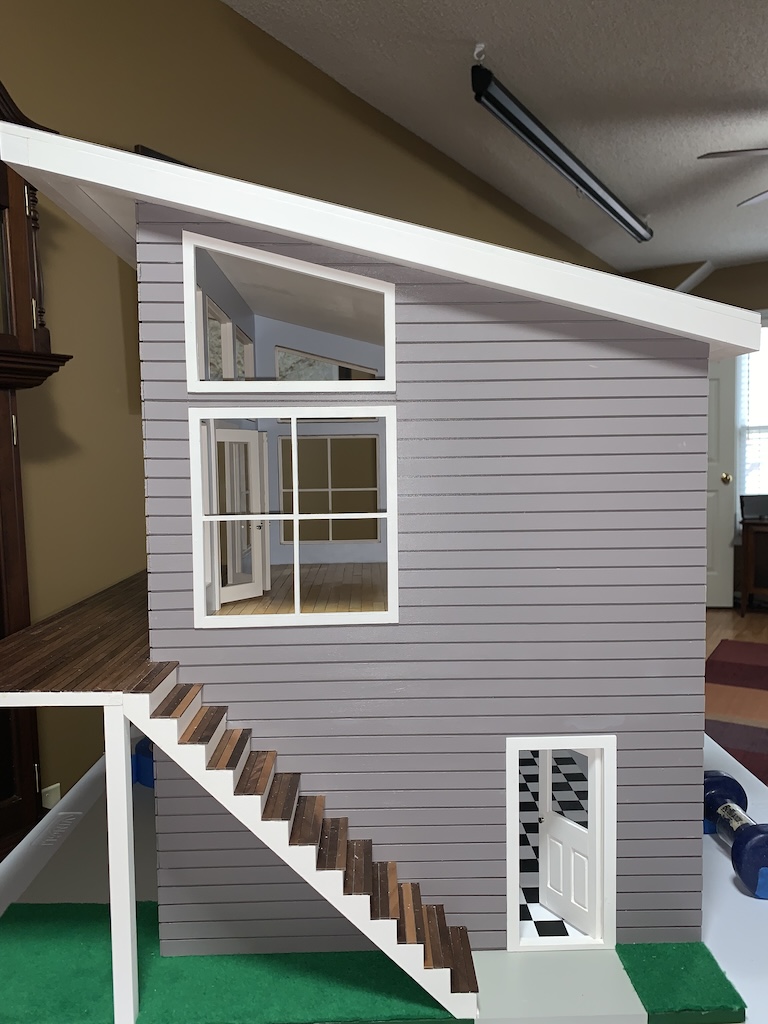
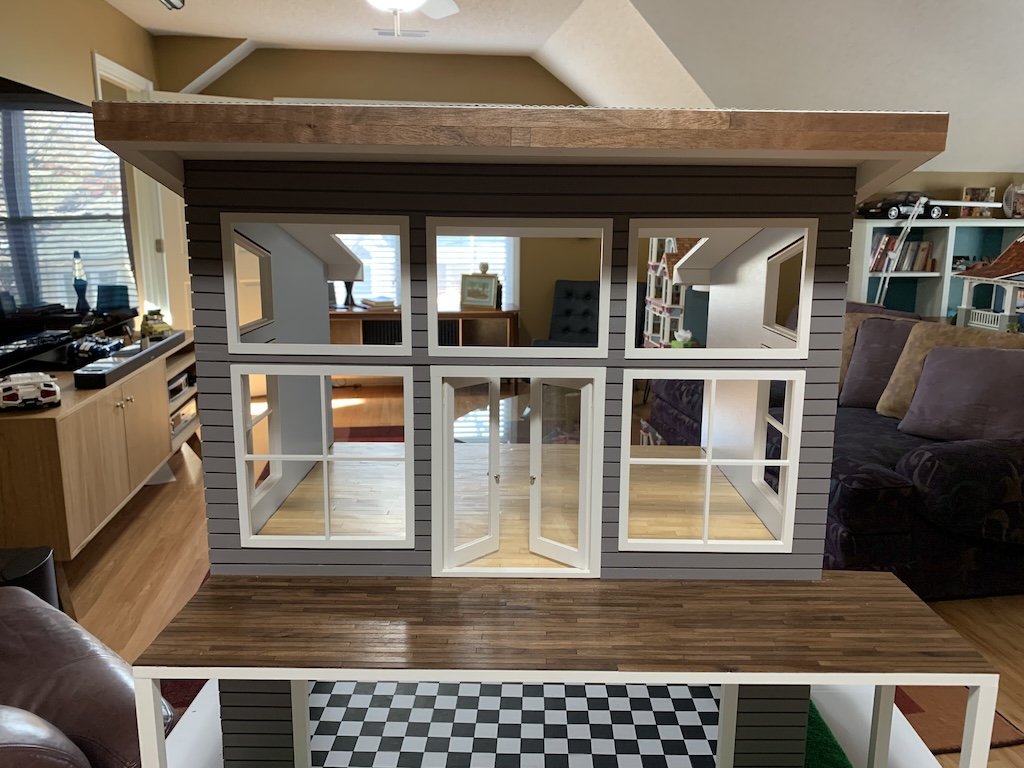
There is no question that the addition of these architectural slats complicated the build, particularly where I had to cut small pieces between windows and door jambs. And I was woefully off on my original estimate of needing 34 two-foot-long strips, having had to purchase and paint an additional 18 strips (in case you were keeping up with the math, of the last dozen I bought, turned out I only needed nine of them). But I loved the exterior look of the garage loft with this addition and for me, it was all worth it!
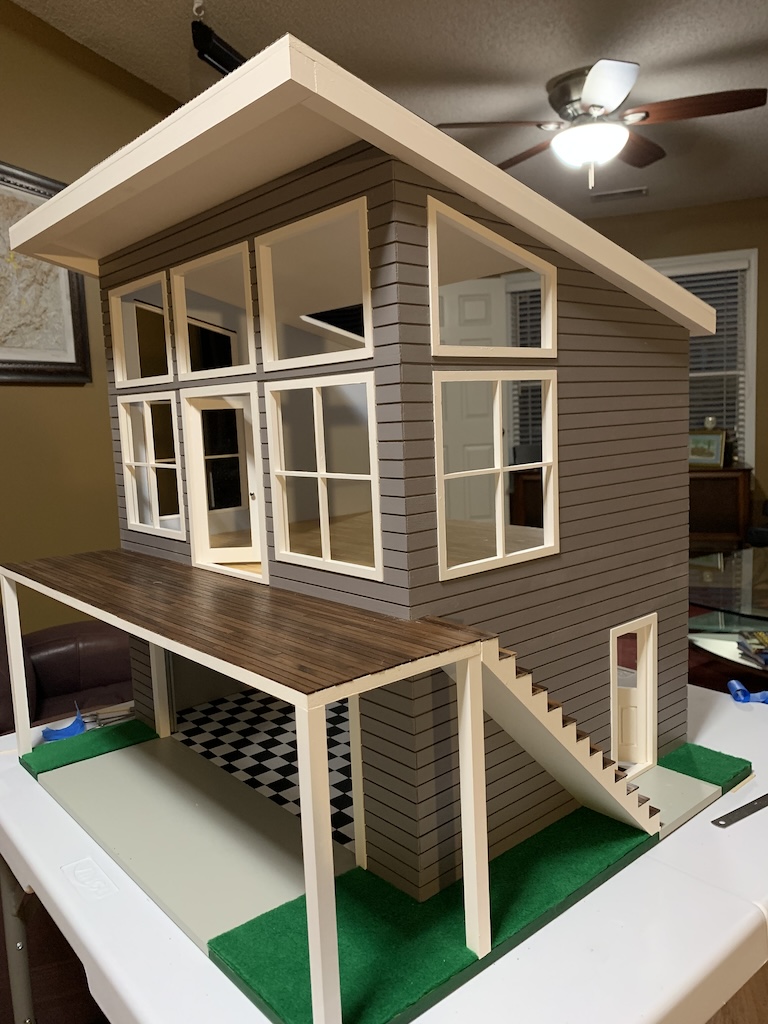
With the addition of the attractive architectural slats complete, I technically only had two processes left in the instructions to finish the garage loft. The first was to add the railings to the porch and stairs and the second was to add the windowpanes and interior window trim. Both processes required the performance of multiple steps. But before I moved on to tackling those last two, I decided to step back and address a couple of changes I wanted to make.
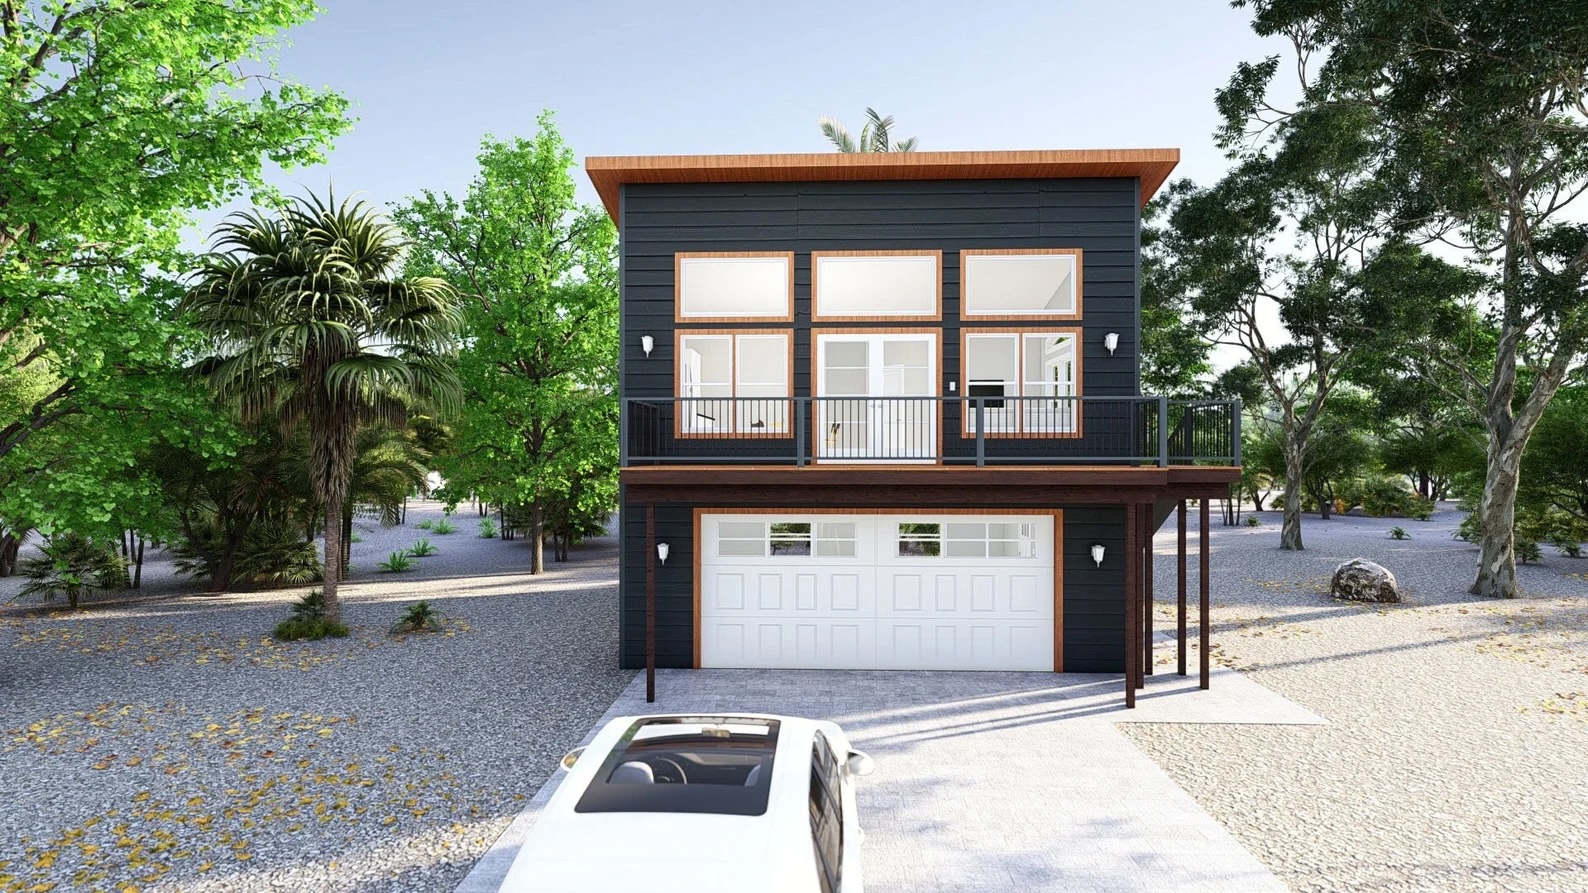
Recall in a previous post me mentioning that had I discovered the above photo before completing the roof and painting the deck base, I would have incorporated more natural wood into my execution. When I talked to my sister about it, I mentioned the idea of using some leftover mahogany veneer that she had previously cut into 1/2-inch strips for the floor of my Craftsman style doll house. When I compared the mahogany to the walnut, we both agreed they looked very similar.
However, since I had already finished the roof with the faux corrugated metal roofing, I could not employ my usual approach of sanding and applying polyurethane to strips already attached since those steps could damage the finished roof. This meant I would need to sand the mahogany veneer strips and apply polyurethane before attaching them to edges of the roof. Once I had done that, I was ready to attach them with my old reliable technique.
First, I applied carpet tape to the edges of the roof. I then figured out where I wanted the joints to align, cut the strips to that length, and began to adhere the strips to the tape. I occasionally had to pull up the strip and realign it, but I was able to do so without damaging the mahogany strip. When I finished, I was most pleased with the transformation from this…
… to this.
But when I looked closely, I could still see some white paint between the corrugated roof and the top of the mahogany strip.
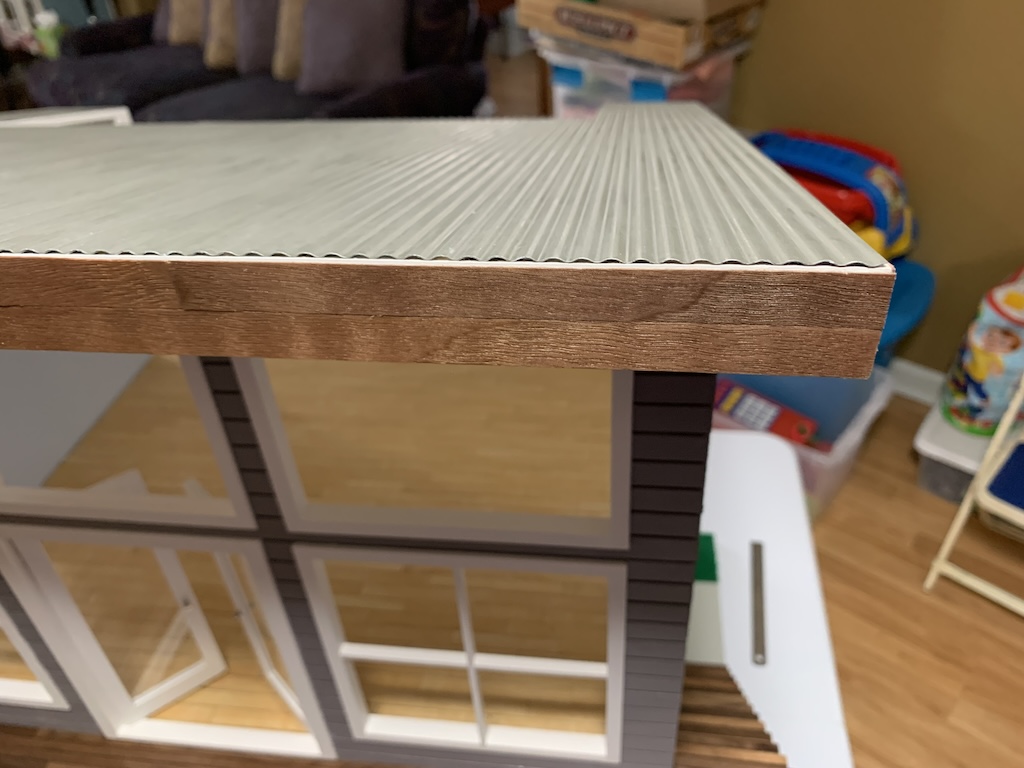
I pondered how to rectify this for a day and then realized, I could just add a walnut strip to be flush with the corrugated roof.
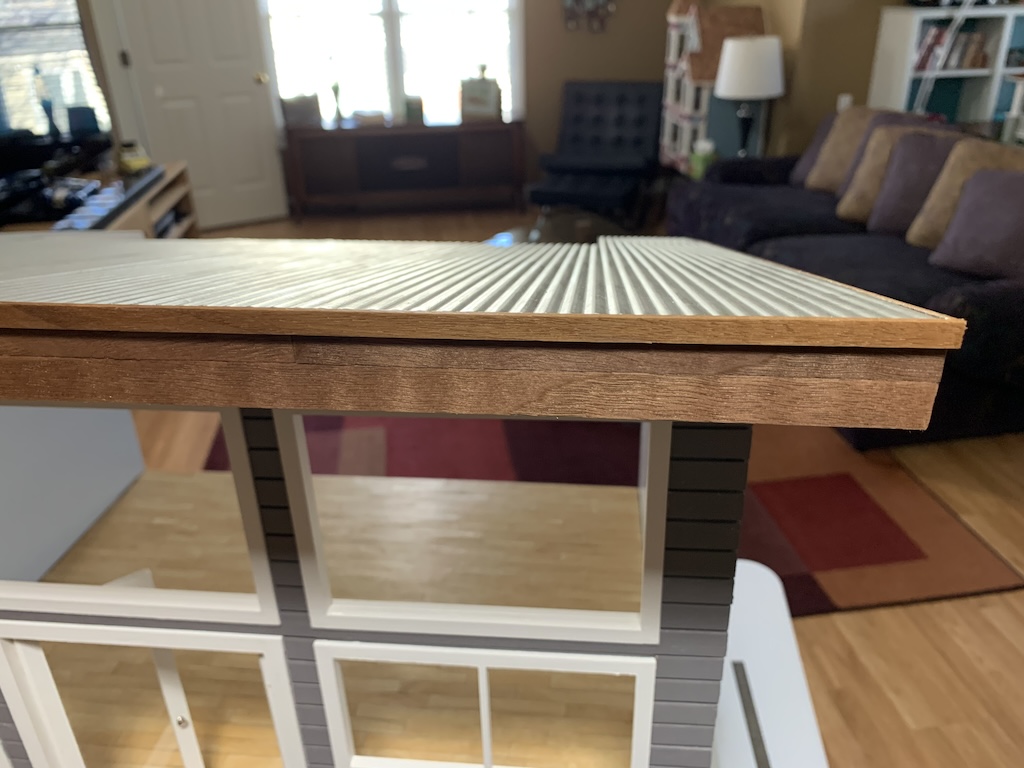
Ah, much better!
The other addition of natural wood I chose was to add skirting to the sides of the deck using the same walnut strips that covered the deck. As with the mahogany veneer, I would need to first sand and then apply polyurethane to the individual walnut strips prior to attaching them to the deck. Again, I figured out where I wanted the joints to align and cut the walnut strips to that length. I applied carpet tape to the back of the walnut strips and began to lay down the walnut strips.
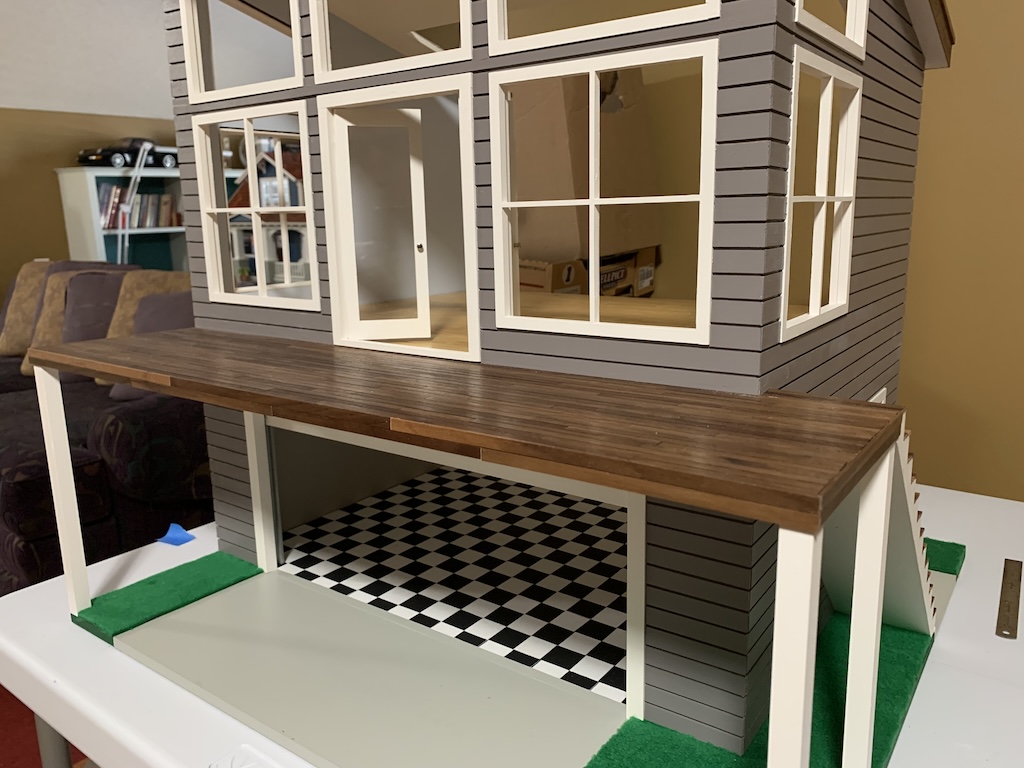
While nowhere near as dramatic as the addition of the mahogany to the roof edges, the addition of the walnut skirting provided a more subtle transformation to the deck.
Now I was ready to tackle those last two processes: railings and windows.
To be continued…
Categories

Amazing job! The addition of the second walnut strip flush with the corrugated roof really adds a finishing touch. Looks great. As does adding the wood to the roof edges. The slats for siding are impressive, and thank heavens you had that tool from your brother. This is quite the project, David!
Thanks Betty! I was most pleased with how these additions came out. And we’re on one of our SibSabs so I was able to thank my brother in person for the tool. Have a great Sunday!