
Doll House Surprise for My 2nd Granddaughter – Topping Out
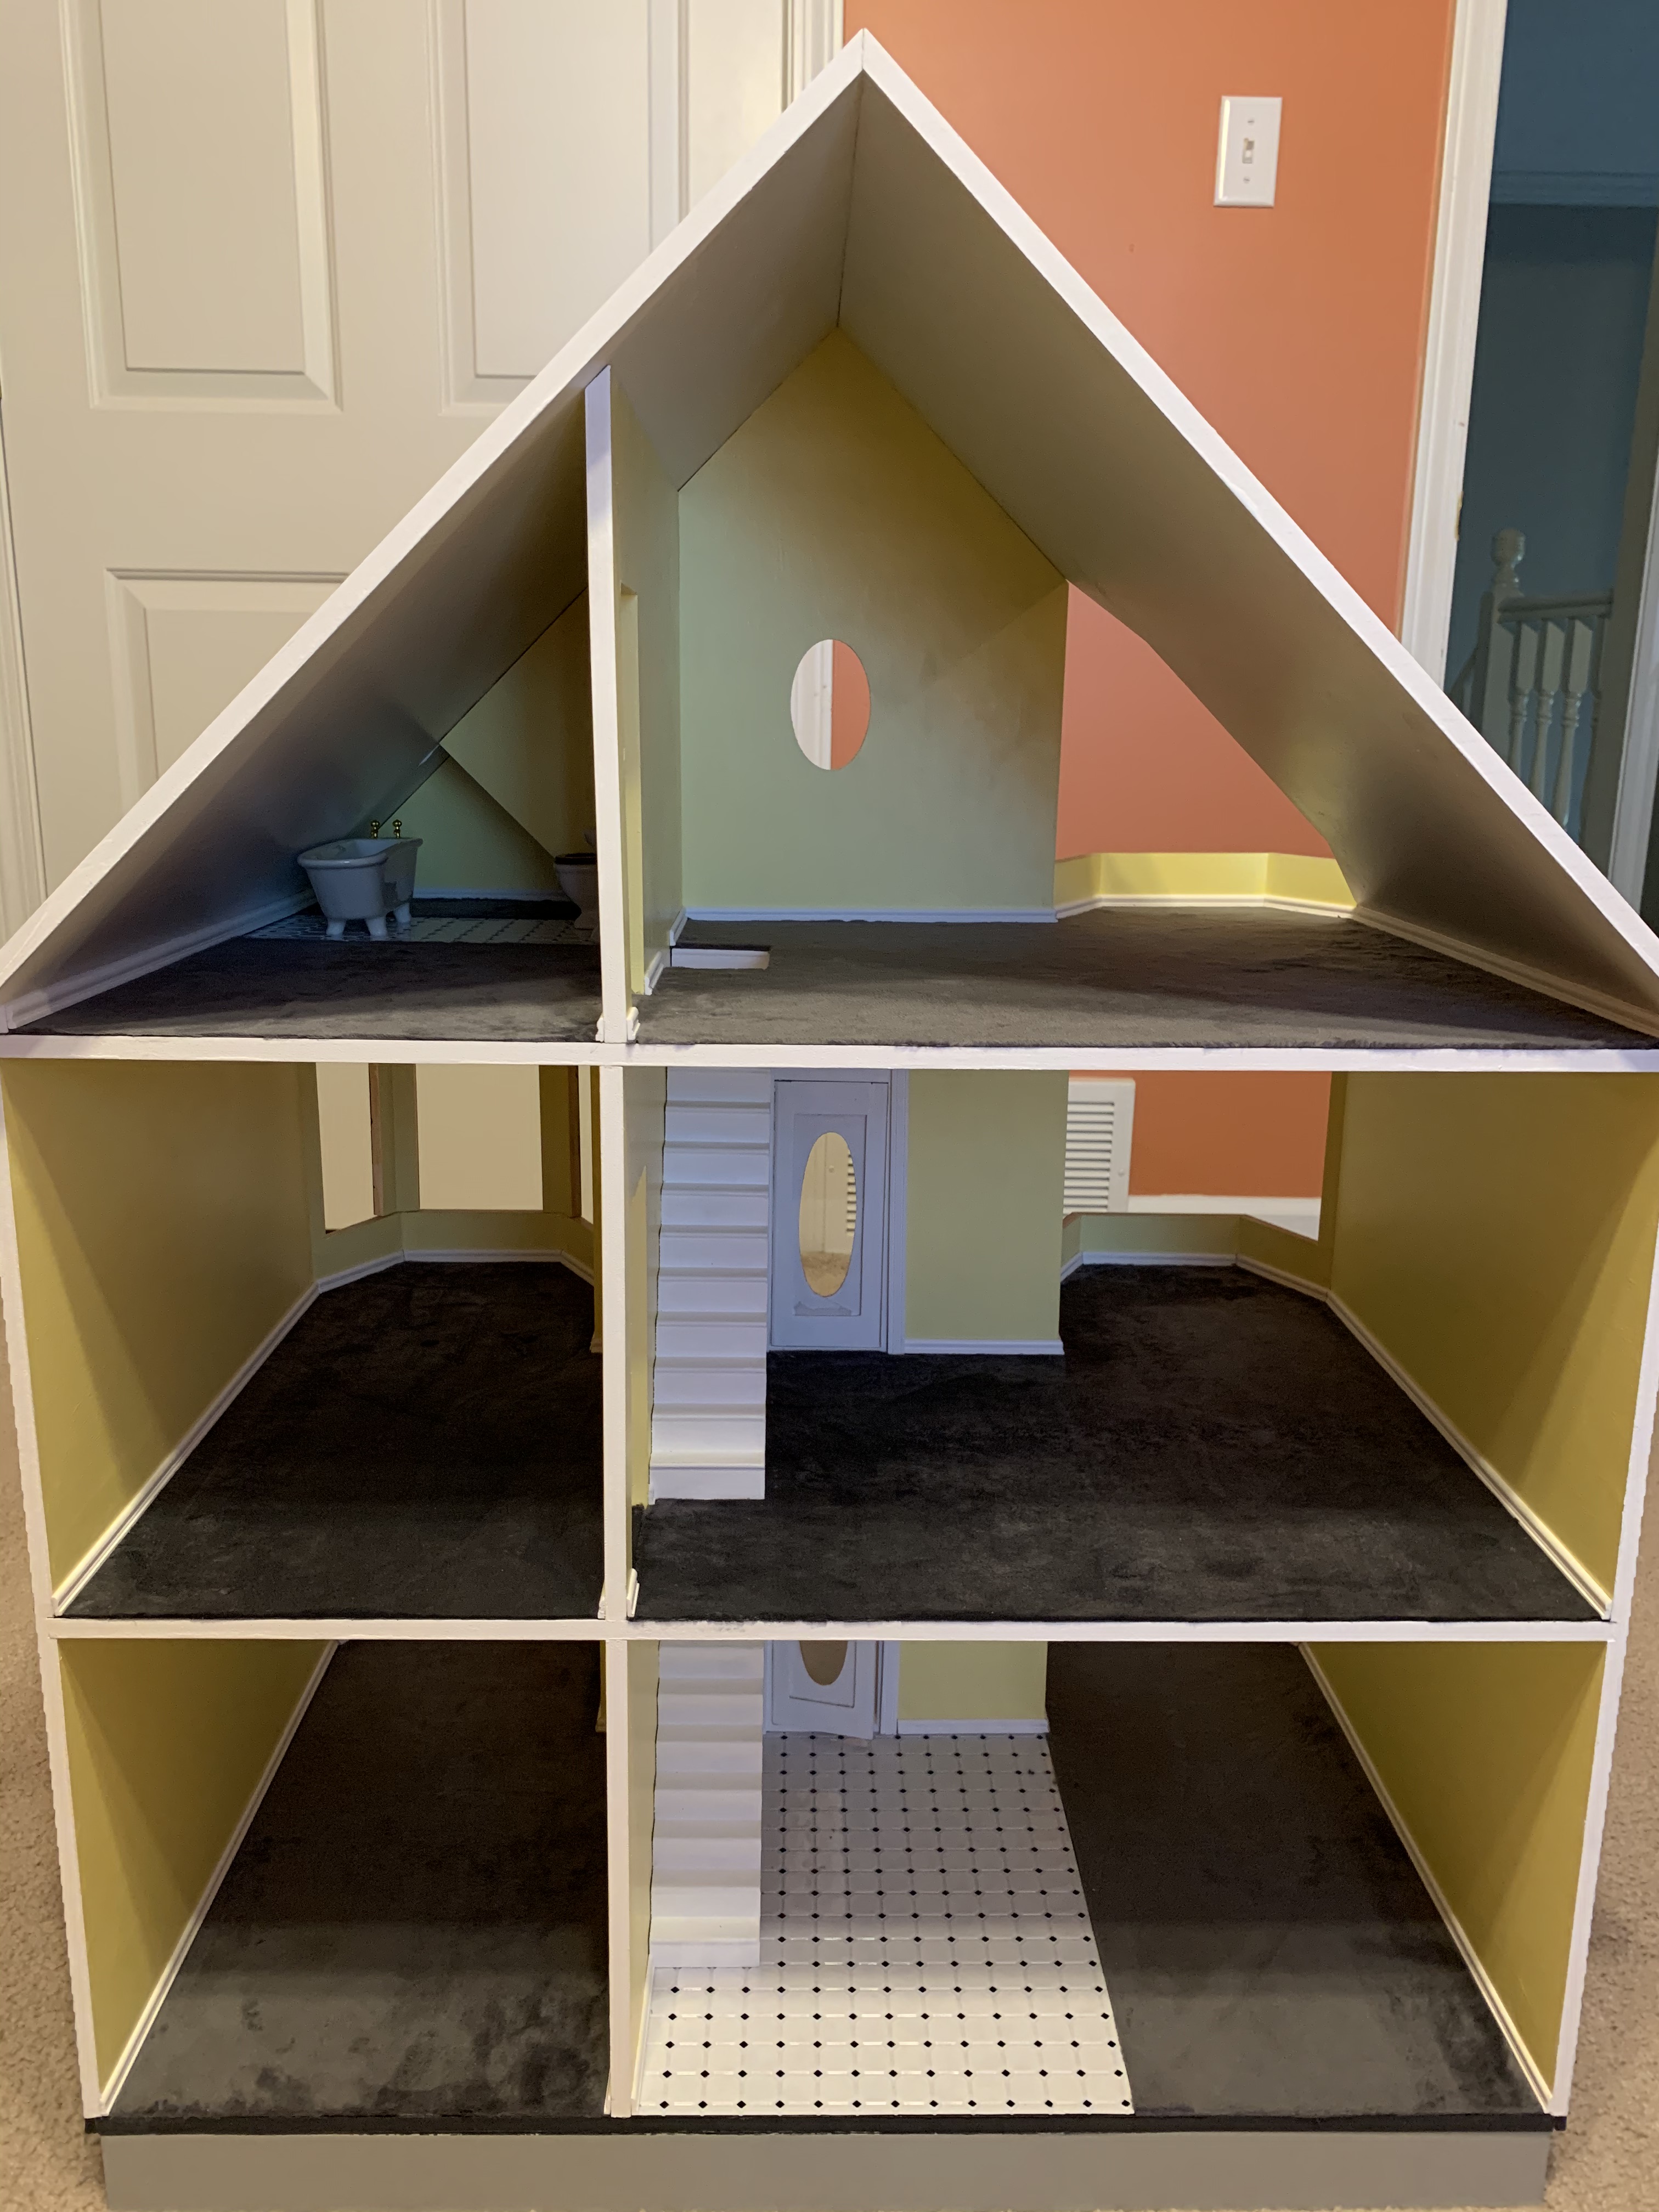
With the third floor, I again planned to deviate from the instructions so that I could install the carpeting and baseboards prior to attaching the roof which also served as the ceiling for the third-floor rooms.
Cutting the fabric for the third floor was even easier than the first floor as there was only a single wall to cut around. However, in spite of fewer obstacles and the experience of the previous two floors, it still took me two cuts for each section to get just the right fit. But each time, using the slightly too small piece as a pattern, the second cut was much easier.
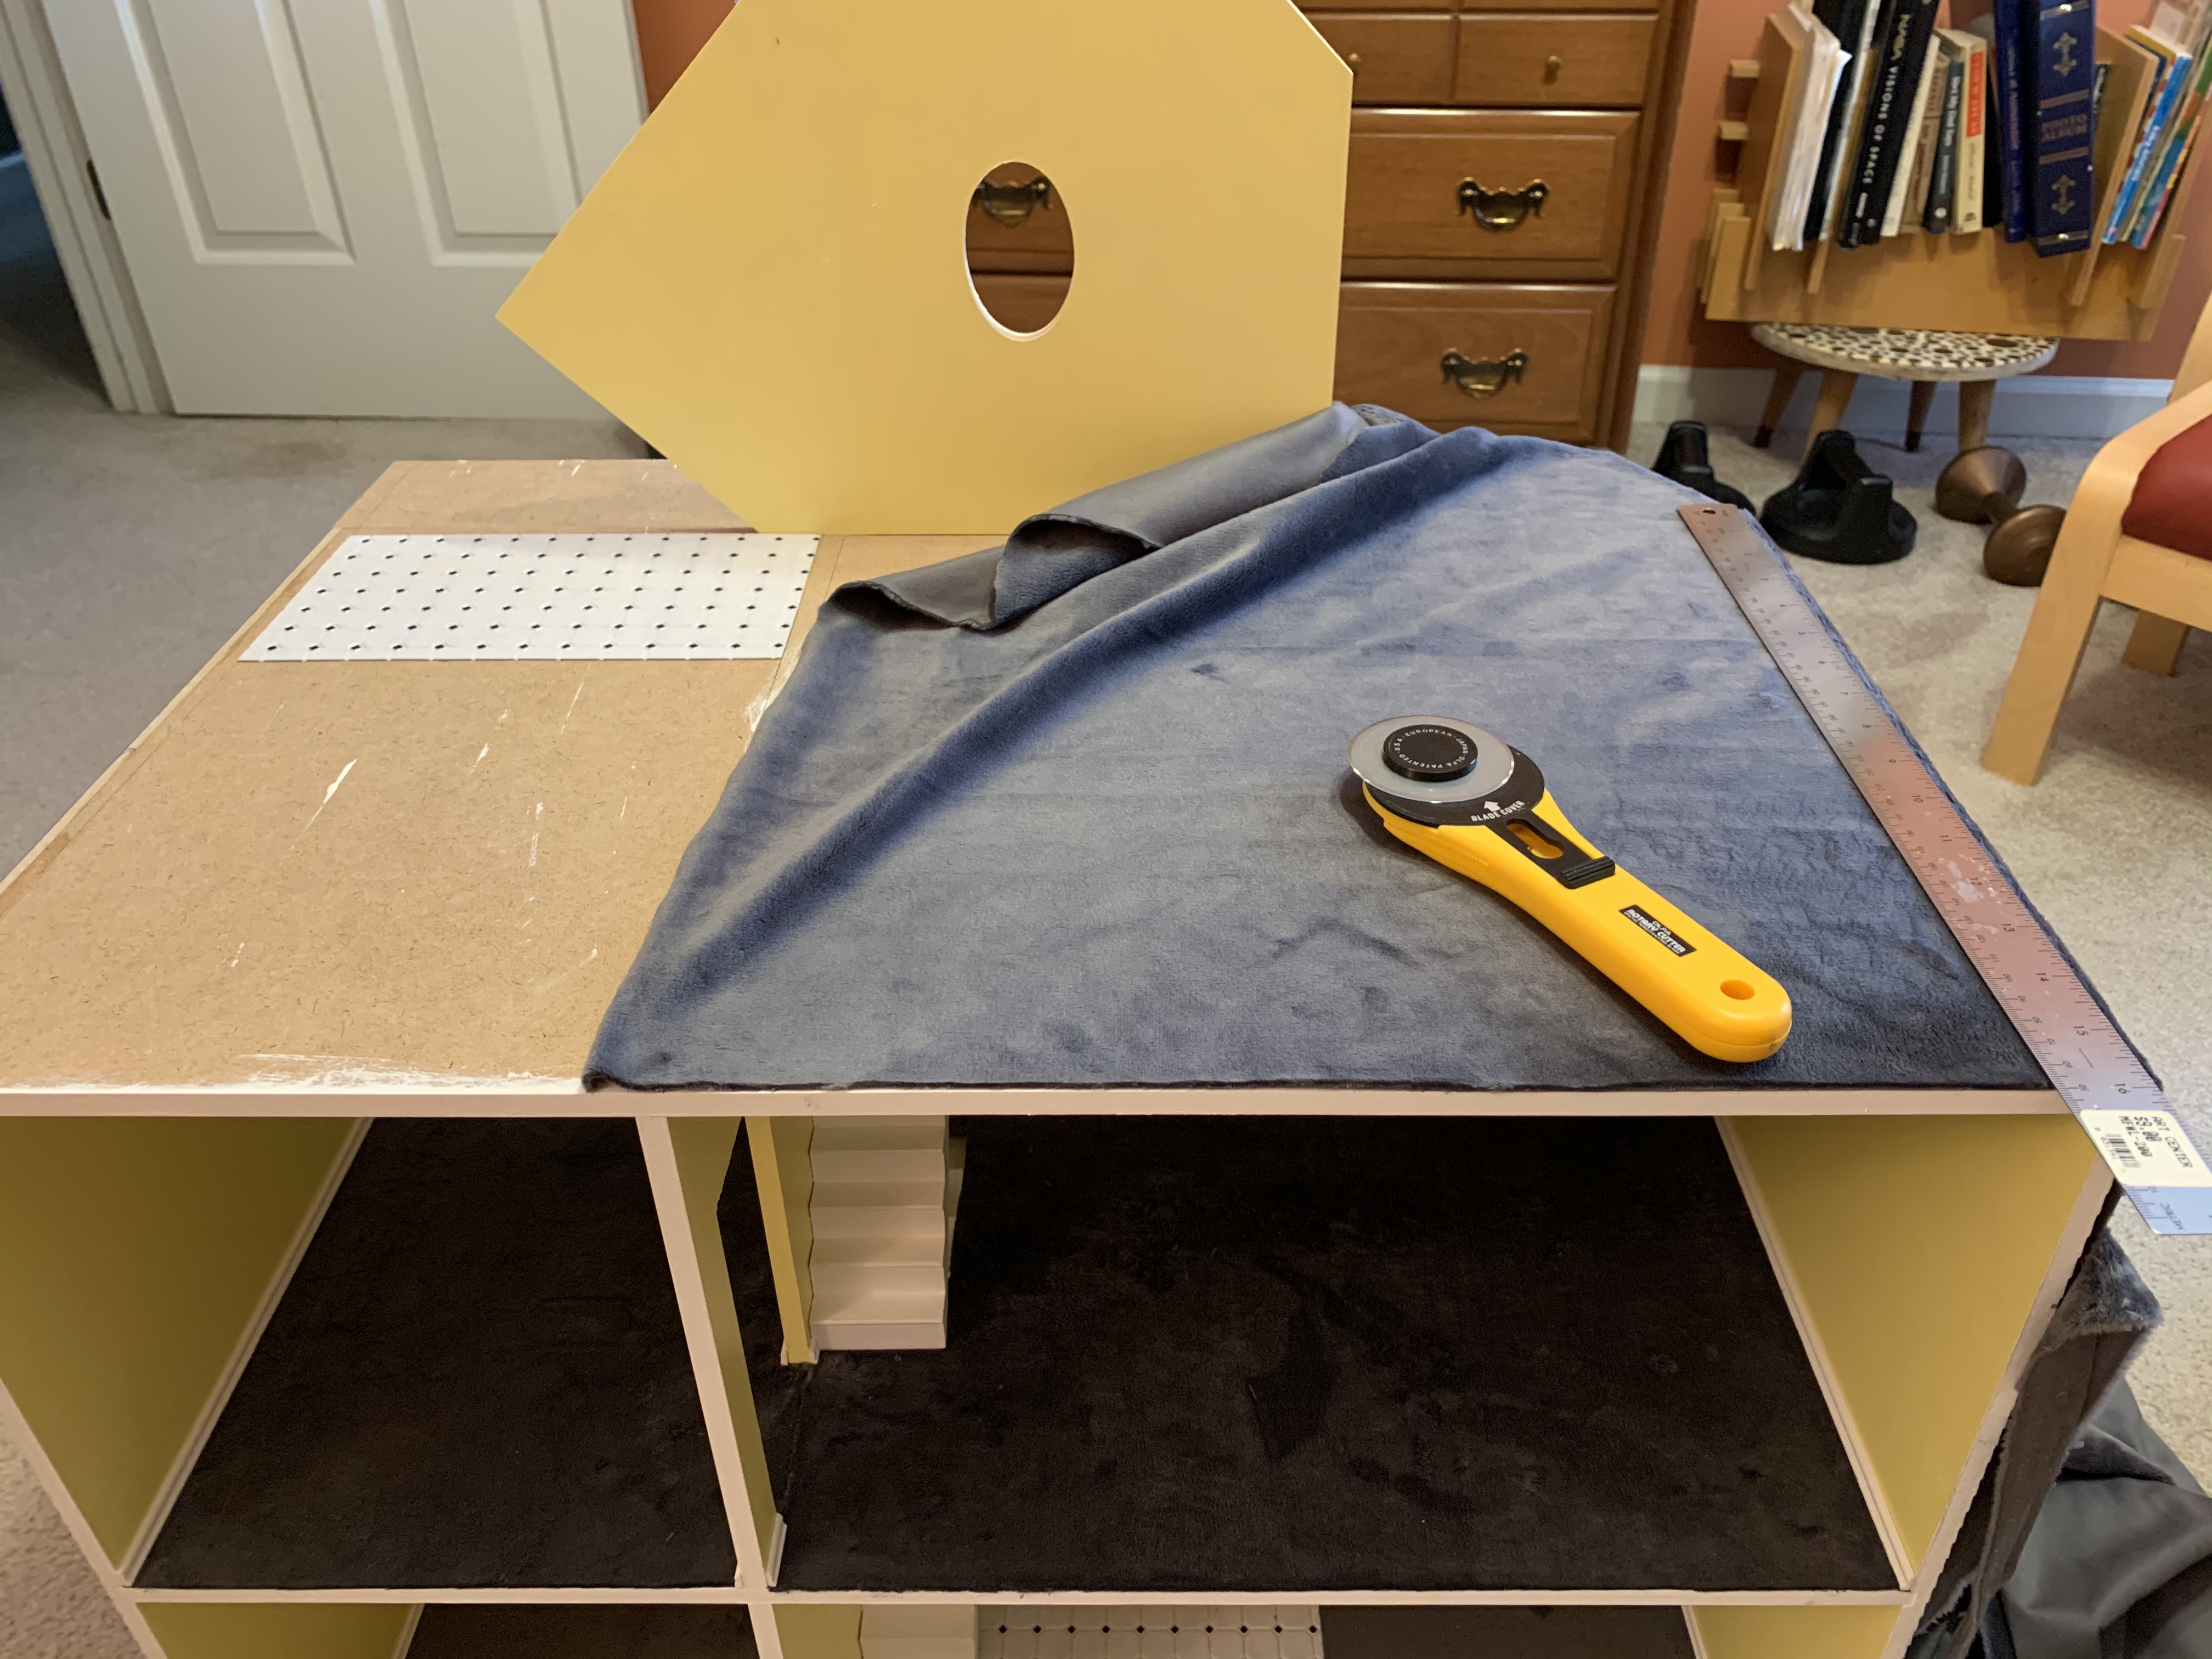
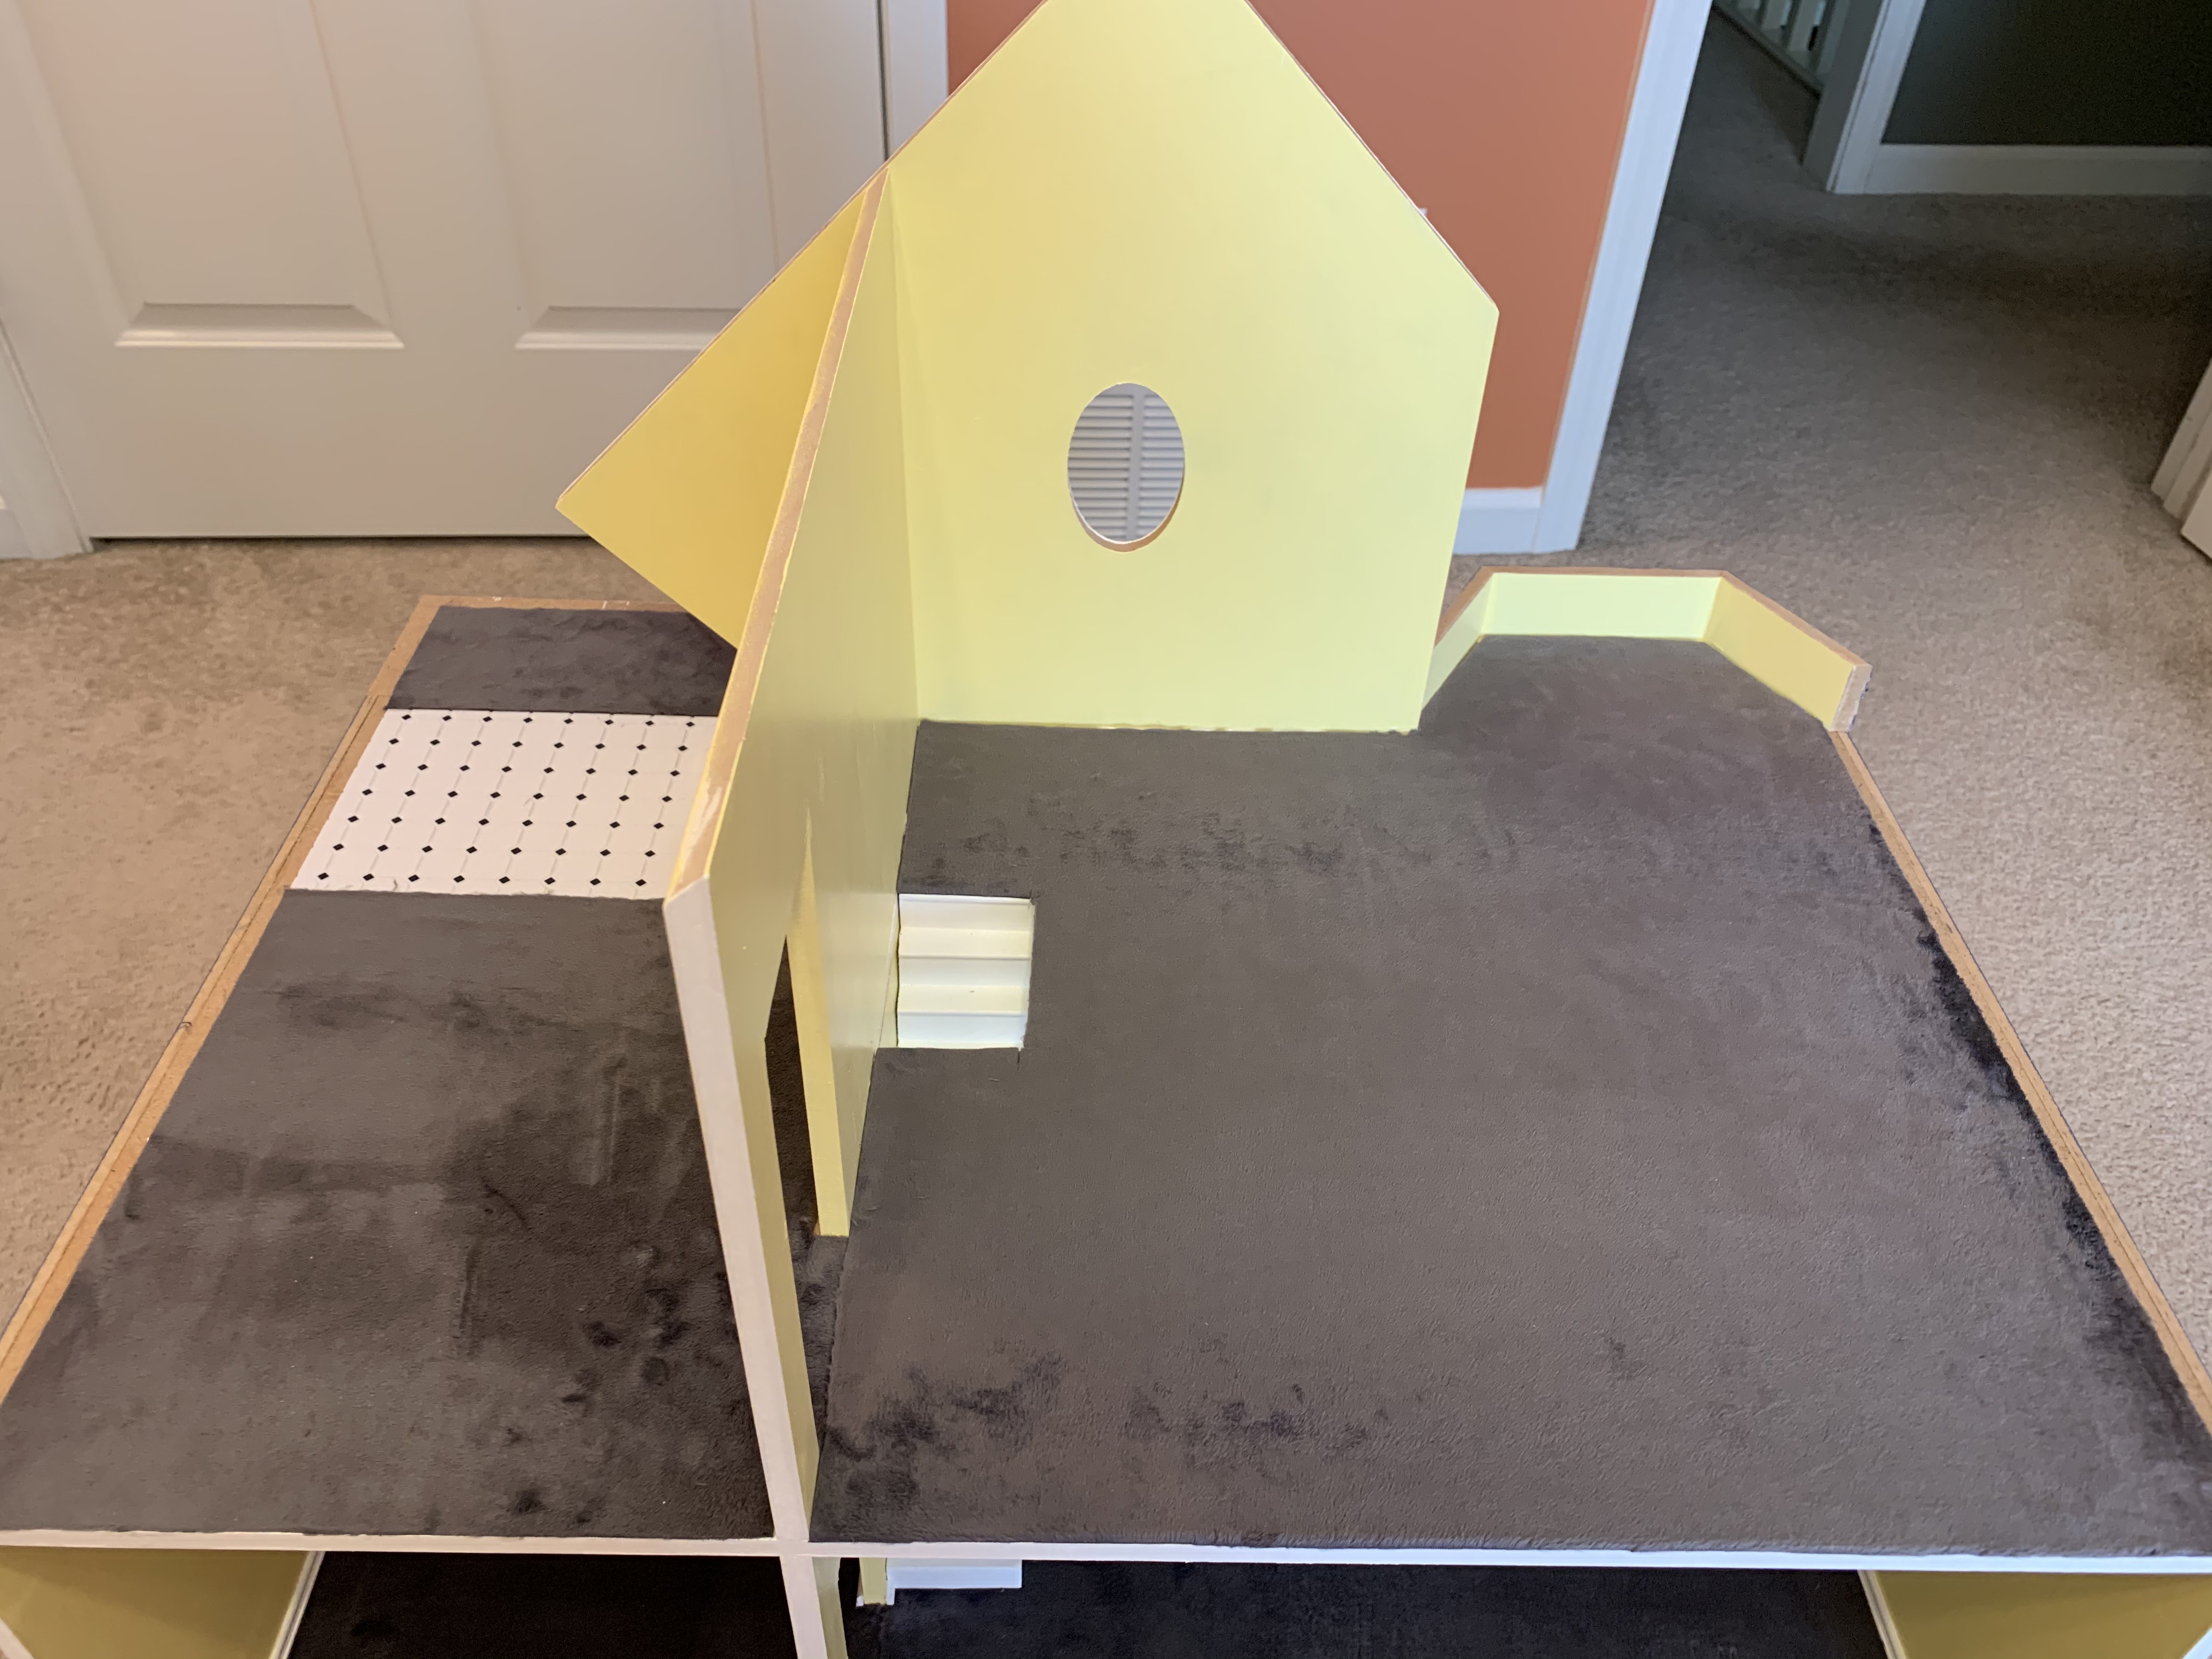
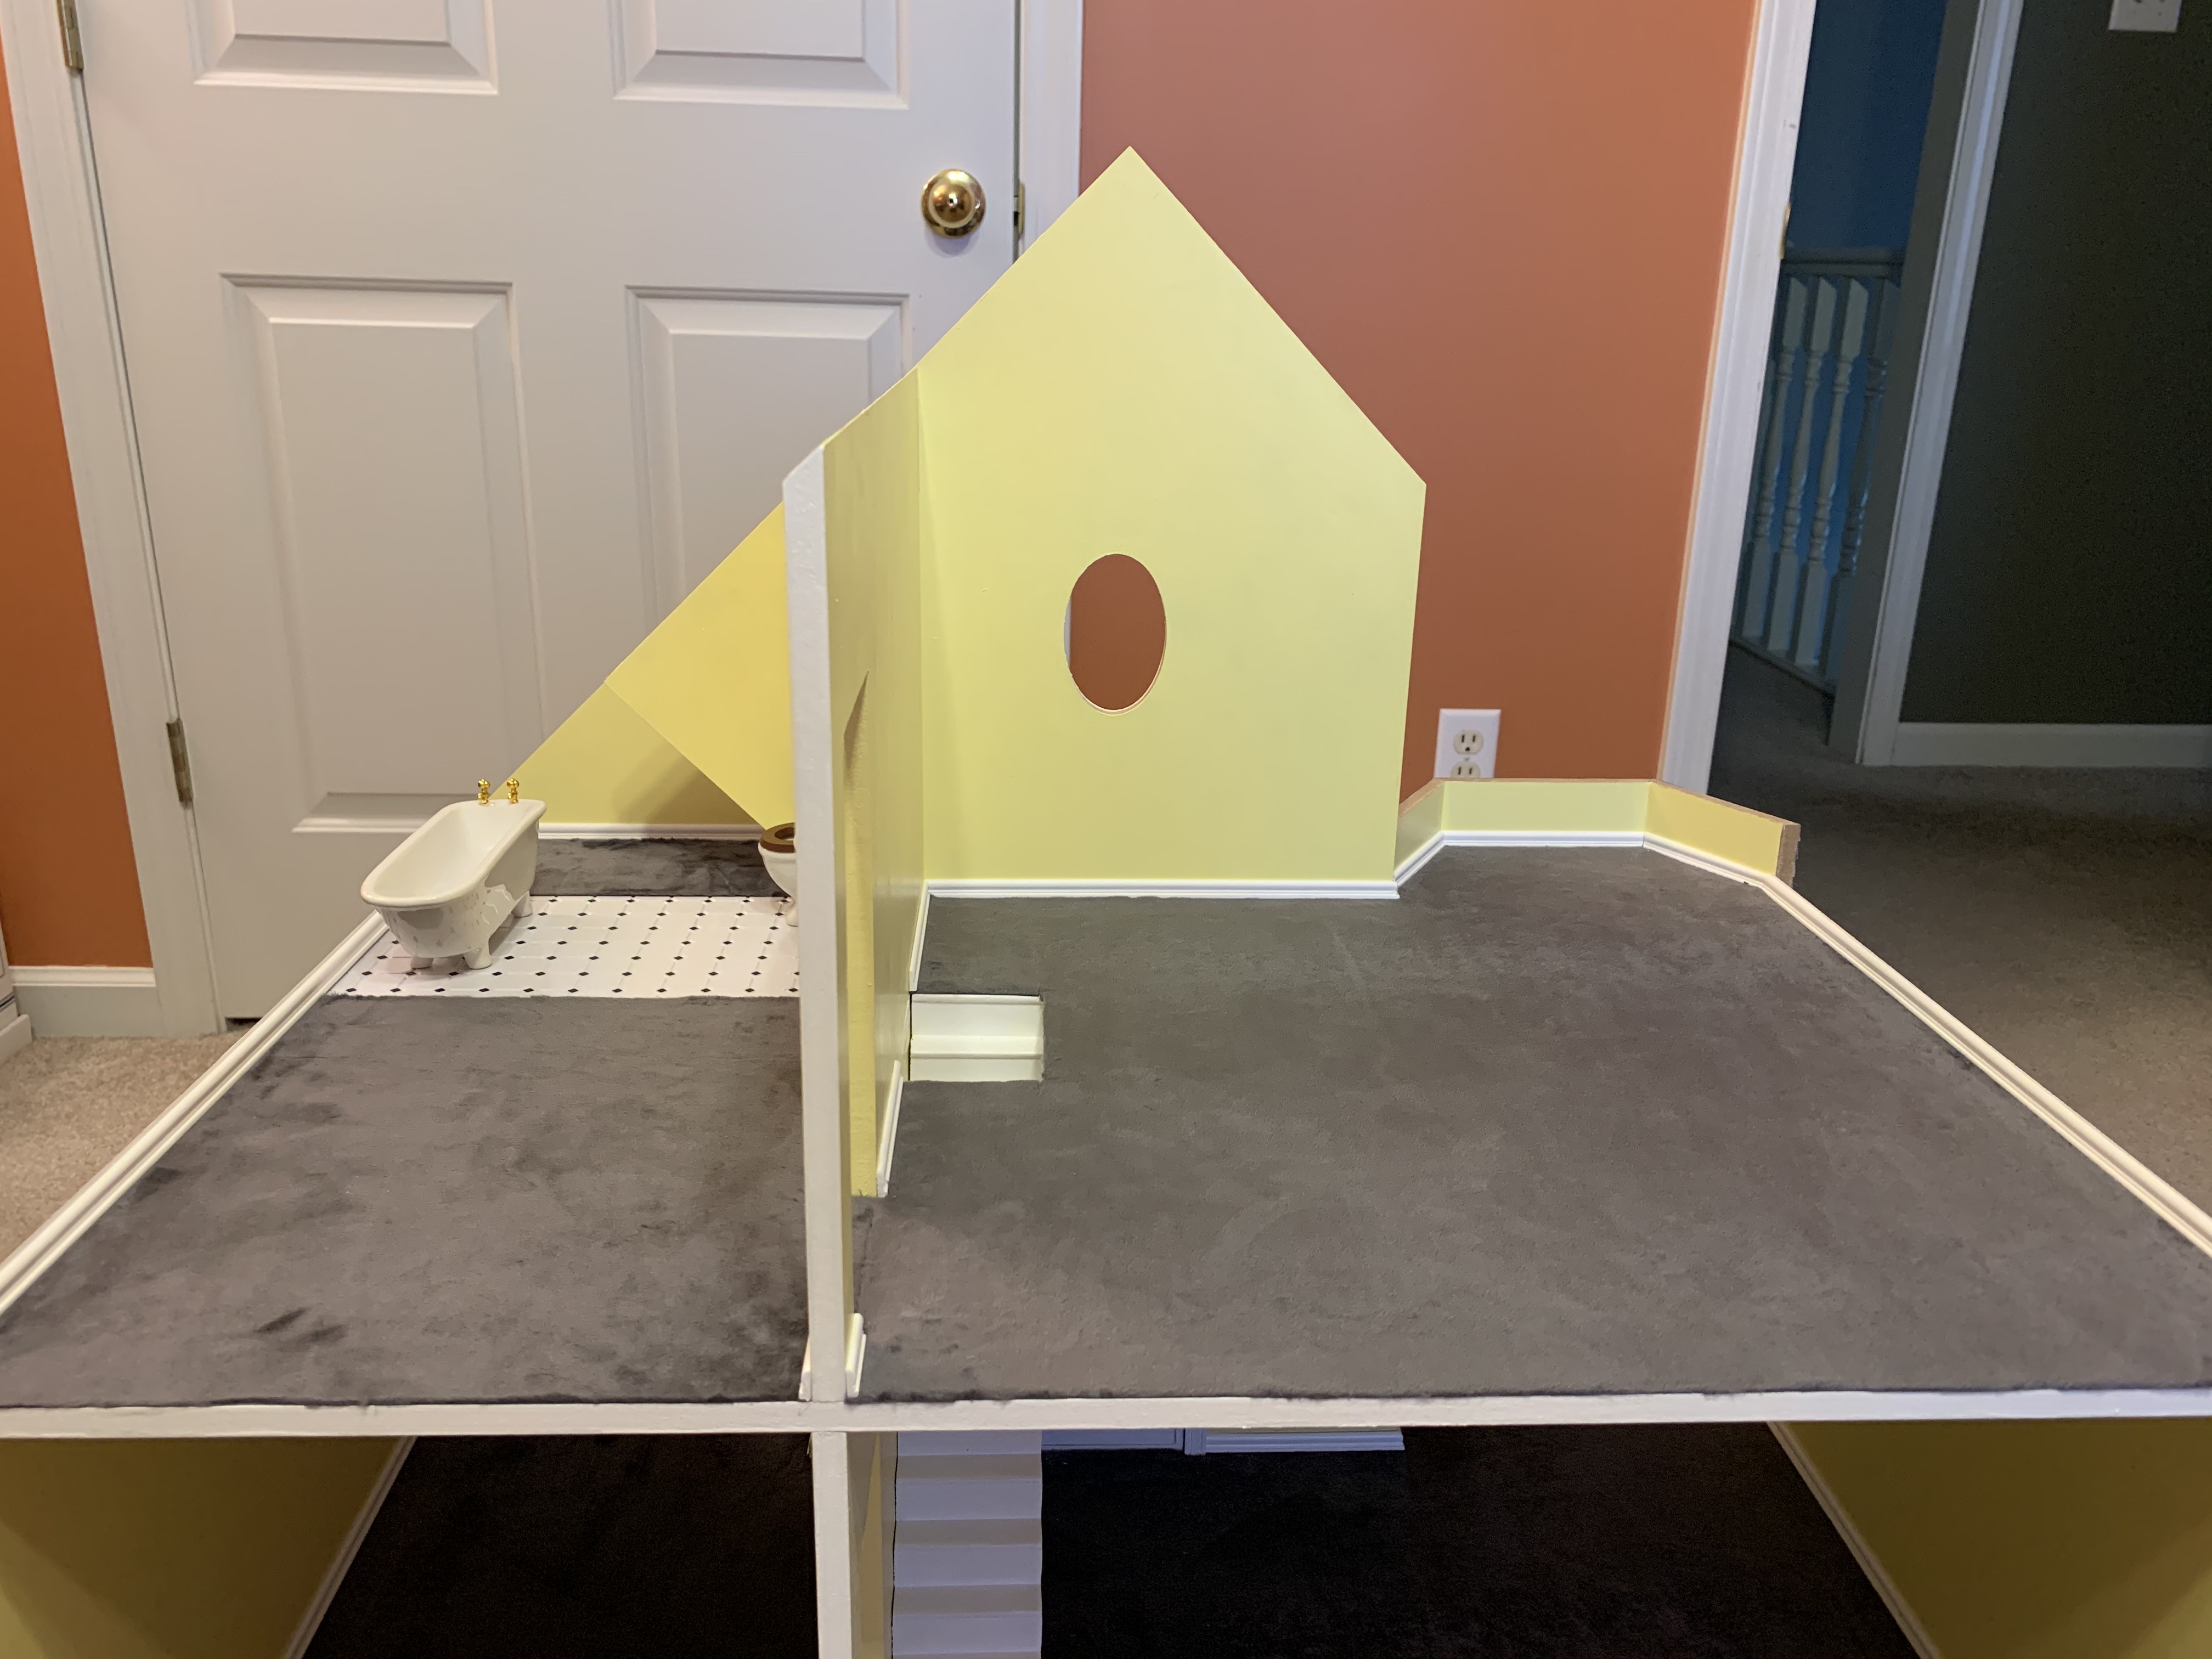
The small piece of the faux tile on the left was what remained from the first-floor kitchen and I thought that it would make a nice flooring for the bathroom as well. You may also, notice a change of scenery in the photo above from the closet where I had been assembling the doll house. I fortunately realized before it was too late that the finished doll house would not fit through the closet door in which it was “hiding.” It would still need to remain hidden when I was not actively working on it and so I relocated it to our oldest son’s bedroom which for who knows why had a closet door 10 inches wider than all the other closet doors in our house.
With the correct size pieces of fabric cut, installing the third-floor carpet was a breeze.
But, before I could add the baseboards, I had to do two things. First, I had to again work ahead on some steps in the instructions to install third-floor pieces to which the baseboards would be attached. Second, I had to return to the local hobby store as I realized I would not have enough baseboard strips to finish the entire floor. But even this was not a wasted trip as I made a great discovery…

…period bathroom fixtures that would look nicely on that faux tile floor.
After building two doll houses each with three floors, I was beginning to feel like a master micro-carpenter with my micro miter box and compass. This floor only had one bay window, so I had fewer 60-degree pieces to cut. The cutting went smoothly and quickly, and it was with a nice sense of accomplishment that I could disassemble my miter tools.
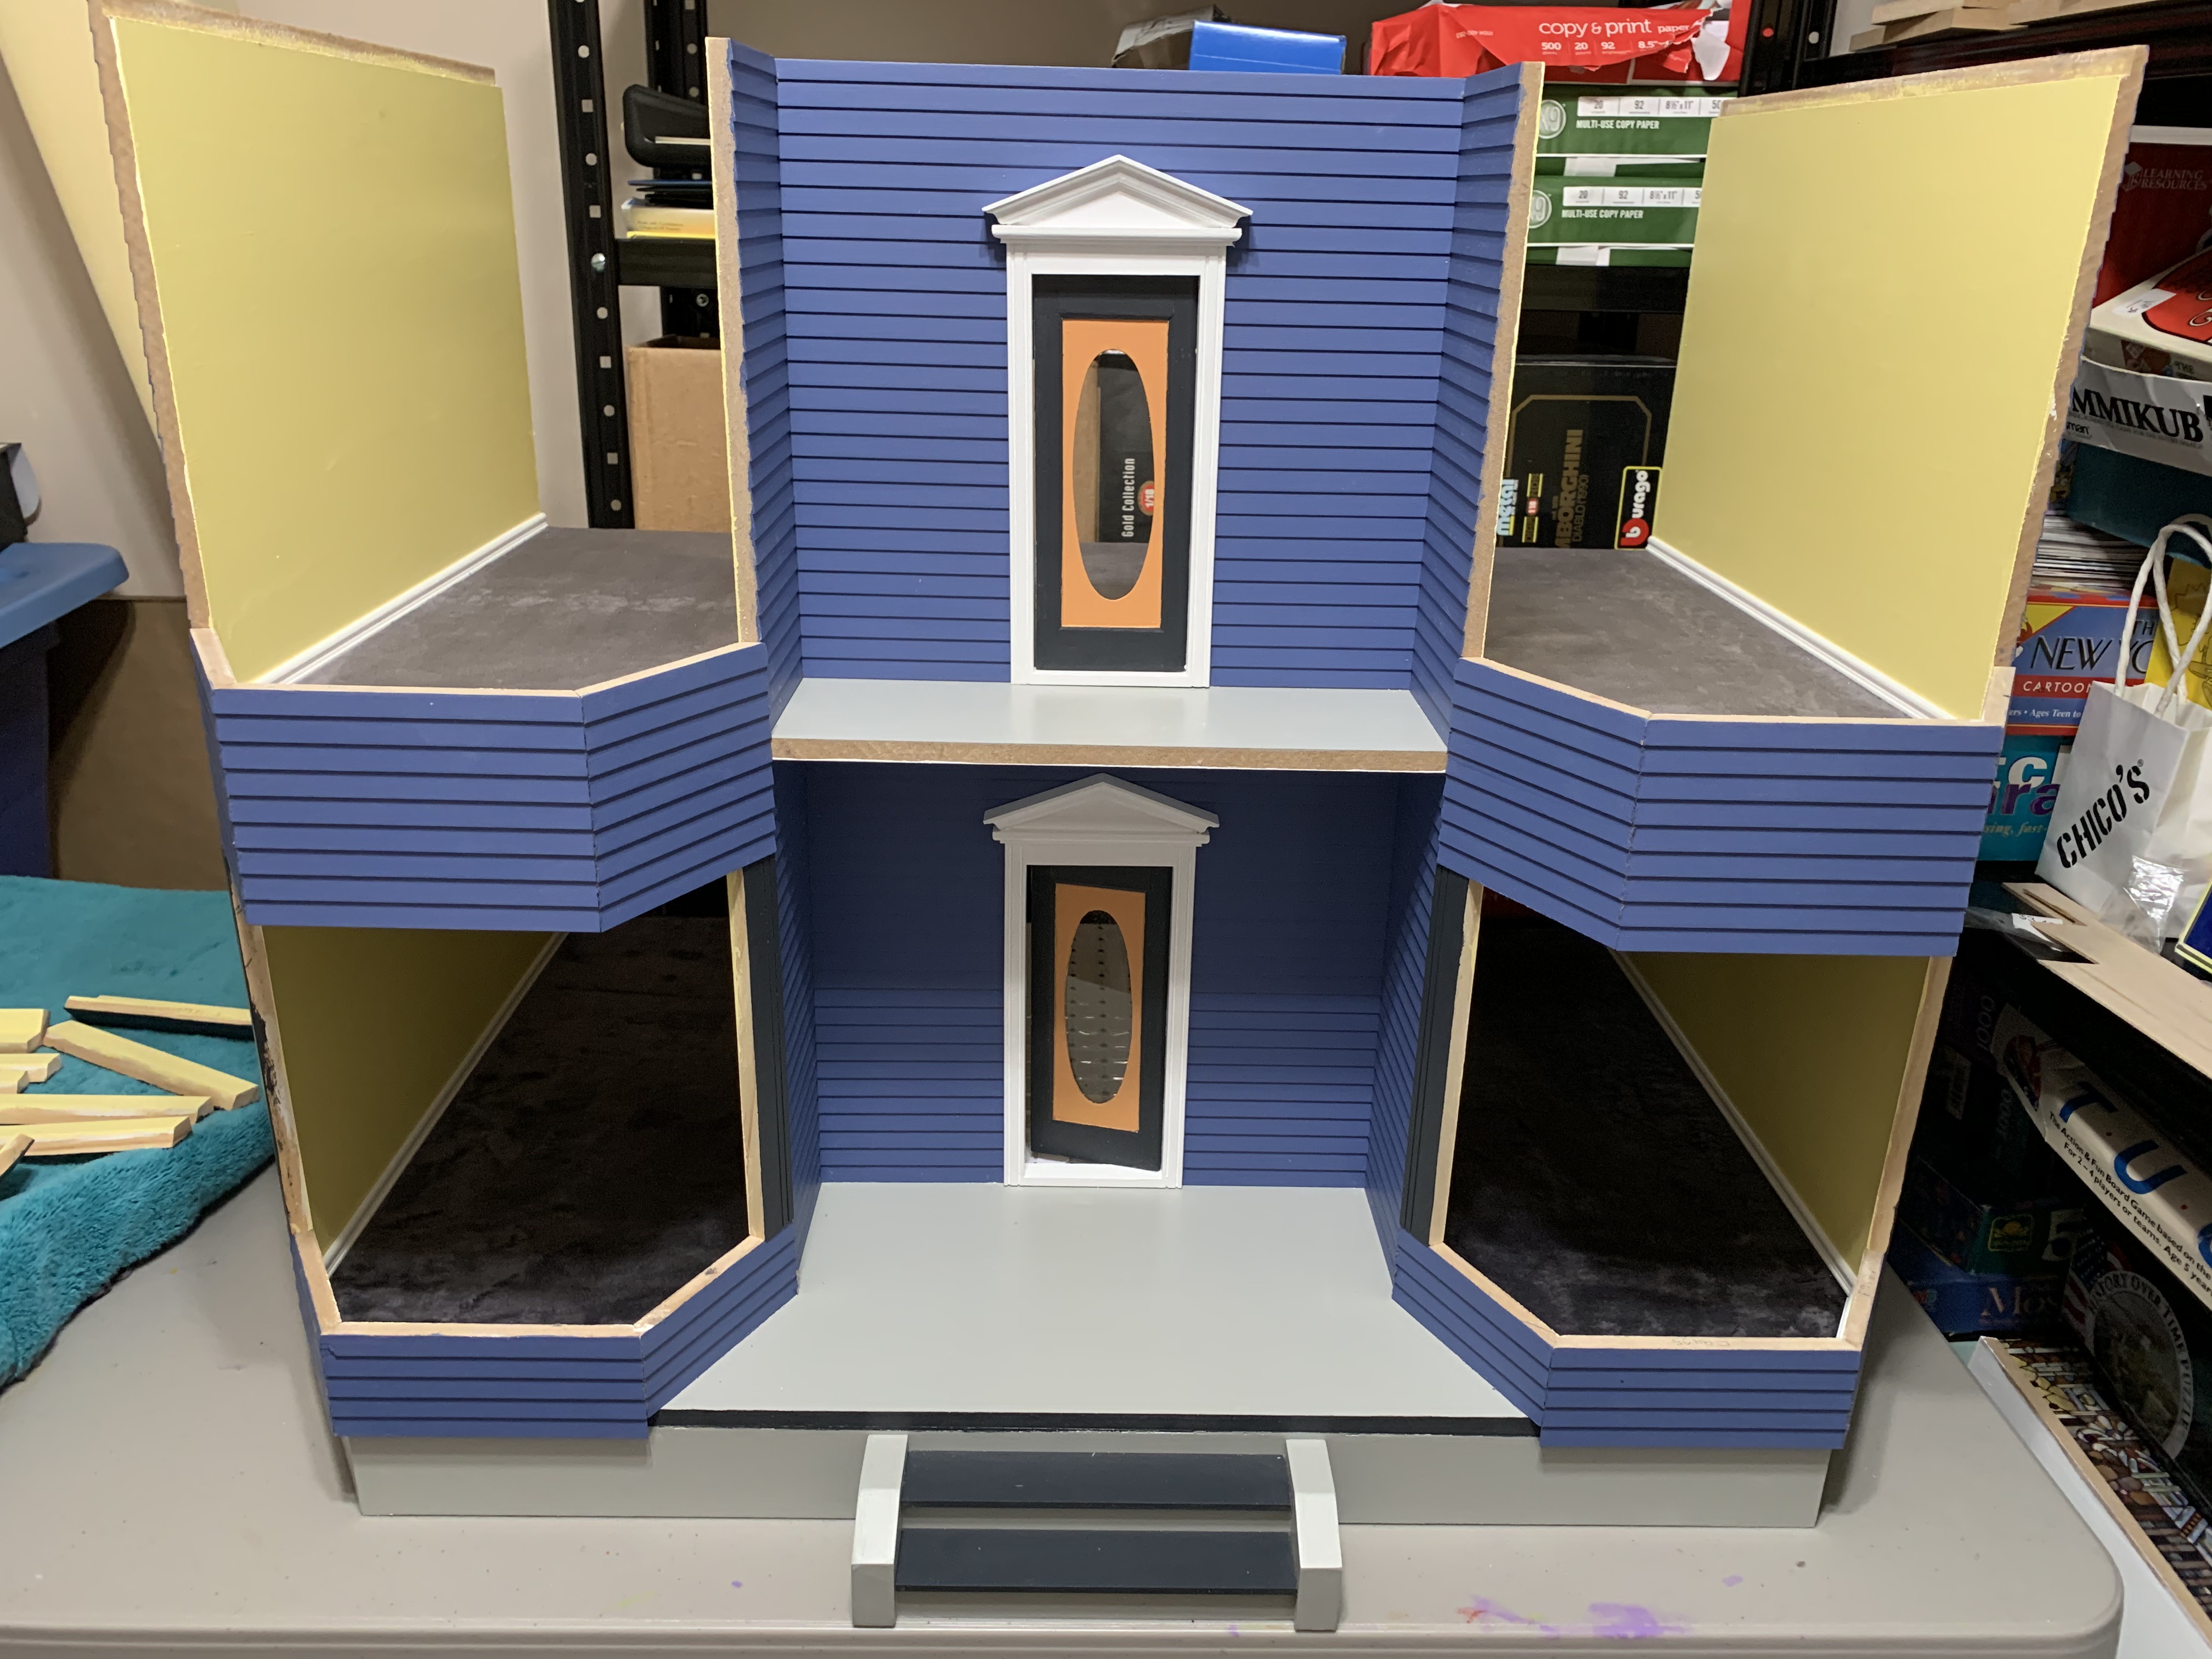
Returning to the instructions, next up was adding the roof and the tower.
Adding the roof went quite easily…

…and when I looked from the back of the house to make sure everything was aligned properly; I had an interesting realization.
Since I had been finishing the interior, installing carpets, stairs and baseboards, as I worked from one floor to the next, the interior of the house was for the most part complete. Having assembled the house in this manner, I knew I would not be having to squeeze my hands into small spaces trying to add interior details. Only one task remained for installing the inside window trims once I reached that step, but I knew from my last doll house experience that that was not a hard step.
As I went to return the house to its closet hiding place, I had another discovery. As I struggled to lift the house off the floor, I noted that with the addition of the roof, the house had grown much heavier. Fortunately, with the interior mostly complete, I could do most of the finishing work with it resting on its table in the closet. And with the addition of the wheels underneath the foundation, I could easily turn it from side to side as I needed access.
With the roof in place, the next step was to install the tower. This step proved a bit more challenging as these three walls were free floating with no attachment above or below them. I taped them together as detailed in the instructions and glued them in place but once the glue had dried and I removed the tape, I found they had shifted out of proper alignment. So, I had to carefully pry the parts apart and repeat the process, succeeding on my second try.
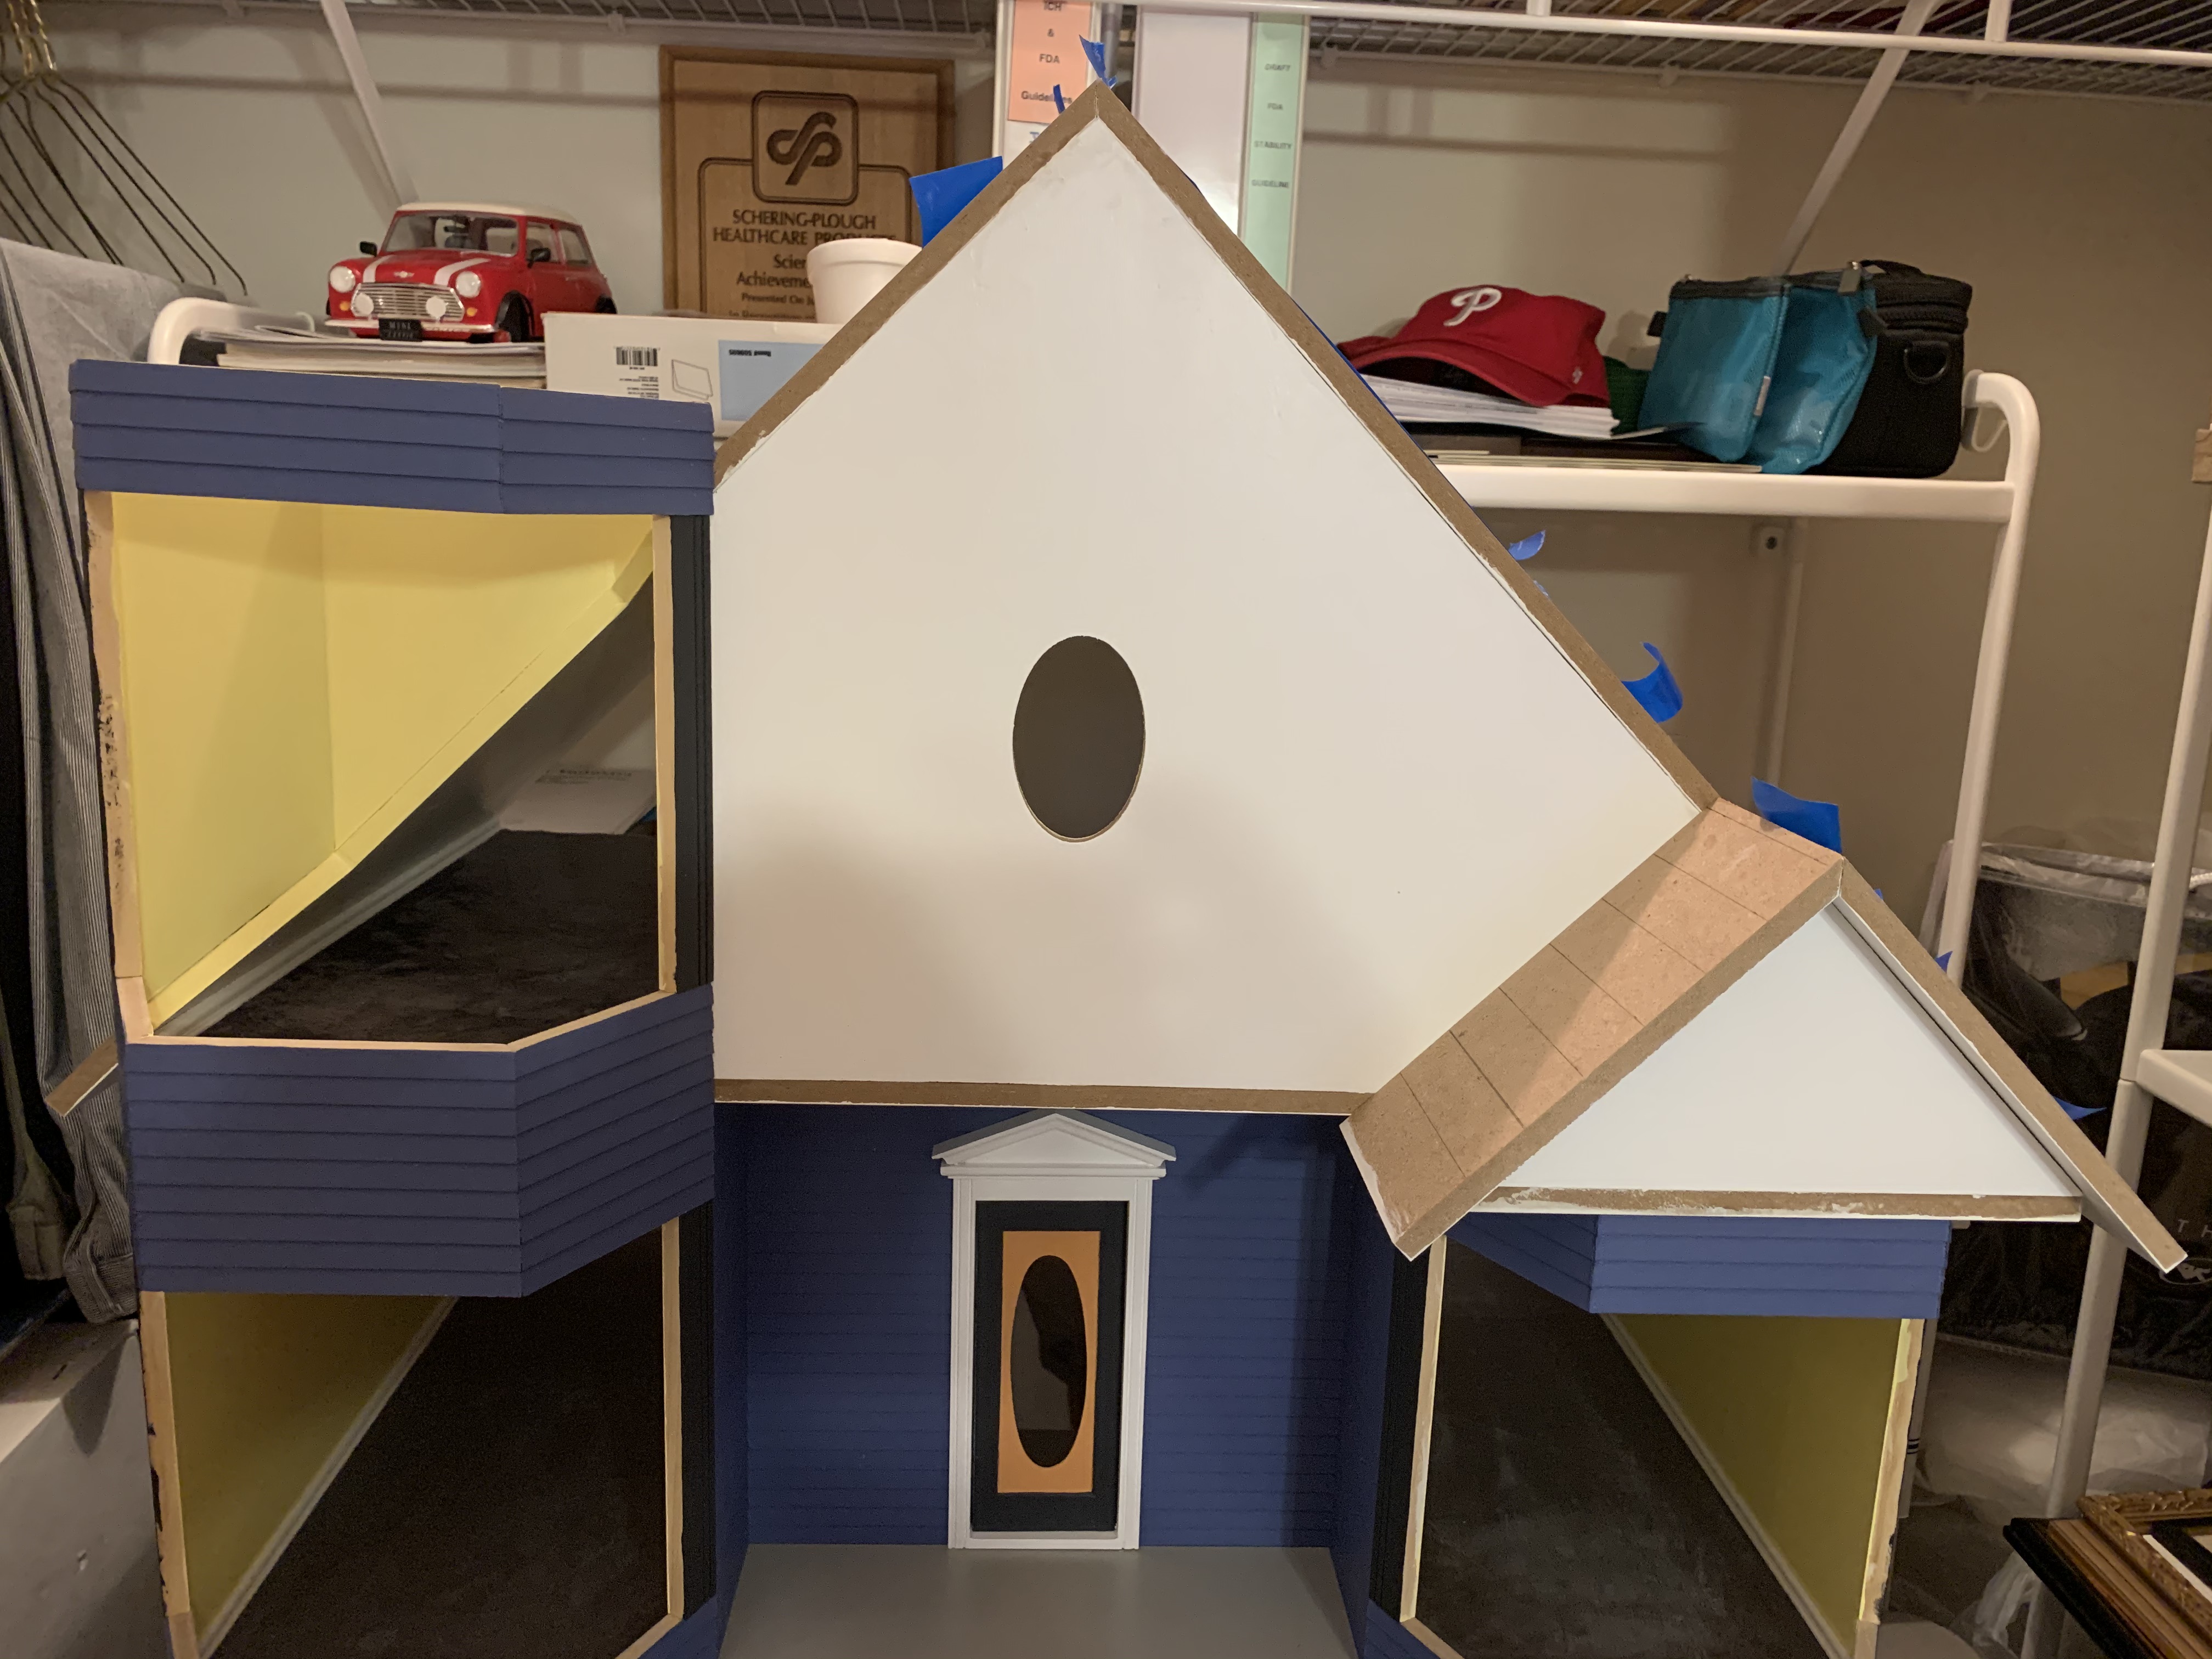
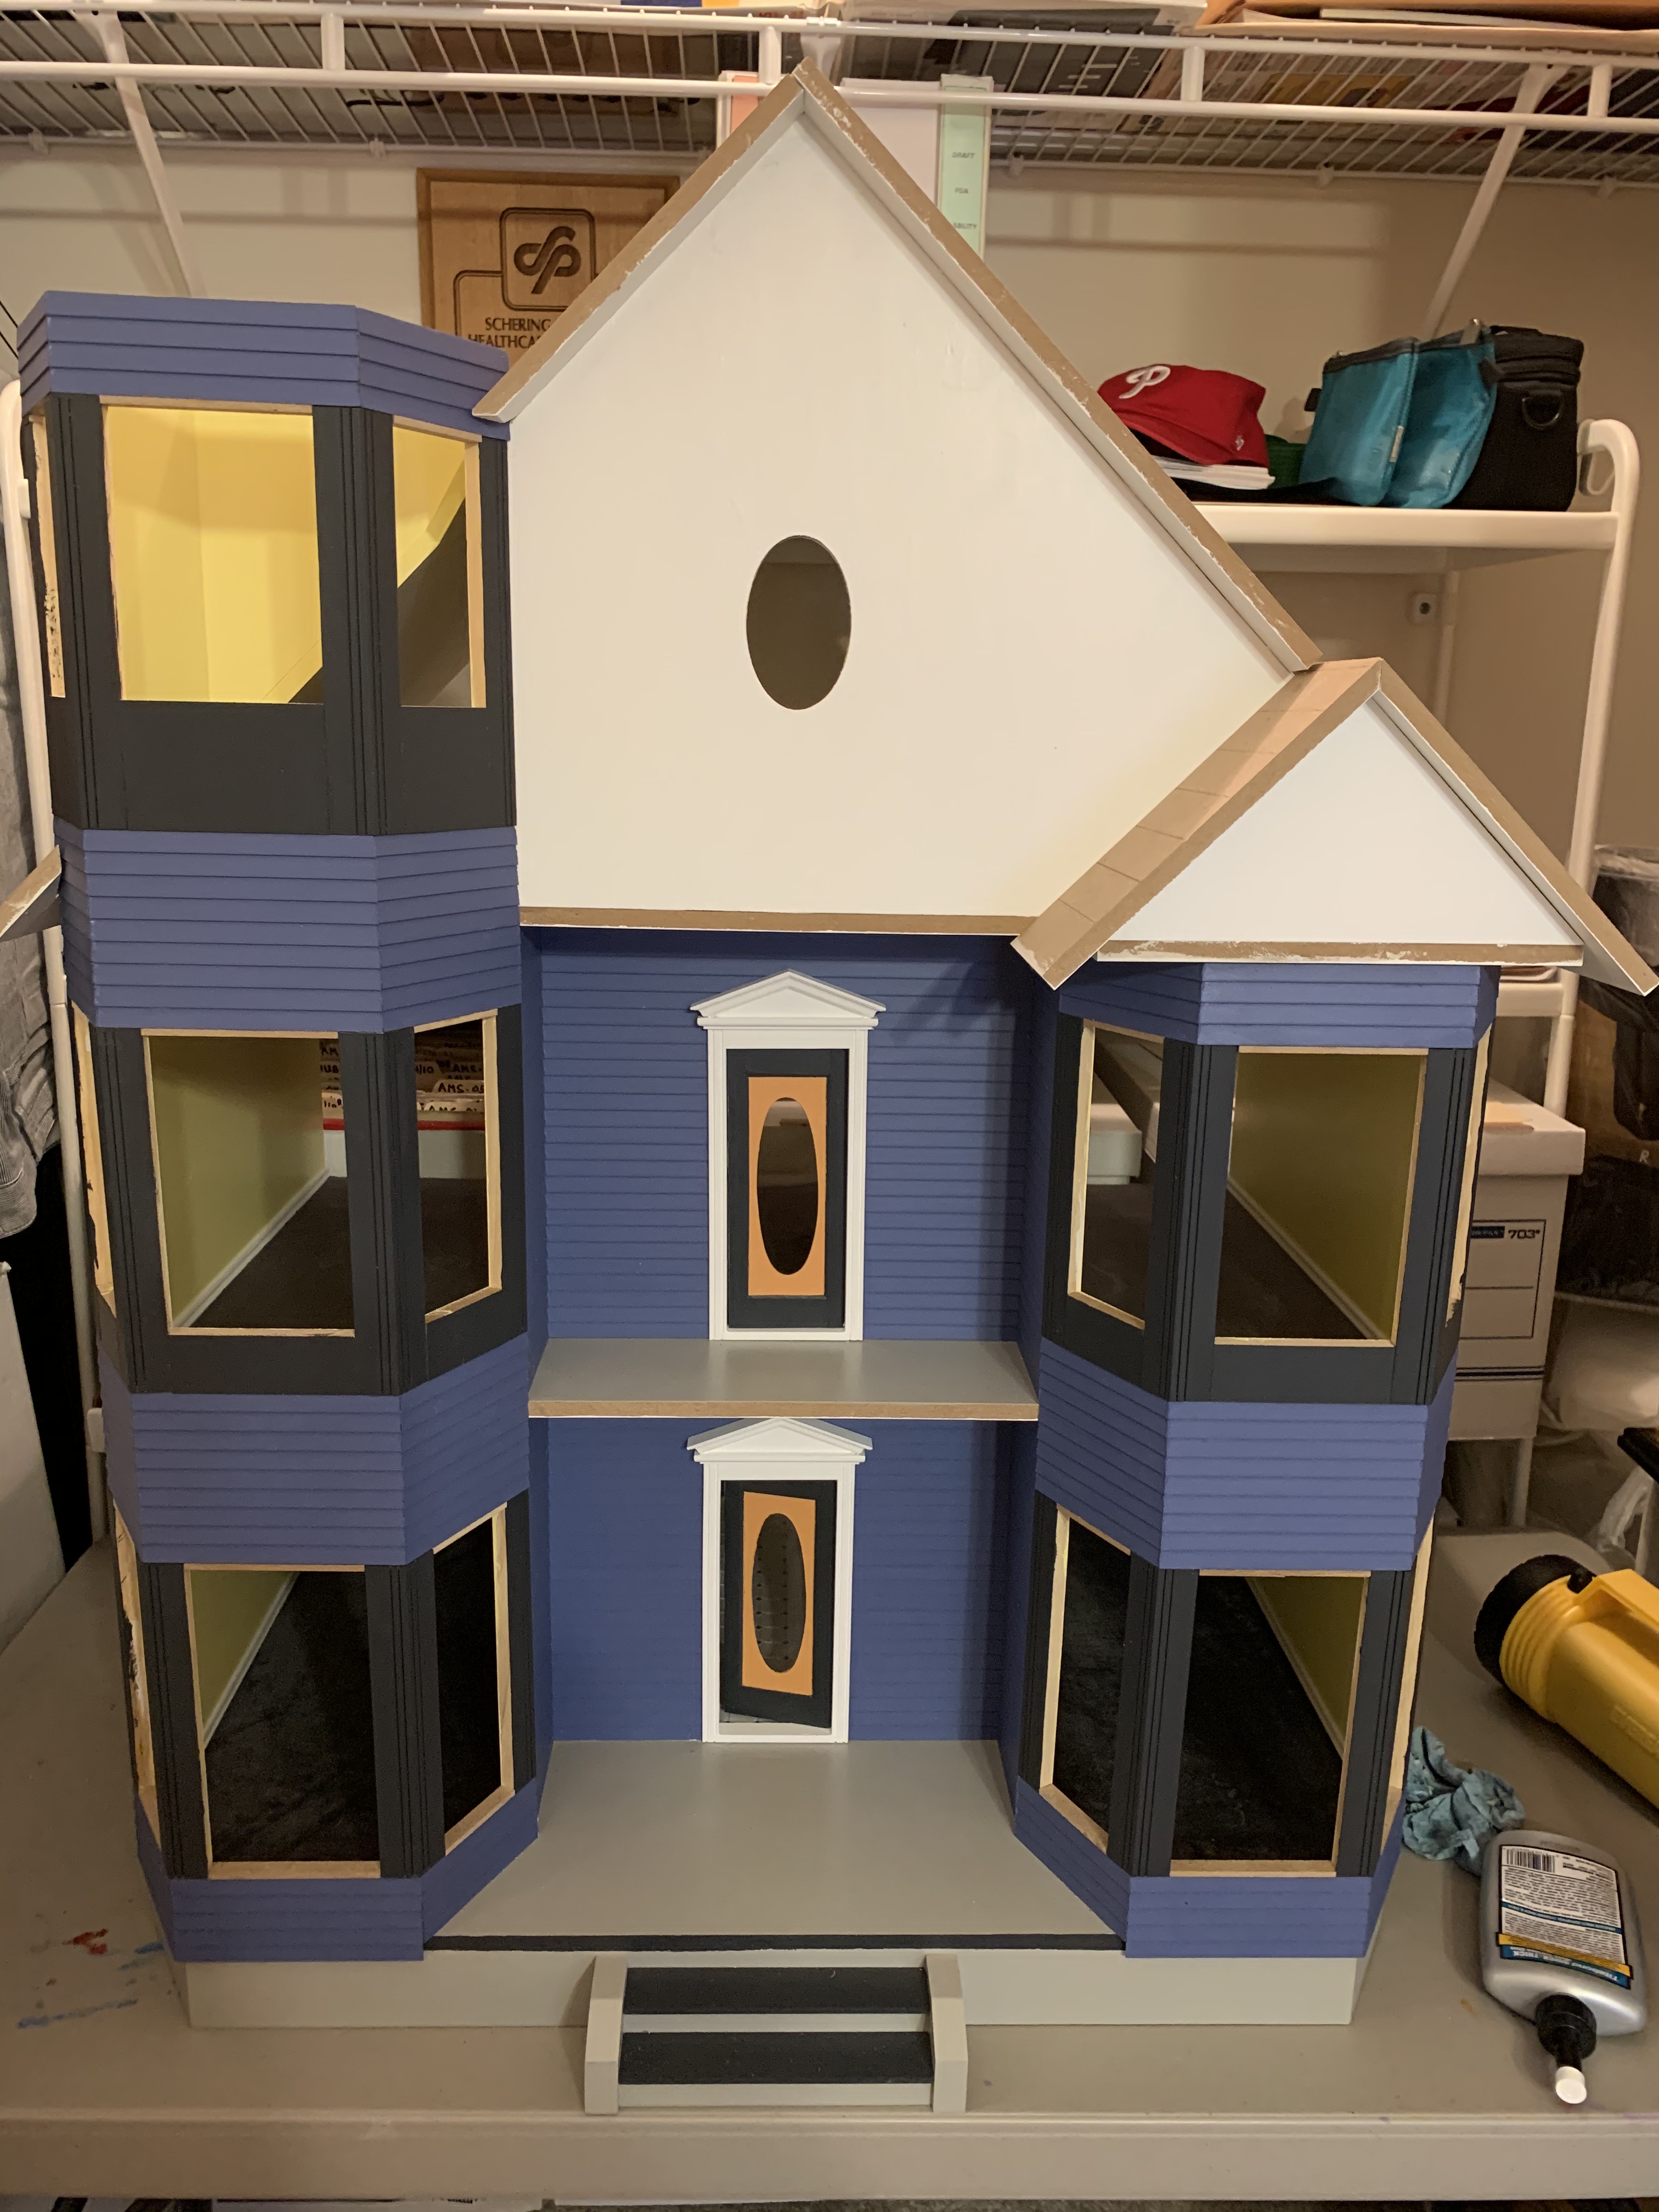
Even though the doll house had taken on an almost complete look from the back, when I looked through the boxes, I still had quite a few parts left to assemble. With the exception of the shingles for the roof and trim strips on the two sides, all of the remaining pieces would be installed on the front façade.
First up was to install all of the individual pieces that would frame out the bay windows. All of these pieces had to be painted black on the exterior and yellow on the interior. Here also is where the accuracy of my installation of the bay walls was tested. For some openings, the eight pieces fit nicely but in others, the fit was so tight that I had to sand them down a bit to get them installed.
Another part of these initial front façade steps was to install the eaves on the main roof sections. There was a big note in the instructions “Don’t skip the “Eaves””! After poring over trying to identify 17 unique trim pieces, I understood why they had the note. After searching unsuccessfully through these, I almost concluded they must be missing from my kit. But fortunately, I found them in one of the other boxes (Had I paid closer attention to the helpful diagram in the instructions, I never would have even rummaged through the bag with all those trim pieces).
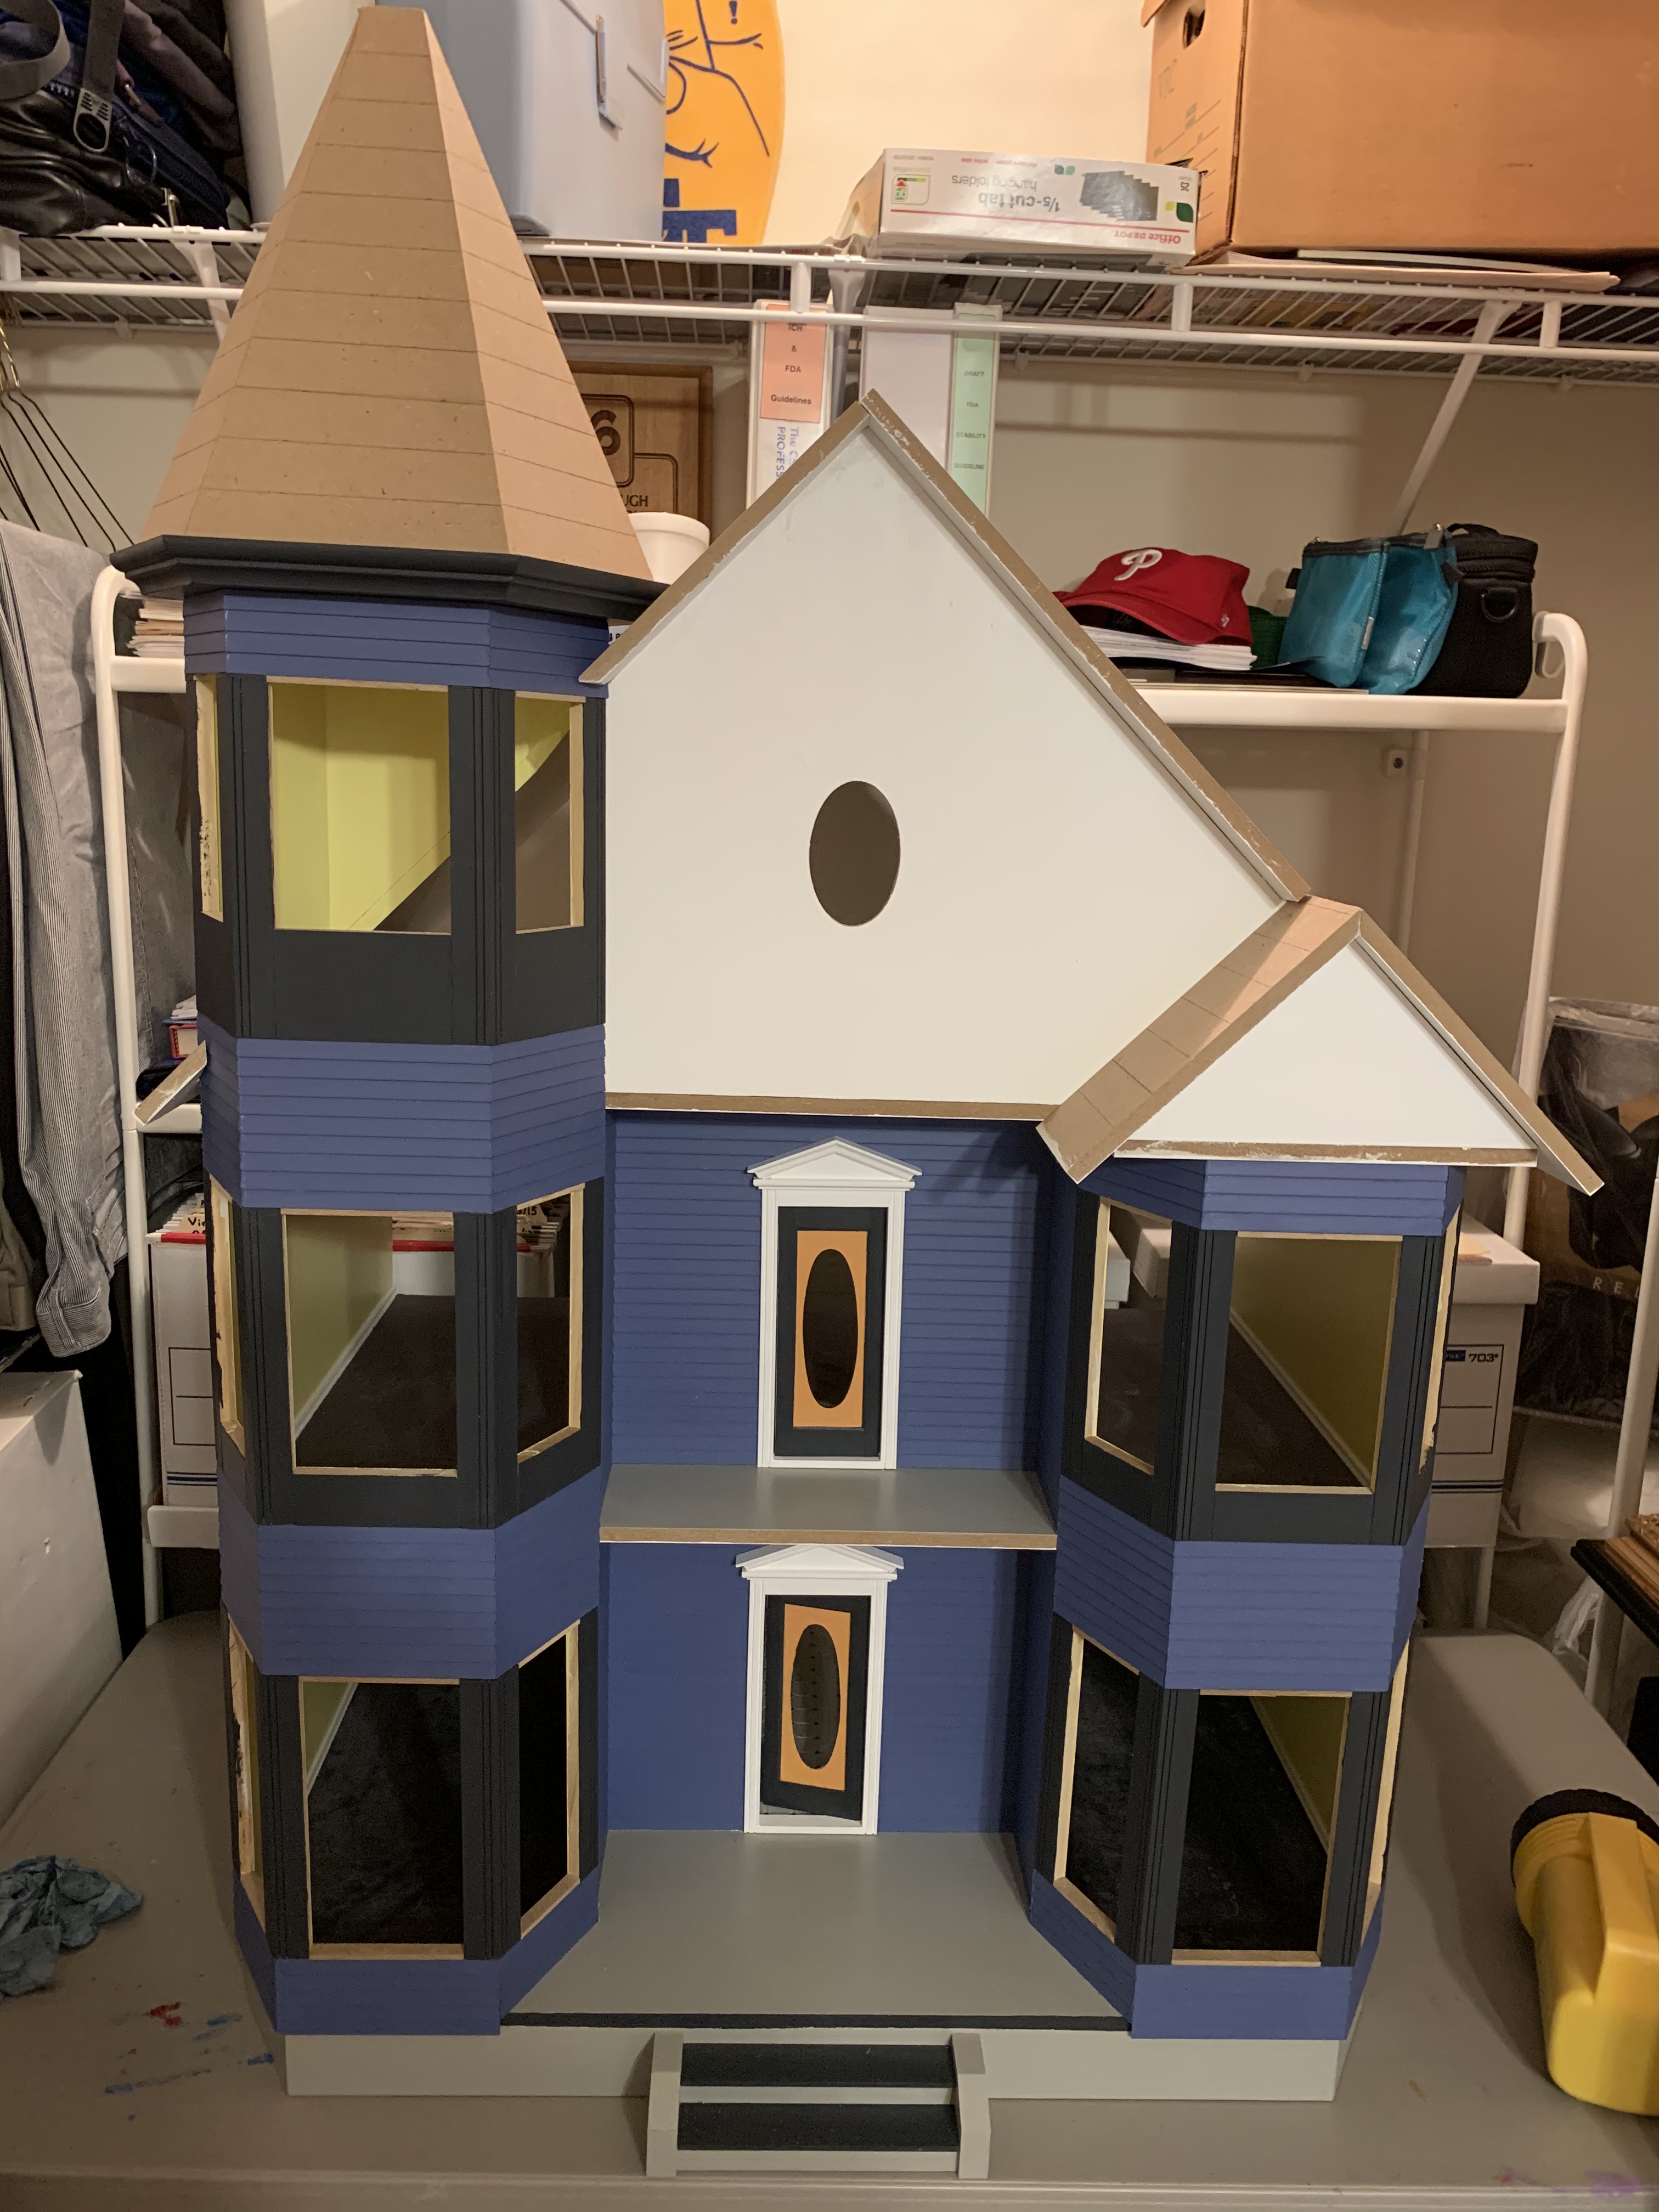
The final step to top out the house was the assembly of the tower roof. The instructions for this step showed you taping all six sections of the tower roof together, applying glue to the edges, and then folding it up into its final shape. Having just had a bad experience with taping and gluing, I chose an alternative approach.
Since the roof sections would ultimately rest in a groove pre-cut in the tower ceiling, it made more sense to glue each piece as it was assembled in the tower ceiling. This ensured proper alignment of each section. Once all pieces were in place, then I taped it together and once dry, placed it on the tower.
To be continued…
Categories

Beautiful work!
Thanks again! Just one more post for the finished house.
This is getting verrrry exciting!!! By the way, I think the last time I saw a miniature miter box was my freshman year of architecture school!
It is and just one more post before the big unveiling. I’m glad I found the little miter box as it made my cutting jobs much easier and more precise.