
Doll House Surprise for My 2nd Granddaughter – Finishing Touches
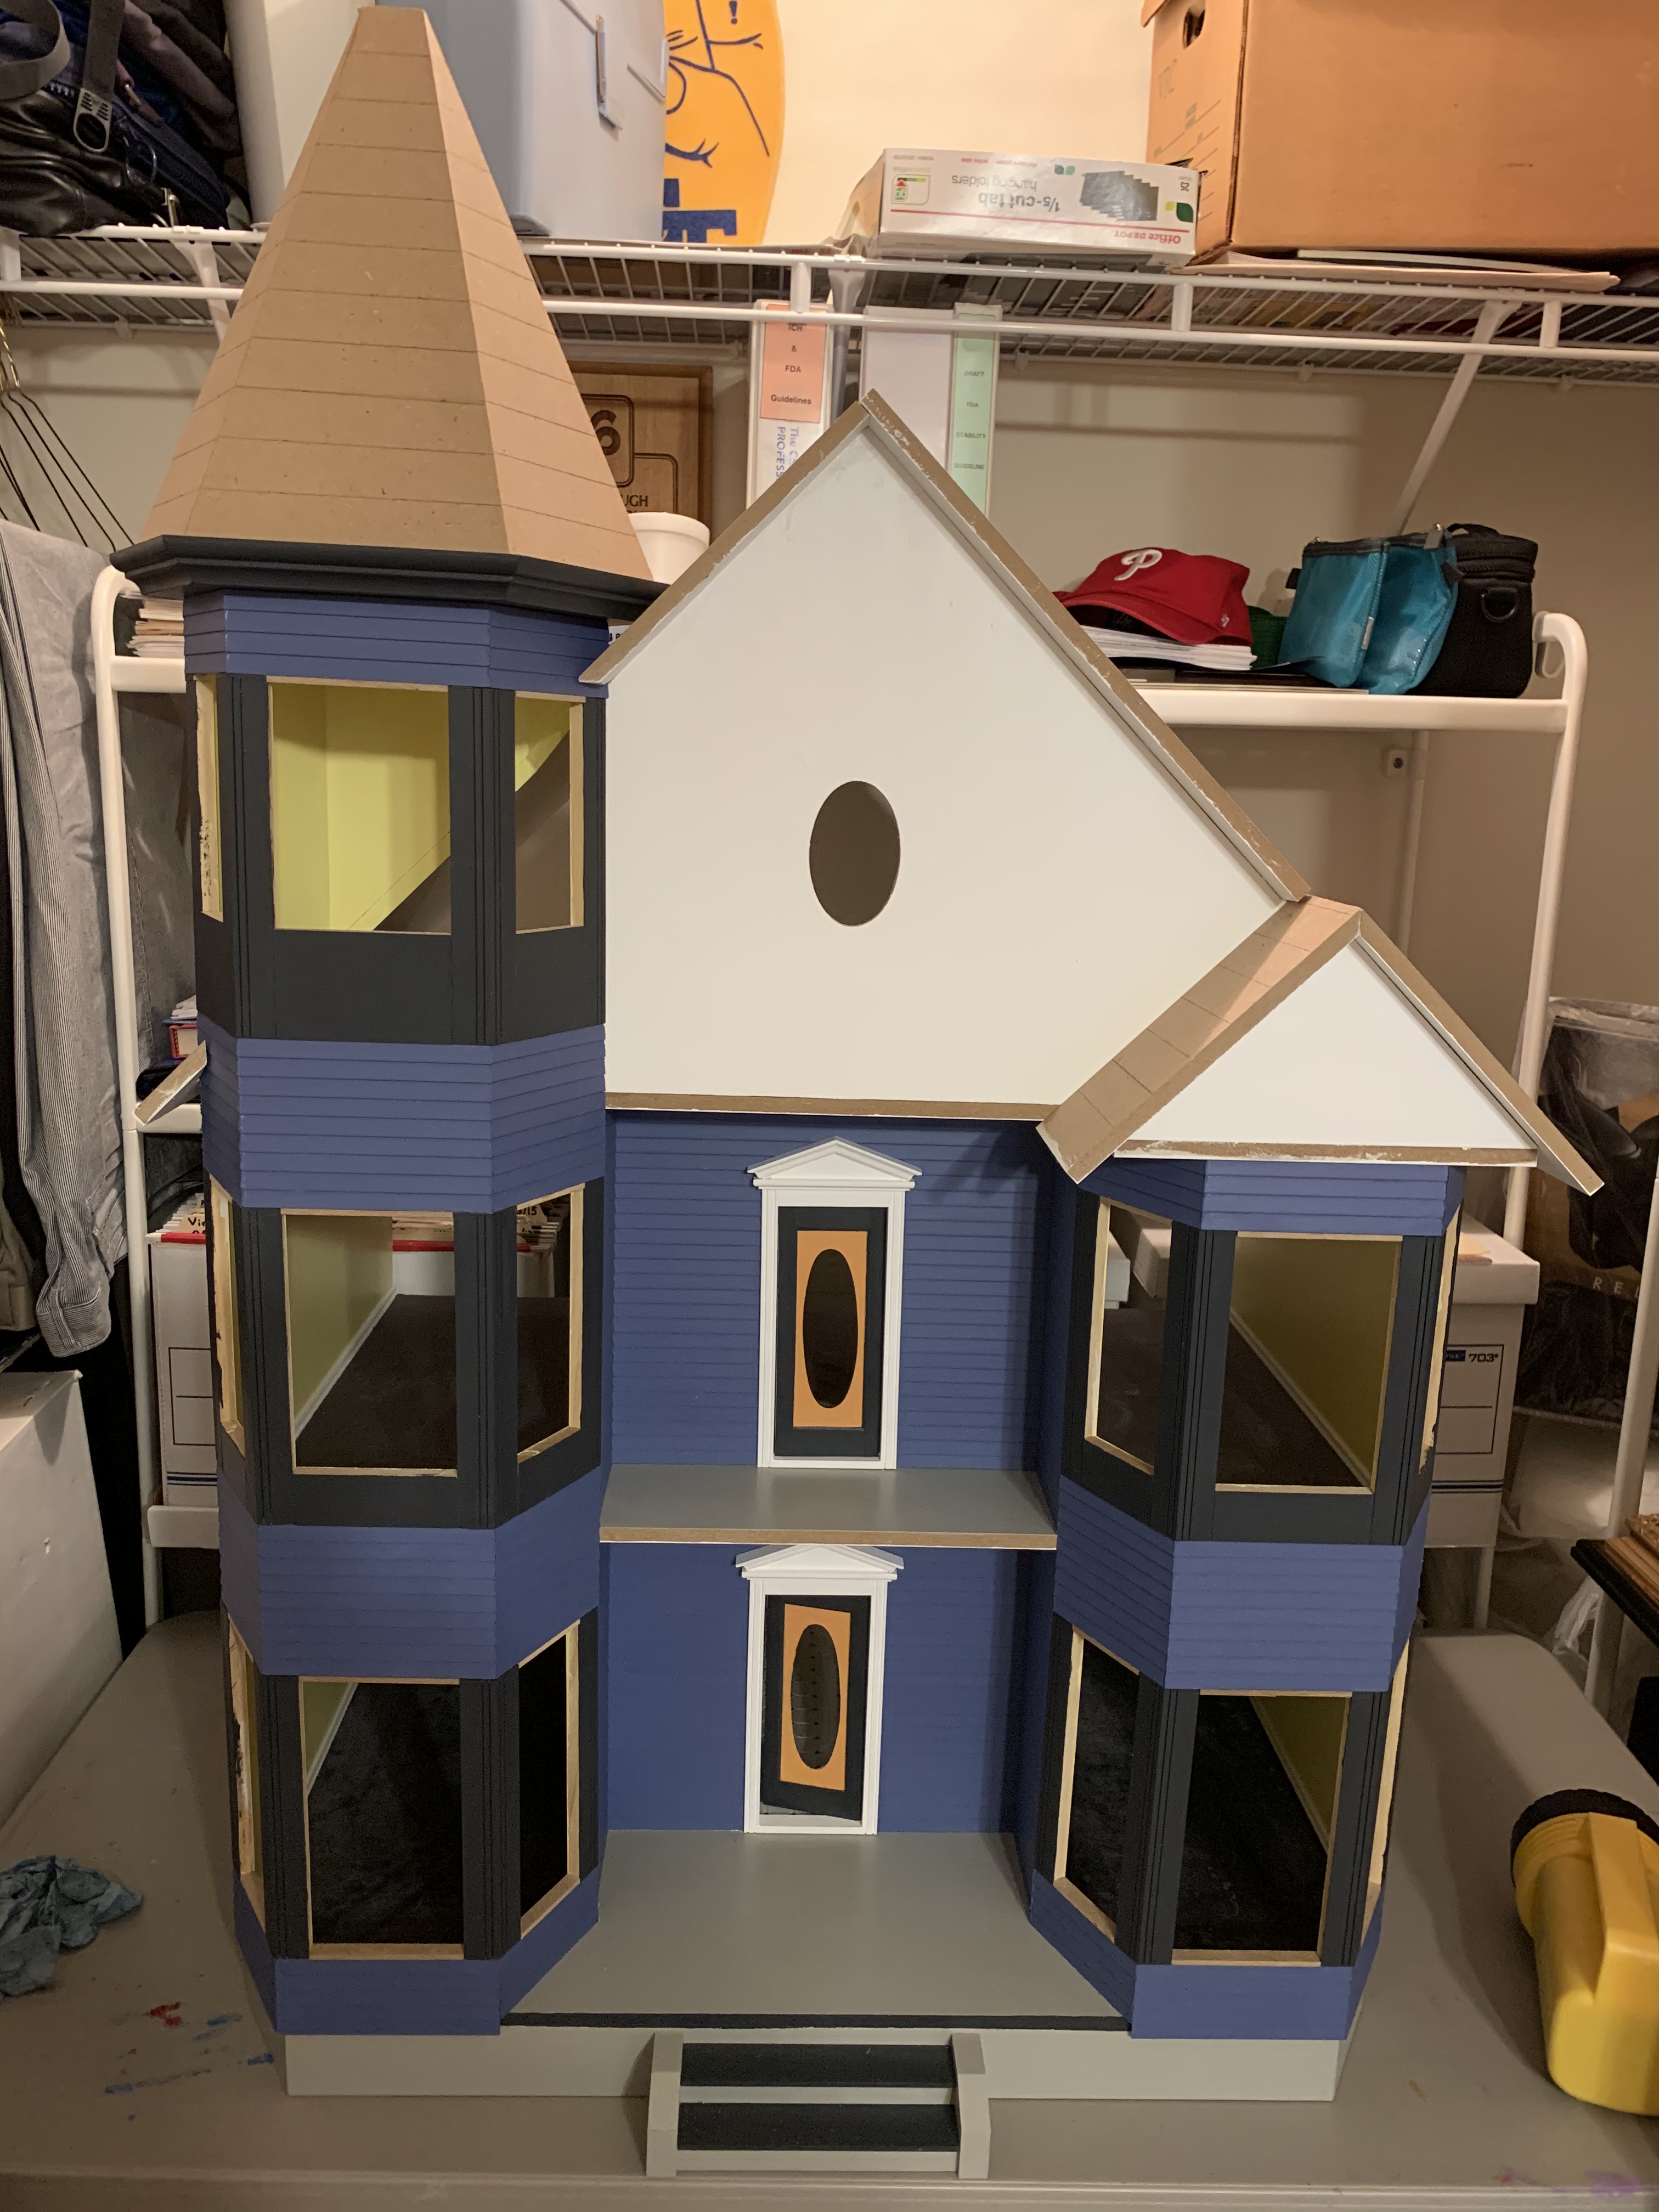
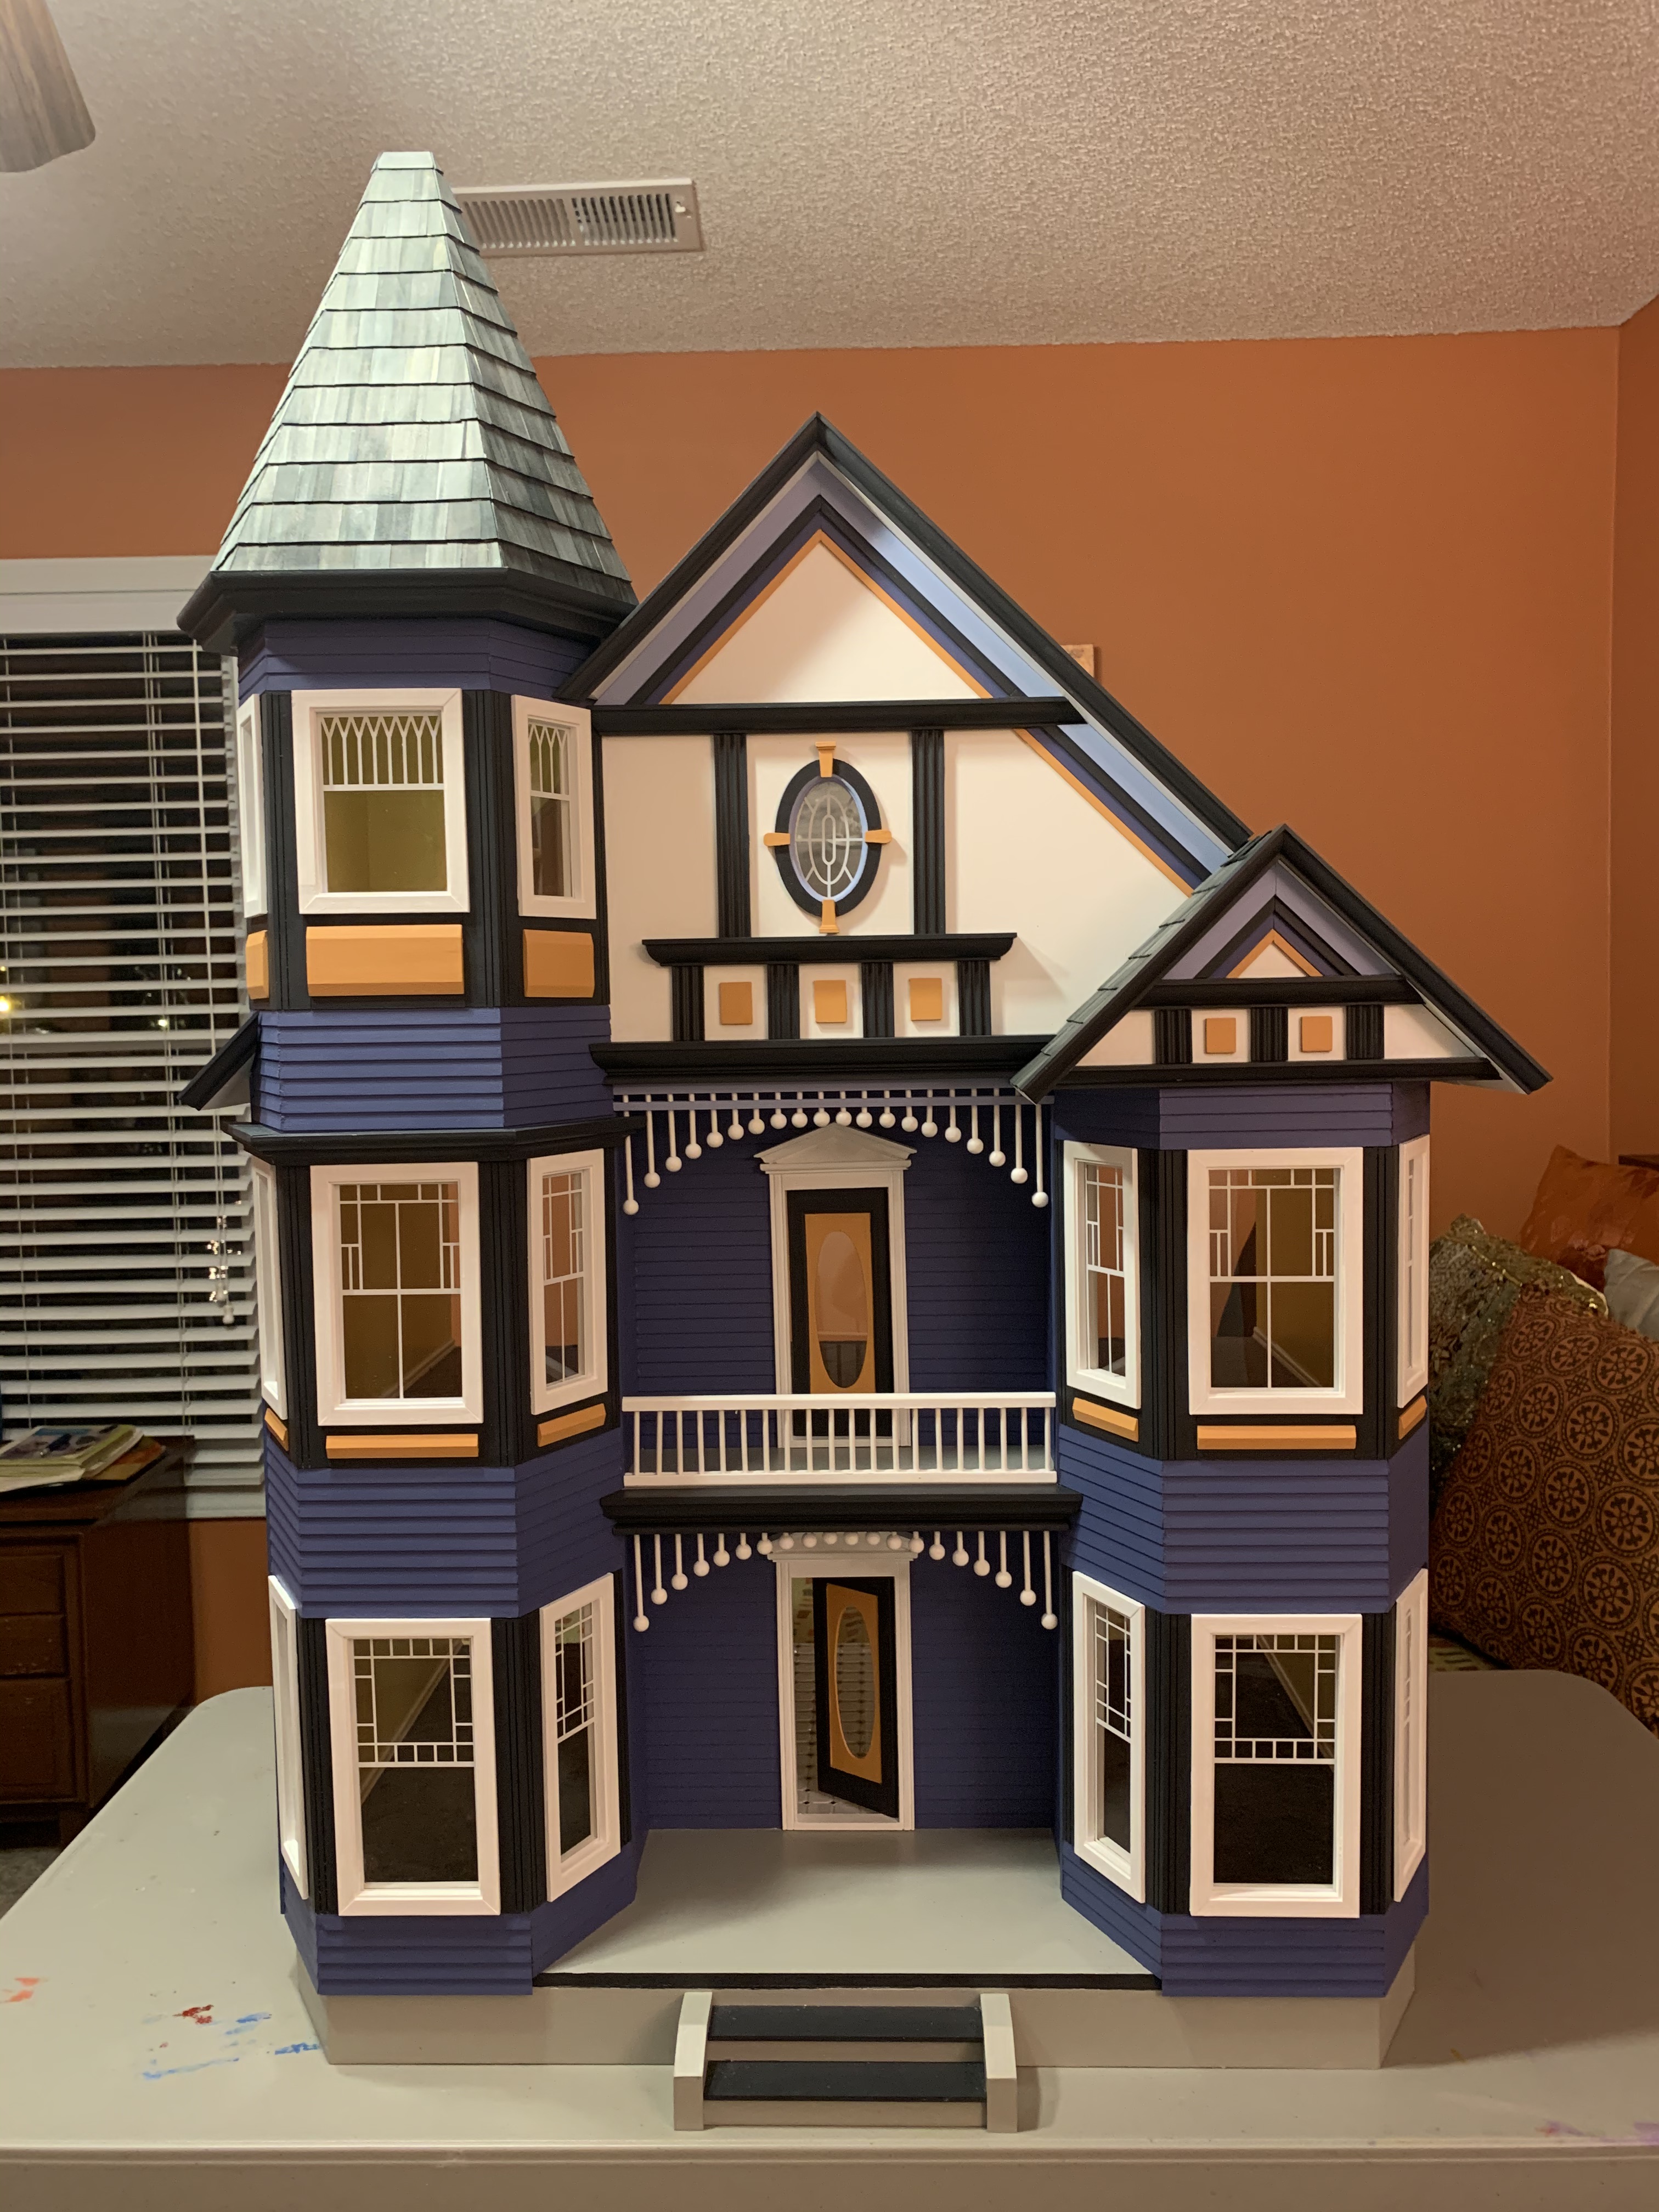
With the doll house topped out and all structural pieces installed, there remained three major steps to complete the house: installation of the windows, shingling the roof, and applying all the decorative pieces on the front façade.
If you read my previous post about building the doll house for my first granddaughter, you know when it came to building the window frames, that I chose not to follow the instructions which included a rather challenging technique whereby the four pieces were taped together, held down by several fingers from one hand while several fingers from the other hand wrapped a rubber band around the whole assembly to ensure a tight fit. Only after successfully mastering this technique was glue applied before repeating the assembly process.
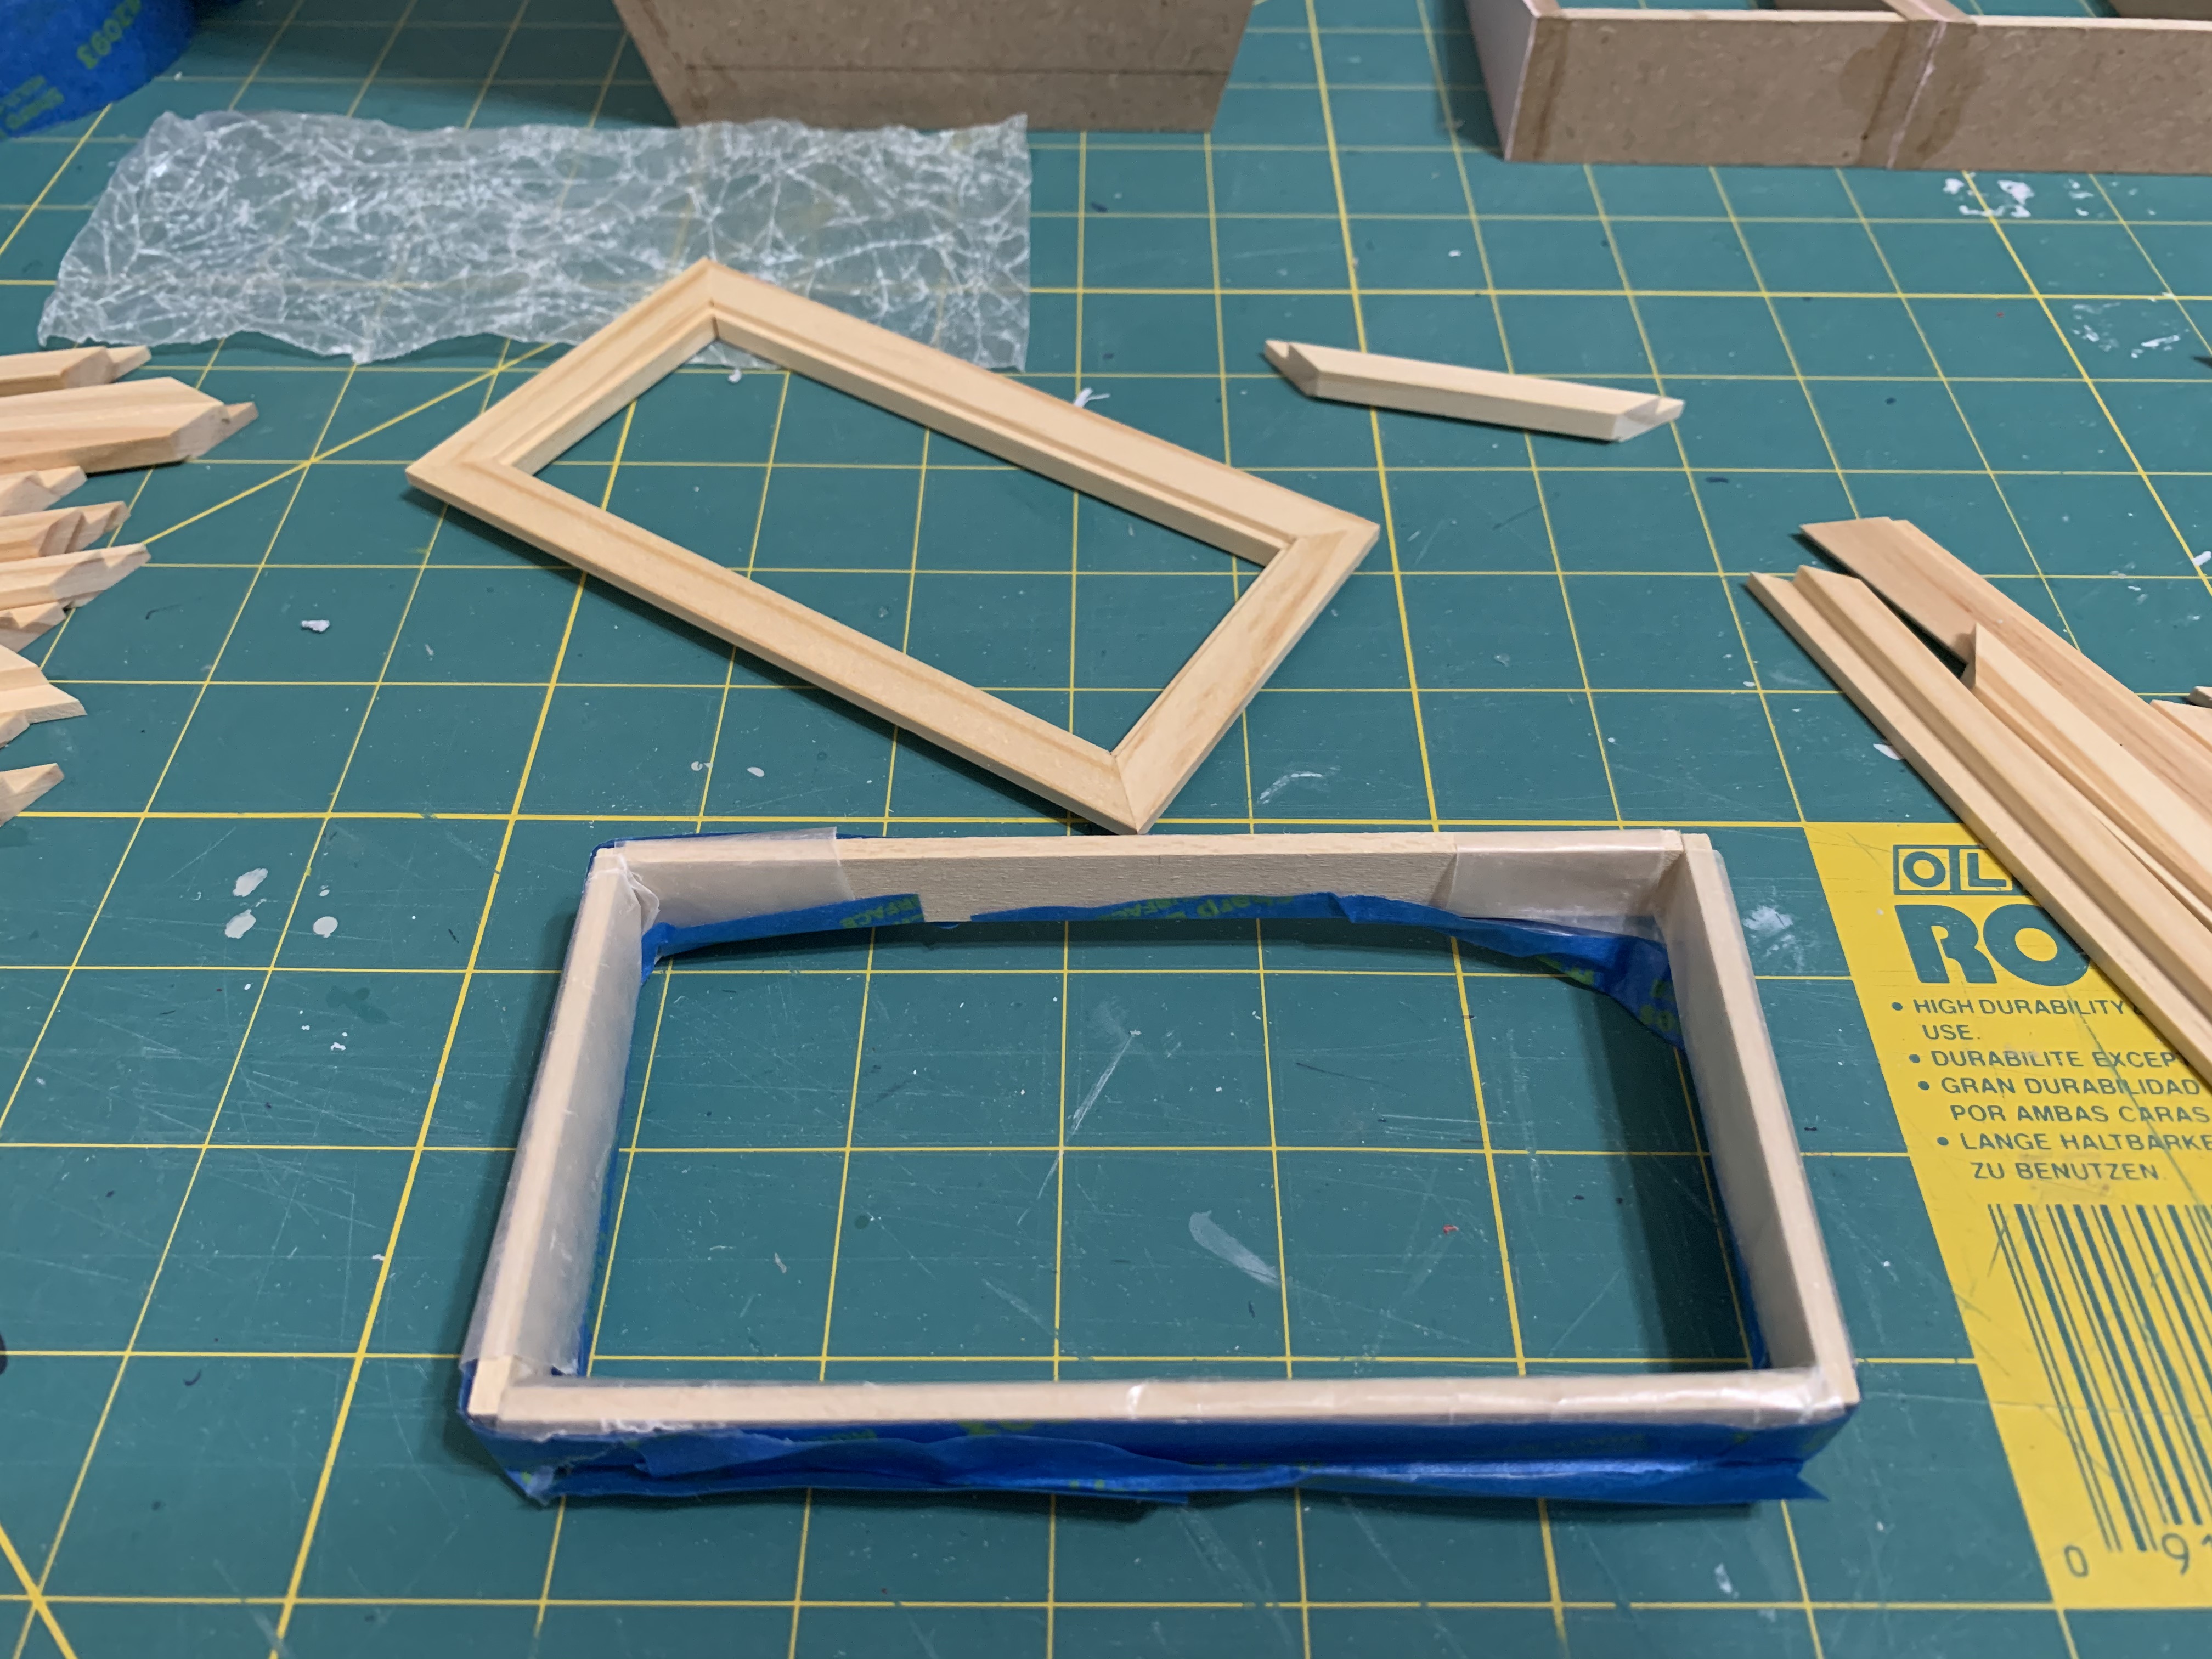
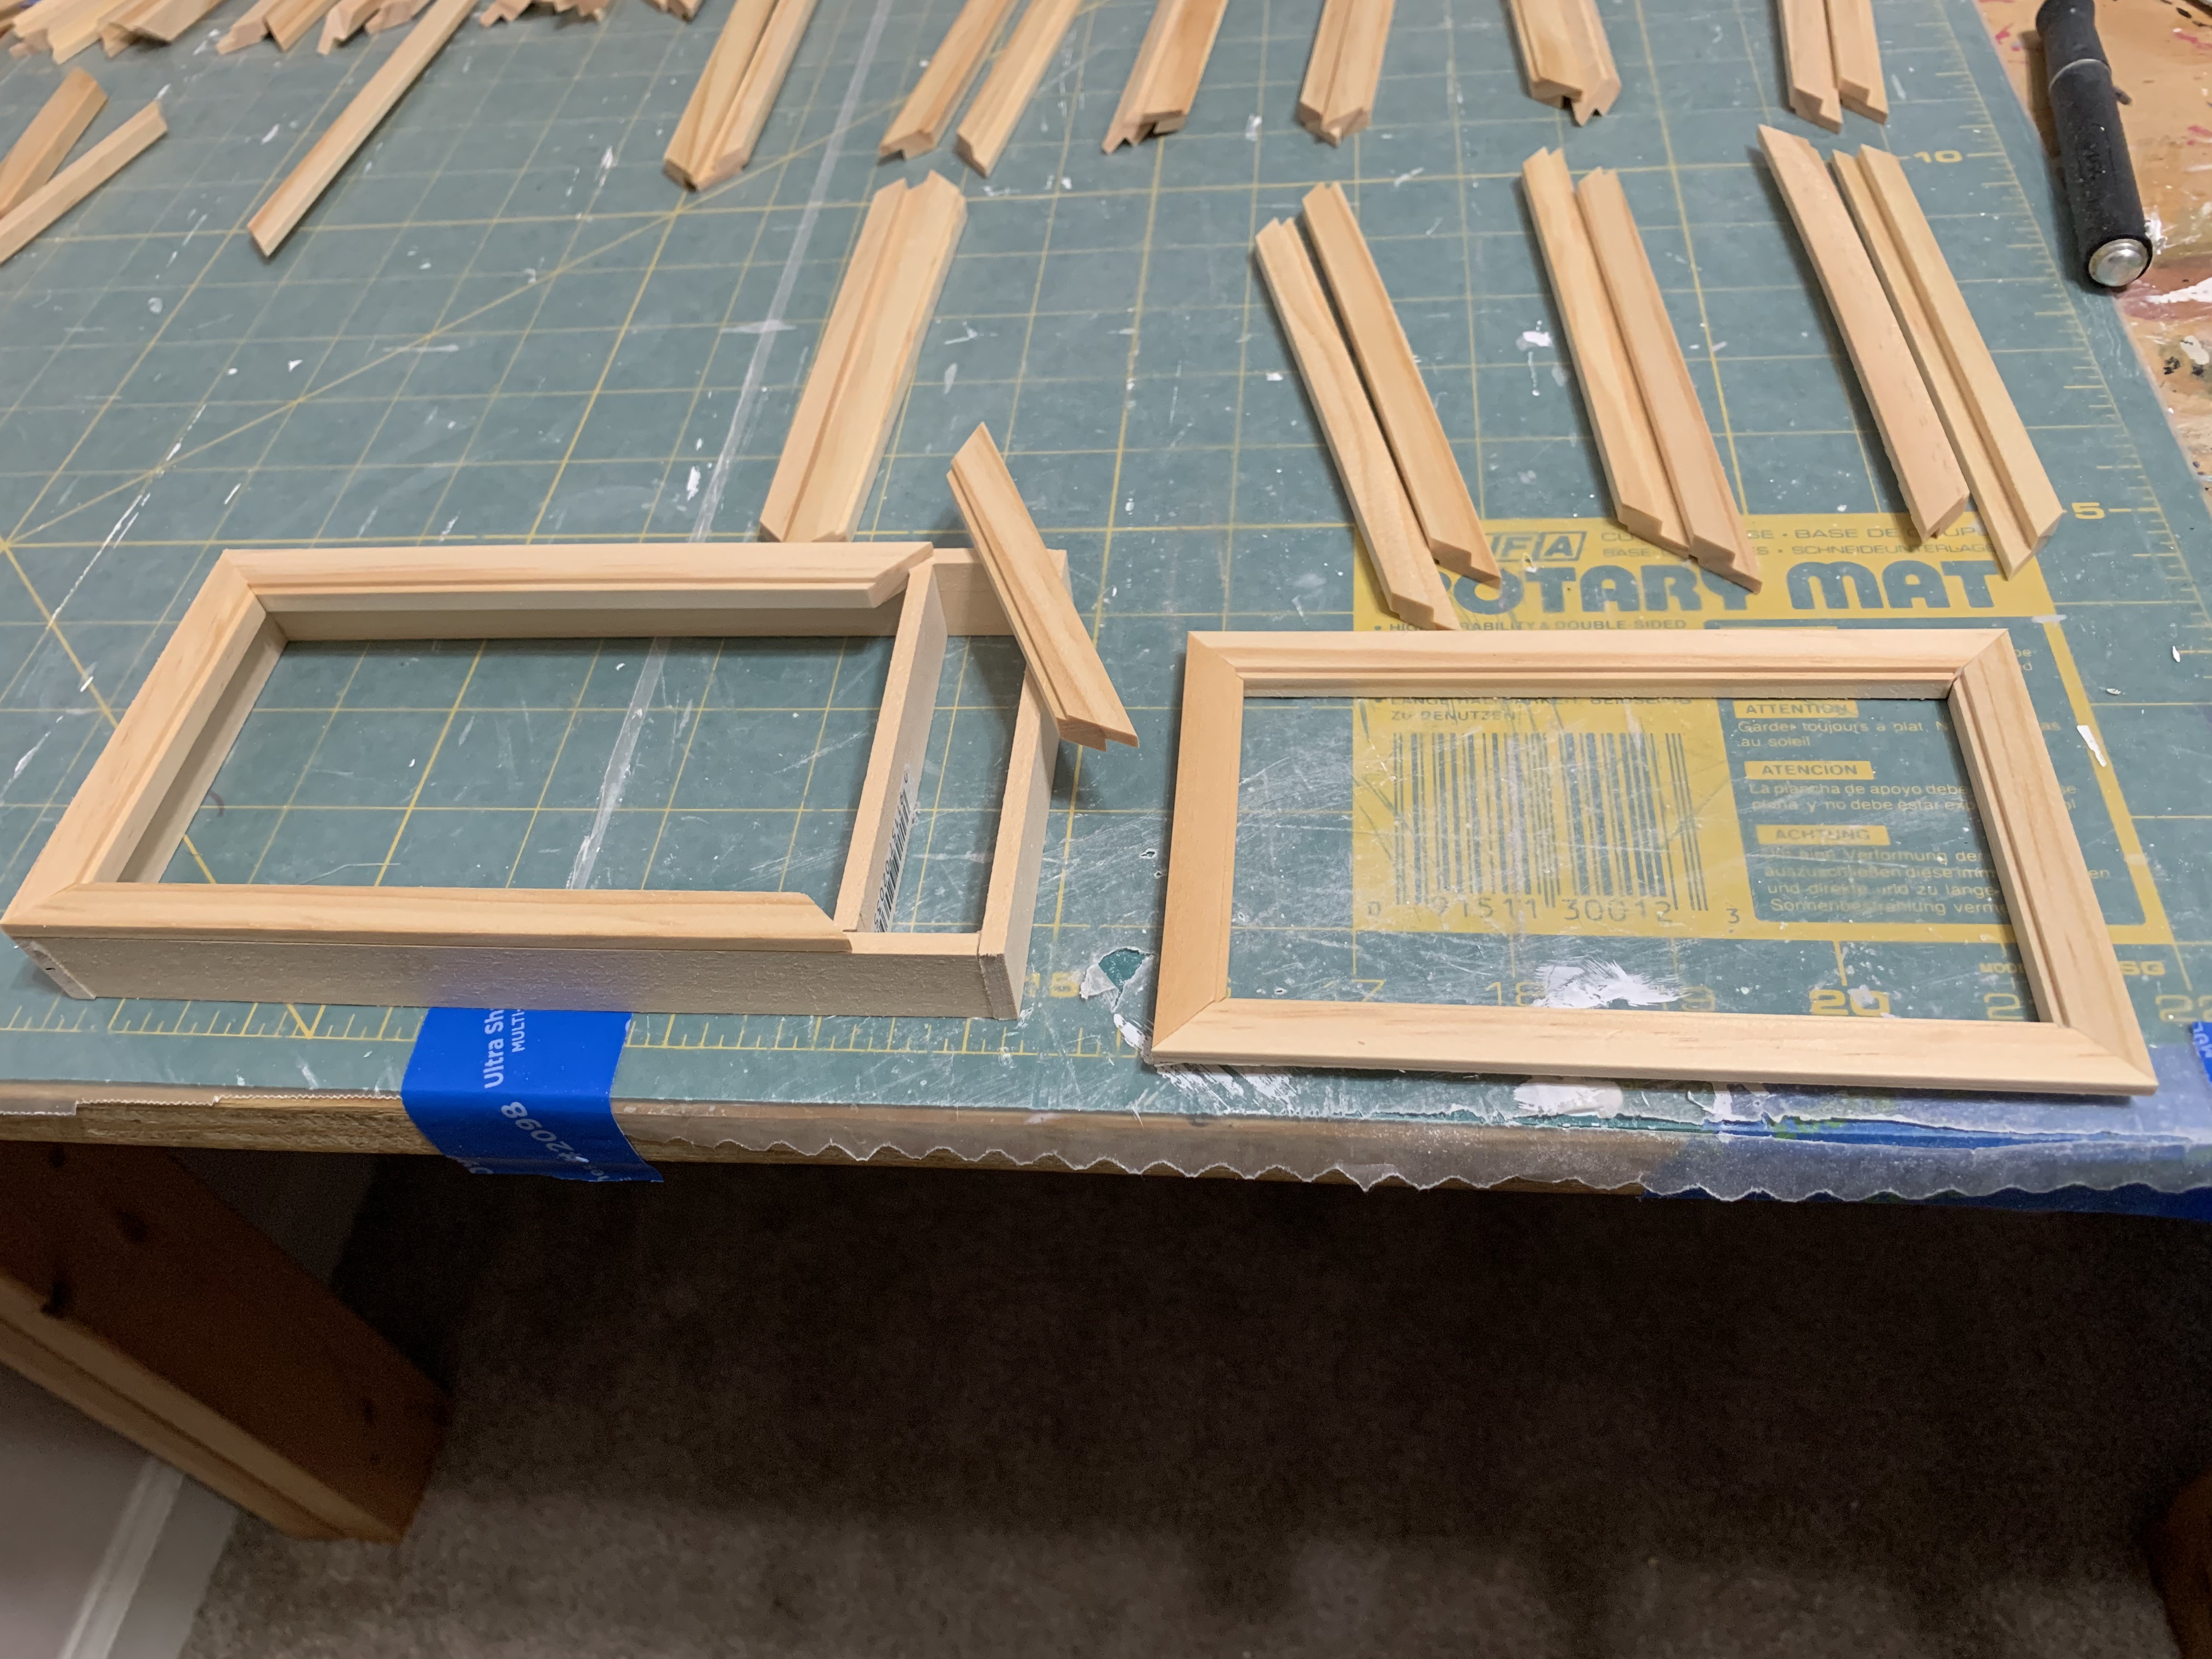
On that first doll house, my alternative idea was to build a jig upon which all four pieces could be more easily glued. This made the assembly of the eight windows (and thus 16 frames, one interior, one exterior) much faster and easier. I still had that jig but when I got to this step, I unfortunately discovered that the windows in this second house were not the same size as the first doll house. In fact, not only were the windows not the same size, this house had six different size windows with a total of 15 windows (and thus 30 frames), almost twice as many as the first house.
Not to be deterred, I knew I could build another jig. I figured that it had to be at least big enough to form the largest frame, those on the first floor, and then I could size it down as I progressed to the smaller windows.

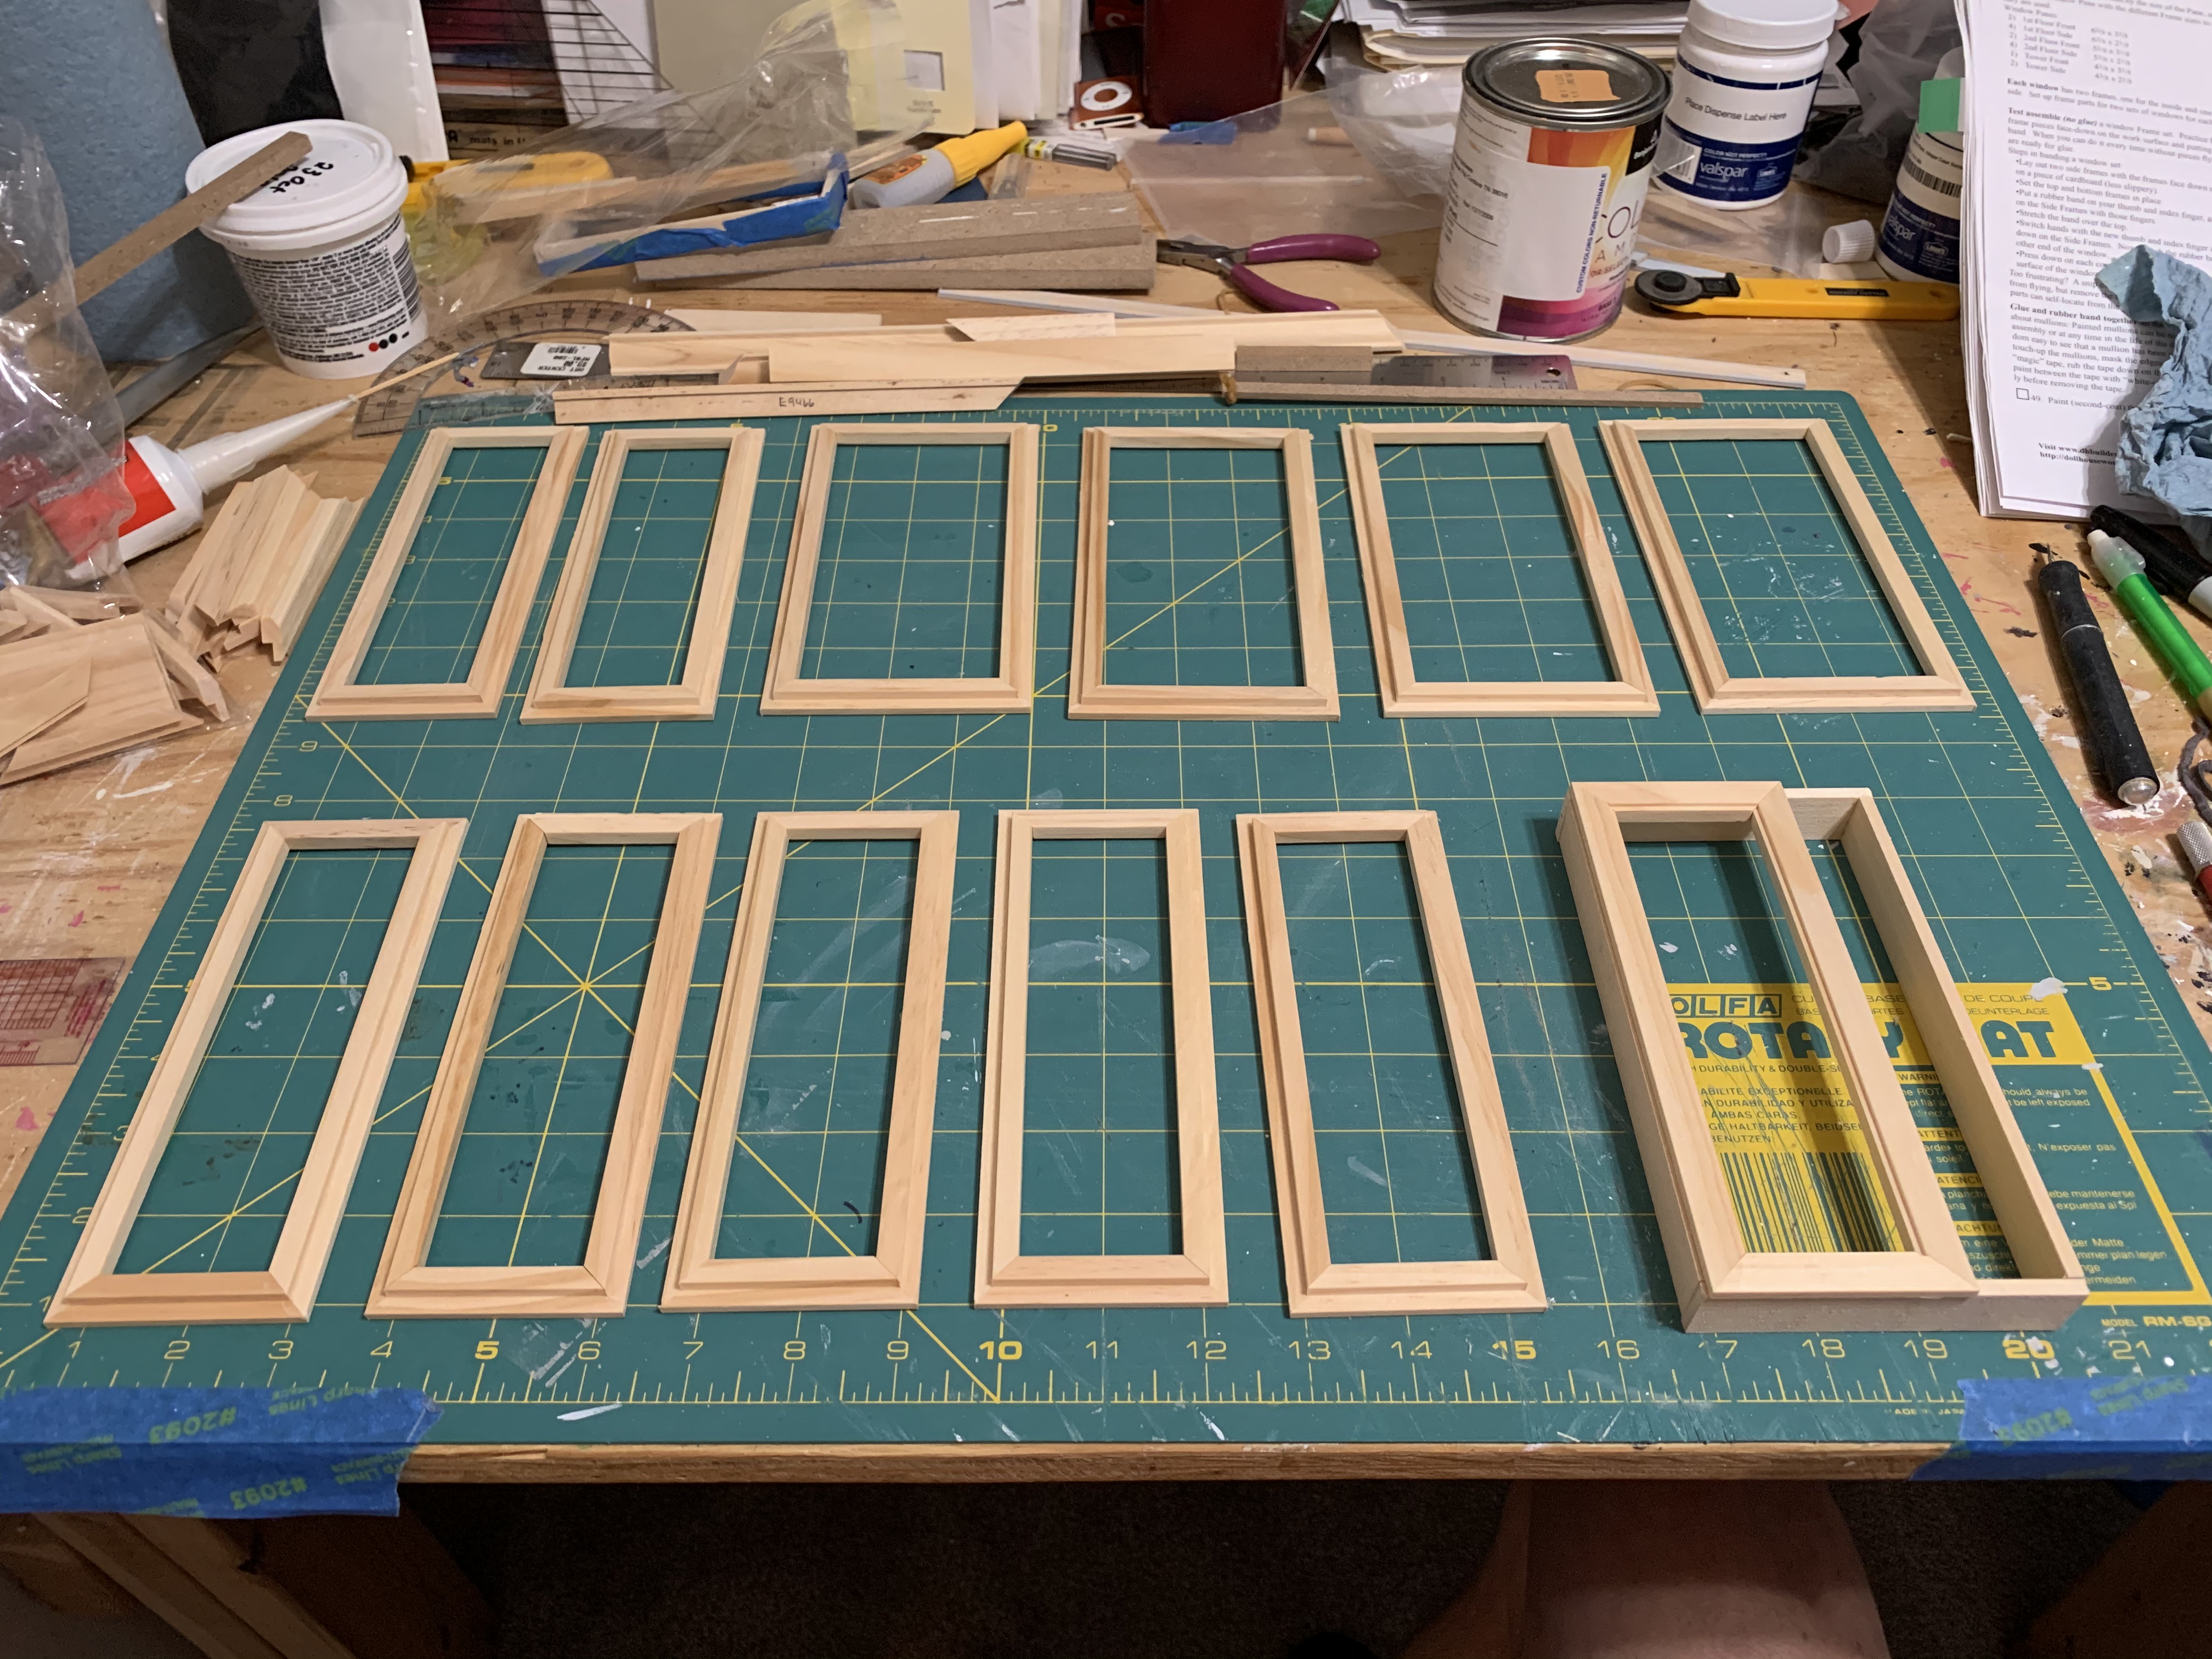
All of the windows on the first floor were the same height and only differed in width between the two front windows and the four side windows. To prevent the window frames from being glued to the jig, I left them in there for just a few minutes until the glue set up (using a fast-drying glue here was critical). I made the largest four windows and when I got to the narrower windows, turns out these were easier to remove from the jig as I had a whole side to use as leverage. In less than about 30 minutes, I had all 12 frames finished for the first floor.
I allowed the glue to set up overnight and then applied three coats of white paint.
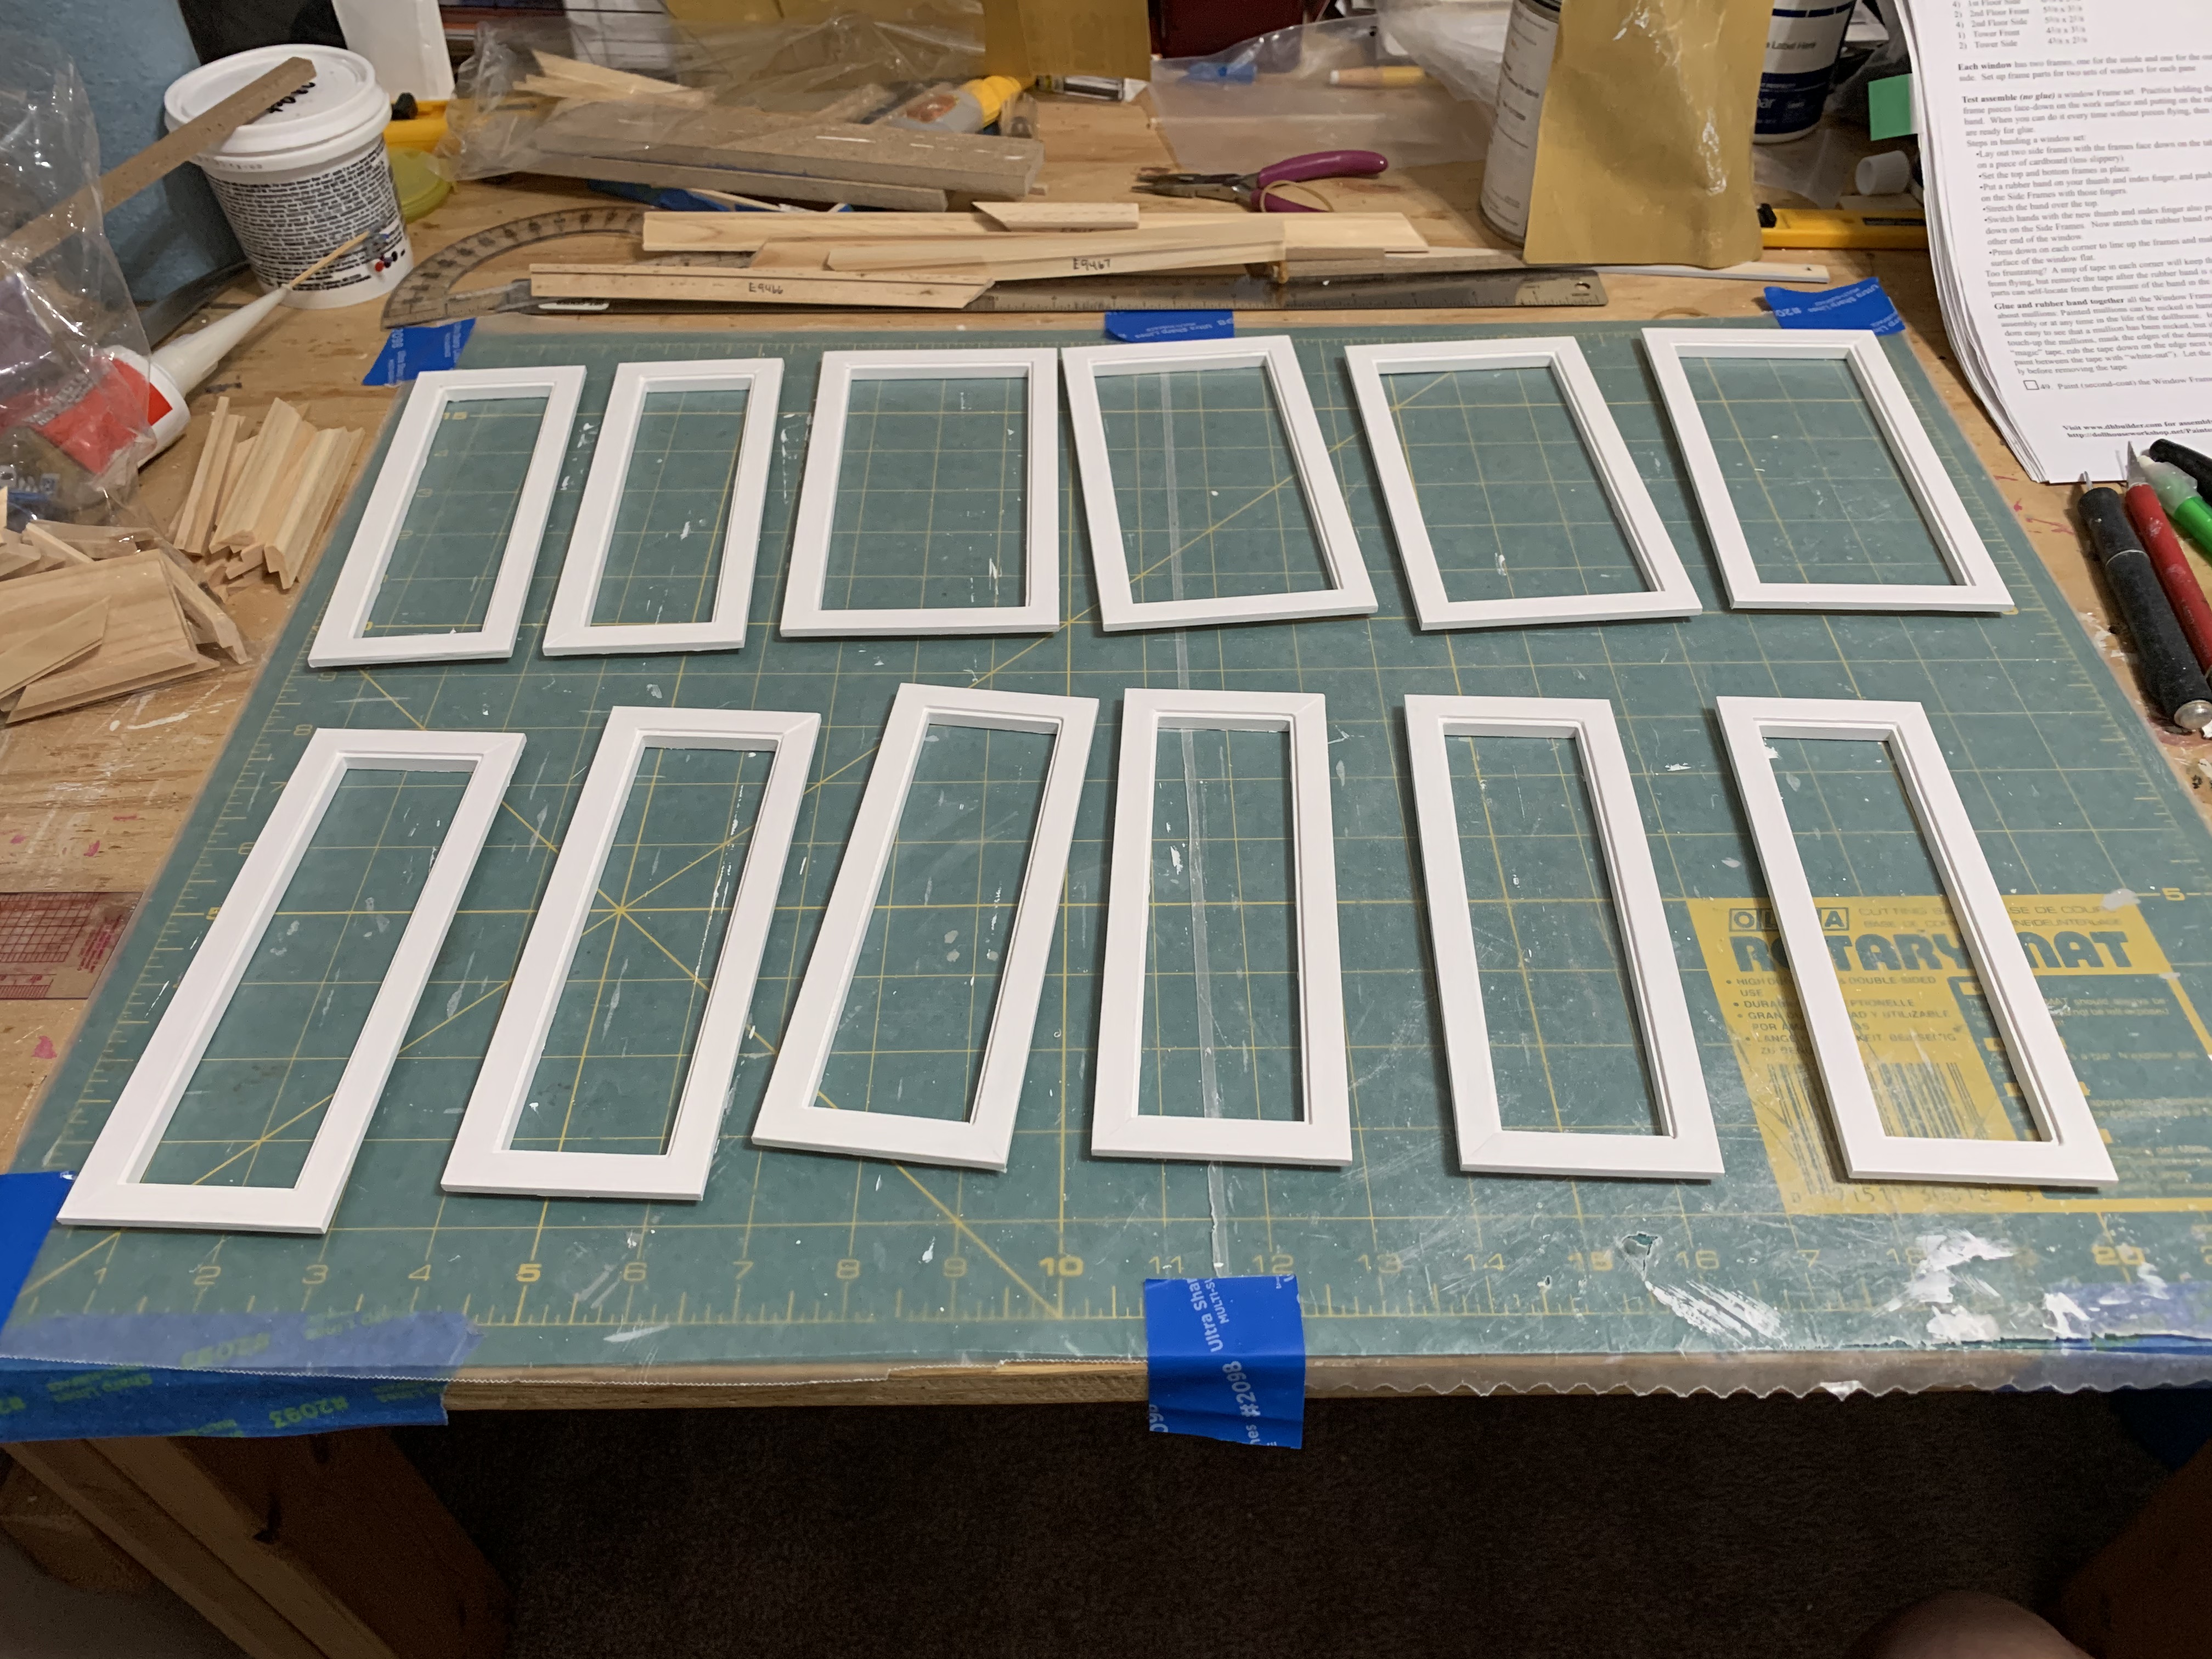
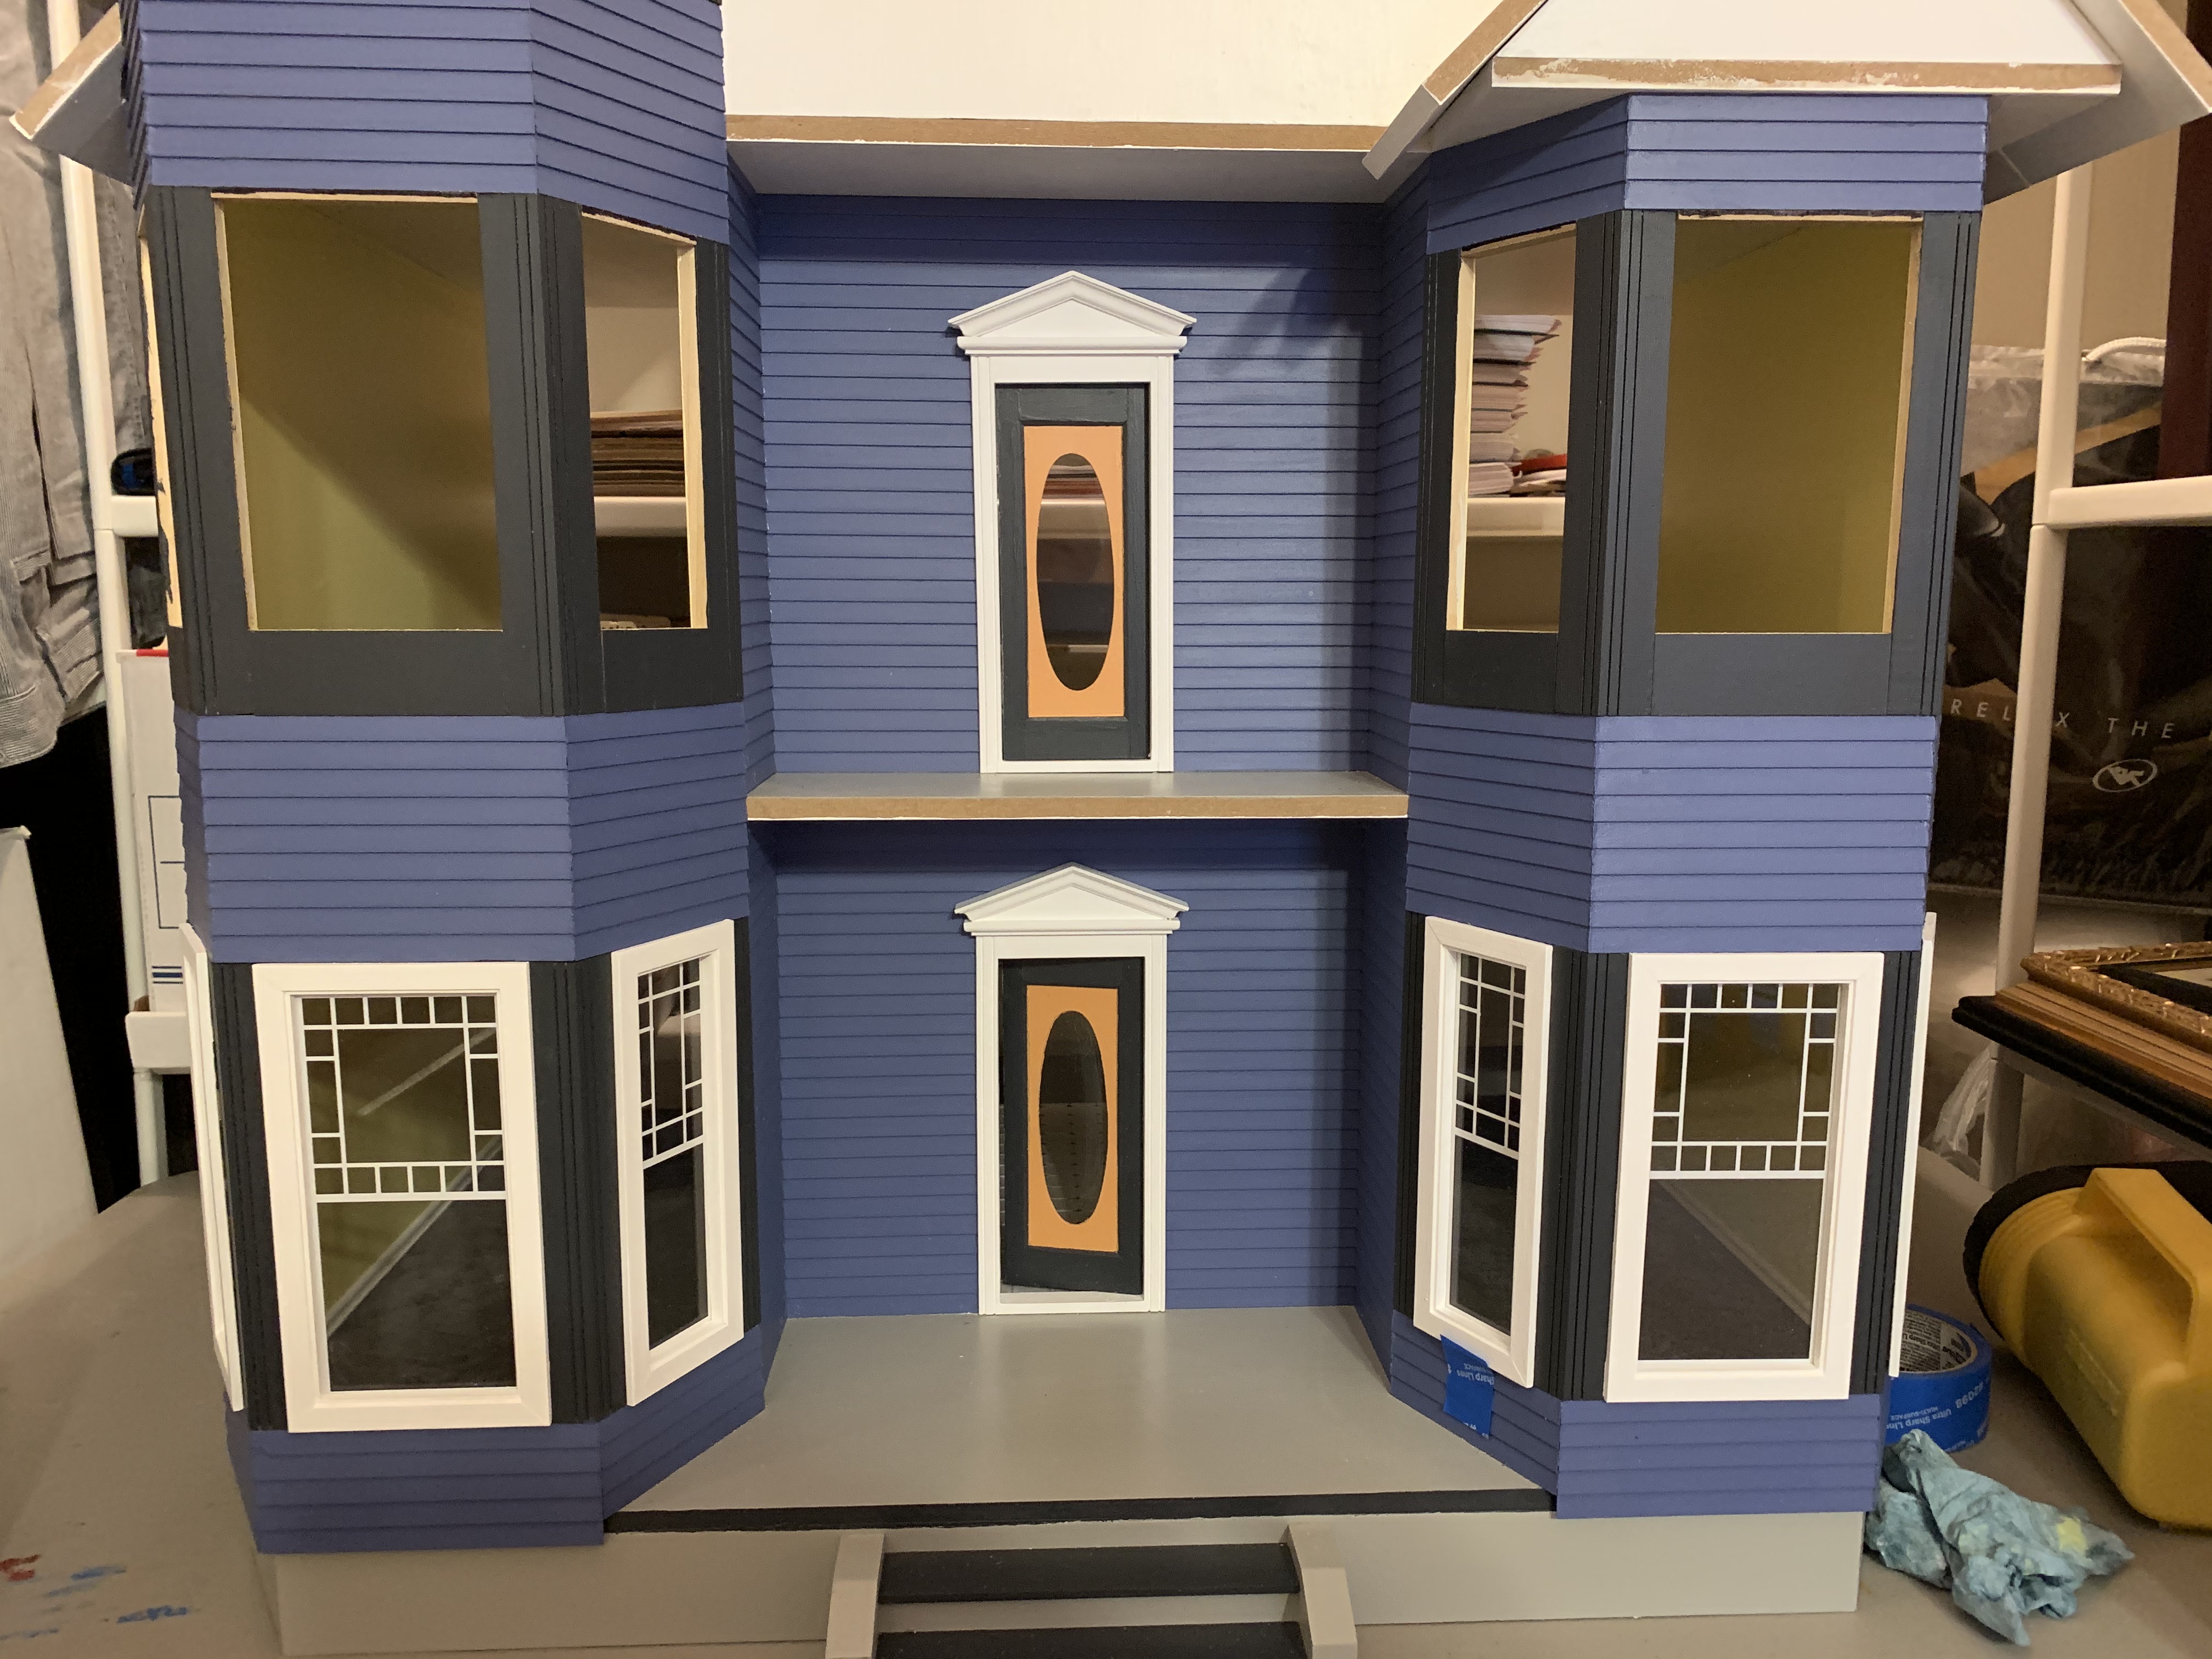
Next the windowpane was taped to the back of the frame and then the frame glued into place on the first floor leaving a really nice look.
When I went to size down my jig, I cut a piece of the same wood so tight, that I didn’t have to glue it in place which made it easy to readjust for the smaller third floor windows as well.
In no time I had the next set of 12 frames built.
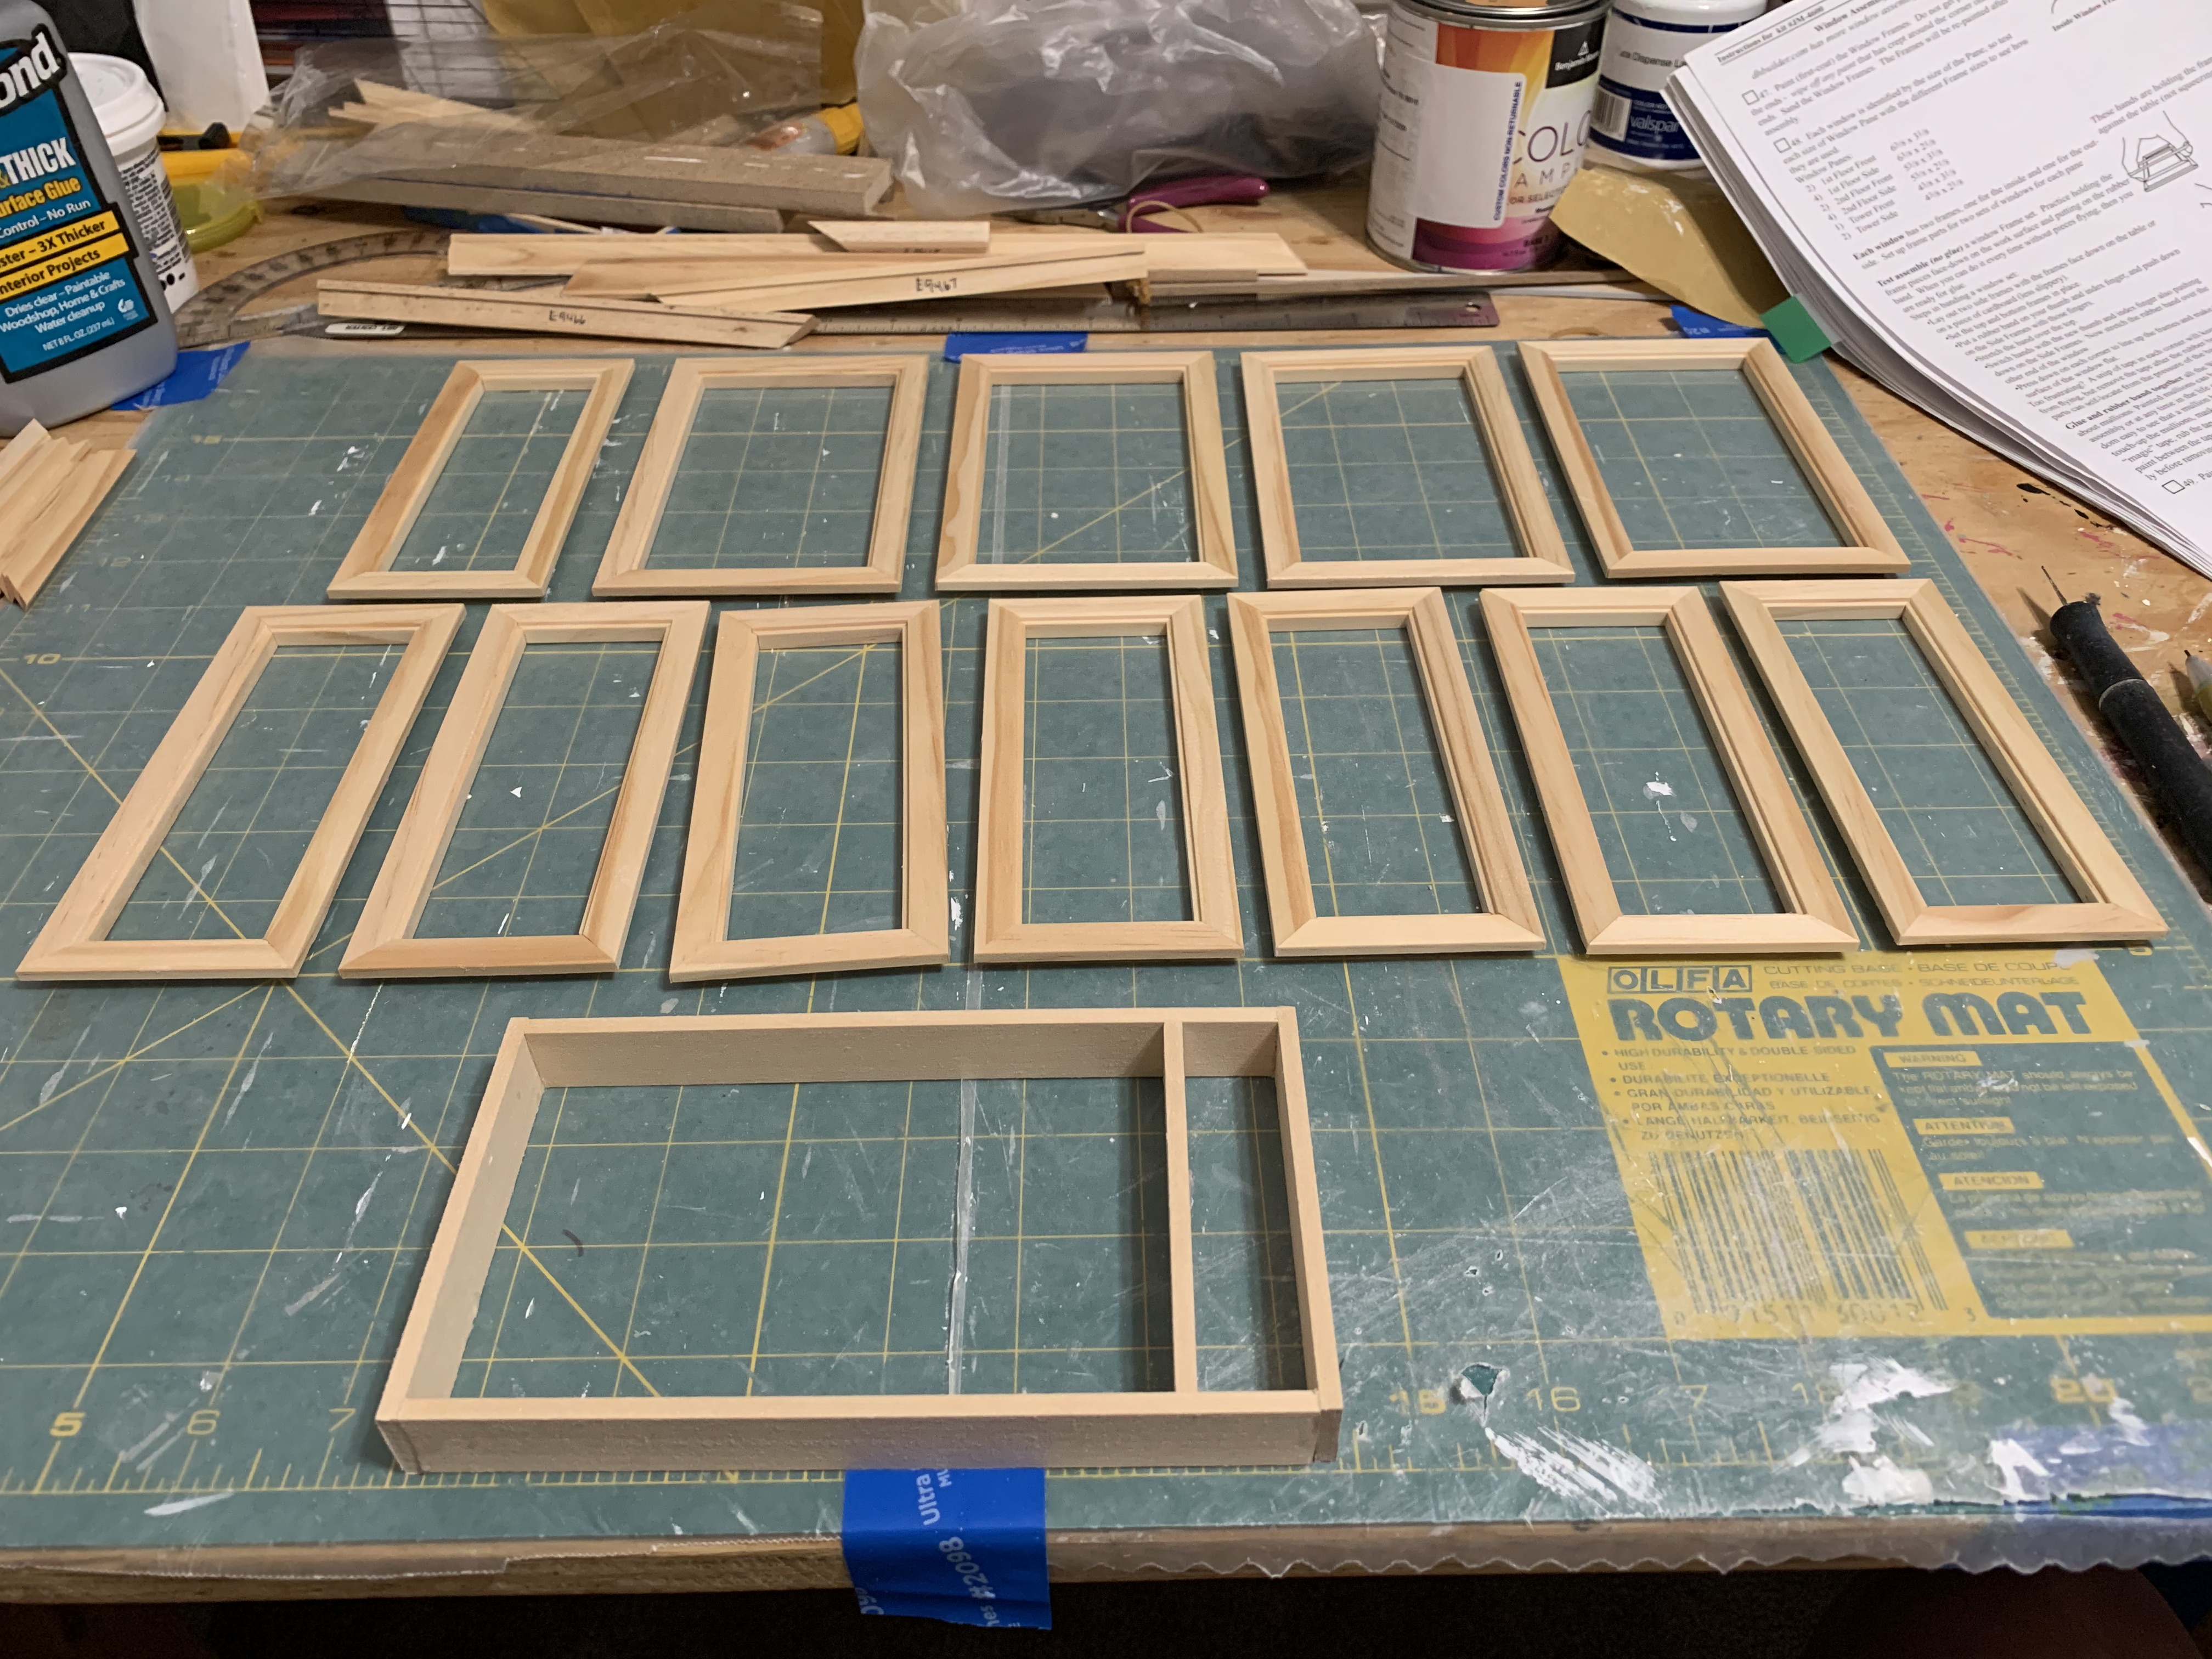
Repeating the painting and installation process for the 2nd and 3rd floors gave the house an almost finished look.

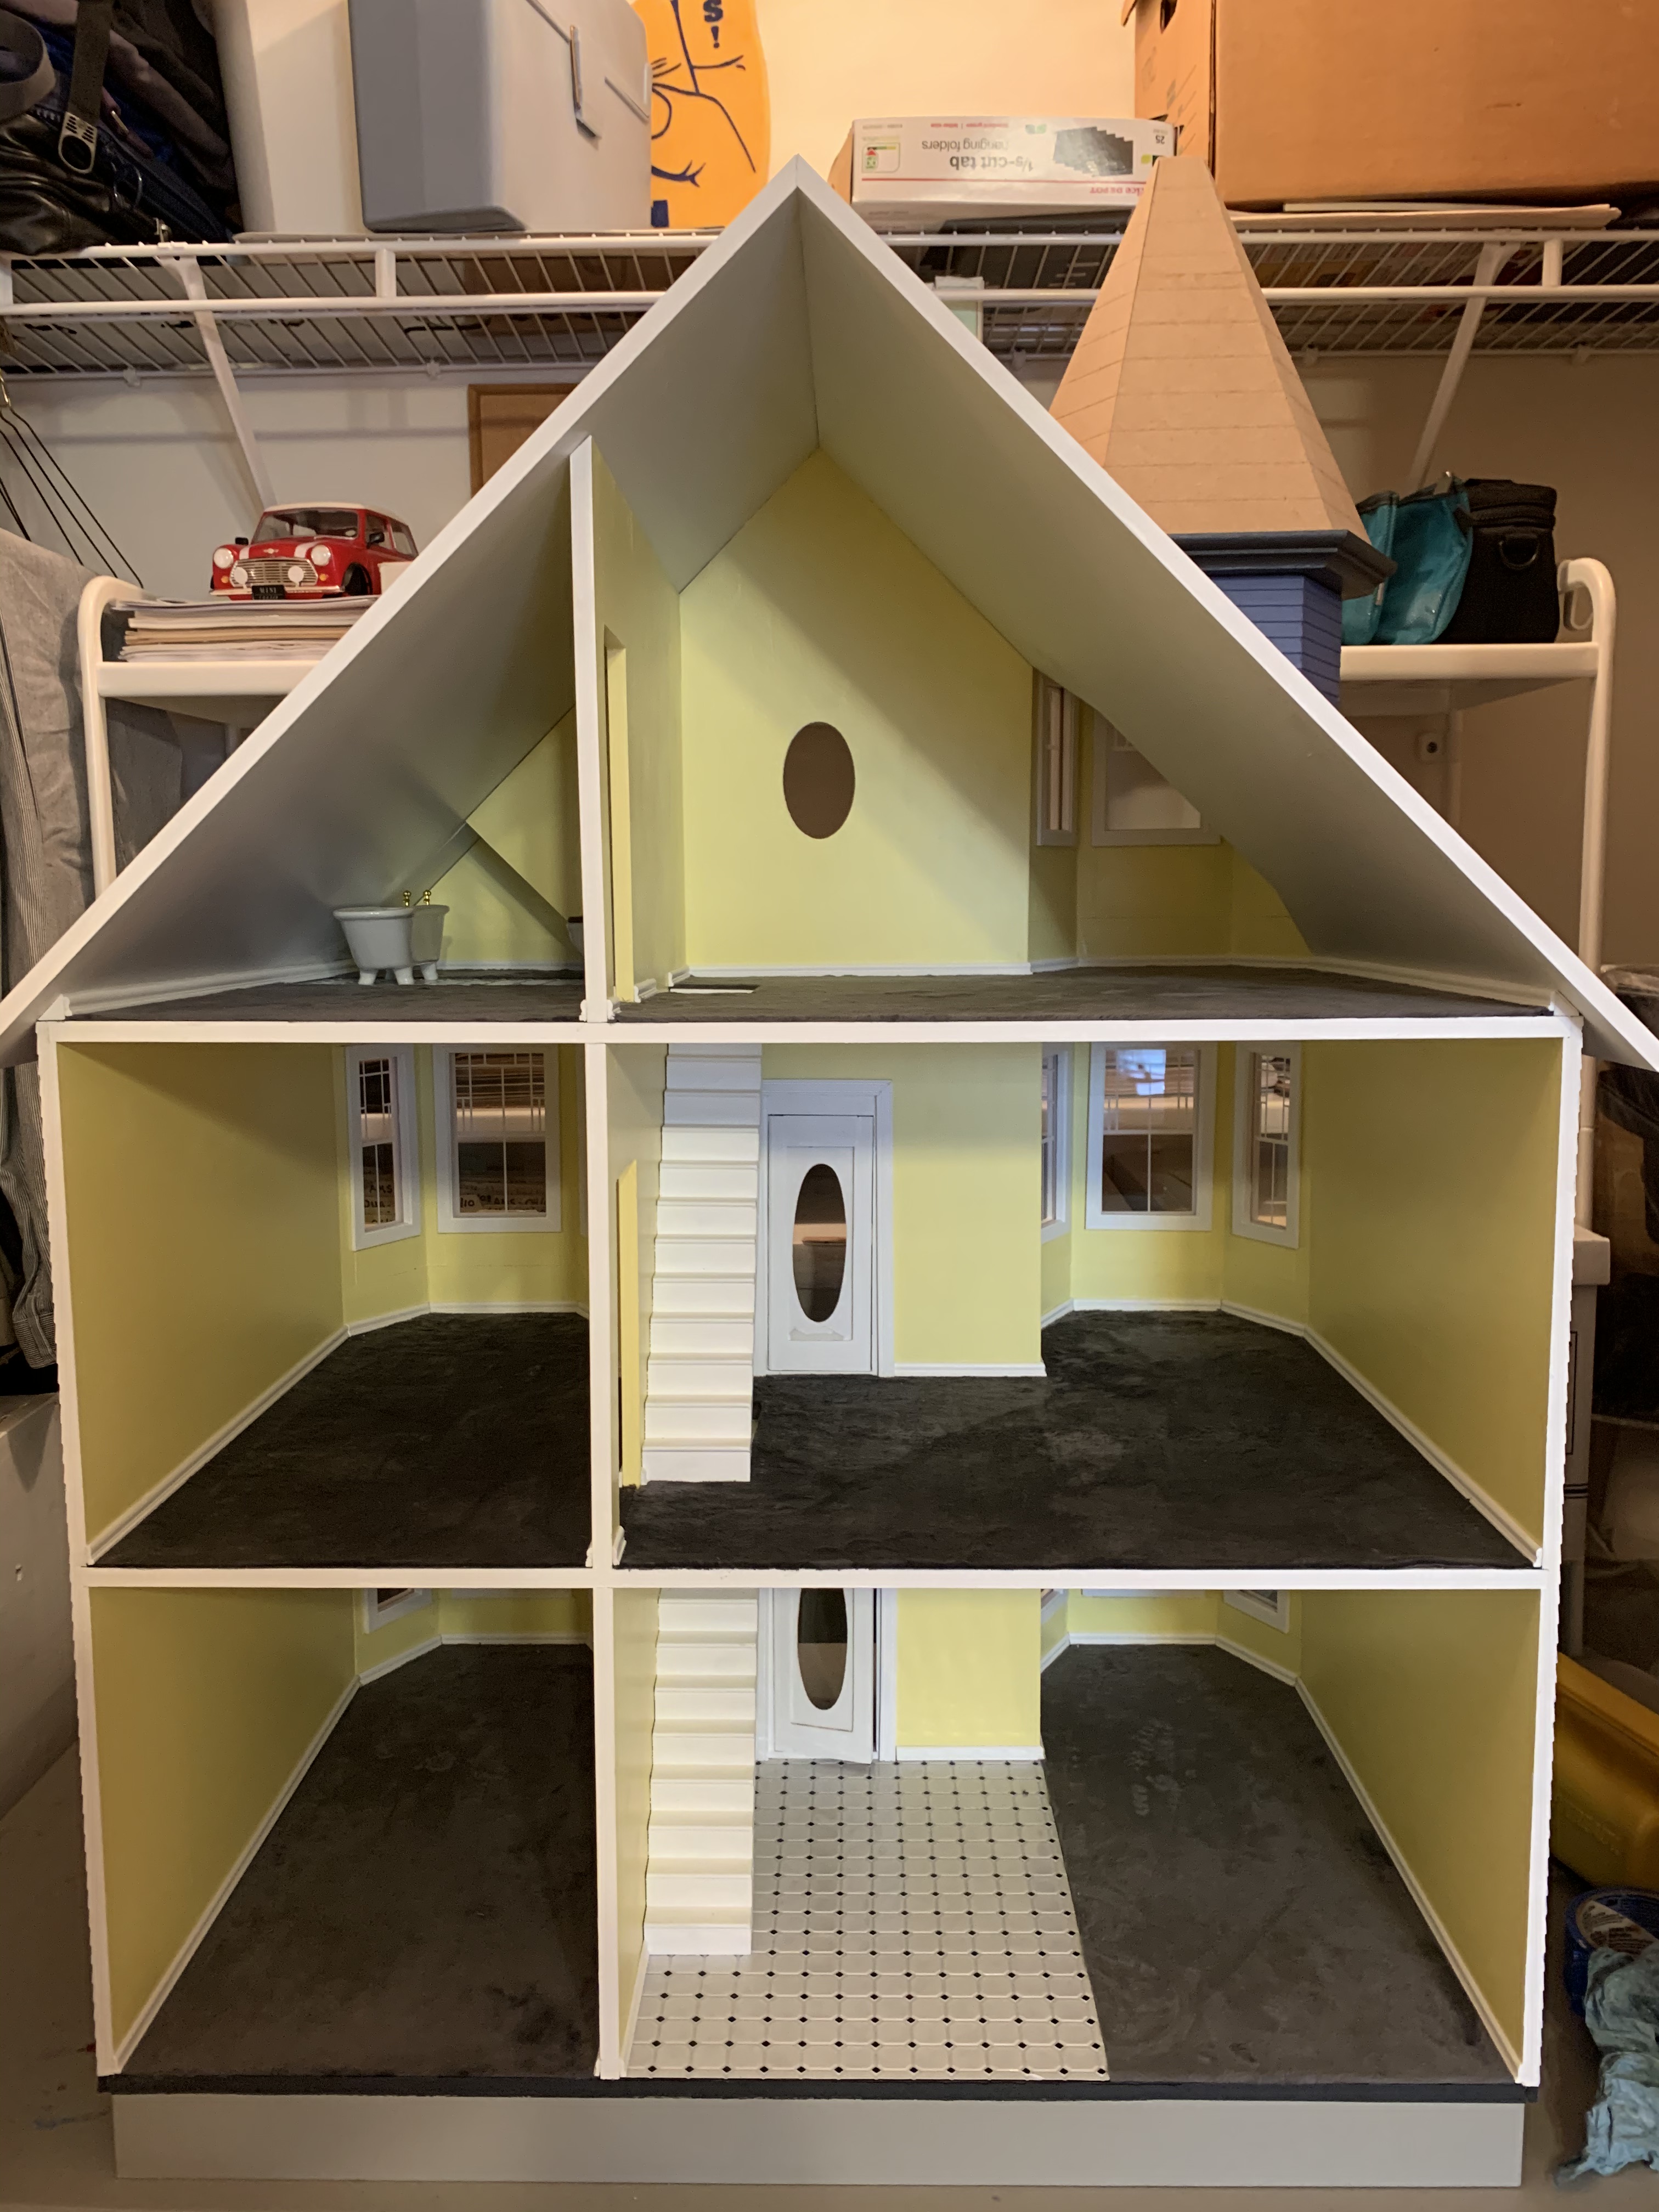
After the exterior frames were installed on each floor, I added the interior frames, which with the exception of the oval shaped attic window, meant the interior of the doll house was now complete.
Of the two remaining major steps, I chose to next start with the addition of the decorative trim on the front façade leaving the roof shingling step for last.

Installing the precut pieces of trim went fairly straight forward with just a few hiccups along the way. However, the ridgeline trim was much more problematic since none of it was pre-cut.
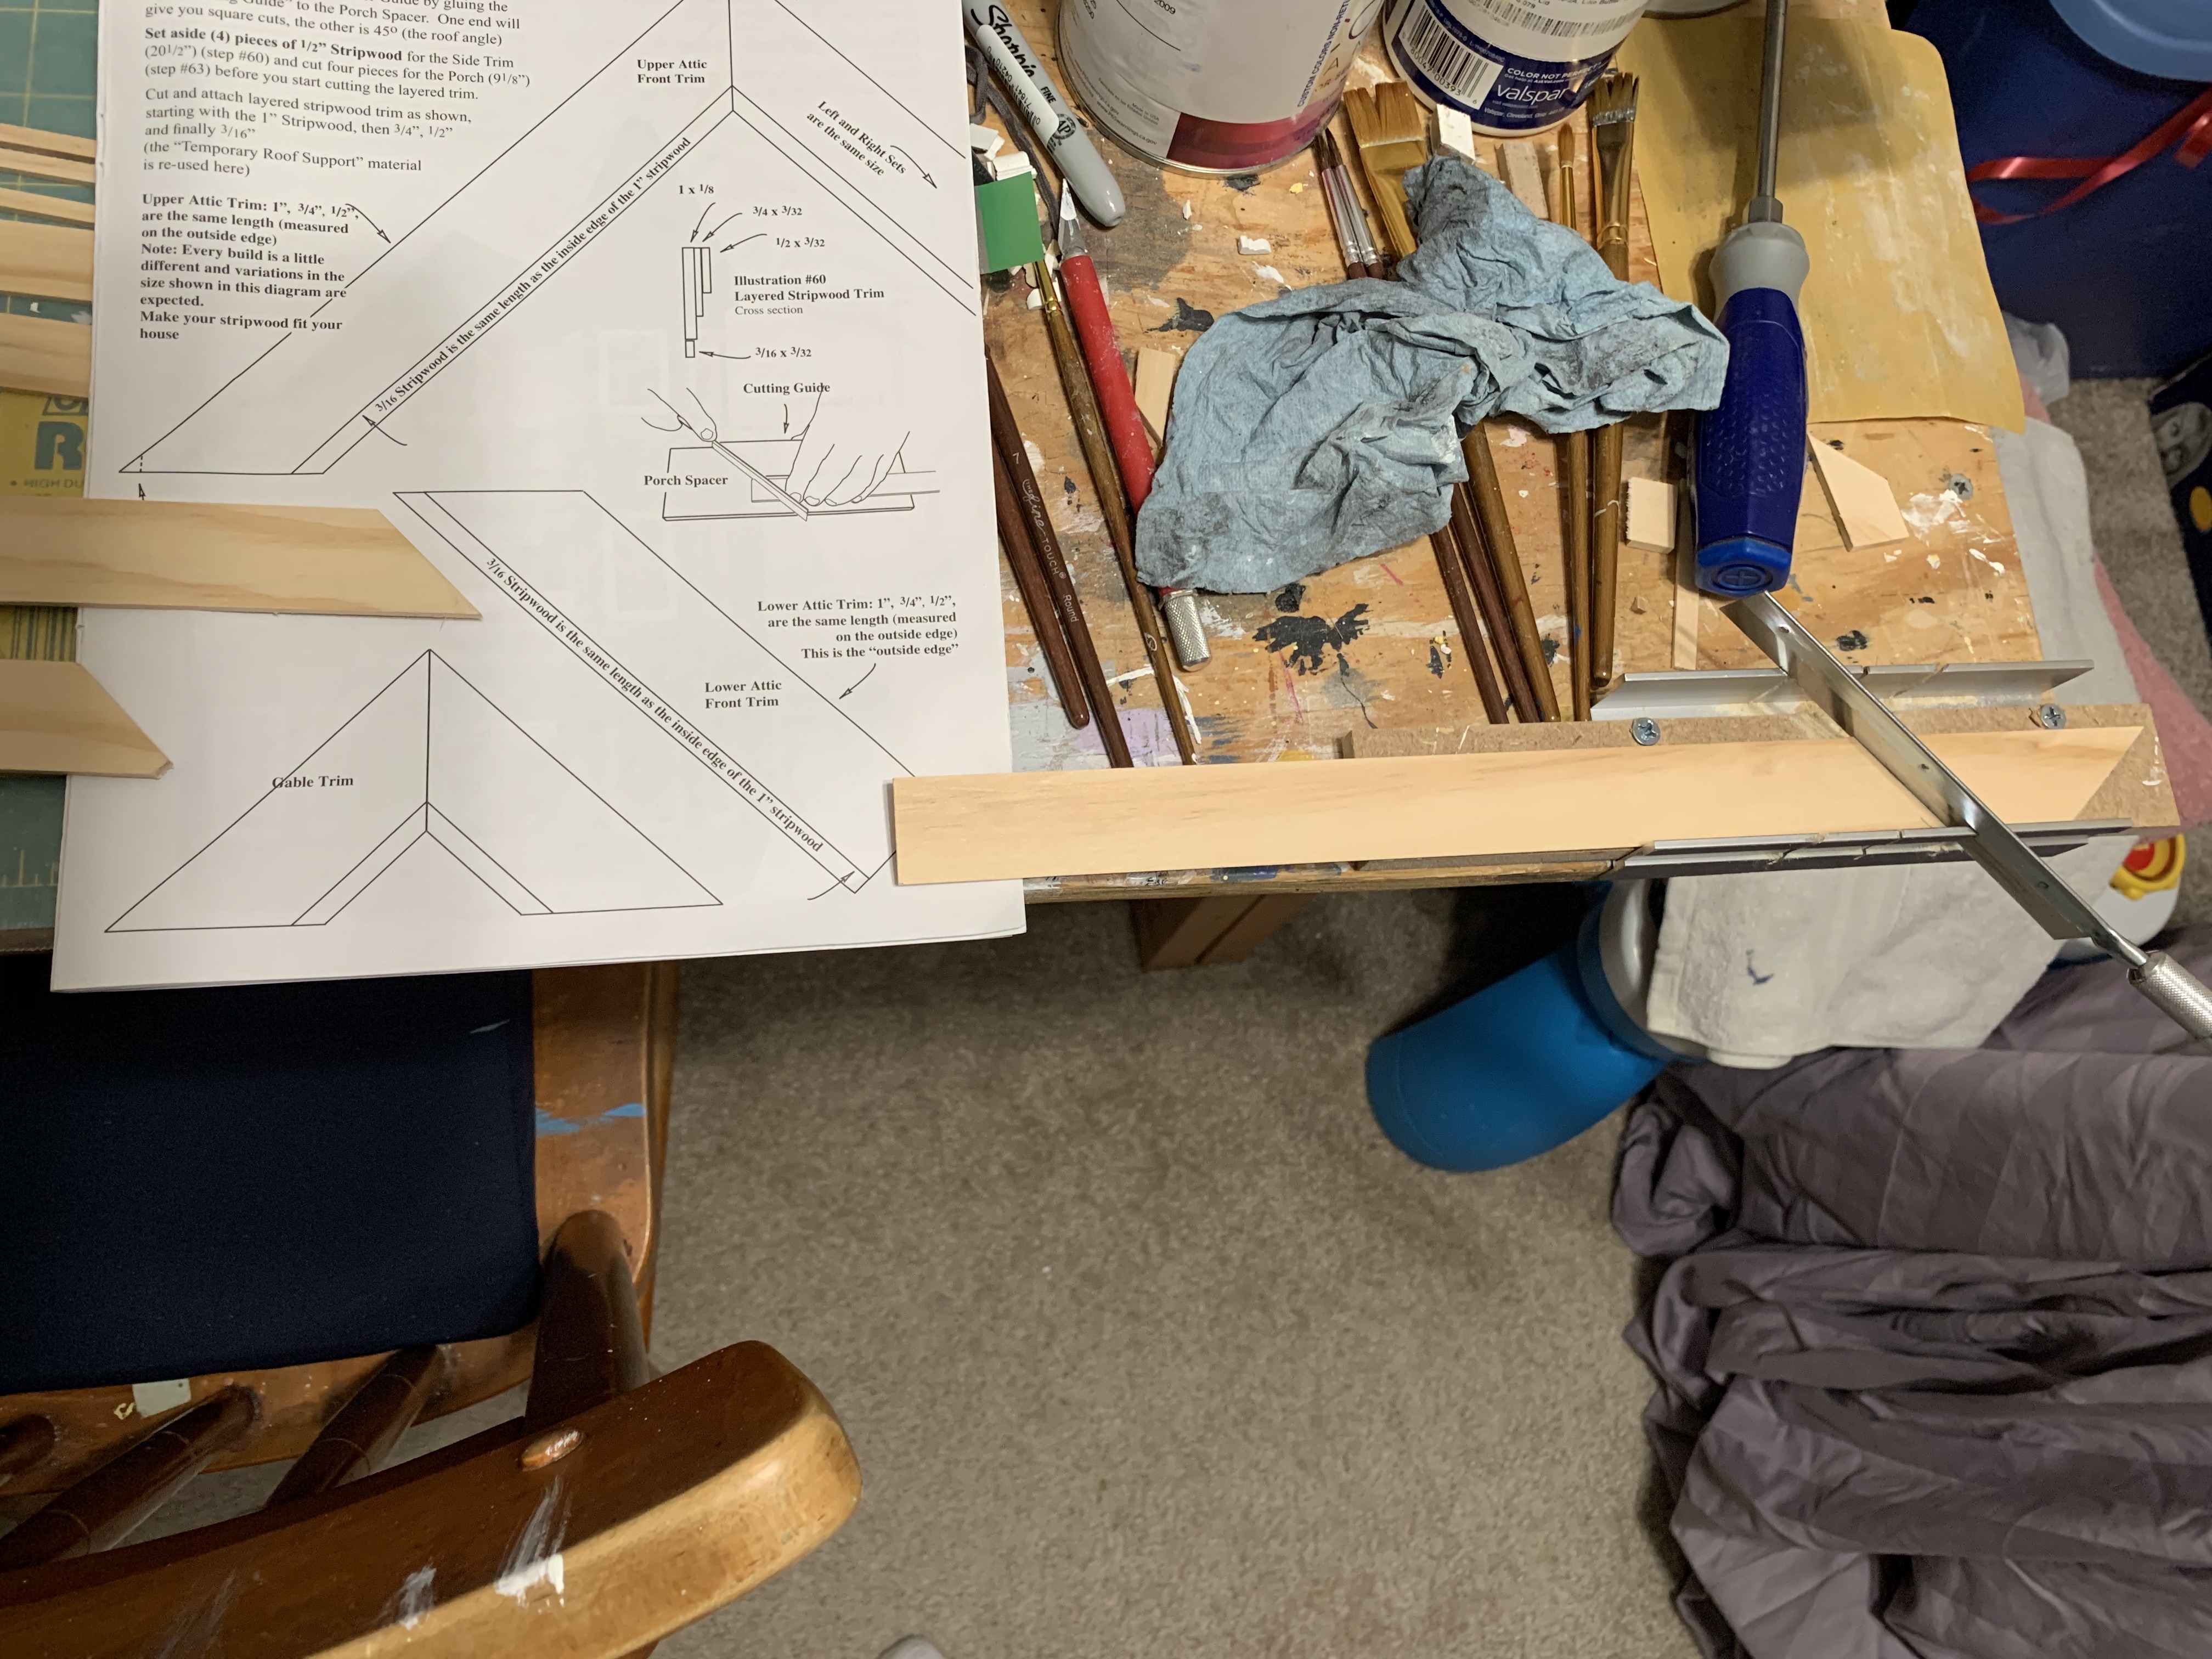
The instructions indicated that “Every build is a little different…” and so the stripwood that would form the 4-layered trim came in 20.5-inch lengths that had to be cut. For a builder who chose not to acquire a miniature miter box, the kit included a piece of MDF cut at a 45-degree angle for use as a cutting guide (as shown in drawing above). Fortunately, for me, I just re-assembled my miter box.
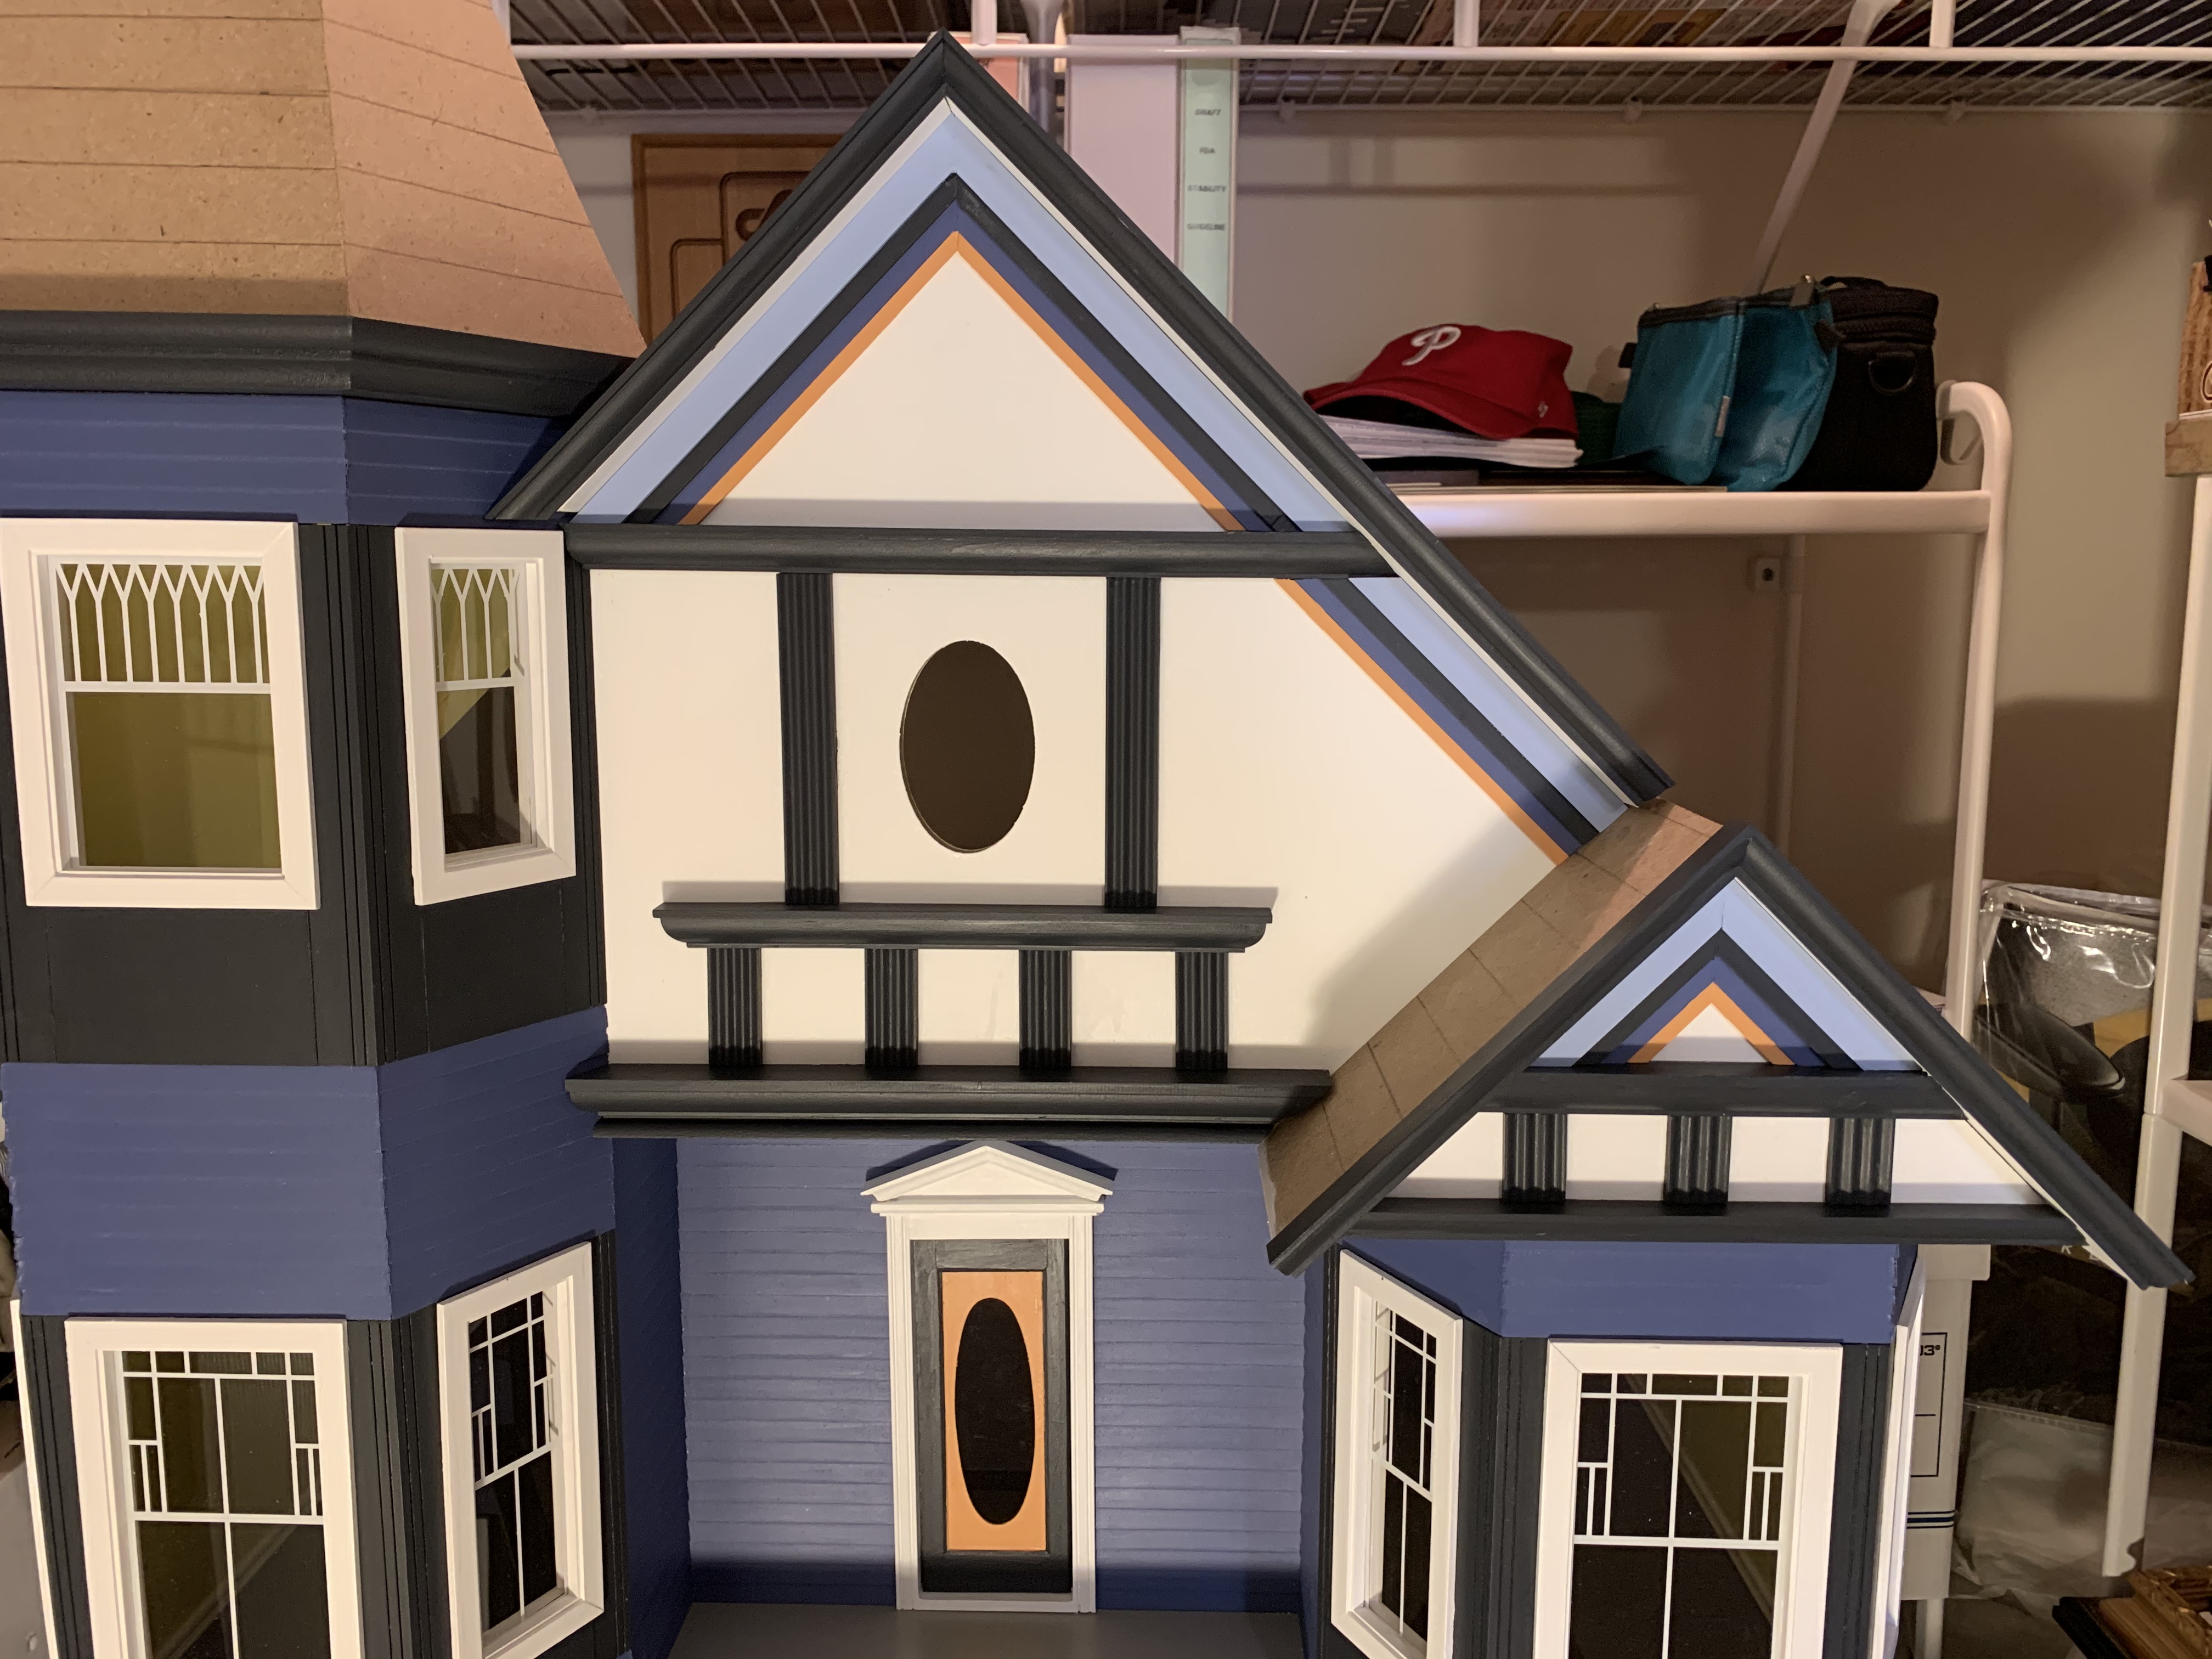
For each ridgeline layered trims (five total), four separate pieces of trim of varying widths had to be cut to the correct length and angle, determined empirically. Even with the aid of my miter box, my first few attempts were failures; some too long and some too short. This step proved one of the most challenging of the build with some of my last cuts still too short or too long. But once I had all 20 pieces cut and painted, they really added a nice colorful detail to the house.
With these ridgelines done, the last part of the front façade was building and installing the balcony railing and the arch railing.
The railing had to be painted and then assembled using the rails and 20 individually cut Dowels as the balusters.
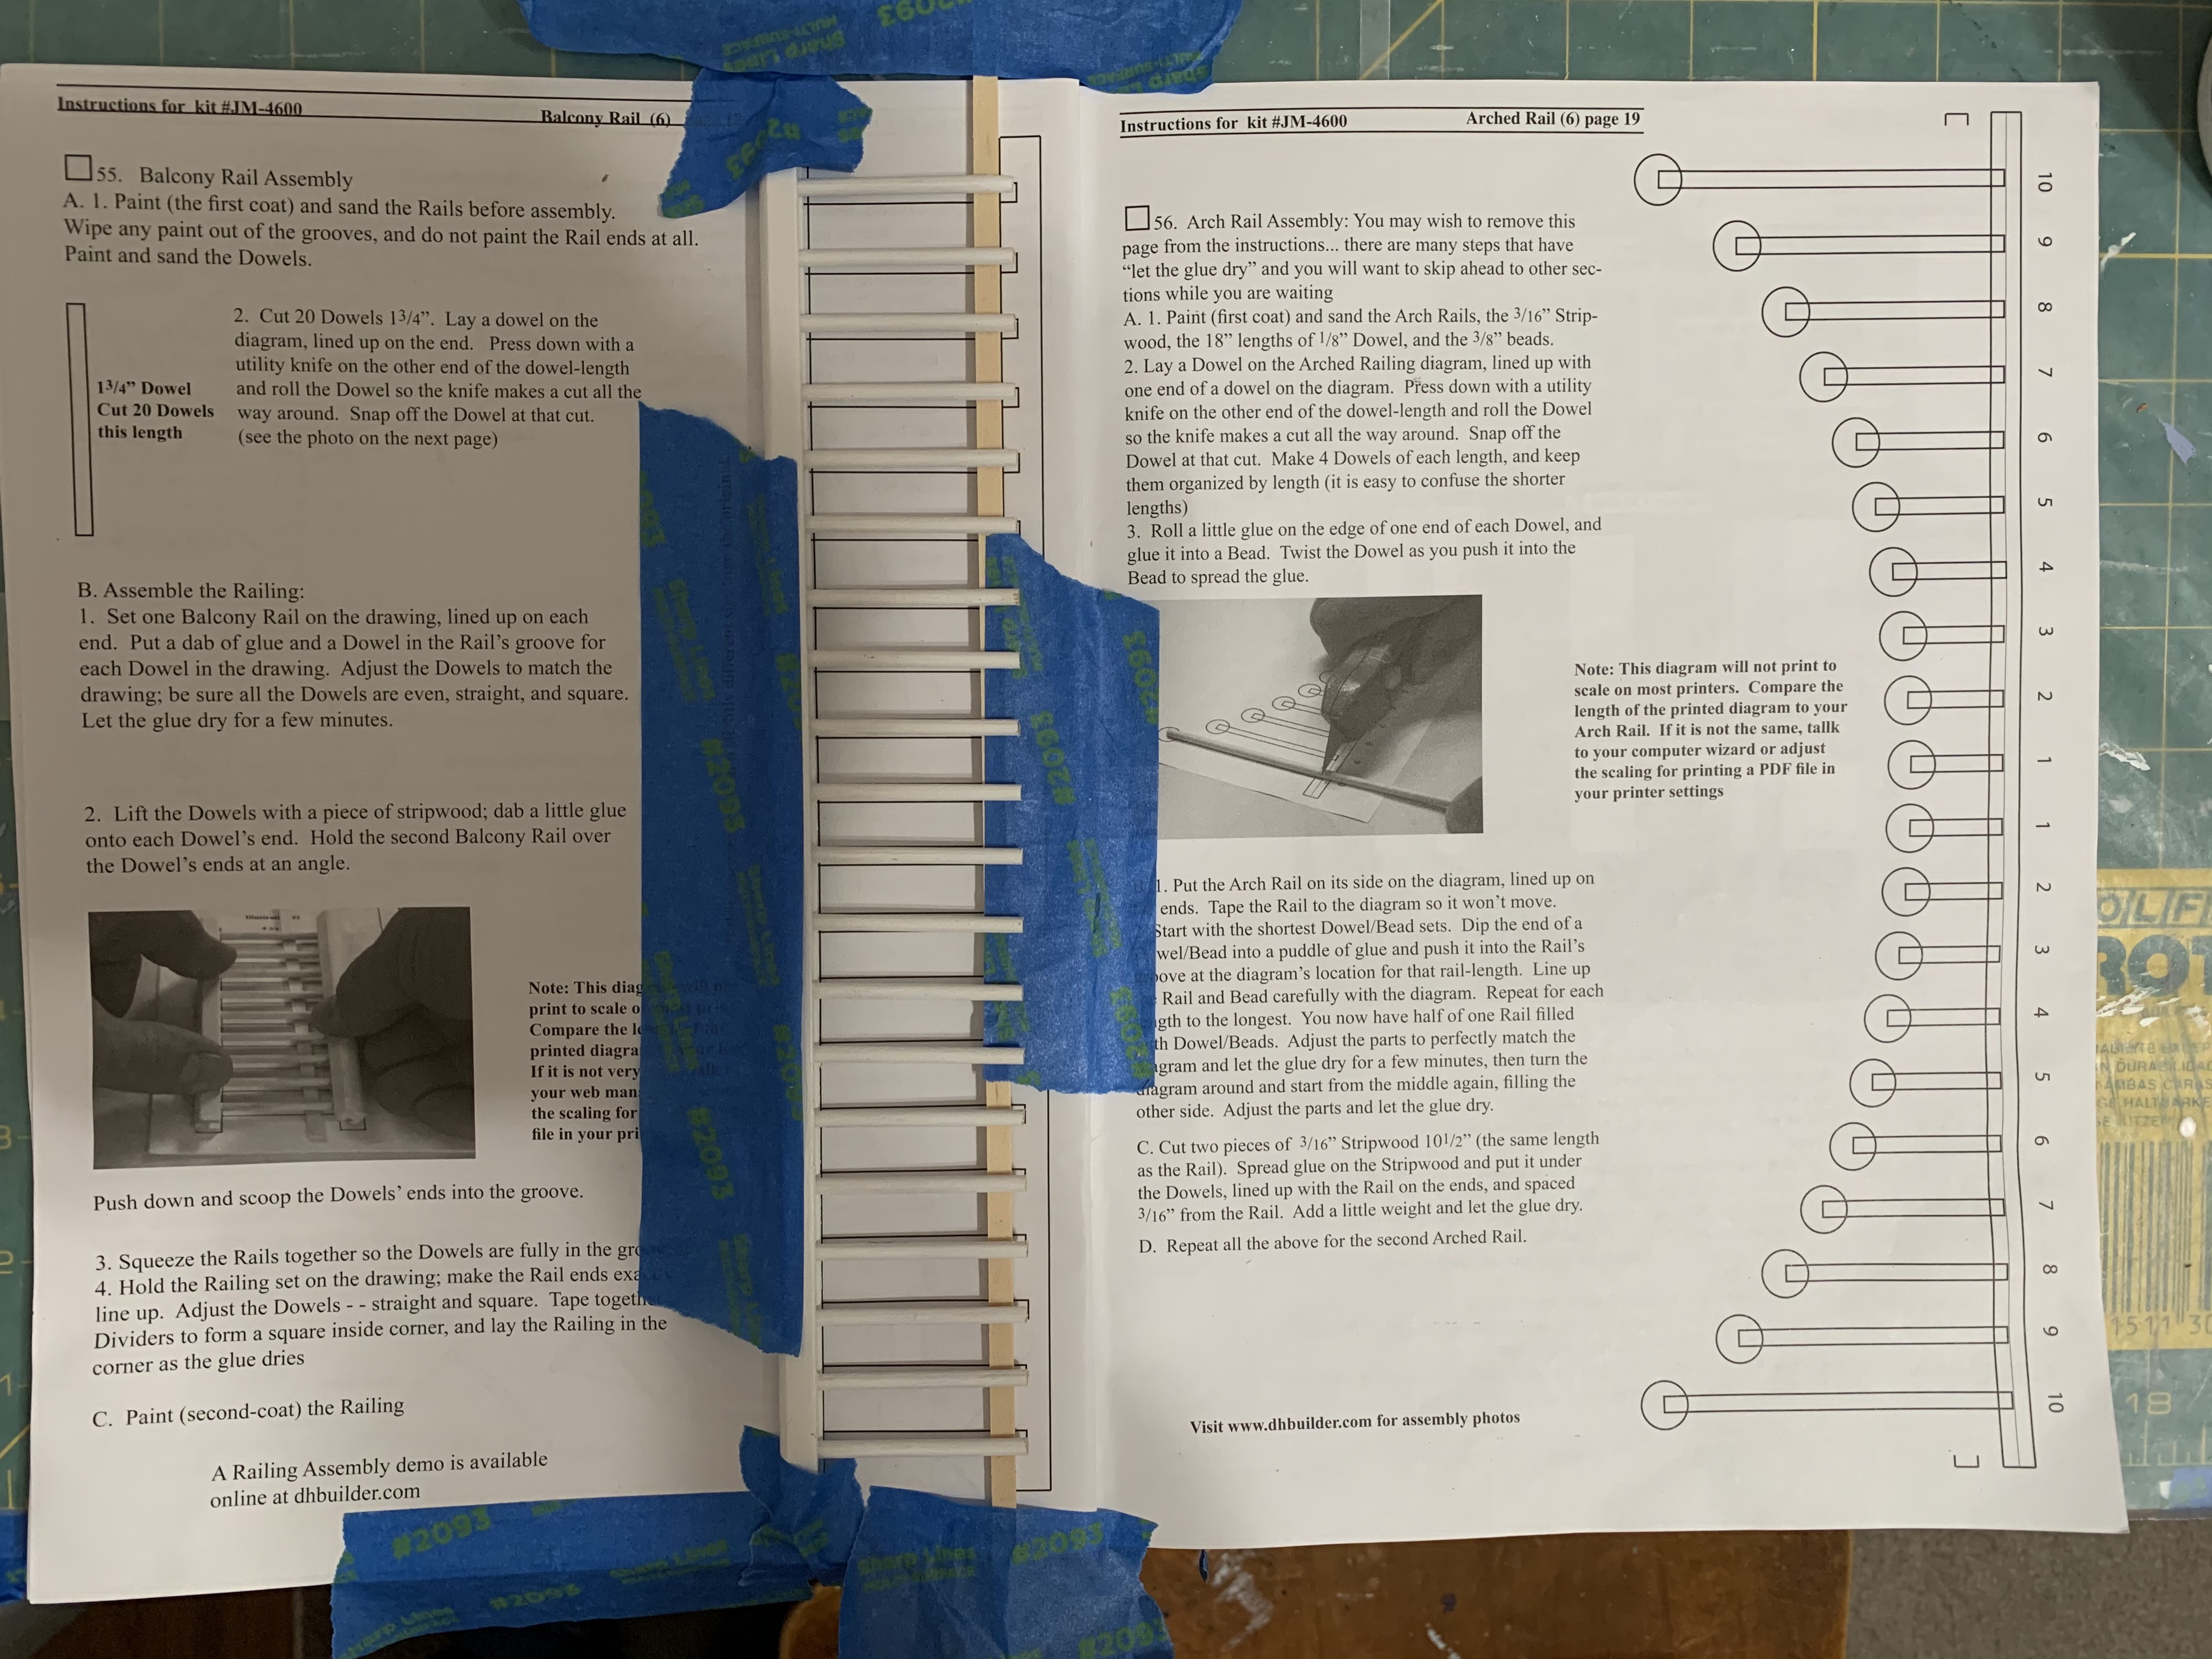
The arch railings were a bit more complicated since each Dowel was cut to a different length with a bead attached. This step encouraged you to tape the parts to the drawing and then glue them all together. This was then done a second time.

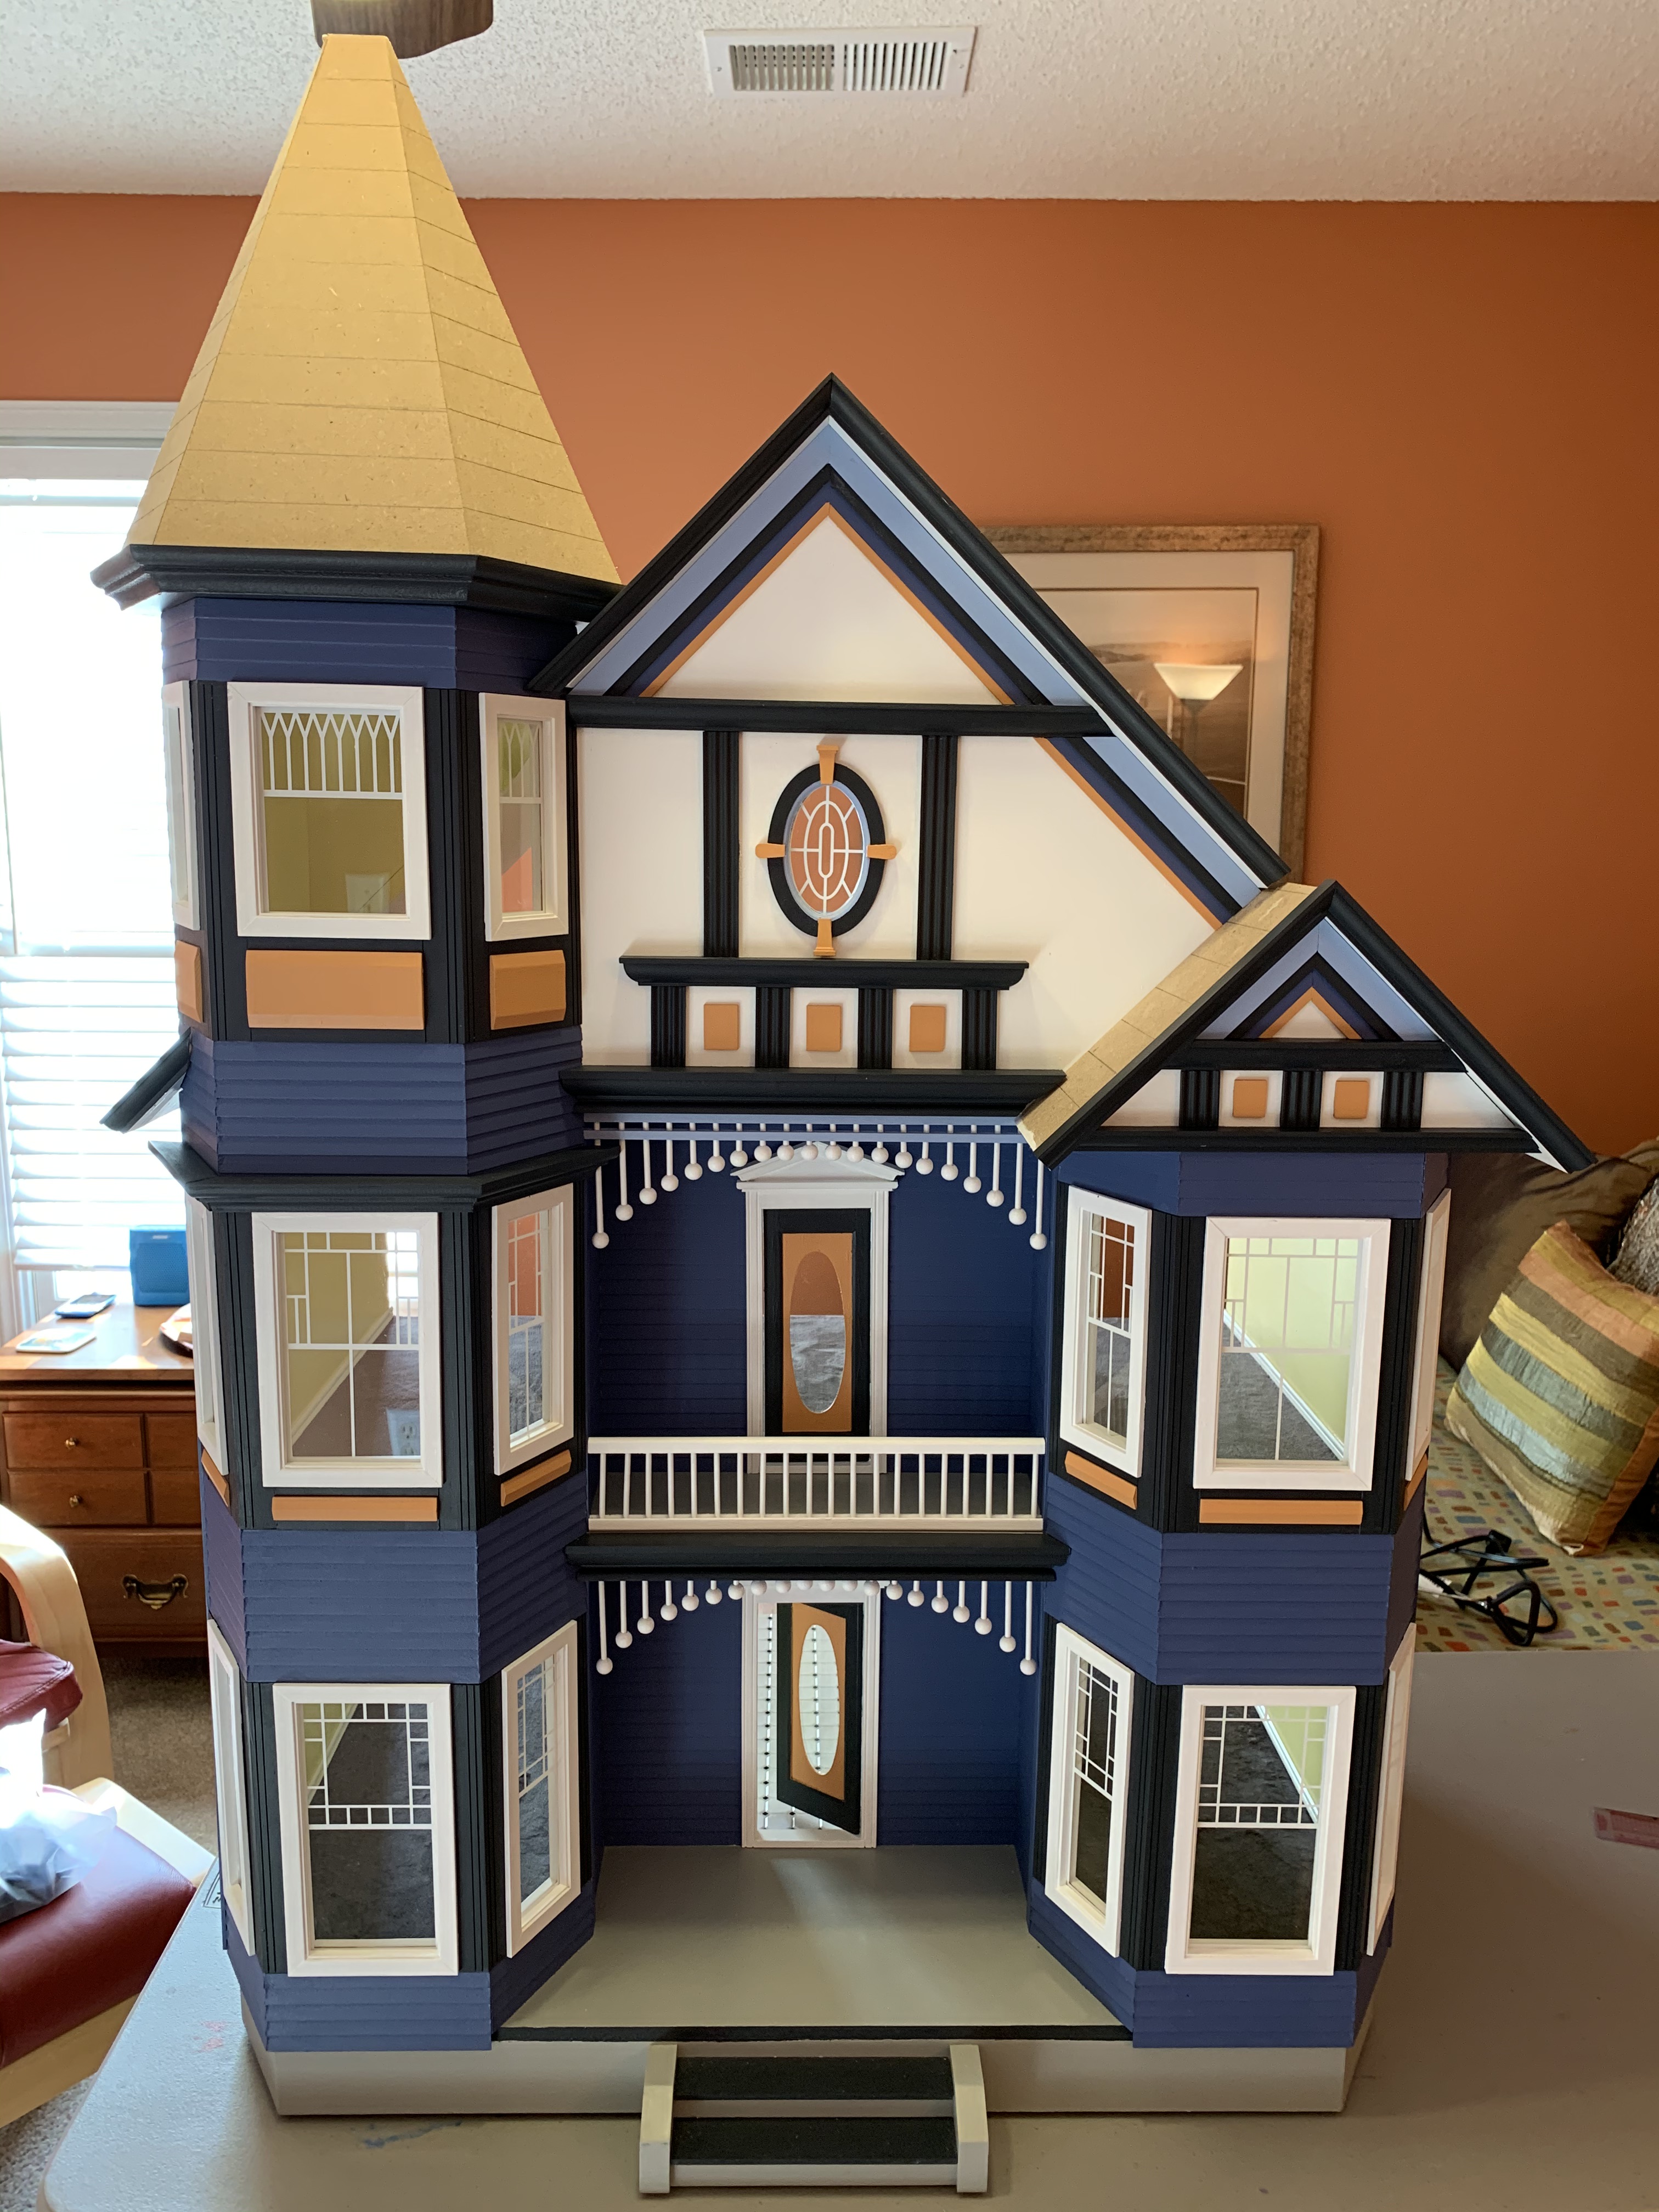
Following their installation, the last pieces to add were the colored raised panels below the top floor windows and finally the oval attic window giving the house a truly finished look!
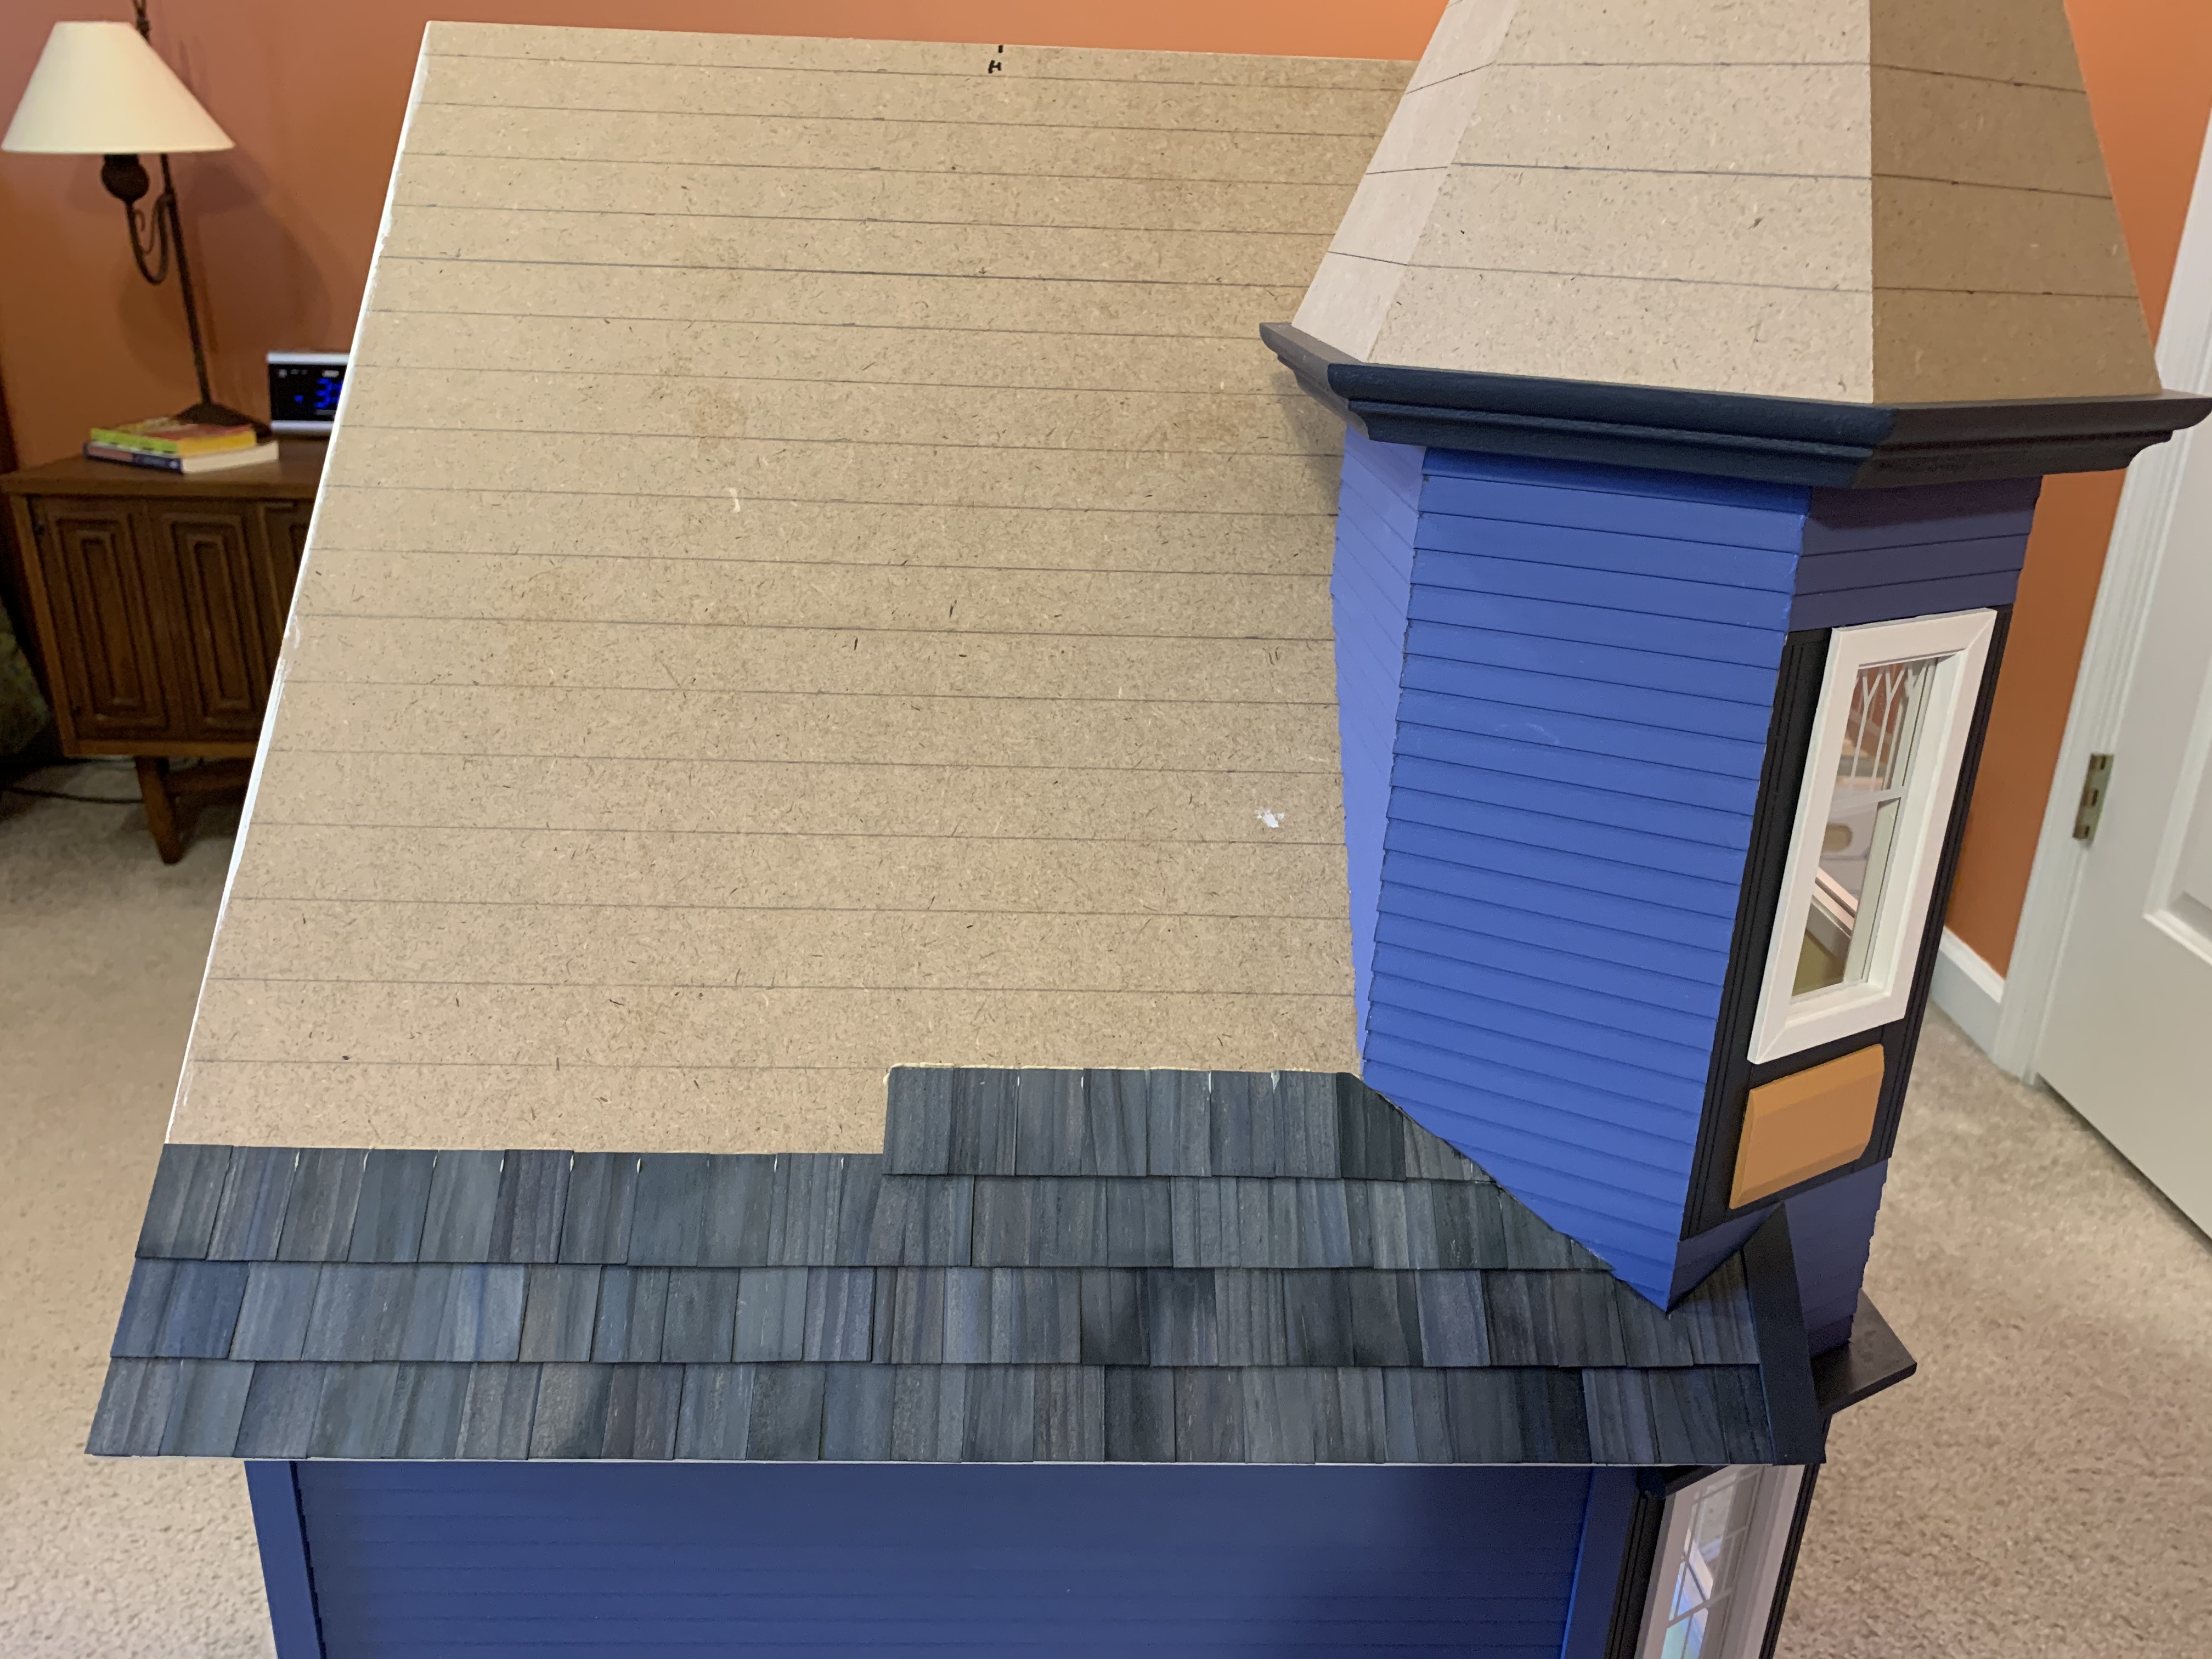
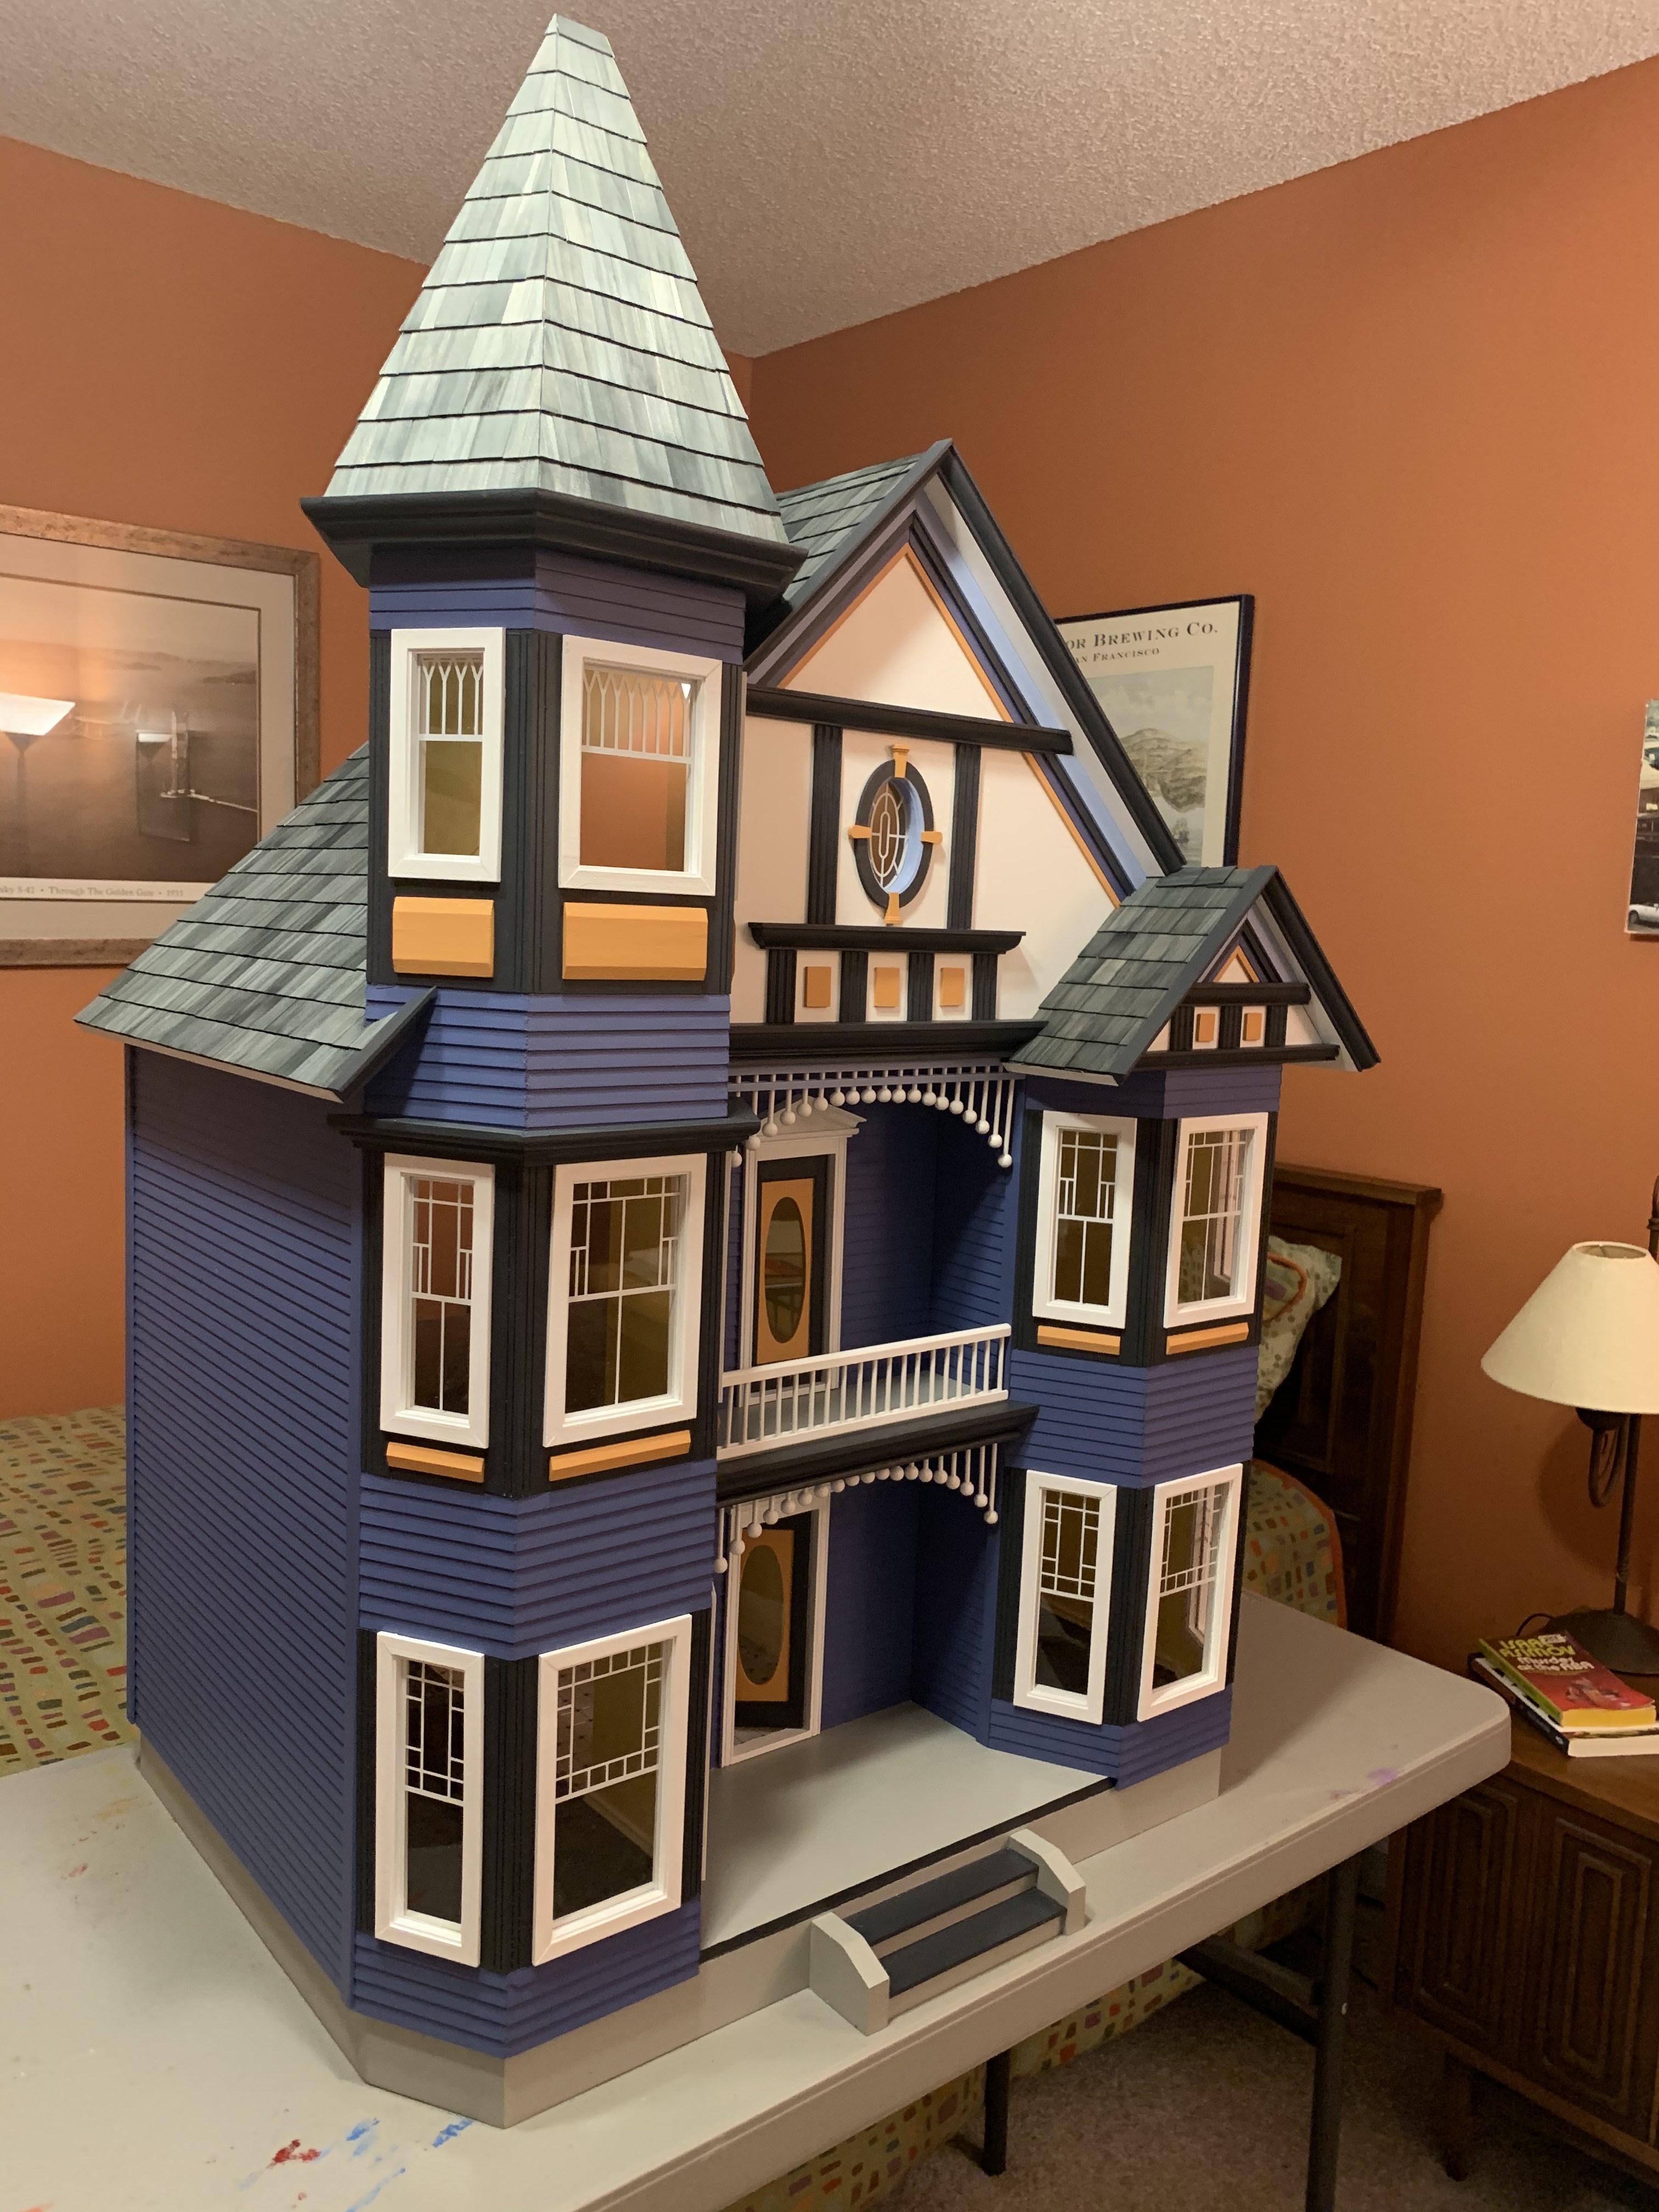
The final construction step was then to dye the shingles and install them on the roof. I previously explained this multi-step process in my post about my first granddaughter’s doll house, so I won’t repeat myself. However, if you would like to review that process in more detail, here is a link.
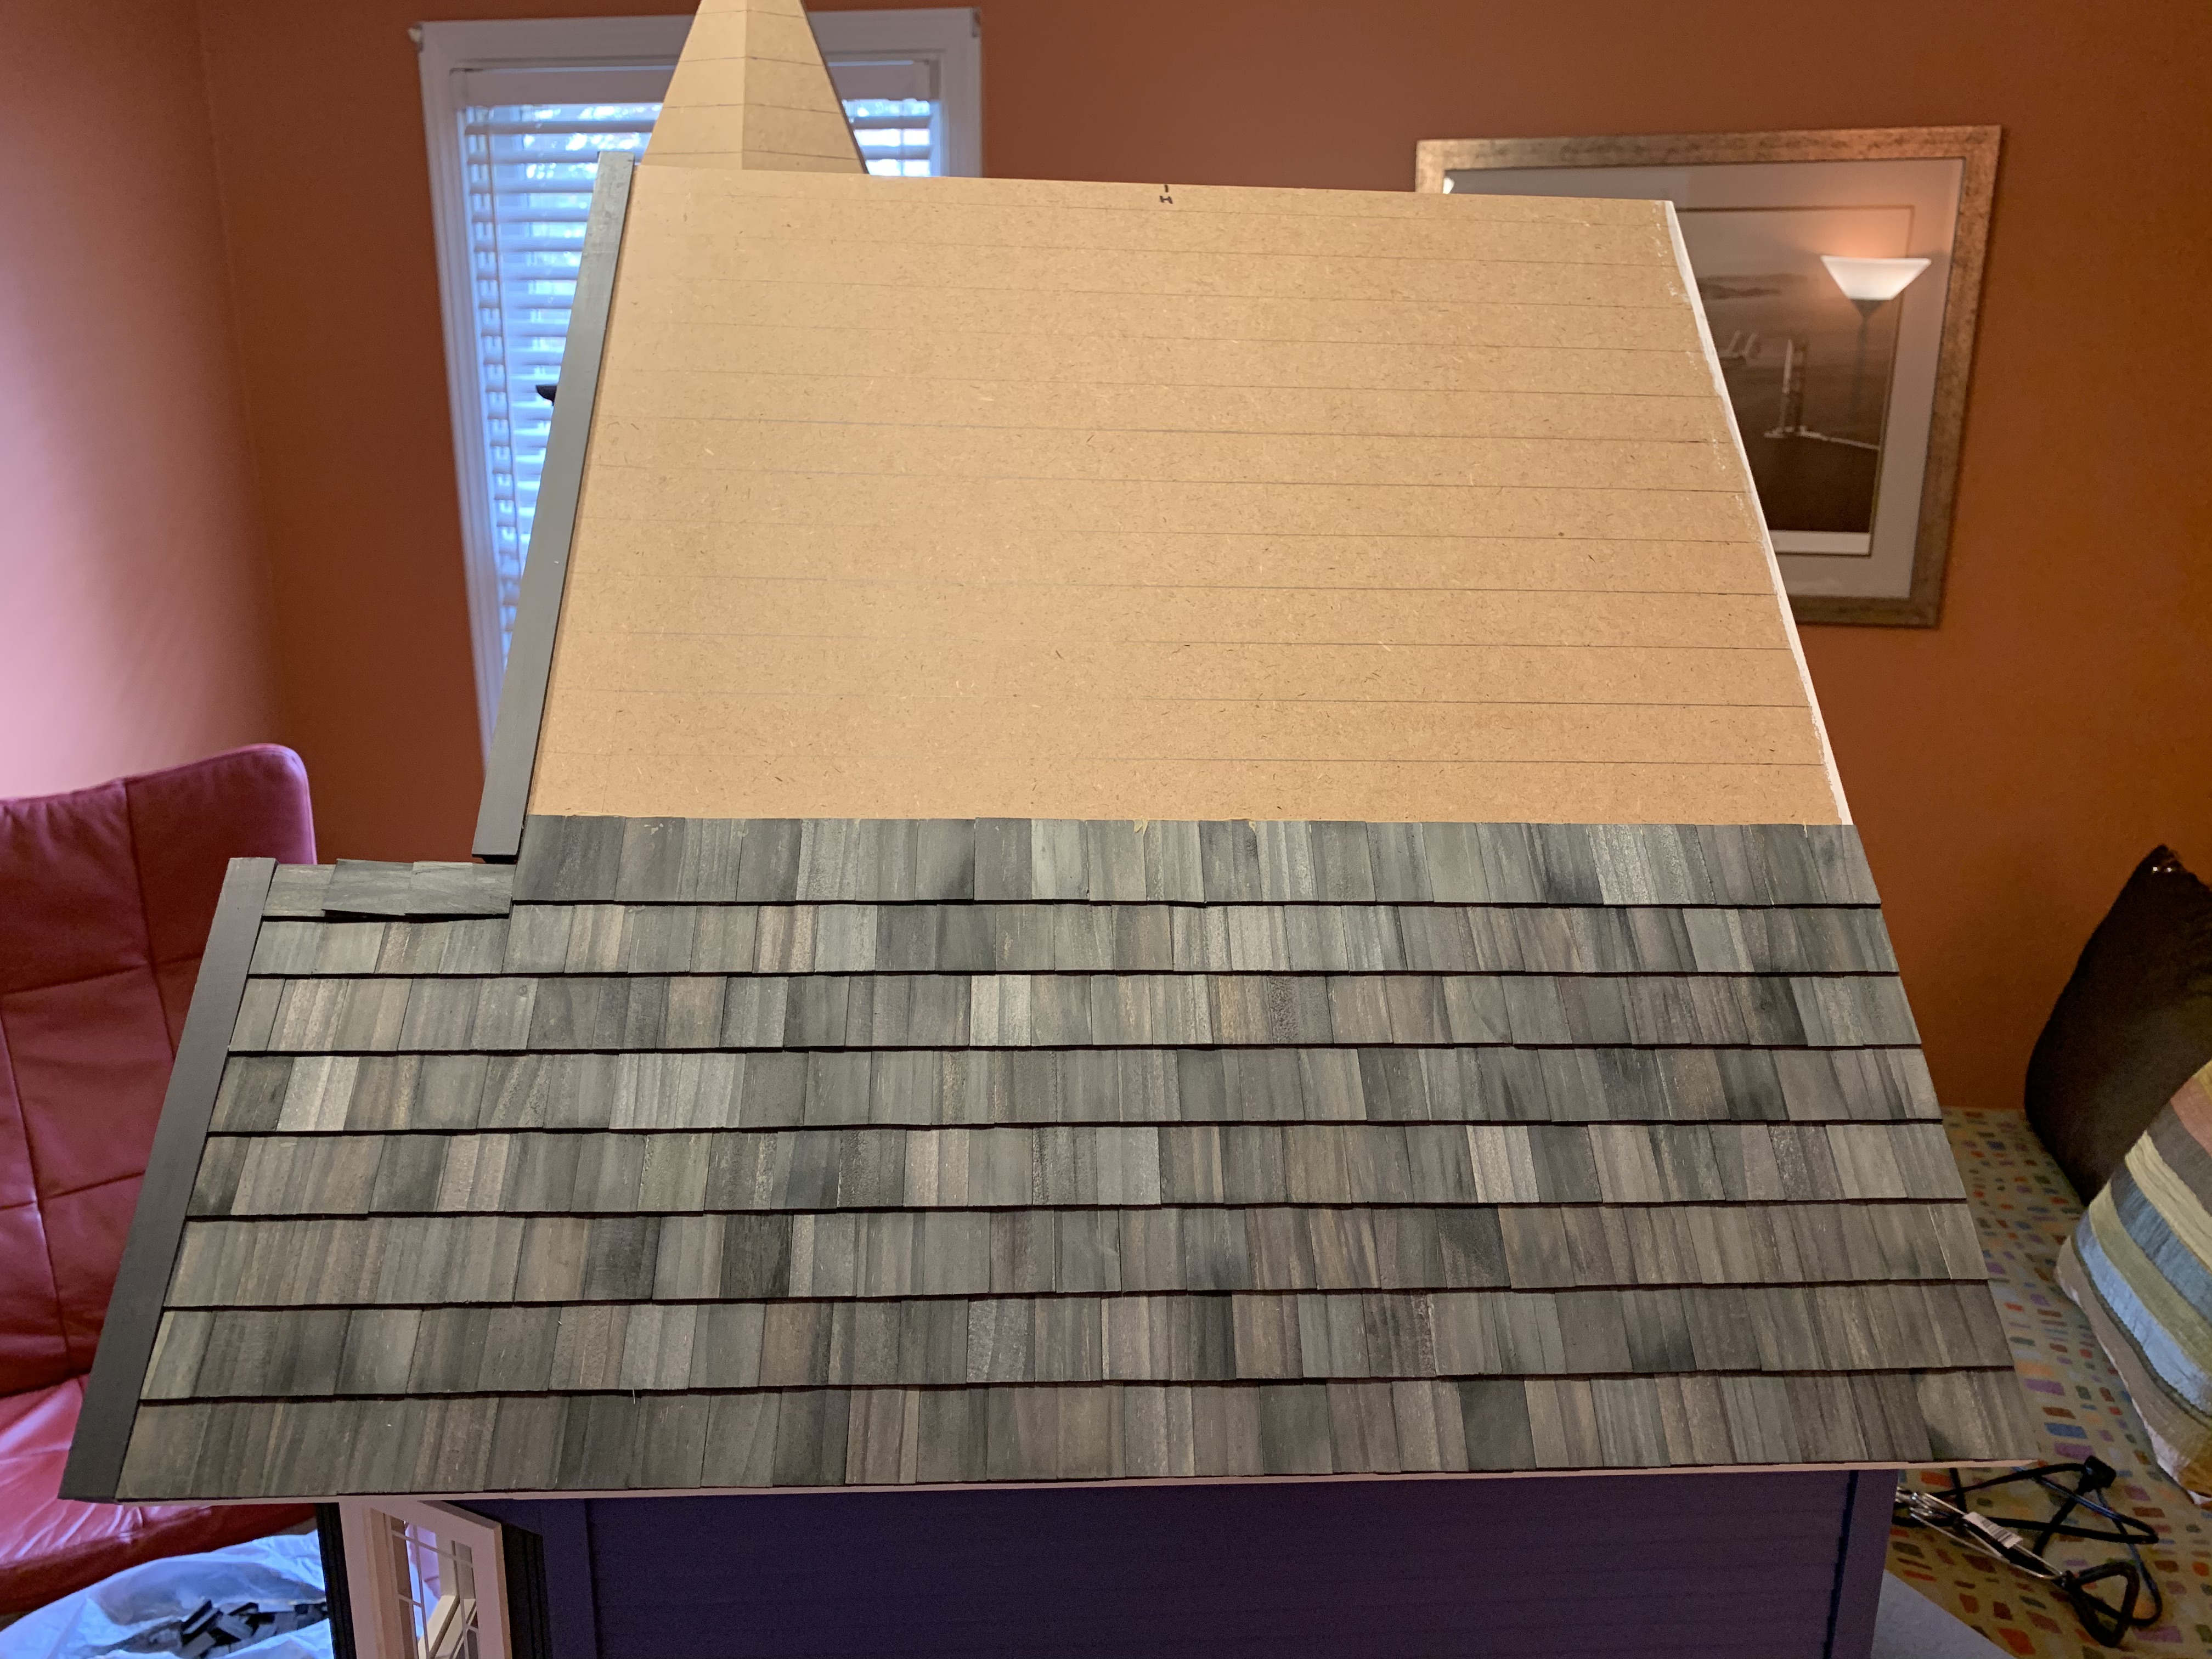
The shingling of the main part of the house went very smoothly and quickly with very few needed cuts, other than around the tower.
Shingling the tower was much more tedious with numerous cuts required as evidenced by the scrap pile to the right.
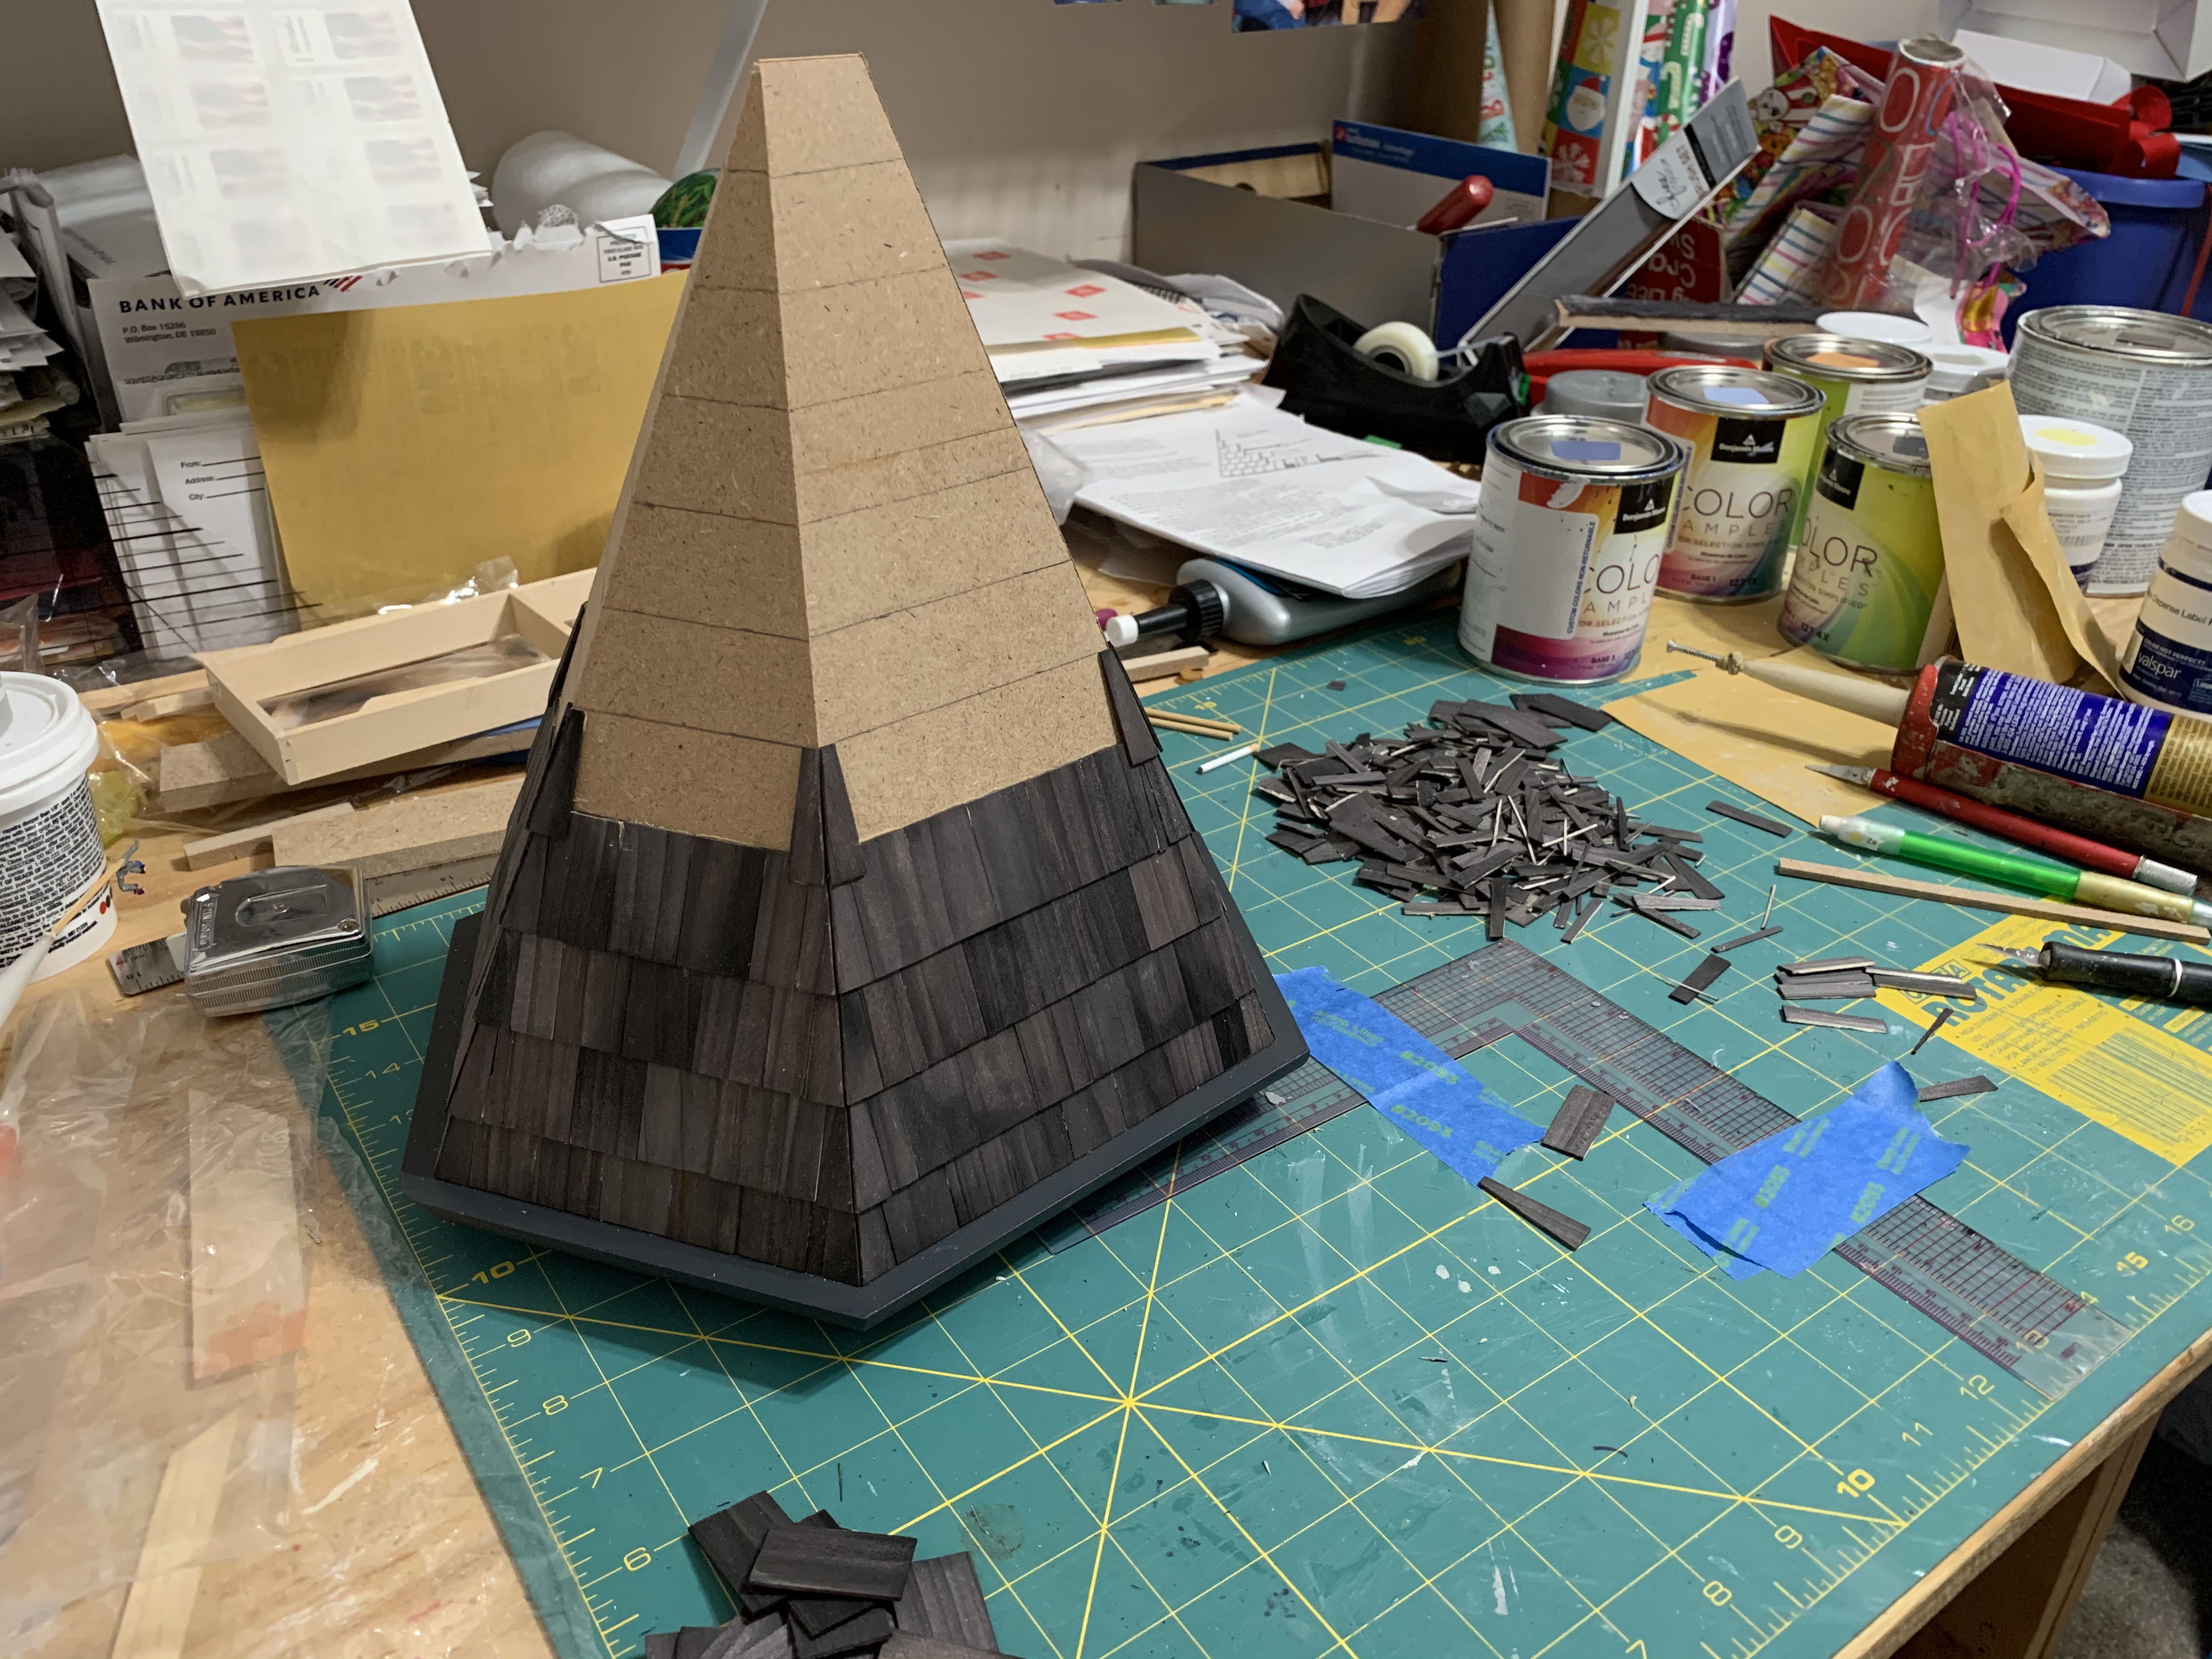
I had to let each pair of the six-corner triangle-shaped shingles dry before filling in the middle which then required multiple cuts so that the joints between shingles was offset one row to the next. The scrap pile grew accordingly but I was most pleased to finish roofing the tower.
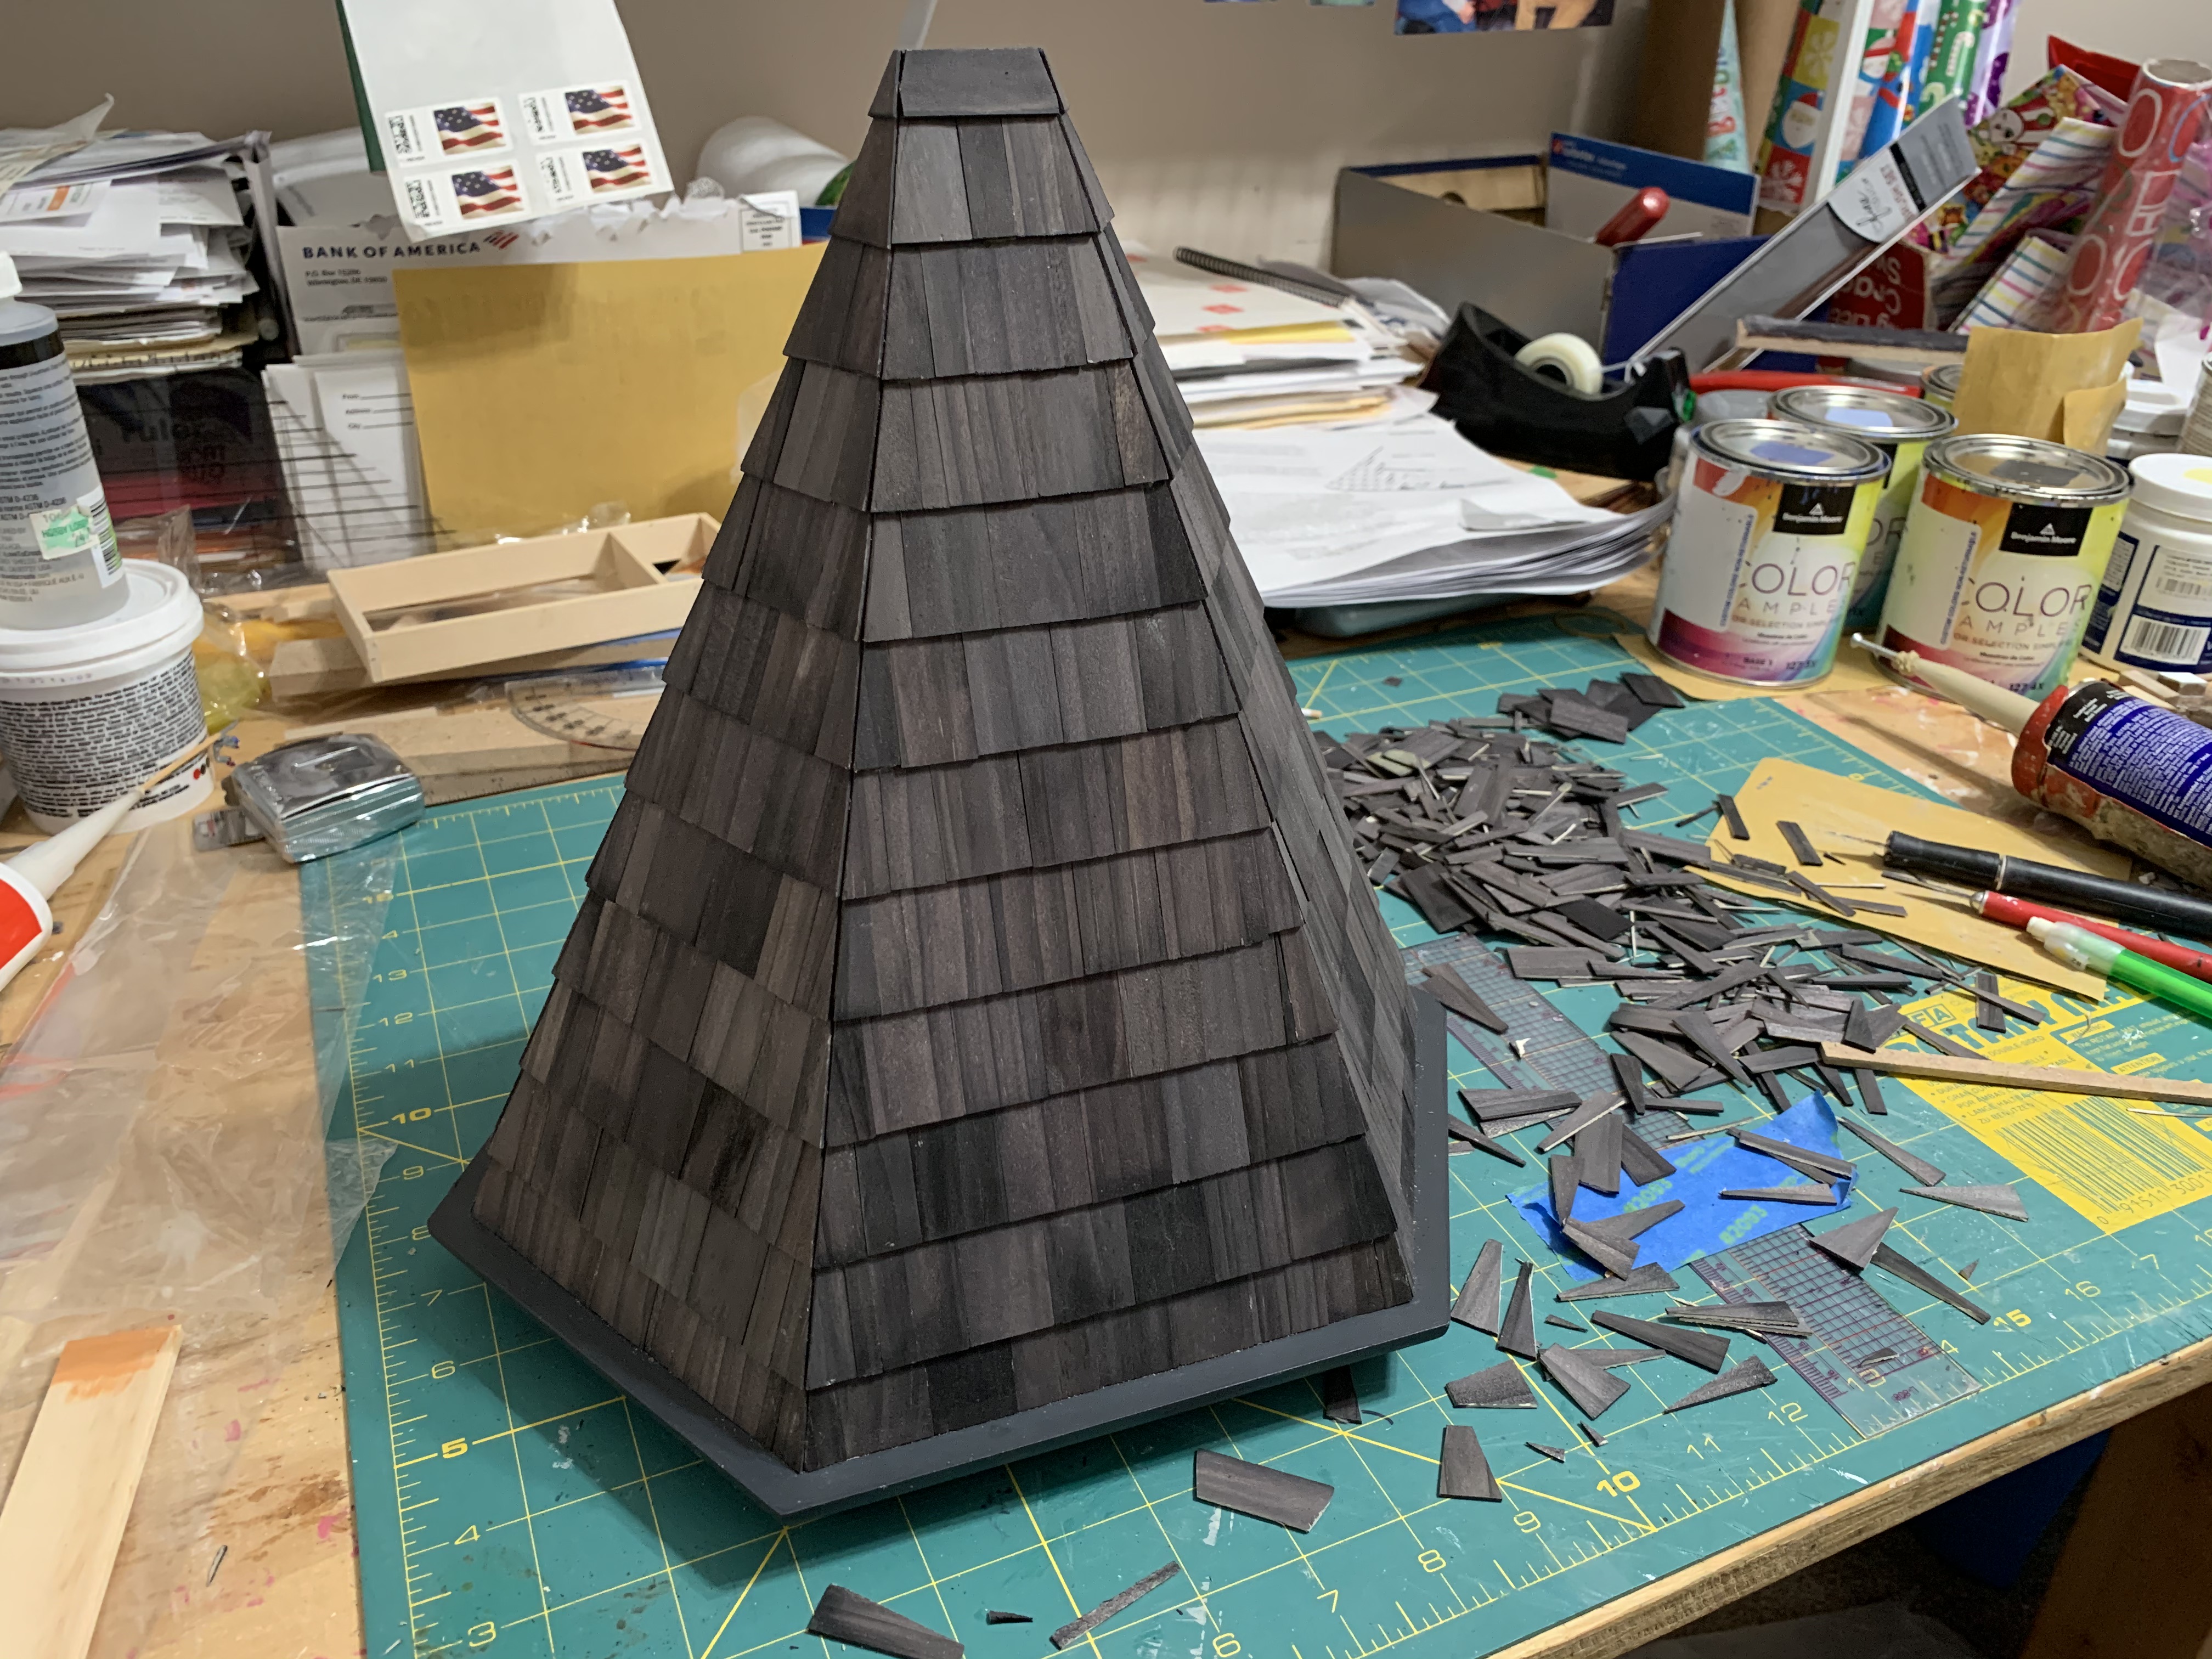
All that was left was to glue the tower roof to the tower and then take photos of the finished doll house.

It then went back into the closet for hiding until it was safe to drive out to California to deliver it to my granddaughter.
A lot of love and fun building went into its construction and I suspect my granddaughter will be most pleased with the finished house especially when she learns that Granddaddy built it especially for her. That is going to be a really enjoyable finish to that long, cross-country road trip!
Categories

Wow, wow, wow! This dollhouse is a work of art. What a lucky granddaughter! I am sure it will be a treasure for generations. Care to adopt me? 🙂 Enjoy the moment when you present her with this special gift built with technical skill and a grandfather’s love.
Thank you so much Betty! It will be a long drive out there but it will be a very special moment to present it to her.
Wow! Impressive, bro. The attention to detail. The creative problem-solving. The patience! Pretty sure this is not a project for me. I am lacking at least one or more of those qualities. I know she will love the doll house!
Thanks, Bro! This makes four dollhouses I have built so far so my skills come from a good bit of practice.