
Doll House Surprise for My 2nd Granddaughter – The Walls Go Up

Once this first section of the walls was glued to the foundation, the next several steps in the instructions involved adding the two side walls and the ceiling/2nd floor.
However, I planned on adding some custom features not included in the doll house kit—custom flooring and baseboards—and so took pause to determine what my steps should be.
Having watched a video of how to install either wood flooring or carpeting after the house was assembled and the challenges necessary to overcome, it seemed to me it would be much easier to install the flooring during the construction phase rather than afterwards. So, before moving ahead with the next steps in the instructions, I decided to install the first-floor flooring.
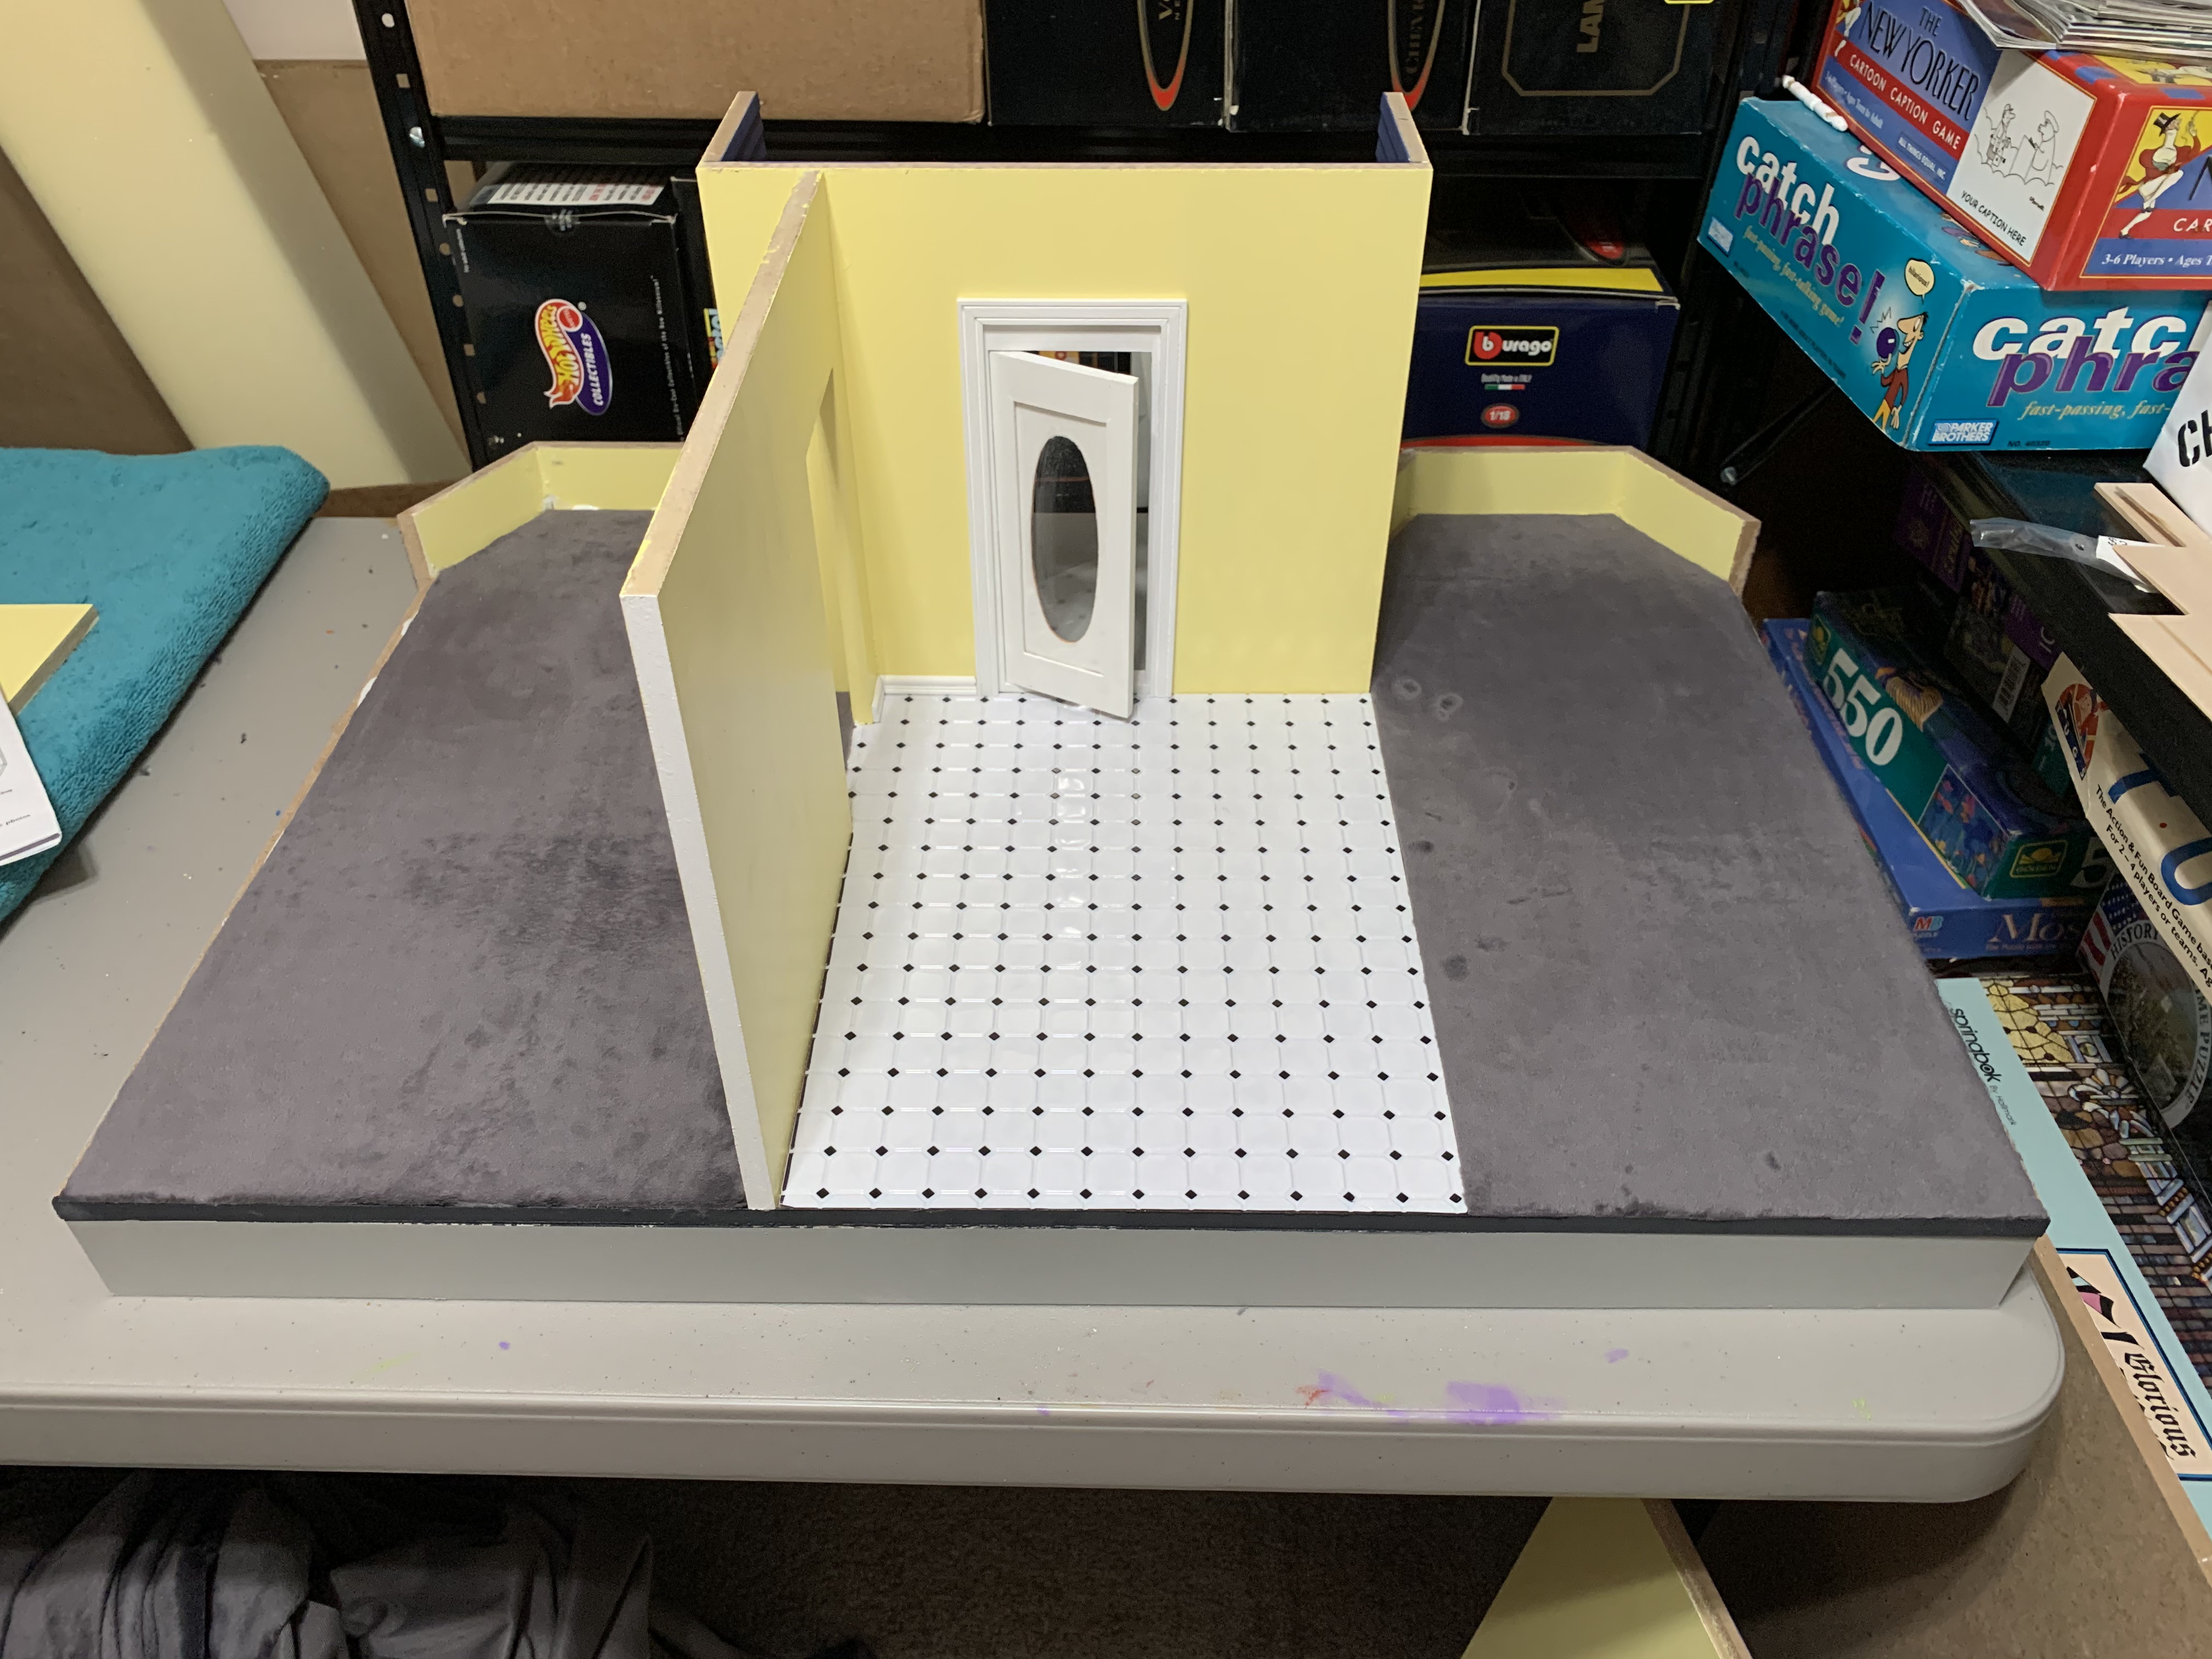
When I was exploring flooring options, I found a faux tile floor that I thought would look nice in the entry area/kitchen. One sheet was more than enough so I decided to purchase it. Since it would define the size of the kitchen, it needed to be installed before the carpeting. But before I could install the tile floor, I needed to know where the divider wall was to be placed since this would be one wall of the kitchen.
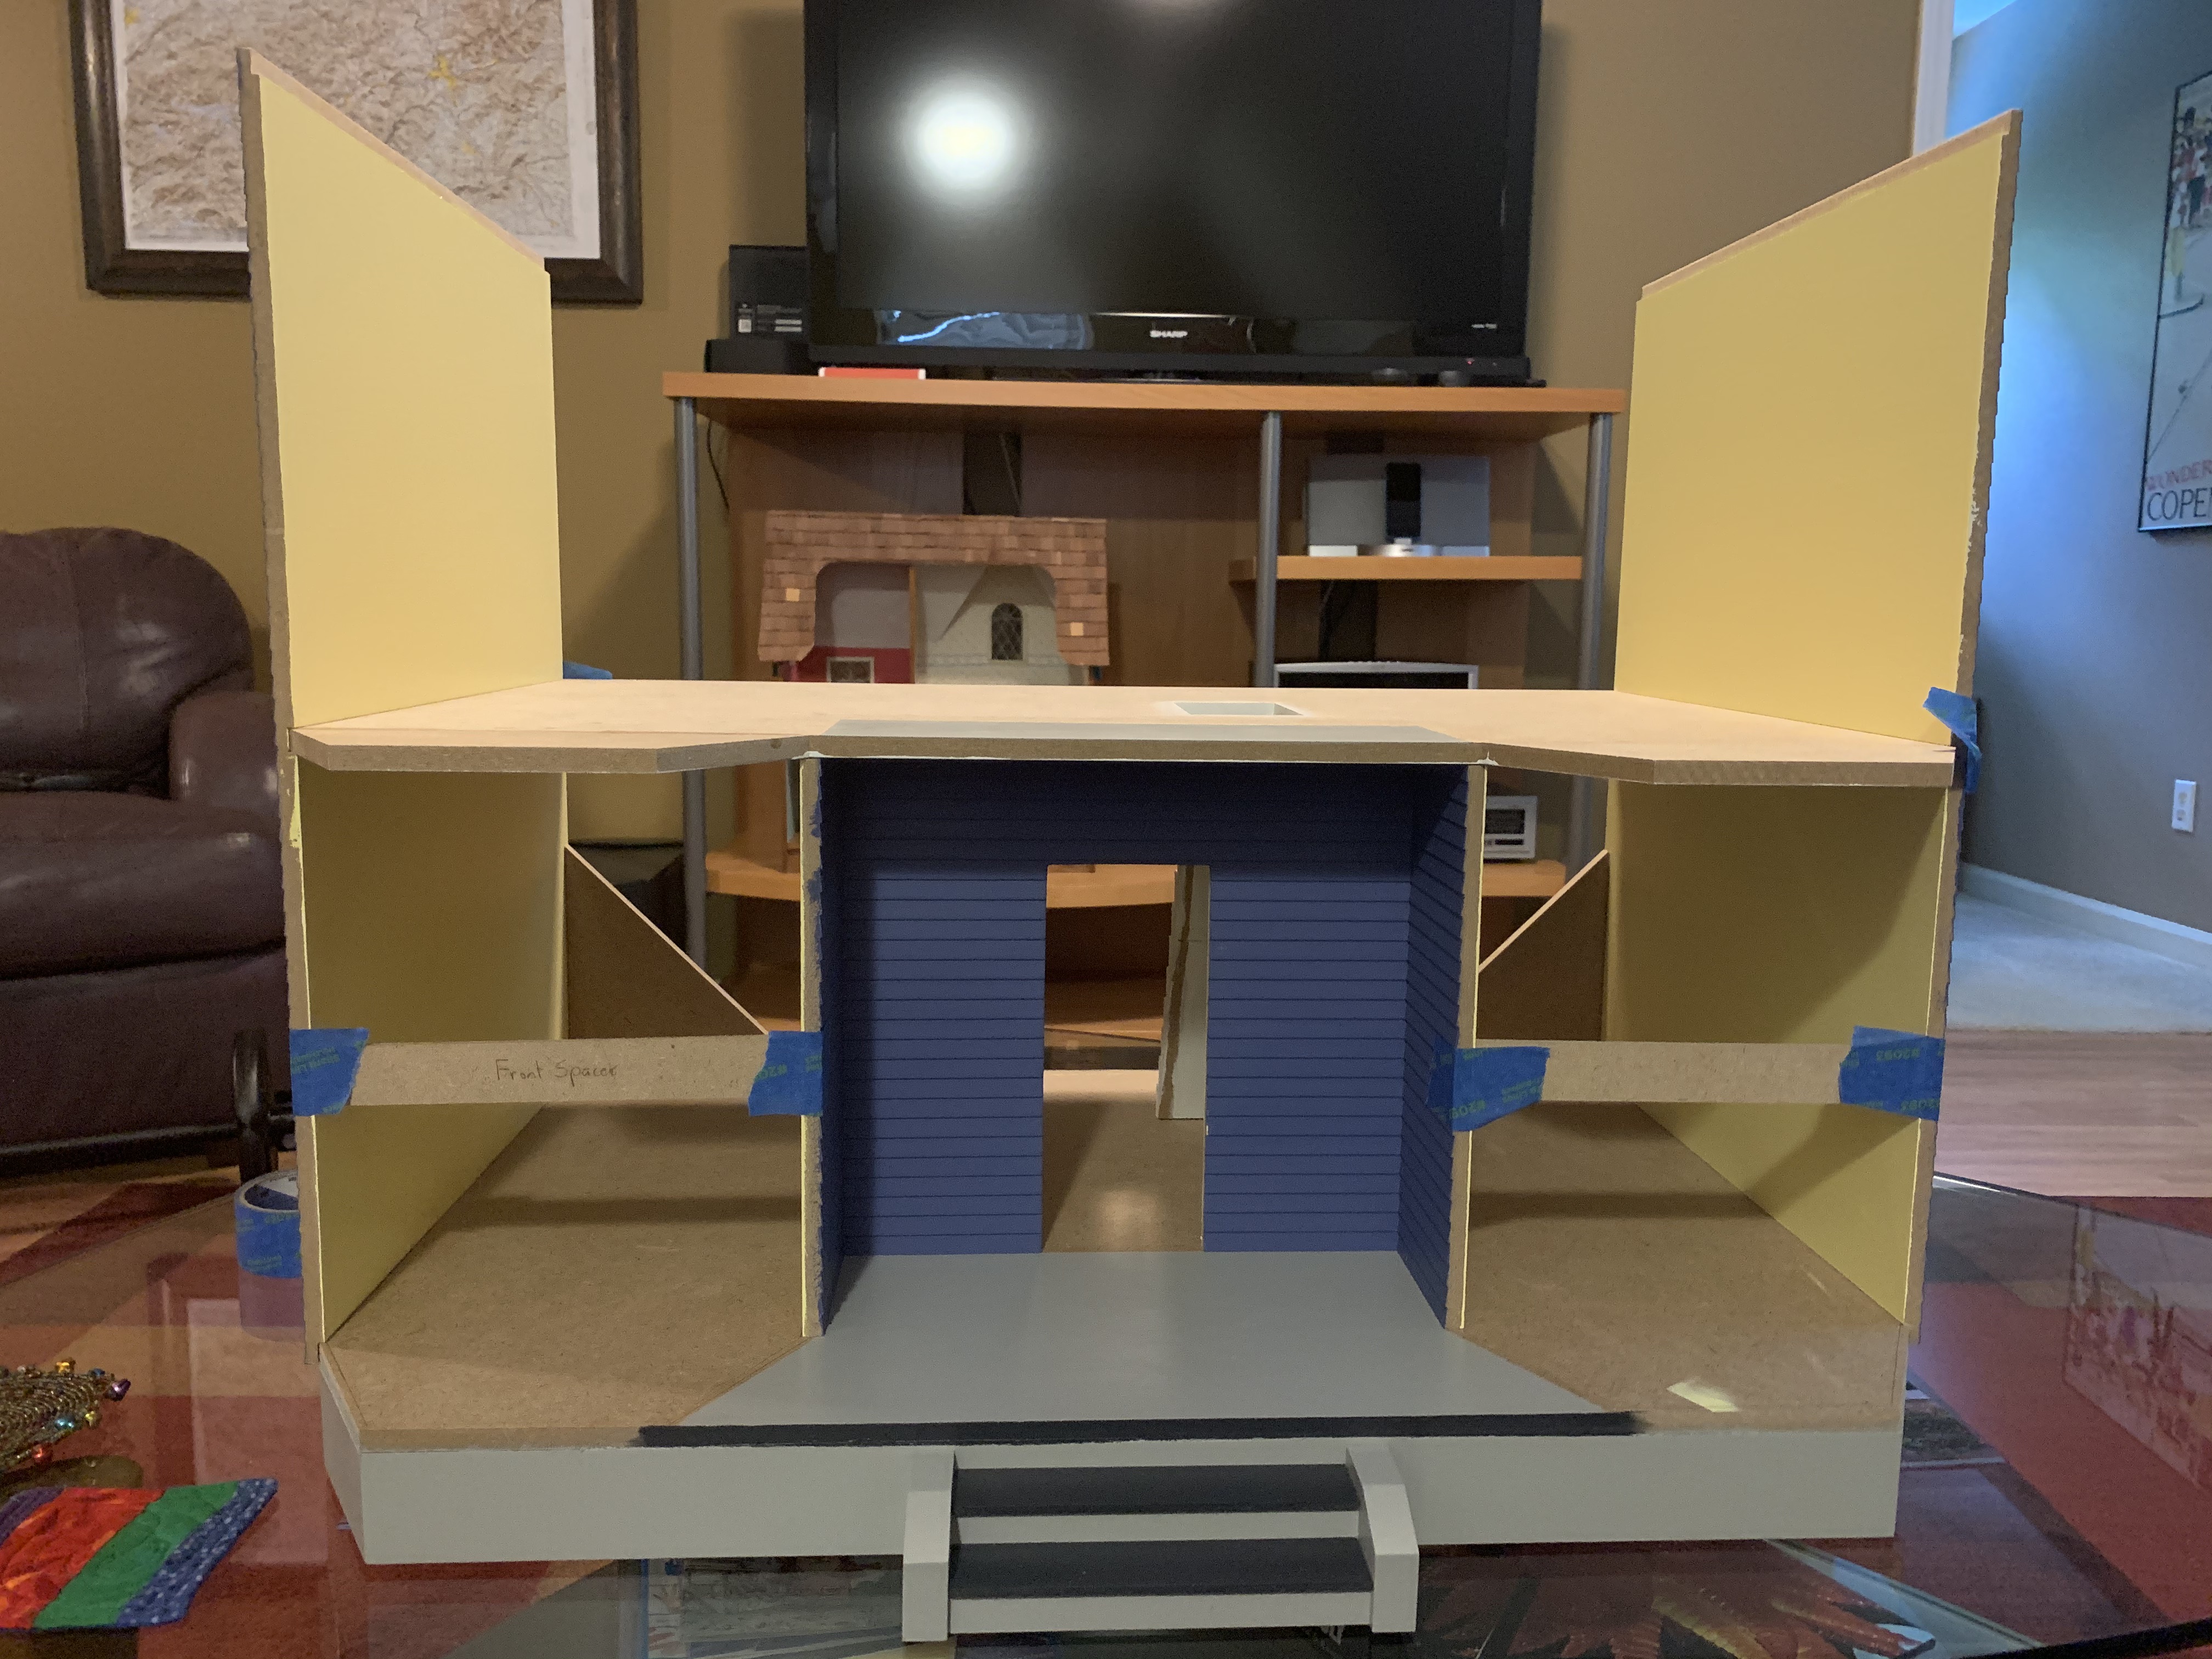
I set up the side walls and ceiling/2nd floor per the instructions with just tape. When I turned the house around to insert the stairs in the stair opening, I found that the stairs did not butt up against the divider wall, to which they would eventually be glued.
Obviously, the divider wall would have to move over so that the stairs could be attached to it.
With the stairs now flush against the wall, this defined where the divider would need to be placed and thus demarcate the kitchen area.
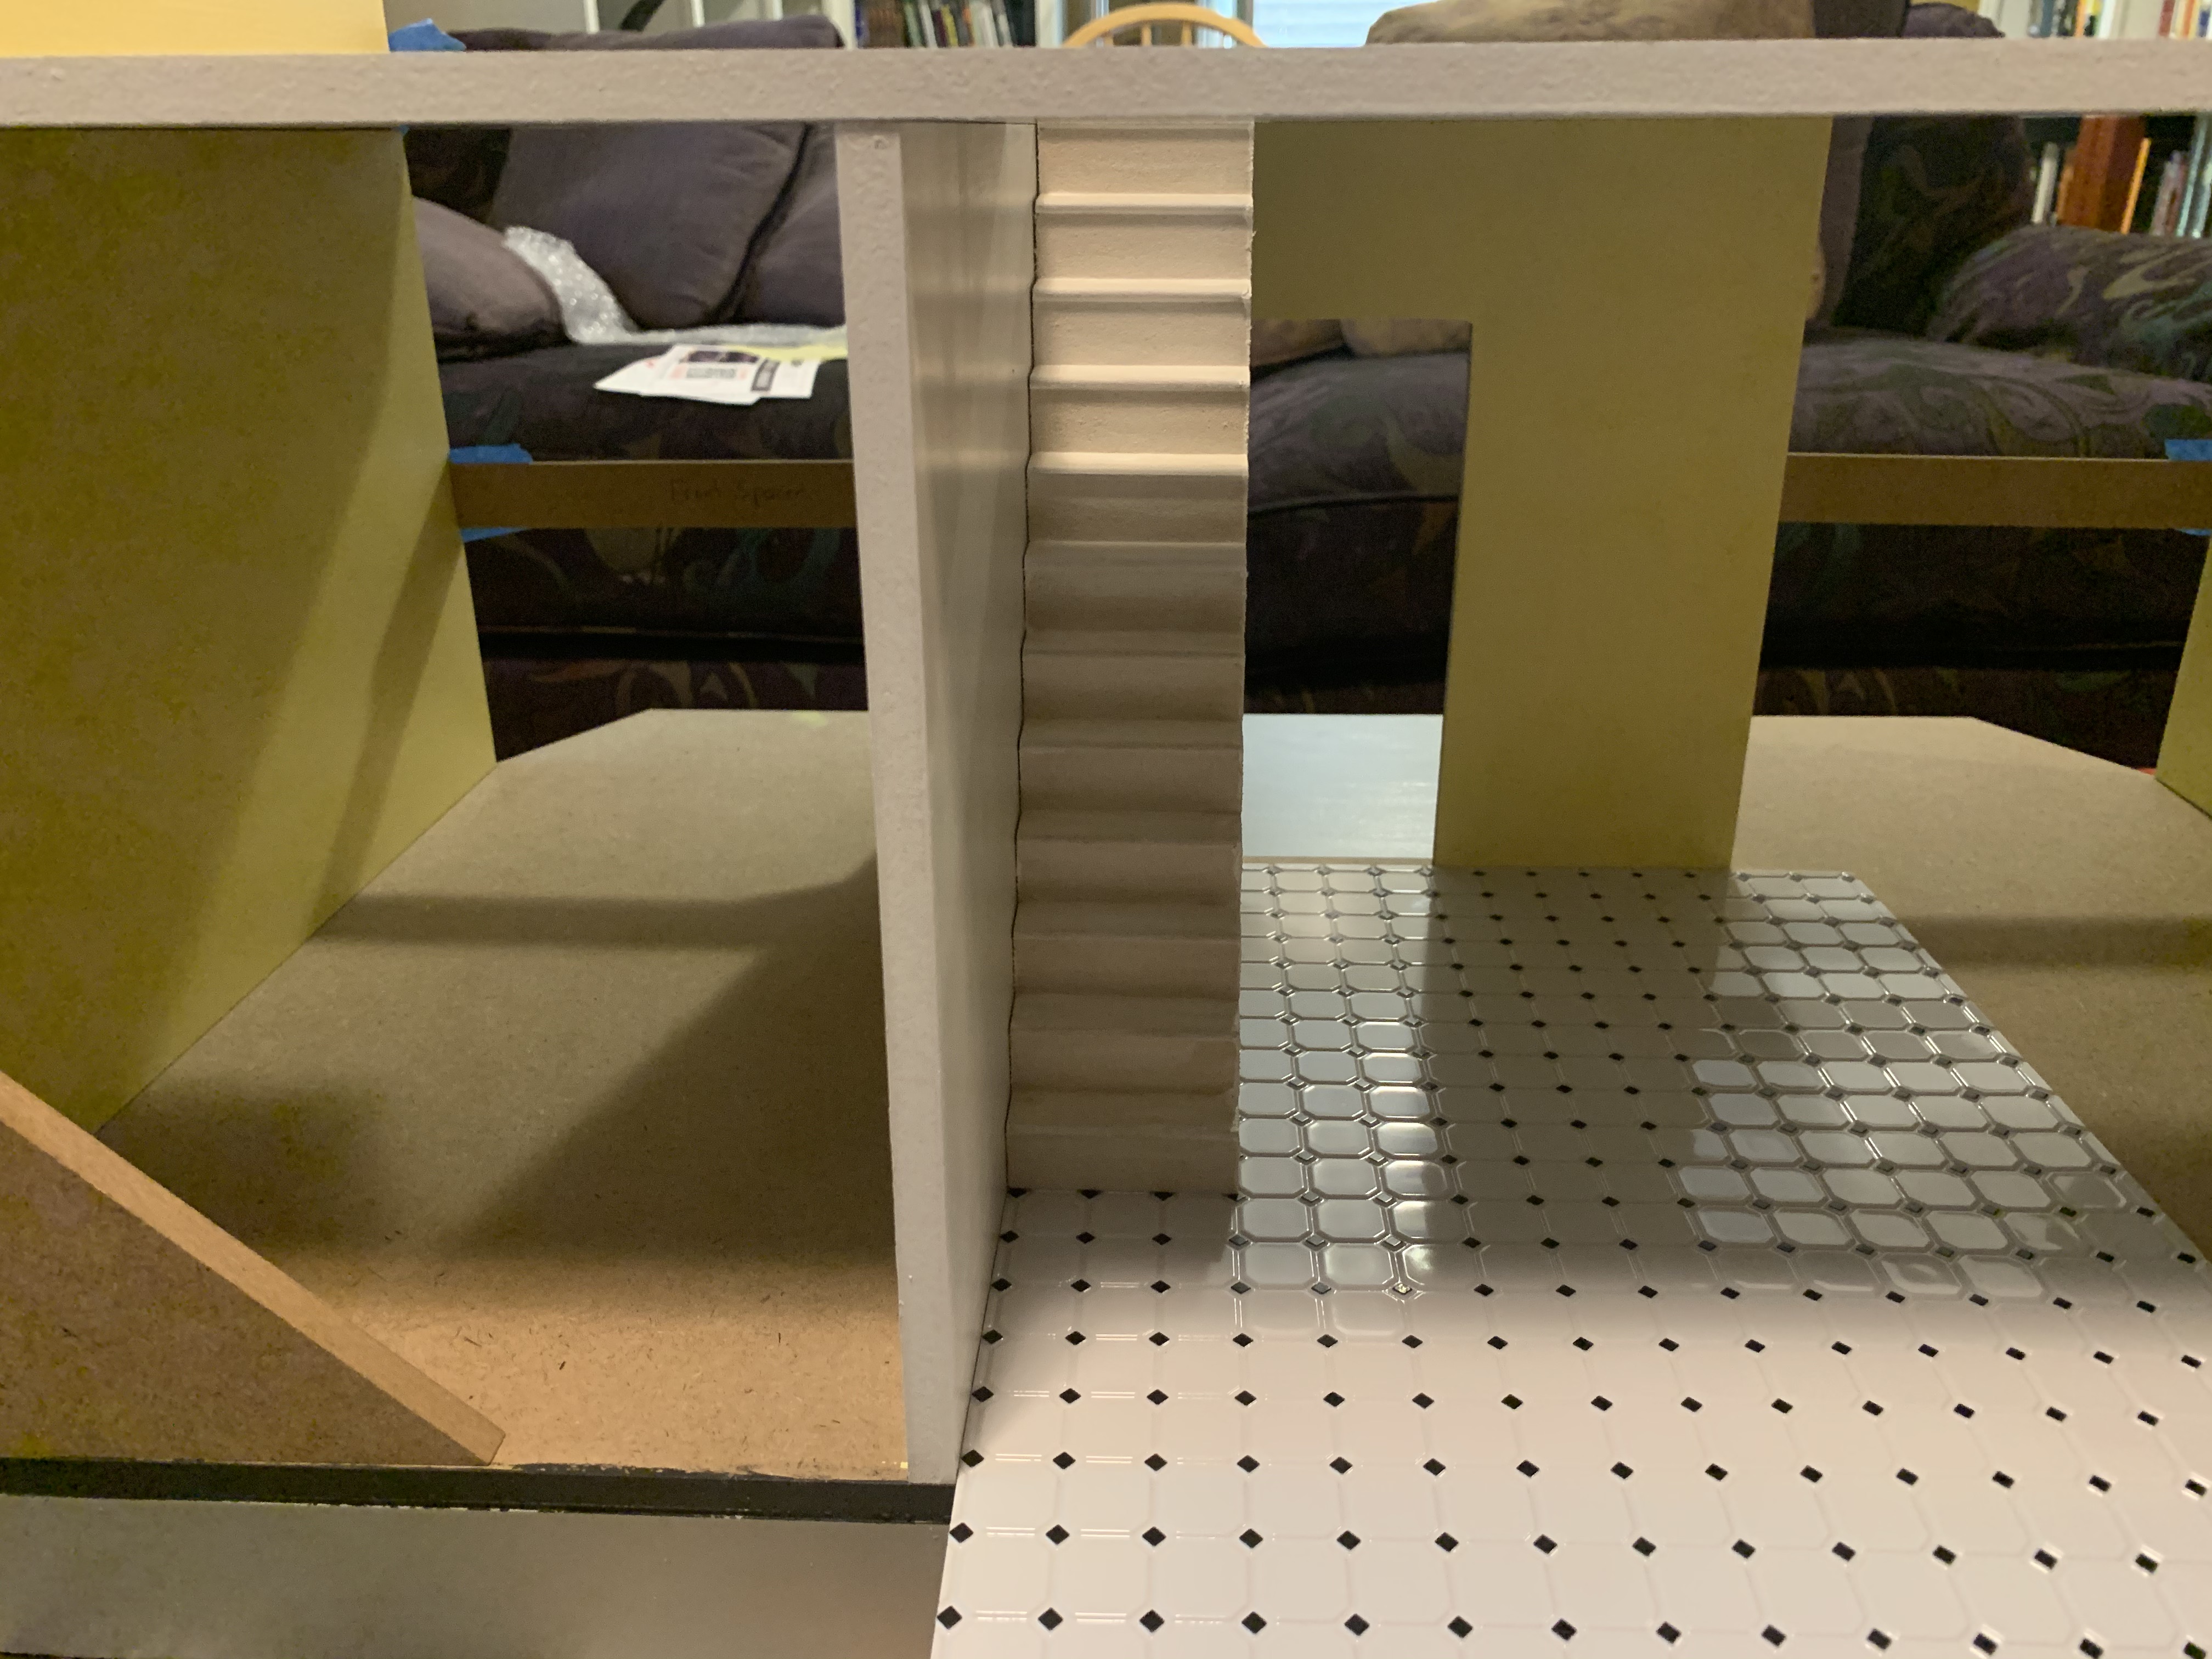
I cut the tile piece to the size of the kitchen defined by the two walls and glued it down. This then allowed me to try cutting my fabric for the carpeted areas.

My first cutting attempt on both pieces failed miserably and I discovered, literally firsthand, how sharp the blade is on a rotary cutter (fortunately just a small cut but how did it bleed). I had bought extra fabric figuring there would be some learning and trial and error involved. My second cut for both, having a bit of practice proved much better.

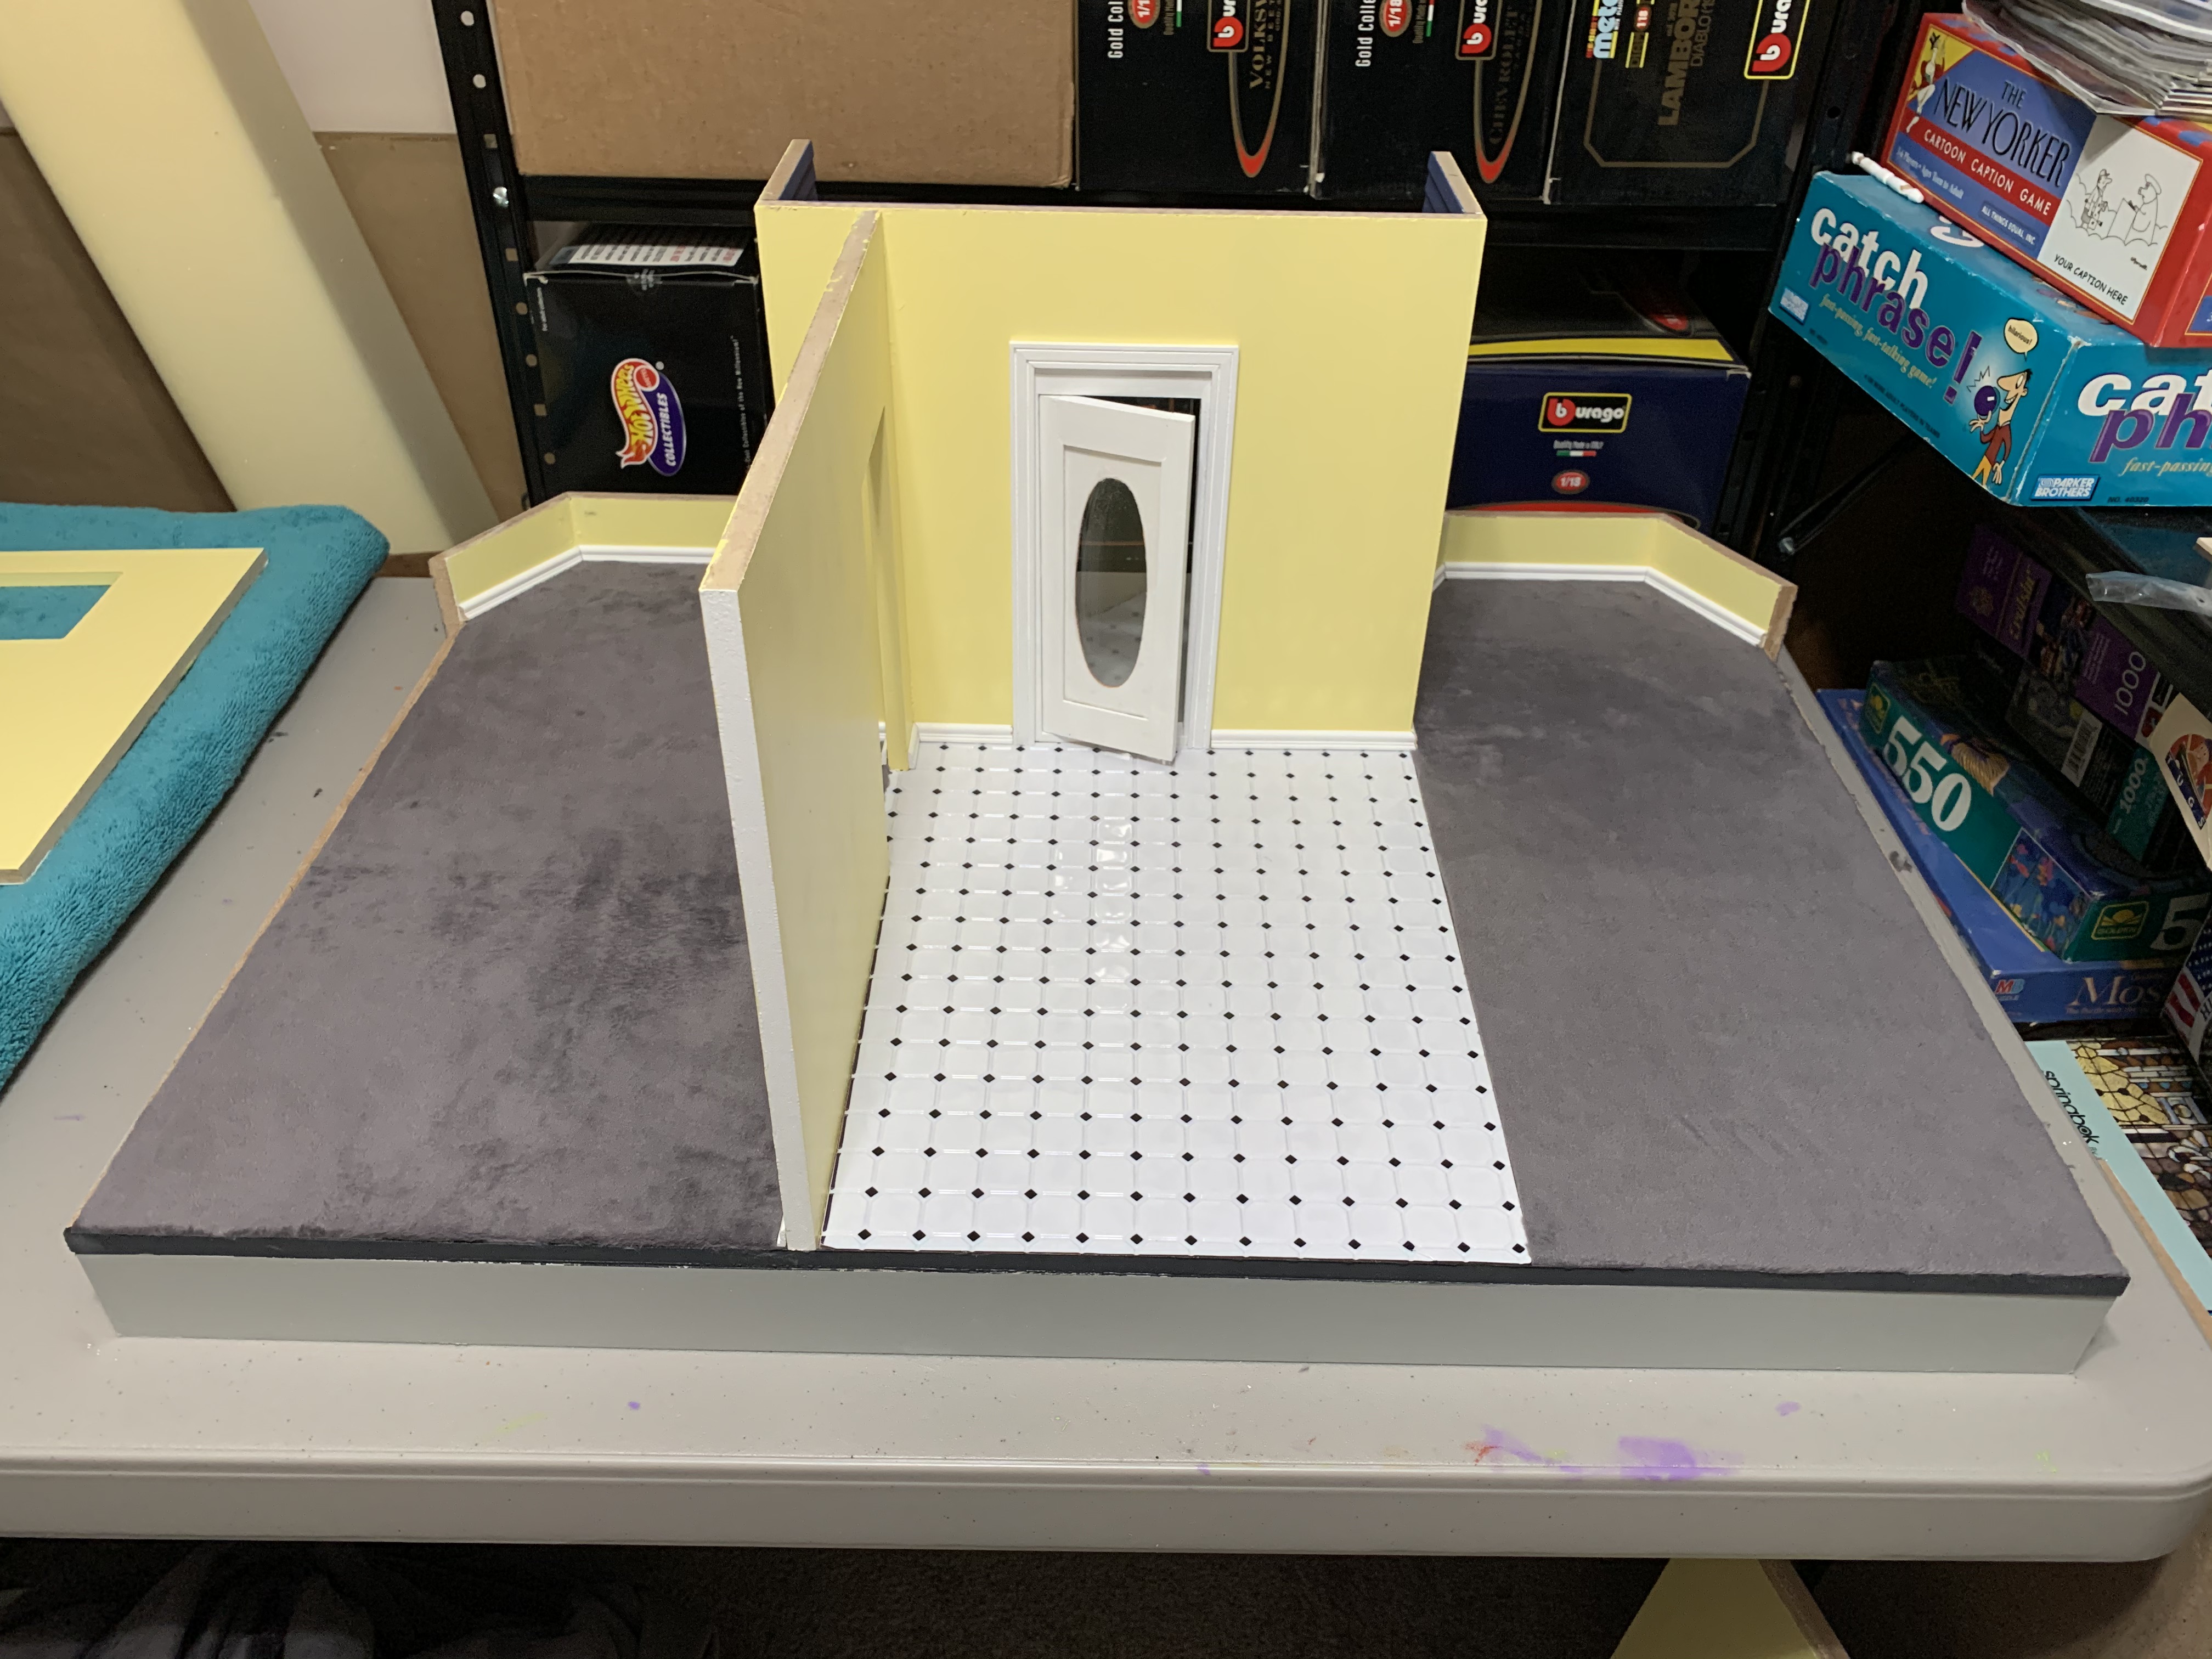
Having easy access to the floor for cutting the fabric made me realize installing the baseboards before continuing with the construction per the instructions would also be much easier. But here again, I had to jump ahead to steps later in the instructions.
These bay wall pieces would need to be installed before I could install the baseboards. In the instructions, these were not installed until the second and third floors had been added. But I only needed the bottom ones for this first floor, so I once again taped the side wall up in order to find their proper location.
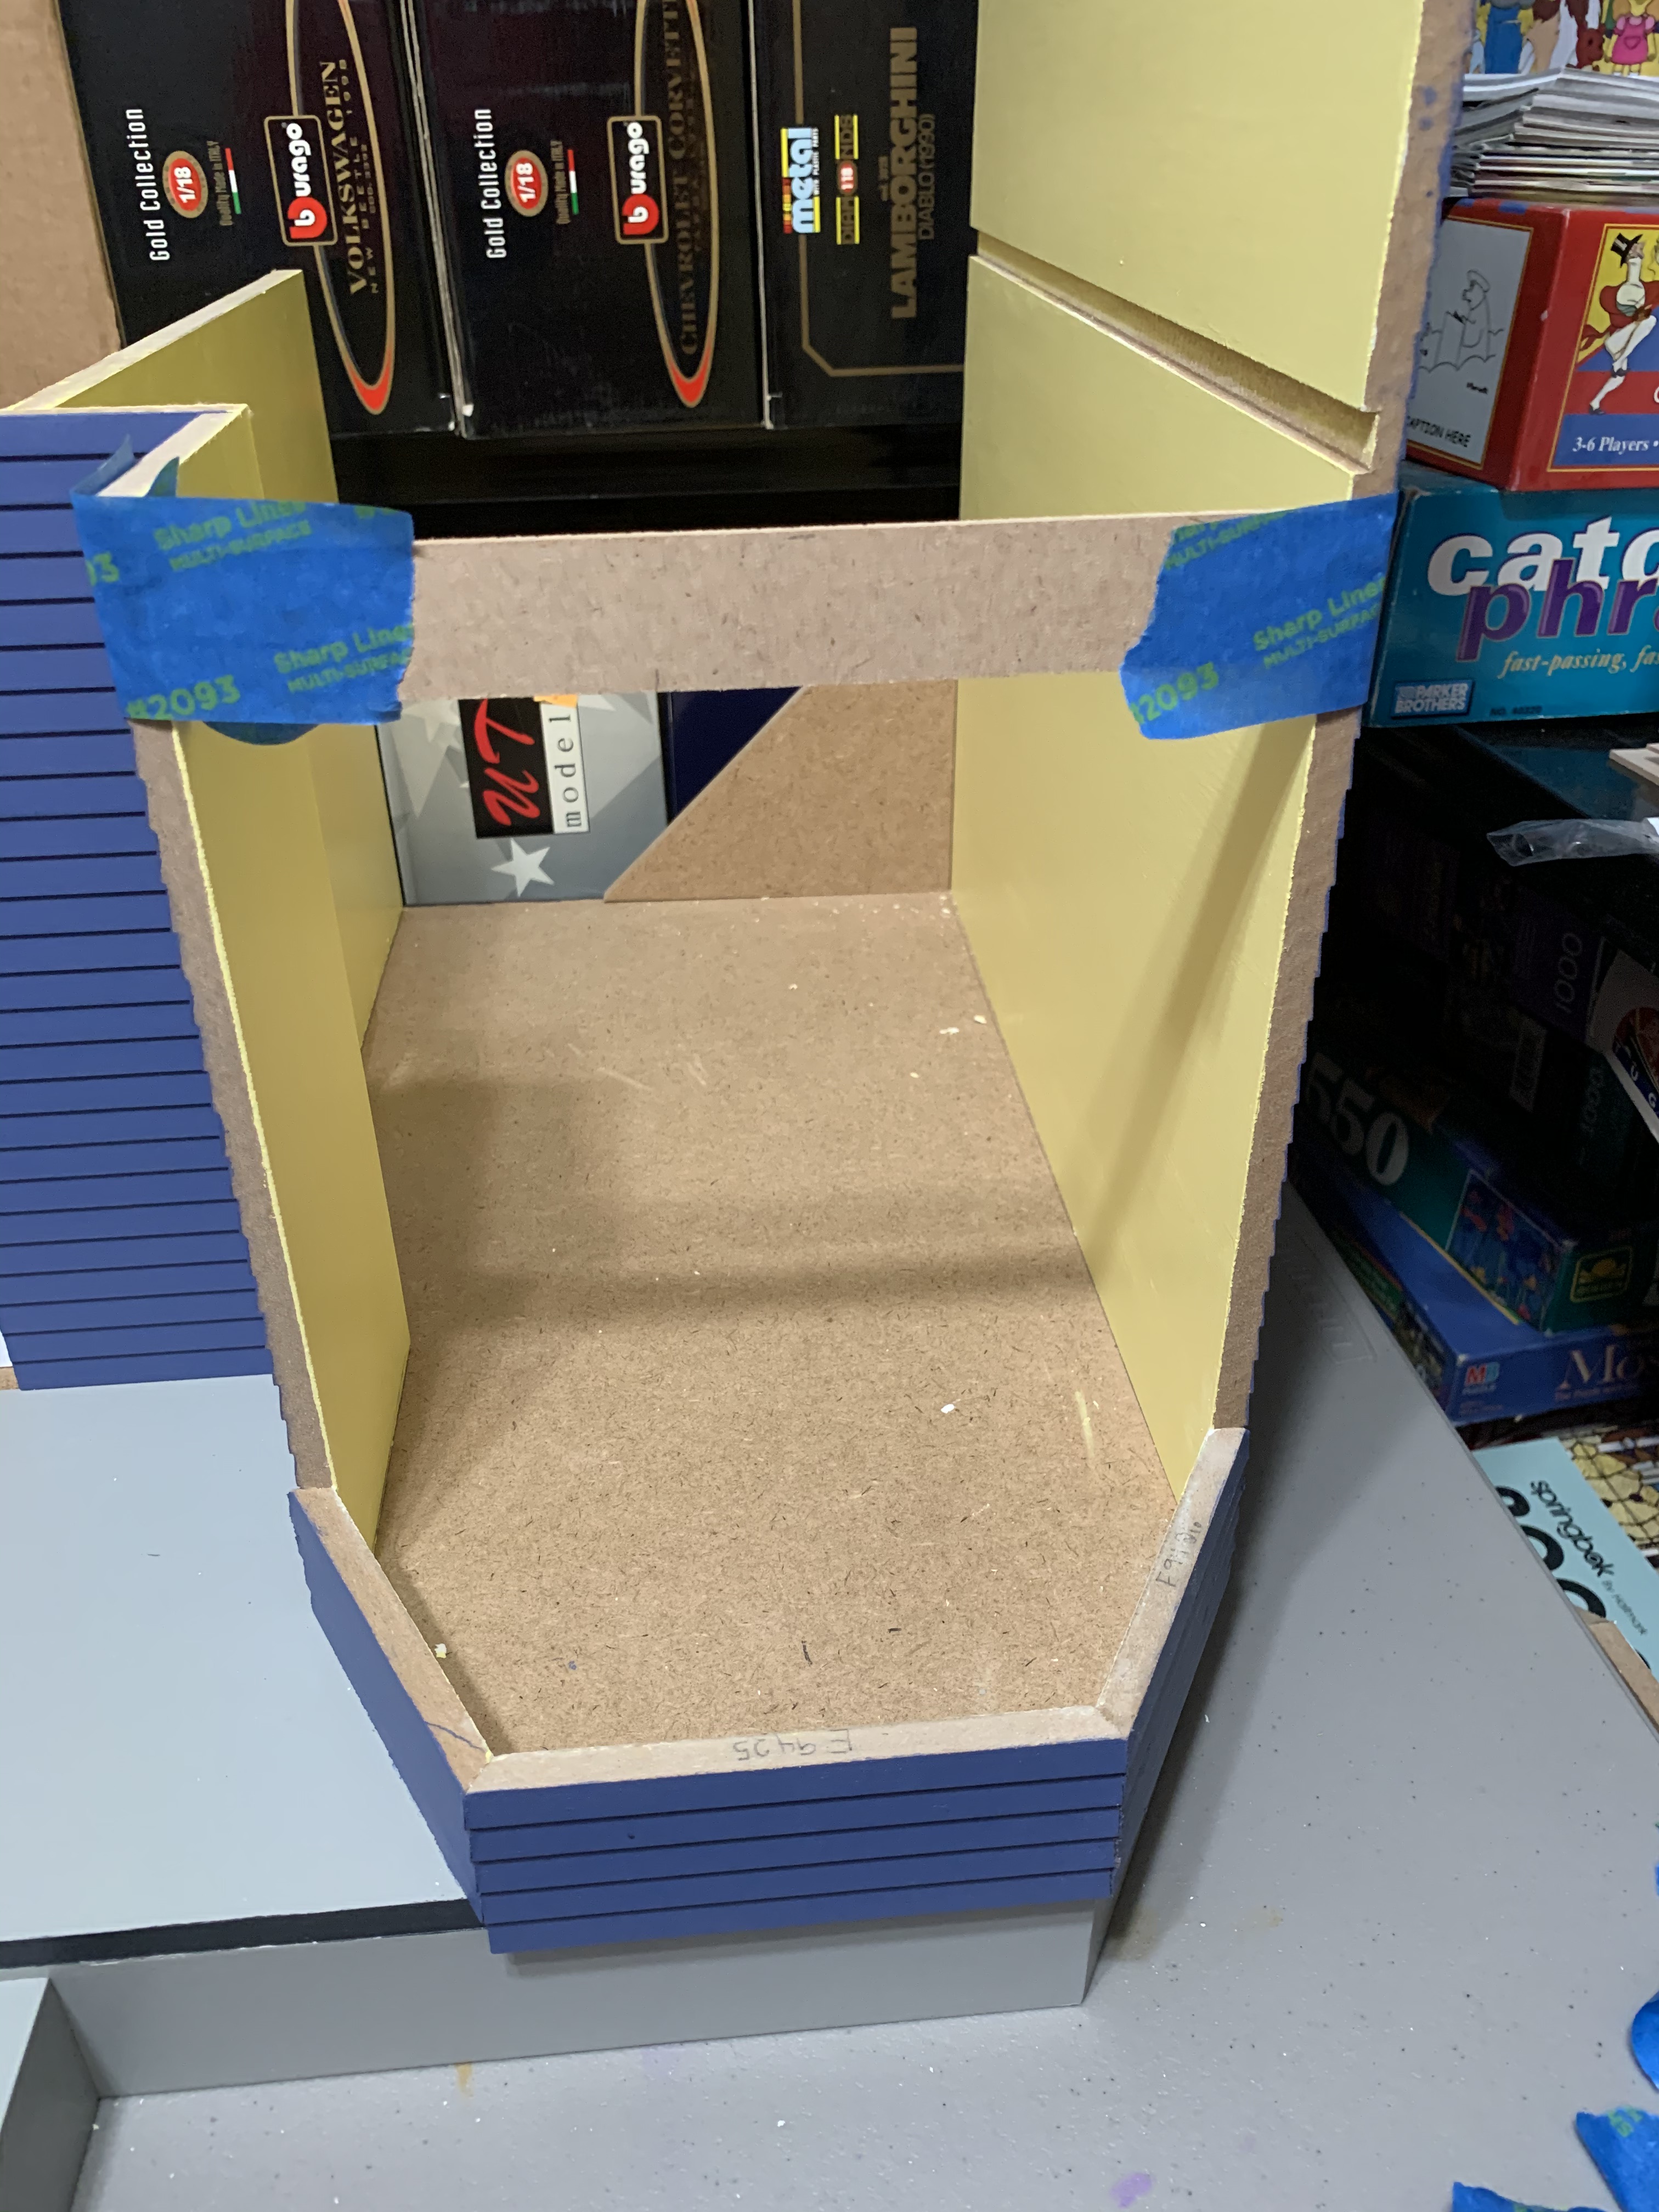
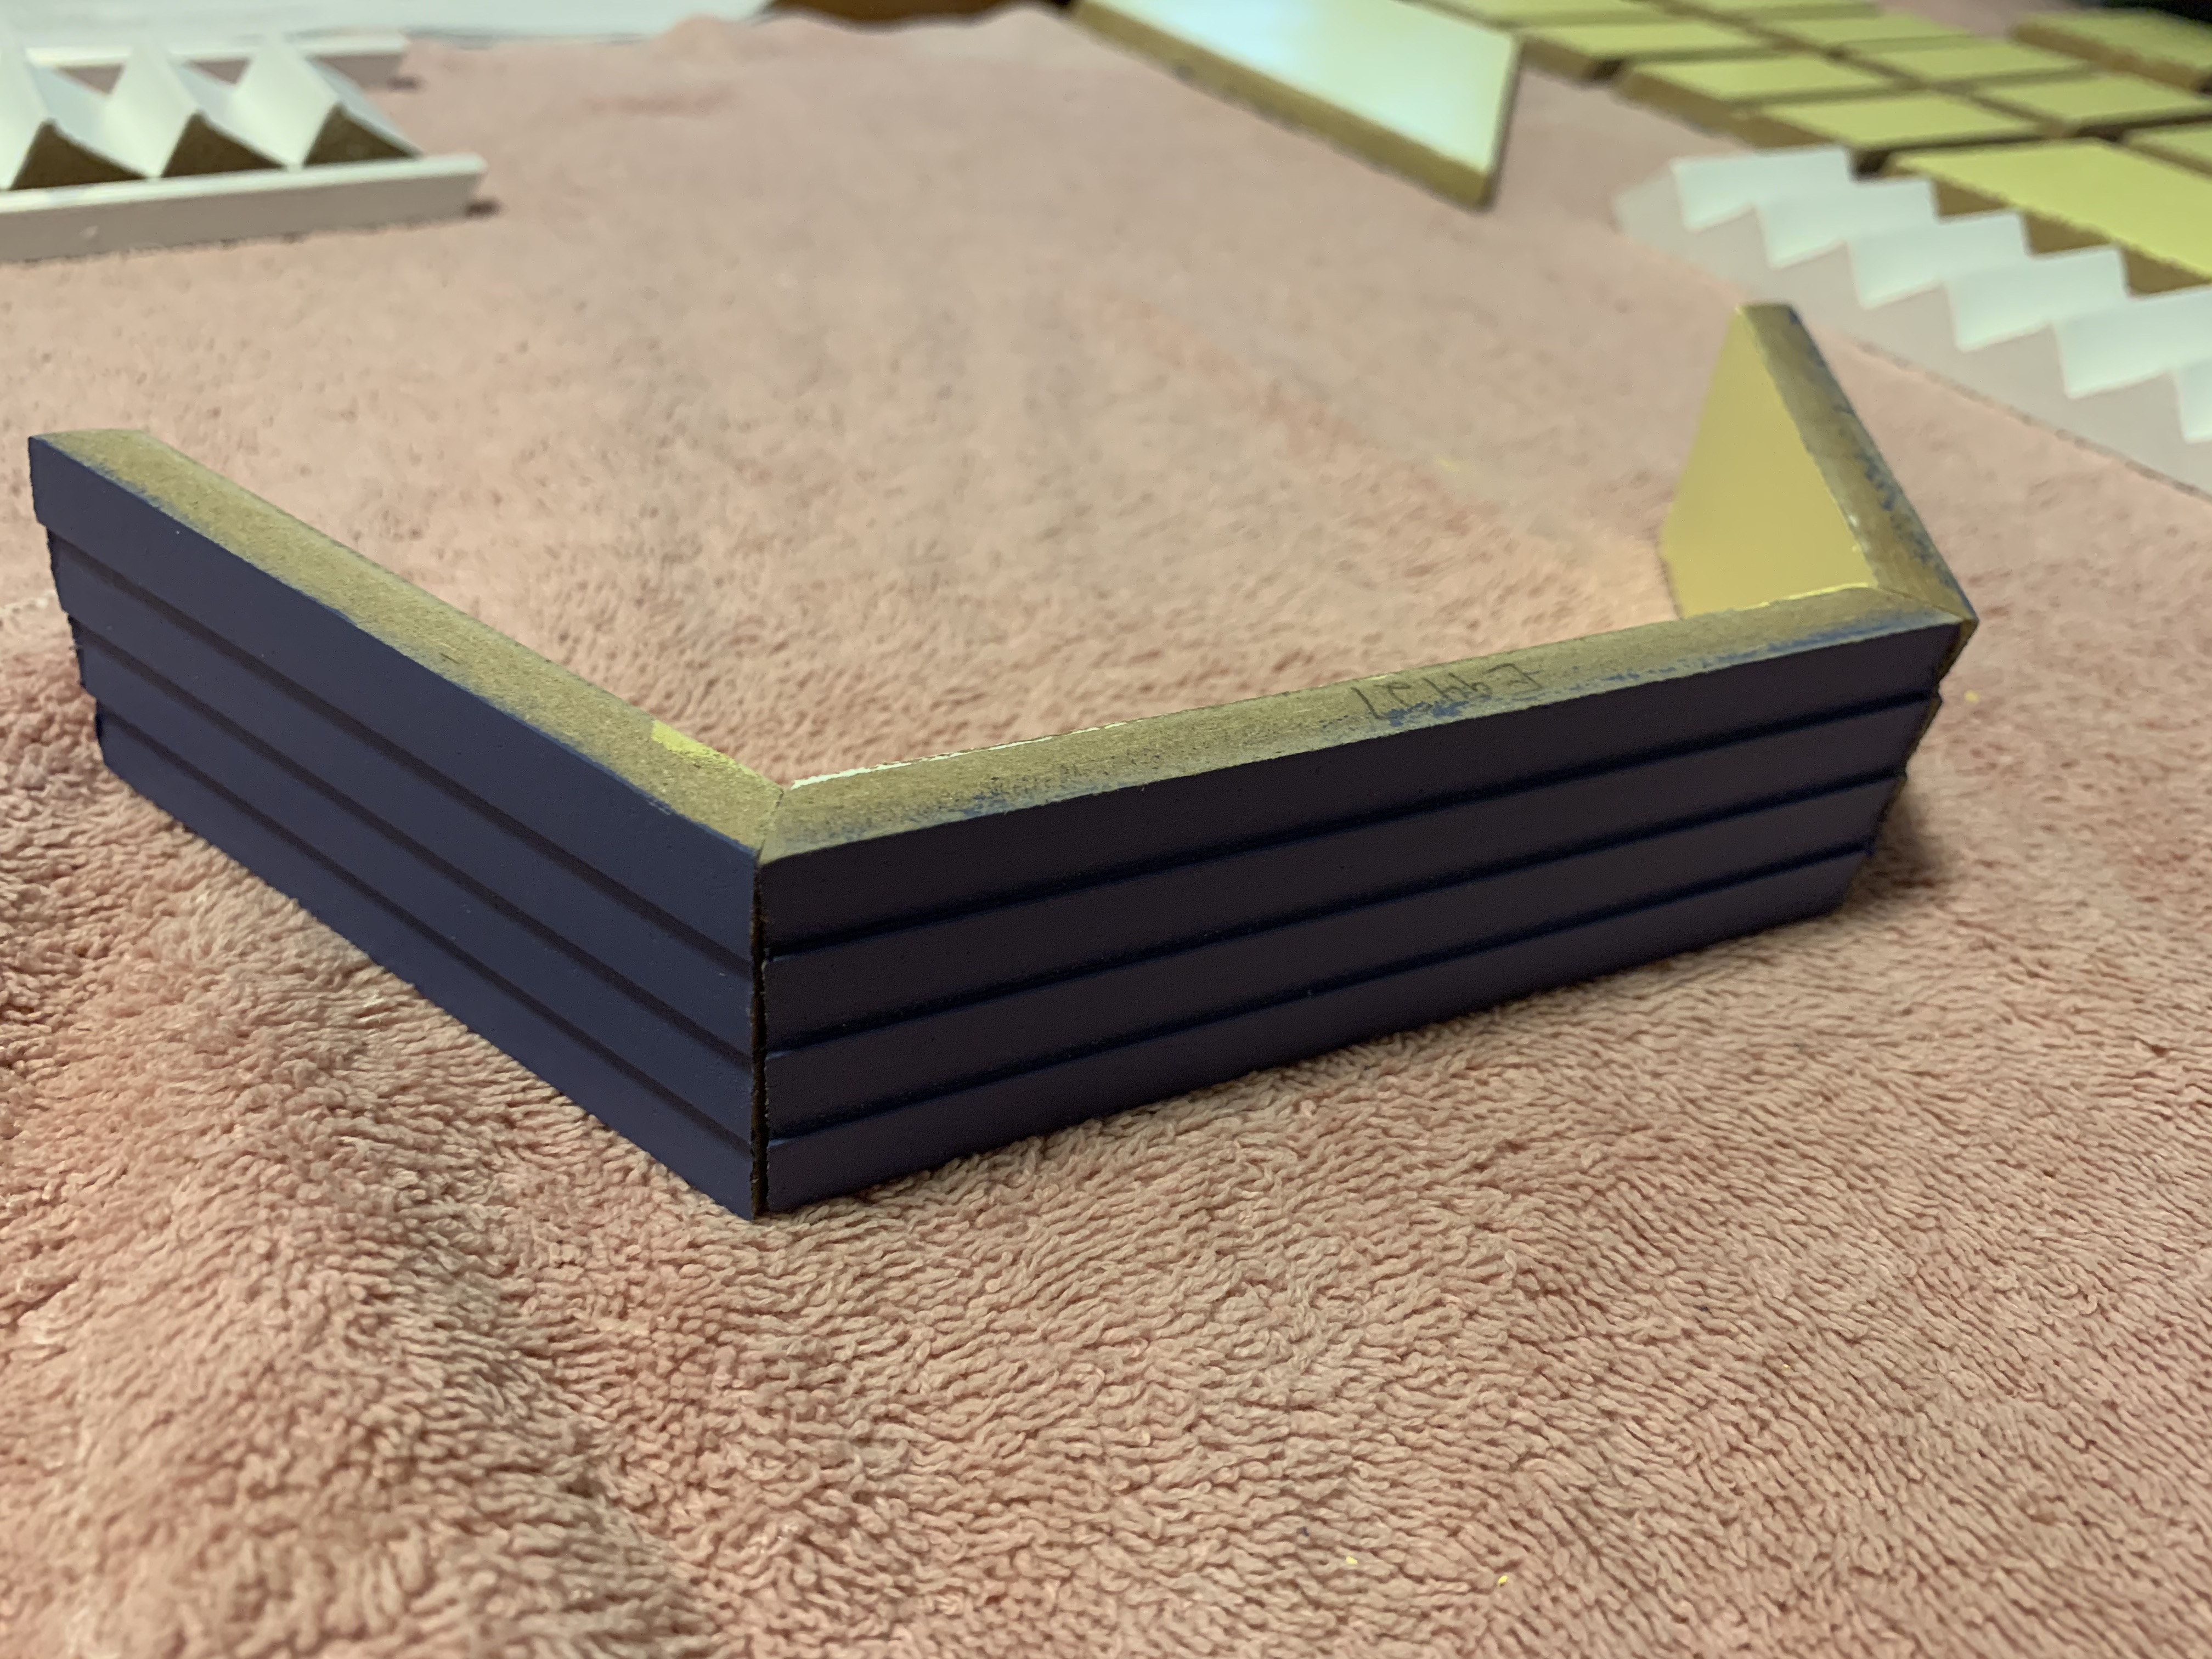
With these bay walls glued to the foundation and the first-floor divider attached, I could now cut my baseboard pieces.
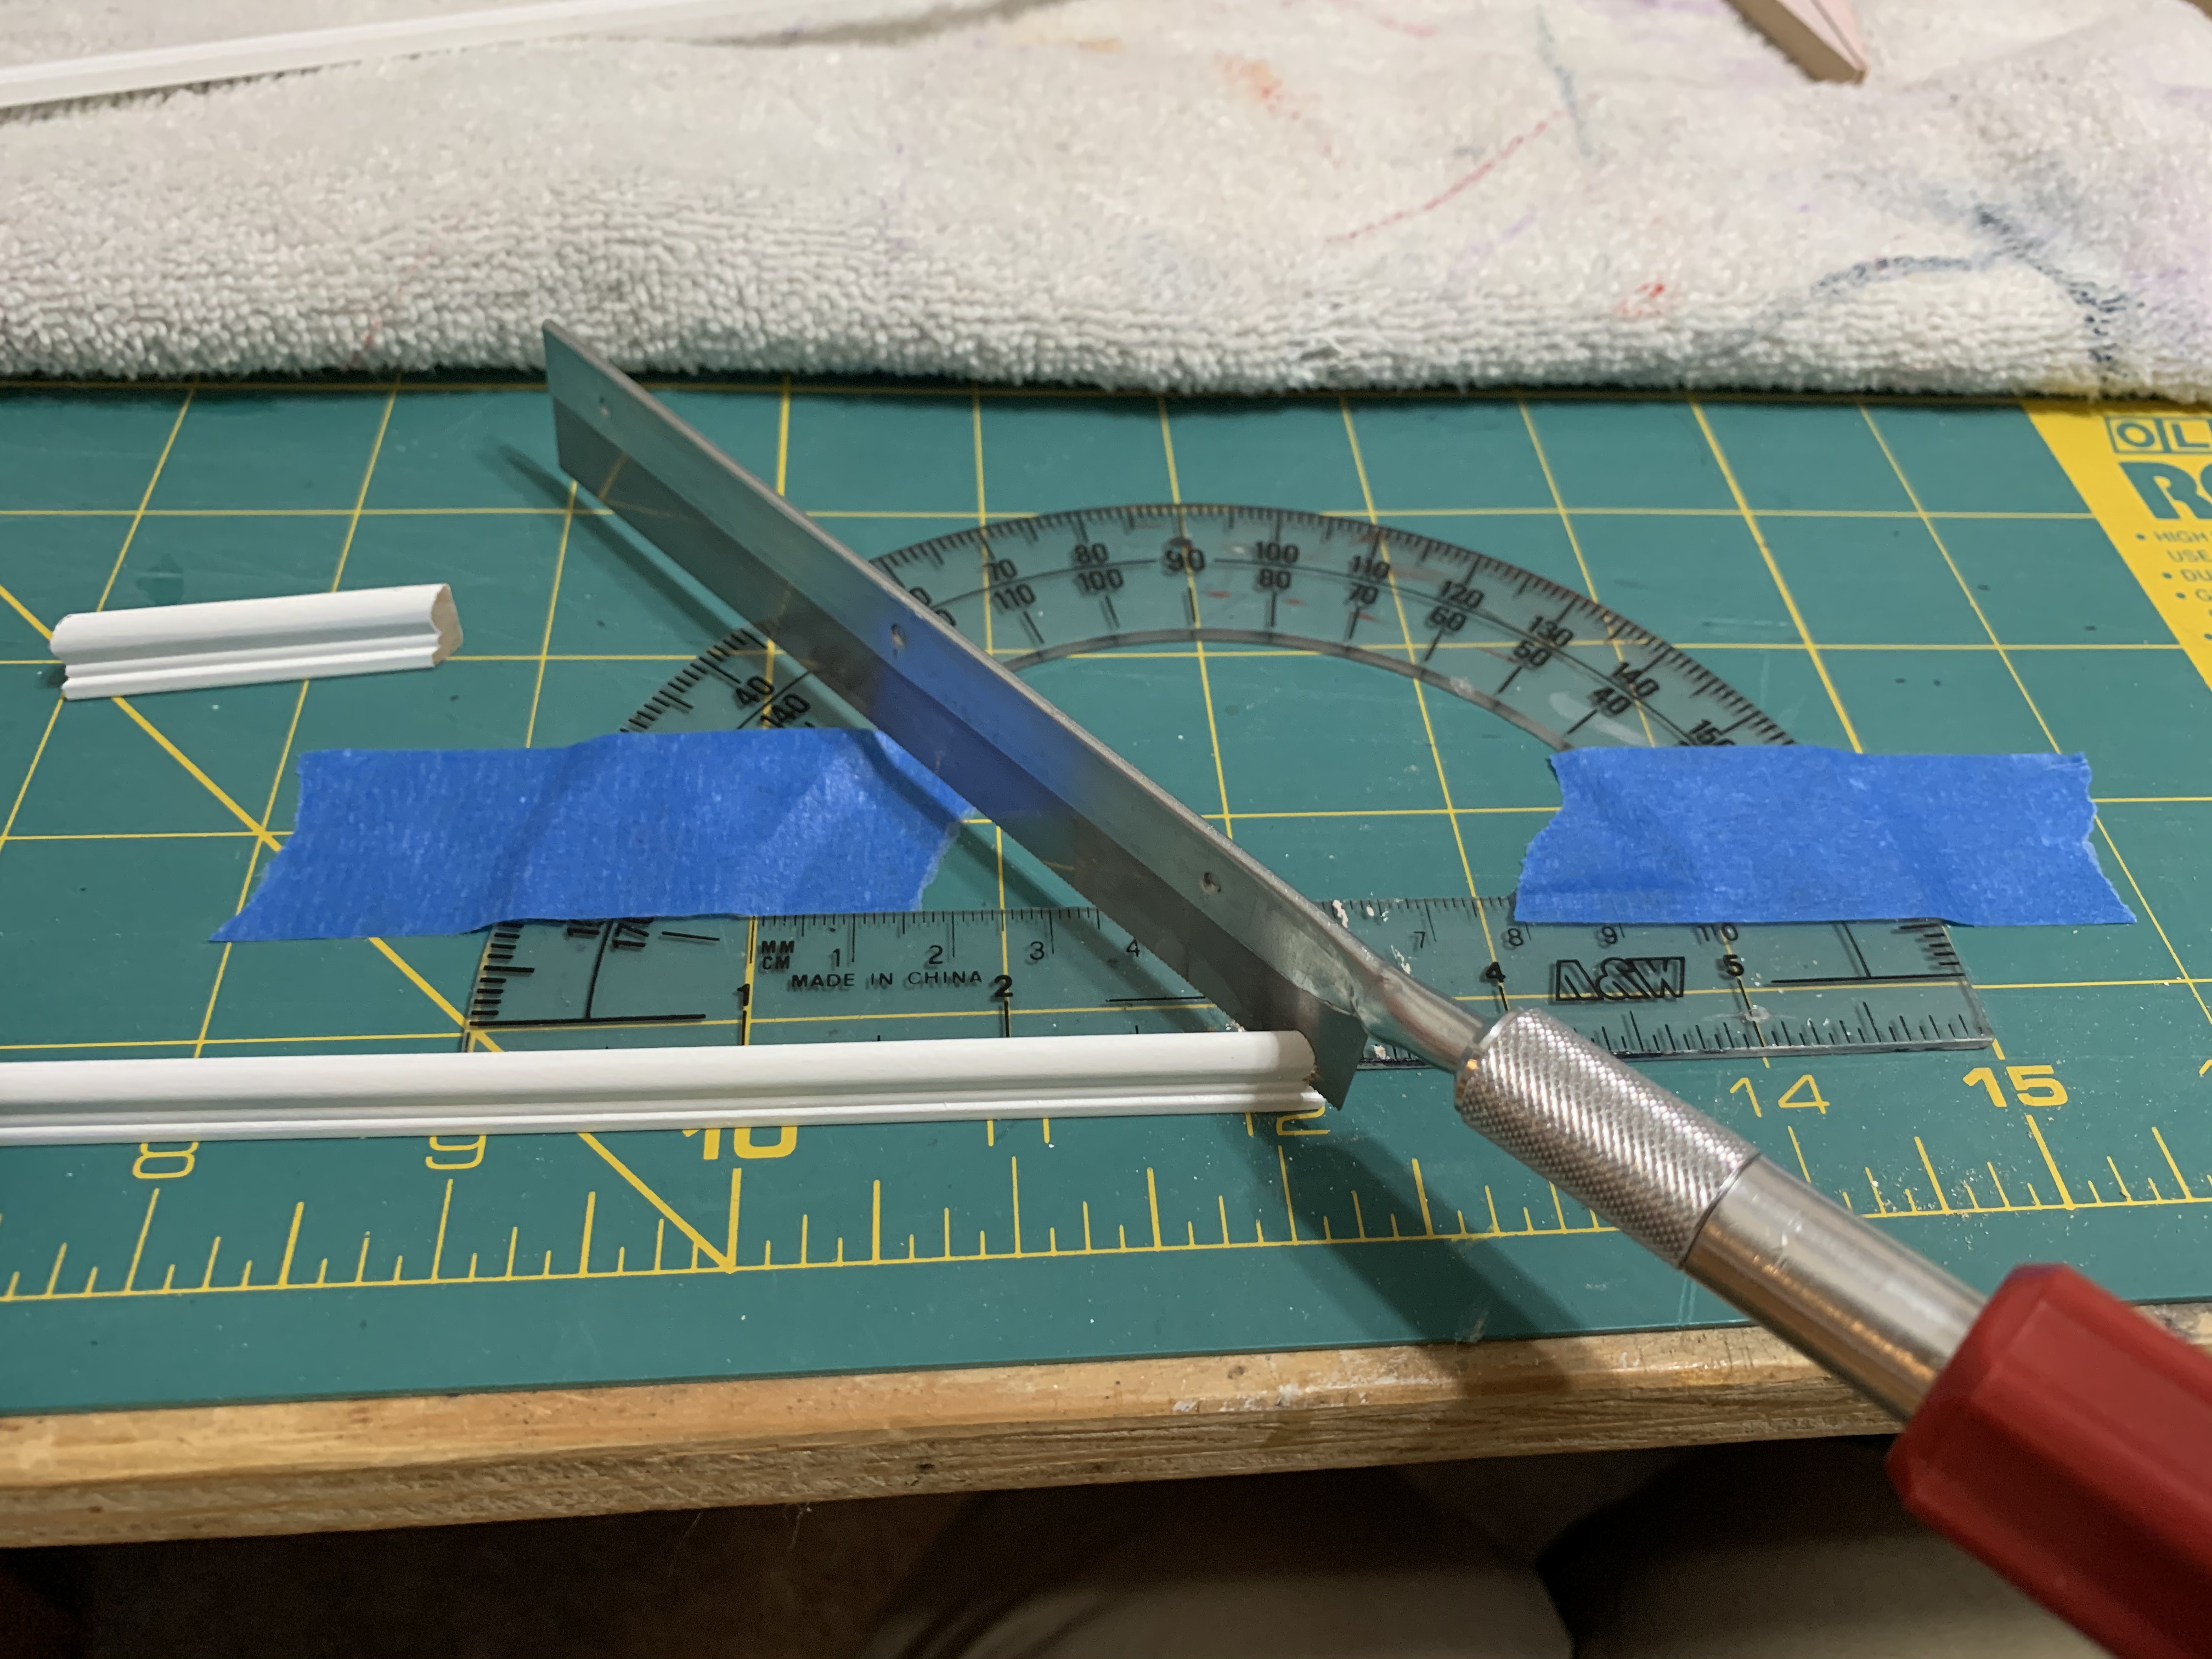
If you read my previous series of blog posts about the first doll house I built, you know that I had to rig up a pseudo miter box using a compass. After I bought this second doll house, I discovered that there actually are miniature miter boxes and so purchased one.
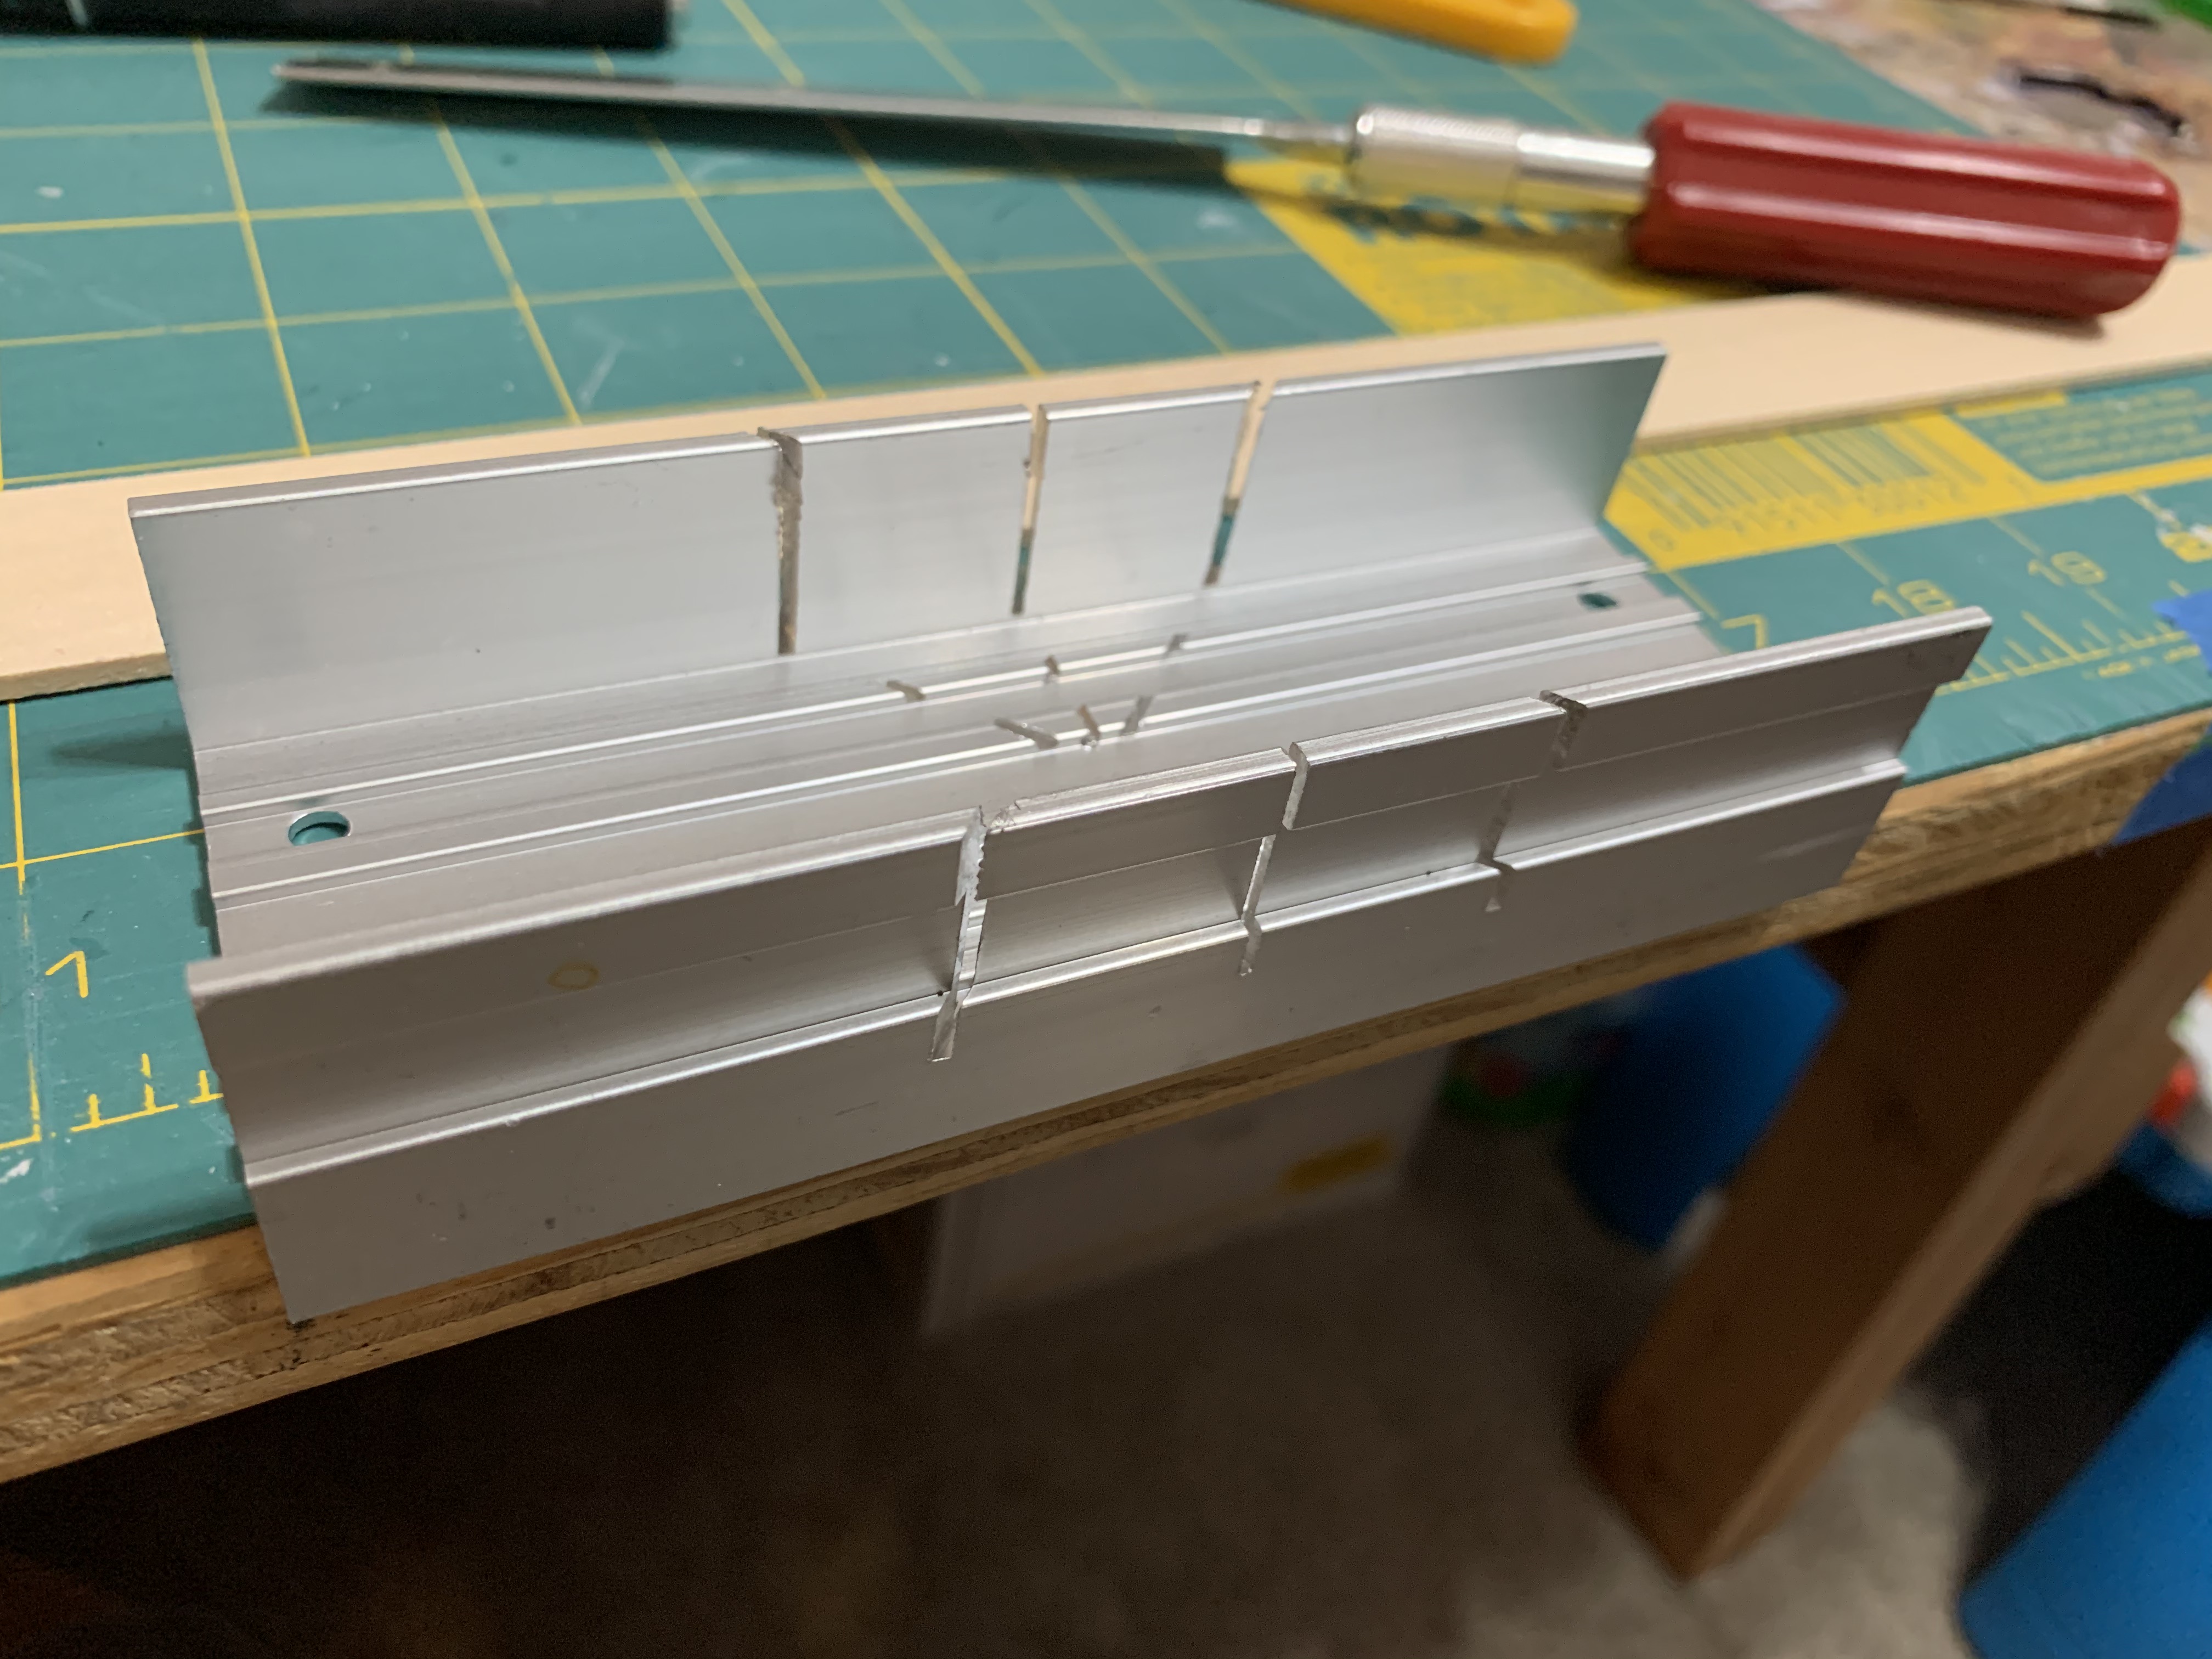
It allowed a 45-degree angle cut and a 90-degree angle cut which worked for many walls. But with the bay walls, I would need a 60-degree cut. So, I had to reassemble my little compass miter to cut the bay baseboards.

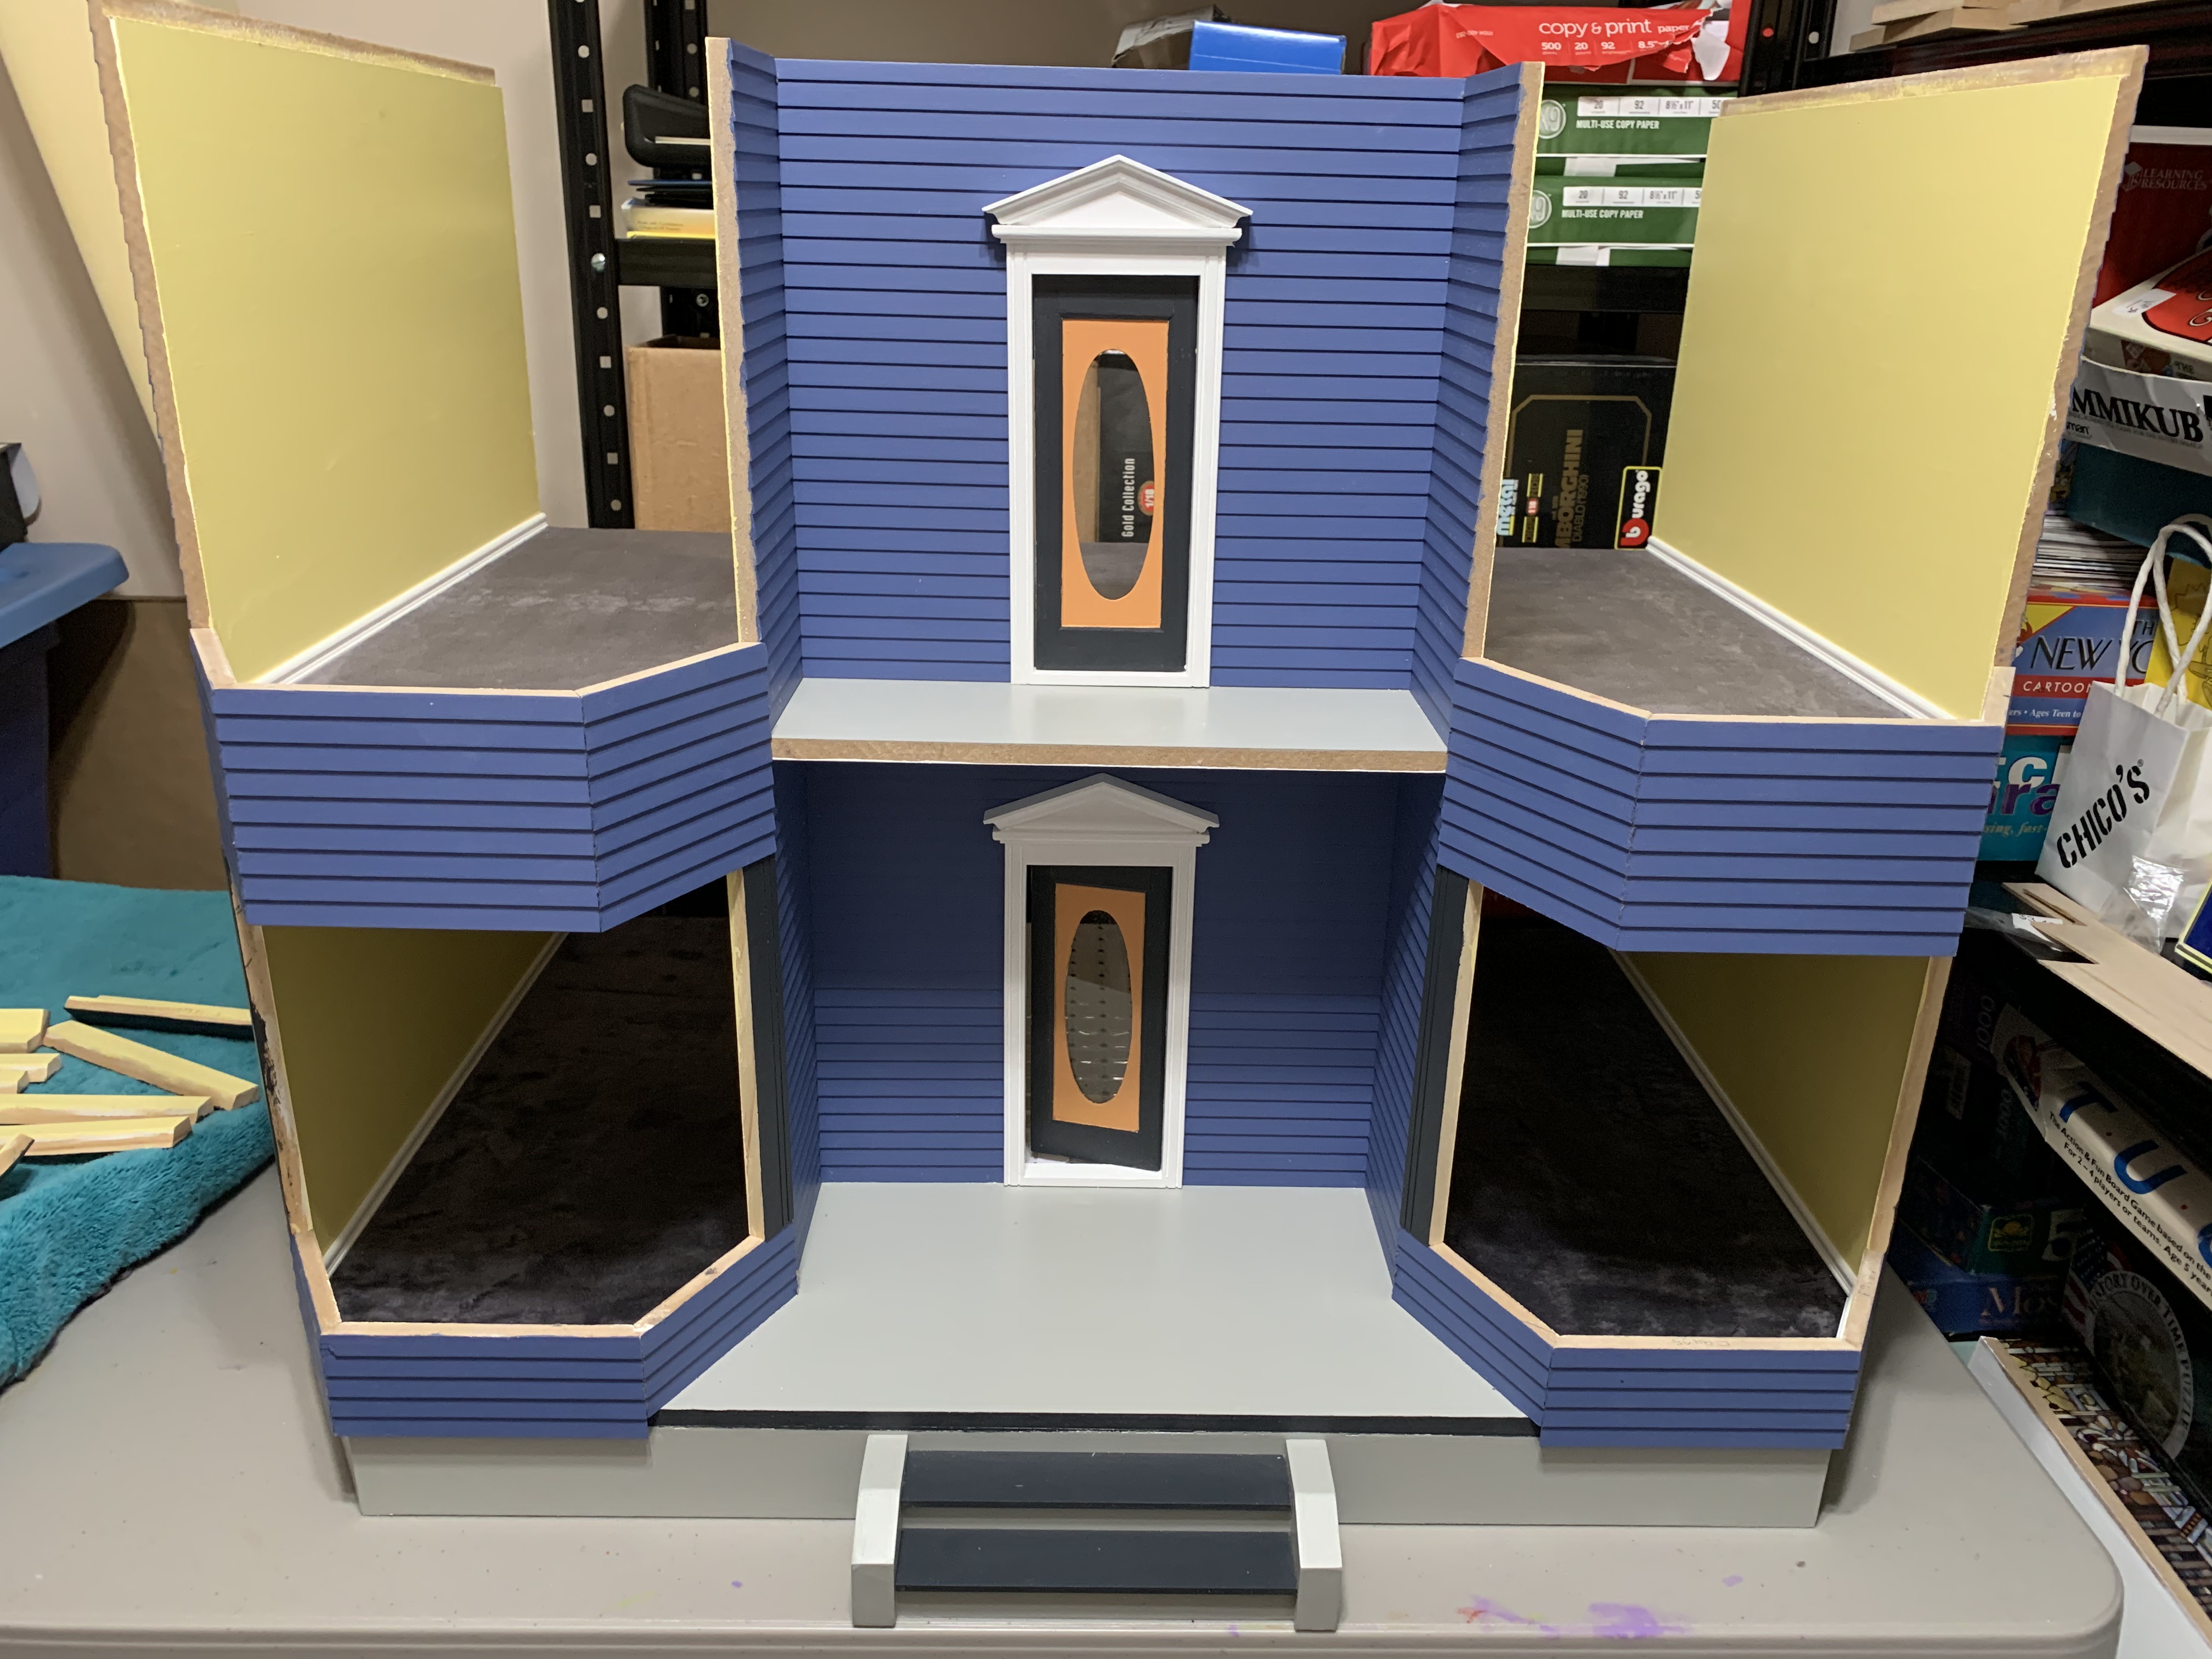
Cutting baseboards for the entire first floor prompted me to work ahead on another step, painting and installing the front door.

This was necessary because the baseboards in the kitchen would butt up against this interior door frame, seen to the right of the disassembled door. And to know where they would be placed required that the front door be installed since the frame was glued to the back of the door assembly.
After a first coat of primer and three coats of paint, in three different colors, the front door and interior frame could finally be installed.

Now I could actually glue down the carpet.
As I smoothed my hand over the plush fabric, I was rather pleased with my ingenuity. Once the glue had dried, I glued down the baseboards.
Now I was ready to resume following the actual instructions.
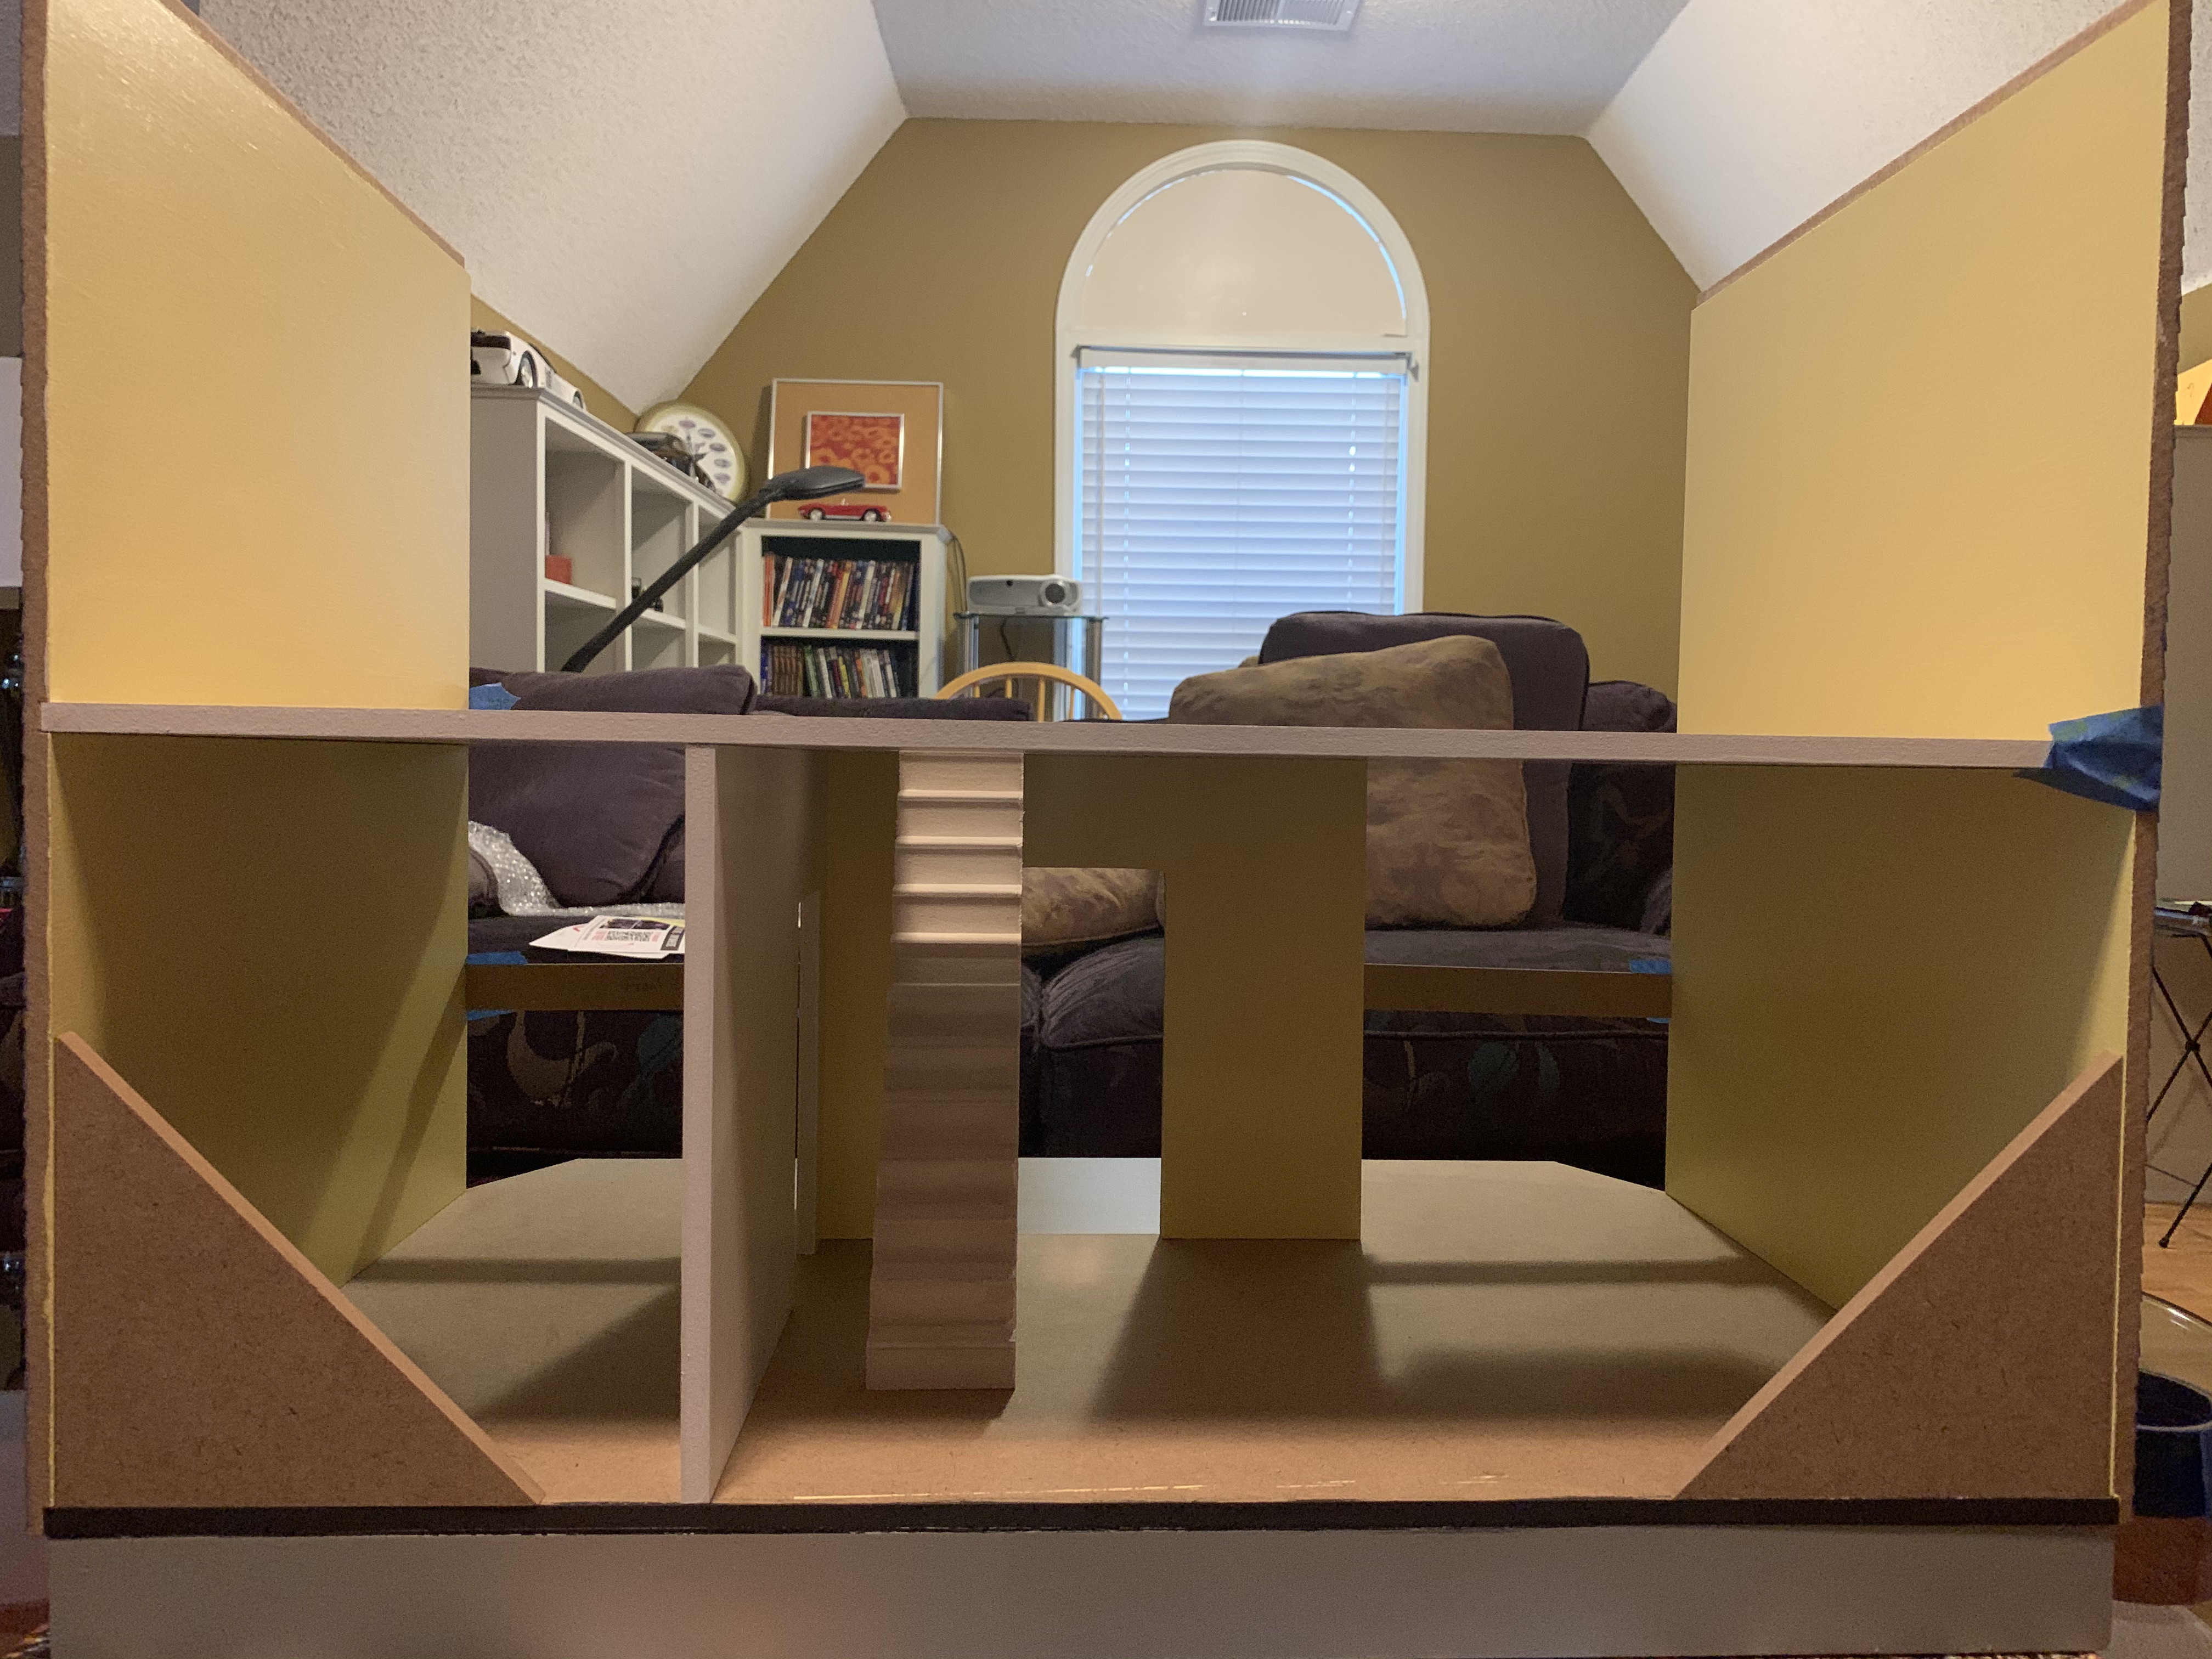
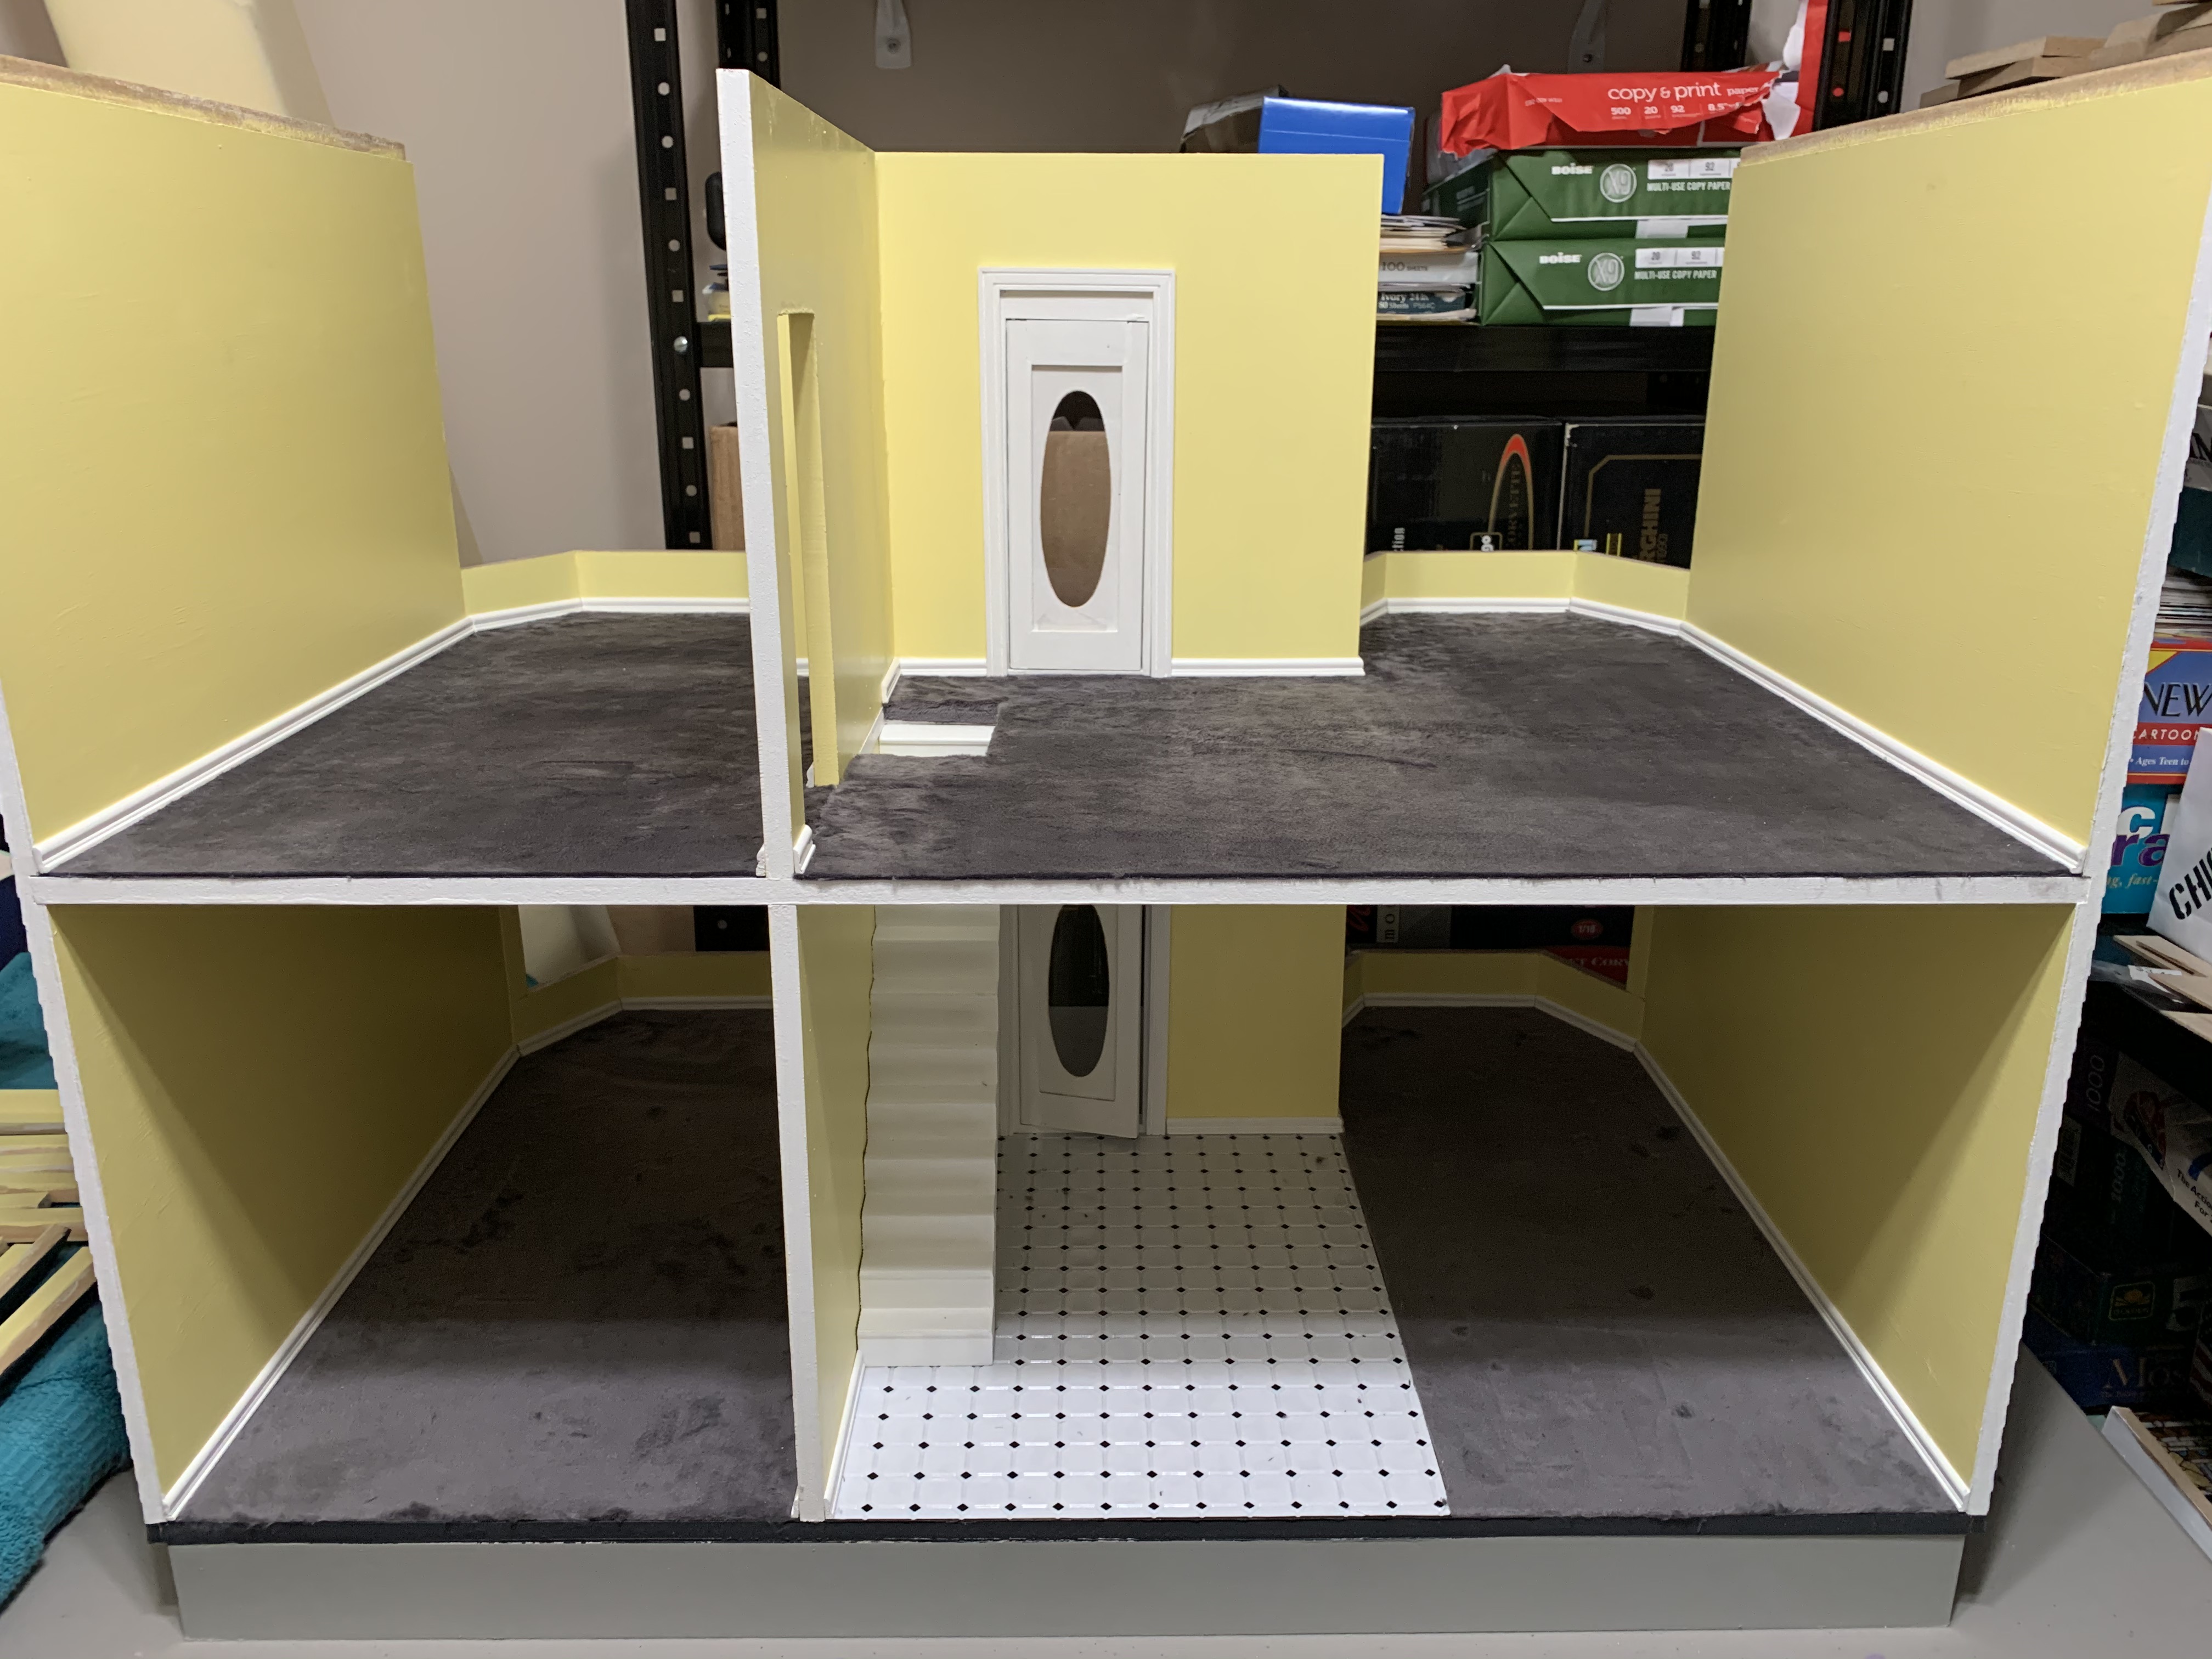
Per the instructions, the two side walls and the ceiling were glued down.
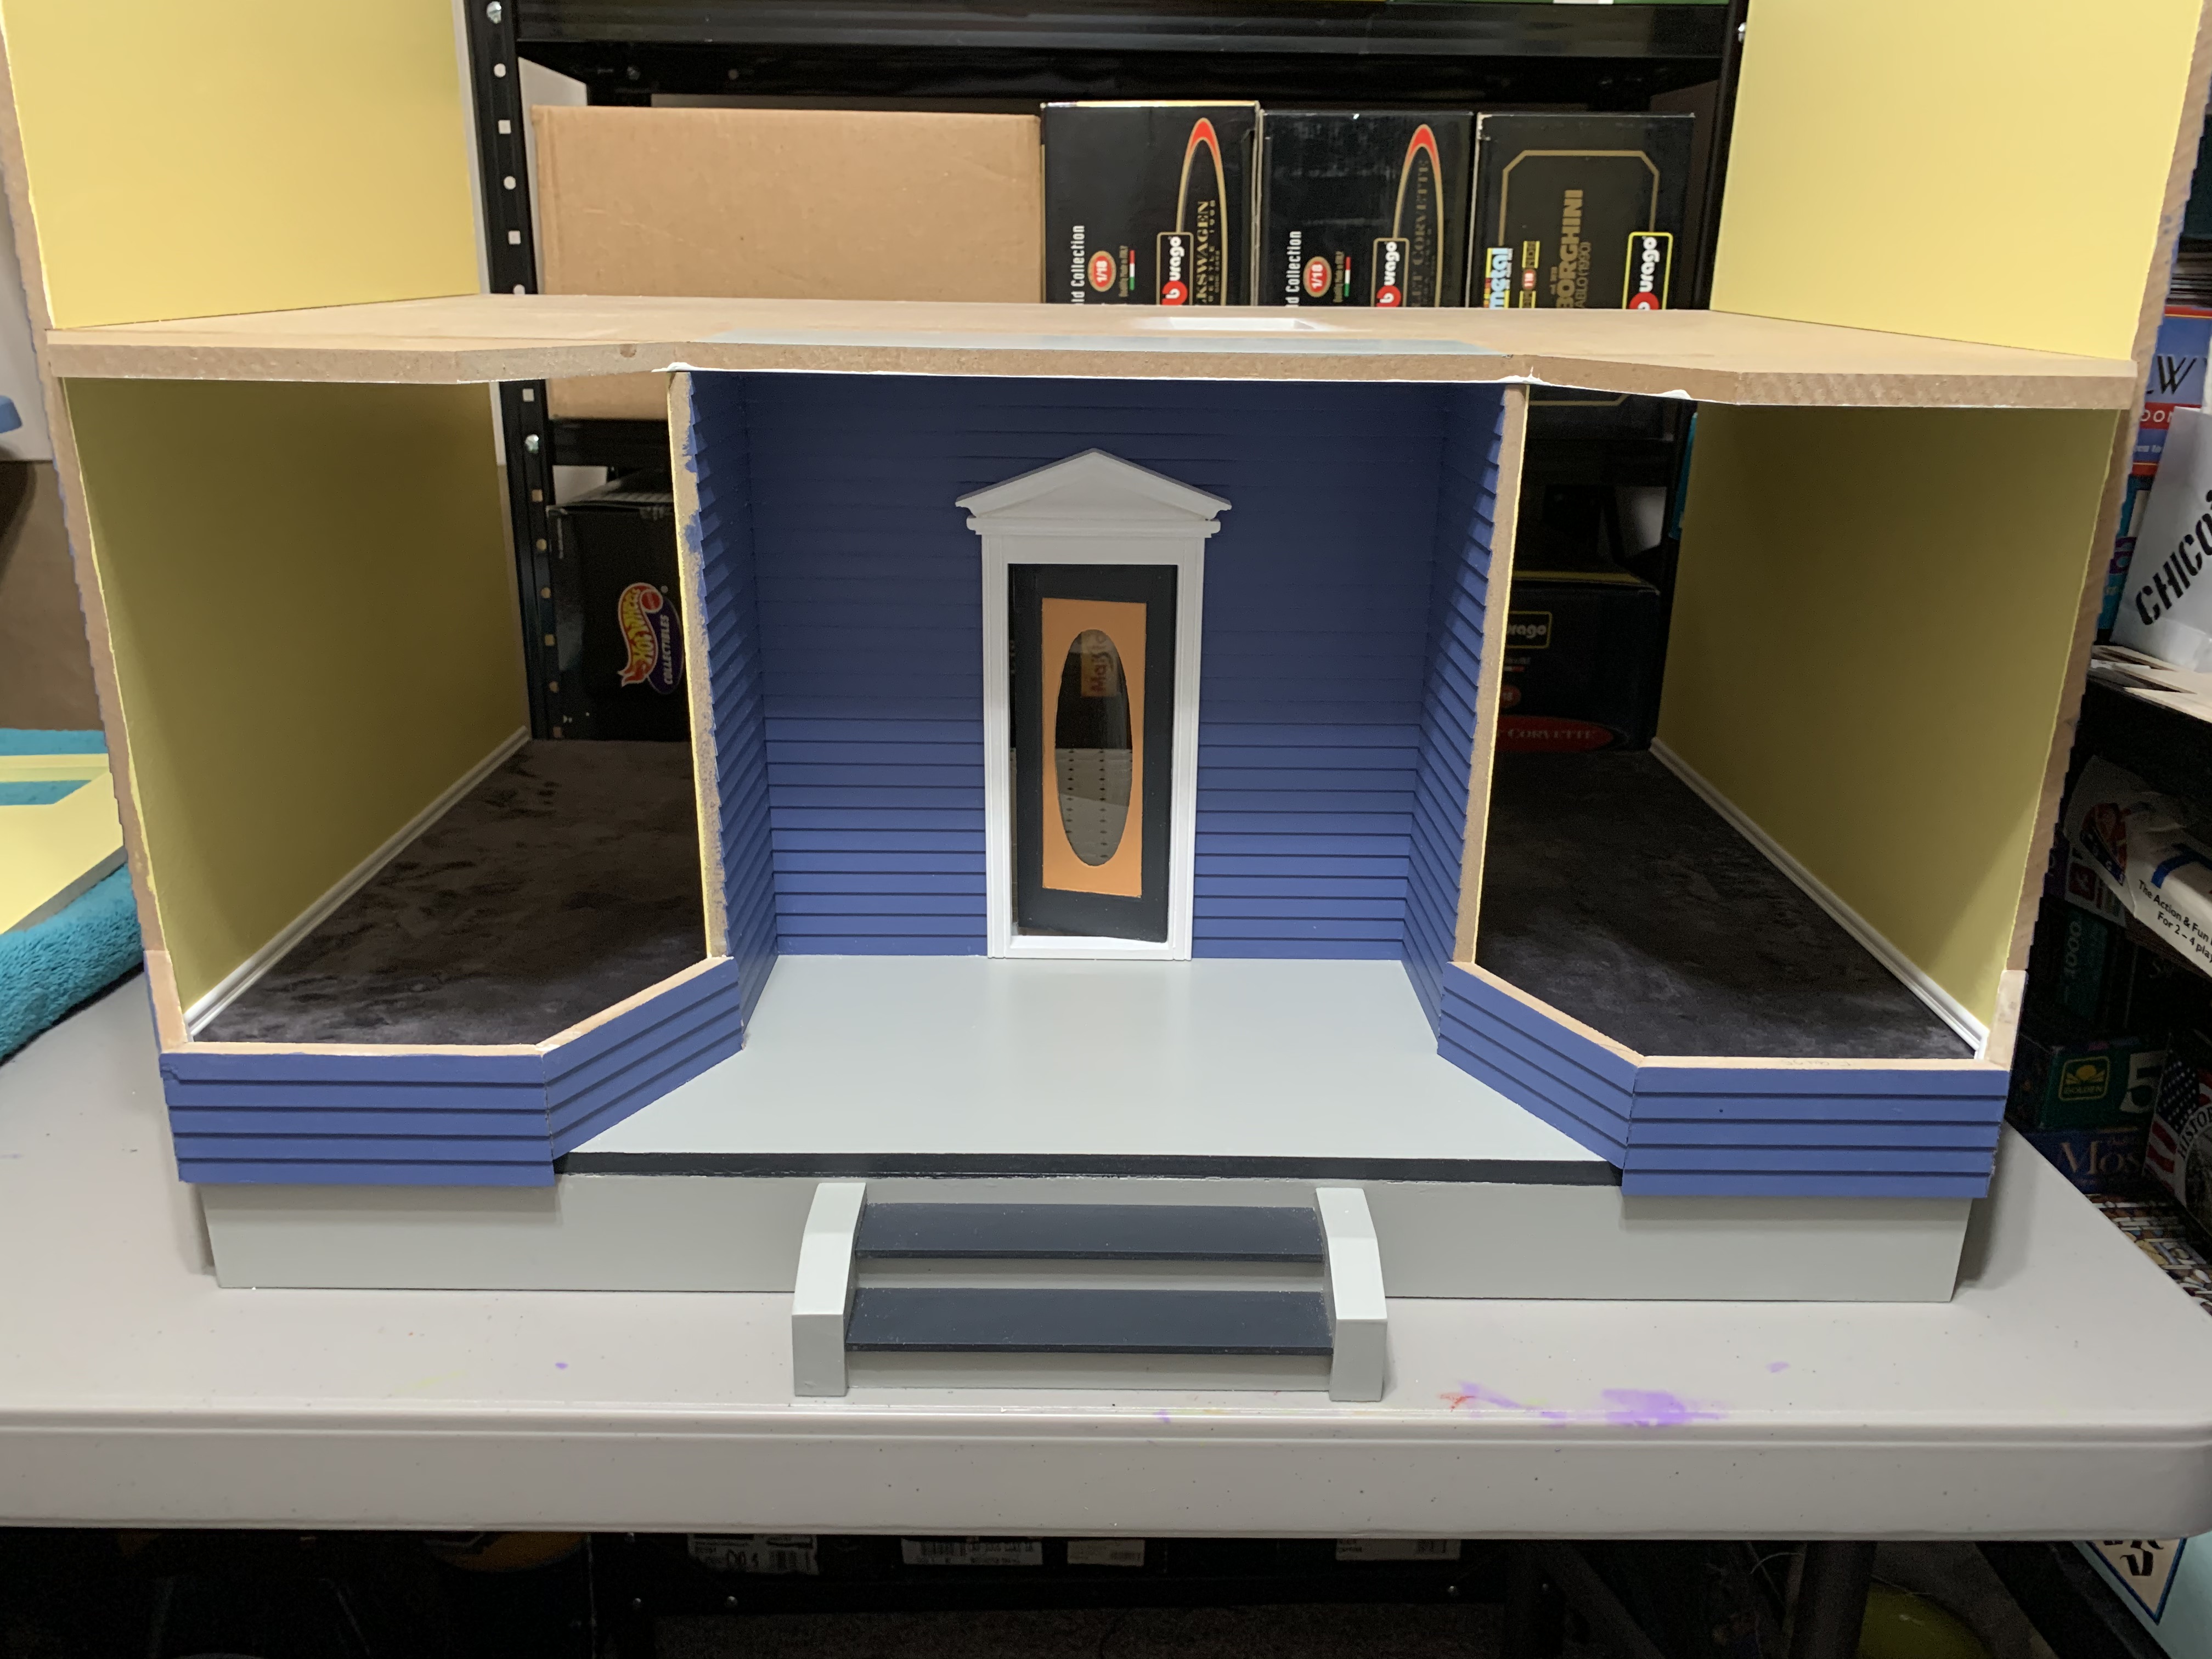
Then came the stairs and all the rest of the baseboards.
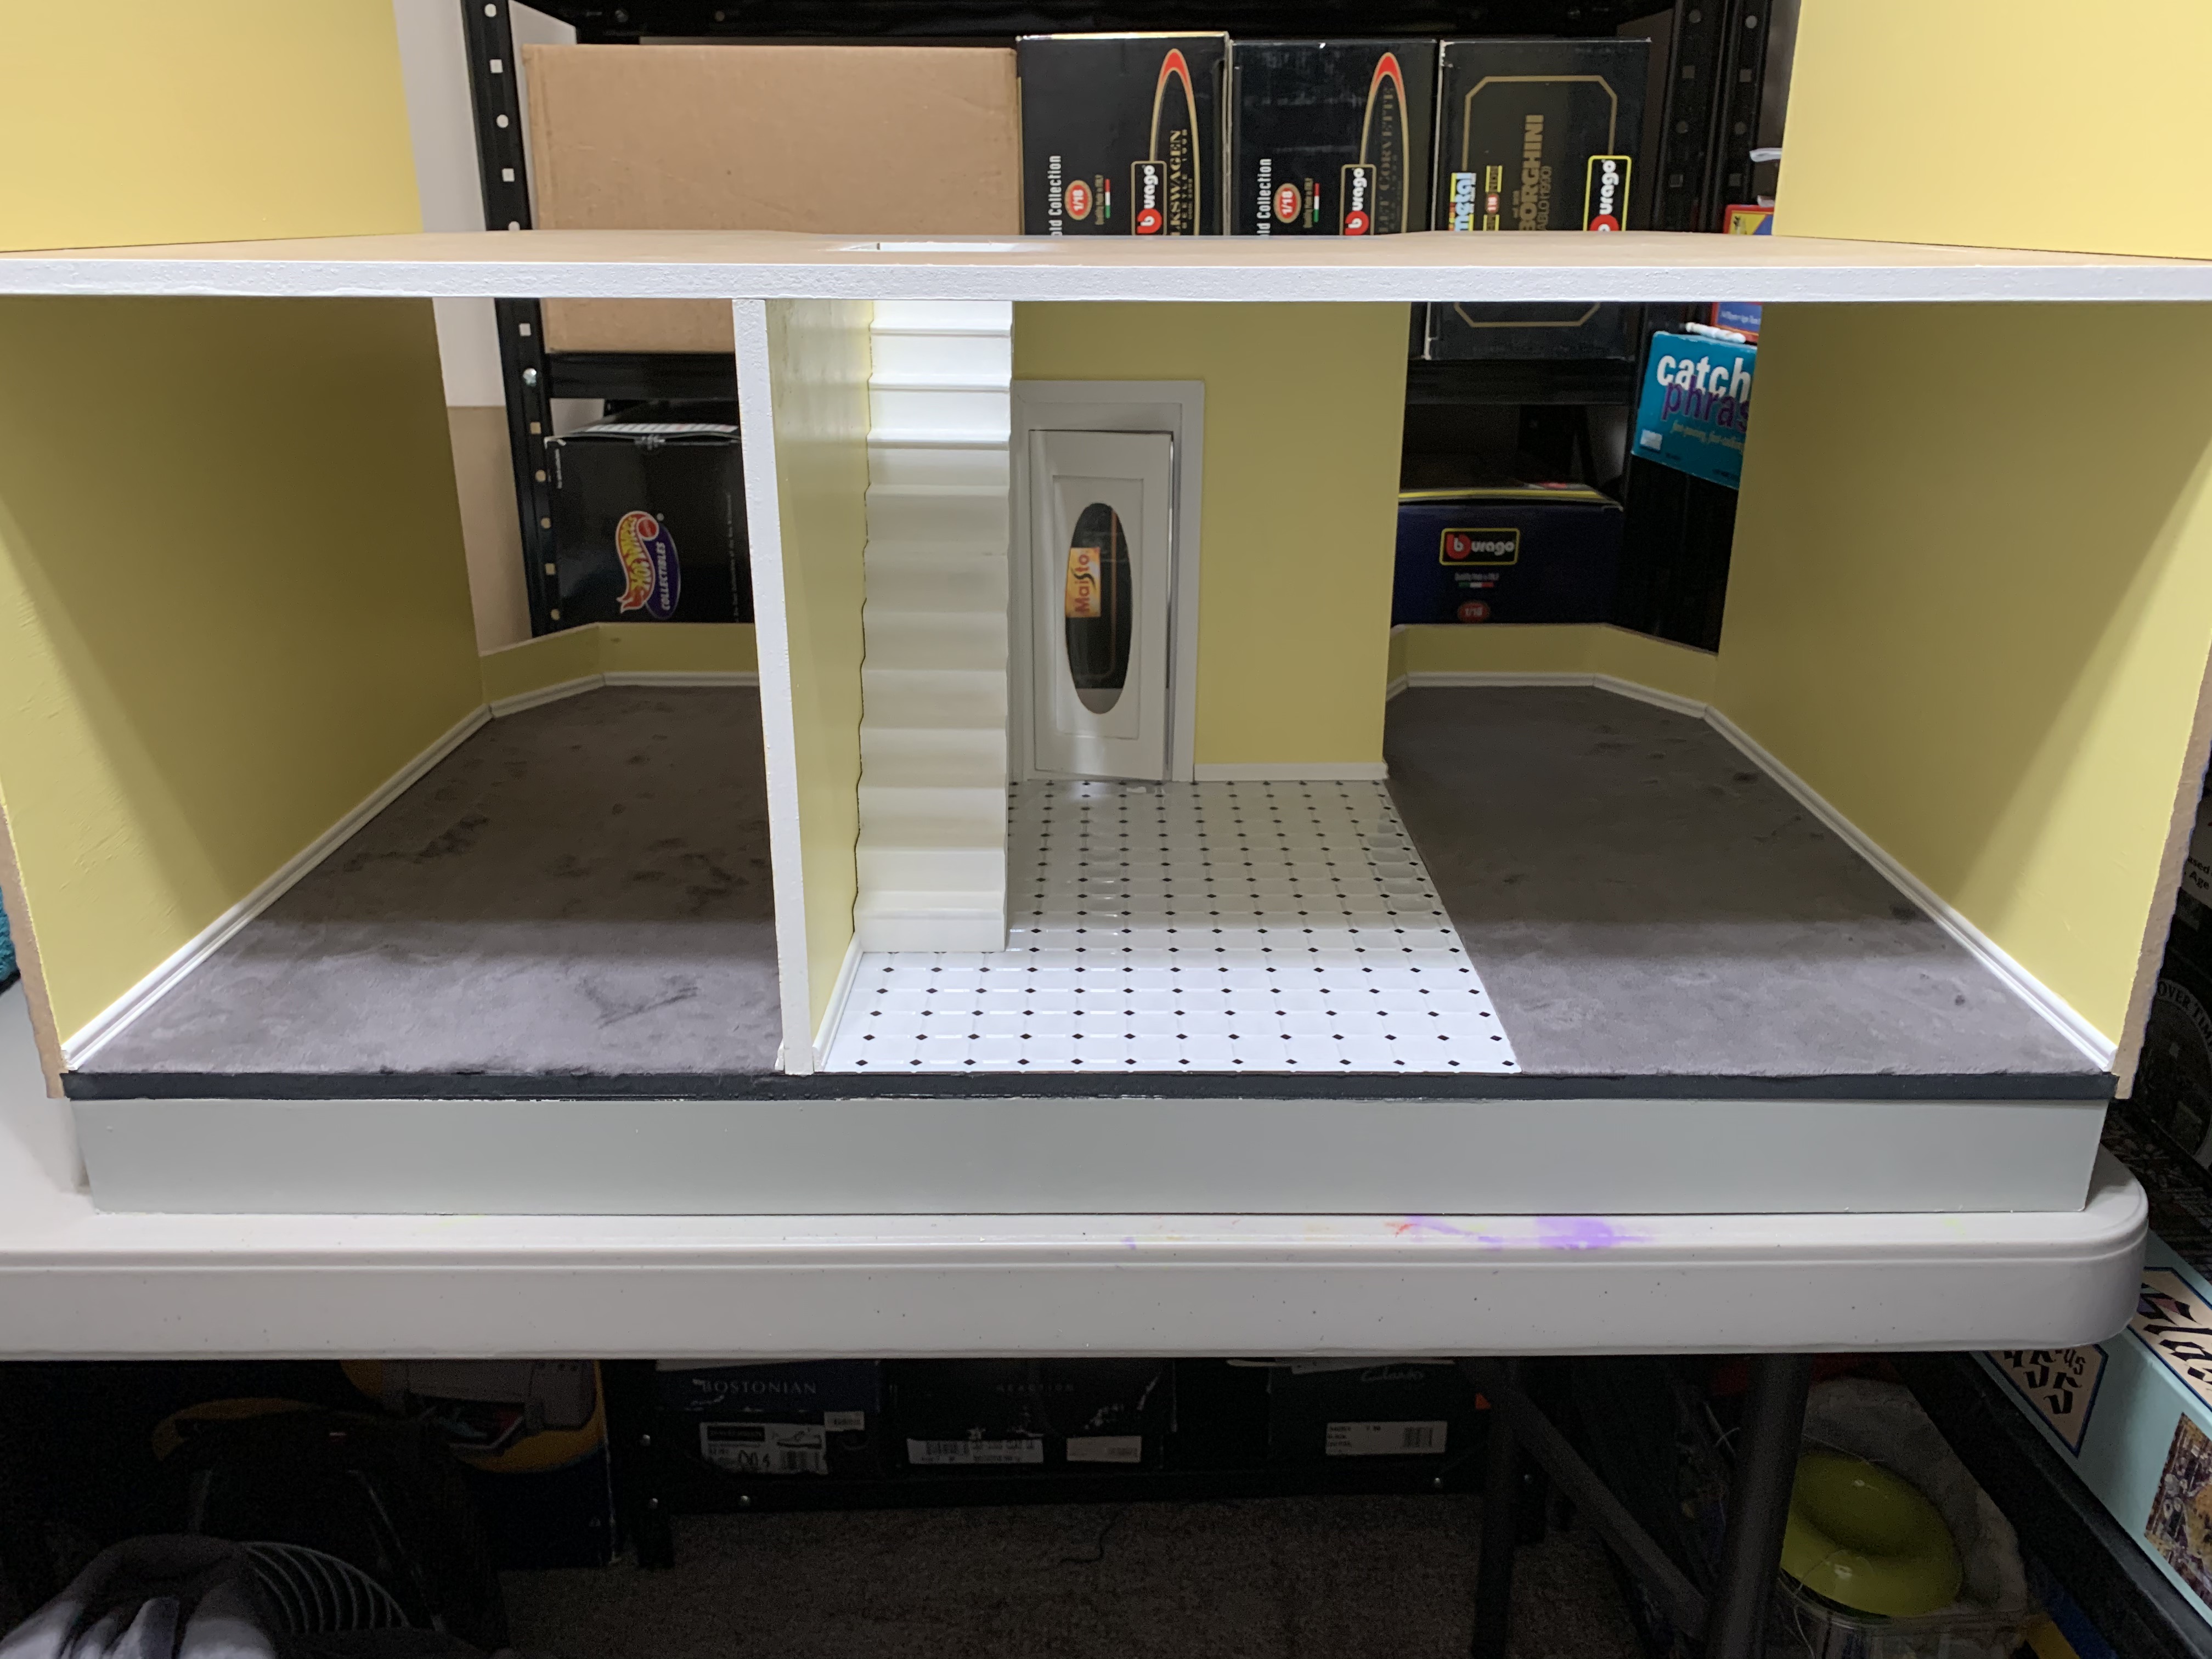
Stepping back, I was very pleased with what I saw.
I was now ready to repeat all those same steps for the second floor. I hoped that with the experience of the first floor, the second floor would go more easily. But there was one big difference.
When I was cutting the fabric for the first floor, I had the flat foundation surface upon which to cut the fabric with just inner walls to cut around and no outer walls to worry about. But with the second floor, the outer walls were now glued in place.
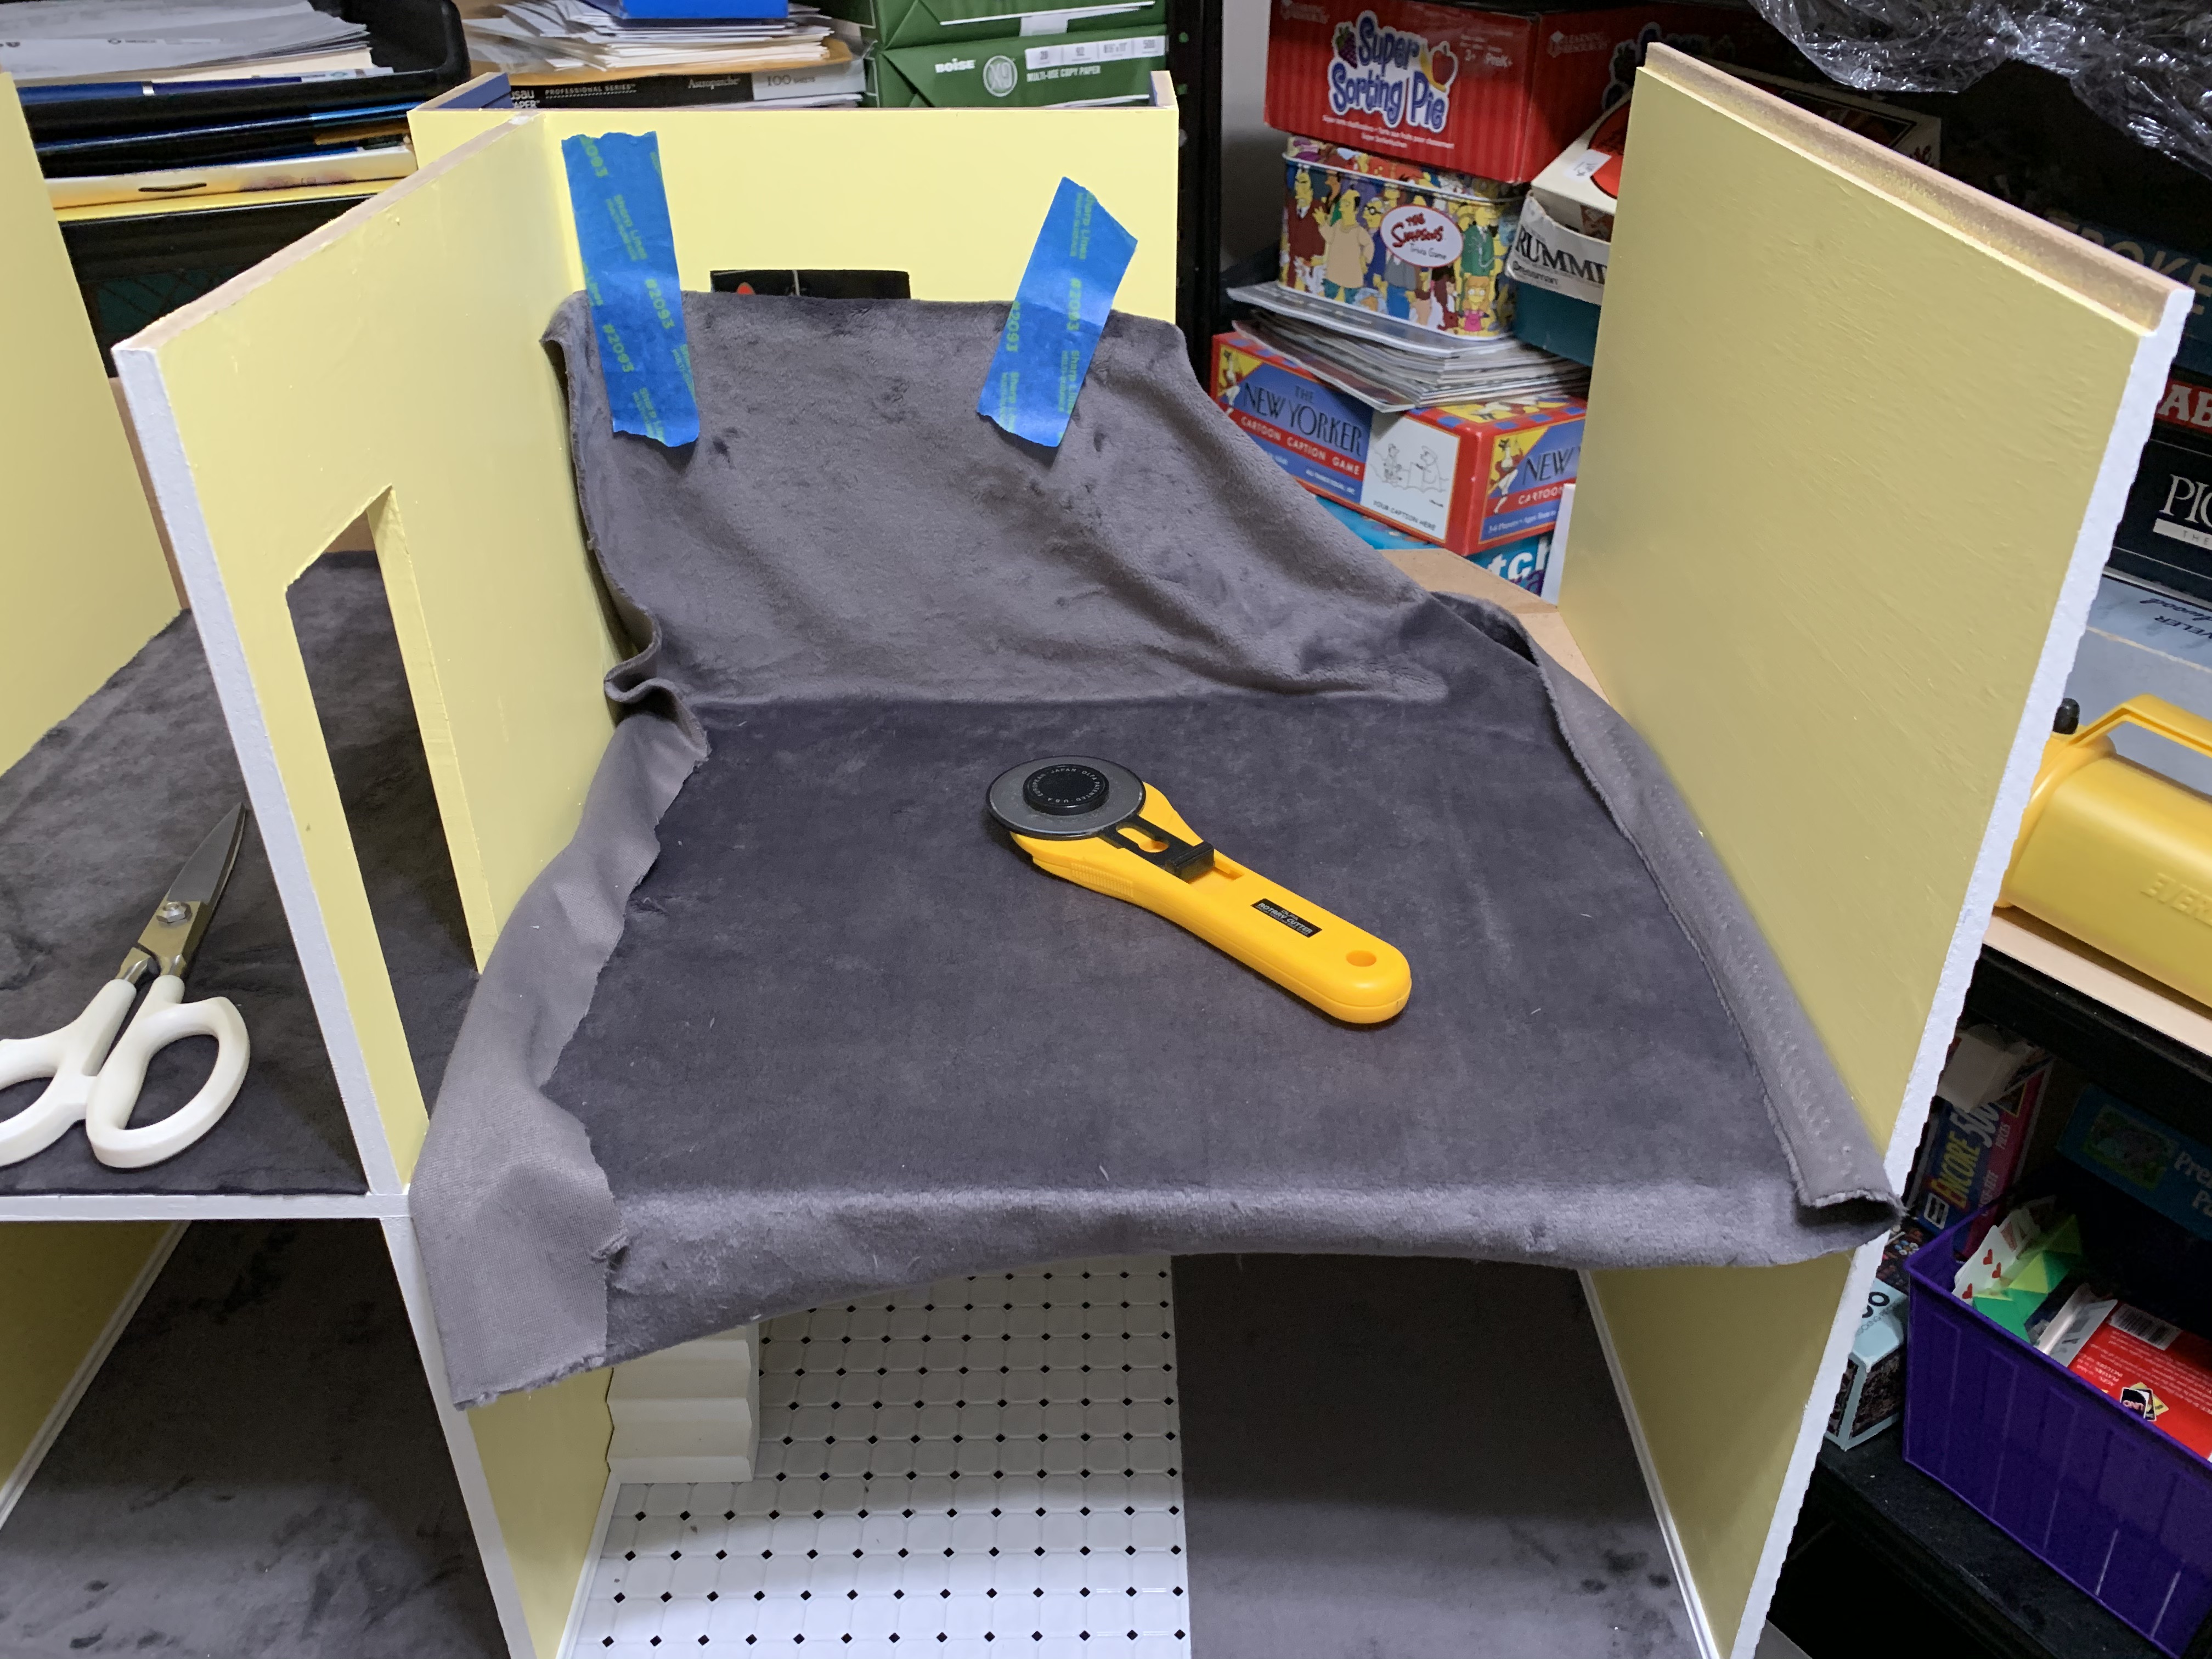
I cut a piece of fabric in approximately the right shape and began to cut it to fit. It proved more challenging having to tape up the extra fabric so I could see to cut. On my first attempt (you can guess where this is going), I started on the divider wall and worked my way around to the back edge. But when I cut the back edge, the last of the 12 different cuts necessary, I found the fabric must have slipped during my cutting as the back-edge fabric now had an inward elliptical shape which did not even cover the entire floor. On my second (and more successful) cut, I started at the back-edge to ensure a straight cut and then progressively worked my way around again.
Beyond this issue, the second floor did prove easier than the first and in no time, I had the carpet glued down and the baseboards cut to length and installed.
This doll house was really starting to take shape. Now I was ready for the third and final floor.
To be continued…
Categories

You are a true artist! The dollhouse looks wonderful so far. Given your attention to detail, I have no doubt it will be an impressive final result!
Thank you so much! Given the high quality of work I have seen you do on your houses, I take that as a very nice compliment.
Well, you’re welcome, but your work is in a higher level than mine. But I will keep trying and read your posts to enhance my skills. Enjoy your day!