
Spring Weeding Turned Landscaping
Continued from Spring Weeding…
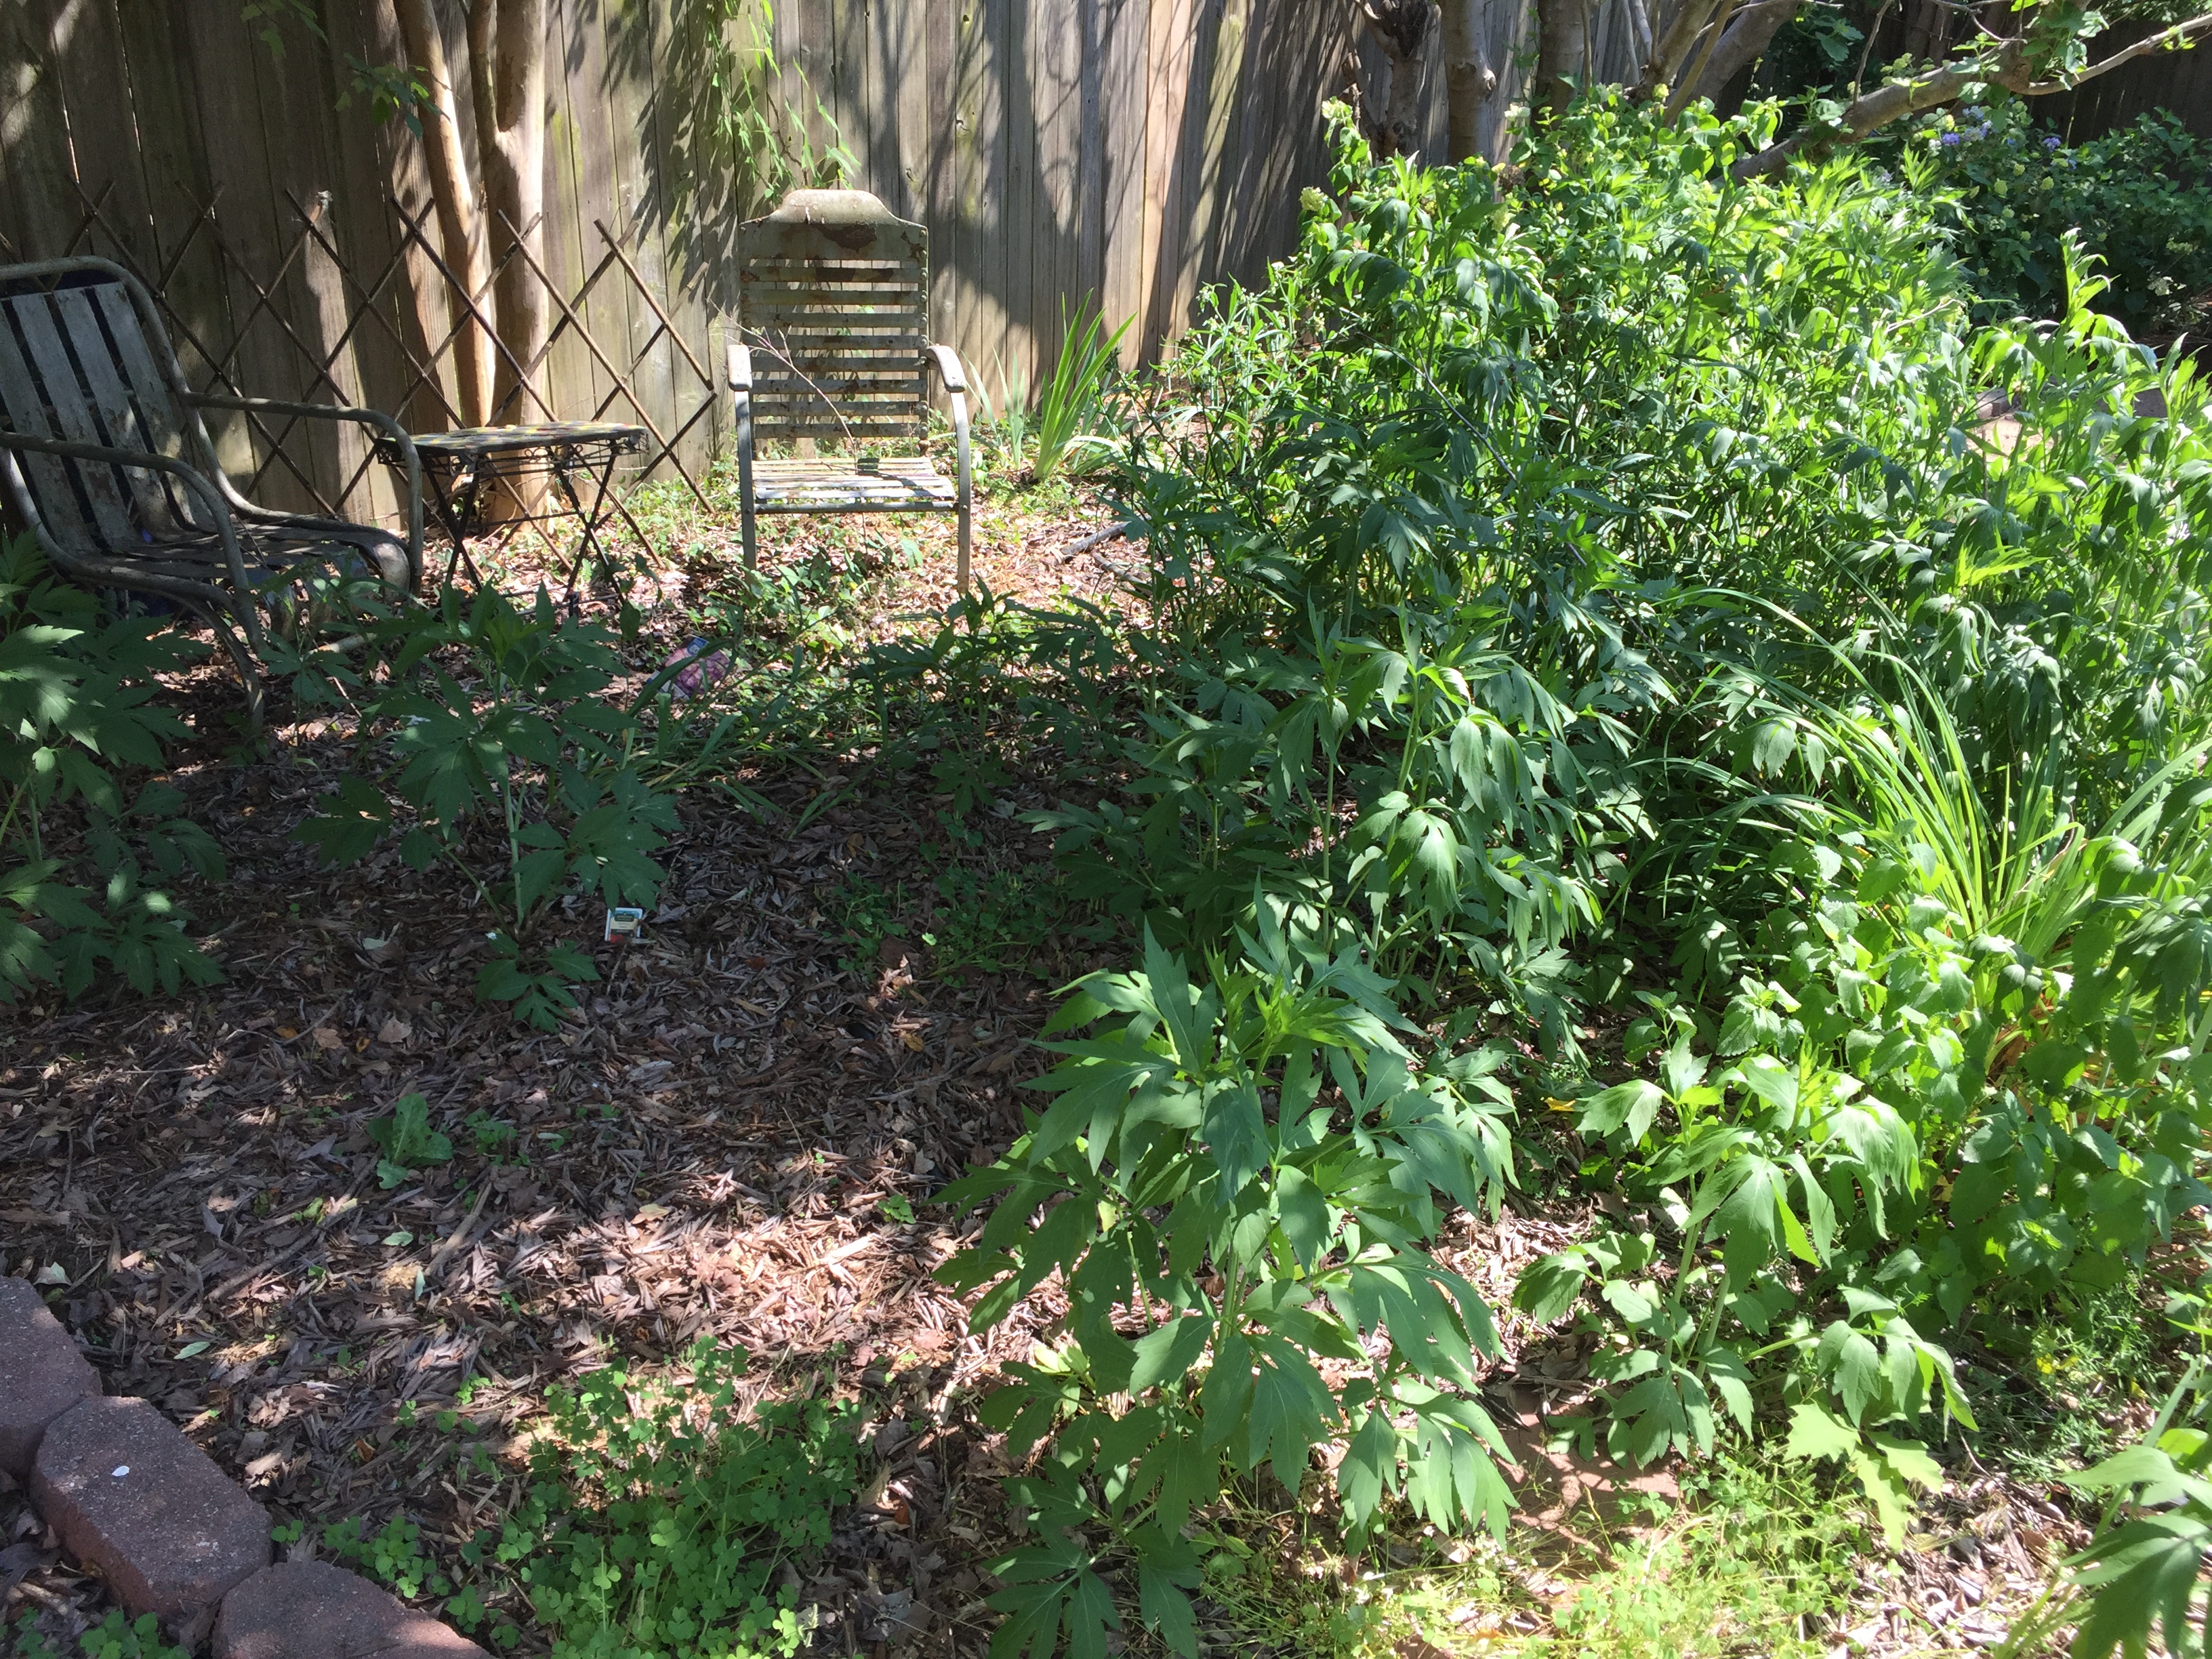
When I started working in this middle bed, in spite of it having quite a “wild look”, it actually turned out to have very few weeds; just several years’ worth of decaying leaves. So clearing it was fairly easy. My wife had previously requested a walkway leading from the upper yard down to her majestic fig tree. I had tried making this in the past by just laying down pea gravel but since the yard slopes significantly here, dirt eventually washed over the pea gravel returning it to a wild state. So my goal was to incorporate a path through this bed, which connected to the upper bed.
As before, I chose to use the brown steel edging that had worked so well on the other beds for defining the walkway…

…and I used the landscape fabric for the walkway and the planting area.
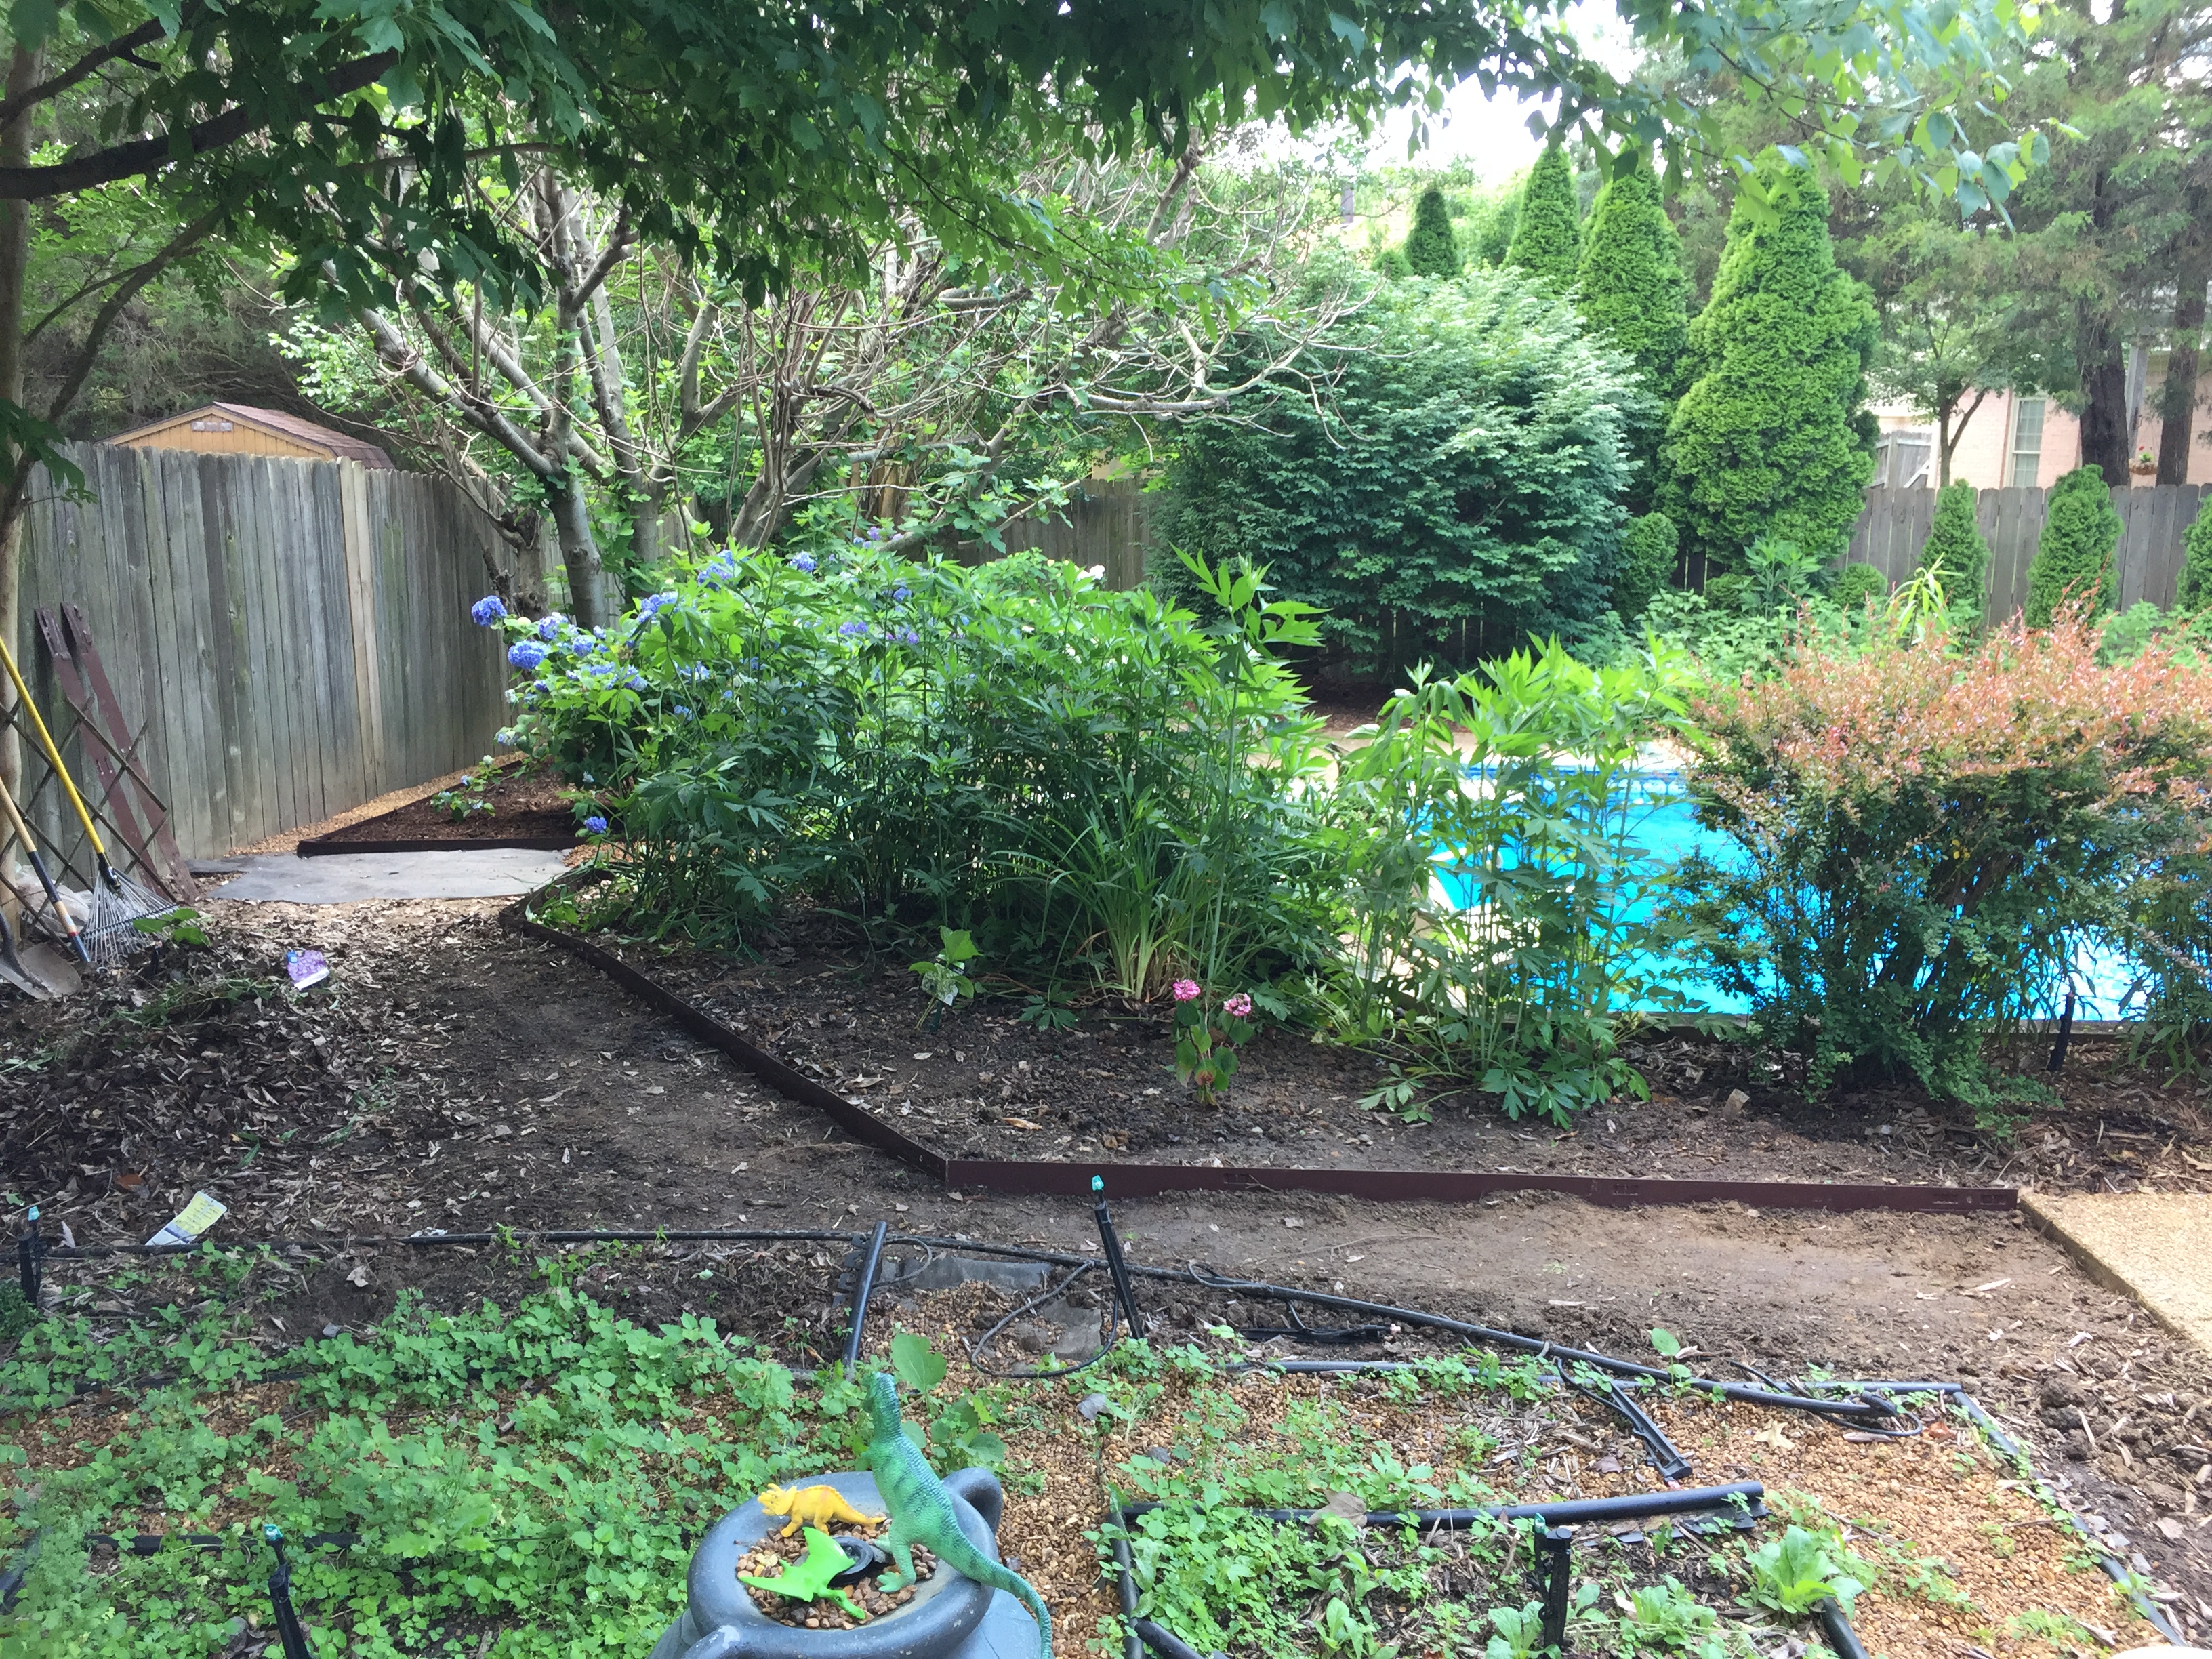
This got me to the last bed. At this point I felt like I was in the home stretch but I still had a significant job ahead of me.
This space in our yard, just off the patio has served a number of different functions.
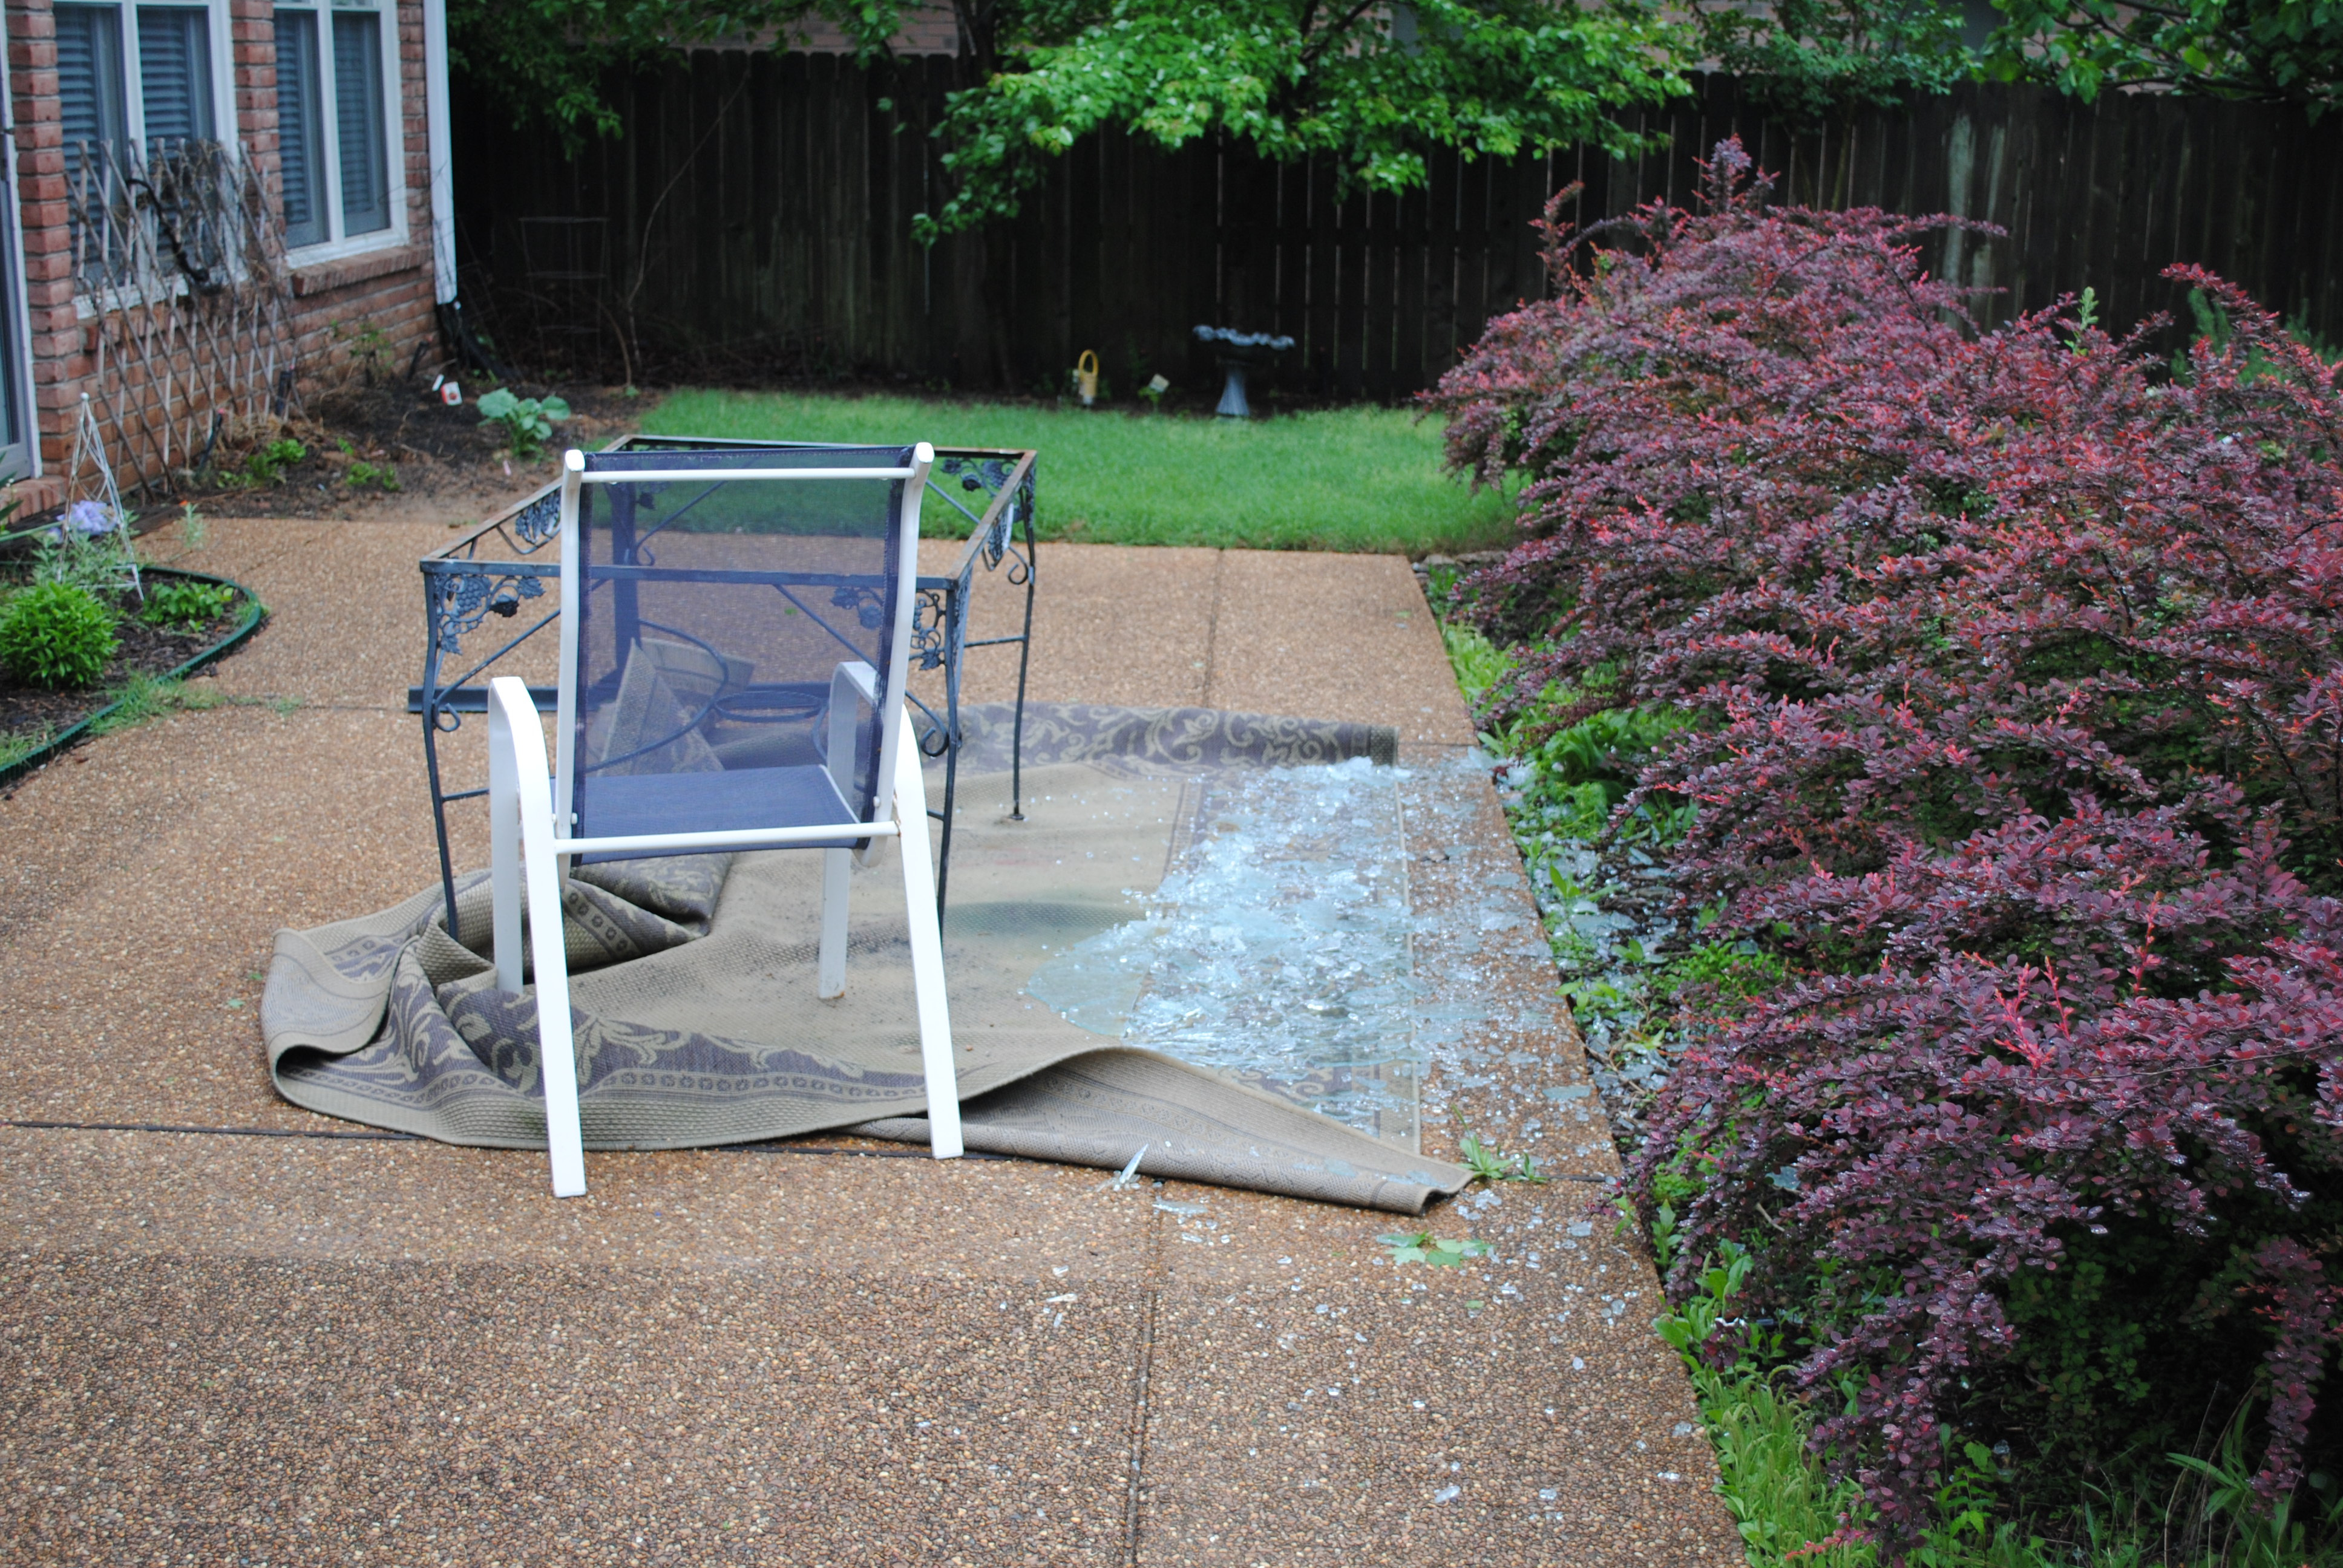
Originally, it was just a grassy space (seen here after a wind storm blew the glass off our patio table).
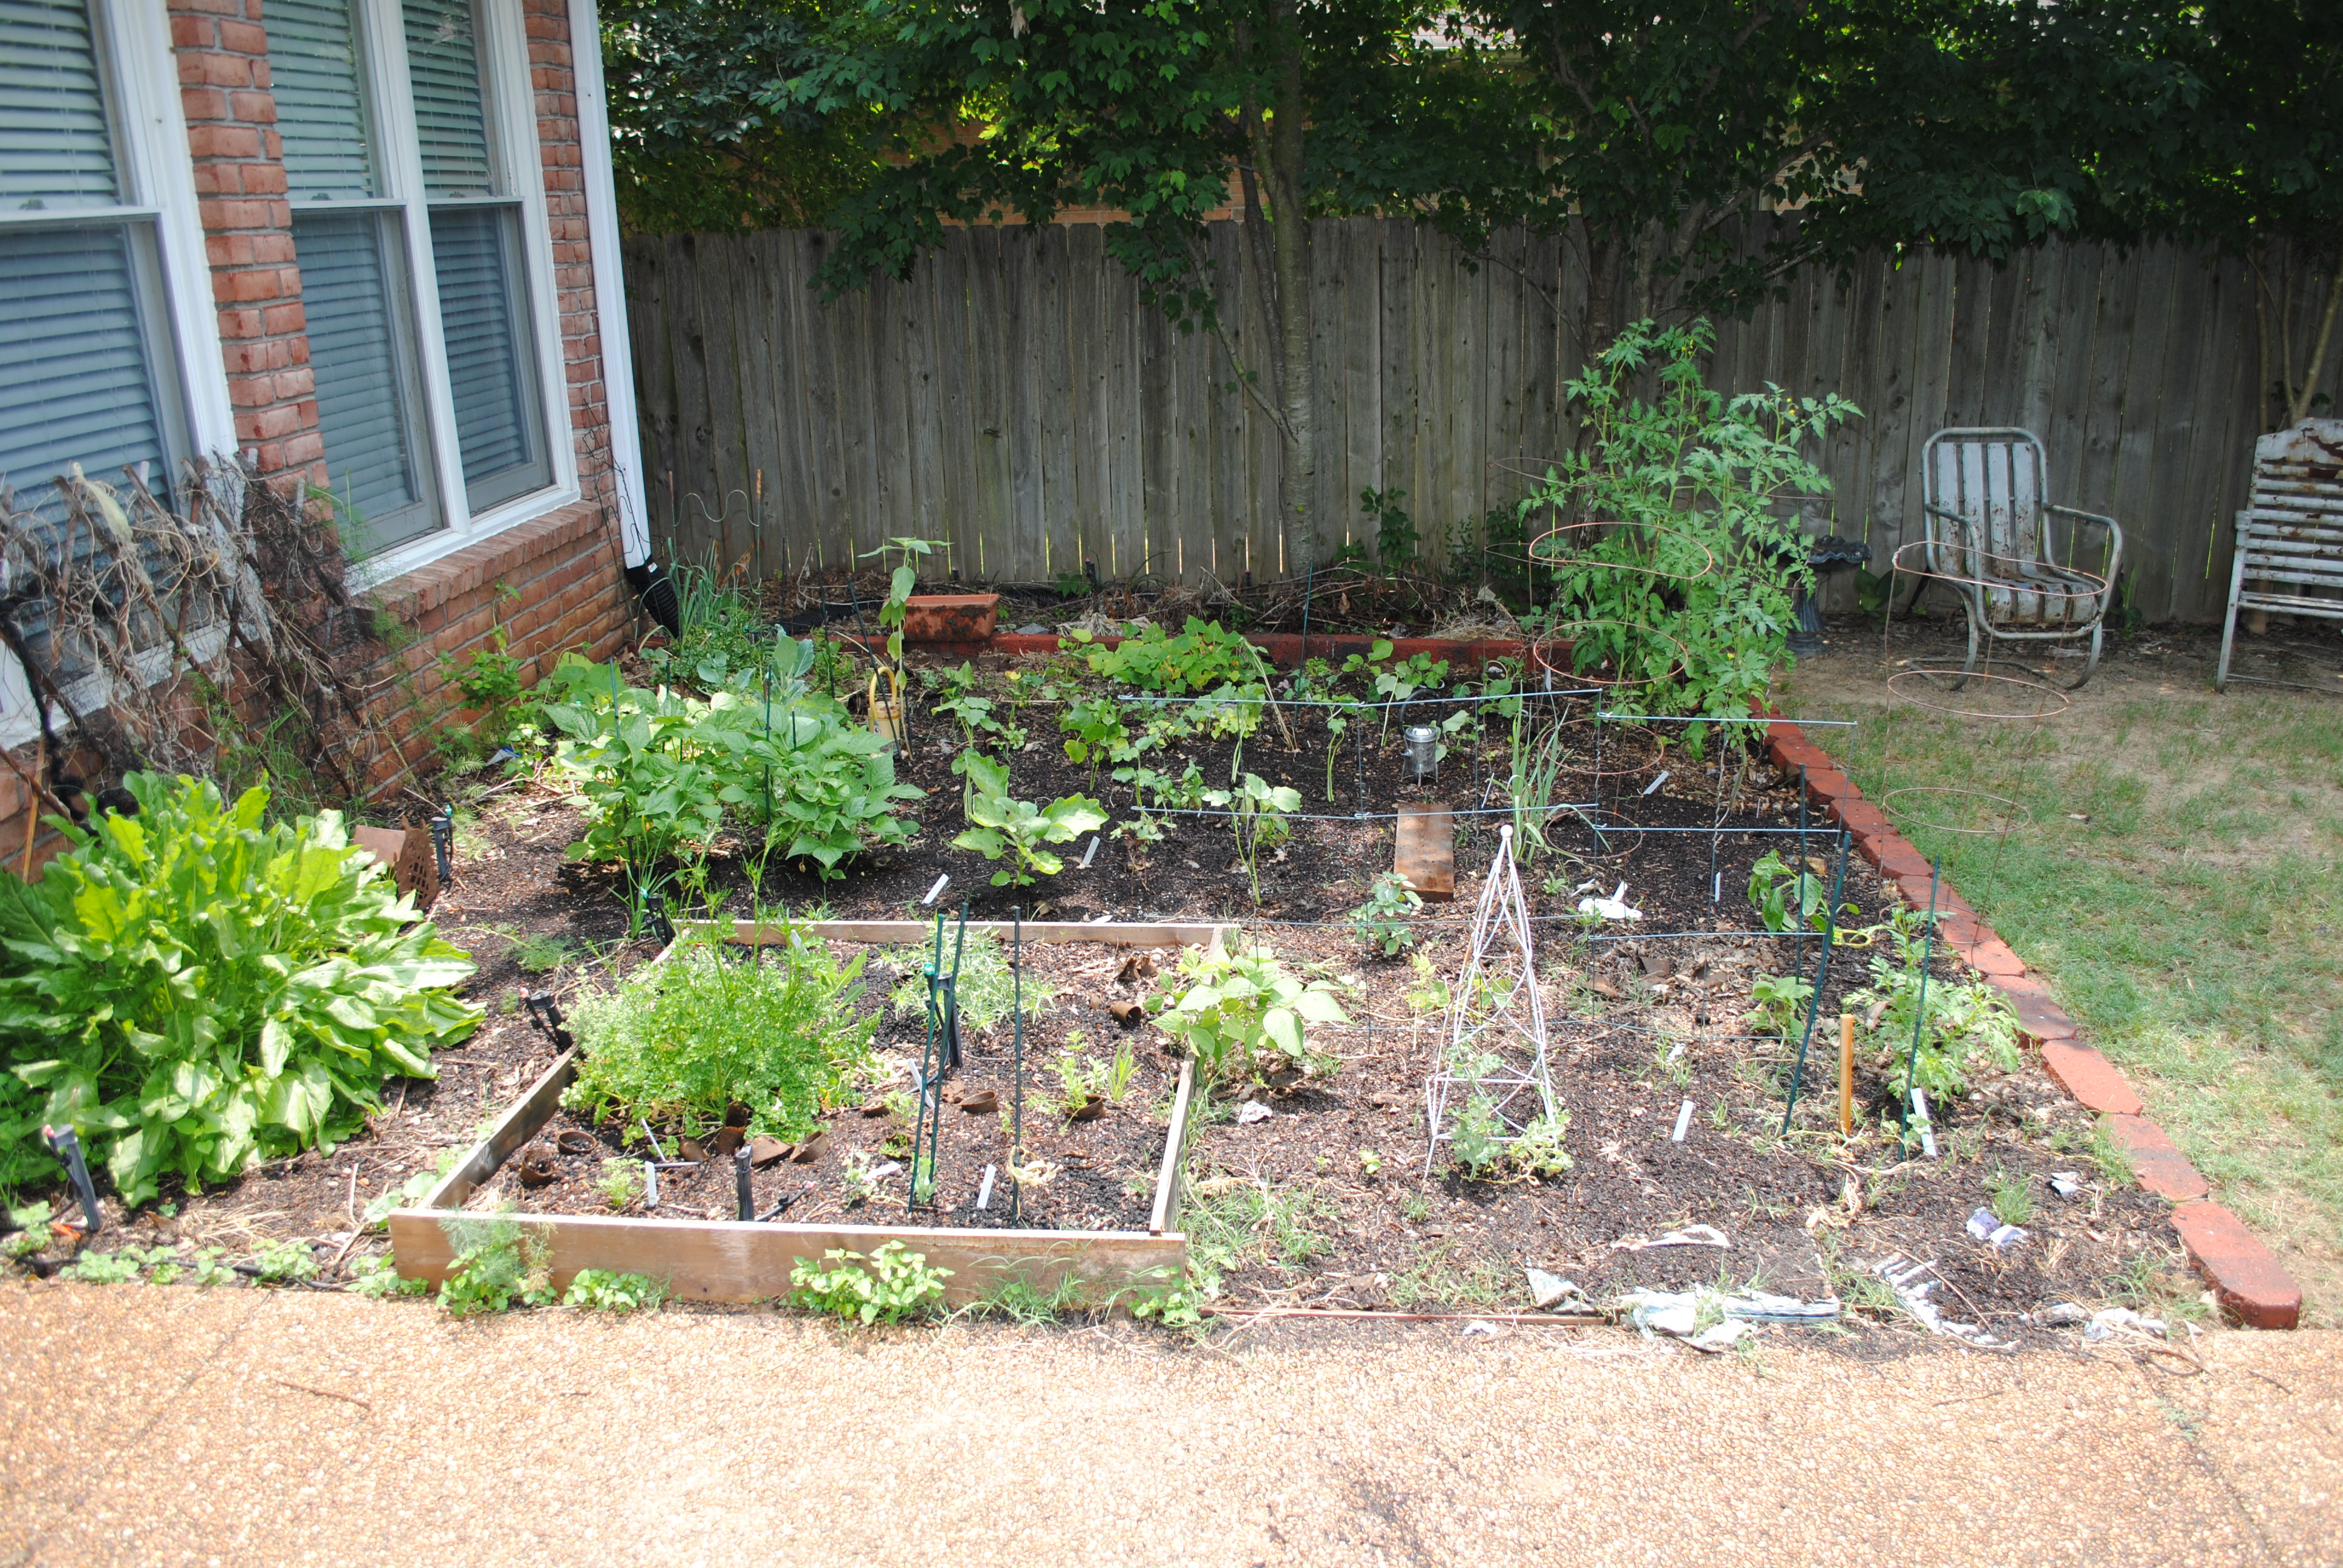
Then my wife decided to turn it into a garden. But as the trees in our yard continued to grow, the garden did not get enough sun and her summer produce was minimal.
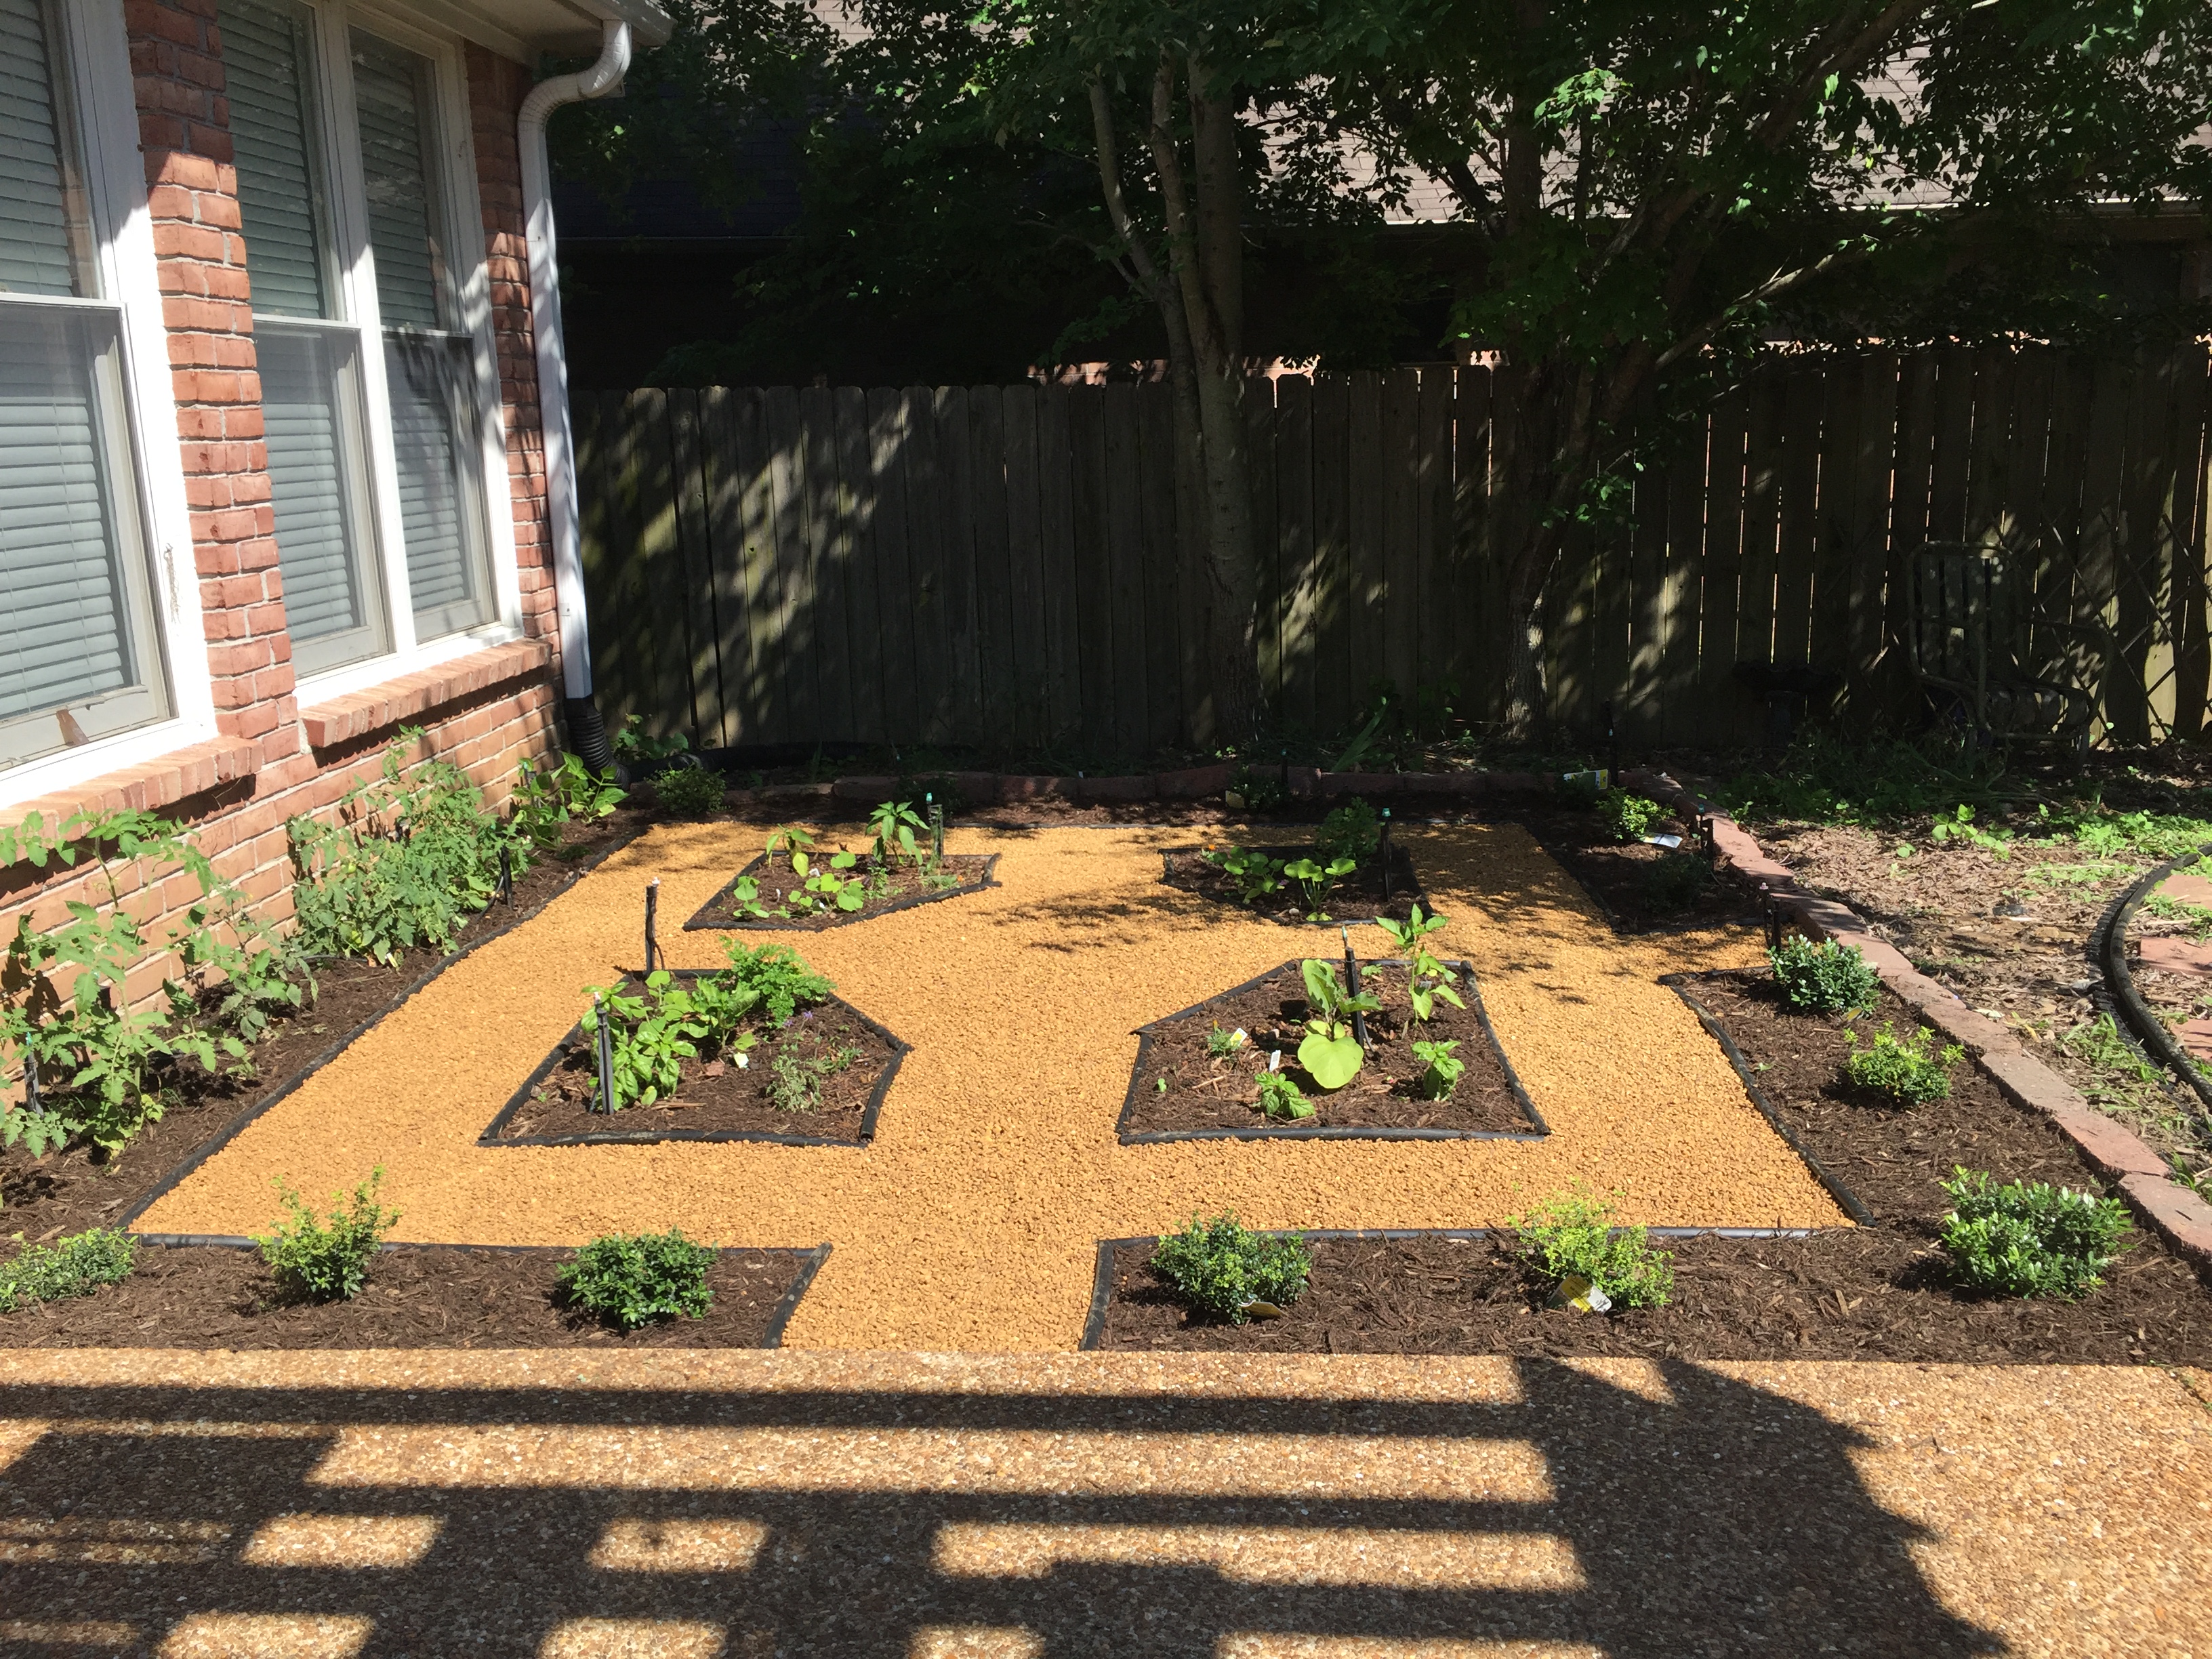
Then in 2016, our oldest son, a landscape architect, came up with this idea to create an interesting space with room for a few garden vegetables and a few fresh herbs. Unfortunately the plastic edging we chose did not provide an adequate barrier to the intermixing of pea gravel and mulch.
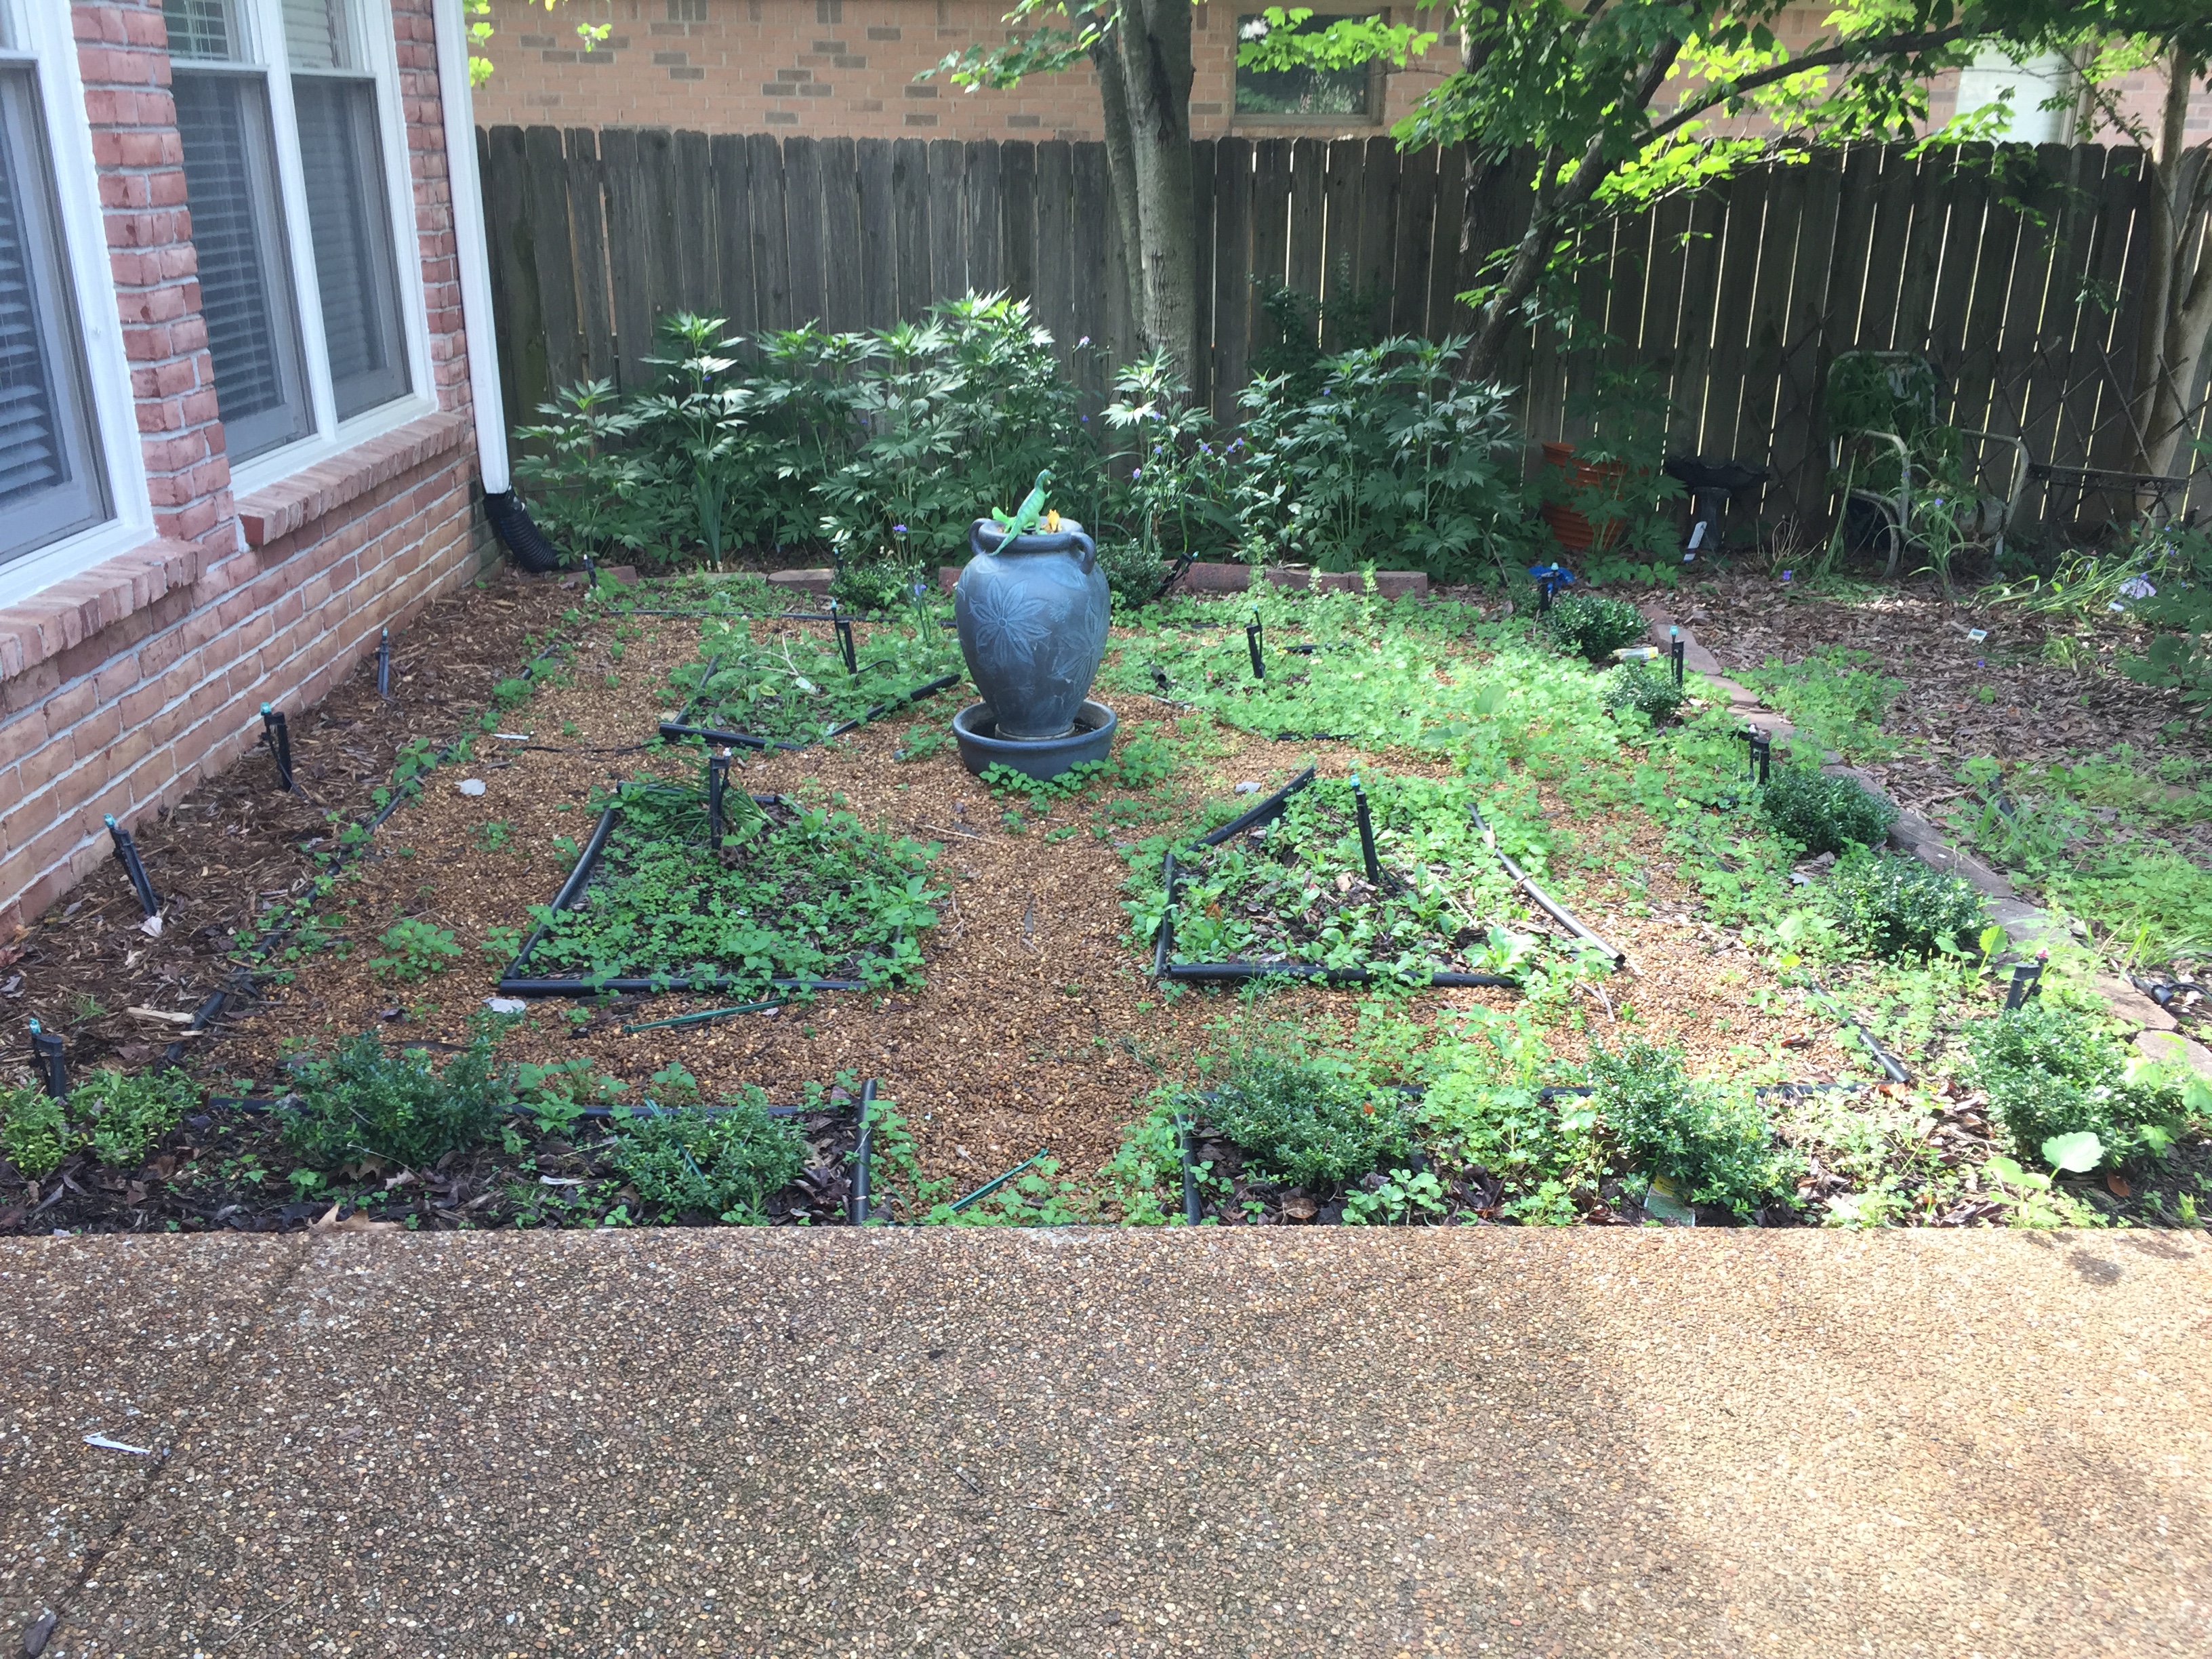
And in spite of my wife laying landscape fabric, enough soil and debris blew into the pea gravel that provided an adequate base for weeds to proliferate, some as tall as the little shrubs.
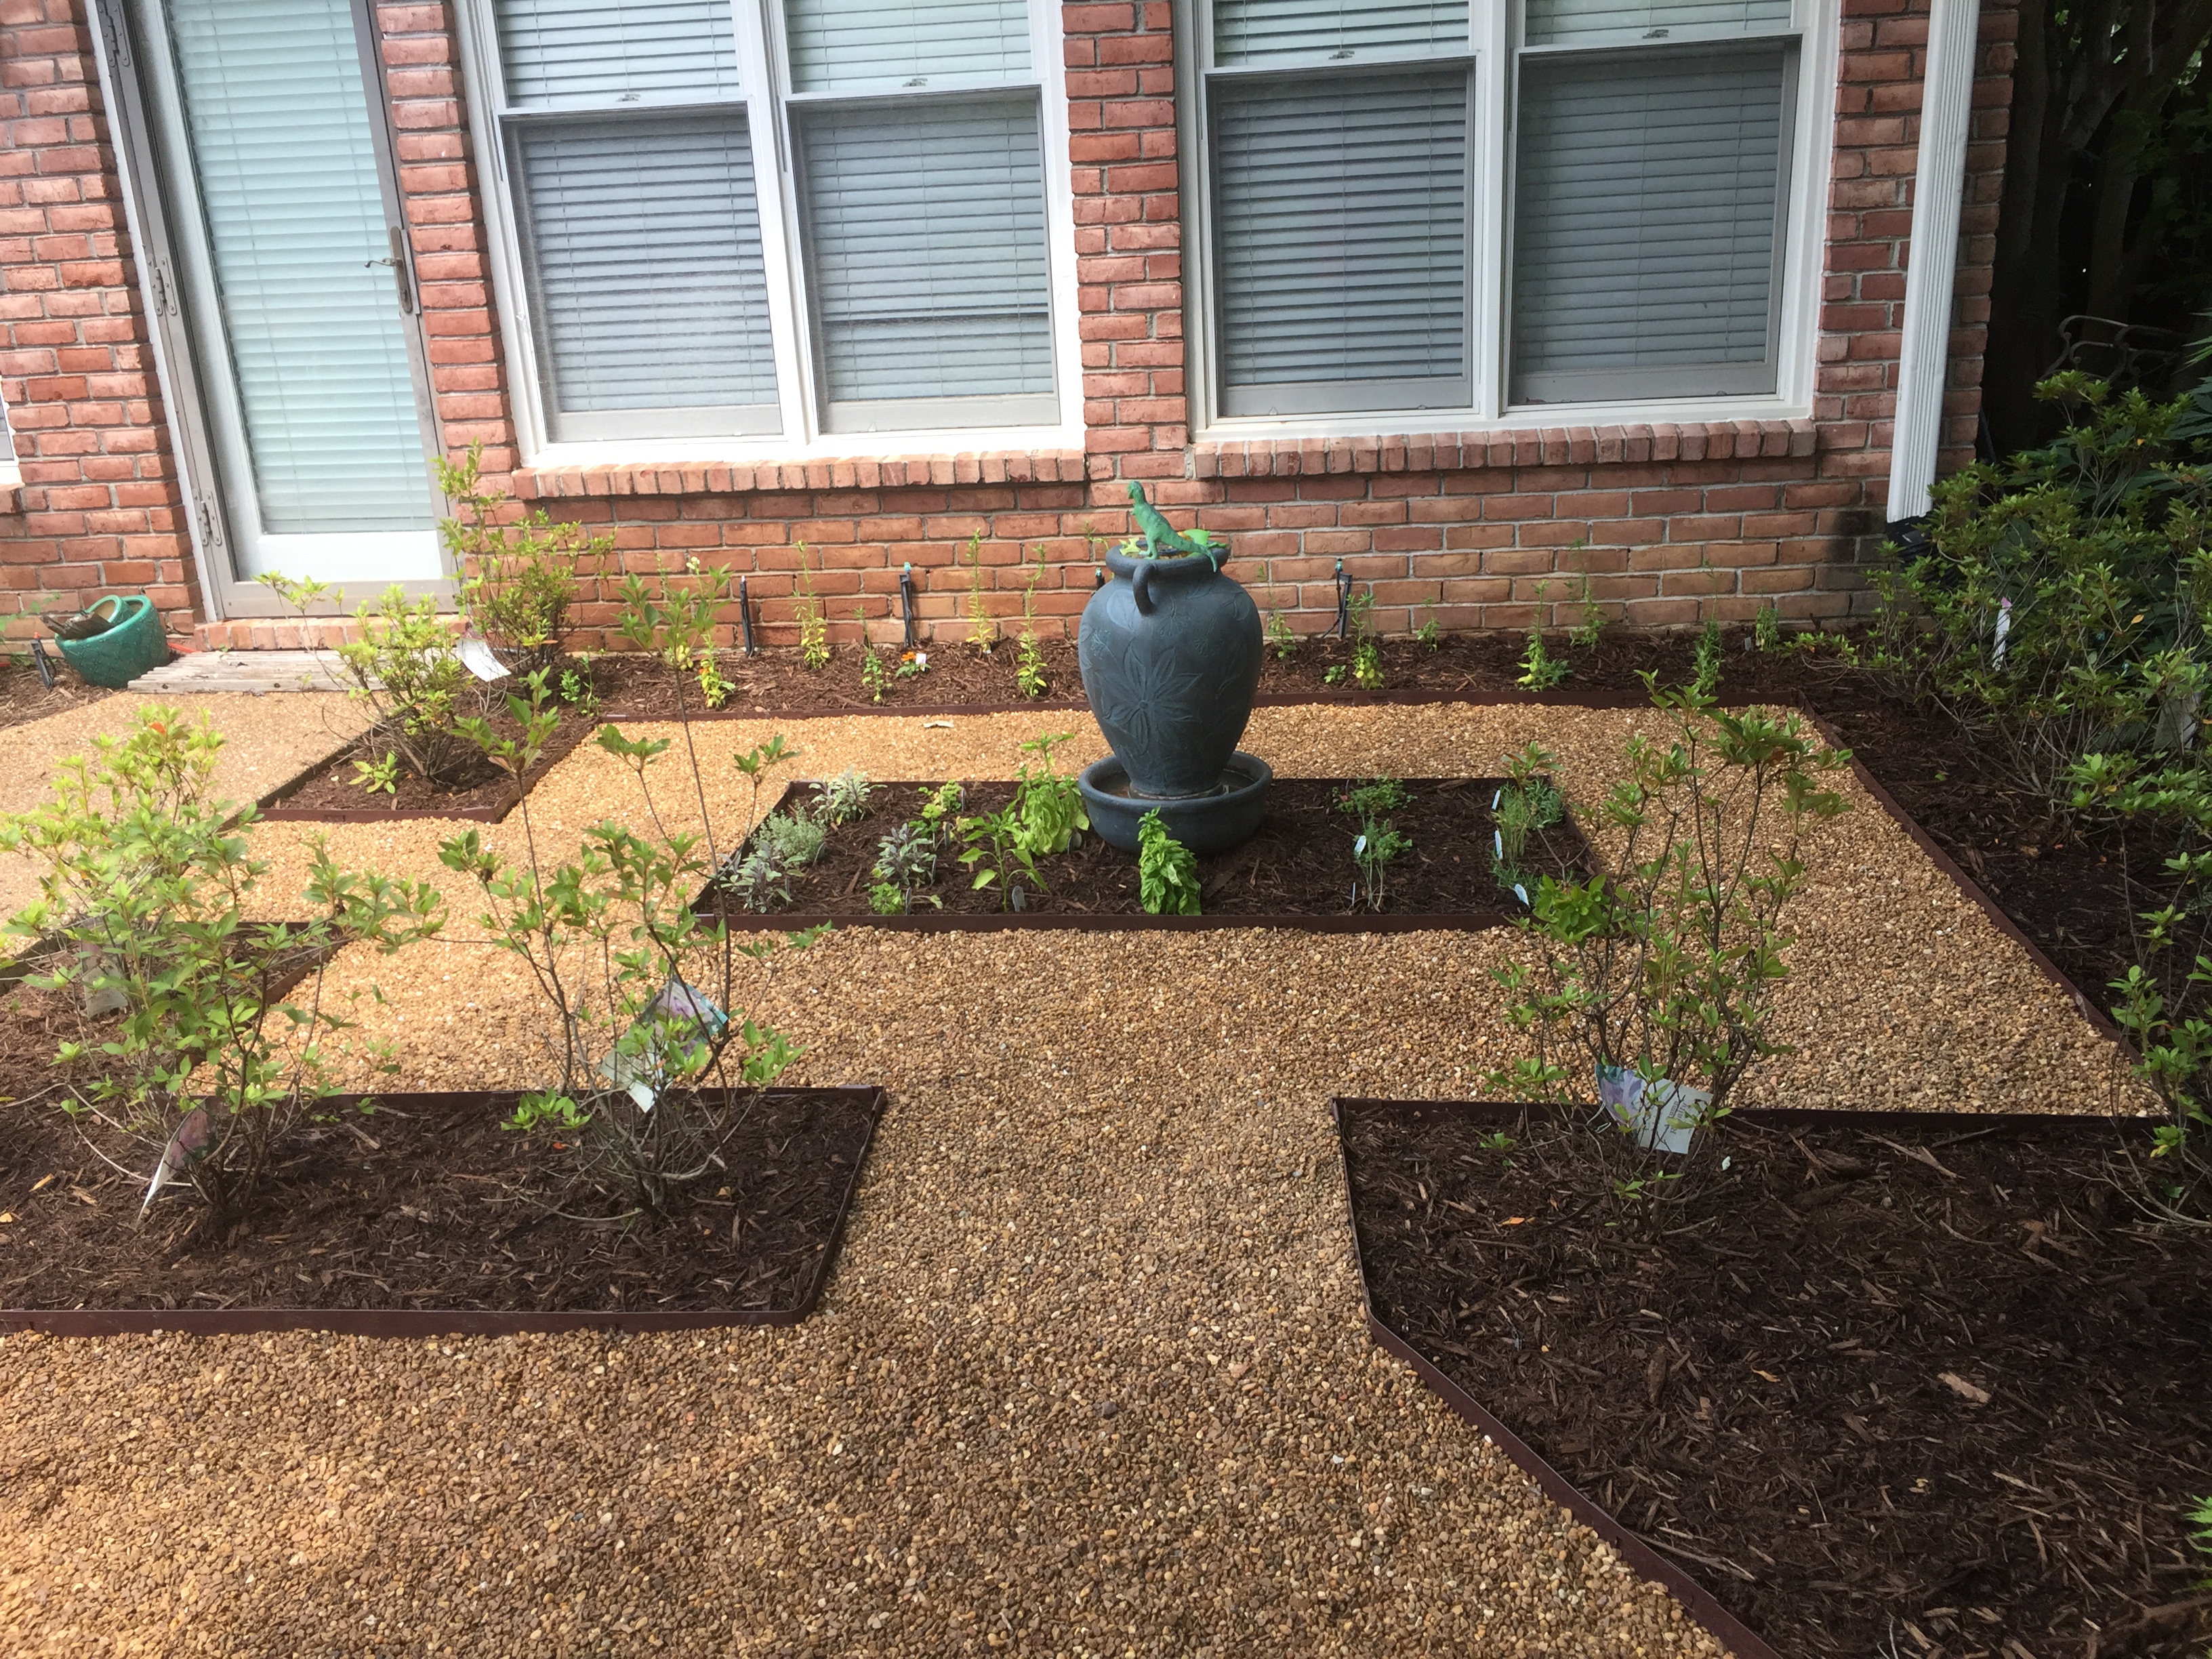
My original thought was to recreate our son’s design with the better quality steel edging. But edging the four small five-sided herb beds would require a tremendous amount of steel cutting and in the end might not be anymore durable. I proposed to my wife the idea of a single central bed for herbs, which would give her the same amount of planting space but be a lot less maintenance. To help her visualize my concept, I made a rough, not drawn-to-scale rendering.
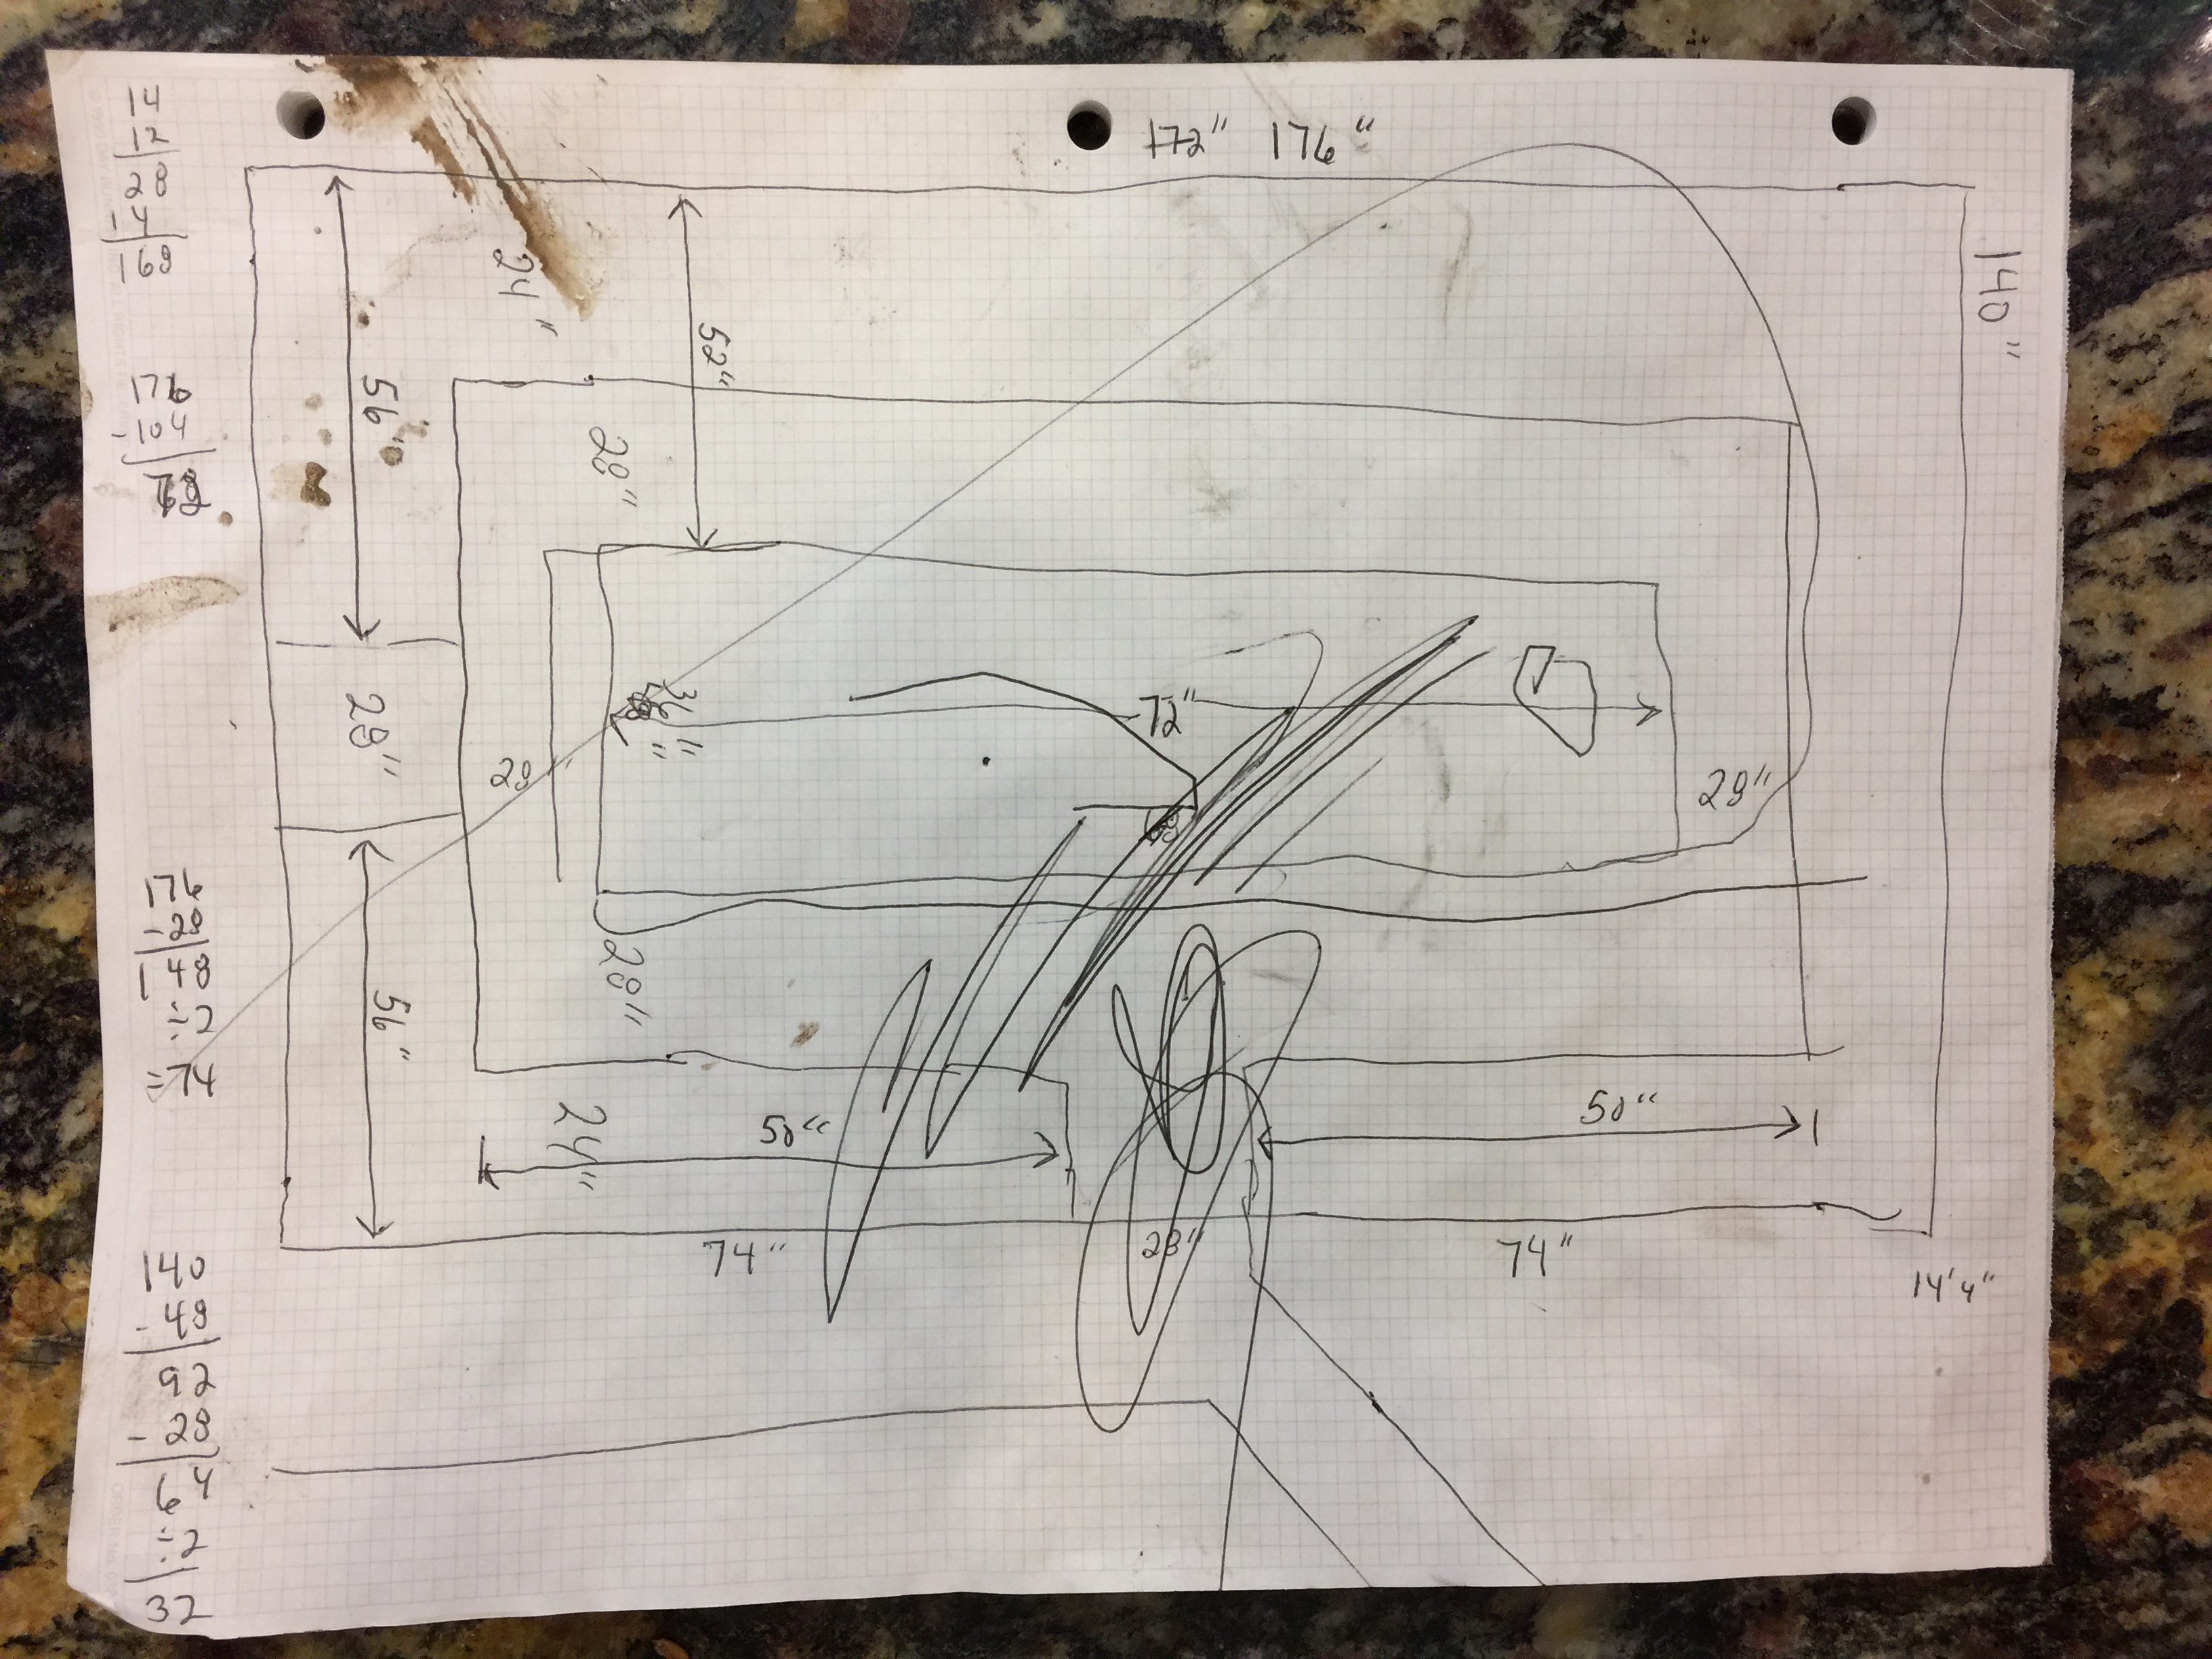
You can see that this is a rough field drawing, complete with mud smug marks and hand calculations (with corrections) for measurements. My granddaughter even added her own artistic flair to the middle of the concept, which obviously rendered this a piece of artwork for the frig.

I figured I had three to four hundred dollars worth of pea gravel in the original design and so decided to recycle it. But it had to be washed of all the dirt, mulch, and weeds, one bucket at a time, a process made a bit easier by my youngest son’s suggestion of drilling many holes in the bottom of my bucket for the dirt to wash through. Turning the bucket on its side even allowed the floating wood mulch to be poured off.

Once I had removed all of the pea gravel, weeds and plastic edging, I was left with a dirt bed ready for my new design.
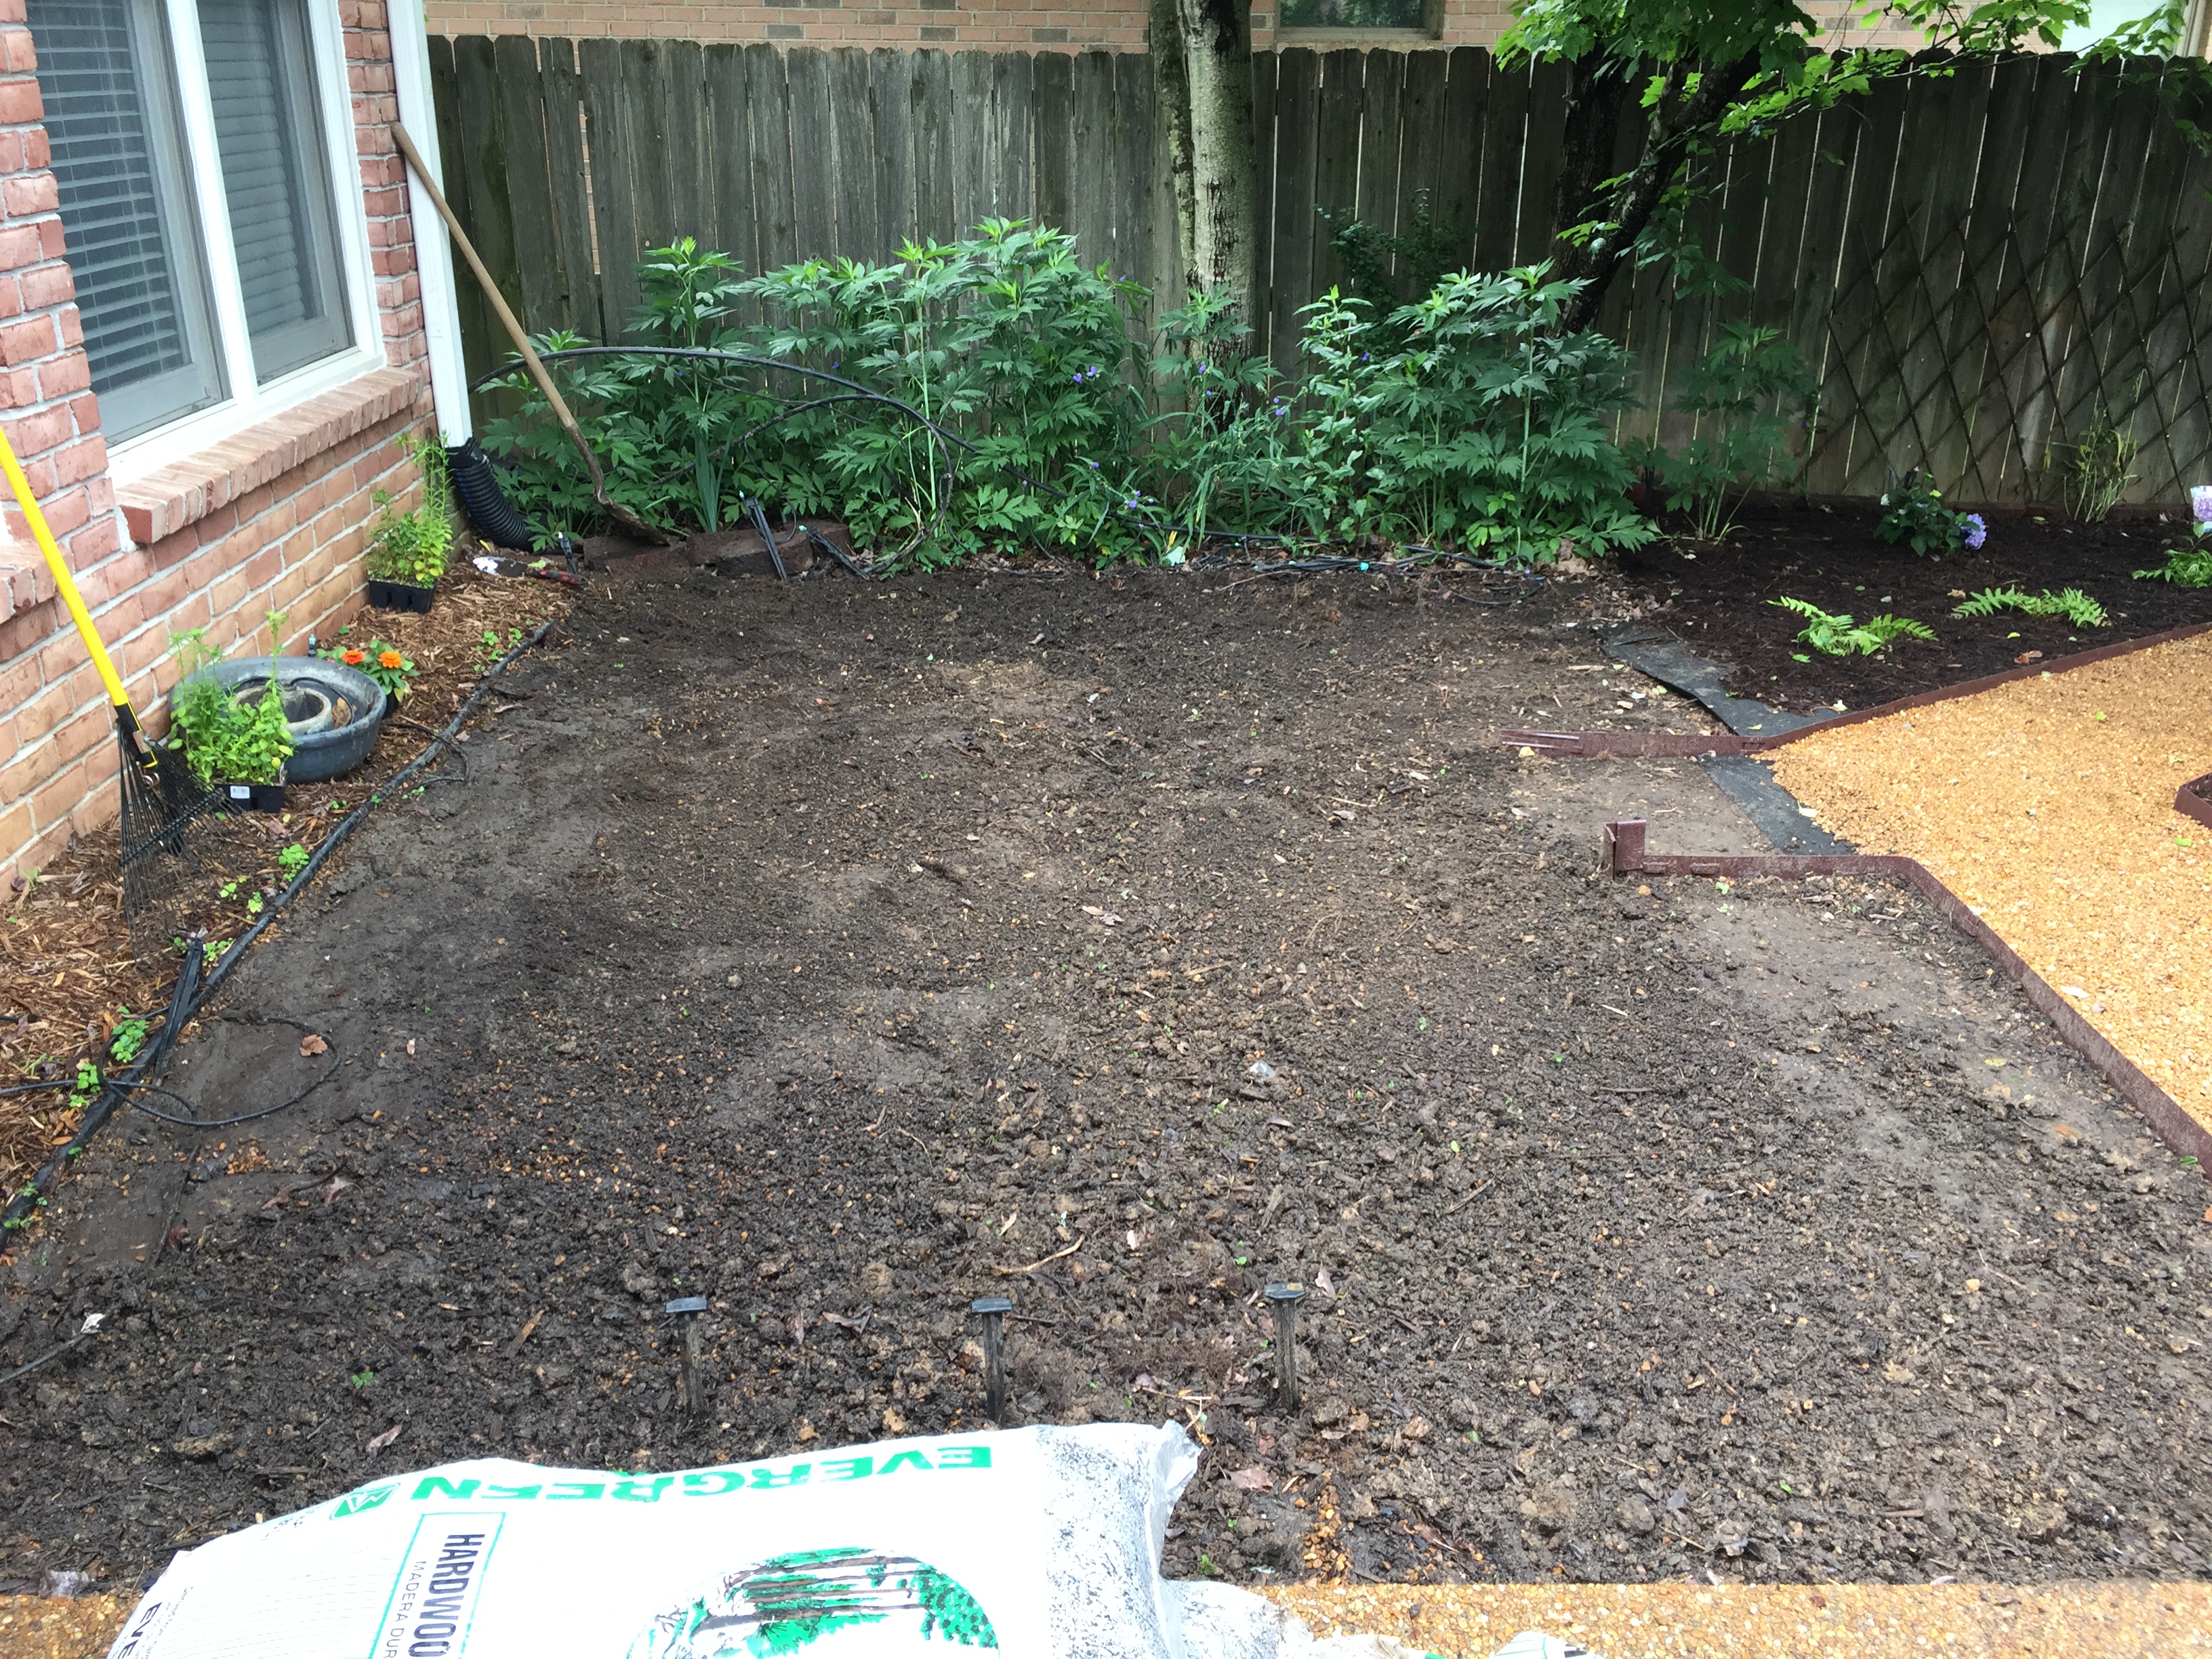
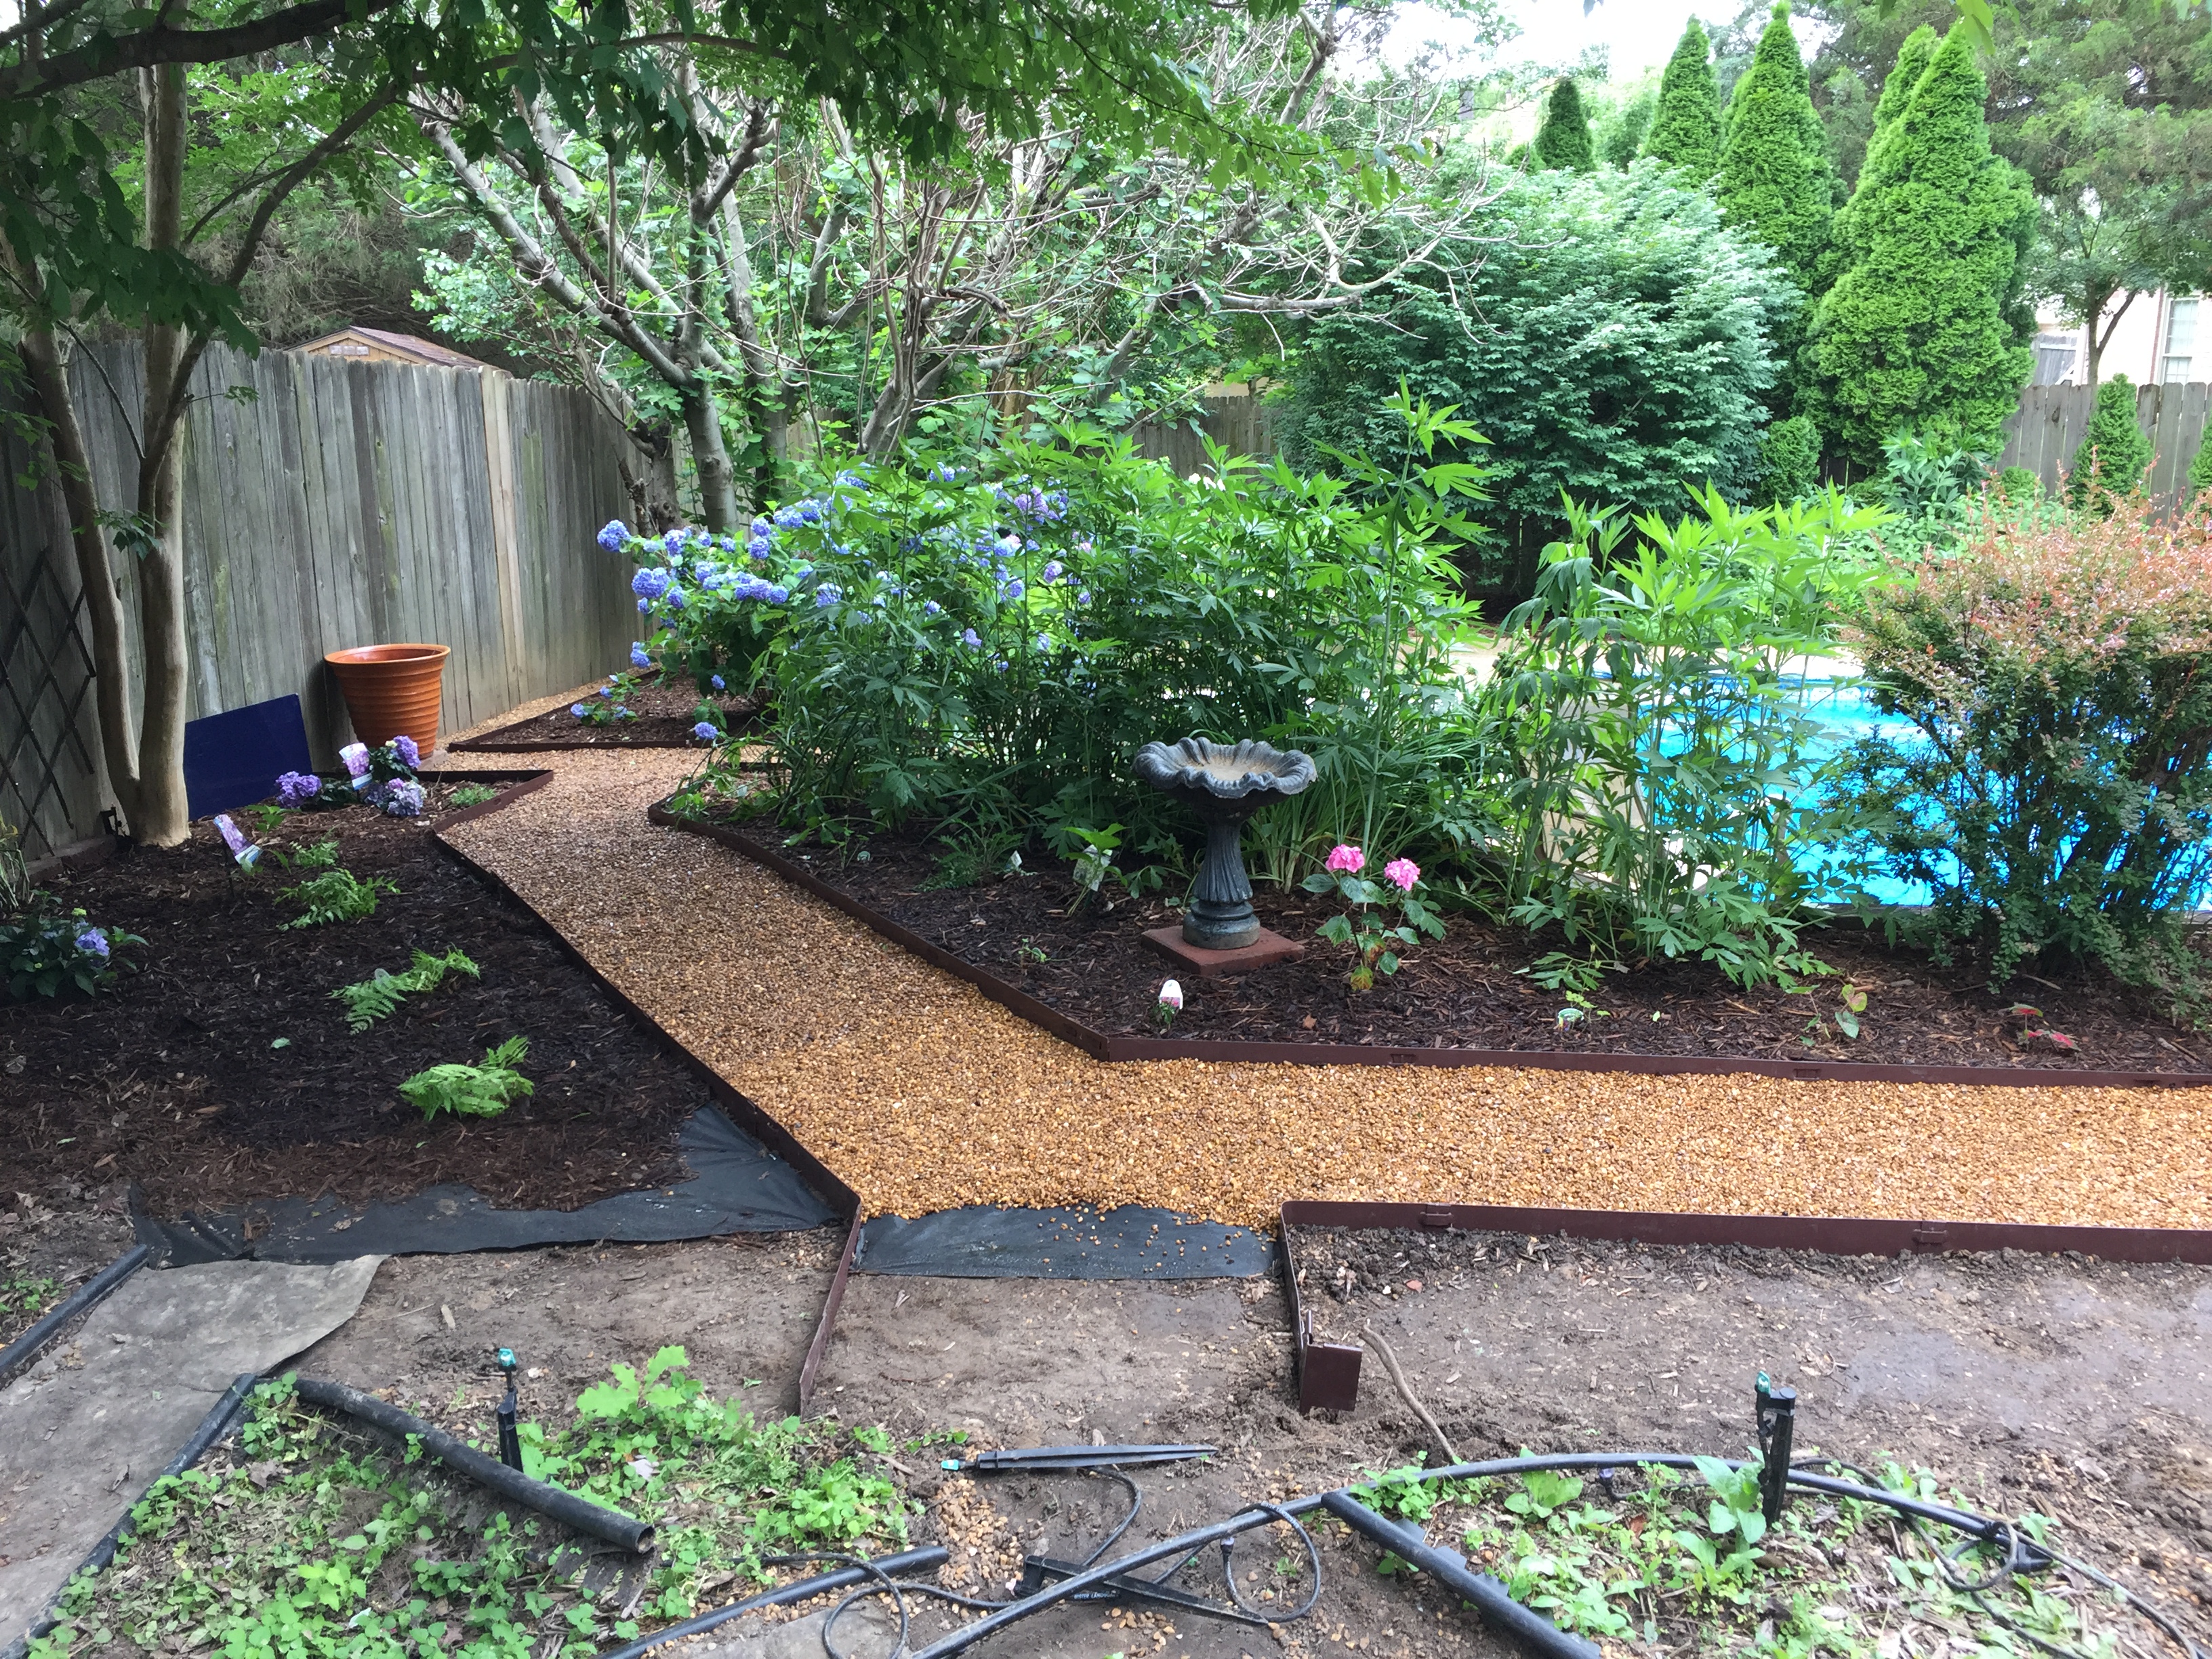
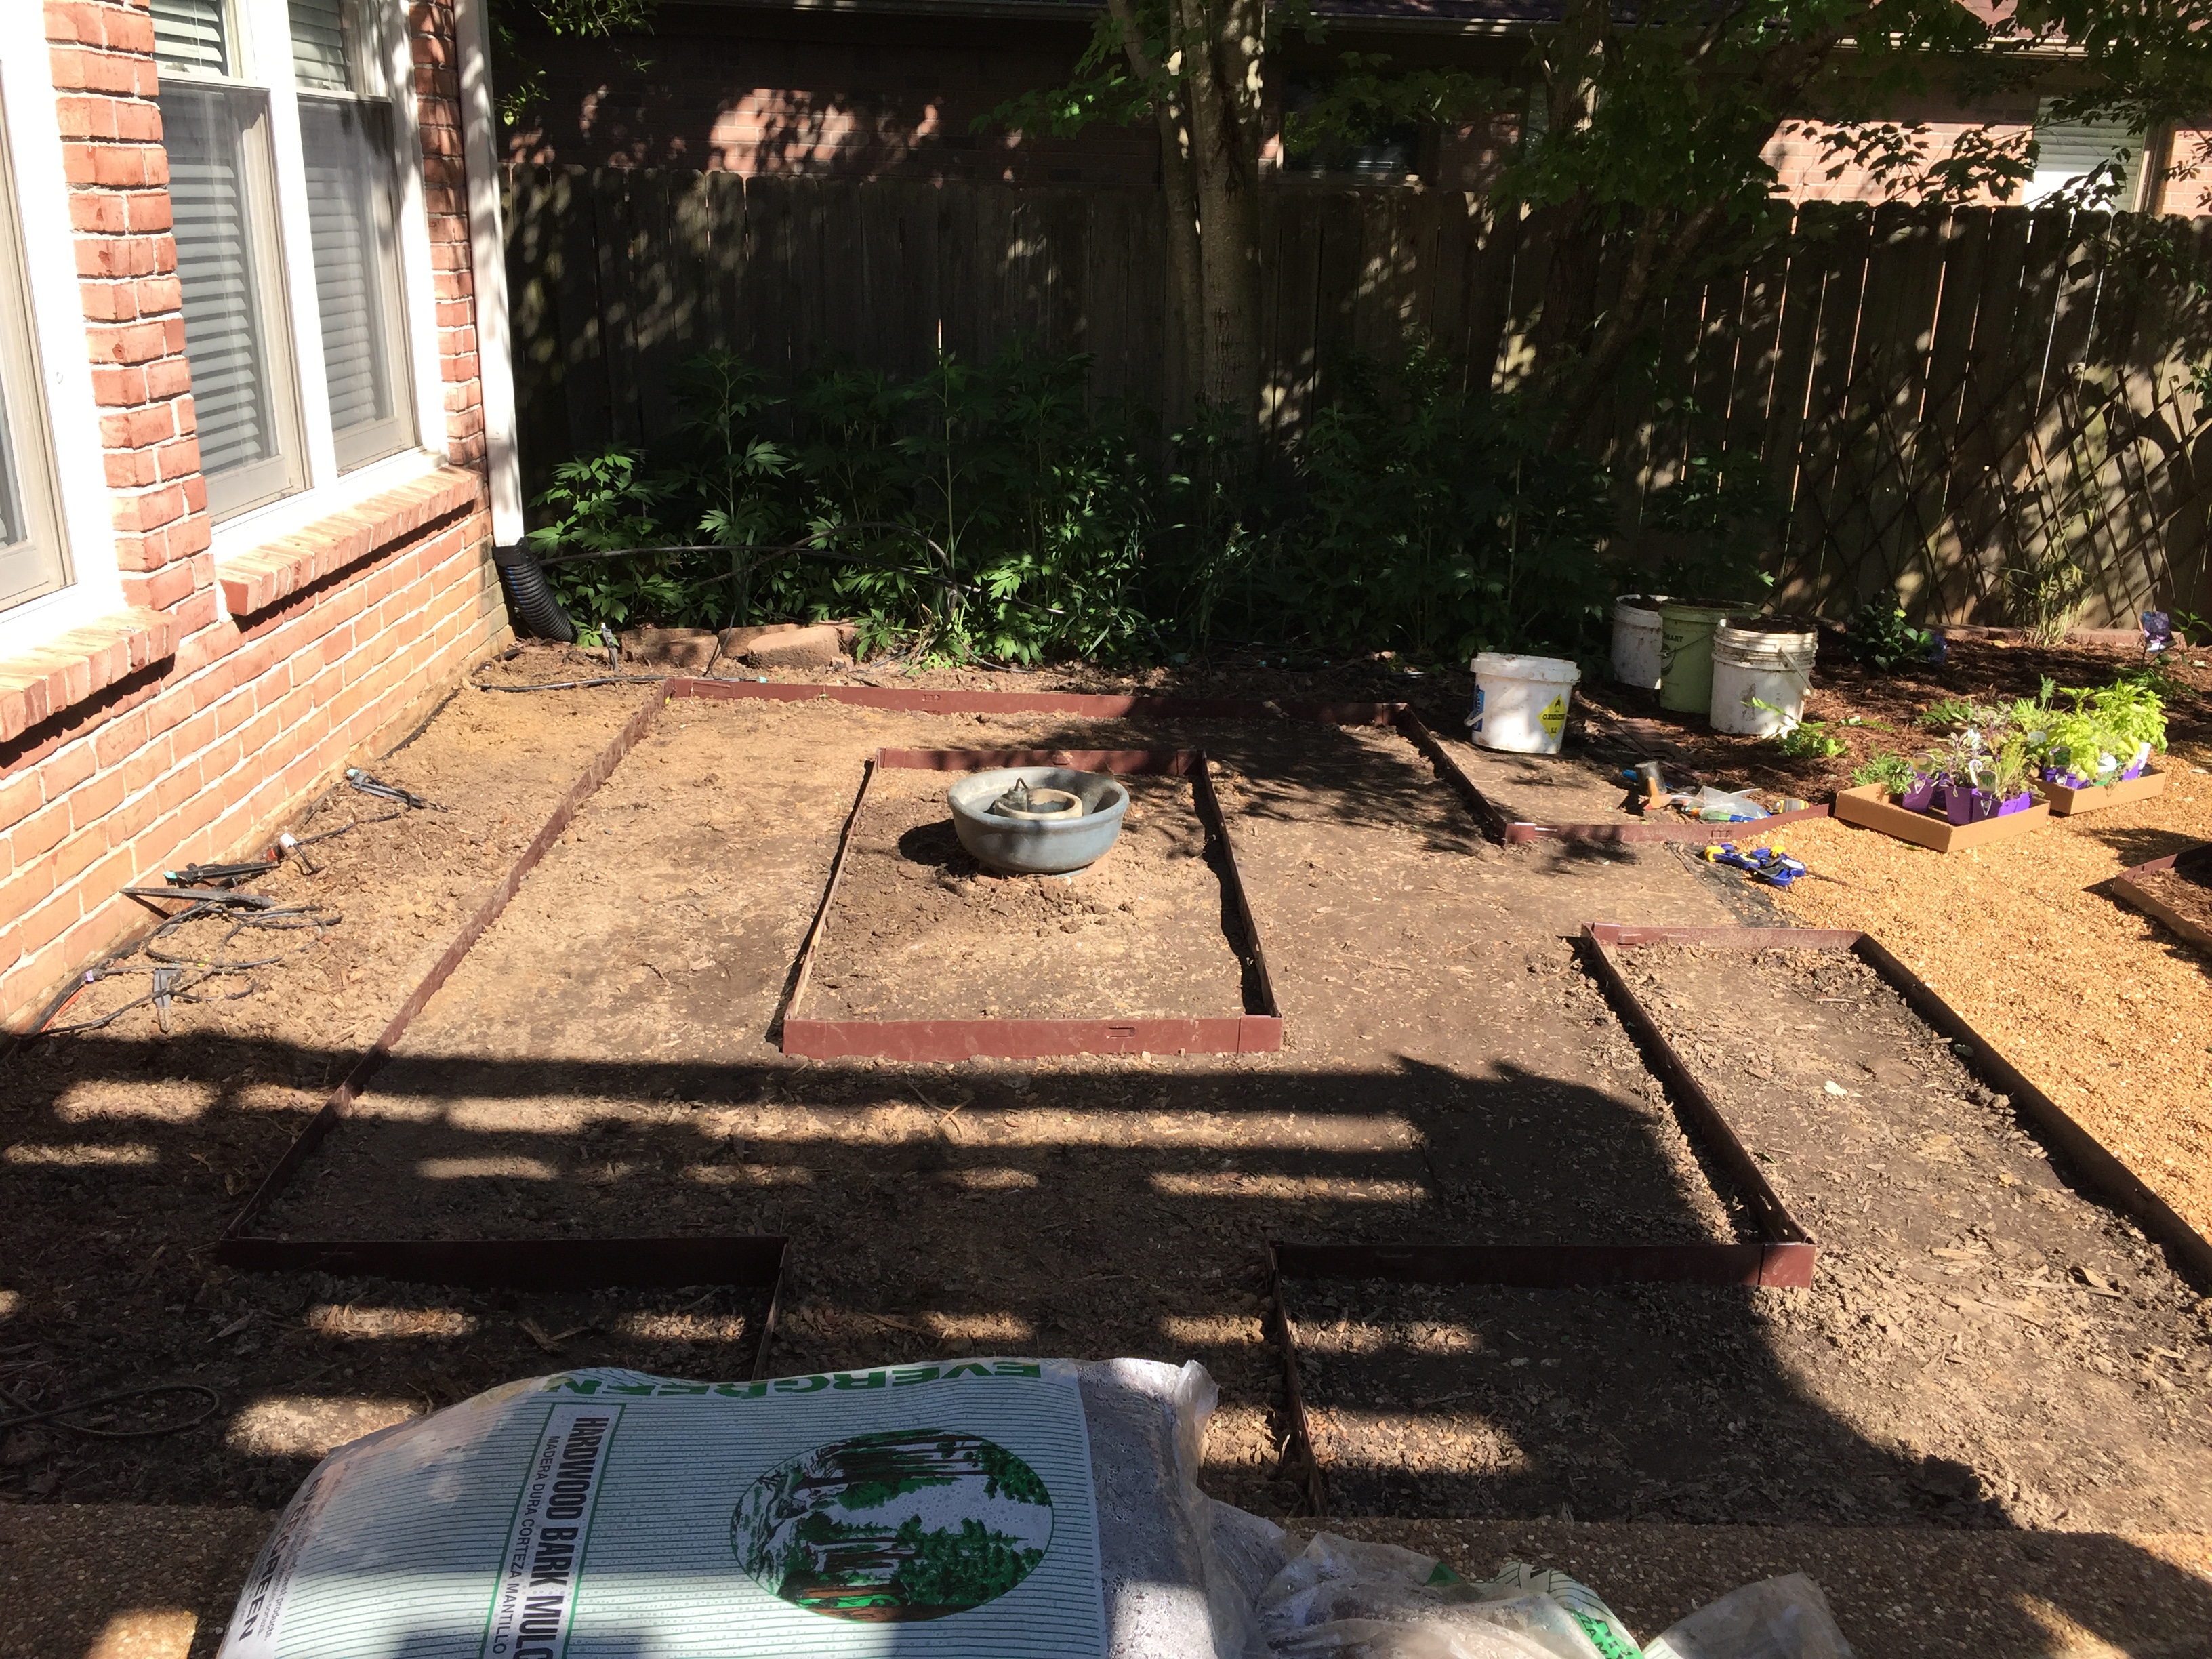
The first step was obviously to lay down the metal edging. This involved a good bit of cutting of the steel edging, but nowhere near as much effort as if I had re-created the original design.
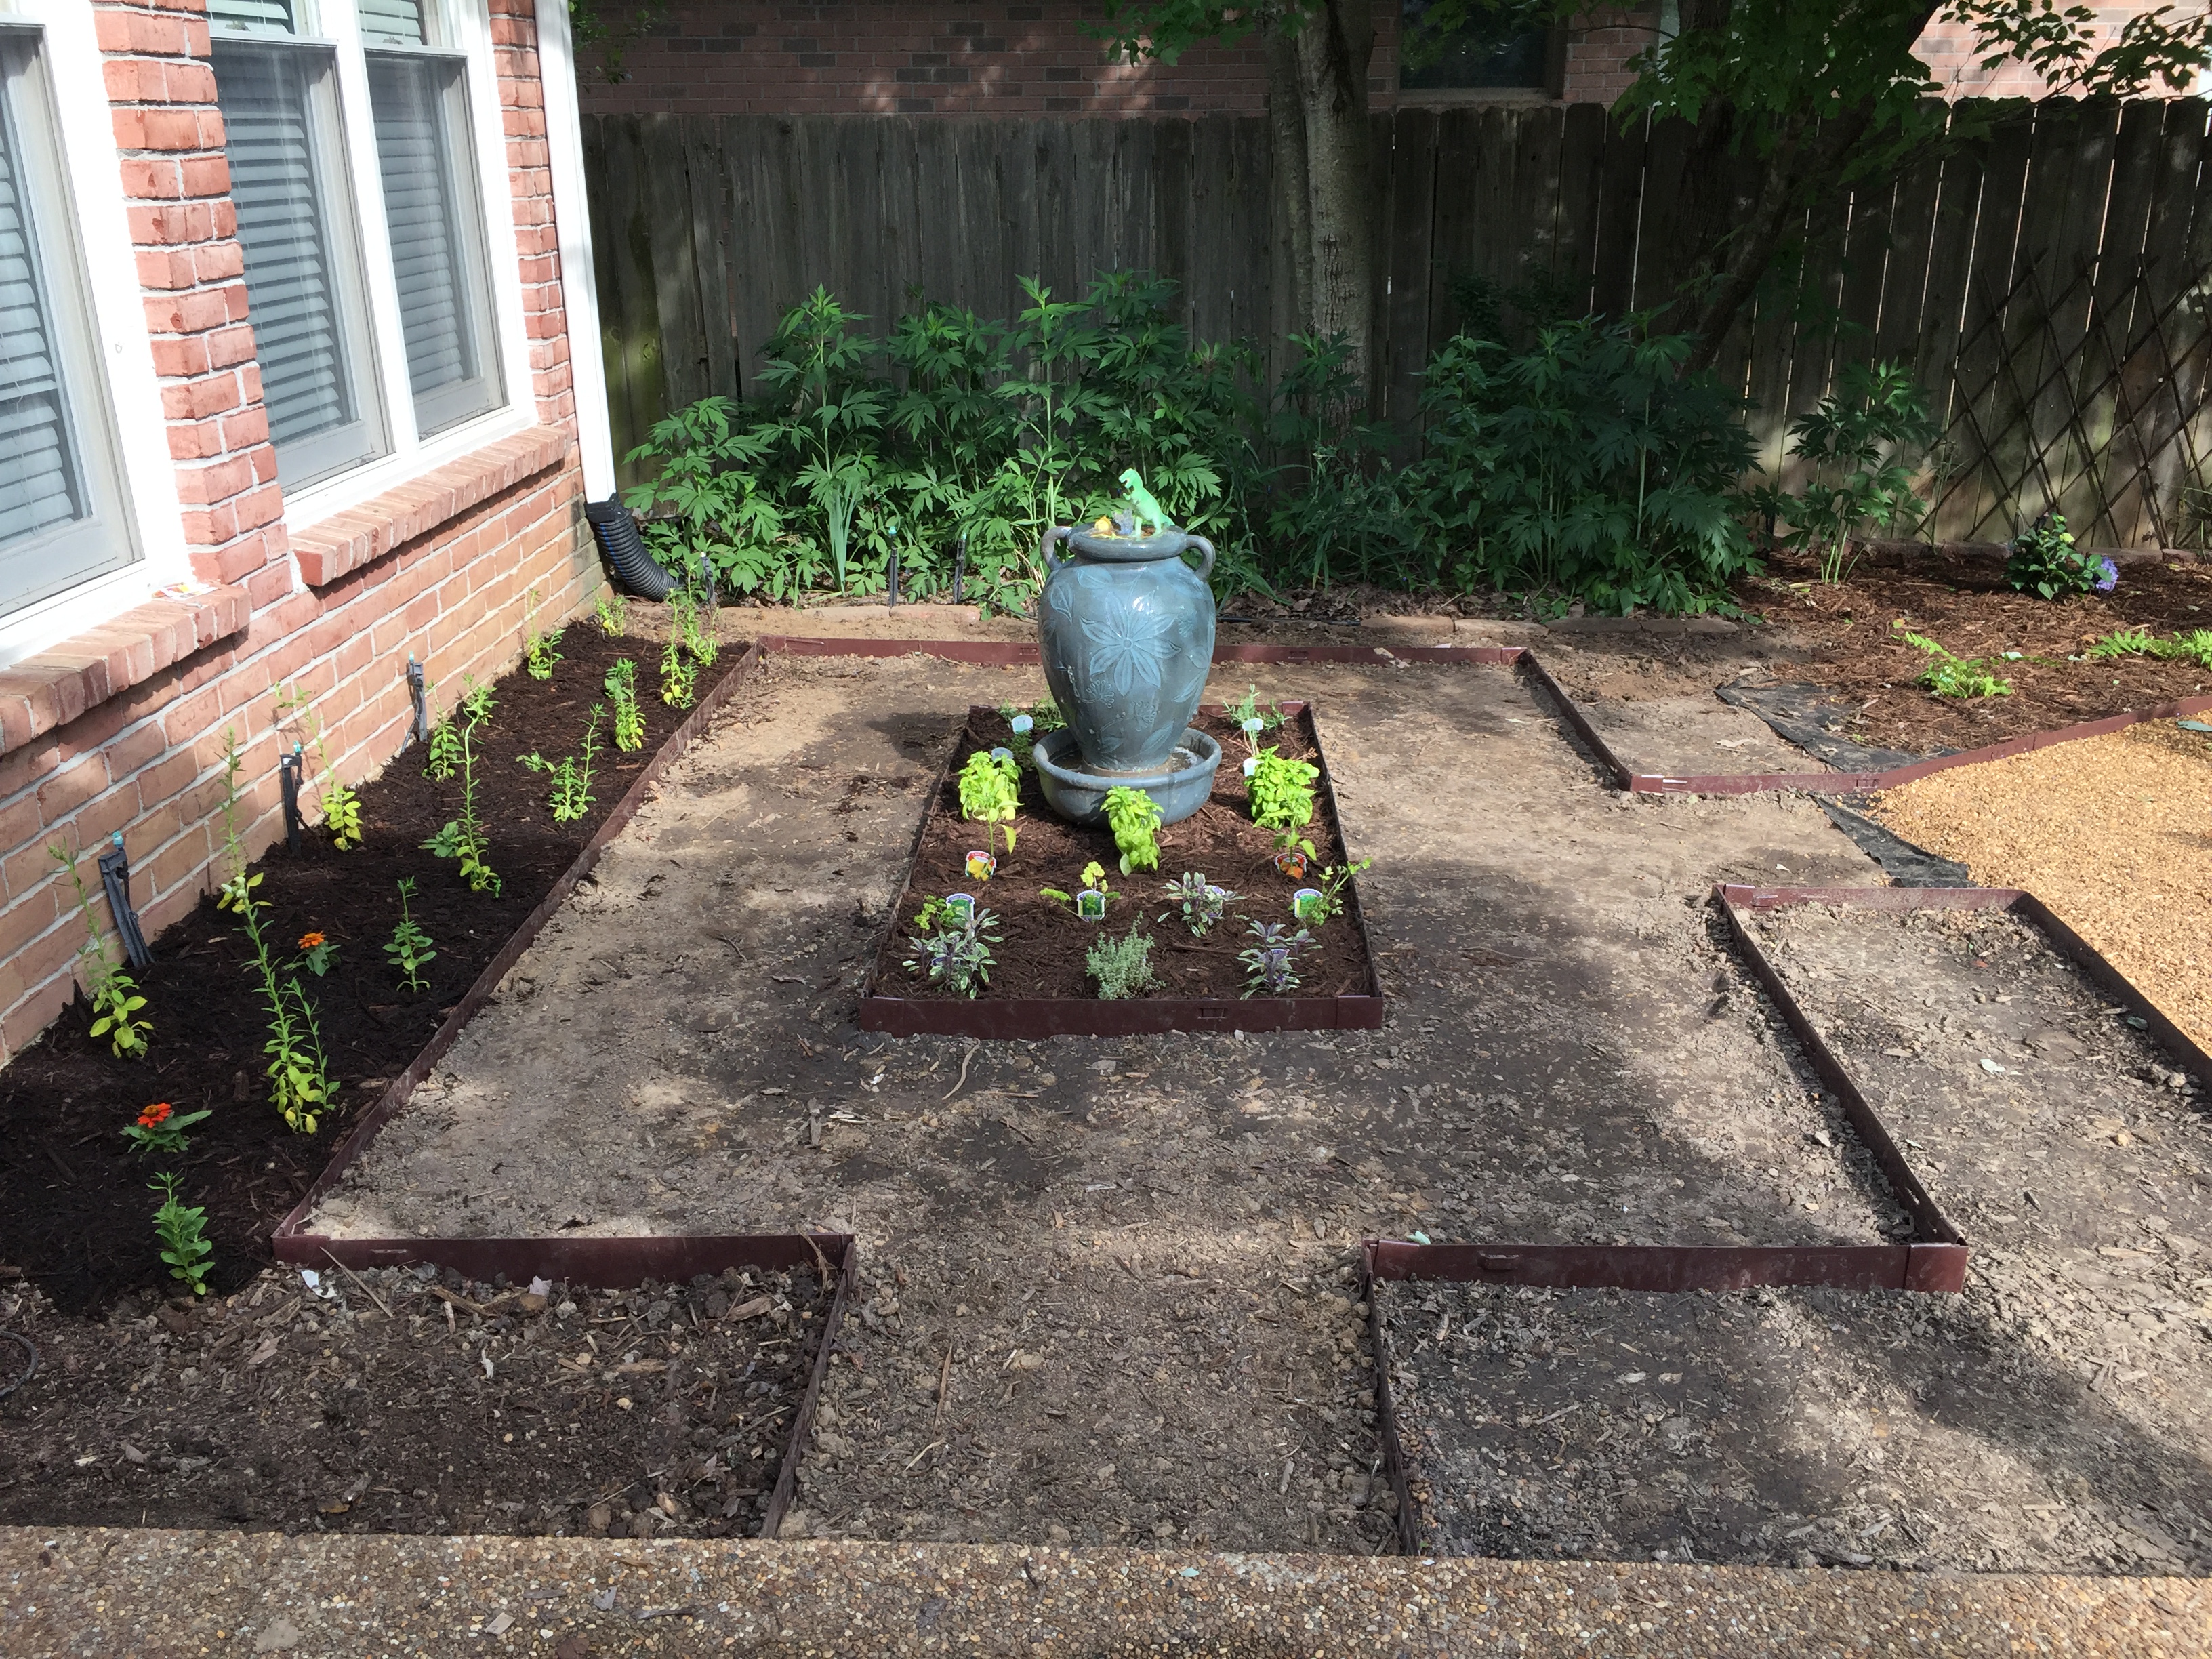
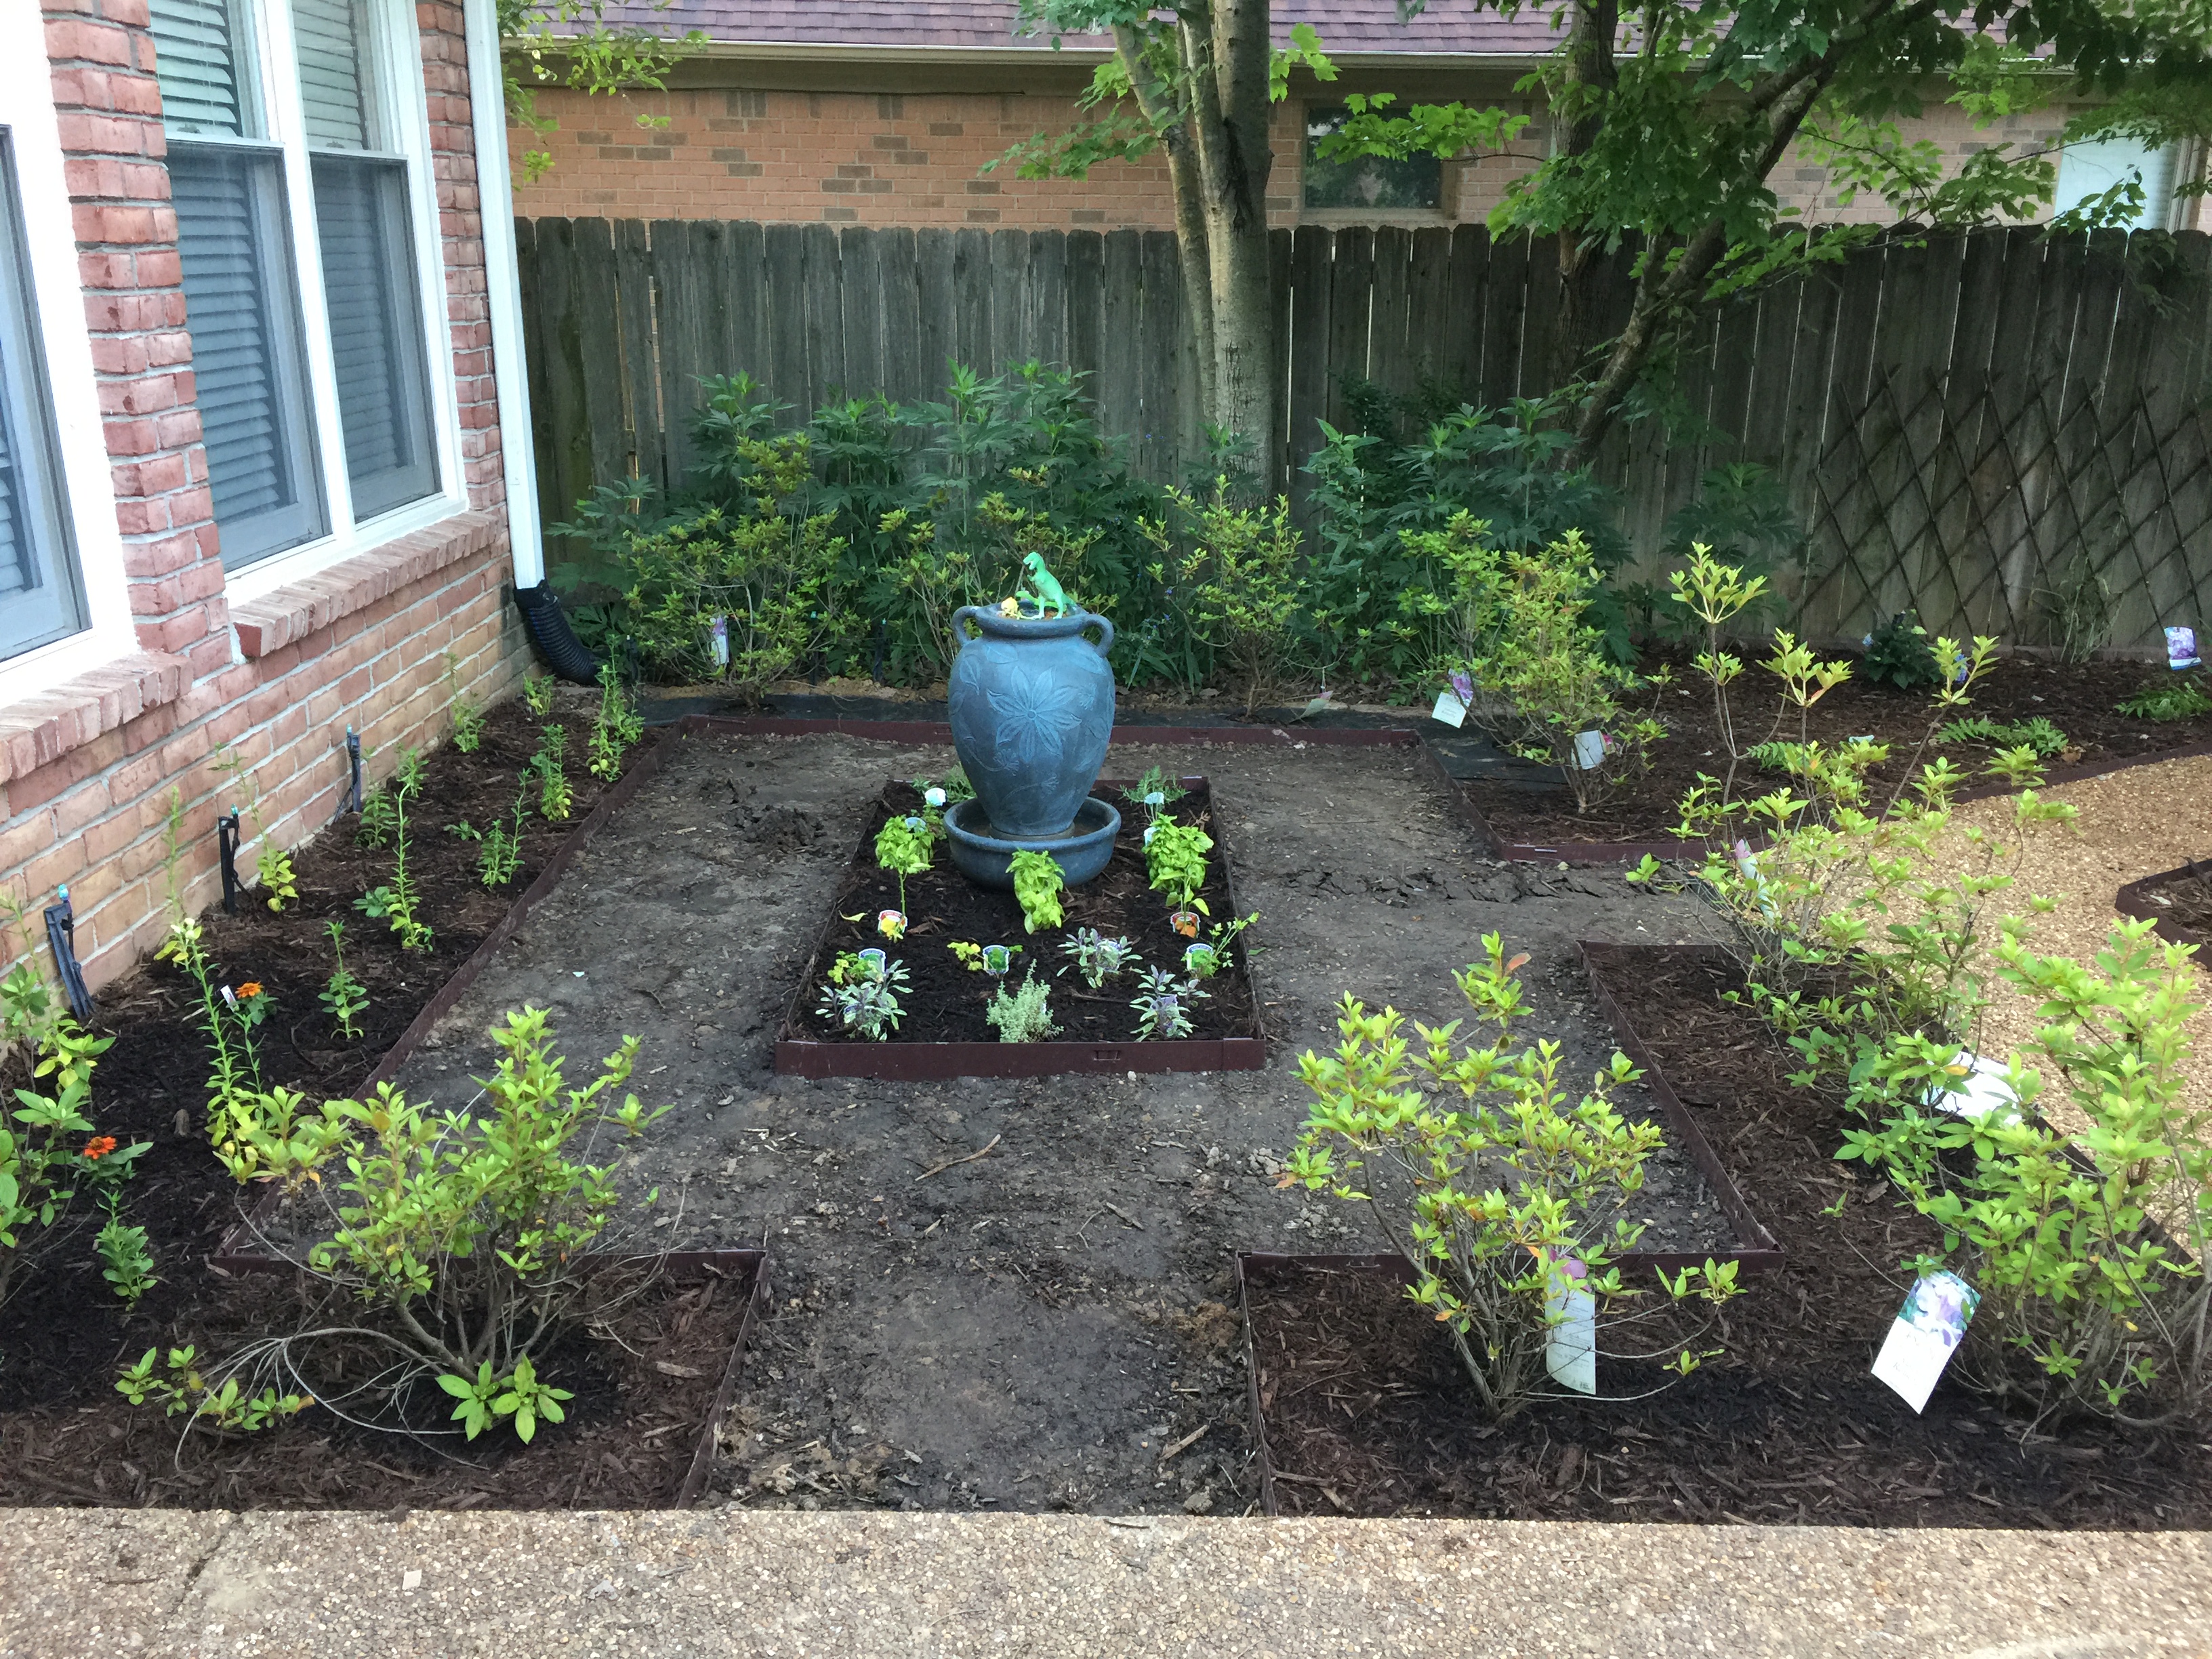
Once I laid out the landscape fabric for the herb garden, my wife placed all 18 of her plants where she wanted them to be planted. Then using scissors, I cut out the shape of the herb container in the fabric and dug the hole for each herb. Planting the herbs was a veritable epicurean delight with the wonderful aromas of the herbs. My mouth practically watered in anticipation of the delicious meals we would have this summer accentuated with such a wide variety of herbs from my wife’s garden.
Along the side next to the house, my wife wanted tall flowers and so those I planted as well. The finishing touch for this part of the garden was to carefully place in the center of the herb bed, the “dinosaur fountain,” so named by our oldest grandson.
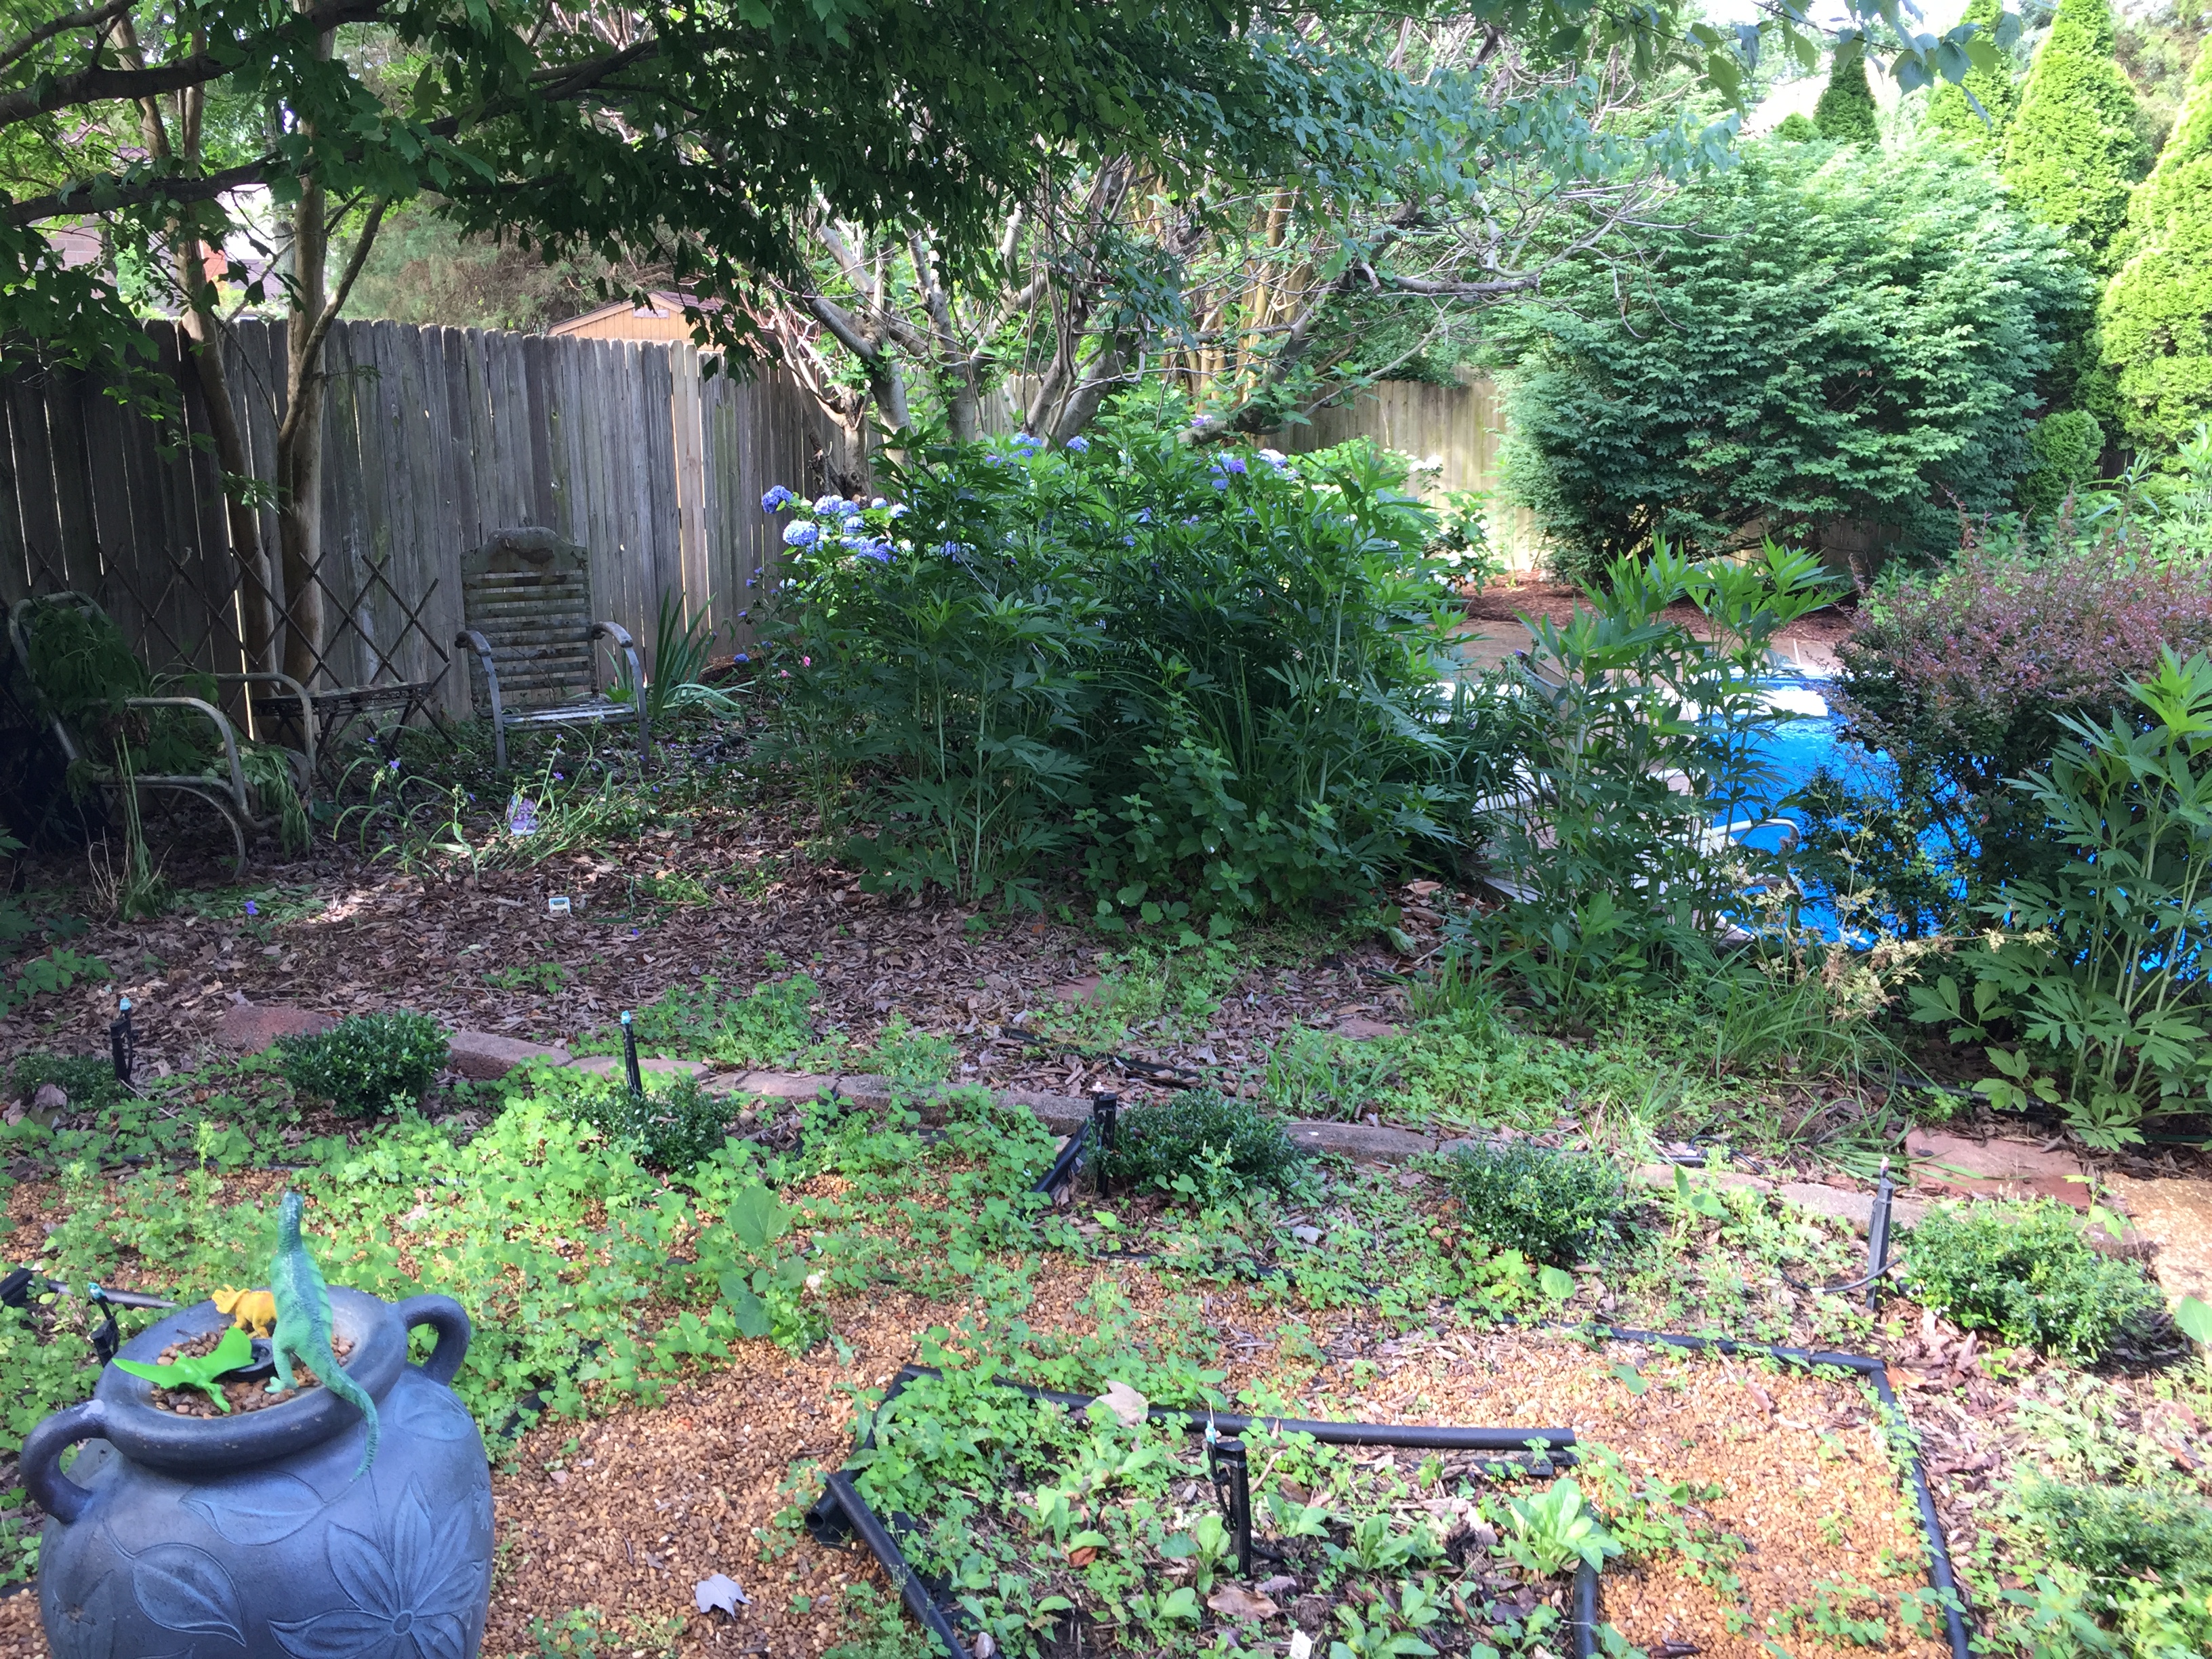
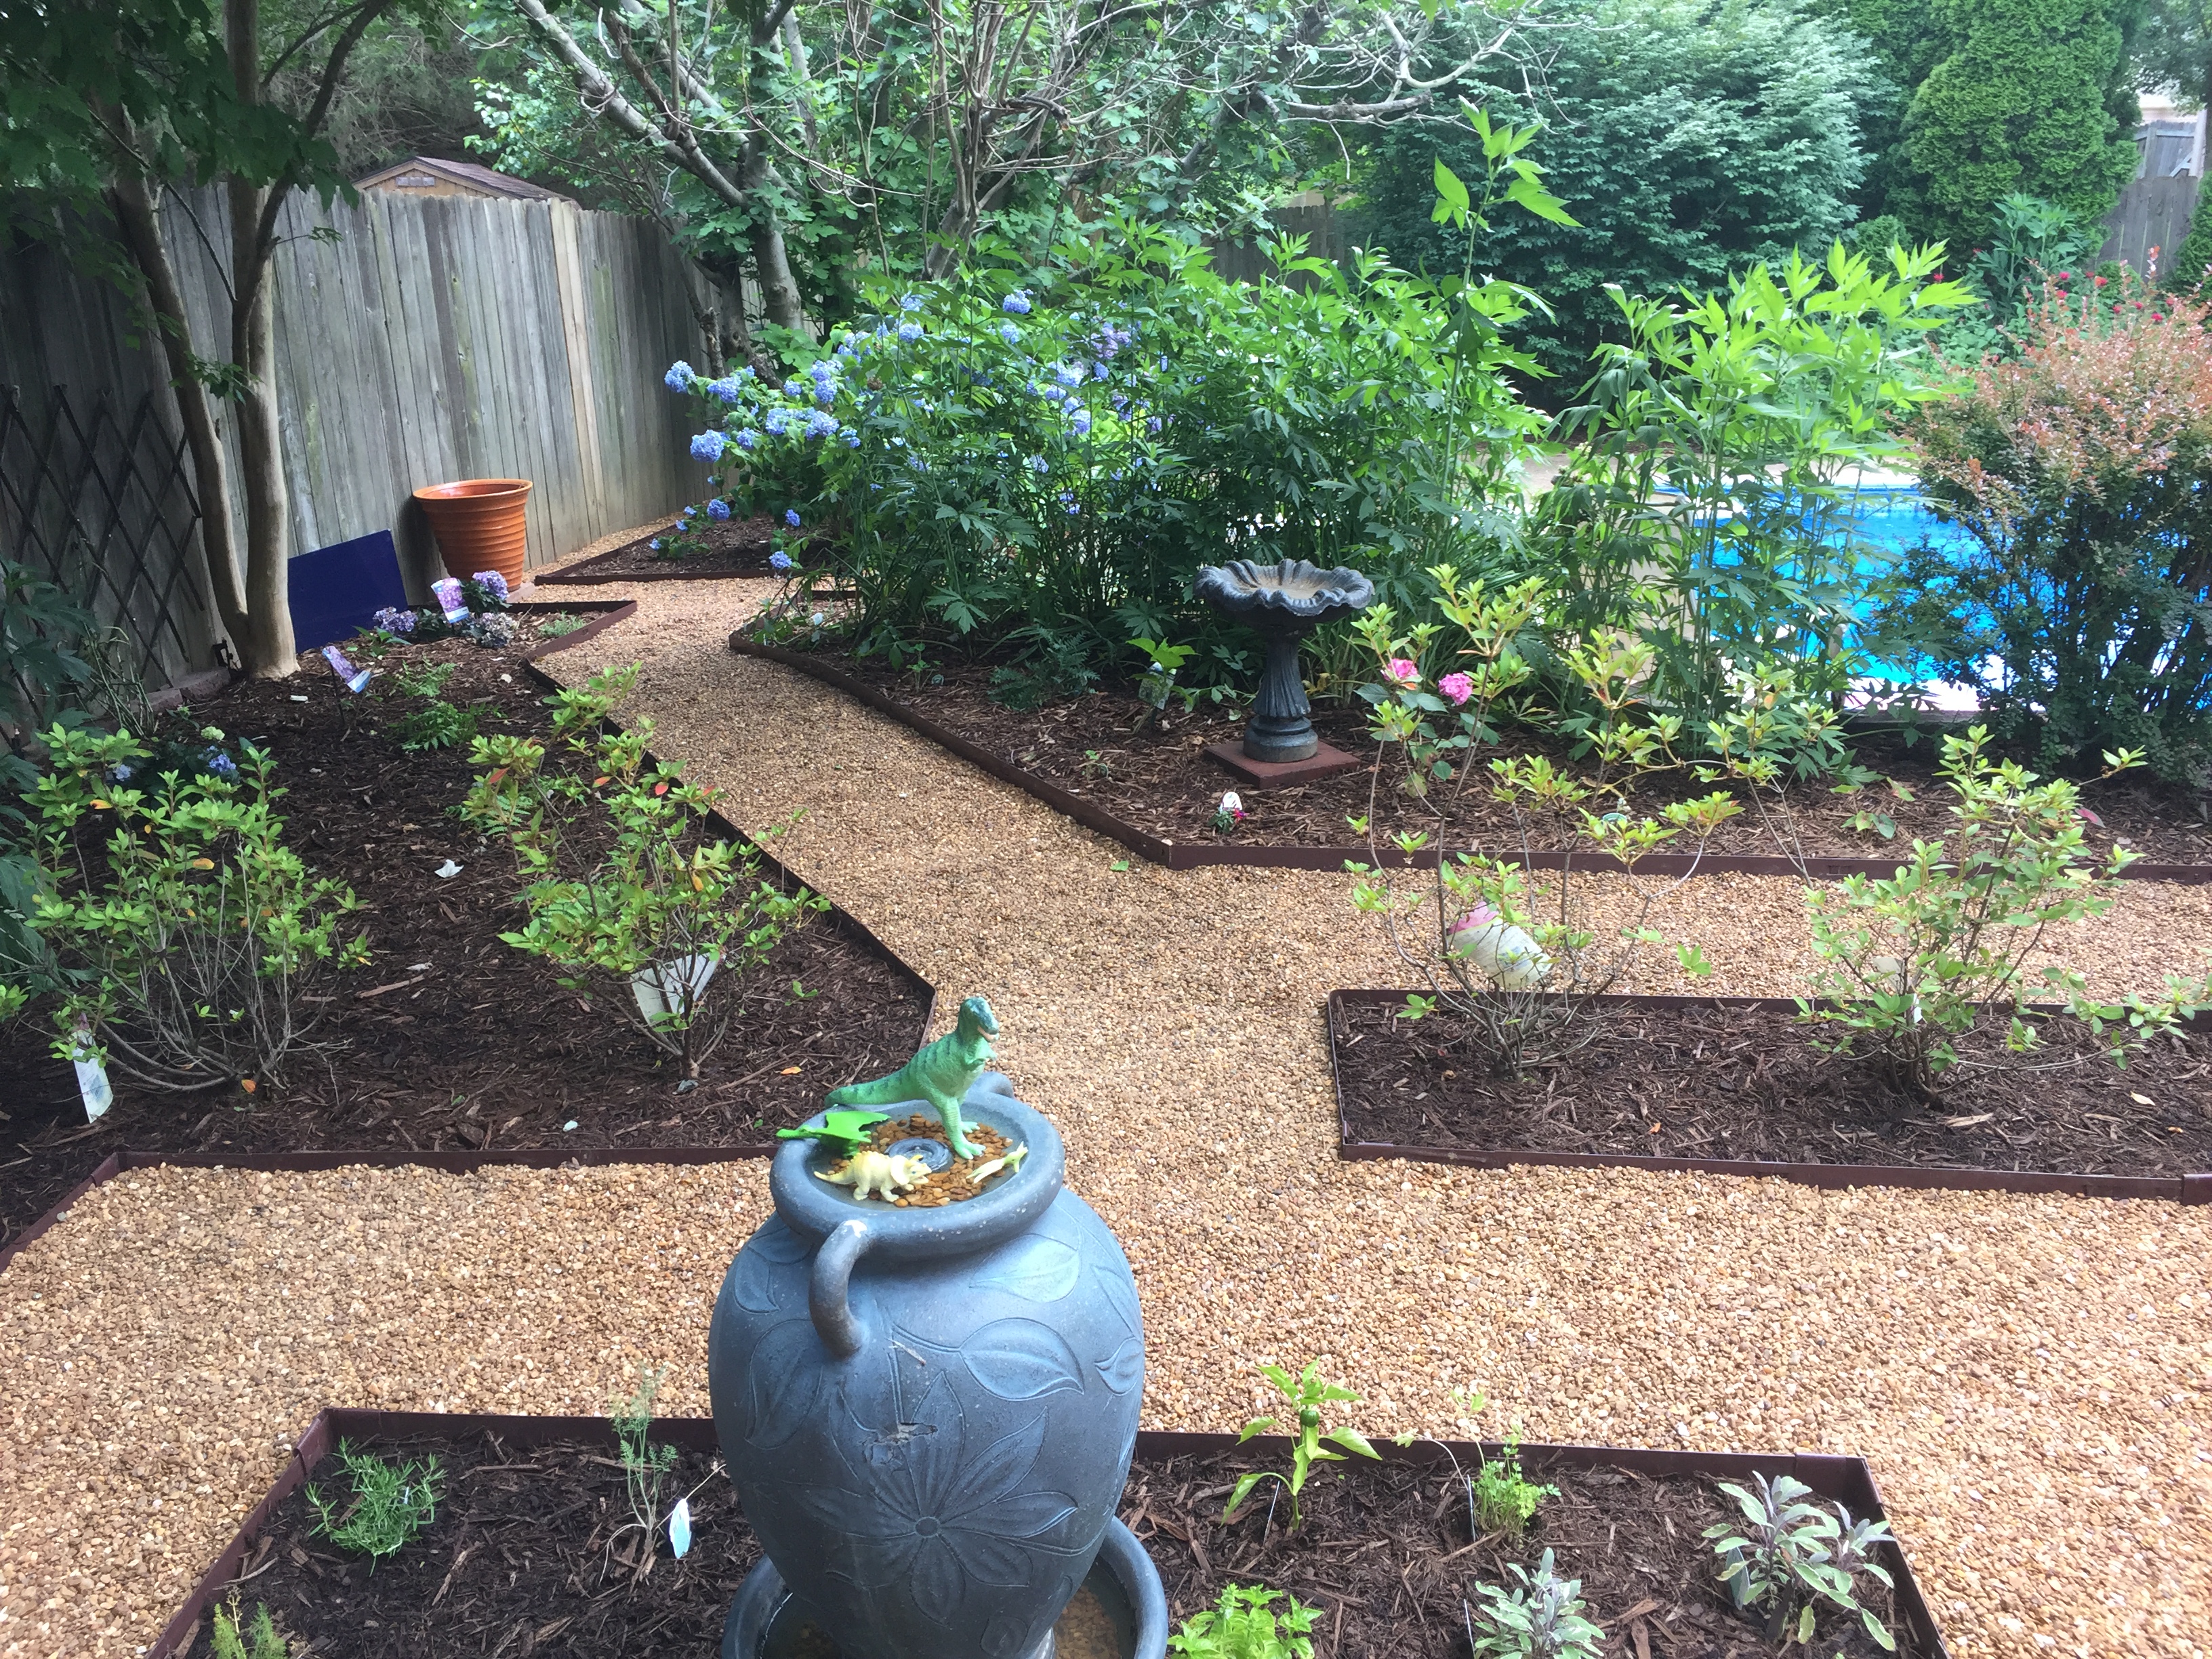
The next step was to add the shrubs around the perimeter that would eventually create the walls for this outdoor space. The small shrubs we previously planted never grew very tall and thus never created the walling effect our son was aiming for as a part of his design. In the photo above, they are barely taller than the surrounding weeds and thus almost invisible.
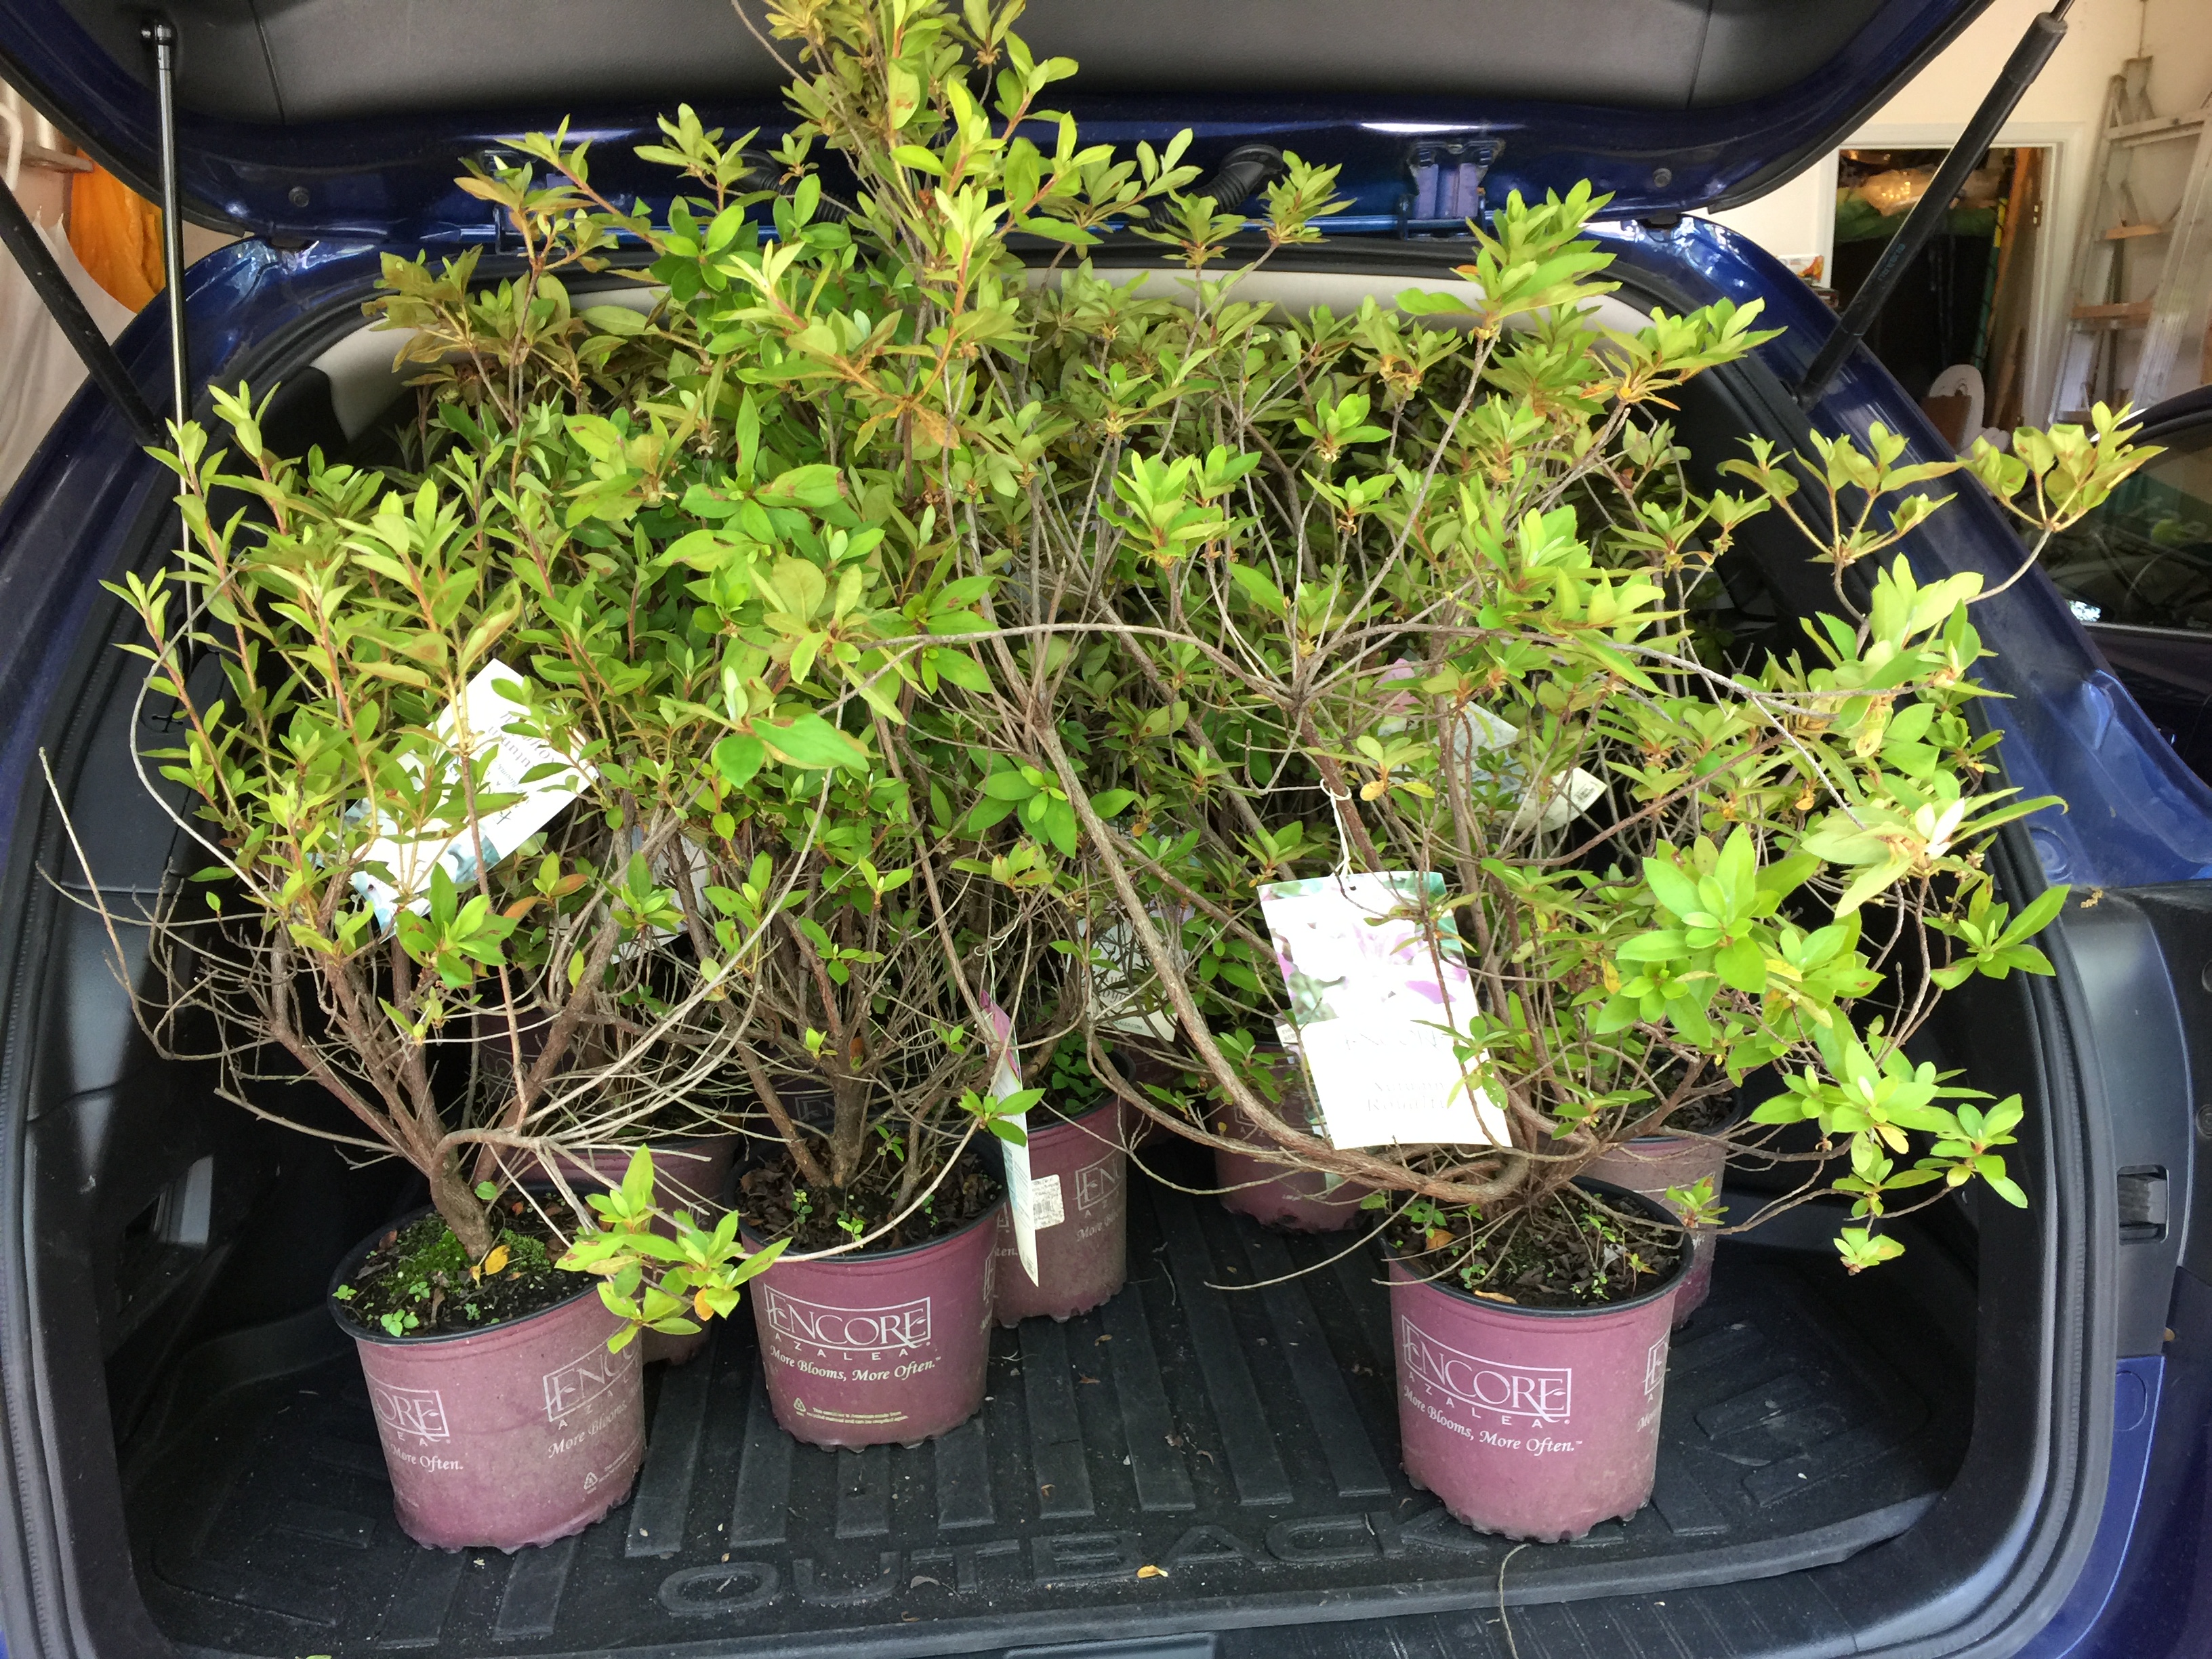
My wife loves flowers and so this time, she wanted to use azaleas as the perimeter border. By the first week of June, the selection at most local nurseries was limited but at one I found some nice Encore in a purple color.

This hybrid variety blooms three times a year so the forest of bushes in the back of my wife’s car should provide us with a forest of color in the garden.
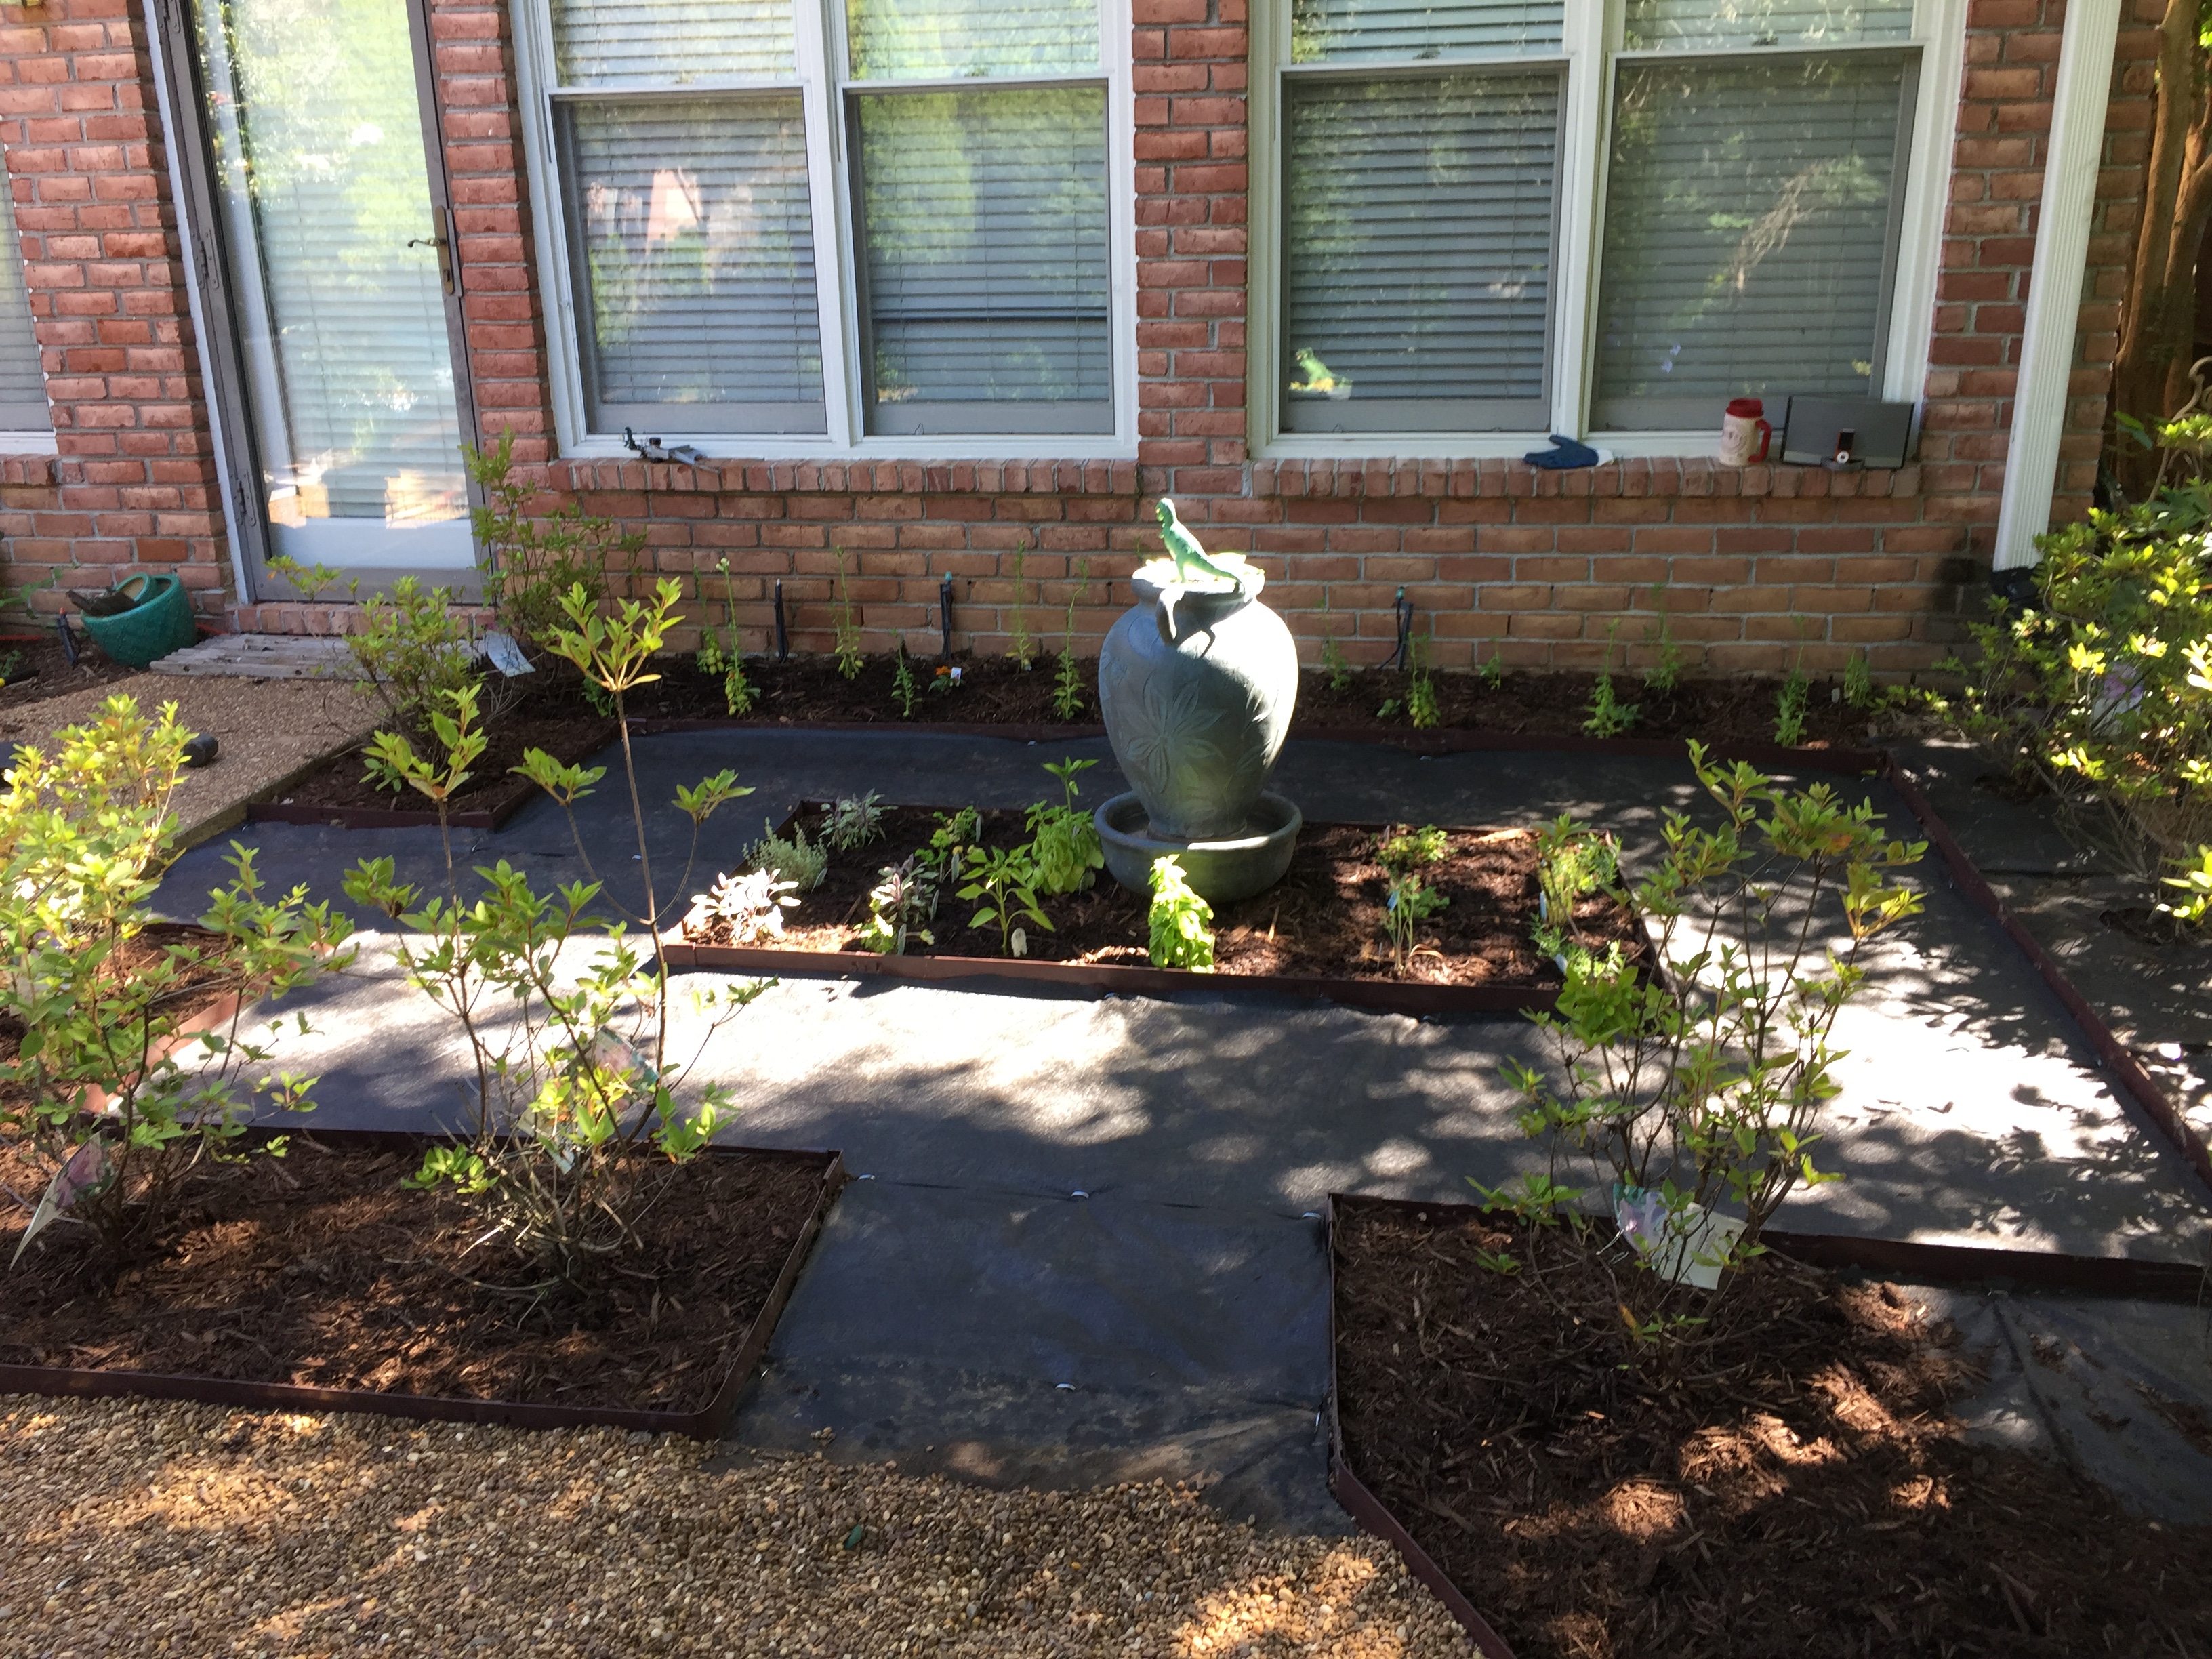
Again, I laid down the landscape fabric and then figured out where to place each shrub. The day before, I had watered this bed thoroughly so digging my holes after cutting the circle in the fabric started out fairly easily but after digging a half dozen holes became very taxing. And when I got underneath the trees at the back of the bed, I encountered numerous tree roots that I had to cut through.
By the end of the day, I was worn out (again!) but felt quite satisfied at what I had accomplished.
The last step was to finish mulching around the shrubs, lay down the landscape fabric on the walkways, and then add the pea gravel.
Interestingly, when I ran out of old gravel and started adding new gravel, there was a distinct stone color line between the old and new. I decided to wash some of the new pea gravel in my handy bucket and found, whereas the water was brown from washing the old gravel, the effluent when washing the new gravel was yellow to umber orange in color. Turns out it had been apparently processed in a plant that also processed sand. From then on, I washed all the new gravel but still noticed a slight color line. However, I guess if the famous Washington Monument can have a stone color line, so can my meager gravel path.
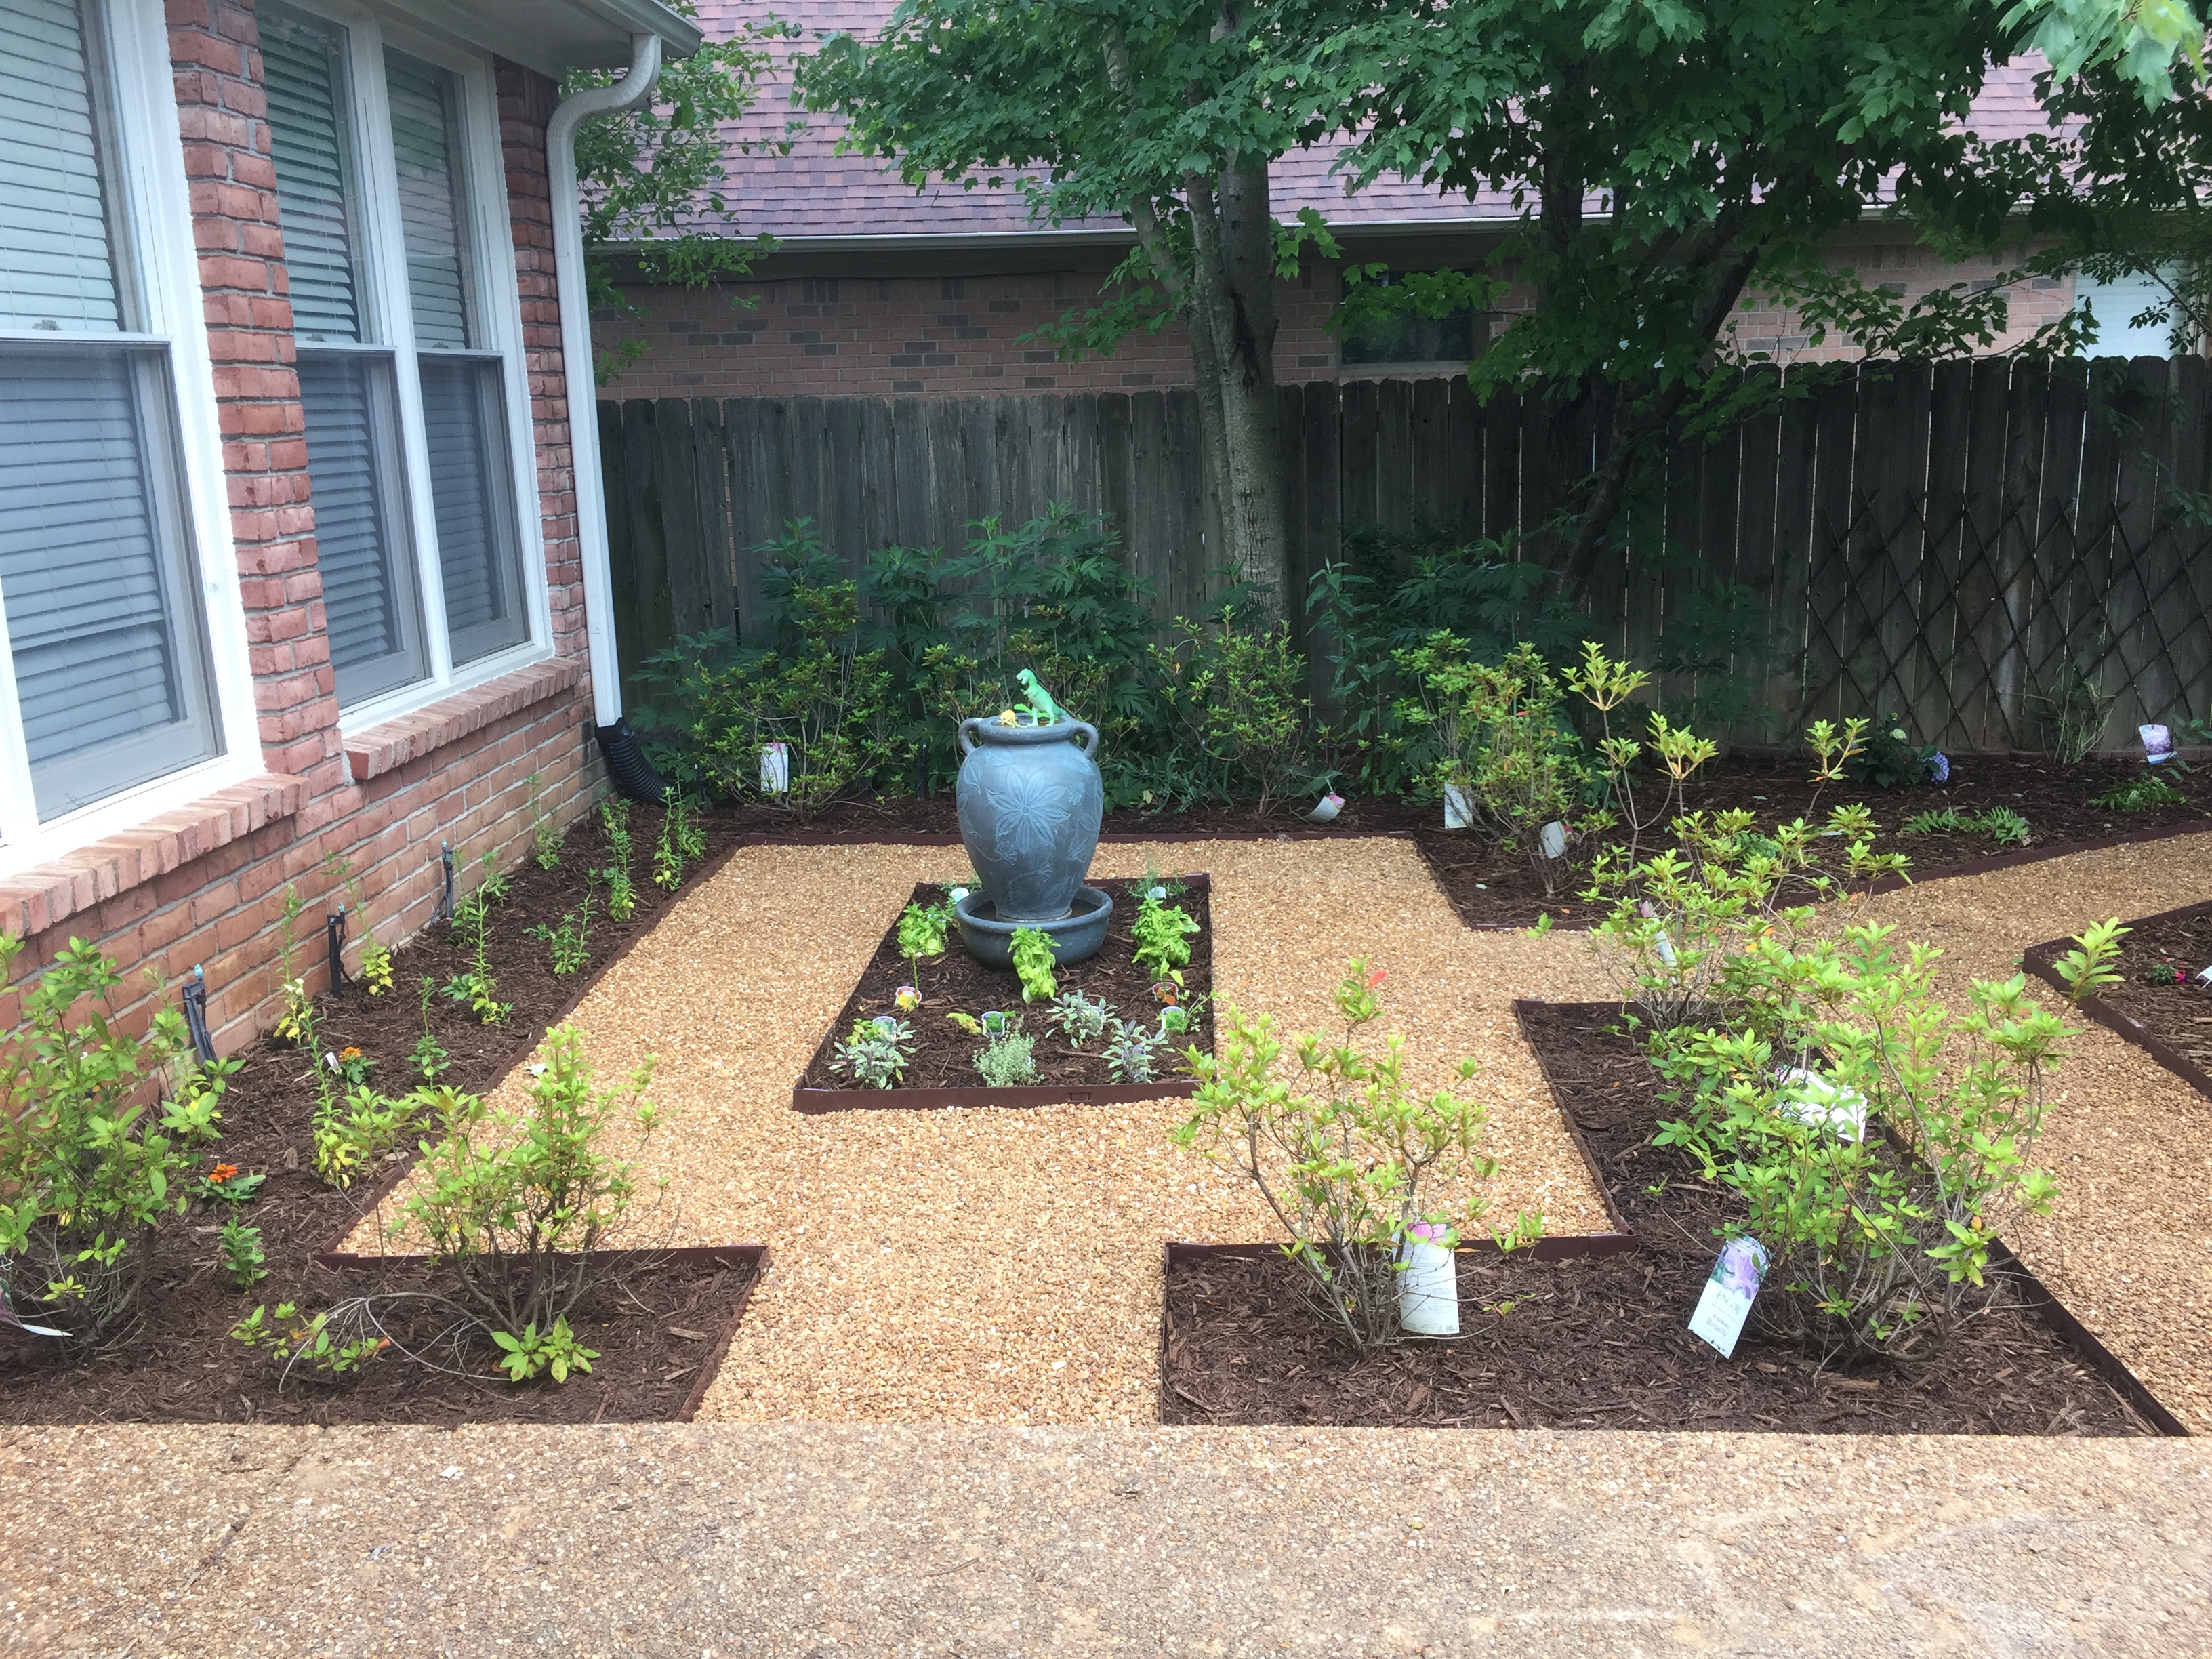
It was with an immense sense of relief and satisfaction when I finally finished this last bed.
When I started weeding back in March, the weather was cold and I had to wear jeans and long sleeved shirts. By the time I finished in June, the weather was hot and so appropriate attire was shorts and t-shirts, which I daily sweated down and dirtied up. At one point while I was working on these outdoor activities, I mentioned to my wife that all this manual labor was going to either keep me young or make me feel old. Now that I am done, I’m not sure which one it is since I am still quite sore.
I didn’t keep track of how many days or hours I spent working on these projects. Towards the end when the weather was hot, I drank a lot of water and I know I burned a lot of extra calories as I lost five pounds between the end of April and the beginning of June. Not that I would necessarily recommend this as a dieting plan.
But with the completion of all this work, a part of the satisfaction is knowing that this is the best our backyard has ever looked. So hopefully when visitors come over this summer, they will enjoy a return to our backyard paradise.
Categories

Very Nice!
Thanks! It was a lot of work but I think well worth it.