
Sopwith Camel – Unforeseen Challenges
Continued from: Sopwith Camel – Spanning the Frames
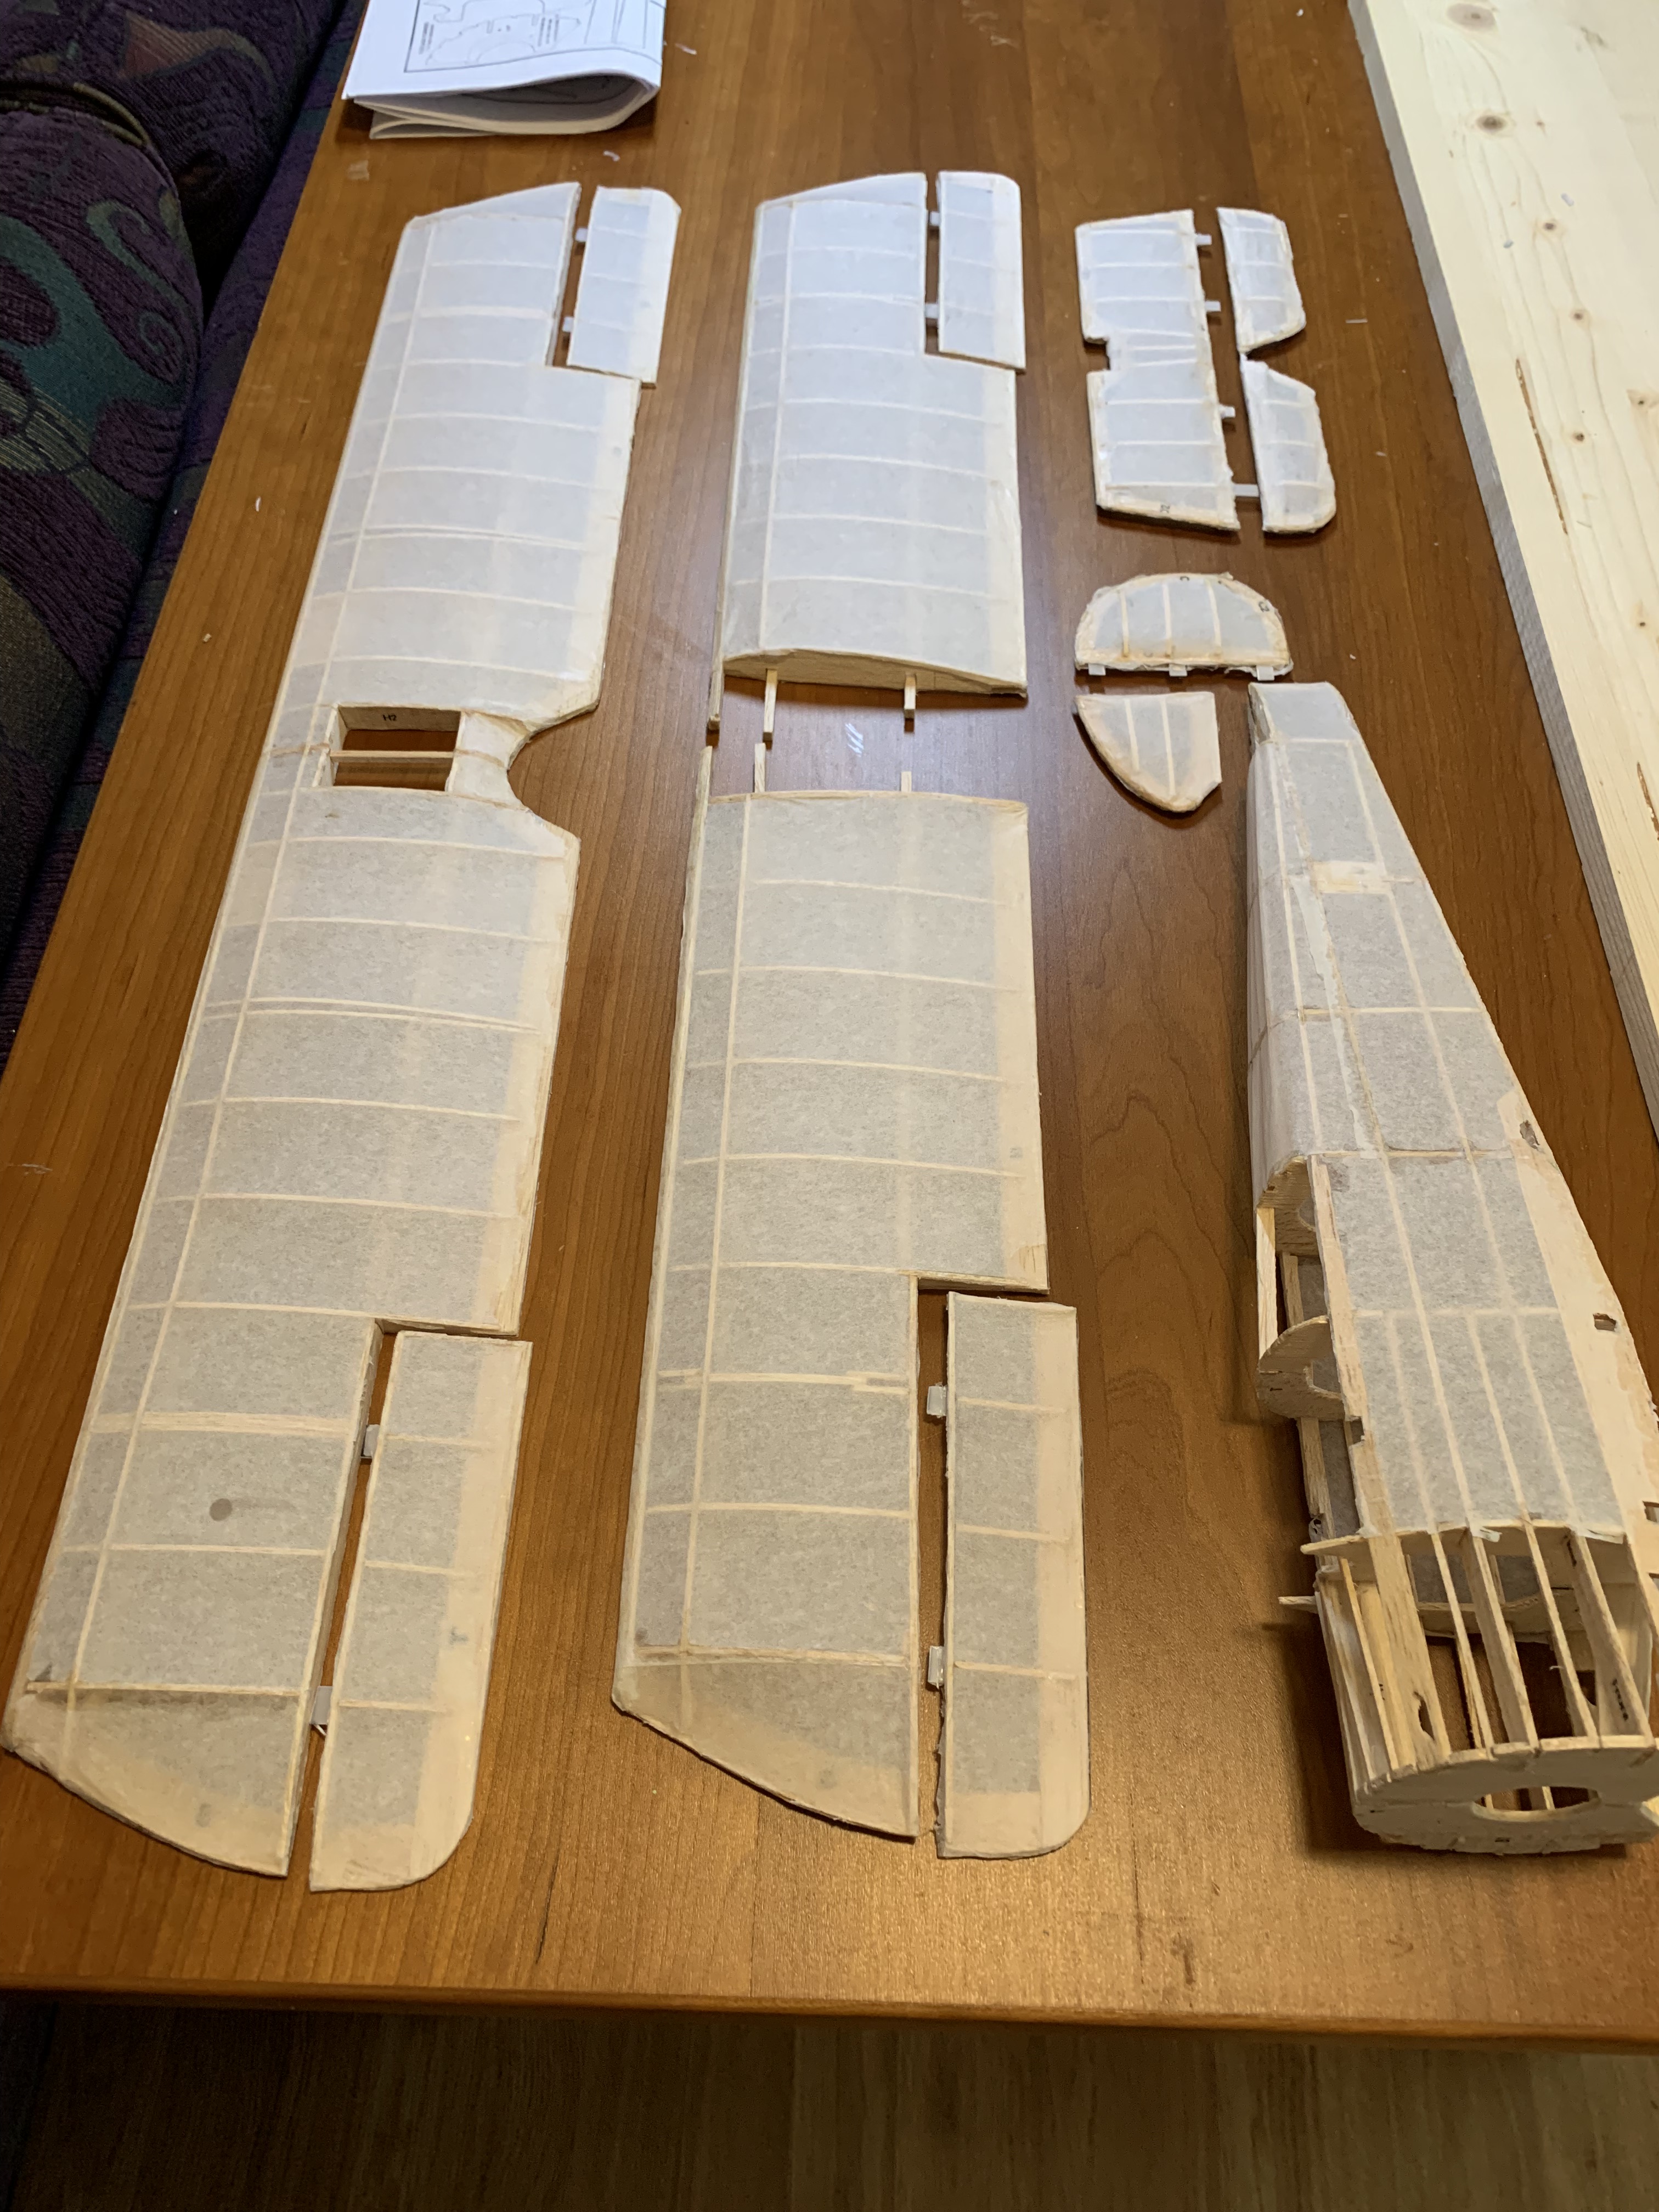
In my last update of the building of this balsa wood model airplane, I had just attached the tissue to the frames and shrunk it tight with water sprayed from an atomizer. The last step in preparing the model for painting was to apply several coats of clear dope to the tissue to give it a “canvas-like” toughness. As I was out of the clear dope, I had used on my Chris Craft boat, I had to return to the hobby store once again.
There where I had purchased it originally, I discovered they were out of stock. I searched the internet for more and found an online hobby store in Atlanta that carried clear dope, although it was a different brand. I figured dope was dope so I purchased it. When I applied the first coat to about half of the frames, I discovered that the dope re-wrinkled my previously taut tissue. This had never happened to me before. Turns out I was the dope.

When I read the small print on the label, I was surprised to learn this dope was water-based. I had never heard of such a thing. I guess the formula had changed over the half century since the last time I had built a model airplane. I stopped and decided to let it dry before proceeding.
After a couple of hours, it tightened up but still seemed to have left some wrinkles that were not there before. Reading further on the bottle instructions (obviously I should had read more closely), I saw that this dope was supposed to be diluted 30:70 with water. I had just glossed over that part given my previous failures at diluting the other bottle of dope with thinner. Thus, I had applied it full strength.
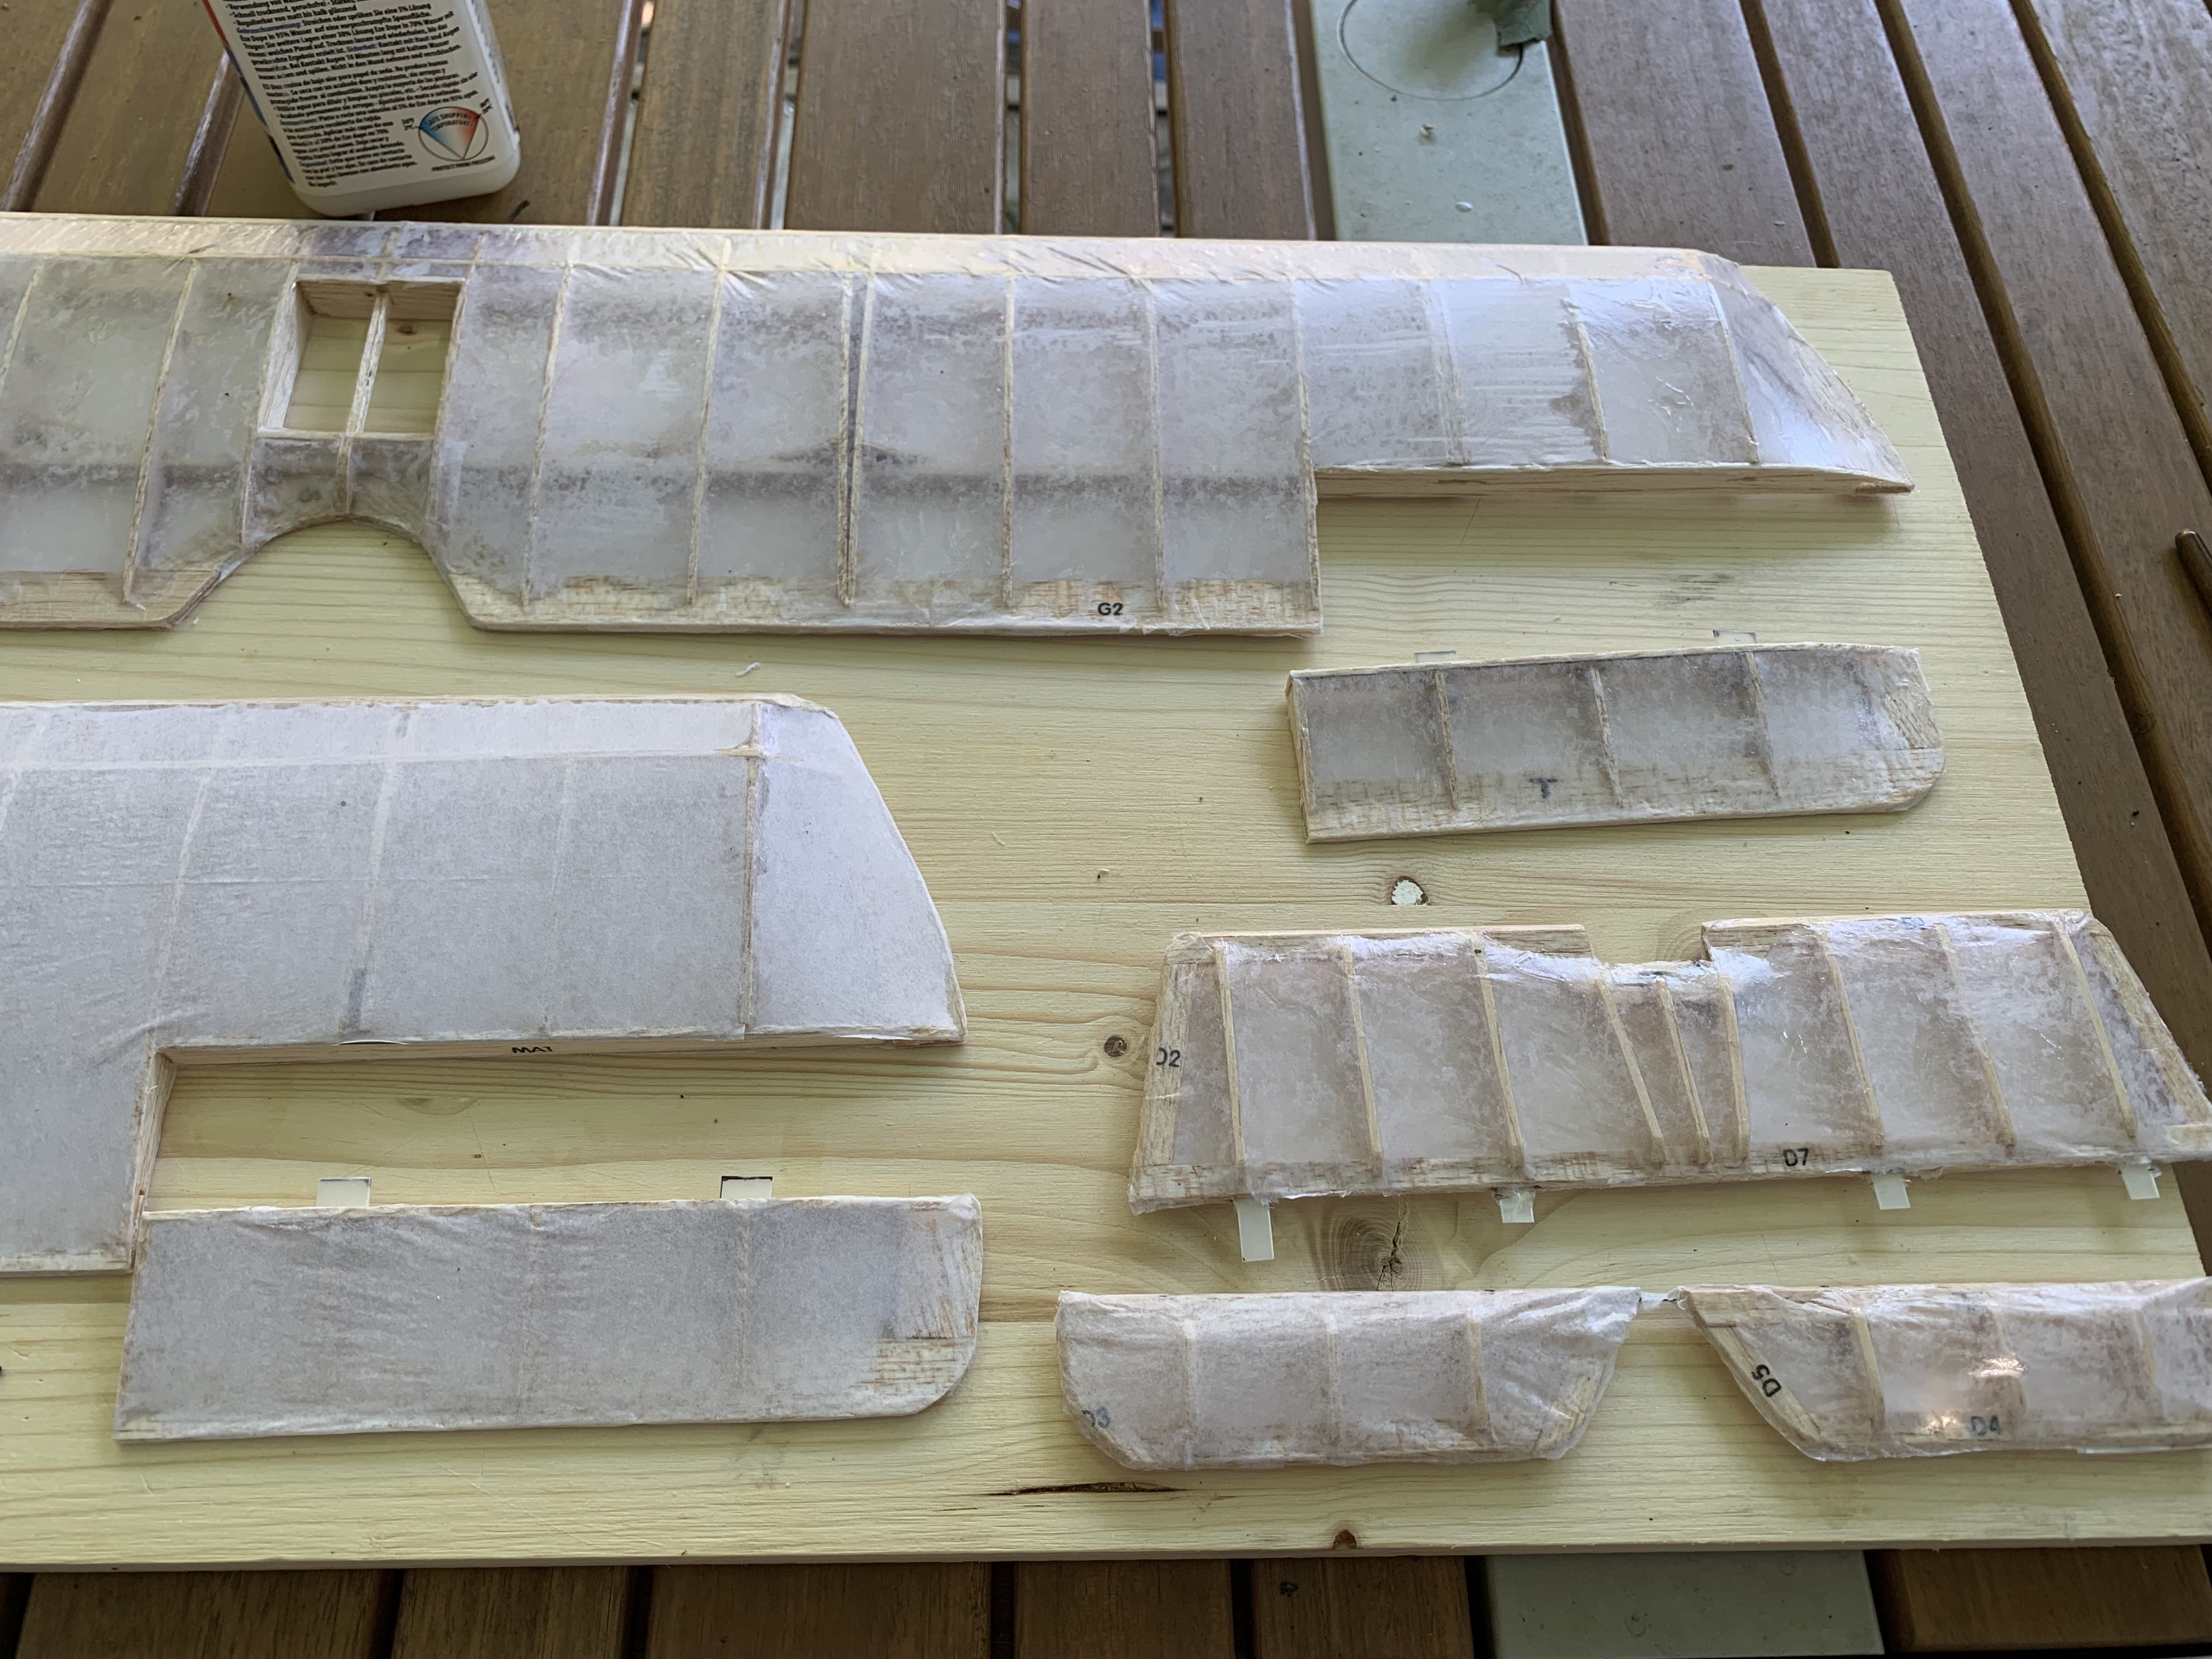
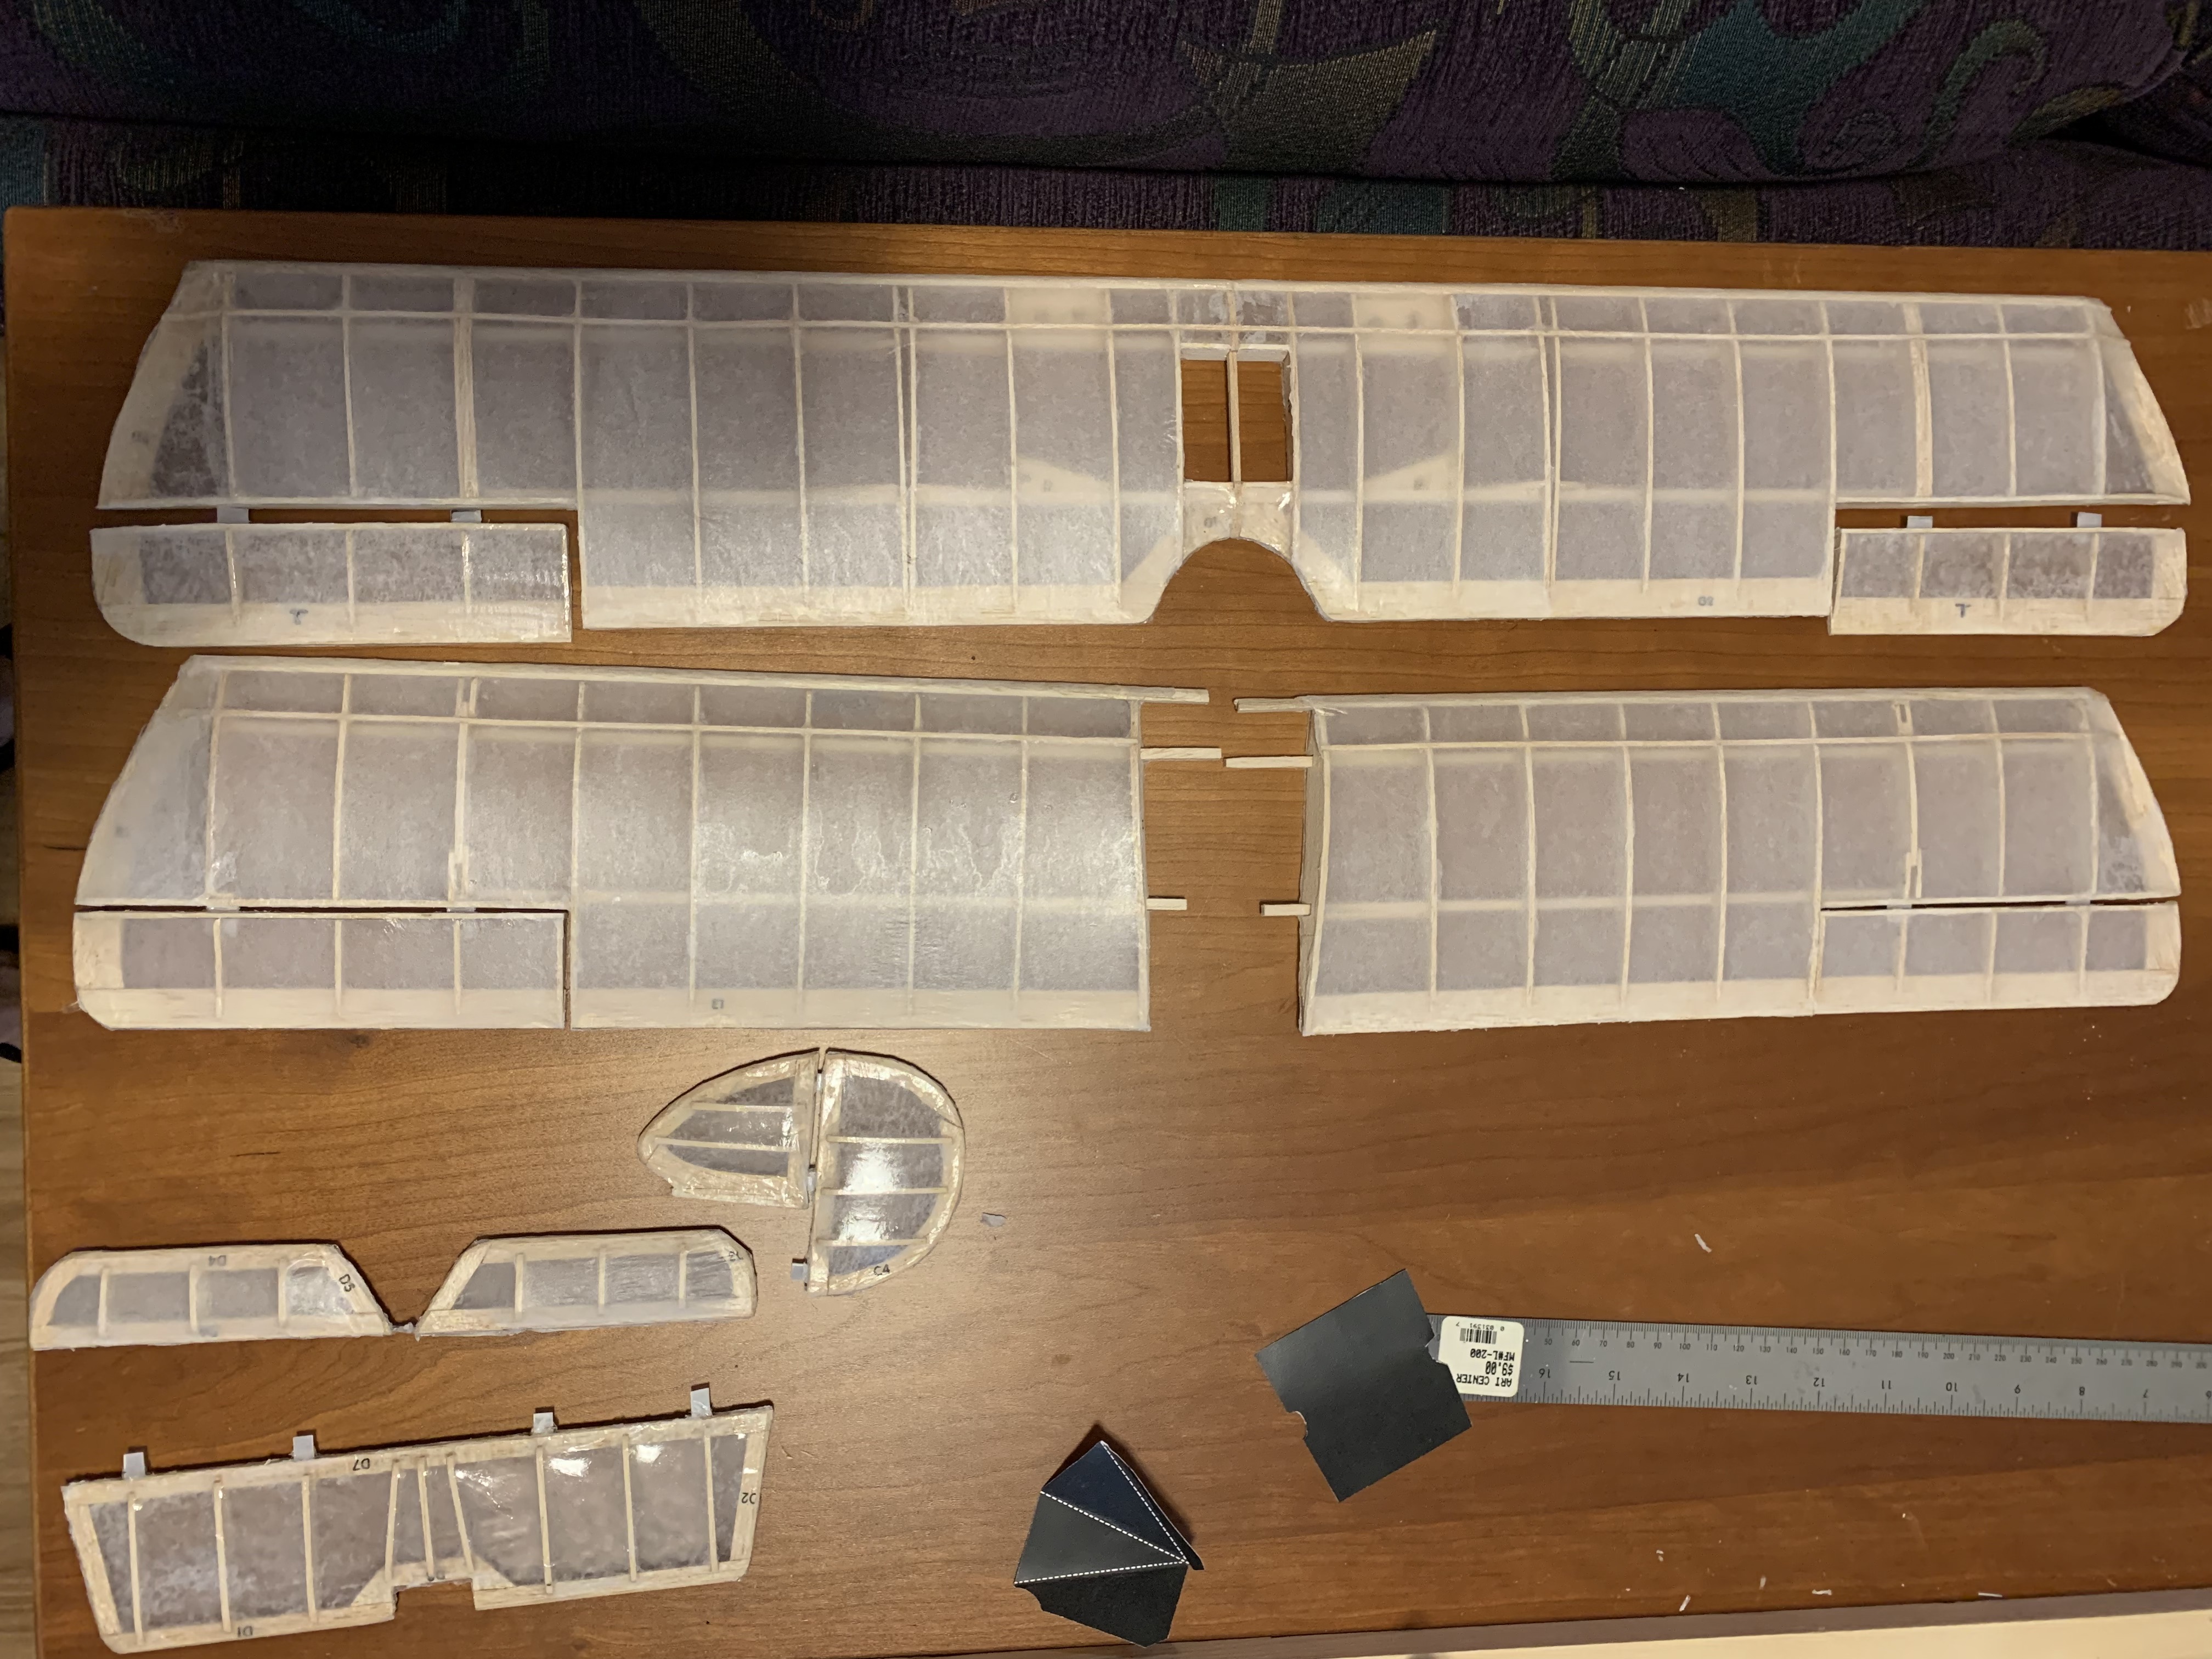
At this point, I was sort of committed to my path forward and so finished applying full strength dope to the rest of the frames. Once dry, I applied dope to the bottom side of all the wings and tail sections. These all demonstrated the same effect—wrinkling upon application but once dried, mostly, though not completely wrinkle-free.
It was really the long sections of tissue on the wings that were the most wrinkled after drying. I decided to go ahead and give all the frames a second coat of undiluted dope to see if like before, the tissue would wrinkle up but then hopefully tighten back up upon drying. It didn’t work.
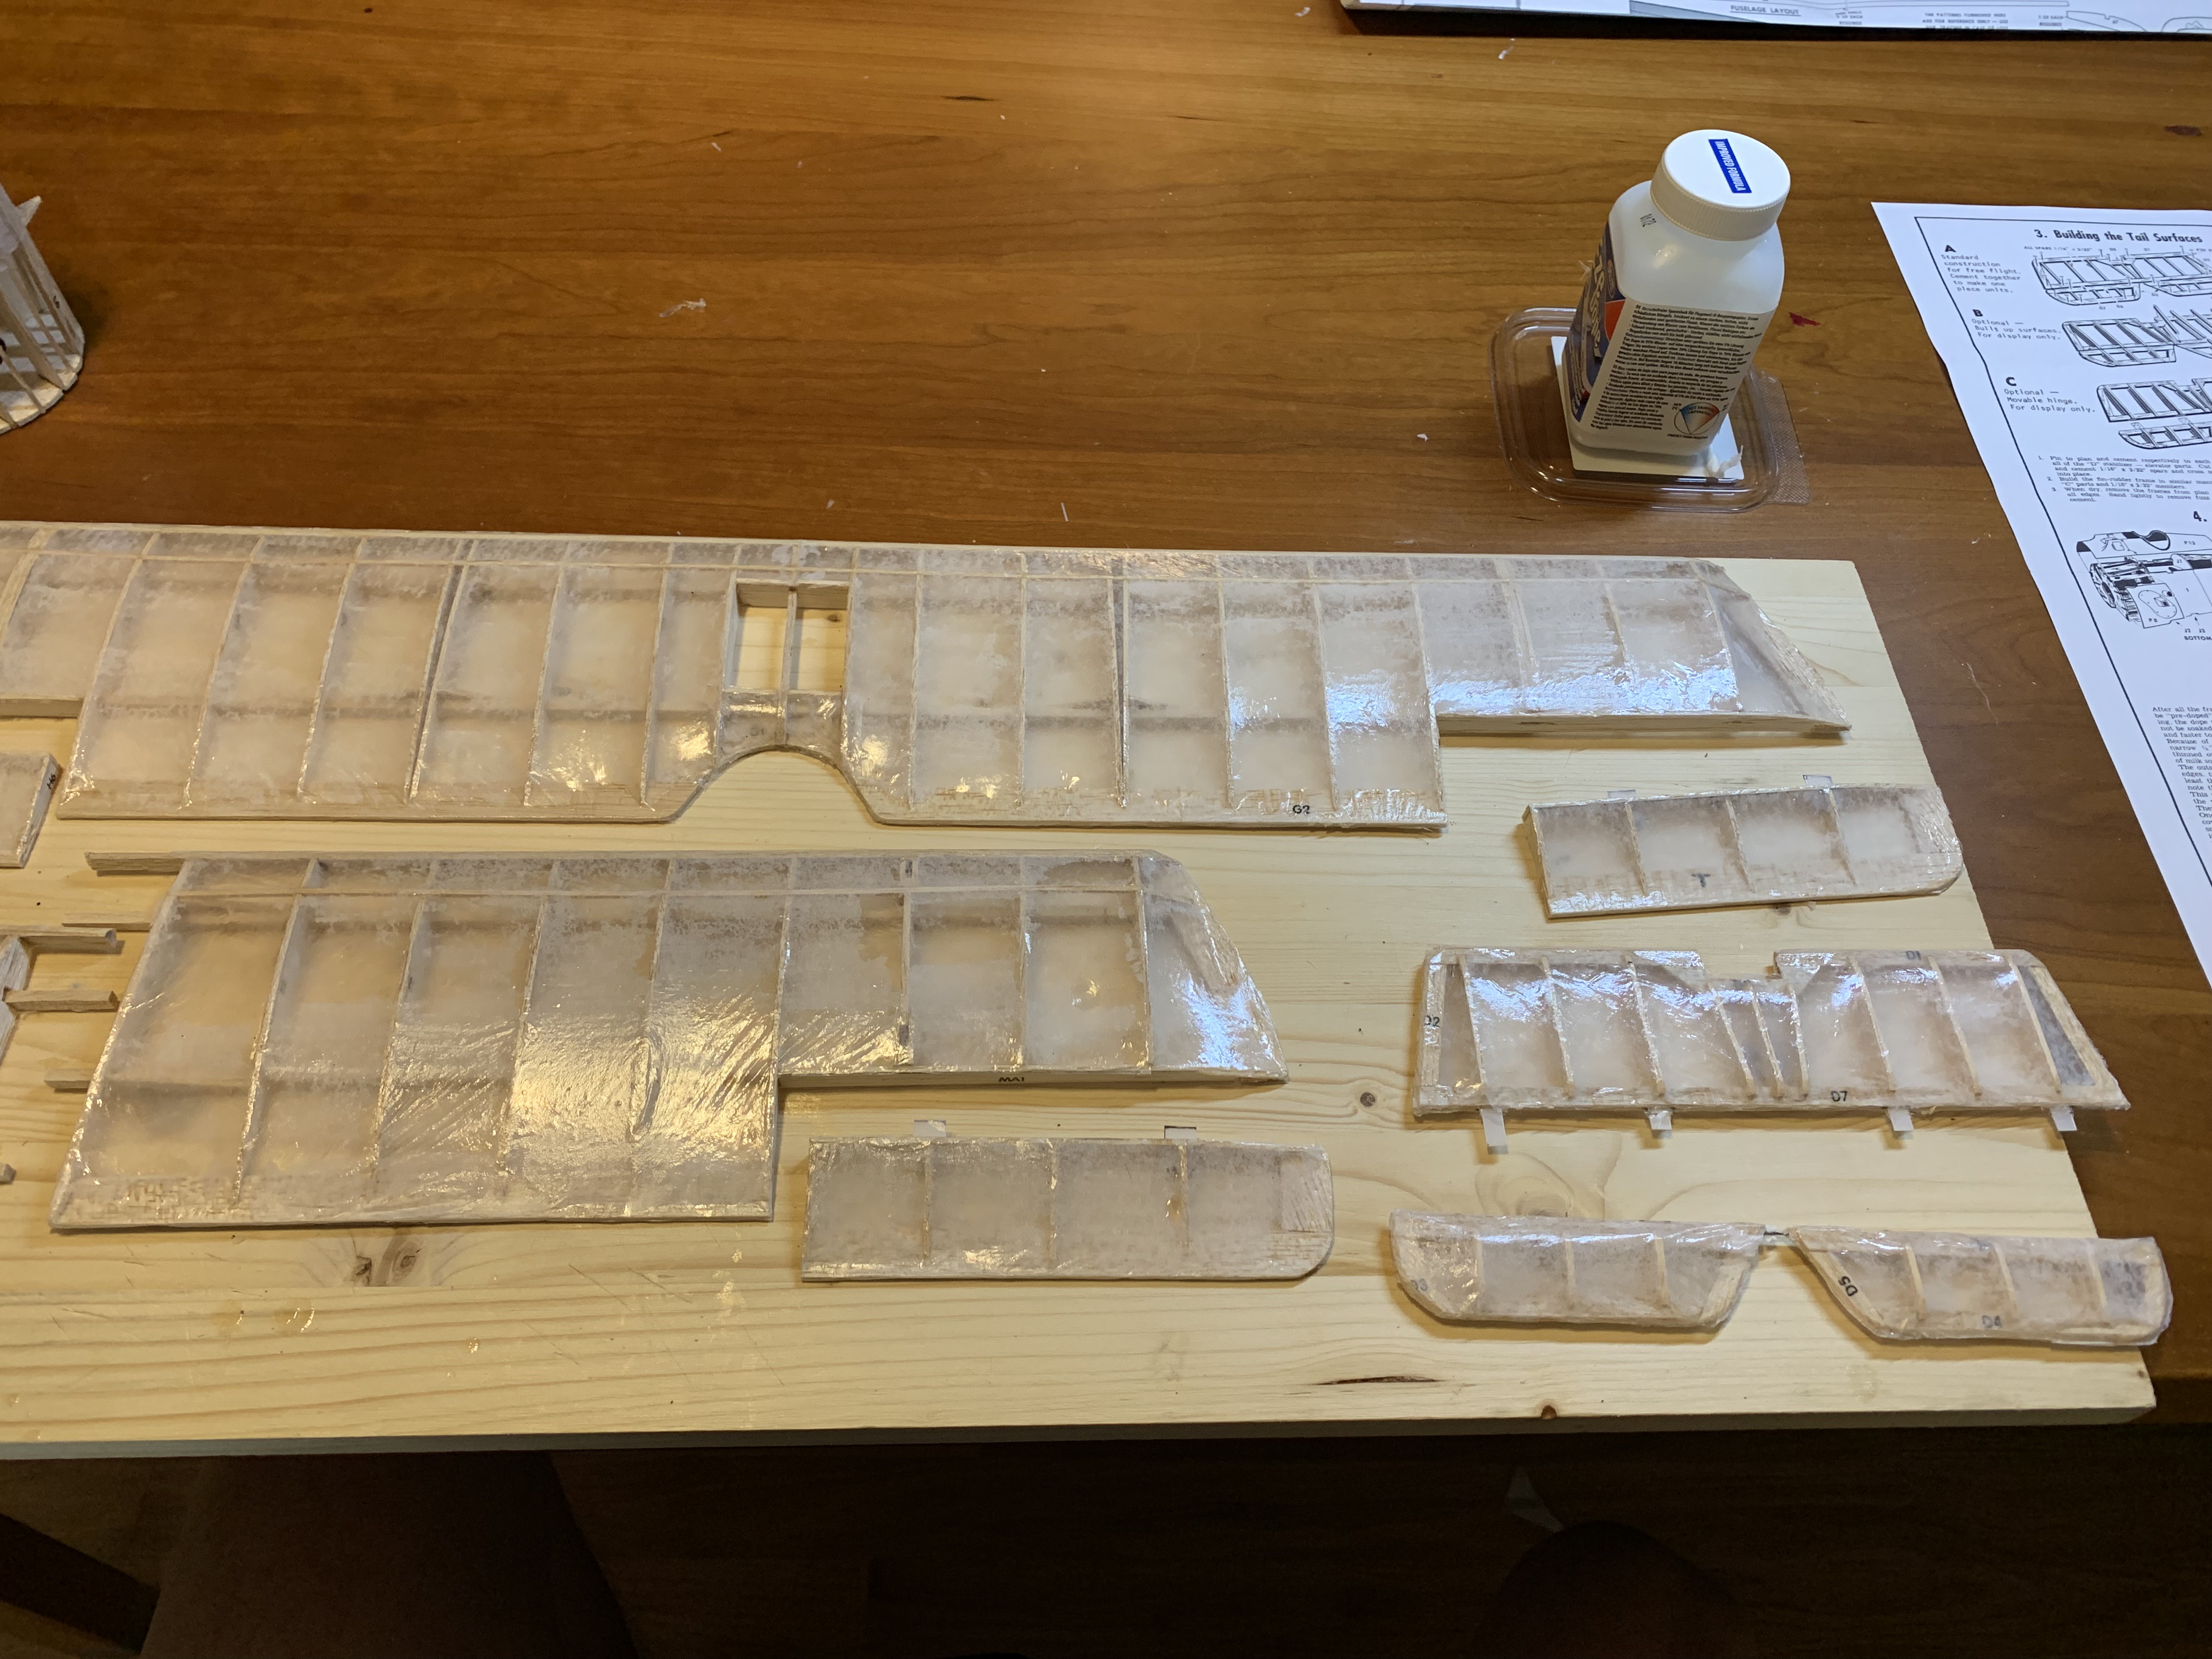
At this point, I decided to search the Internet to see if there was a video of how one applied dope to models in the 21st century. Not only did I find one, but it was produced by the same company that made the dope. Watching it, I saw that once the tissue was firmly attached to the model, they skipped the water atomizer step and proceeded to apply multiple coats of the diluted dope. In the video, since it was water-based, it dried tight eliminating the need for the water atomizing step.
Now I had a decision to make. Should I live with the wrinkles or should I start over with new tissue and use the correct technique for applying this type of dope. Since, I am a perfectionist, I figured I would never be happy with the wrinkles and so decided to try again with the proper technique. The good news was, not all of the frames had wrinkles so I would not be redoing all of them.
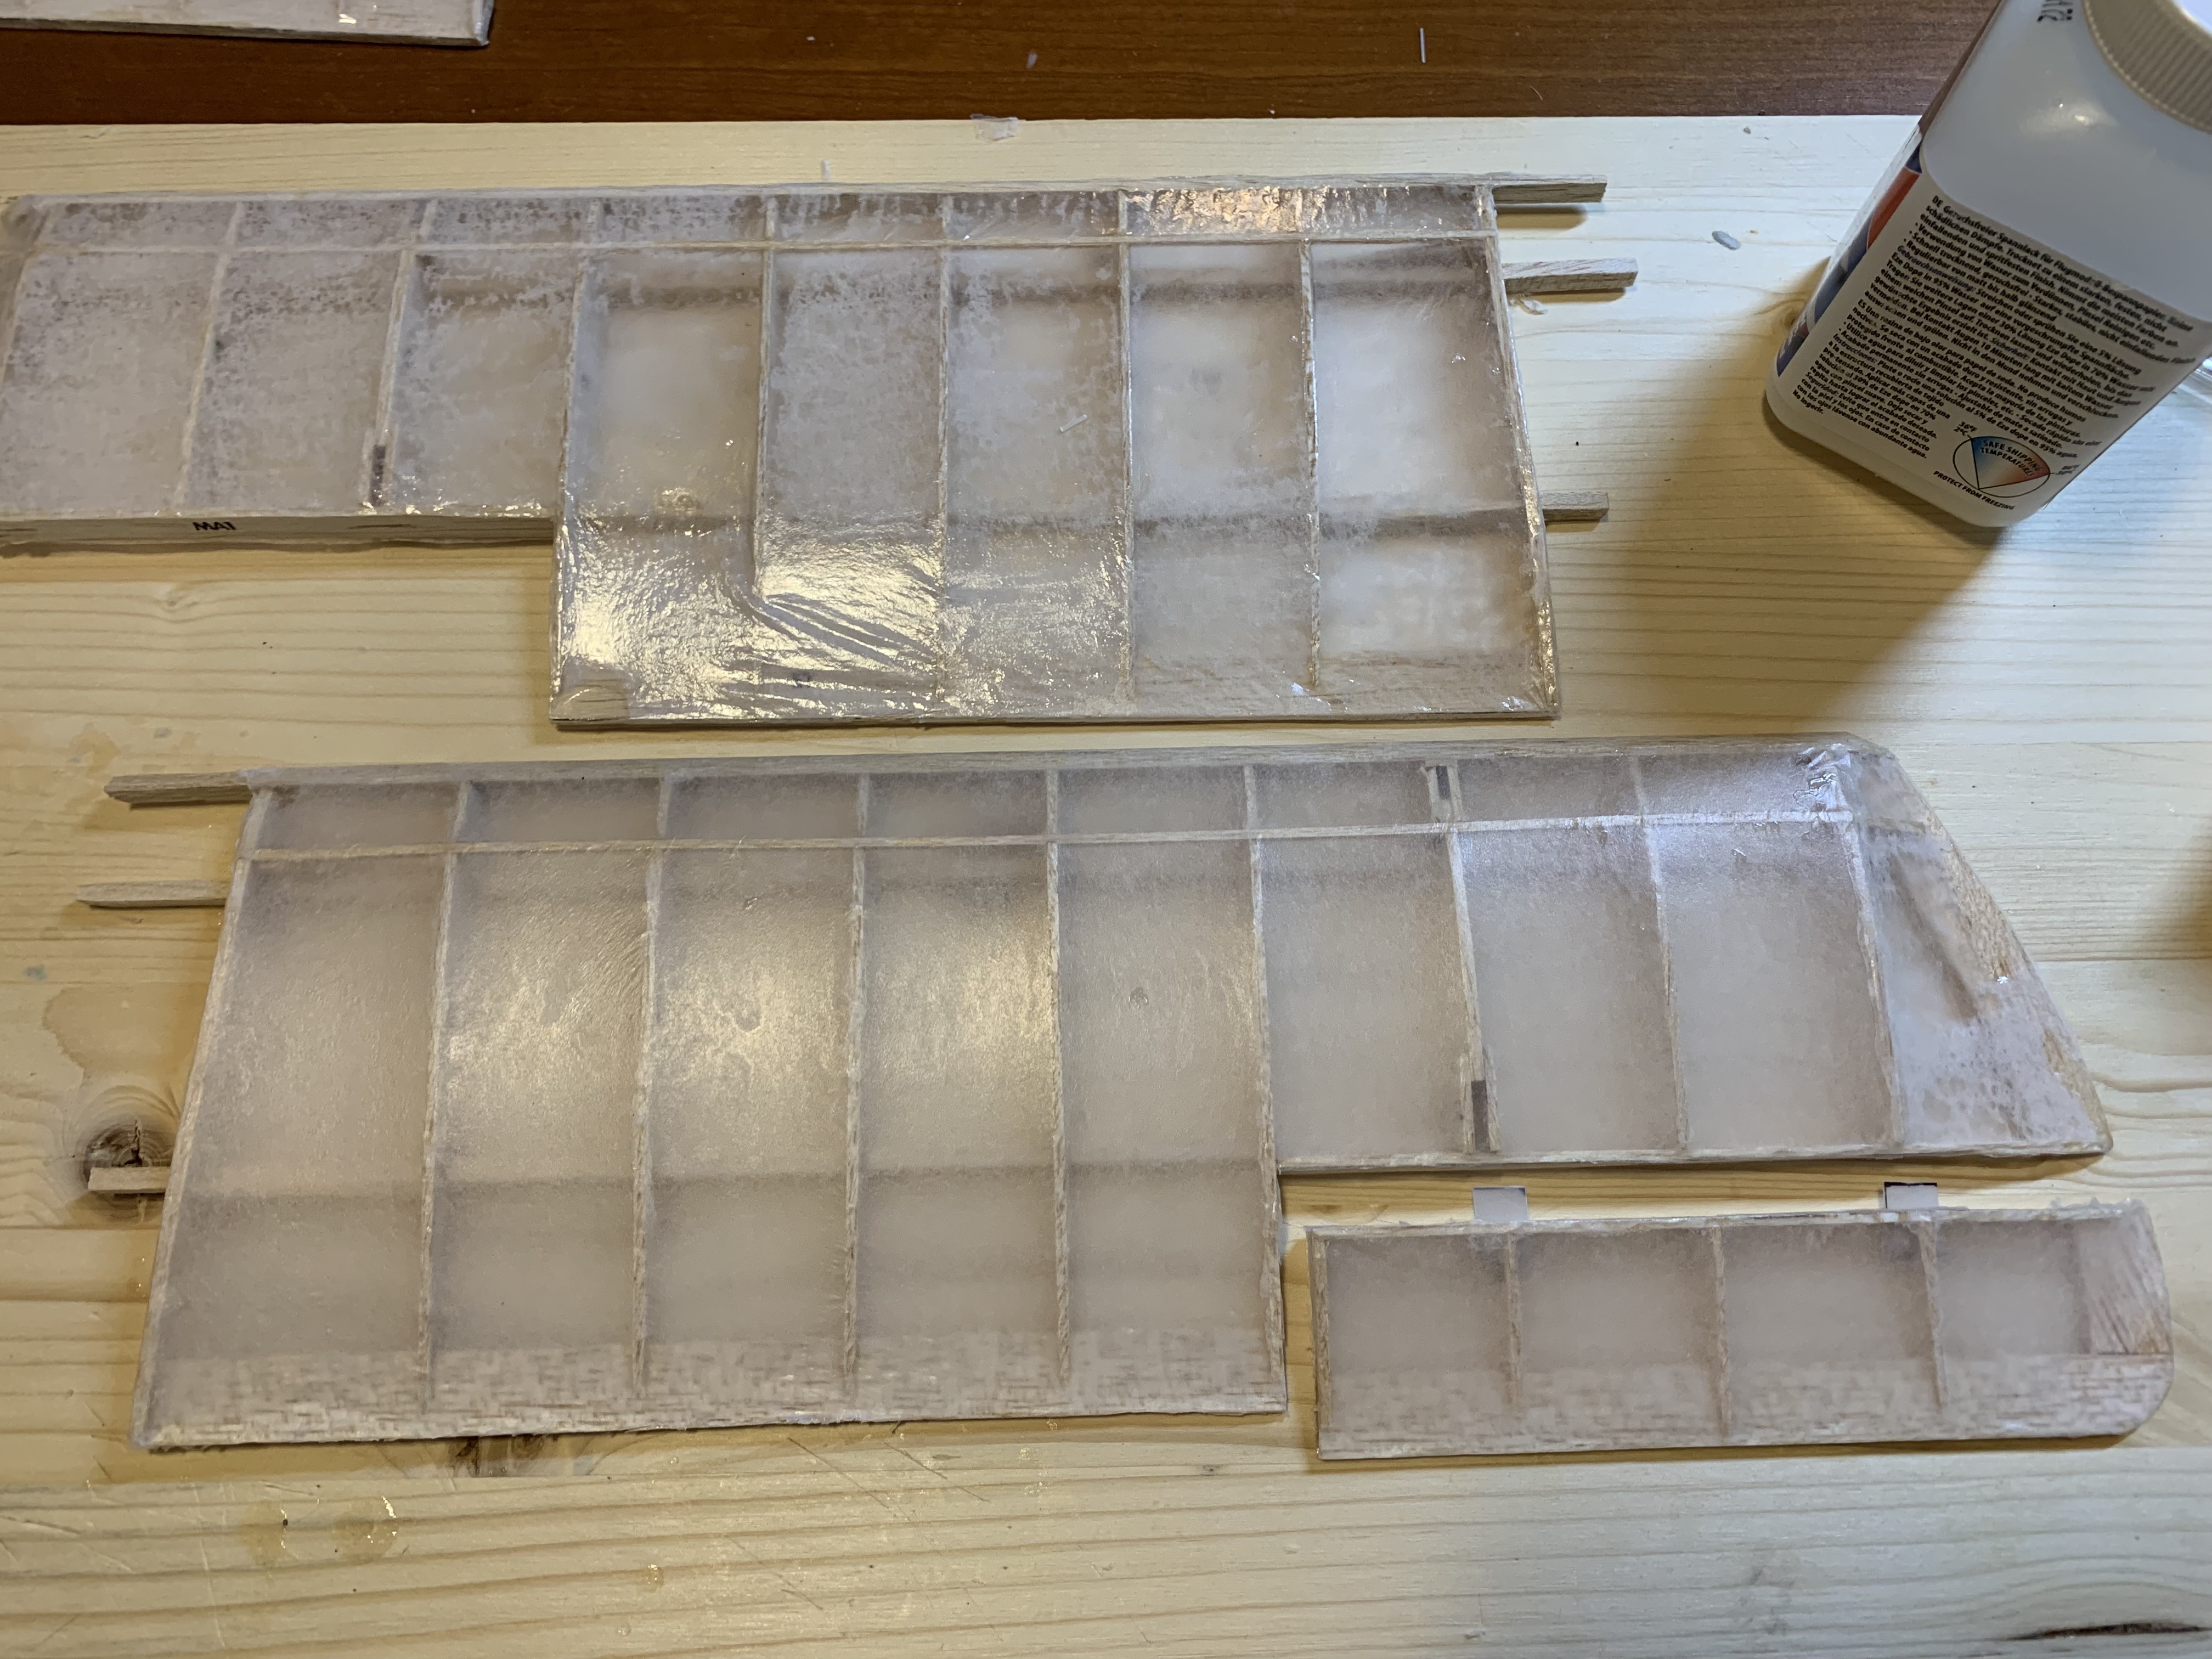
I decided to start with just one of the smaller lower wings to see if this alternate technique actually worked. I stripped off the old tissue from the wing and then attached new tissue dry as before. As shown in the video, I did not spray with water but just brushed on the diluted (30:70) dope. It immediately wrinkled but then soon dried taut. I repeated this application two more times for a total of three coats and each time, the tissue immediately wrinkled but then dried taut. It worked beautifully! In fact, this was the best-looking wing I had done especially when compared to the wrinkled one above.
I proceeded to redo the other bottom wing and the top wing.
They looked so much better than the original work I had done I decided to redo the fuselage as well. In fact, I ended up redoing everything except for two of the ailerons and the tail surfaces. Thankfully the kit included enough tissue to completely cover all the frames twice—no doubt just for those dopes that didn’t read the dope directions.

The next step in the directions was to paint the thermo-formed plastic parts.
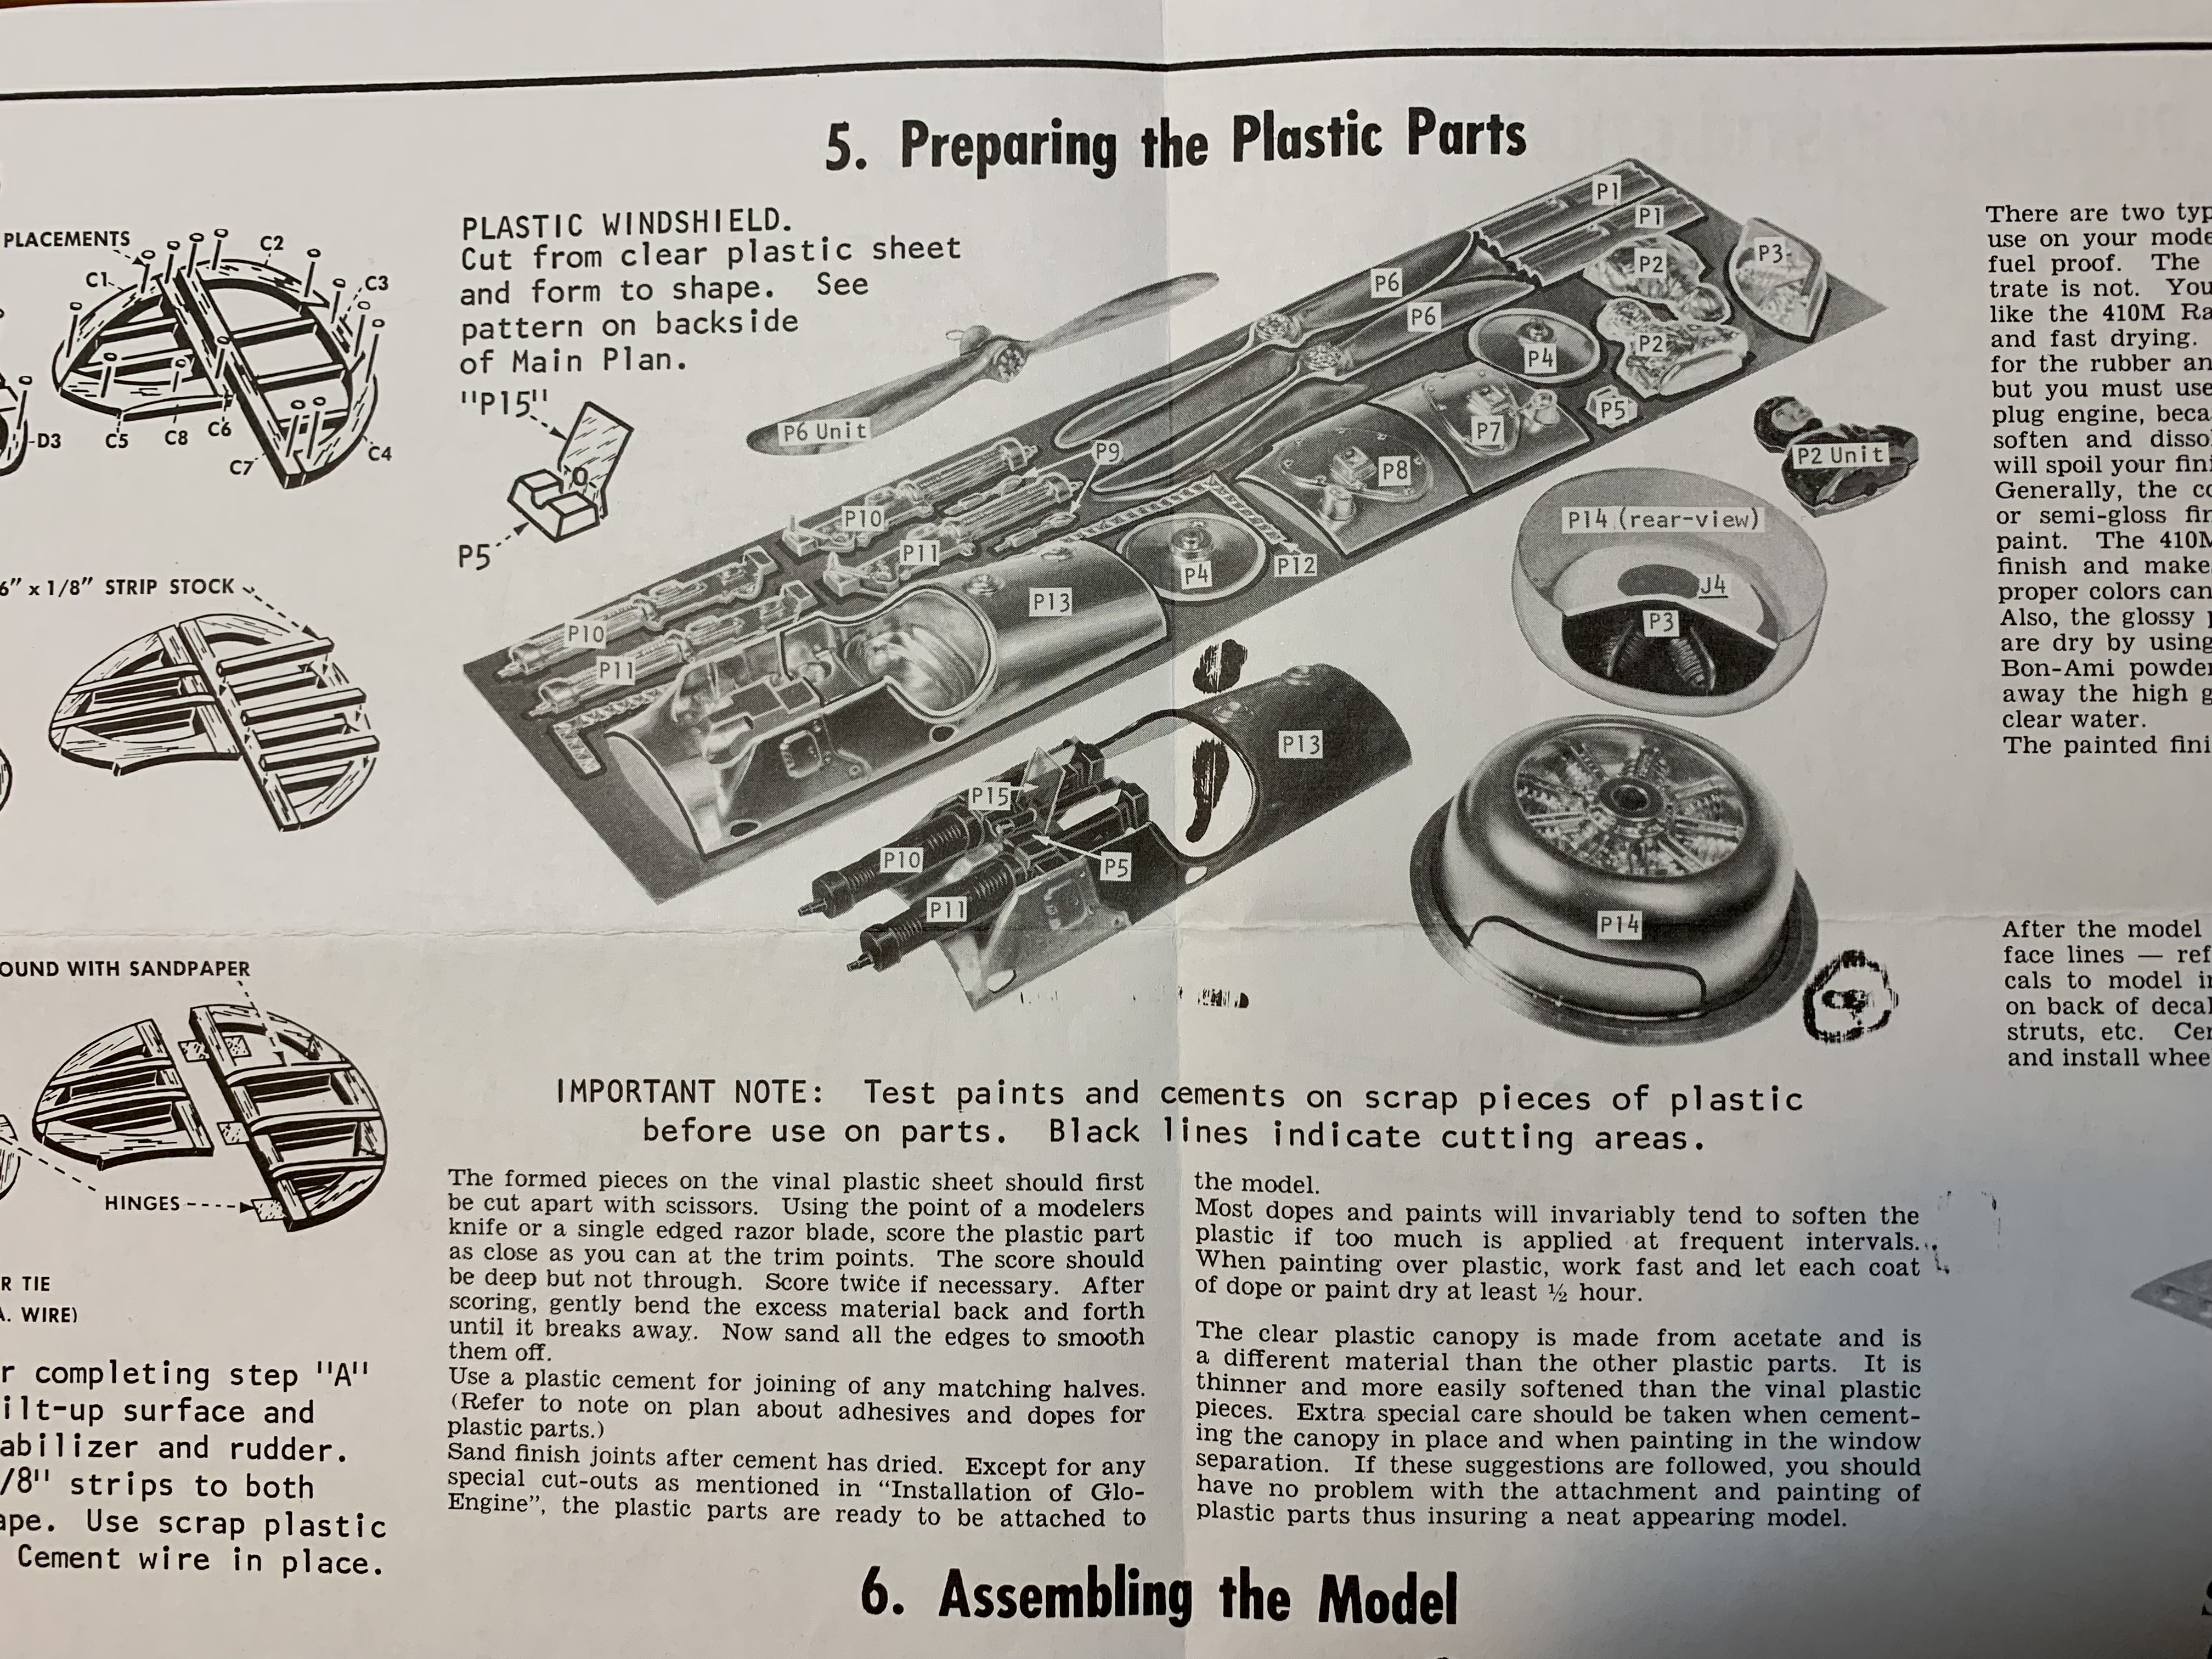
These pieces modeled the metal parts of the airplane, e.g., the engine cowling and the cockpit, and presented their own challenges as I am not a steady-handed paint artist.
I much prefer to paint parts separately and then assemble them but, in this case, I really did not have that option.

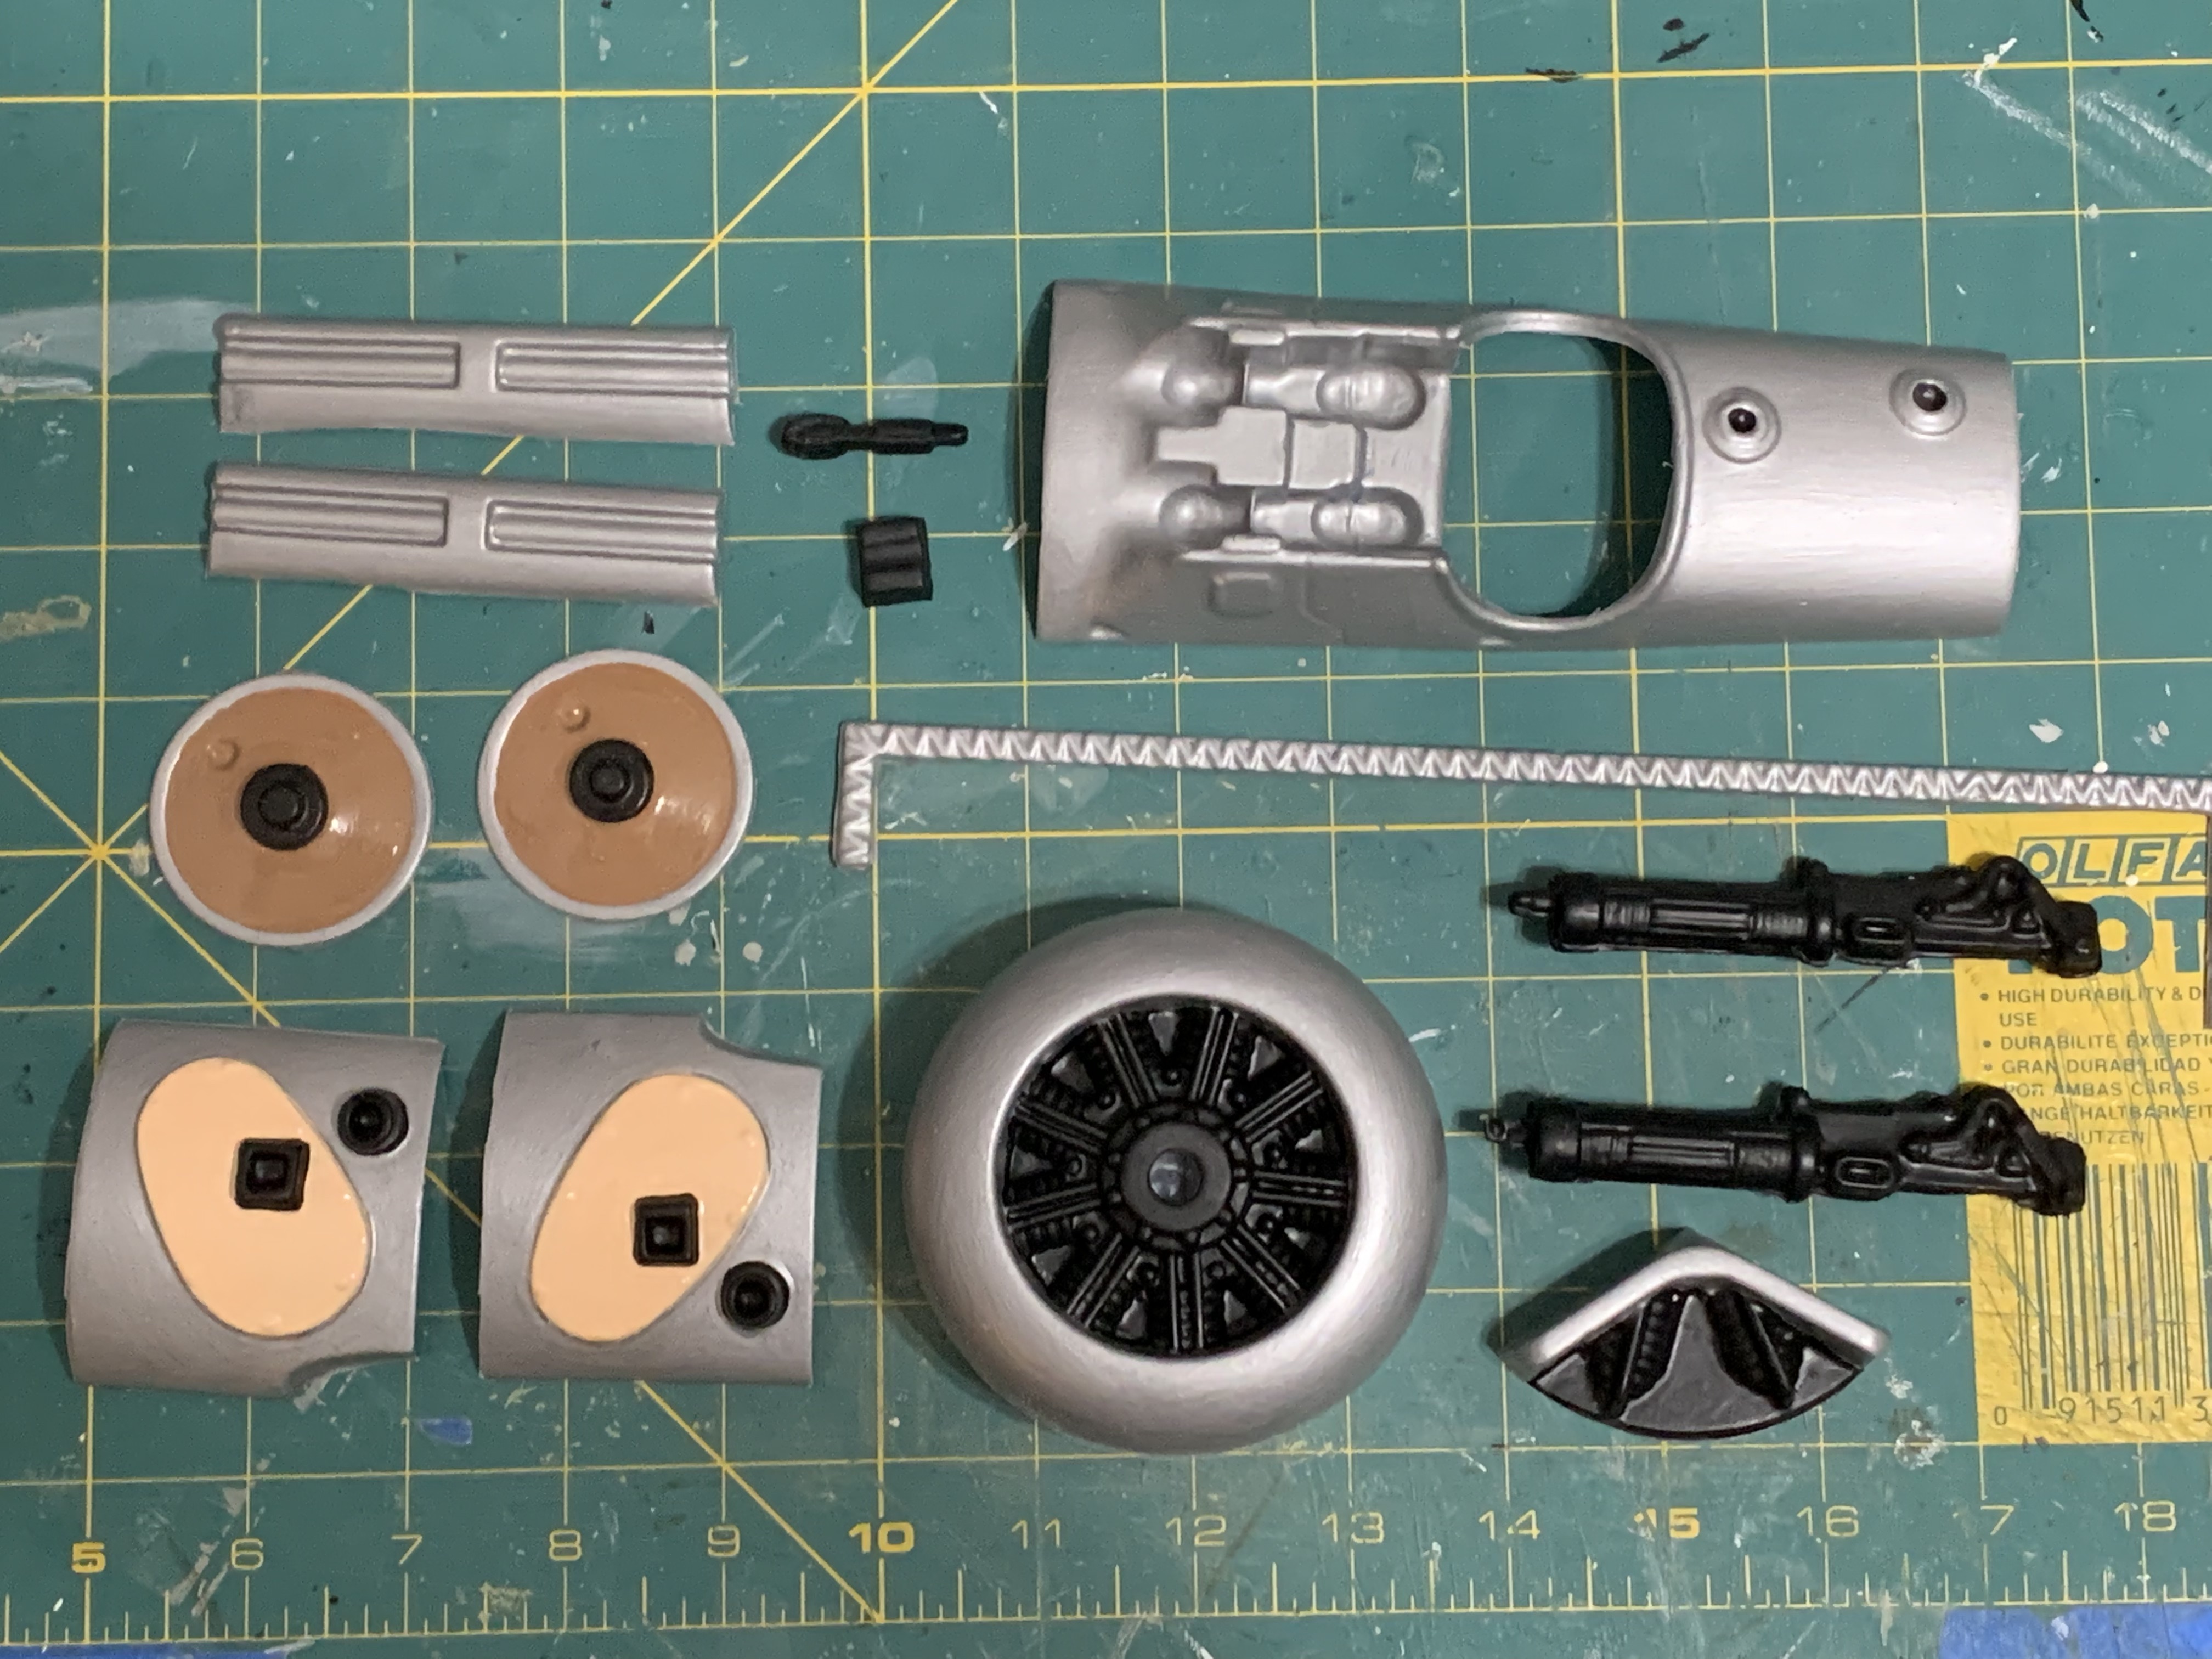
As can be seen, individual pieces required as much as three different paints. It took me quite a while with ever smaller brushes to get a fairly distinct demarcation between the different components that had been molded together into a single piece. In fact, I did not even try to paint all the different colors necessary for the pilot. I decided I would just have a pilotless model.
Once the painting was complete, then all the pieces had to be carefully cut out. I quickly learned that cutting the flexible plastic was not very forgiving. My razor blade occasionally turned, or the plastic flexed while cutting the pieces from the plastic sheet. Assembling the left- and right-side moldings proved even more difficult as I had a hard time cutting a straight line. Once I glued the two halves together, I had to sand down the excess and repaint.
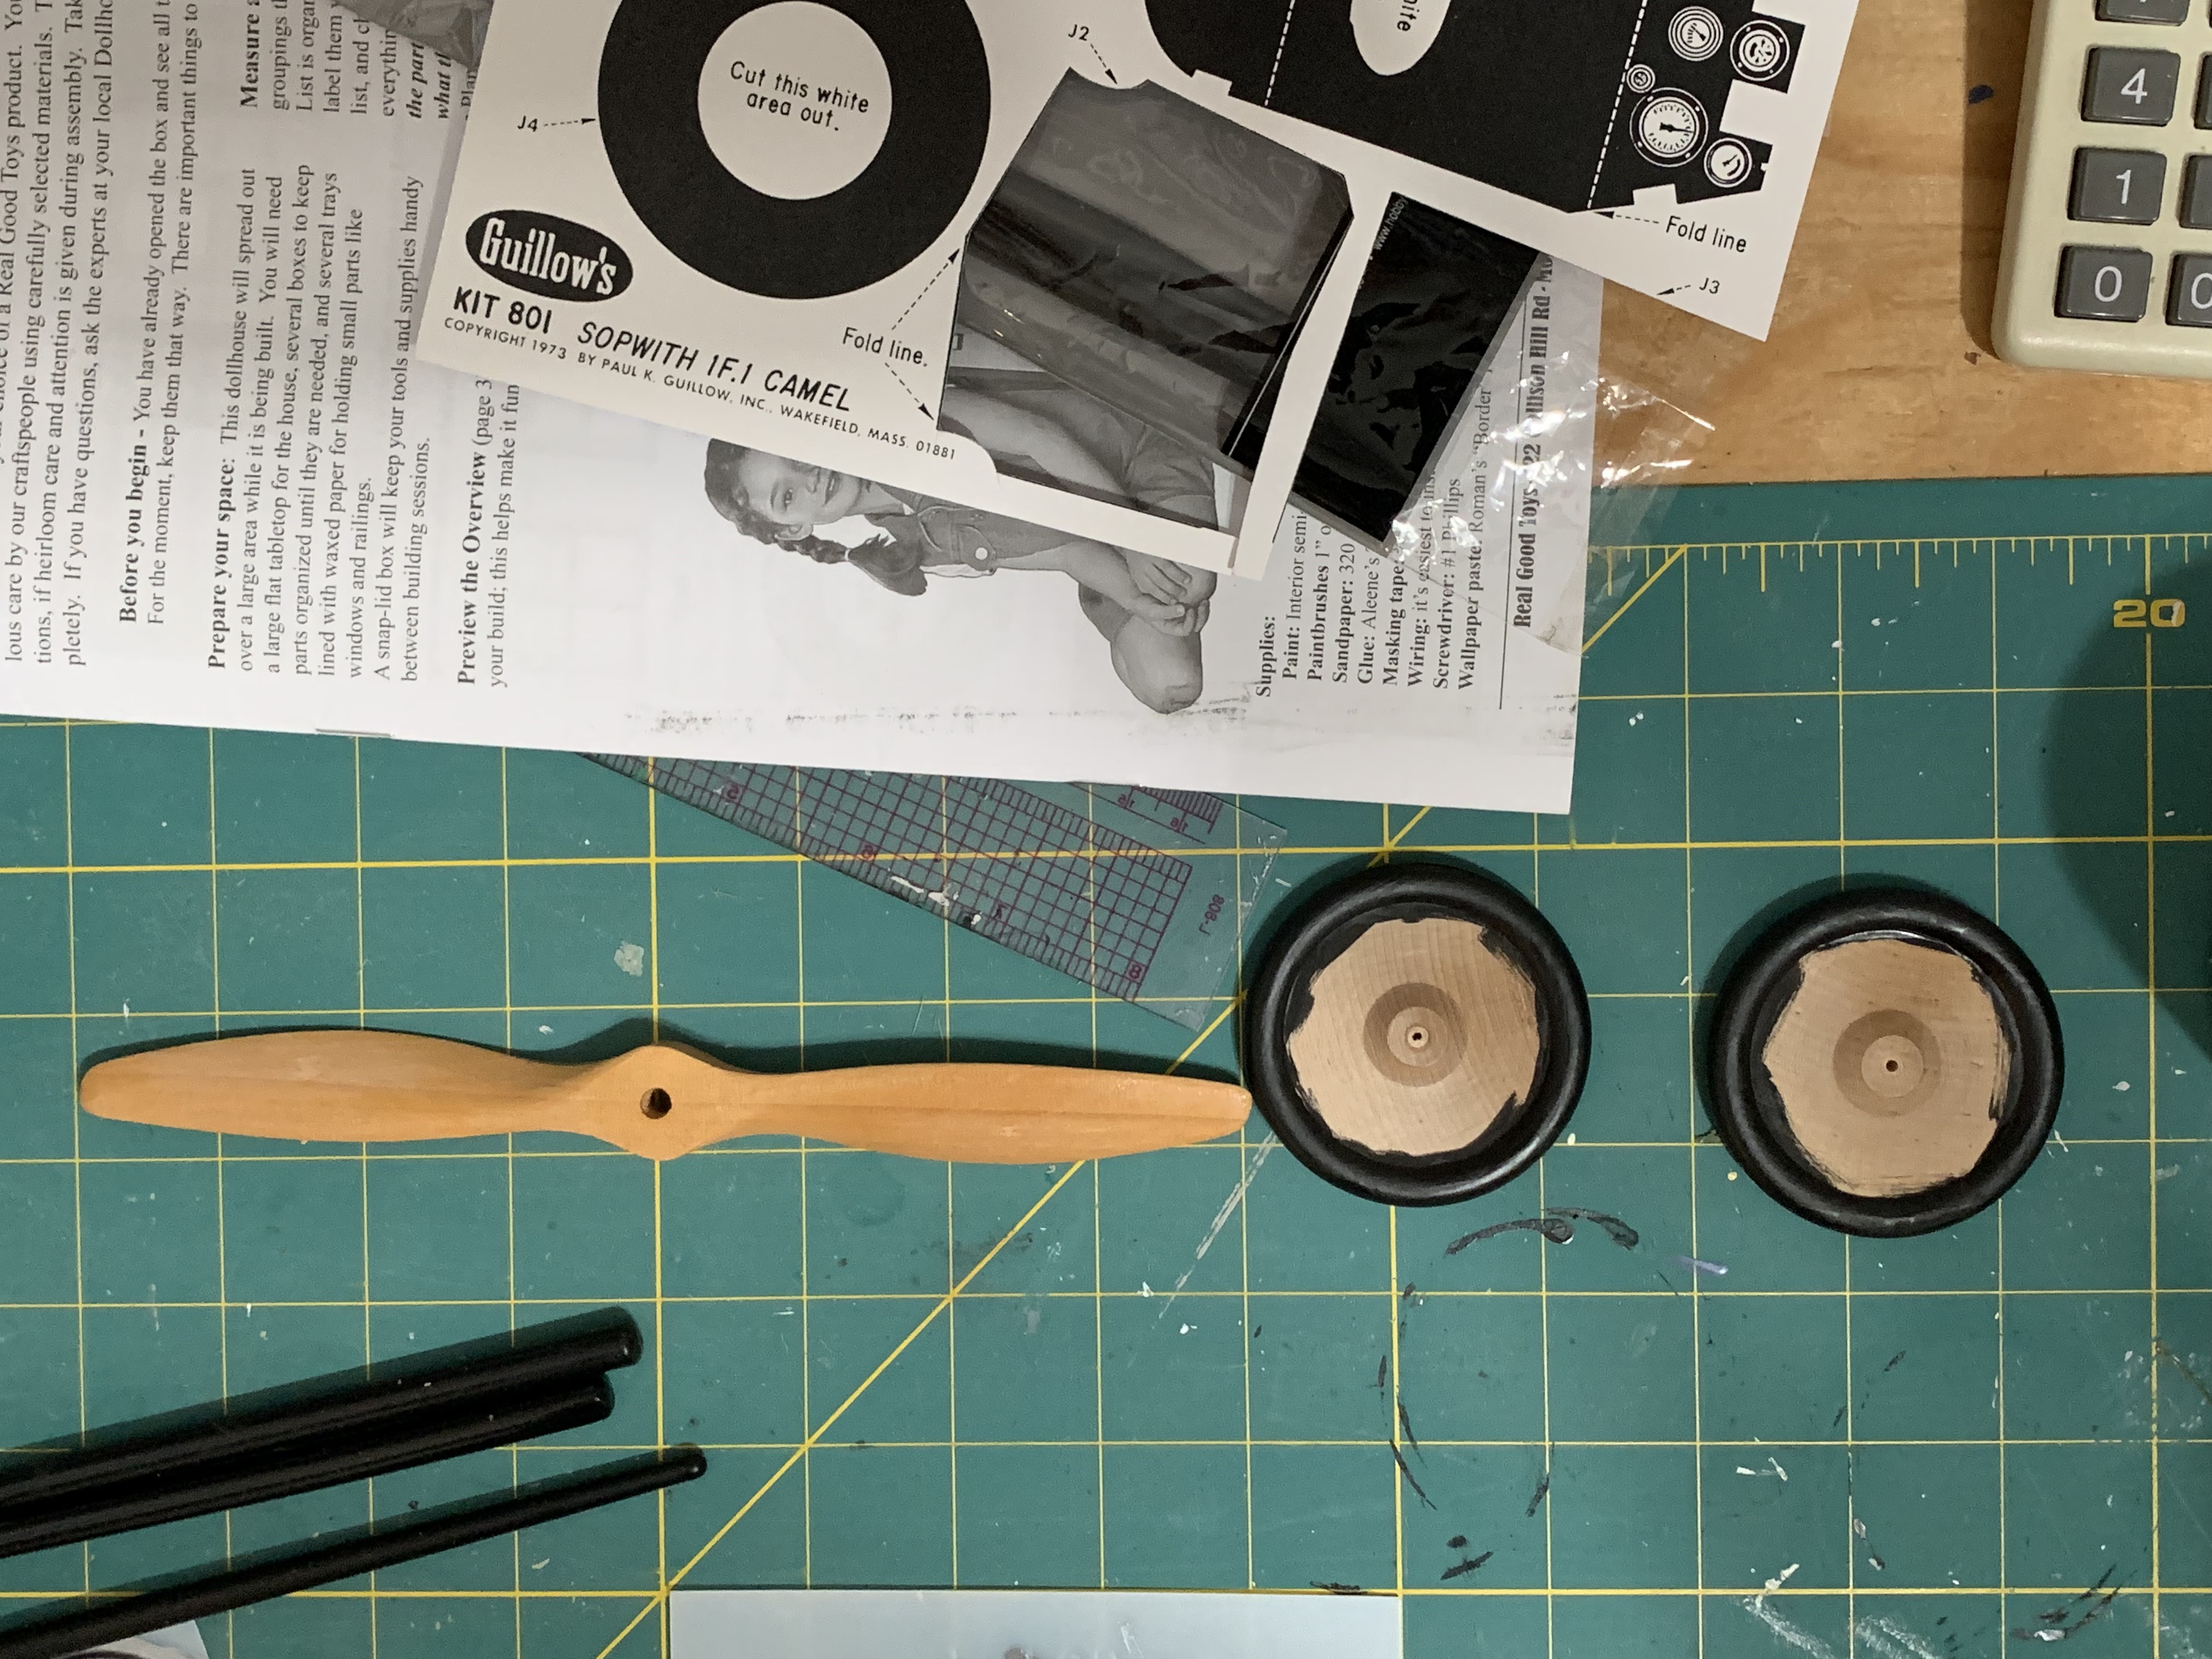
I had planned on upgrading the wheels and propeller but could not find any suitable rubber or plastic wheels to replace the wooden wheels included in the model. So, these I just had to paint. But I was able to find a real wooden propeller of the right scale to replace the thermo-formed one included.
With all the plastic pieces painted and cut out, I then had another decision to make.
The next step in the instructions was to fully assemble the plane and then paint it. It seemed to me that it would be much easier to paint the pieces first and then assemble them. Especially since I needed to paint the edges of the wings and ailerons where the two fit together. So, I decided to work out of order.
To be continued…
Categories

What a huge undertaking! I’m so glad you got those wrinkles out—the wings look amazing!
Thanks! I was relieved too. When you come home, you can see the finished plane.