
Doll House for My Sister – 1st Phase
After having built a doll house for each of my two granddaughters and one for my sister’s grandchildren, my miniature home construction clientele went in a different direction—building a doll house for my sister. She and I had had such fun building the last doll house together, we decided to build another one just like the one we had left in California for her grandchildren, only this would be for her.
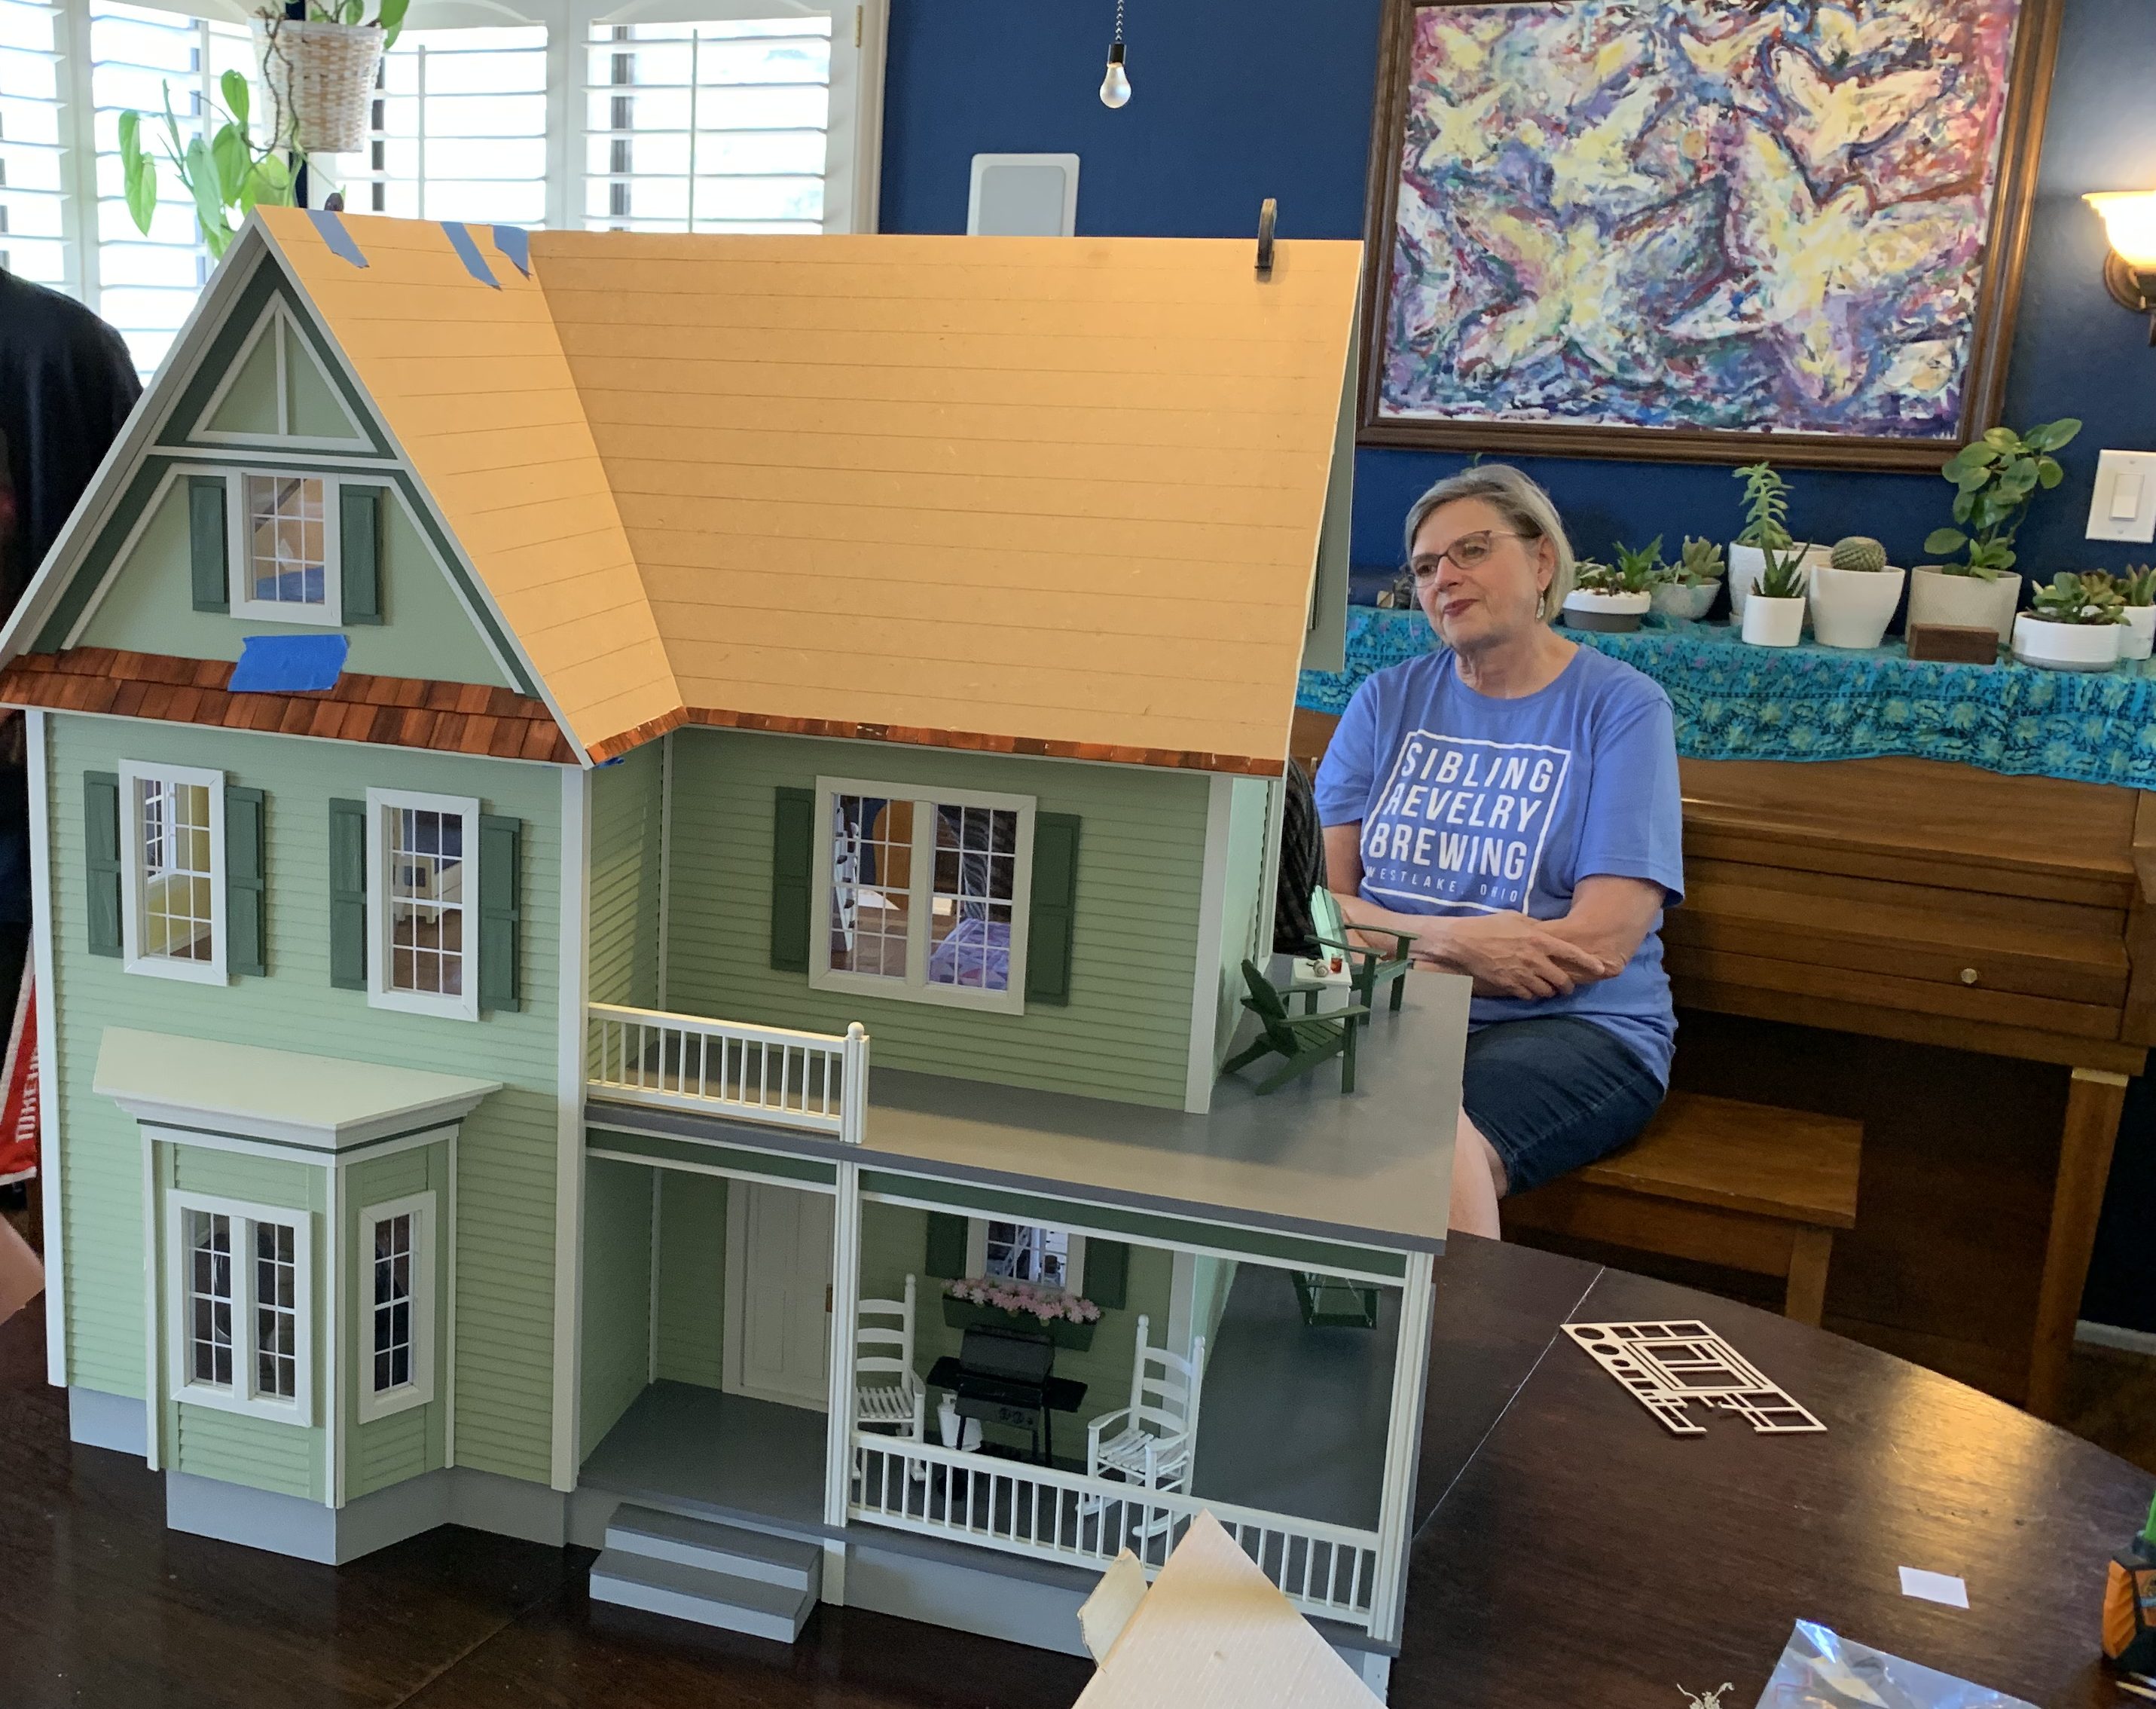
You may recall from that series of posts that my sister had picked out all of the exterior and interior color paints. When we first talked about building another doll house, we both agreed that the paint schemes she had selected were perfect and so decided to use the same colors. I proceeded to buy the house kit and then waited for an opportune time to begin building it. That opportunity came during the heat wave we had in Memphis during July when it got too hot to work outdoors on the balsa wood model airplane where I needed to be to apply the extremely smelly paint.
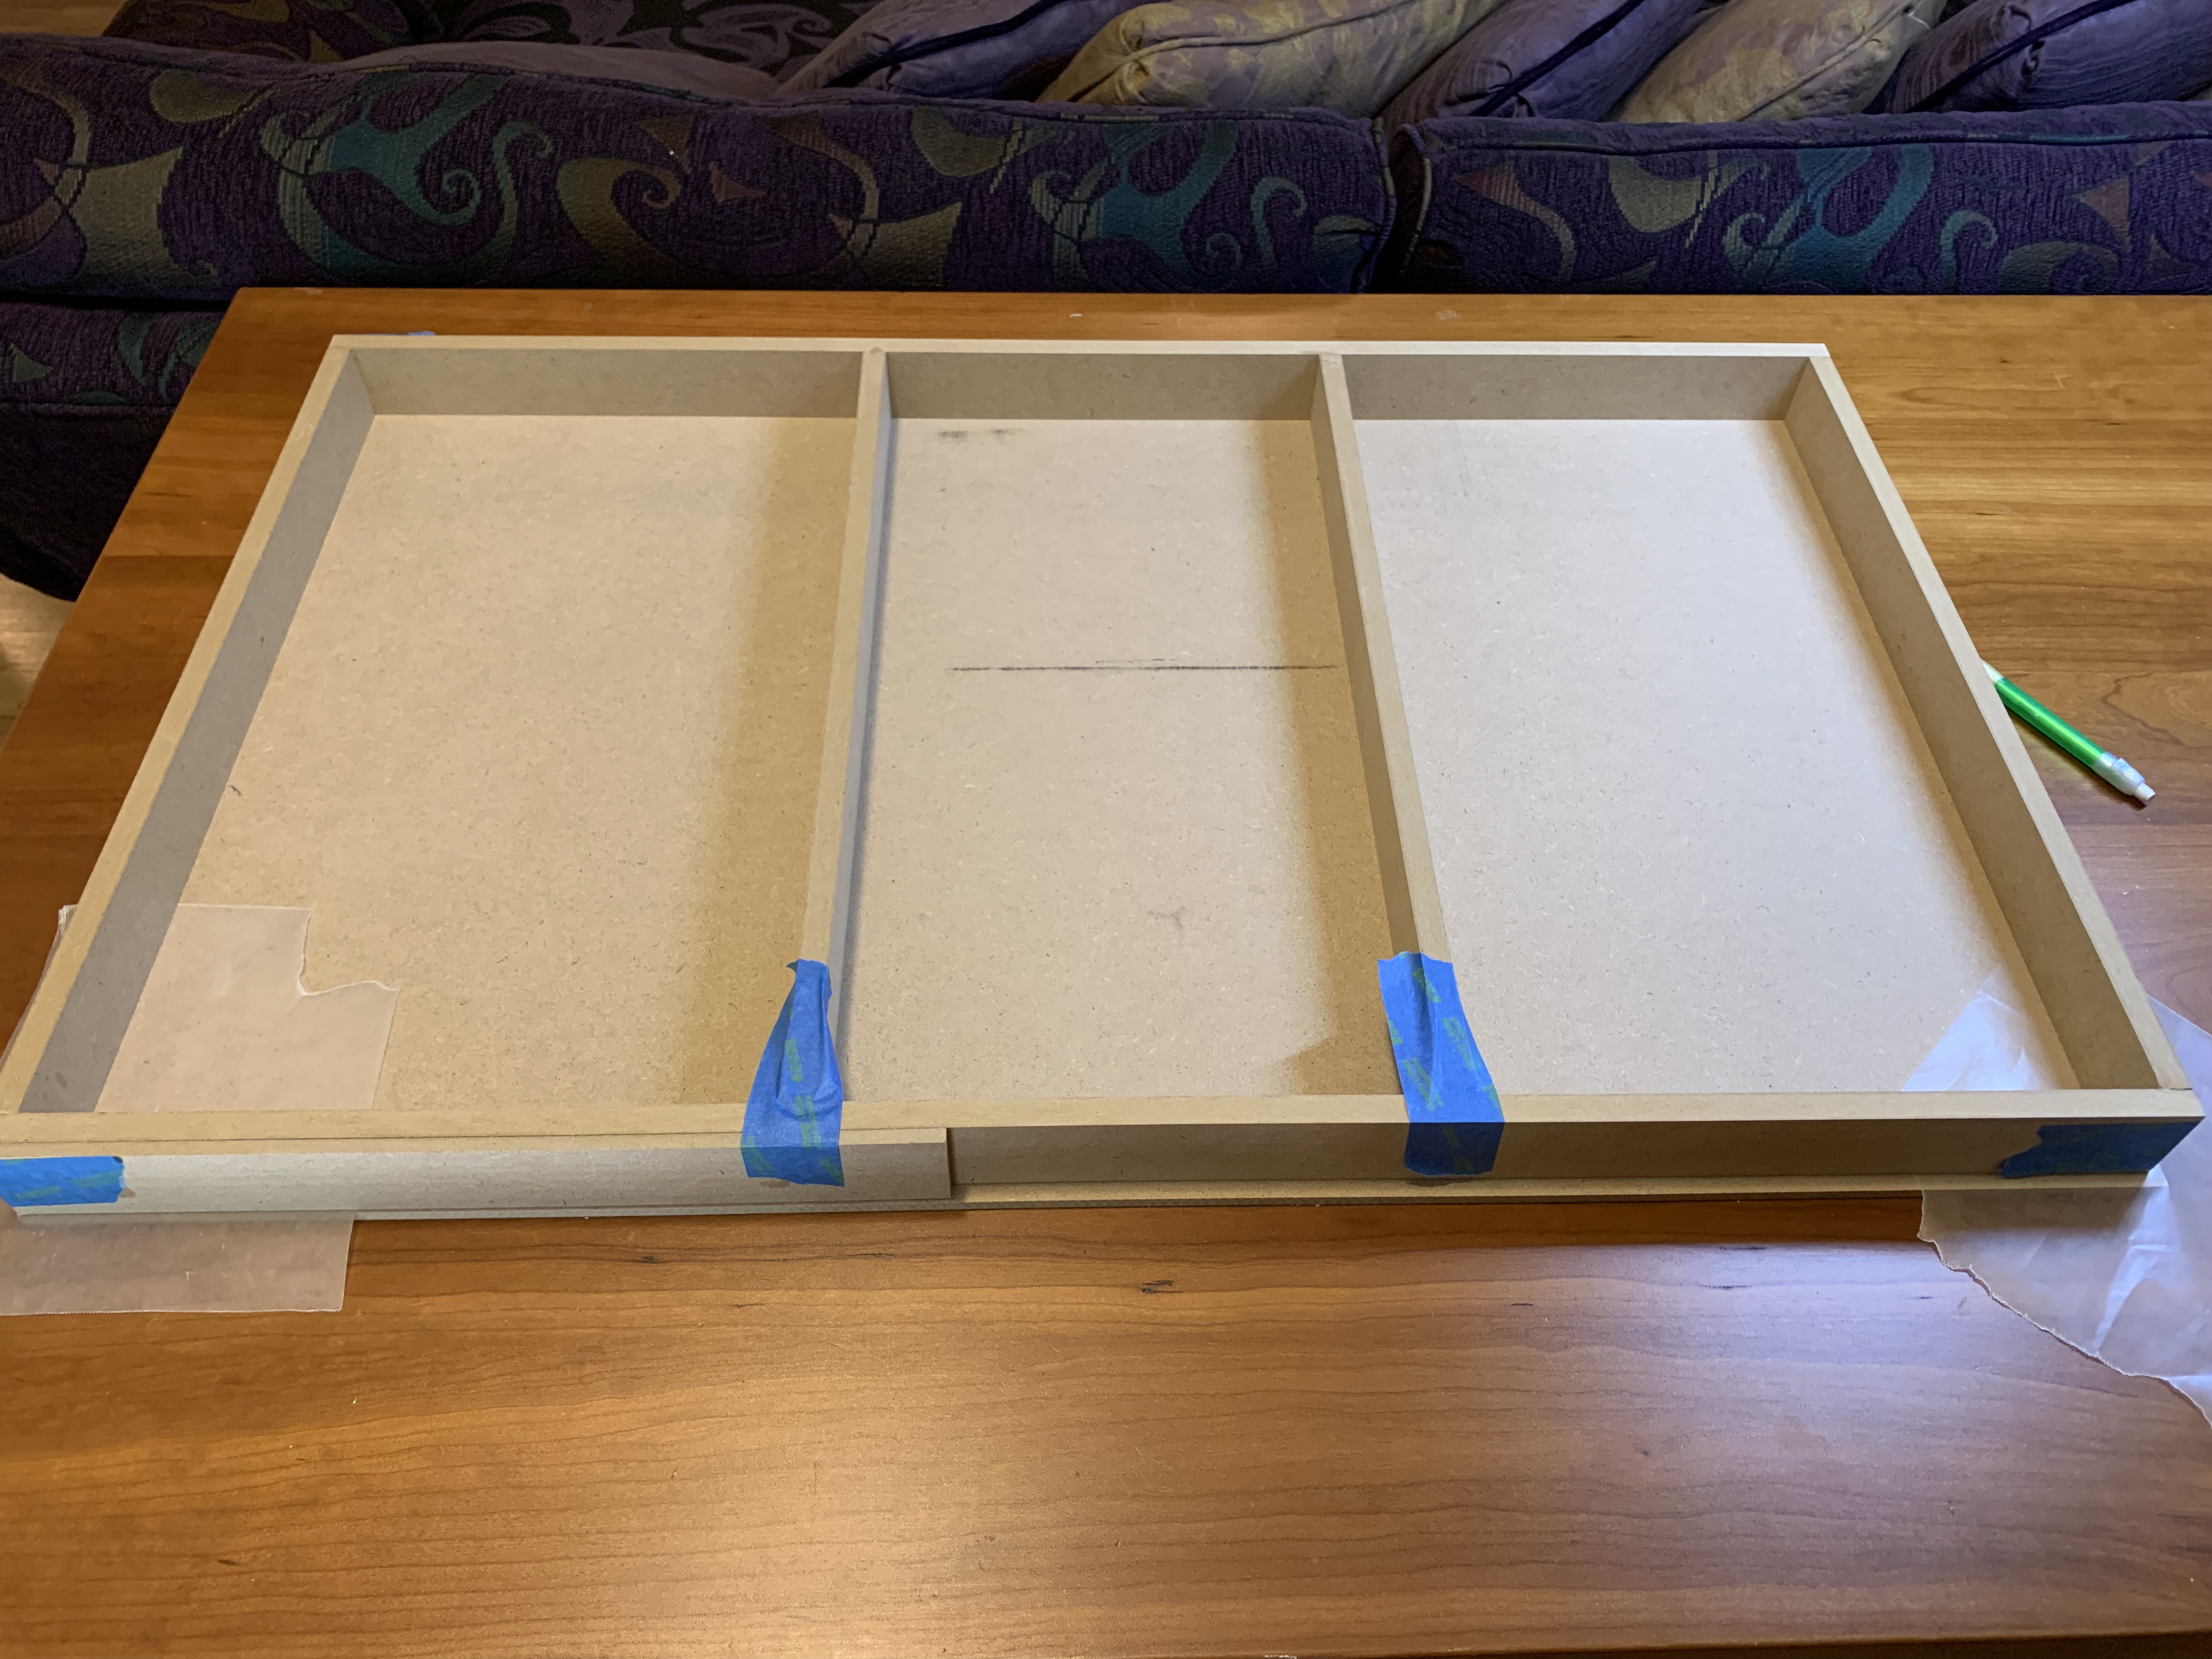
As usual, the first step is to start with building the foundation. Following that, I painted the porches and ceilings and then temporarily taped the house together to determine where exactly the first two floor rooms would be. We planned on once again installing unique flooring and as I learned from the last model, this is a much easier step when there are no walls in place.

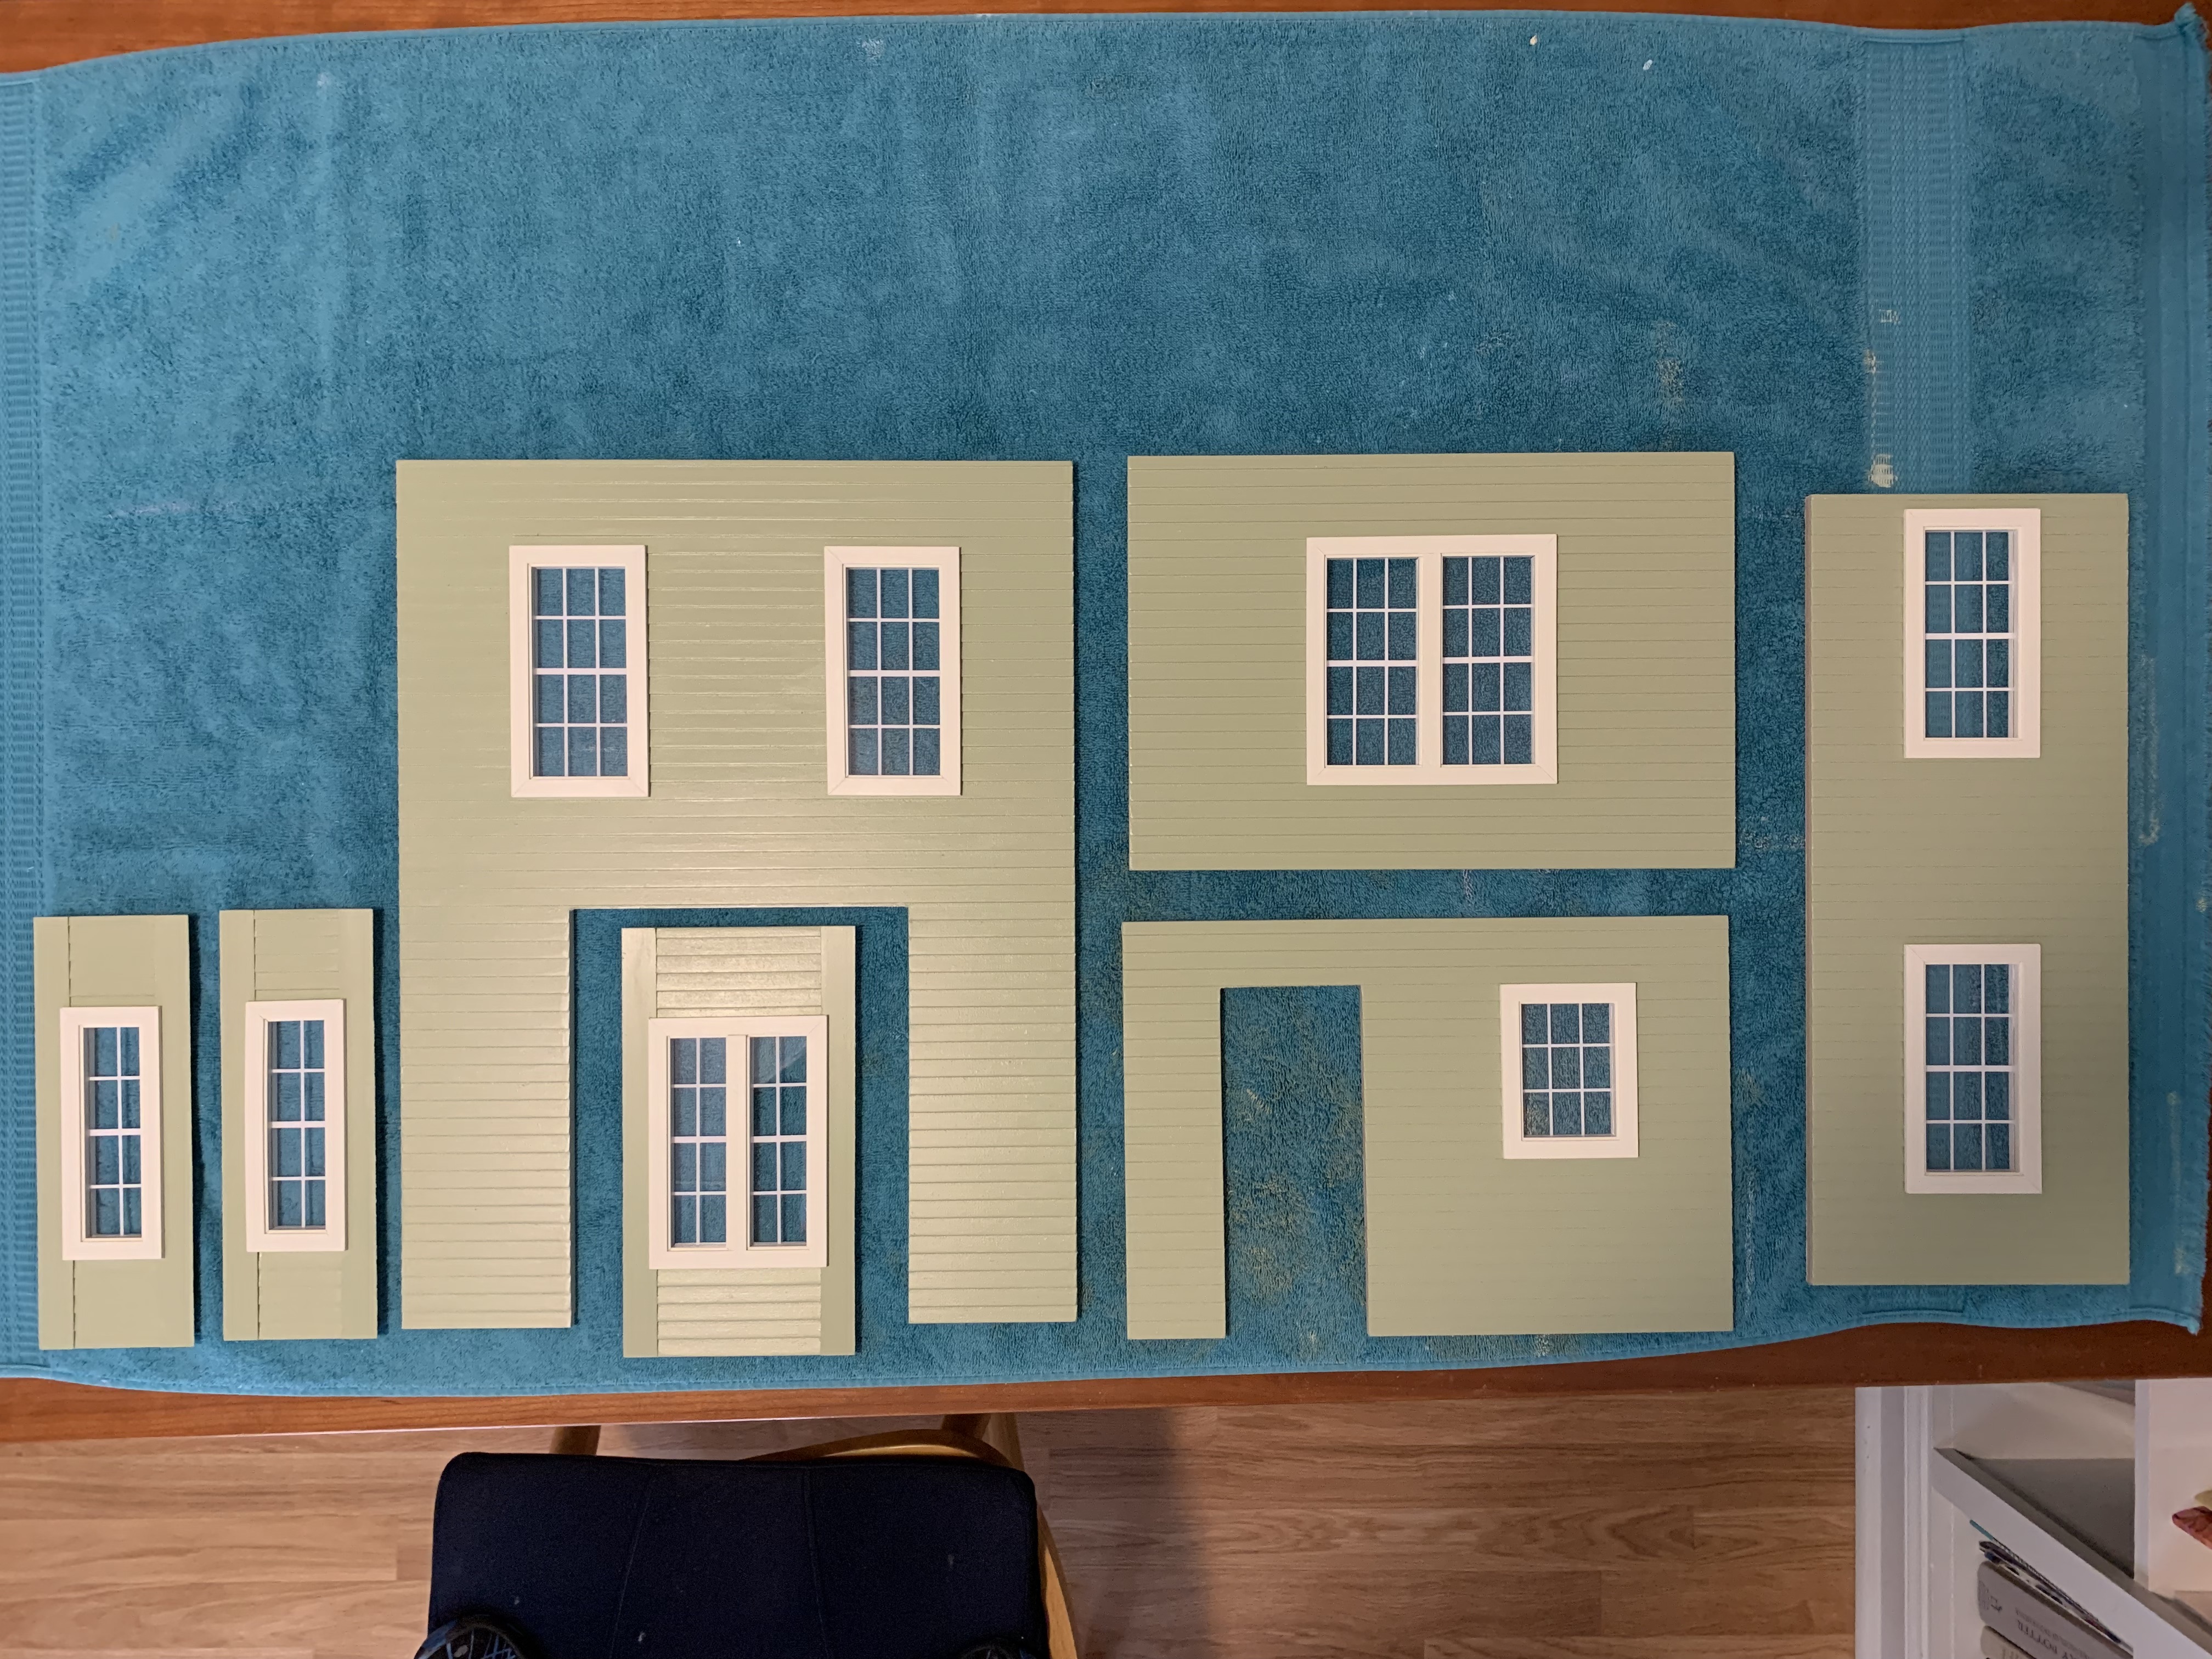
I then started what I have written about before as the most tedious, tiring, and labor-intensive step—painting and sanding the exterior clapboards between coats of paint. As the instructions indicated, I had to be careful while sanding not to wear down the bottom edge of the simulated clapboards which had been machined into the smooth medium density fiberboard (MDF). On this my fourth dollhouse made from this material, I tried a fourth different approach.
After painting the first coat, I used a home-made 220-grit sanding block to sand each individual clapboard back and forth five times (10 strokes total). I then wiped it down with a damp towel followed by sanding back and forth twice (4 strokes total) with a 400-grit sanding block. My intent was to get as smooth a finish as I could in a single sanding step to avoid having to sand between subsequent coats of paint. Rubbing my hand over the clapboards, they felt nice and smooth. I was hopeful.
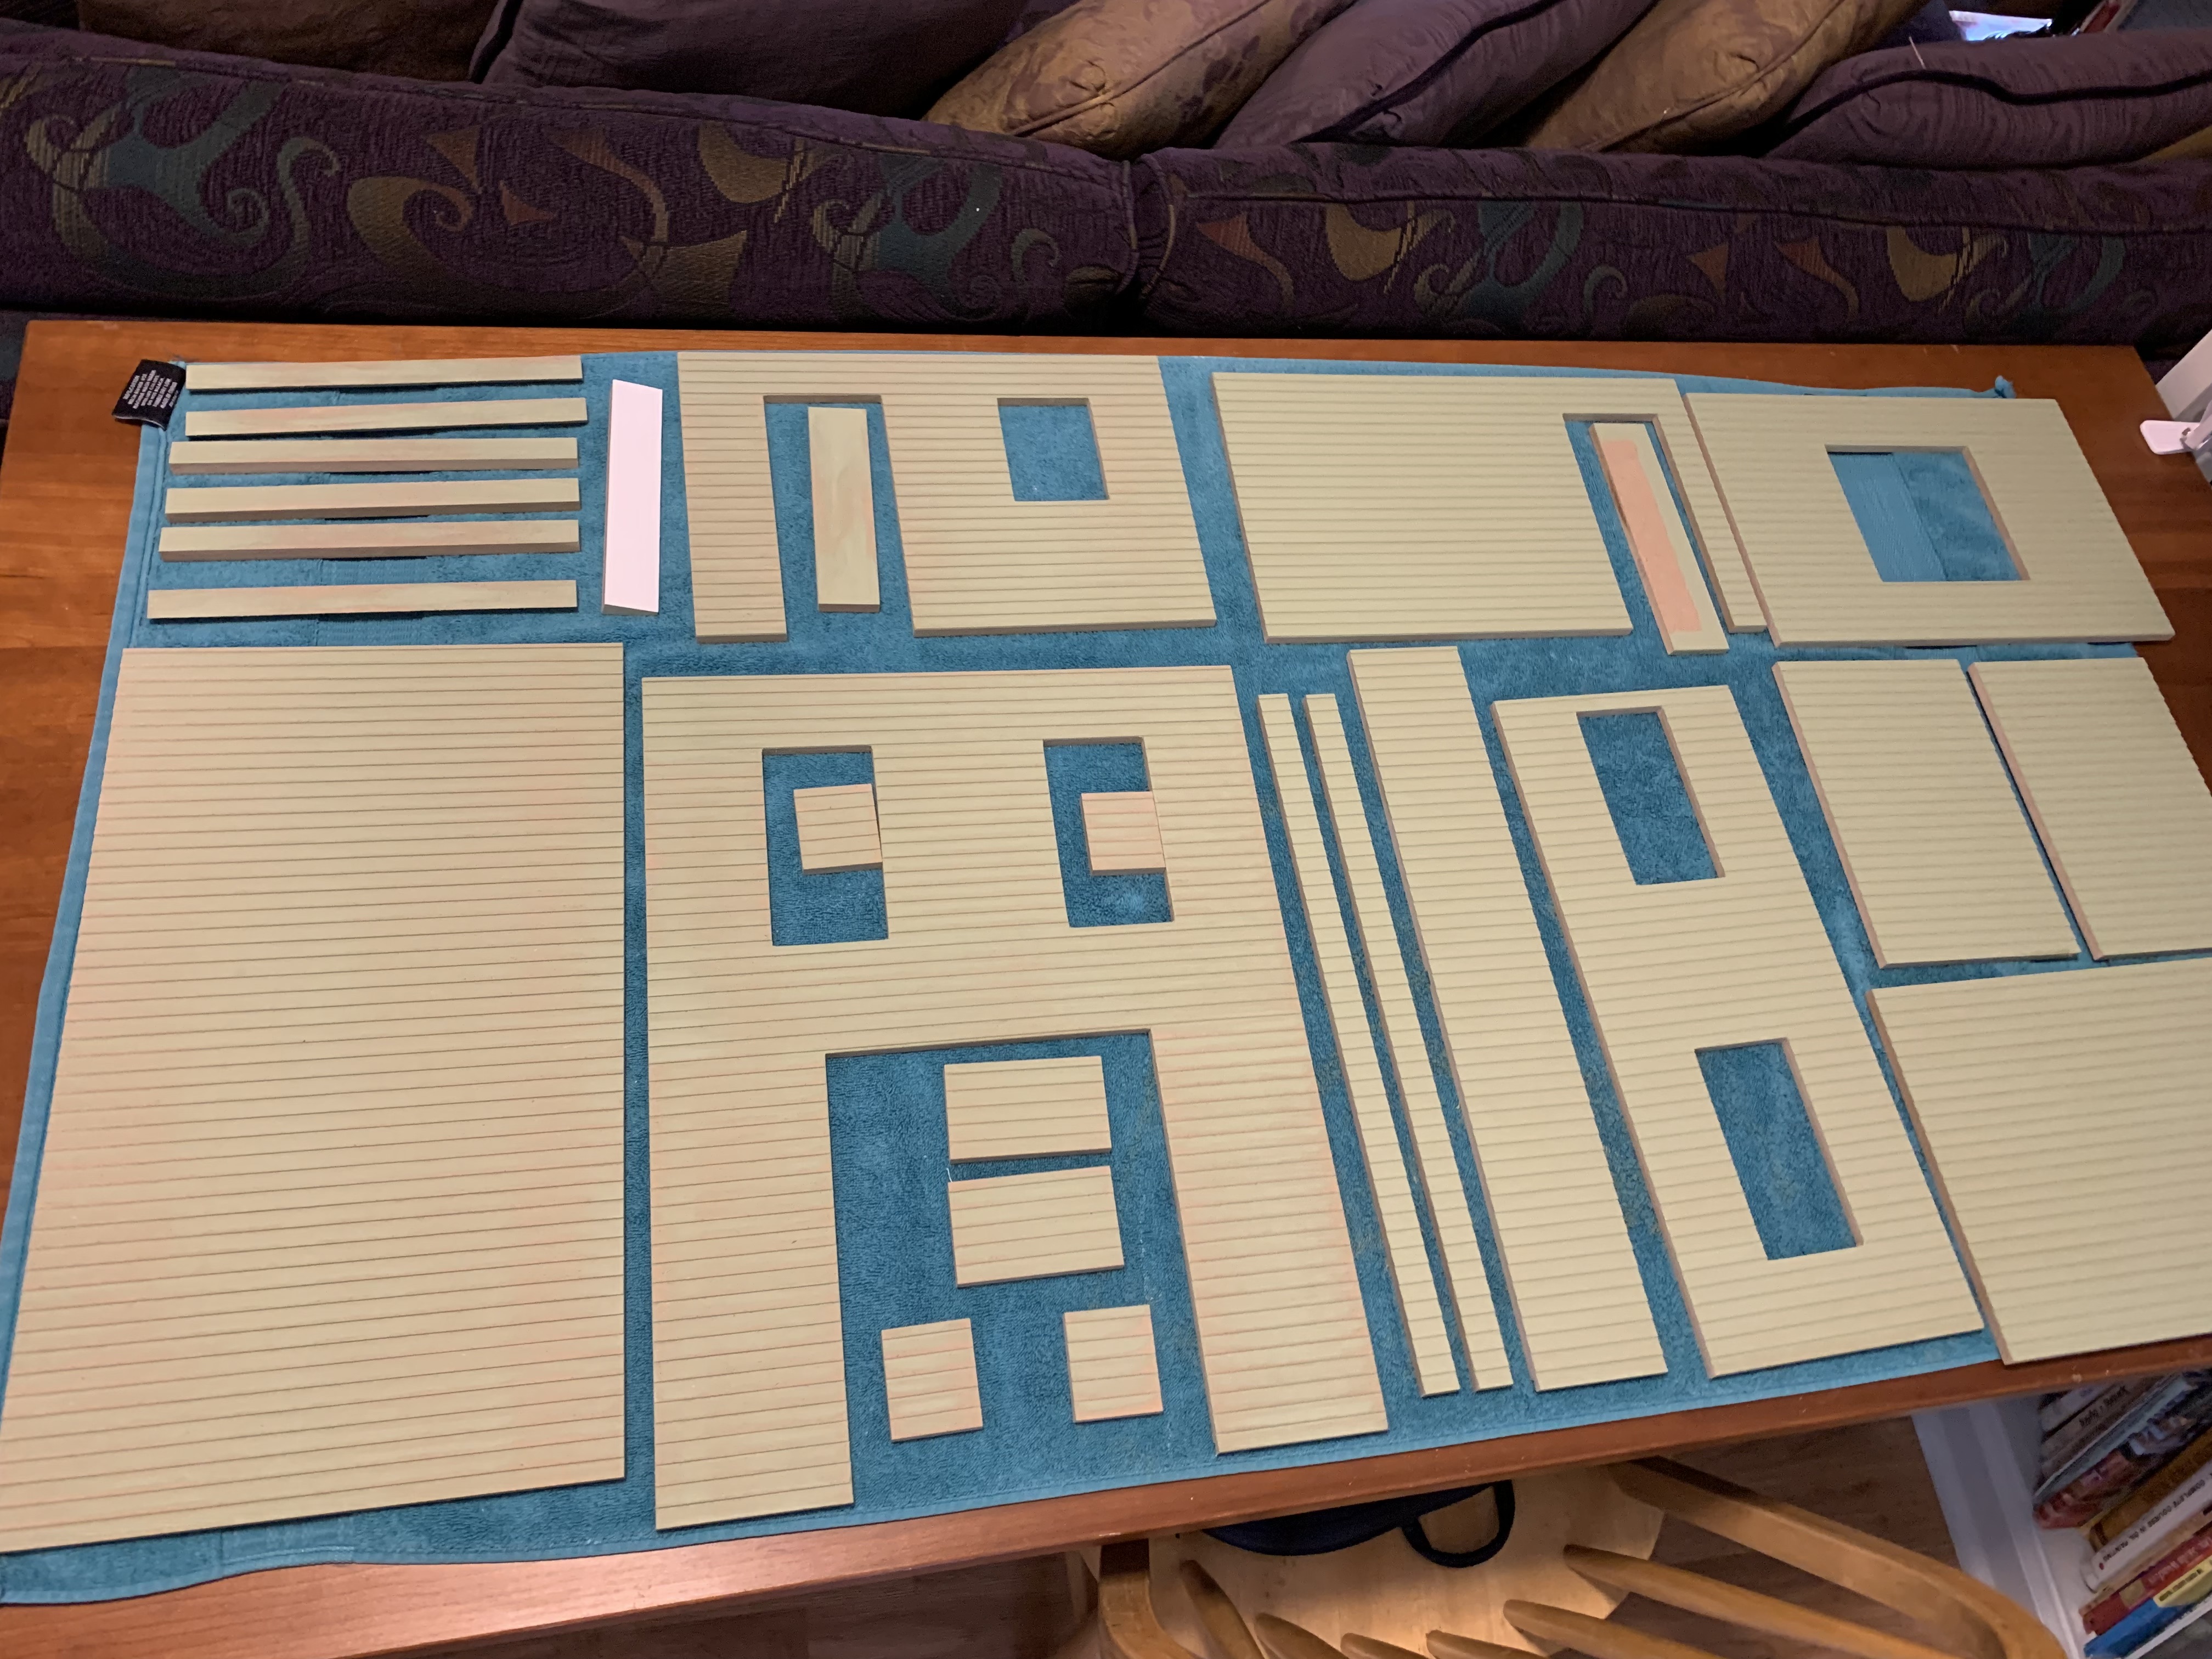
But after I painted the second coat and let it dry overnight, I ran my hand over the finish to find my sanding technique did not work as I still had a rough finish. The paint seemed to have pulled up some additional fibers from the MDF. So, I sanded each clapboard back and forth twice more (4 strokes total) using my 400-grit sanding block before painting my third coat of paint.
After the third coat of paint had dried, the clapboards seemed smooth enough to obviate another sanding step and so I proceeded to paint the fourth coat. Once that coat was dry, there were still a few clapboards that were not as smooth as I would have liked and so for good measure, I painted a fifth coat of paint.

With the exterior painting complete, I next turned to painting the interior walls. As I stated previously, we decided to use the same interior colors as before, but we did make one change. Since this house would be for my sister rather than her four grandchildren, the small bedroom upstairs could be made into a home office rather than a bedroom. Since she liked the purple color for the bedroom, we switched painting the smaller room yellow and the larger room purple.
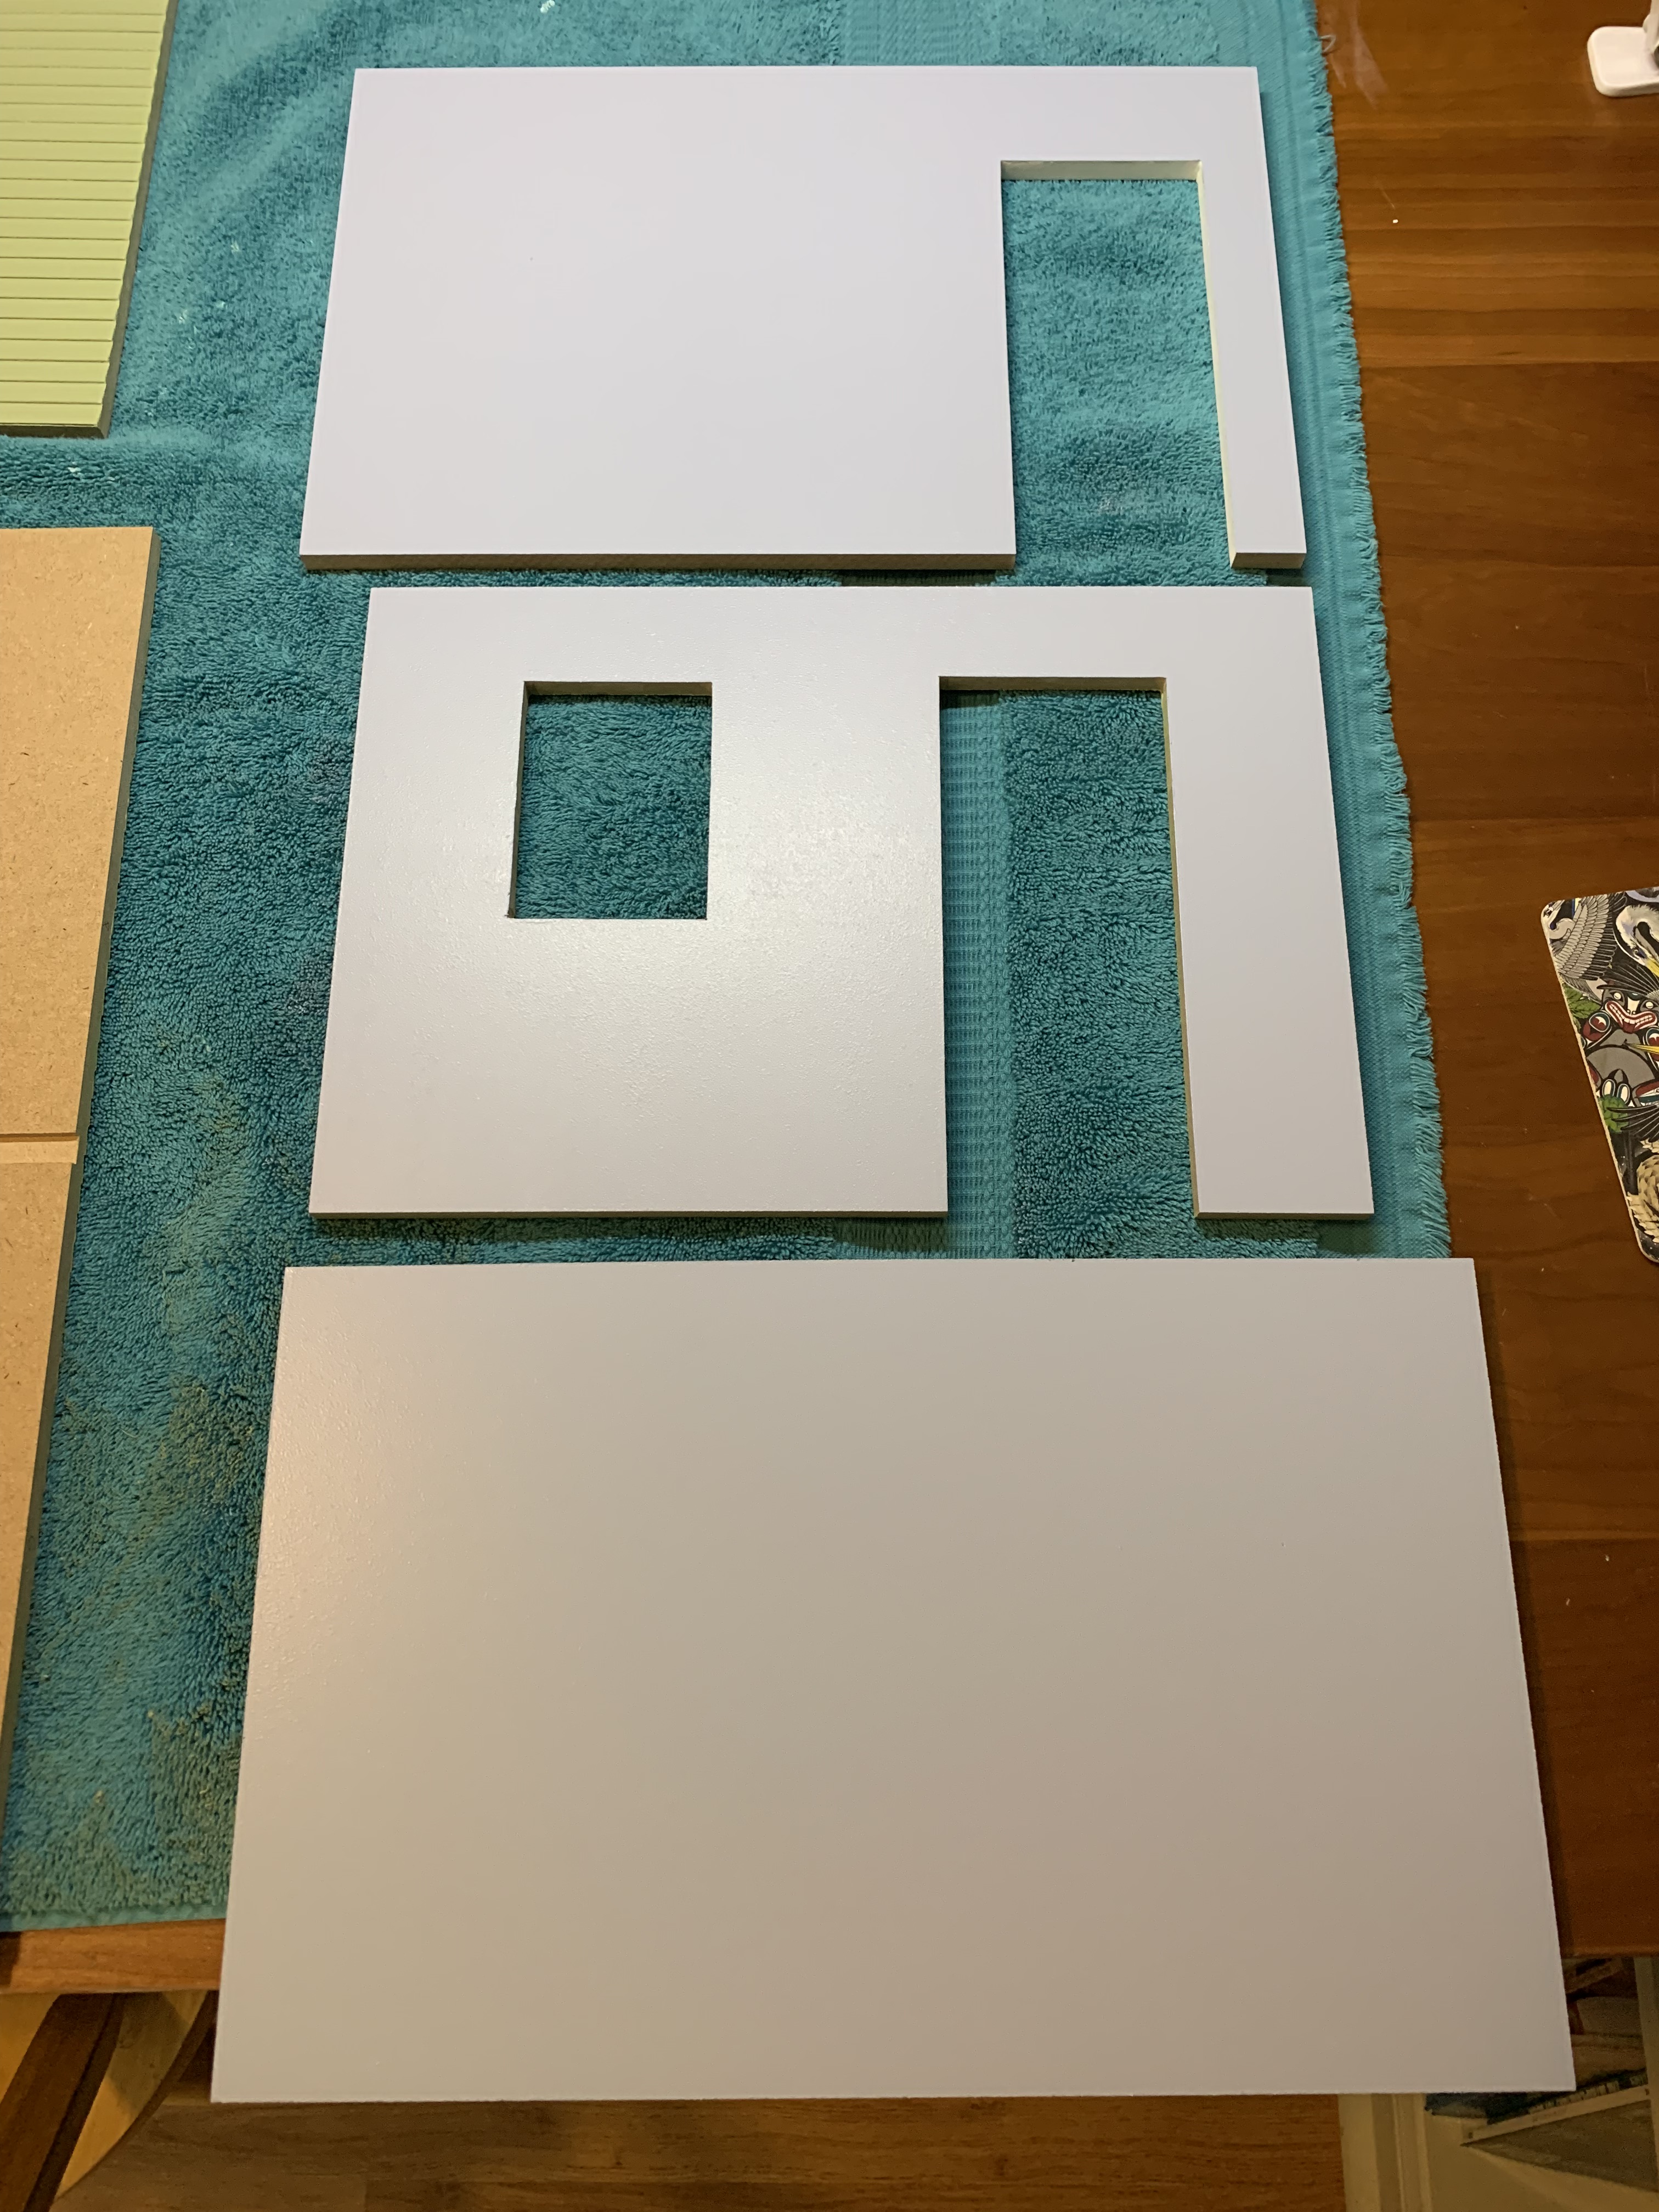
I started with the downstairs first and painted the kitchen the same color blue using the small roller that had made the job so fast on the last doll house. The two smaller rooms had only three walls to paint so I also painted the second-floor small room next, this time yellow. This allowed me to move these finished walls off my work surface to give me more room to paint all the extra wall pieces in the two larger rooms.
The first-floor large room is the one with the most walls to paint as it includes the bay windows and a side alcove, so I decided to paint it next.
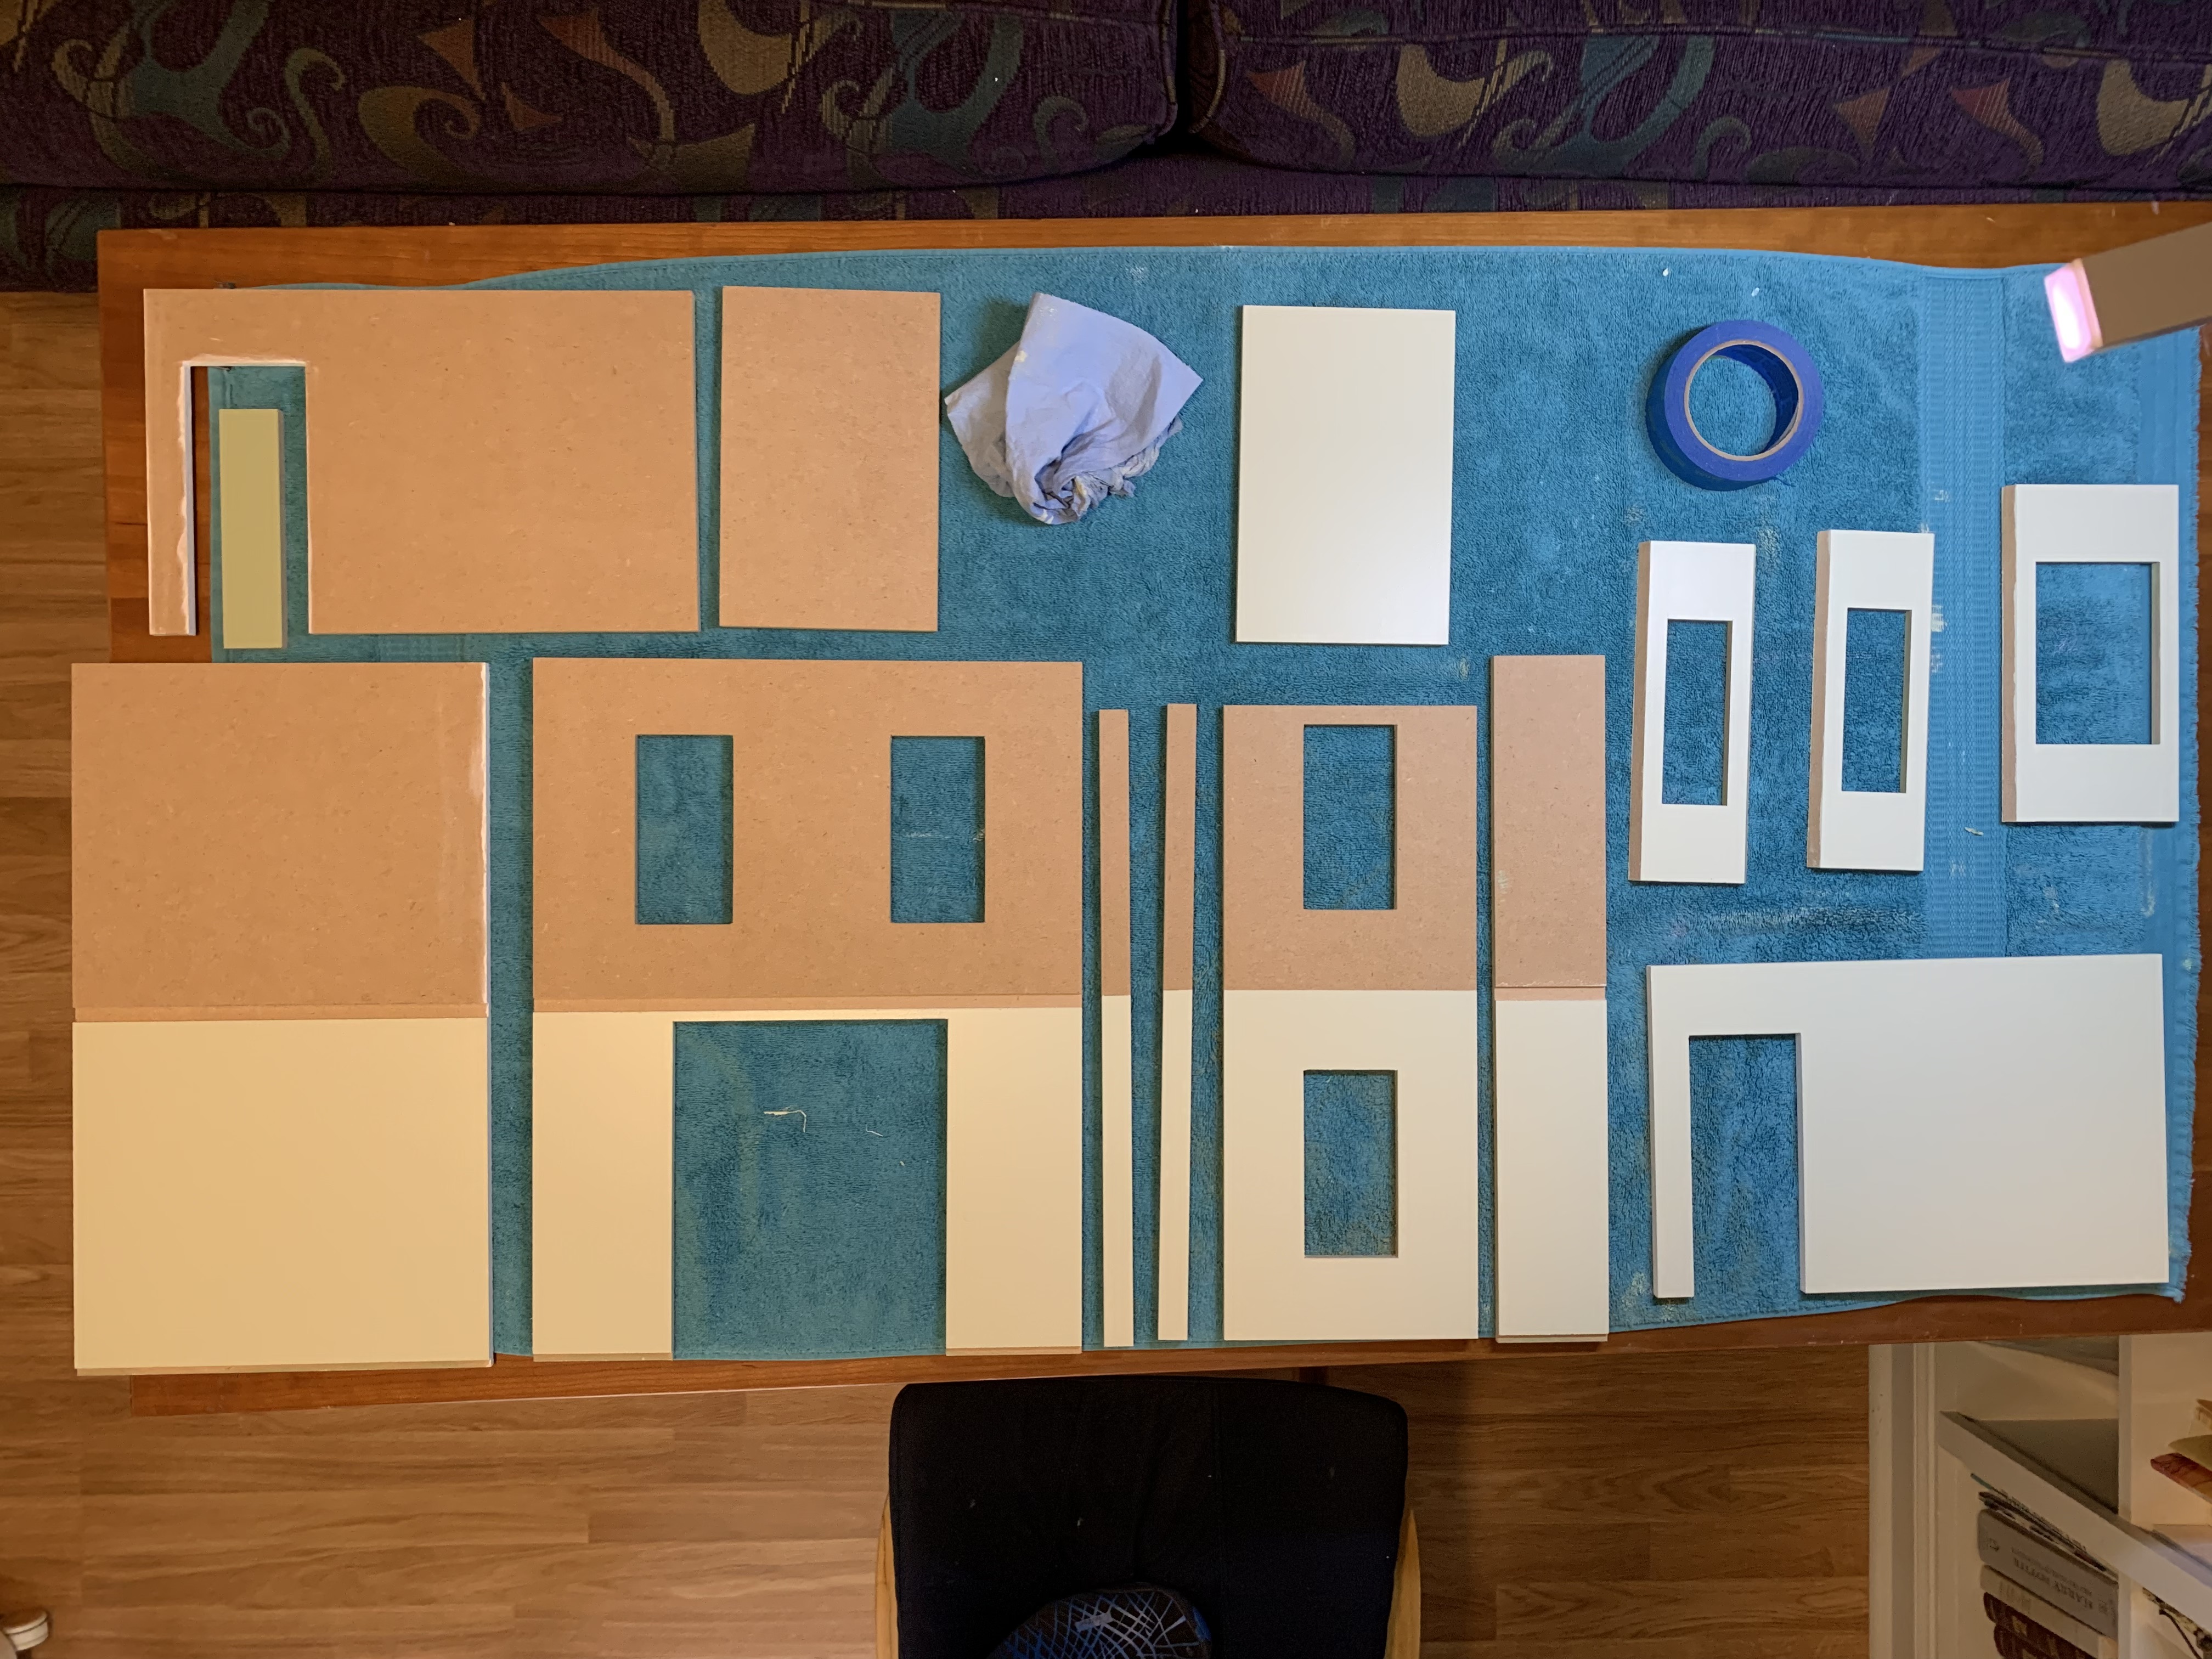
The last of these four rooms was the second-floor large room which as I indicated, we decided to paint purple this time.

In the doll house we built for my sister’s grandchildren, we did not finish the third floor as they were going to do that themselves. So, without a precedent, we will need to figure out how to decorate the third floor once we get to that level.
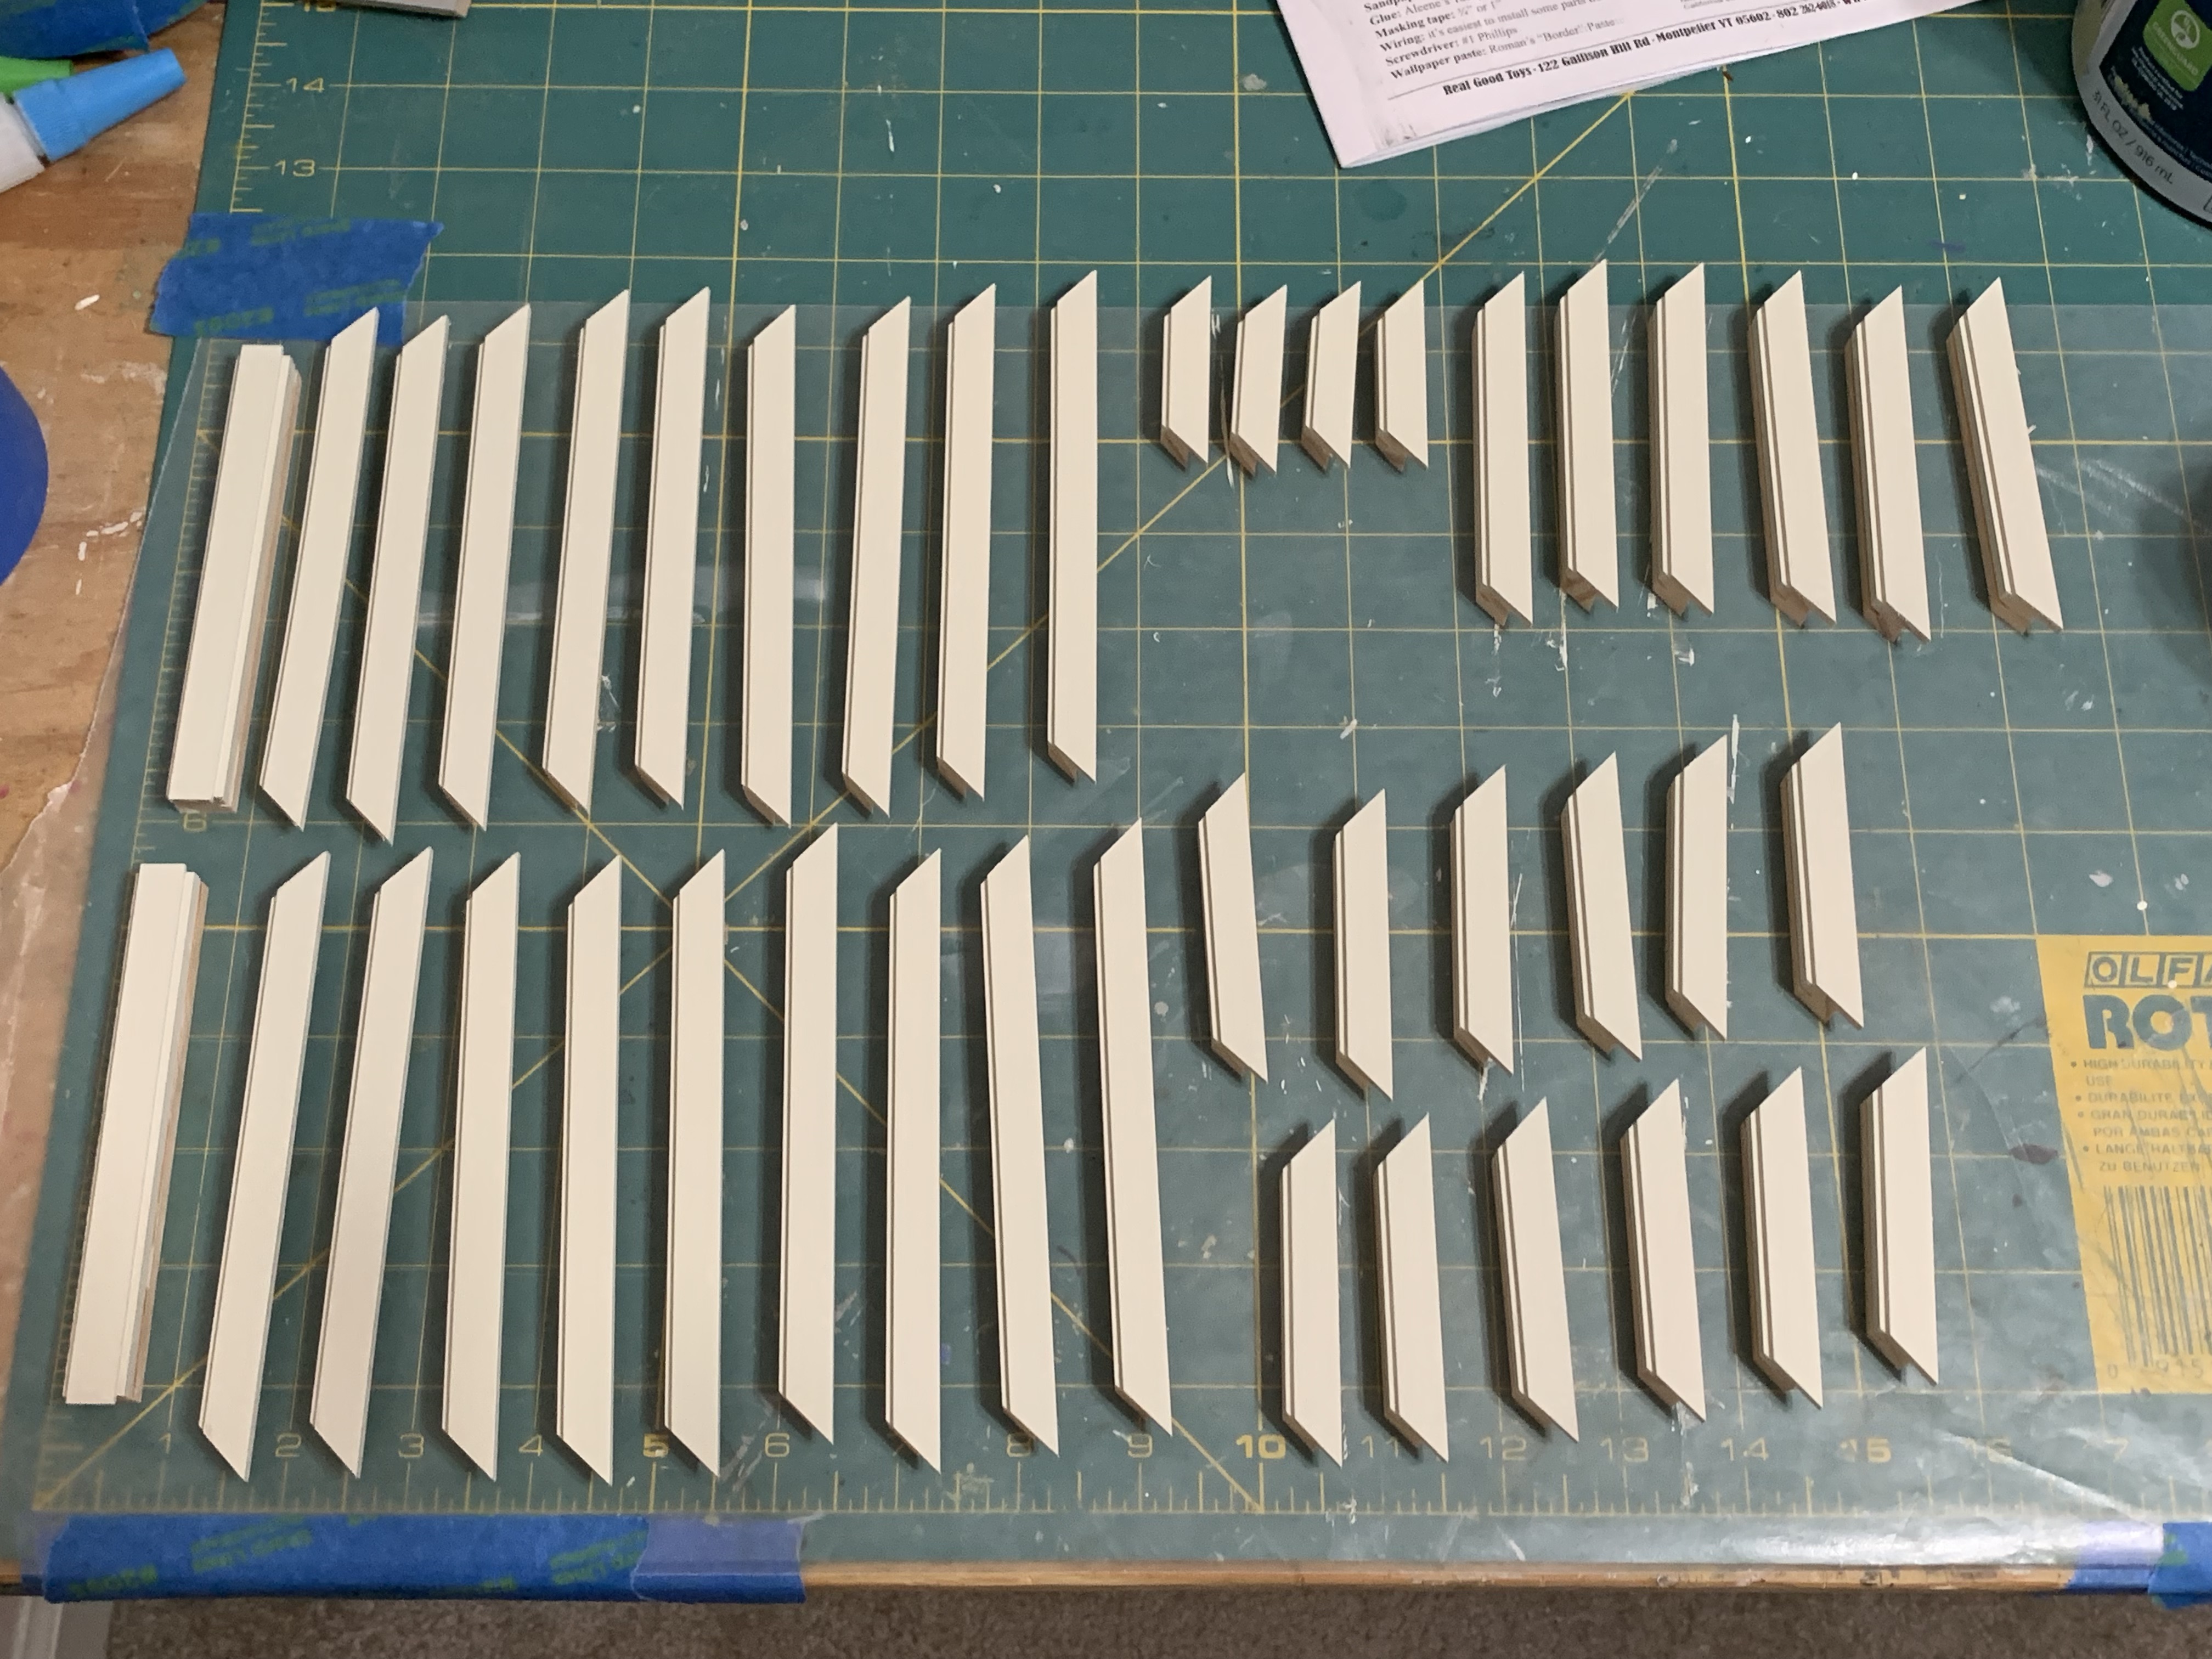
While I was waiting for the paint to dry on the interior walls between coats, I worked ahead and began painting the window trims, both exterior and interior. This was a task my sister performed on the last doll house when she came over in December of last year. I can now appreciate what a big job that was.
There were 42 individual exterior frames that needed to be painted…
…and 40 interior trim pieces.
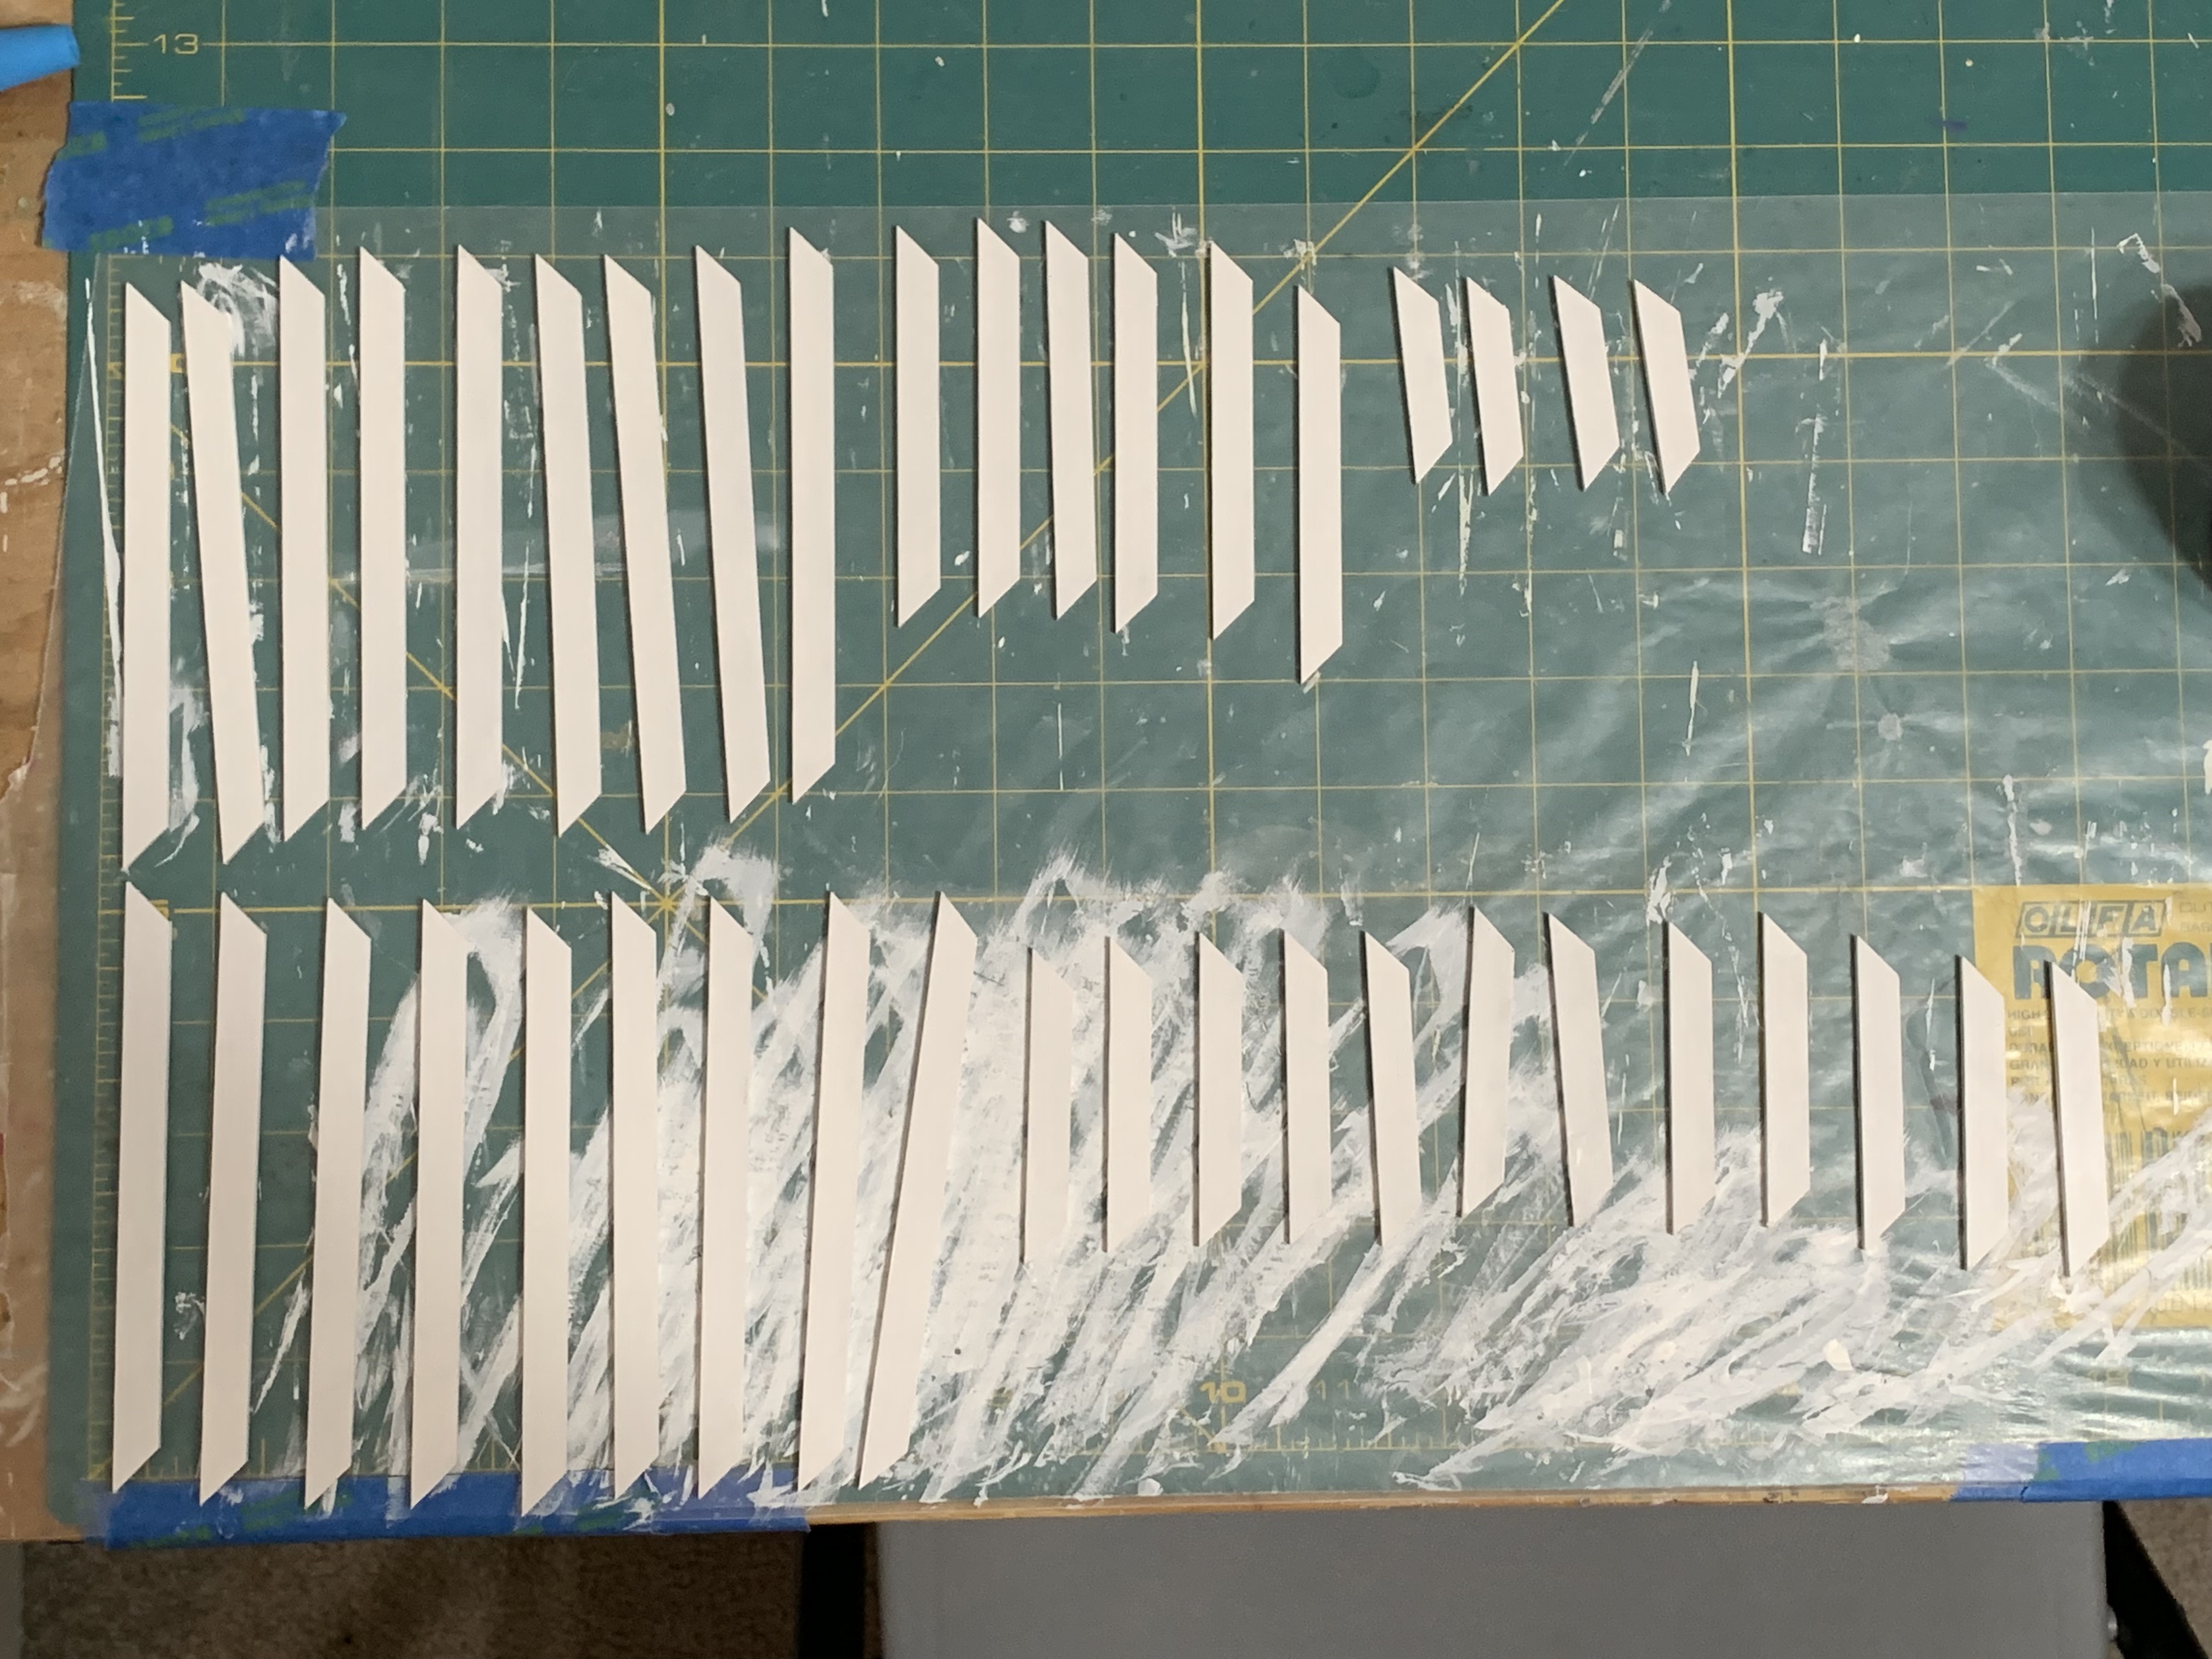
It was a lot of painting and on the exterior frames, the outside of the window frame was painted one color while the inside was painted a different color.
But the advantage of doing this now was that it allowed me to build the windows like before, using the window openings as a jig and then install them while the walls were flat on my workspace. This way, I did not have to try to squeeze my large hands into tiny spaces after the house was built.
With the walls now all painted and ready to be raised, the next step before beginning to assemble the doll house was to but down the flooring on the first and second floors.
To Be Continued…
Categories

Awesome! So glad you have such a fun project together!
Thanks it is fun and has brought us closer.
Beautiful work, David. You do such a meticulous job! I wonder if the instructions that came with the kit are so precise. Or does it just say to sand and paint? Or just paint? I get away from my dollhouse work during camping season. Your post reminds me how much I like dollhouses! I am looking forward to your next post!
Thanks for the compliment, Betty. No the instructions just say to sand one time after the first coat of paint. To me, it needs more sanding. Sorry to keep you hanging on the next update. I’ve been working on my airplane and have a number of other topics to post.