
A Classic Boat Model – Fitting Out!
Continued from: A Classic Boat Model – All Planked Out

With the boat now fully planked, the last step before sealing and finishing the wood was to sand the entire boat using several different grades of sandpaper. To avoid getting sawdust in the cockpits, I taped over them with blue painter’s tape.
Using my 120- and 220-grit sanding blocks, I started on the transom, the smallest and flattest part of the boat. It went fairly well without too much effort but when I started on the port side at the stern, I quickly realized this was going to take a lot of repetitive arm motion to hand sand the boat. The instructions indicated you could use an electric palm sander to save effort on the deck and so decided to use it for the sides as well.
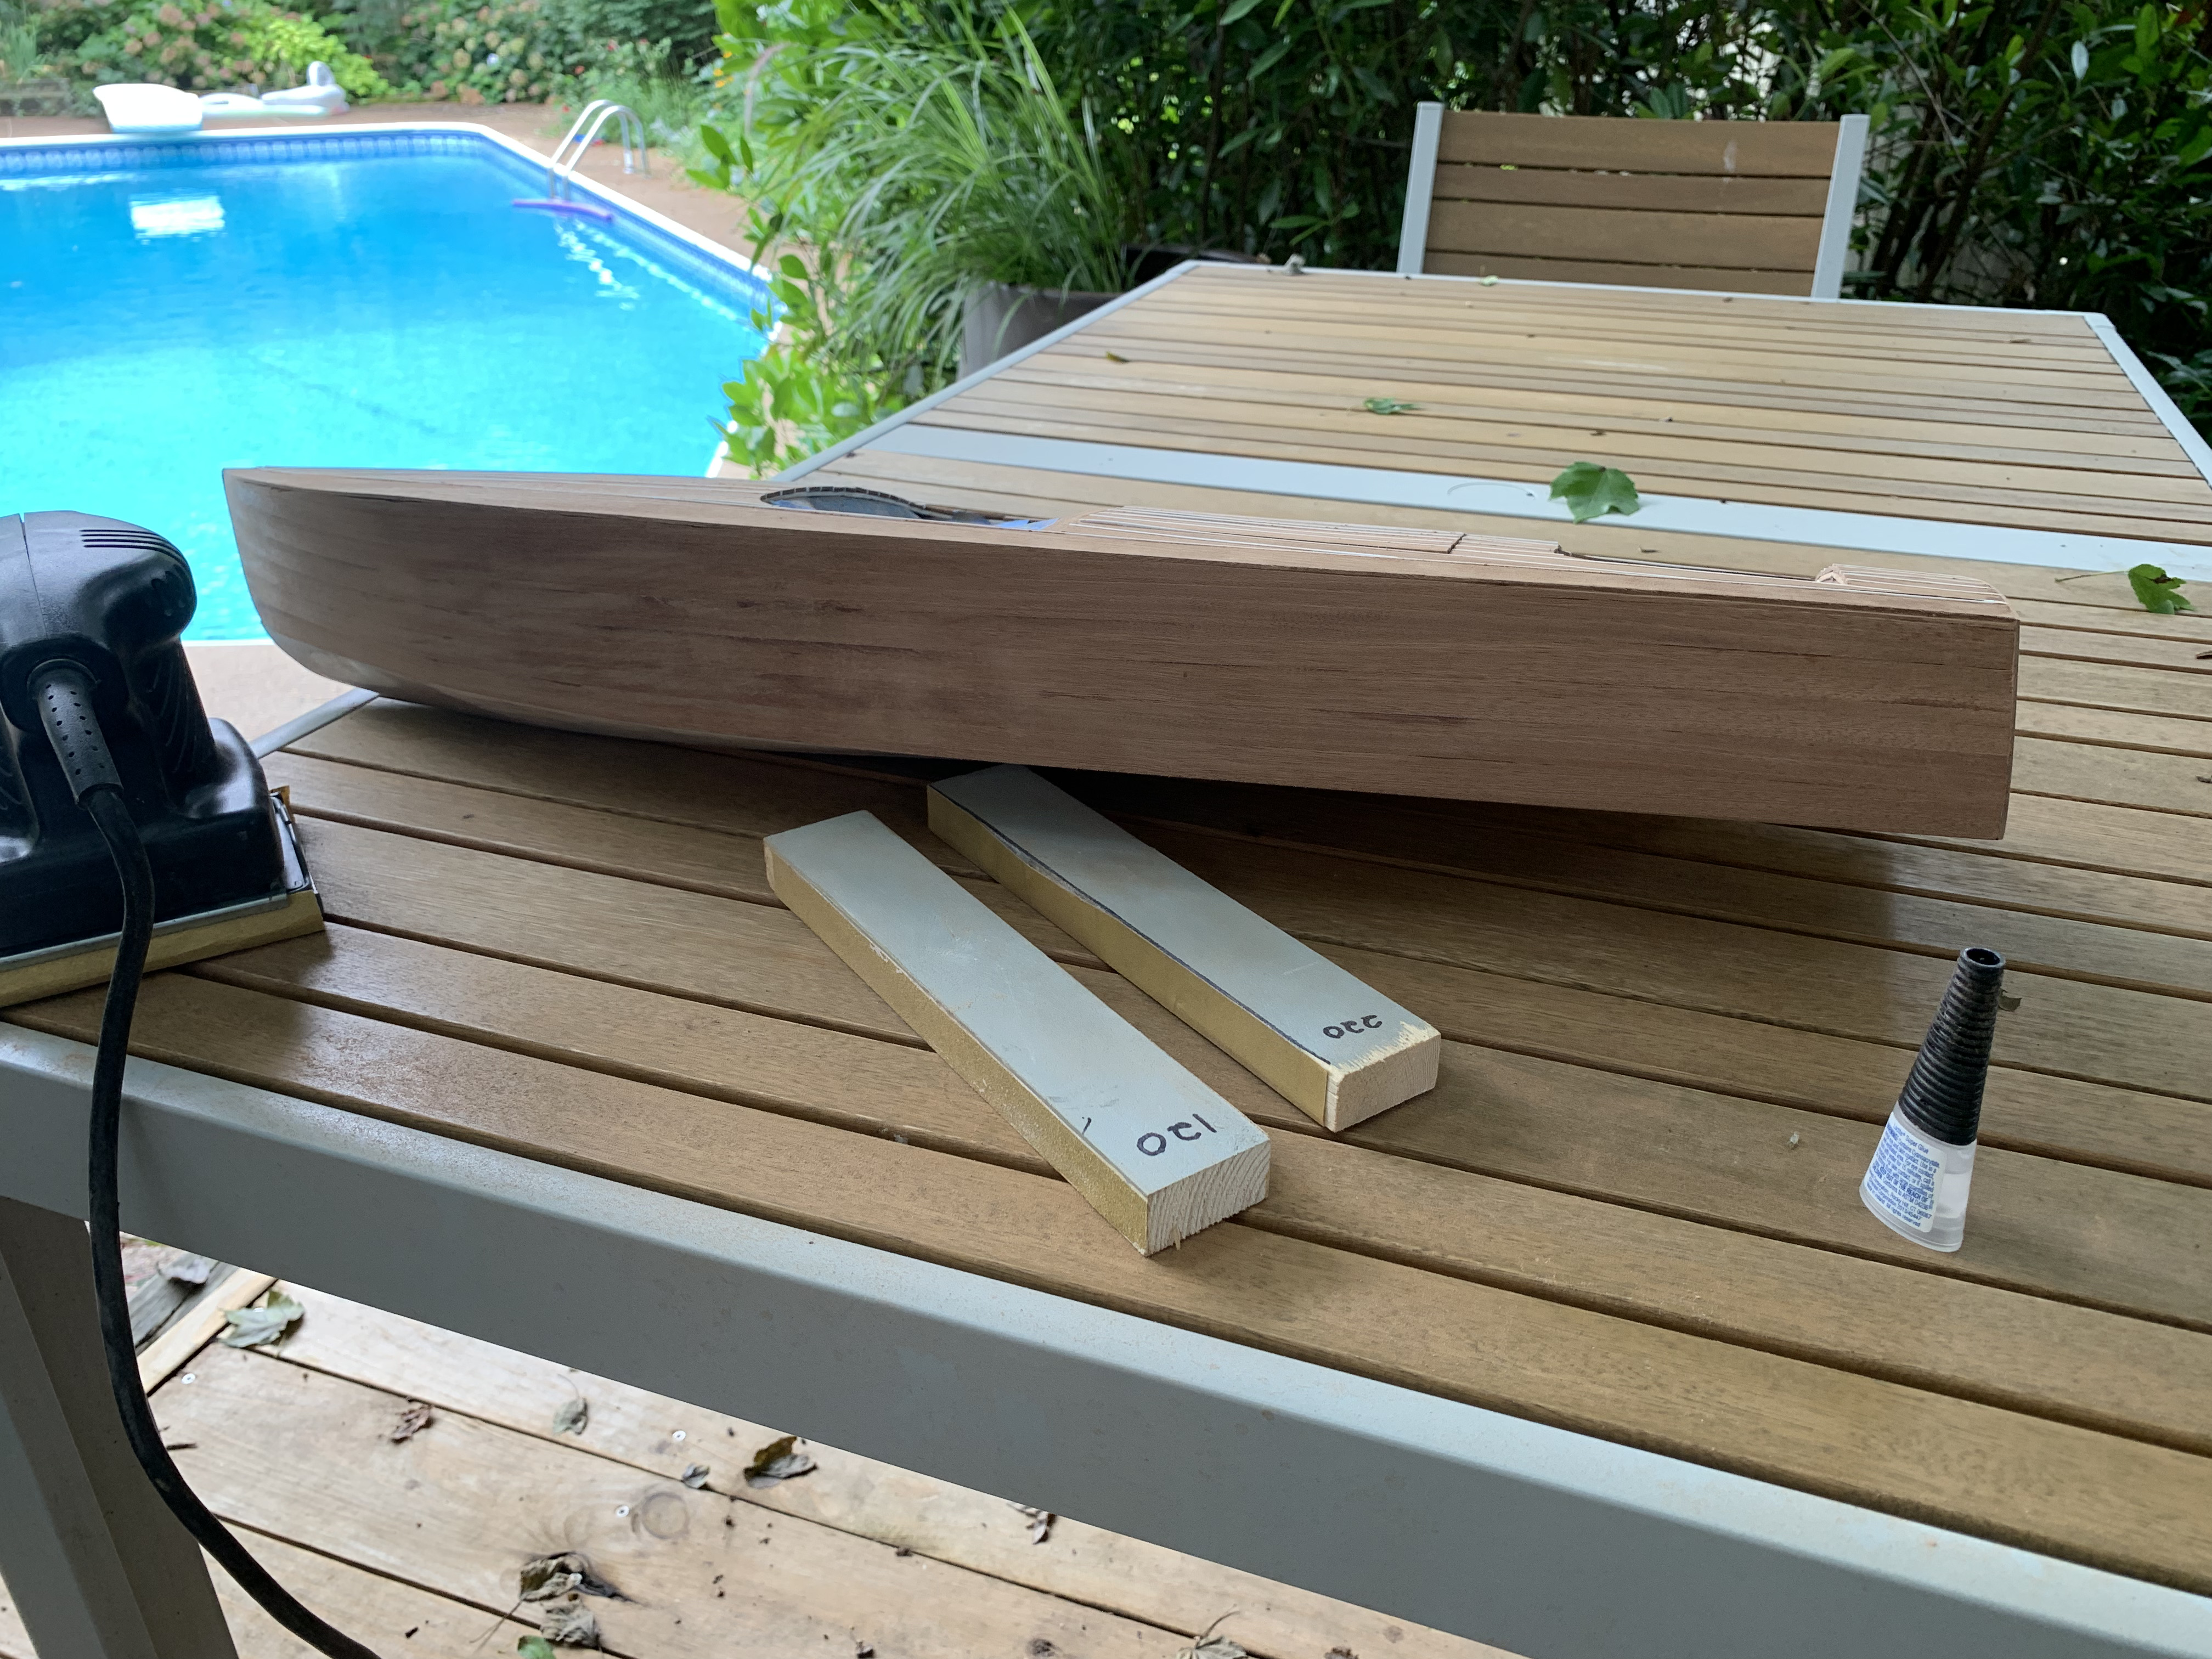
The palm sander made quick work of the port side and left a nice smooth finish that I sanded even smoother with my 220-grit block. As cautioned in the instructions, occasionally I ran across a section of plank towards the bow that was not fully glued down and so added a small amount of liquid super glue and then held it in place until it set prior to resuming sanding.
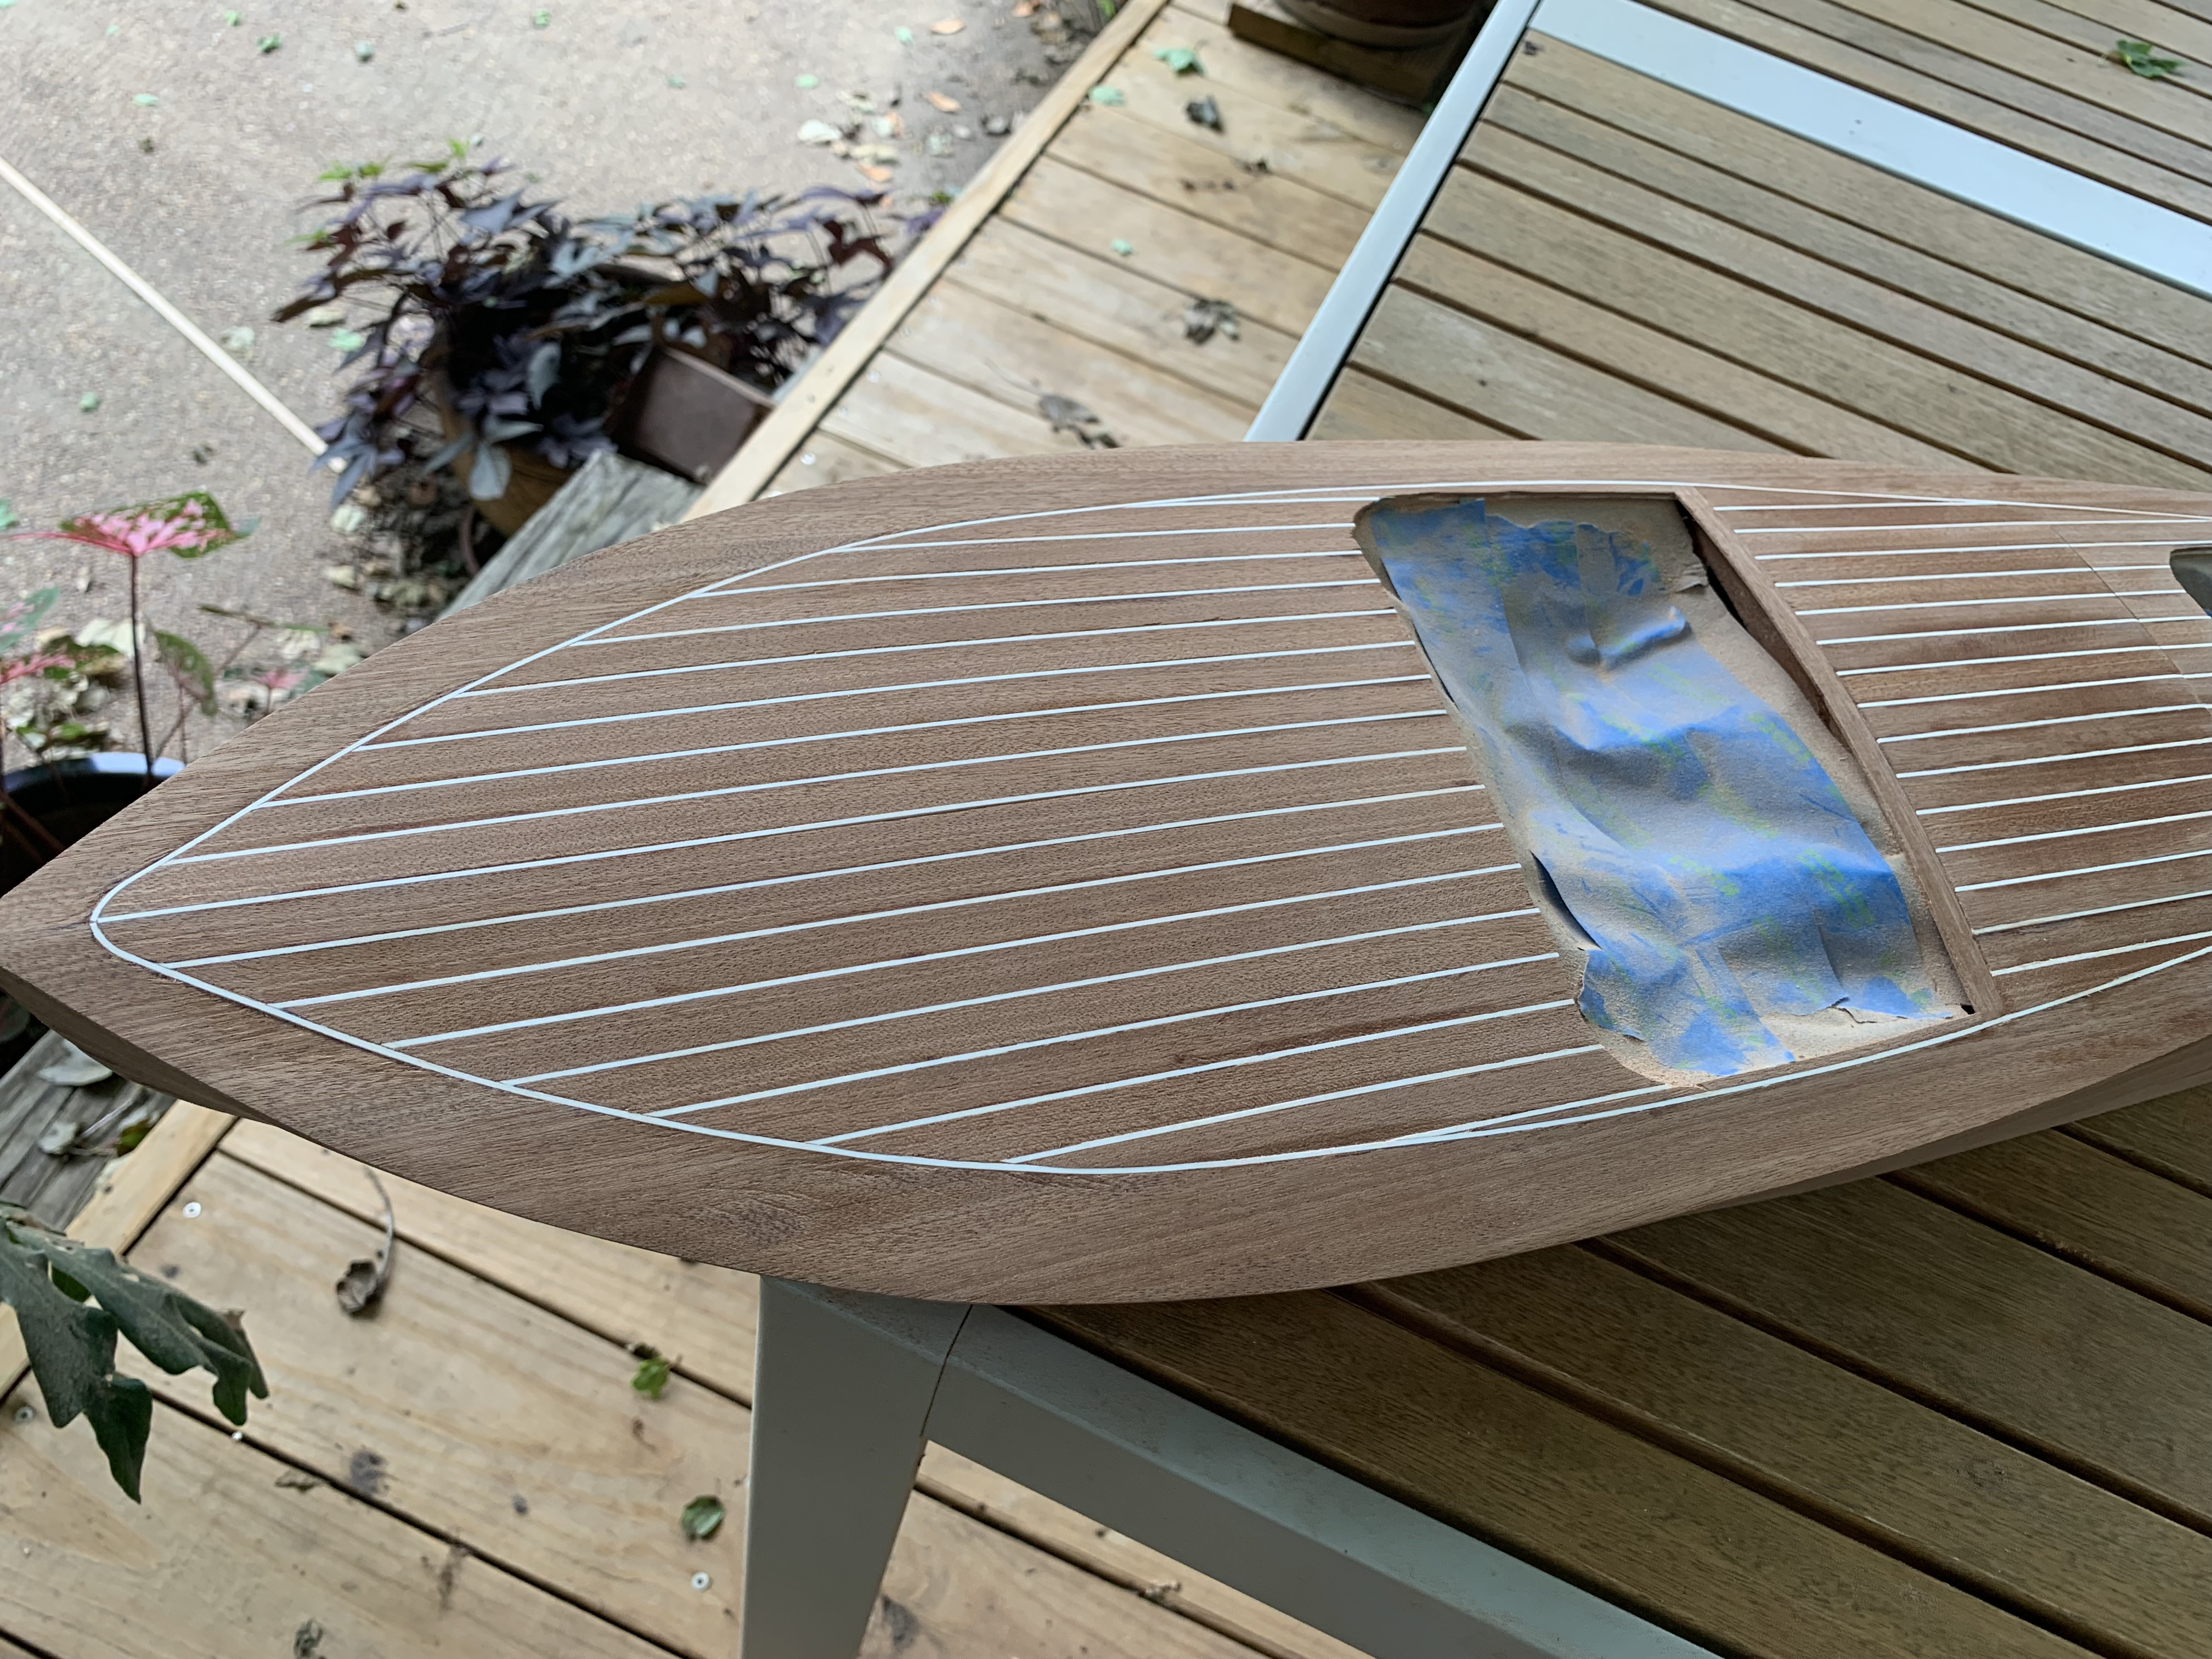
The starboard side went similarly and when I started on the deck, the palm sander made sanding down the white styrene strips level with the planks even easier. I finished the front deck and hatch and then all of a sudden, my palm sander stopped. I assumed it had just overheated but after cooling down a while still would not turn on. I guess I burned it out but at least it gave its last gasps for a good cause. With just the rear deck in front and back of the rear cockpit to complete, I sanded those by hand with my two blocks. After wiping down the boat twice with a damp rag, I thought the boat looked very nice.
But when I stood up, I saw that I was completely covered with sawdust. Obviously, I would have to shower before continuing with the next step.
In the instructions, the next step was an optional staining of the mahogany planks prior to “fiberglassing” the boat to waterproof it (which I planned to omit since my boat would not be run in water). However, since the mahogany wood was already fairly dark, I decided to just try applying a clear polyurethane to a scrap piece of mahogany. After two coats with sanding in between, I was quite pleased with the lustrous finish and so decided to skip the staining and just go with the clear polyurethane finish.

After just one coat of polyurethane, I was quite pleased with the results and what’s more, the spots where glue had gotten on the exterior mahogany had completely blended in.
With sanding in between each coat, I continued to apply additional coats of the polyurethane. Once I had three coats, I paused to examine my work closely. I noticed there were a few places where excess polyurethane had dried and so decided to sand one more time and finish with a fourth coat.
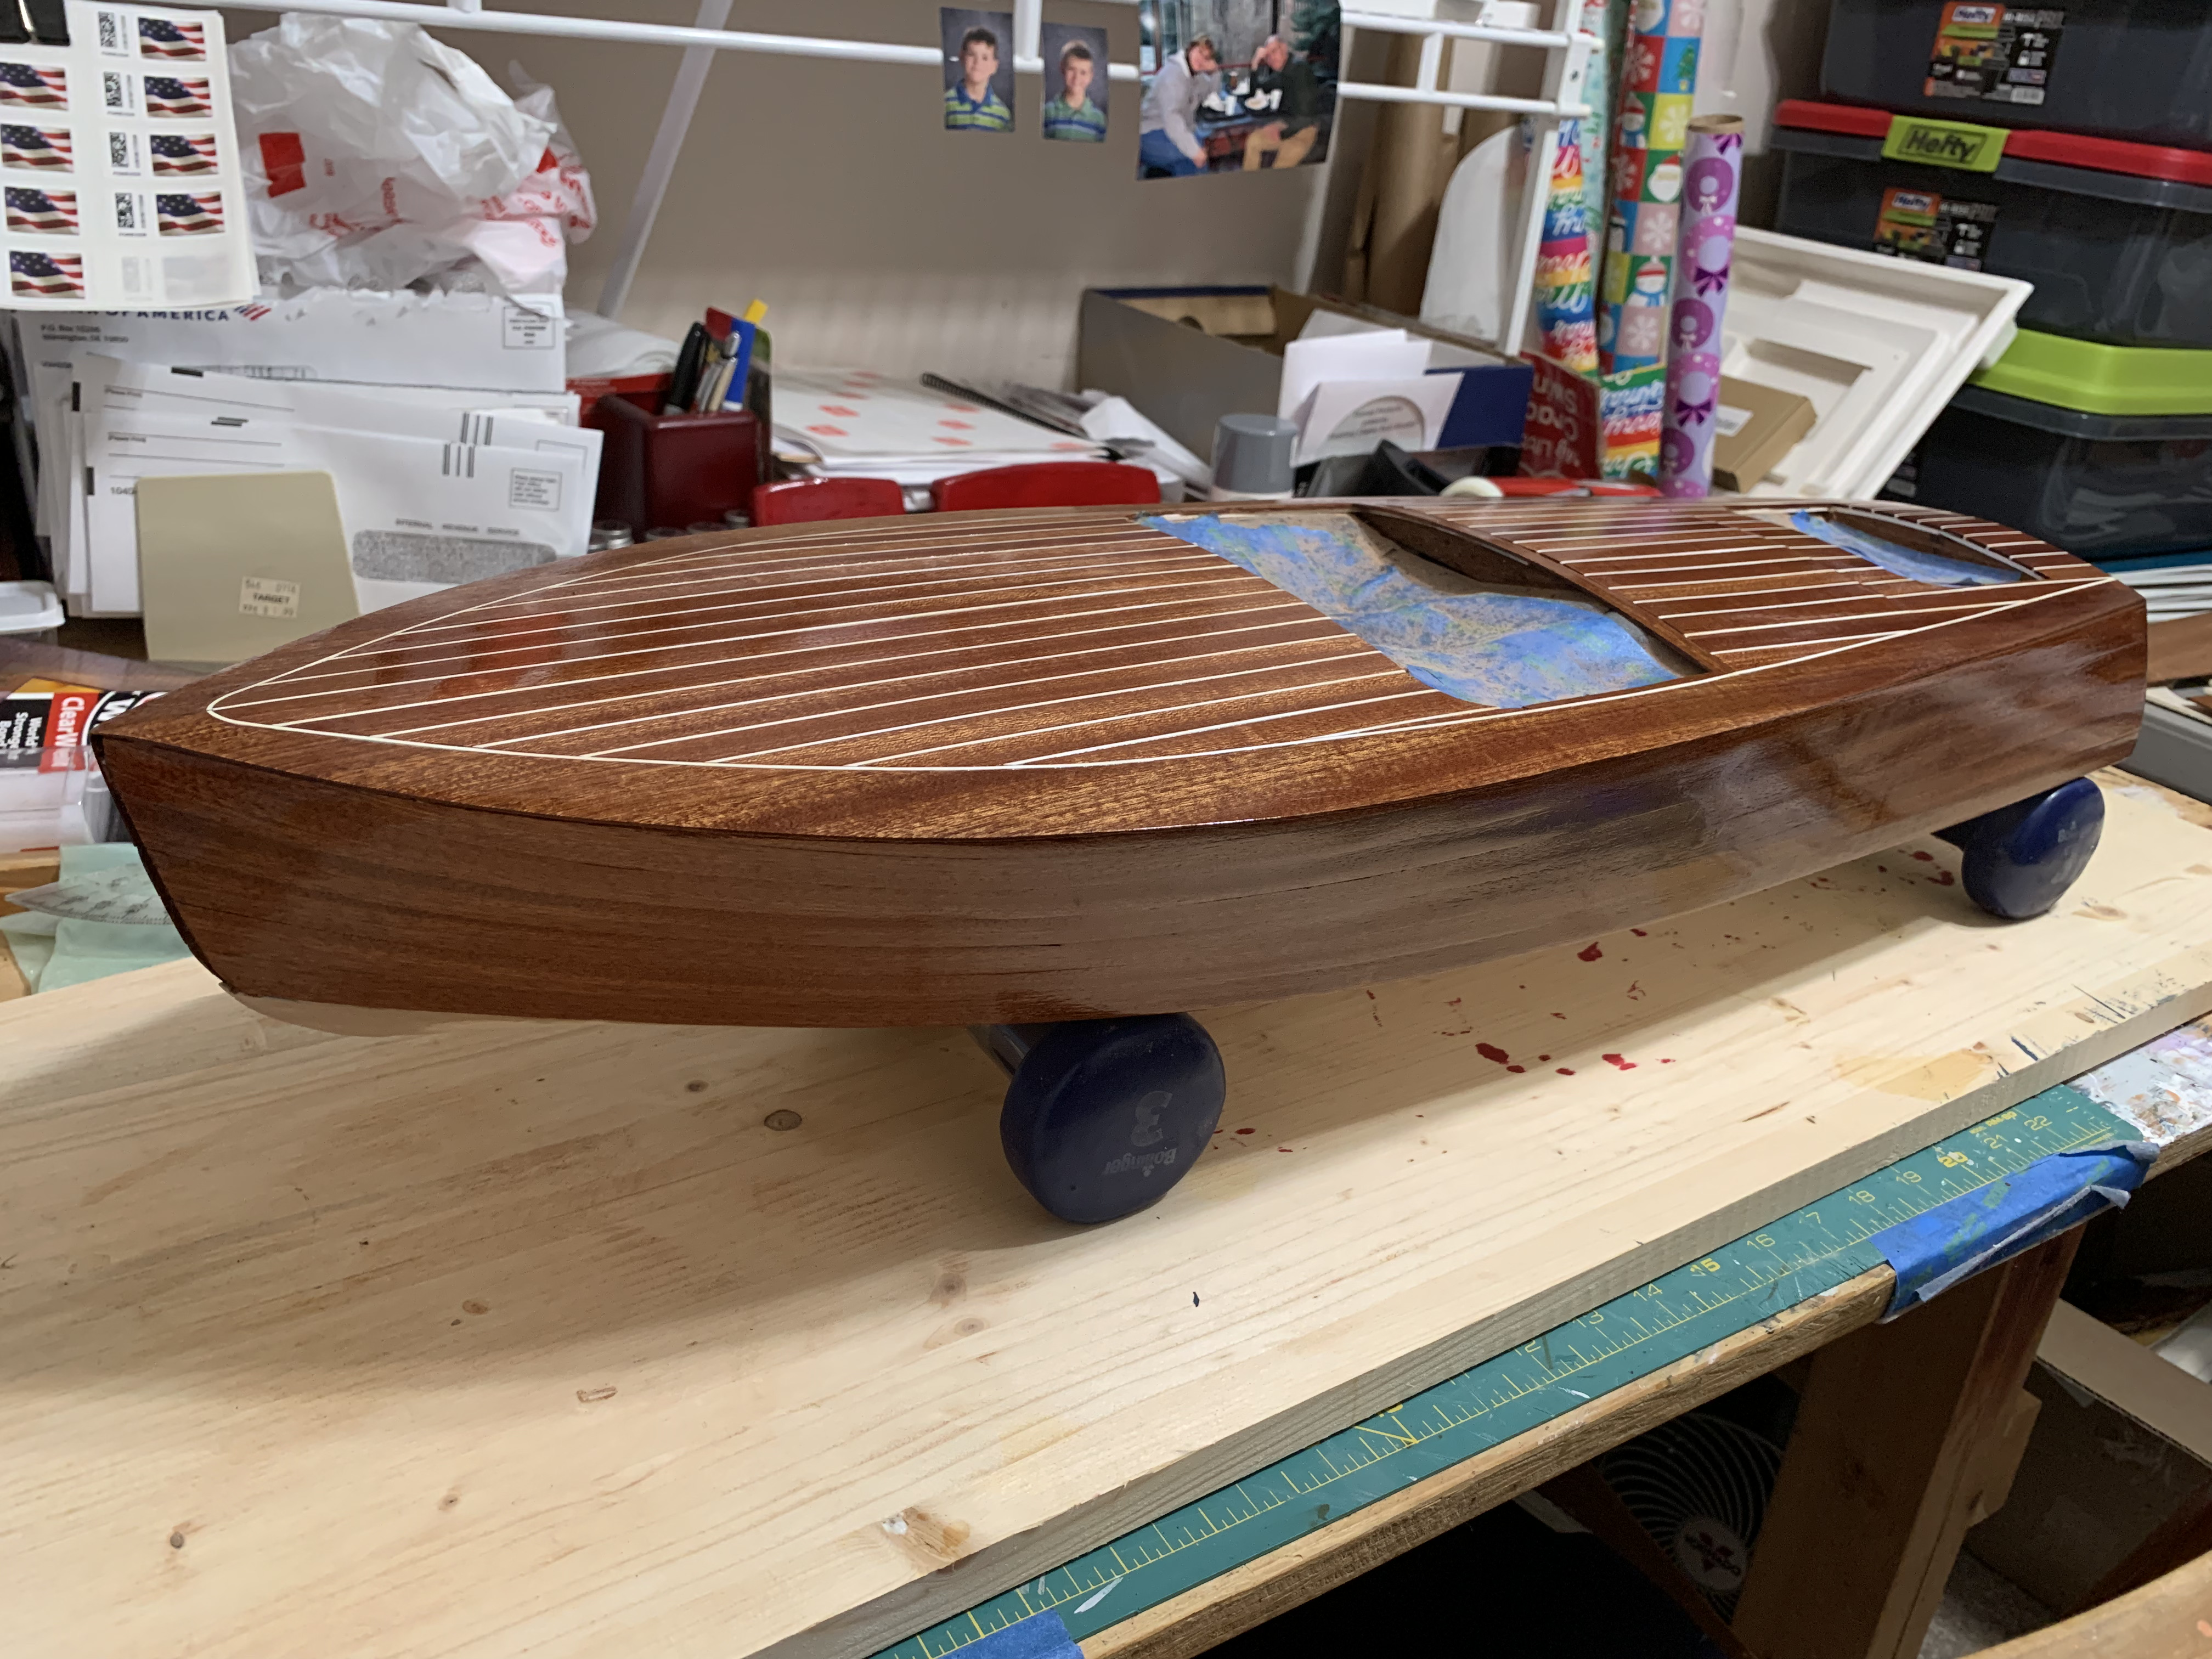
Once this last coat was fully dry, I ran my hands over the shiny finish and was pleased to feel an almost furniture-like smoothness.
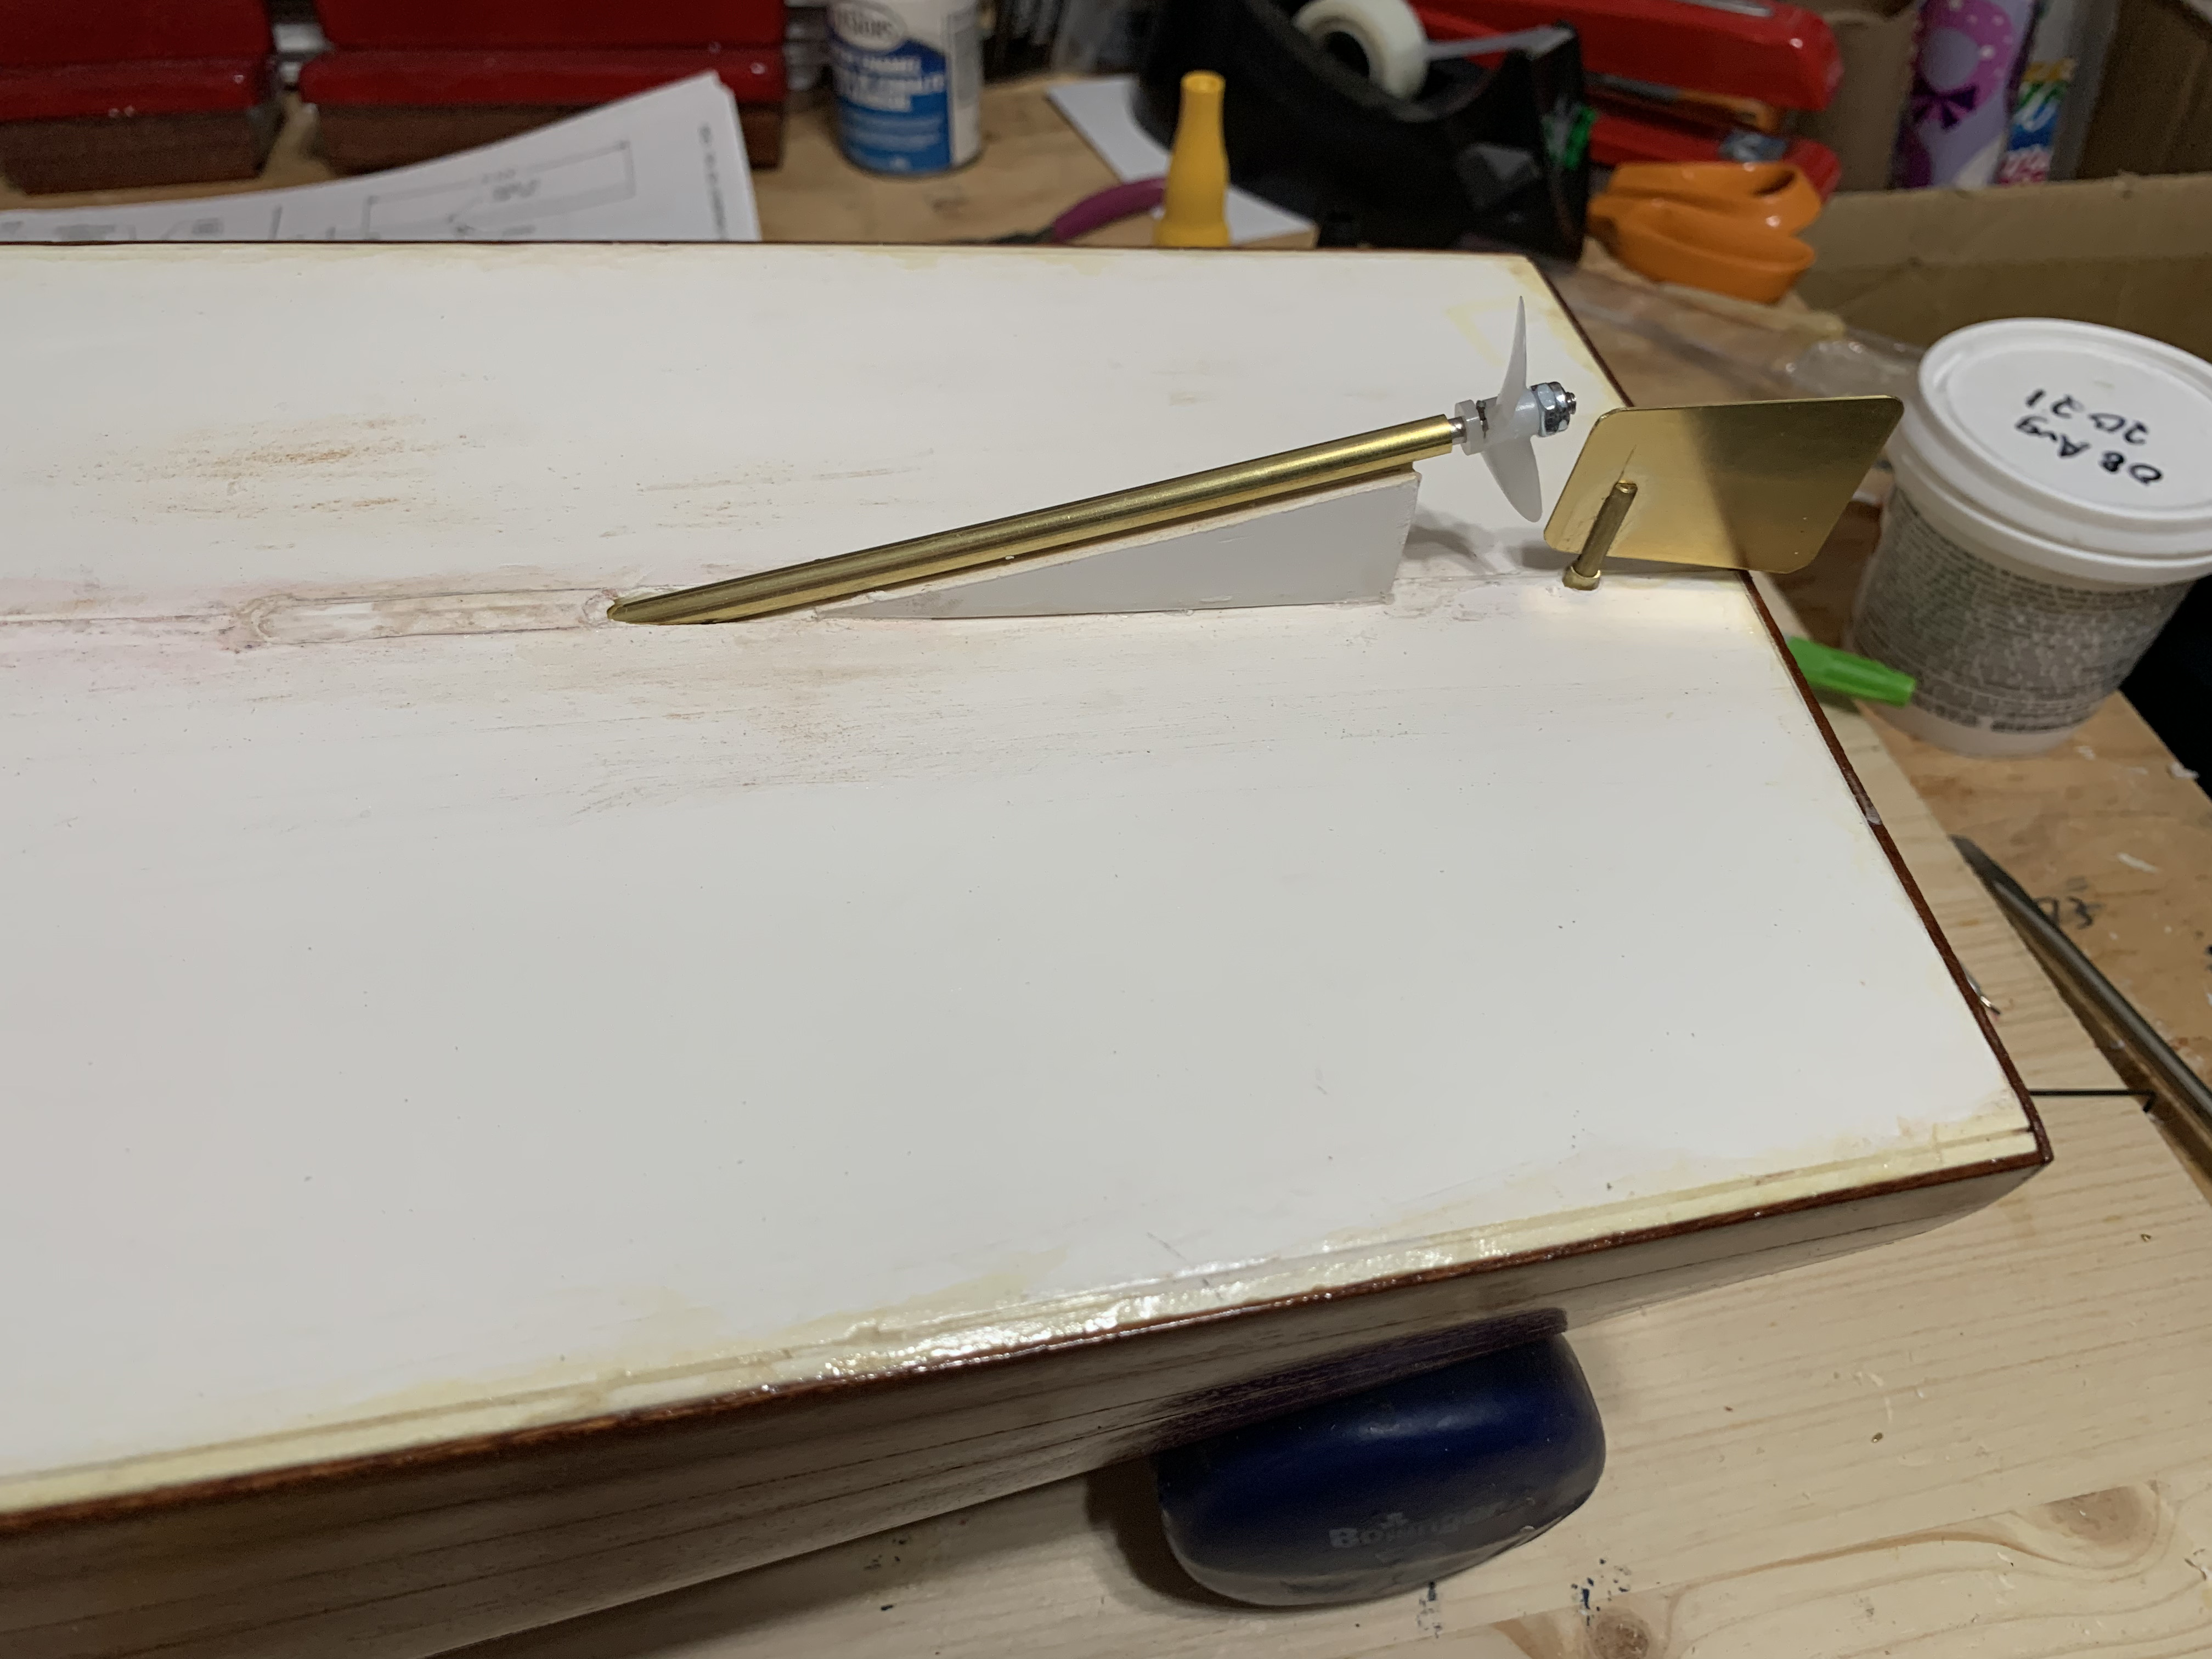
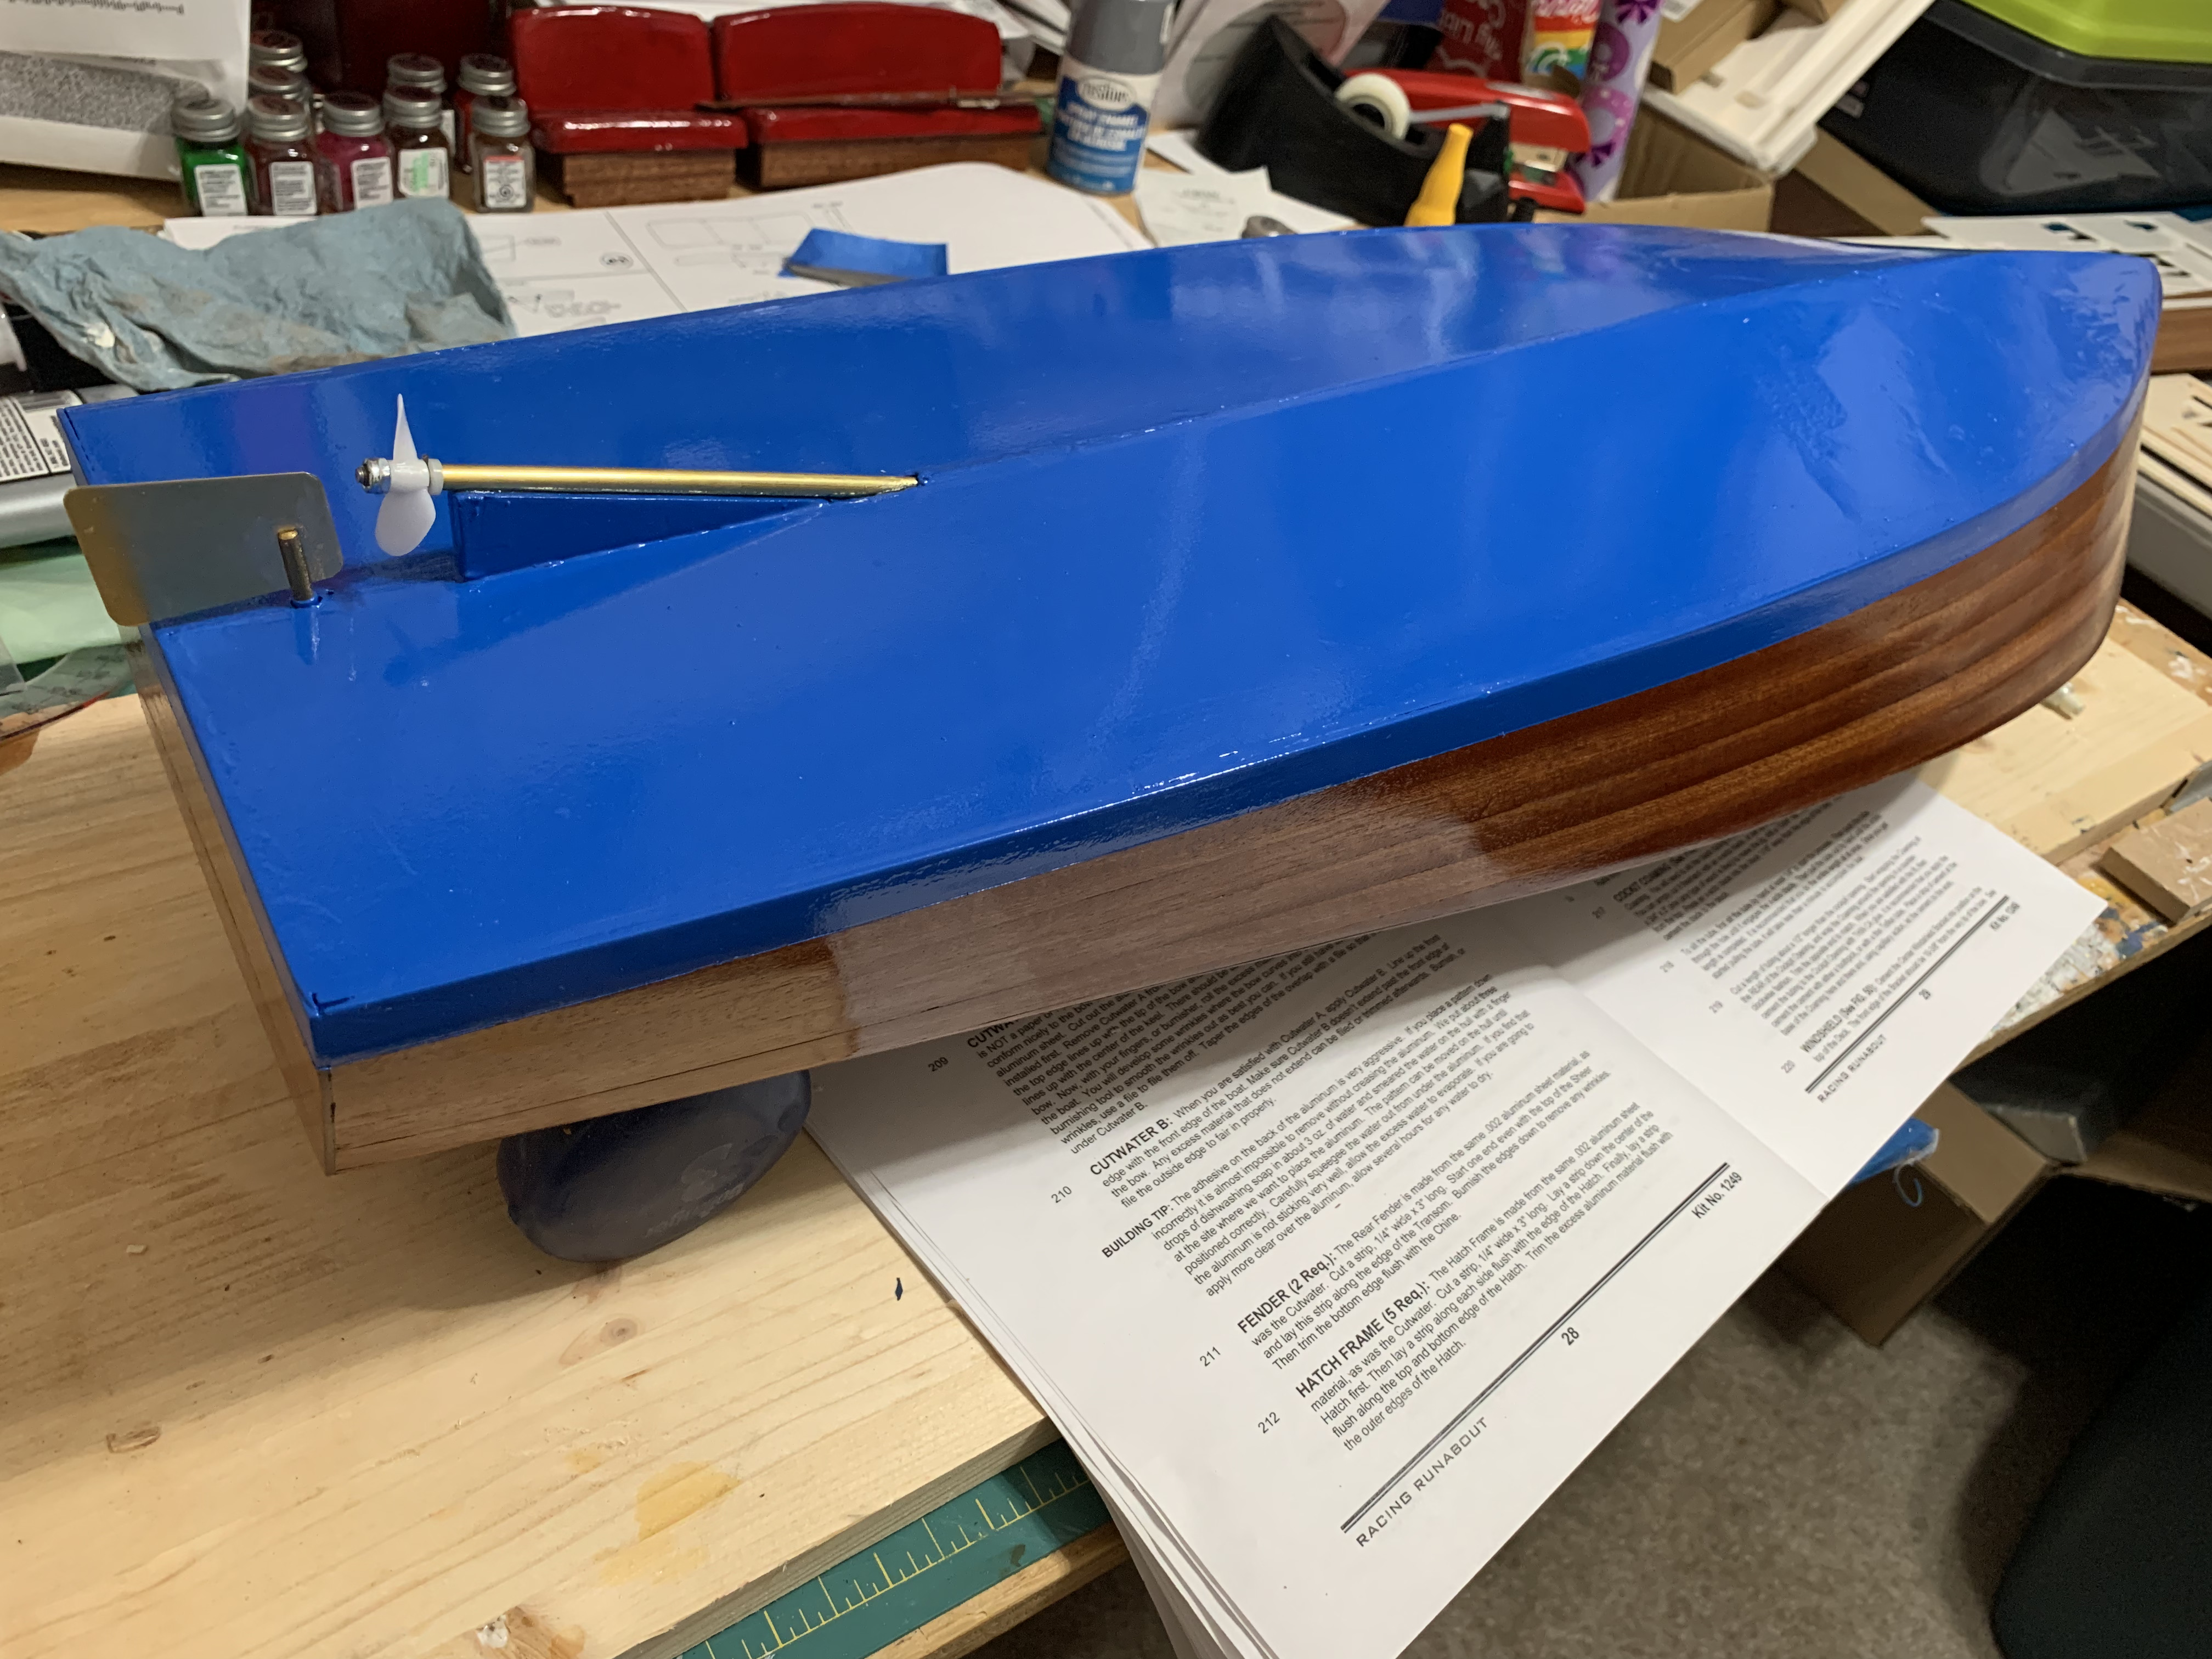
The next major steps involved installing the RC running hardware. Although I was not making my boat a running model, I still had to follow some of the instructions as I still needed to install the external hardware—the rudder and propeller. To do so, I had to learn a few more nautical terms such as stuffing box and a skeg.
In order to insert the stuffing box (which ironically is not a square box but a round tube that houses the propeller drive shaft), I had to cut a large hole in the bottom of the boat, that then had to be filled in. The skeg is the triangular shaped piece that the stuffing box rests on to provide the proper drive angle. Simply drilling a hole was all that was needed to insert the rudder into its shaft.
I read online that the bottom of the actual boat was often painted to the customer’s desired color. Since blue is my favorite color, I chose a “Sail Blue” shade aerosol paint.
Since I was going to use spray paint, I first had to lay down blue painter’s tape along the sides and back of the boat to delineate the “water line” where the hull would be painted. I then had to tape newspaper over the rest of the boat to prevent paint overspray from getting on my nice and shiny mahogany planking.
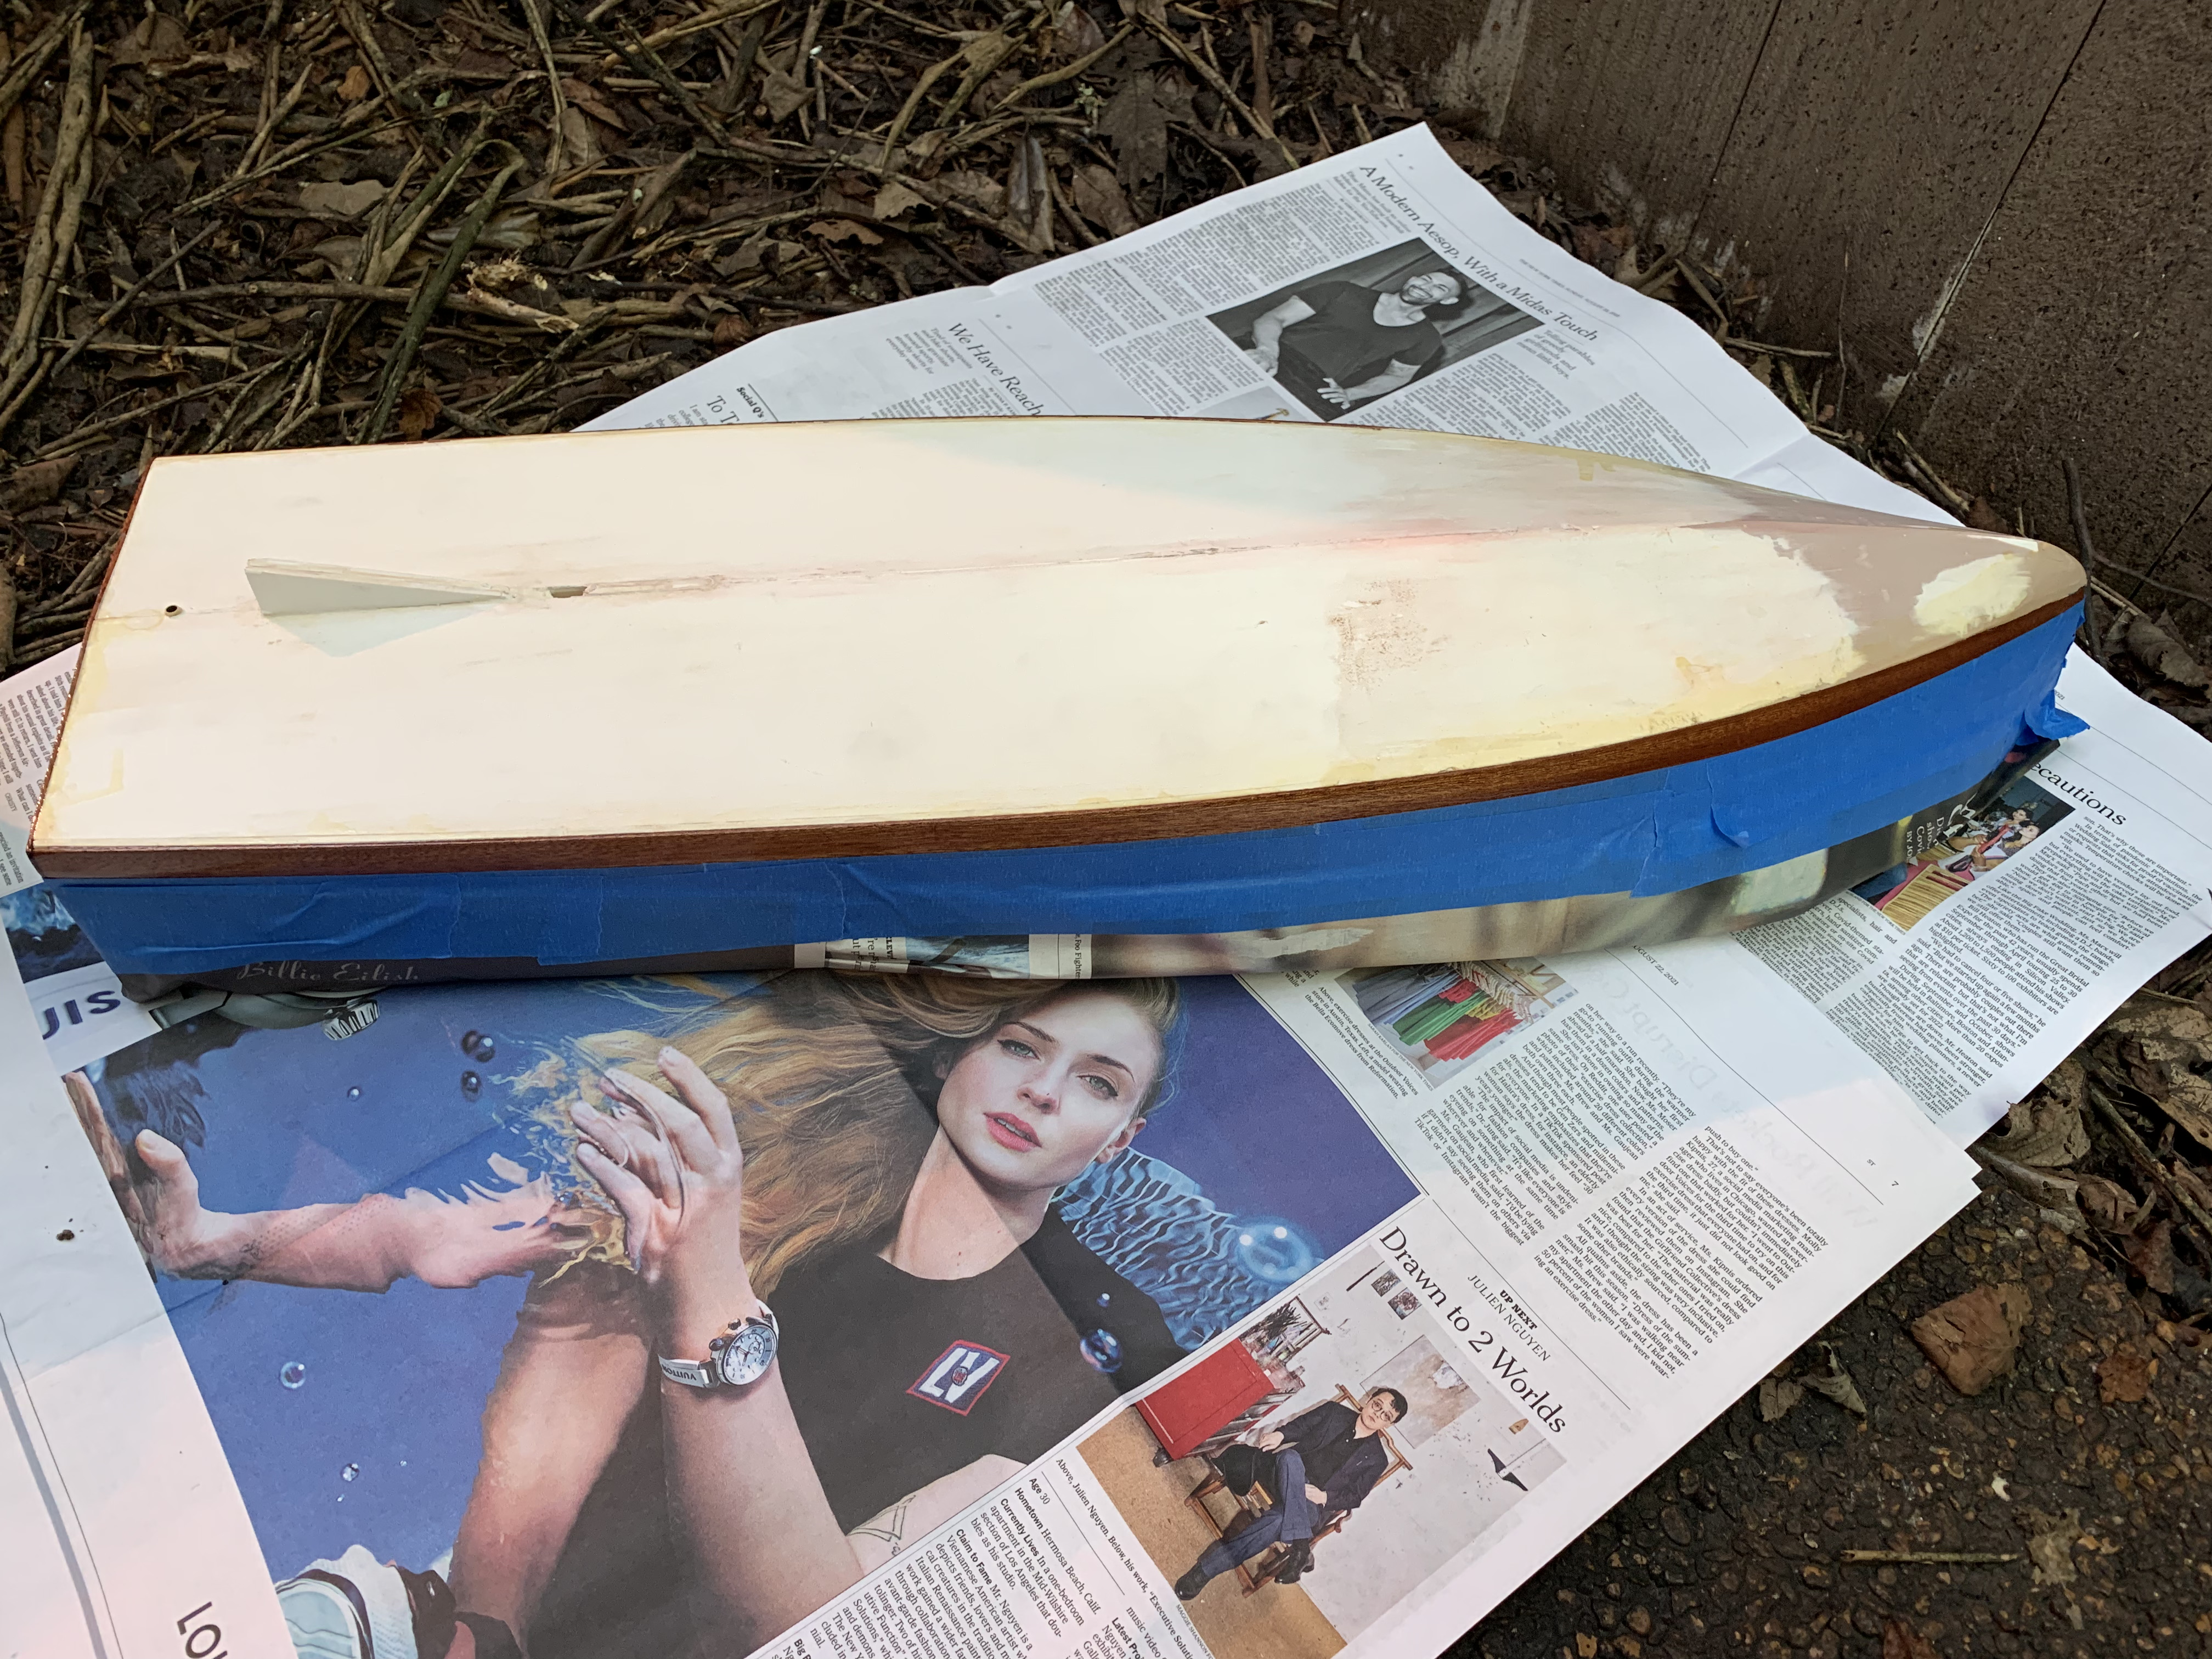
It took four light coats of spray paint over a couple of days to get the shiny, glossy finish I was looking for. After letting it dry overnight, I carefully removed the tape and newspaper and was pleased to see a perfectly straight line with only a couple of small “bleed throughs” that I easily scraped off. Reinstalling the propeller and rudder gave me the finished bottom.
While I had been waiting for the paint to dry between coats, I worked ahead getting the remaining pieces painted and ready to install in the front cockpit. With these in place, I reinserted the seats and had the cockpits complete but for the black coaming that would run along the cockpit edges.
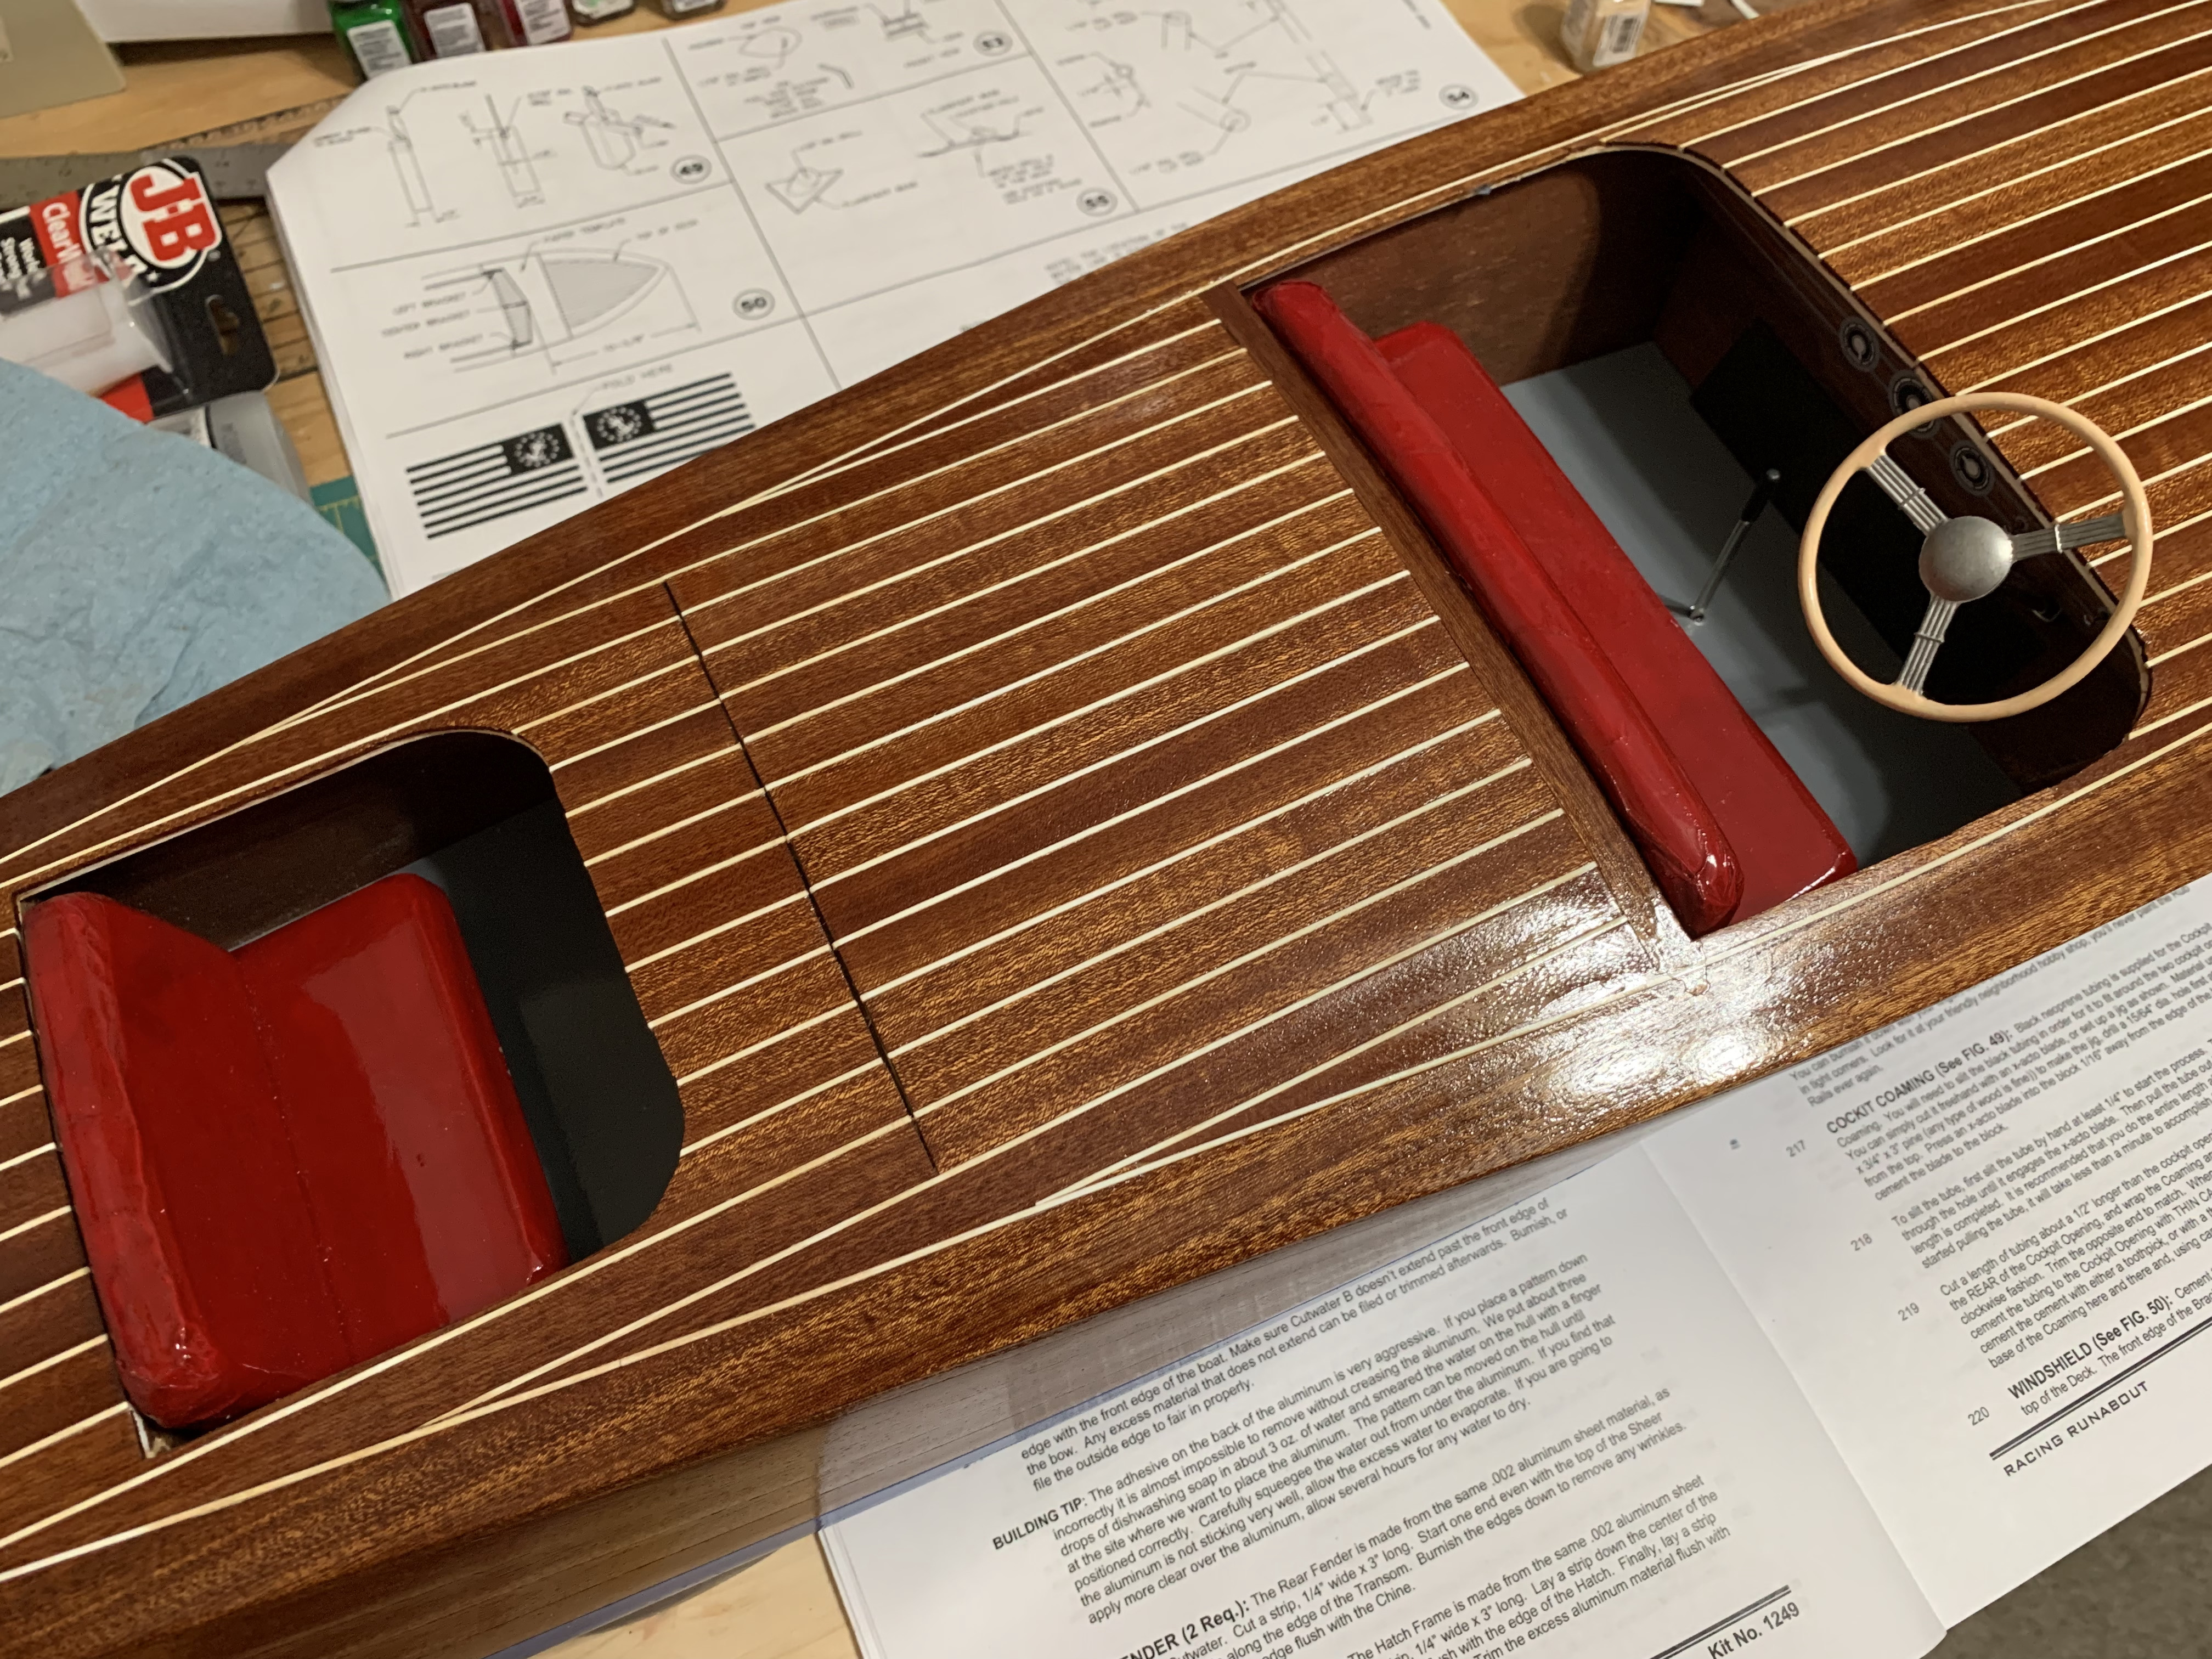
The final fitting out involved attaching a number of different materials but several of these assembly steps presented me with extreme frustrations. The plastic rub rail, the material that prevents the hull from rubbing against the dock, was so coiled up from being inside the box for who knows how long, that I could never get it uncoiled. I finally gave up on it and went to a hobby store and bought a different material that came in straight lengths.
The jackstaff and flagstaff were made from tiny dowel rods, one only 1/8 of inch in diameter. The instructions indicated you needed to drill a 1/16-inch hole in the end to accept a 1/16-inch brass rod. That would mean there would be 1/32 of inch of dowel left all around the 1/16 inch hole, about twice the thickness of an eggshell. My manual attempt to drill the hole failed futilely and so after buying another dowel rod, I was able to accomplish this thanks to having a drill press. I am not sure of any other way this could have been done.
With the most challenging steps complete, I managed to struggle through attaching the remaining fittings. For some of these fittings, I had to drill a hole in my gorgeous hull to sink the pin on the bottom of the fitting. I glued the last pieces onto the boat on the 20th of September, just a little more than seven months after I started. I immediately christened her the Foxy Lady, a seemingly appropriate name for a red mahogany wooden classic boat. Then it was outside for her first finished photos.

This was far and above, the most challenging modelling experience I have ever had in my 50+ years of building miniature models. Multiple times, I was on the verge of giving up as I became so frustrated, but I managed to struggle through. And I am glad I did because it is also turned out to be the most beautiful model I have ever built.

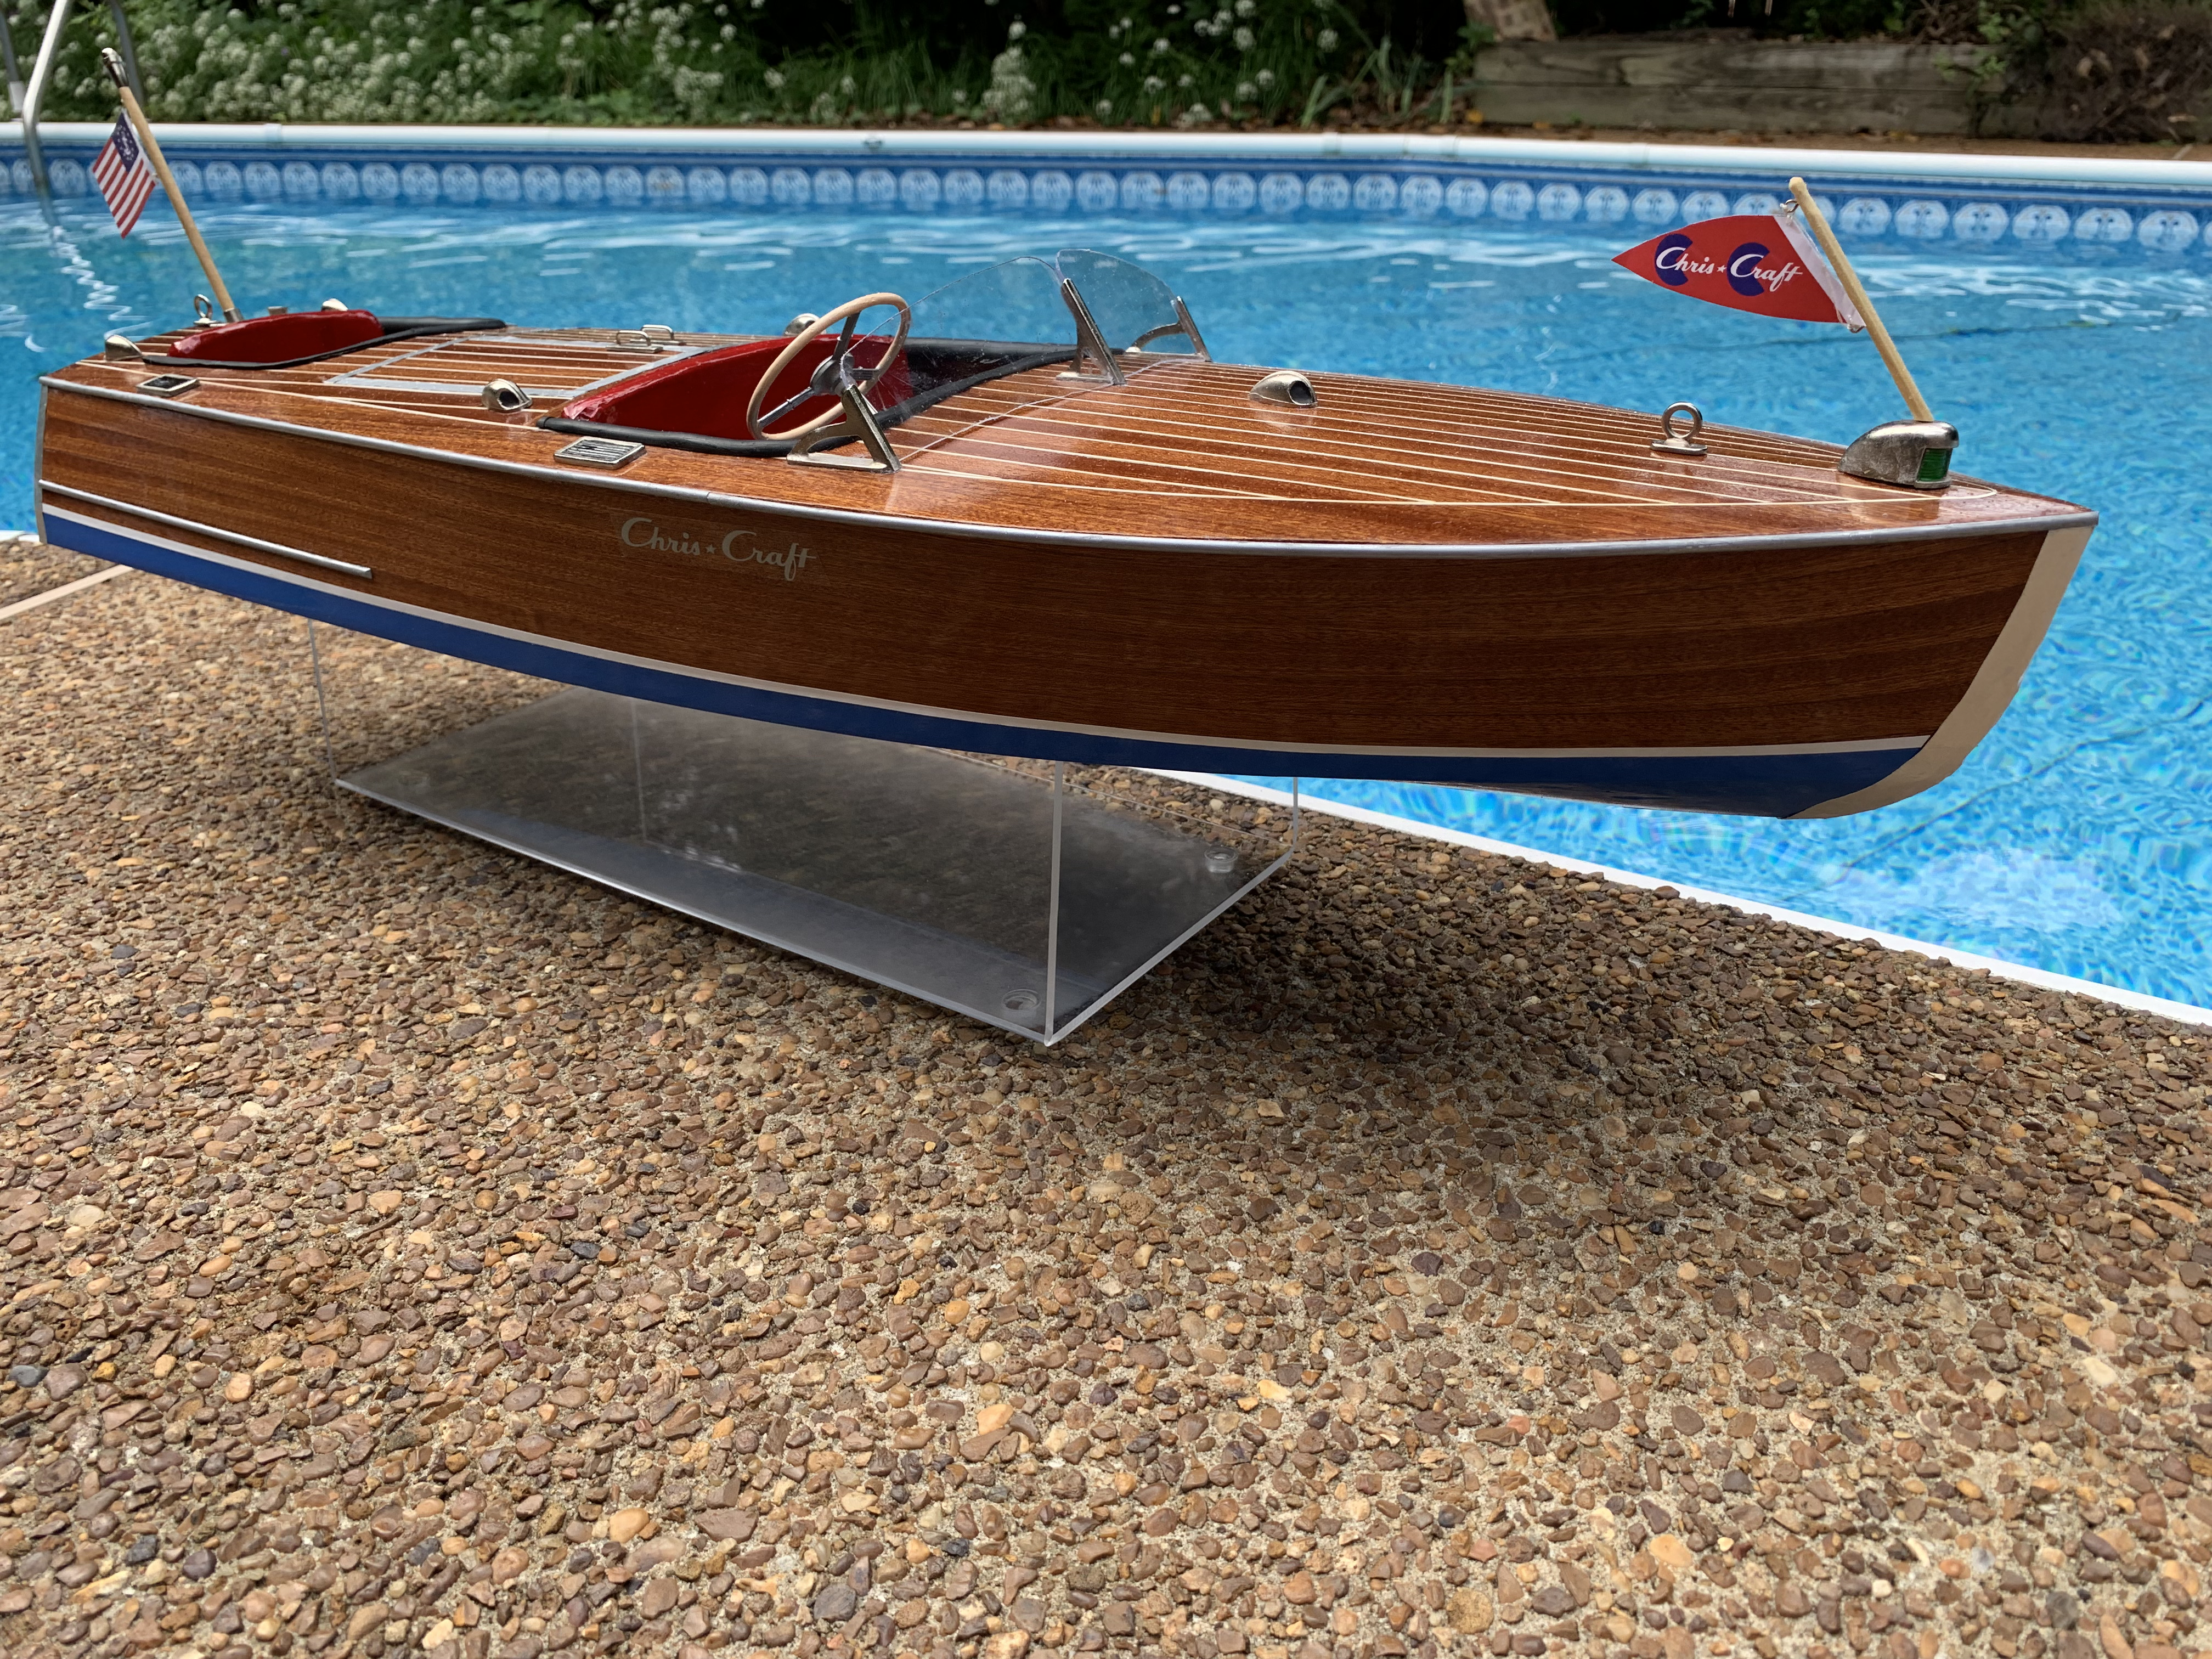
Finally finishing it really gave me a tremendous new appreciation for the modelers who had crafted historic ship models from scratch—the miniature ships that I have enjoyed seeing in museums over the years. In fact, it is probably having seen these classics that prompted me to actually take on this model of a classic boat from my own lifetime.
While extremely pleased with my end result, I would not liken it to be a “museum quality” model. Nevertheless, I will proudly display it in my home, and I will be happy to show it off to anyone. But I think in the future, I will forgo any other wooden boat models and stick to building doll houses, which I now have a request for another one—my fifth to build—from my niece for her daughter, once she is old enough.

Categories

Good story. Beautiful boat!
Thanks, I am really proud of it as hard as it was to build.
Wow, it’s beautiful! I love the wood color! I know the boys will be impressed.
Thanks, I will gladly show it off to them!