
A Classic Boat Model – Finally, Some Planking
Continued from: A Classic Boat Model – Taking Shape
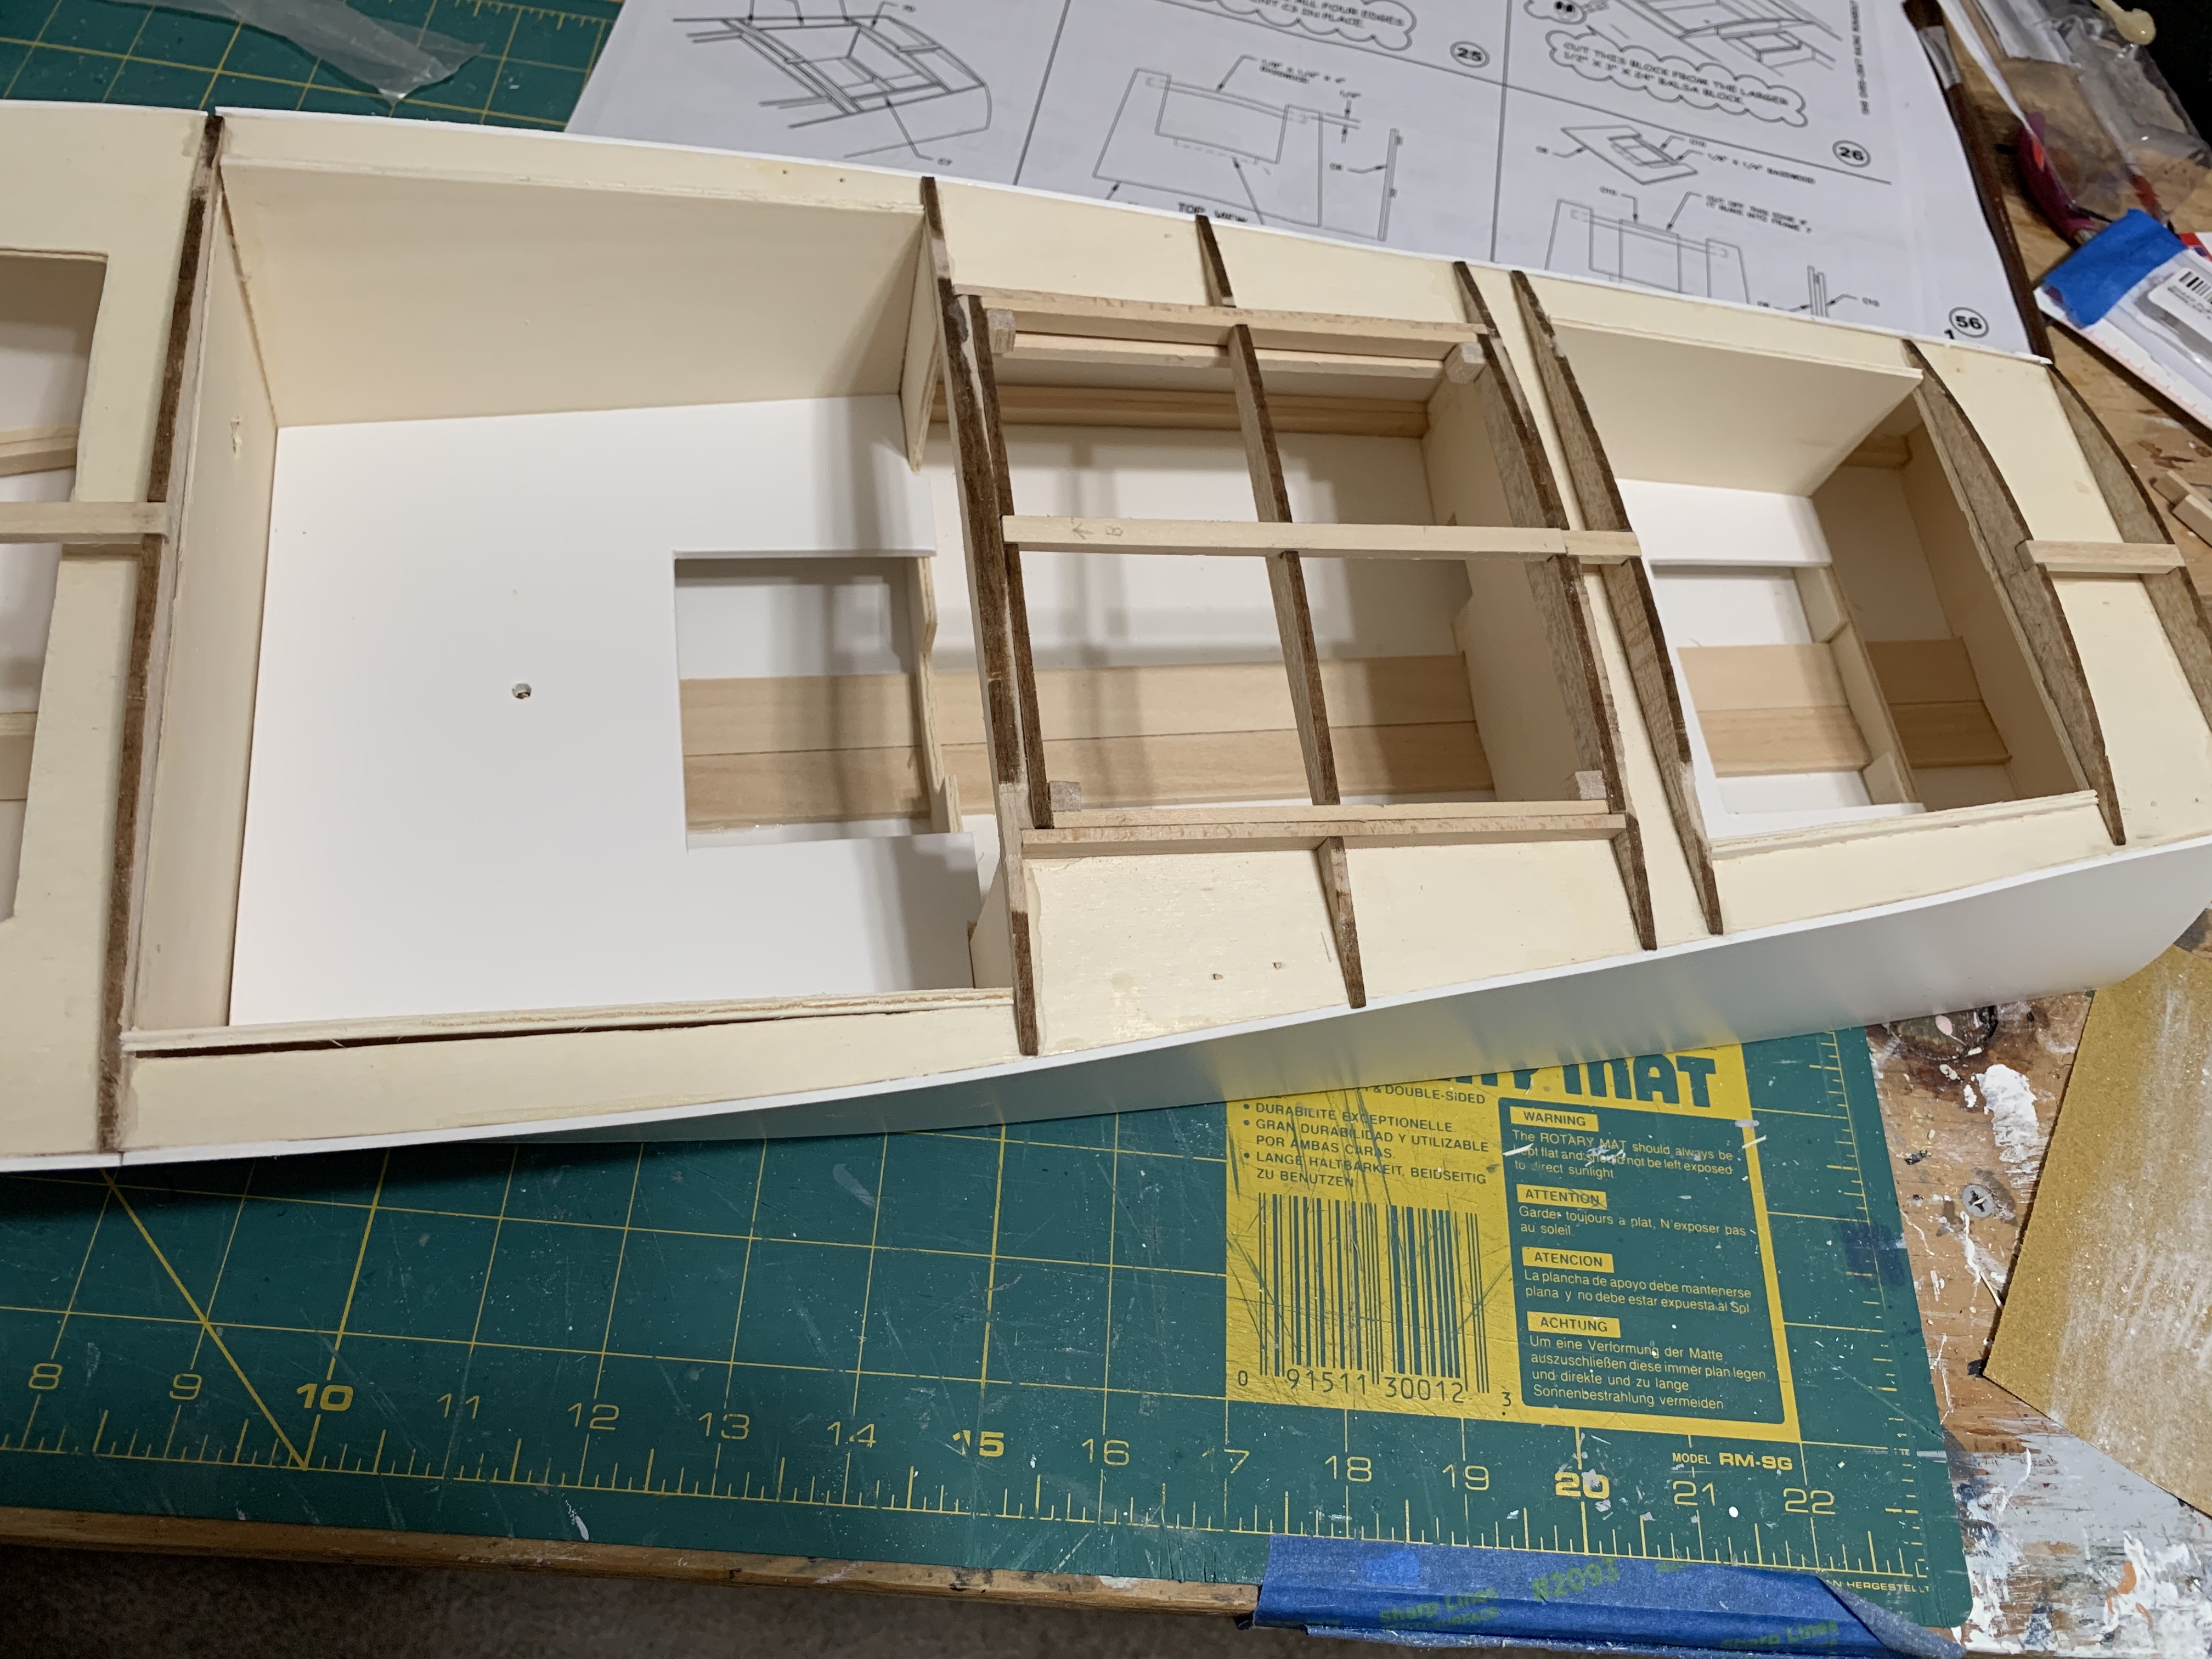
After gluing on the cockpit side walls but before cementing the PVC floor in place or the other cockpit pieces, I skipped to the next page of the instructions and found the next section of the instructions was “Stain and Paint the Front and Rear Cockpit.” Wow, glad I stopped when I did!
I enjoy painting and I am a perfectionist, but my talents and my abilities typically fall somewhat short of precision (on home painting jobs, I use lots and lots of blue painter’s tape to get nice straight paint lines). When building a model, my preferred painting approach is to paint individual parts BEFORE assembly rather than afterwards, so the different parts painted or stained different colors don’t end up with joints where both colors overlap or bleed into each other.
All the visible wooden surfaces inside the two cockpits were supposed to be stained mahogany to match the hull planking which is small strips of mahogany wood. The PVC floors were supposed to be spray painted gray to simulate the non-skid surface of the full-size boat. It was certainly easier to stain the wooden surfaces without worry of getting the stain on the painted floors, which I spray painted all by themselves outside on newspaper before gluing in place.

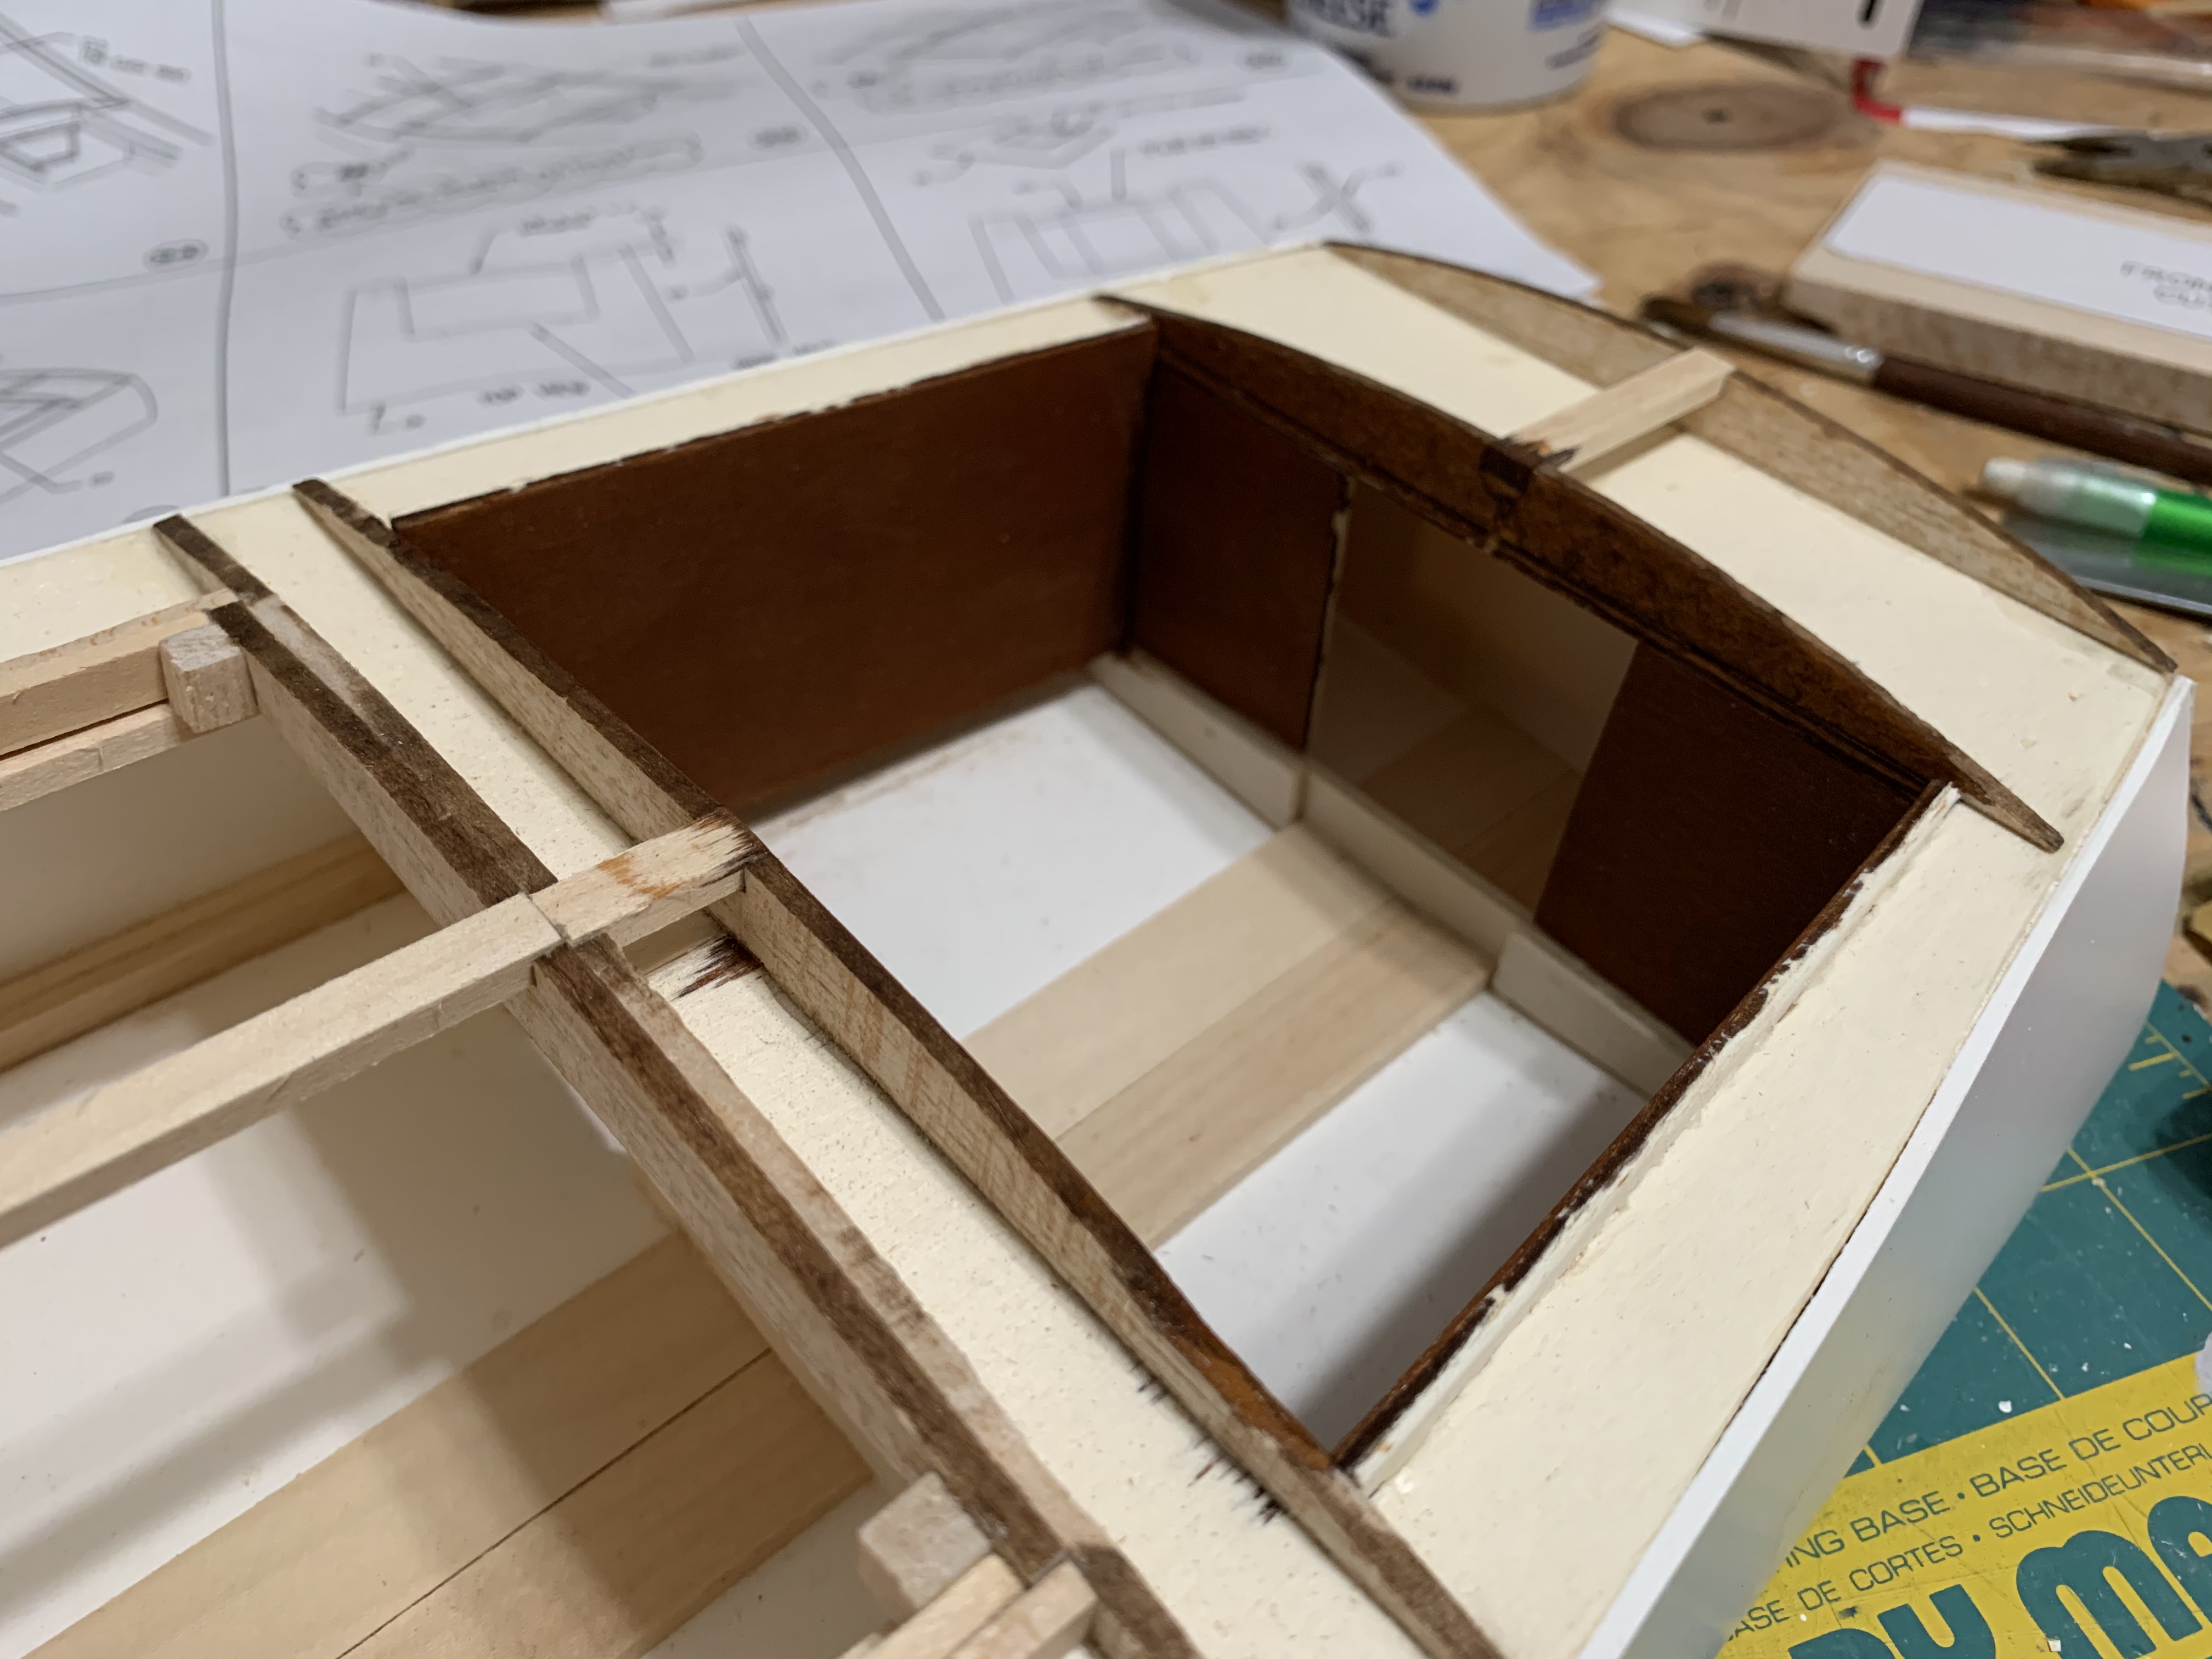
But after I had stained the interior wooden surfaces, I wondered why there was such a large opening in the back of the rear cockpit. When I looked at the size of the rear seat, I realized there was going to be a large unfinished gap left. This might have been to accommodate some of the running hardware for the RC but since I was not going to add that feature, I decided to cut some small squares and add them to close the gap, staining them to match.
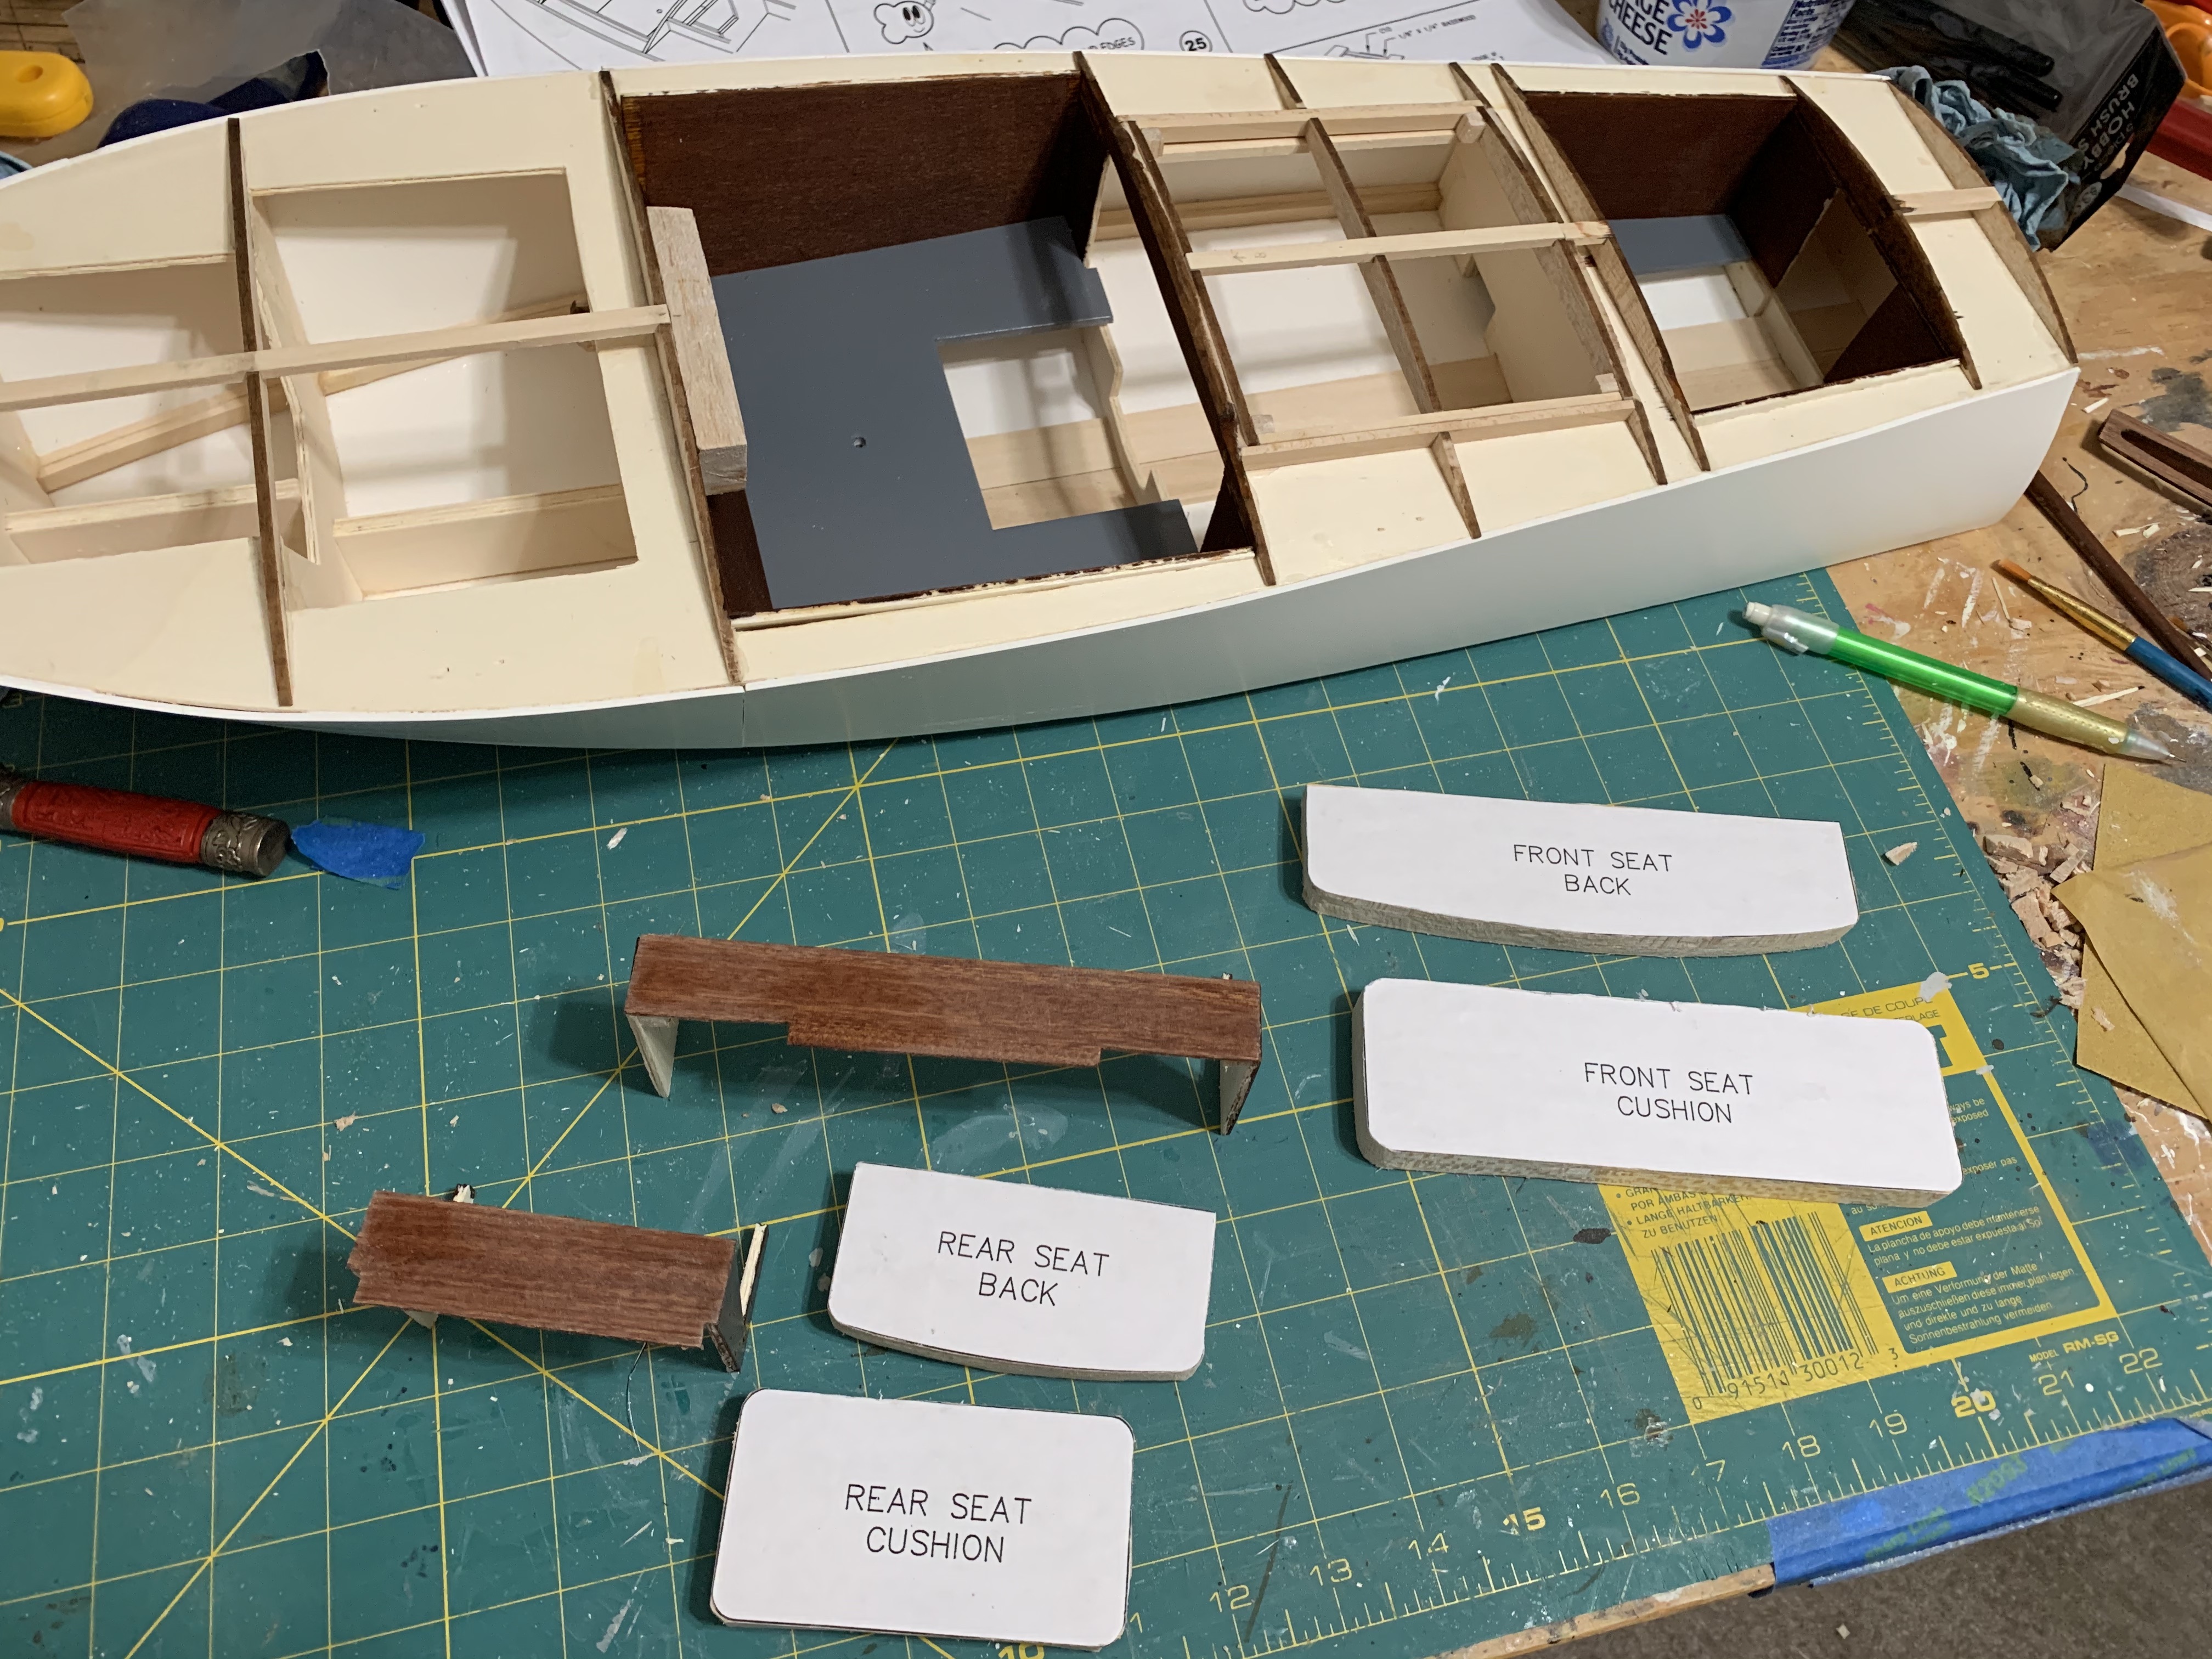
With this discovery solved, I decided to work ahead to finish out the cockpit interiors to ensure I had no other surprises.

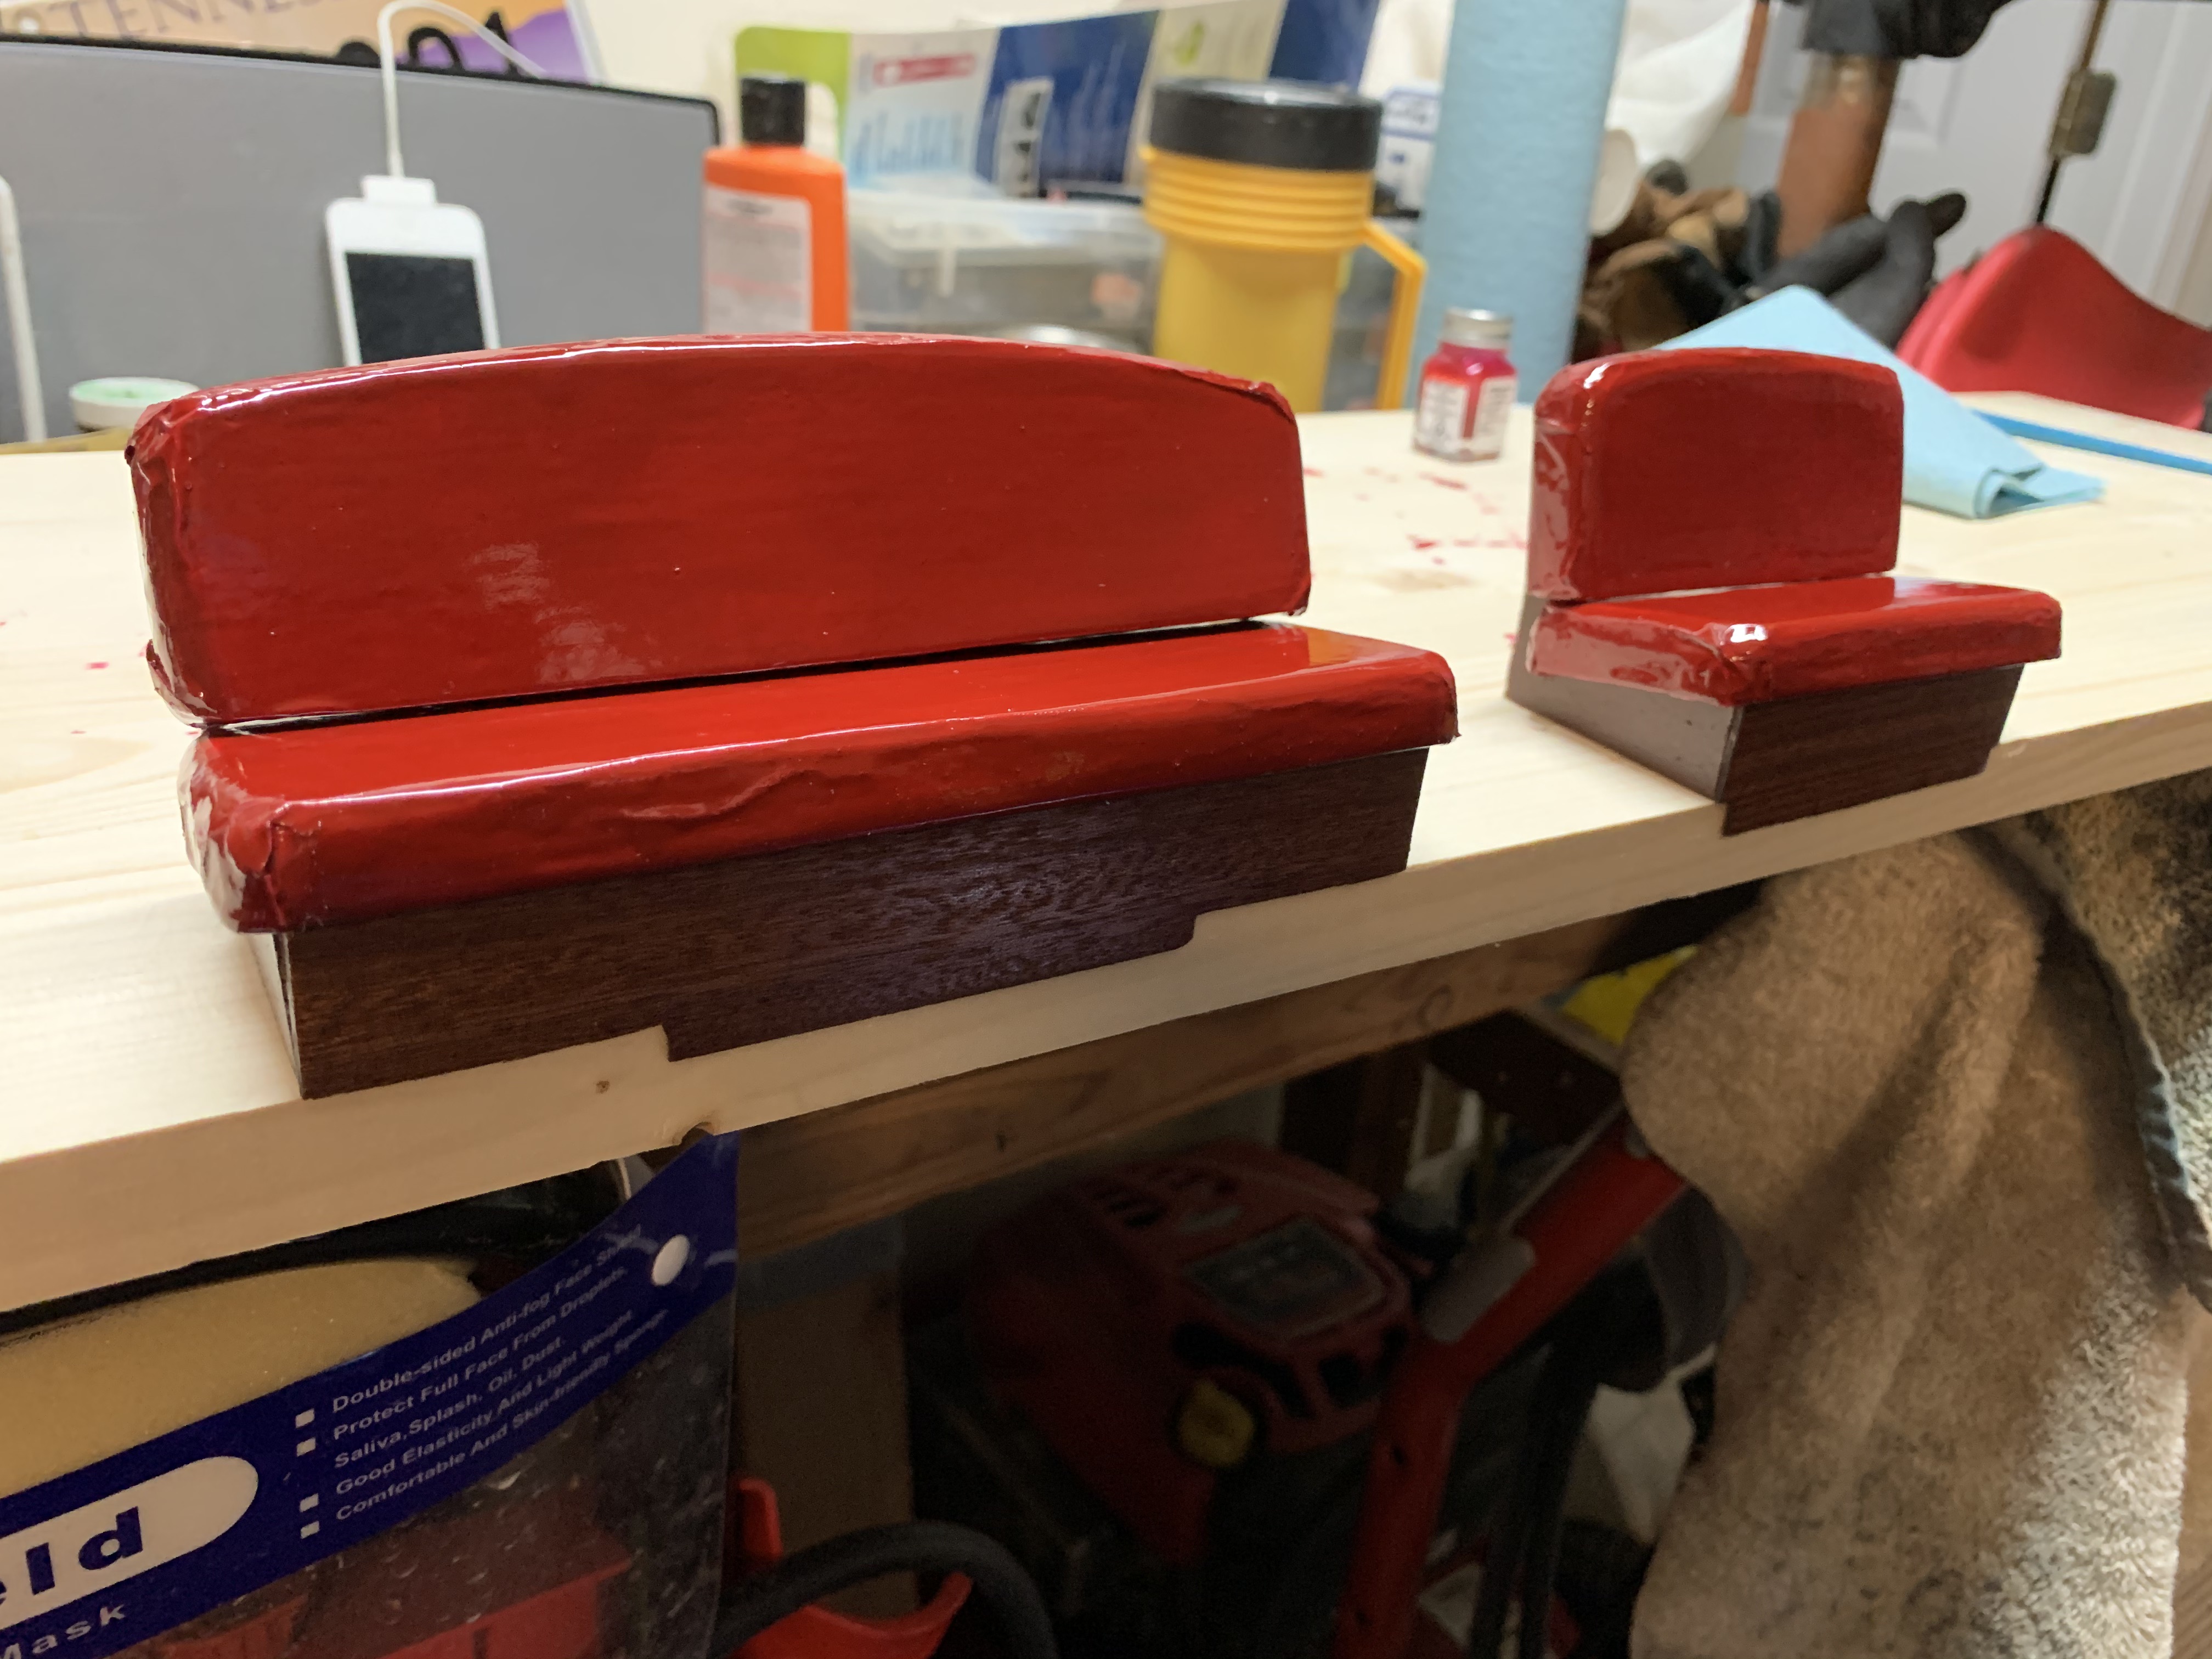
Both the front and rear seats were made of a seat cushion and a seat back that was mounted on a wooden frame. The plans included templates that were used to cut these to size from a ½ inch thick balsa block and then sanded to the correct shape.
After sanding the cutout blocks to shape, there were several steps that included doping and sanding and covering with airplane tissue followed by more sanding and doping prior to painting. I always thought the term “dope” was unusual for this type of model paint but that was what I had used many years ago on the wooden airplane models I had built. All the steps outlined were intended to give the seats a “simulated leather look.” I’d say not bad.
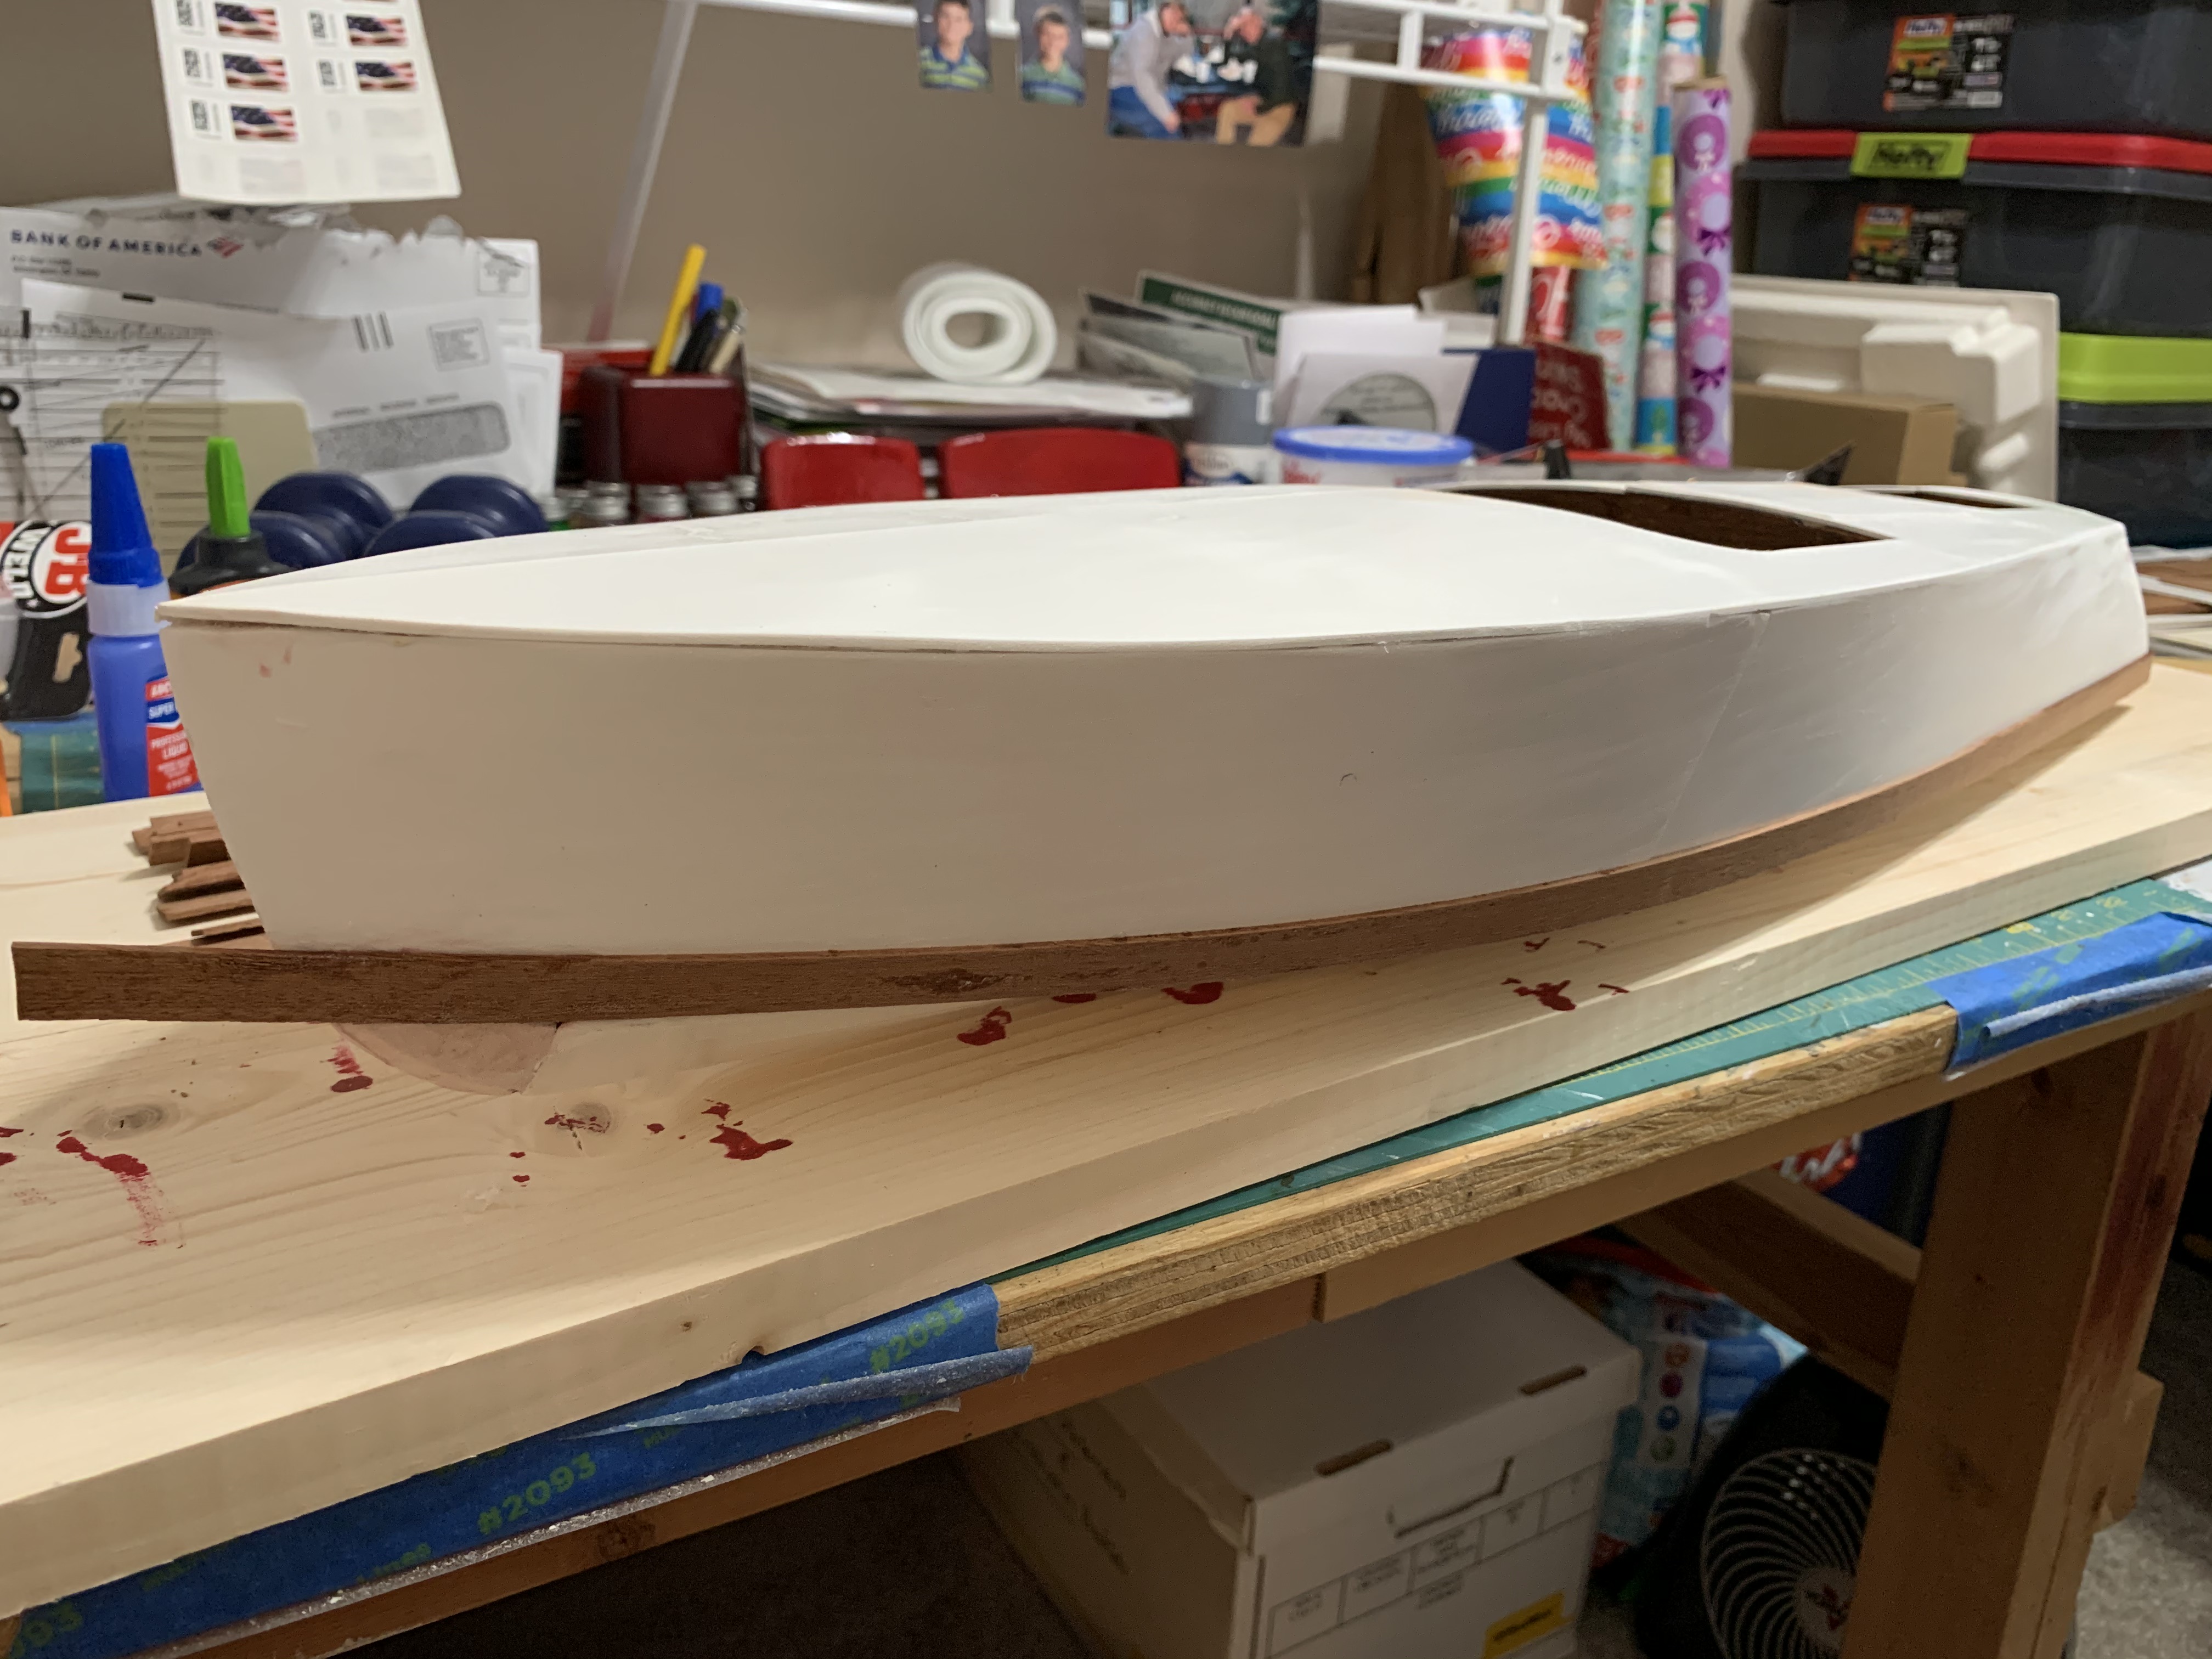
With the cockpits nearly complete and no other surprises, I proceeded to the next step of adding the upper deck sub-planking. Since there were no unusual contour changes on the deck, gluing the two pieces into place proved much easier than attaching the bottom or sides of the boat. But naturally, there was still some sanding and trimming of this deck sub-planking before what I envisioned would be a really fun step—planking the thin mahogany strips.

In the instructions, there was a note that said, “Now is the time you have been looking forward to, planking the exterior of the hull with the mahogany planks.” I had in fact been looking forward to this step from the very beginning but before starting this process, I first watched a one and half hour video I had purchased from the manufacturer. It gave very helpful advice about attaching the planks to all exterior surfaces of the boat and how to ensure the planks butted up against each other snugly. The video then went on to demonstrate how to fiberglass the boat, a required step if the model was to be run in water.
Since I had made the decision not to make a RC running boat, I would not have to complete these steps. After watching the rest of the video, I was glad I had made that decision as it required about seven layers of three different materials followed by four to five hours of sanding prior to applying the final two finish coats. Whew, what a job!

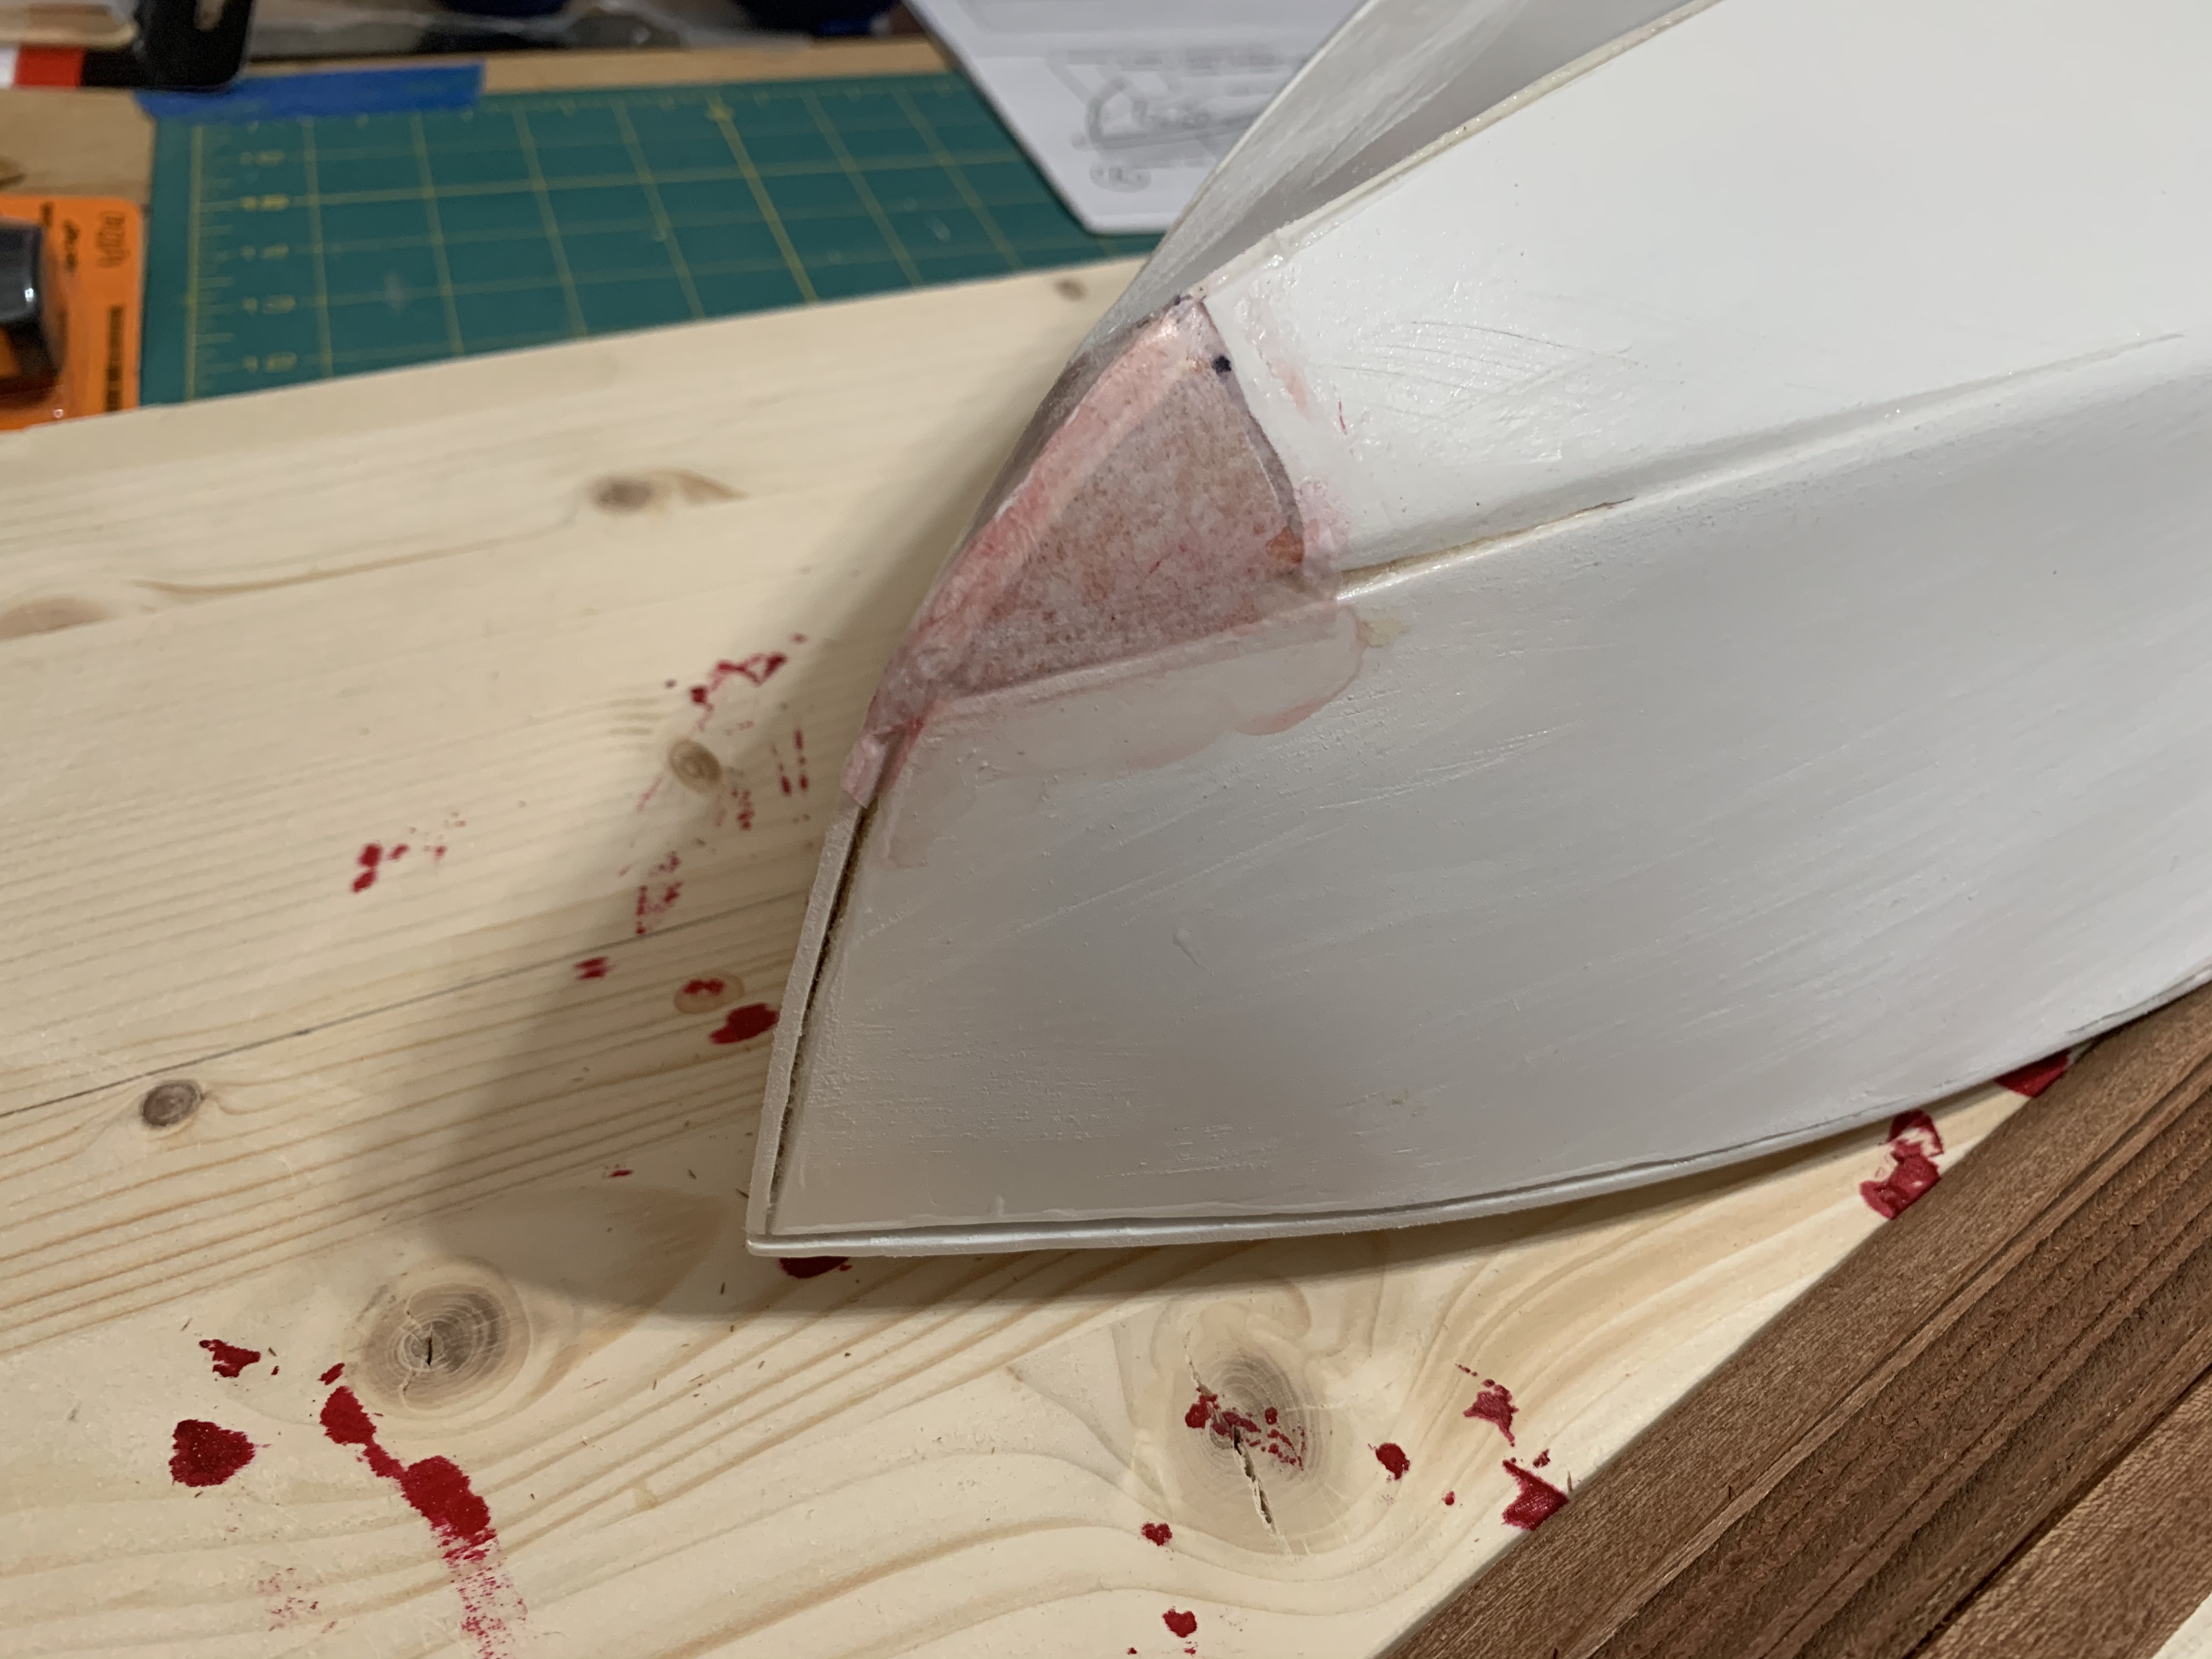
One step I needed to take before planking was to fix this minor deficiency at the bow. The instructions indicated that any voids below the chine could be filled in with Bondo. Instead, I decided to use the technique which was used to finish the seats—applying airplane tissue with several coats of clear dope. This alternate approach seemed to work well although I obviously did not get all the residual red paint off my brush prior to dipping it into the dope.
Although I had been looking forward to this planking of the mahogany strips, after watching the video and seeing all the potential mistakes that could be made during the planking, I was a bit intimidated to start this step. And since I was not going to fiberglass my boat, I didn’t have that technique to cover up any mistakes. Thus, for my build, what I did was what I was going to get.
Overcoming my trepidation, I started by followed the instructions of only applying about 6 inches of CA glue at a time (this time using gel rather than liquid to keep it from running). Starting at the stern, it went on fairly easily but as I approached the bow, the many different directions the plank had to bend to match the contour of the sub-planking caused me to apply pressure in multiple directions at the same time with both my hands. After gluing a bit of my fingers to the plank, I figured out I could hold the plank in place by putting wax paper between the plank and my fingers. Holding it in place for a while, I would lift up my fingers only to find another spot that needed gluing down. But after about 20 minutes, I finally had the first plank in place.
When I started on the second plank, I realized I could use my little clamps to keep the two planks tight to each other. This also eliminated the need for me to hold the plank in place for an extended period of time awaiting the glue to set up.
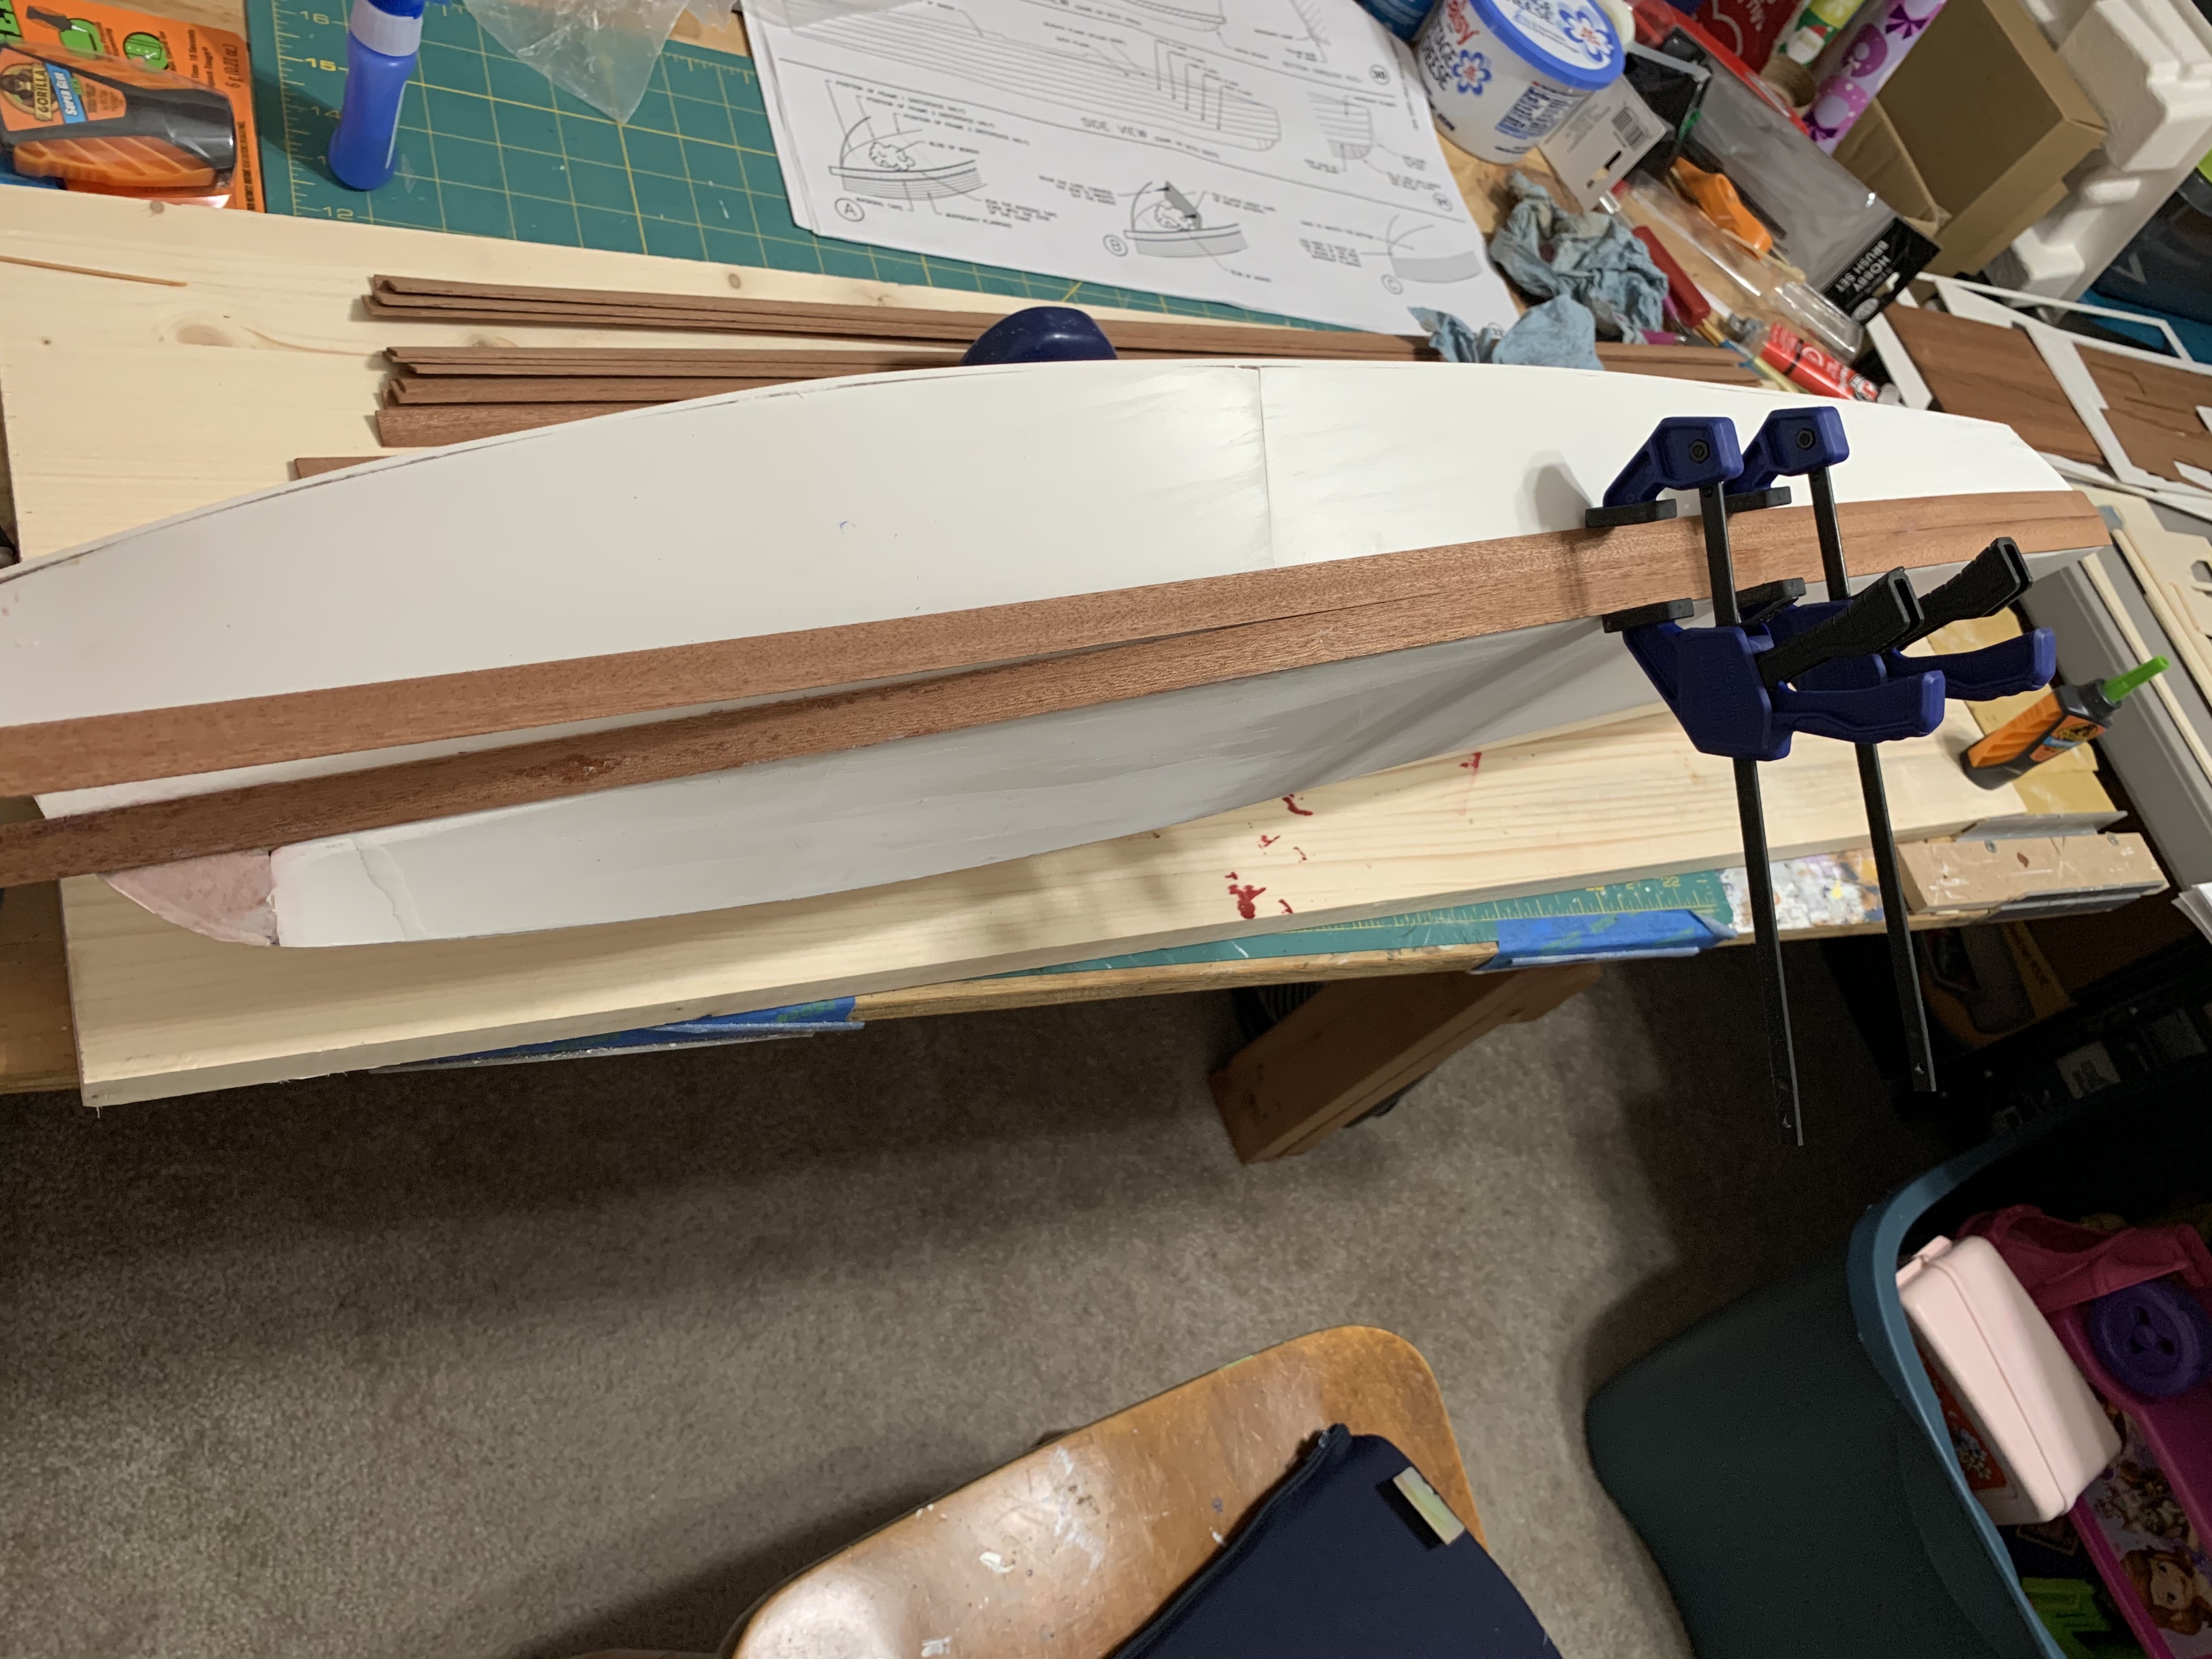
I continued gluing the remaining four planks over the next several days, gluing a small stretch at a time, clamping it, and then leaving it to dry for an hour or so.
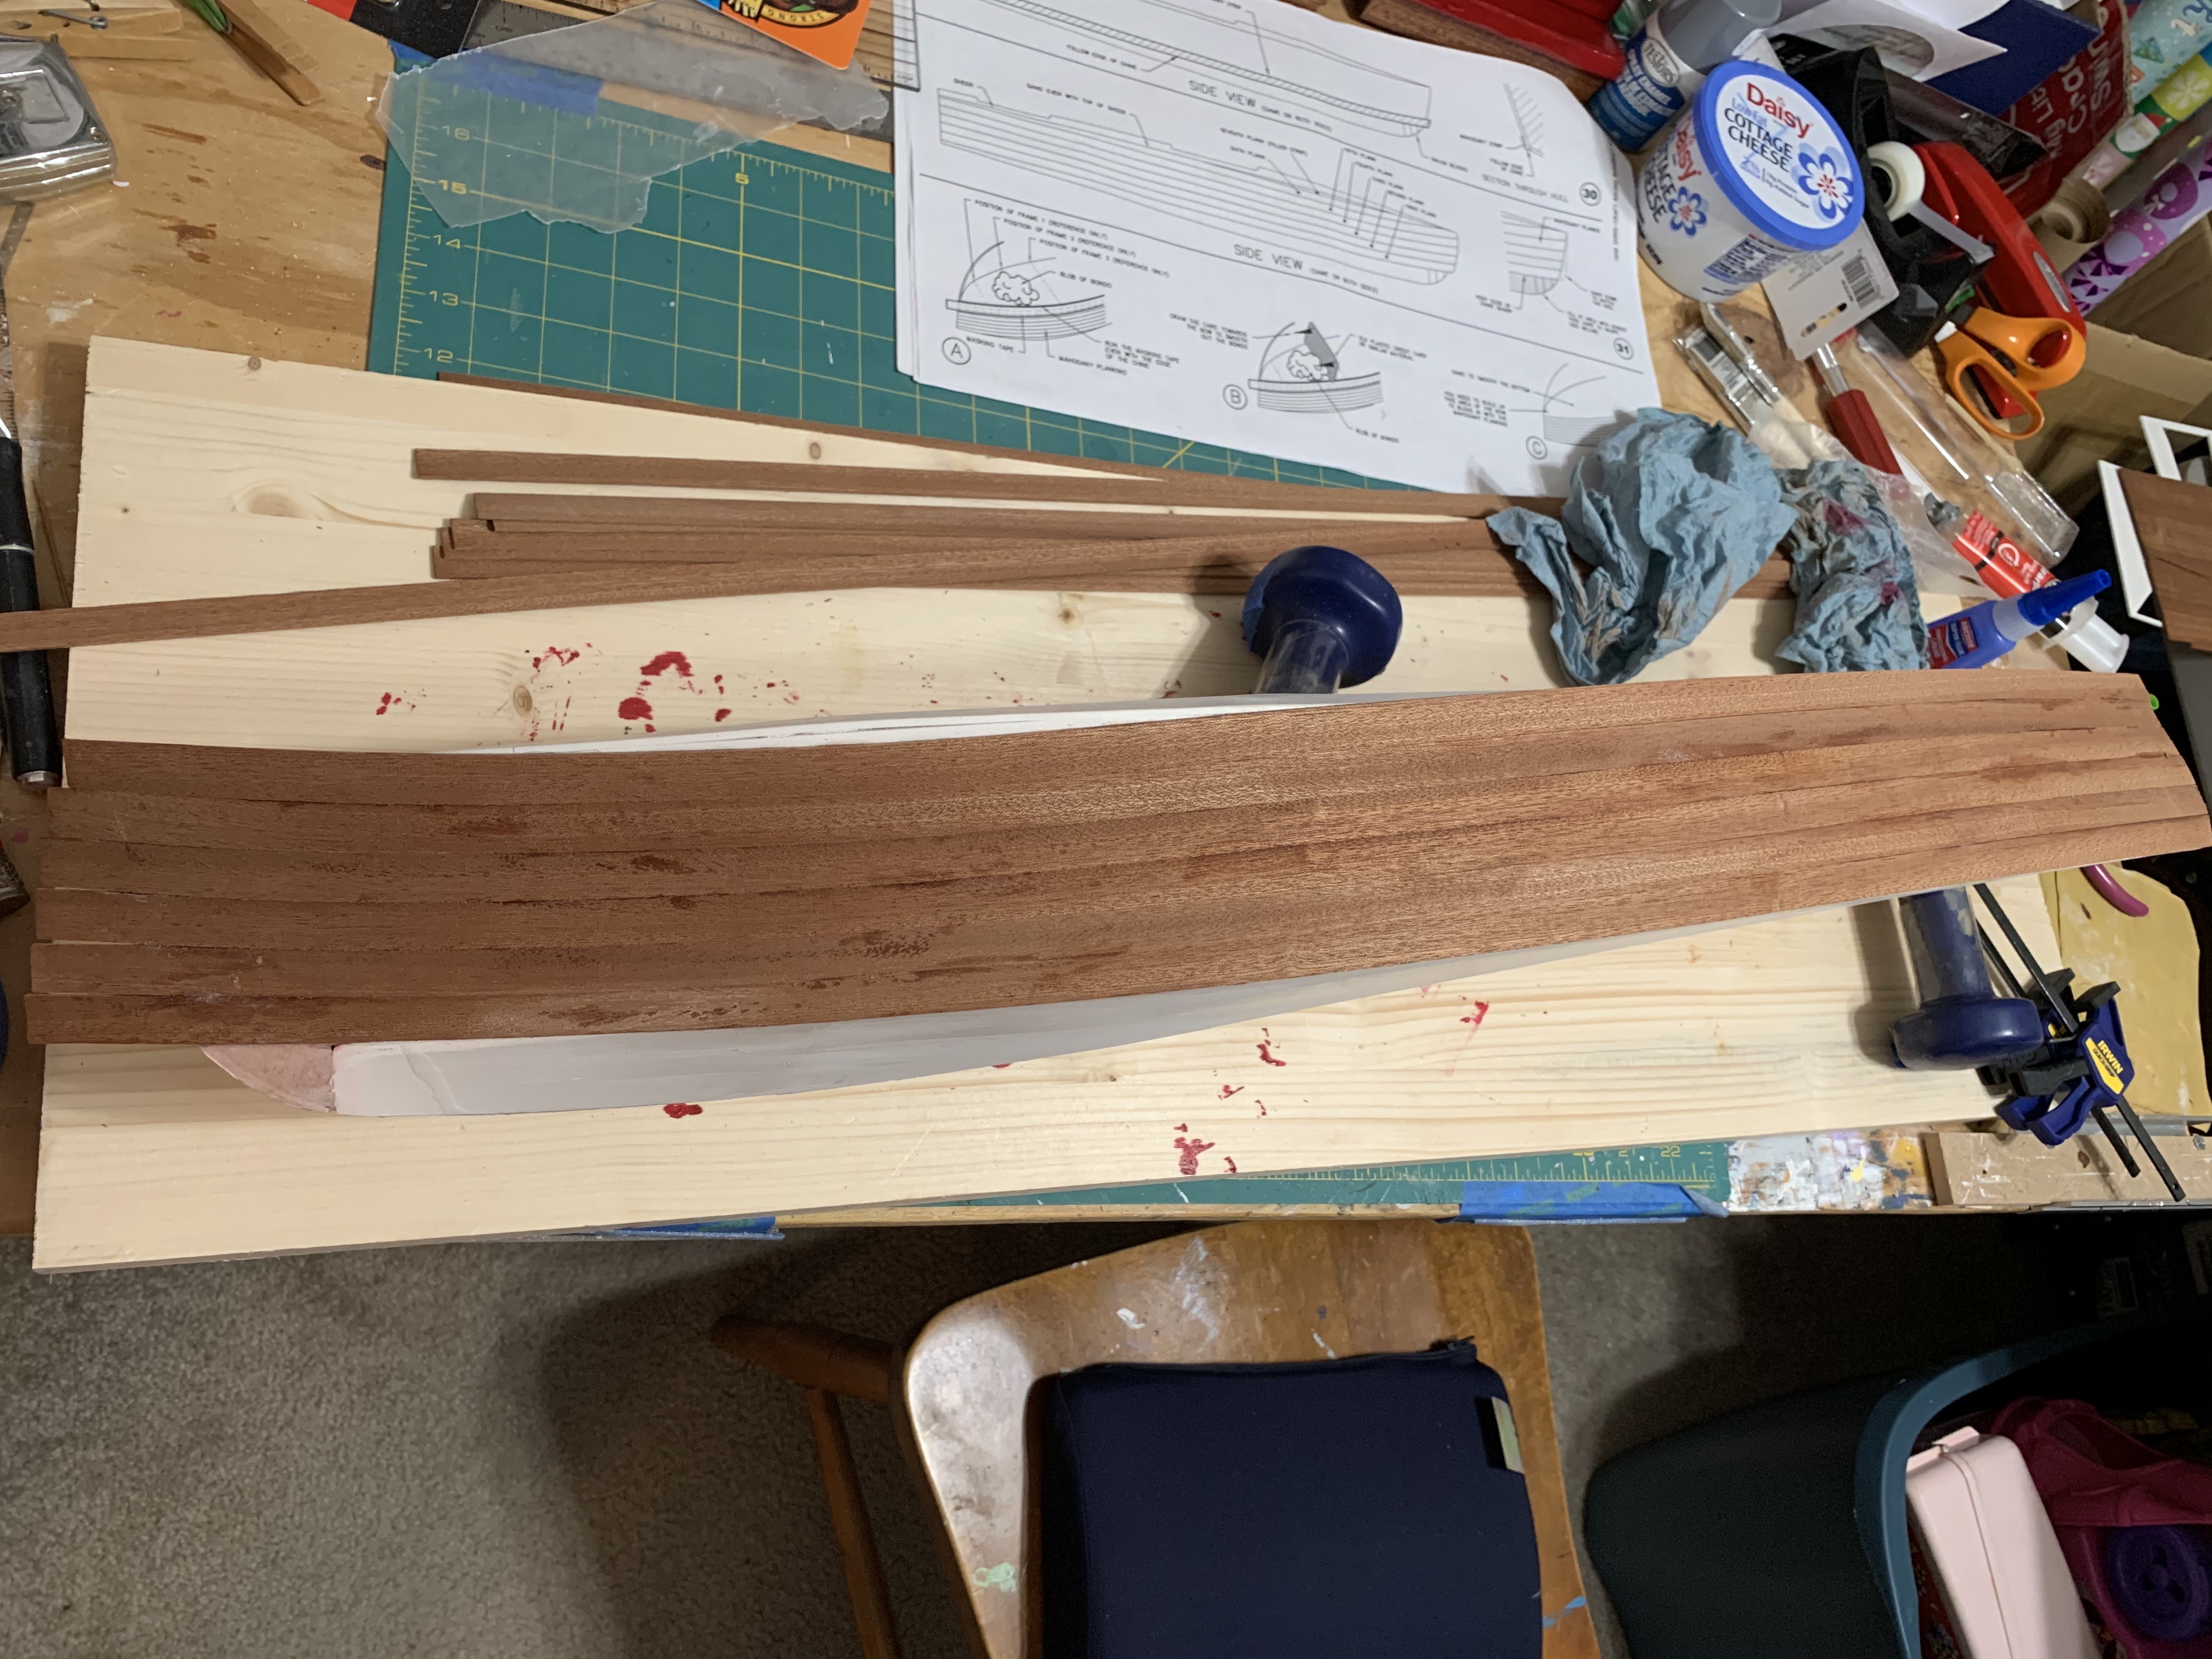
Once I had all six planks in place and just had the small 7th piece to cut and fit in at mid-deck, I looked back at my overall work. I was somewhat displeased where the glue had gotten onto the outer surface of the plank (dark stains between planks) and even tried sanding it off on the bottom plank near the bow. It did not really come off with the sanding. Knowing that I would have to sand the entire boat once all the planks were glued on, I would have to wait and see if applying the polyurethane would hide the discolorations. If not, this would be the side facing the wall and I would just have to do a better job on the other side of keeping the glue off the exterior surface.
To be continued…
Categories

One thought on “A Classic Boat Model – Finally, Some Planking” Leave a comment ›