
Doll House Surprise for My Granddaughter – Finishing Touches
Each of the 12 shutters were made from three pieces, one shutter core and two shutter panels, each piece individually painted. Turns out painting them was the easiest part. Assembling them proved challenging.
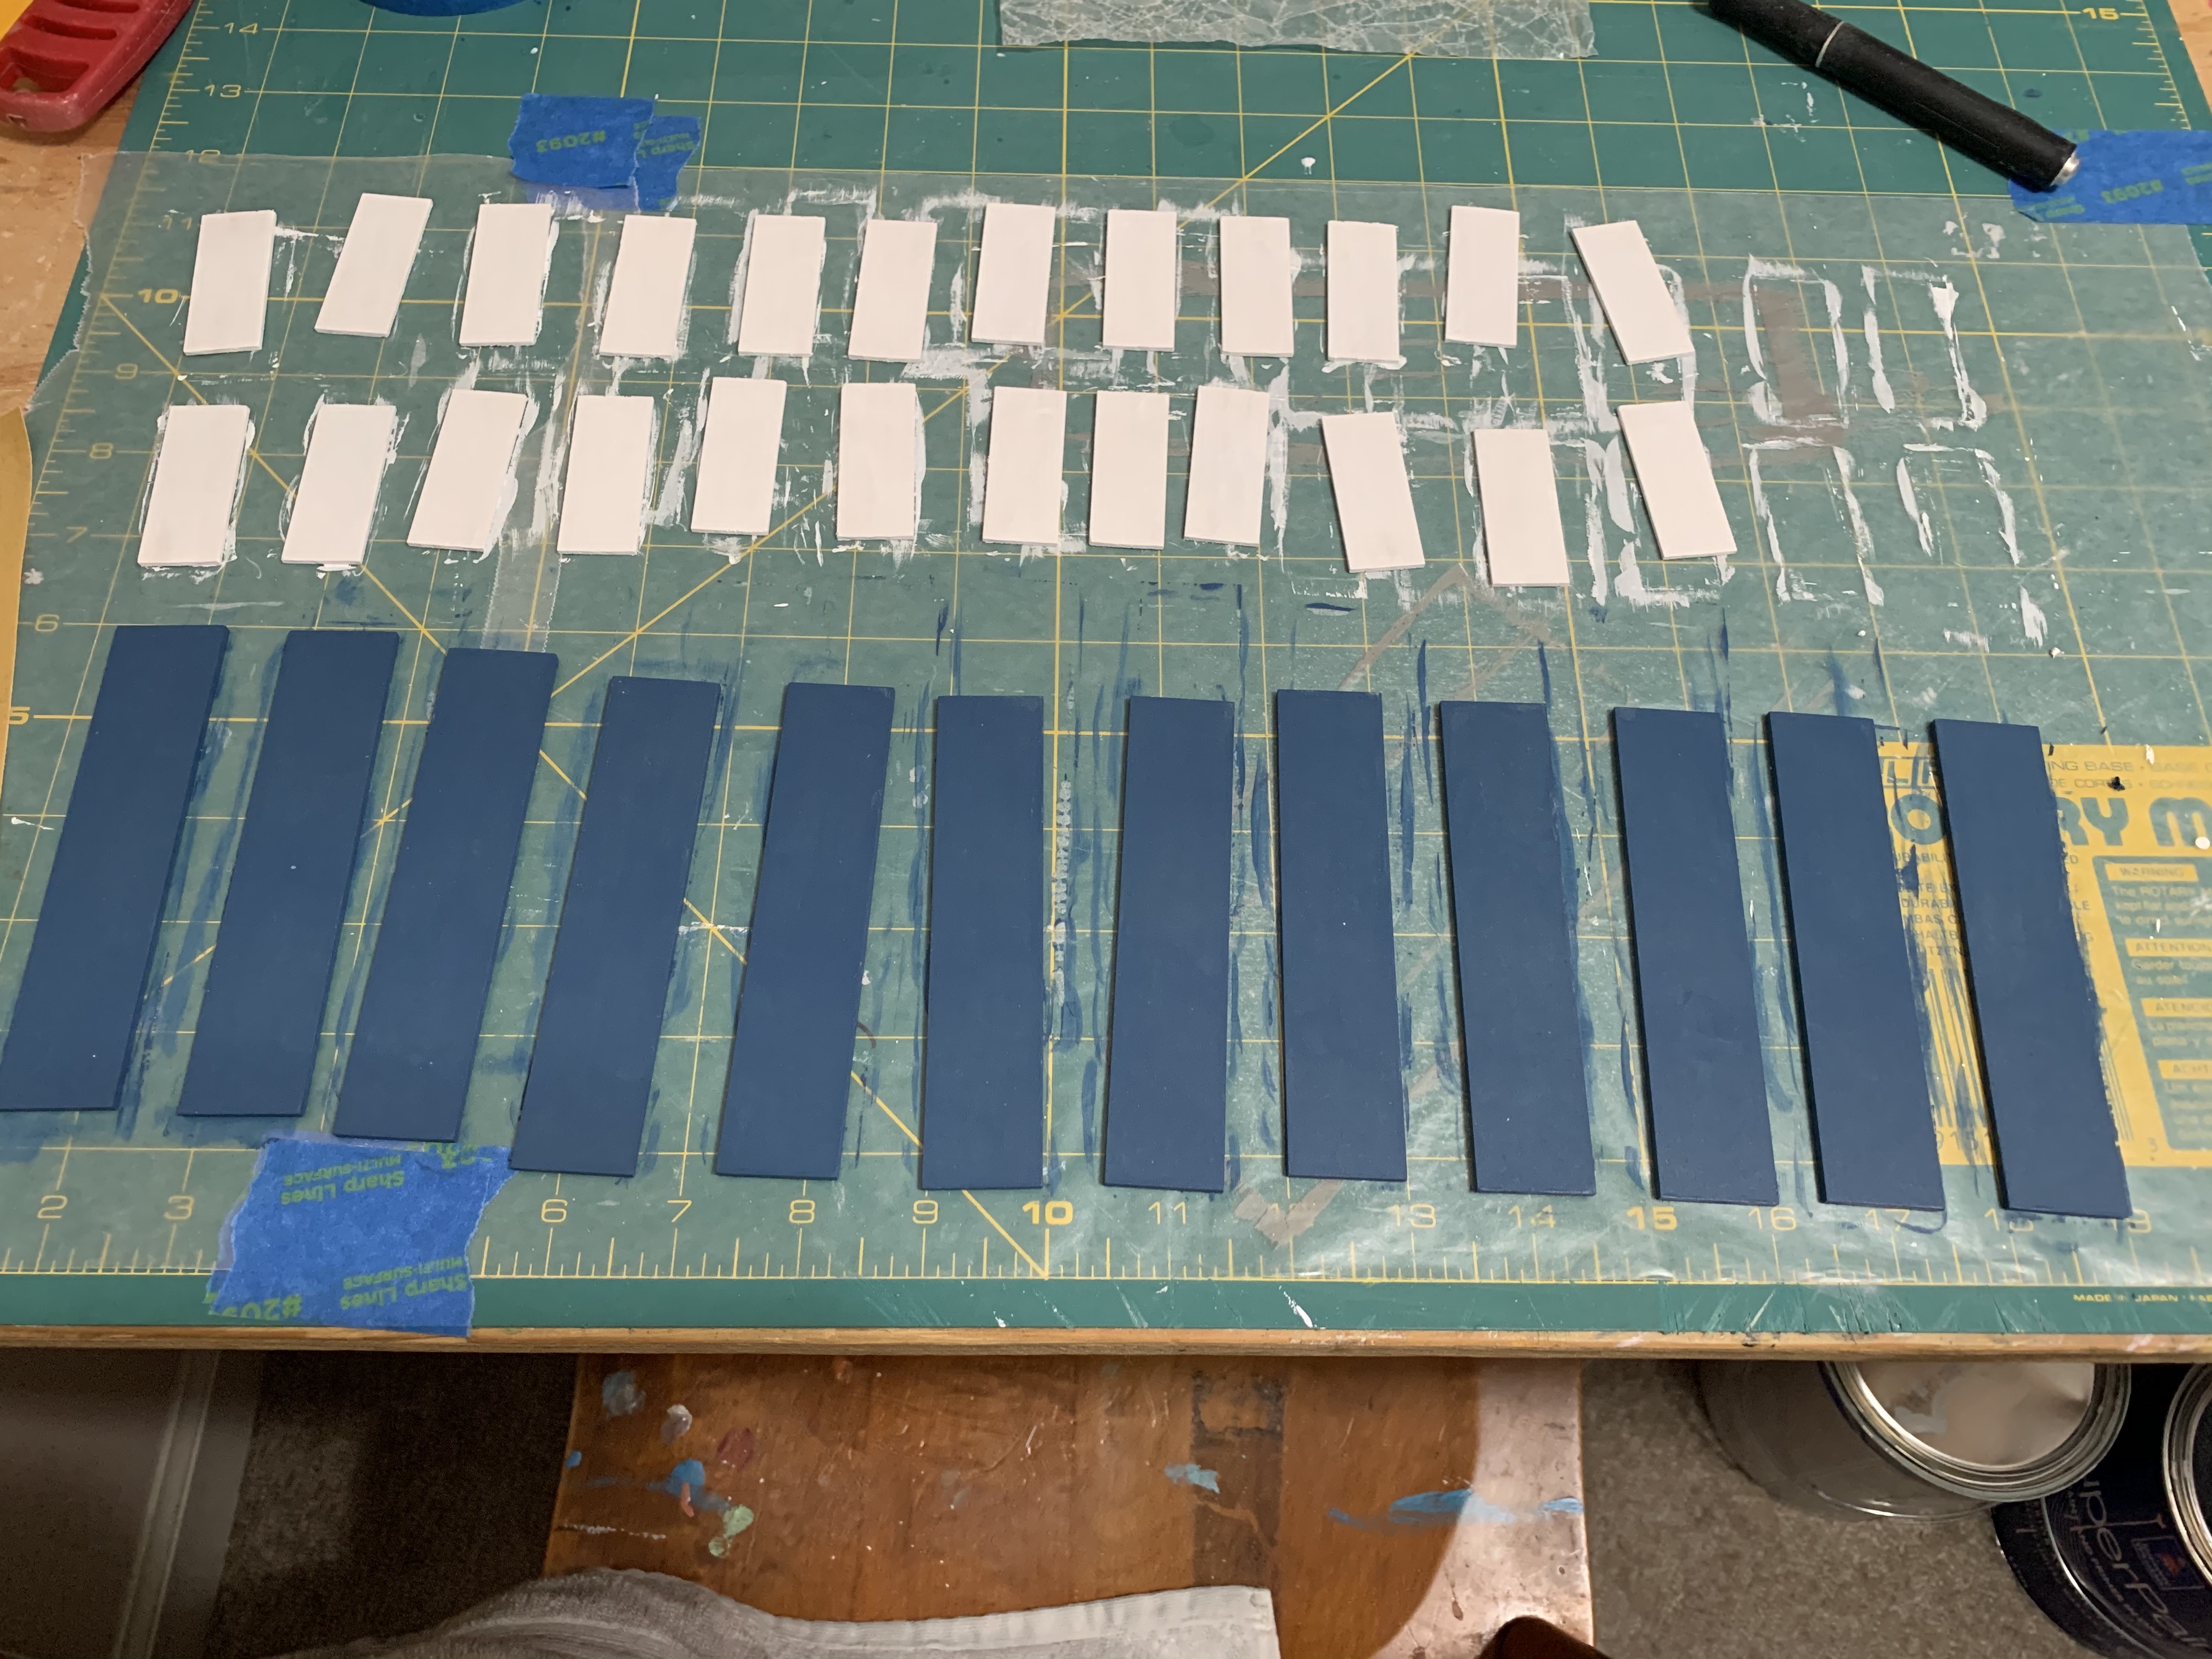
According to the diagram in the instructions, the two shutter panels were supposed to be evenly spaced on the shutter core, top to bottom and left to right. The problem was how to easily get them centered just right 24 times when the required measurements needed were not an even 1/16 of an inch or millimeter distance. Plus, the instructions indicated that since the panels were so thin, too much glue would cause the edges of them to curl.
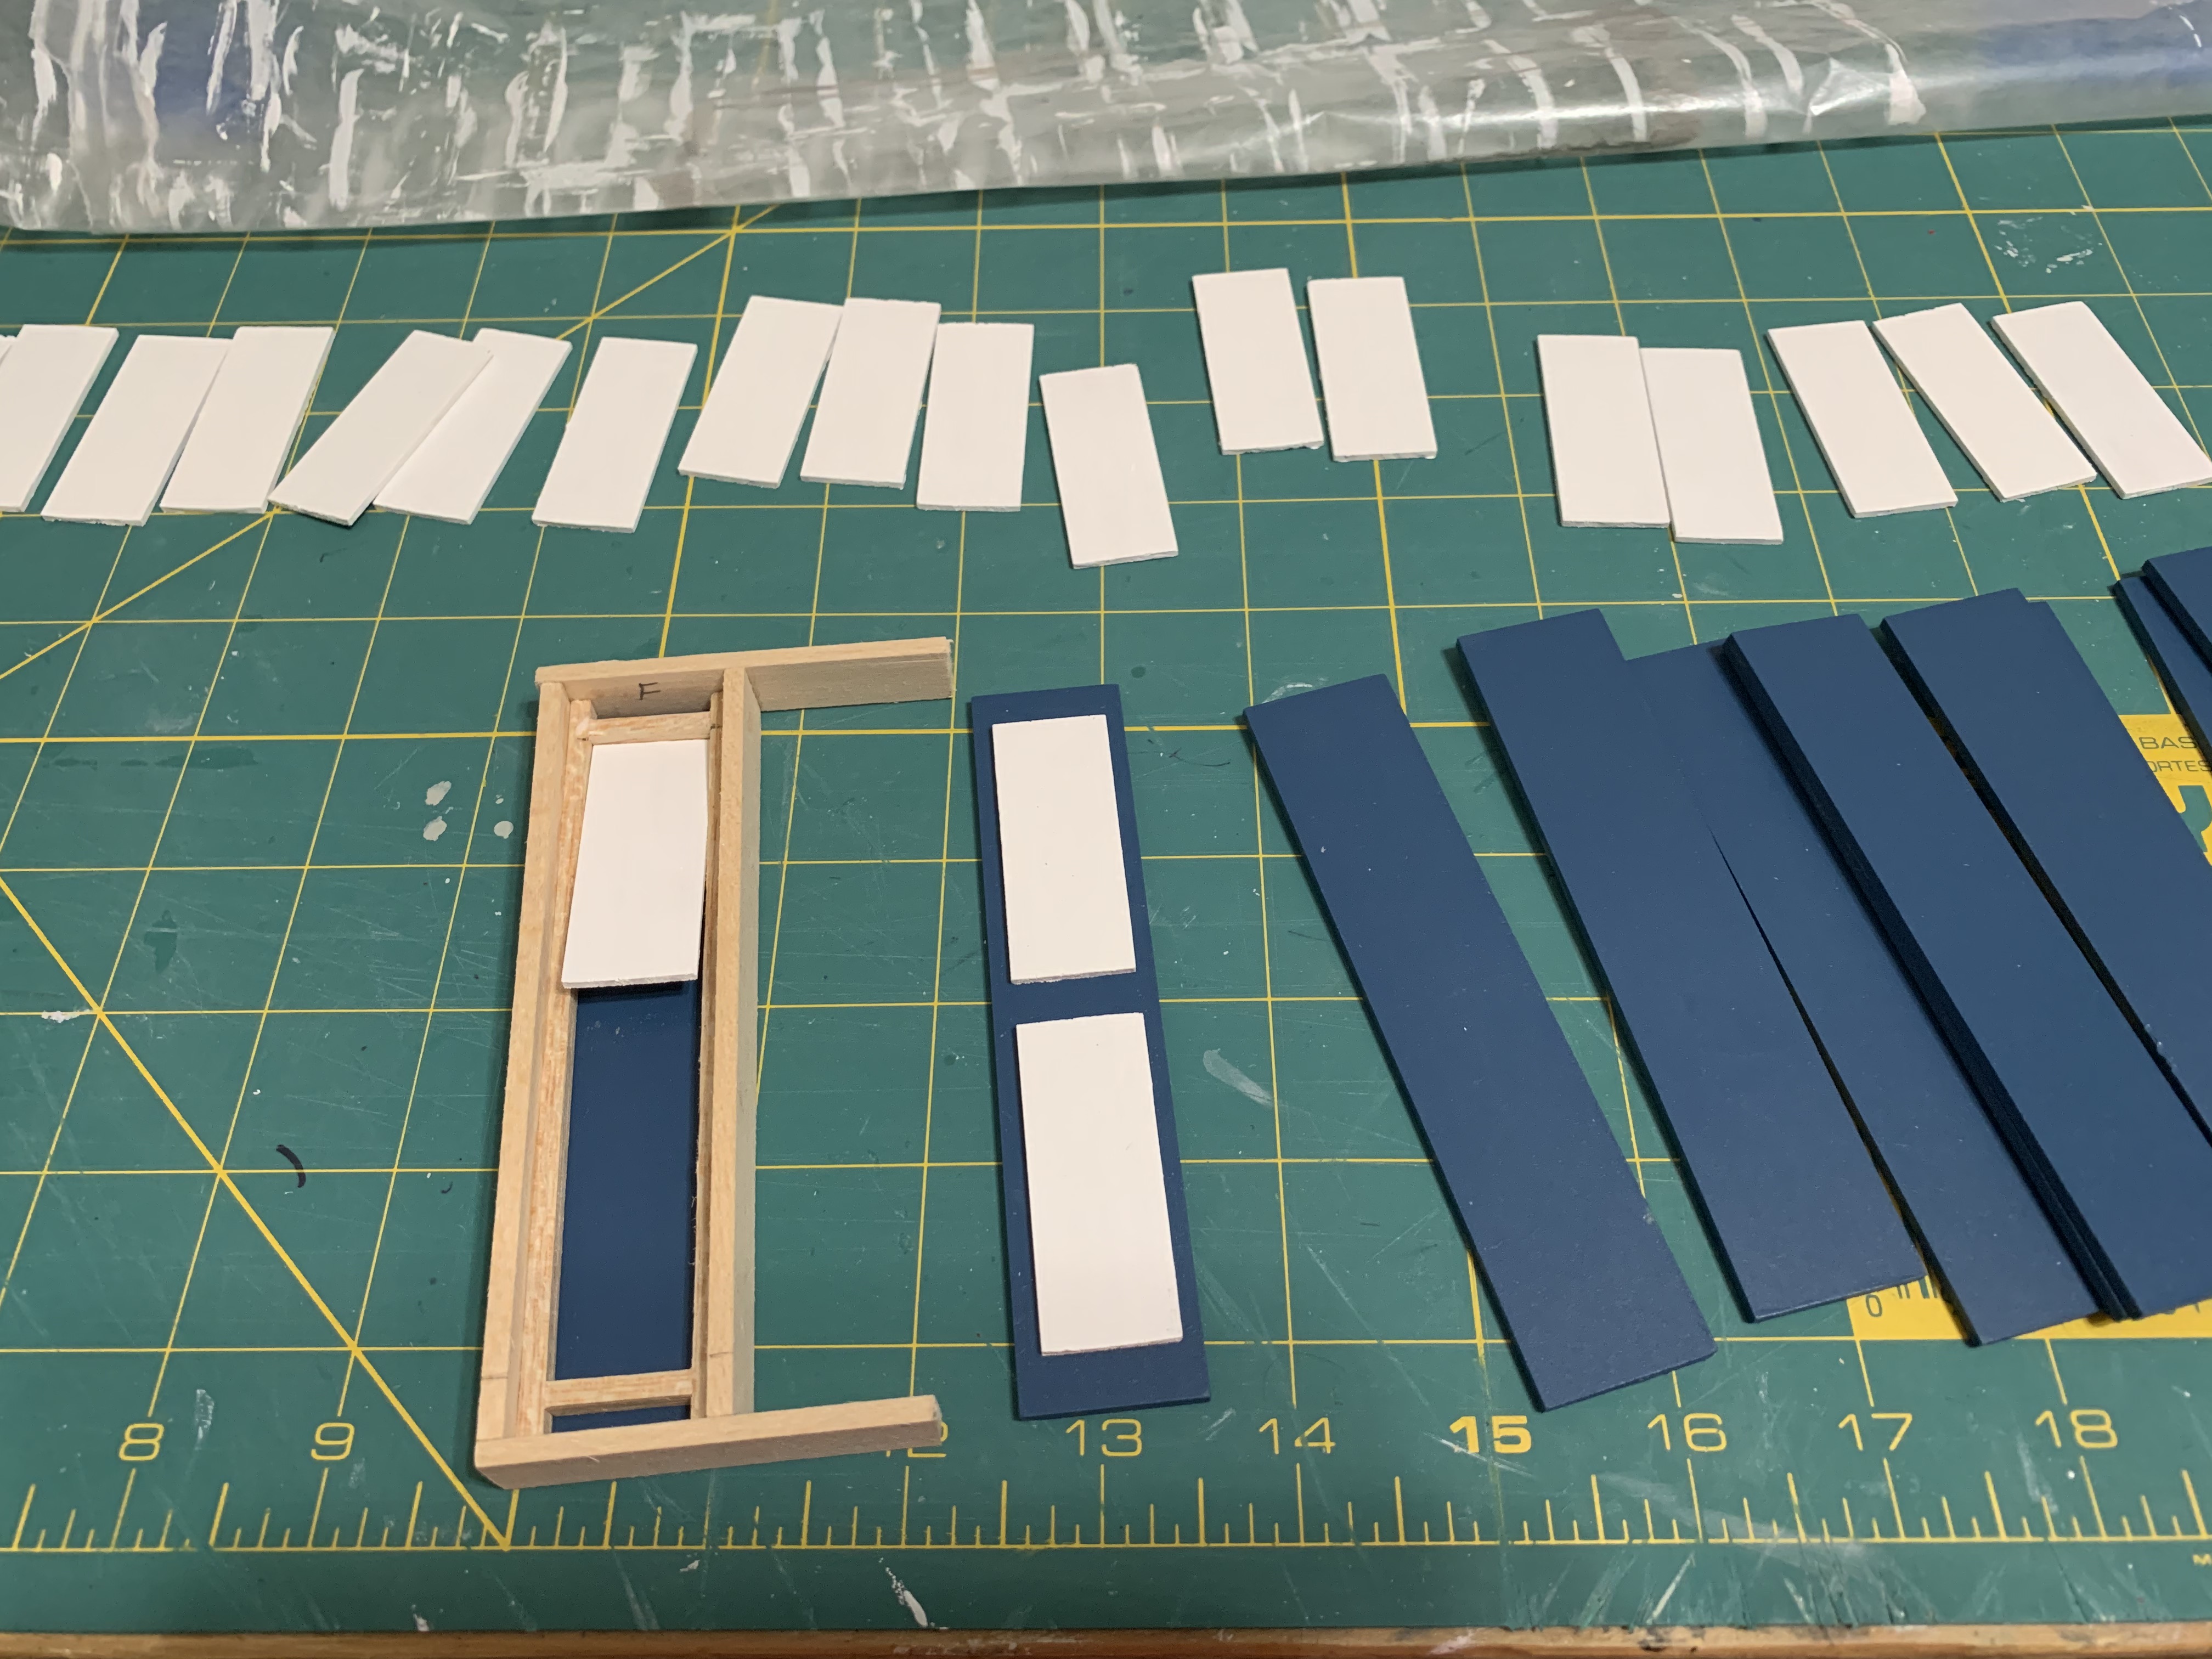
I pondered this for a few days while trying to get even one shutter just right without any success. Then I decided to do what I did before and build a jig to make the assembly easier. Again, using some extra small pieces of wood that I found leftover from my son’s college architecture modeling days, I designed and built a jig that the shutter core would fit into with guides along the bottoms and sides for placing the panels evenly. Also, to avoid the curling issue (which I did in fact experience with water-based glue), I used a single drop of a solvent based super glue to secure the panels. Since this glue dried in 15 seconds, I was able to crank out the finished shutters quickly.
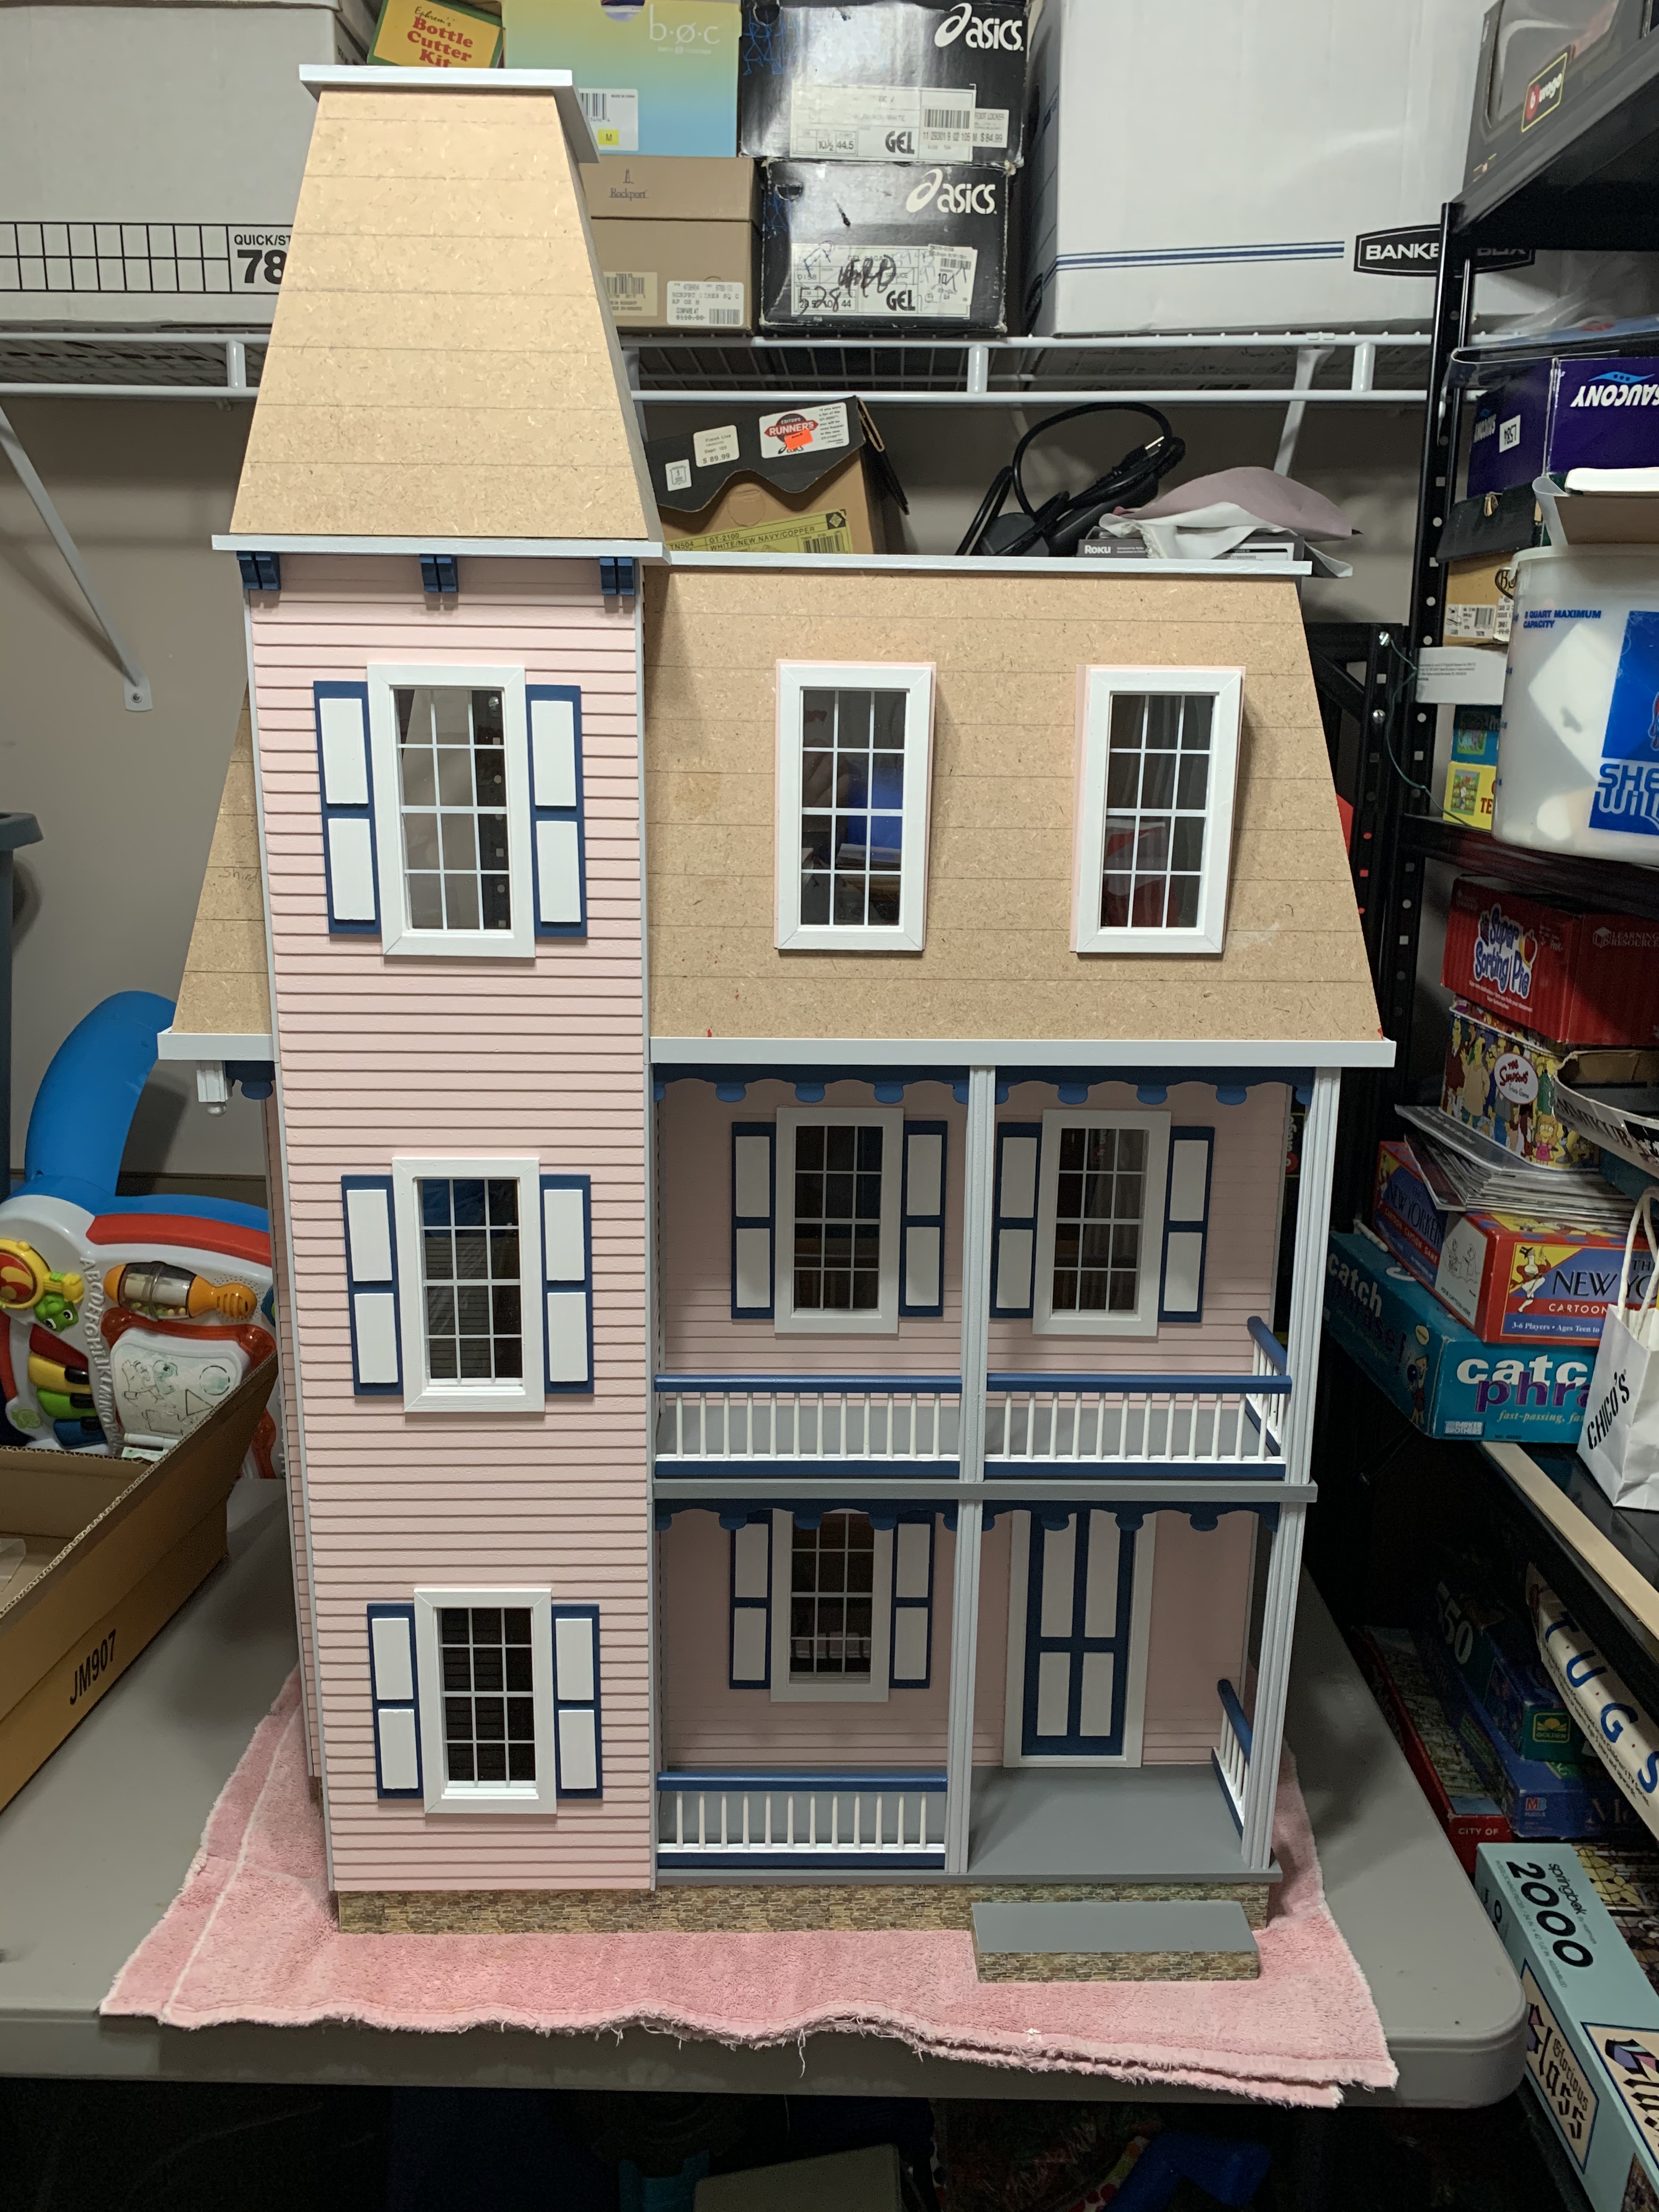
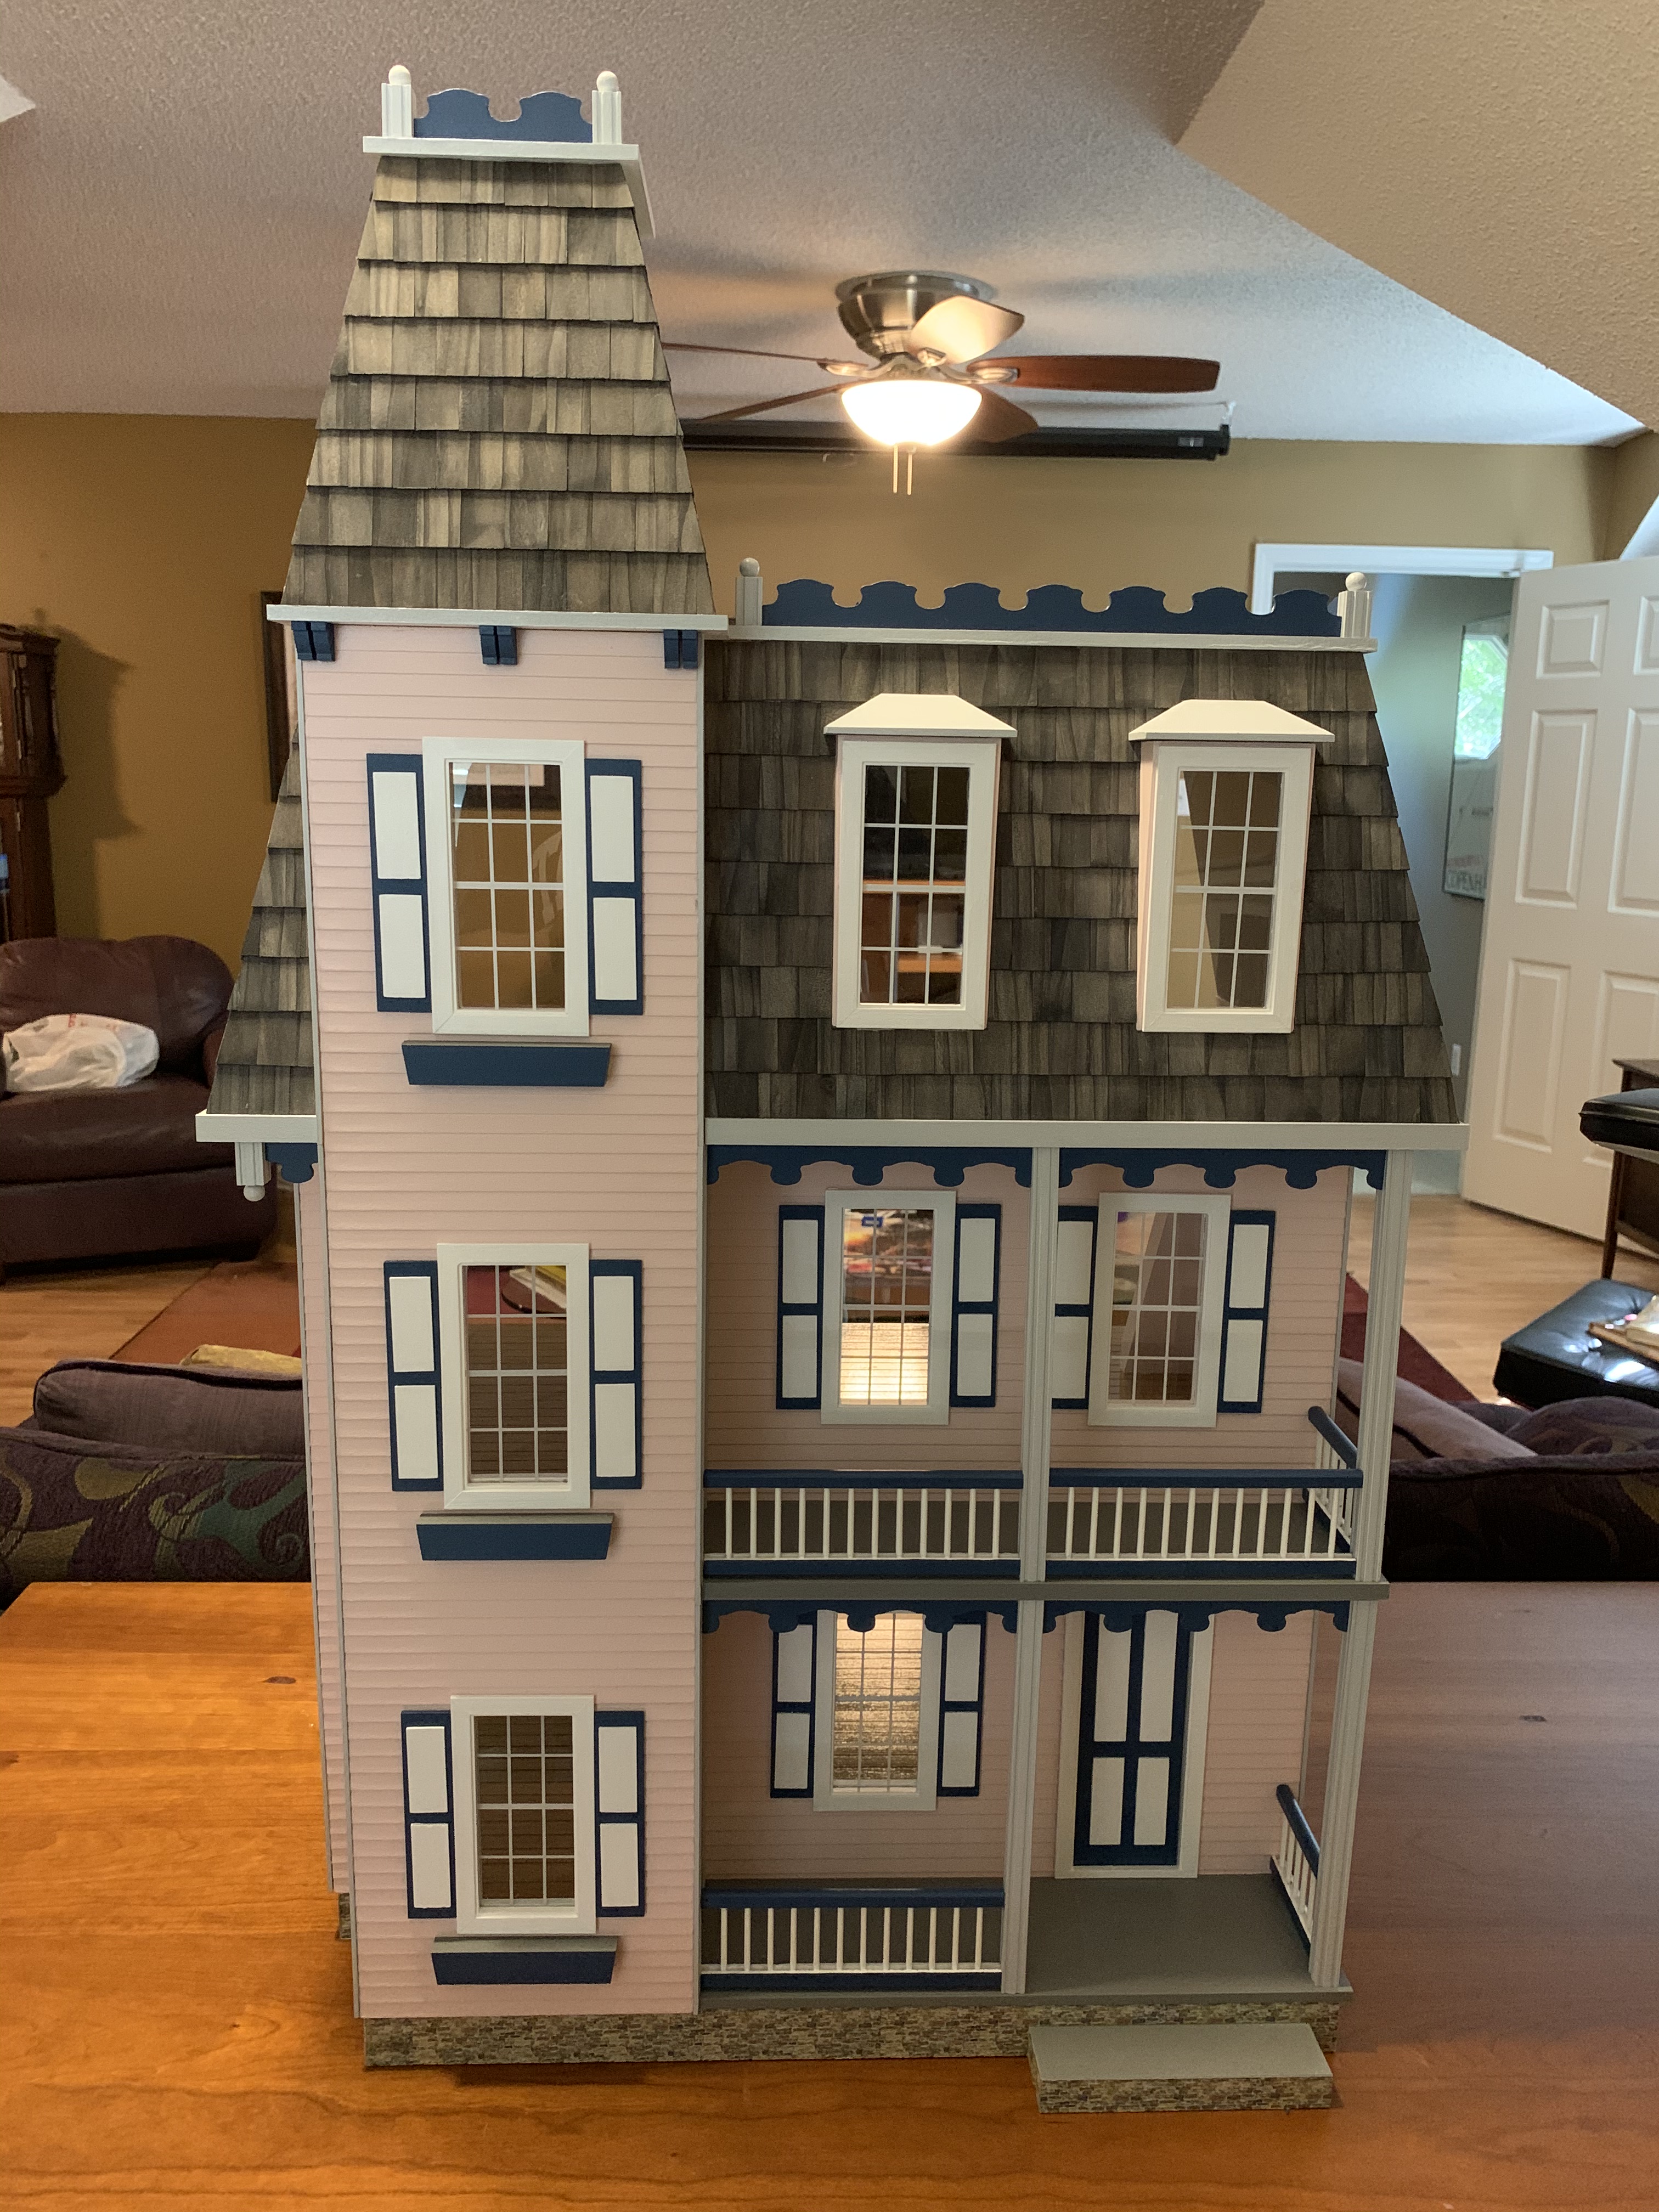
Then attaching the 12 shutters gave the house that much more of a finished look.
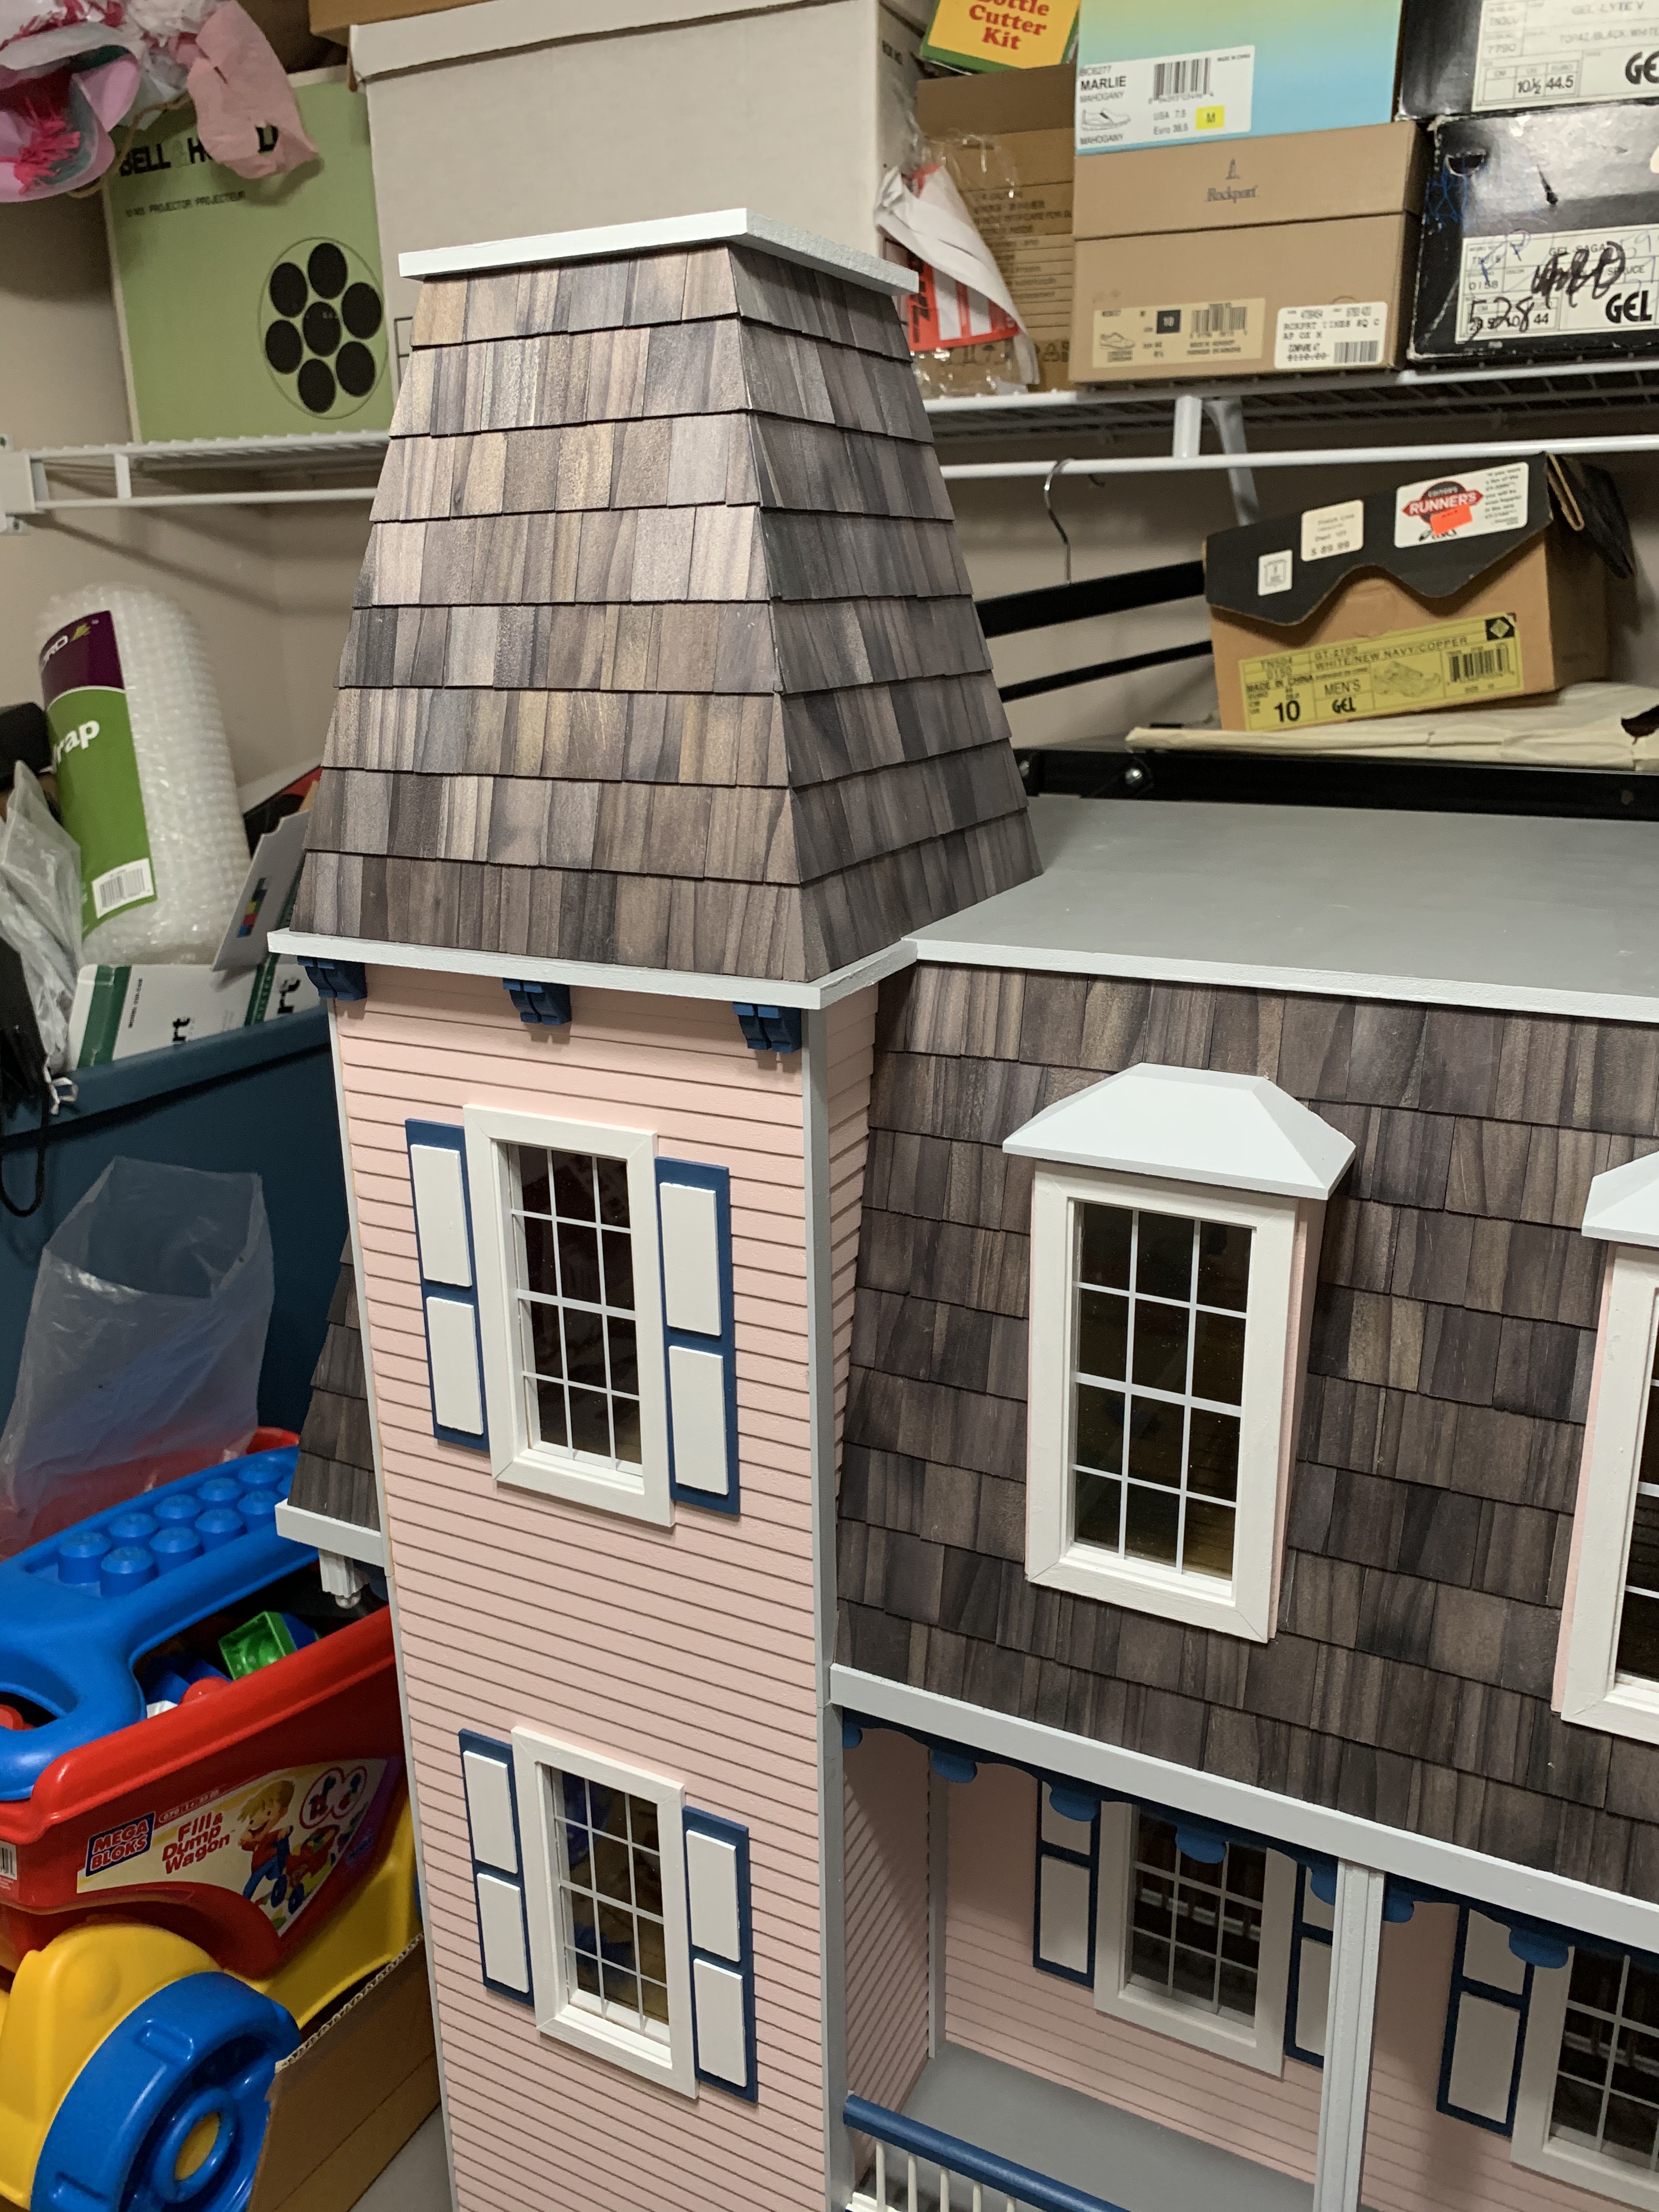
The next step was to attach the shingles to the roof. The shingles came precut just to the right size from natural white cedar. Full size shingles used on a real home and exposed to the elements (rain, sun, etc.) would normally age to a grey color over time. Since hopefully this dollhouse would not be left out in the rain, it was necessary to “artificially” age the shingles with dye.

The dye I purchased was for staining them grey and mixed with water, it looked black. Reading the instructions, I was surprised at the number of steps involved over multiple days to get the desired finished color. Depending on the length of time the shingles were in the dye bath, the color would darken. As soon as I put the first ones in, I immediately got the color I wanted so I poured them into the milk jug funnel to separate them from the dye.
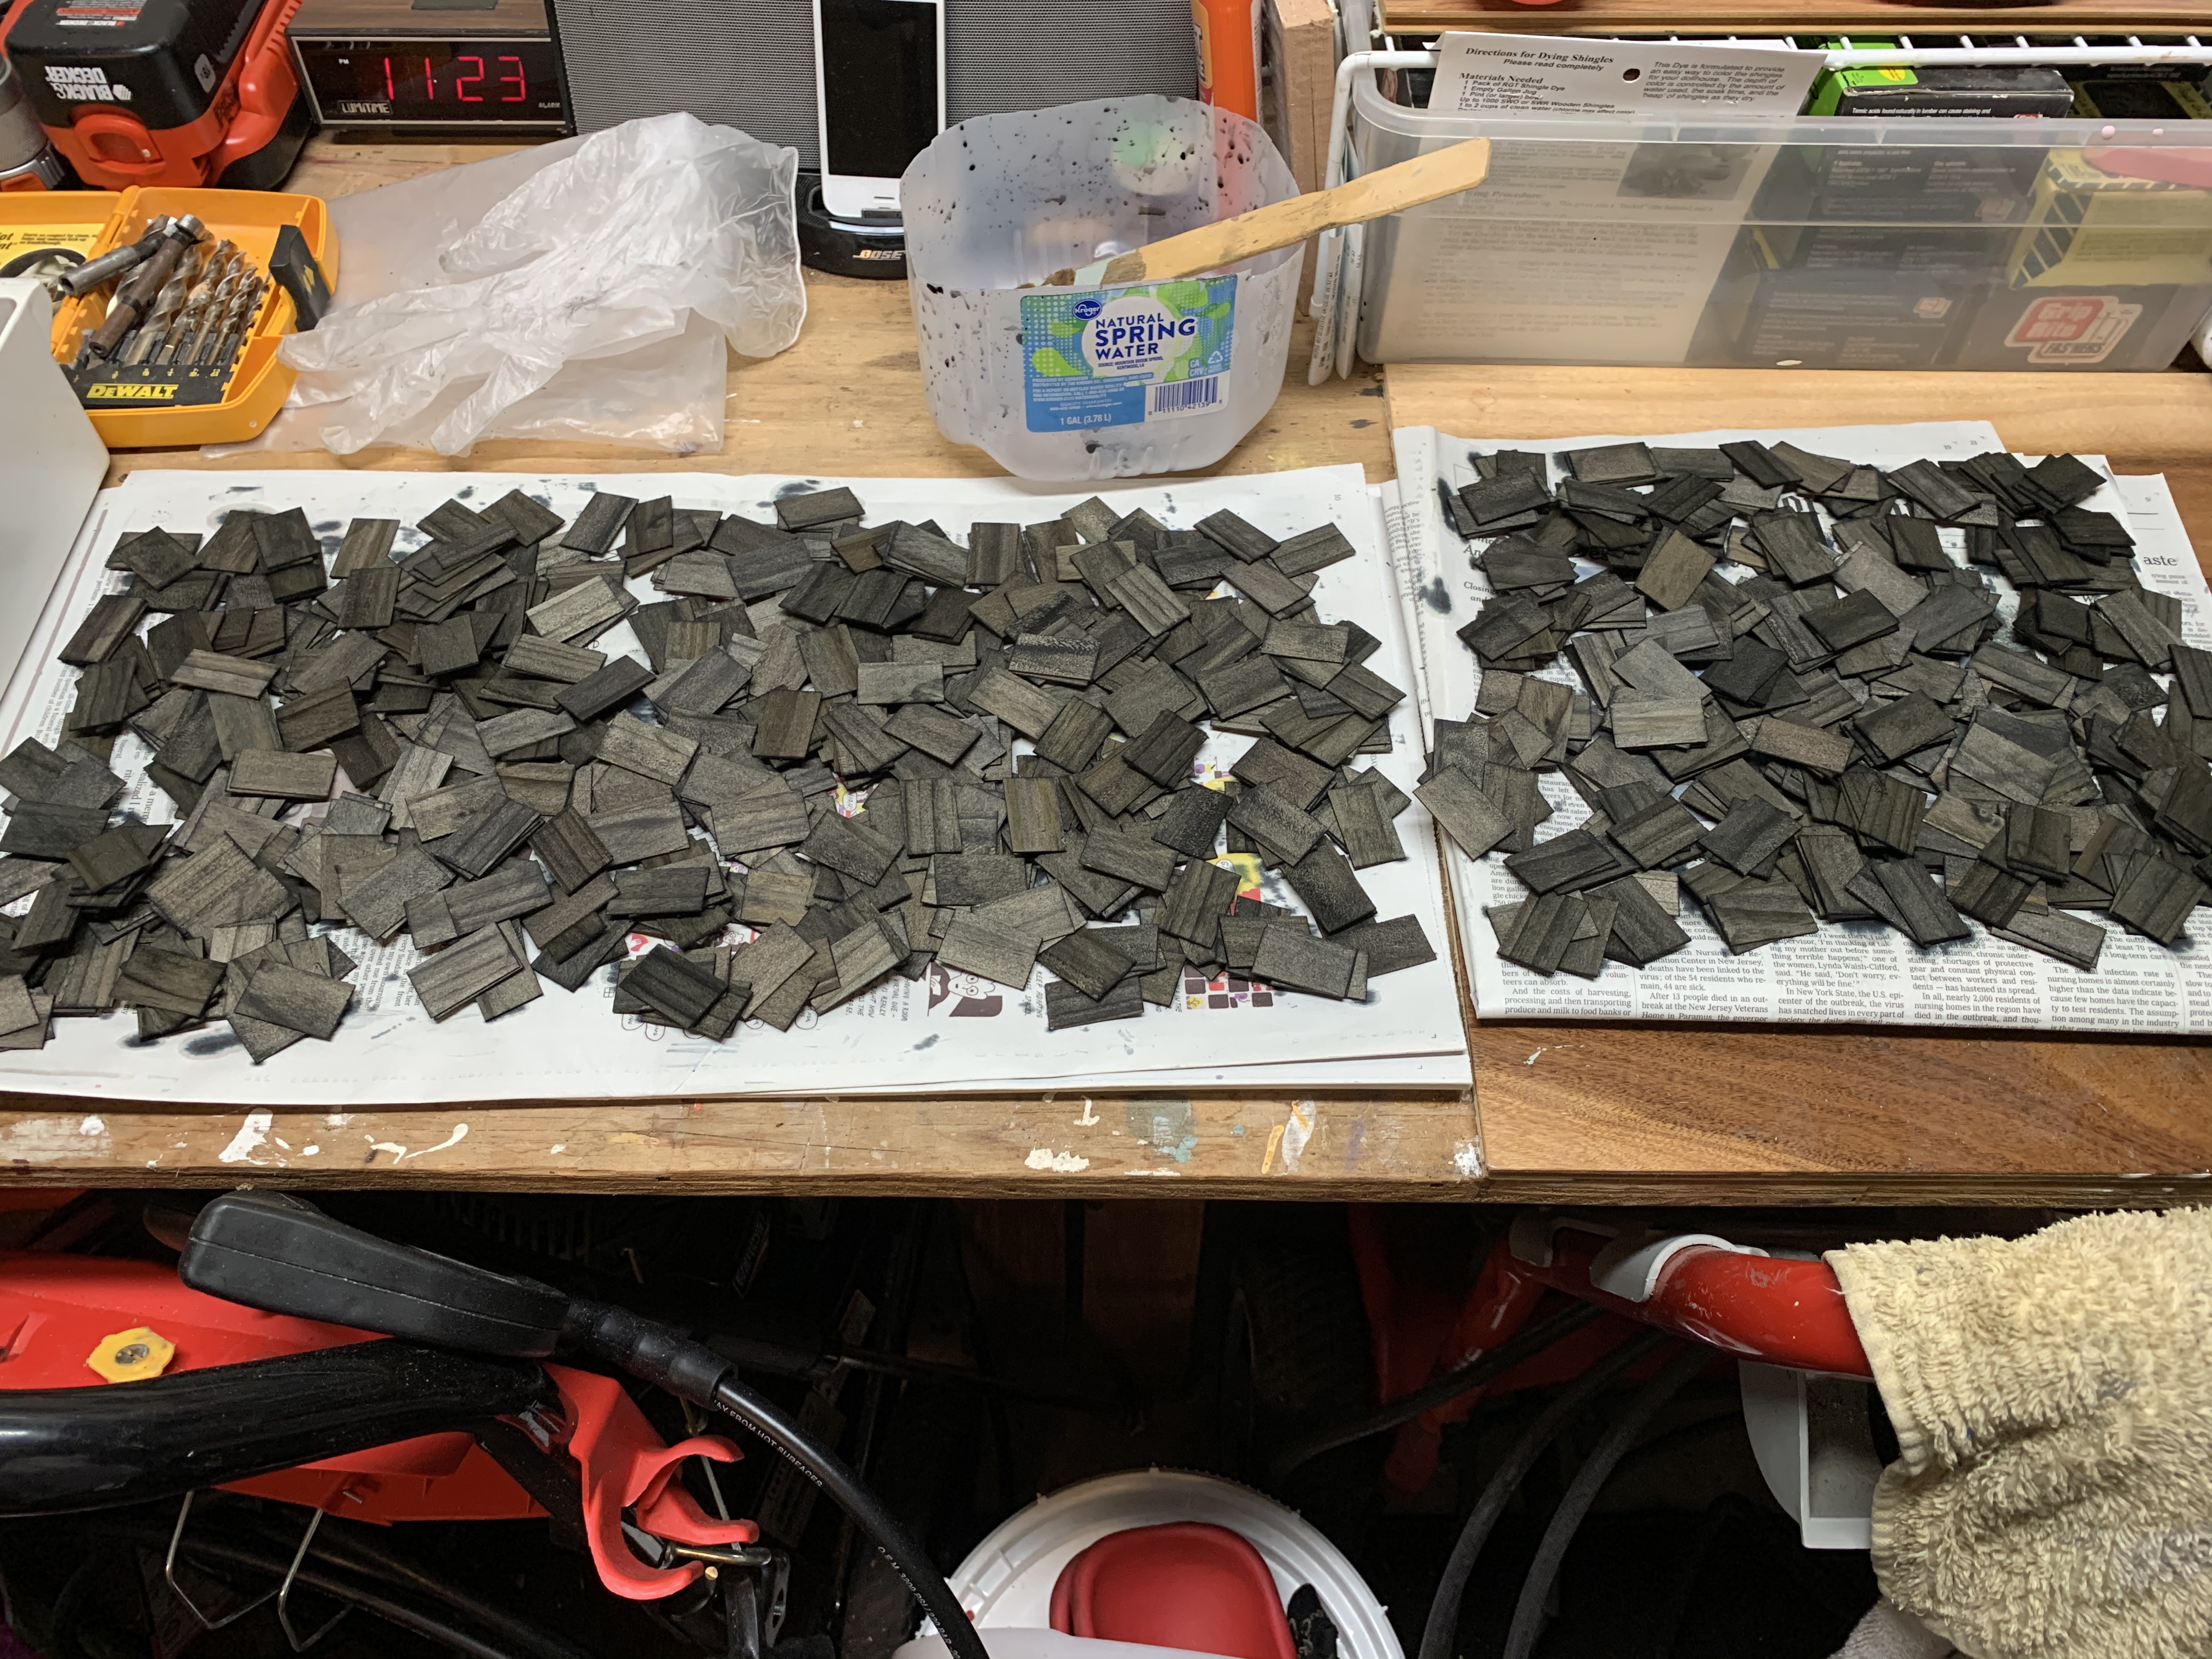
Following dyeing, the multi-day steps involved heaping them into piles and then stirring them by hand multiple times per day. This was supposed to deepen the final color even more. Since I already had the color I desired, I spread them out over newspaper to dry and skipped all the rest of the steps.

A few days later, after the shingles had thoroughly dried, I began to glue them to the roof. The first step was to glue a row along the side, and then to glue the same row along the front. Where the side roof met the front roof, these two shingles had to be cut at an angle with the front shingle overlapping the side shingle.
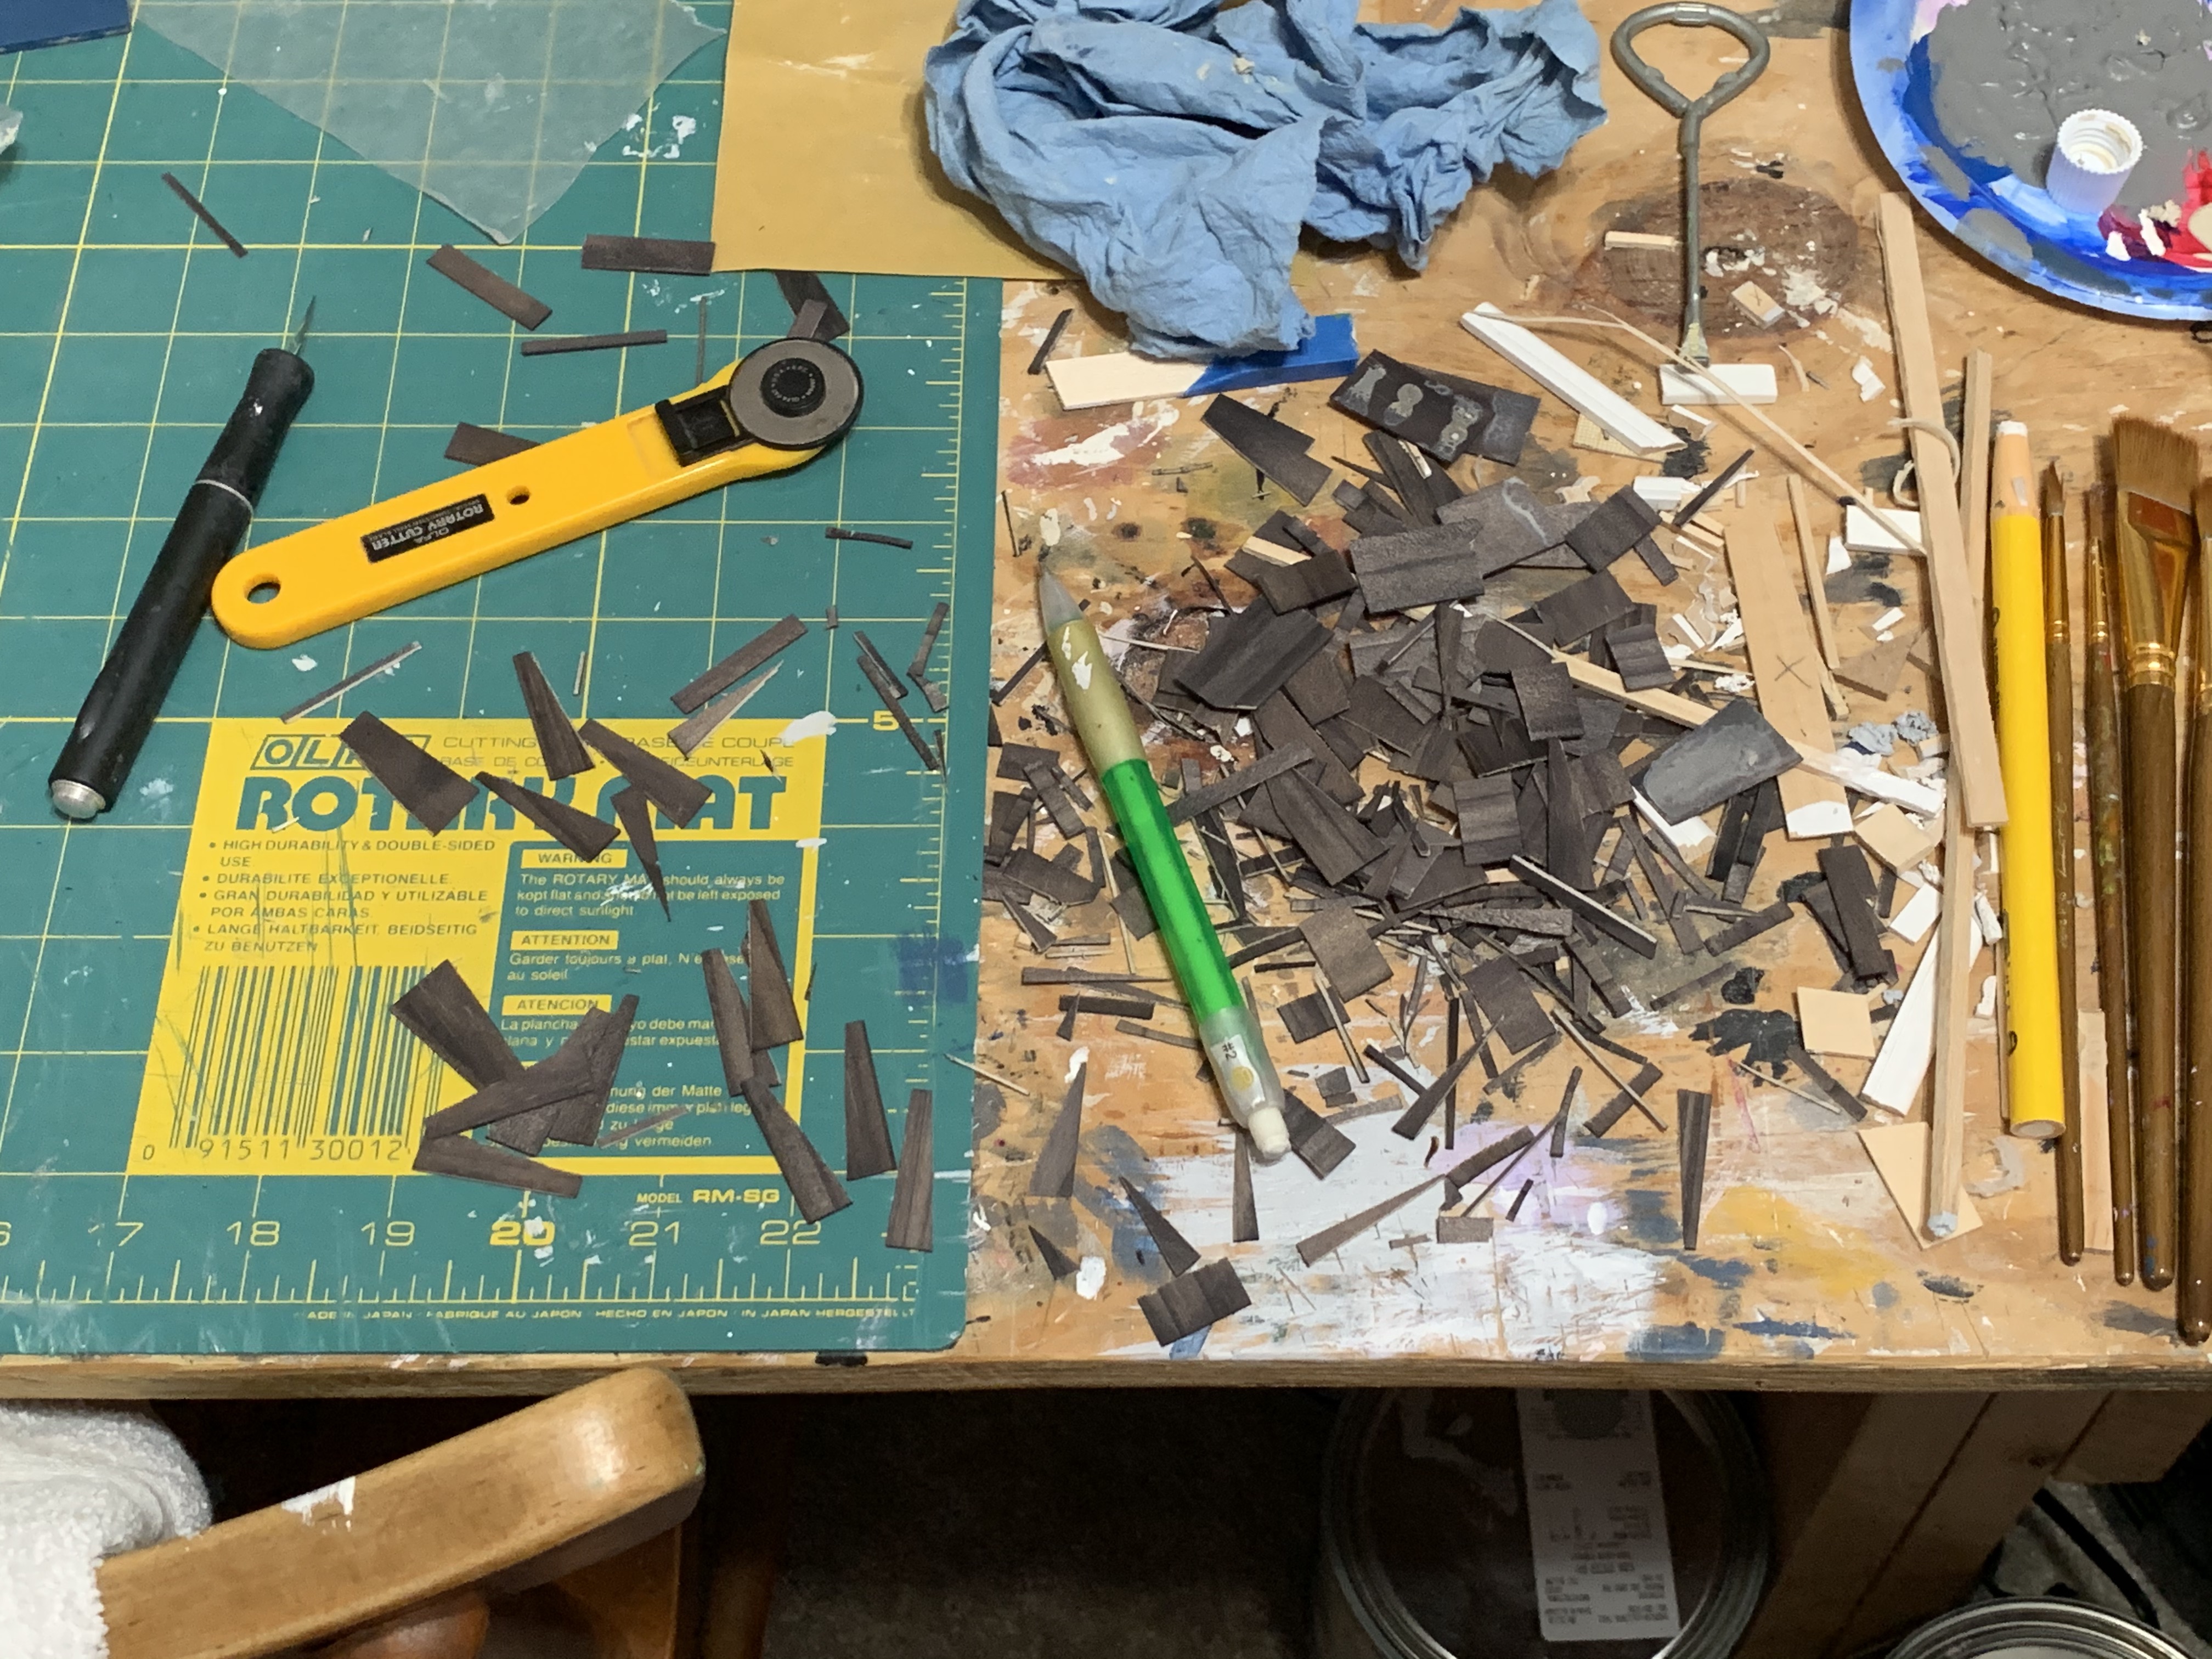
This was a trial-and-error approach and for some corners, it took multiple cuts to get the right fit. Thank goodness the kit came with plenty of extra shingles. This is also where I realized the value in following the dye instructions by saving the left-over dye “for touch-ups.” Each cut I made exposed the virgin light colored wood and so I had to dye the cut edge using a toothpick dipped in the dye.
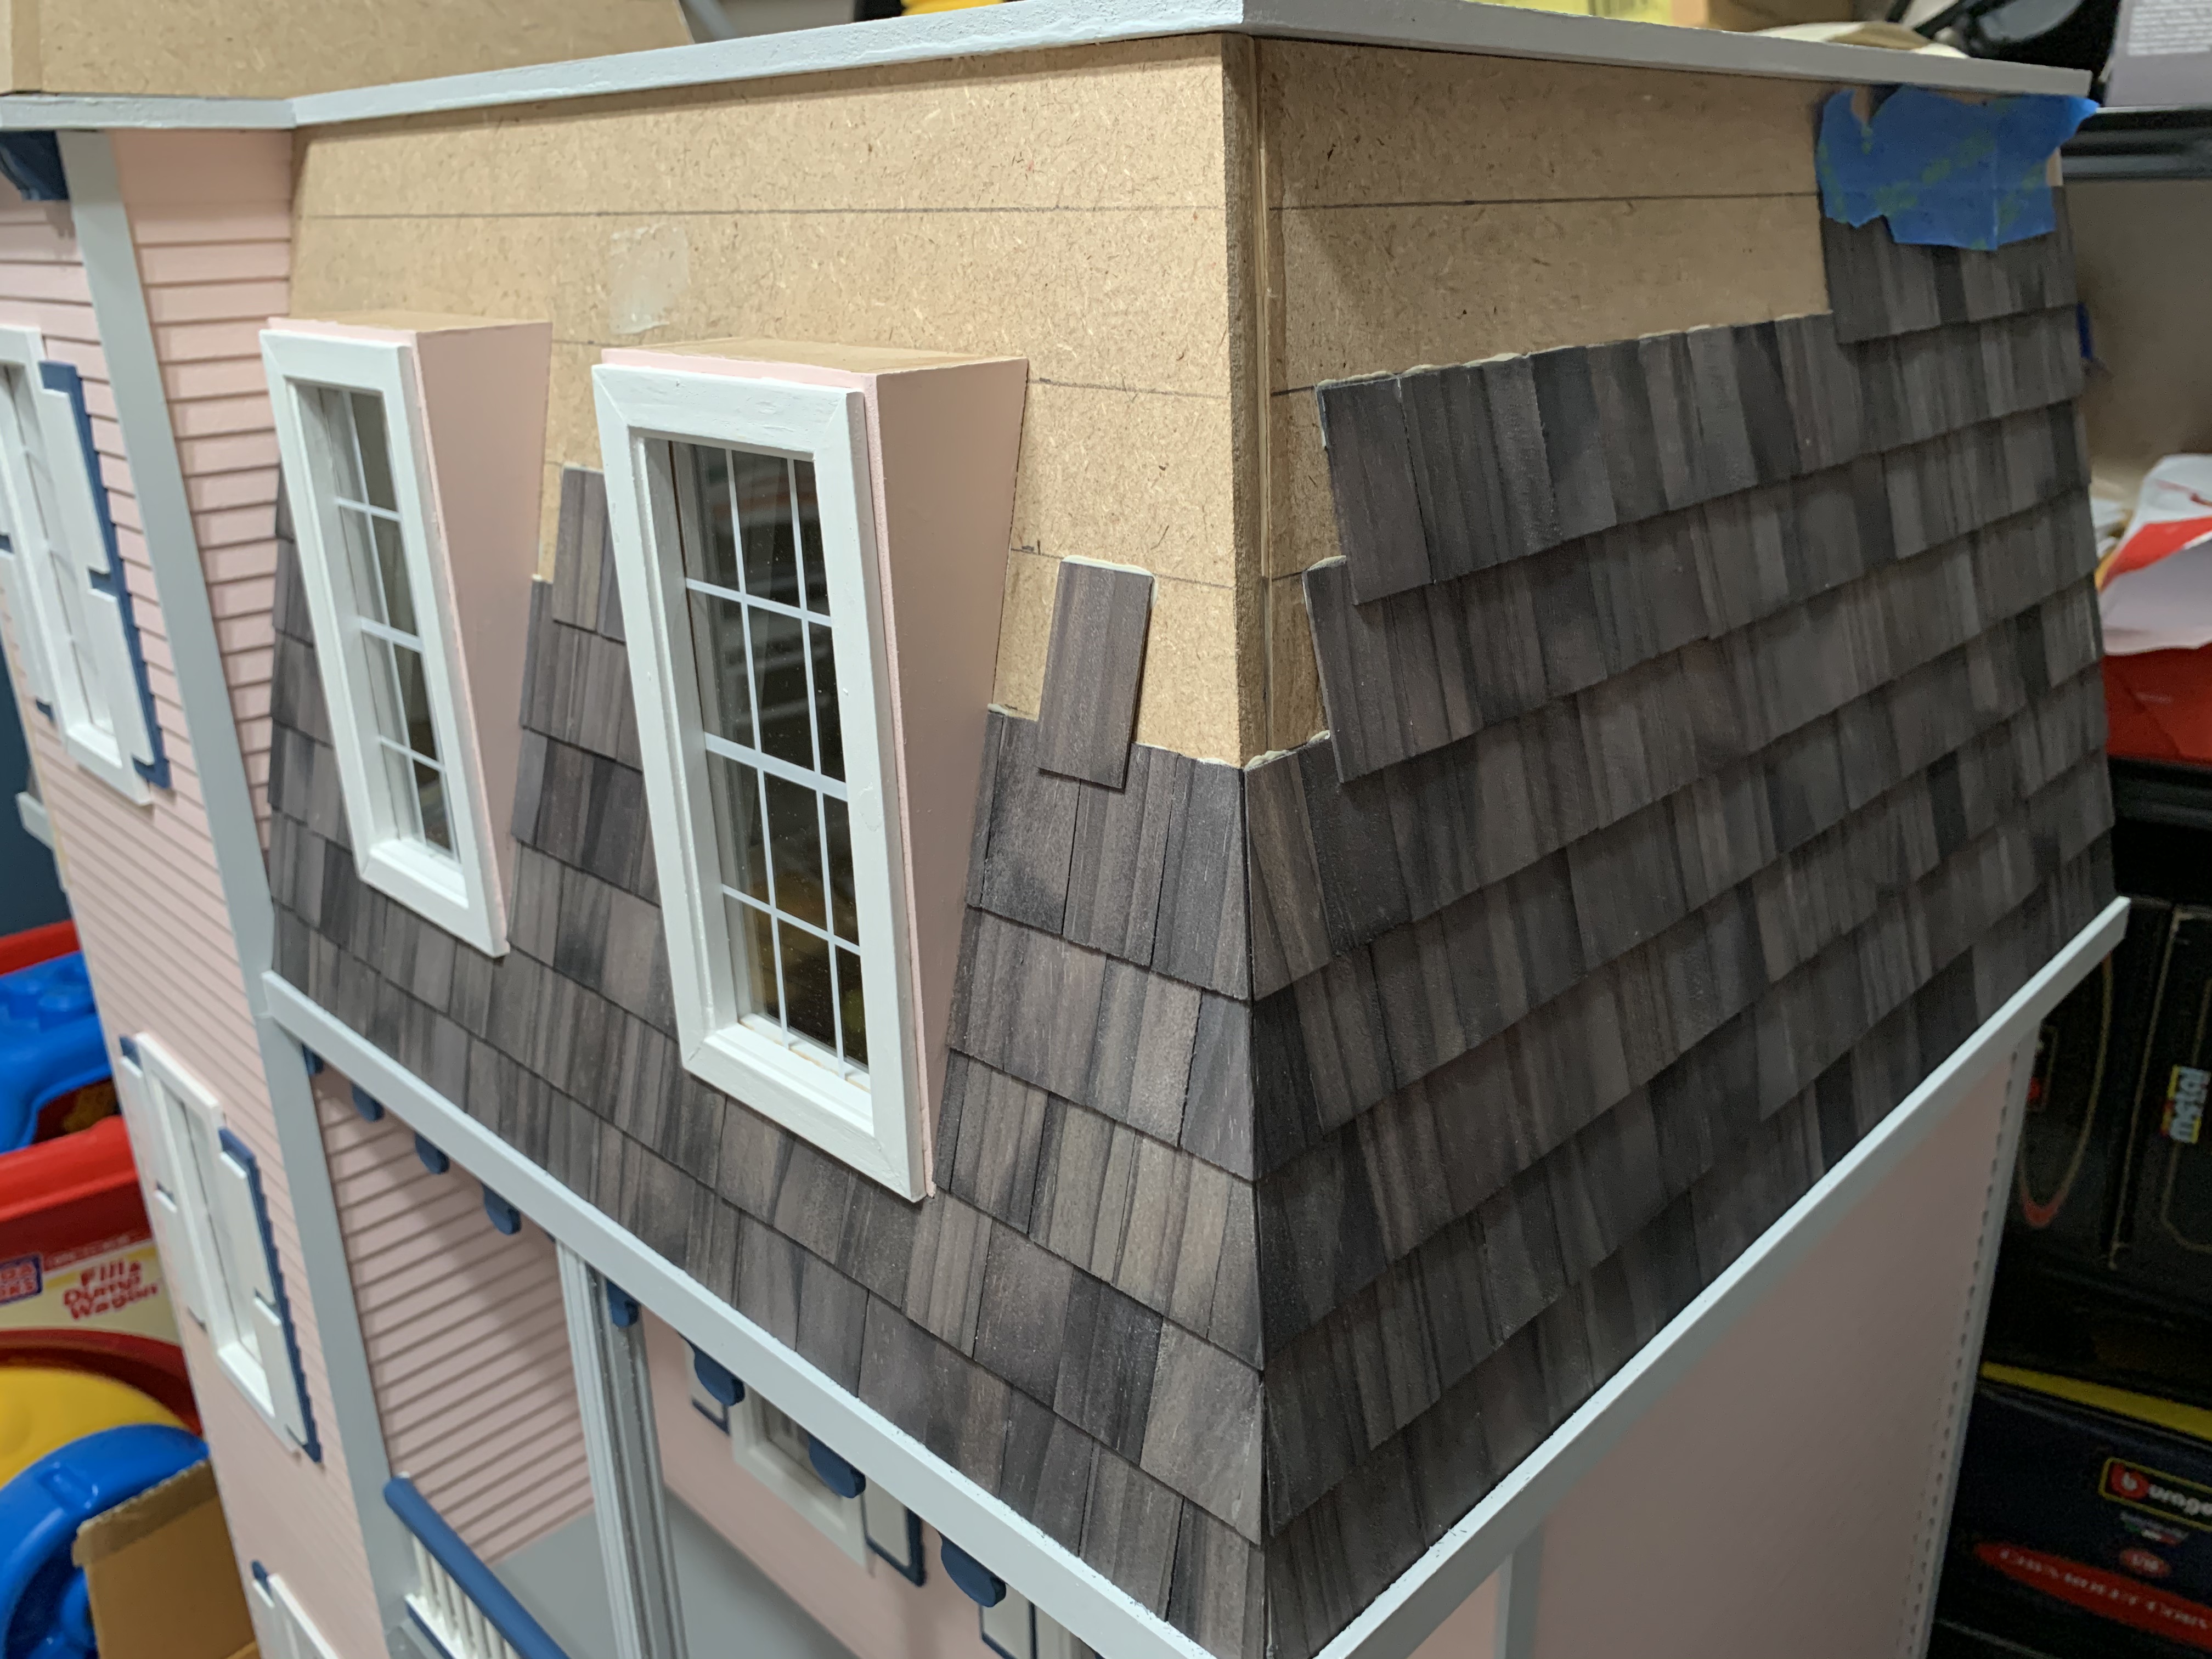
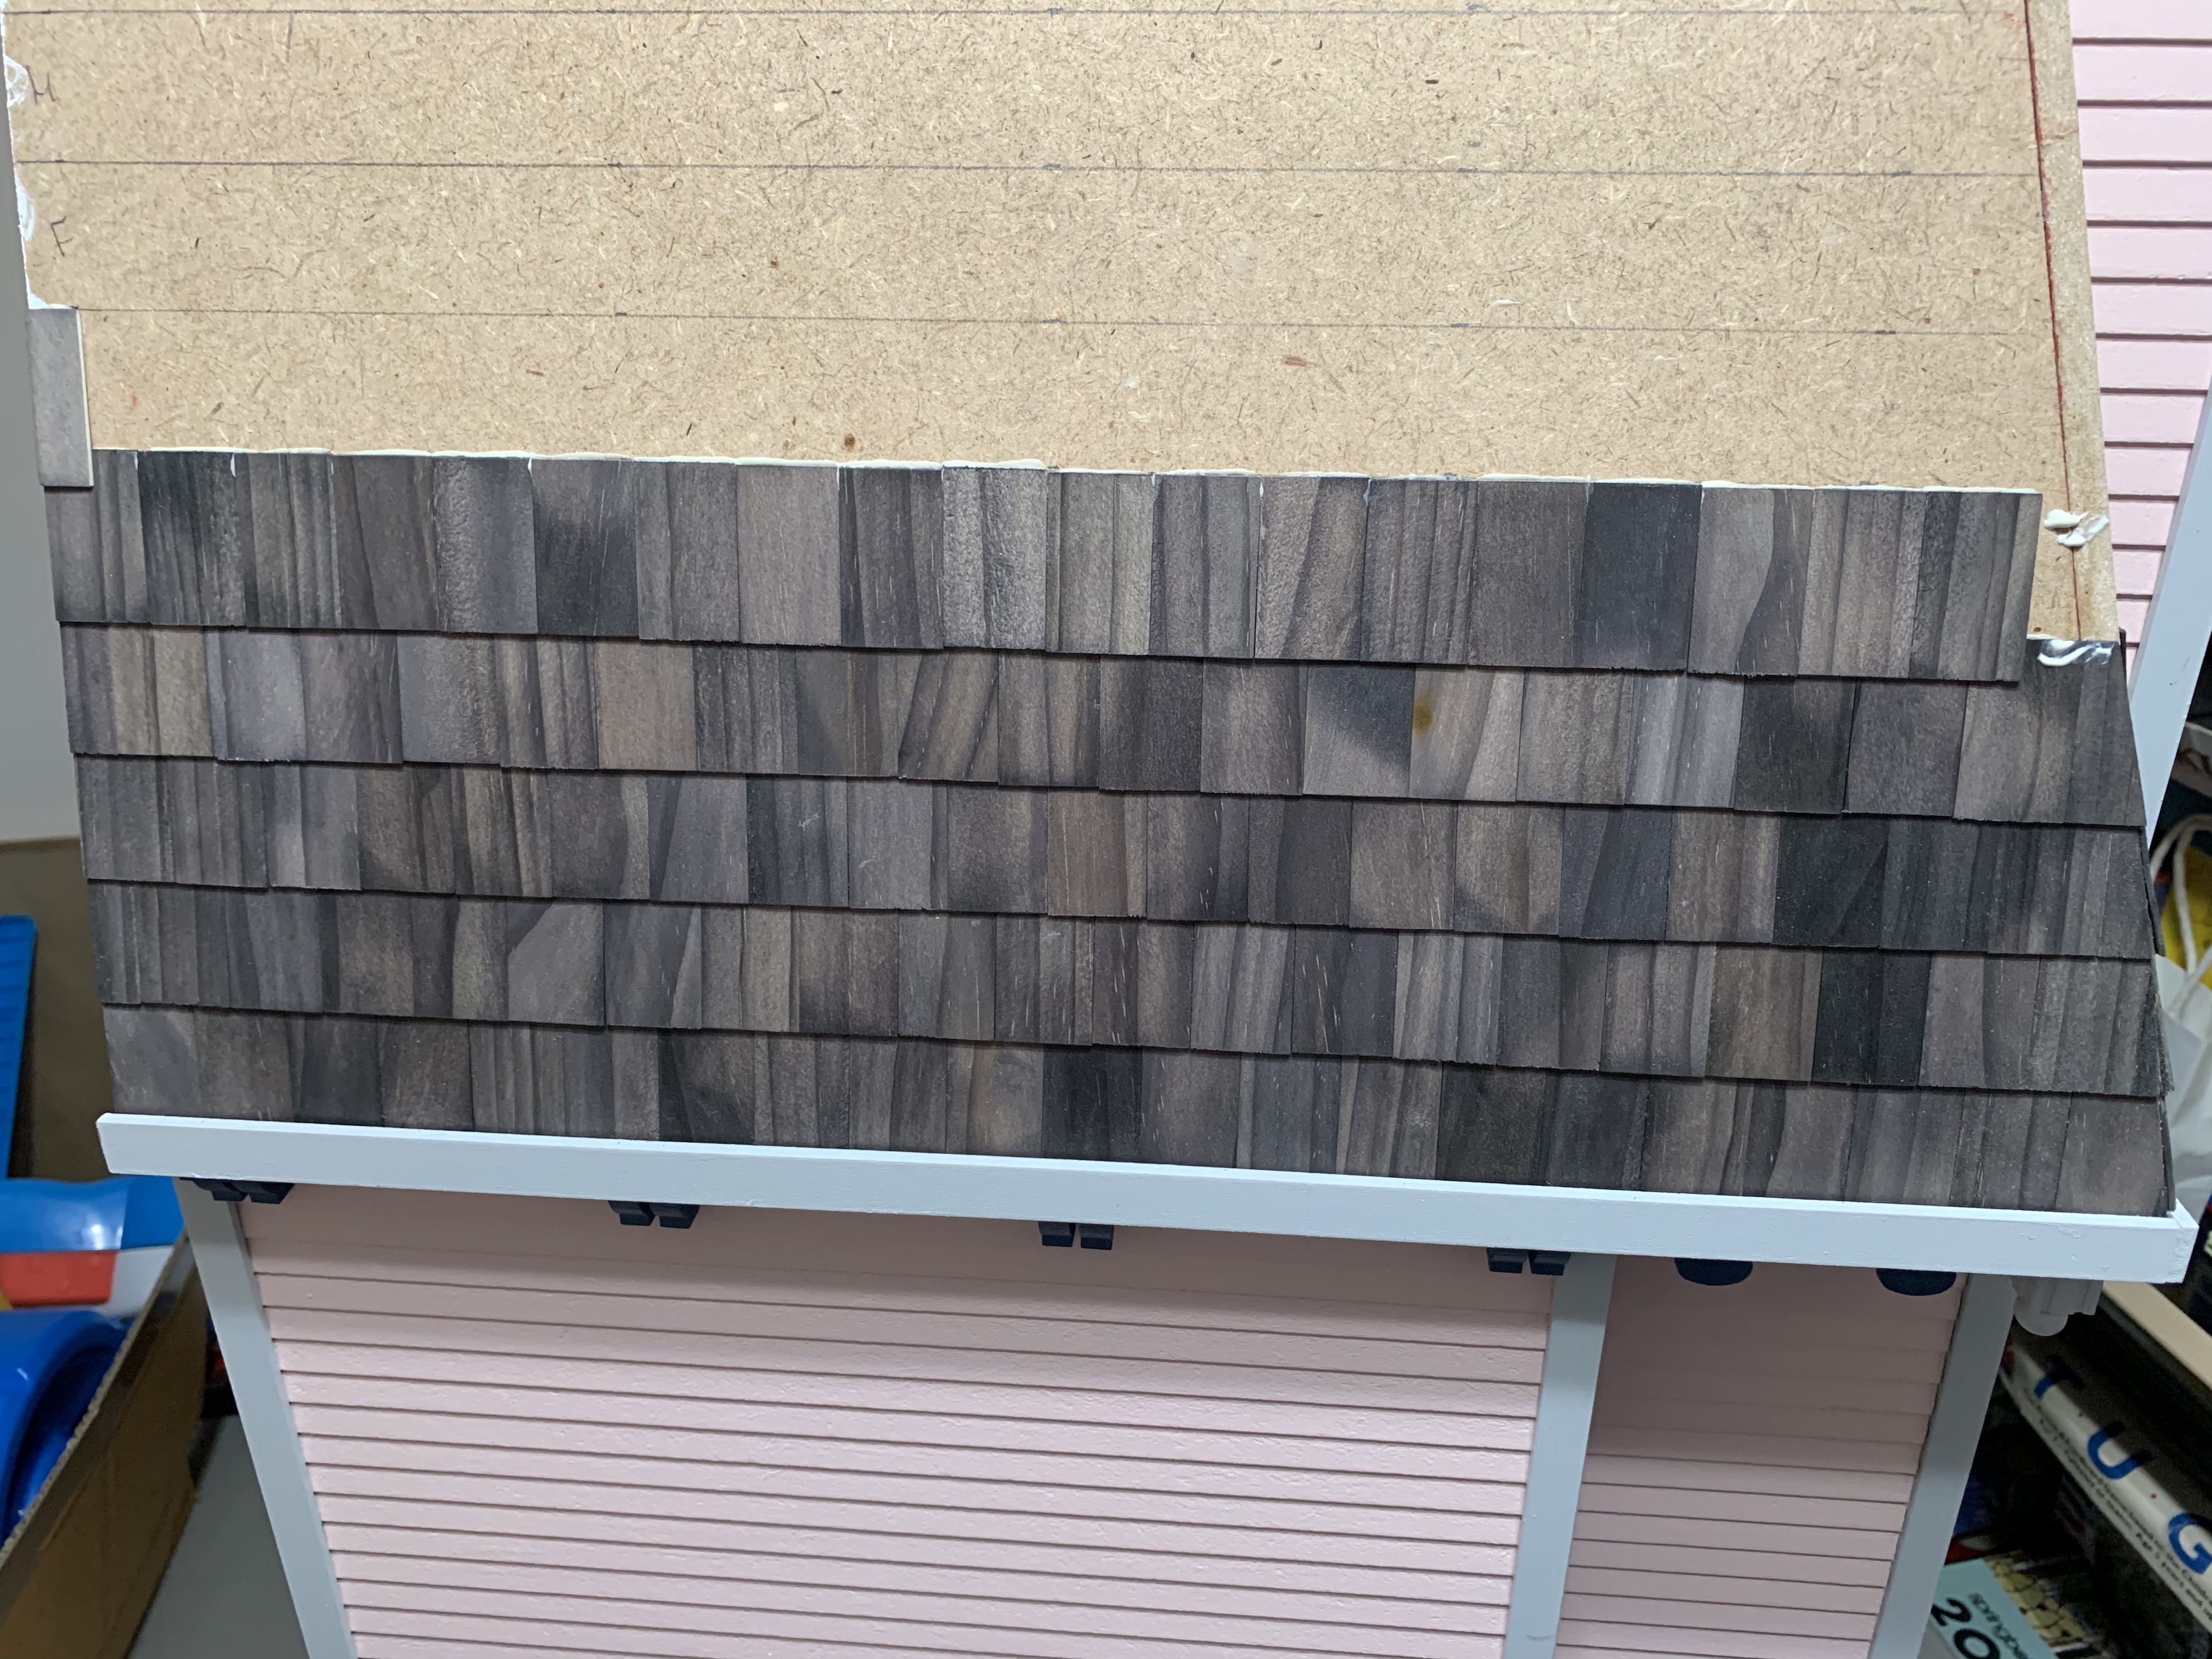
Progress along the sides went fairly quickly although I found if I tried to glue an entire row, some of the shingles would buckle as the glue dried. Therefore, I only did half a row at a time and to prevent the buckling, held the shingles in place with blue painters’ tape (seen in the top right of the photo above).

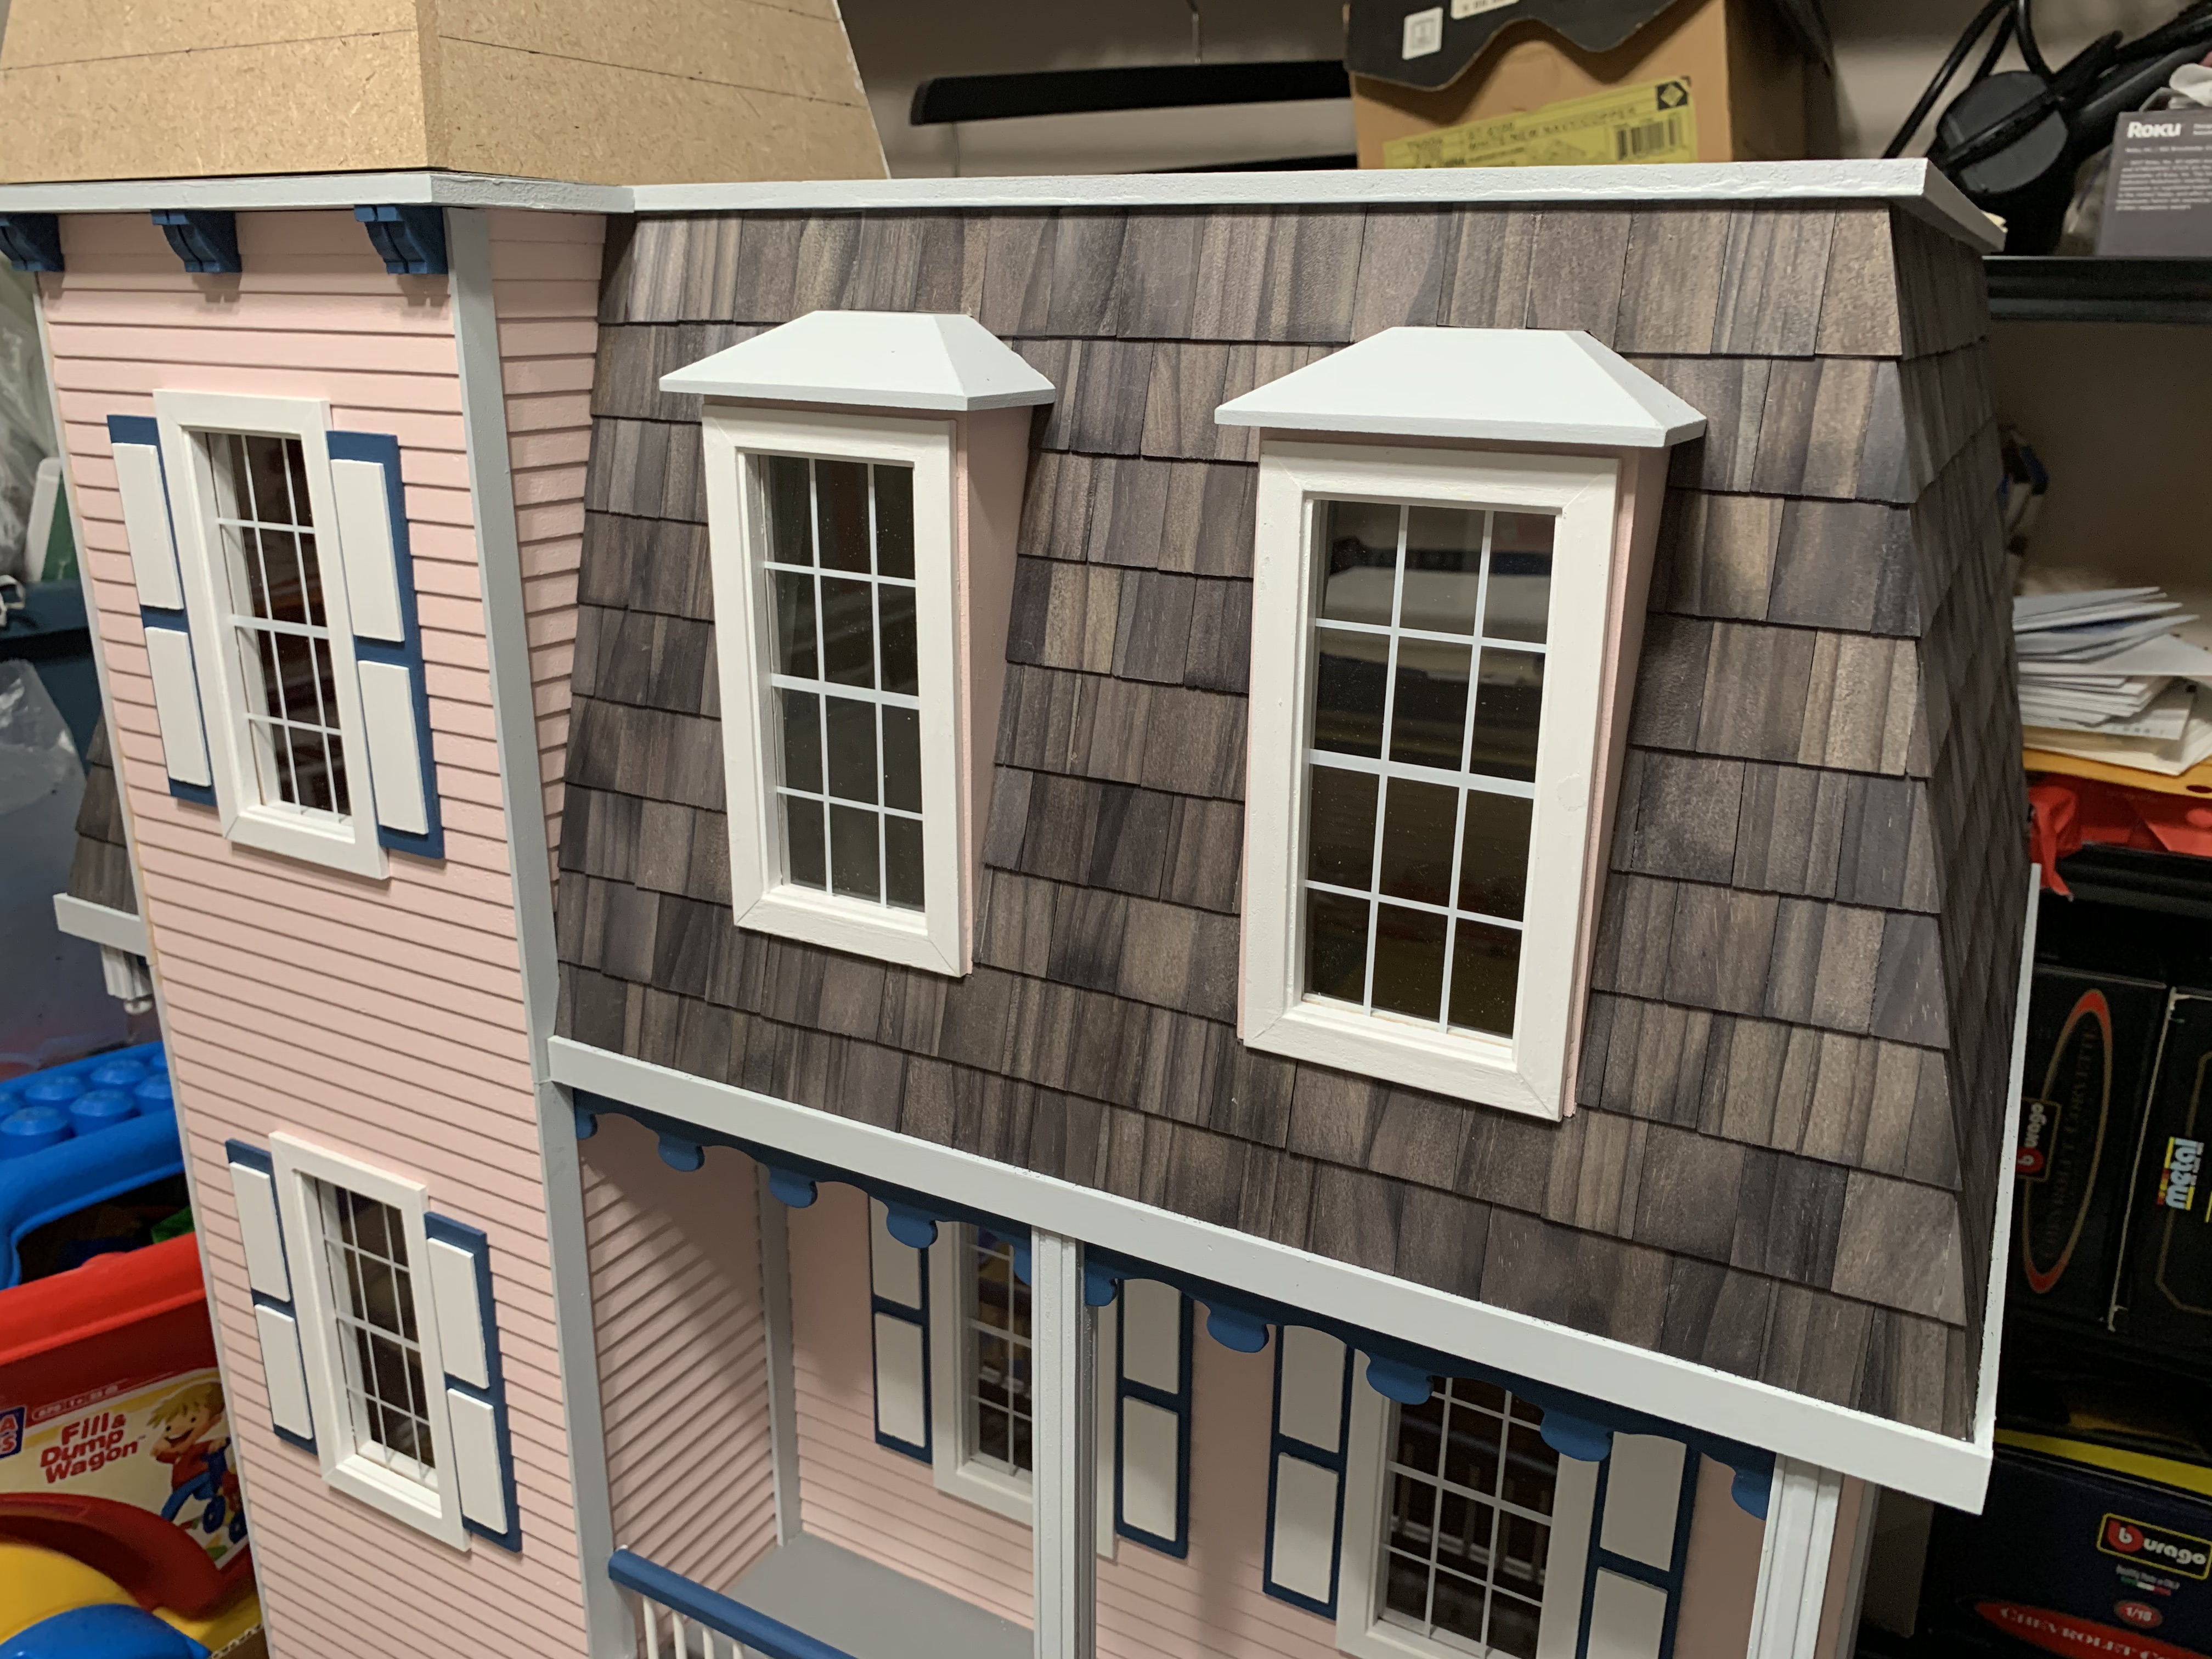
Progress along the front was slowed due to all the piecing that had to be done around the two dormers. At times, this process was slow and tedious with all the cutting and sanding, re-cutting and re-sanding to get the pieces to just the right size. Then, once glued in place, letting them dry before working on the next row. But I kept plugging at it a little each day and soon I had finished the Mansard roof.
All that remained of the roofing was shingling the three sides of the tower.
By the time I had finished gluing on the last of the shingles, I had quite a pile of scraps left over from all of my “trial and error” cuts.
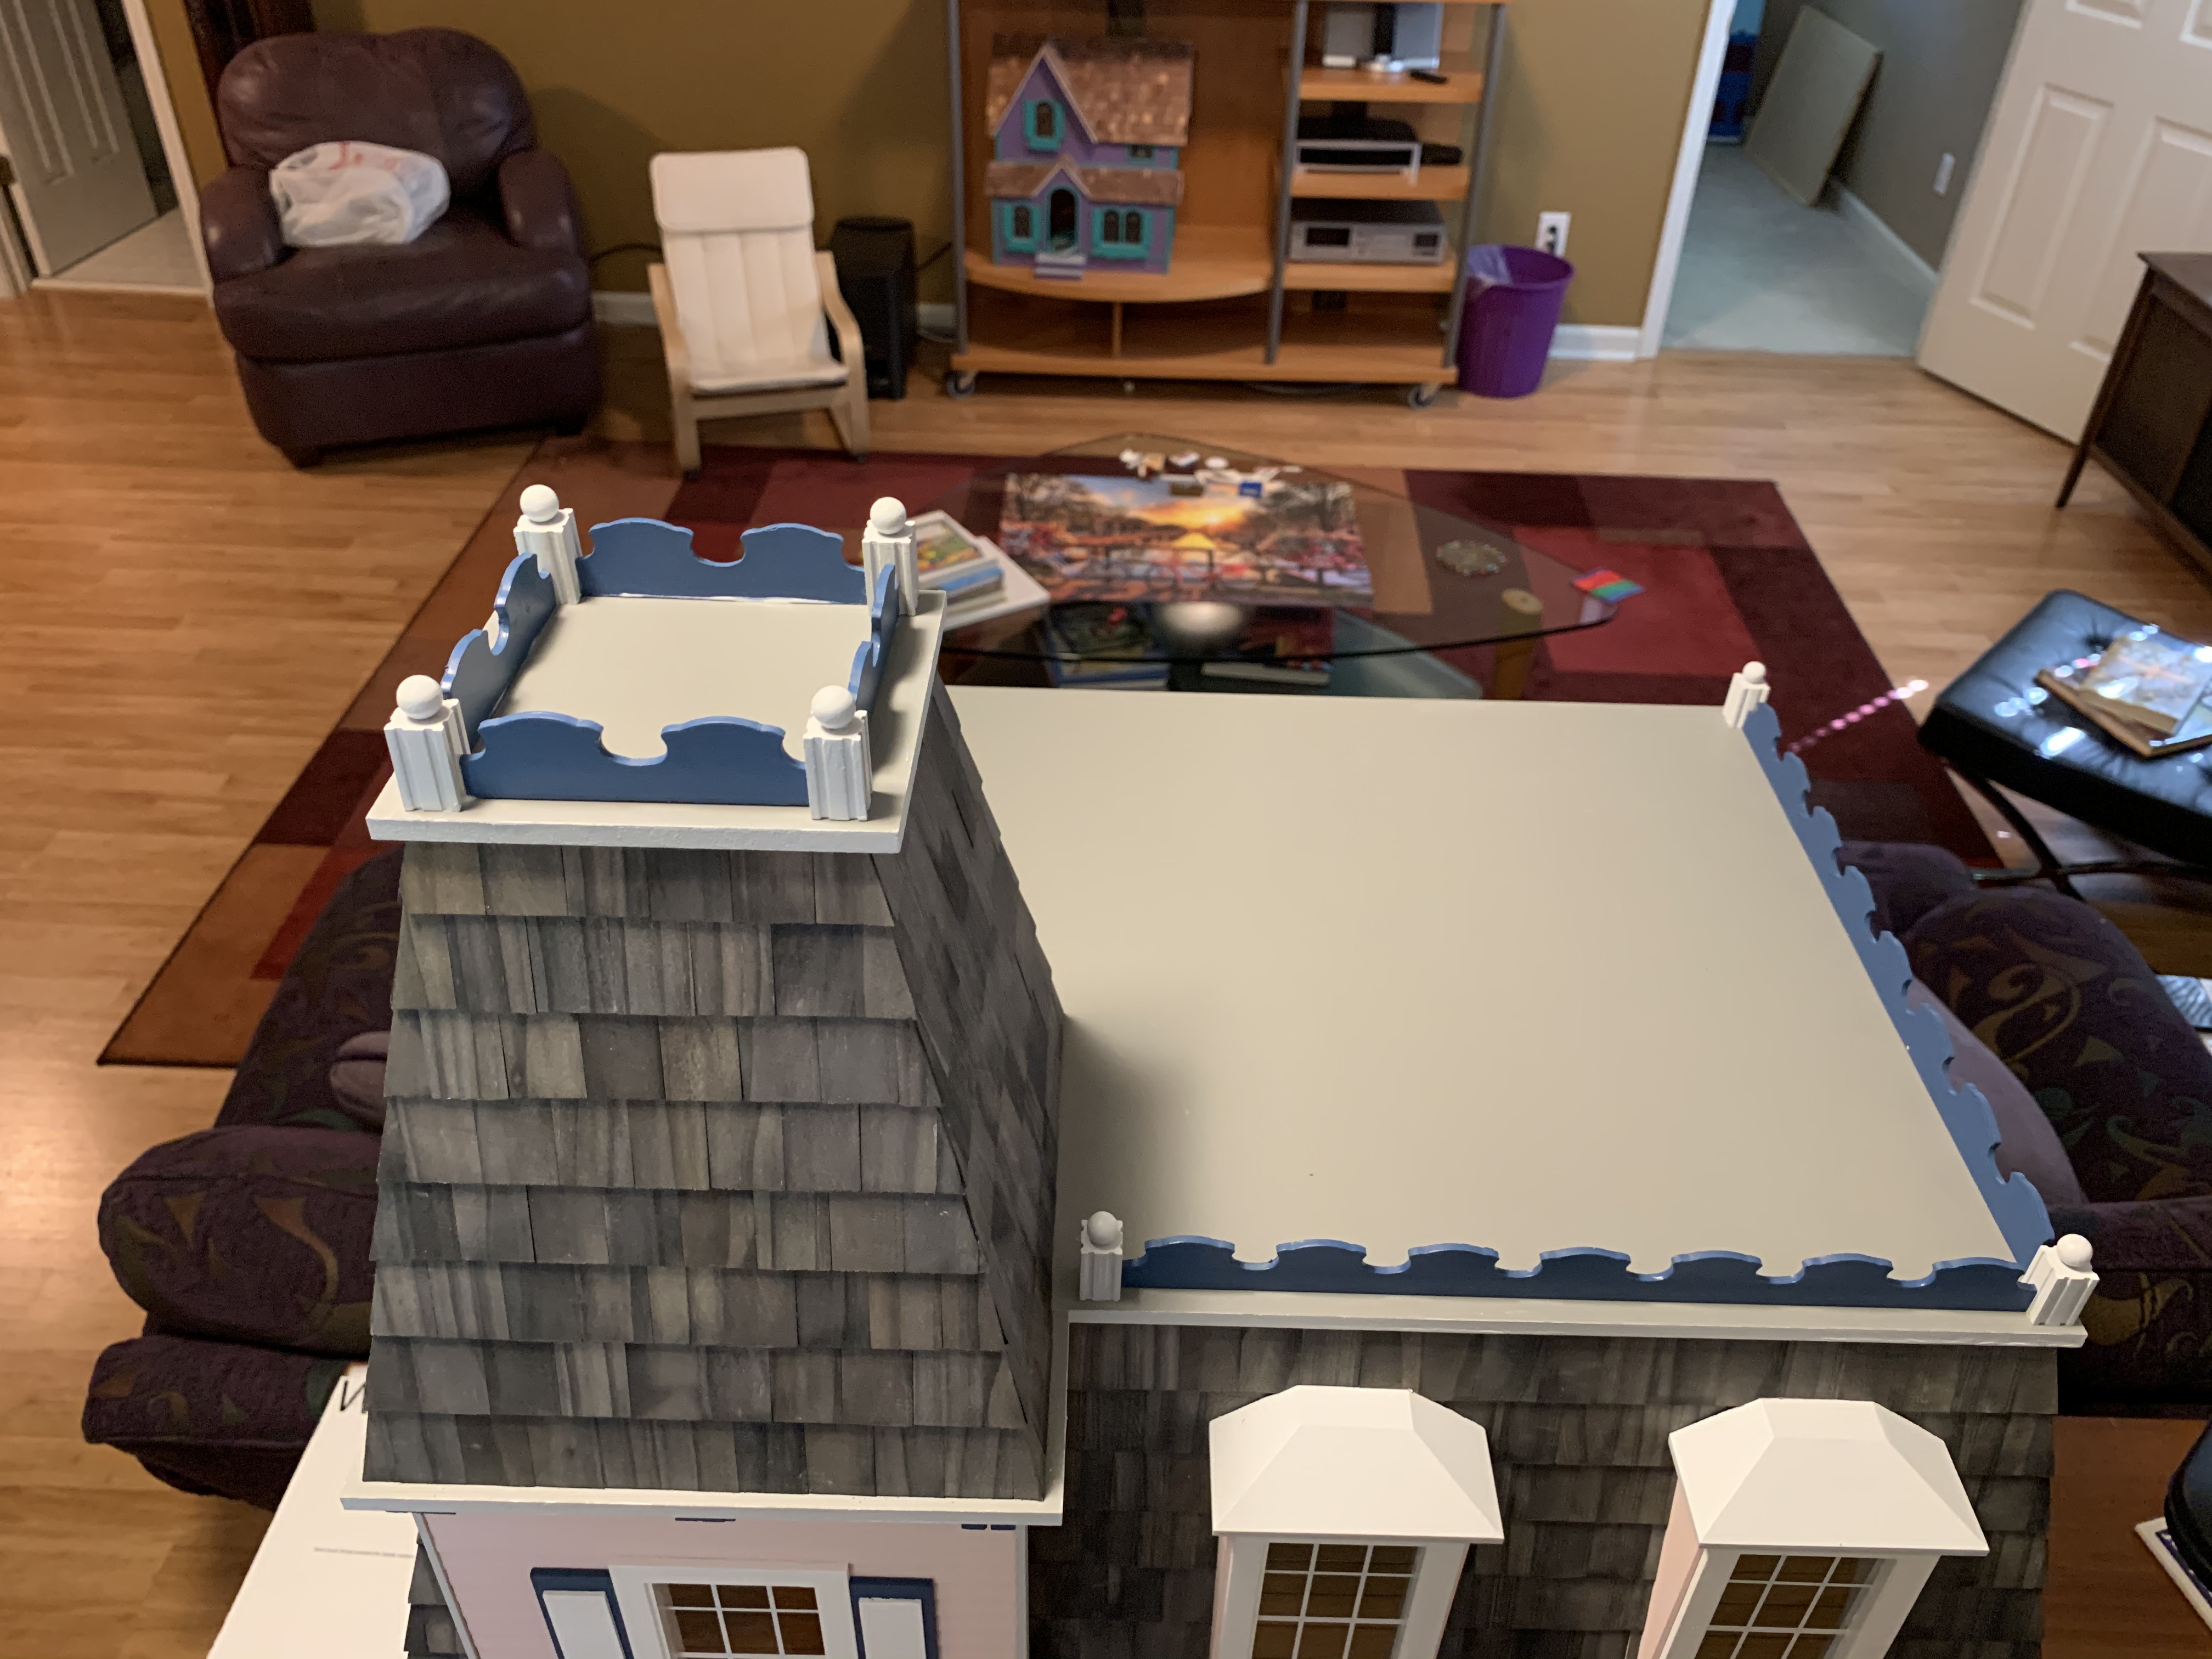
The last assembly improvement I made was on these flute posts that would form the corners of the roof top cresting.

Each post was to be topped with a small ball that just happened to already have a hole pre-drilled into it. I felt simply gluing a ball to the top would result in a finished piece that could easily be broken by small inquiring hands. Therefore, drawing two lines from the corners of the post to get the true center, I then drilled a hole of the same diameter. Then using a small square piece of wood (I didn’t have a dowel rod), I first glued the stick into the ball and then into the post after painting. Painting the crest pieces, flower boxes and dormer roofs as well got everything ready for the final assembly step.

Once all the shingling was complete, the last steps were to attach the roof cresting…
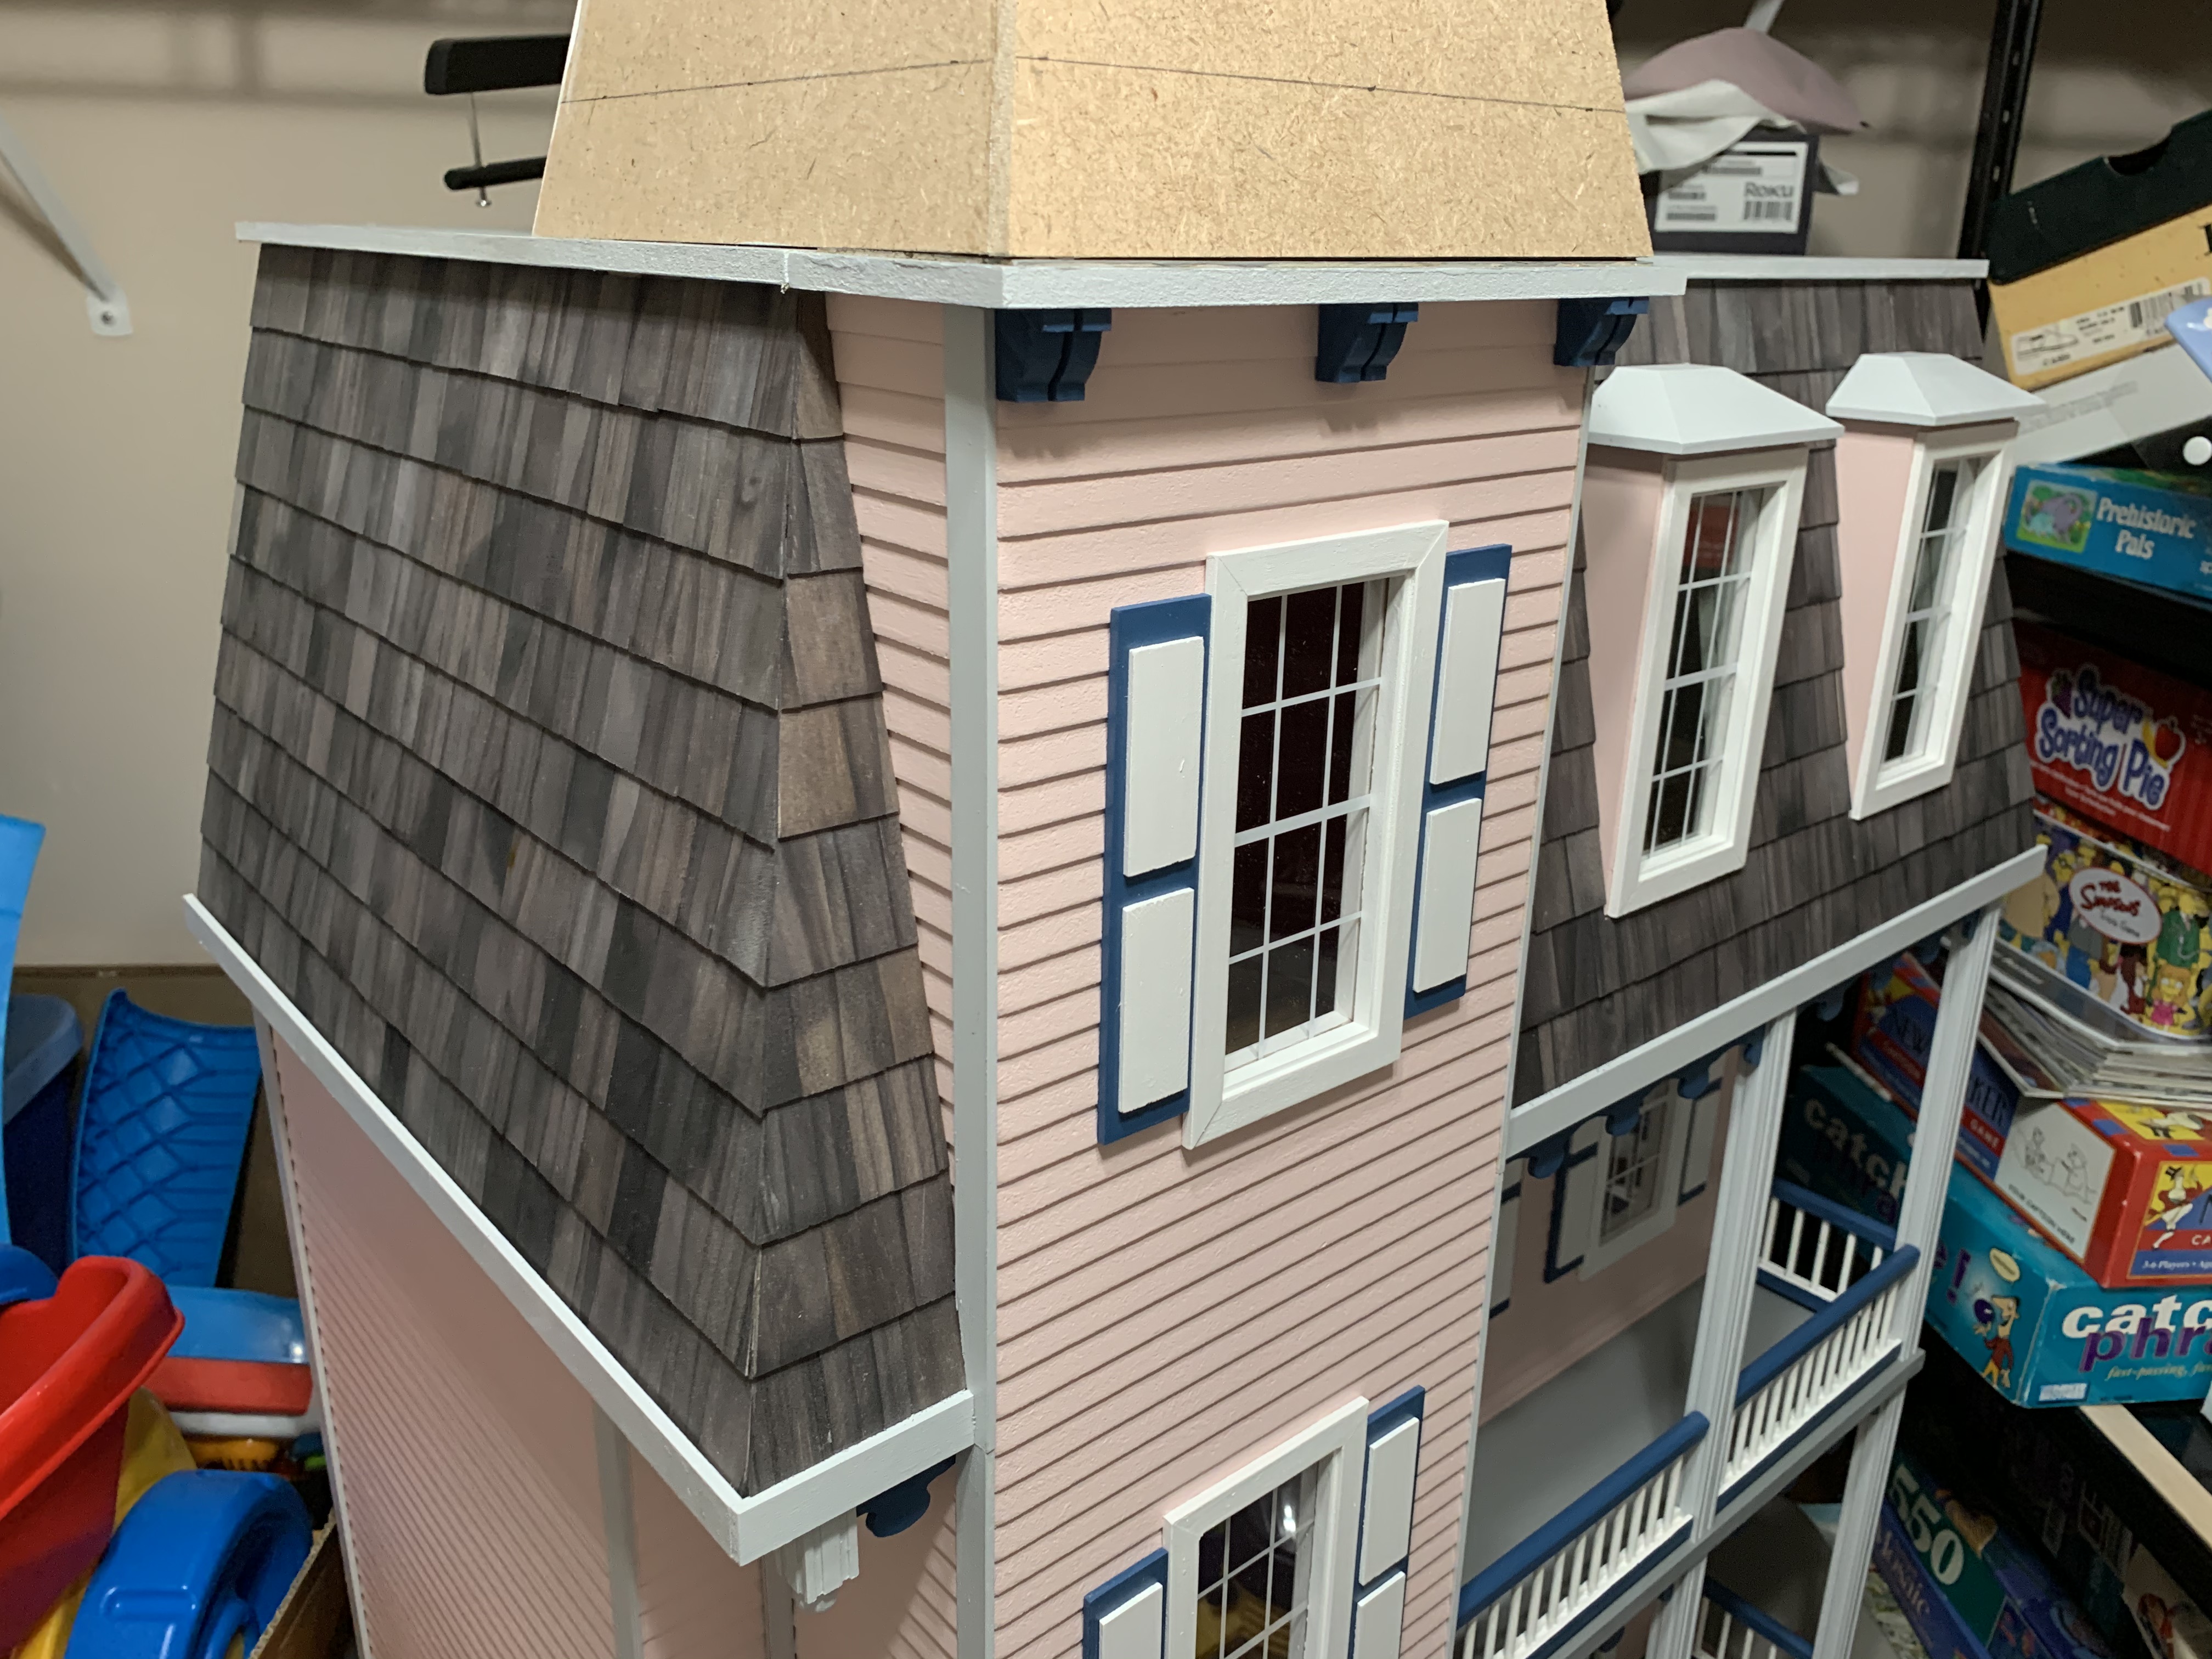
…and then the window boxes.
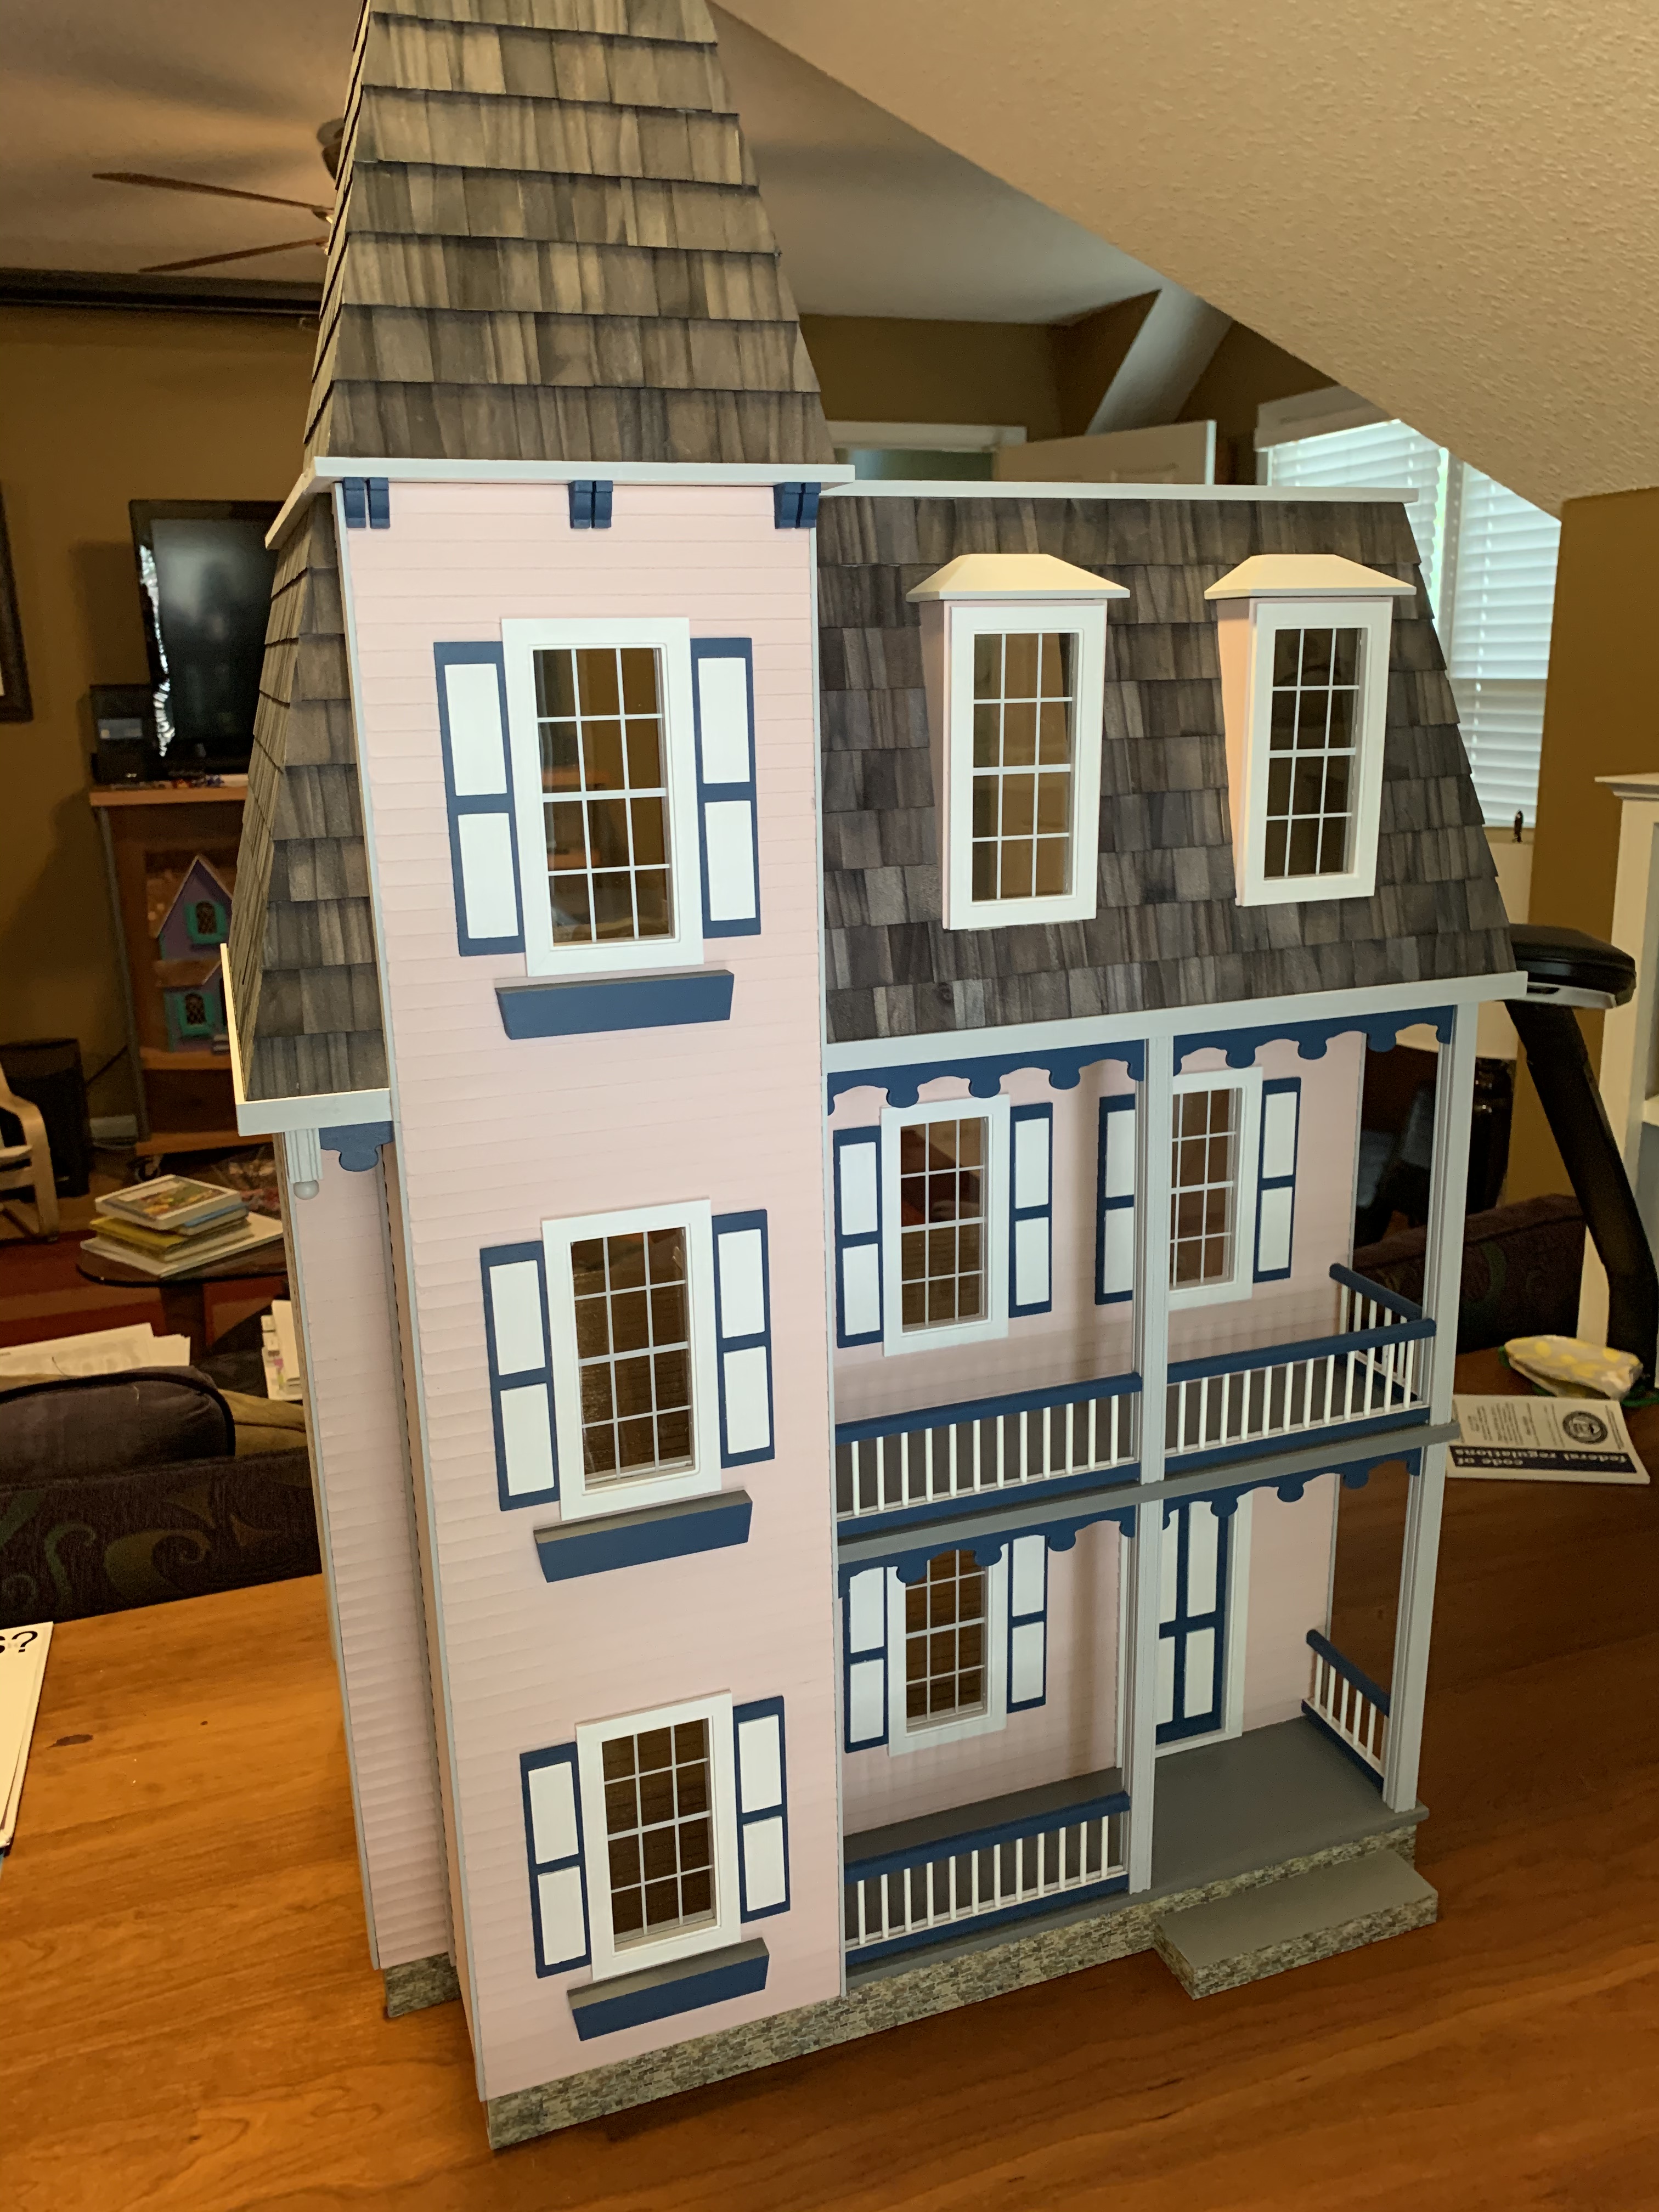
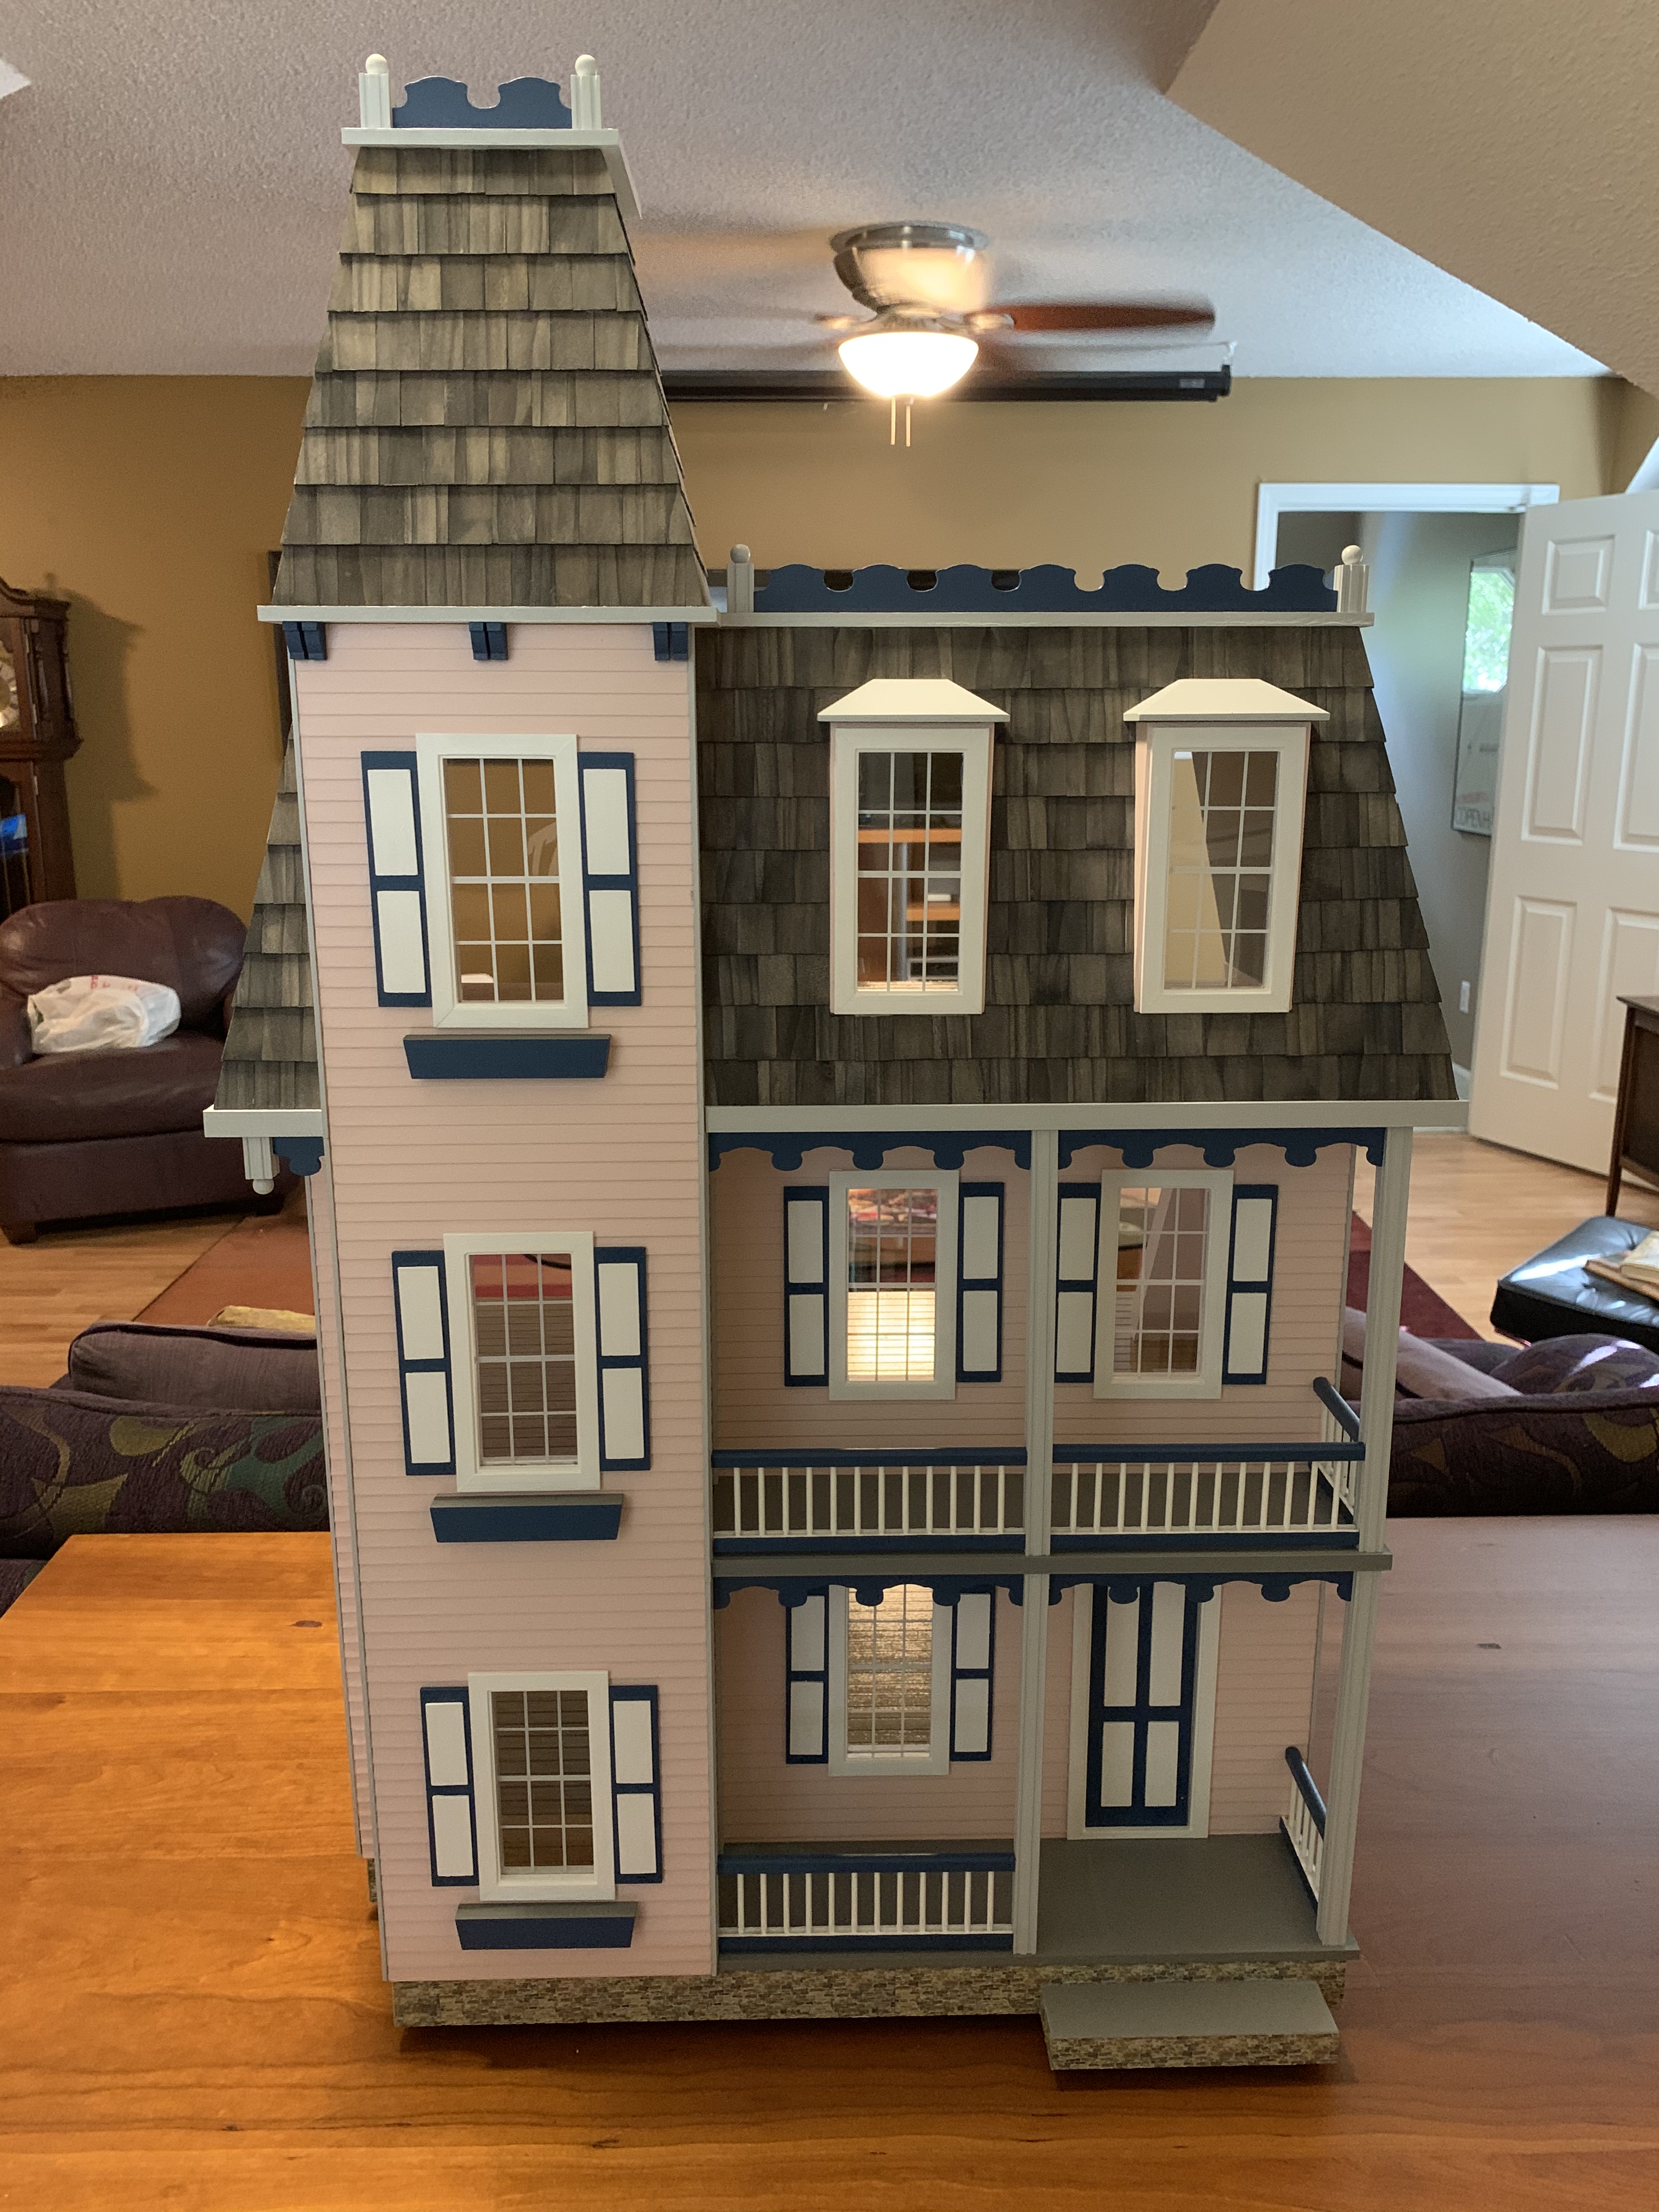
At that point, I could step back and admire the finished house!
But I had noticed when I lifted the house onto this work surface to complete the final assembly work that due to its heavy weight, my granddaughter would not be able to easily turn the house around from front to back.
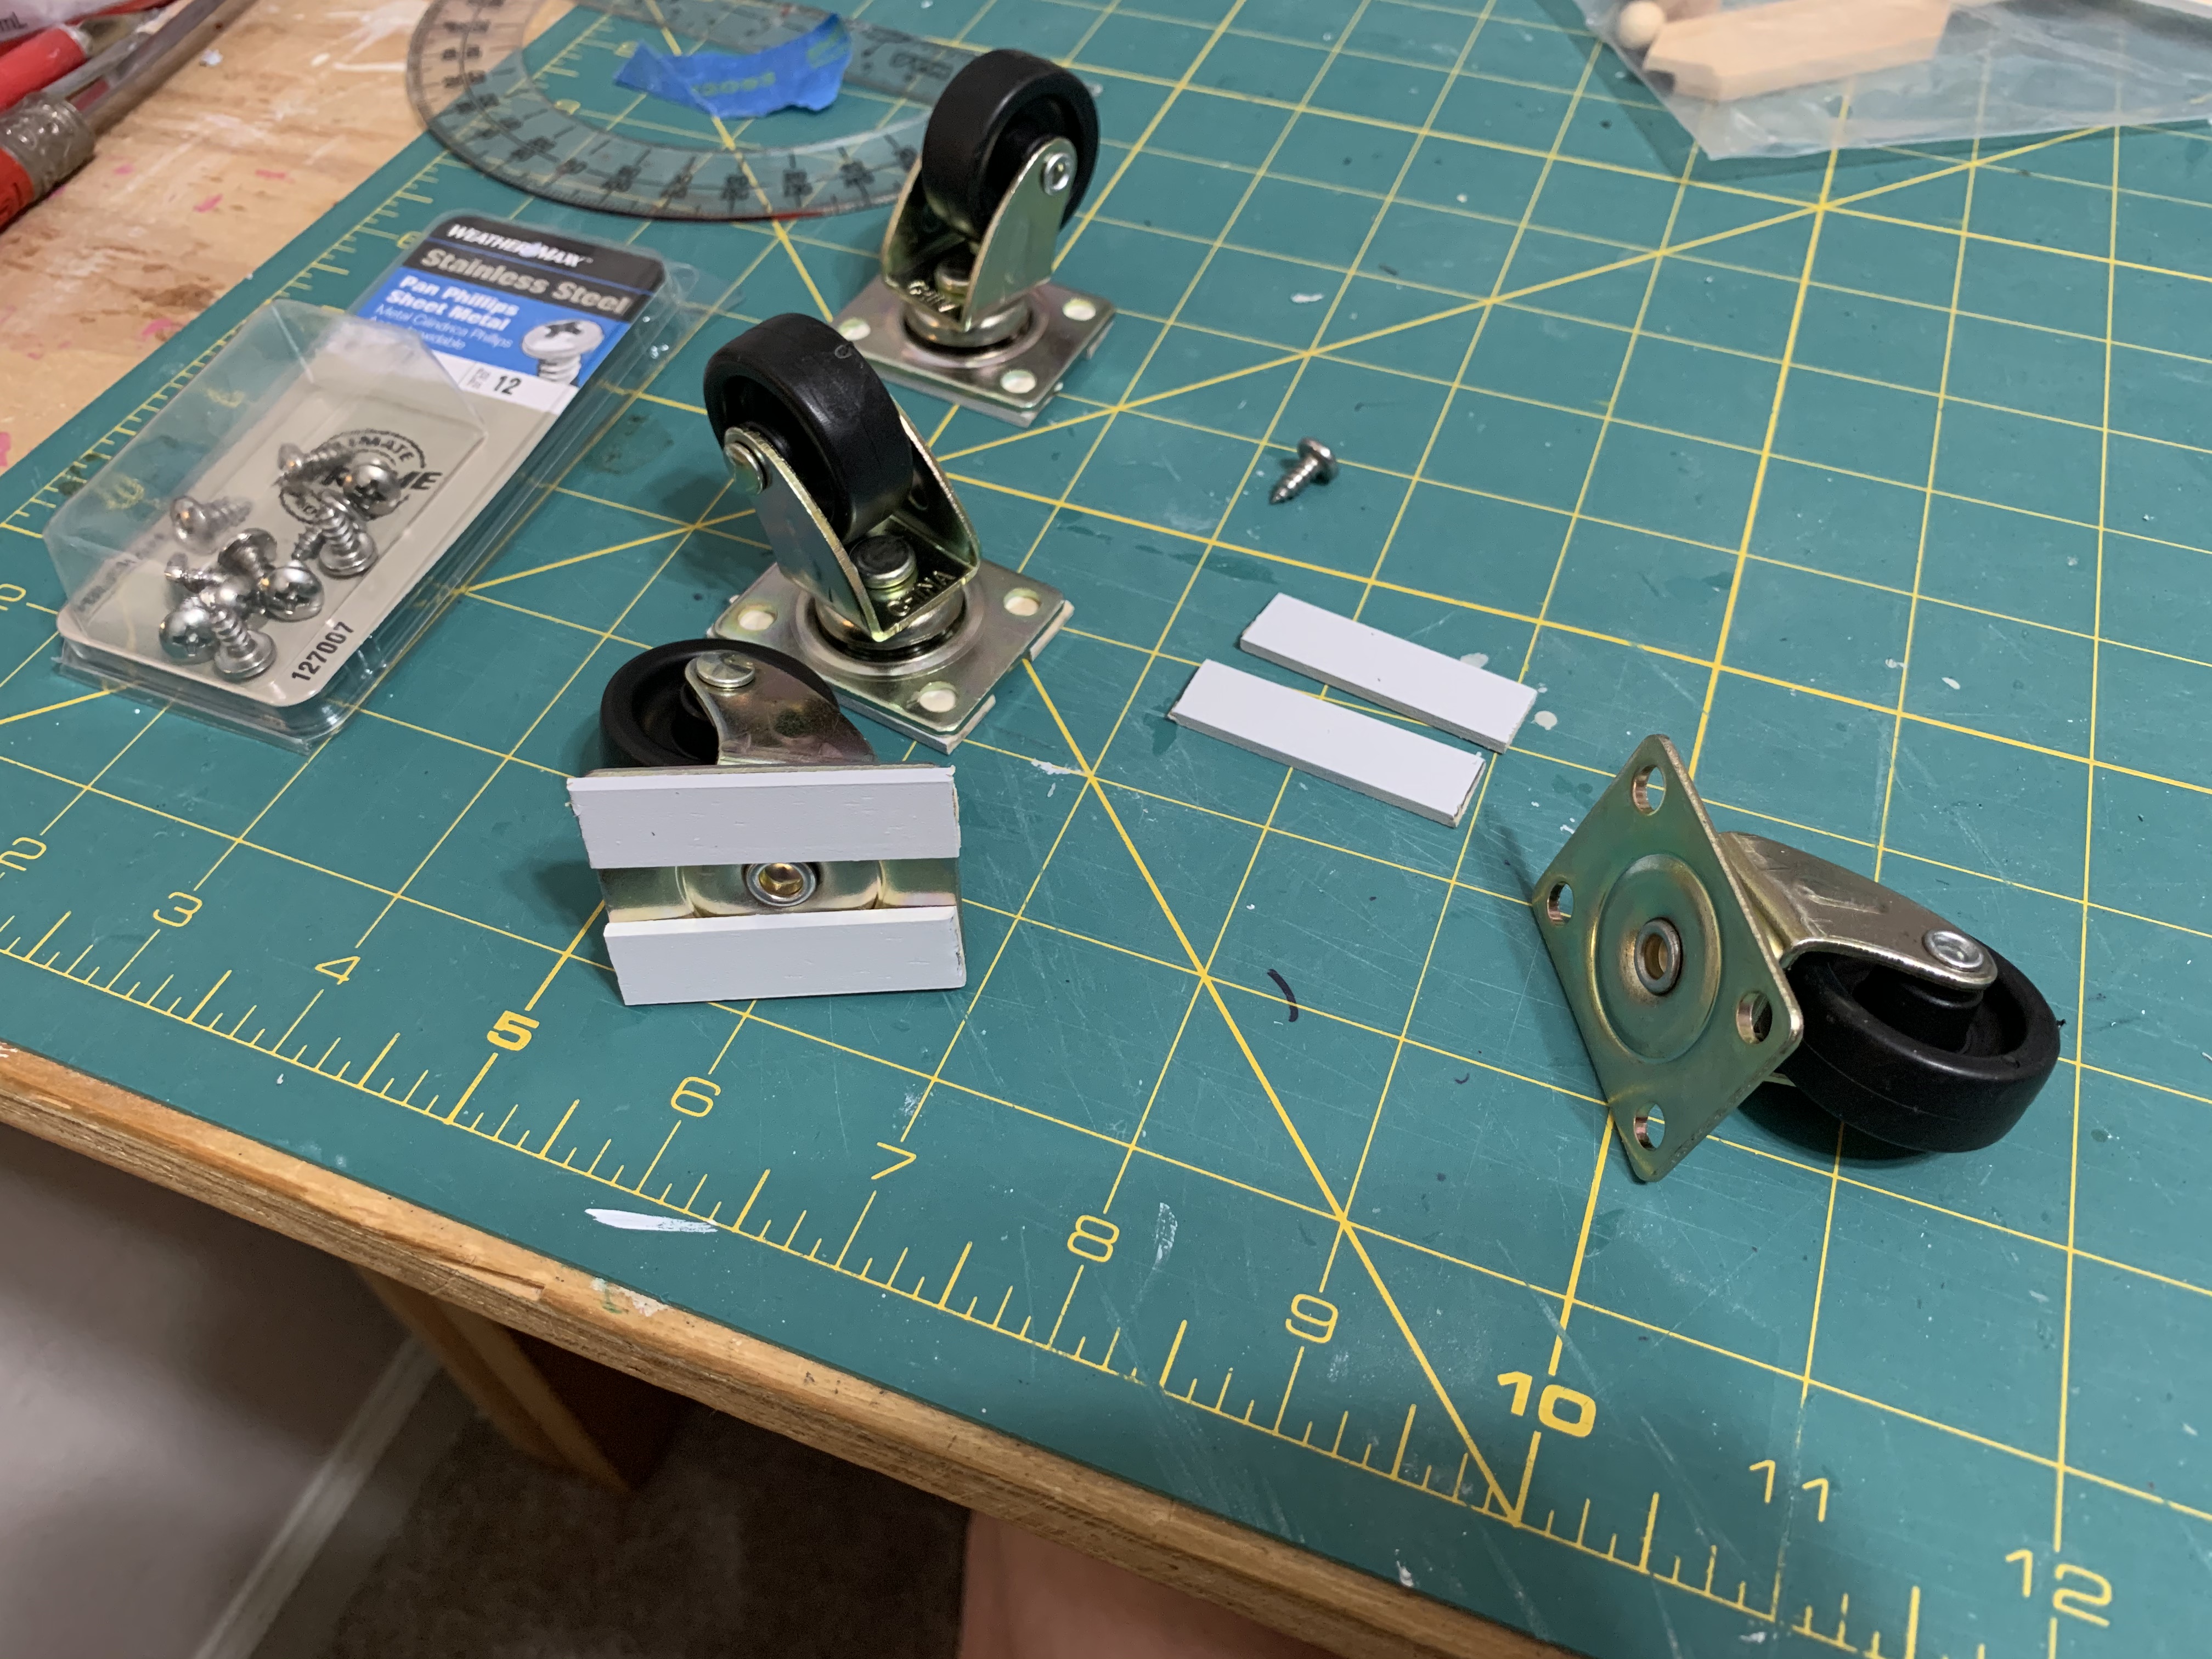
So, I came up with the idea of attaching small caster wheels under the foundation. The shortest length screws I could find were 3/8 of an inch so to ensure the screw threads did not come up through the first floor, I glued these small strips of wood to the wheels before gluing and screwing them to the foundation.
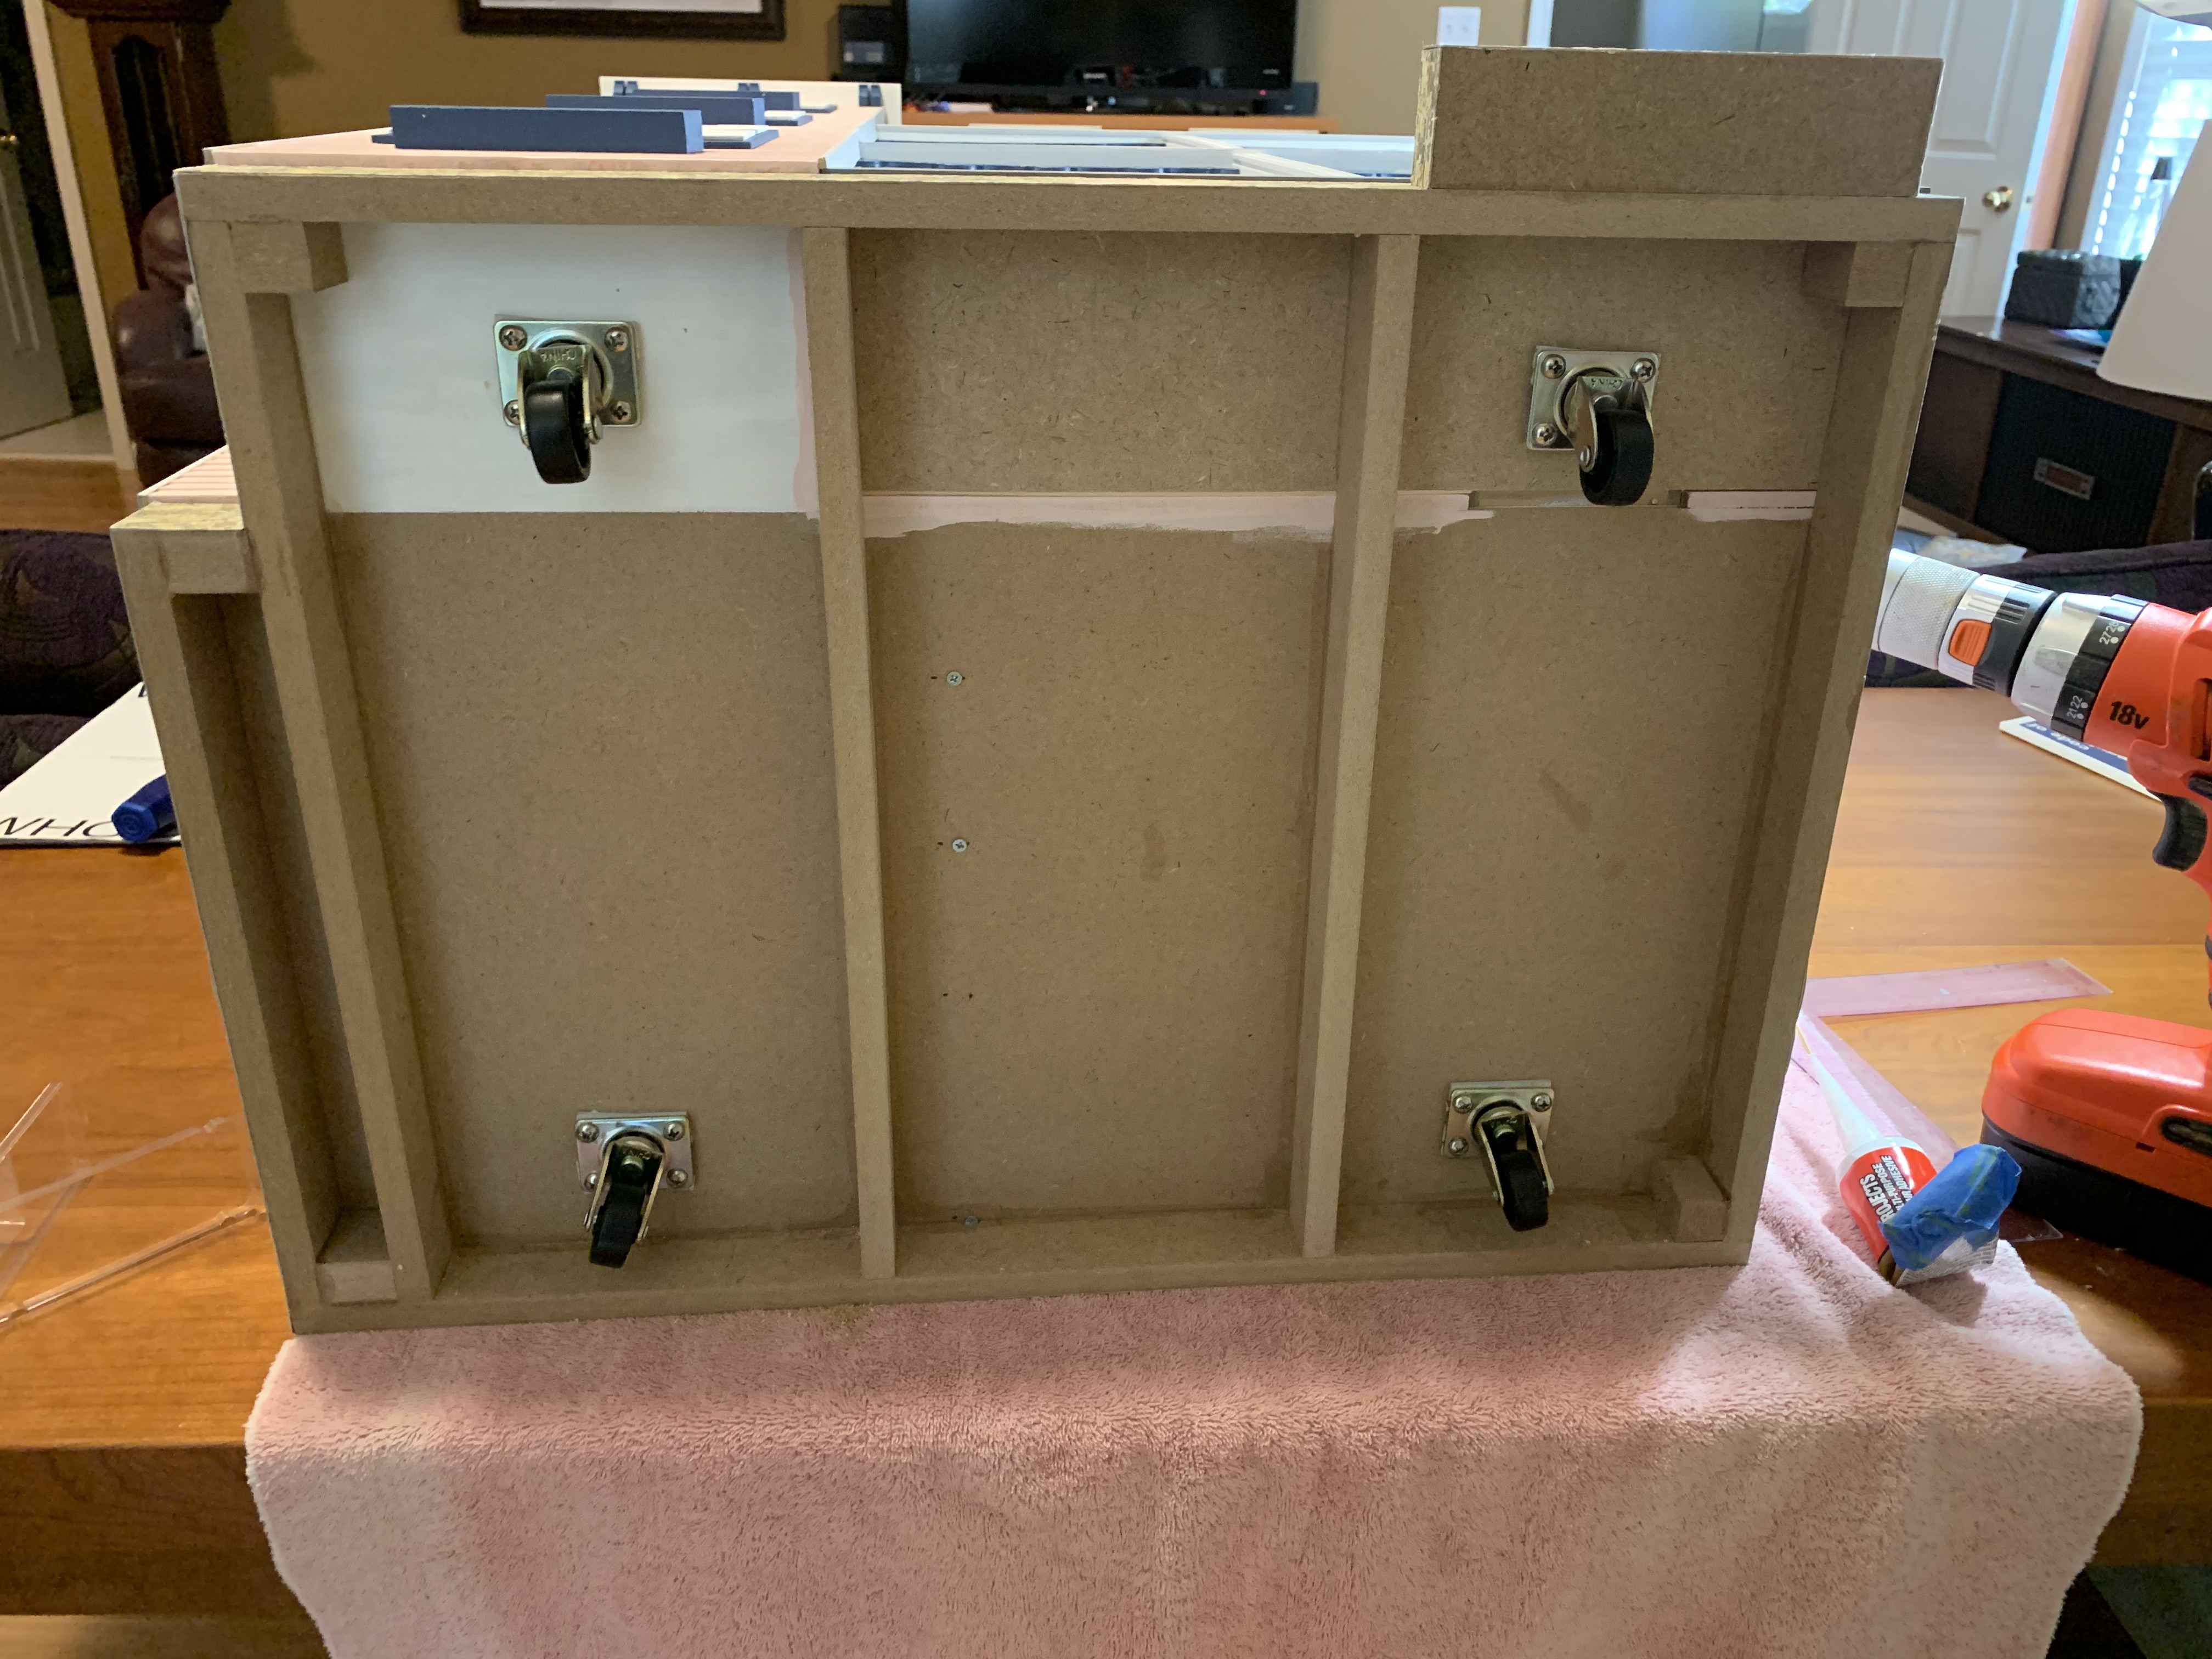
With these attached, the house could be easily turned side to side or front to back.
I completed the house by the end of May and so then needed to keep it hidden until Christmas. I knew it could not stay in its present cloistered location as my wife had already prevented our granddaughter from entering the playroom closet looking for games that were also stored in that closet. So, into a less used closet it went for safer keeping until Christmas morning when my granddaughter would excitedly discover it under the tree.

As I closed the door on the newly finished doll house, I reflected back on what fun I had had building it. It was indeed a bittersweet moment as I was sad the construction phase was over but quite pleased with the final result and the knowledge that the fun had not even started for my granddaughter. But even so, all along I felt I might get the chance to build another doll house for our other granddaughter, who is about eight months younger than our in-town granddaughter.
I checked with her parents and amazingly they had already planned on giving her a doll house and loved the idea of me building it for her. I just then needed to figure out how to get it out to the west coast, undamaged. Oh yea, that big long road trip I had been suggesting my wife and I take out to the west coast; now I had another good reason to pack up the car and hit the road. “California, here we come!”

Categories

It looks amazing! And I love all of this! Both girls will be so excited!
Thanks, I hope they will!
Looks great! Can’t wait to see the one for you-know-who!!!
Thanks! It will be well documented also and you will see it here first. I was making good progress until lately things have gotten a bit crazy.