
Doll House Surprise for My Granddaughter – Topping Out
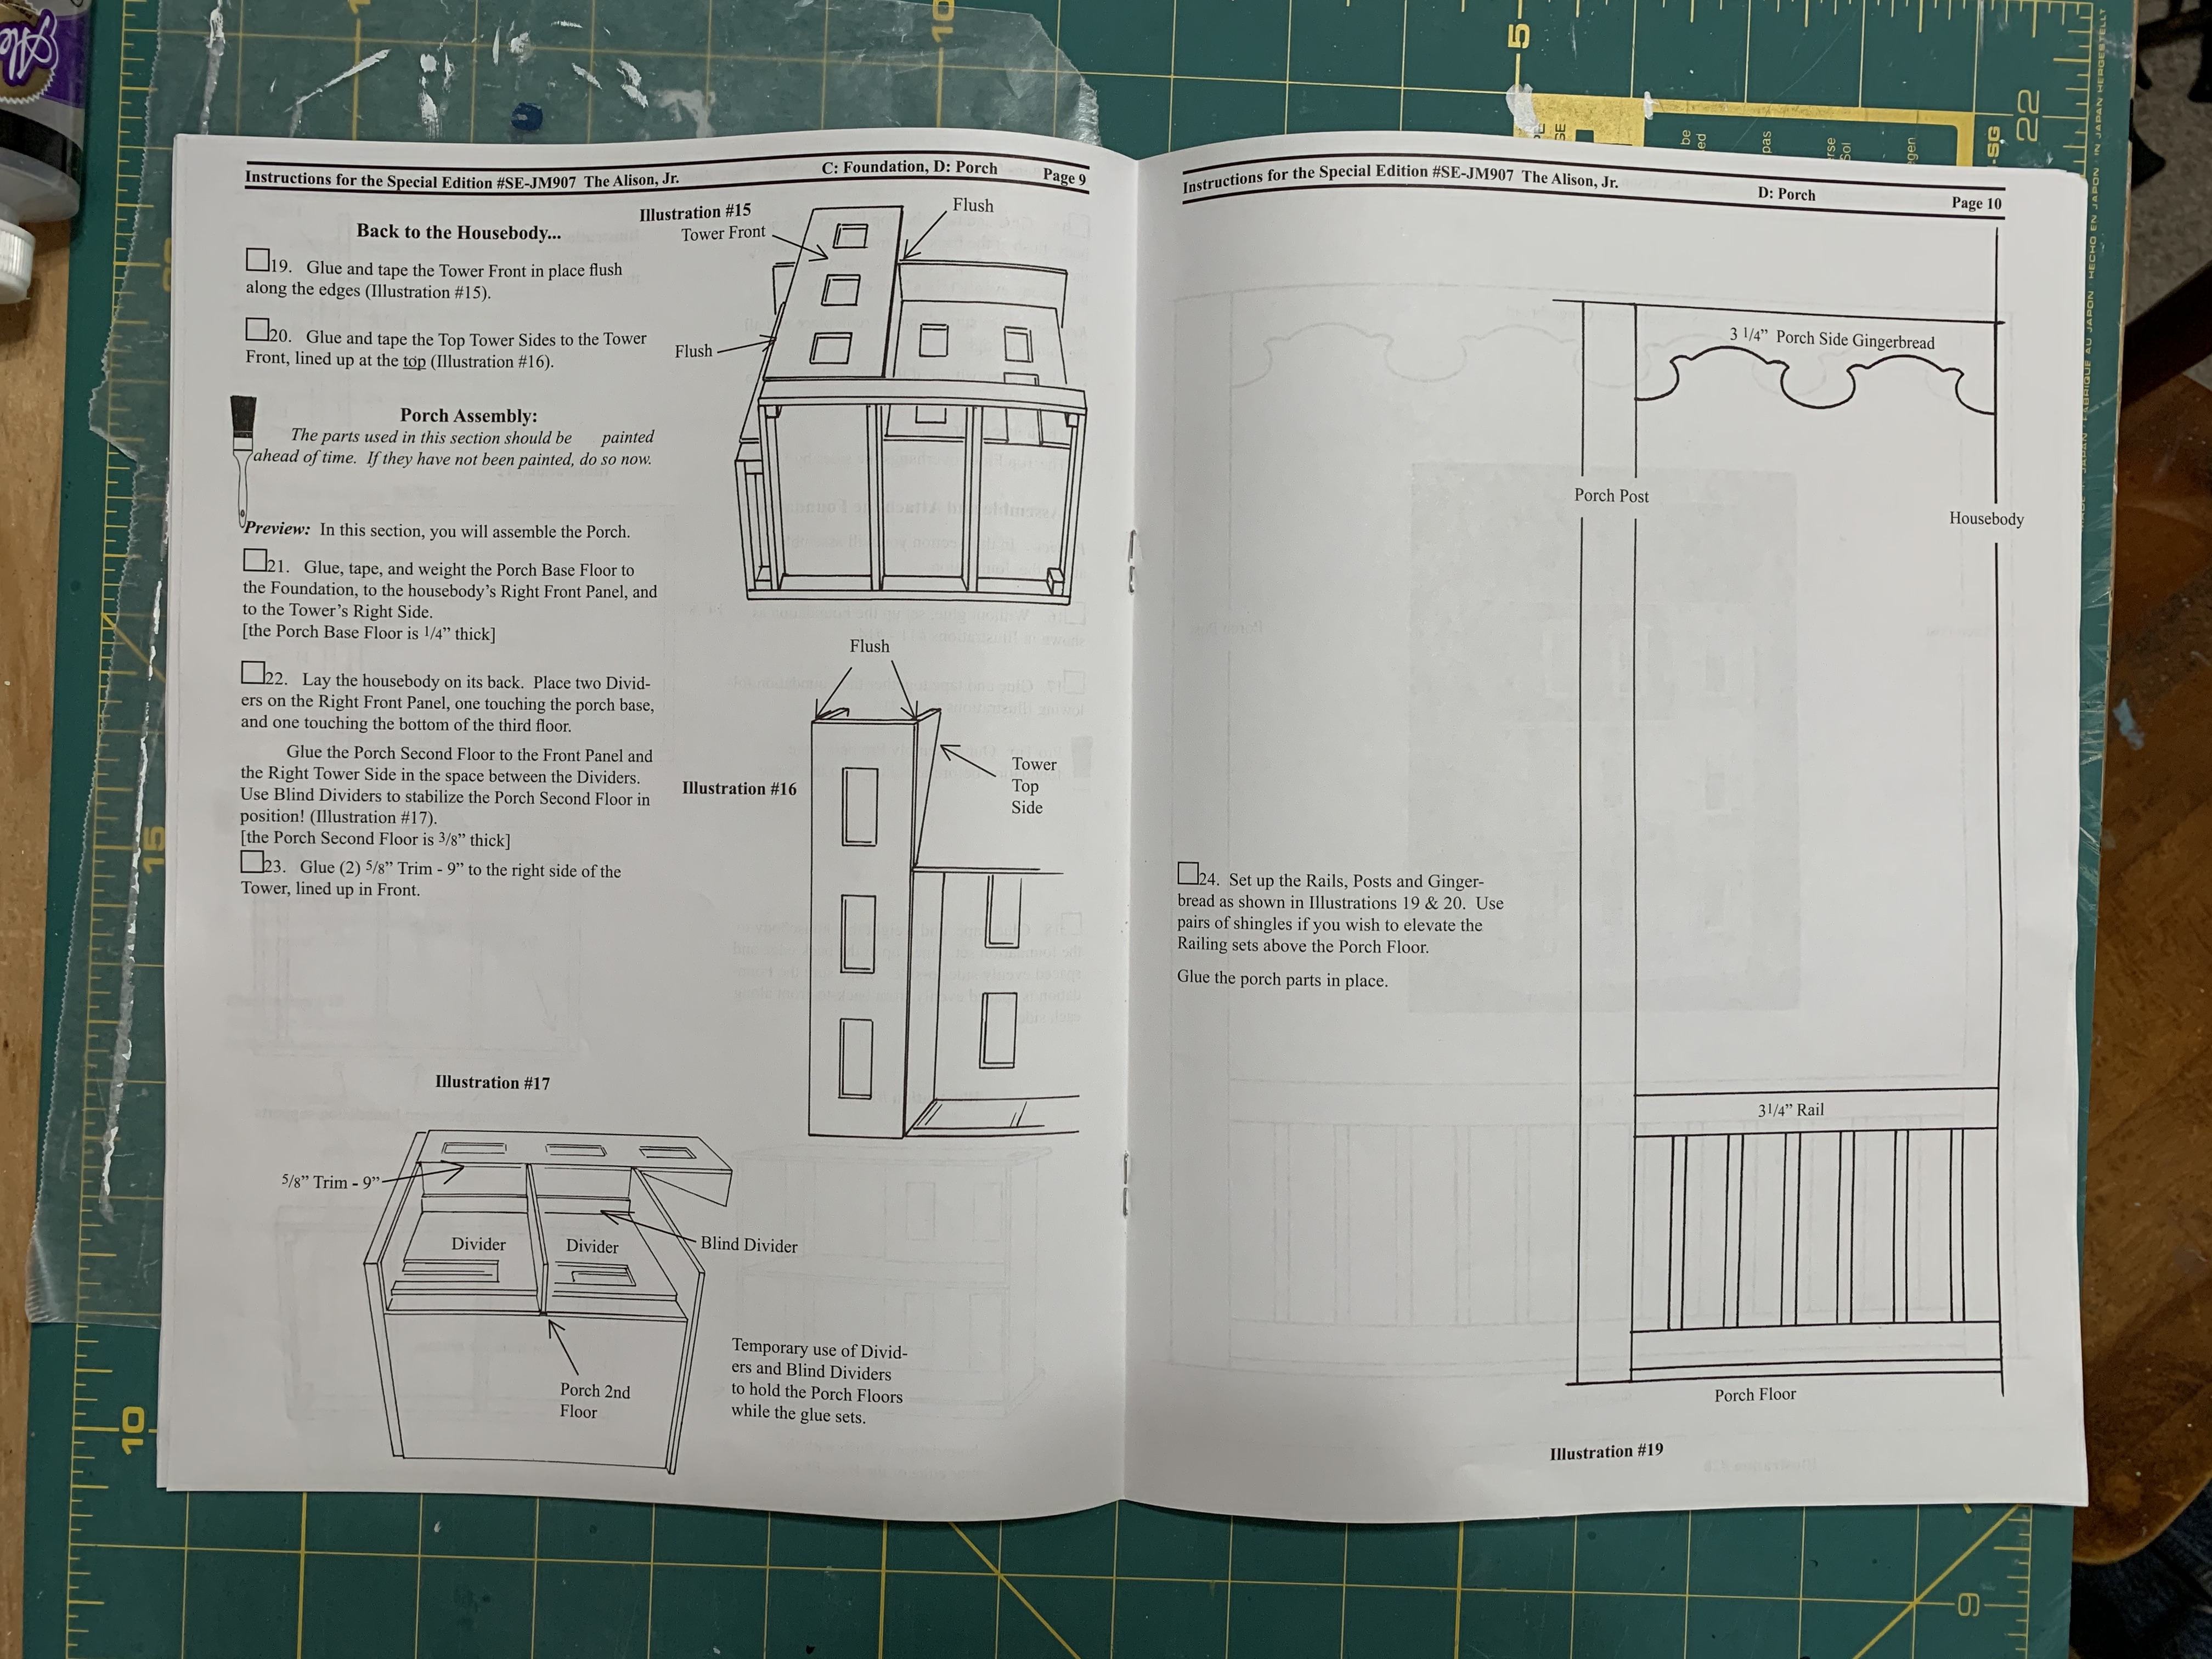
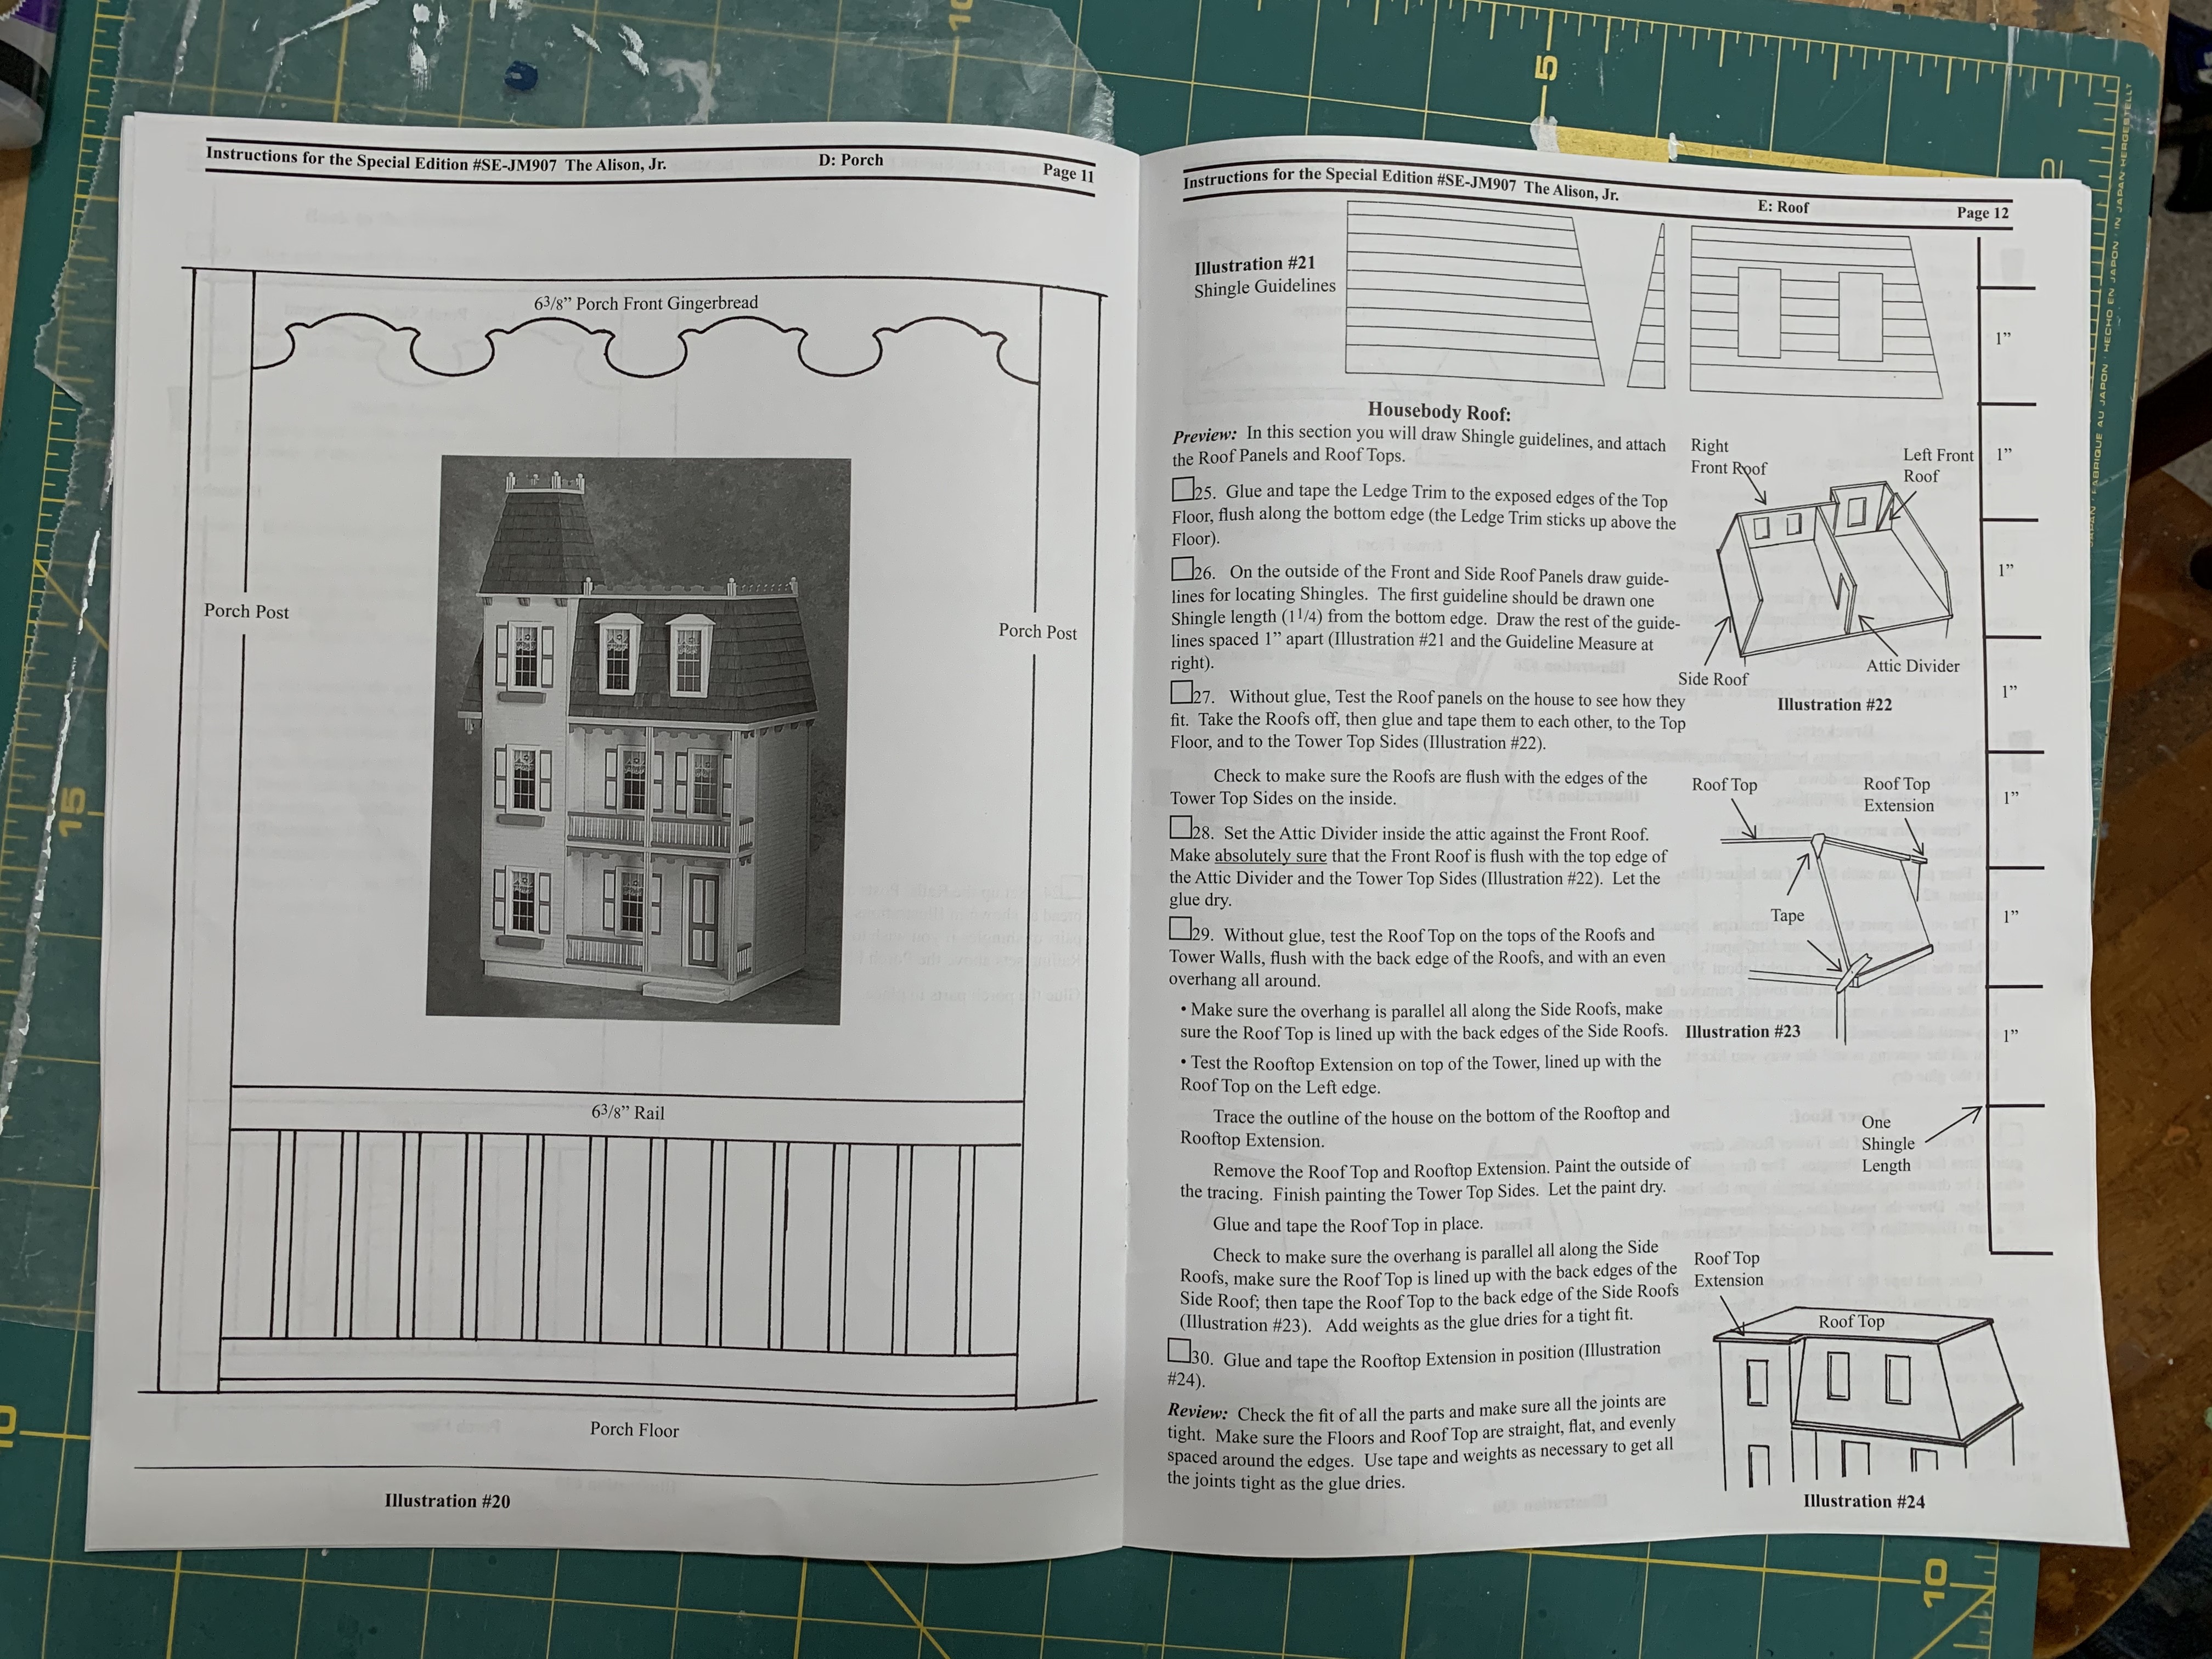
Returning to the instructions, the next step was to add the two porch floors, the posts, the railings and the gingerbread adornments. Continuing to follow the color scheme on the box, the railing would be painted two different colors. Rather than trying to hand paint the balusters, I used white spray paint covering the rest of the railing with tape. Then after multiple coats, I was able to remove the tape and paint the top and bottom of the railing.

Although not detailed in the instructions on how to assemble all of these pieces, I chose to glue one section of railing to each post to aid in assembly.
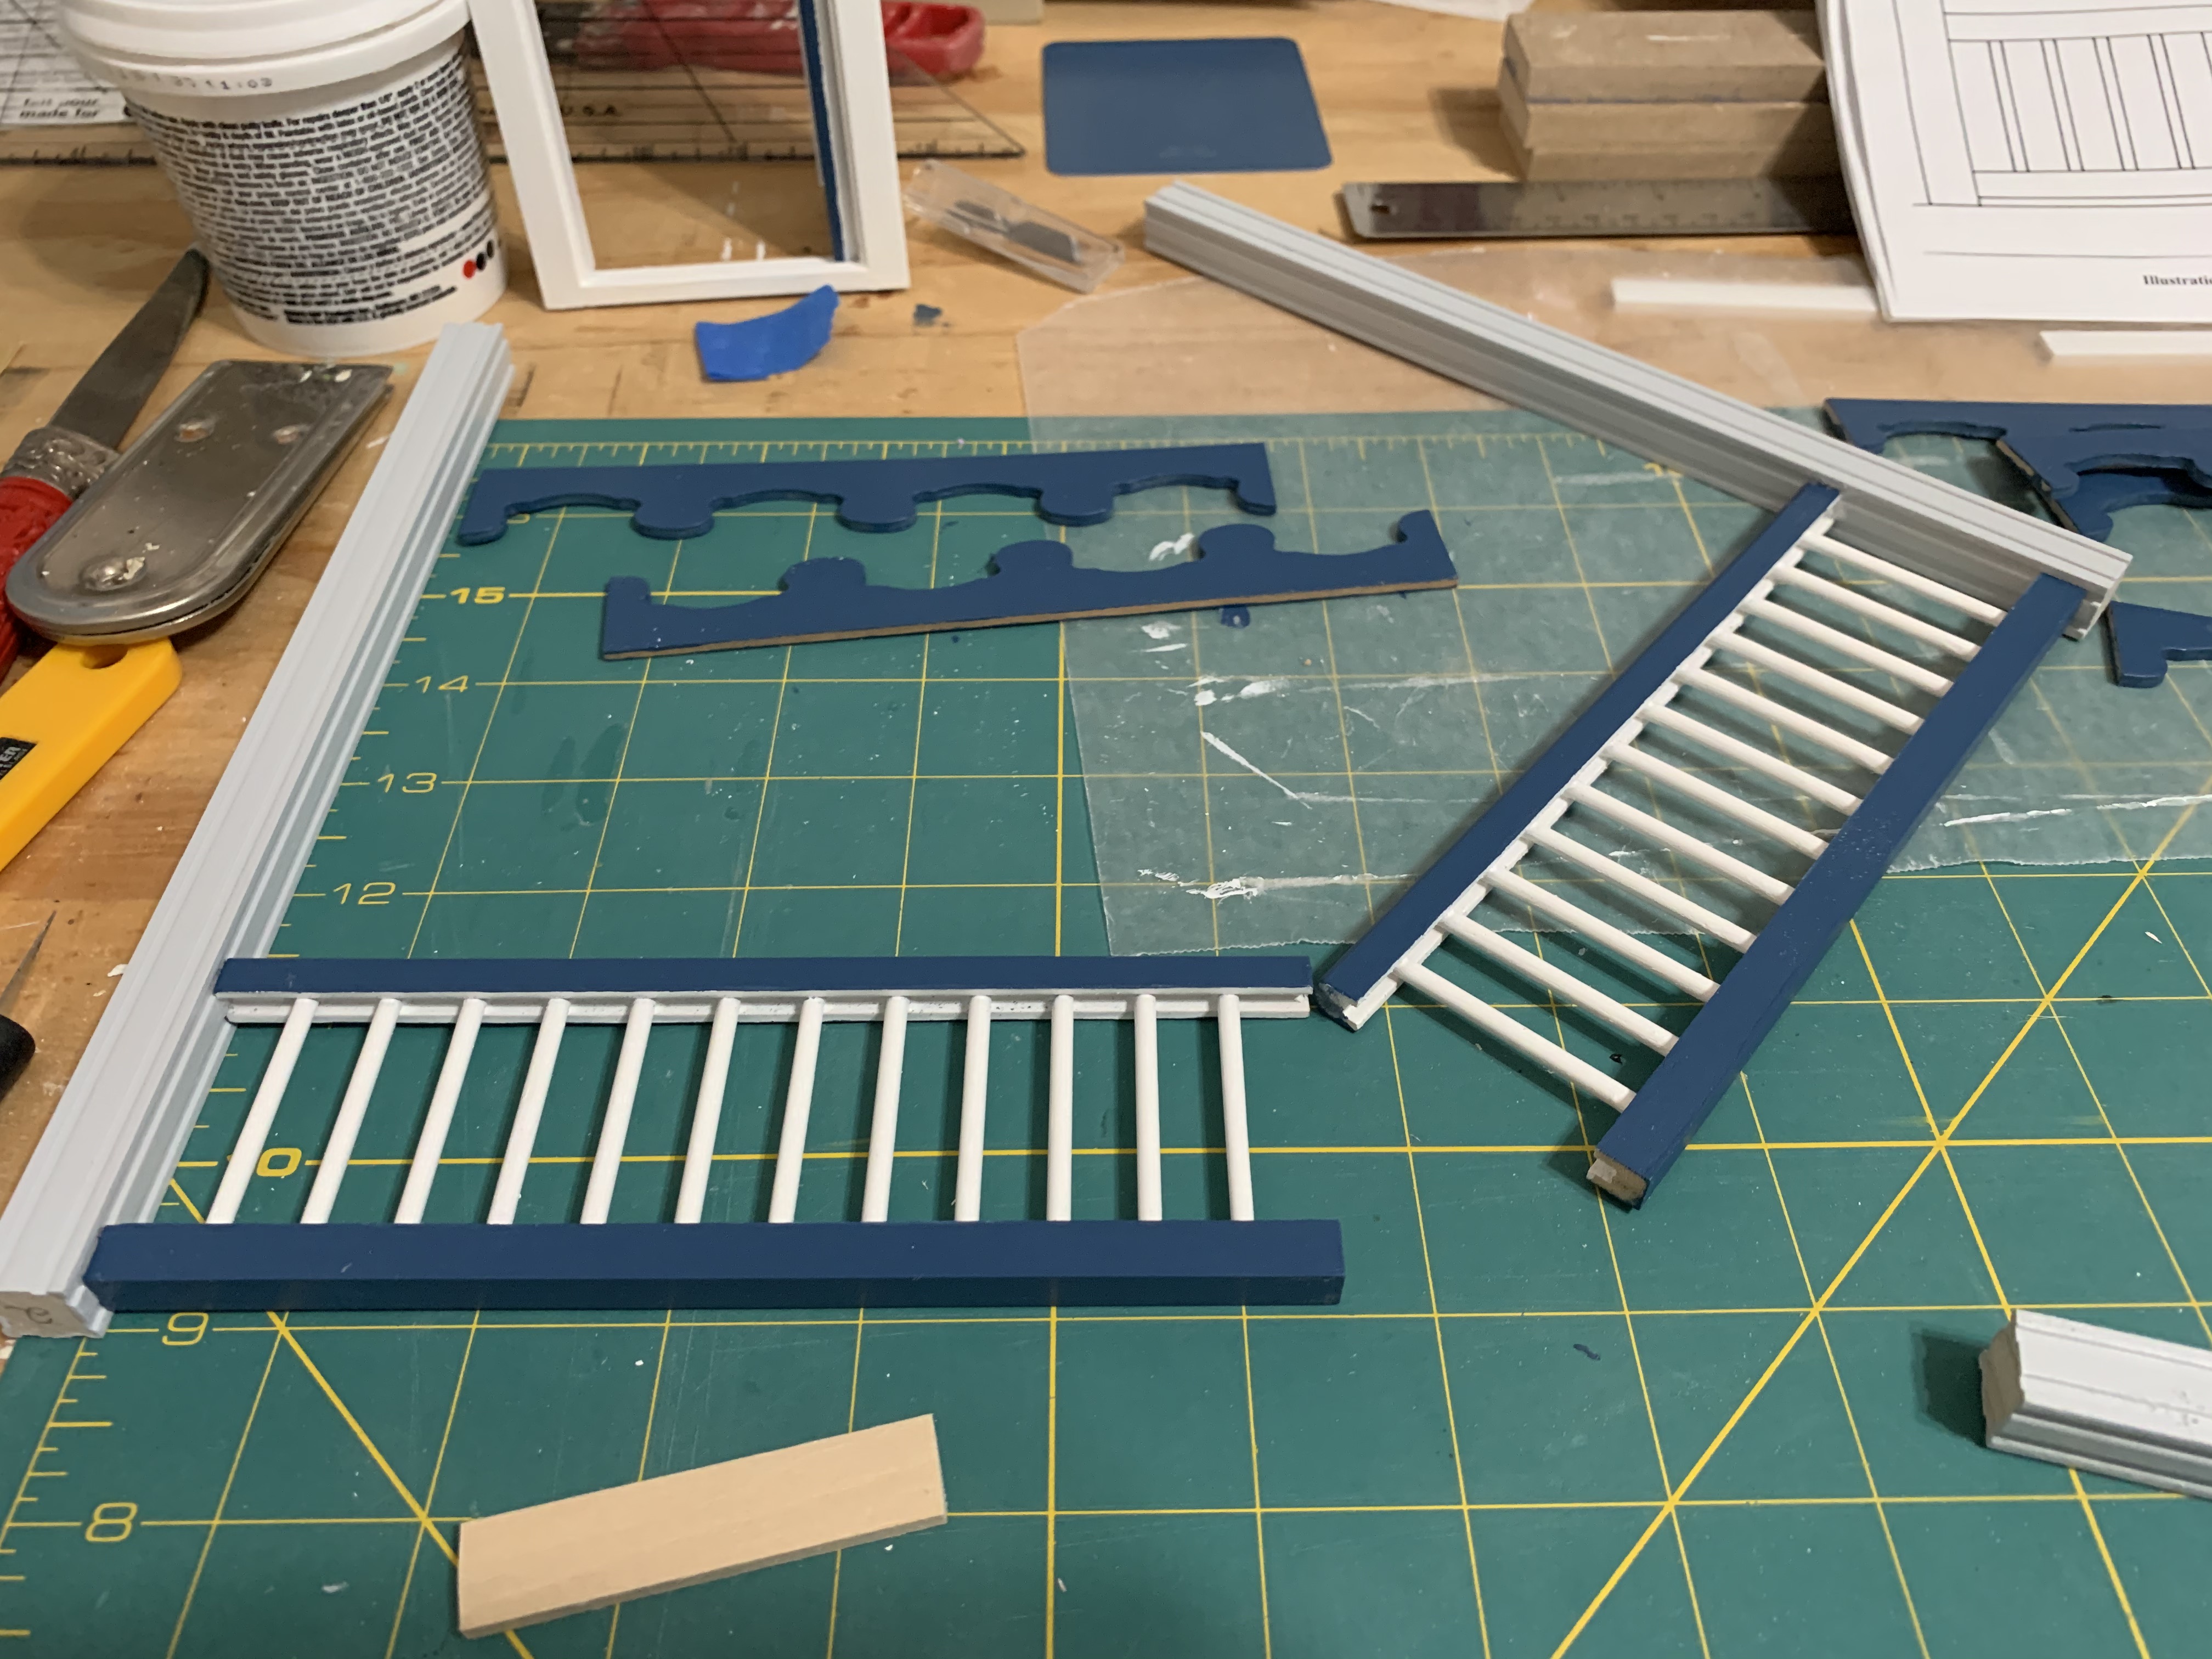
This would make final assembly of all the porch pieces much easier and ensure proper alignment from the first floor to the second.

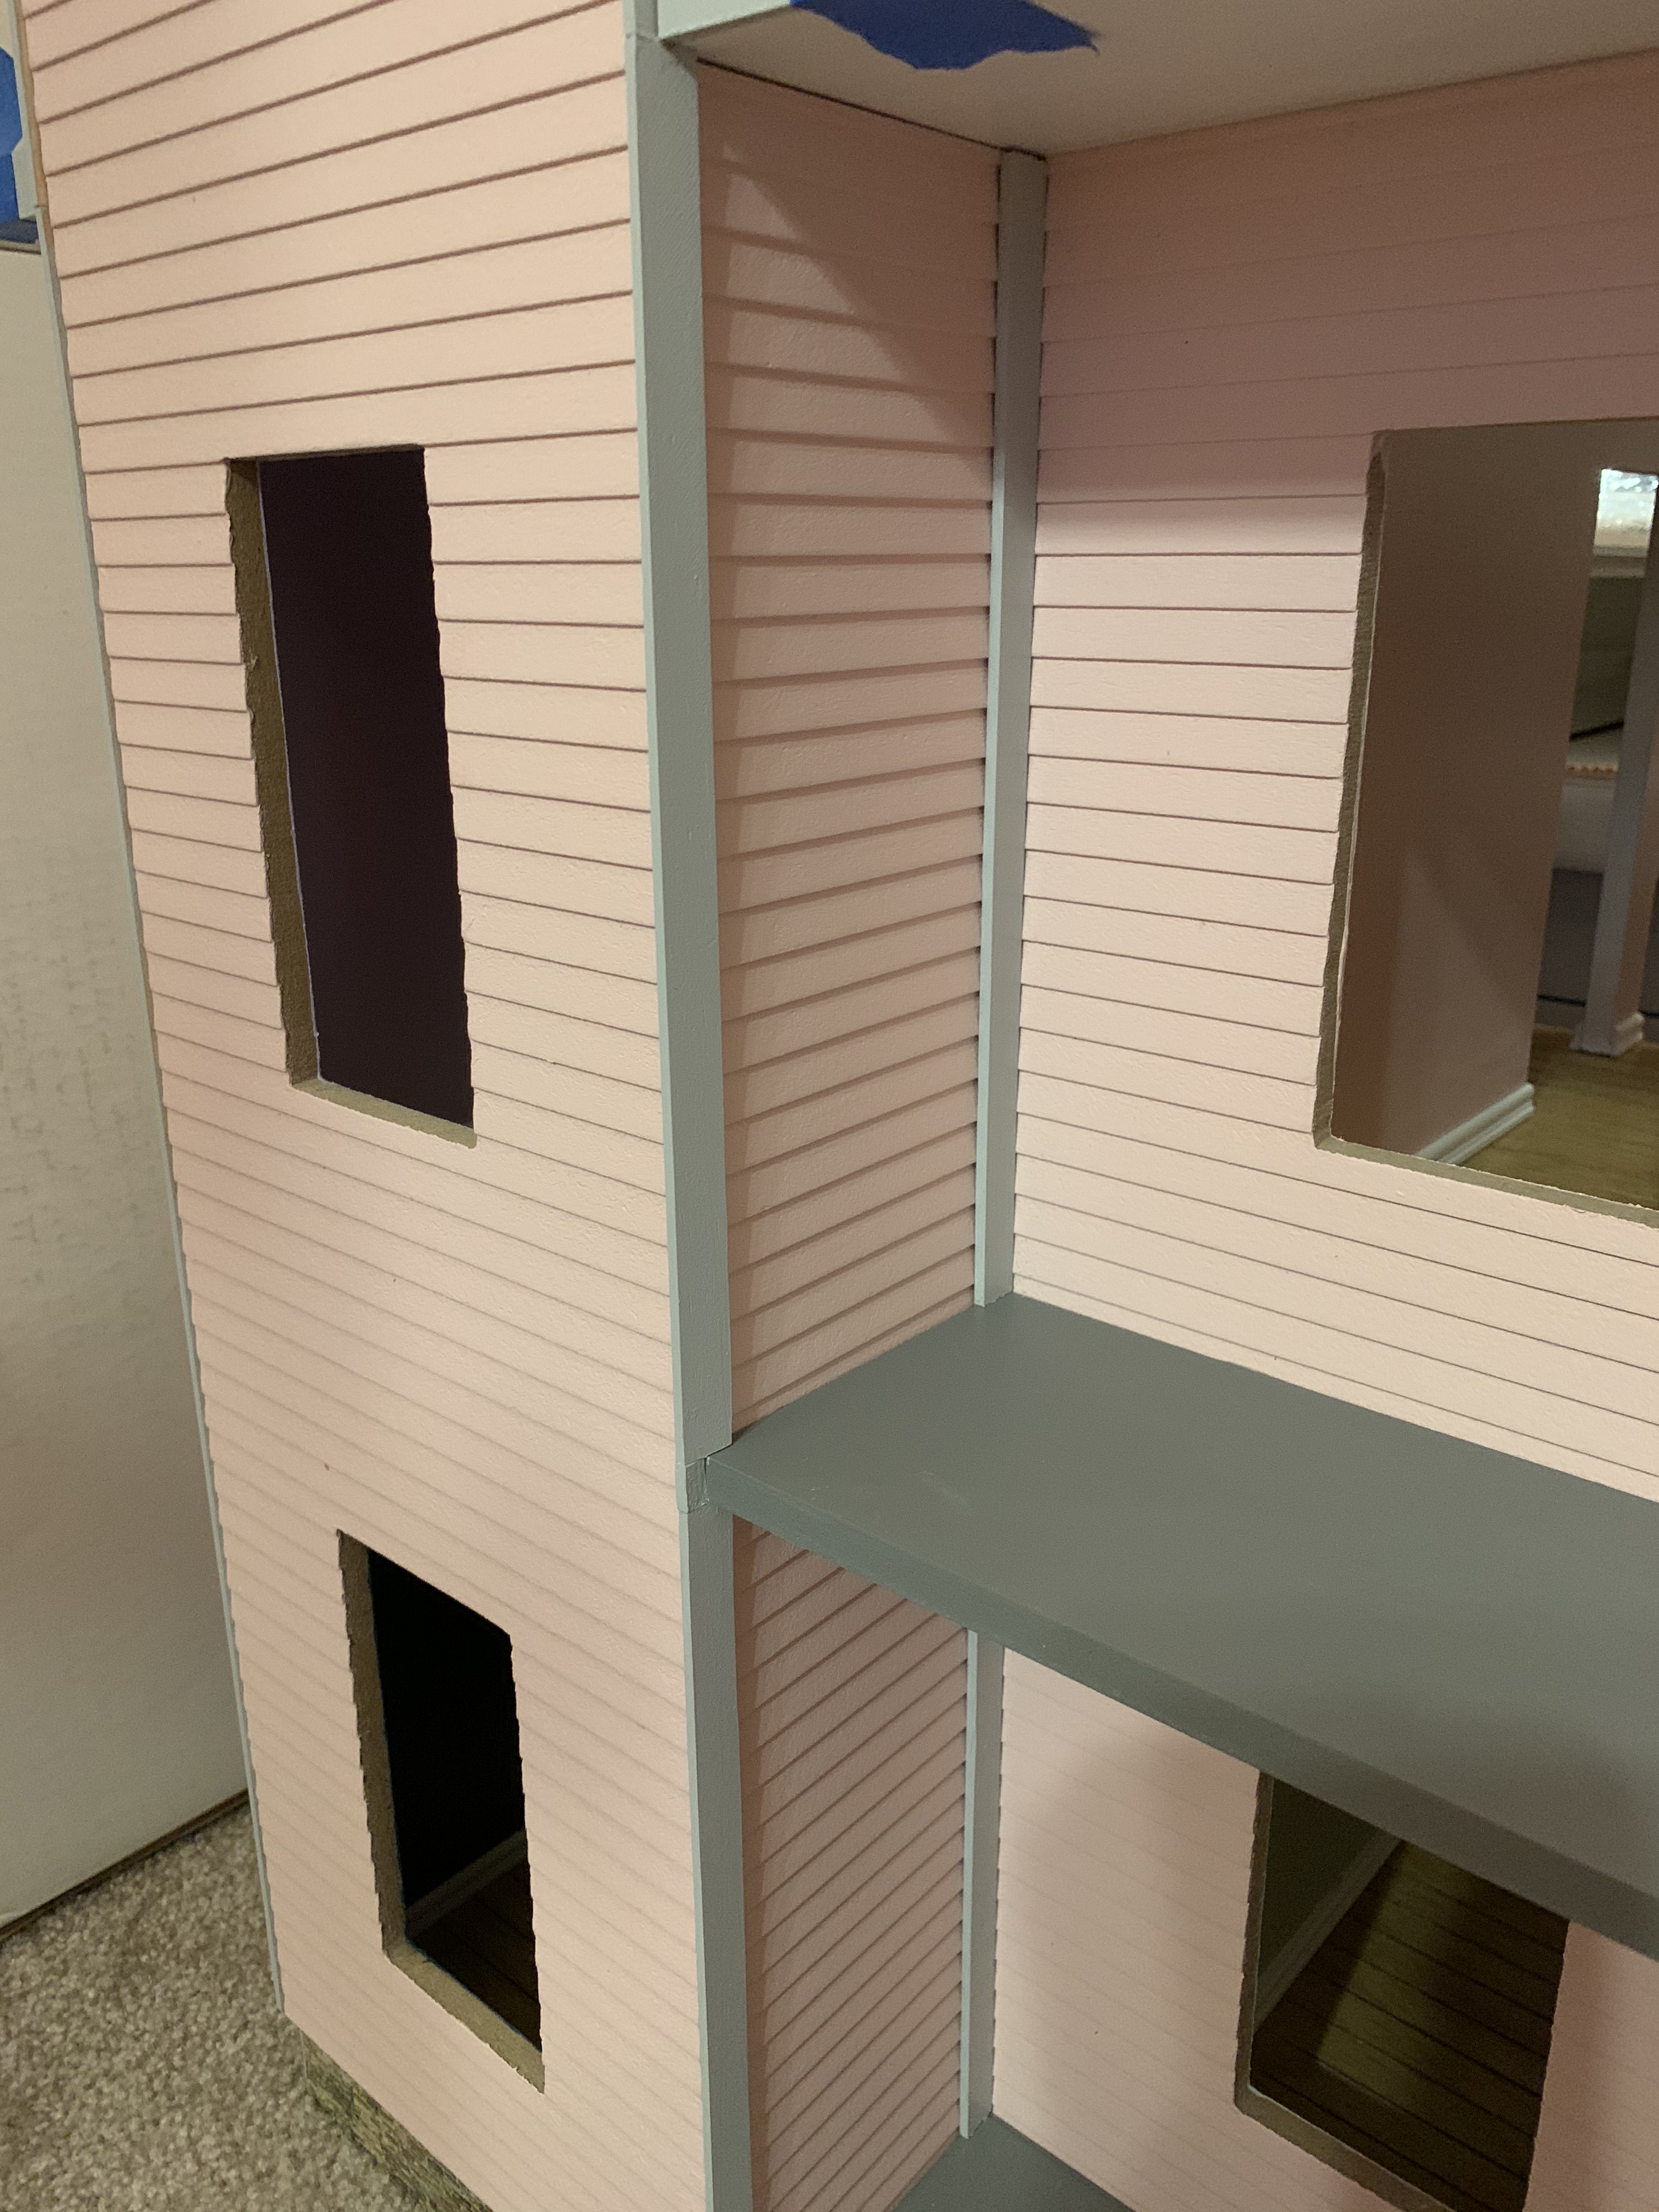
While I was building these sub-assemblies, I worked ahead and attached all of the exterior trim strips that would hide the wall joints where two separate sections of the exterior came together in a 90-degree angle.
I also decided to install the front door…
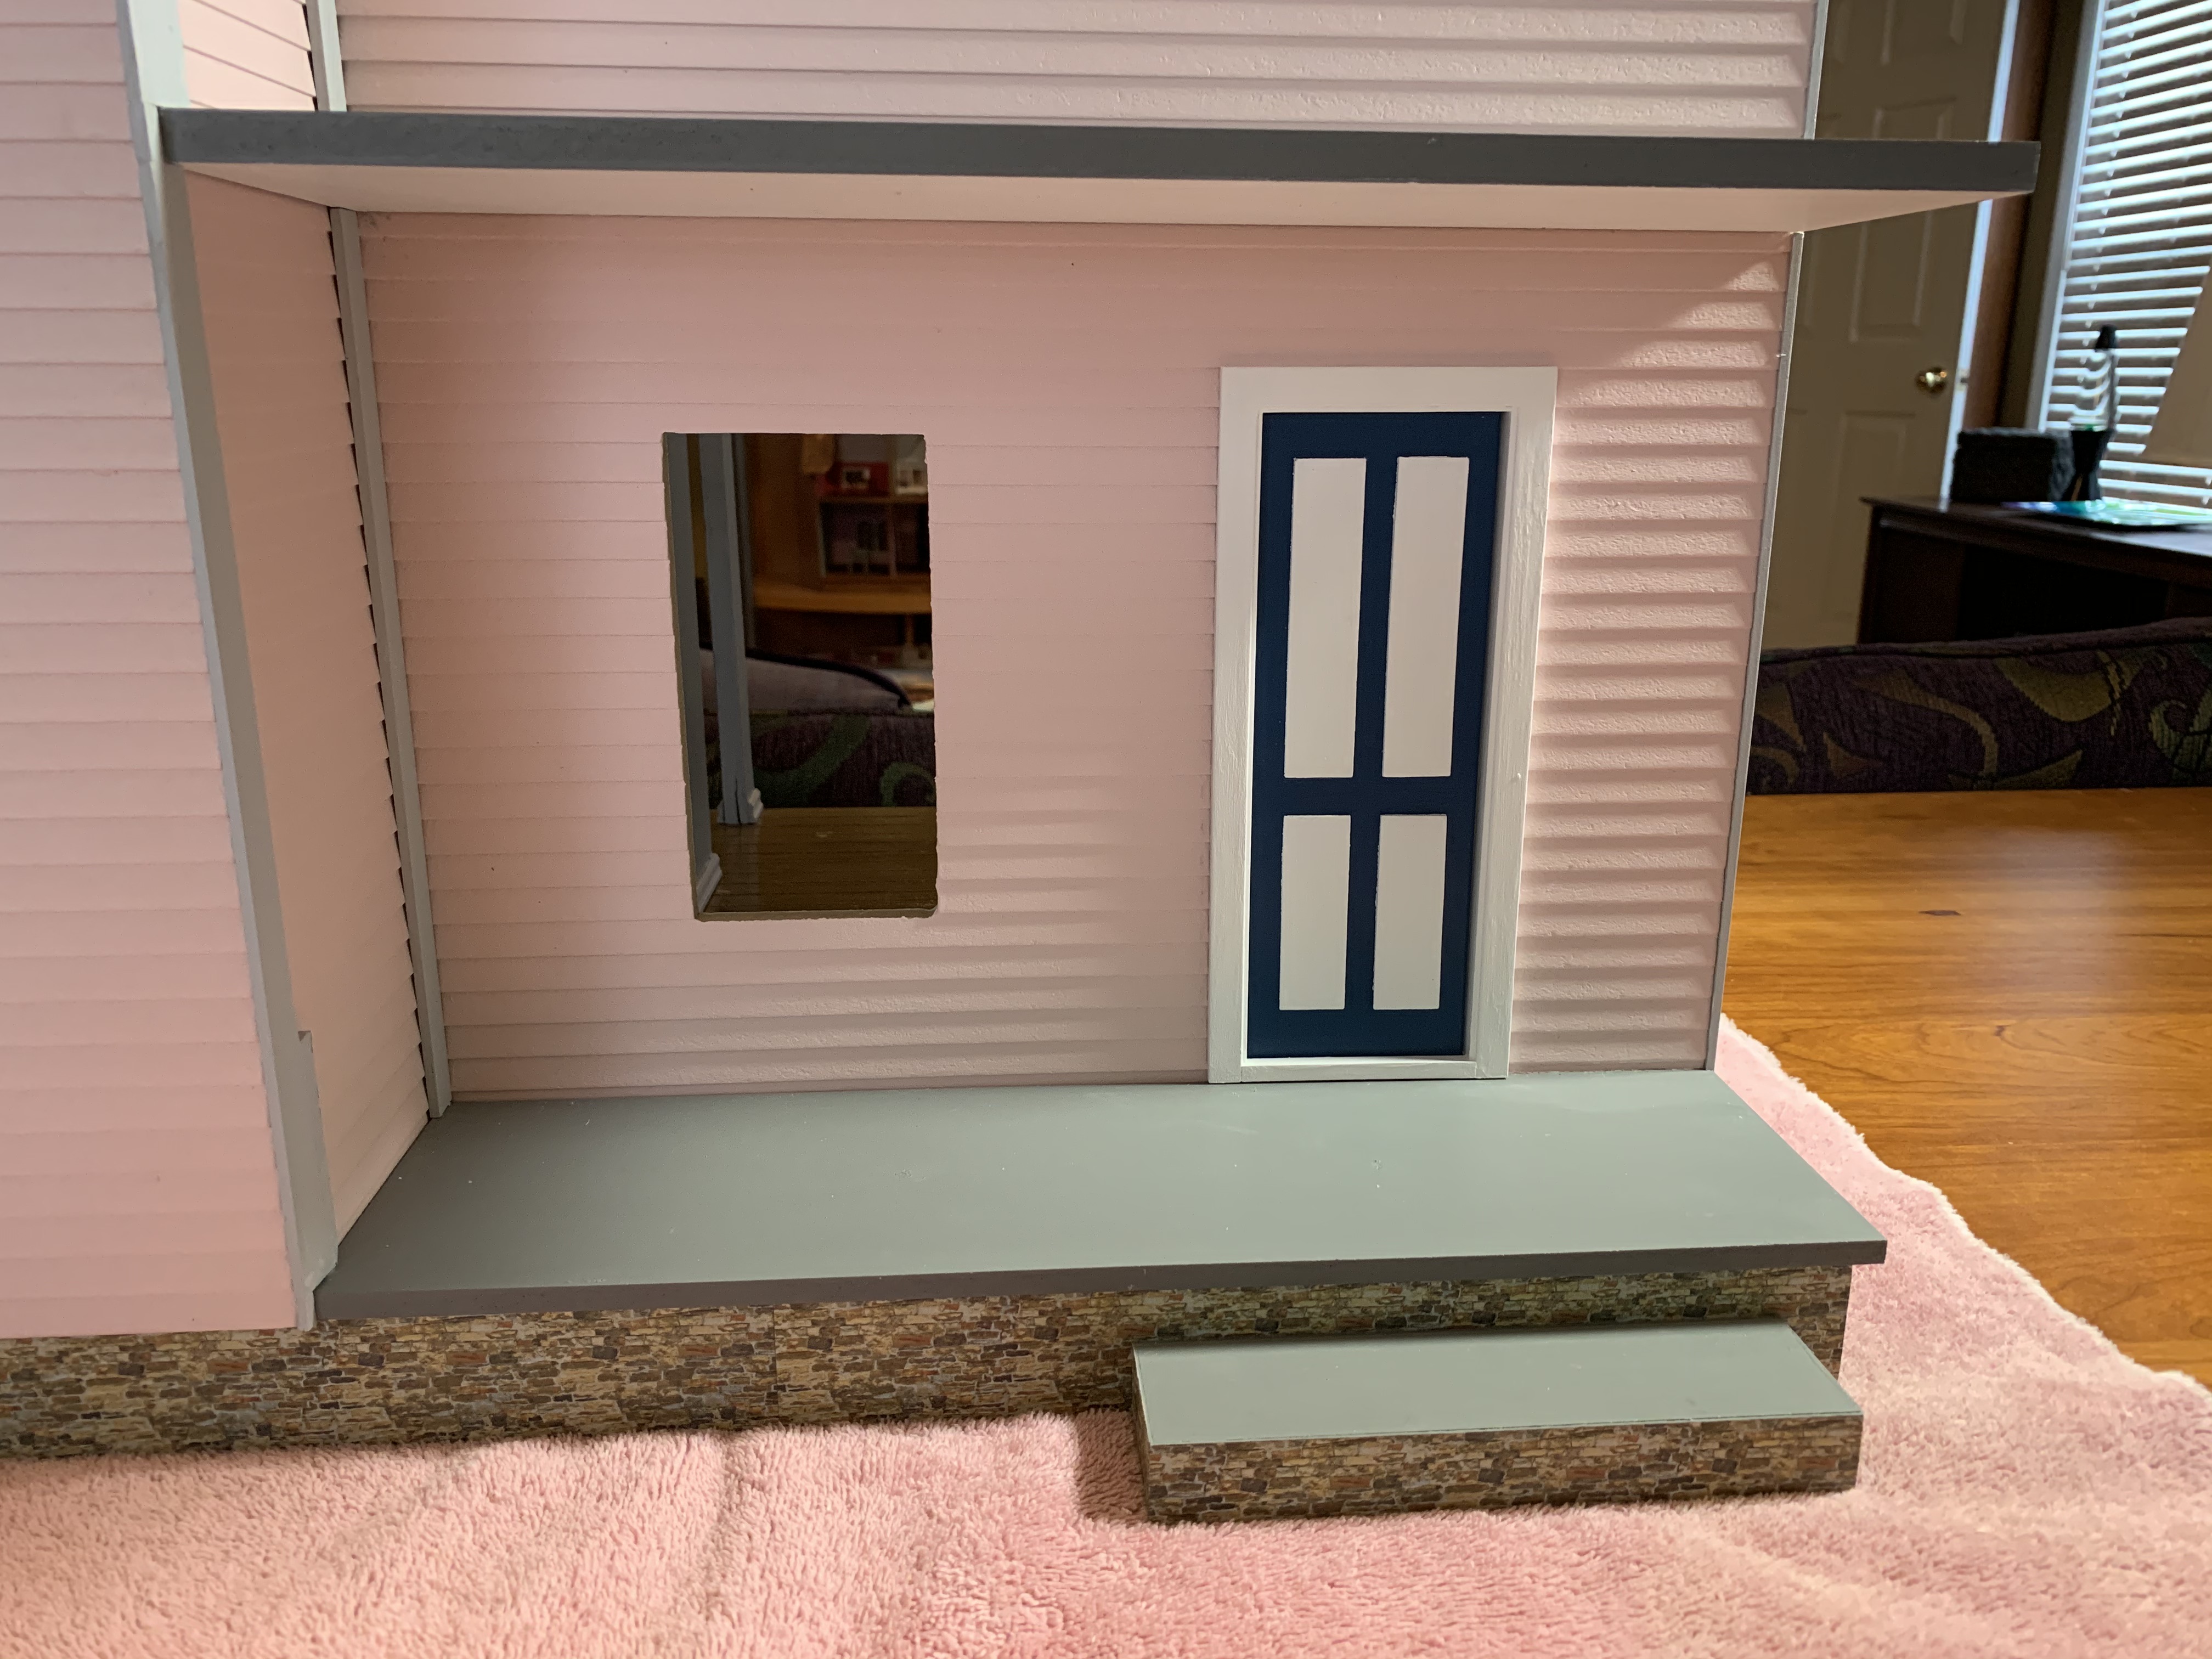
…and the stairs since I couldn’t finish the baseboards without the stairs or door frame in their final positions. I had previously painted and assembled each set of stairs and the door. With these in place, I could finish the baseboards.
When I cut the last piece of baseboard, I felt a sense of relief to dis-assemble my little set up. While I am glad, I chose to install baseboards as it gave the house a more realistic look, adding them was anything but simple. But I was most pleased with the outcome.

Returning to the porch, I pieced together all of the individual subassemblies and stepped back.

Now it really was looking like a house!
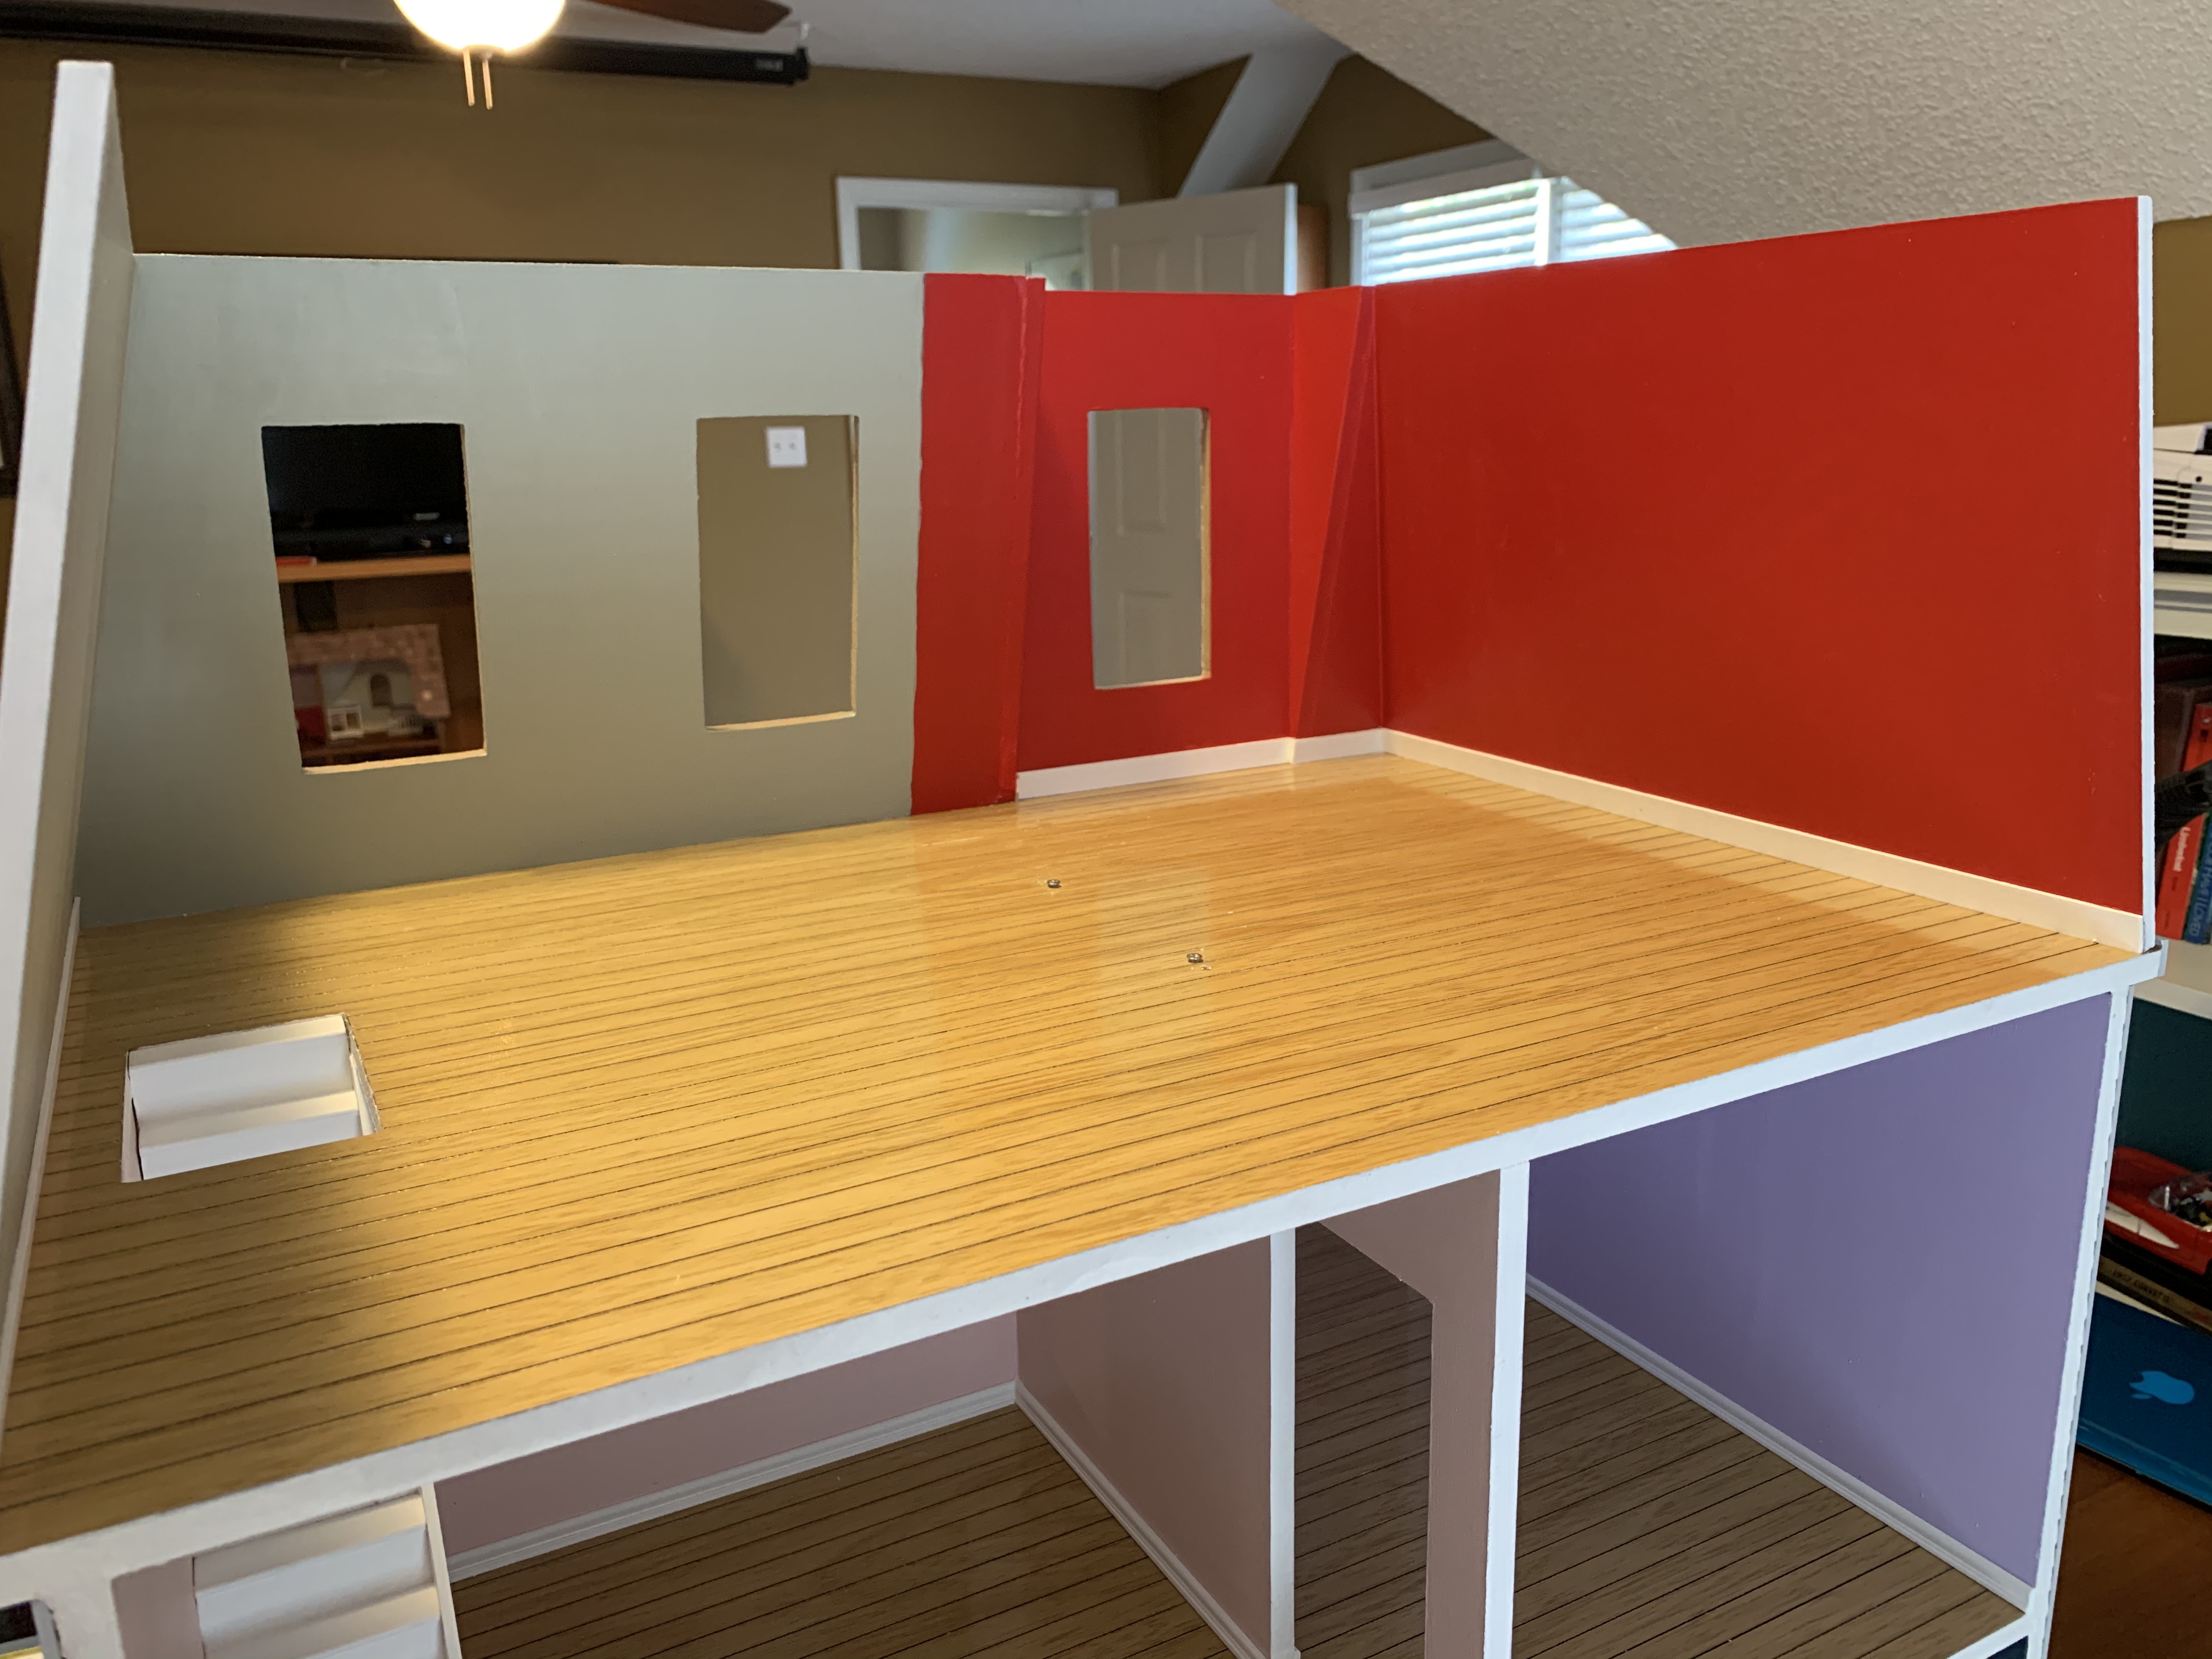
With the foundation attached and first two floors complete, all that remained was assembling the top floor, roof, and tower, a process that involved much more painting as well.
When I compared the third floor to the first and second, it seemed lacking without baseboards.
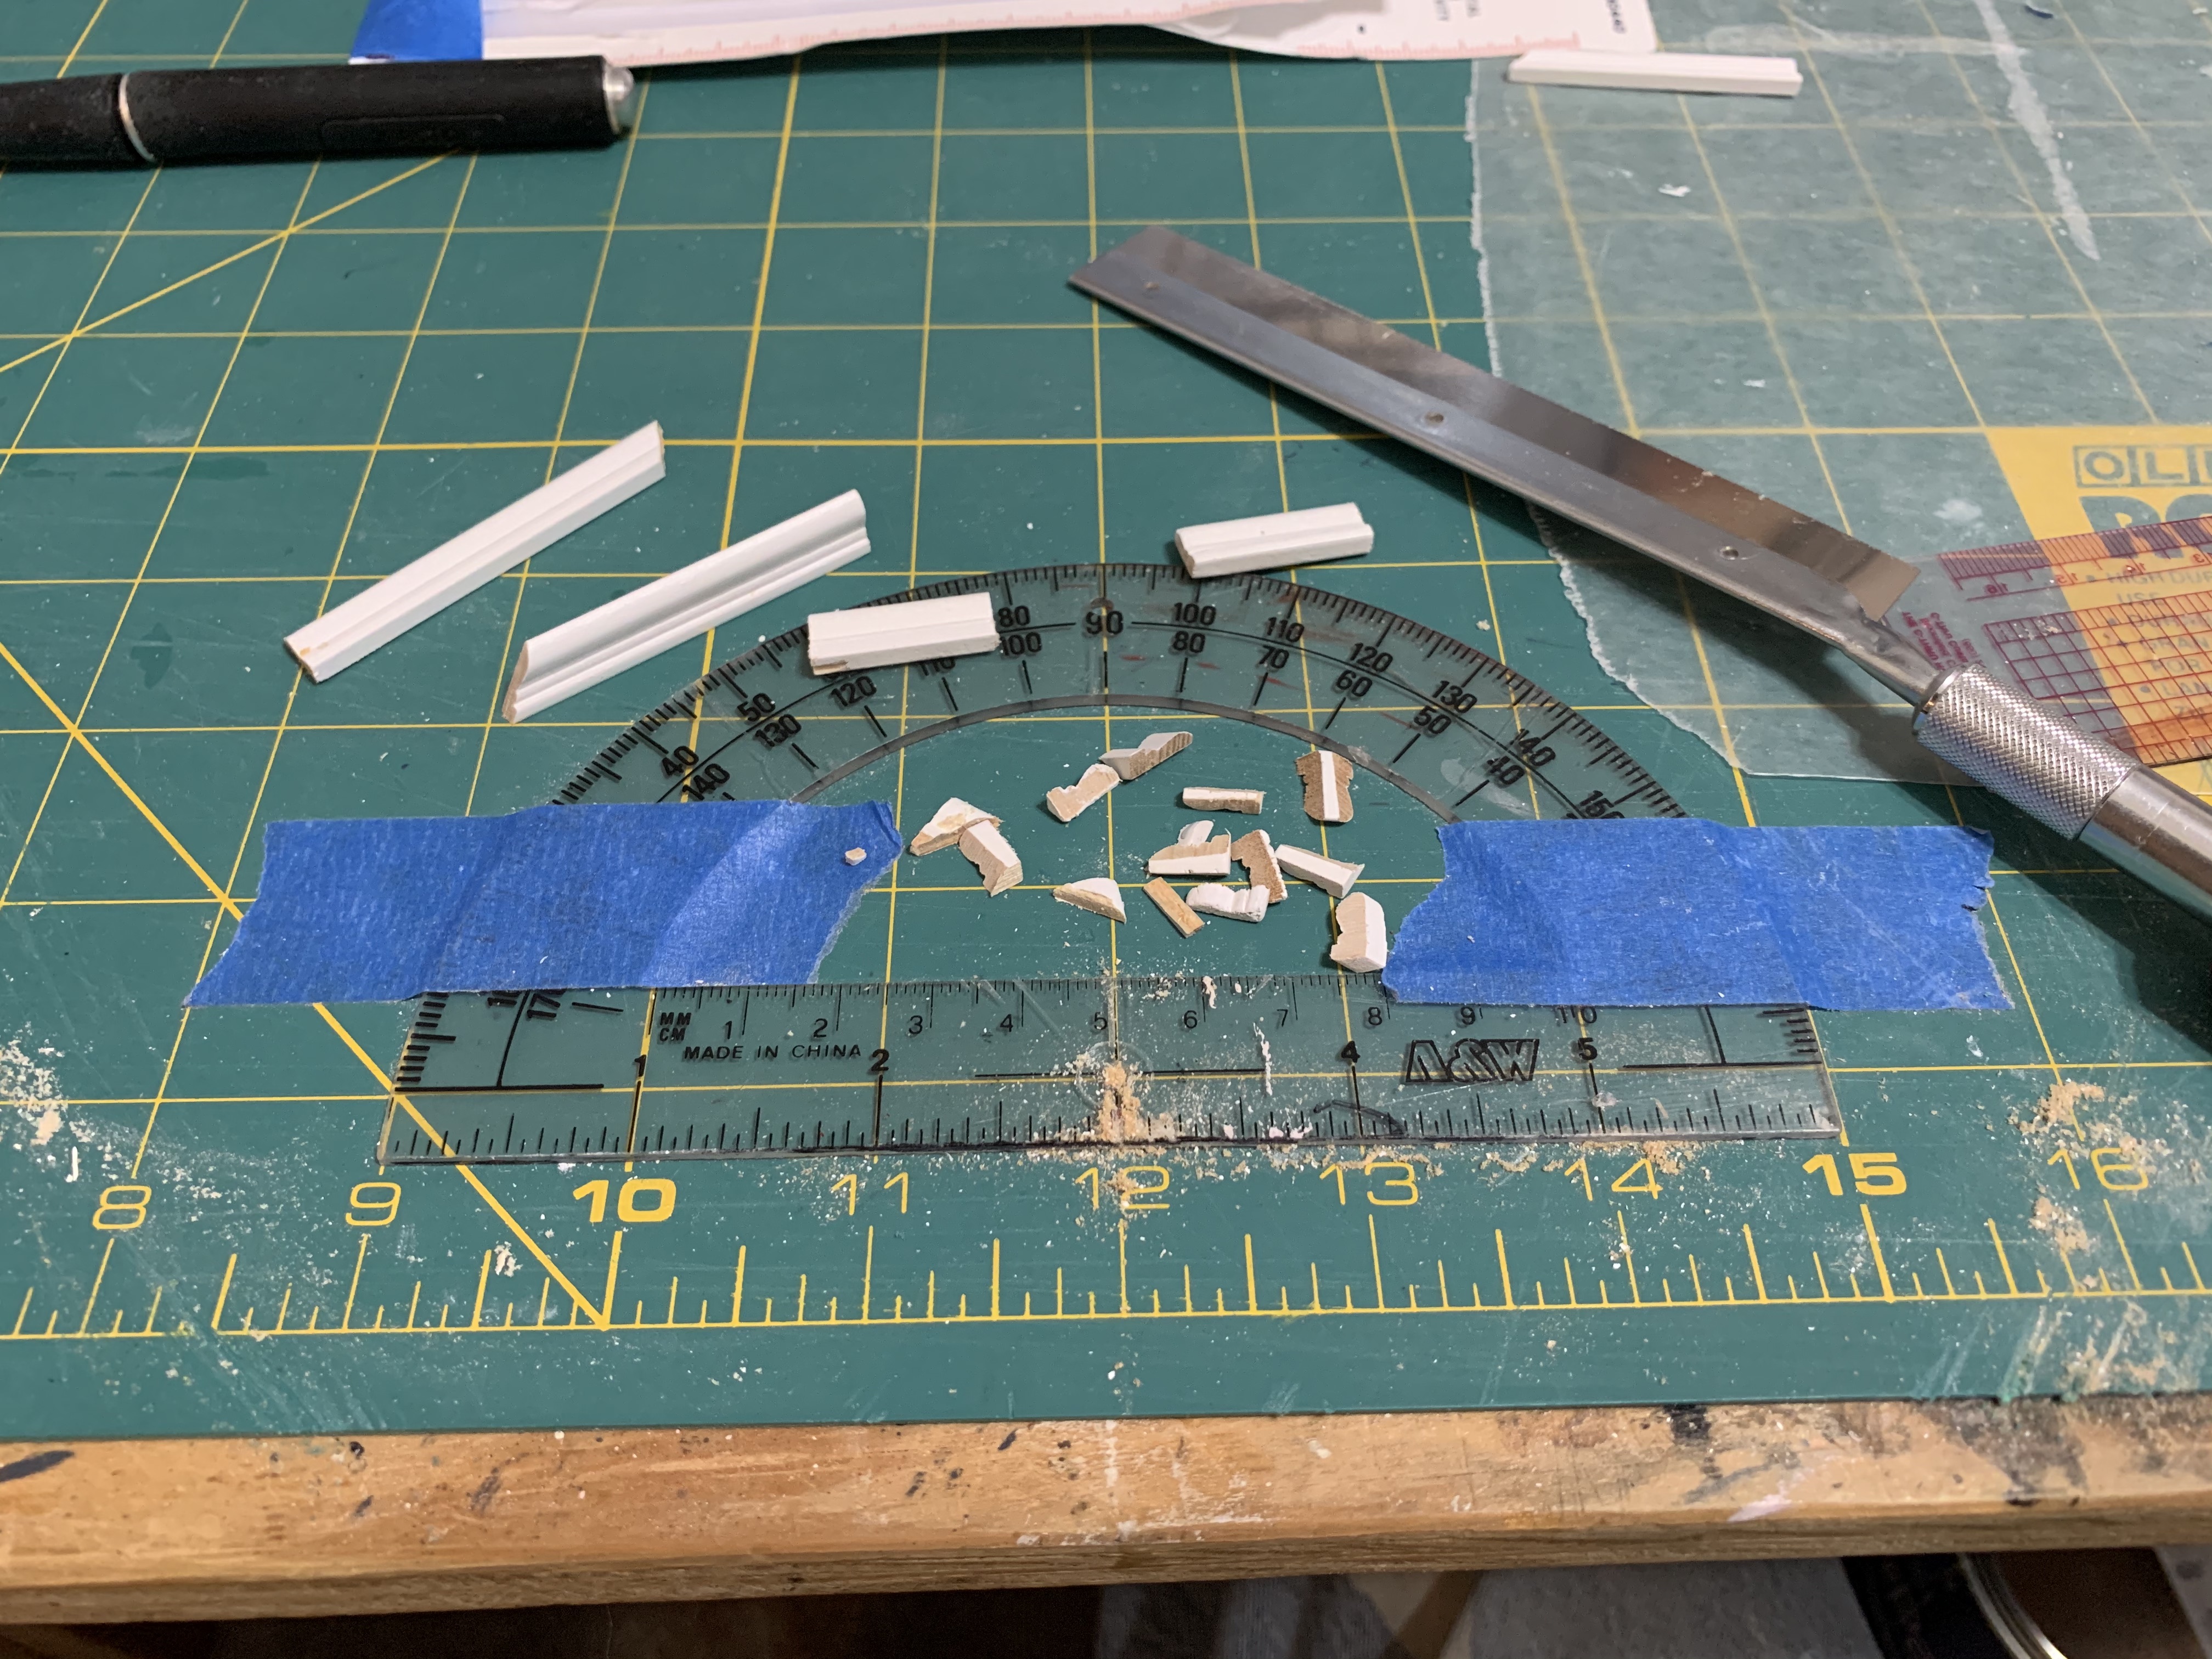
Since the third floor is essentially finished attic space with slanted walls making up the Mansard roof, I knew I could not use the same miniature baseboards as the sloped attic wall and floor did not come together at a 90-degree angle. So, to give it more of that finished look, I chose to use small 1/16-inch-thick strips of bass wood that were thin enough to make a smooth fit without a gap. Much better.
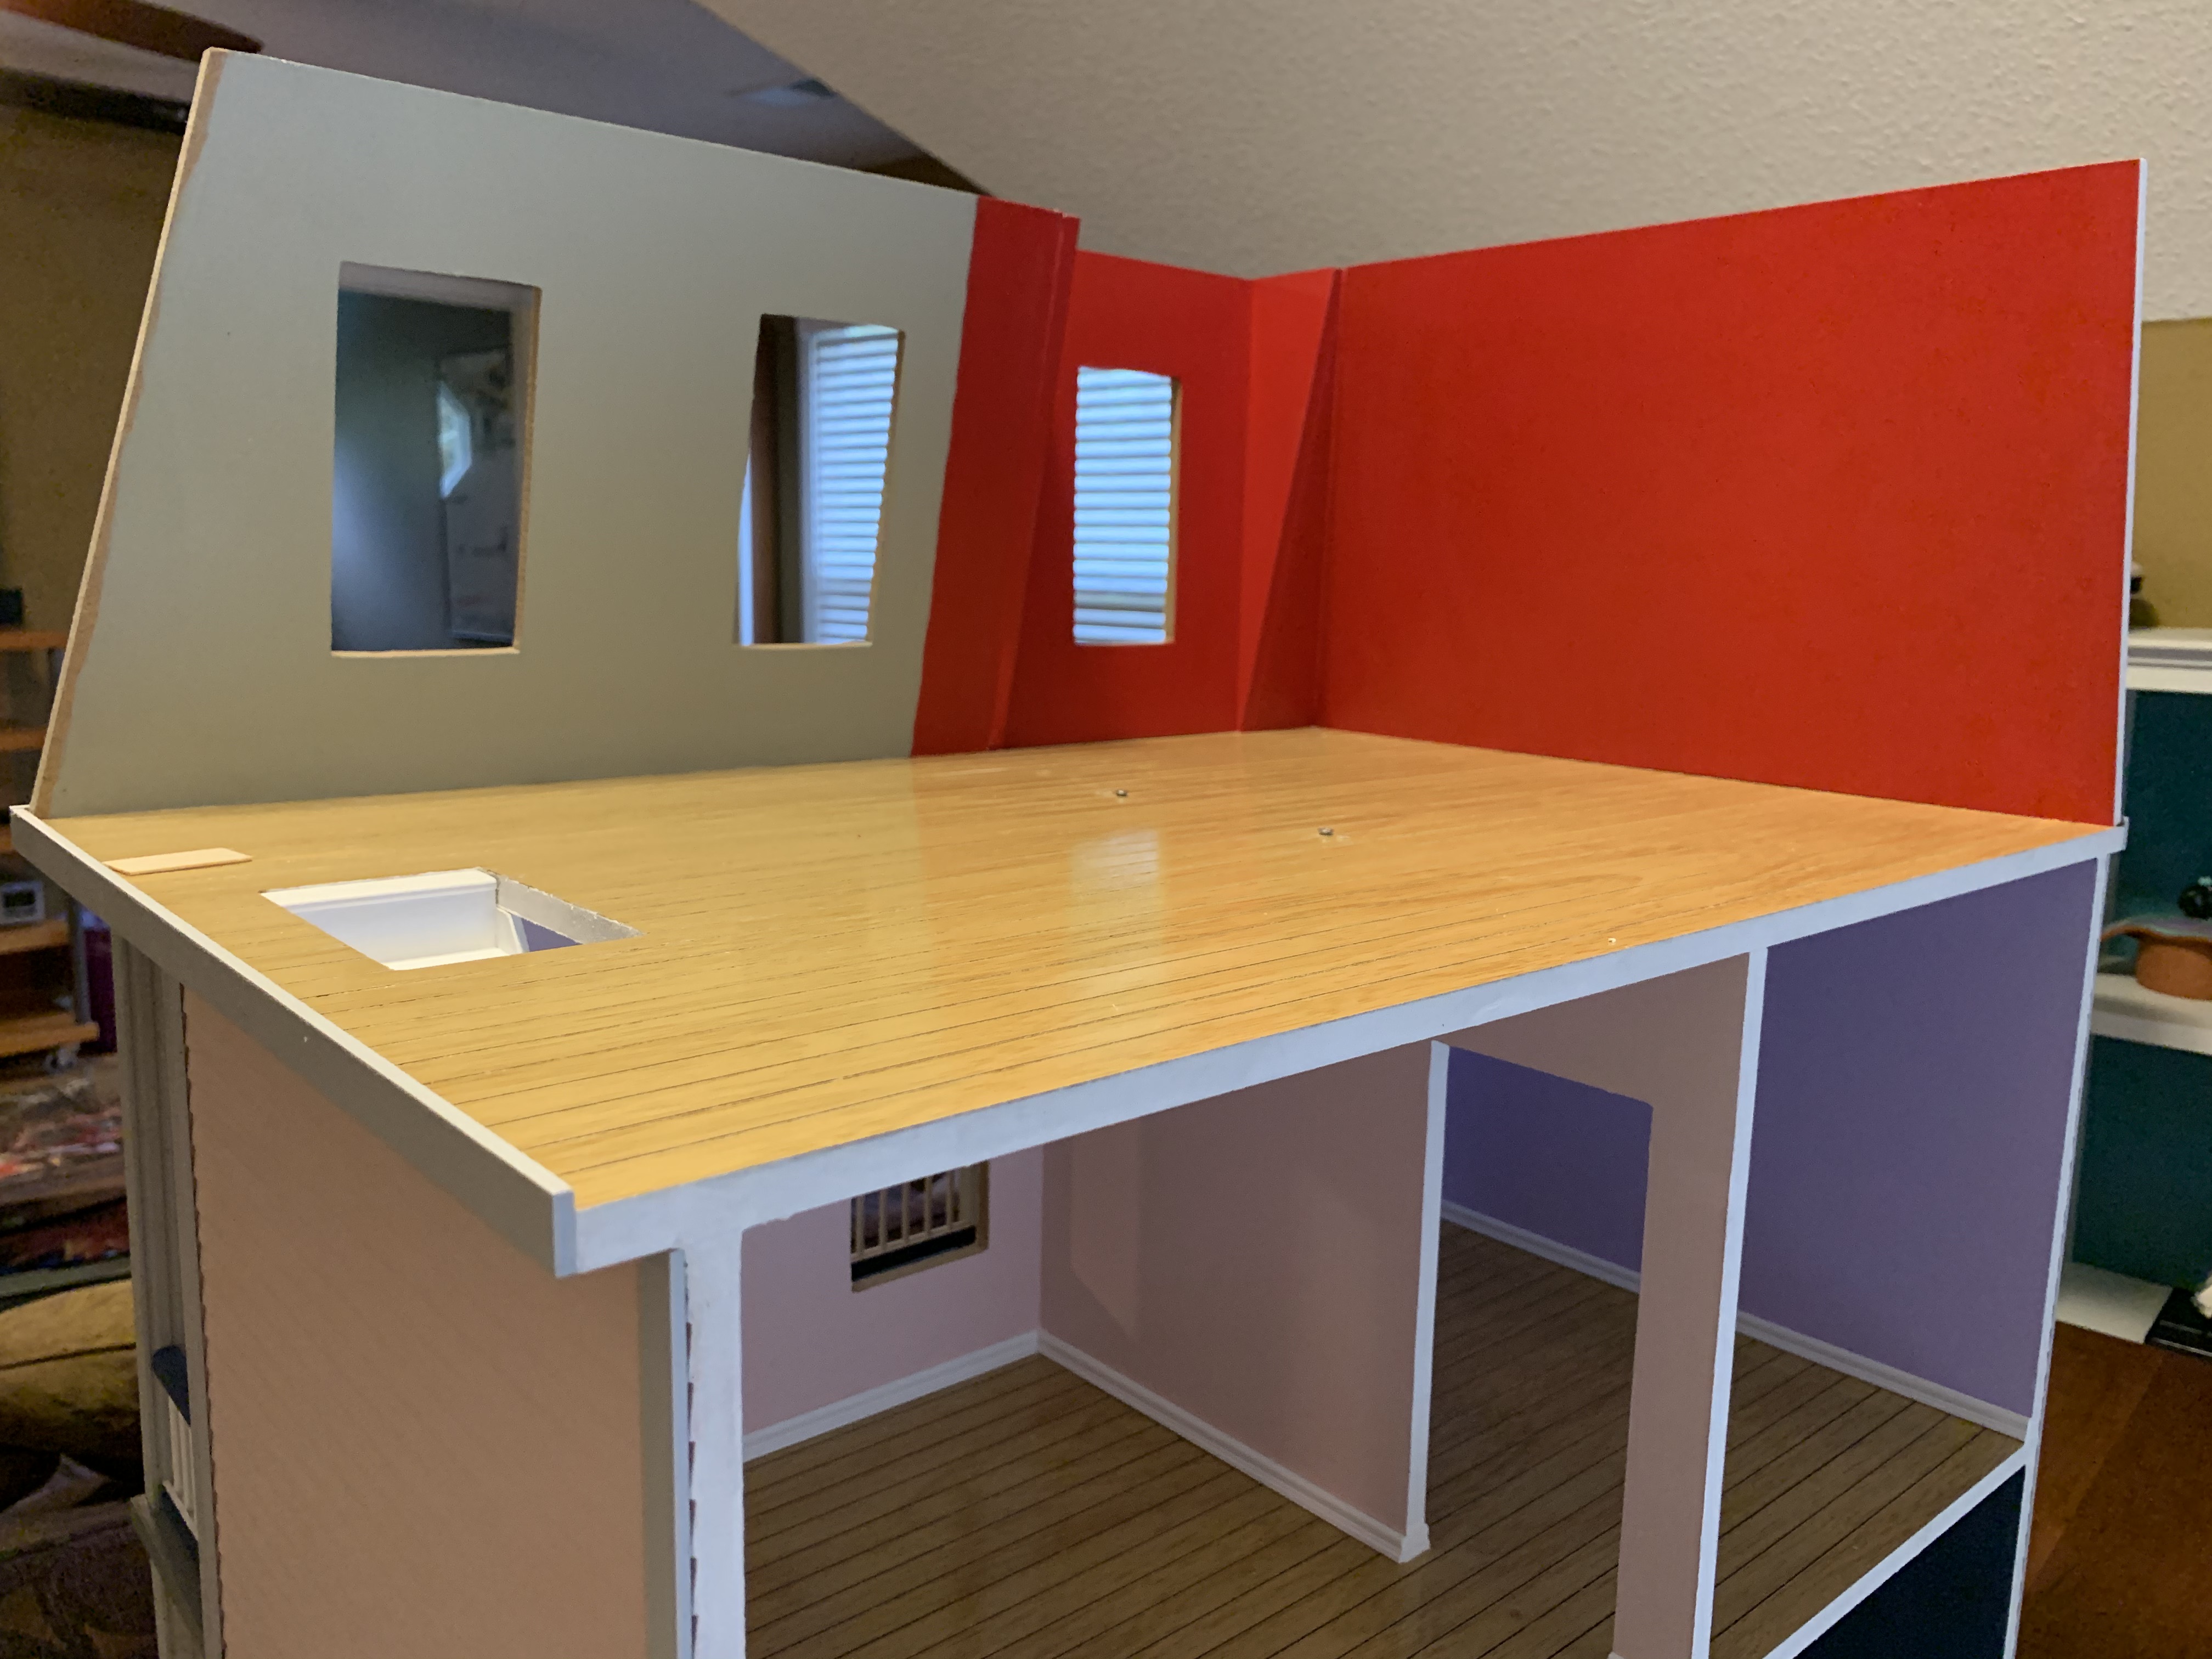
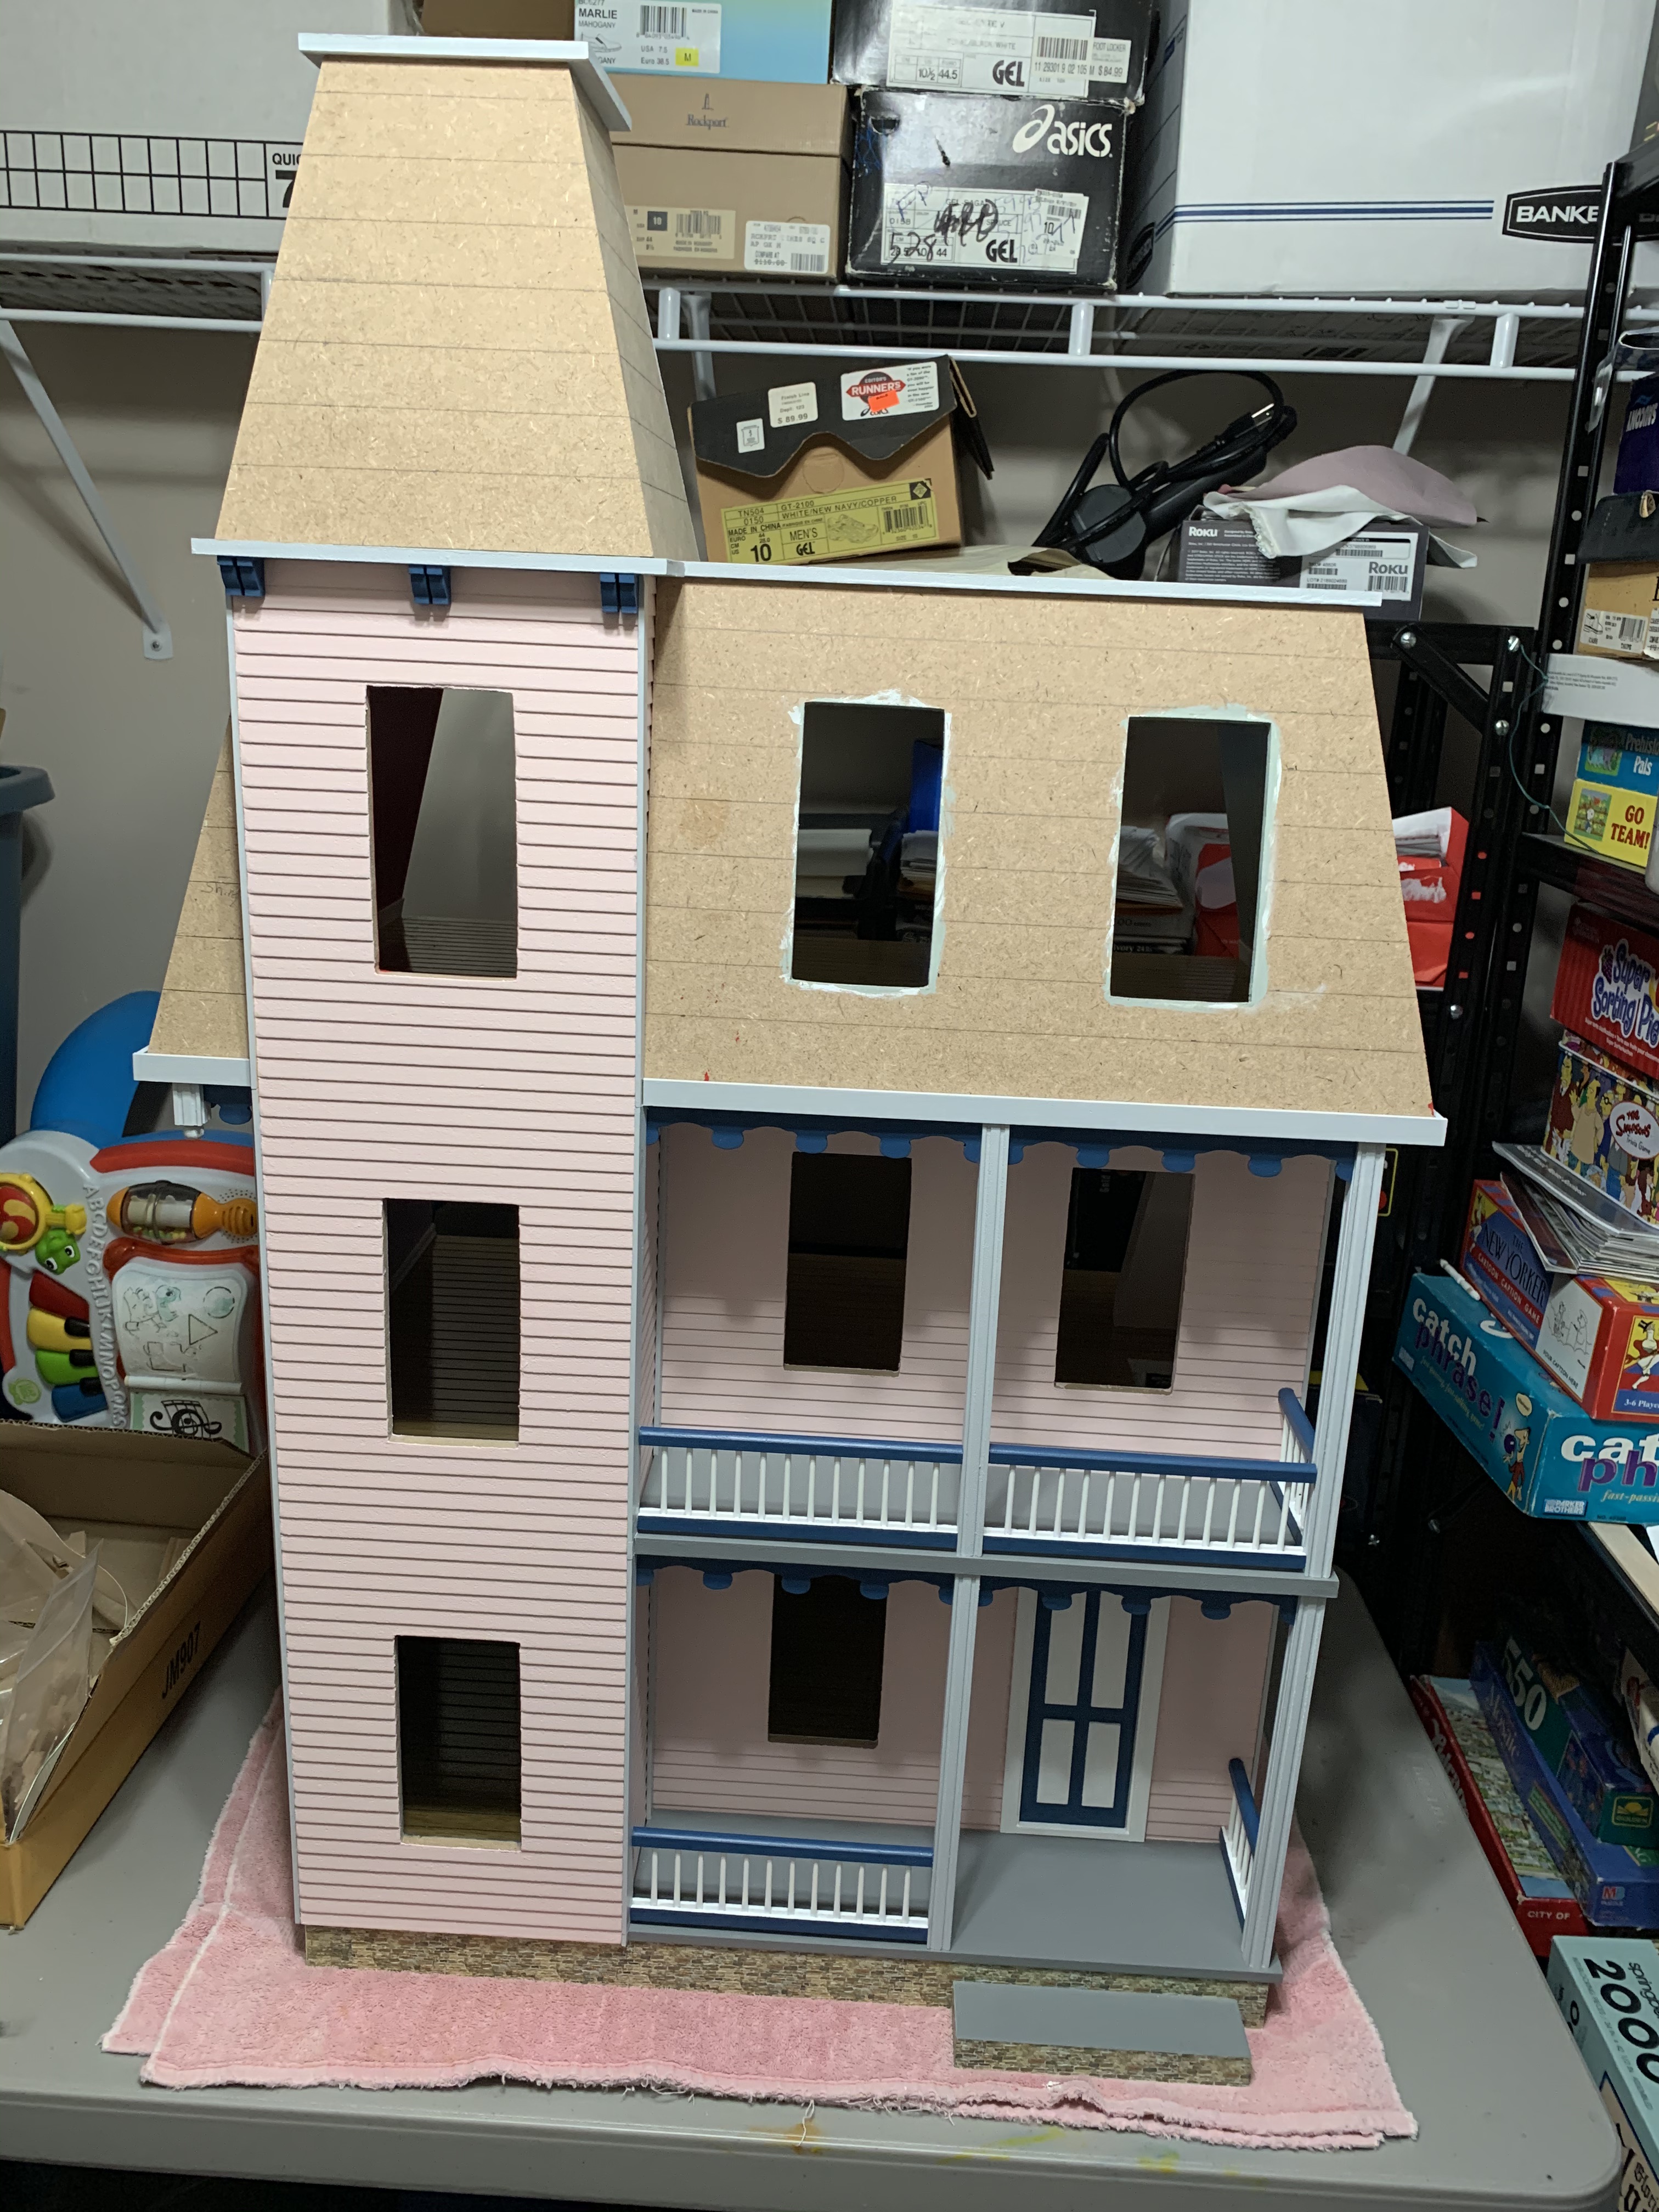
Once I completed the third floor walls and baseboards, the next step was to attach the roof, which had to be painted on all six sides, three different colors since it was not only the roof (top surface, dark grey), but the third floor ceiling (bottom surface, white) and the facia wrapping the house (four sides, light grey). But this step made the house seem closer to being move-in ready, just missing shingles, roof tower, and windows.

At this point with so much of the house assembled, the dollhouse was too heavy to easily move from its hiding place on the floor of a closet to my open work area. I needed to find a more permanent place for it where it could remain hidden at all times, but yet easily accessible for attaching additional components. Fortunately, with a little rearranging, I was able to fit my fold-up worktable into the large closet off our playroom, place the dollhouse on it, and still leave my closet workspace clear for painting, gluing, and assembling.

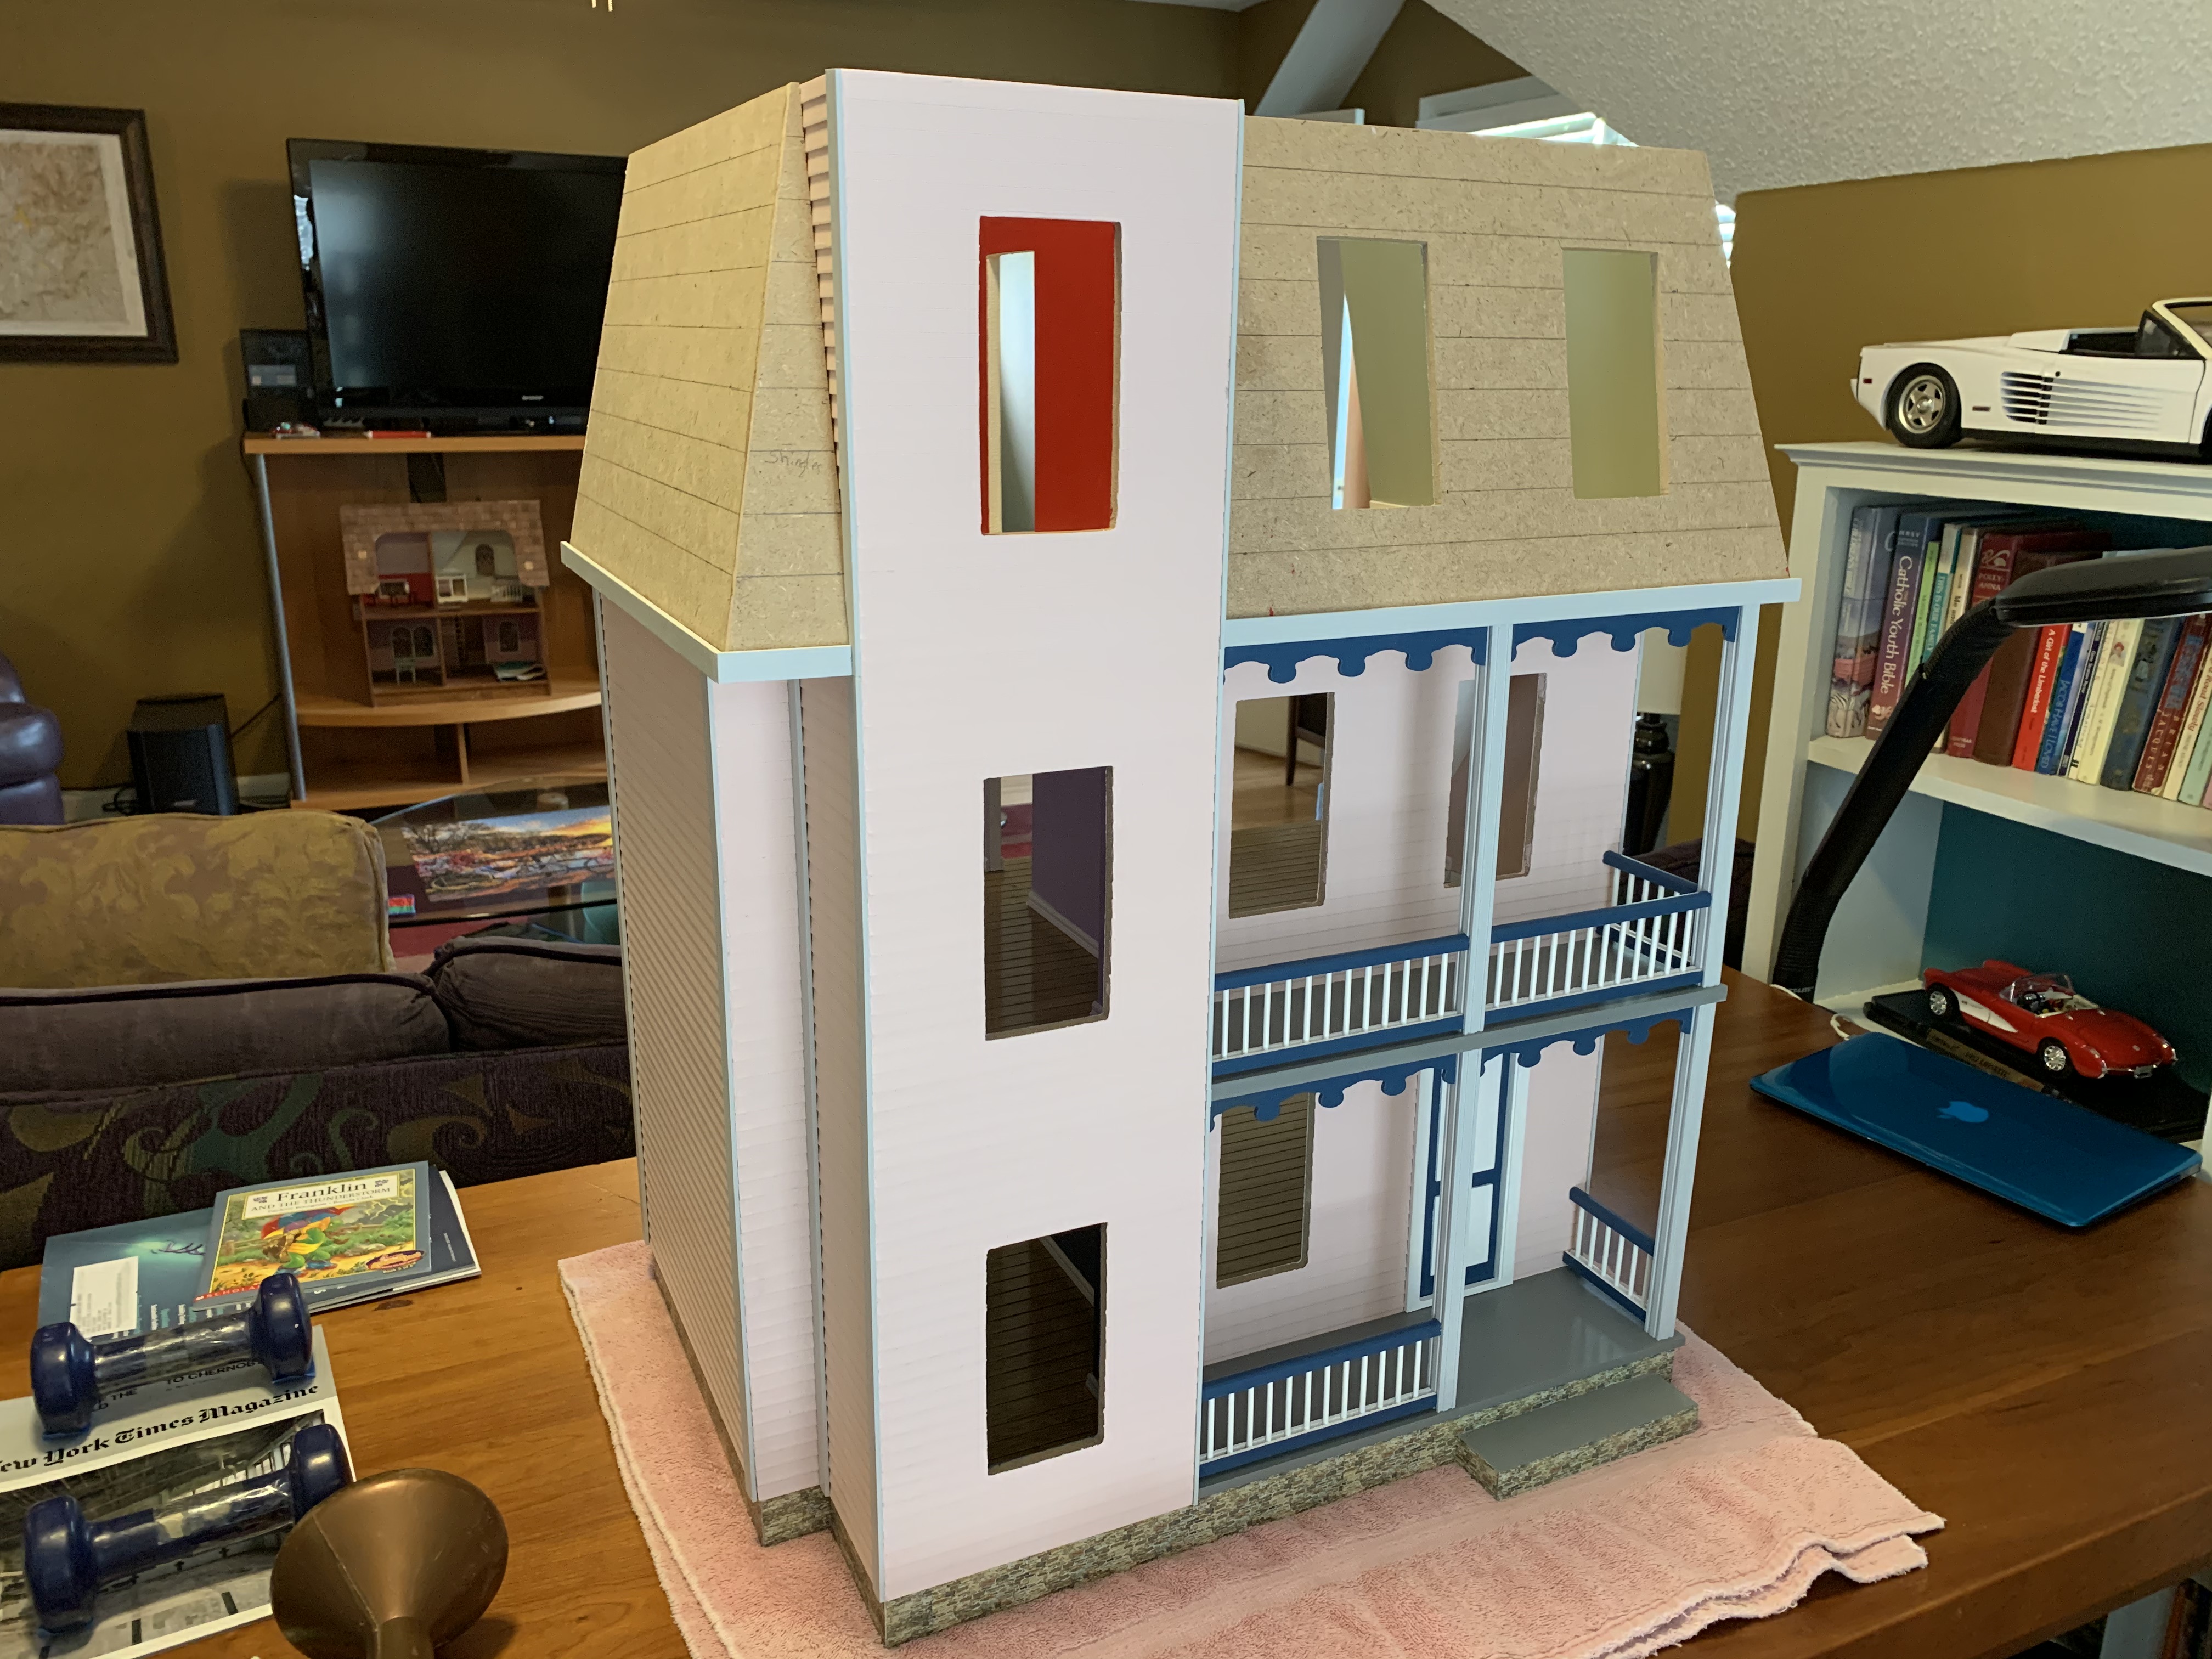
With its new cloistered home secure, I painted, assembled, and attached the roof tower.
Next up in the instructions was assembling the window frames which included one interior frame and one exterior frame, each comprised of four individual pieces of wood.
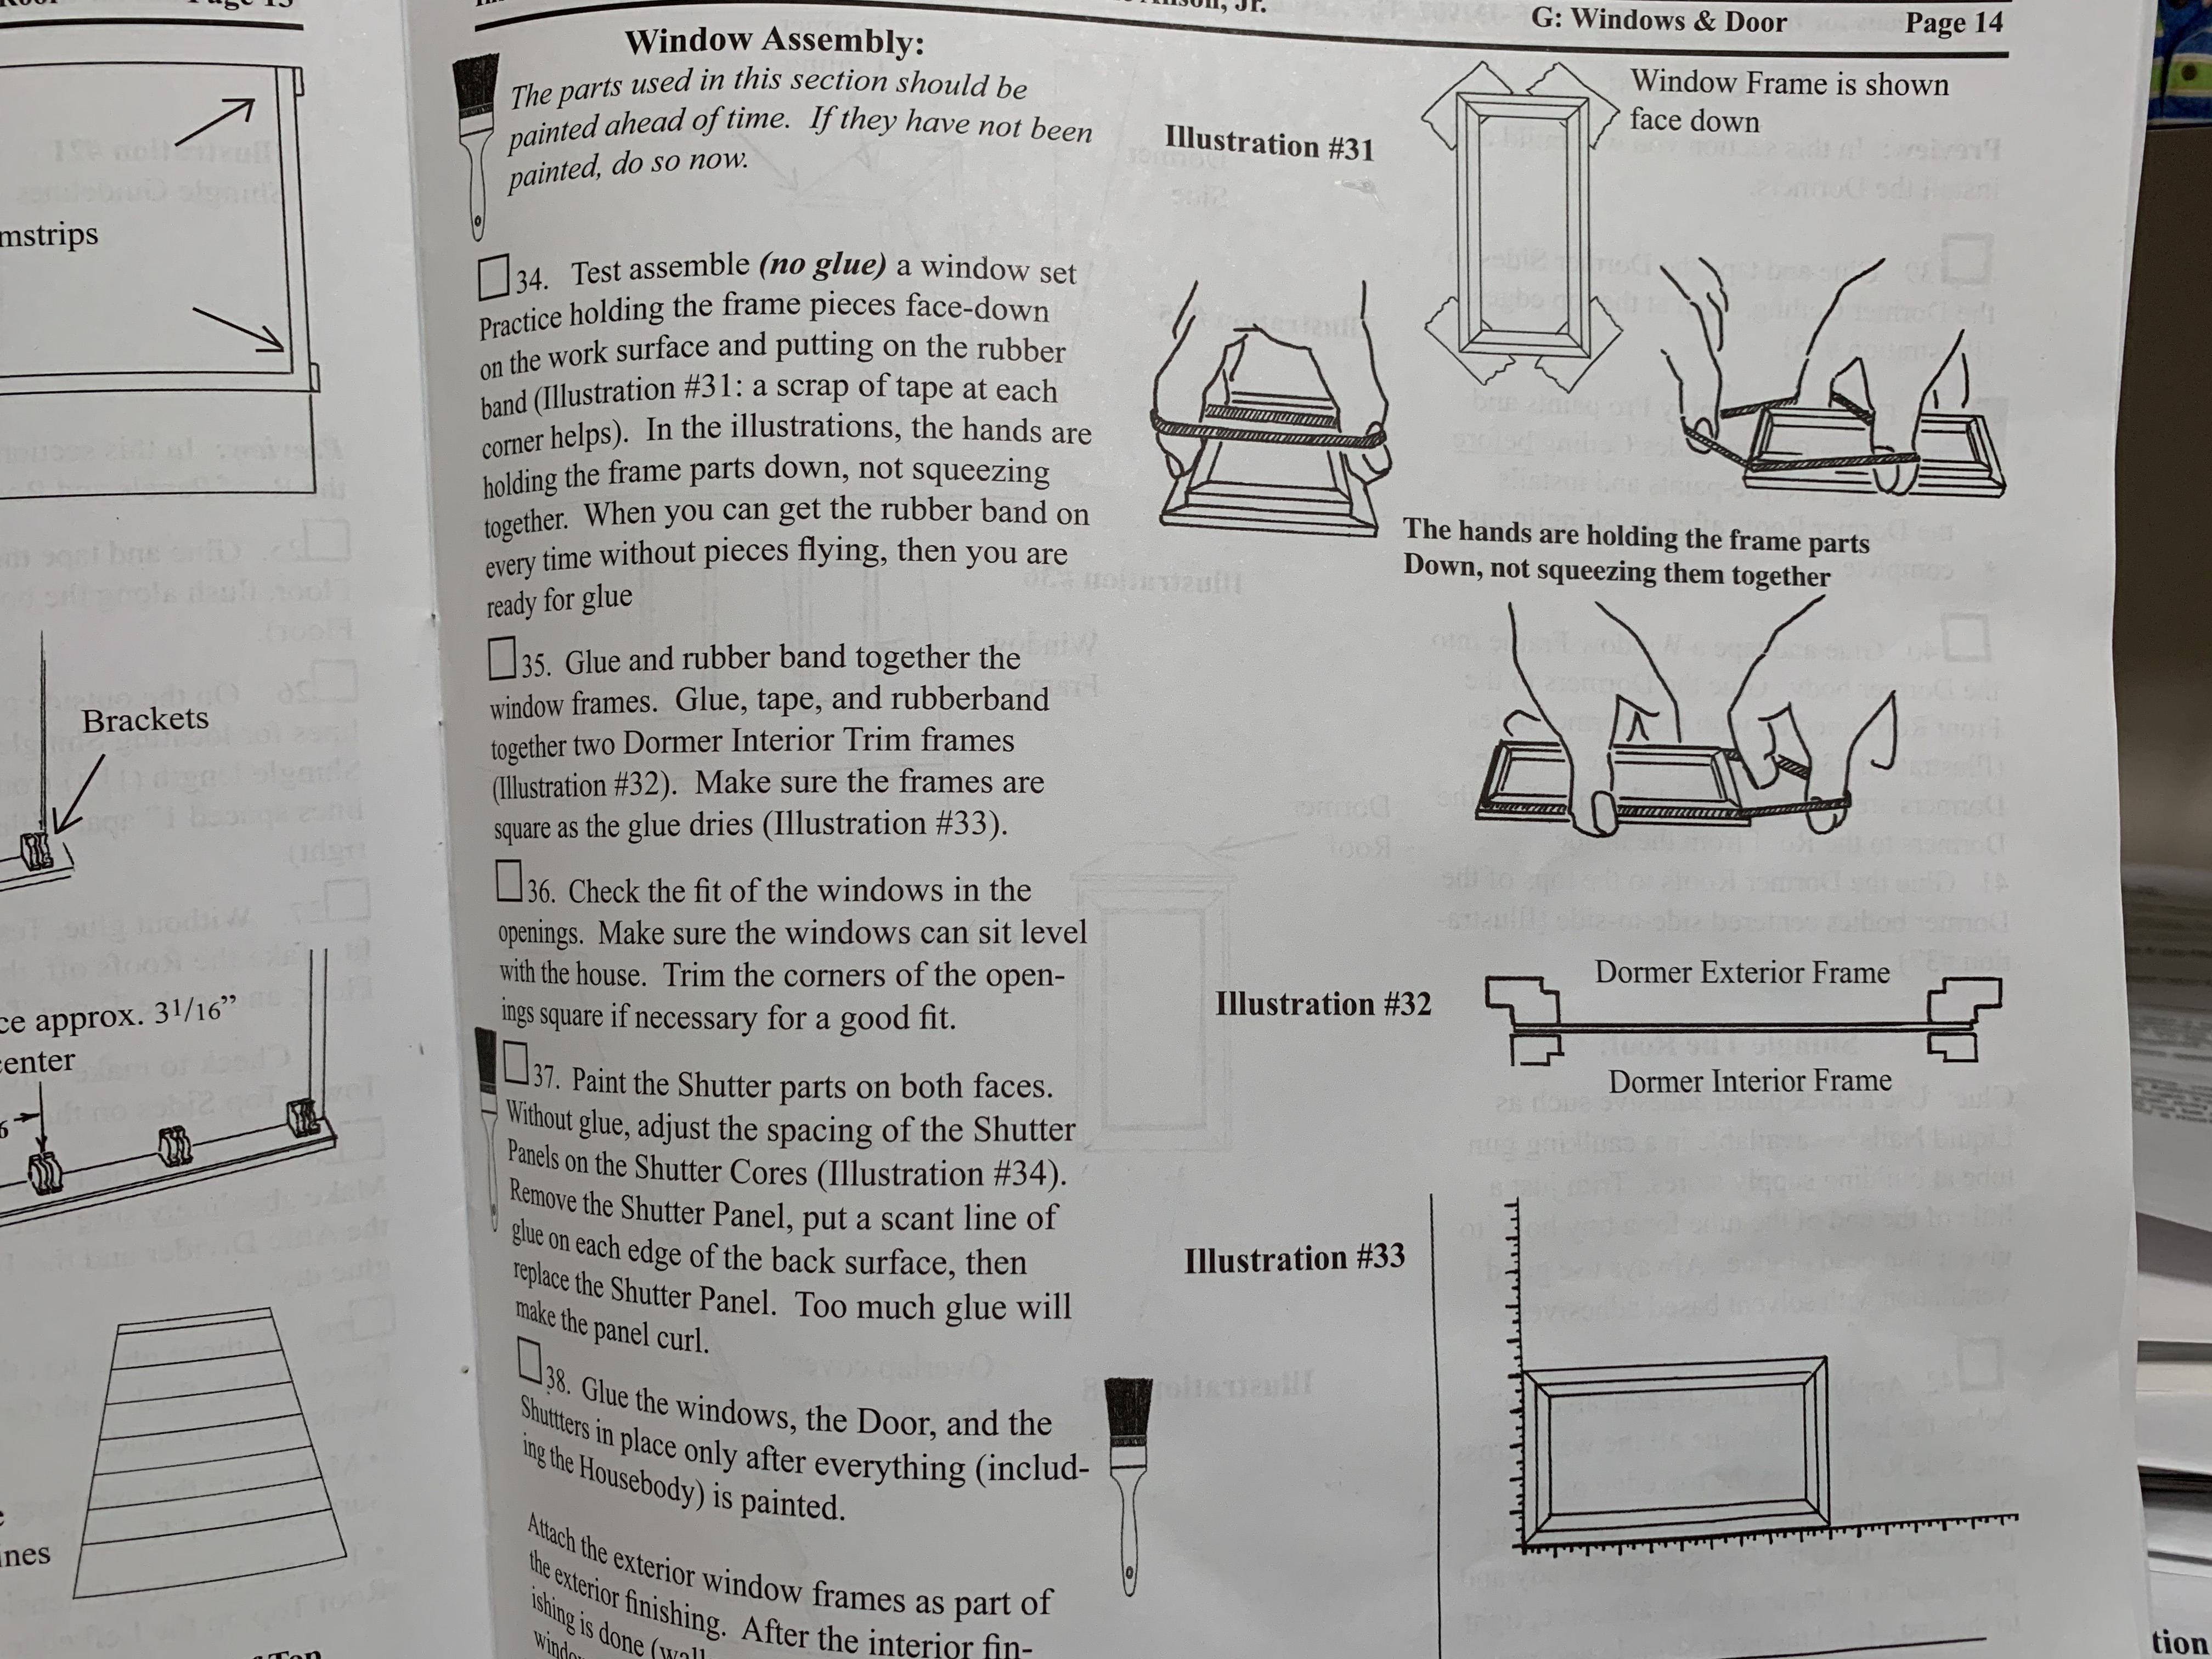
The instruction diagram demonstrated a rather challenging technique whereby the four pieces were taped together, held down by several fingers from one hand while several fingers from the other hand wrapped a rubber band around the whole assembly to ensure a tight fit. The instructions included this statement: “When you can get the rubber band on every time without pieces flying, then you are ready for glue.” I “practiced” this technique numerous times and concluded that my less nimble senior citizen fingers would never get it to work even once, much less every time.

So, I came up with an alternative approach whereby I glued two pieces together at a time to ensure they were square, and then glued these two subassemblies together.
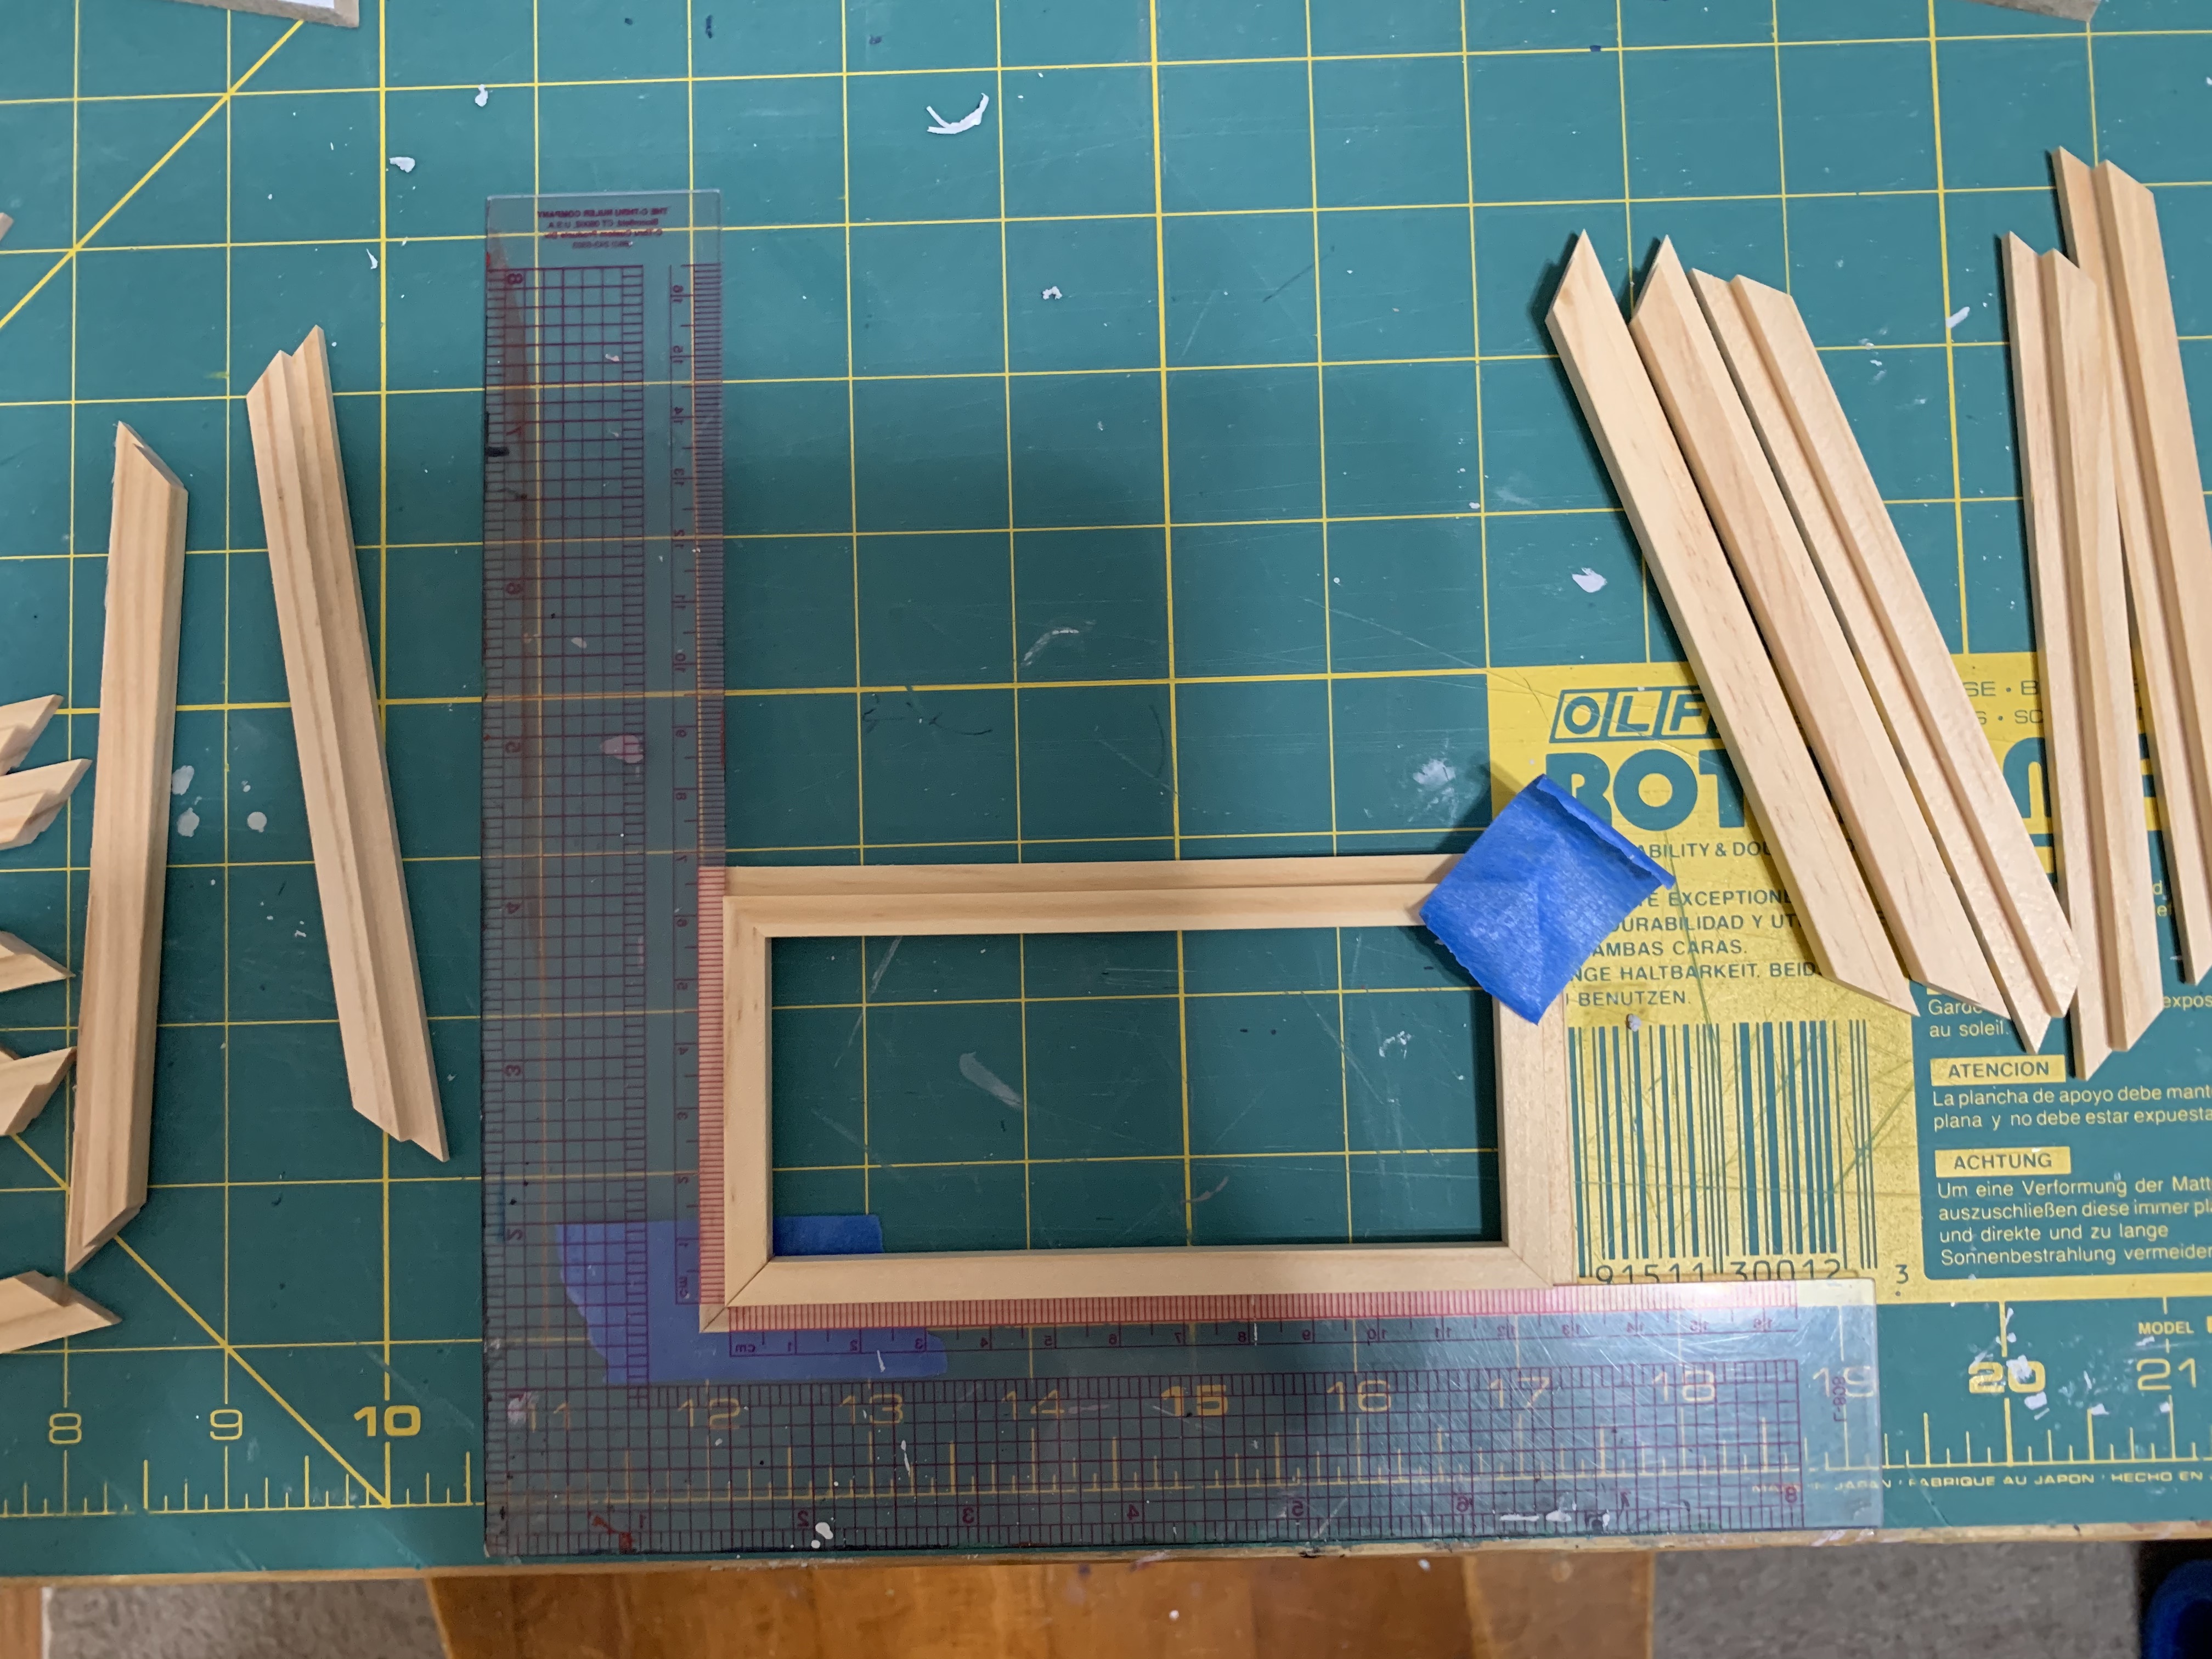
Realizing that with eight windows and thus 16 frames to build (one for the exterior, one for the interior), this would be a very time-consuming process having to wait for each subassembly to dry before then gluing these two together. I then came up with the idea of making a little jig by gluing together some strips of wood that I had available, leftover from my son’s college architecture modeling days.
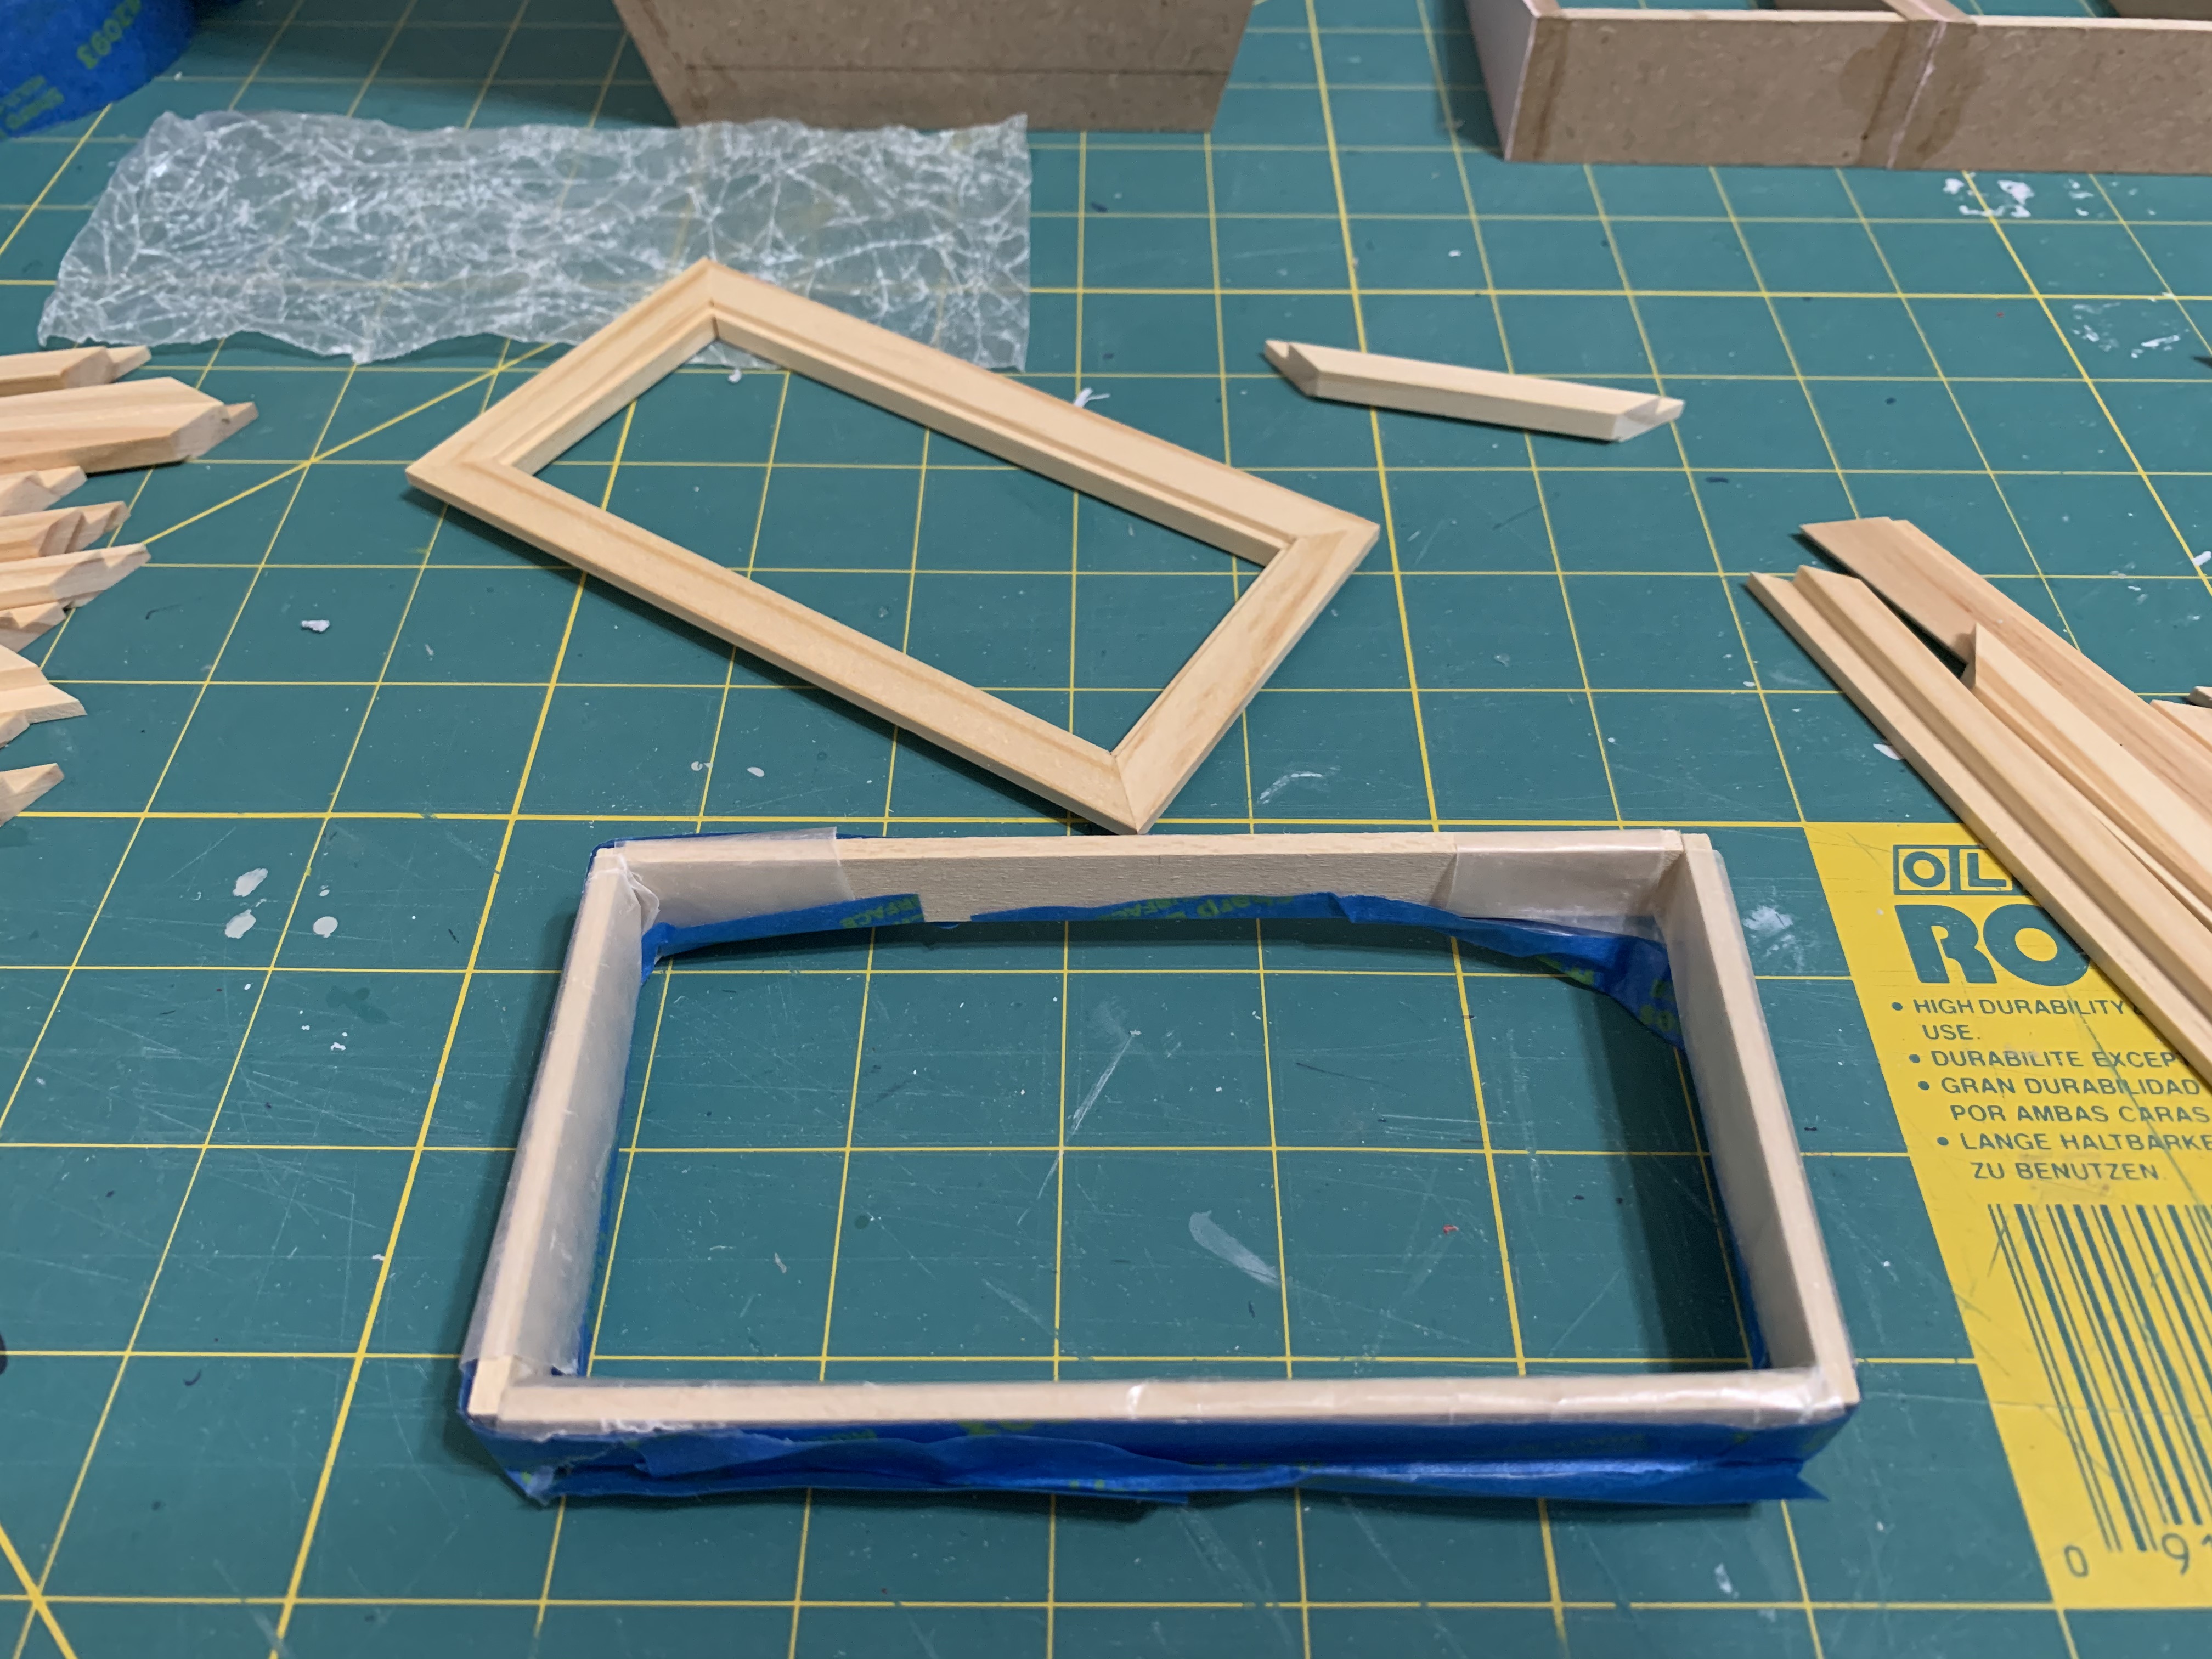
I covered it with wax paper (secured with blue tape) to keep excessive glue from bonding the window frame to the jig…
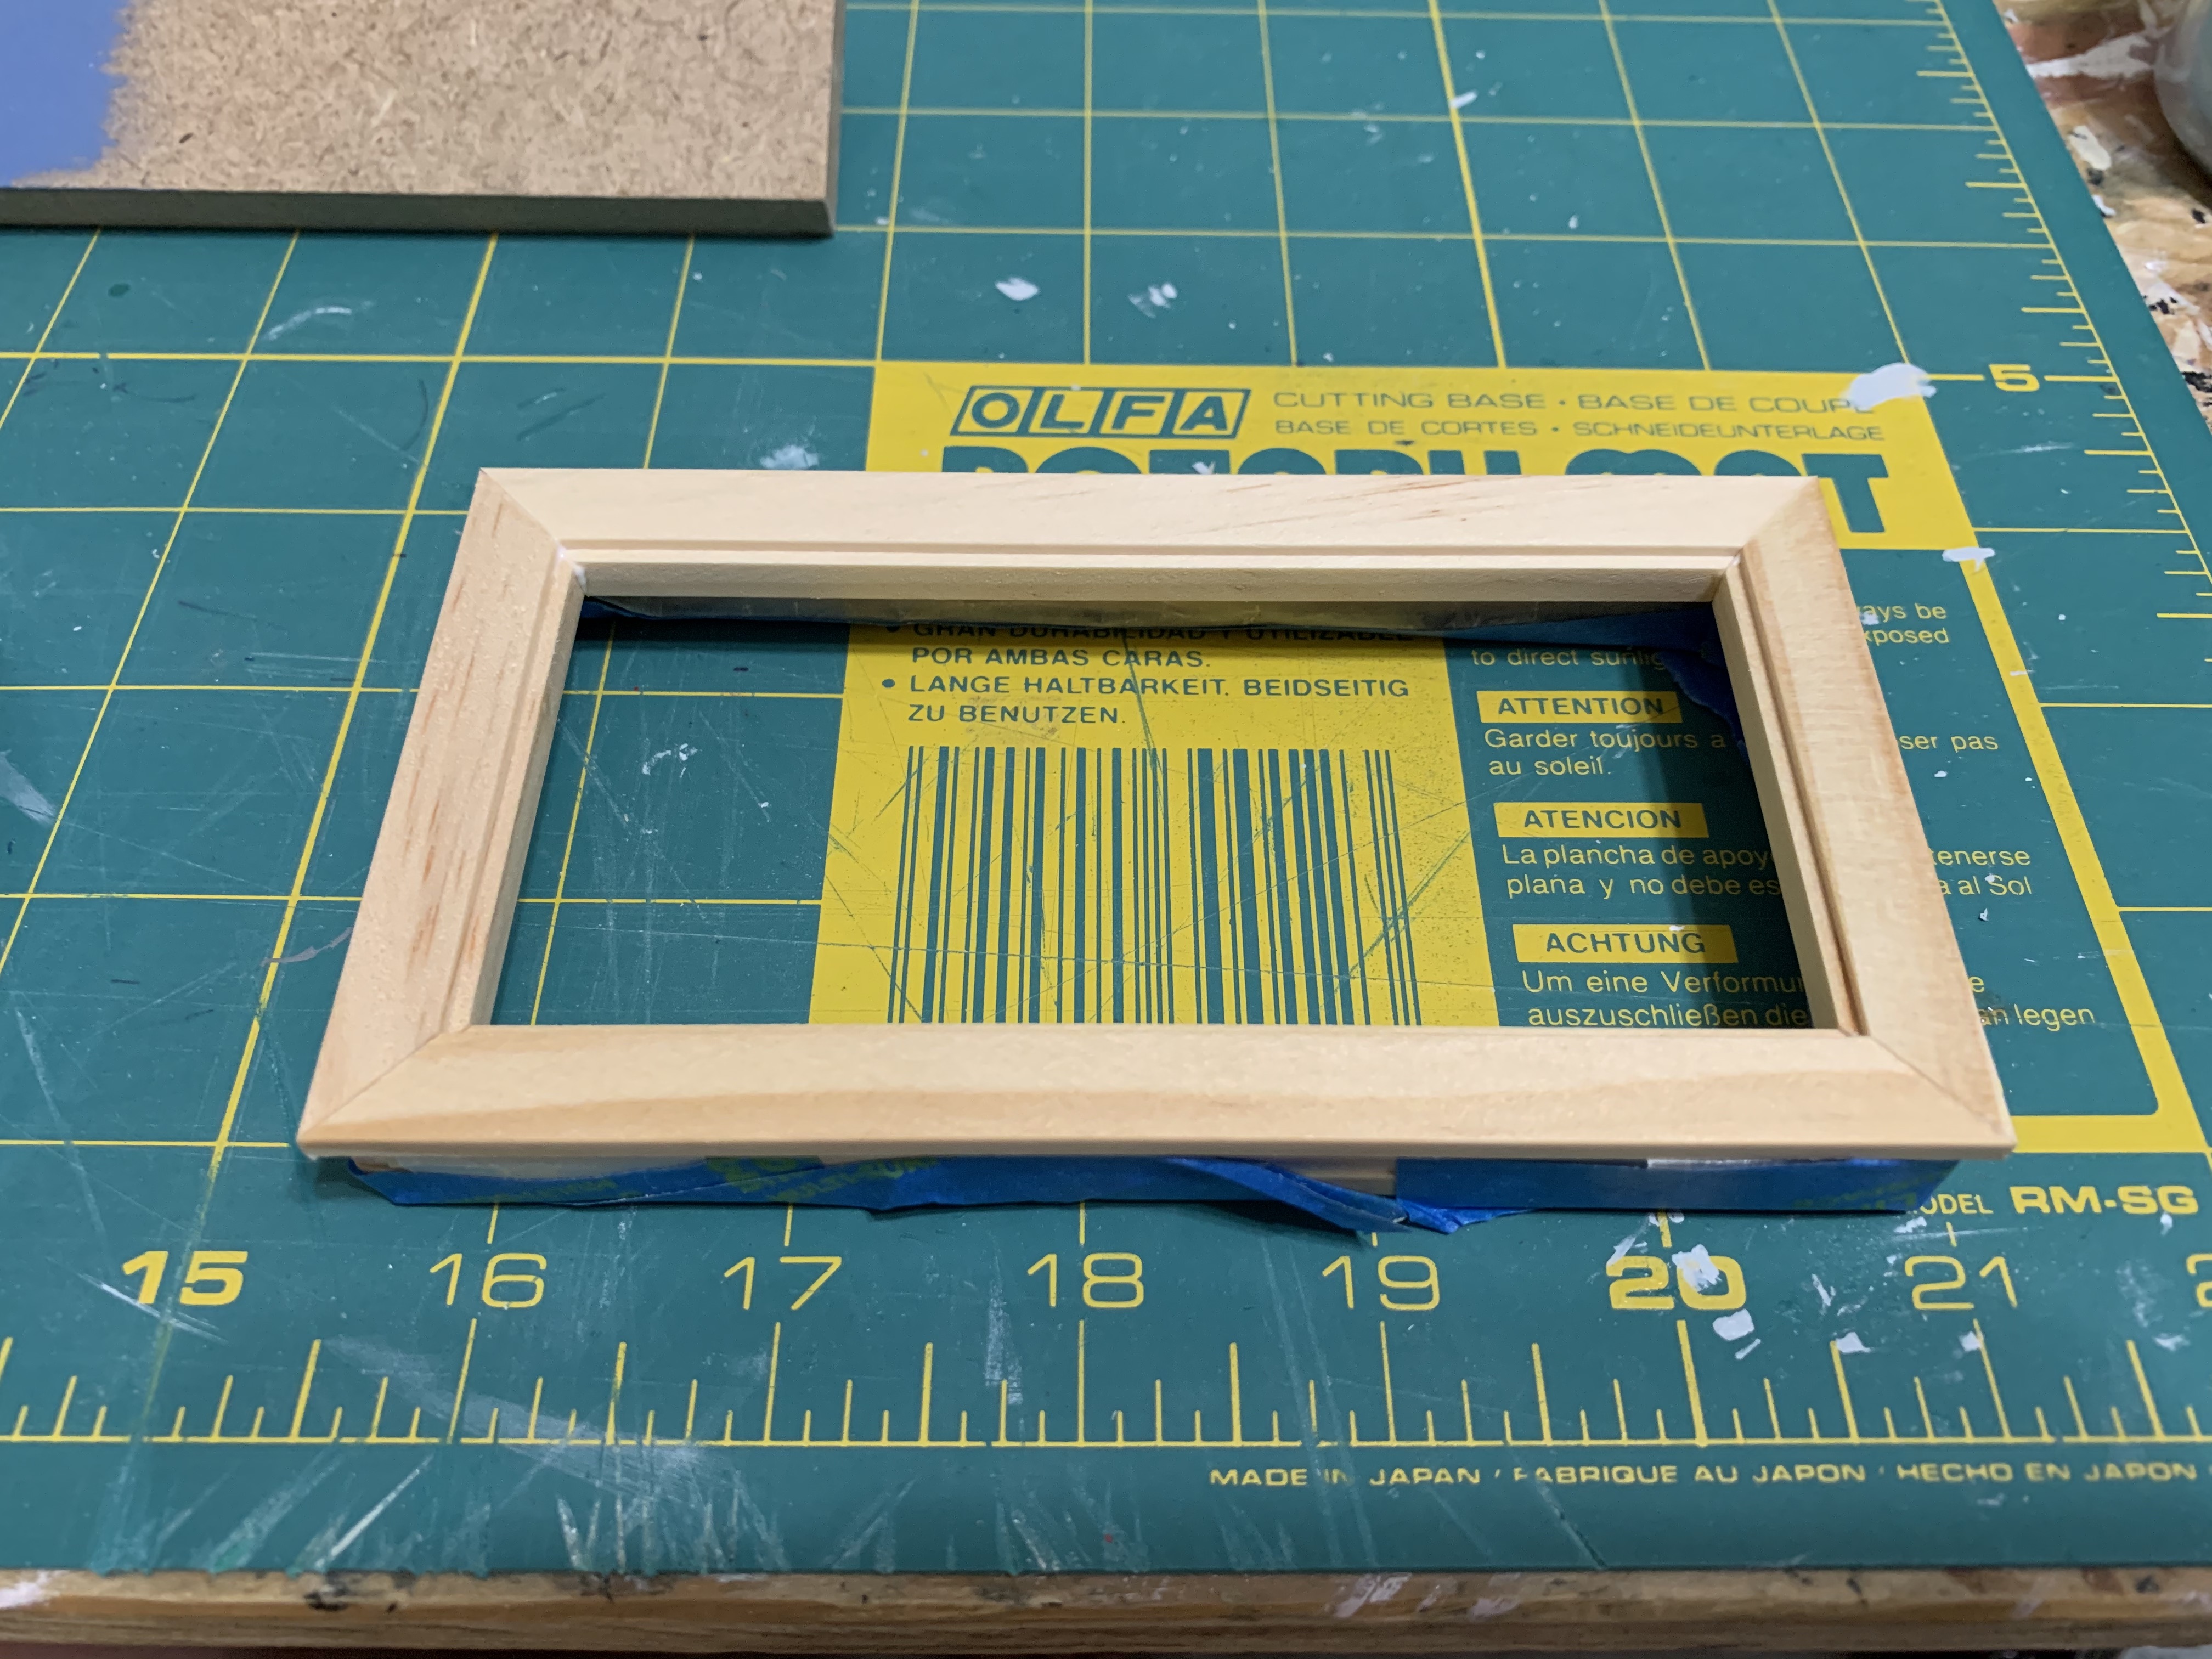
…and then all four window pieces could be glued together at the same time.
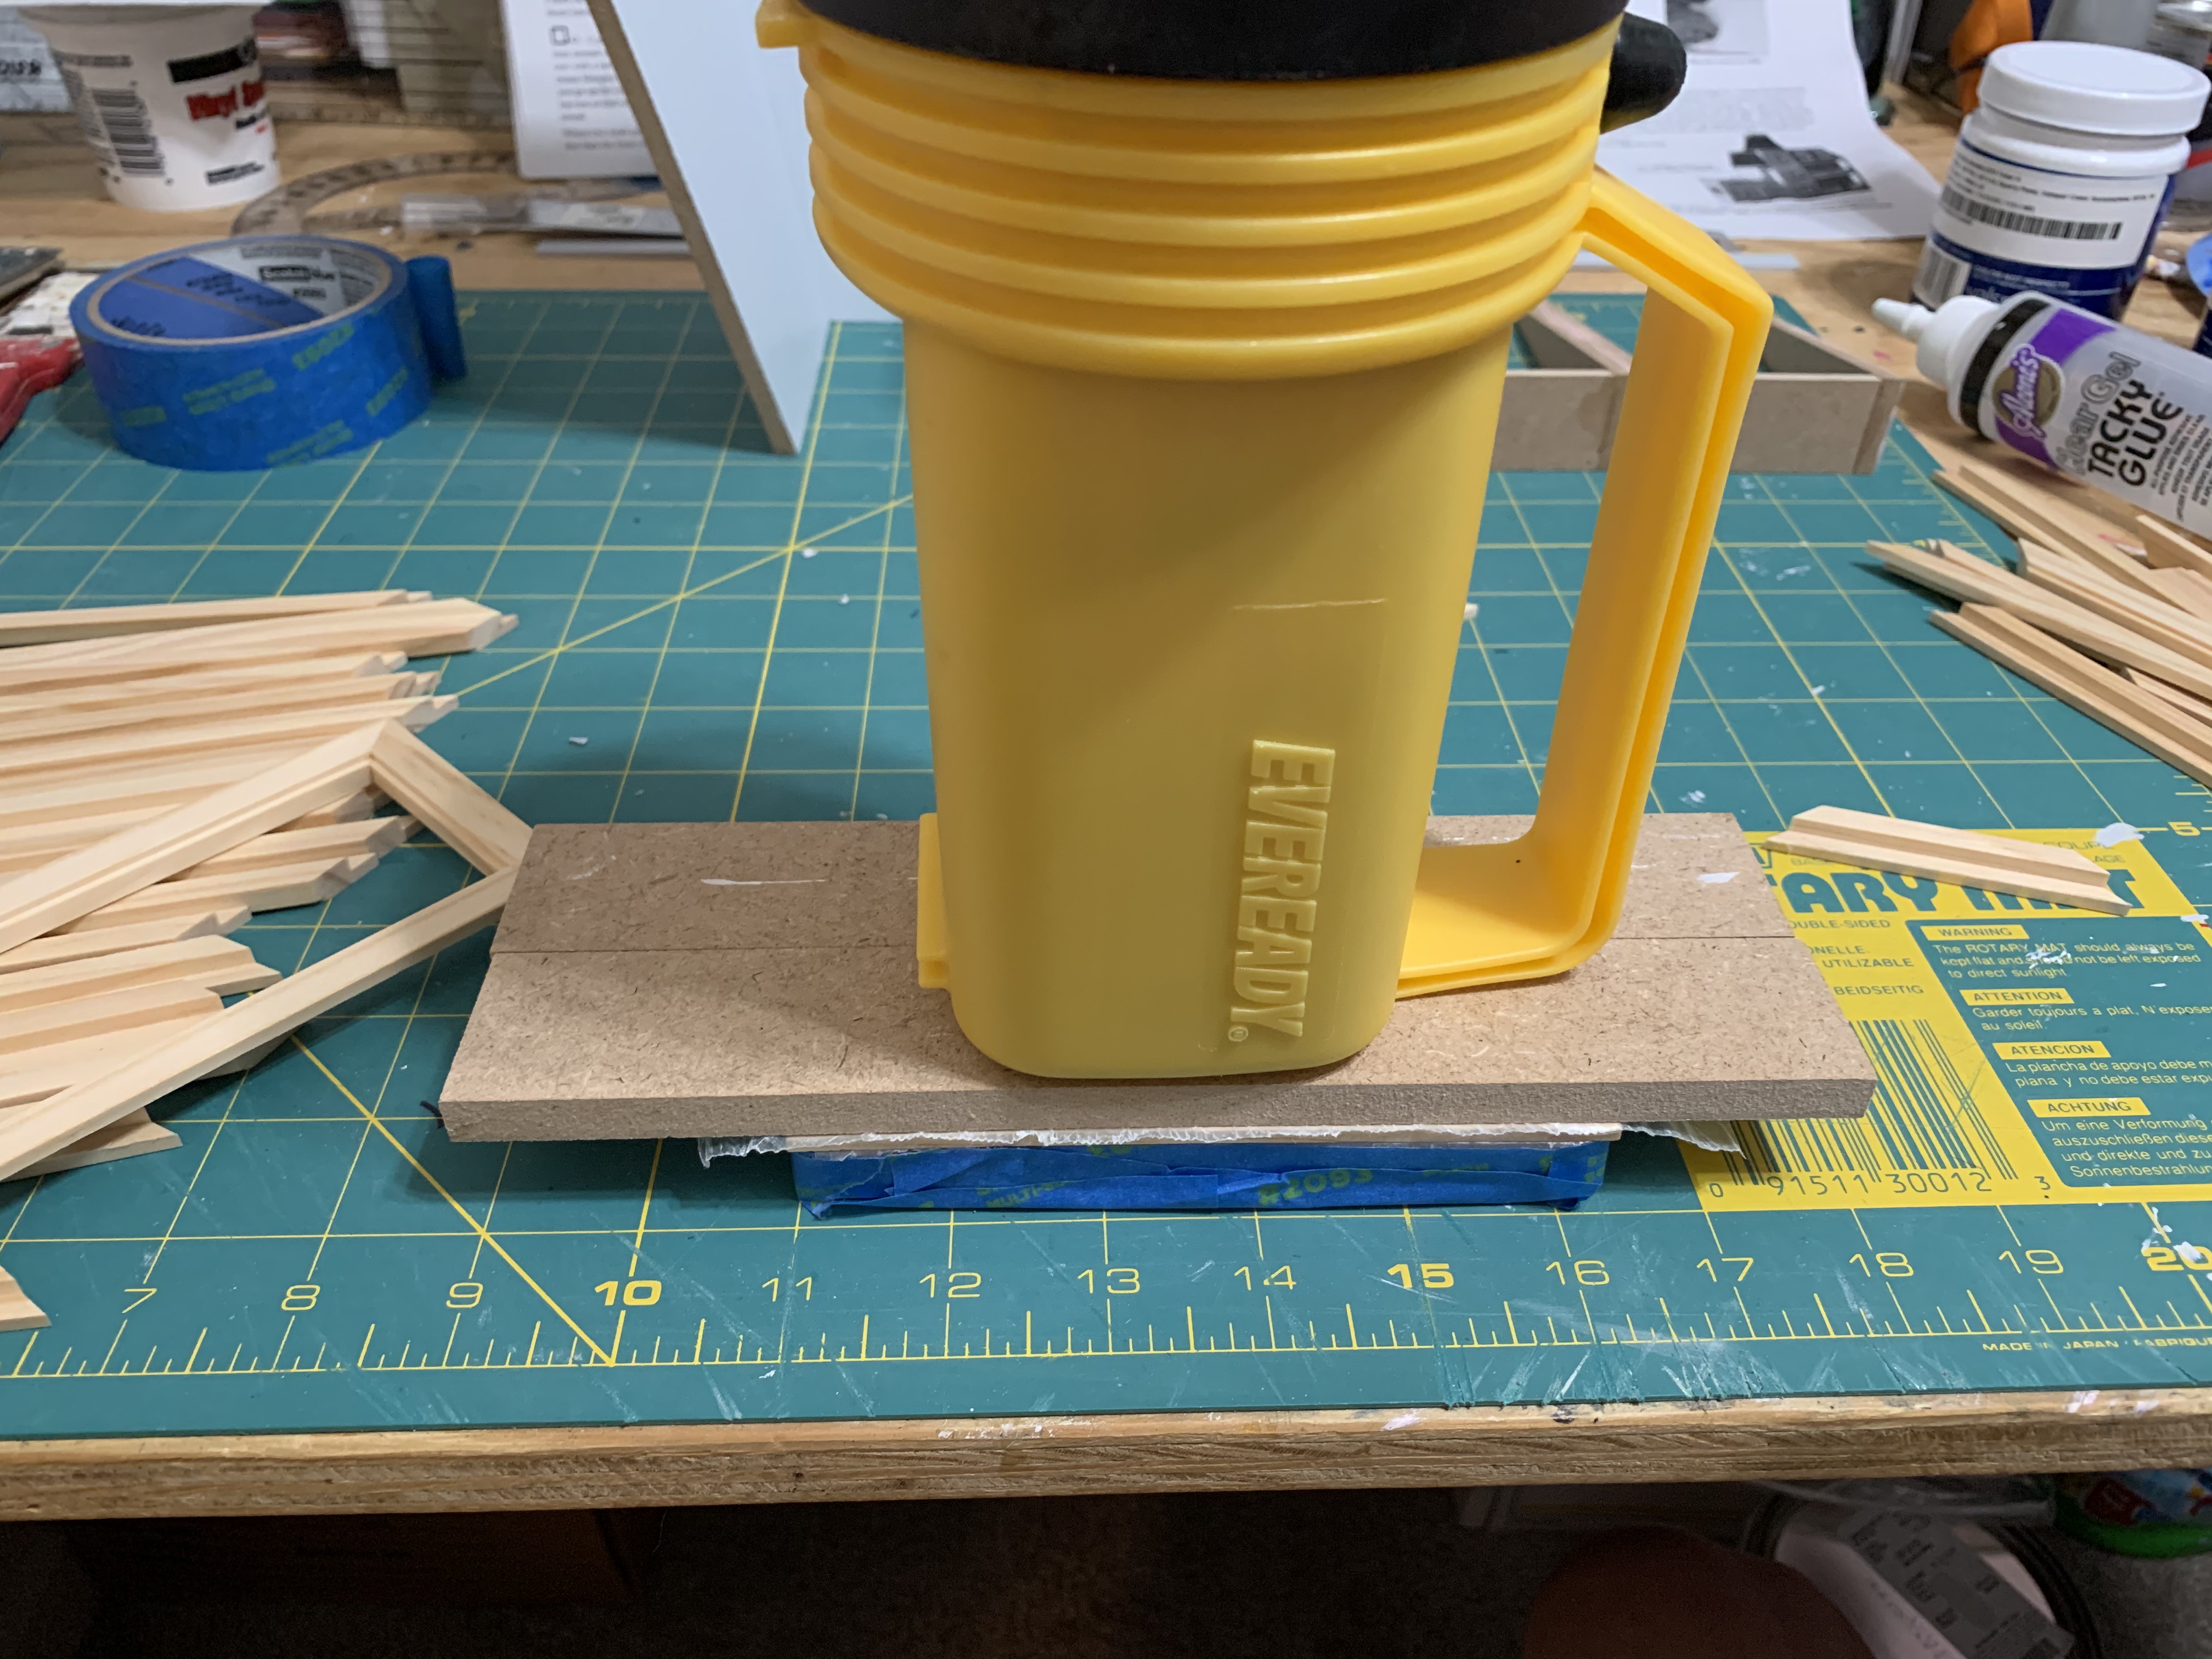
To ensure a tight bond of the four corners and a level surface of the entire frame, I laid a piece of wax paper over the top of the just glued window frame, set a couple of pieces of wood on top, and then placed a small weight (flashlight) to provide just enough compression force, leaving it to dry thoroughly for a couple of hours before removing the finished frame from the jig.

As I was progressively cranking out the 14 additional window frames, I decided to work ahead while each one was drying by painting the window frames that would attach to the roof dormers. I figured these windows would be much easier to assemble with the dormer on my work surface rather than attached to the house since the interior frame fit inside the dormer rather than flush against the wall.

This did make their assembly easier and with the frames already attached, ensured a level placement on the roof.
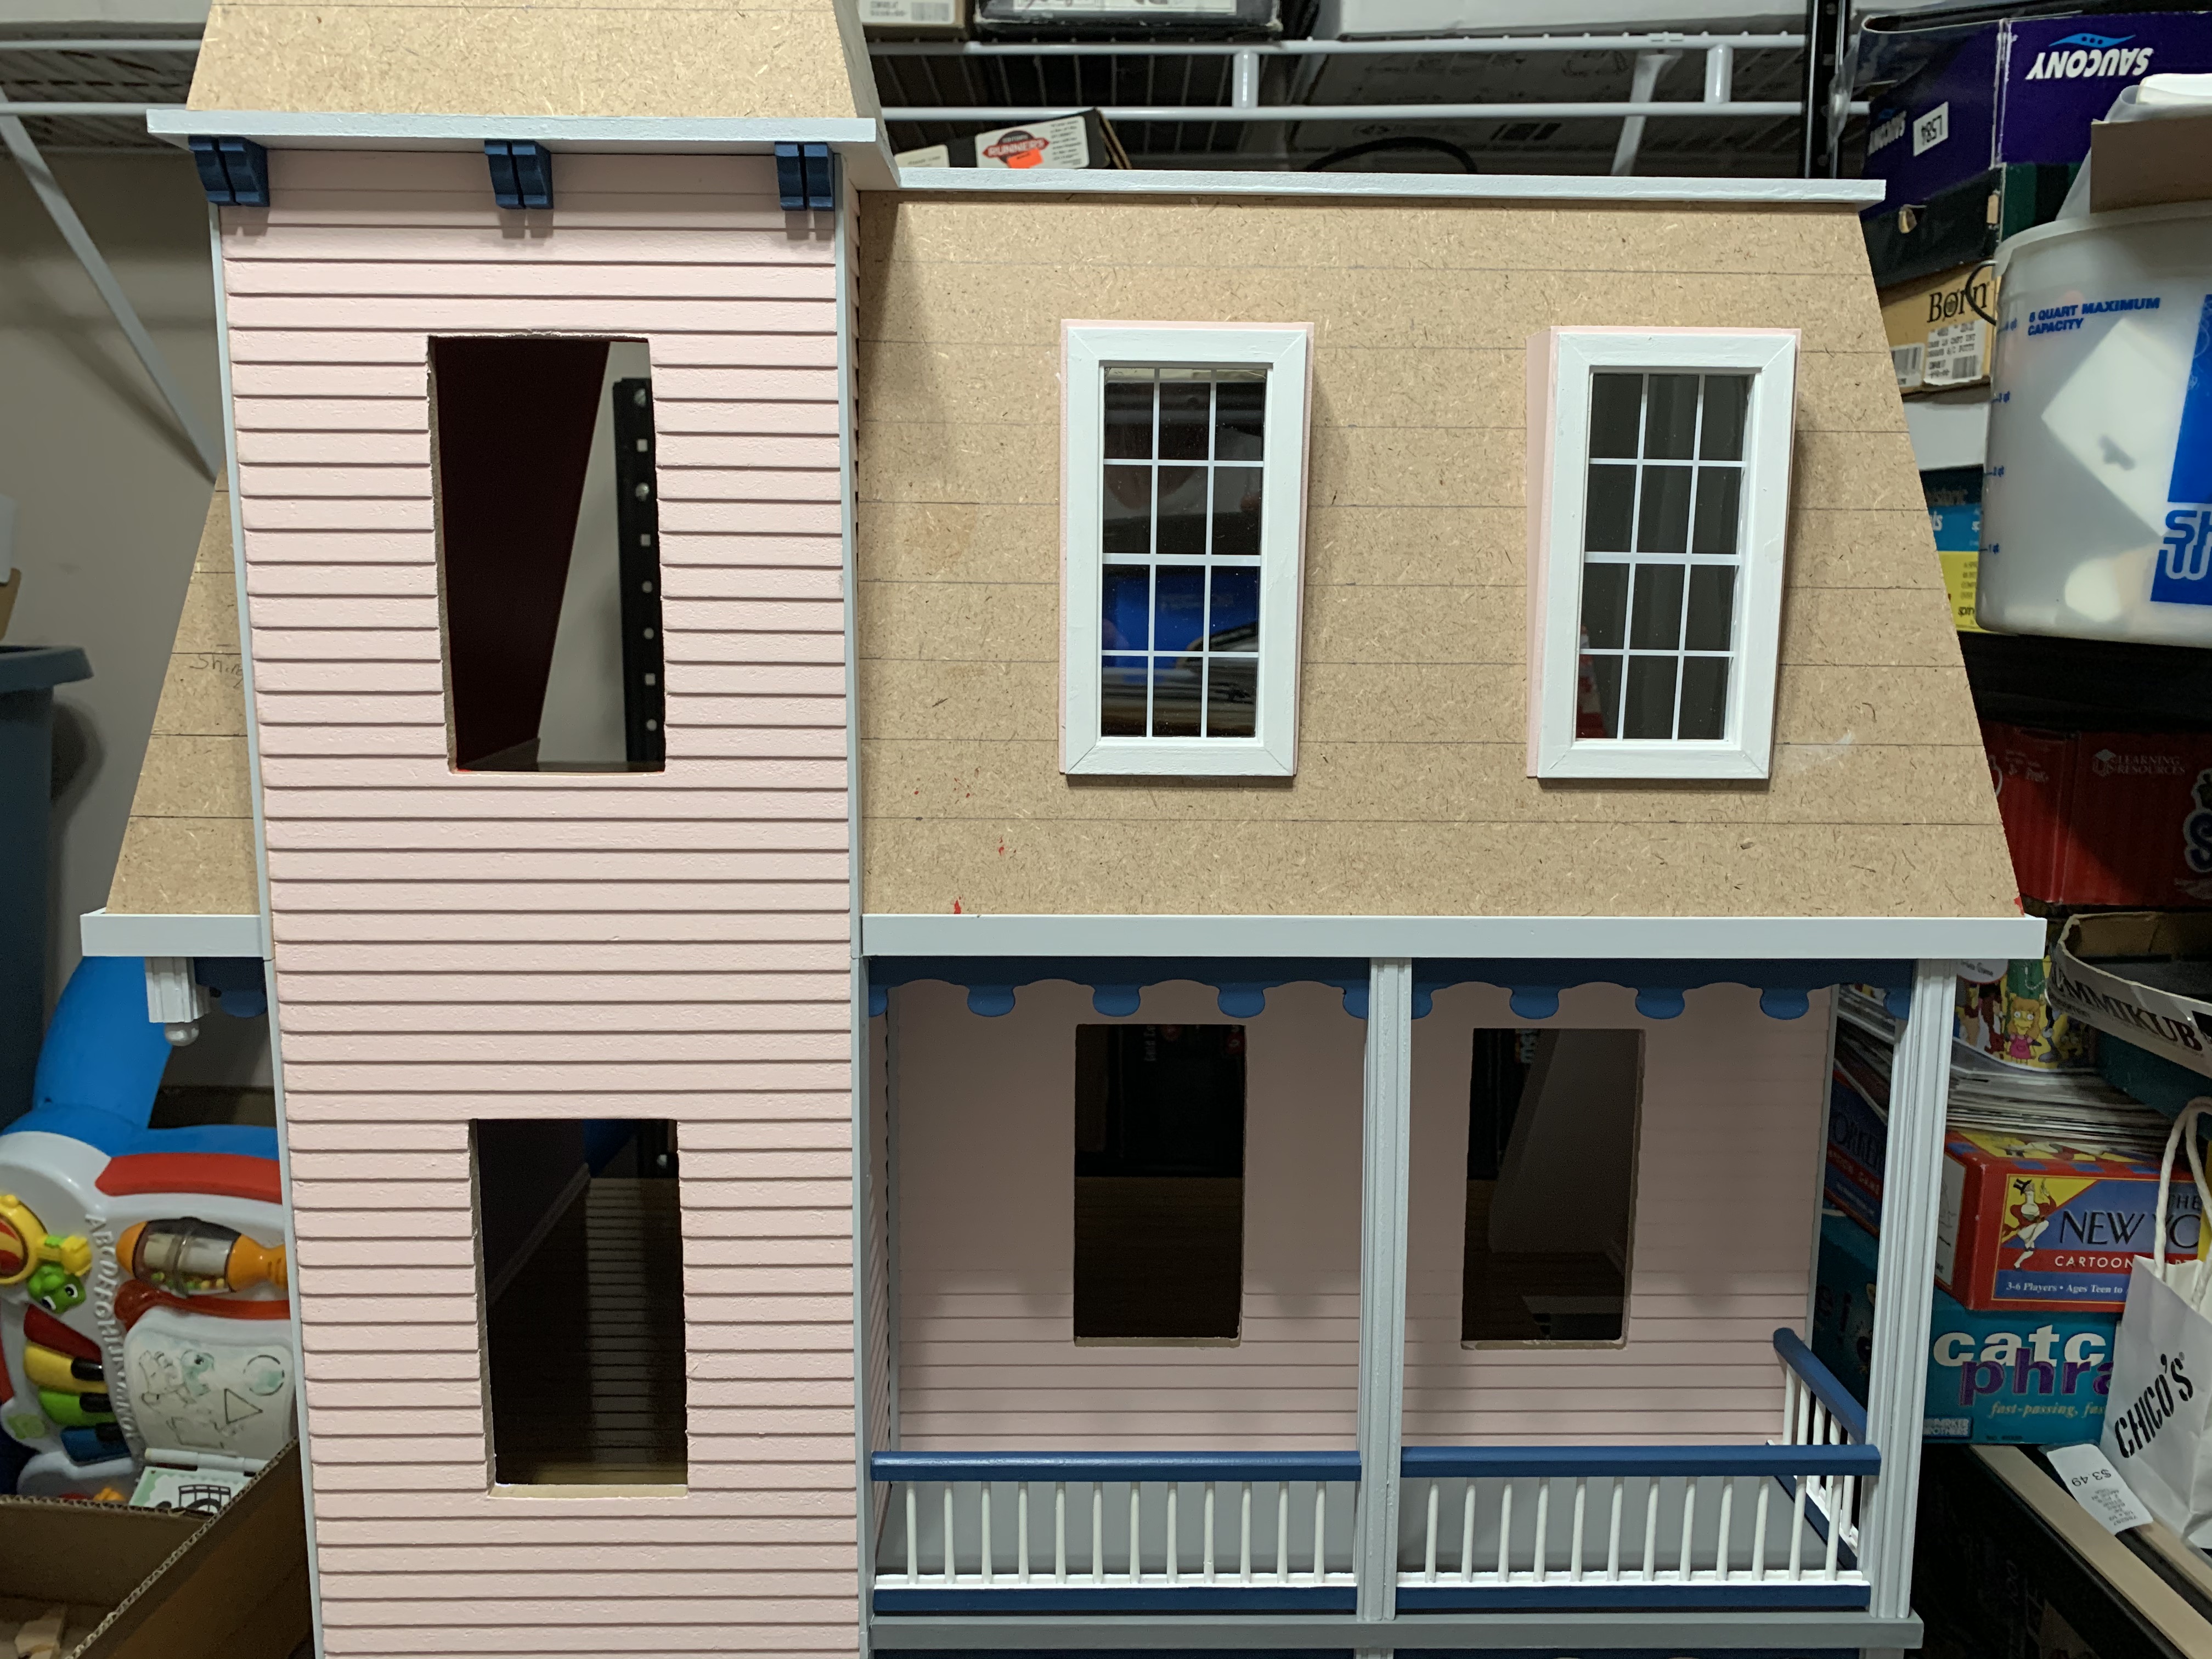
I continued to paint the remaining 14 window frames to get them ready for their proper installation. The instructions indicated that the exterior frames should be attached first and then the interior frames only after the interior painting had been completed. Since I had previously painted the interior walls before assembling the house, I chose to glue the interior frames in first and then once dry, installing the window glass panels and the exterior frames from the outside of the house.

Now it really did look like an almost completed house with just three major steps left: painting and attaching the shutters/planters, staining and attaching the shingles, and painting and attaching the roof crests.
To be continued…
Categories

This is awesome, and it looks like so much fun!
Thanks, I had a blast building it!