
Doll House Furnishings – Phase 6
Continued from: Doll House Furnishings – Phase 5
I know it has been several months since I provided an update on how I have been furnishing my doll house, but this next part of the story actually dates back to almost the beginning of 2024.

It was in February while my wife was out of town that my sister drove over for a weekend of miniature play time together. While here, she got to see all the furnishings I had hand crafted or purchased for my doll house. With my kitchen and bath complete, we talked about which rooms I should focus on next.

Then she said she wanted to show me what was possible for us to make if we bought a laser printer.
When I heard her say laser printer, I thought what you are probably thinking—a laser printer that prints out high quality documents on paper. How could that make 1/12-scale doll house furniture from wood? But what she was actually referring to was something completely different. This laser printer didn’t print on paper, it cut wood—cut wood with a laser (also known as a laser cutter).

My sister then showed me a video of someone who had taken the full-scale mid-century modern credenza above and scaled it down to “print” on the laser cutter. The video included not only how she had cut out the individual pieces, but also how she had assembled them into a working model with sliding doors and removeable drawers. I was sold!
The next morning, we searched online where one was available in town and then drove there to purchase it.

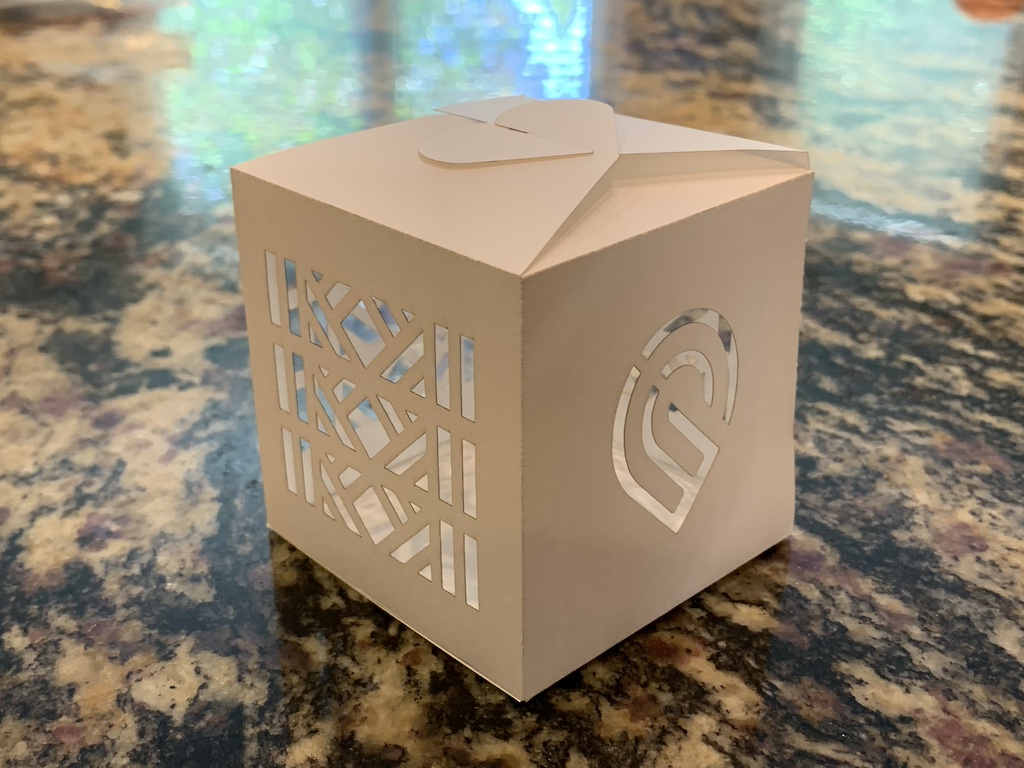
Once we brought it home, unboxed it, and set it up, we followed the introductory tutorial on how to “print” a paper box. Using just a standard piece of paper, the laser was precise enough to cut out sections from the paper while also merely scoring fold lines. Once the “print” was complete, I punched out the two-dimensional cutting and then folded it into a 3-D box.
We were both impressed!
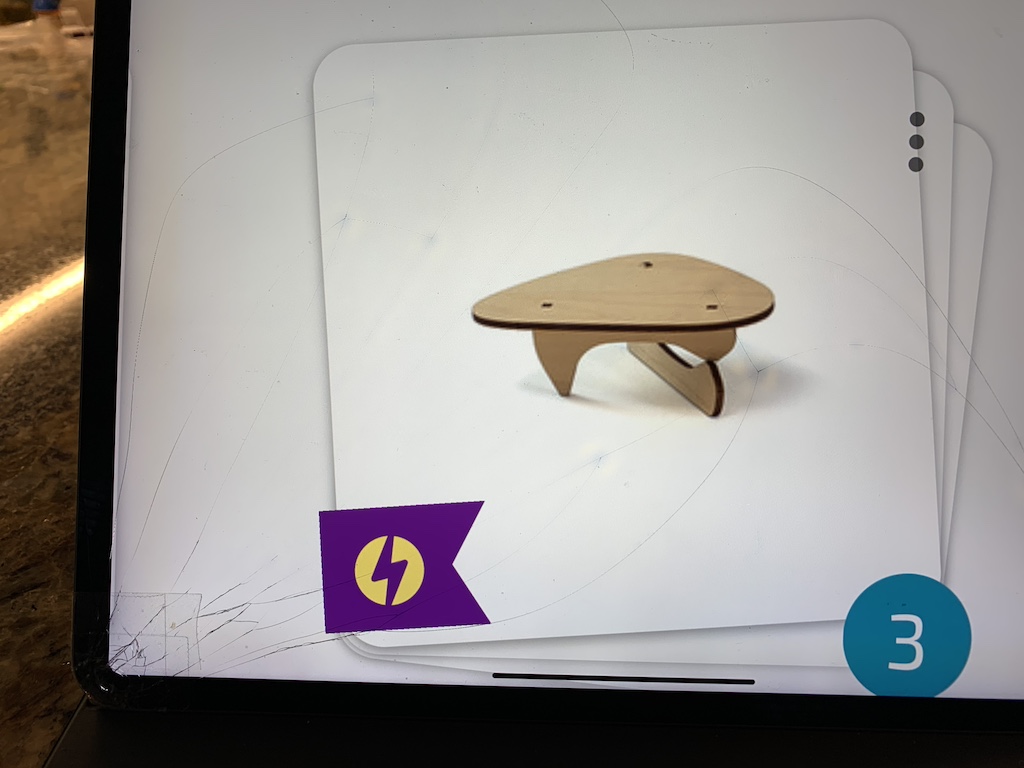
By signing up for a free, introductory subscription, we then had access to 1/12-scale furniture designs that had been previously programmed into the printer software. We scrolled through the options, not all of which worked on the particular model printer we had purchased. But we did find a simple mid-century modern coffee table that we decided to try first.
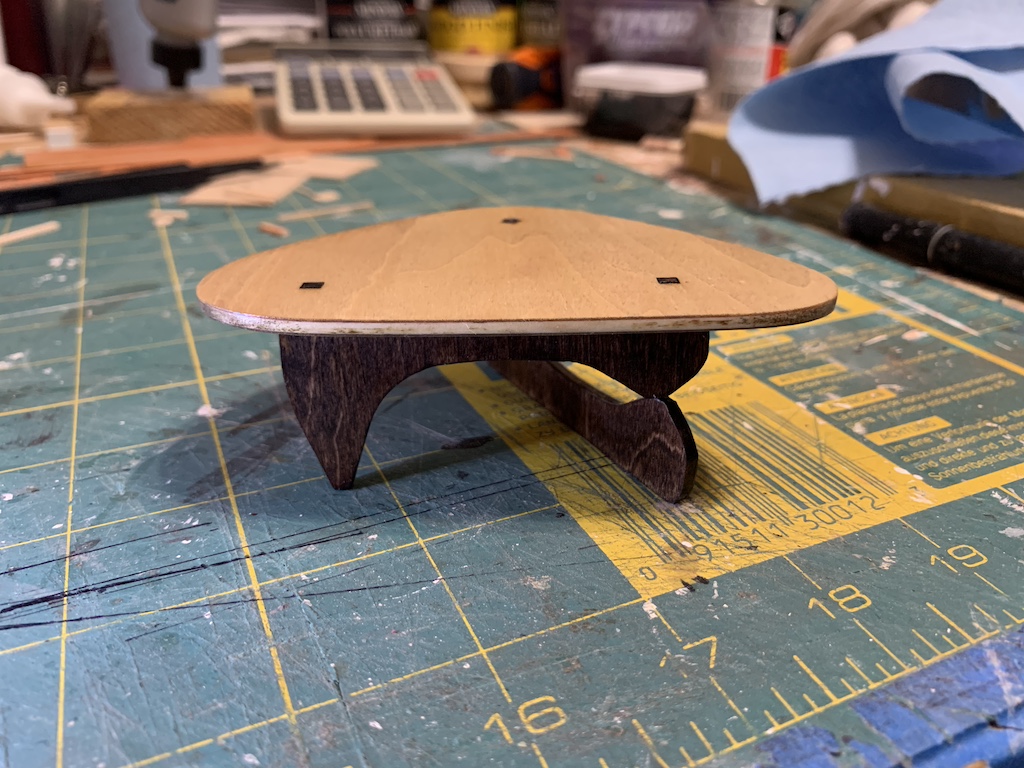
Using a piece of 12” X 12” bass plywood that came with the printer, we set it up to cut out the three pieces.

To make it a bit more interesting, I decided to stain the legs first. Then I applied a couple of coats of polyurethane to all the pieces. With just three pieces to glue, it came together very quickly.
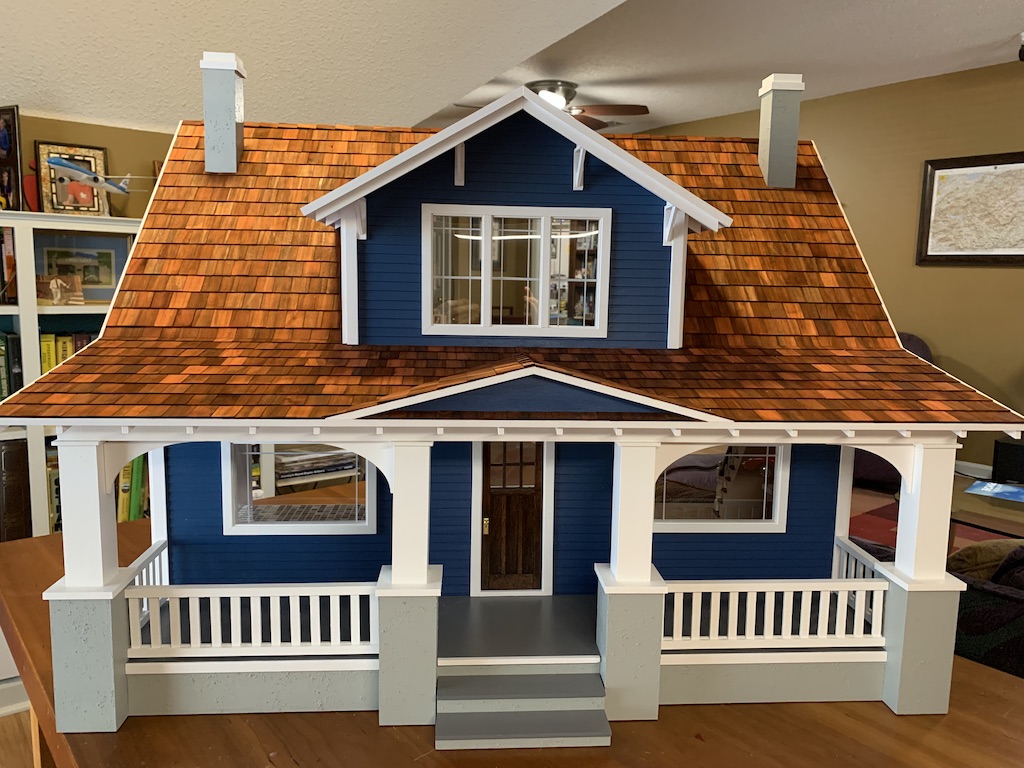
I knew this would be the perfect coffee table for my first-floor main room. I had previously bought a faux-leather love seat to go in that room…

… and this coffee table would be a good match. With the IKEA POANG chair my sister had previously 3-D printed and painted for me, this would make a great start on that room.

Returning to that credenza that my sister first showed me, we both agreed that we each wanted one for our doll houses, mine to go in that main first-floor room. She said she would work on that once she got home. With our weekend over, we boxed up the laser printer so she could take it home to “play” with it.
Over the ensuing months, what I did not know was the amount of work (play?) my sister put into making the credenza. She first had to take the dimensions from the full-scale piece of furniture online and then draw them in Adobe Illustrator, first having converted the measurements to 1/12-scale. She then had to arrange them to fit on the 12” X 12” square of wood yielding the digital image below.

She then loaded the file into the laser printer app, placed the sheet of wood in the printer, and let the printer do its thing. I know this is an extreme oversimplification of the process which at times was trial-and-error, but without getting further into the technical details, here is her first finished credenza.
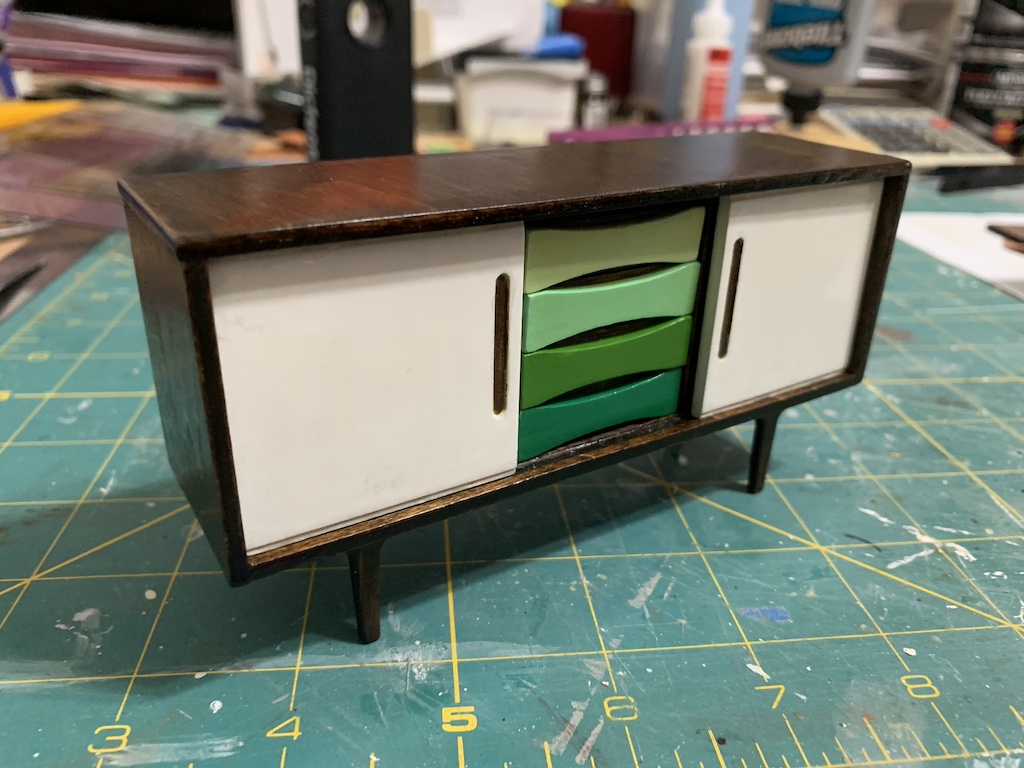
Impressive right?
Before delving further into the world of miniature furniture production, I do need to cover several important but less complex topics of relevance for building doll house furniture this way.
The laser, as all lasers do, cuts by burning through the material. To prevent the laser from charring the upper and lower surface along where the cuts are made, a thin piece of paper is adhered to both the top and bottom of the veneer. But the cut edge does get charred.
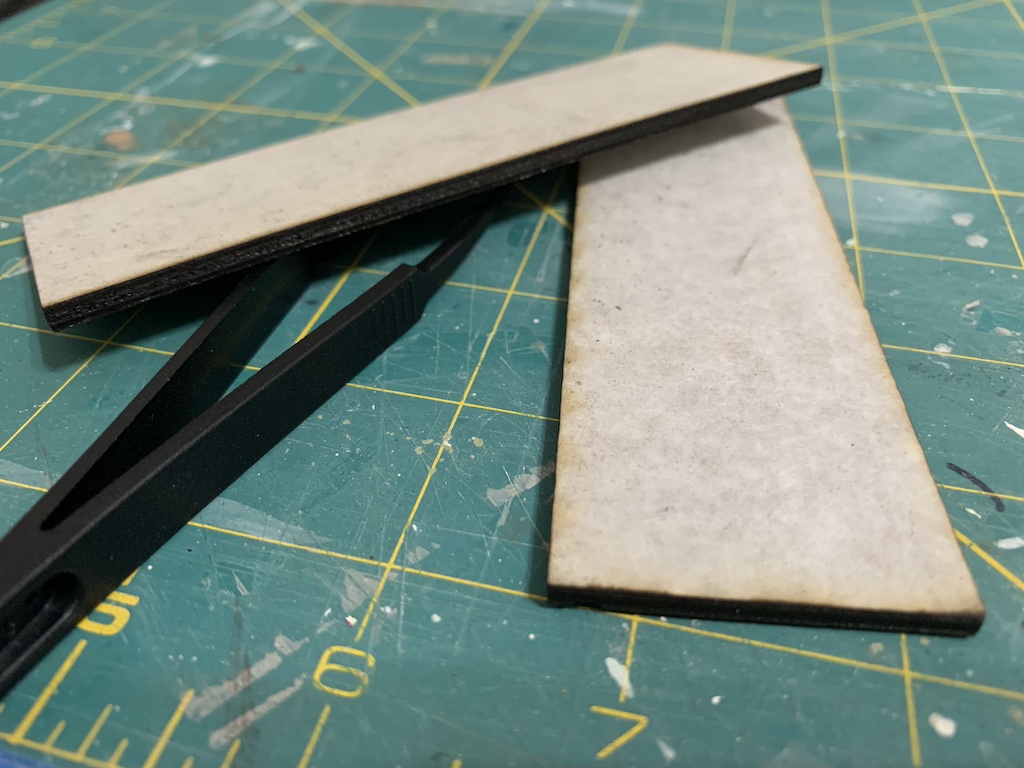
Once the pieces are cut out, the first step is to scrub the edge with rubbing alcohol to remove as much of the char as possible. Prior to scrubbing, you can not only see that the edges are charred, but you can smell that they are charred as they smell like wood pulled from a burning campfire. It takes quite a bit of rubbing to completely remove the char. And as you scrub, your hands will take on that distinctive campfire aroma.
Looking again at the photo of the coffee table design, you can tell they chose not to scrub the edges as they are that dark burned char.
Two more critical details are important to remember. First, when you lay out the furniture to be cut, you want to orient the long pieces and side pieces to be cut with the grain. The other detail is once you adhere the paper to the wood, you need to remember which way the grain was running so you will know how to load the wood into the printer. A slip up in either case is…well a real problem.
To be continued…
Categories

It is so much fun reliving these adventures with you!
Thanks! There’s lots more to come.
So glad to learn the advent of the printer! And good news for me—as Mare makes newer and better furniture, I get the castoffs to furnish MY dollhouse as Ferris now has mine! Great blog Dave!
Thanks! I wondered where your doll house was.
This is fascinating! That mid-century credenza is really cool. And the thought that one could be made with a laser printer is amazing, too. Your sister is very talented and skilled. I look forward to your next post!
Thanks Betty! My sister is very talented and I appreciate her focusing her talent on doll house furnishings. There’s lots more to come.