
Doll House Furnishings – Phase 5
Continued from: Doll House Furnishings – Phase 4
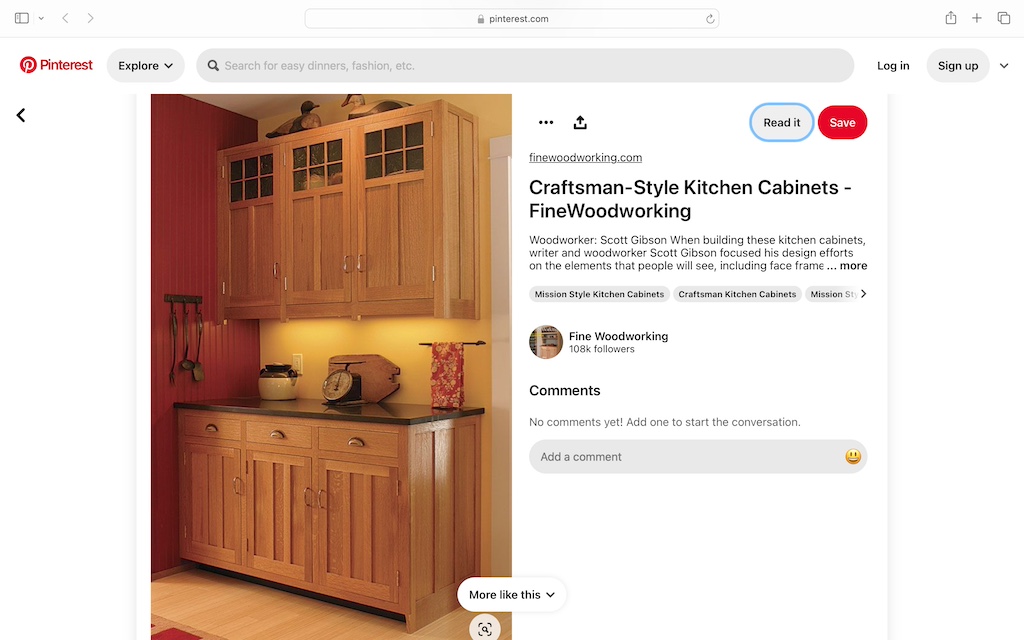
Looking back at the photo of the actual cabinets, I could see that the glass panes were perfect squares while mine were 3/8 of an inch wide but only 3/16 of an inch tall (recall 3/16 + 3/16 = 6/16 or 3/8). Thus, each pane on my miniature cabinet was 3/16 of inch too short. Taking out my small ruler, I measured the height of the floor cabinet and the height of the wall cabinet on my computer screen. They were the same.
Now I knew my mistake. I had measured the height of our kitchen wall cabinets and found them to 2.5 feet tall, six inches shorter than our floor cabinets (which were 3 feet tall). So, in 1/12 scale, I had made the floor cabinets 3 inches tall and the wall cabinet 2.5 inches tall. But since the wall cabinet was the same height as the floor cabinet in the photo, I should have made both 3 inches tall.
I angst over having to completely remake the wall cabinet until one morning when I woke up, I realized I only had to increase the height of the glass inset. The height of the solid portion of the cabinet doors would still be the same. I would just have to make new vertical trim pieces and new side panels to accommodate the taller height, but all the horizontal pieces could be re-used.
Returning to my tried-and-true technique of using a hairdryer to soften the glue for separating pieces, I was able to remove the two sides and all the trim pieces without breaking any of the ones that I intended to reuse.
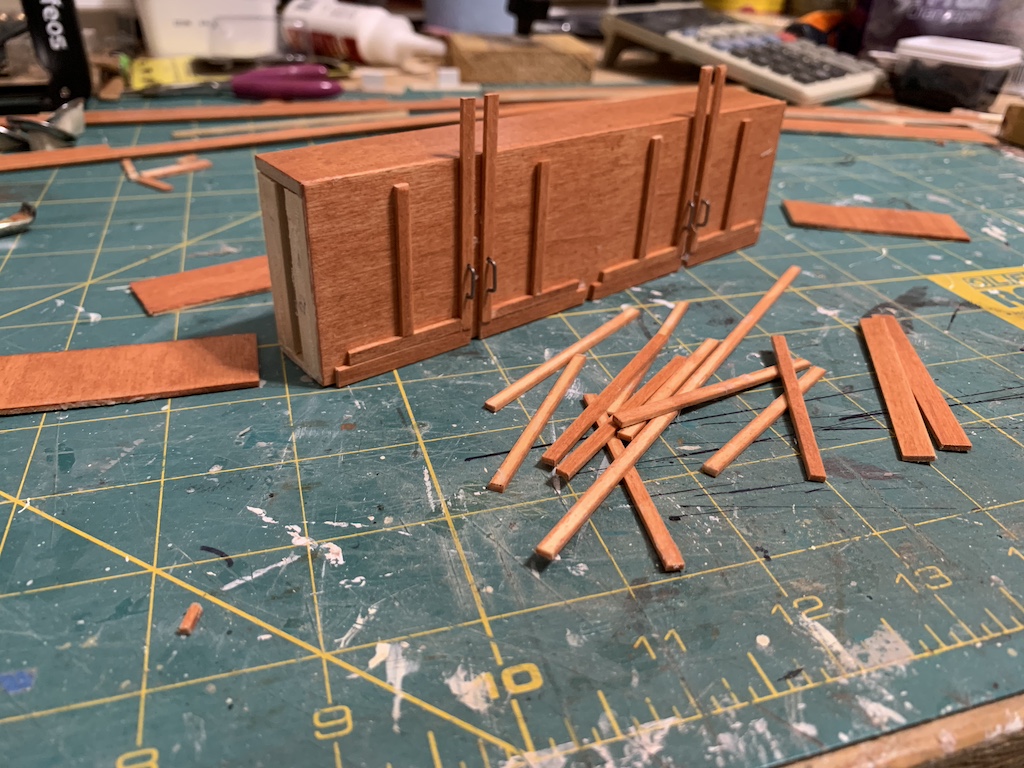
Since the top and bottom pane in each door needed to be 3/16 of an inch taller to make them a square 3/8 of an inch tall, I proceeded to make the new parts all 3/8 of an inch taller (3/16” X 2 = 3/8”).
Without much difficulty, I managed to glue on the new taller sides and added all the new longer vertical trim pieces reusing the existing horizontal pieces. But cutting and gluing the small trim pieces for the glass inset was just as challenging as before. Once I had finished the cabinet front, I glued the plates to new Balsa triangles that made them stand up more on the shelf. After regluing on the back and top, I had my wall cabinet finished.
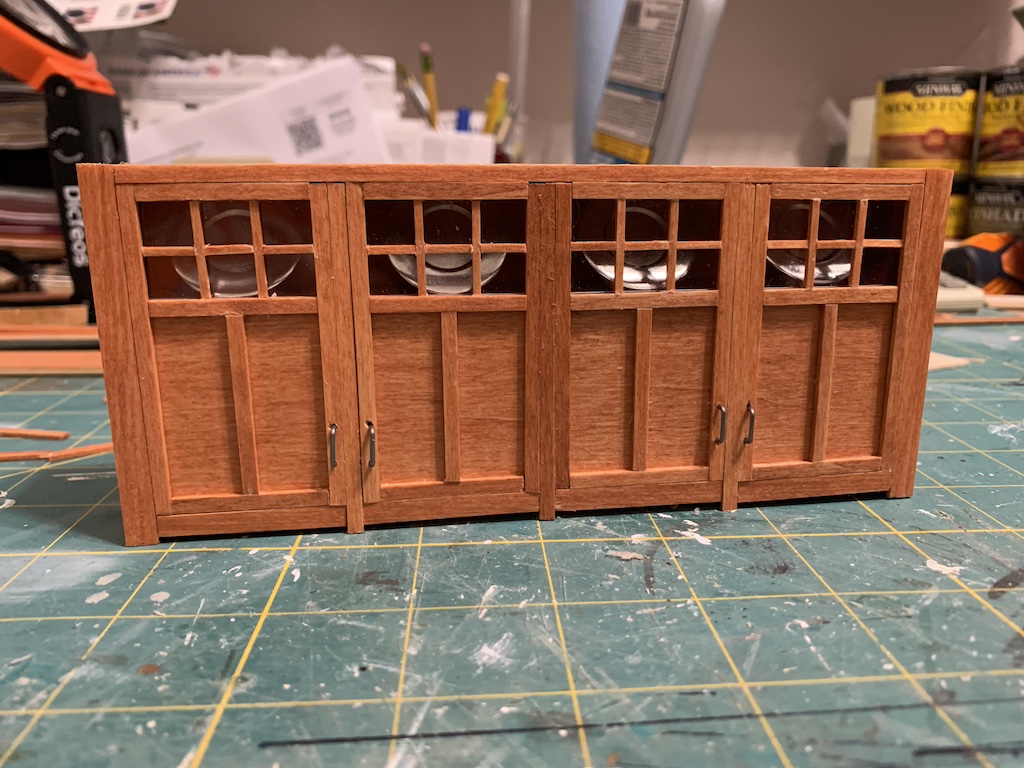
I was much more pleased with this wall cabinet than my first one since my panes were now square and the plates were much more visible now that they stood up taller.
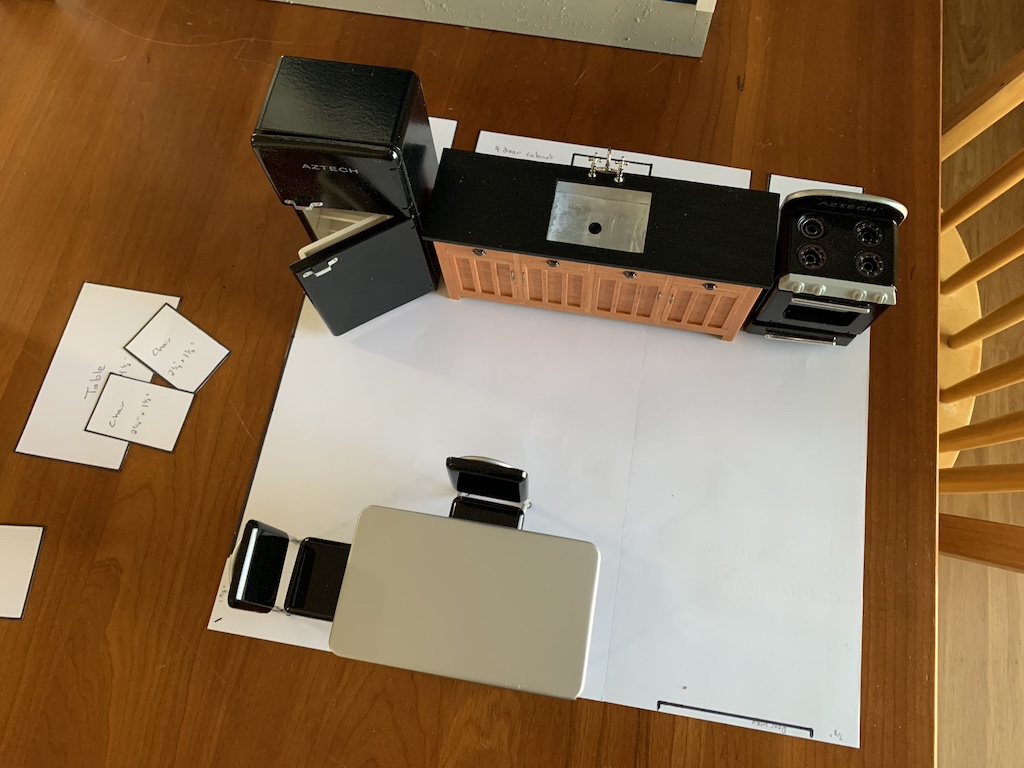
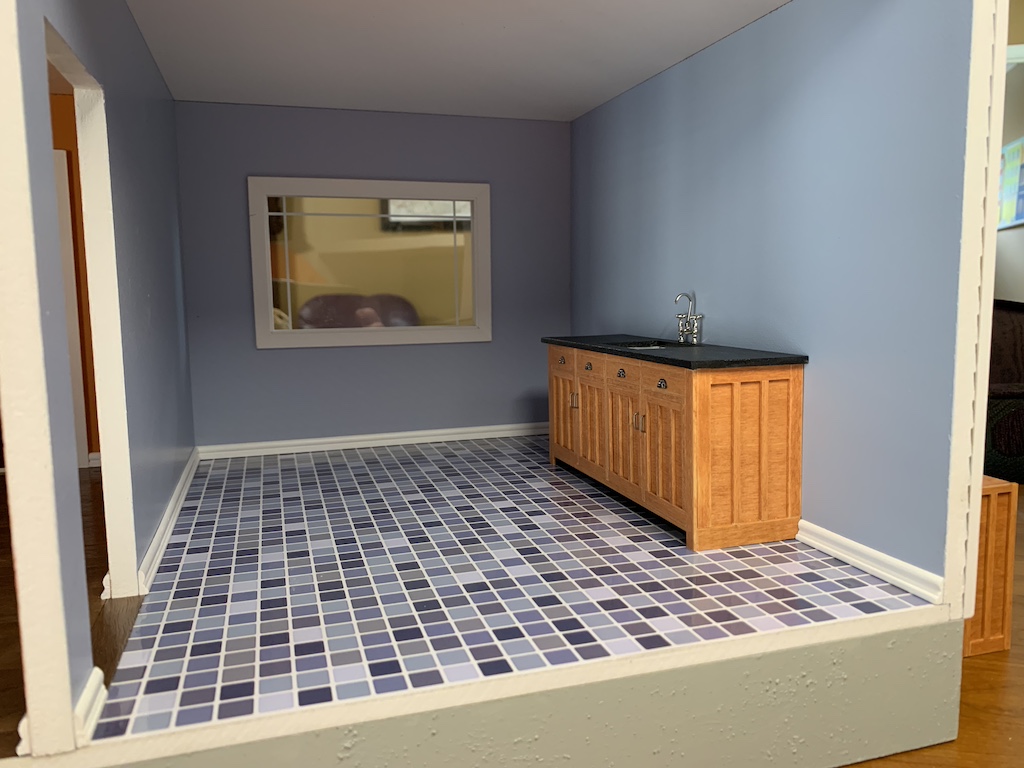
I was now ready to install my kitchen cabinets. But first, I needed to add the baseboards which I had omitted knowing I would want the floor cabinets to fit flush against the wall. I added the piece under the window and on the wall where the table would go. I then measured on my drawing how long the baseboard would be behind the refrigerator.
With these installed, I could now glue my floor cabinet in and add the last piece of baseboard.
Now I just needed to hang the wall cabinet above the floor cabinet. I rigged up a jig to hold the cabinet at the right height above the counter (1.5 inches) while being glued to the wall and then I leaned a hand weight against the front of the wall cabinet to make it flush with the wall. Once the glue had dried, I removed the jig and there were my kitchen cabinets complete!
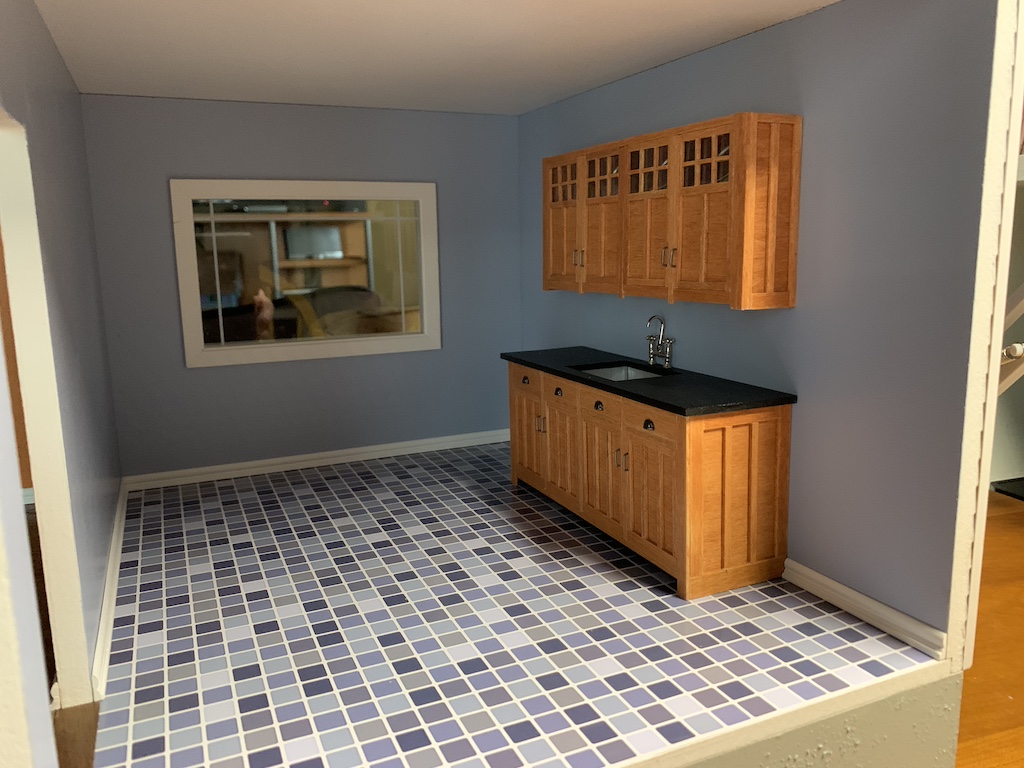
Adding my appliances along with the table and chairs, placing a bowl of my favorite fruit (oranges) on the table, this kitchen was ready for as the saying goes: “cooking with gas.”

With the kitchen complete, I could now return to the slight modification I planned to make in the bathroom.
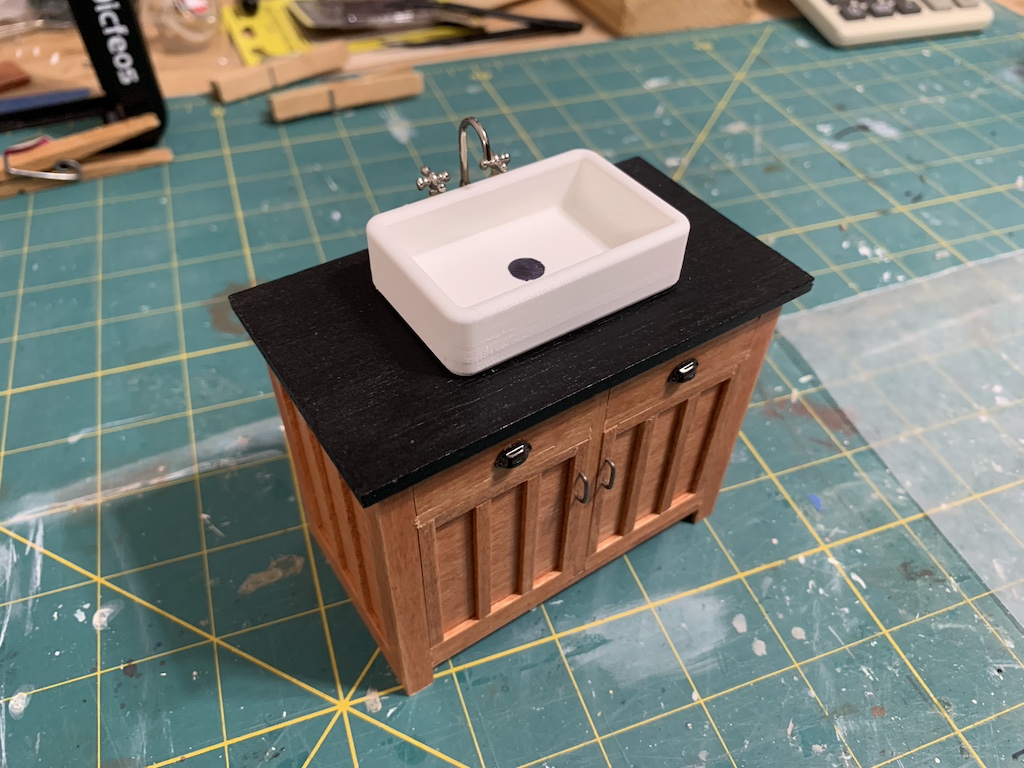
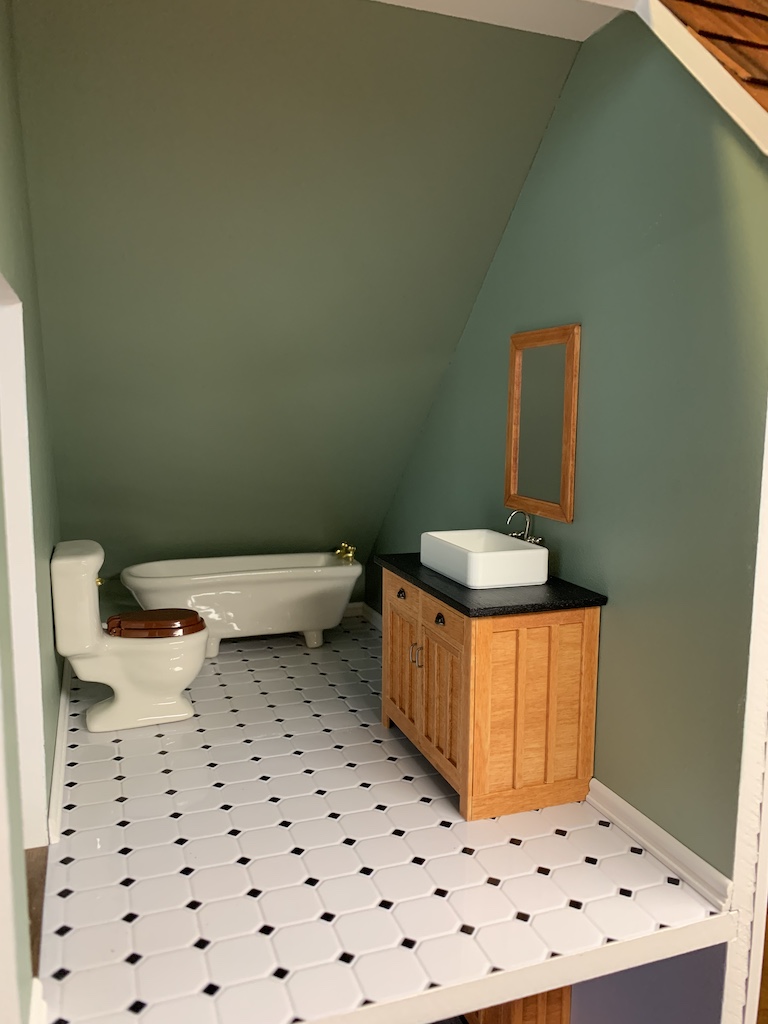
In my last update, you may recall that my kitchen was too narrow to have cabinets on opposite walls. But rather than not using the 2-door cabinet, I had the idea of making it into a bathroom vanity. To do so, I would just need to add a sink and faucet.
Rather than making a new countertop with a built-in sink like in the kitchen, I figured it would be easier to add a basin sink on top of the countertop. I texted my sister if she could 3-D print one for me and she said yes. I texted a photo of what I thought might look good and she worked her magic.
Based on the dimensions of the cabinet I gave her; she actually printed three different size sinks. When she drove over one weekend to work on kitchen cabinets for her own doll house, she brought them with her. We lined them up to see how they compared.
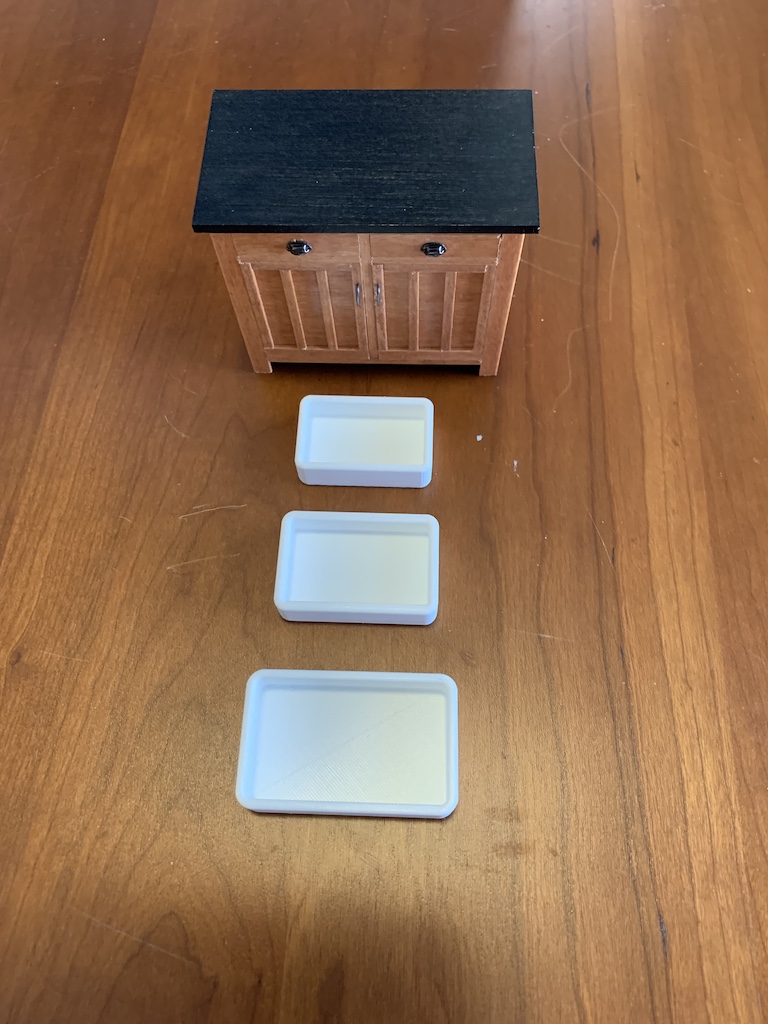
Progressively going from largest to smallest sinks, it was a little akin to Goldilocks and the three Bear’s beds—only this time it was the middle one that was just the right size.
To install the vanity in the bathroom, I had to first pull out the baseboard and cut out a section for the cabinet. I could then glue the cabinet flush to the wall with the baseboard on either side of it. I then had another bright idea.
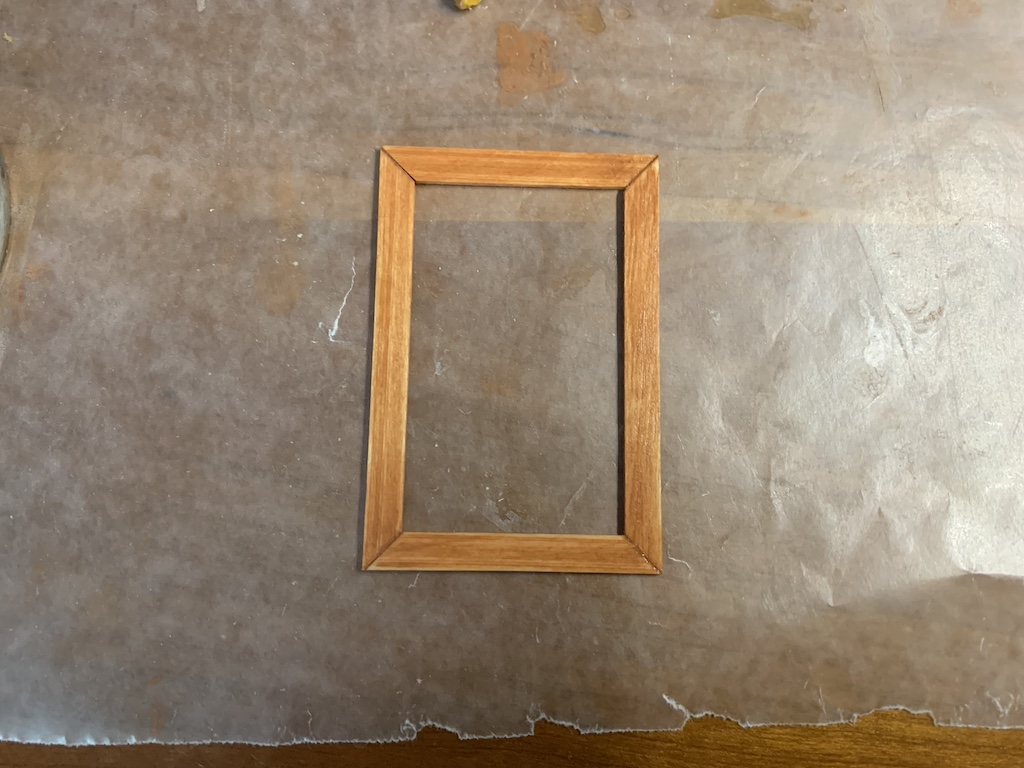
What bathroom would be complete without a mirror. I figured I could use some of the 1/4-inch trim as a frame for the mirror, stained to match the cabinet. I just needed to figure out what material to use for the mirror.
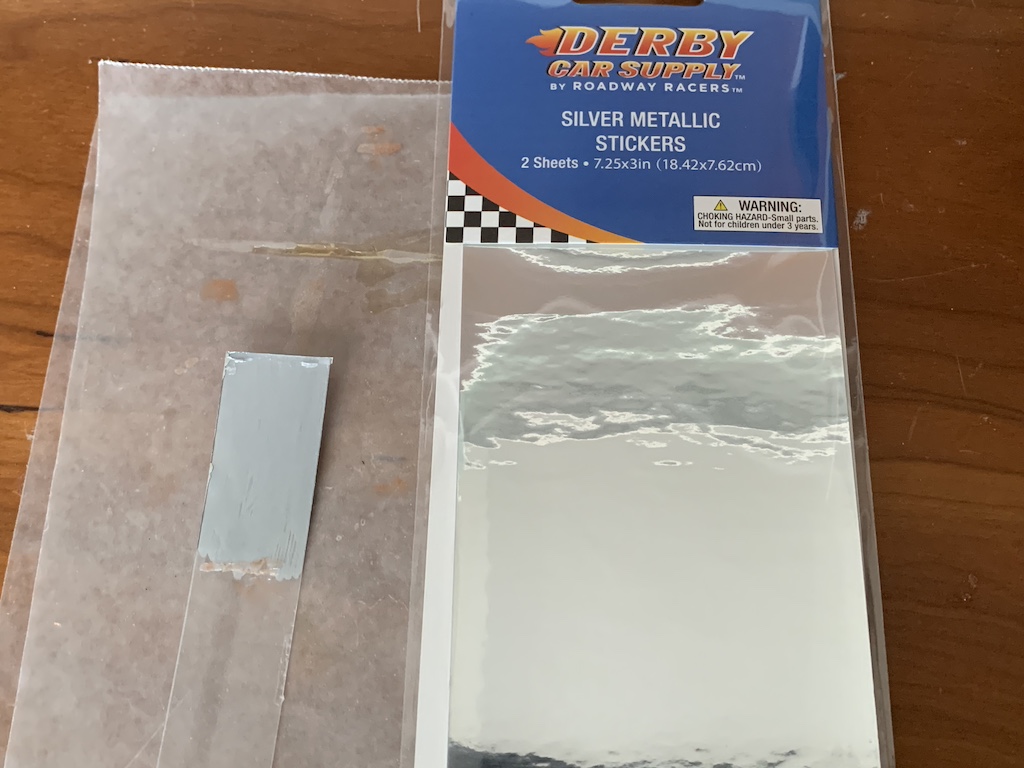
I thought of aluminum foil, but I found it was not reflective enough. I went to my local hobby shop and wandered the aisles looking for an idea. I found two but one was much superior.
My first idea, painting silver paint on the back of a clear piece of plastic was not very reflective but the second item I found was which was actually intended for decorating pine wood derby cars—a self-adhesive silvered paper.
This made for a decent mirror with a fair reflection of myself…
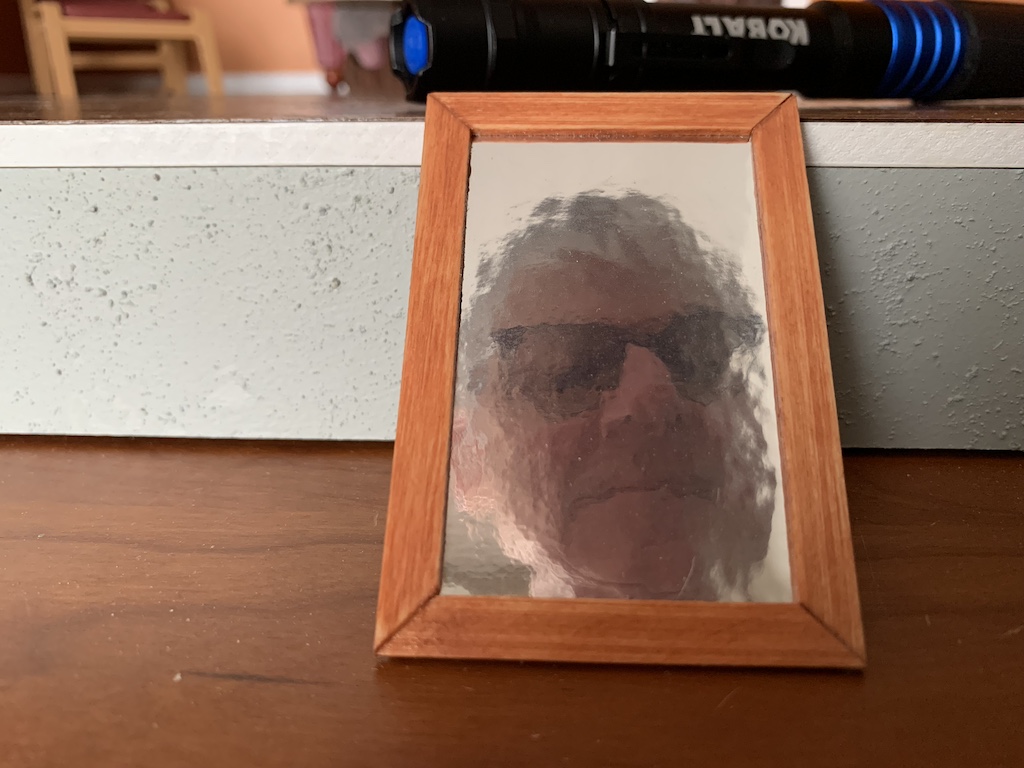
…which allowed me to finish the bathroom.
Now to move onto the next room, which should it be?
To be continued…
Categories

Can’t wait to see this progress in person!
I know you’ll love it!
great post
Thanks!
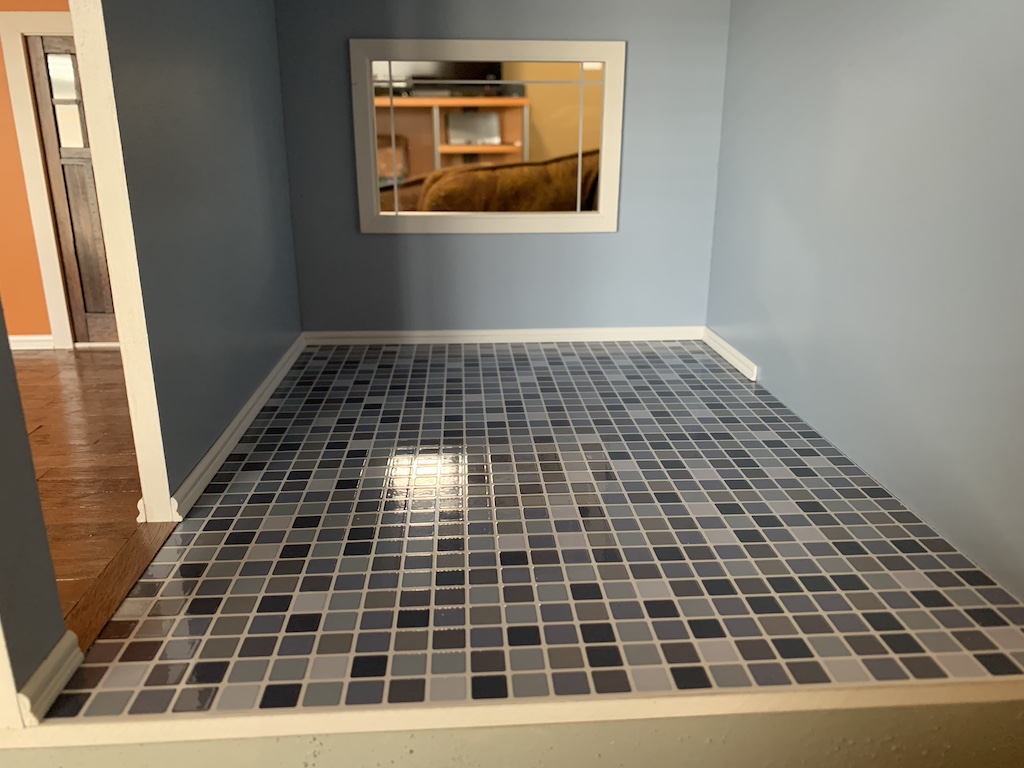
Beautiful work, David. I wish I could miniaturize myself for a bit and walk around in this dollhouse. I see something under the kitchen window, and I’m not sure what it is. I have a guess though. Lastly, the upper cabinets do look better with the square windows and the plates standing up a bit more. Whatever room is next, I am looking forward to reading about it!
Thanks Betty! I am much more pleased with the redone upper cabinet. All three of my siblings are here this weekend and they got to see the reveal in person. My sibs figured out the piece under the kitchen window is a wall cabinet. It came with the kitchen pieces and would have gone above the kitchen sink/cabinet that also came with the set, but which I did not use.