
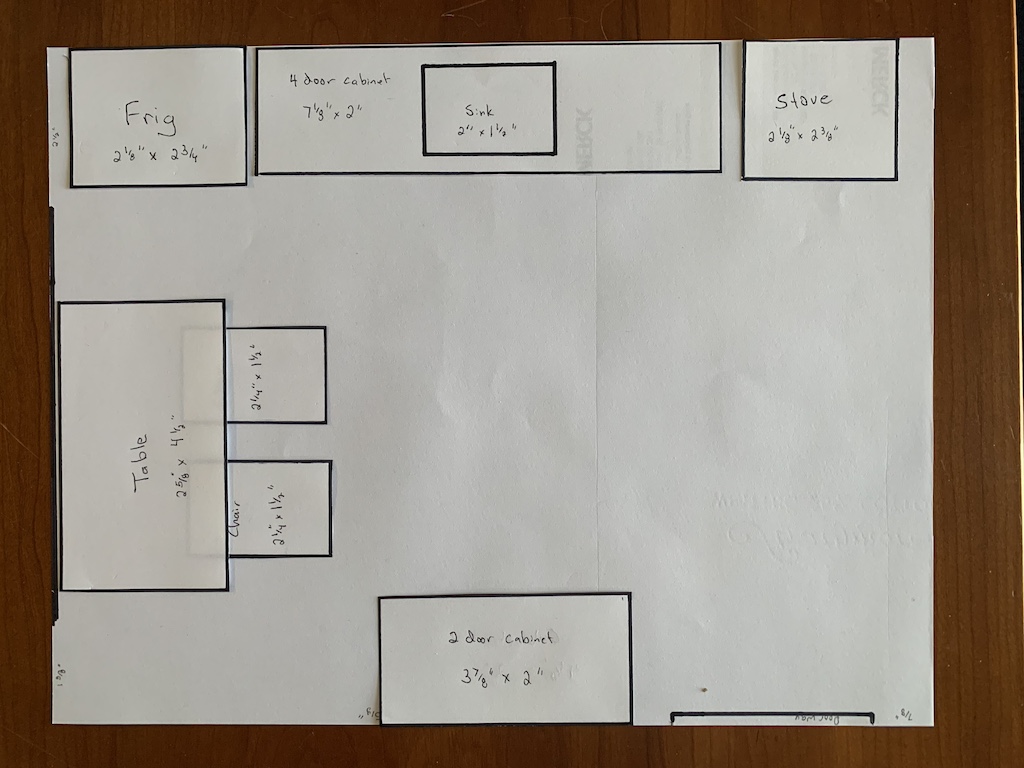
Doll House Furnishings – Phase 4
Continued from: Doll House Furnishings – Phase 3
I progressively removed each piece of paper that represented a furnishing for the kitchen and replaced it with the actual fixture in the same spot. Once I had all of them in place, I could see the kitchen spacing was going to be very tight. In fact, when I opened the refrigerator door, it hit the dining table.
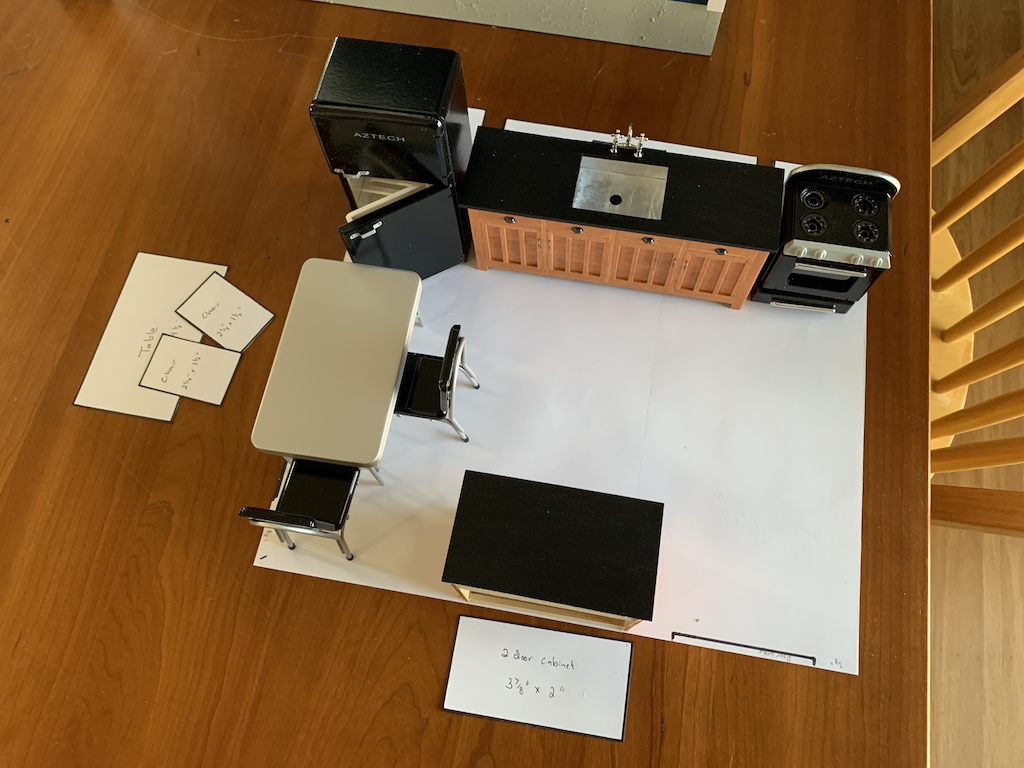
I have said this before, it is interesting how a 2-D scale drawing does not always reflect a true perspective in a 3-D world. I tried moving the table away from the refrigerator but then the chair at the end of the table would butt up against the wall preventing a 1/12-scale character from sitting there. I tried moving the table to between the two cabinets but that made it look like the table had just been shoe-horned into a tight space.
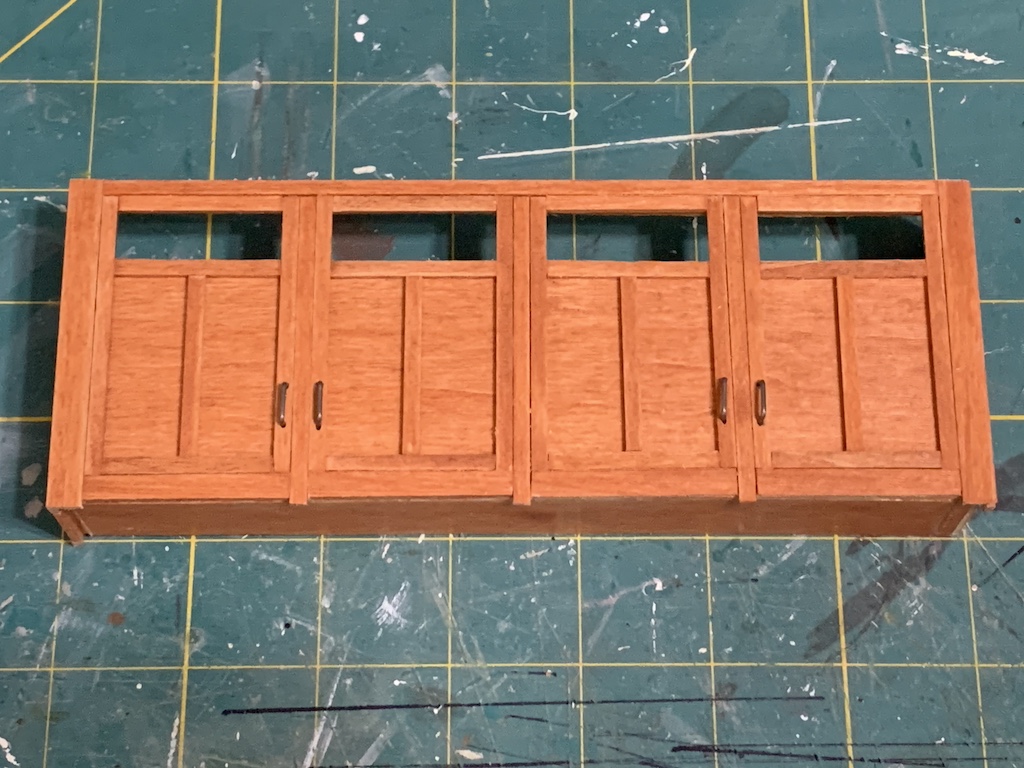
After all the effort I put into making the cabinets, I wanted to be able to use both. Then I had a bright idea. Why not take the 2-door cabinet out of the kitchen and turn it into a bathroom vanity? Having a Craftsman style vanity in the bathroom would be a big improvement over the pedestal sink there now and maintain the same style in both the kitchen and the bathroom.
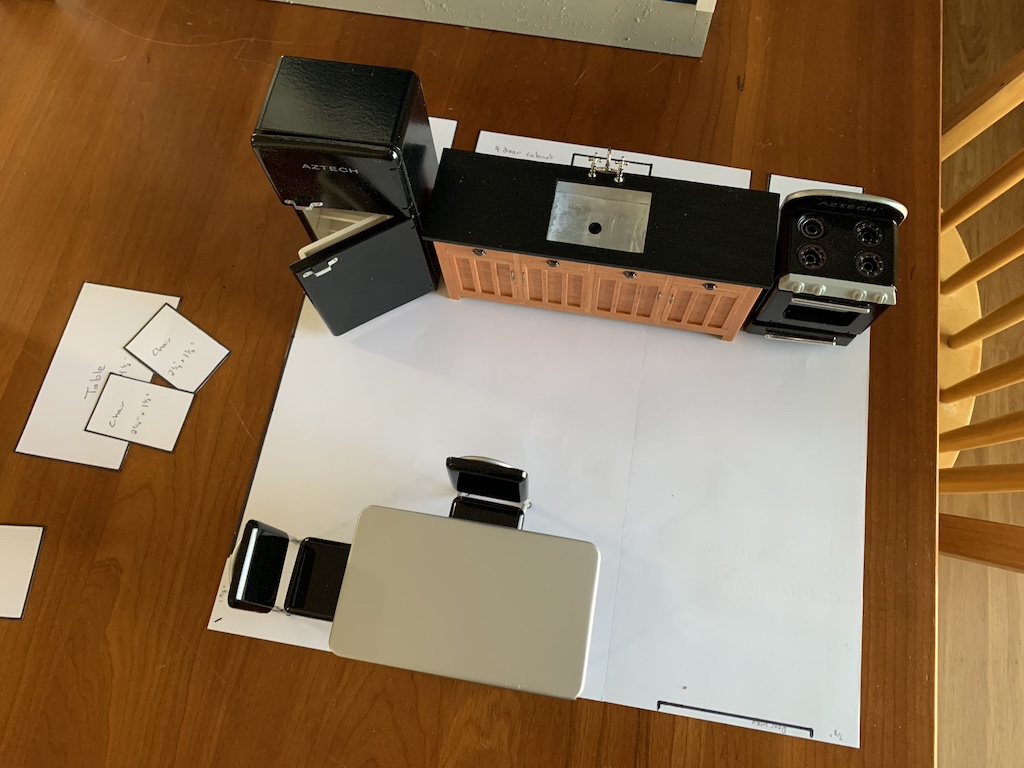
Moving the 2-door cabinet out and placing the dining table against the wall where the cabinet previously was really opened up the kitchen floor plan.
With just the 4-door cabinet in the kitchen, it meant I only needed to build a single wall cabinet to go over it (simplifying my work; I mean my play). I took measurements of our wall cabinets and found them to be 1.5 feet above the countertop, 2.5 feet tall and 1 foot deep. I loved how these measurements kept coming out easy conversions to my 1/12-scale.
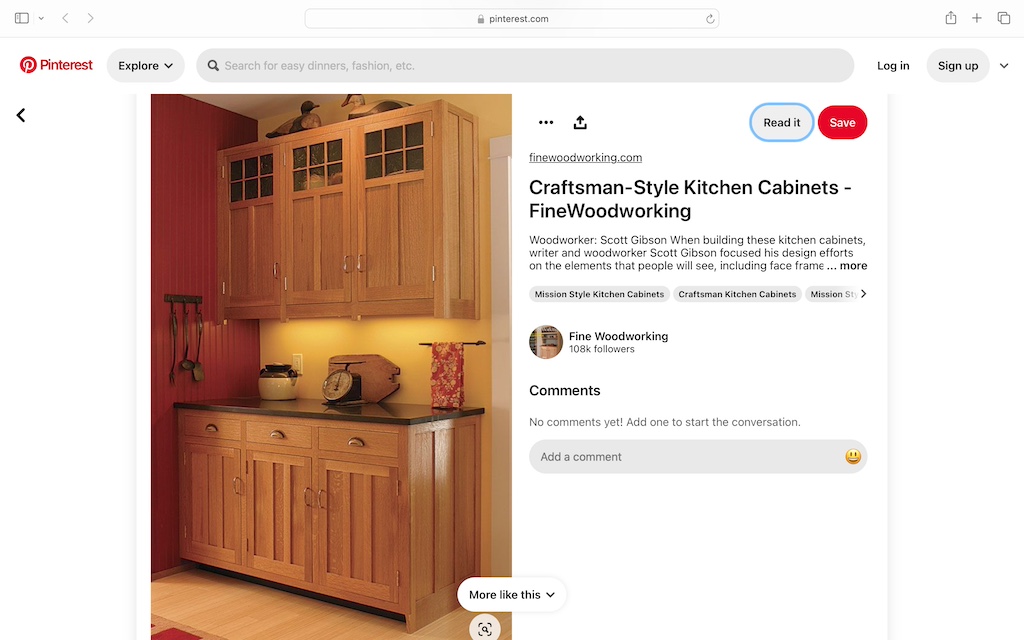
Returning to the full-scale photo, it seemed these proportions for the wall cabinet would be about right. But with the glass inset at the top, I would have to build some interior details. I still would not make the doors functional just like the floor cabinets, but I would have to include a shelf and finish the interior since it would show through the glass.
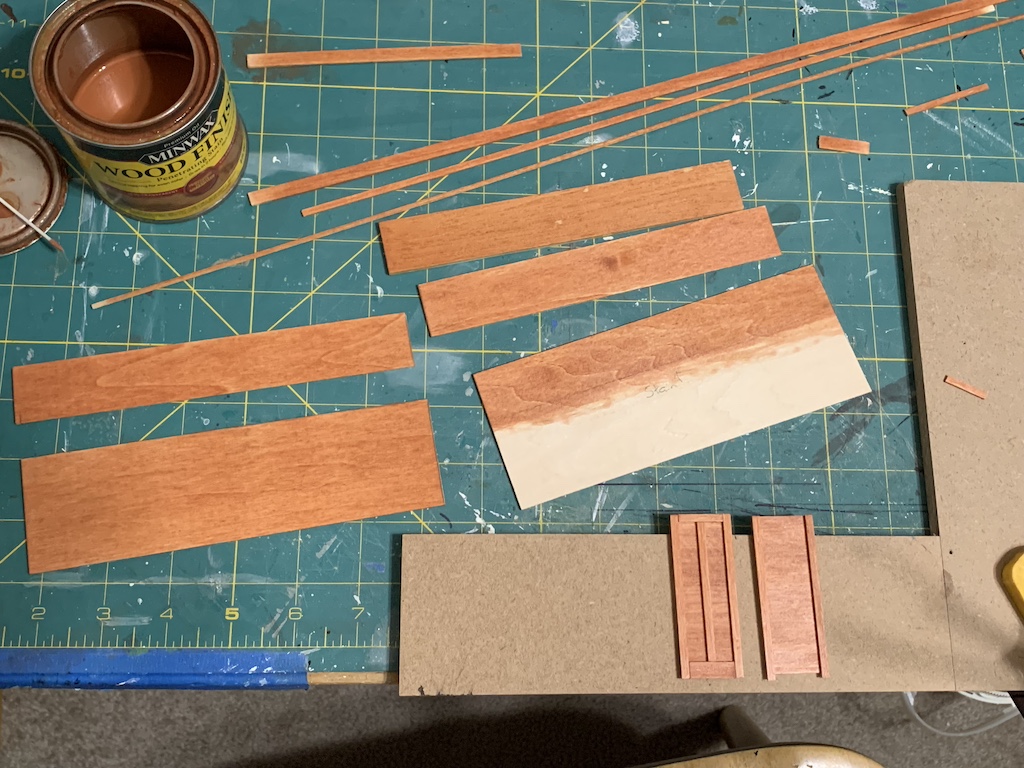
Taking measurements of the cabinet photo on my computer screen, I determined that the glass inset was about one fourth of the total height. With this and the 1/12-scale conversion from our wall cabinet, I had the dimensions I needed to build. I then cut all of the front, side, top, bottom, shelf and back pieces and then measured how much trim I would need.
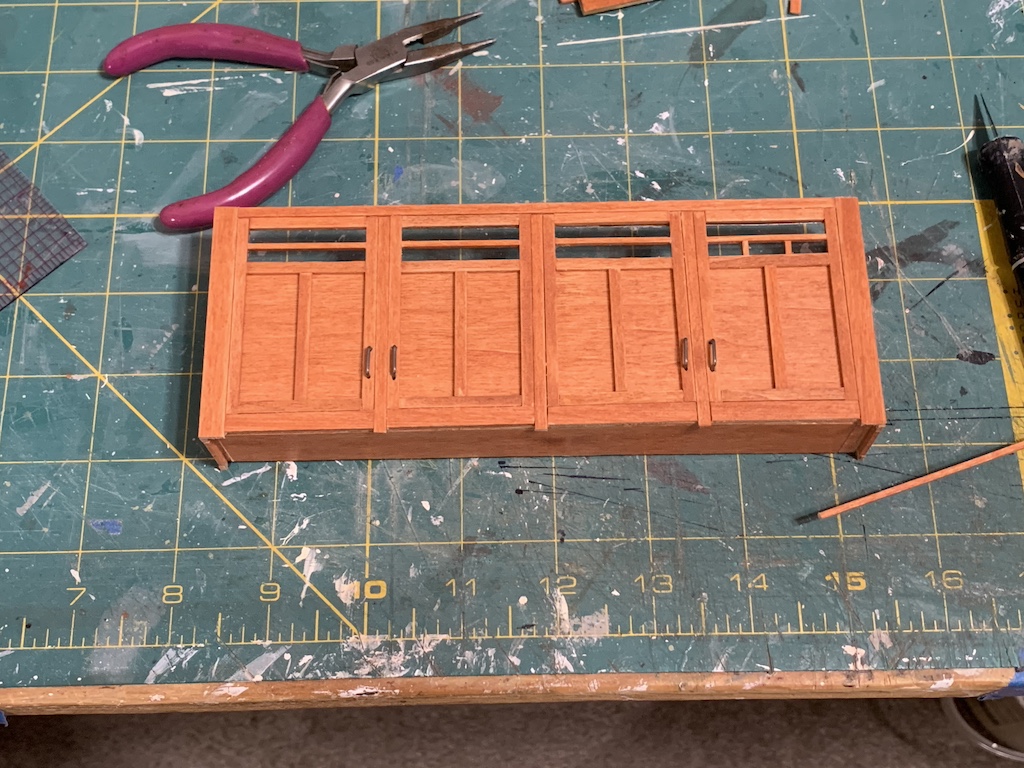
As before, I sanded them all, applied two coats of stain, and then brushed on two coats of polyurethane.
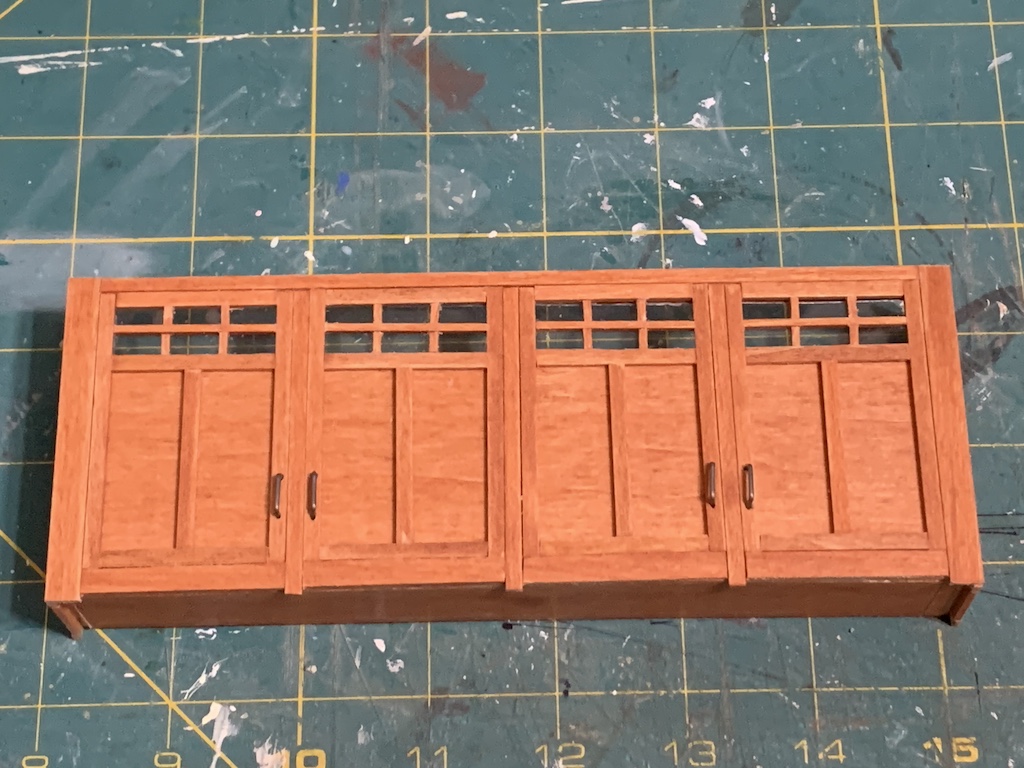
For this wall cabinet, there would be several differences from the two floor cabinets I had already built. First, the glass inset would add a unique feature. Second, with this cabinet being narrower, there was only a single interior trim piece on both sides that carried over to the front. And finally, looking at the photo of the real cabinet above, the trim extended down below the bottom of the cabinet at several locations.
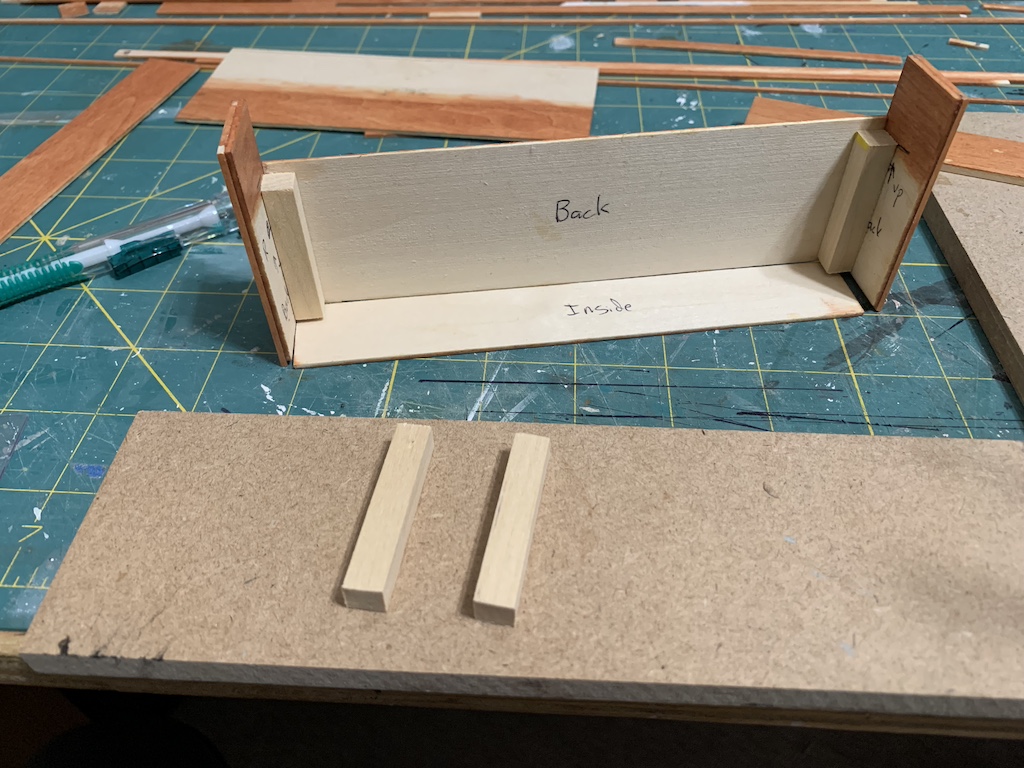
Once both sides were completed, I glued the sides to the front as before with the sides overlapping the front. I again used scrap 3/8-inch square Basswood to support the sides with one difference. This time, I cut them to an accurate length so that they could provide support for the shelf visible through the glass inset as well as the bottom of the cabinet that would be flush inside the front and sides.
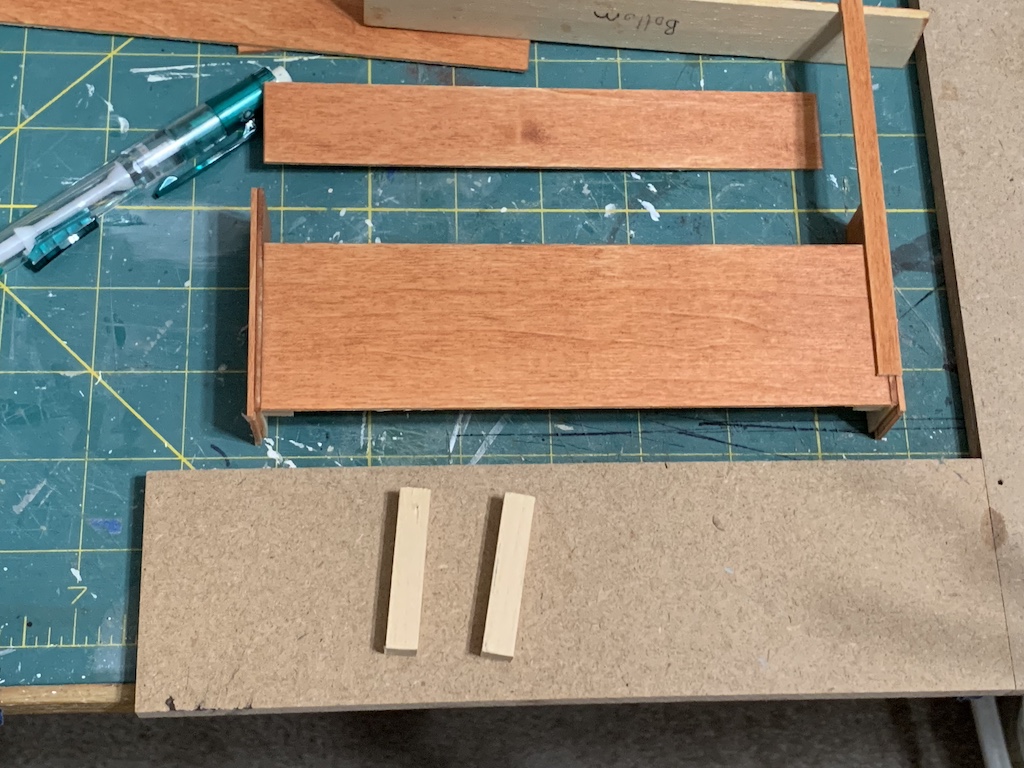
But when I placed the bottom of the cabinet in its position, I could see that I had made a calculation error. Measuring I found a gap of 1/8 inch on the right in the photo above (or when centered, 1/16 inch on each end). I also noticed the bottom was too wide, interestingly by, you guessed it, 1/8 of an inch (or when centered, 1/16 inch at the front and back). When I laid the shelf on its supports, I saw I had the same error as the cabinet bottom.
I think where I made my miscalculation was, I cut these pieces thinking the cabinet front would overlap the two sides rather than the sides overlapping the front. However, for the front edge trim to hide the side joint, the front had to be flush inside the two sides the way I had designed and assembled the two floor cabinets. Since the front piece is 1/16-inch-thick Basswood, this would explain the 1/16-inch gap on each end.
Since the bottom would not be readily visible from the exterior of the cabinet, I figured I could add a small 1/8-inch strip of stained Basswood without having to recut, stain, and polyurethane this piece. But the shelf and top would be visible and so I did have to recut, re-stain, and re-polyurethane them. Also, this meant the back of the cabinet I had made was off by the same 1/16-inch dimension on all four sides necessitating a similar fix.
While these extra pieces were drying after being stained and polyurethaned, I proceeded to add the cabinet front trim pieces. In the photo below, you will see an unstained piece at the top beneath the trim. I had to add this when I realized I had nothing to which to glue the top trim piece.
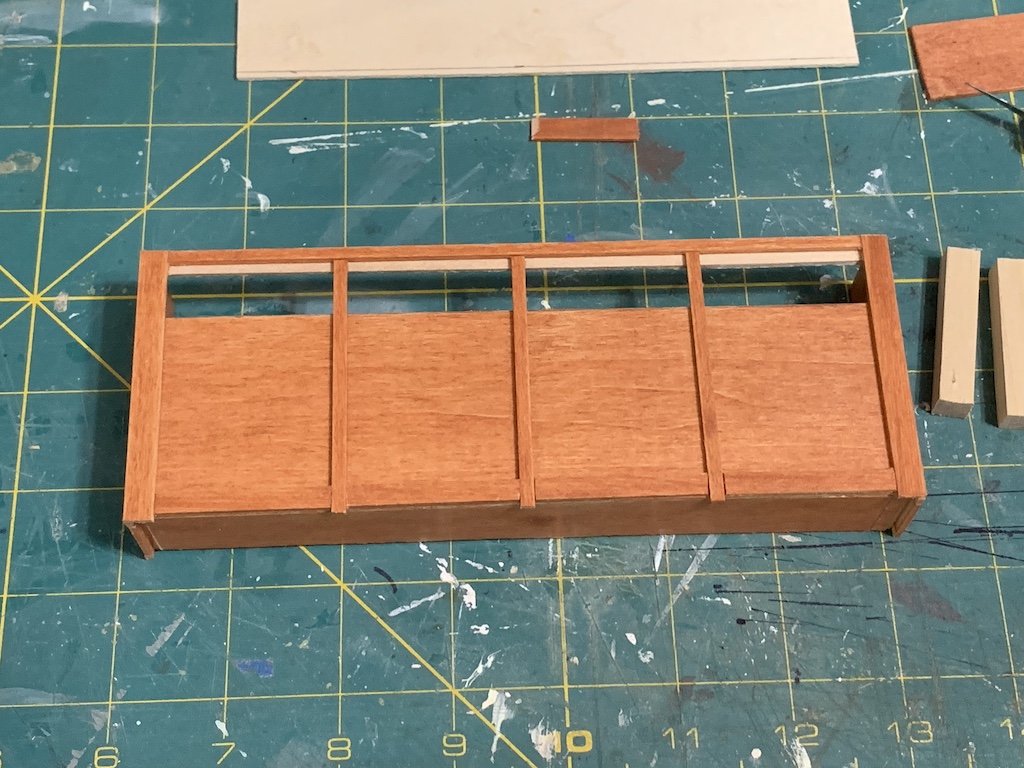
After that, I added the trim pieces to make the faux doors with the openings for the glass at the top.
I then cut a long, narrow piece of clear polystyrene and glued it to the back of the trim pieces to simulate the glass. I then cut the four horizontal trim pieces that fit inside the glass inset. But when I went to cut the vertical pieces, I ran into some problems.
The vertical pieces were only 3/16 of inch long so it took a while to figure out how to cut 16 of them uniformly. The slightest difference in my cutting left a tiny piece that did not fit and had to be carefully sanded. Then applying glue and placing them in place with the needle nose pliers presented its own ambidextrous problems. Fortunately, the width of each of the six individual panes in each door was exactly 3/8 inch so with a stock 3/8-inch strip of Basswood, I was able to get them all properly aligned.
To say that this step was challenging is an extreme understatement for had I known how difficult, I would have made the cabinet doors solid like the floor cabinets.
The last steps were to glue in the shelf, cabinet back and cabinet top. Knowing the interior would be visible through the glass inset, rather than leaving it empty, I bought some little plates to display. These I glued to small Balsa triangles so they would stand up inside the cabinet and then glued each one to the shelf before gluing on the cabinet top.
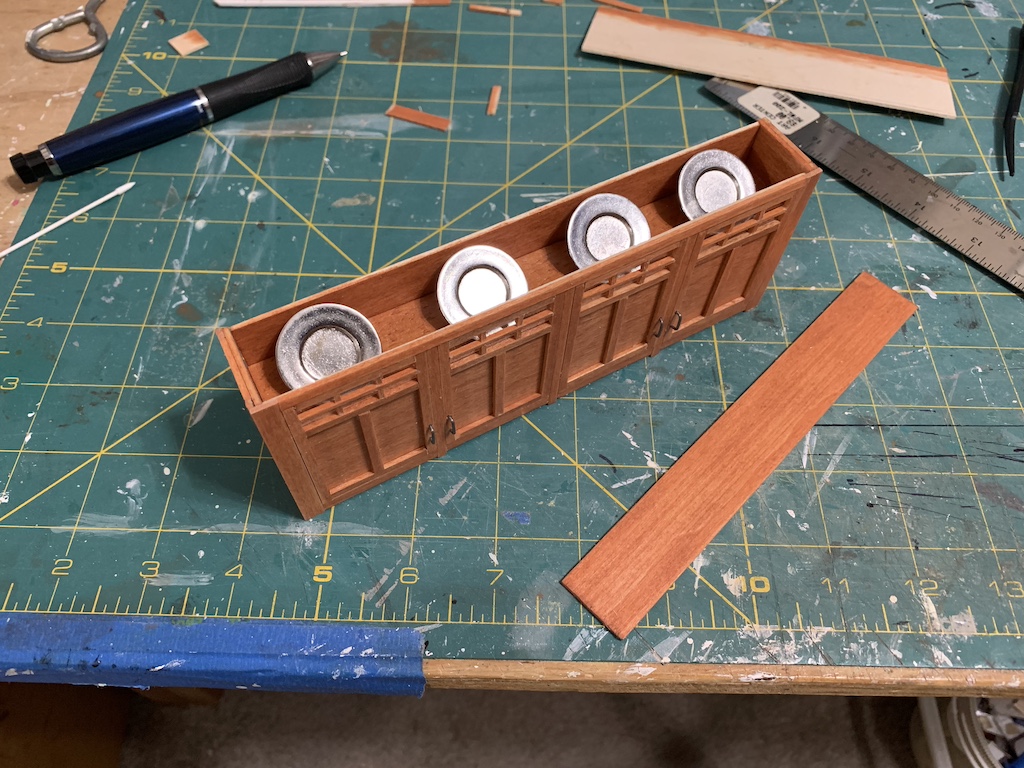
Once I had the top glued on, I could barely see the plates inside.

Looking back at the photo of the actual cabinets, I realized I had made another mistake—this one a serious one.
To be continued…
Categories

I am going through all this with you Dave! But isn’t it fun?!
Yes it is and you will have some fun yourself when you begin to make the cabinets for your doll house!
David, these cabinets are beautiful. I can’t imagine what serious mistake you made. The kitchen will look nice being opened up. I look forward to your next post!
Thanks Betty all will be revealed in the next post. Hope you have a nice day!
You, too, David!
Once again, a masterful craft job, bro! And again, you demonstrated the patience of a saint. Had I been doing this project, after running into the problems you did, those cabinets likely would’ve ended up in the dust bin before ever seeing the light of day. Very ambitious project; great execution!
Thanks Bro! Will be glad to show the finished cabinets off to you next week.
I can’t believe you made these! The tiny details are incredible!
Thanks sweetie. Can’t wait for you to see them when you come home!