
Miniature Bookshelf Room – Finishing Up
Continued from: Miniature Bookshelf Room – Getting Started

As I was waiting for different glued parts of the chair to dry, I worked ahead on some other room additions which accompany the chair in the photo above.
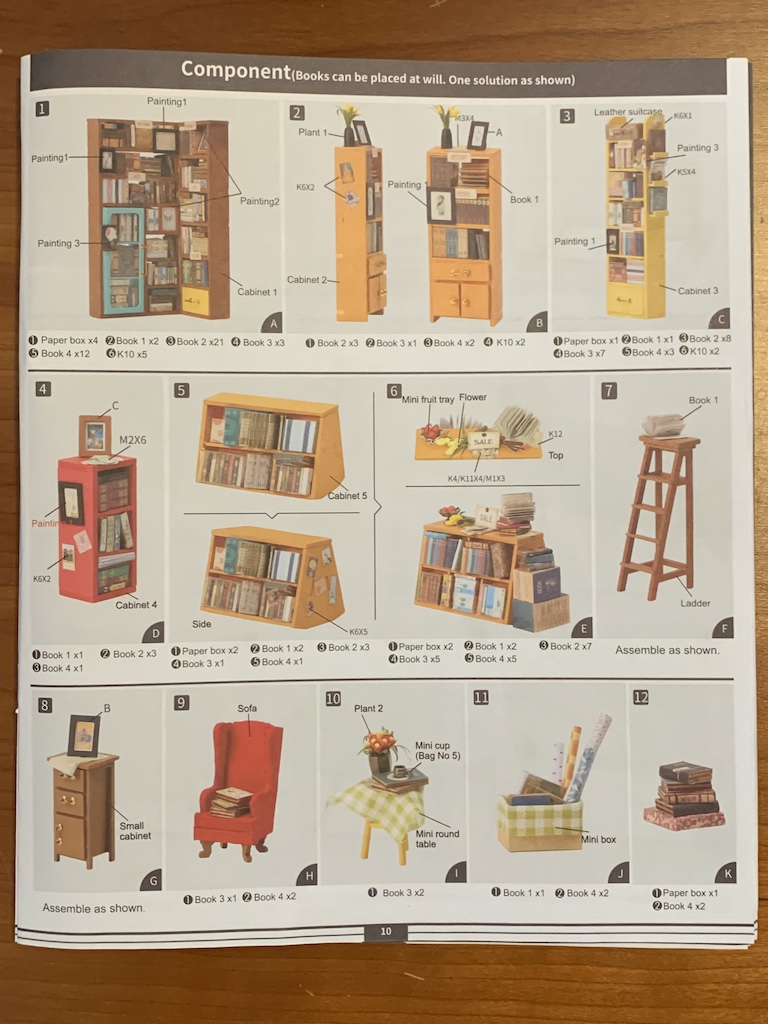
Turning the page of the instruction booklet, I could see that I was next going to be working just with paper.
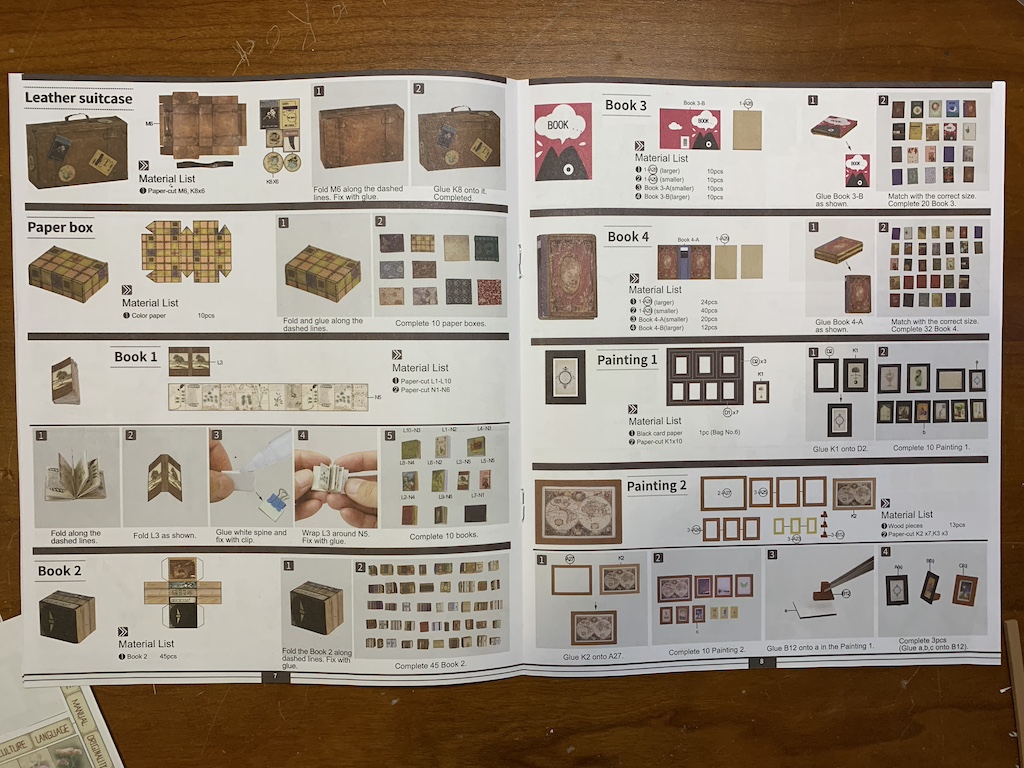
I have a vague recollection of cutting out paper dolls with my daughter when she was young, and that was the first thought I had as I began cutting out the suitcase. But that long-ago experience with my daughter did not prepare me for turning these cutouts into three dimensional objects. The suitcase was not too difficult and looked remarkably realistic when finished but when I started on the box, it proved quite a bit more challenging being so small. In fact, were it not for my lighted magnifying glass, I could not have even see the solid cut lines and the dotted fold lines on the box.
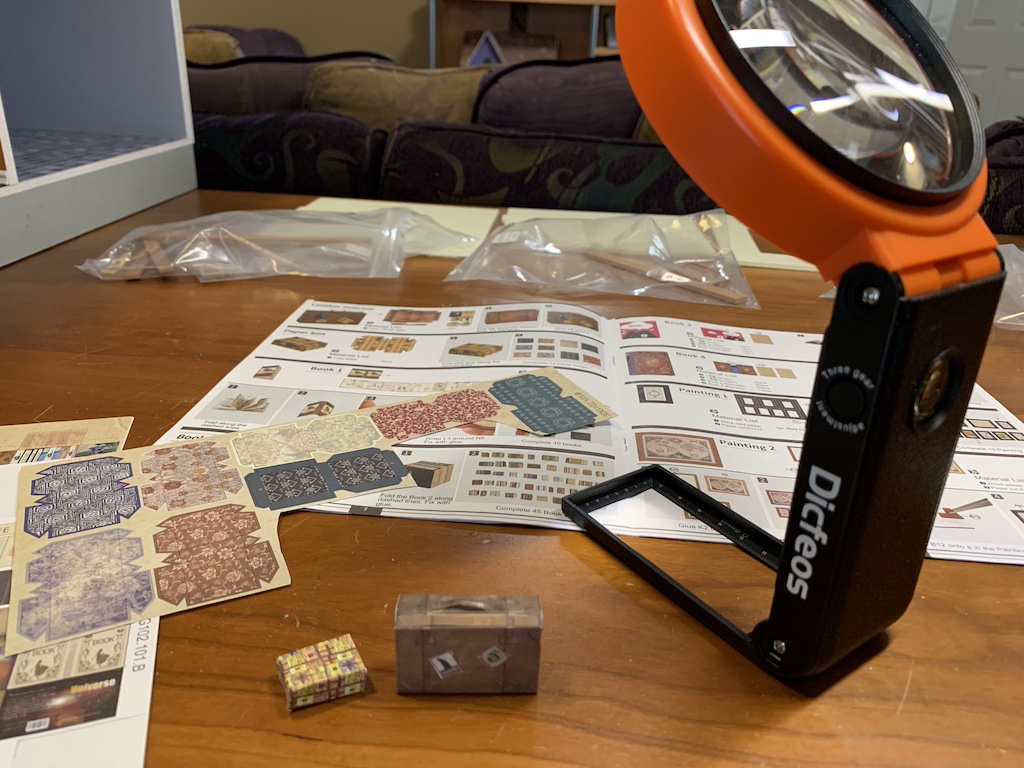
I knew the box wasn’t perfect, but I had a chance to hone my cutting, folding, and gluing skills as I had a total of ten similarly sized boxes to make.
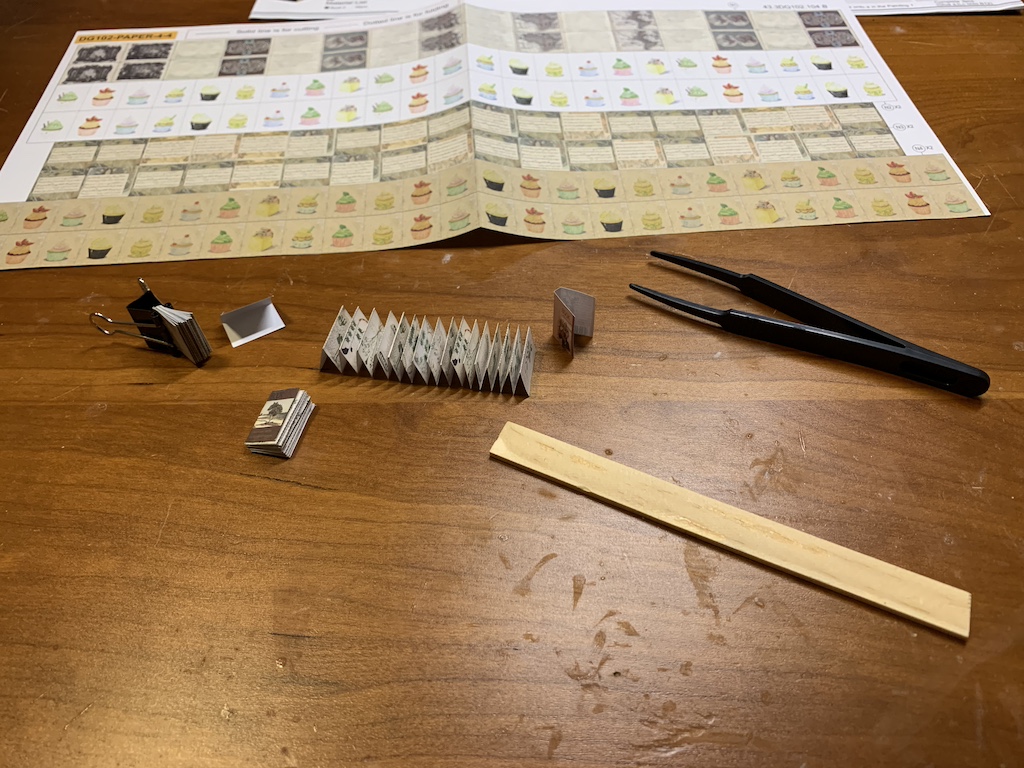
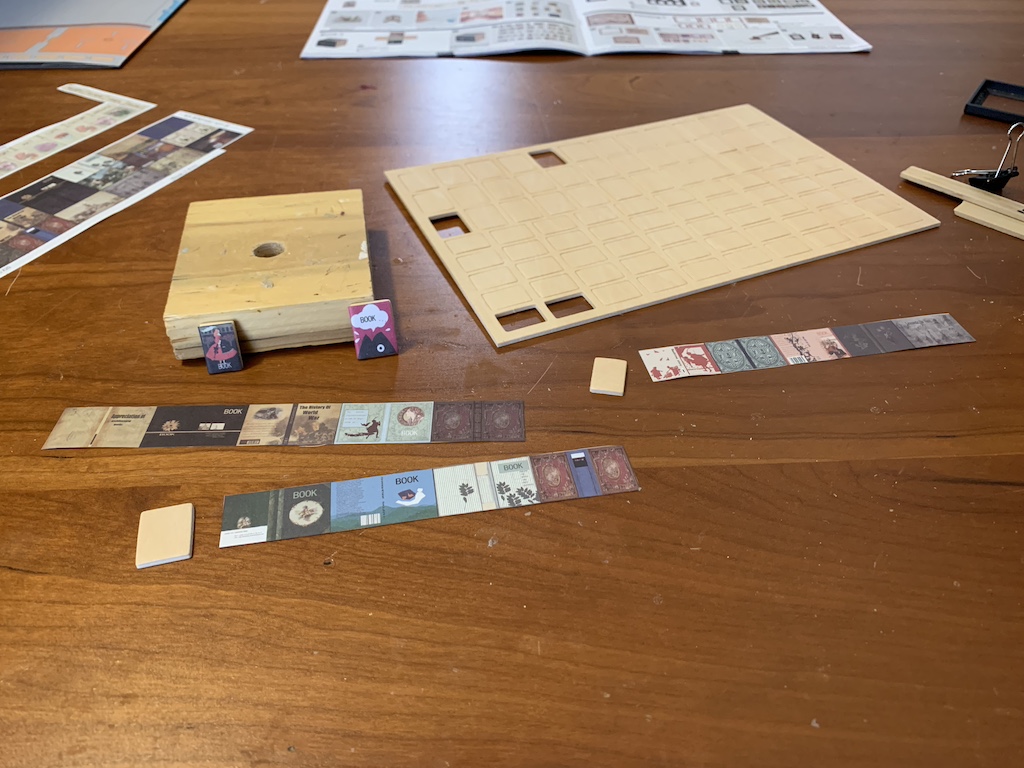
Once those were complete, I had a chance to make a book. This involved cutting out a long strip of pages (sheet at top of photo below), accurately folding it over 25 times to create the book pages (middle of photo), gluing the spine with compression from a small clip (far left), and then gluing the pages into the previously cut out book cover (complete book far left). I used that wooden stick to hold the page strip in place to give me a straight edge to fold along the dotted lines. For this step, I also needed to make ten separate books.
But wait, there are a lot more than ten books in this study. Next up was to make little boxes of groups of books. Some of these had as few as three books in a group but as many as ten. And with 45 of these to make, I was going to be creating a lot of books for the bookcases.
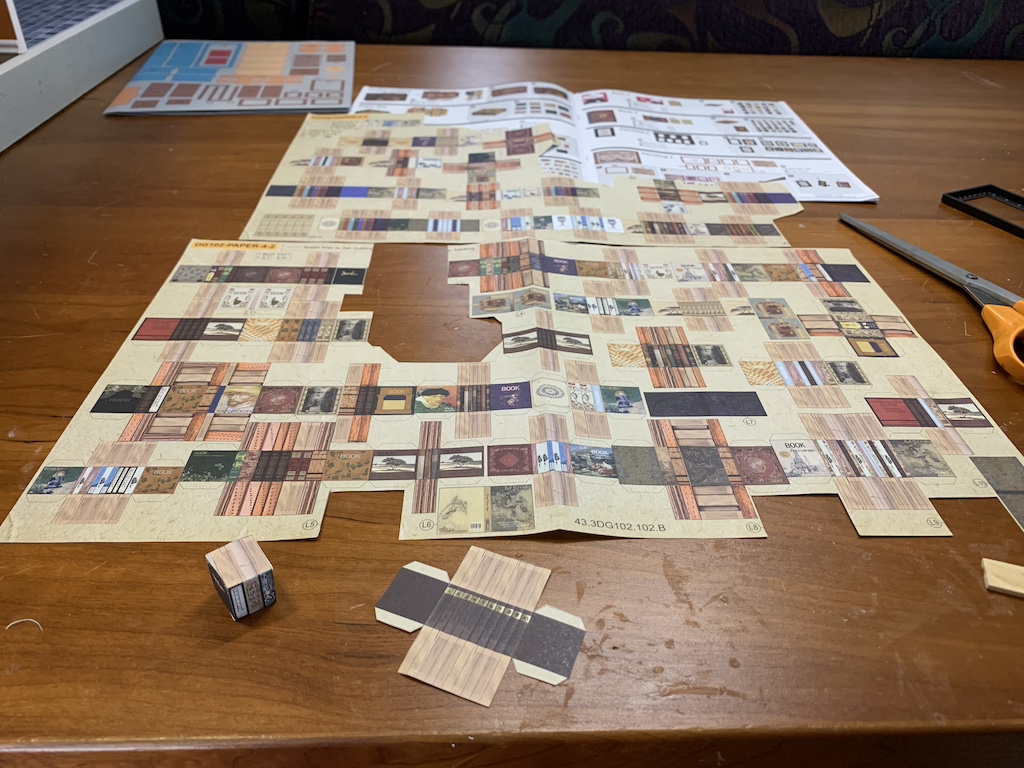
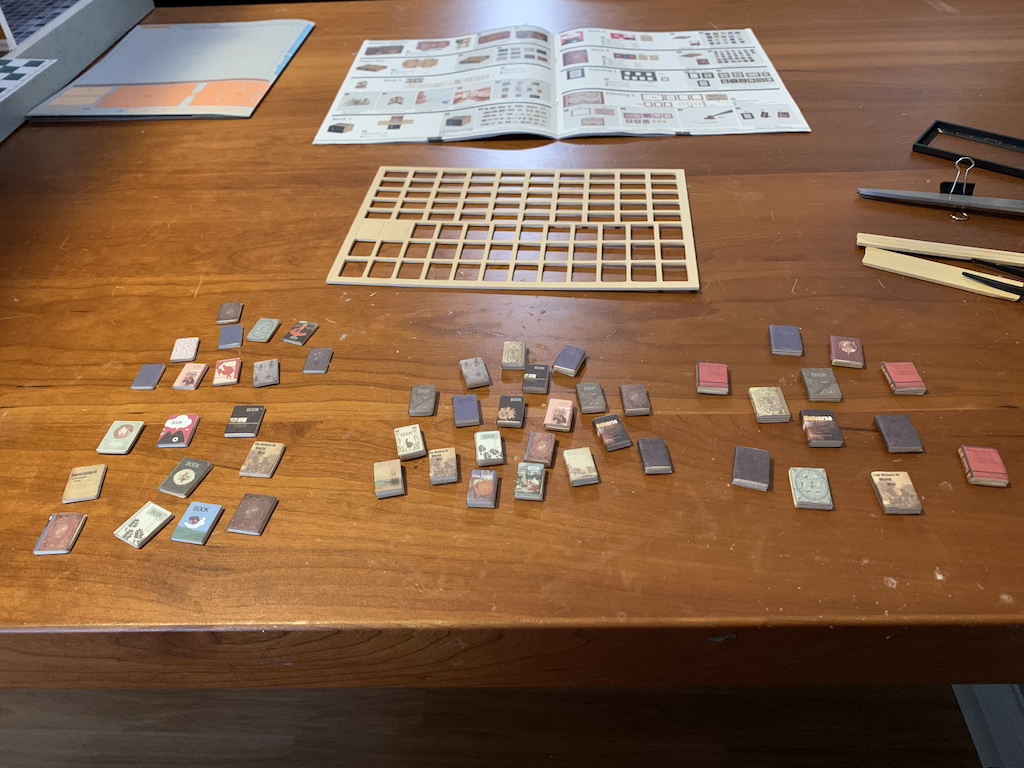
With these 45 complete, I moved on to make another kind of book with a printed book cover and a wooden core upon which the cover was pasted.
Some of these (20 on left in photo below), used just one wooden core but the 32 books on the right were thicker using two glued together wooden cores.
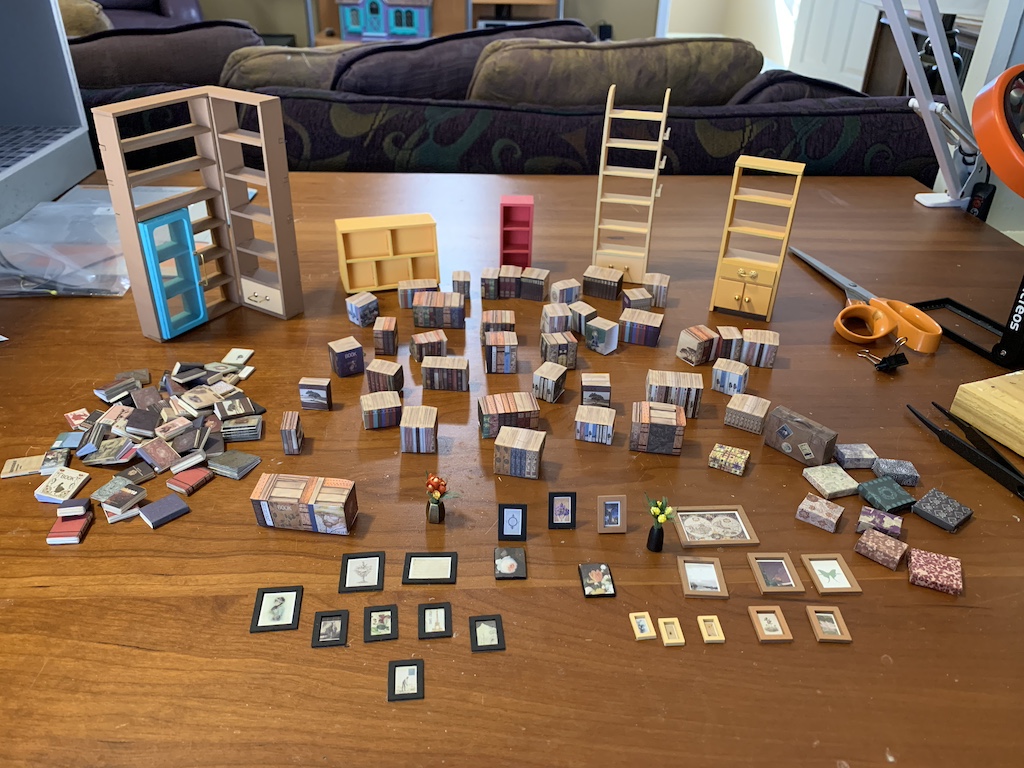
This completed the library of the books for the bookcases. After making several framed paintings and a couple of flower vases, …
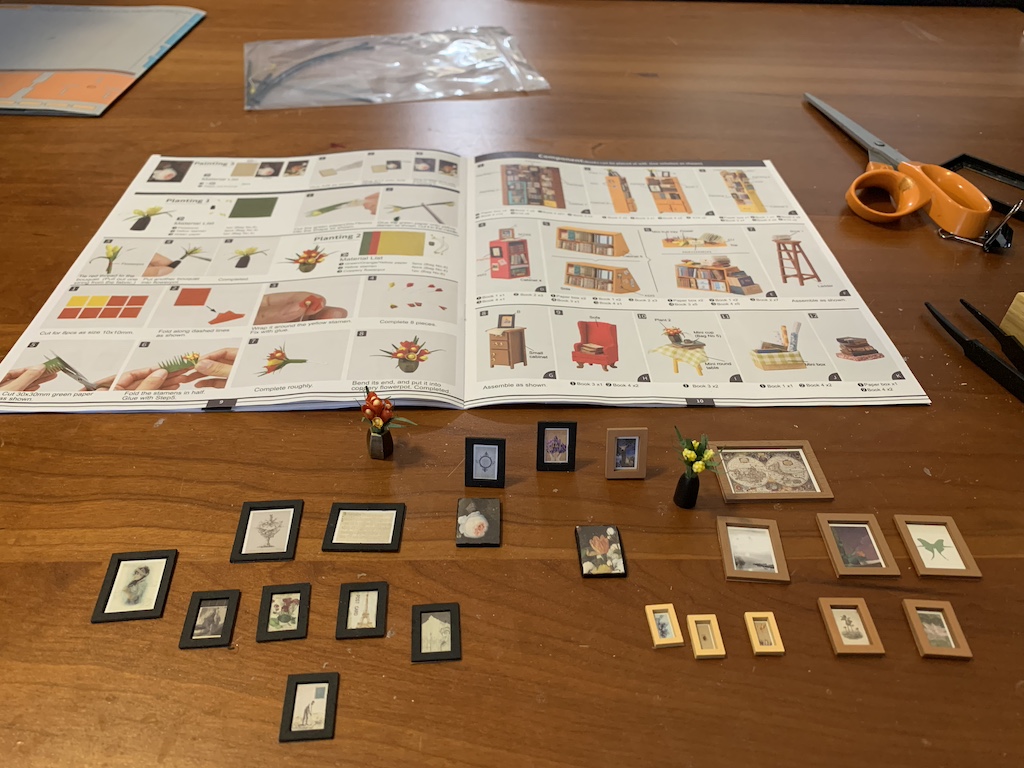
… I was then finished with making all of the subassemblies. I was now ready to actually fill the bookcases with all of these books!
The instructions included a possible placement of the various types of books in the bookcases, but indicated it was only one option.
I started out following their suggestions for the first couple of bookcases but then decided to venture out my own. Although not indicated in the instructions, I chose to glue the books into their various locations as I figured if any small hands got to the finished room later, books would literally fly off the shelves. I really had a great time deciding where to shelve the different books, adding in some interesting features of my own creation.
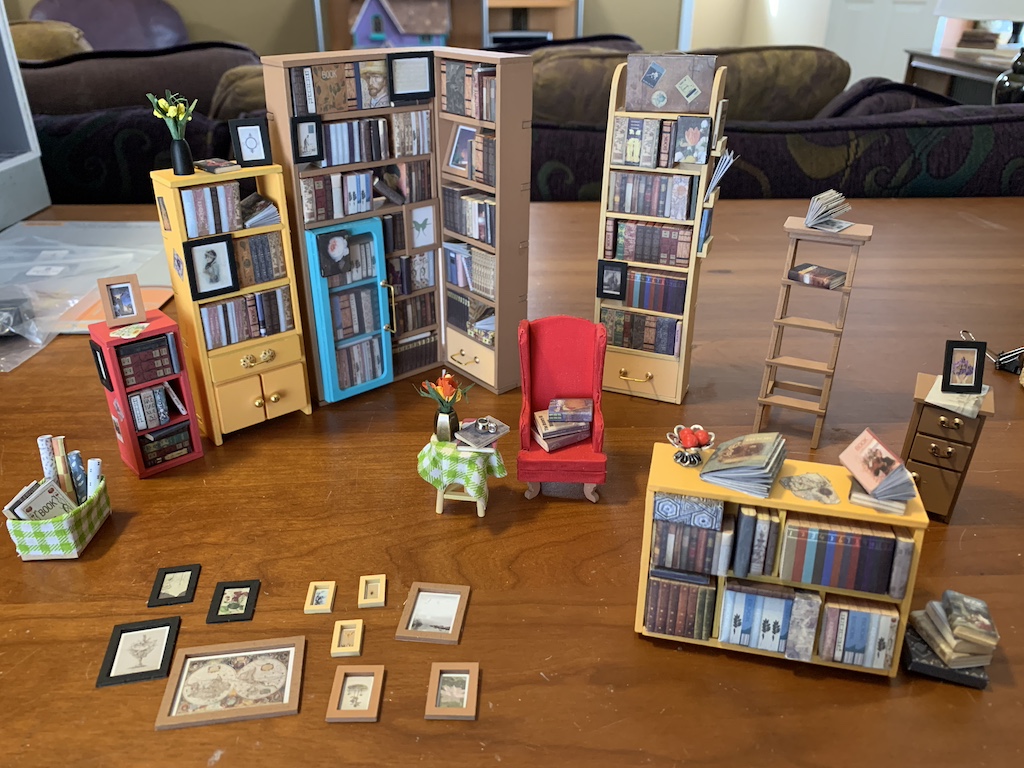
Sitting back after gluing in the last few books, I was really pleased with the outcome.
With the furnishings now ready to be moved into the room, I now needed to build the study. With the previously painted pieces, it was easy to assemble the walls and foundation. But I knew I had an issue with the floor as I had discovered it was significantly warped when I opened the box and removed all the contents.
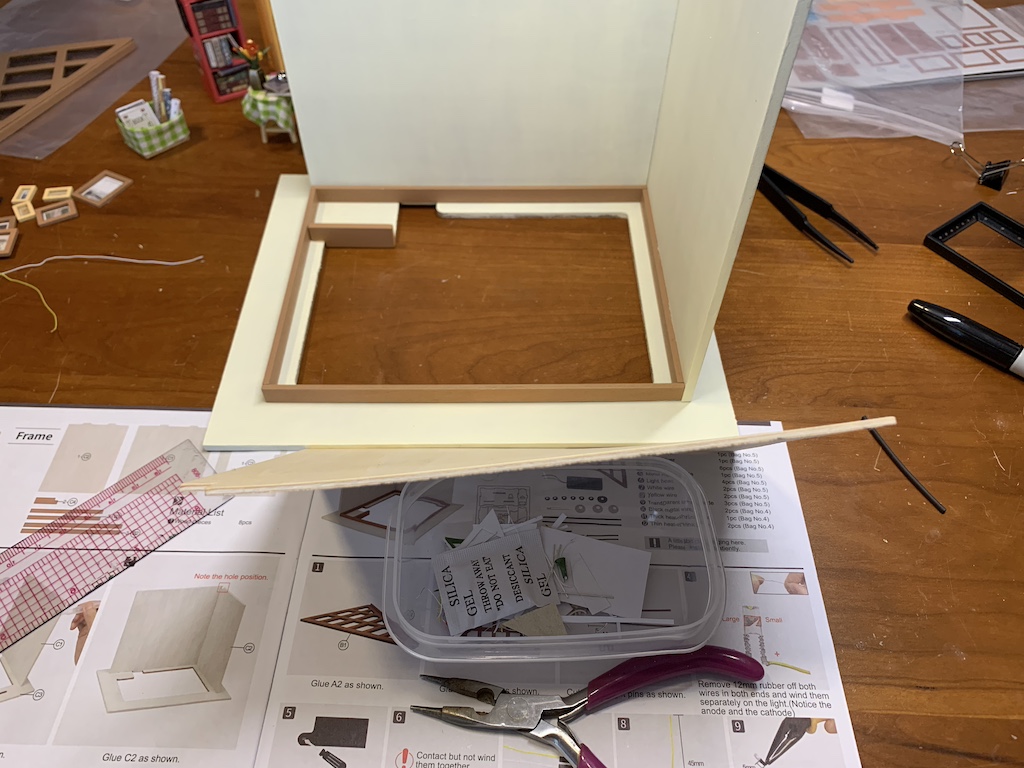
I was actually not surprised as in the six doll houses I had built over the last four years, each one had multiple warped wooden parts. I considered buying some Bass wood to replace the warped floor. But then I decided to try to glue it down first. Using glue liberally and placing a 3-pound hand weight on the floor seemed to securely fix it onto the foundation after sitting for 24 hours.
The last major piece to build was the working LED light fixture.
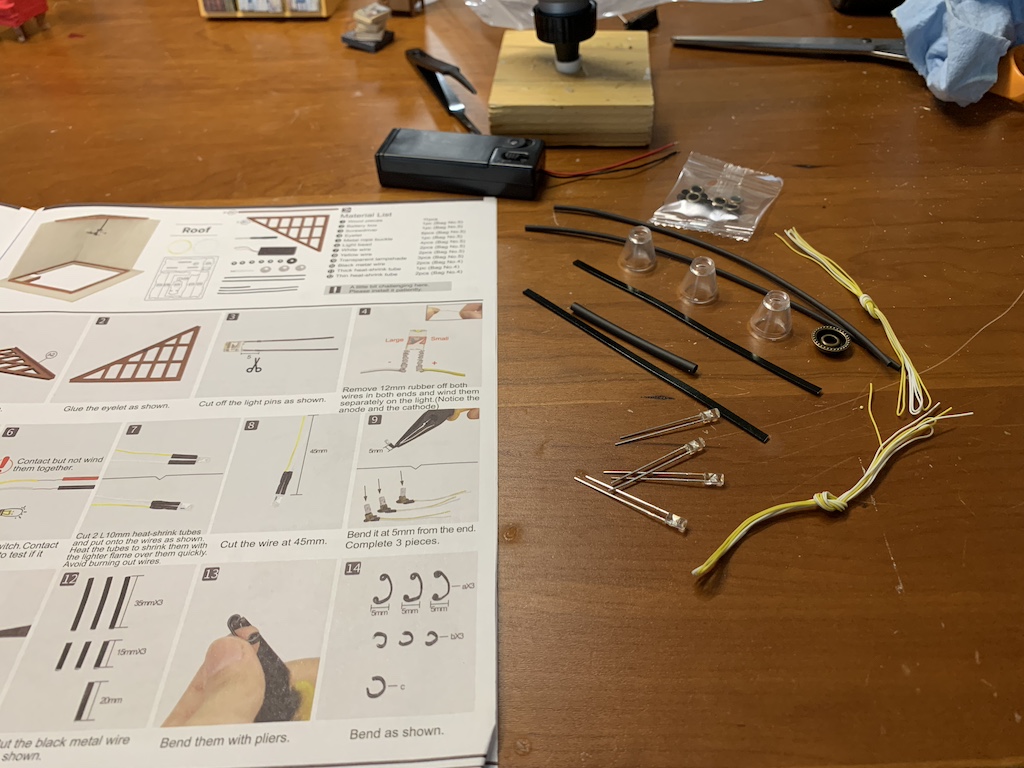
The kit included all these materials for fabricating it from scratch. In the instructions, there was a highlighted warning: “A little bit challenging here. Please install it patiently.” Turns out that was an understatement.
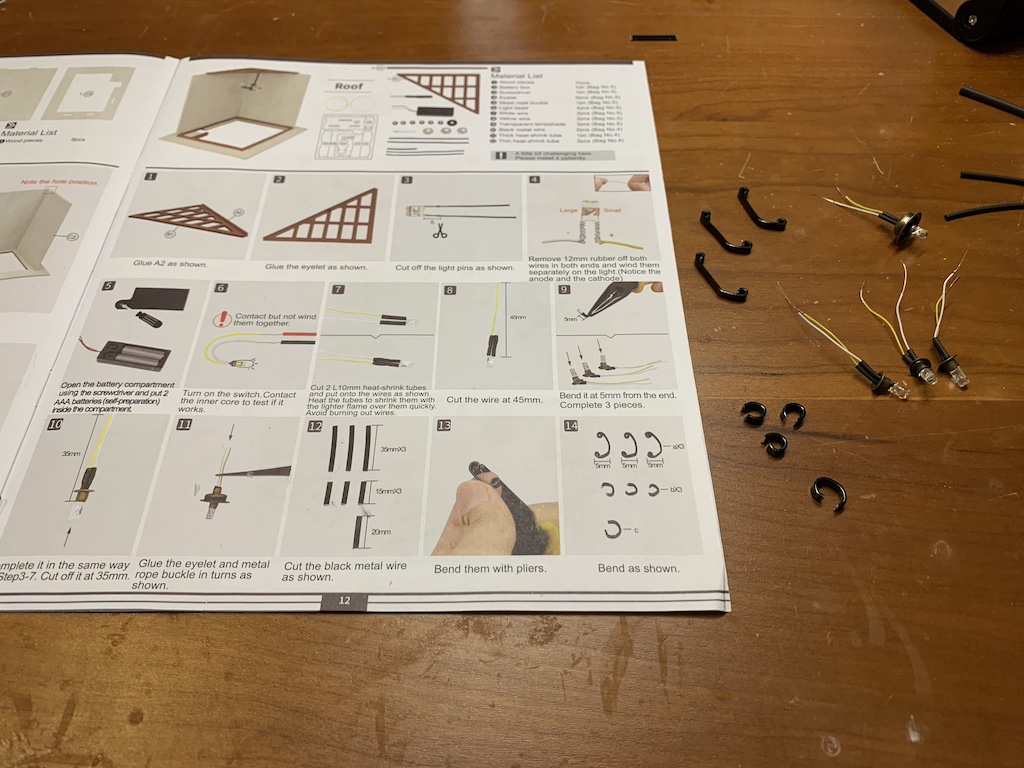
The instructions with the photos provided very clear guidance on this first page and I managed to obtain four functioning lights with just one broken wire that had to be redone.

But once I had the four individual lights wired together (step 20 in photo above) and tested it, none of them worked. I knew the problem was some bare wire was shorting out the fixture. I twisted the wires around a bit, retested it, and found two of them worked.
At this point, my only option was to untwist all eight wires, re-twist them together, and then replace the heat shrink tubes (the insulation) to ensure no bare sections of the wires were left uncovered. Getting them apart proved even more challenging than putting them together and on one of the lights, the exposed metal wire broke off right at the top of the insulation. This meant I would have to completely dissemble this one light and start over.
I began to wonder how often I might actually turn on the light and thinking rarely, I decided a non-functioning light fixture would work just as well. But then when I tried to follow the remaining steps to assemble it, I could not get any of the parts to line up properly. Having invested several hours up to this point, I pondered what to do next.
Knowing that my past performance on building this light fixture was no guarantee for my future success, I simply put all of the pieces back into the zip lock bag. I figured one day, if I wanted to, I could get it back out and try again. But knowing how fragile the tiny wires were and that with any excessive twisting, they would easily break, the parts might just stay in that bag.
With the floor securely in place and the faux tile installed, the last step was to glue the individual study furnishings into place.
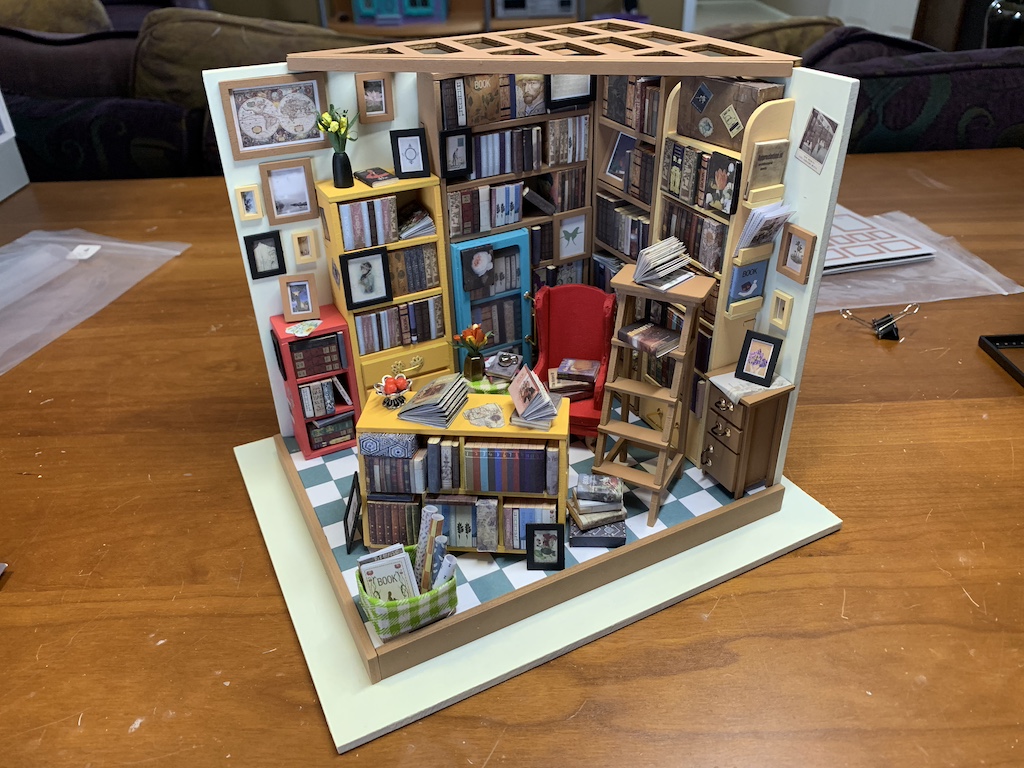
In spite of not having a light fixture, I was extremely pleased with the outcome.
I must say I really had a blast building this miniature study. Just like when working on a puzzle, I often found myself totally losing track of time as I was having such fun. And building all these furnishings gave me confidence that I could return to assembling some furnishings for my empty doll house.
Categories

I cannot believe you have the extreme patience to build this! I am so impressed and can’t wait to see it!
Thanks it was a lot of fun to build.
Very impressive, David. It looks like this kit took an amazing amount of patience and precise attention to detail. Kudos to you for completing it; it looks great! However, I do have to say, I hope no one ever gifts me such a kit. I am glad you had so much fun completing this project!
Thanks Betty it was a lot of fun to build. Hope you have a nice Sunday.
Thanks, David. Hope you have a nice Sunday, too.
This! Is! Awesome! I was a little worried it would be more stressful than fun, but I’m so glad you enjoyed it! I wish I could shrink myself so I could sit in the chair and read!
Thanks for giving it to me. I really did enjoy building it. Yea lots of books to read there.