
My First LEGO Set – Final Assembly
As I began working with the two “3” bags, I was amazed at how the car was taking shape from mostly square or rectangular pieces. At times, I could not even recognize what part I was building until several steps later when it took its final shape. And at times, I discovered that just like when I get into “the zone” putting together puzzles, I would totally lose track of time and could not believe how much time had flown by when I looked at the clock. I guess it is not surprising as it is akin to building a three-dimensional puzzle with a very satisfying “click” as the pieces snap together tightly.
As I was building the passenger seat, I ran into my first hiccup when I realized I did not have the right colored pieces for the middle of the seat.
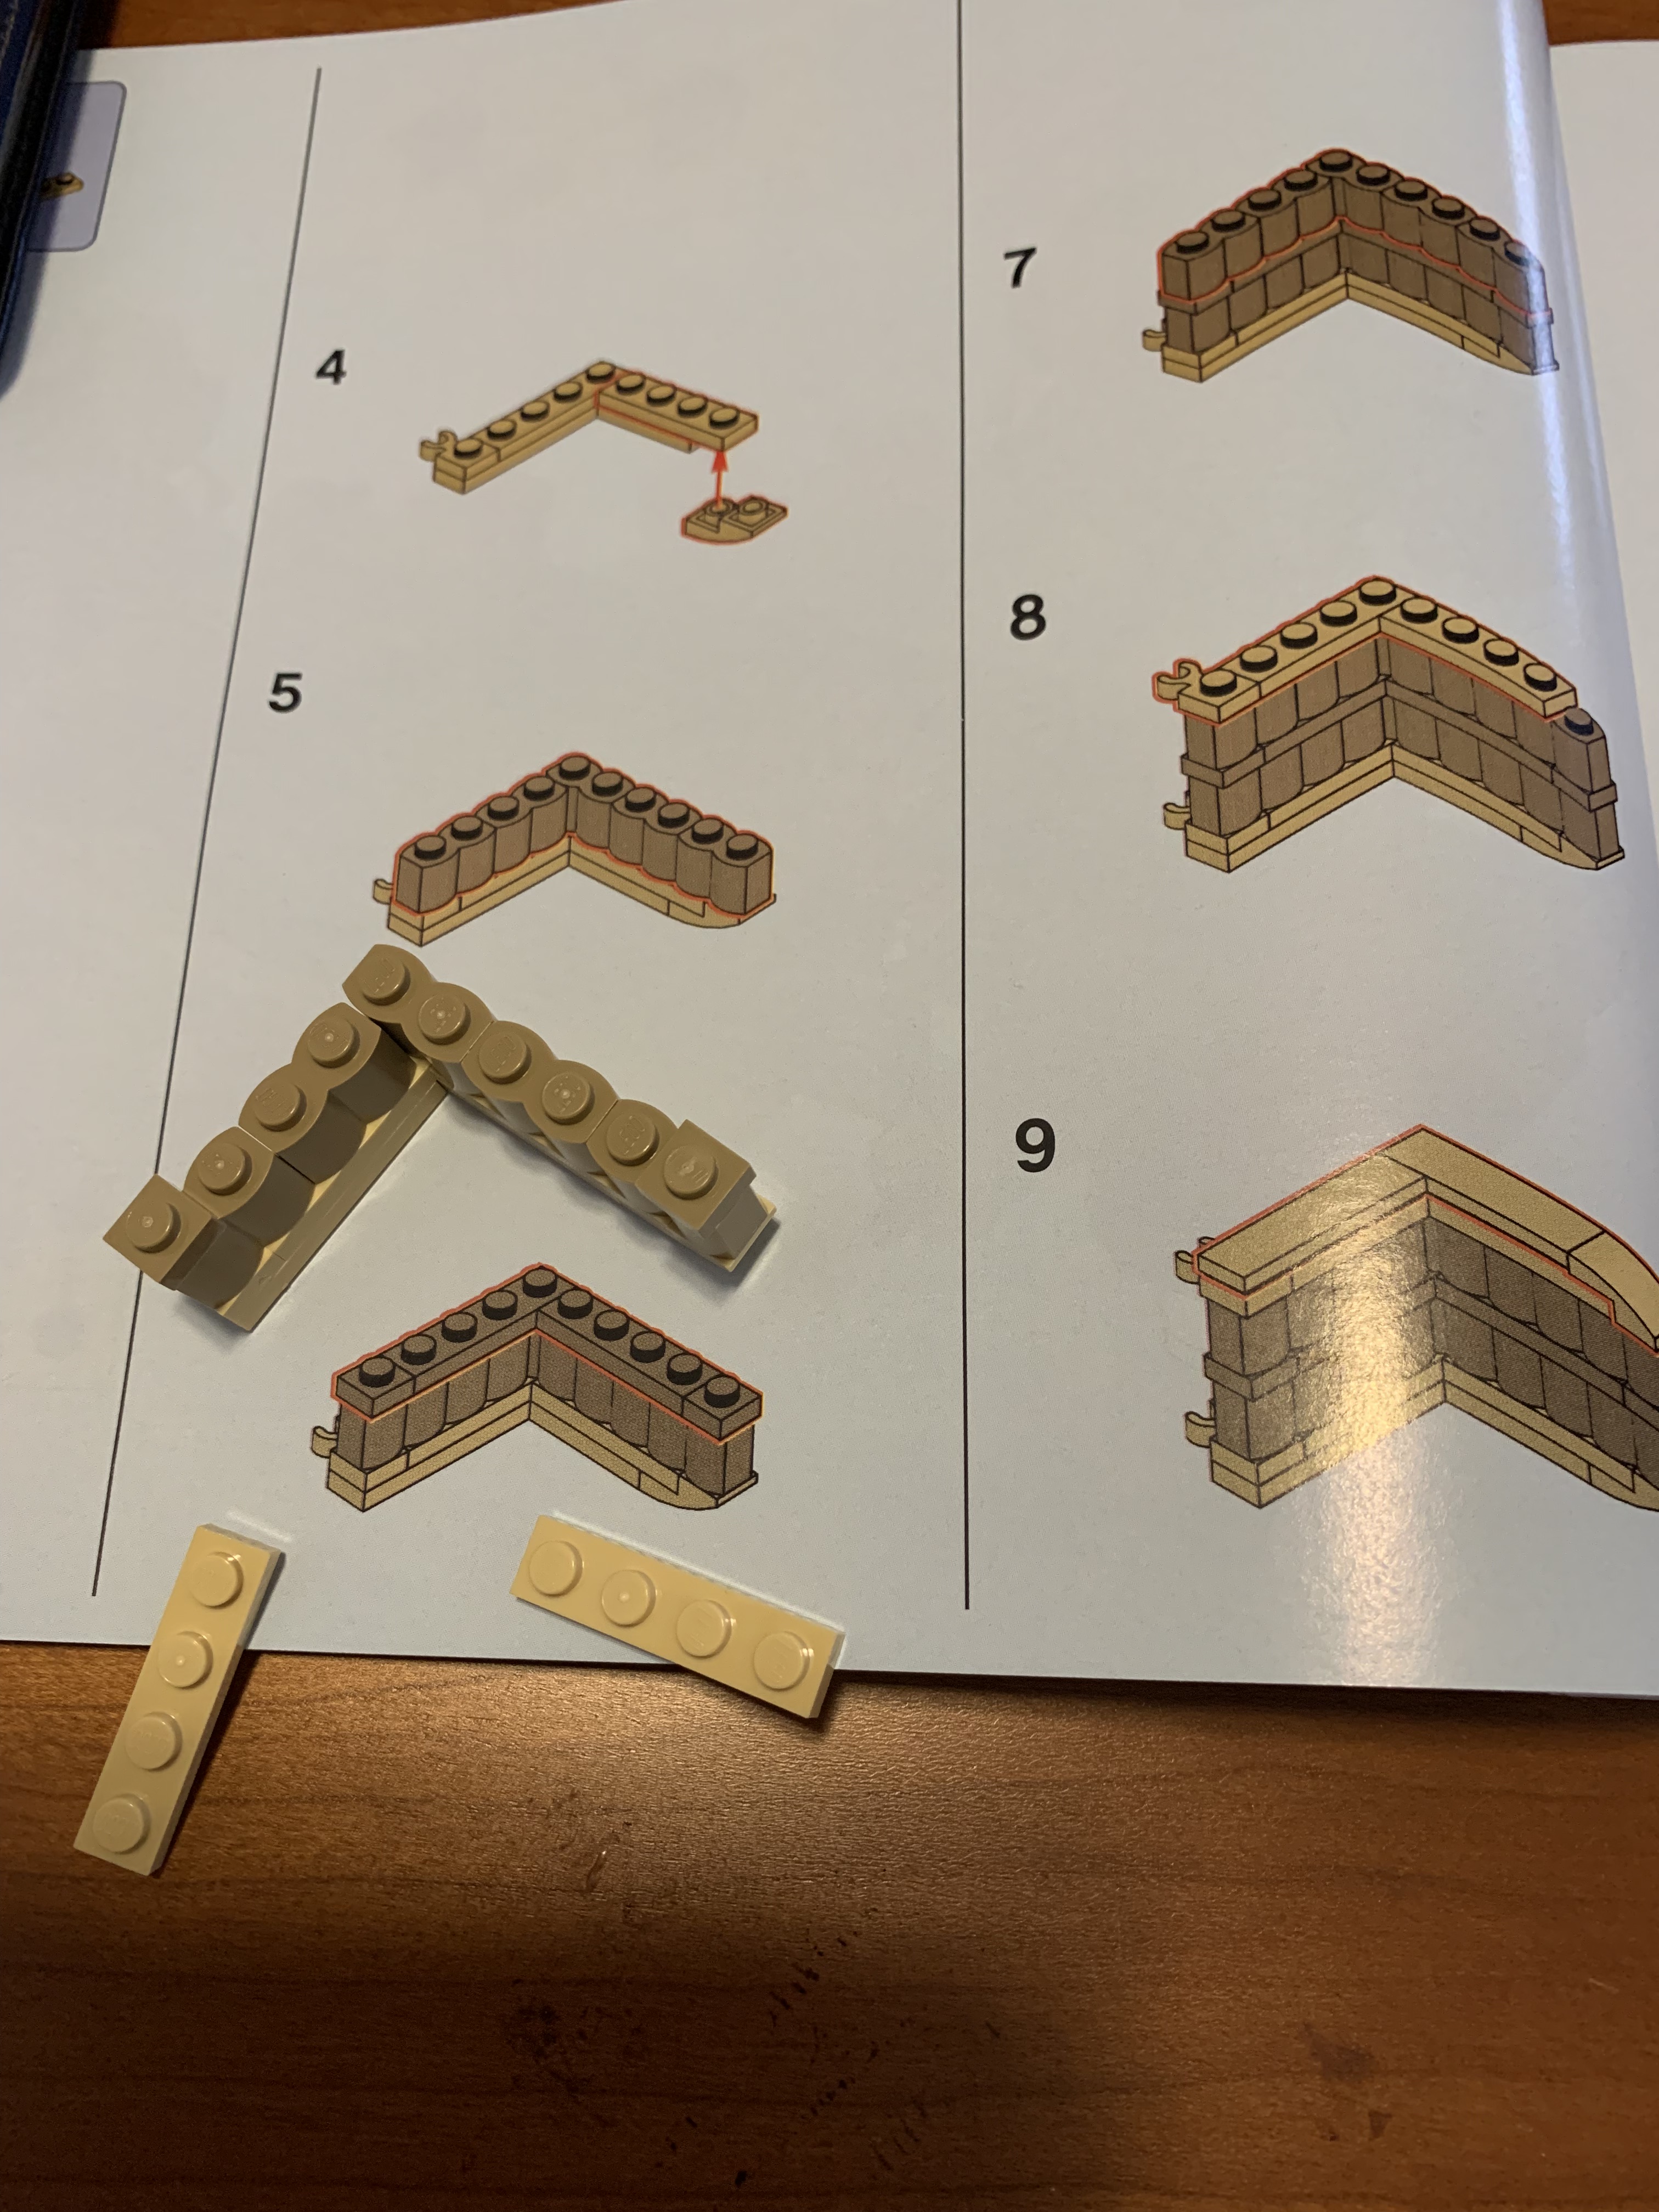
At first thinking I had some pieces missing, I decided to look back through the directions to see if I had made a mistake on a previous step. Sure enough, I discovered I had used the wrong tan-colored pieces in an earlier step (there were two shades of tan pieces). I then had to work backwards to remove the incorrect pieces and then rebuild through those steps.
When I started to build the doors, I ran into another problem. The body color blue pieces were so dark in the pictures in the instruction booklet, that I could not see enough detail to know the correct orientation of pieces. Thankfully I remembered from visiting my grandson last fall that you could download a LEGO app that included instructions for all their kits.
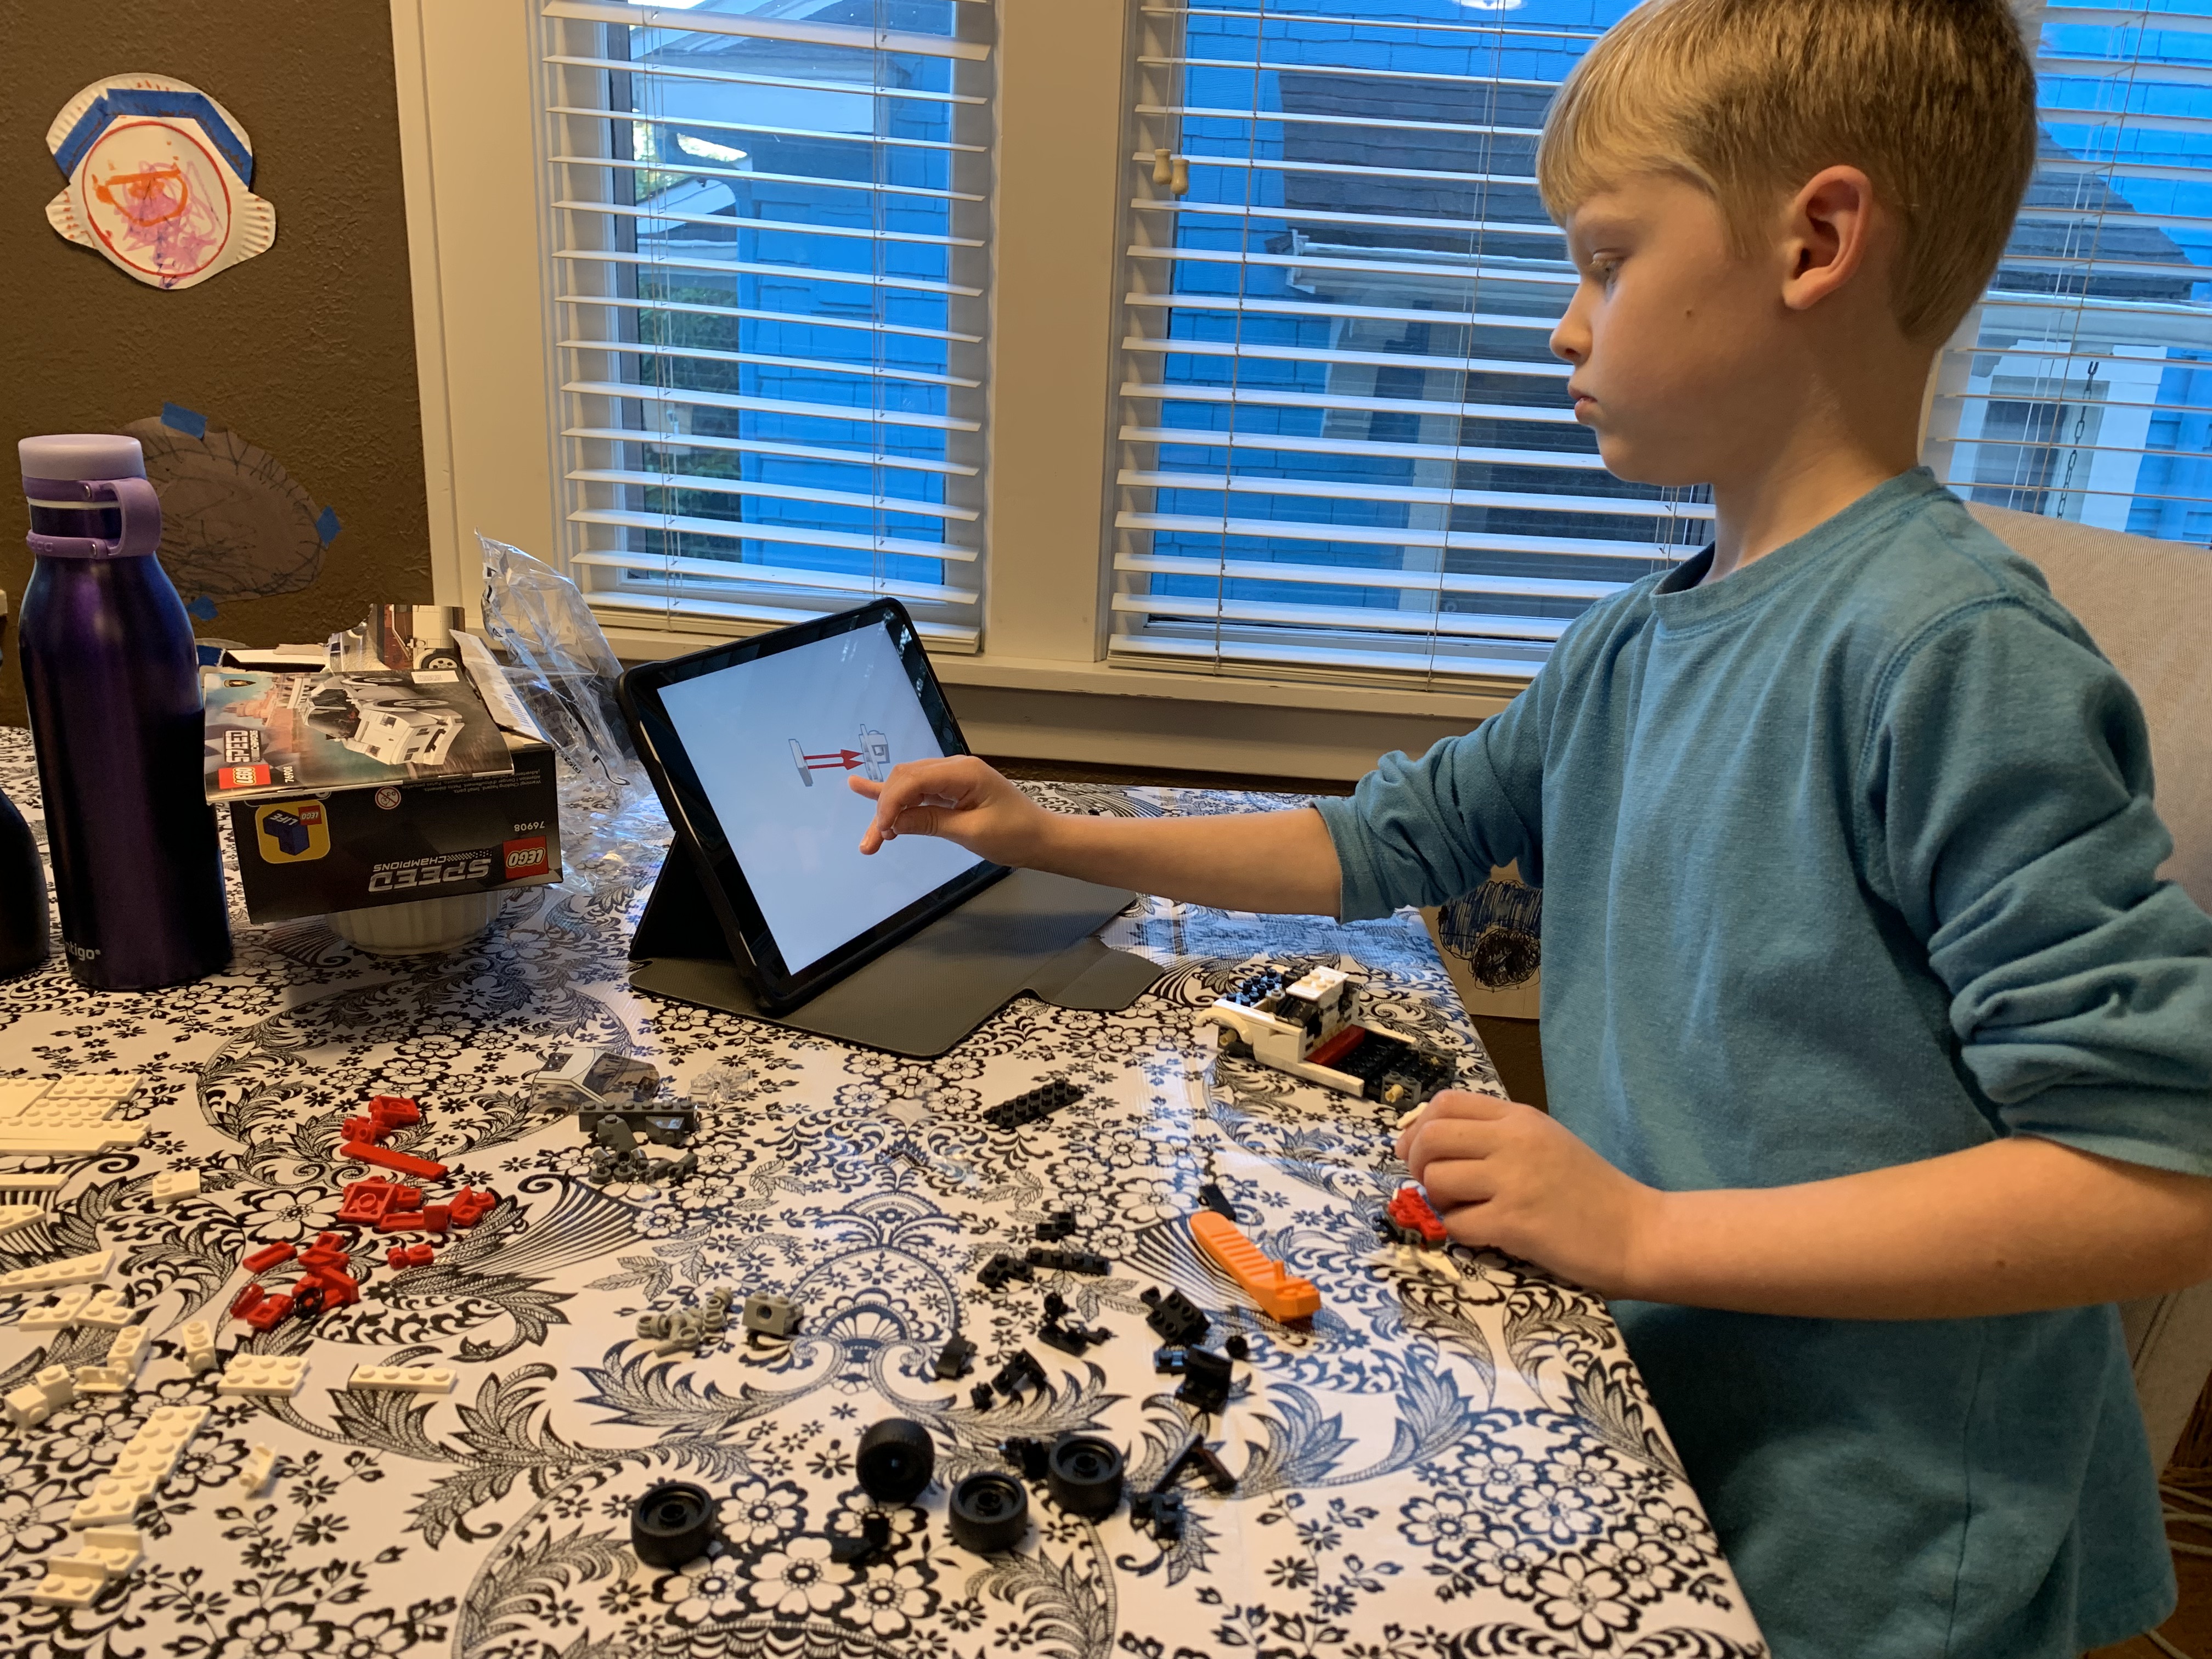
Pulling up the same page of the instructions on the app, I could much more easily see the detail I needed to understand the assembly.

With the aid of the app, I was able to finish the driver’s side door and was then amazed at how all the intricate pieces fit together to make a smoothly opening door.
Having the experience of finishing the driver’s side door, I was able to assemble the passenger’s side door more easily and was then ready to move onto the two “4” bags.
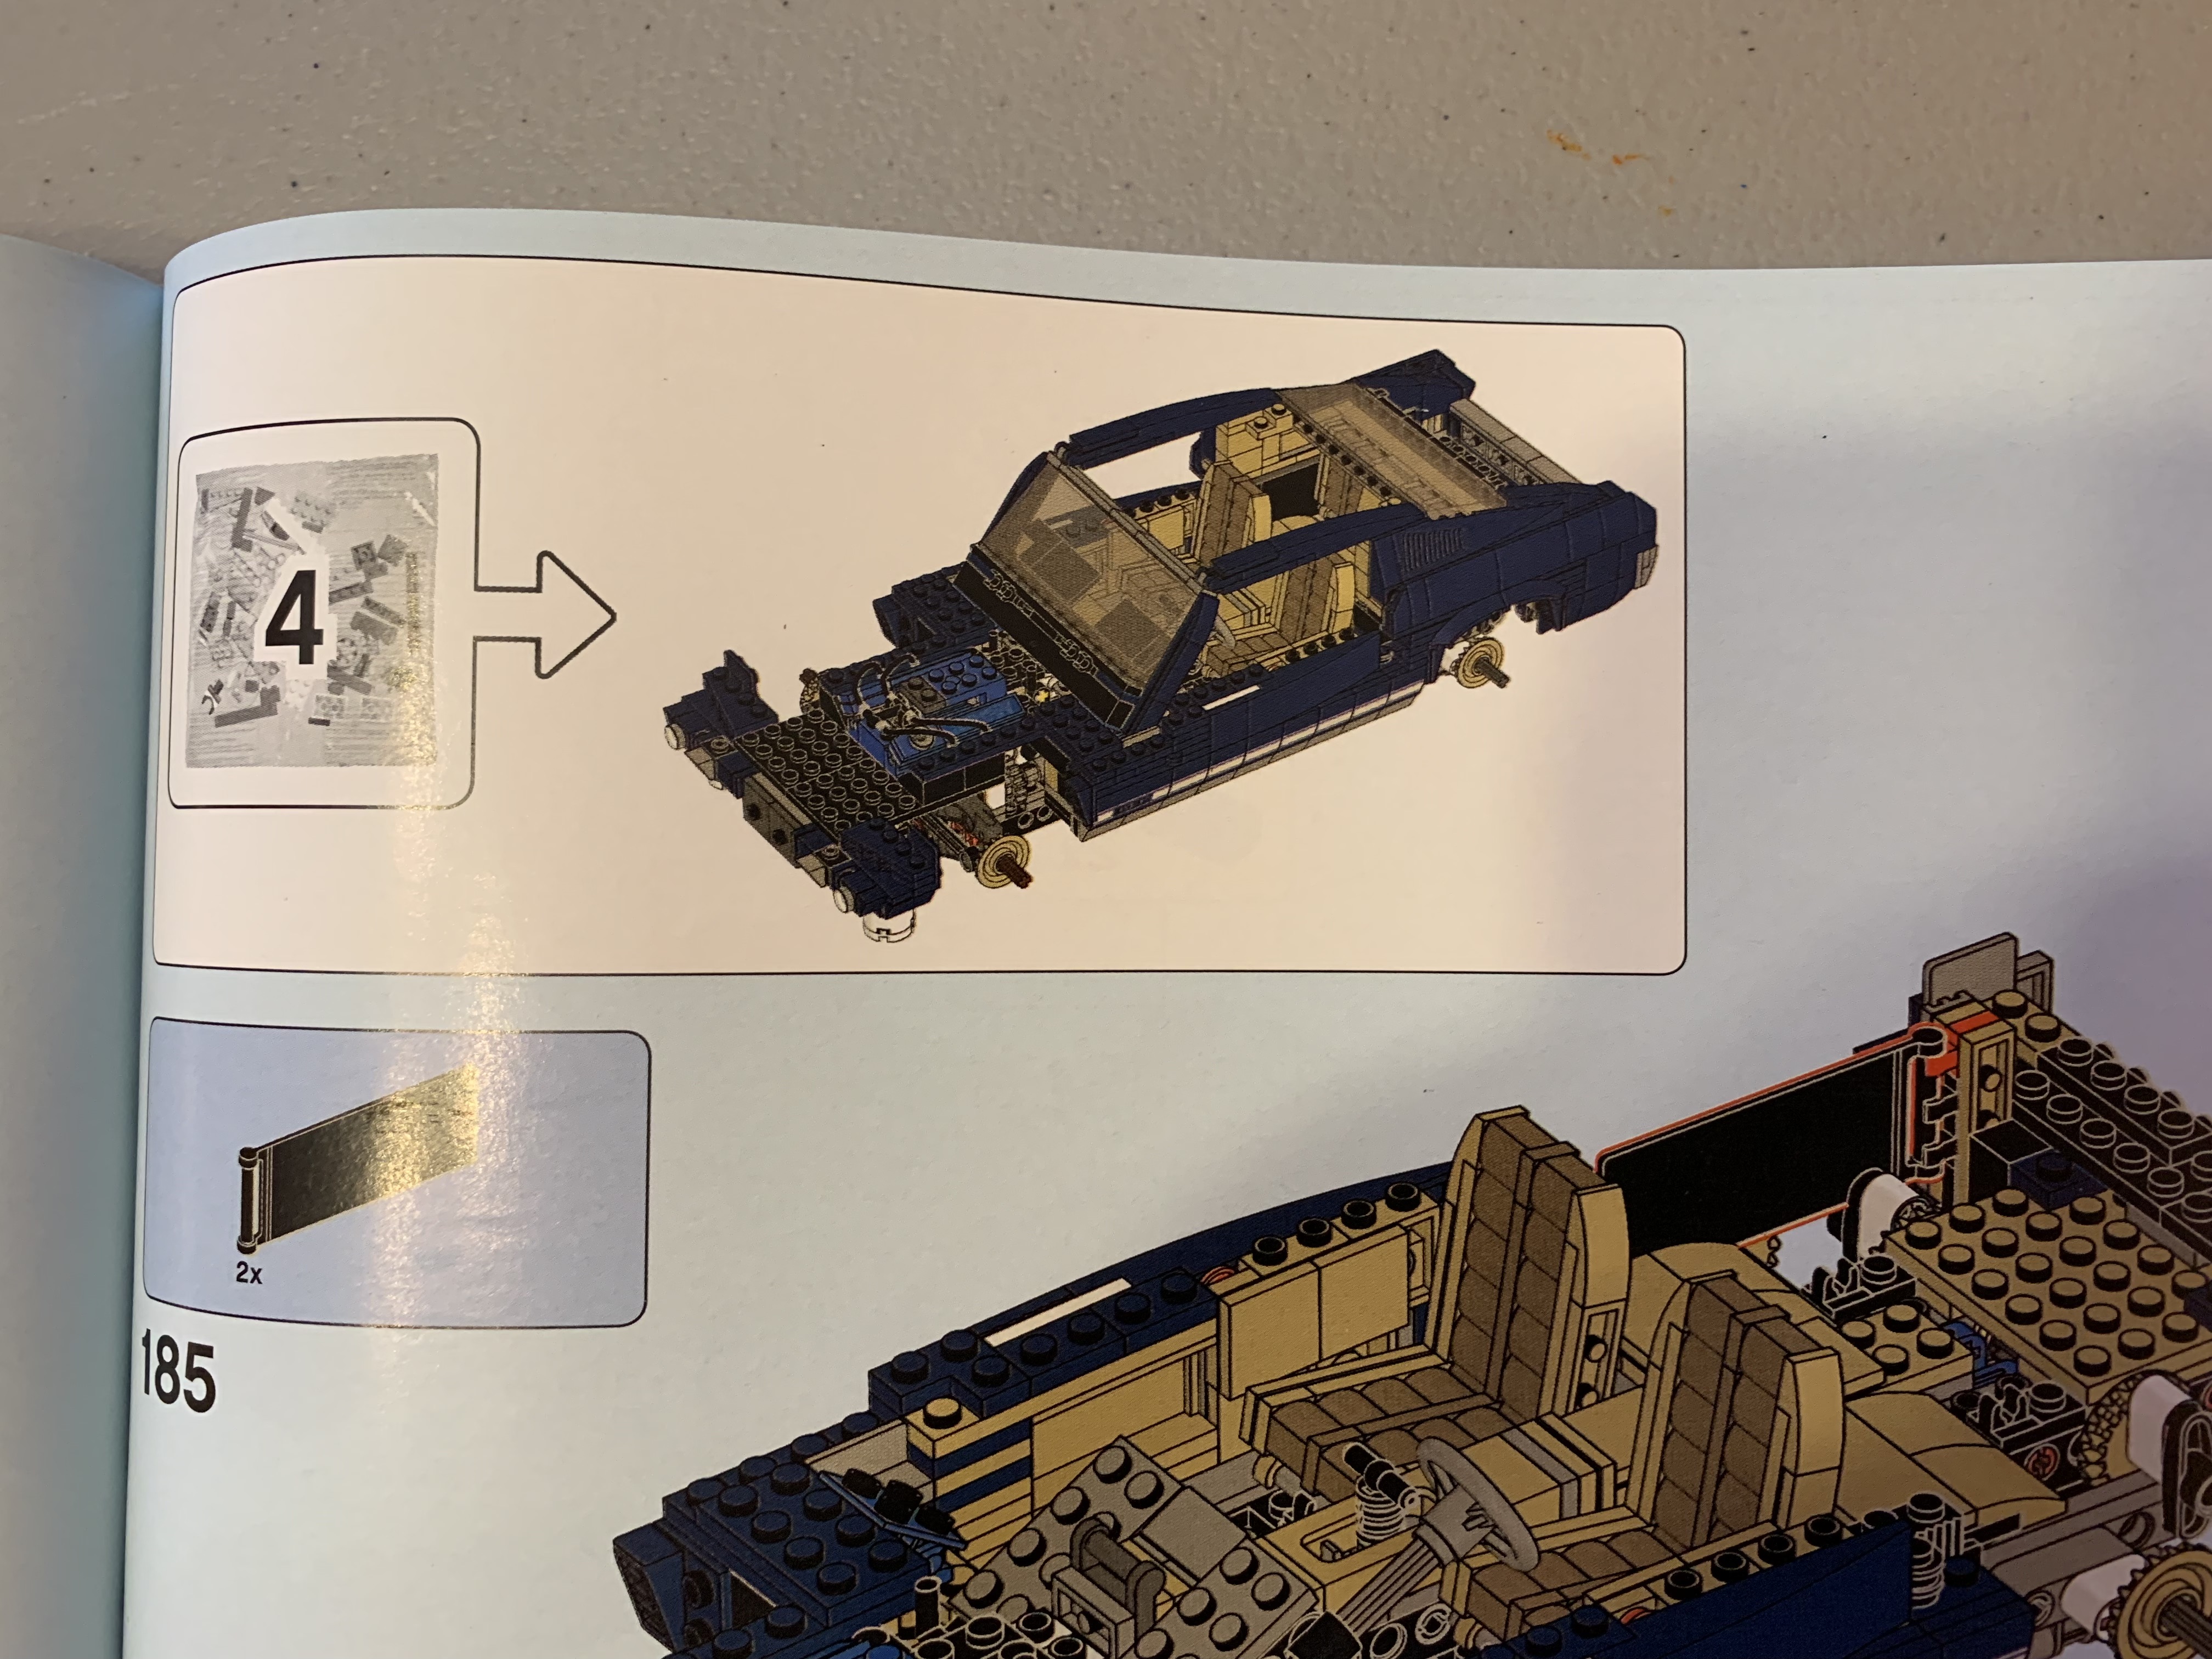
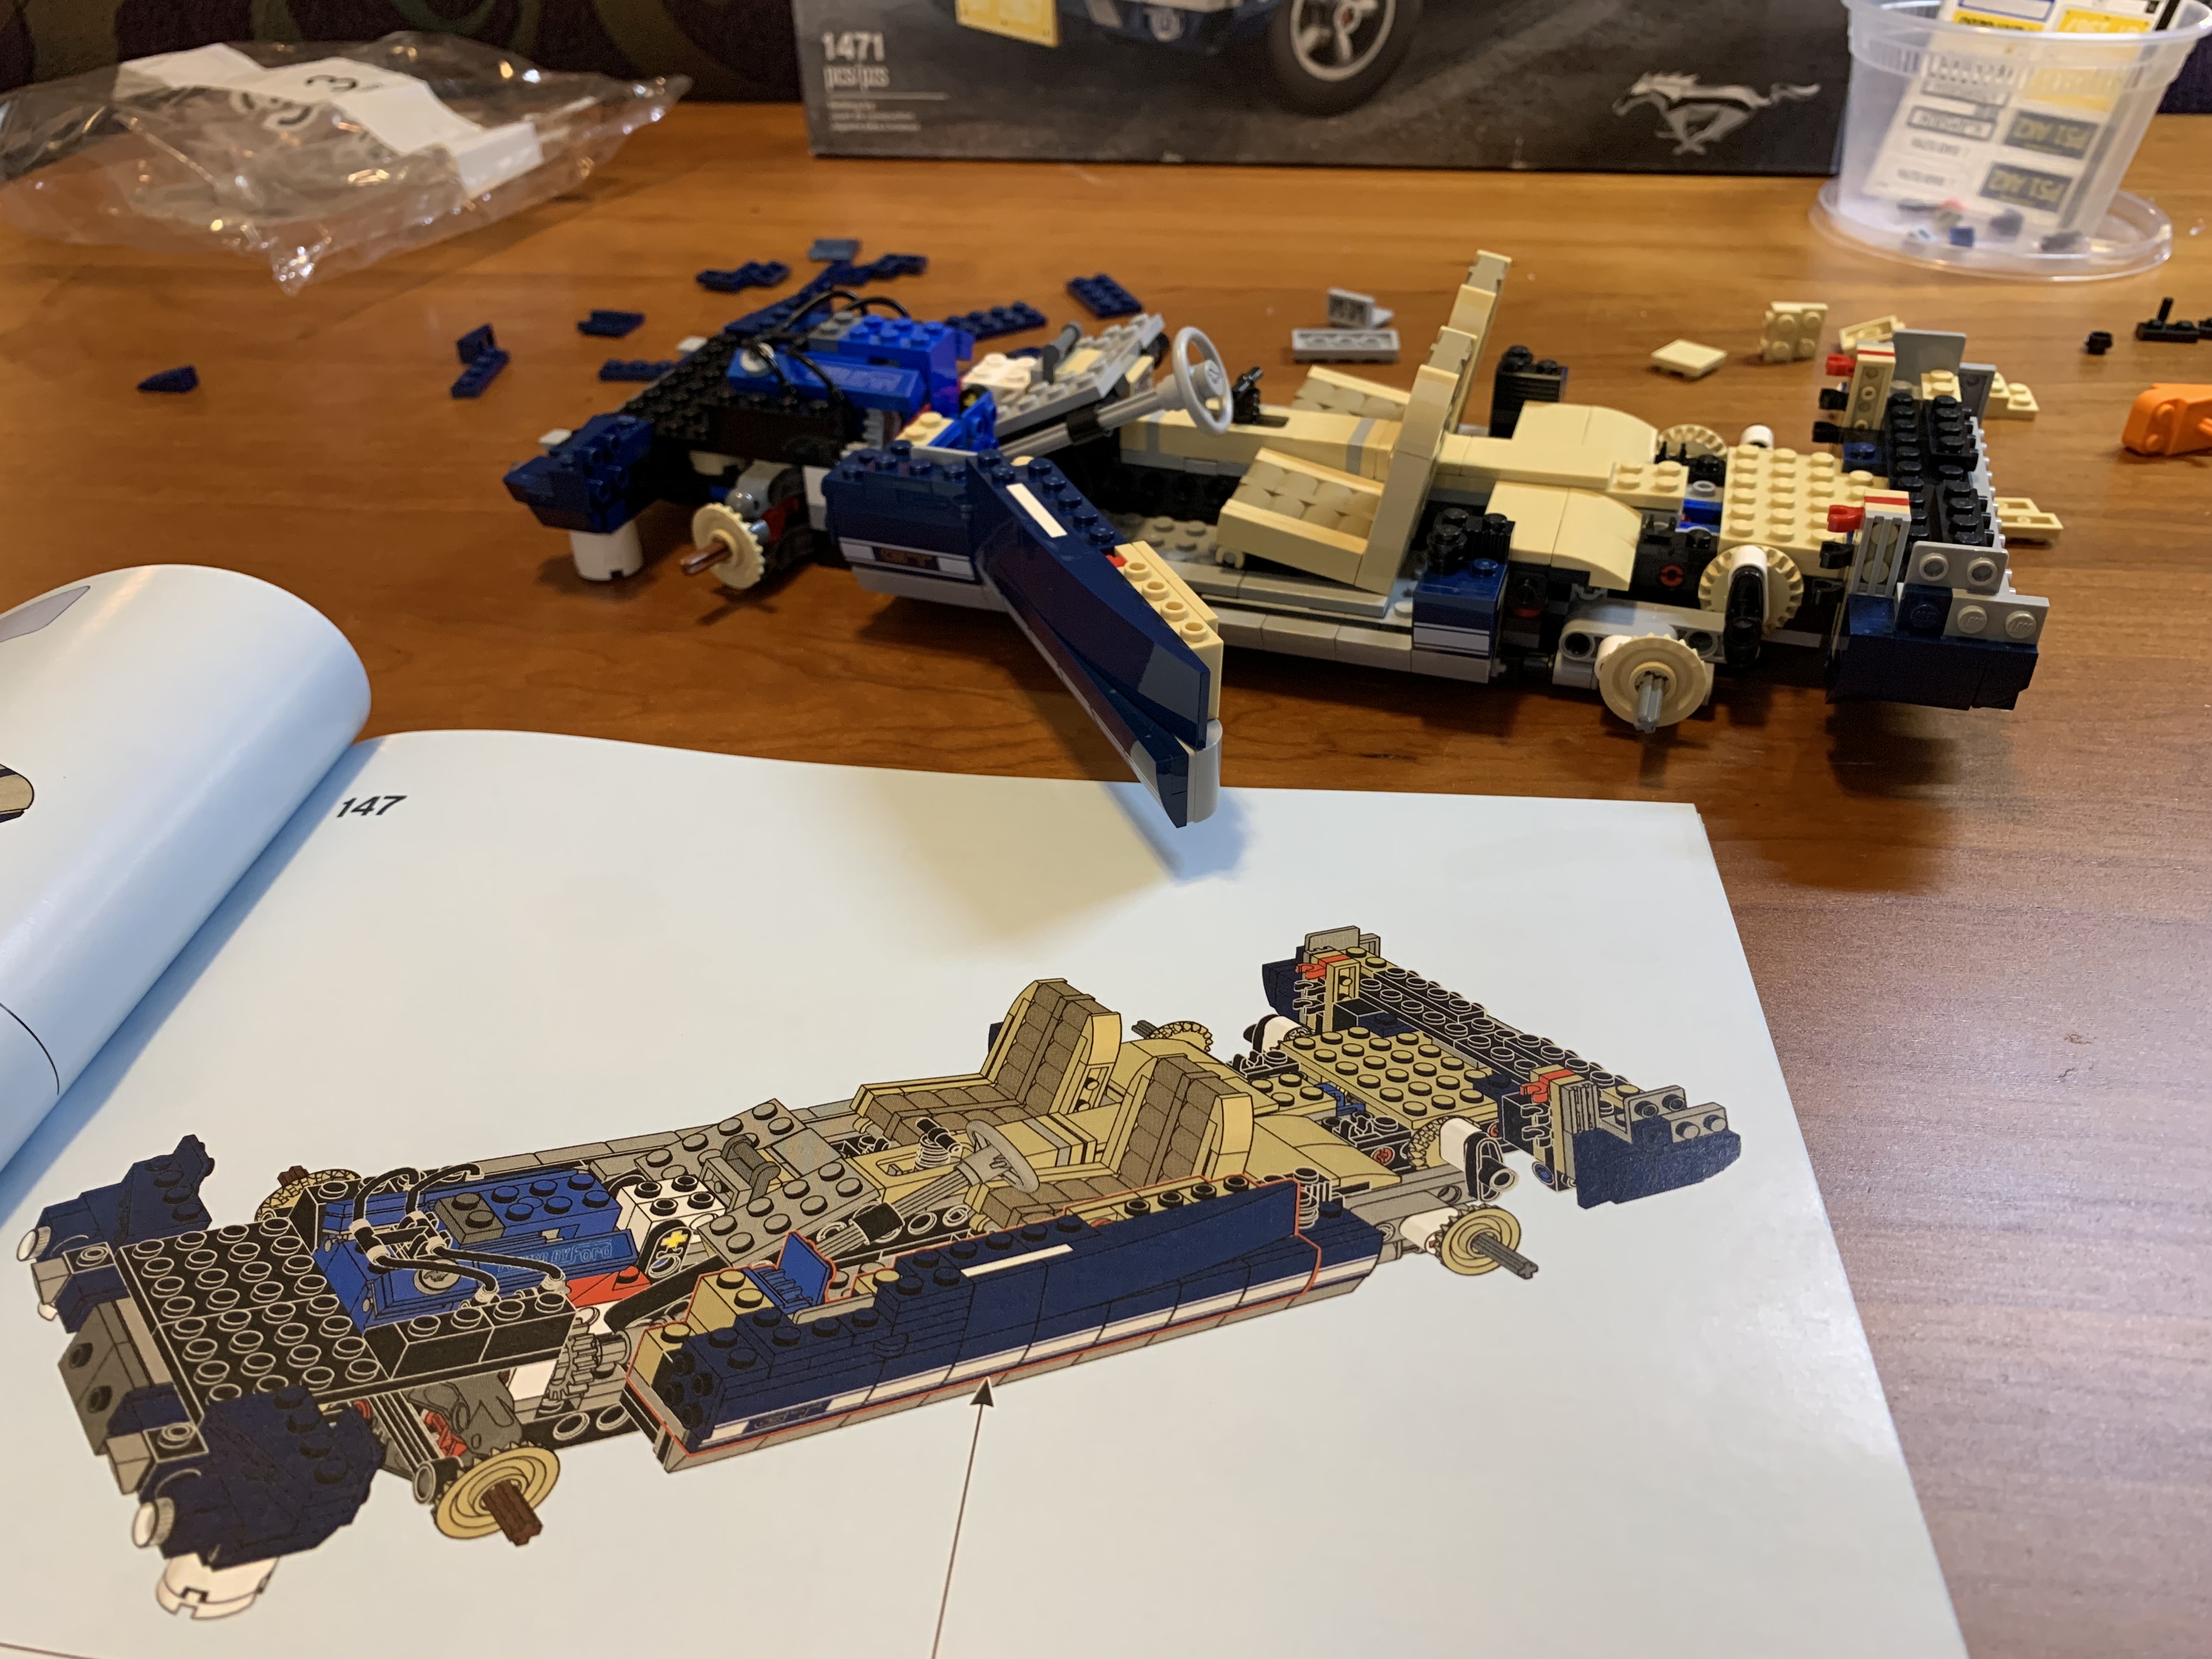
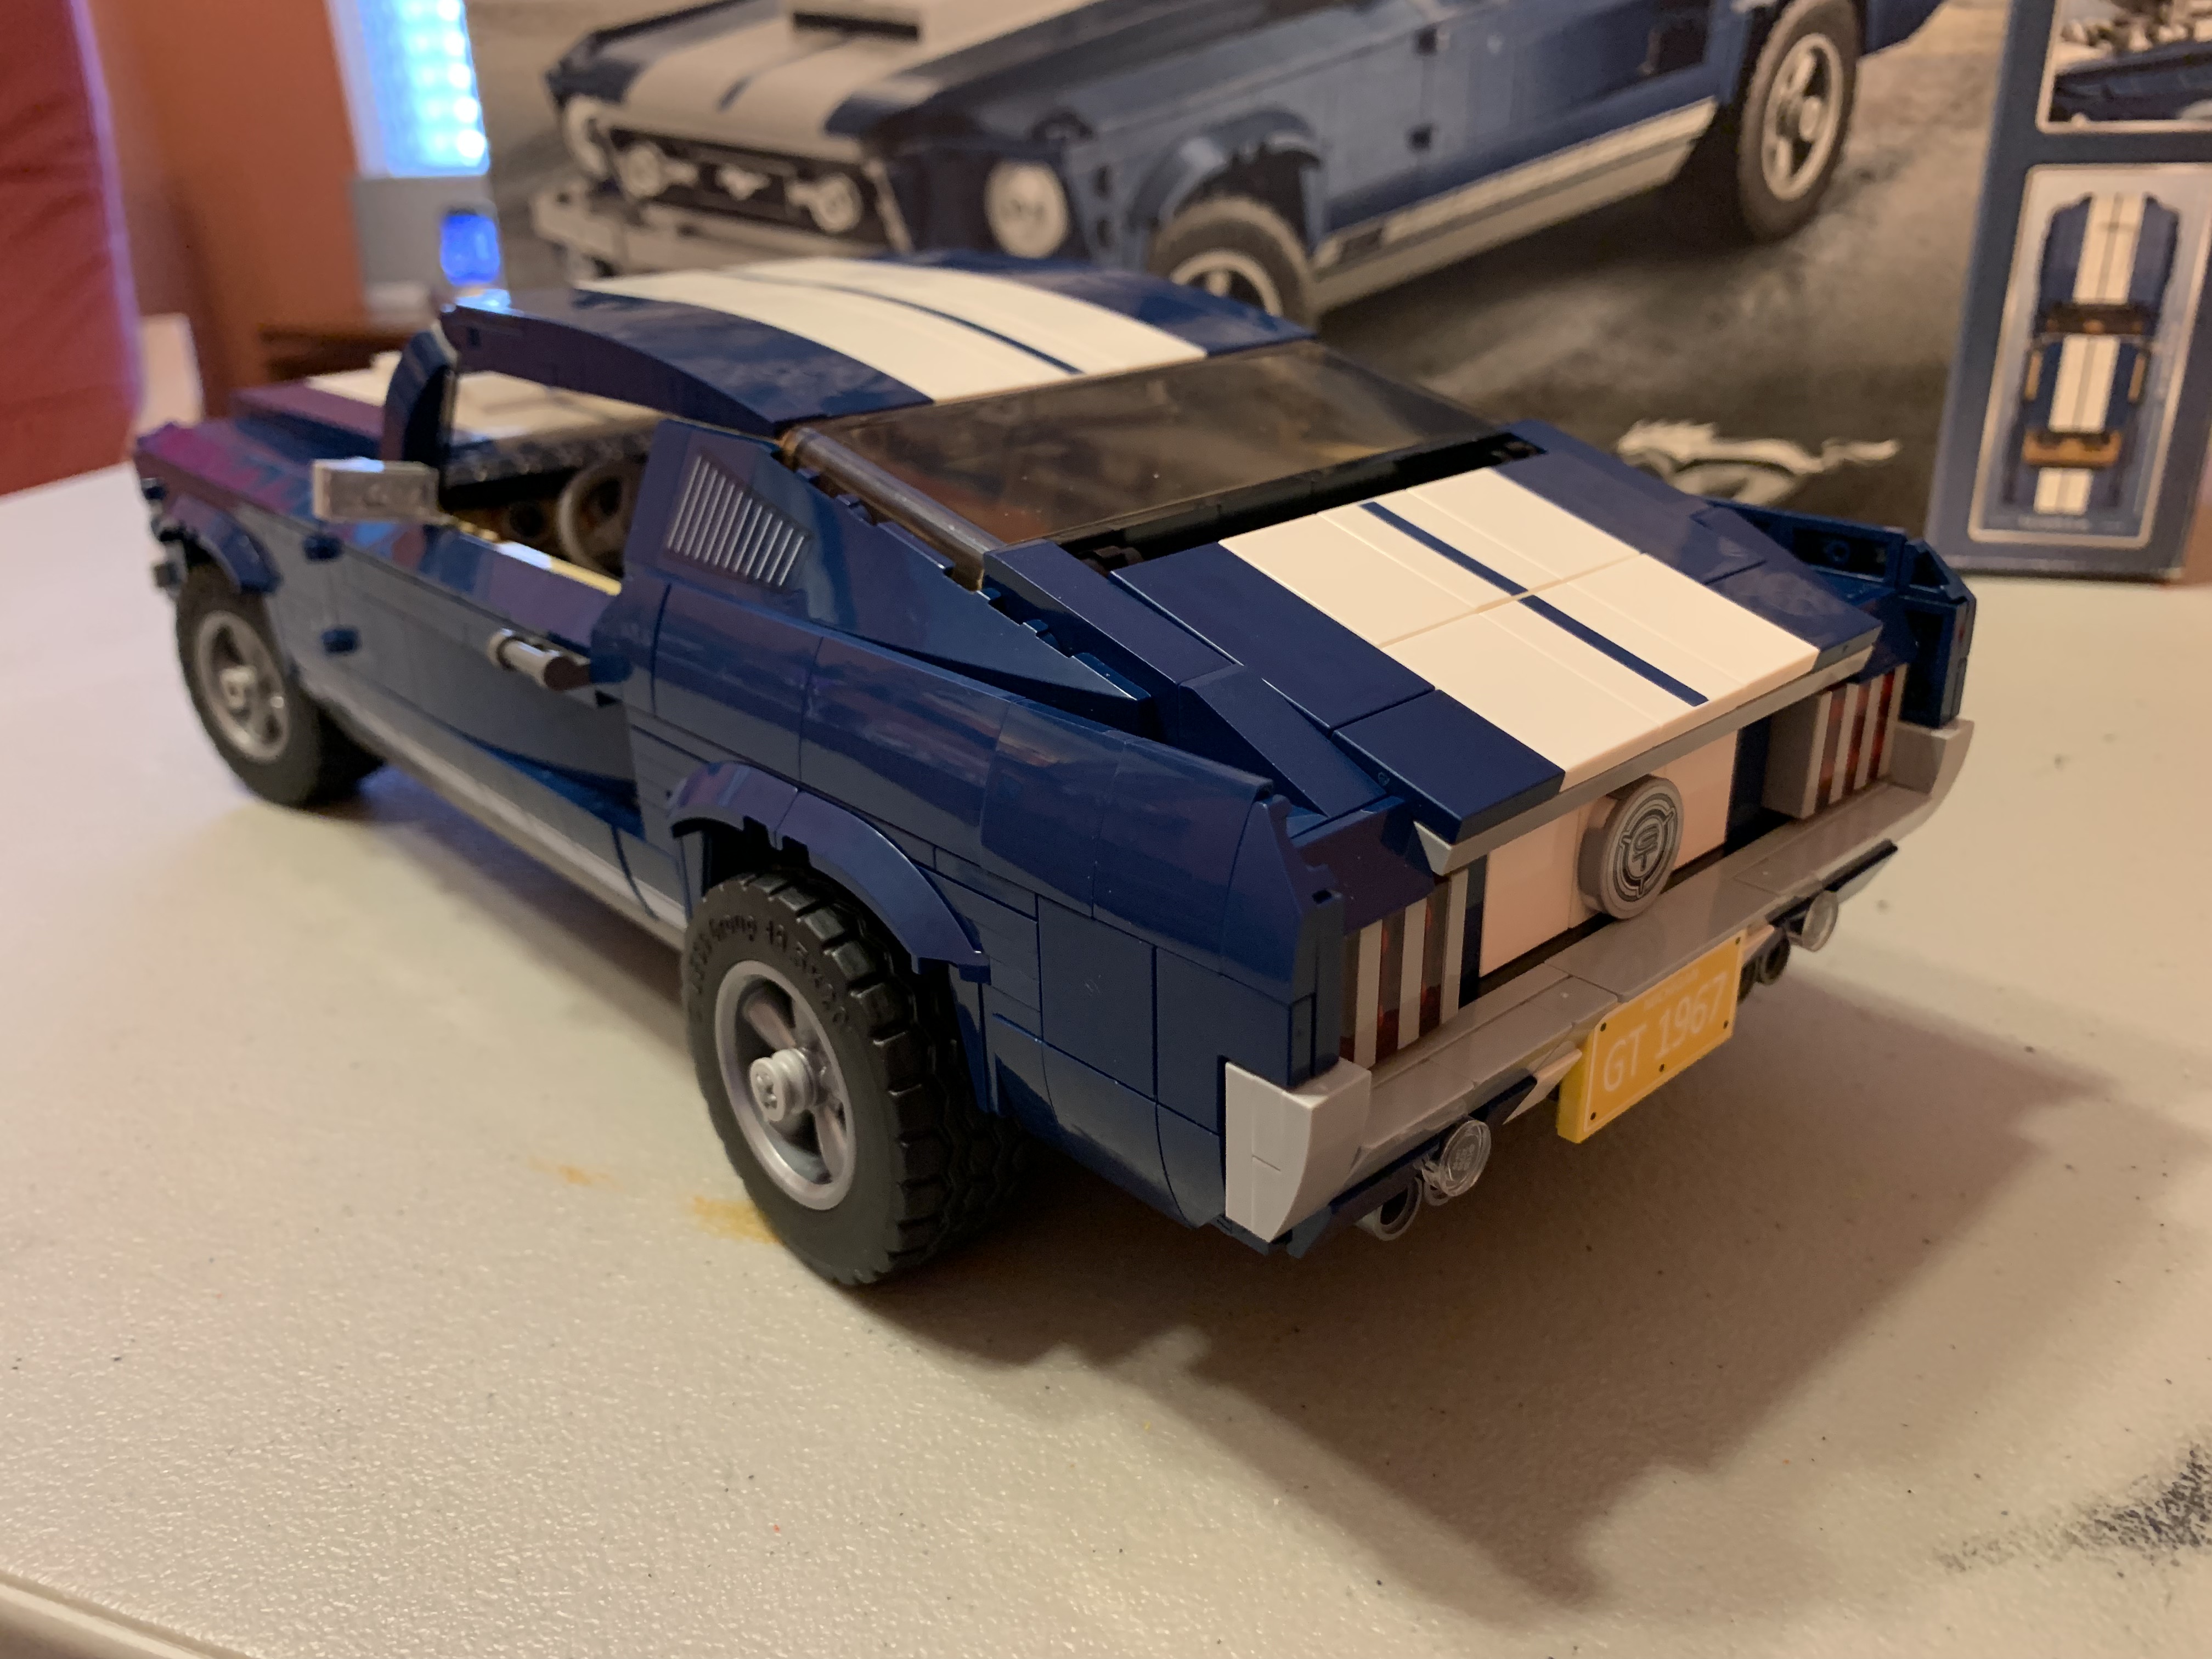
The preview photo for the finished “4” bags showed I would achieve a very recognizable body at the conclusion of this series of steps. As before, I organized the pieces by common color and then began the assembly. I was again amazed as I built how so many square and rectangular shapes could create this classic car—of course with a few custom shaped pieces thrown in.
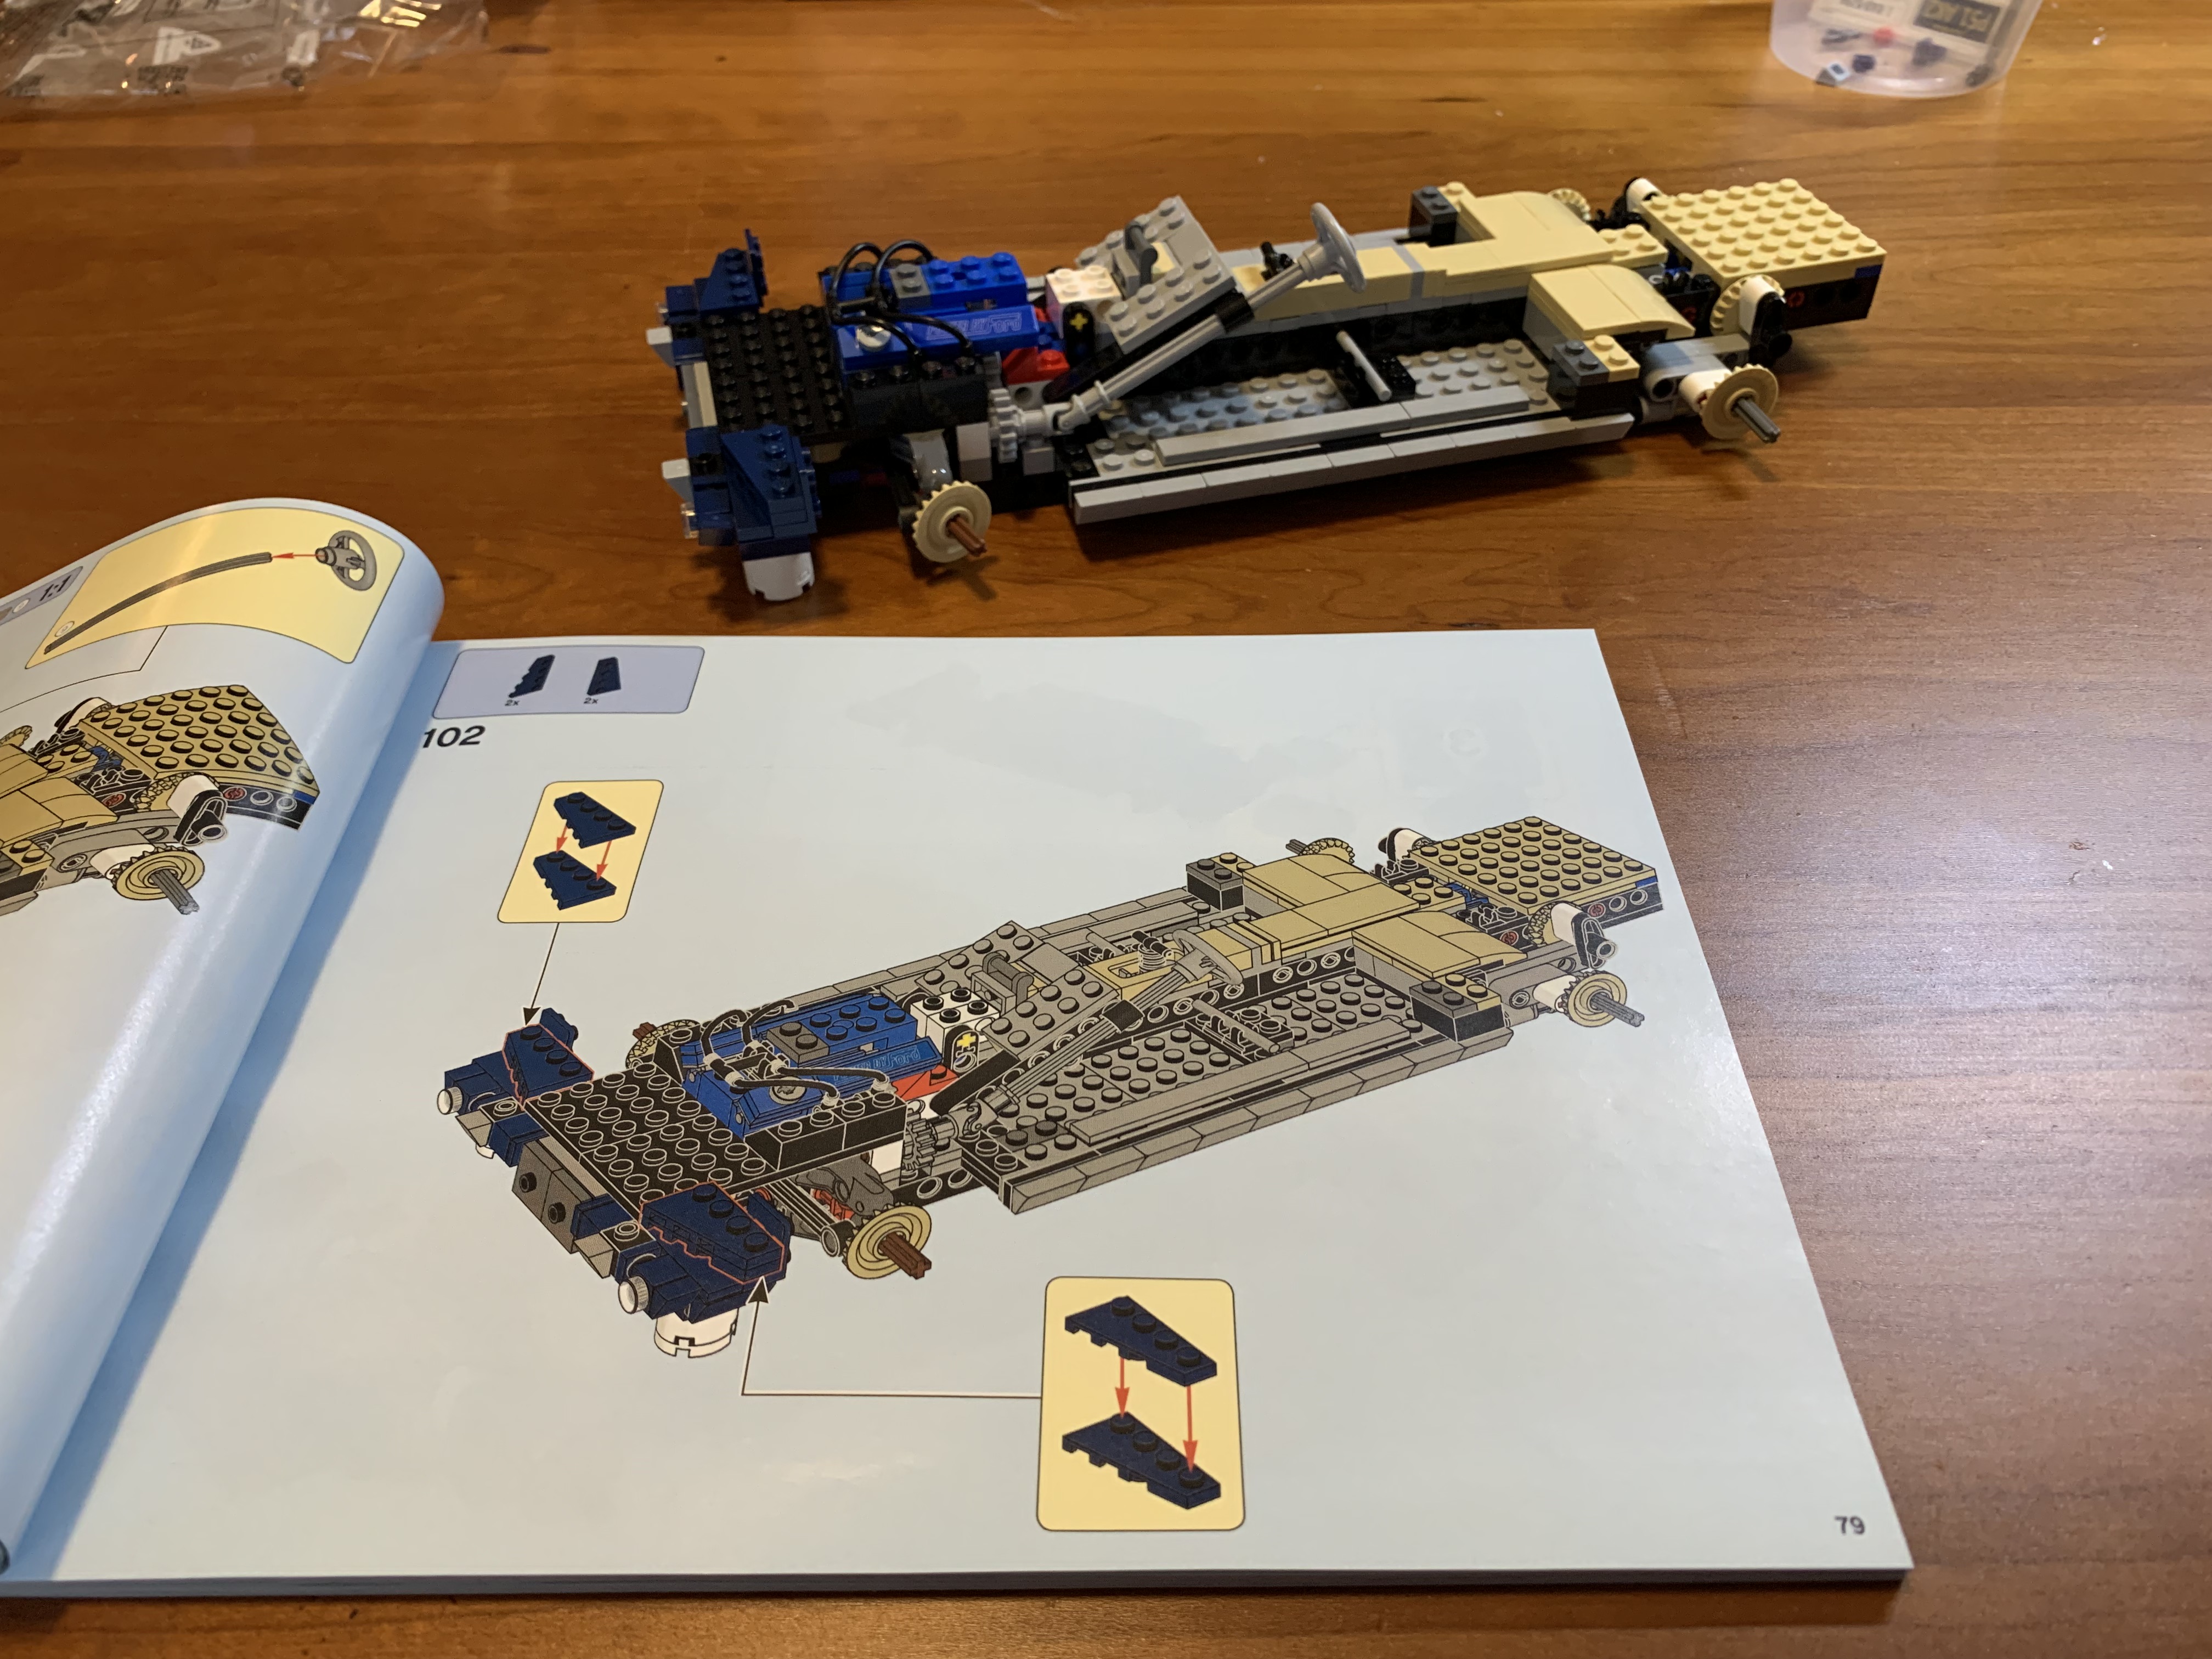
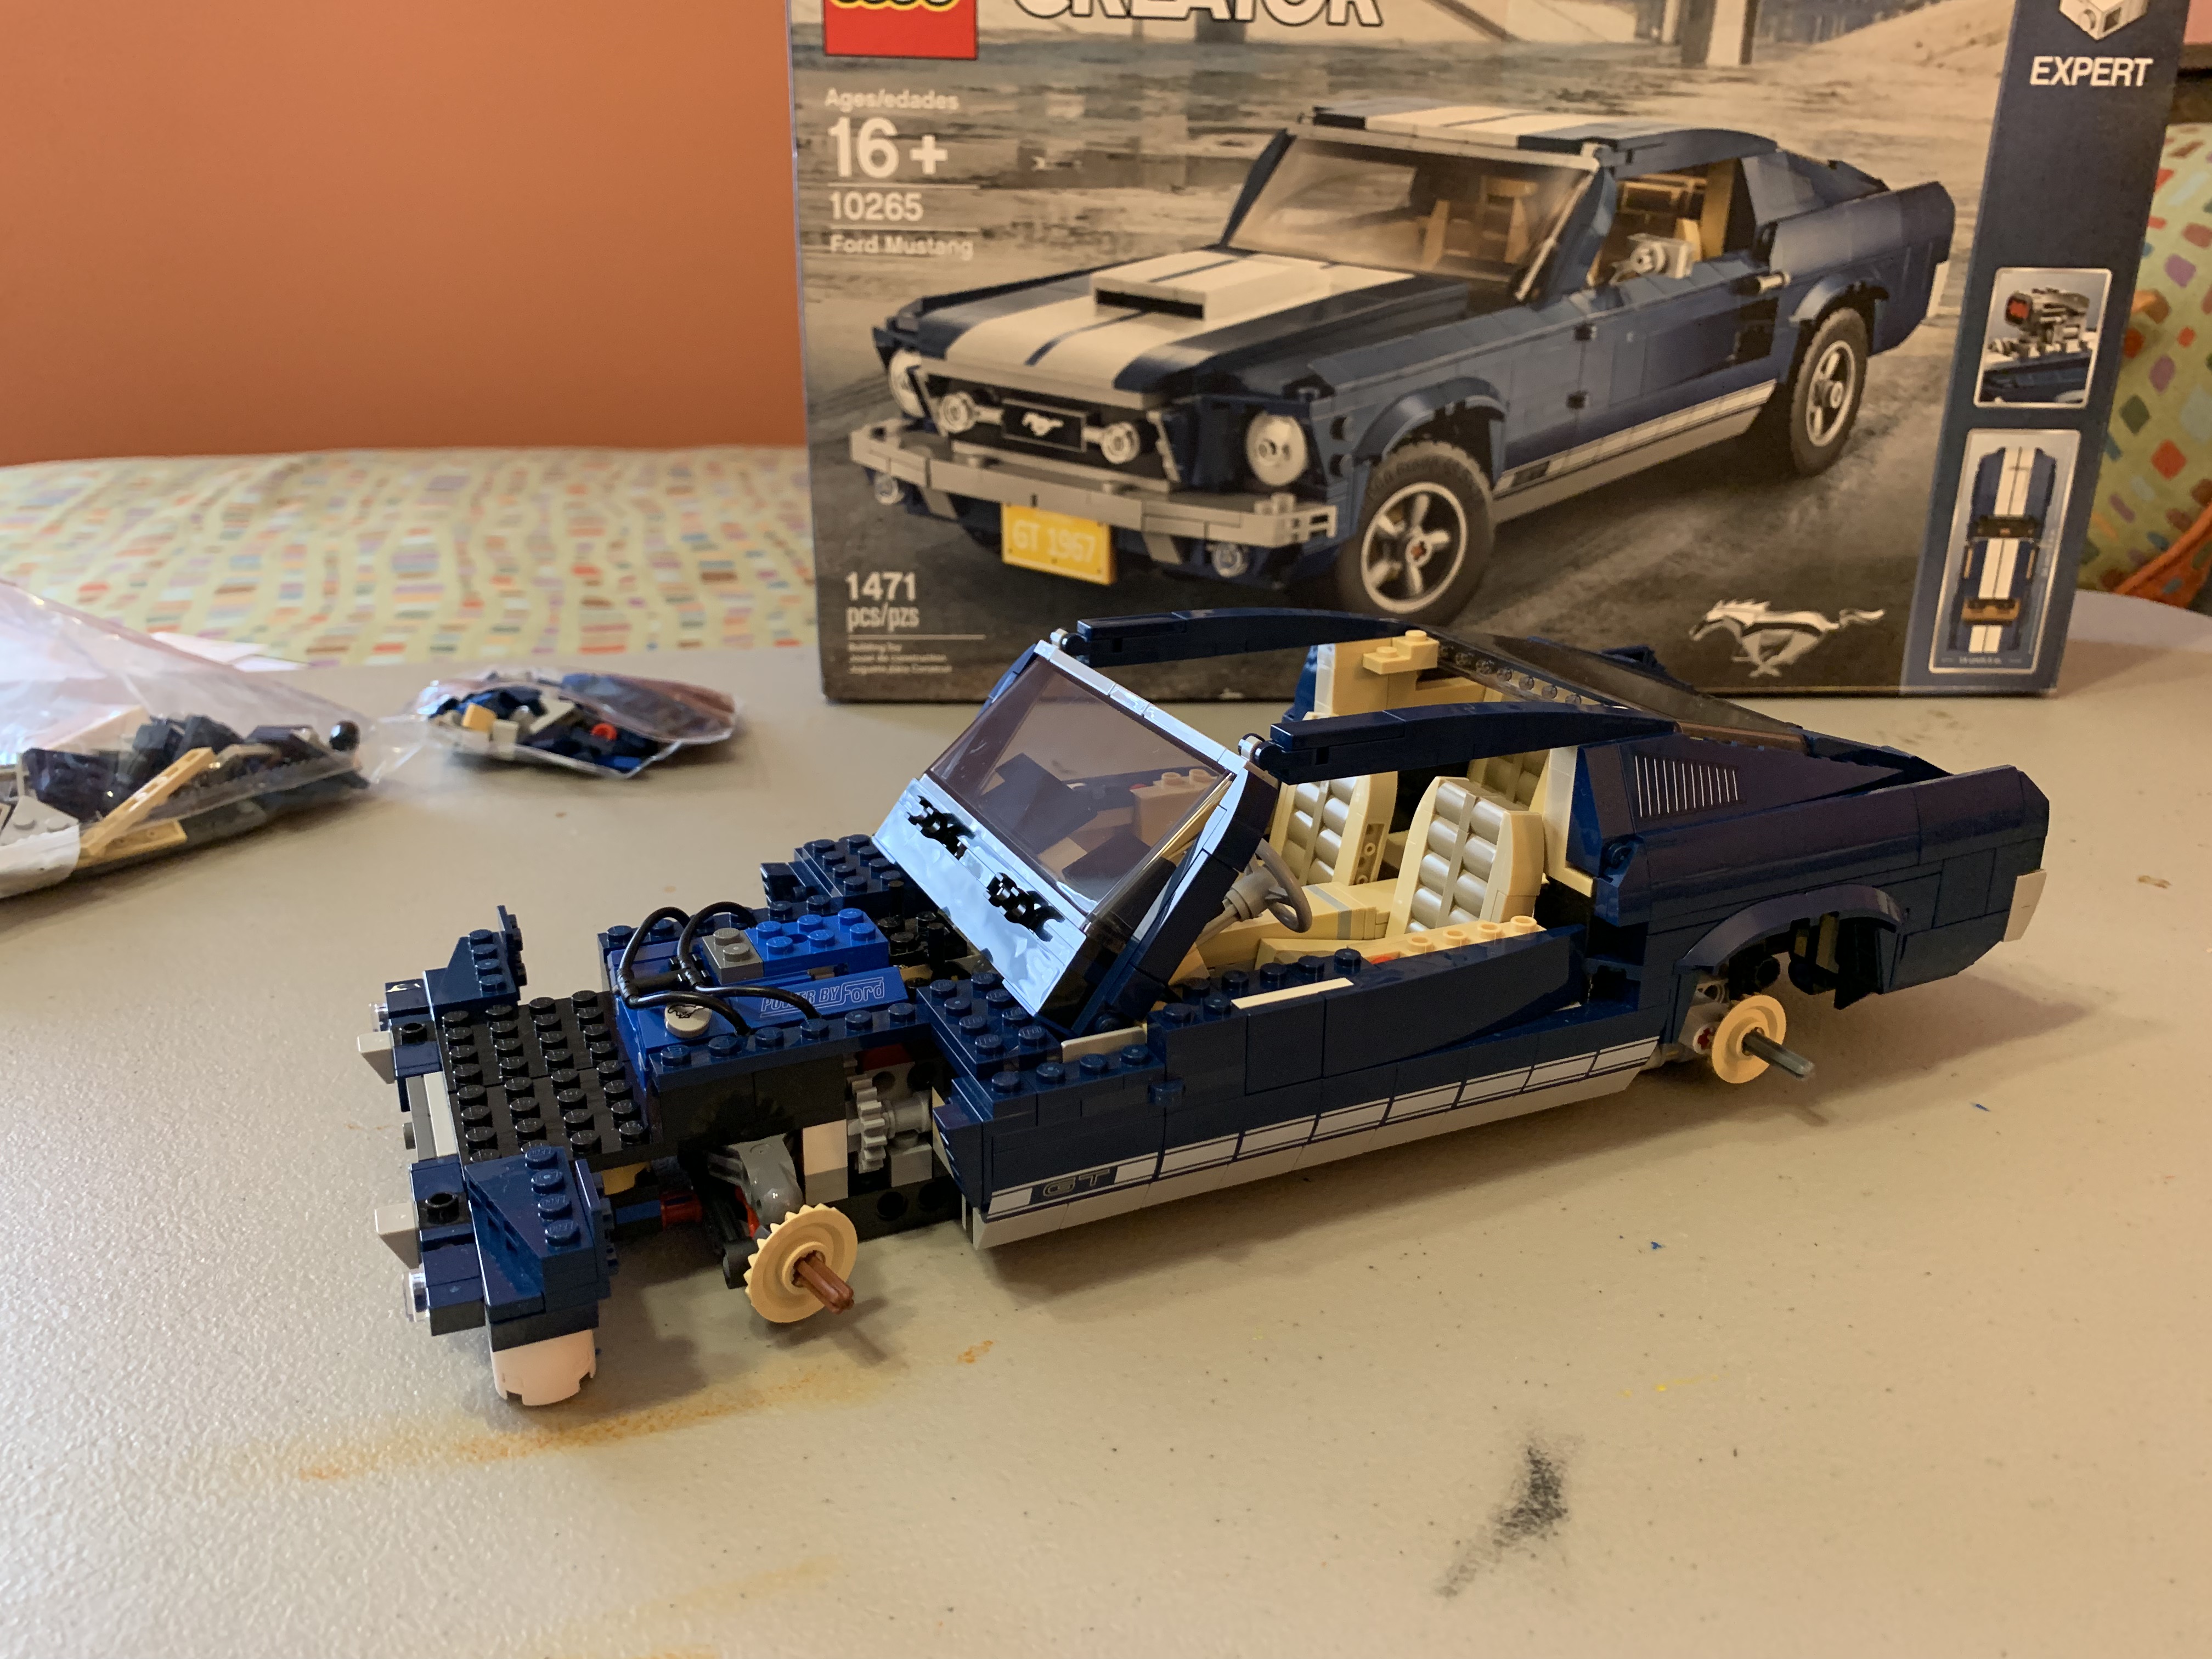
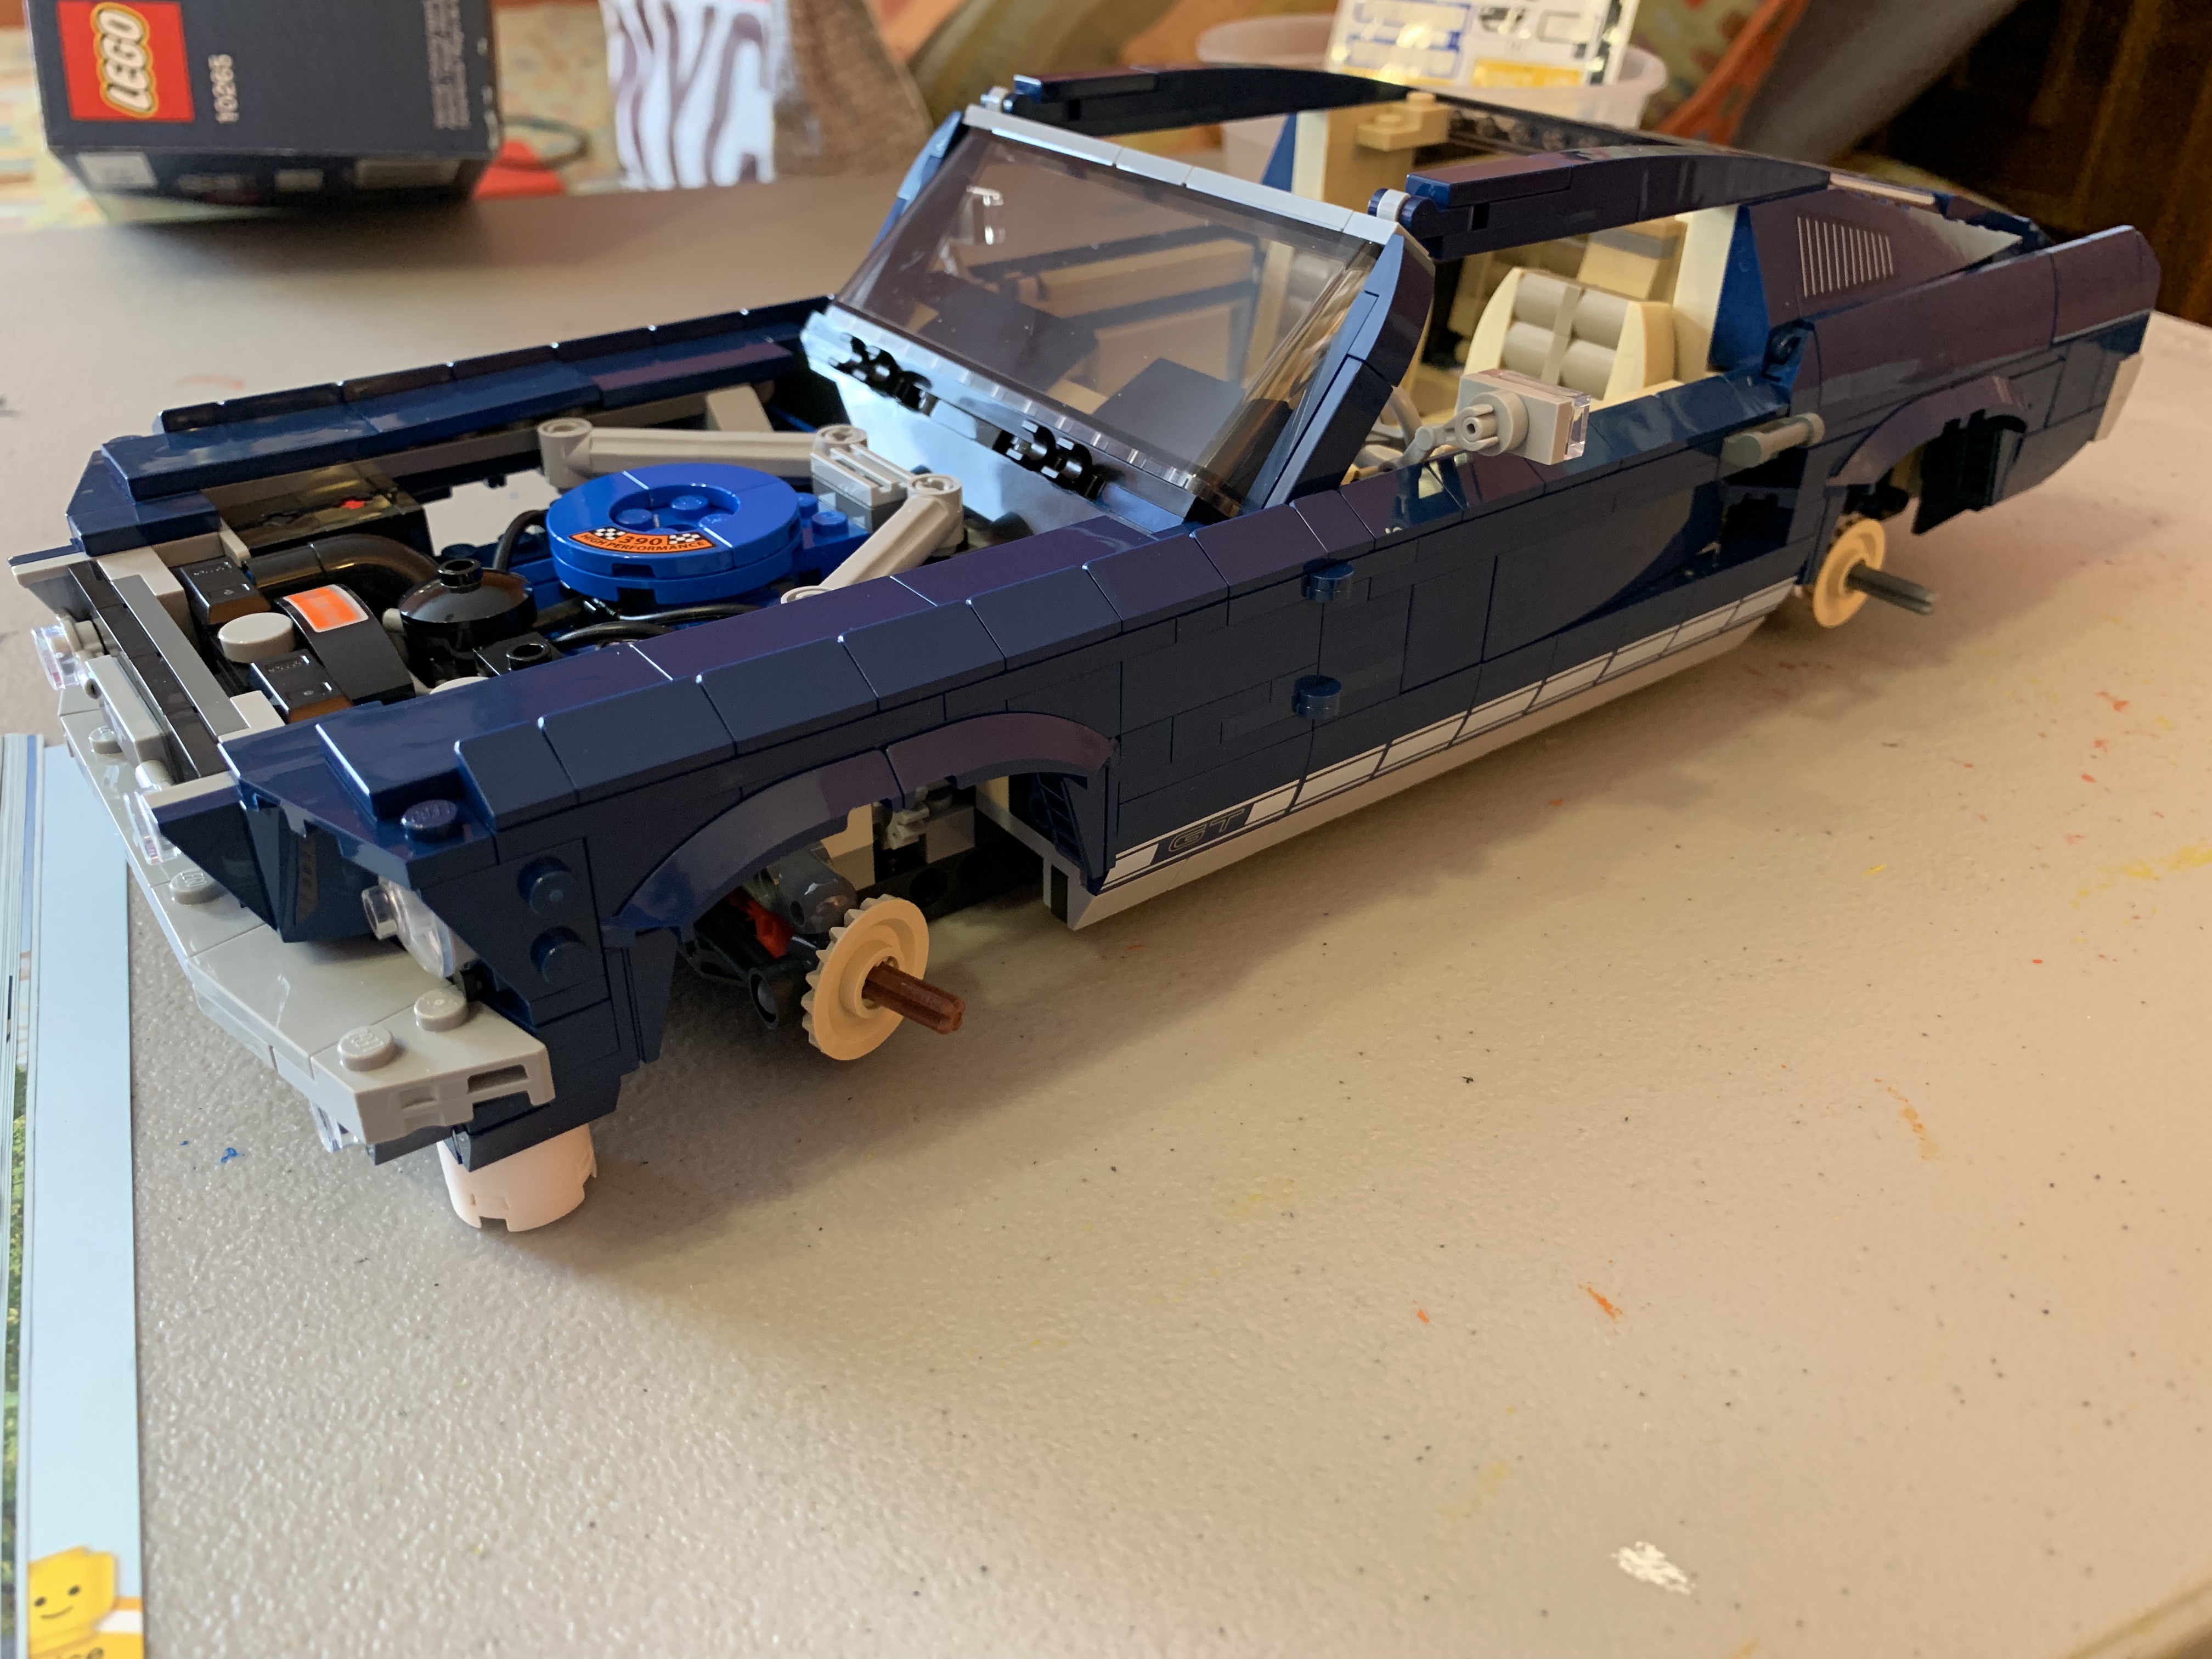
When I was almost at the end of this phase and down to just a few remaining pieces, I realized that I was missing two smooth rectangular body-colored pieces that would attach to the bottom of the A-pillars (the car body structures that support the windshield). The last time this happened, I discovered that I had used the wrong-colored pieces in a previous step. But this time, I did not have the right shapes remaining in a different color. I searched the floor to make sure I had not dropped any pieces but found none.
Looking into the unopened bags, I did not find the same two pieces that I could “borrow” from. Instead, I had to improvise using square pieces of the right color hoping where these would be needed in a future step would not be critical. Attaching the last few pieces, I was pleased with the way the car was looking (You will notice in the photo below that I had to relocate my miniature car factory as its previous real estate was supplanted by the beginning of our winter puzzling).
Next up was the number “5” bags and as before, I sorted pieces into similar colored piles, except for the bag of really small pieces which I kept together.
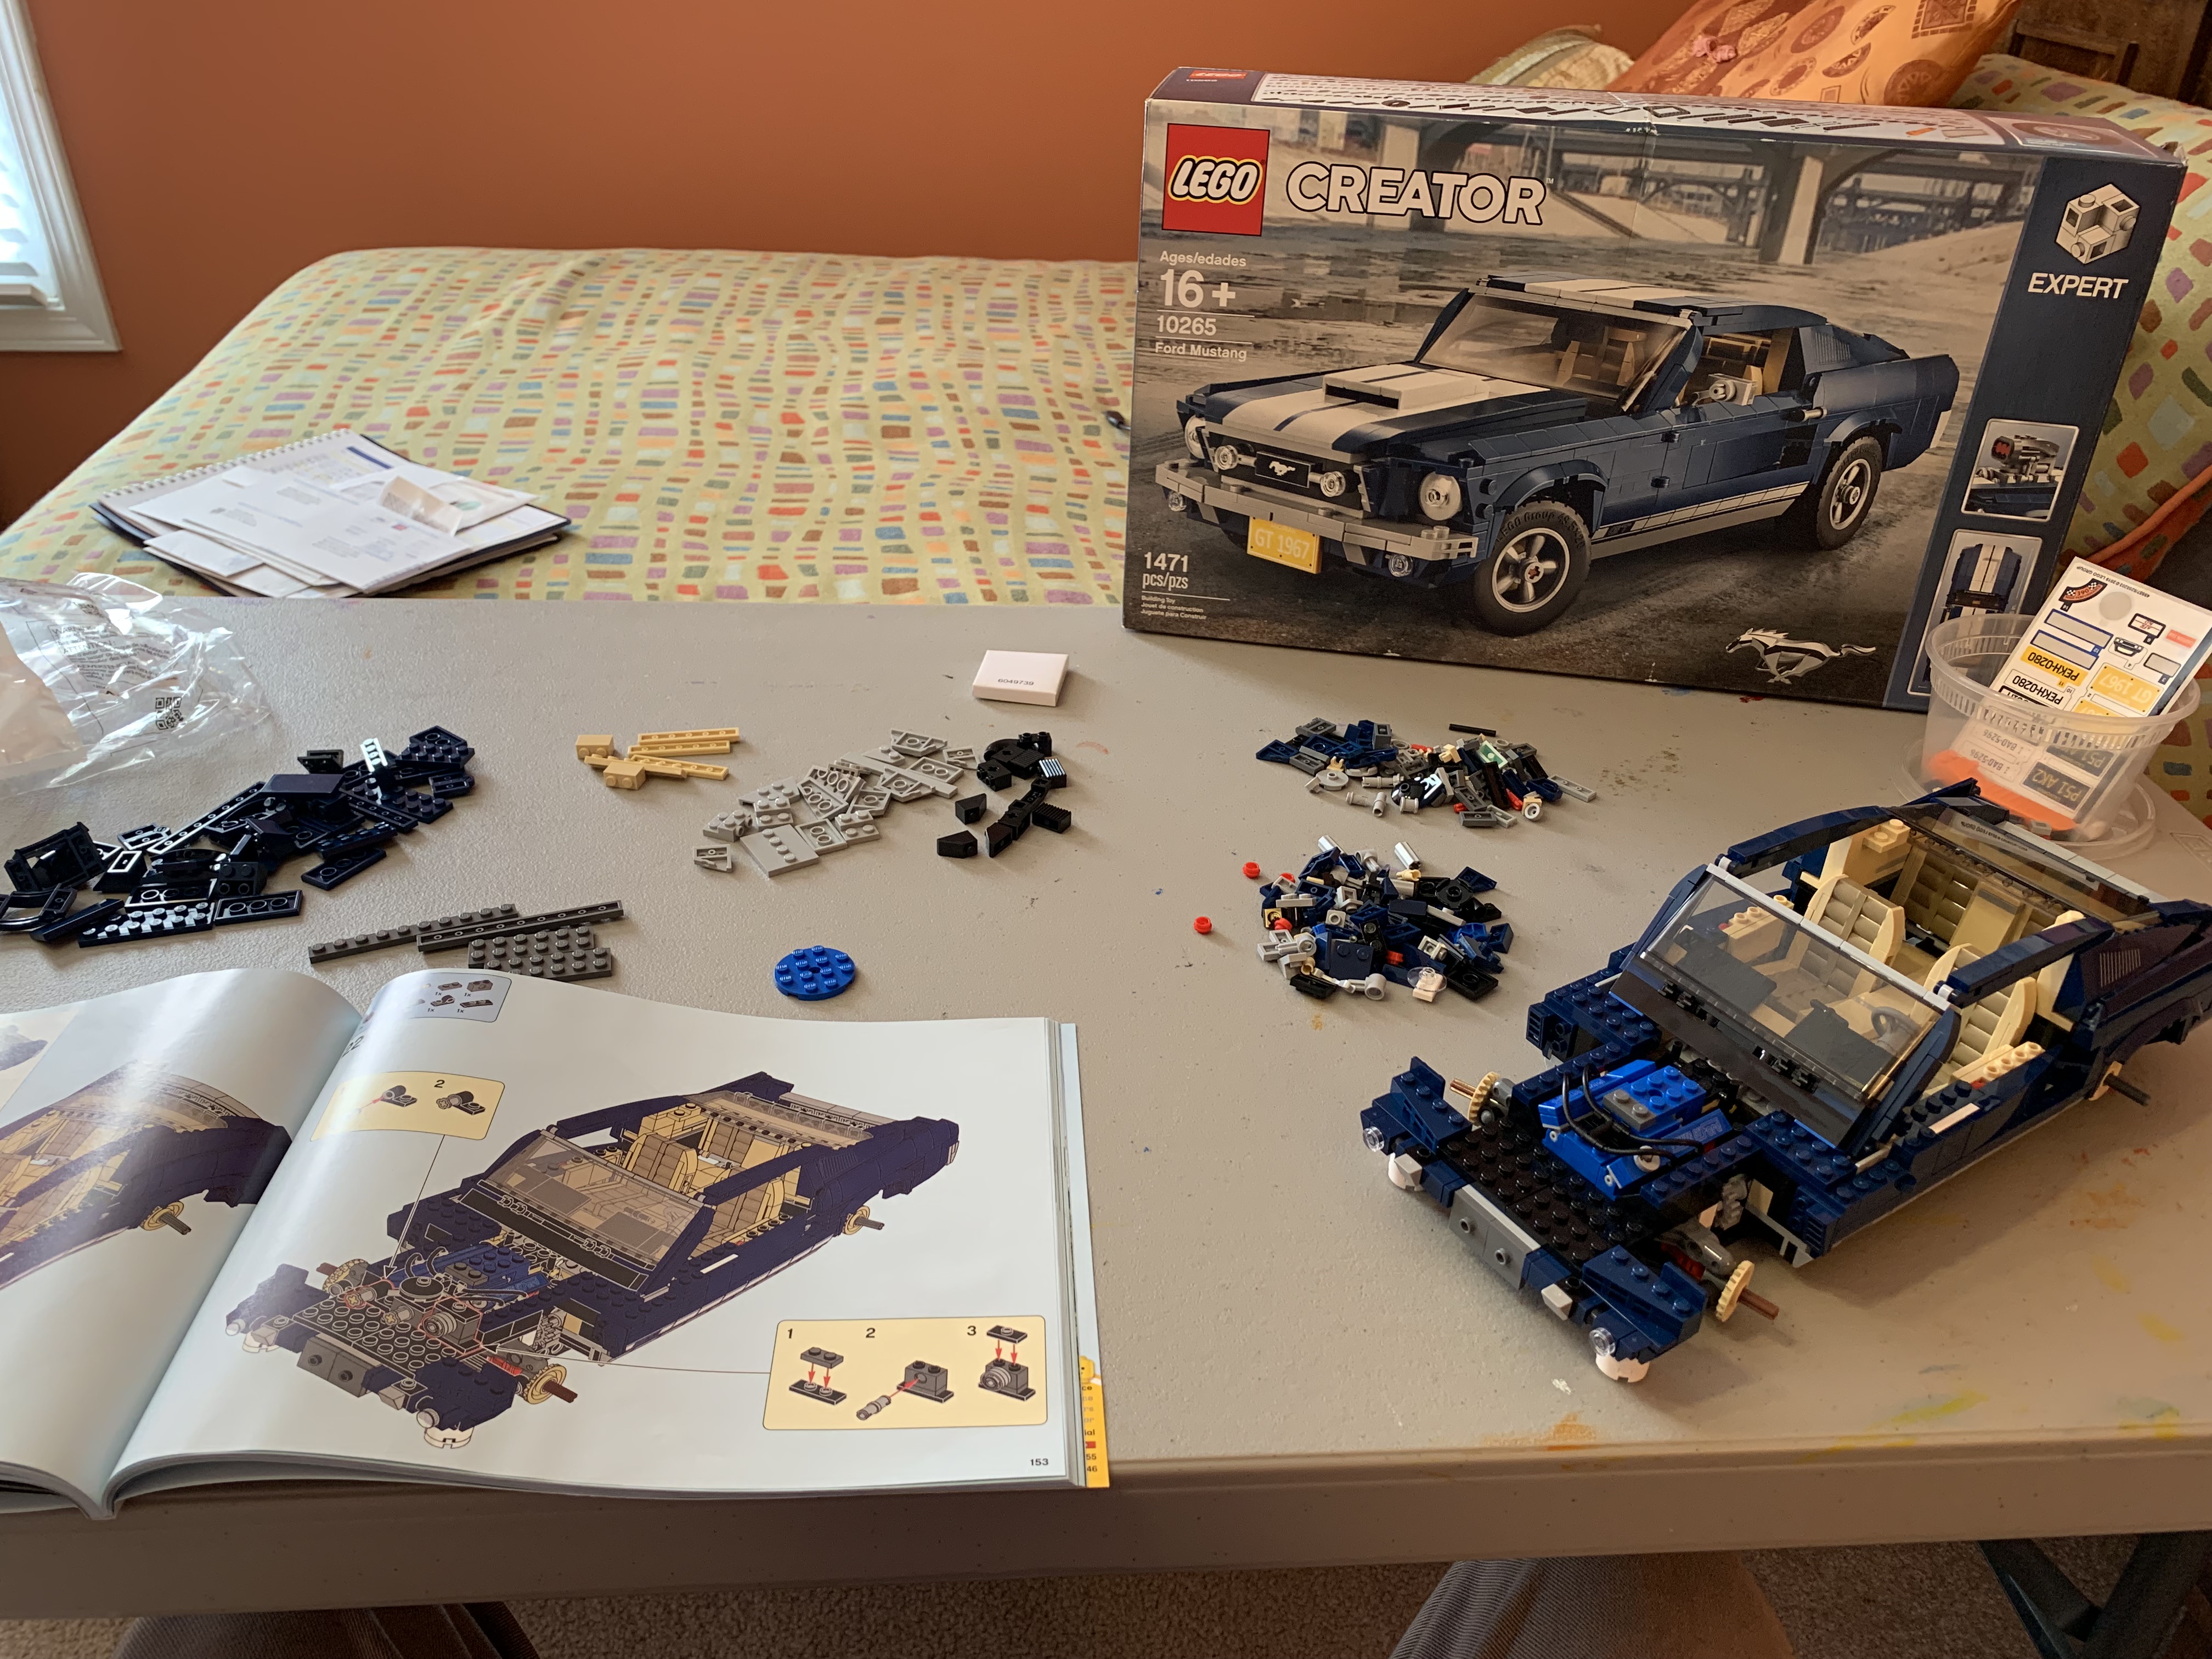
Once I was about halfway through with these bags, I had finished a realistic looking engine bay.
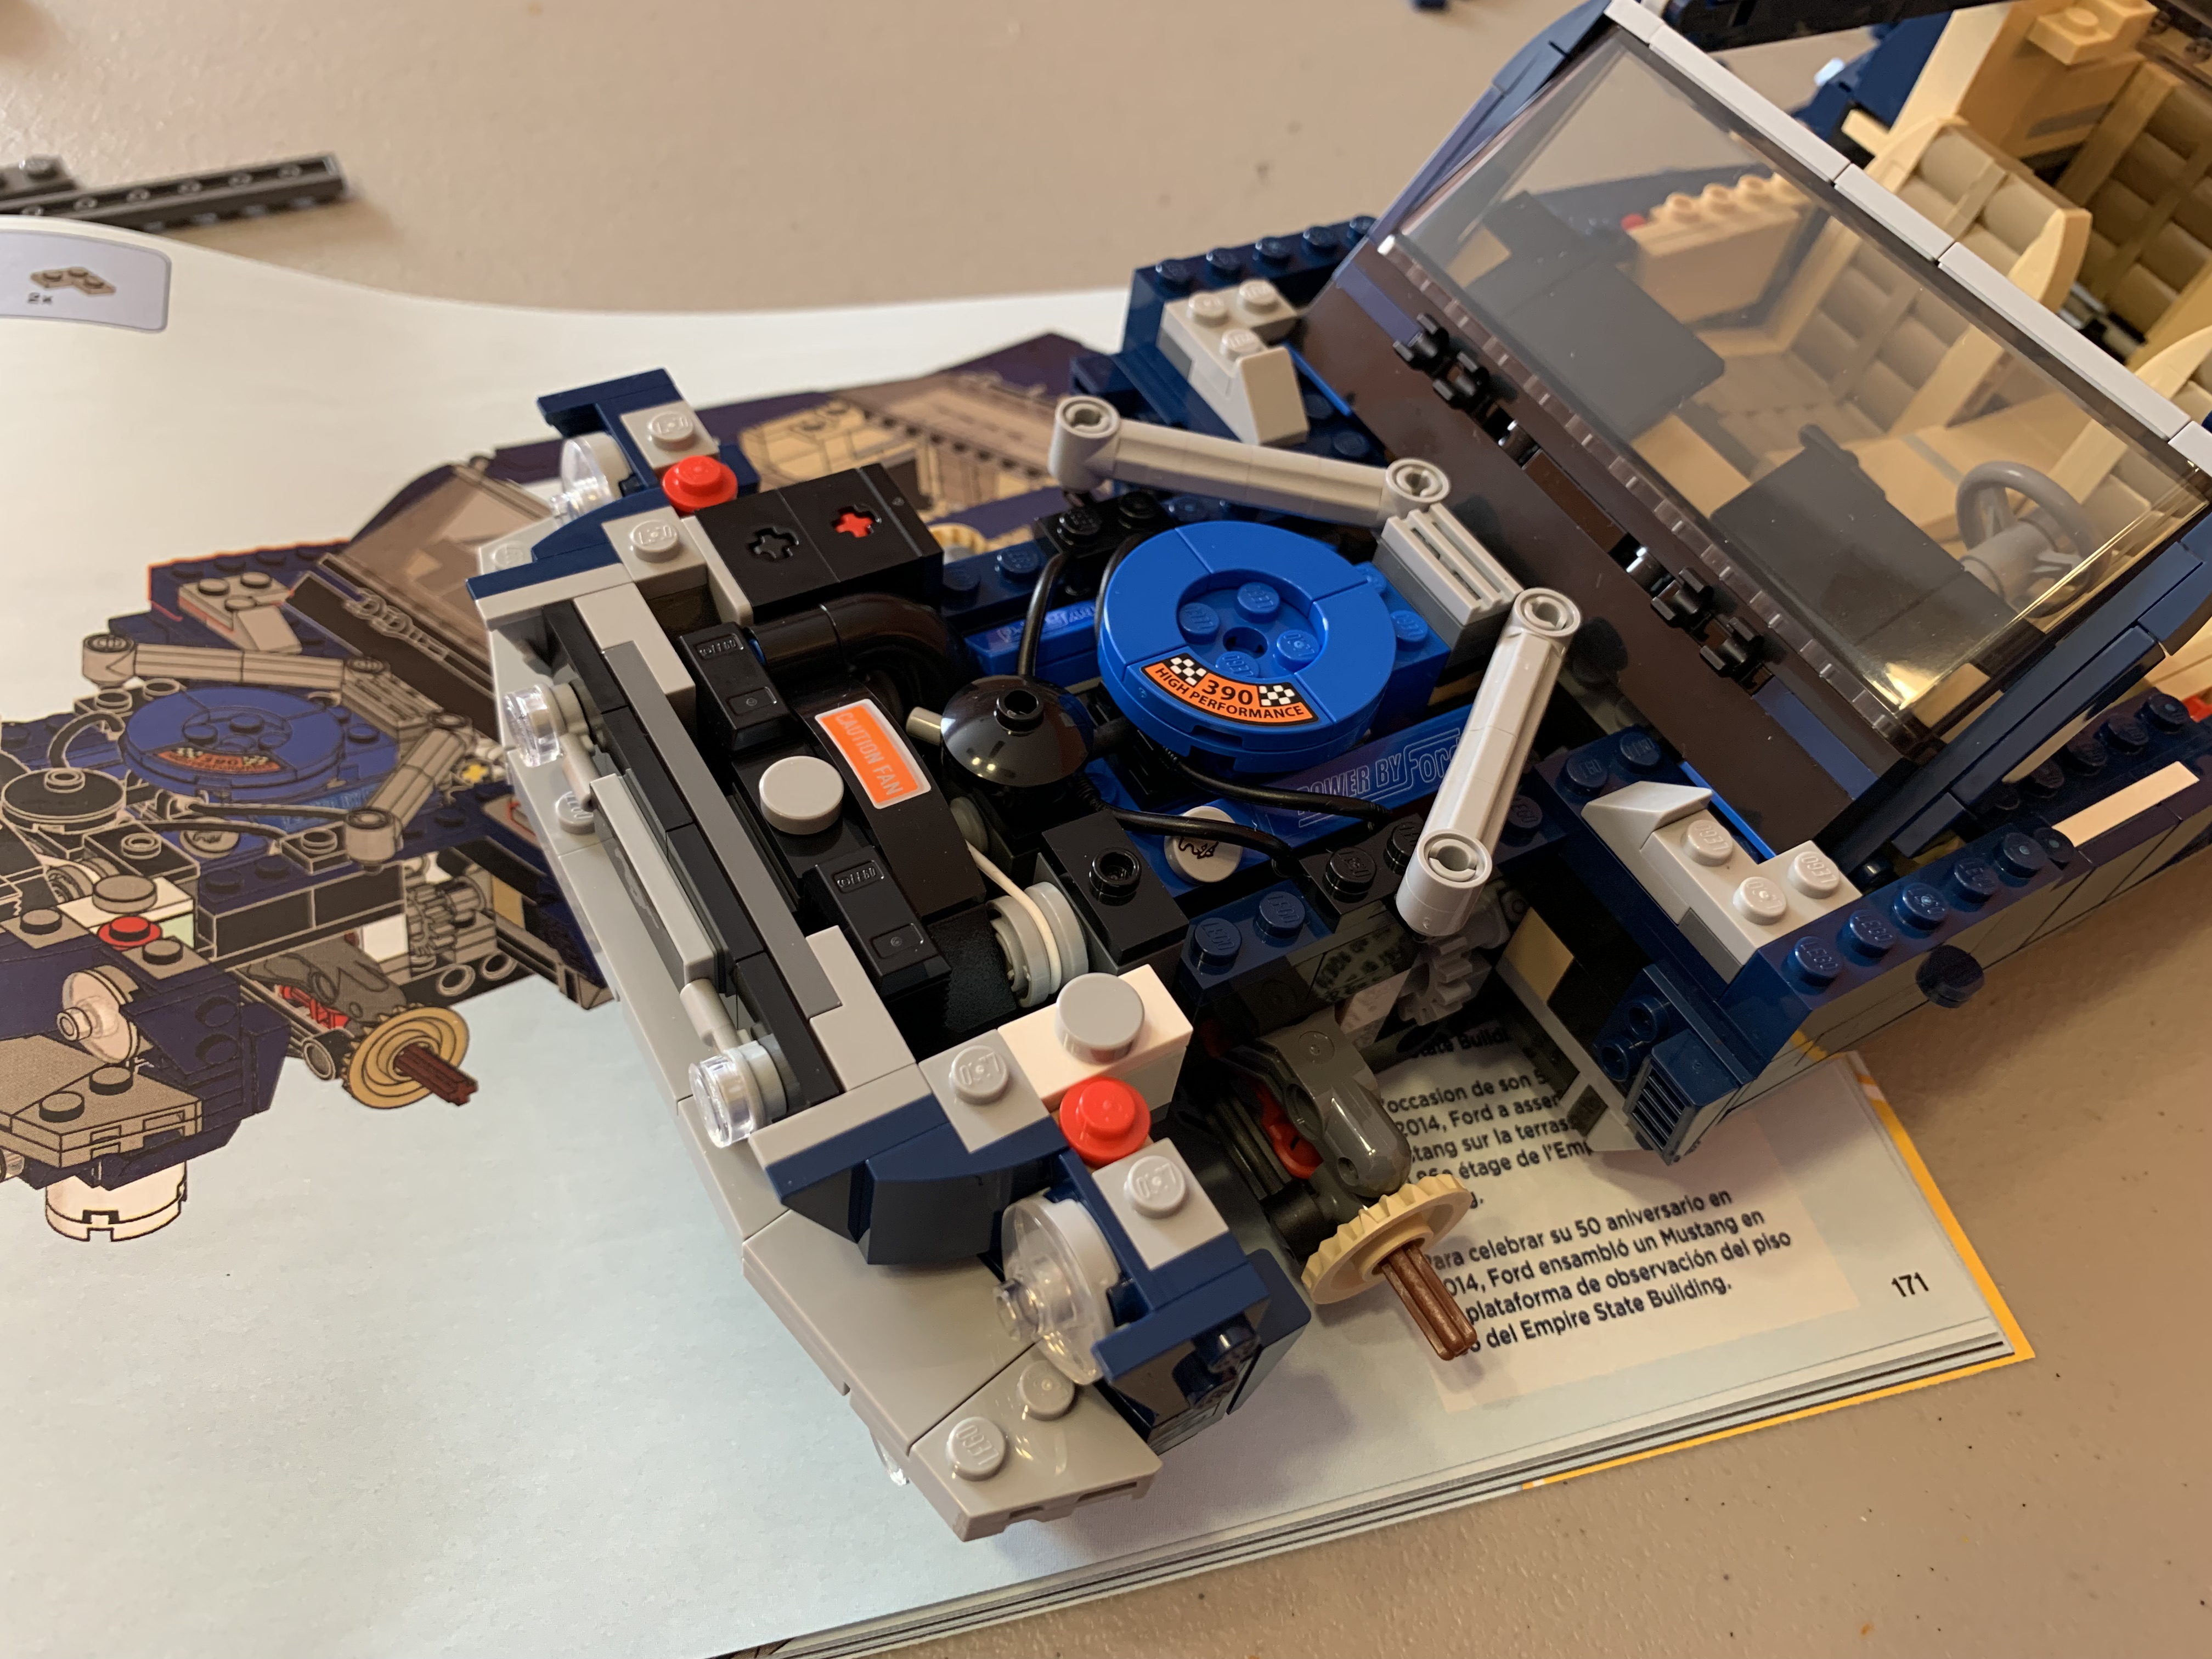
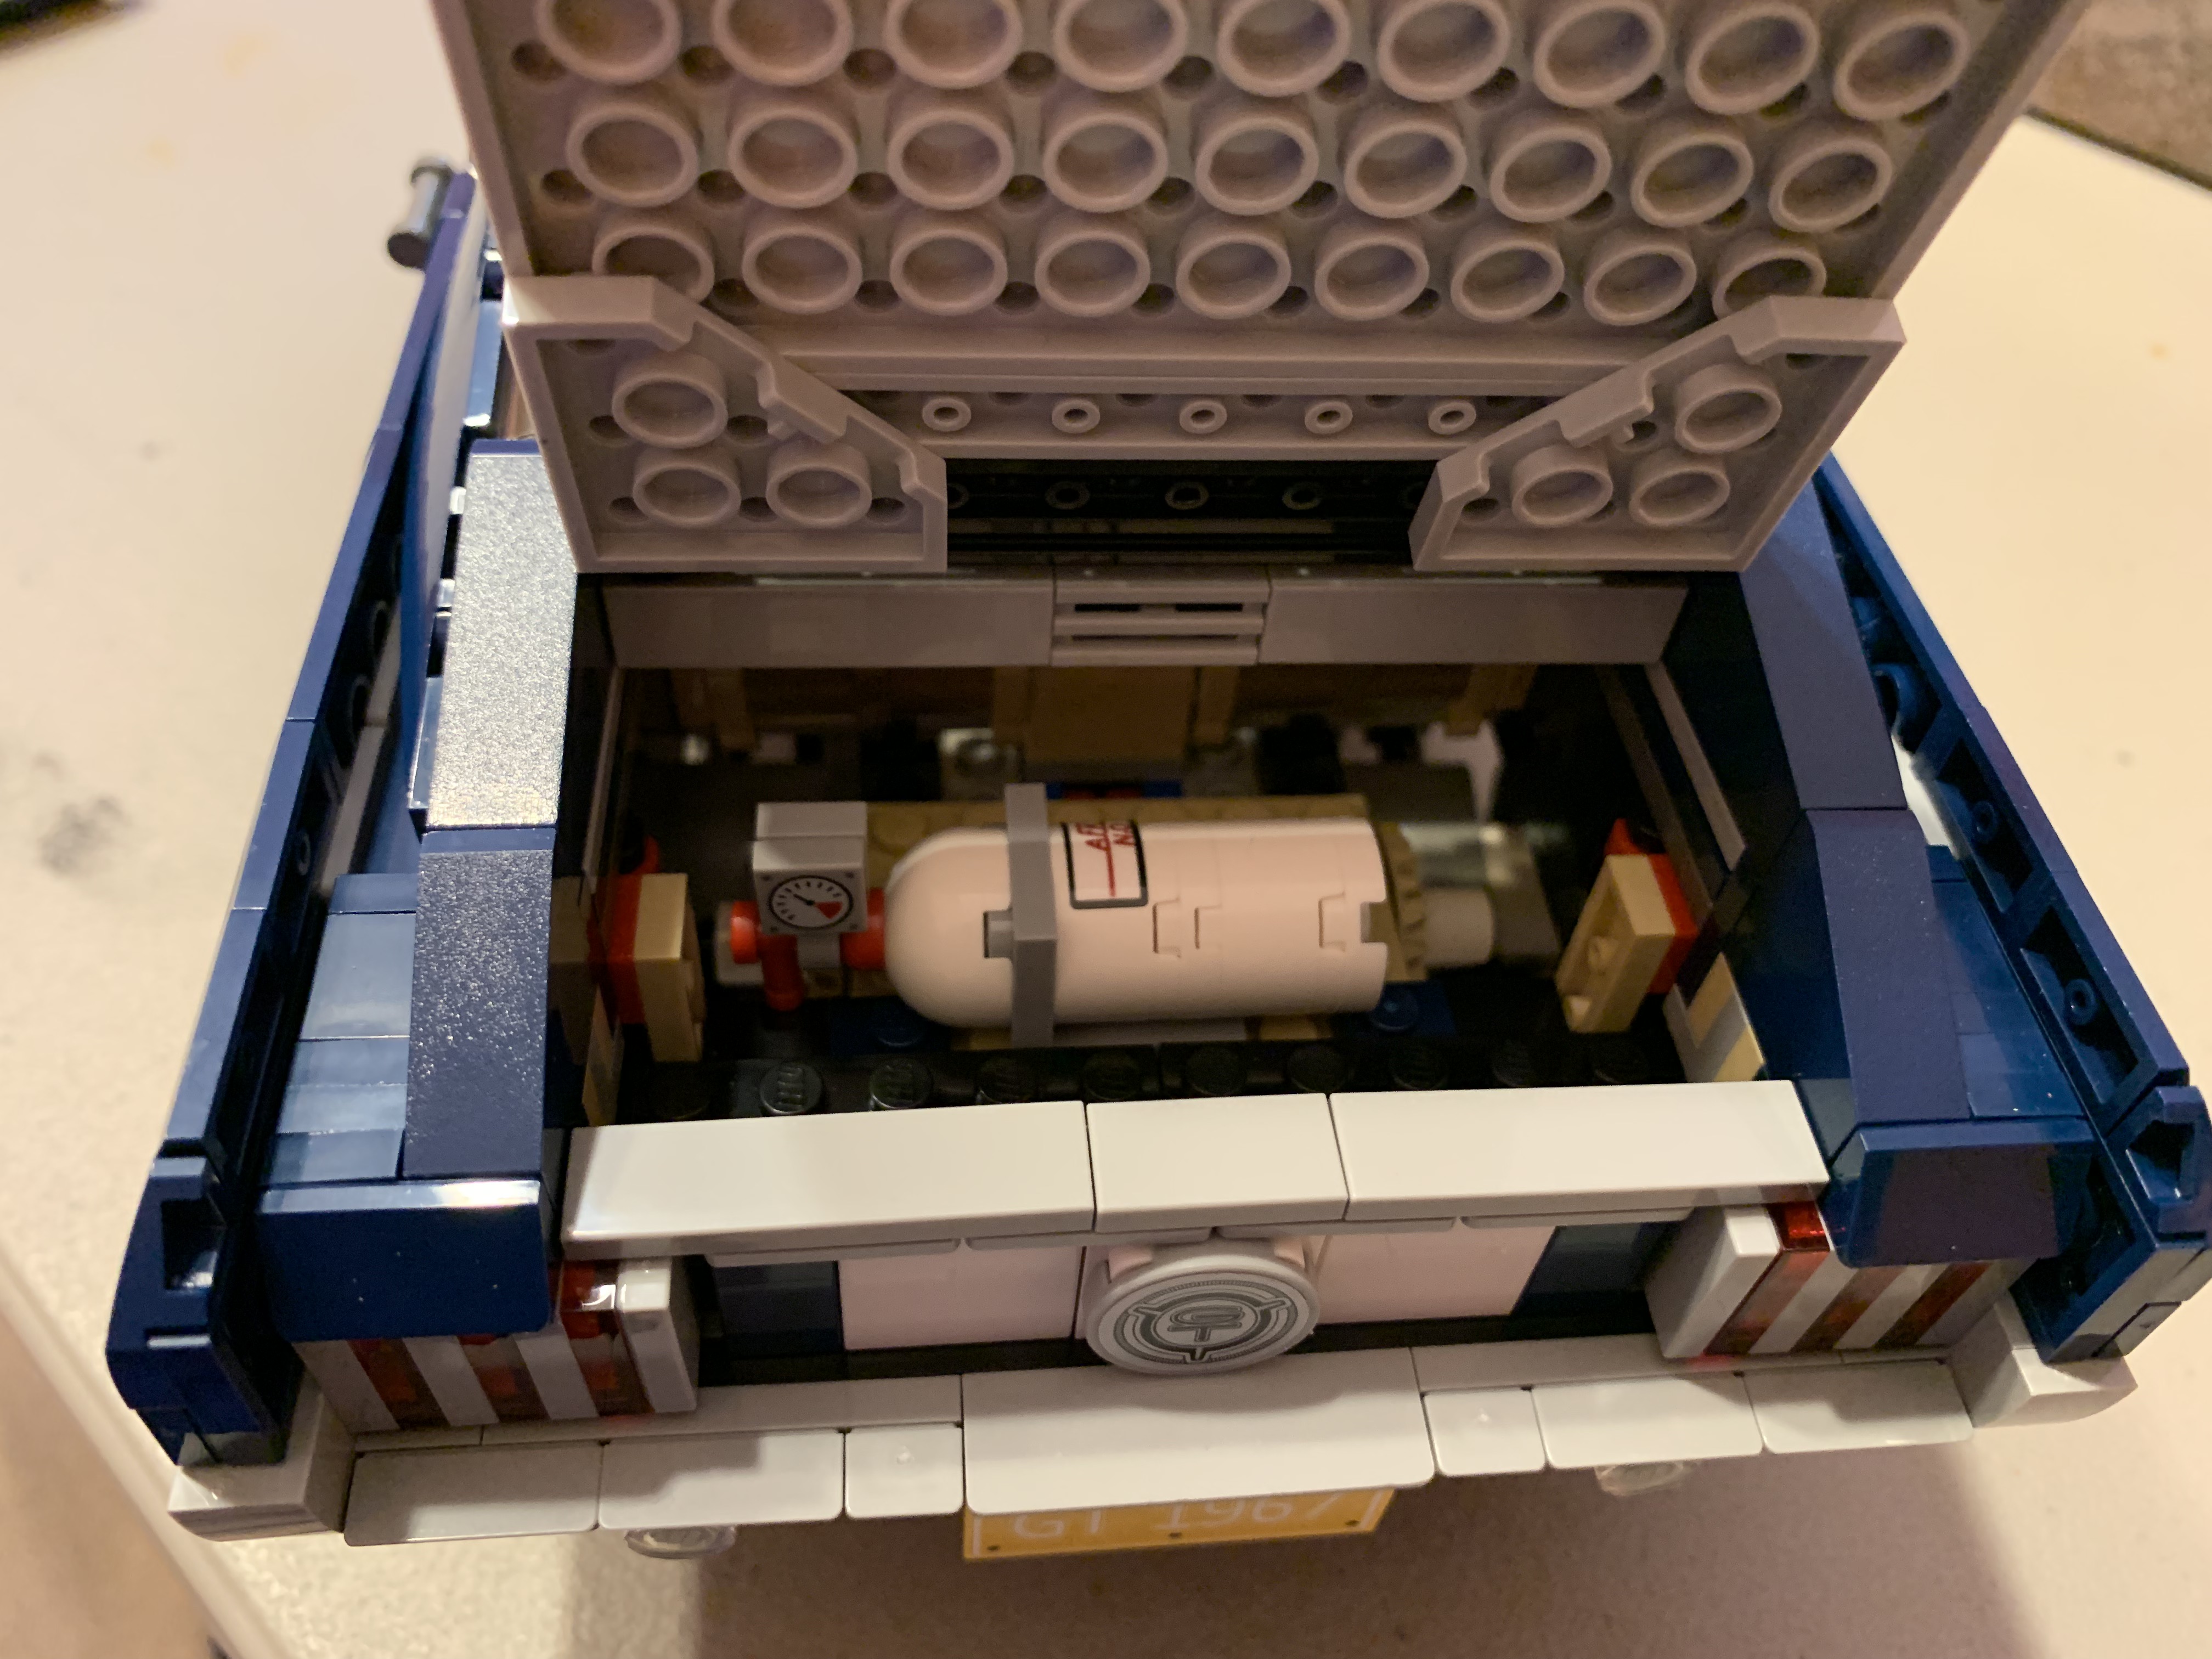
When I got down to the last few pieces, I discovered that I needed the small pieces I had “borrowed” from this bag. I really had no choice but to remove them from where I had added them. But once I had completed this phase, I discovered where the pieces had been attached to the A-pillars was not even visible with the body panels added so their absence was not even noticeable.
With just the number “6” bags left; this model was definitely taking on the look of a car nearing the end of its assembly line.
Emptying out and sorting the number “6” bags, I made quick work of completing the model and I was actually surprised the build was complete as I still had a number of pieces left over.
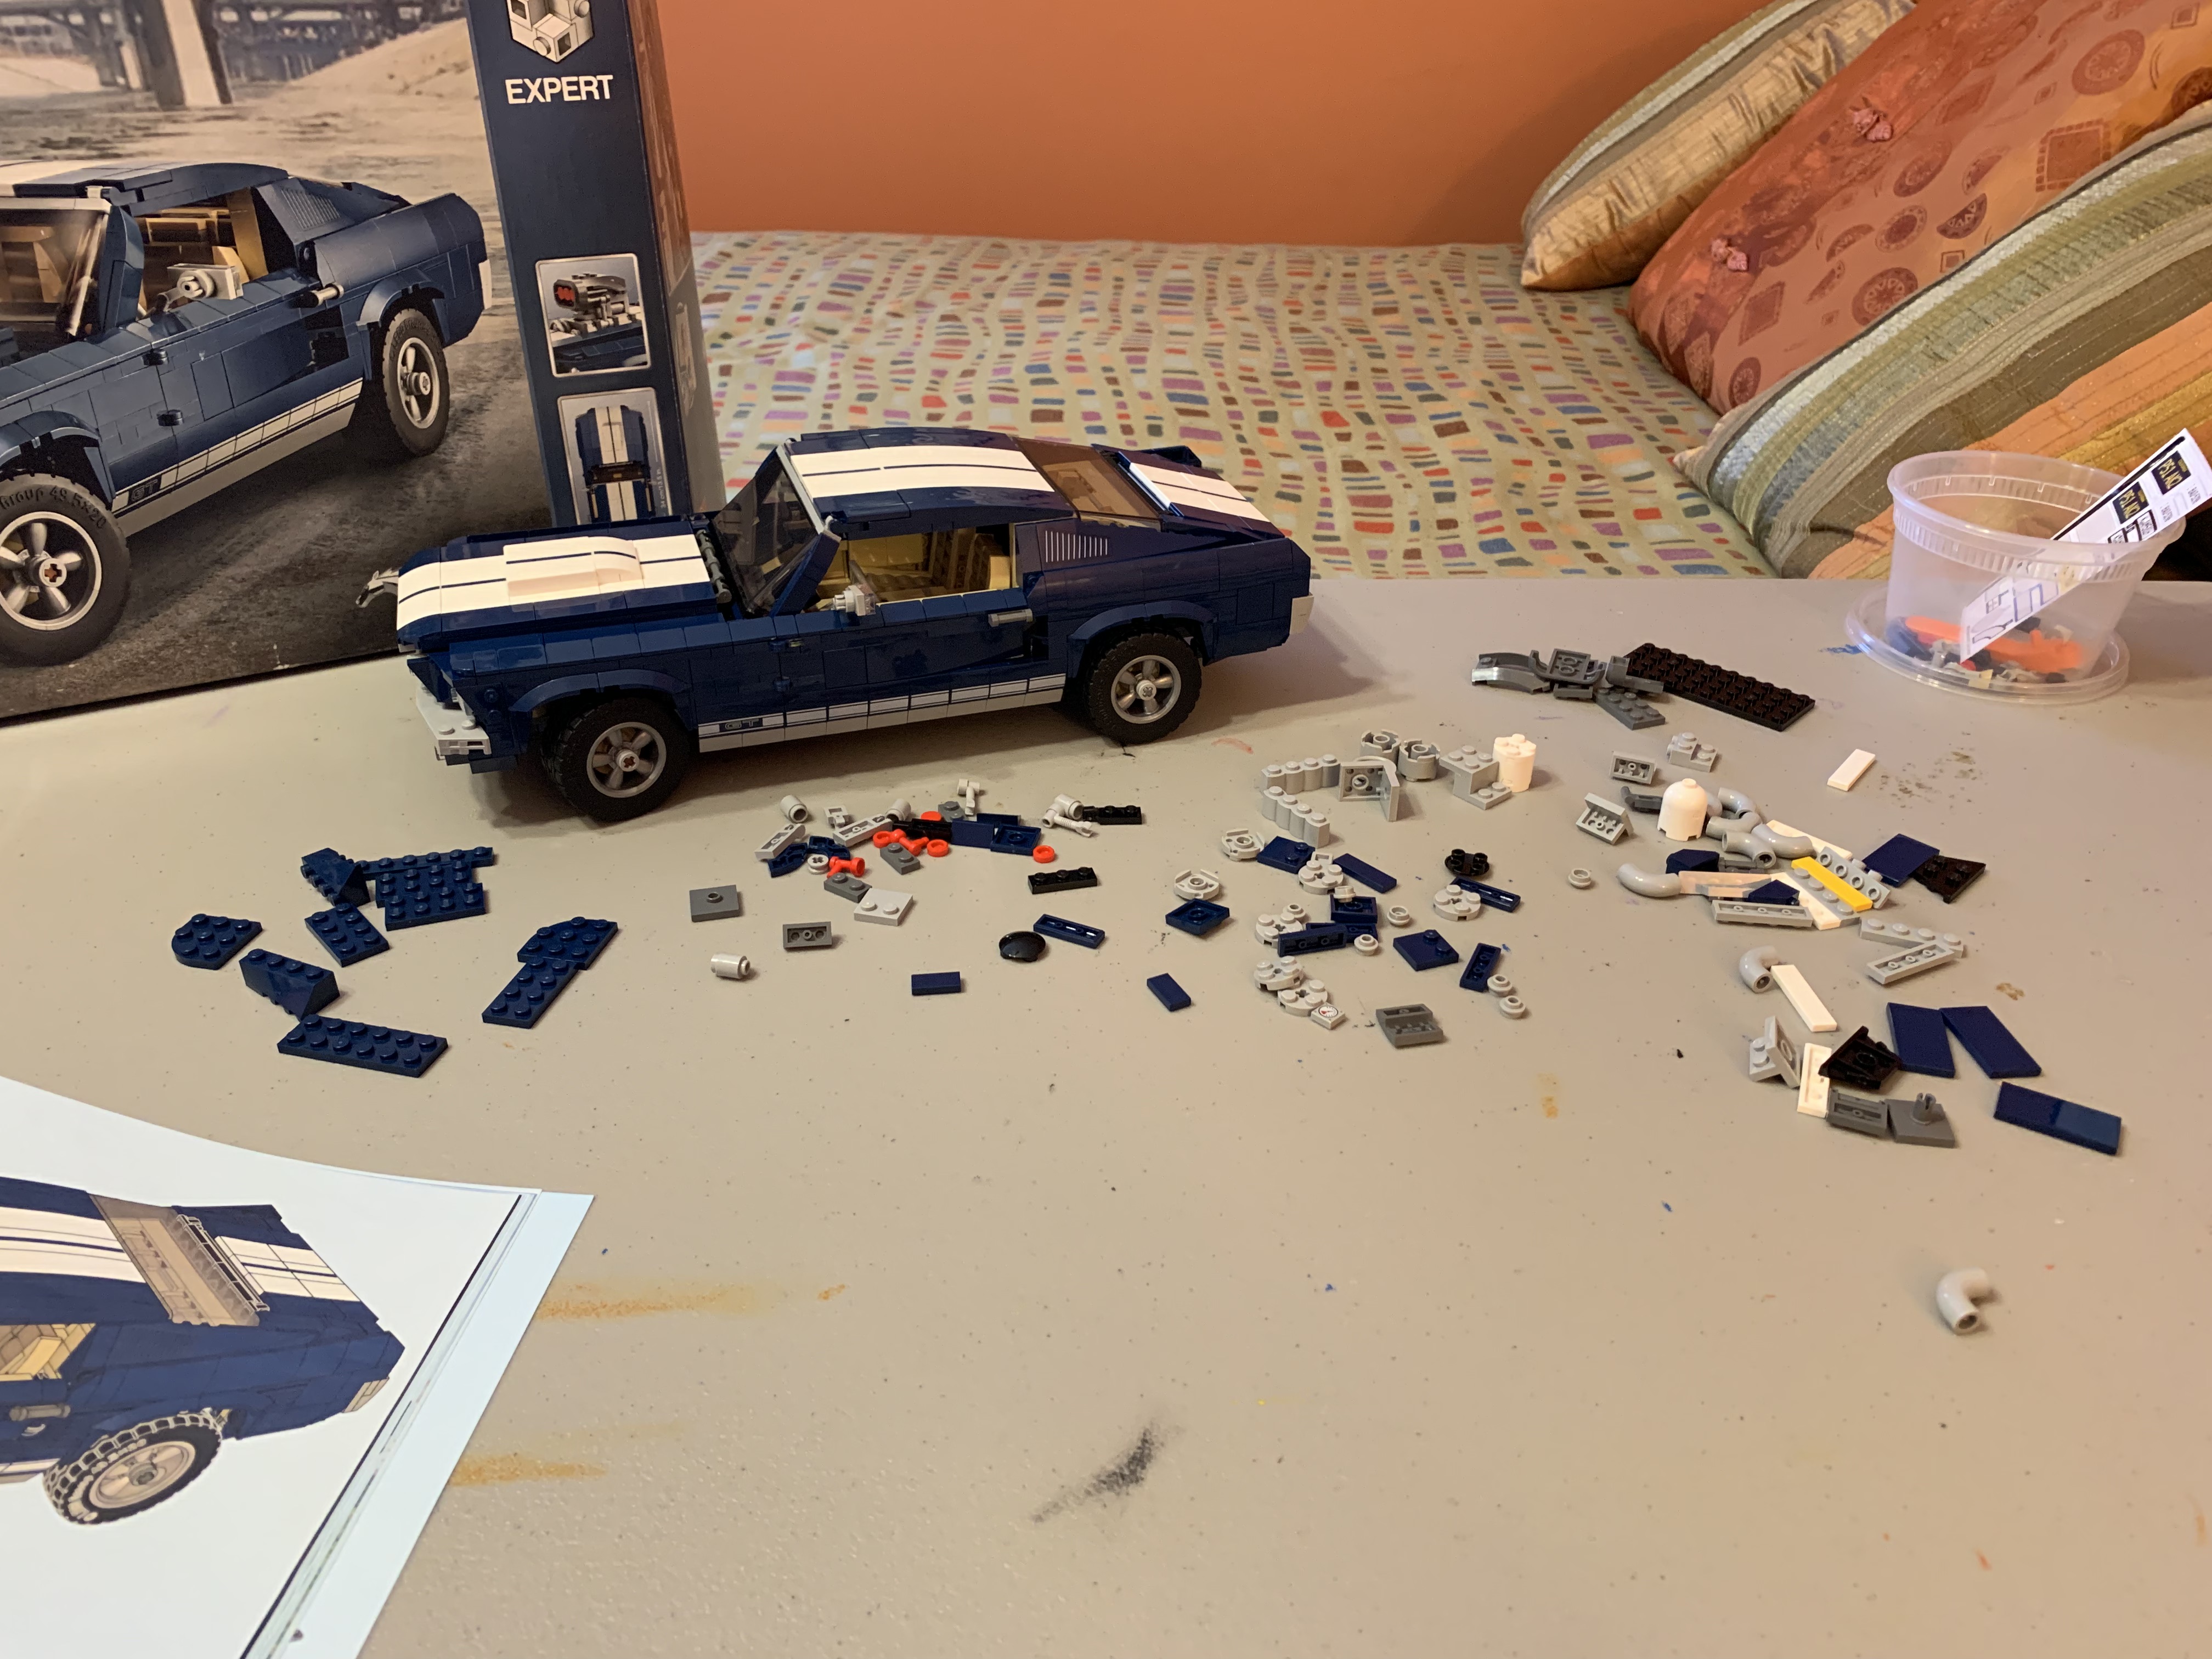
But then I remembered the extra pieces were for the customization option as shown on the back of the box.
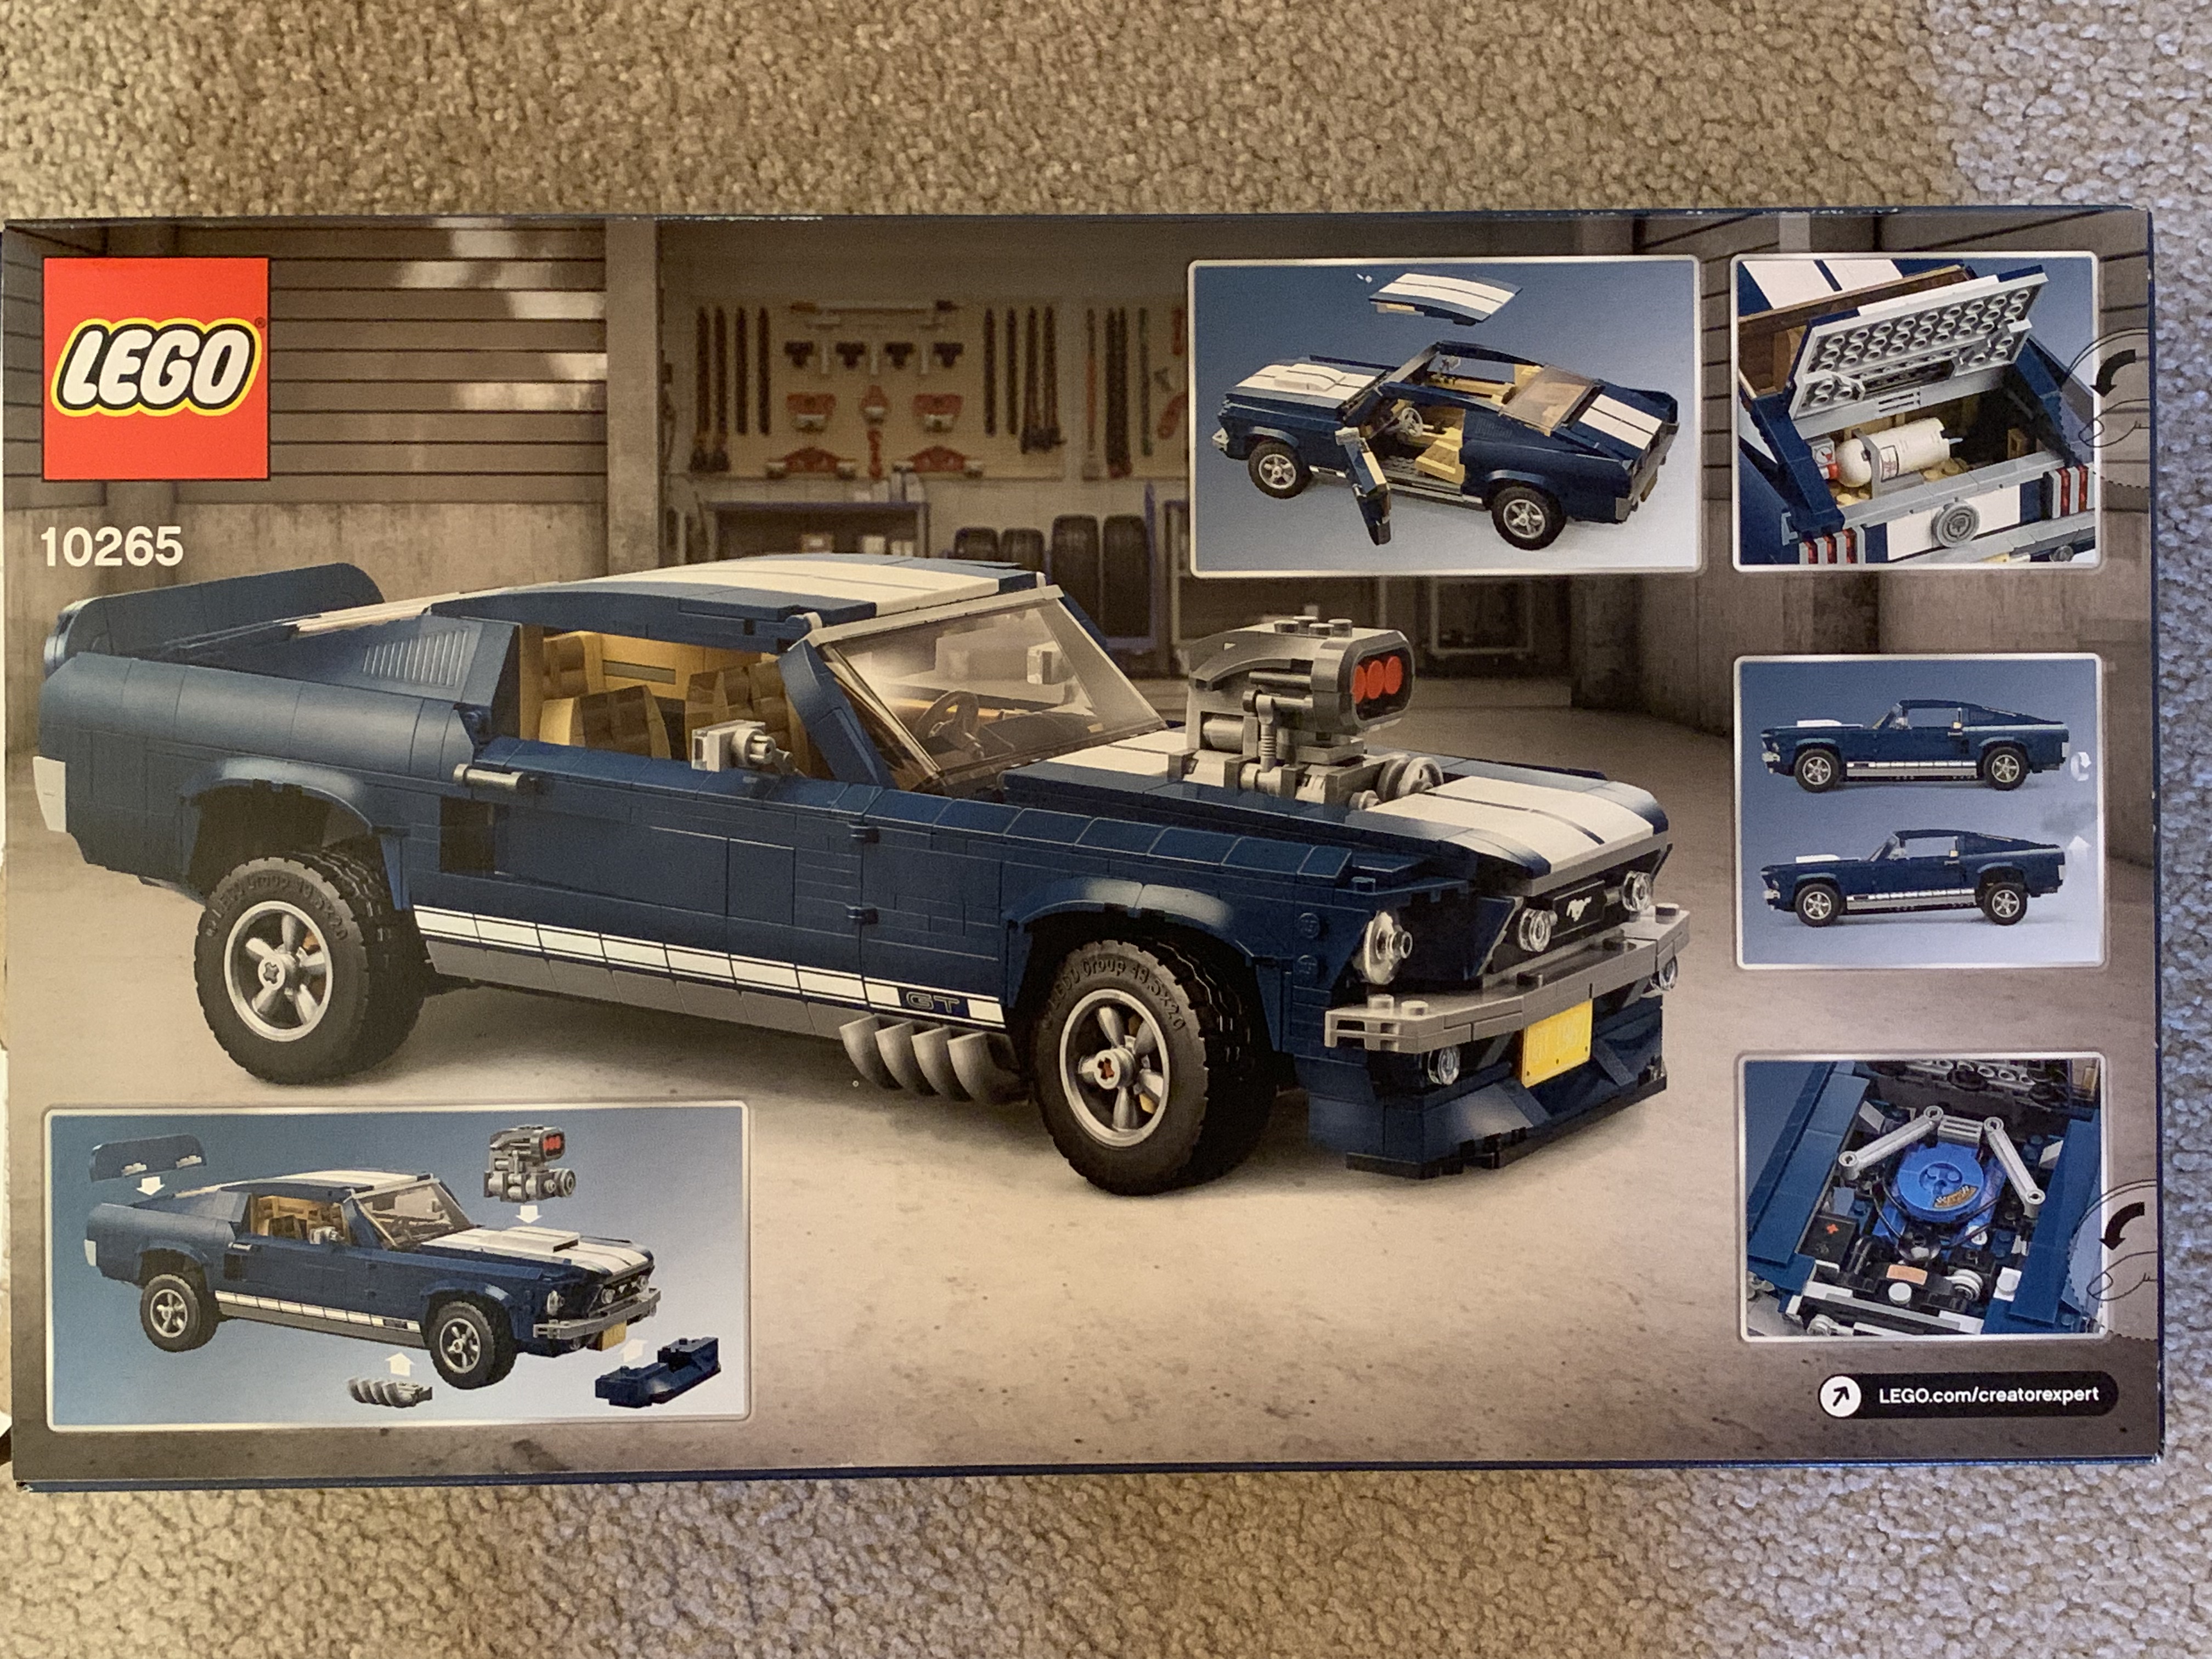
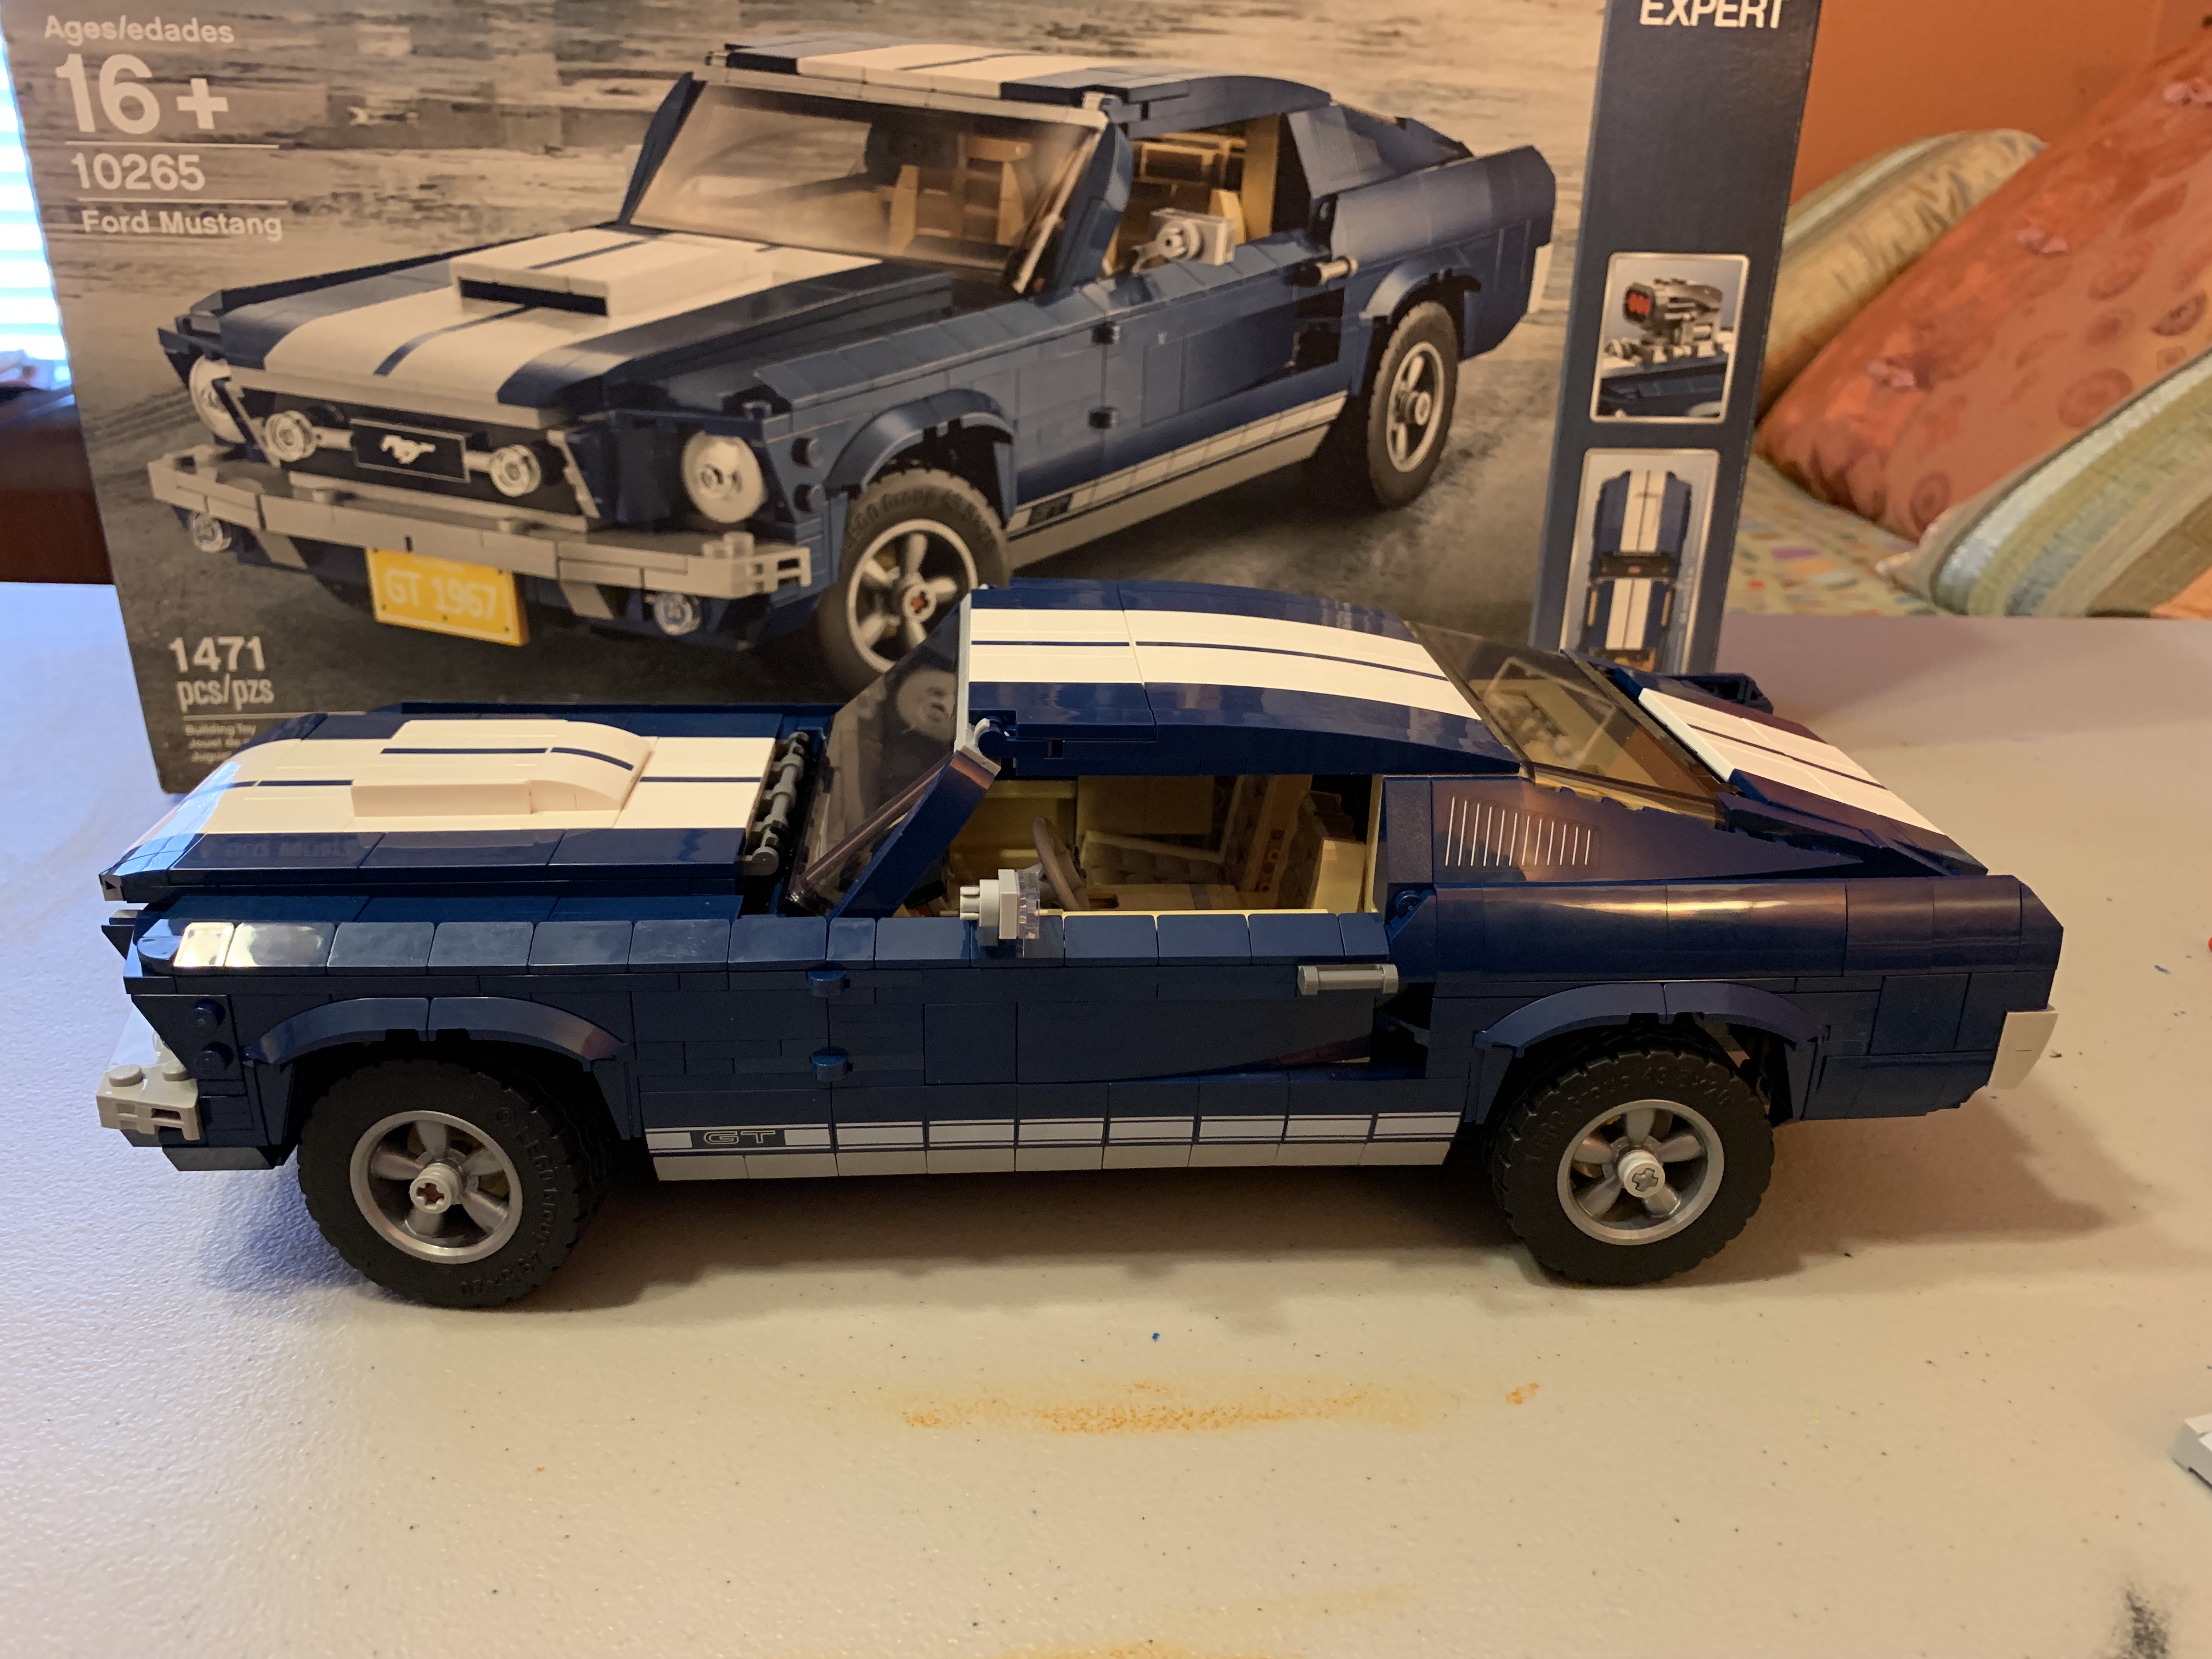
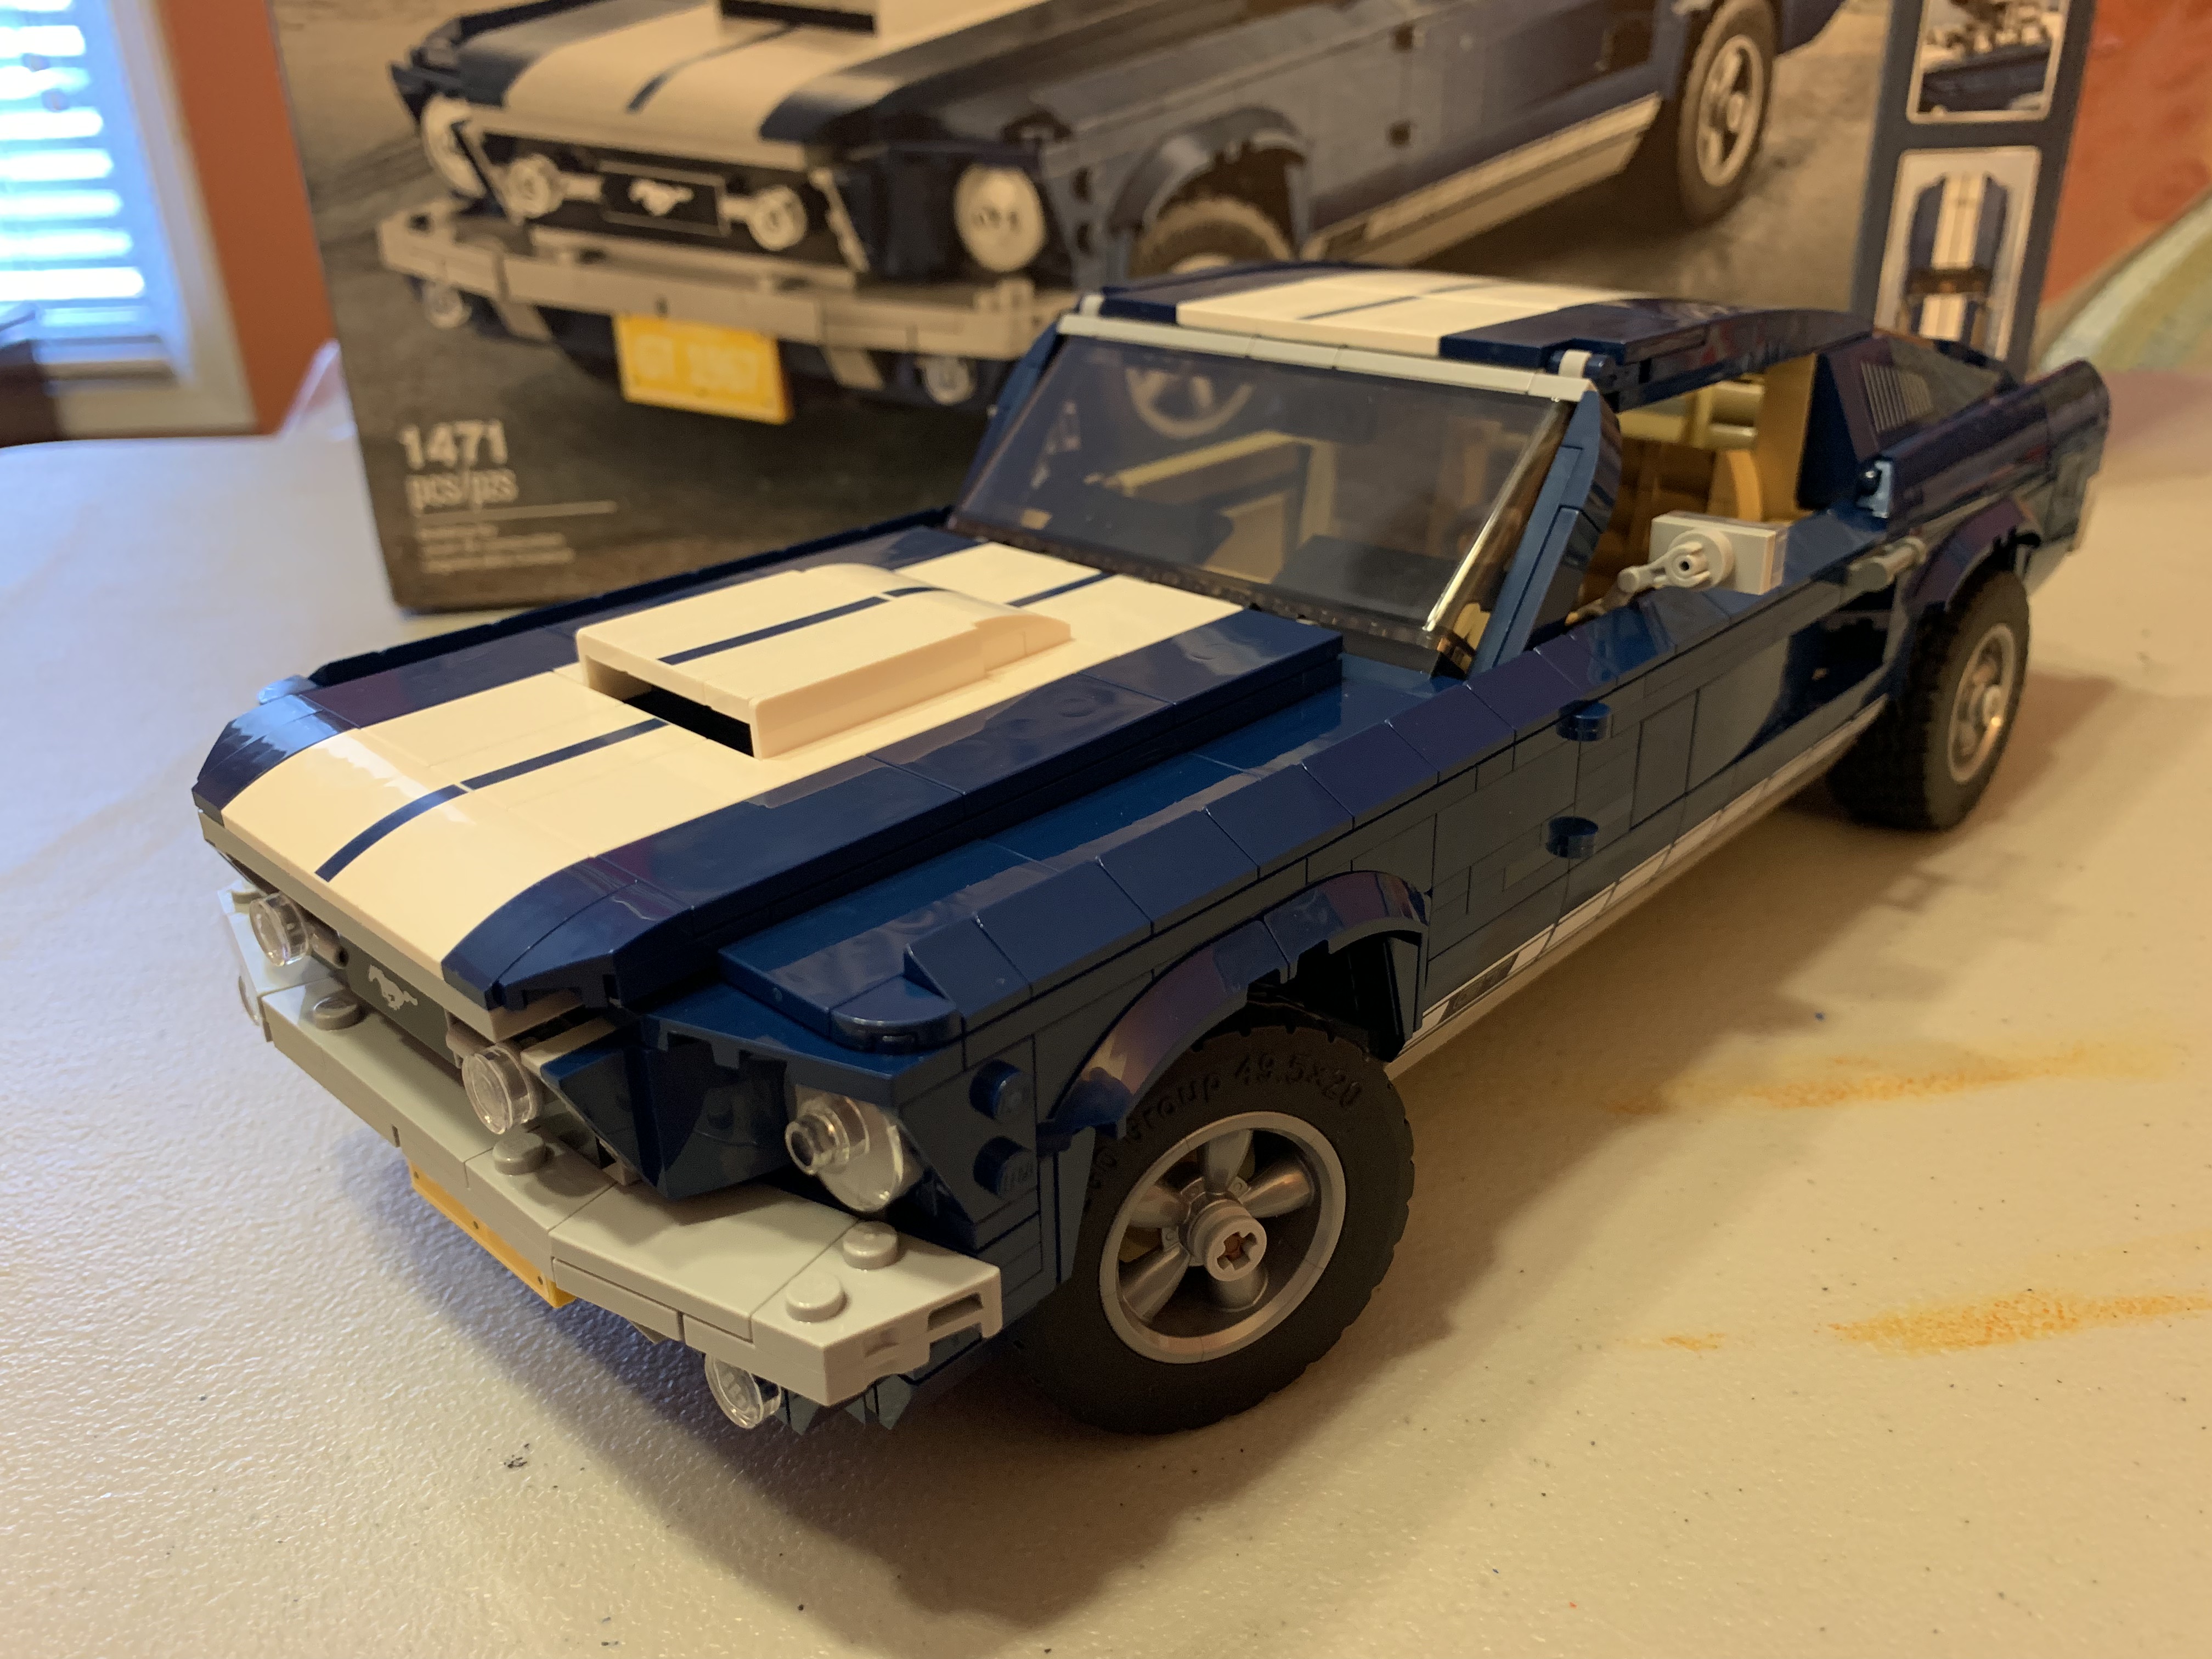
I decided to go ahead and build the customization pieces just for the fun of it but before I did, I wanted to capture a few photos of the finished model.

Once I had the customized pieces built it was easy to convert to the souped-up Mustang. The hood scoop was replaced with a through-the-hood supercharger, the rear tail pipes replaced with short exhaust headers beneath the doors, the addition of an air dam below the front bumper, and with the twist of a nob, the rear end was jacked up. These modifications turned the stock model into a hot dragster ready for the drag strip quarter mile…

…complete with a nitrous oxide boost (NOS) tank in the trunk for hyped up horsepower!
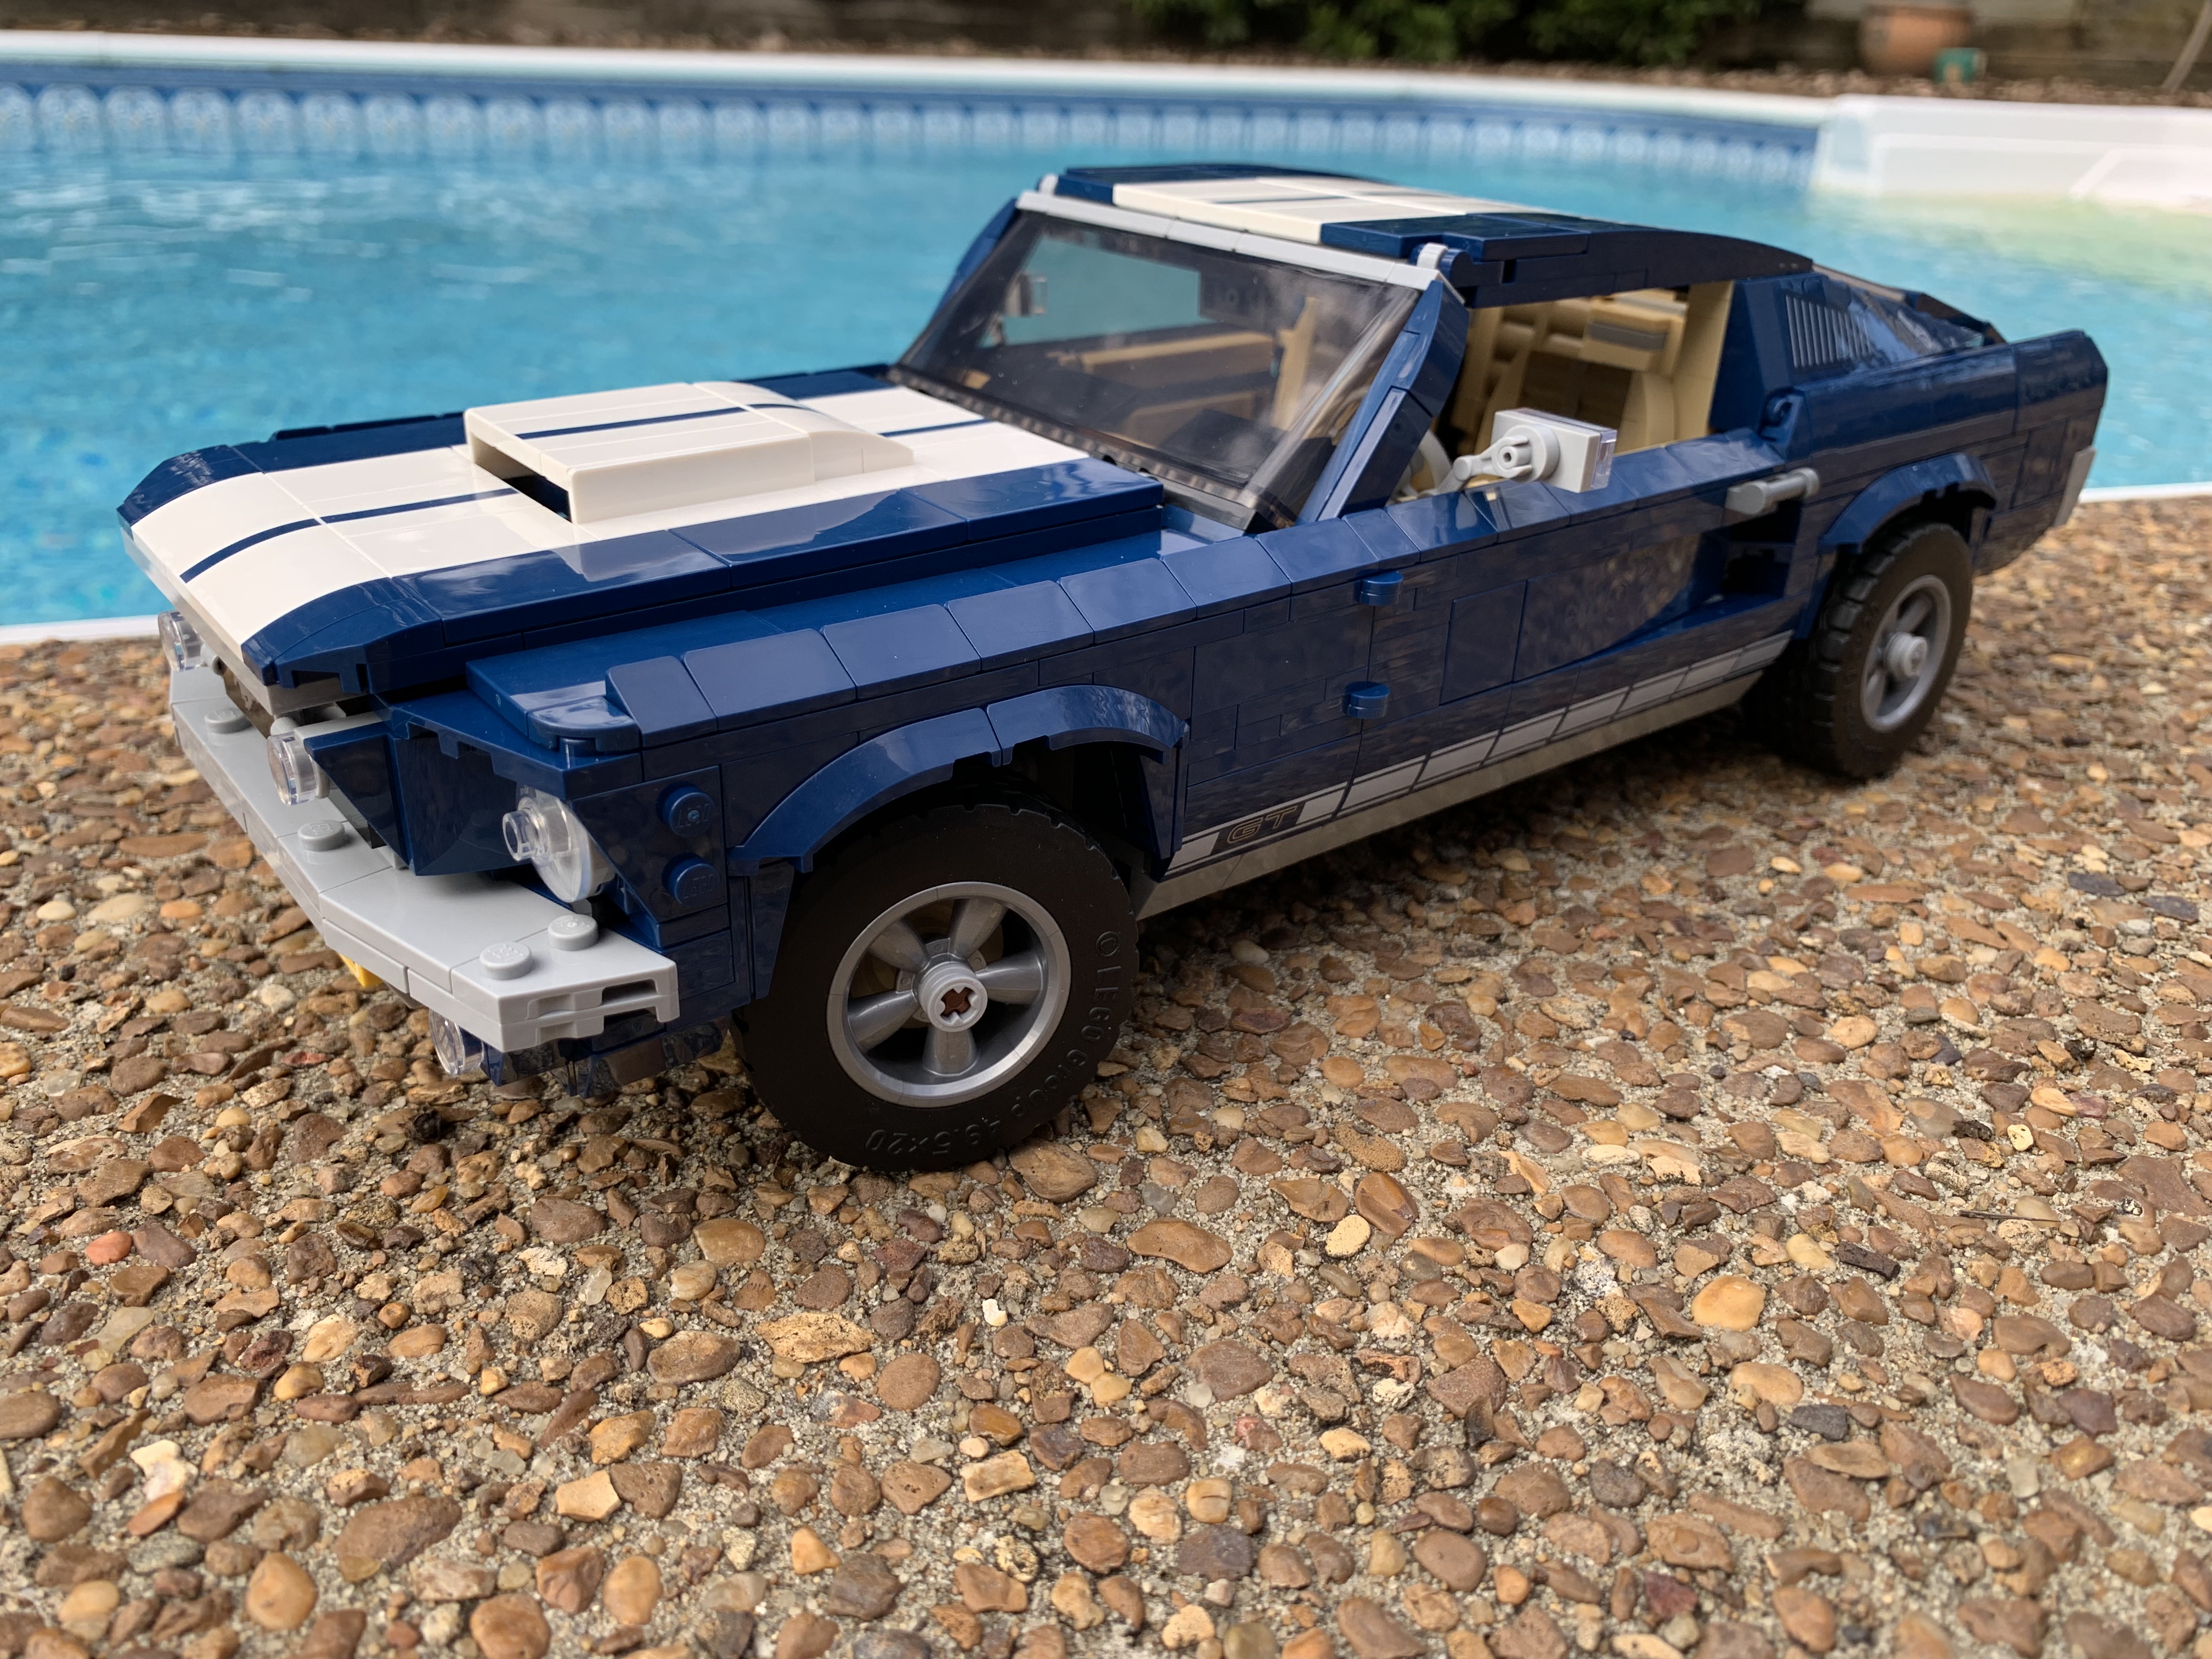
Converting it back to stock was just as easy with the removal of these custom parts.
I had an absolute blast building this first LEGO kit of my own and before even completing it, I knew it would not be my last. As such, I joined the LEGO VIP club to receive periodic e-mail announcements and to get early access to new kit releases. That way the next time I went out to the west coast to visit grandchildren, I would be able to order in advance kits that our grandchildren had never seen before making the gifts an even bigger surprise.
I must say this first LEGO kit has opened up a whole new world of miniature modeling for me—one that I never got to enjoy as a child but can now as a senior citizen. And I am already exploring what my next kit adventure will be. If I have piqued your interest, maybe you’d like to come along for the ride with me. If so, just hop in!

Categories

Excellent job, David! Which version of the car do you like better – the souped up one or the regular? Does it bother you about the 2 pieces you “borrowed” and then replaced because they couldn’t even be seen? For me, I would wonder, well, why were they used in the first place if they couldn’t be seen? I would be thinking, “There must be a reason!” And I would think your grandson would be happy to know you used the app to assist you. He taught you something! You have made me appreciate the modern day world of LEGOs! Have fun with your future projects! I know you will be making more than just a LEGO build – you’ll be making great memories with your grandson!
Thanks, Betty. I definitely like the stock Mustang version best and that is how it sits on a dresser. And yes that app did help. I asked my daughter to thank him for sharing this great piece of technology.
Since I have become a VIP member, I have found out about new and unique kits and I already have one for each of my west coast grandkids to build together next time we go. And for myself, I already have my next two.