
A Swing Set Upgrade!

In 2017, I wrote a post about how much our in-town granddaughter loved to swing. It was in the spring of that year when her grandmother (my wife affectionately known as Mimi) bought a swing set for her backyard. Since then, she has had many hours of fun swinging. The swing set moved with her to her new house in 2019 and she has continued to be a swinger.
But in the ensuing five years since its original purchase, she has really outgrown that swing set although she now has a little brother that has picked up where she started.

At the beginning of the pandemic, when we knew we would be taking more “stay-cations”, we attempted to buy a larger swing set for her to enjoy but found they were all out of stock with no prediction of when any new stock would be available. Thankfully that changed this year when Mimi found a really nice set online. Being a larger play structure, some of the websites offered an assembly option in the purchase price for several hundreds of dollars more but since I love building things, I told my wife I would be happy to assemble it myself. After a short wait, our set arrived ready for assembly. Little did I know until I started opening the boxes what I had gotten into.

The kit came in eight large boxes strapped to a 10-foot-long pallet (I didn’t even know pallets came in that length). First up was to find the instructions which thankfully were in the first box we opened. Looking over the 90-page instructions (plus supplemental sheets), I had no idea the kit would come with 152 individual cedar boards, 439 screws, 97 bolts, 172 nuts and washers, and numerous large hardware items (such as ropes, swings, grip handles). The instructions indicated that depending upon your experience level, it could take from 6 to 24 hours to fully assemble the unit. When I shared that time estimate with a friend, she remarked yes maybe with a crew of six.
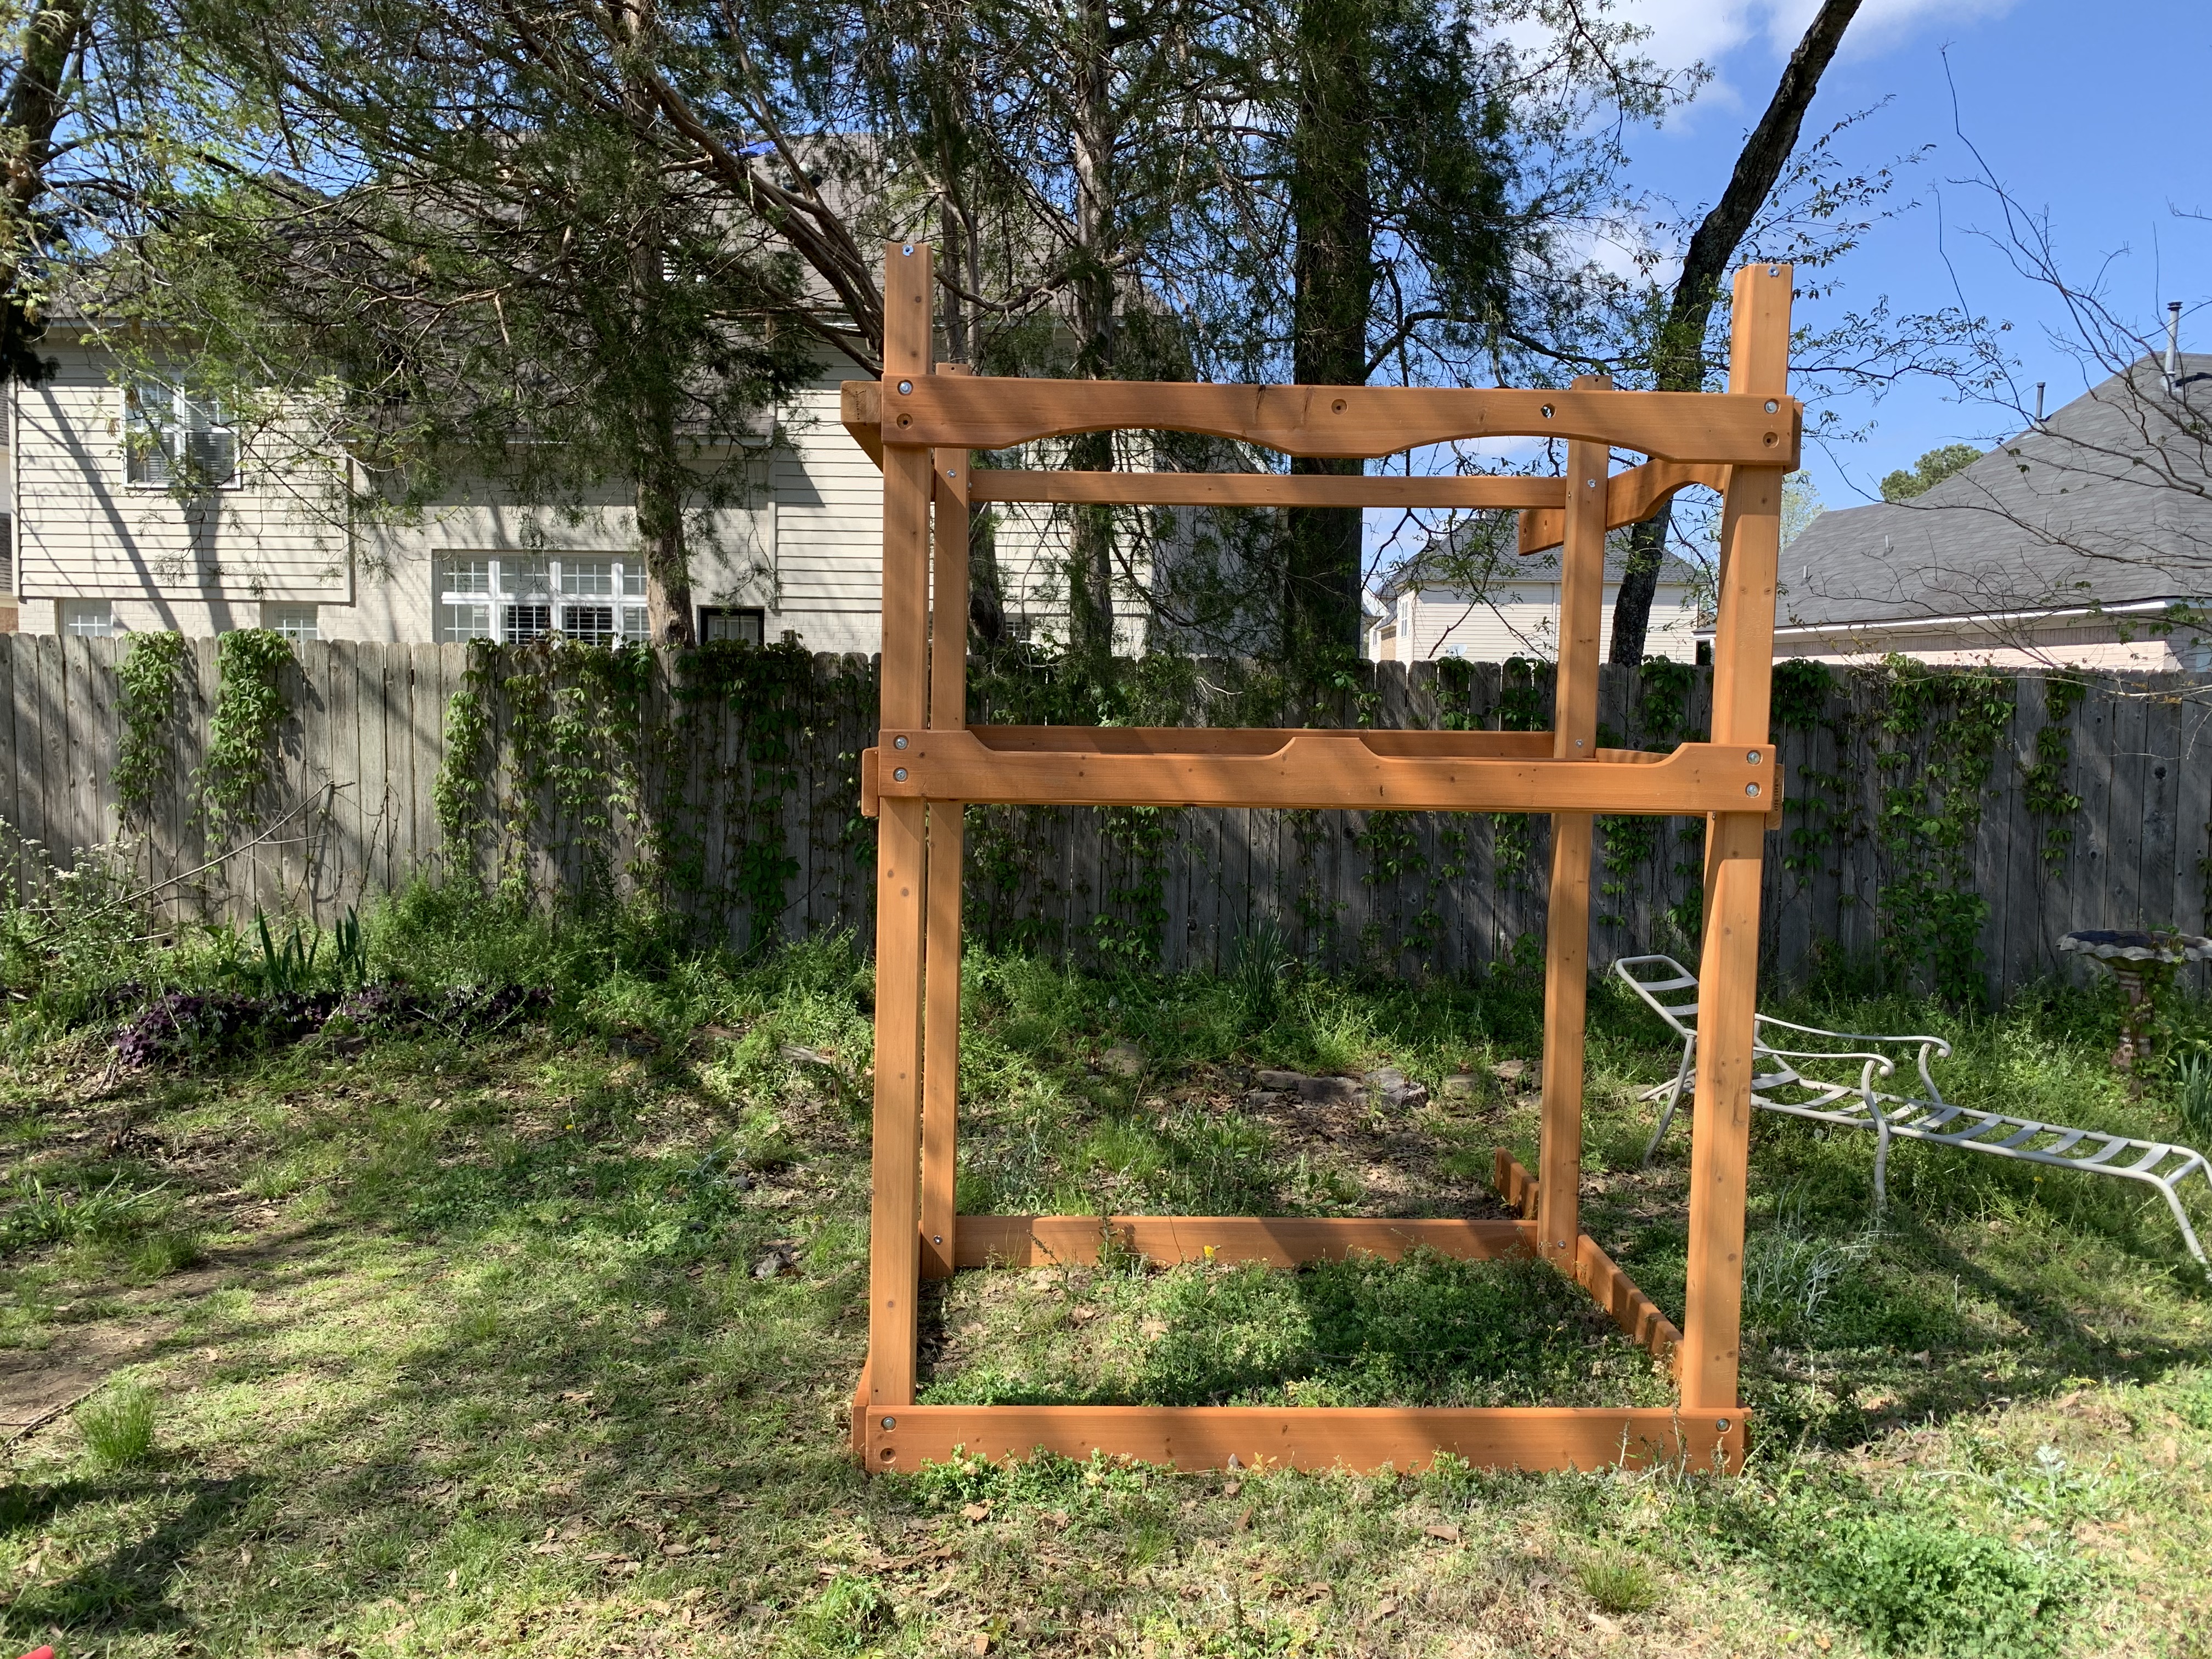
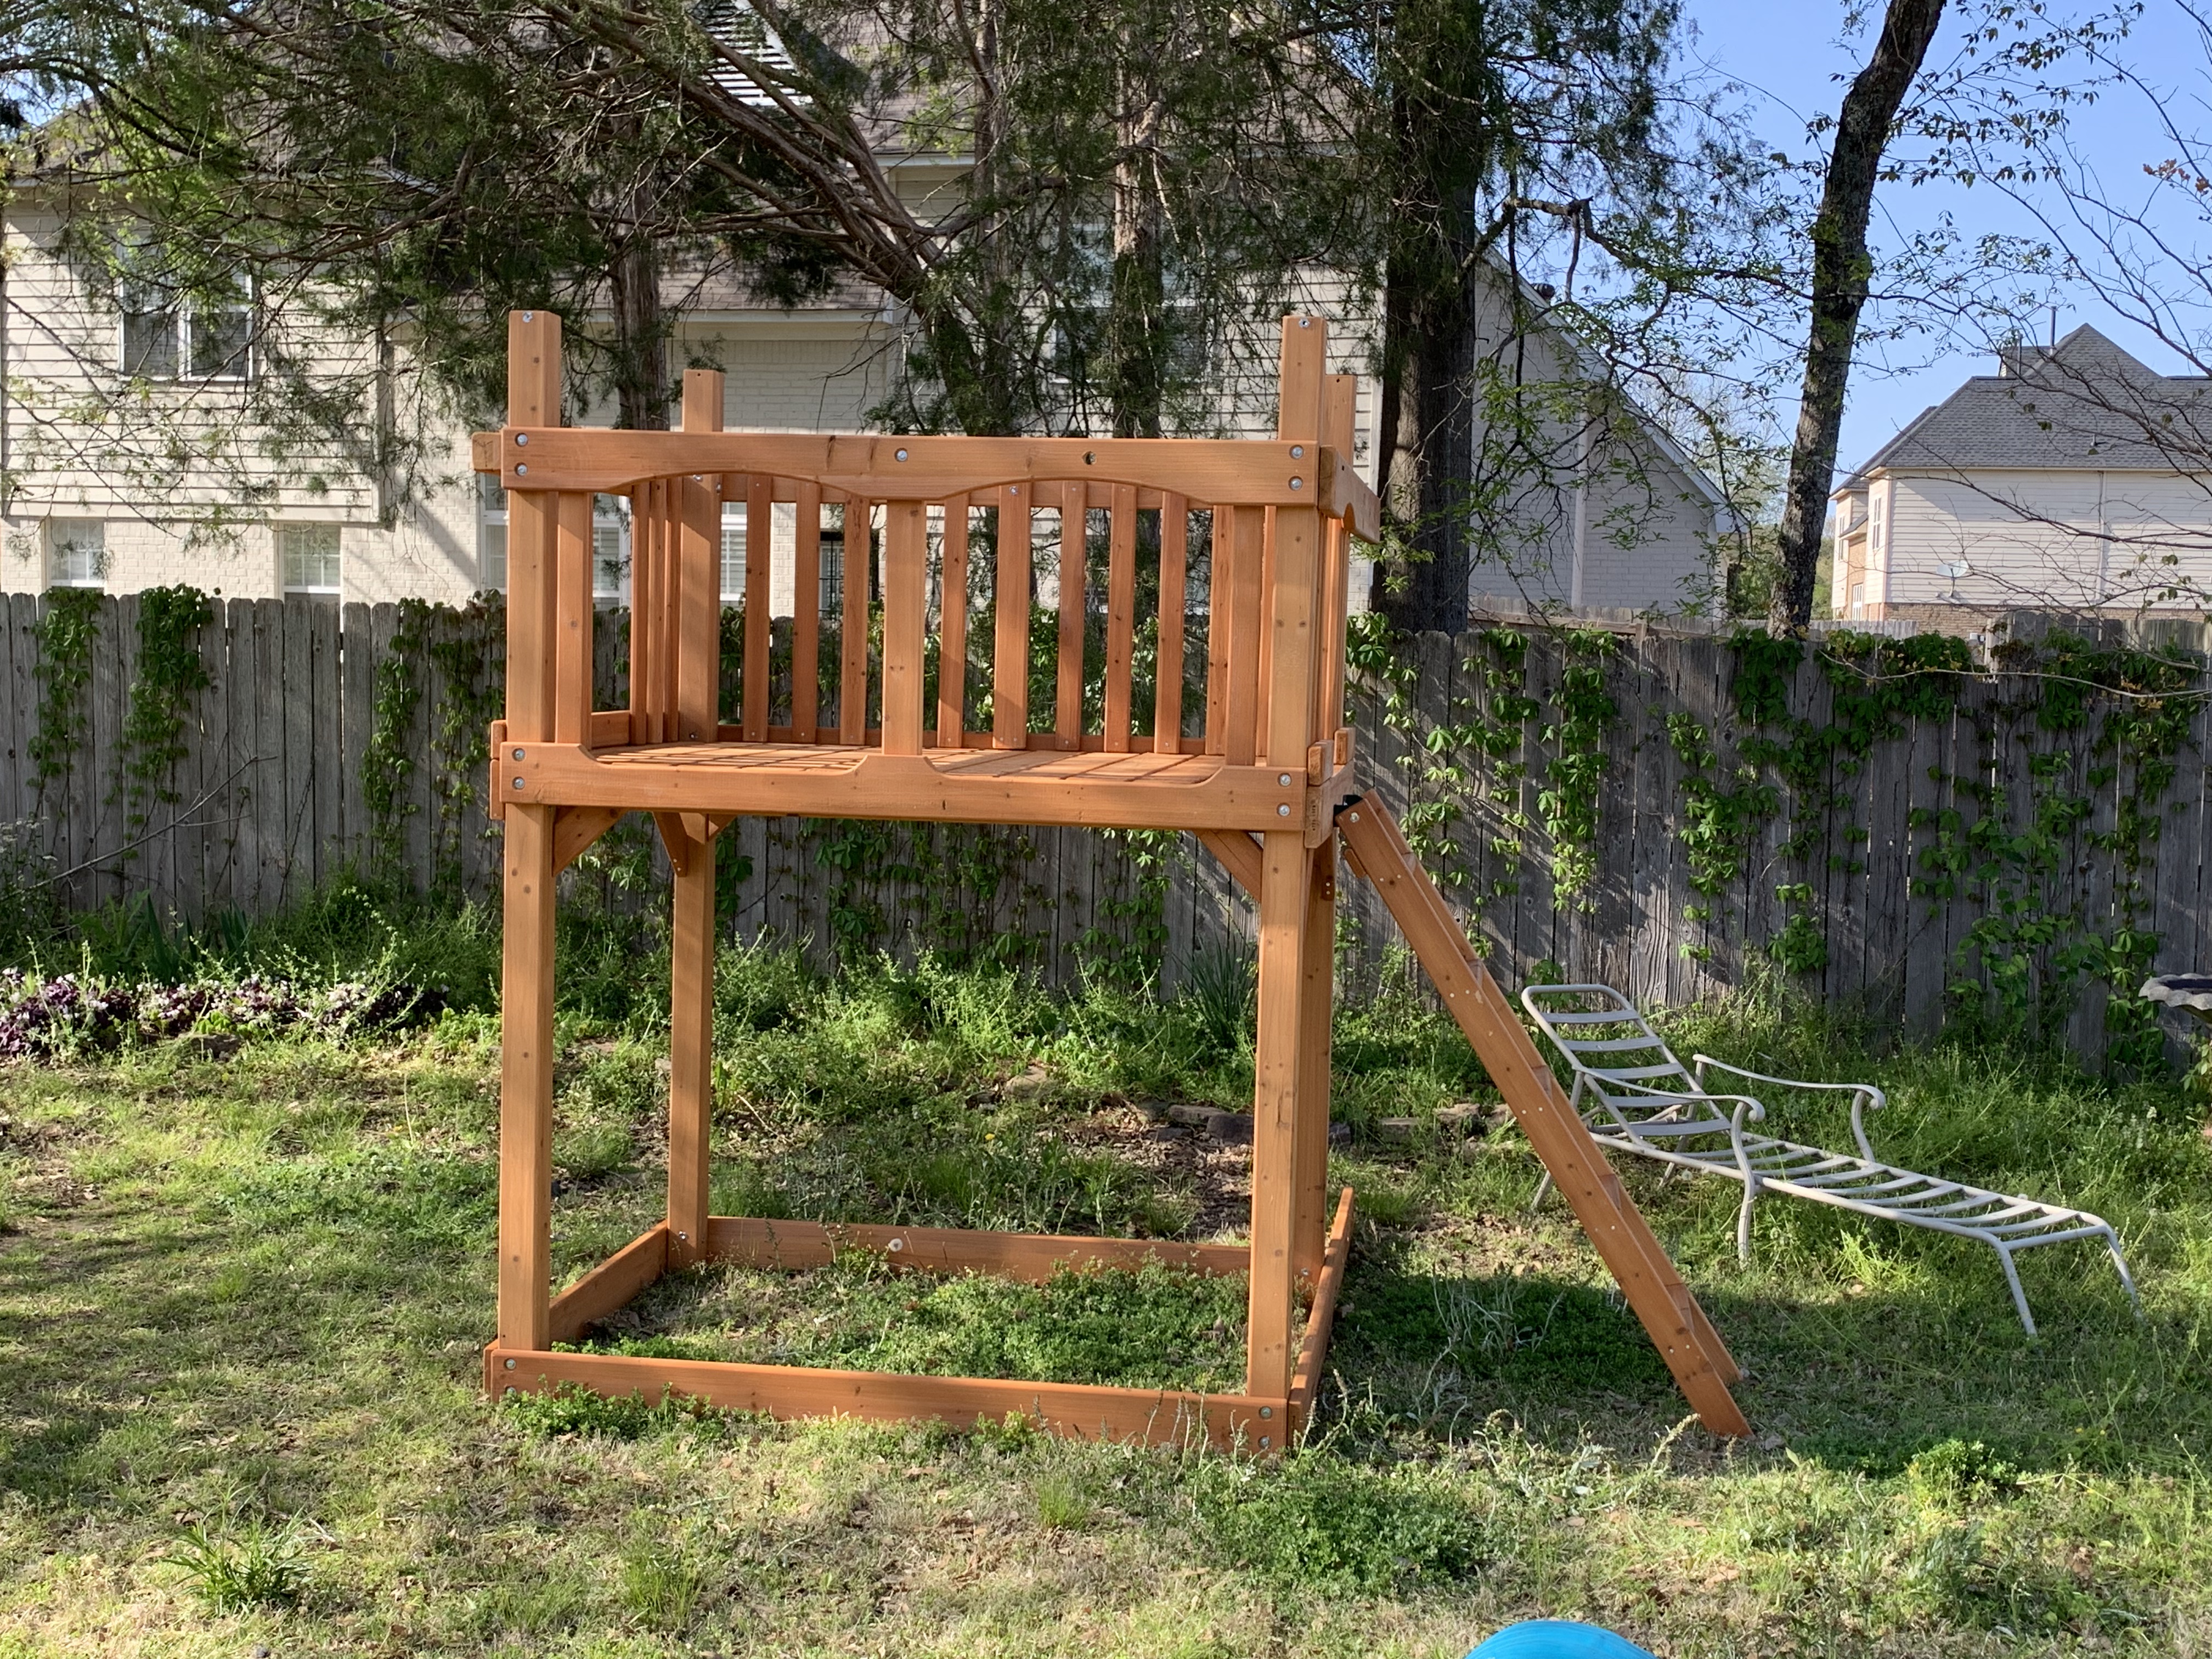
Undeterred, I dived right in. The first major step was to assemble the frame for the clubhouse although it included several individual steps. There was a caution in the instructions that stated any mistakes made at this point would require the complete disassembly. I found that I double, and triple checked myself to ensure I was following the directions correctly which obviously made everything take longer. By midafternoon of the first day, I had this assembly ready for placement in its final location…
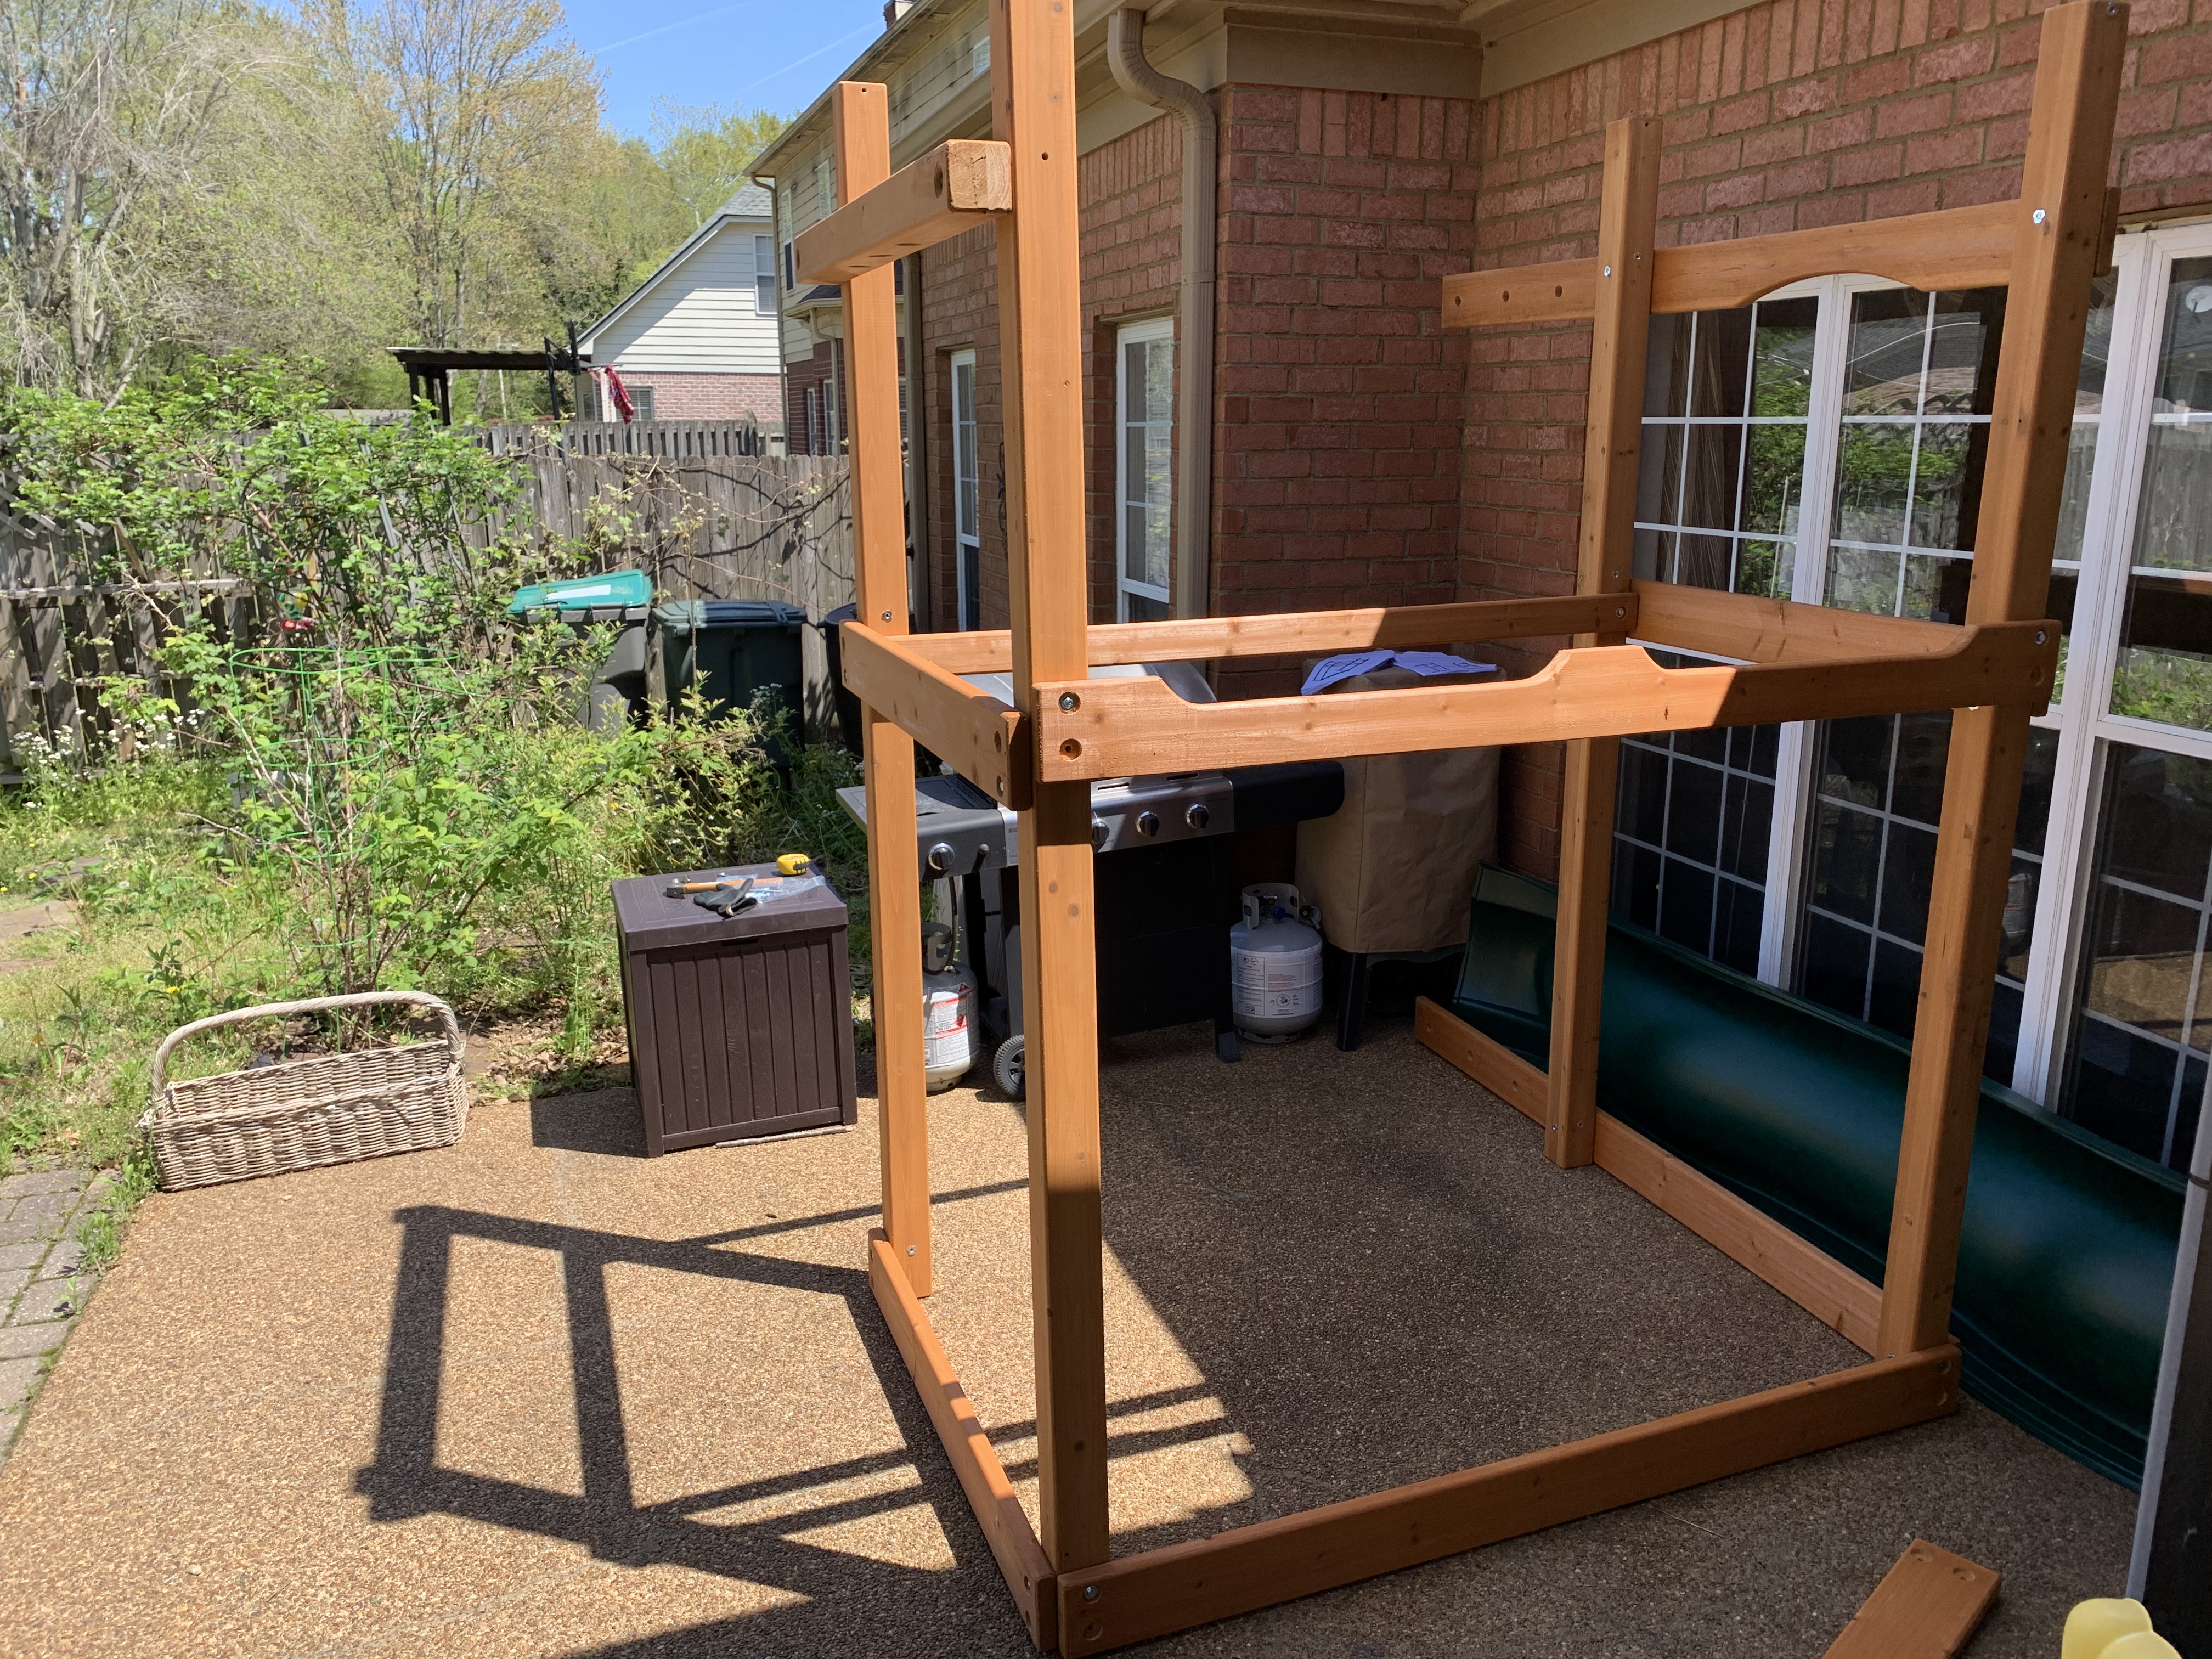
…and a little later in that day, I had added a few more components and gotten it level and plumb
The next day, I knew my daughter-in-law would like to have her parking spot back in the garage and so I did what the instructions indicated you were SUPPOSED to do first, I inventoried everything so I could move it out of the garage. Doing so, I discovered six boards that were split so badly, they could not be used. Apparently, this is a fairly common occurrence as the instructions included a web address where to request replacement parts.

The net of this was that I would have to delay performing certain steps until the replacement boards arrived. I continued working and by midafternoon, had the decking in and ladder installed which meant I would no longer have to climb up to the clubhouse using a step ladder.
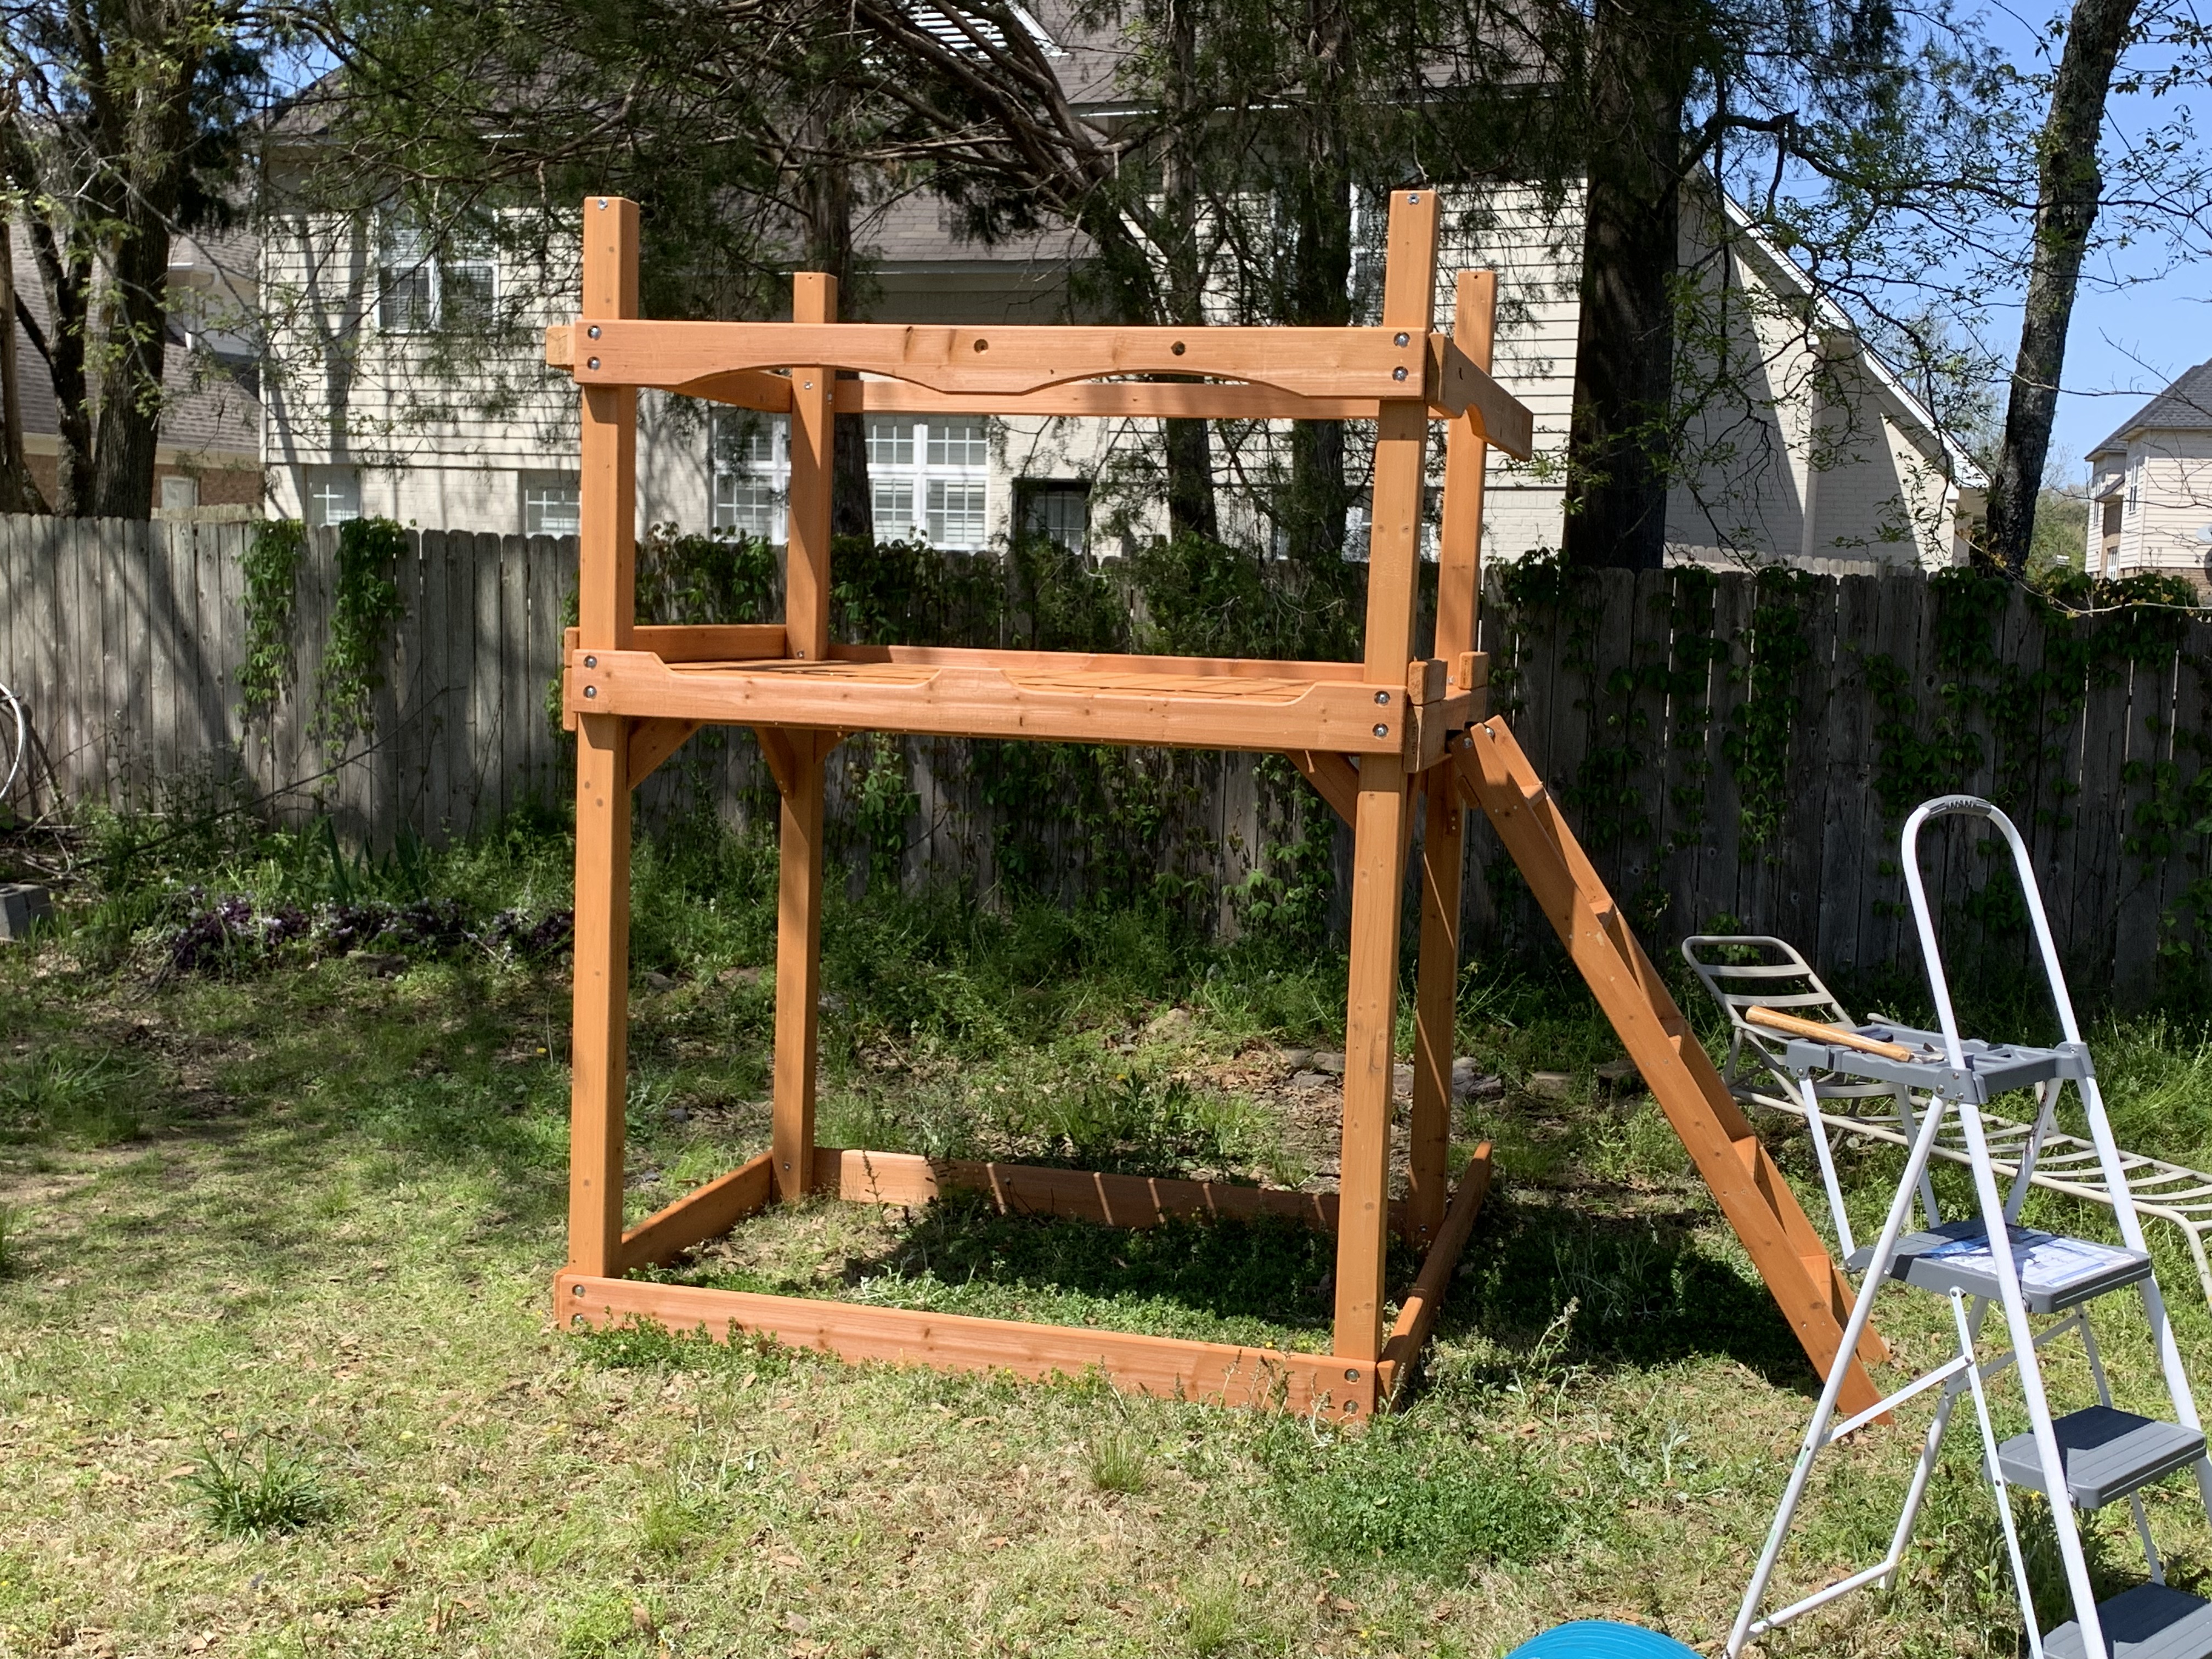
By the end of the second day, I had installed all the safety railings and balusters to prevent a youngster from falling.
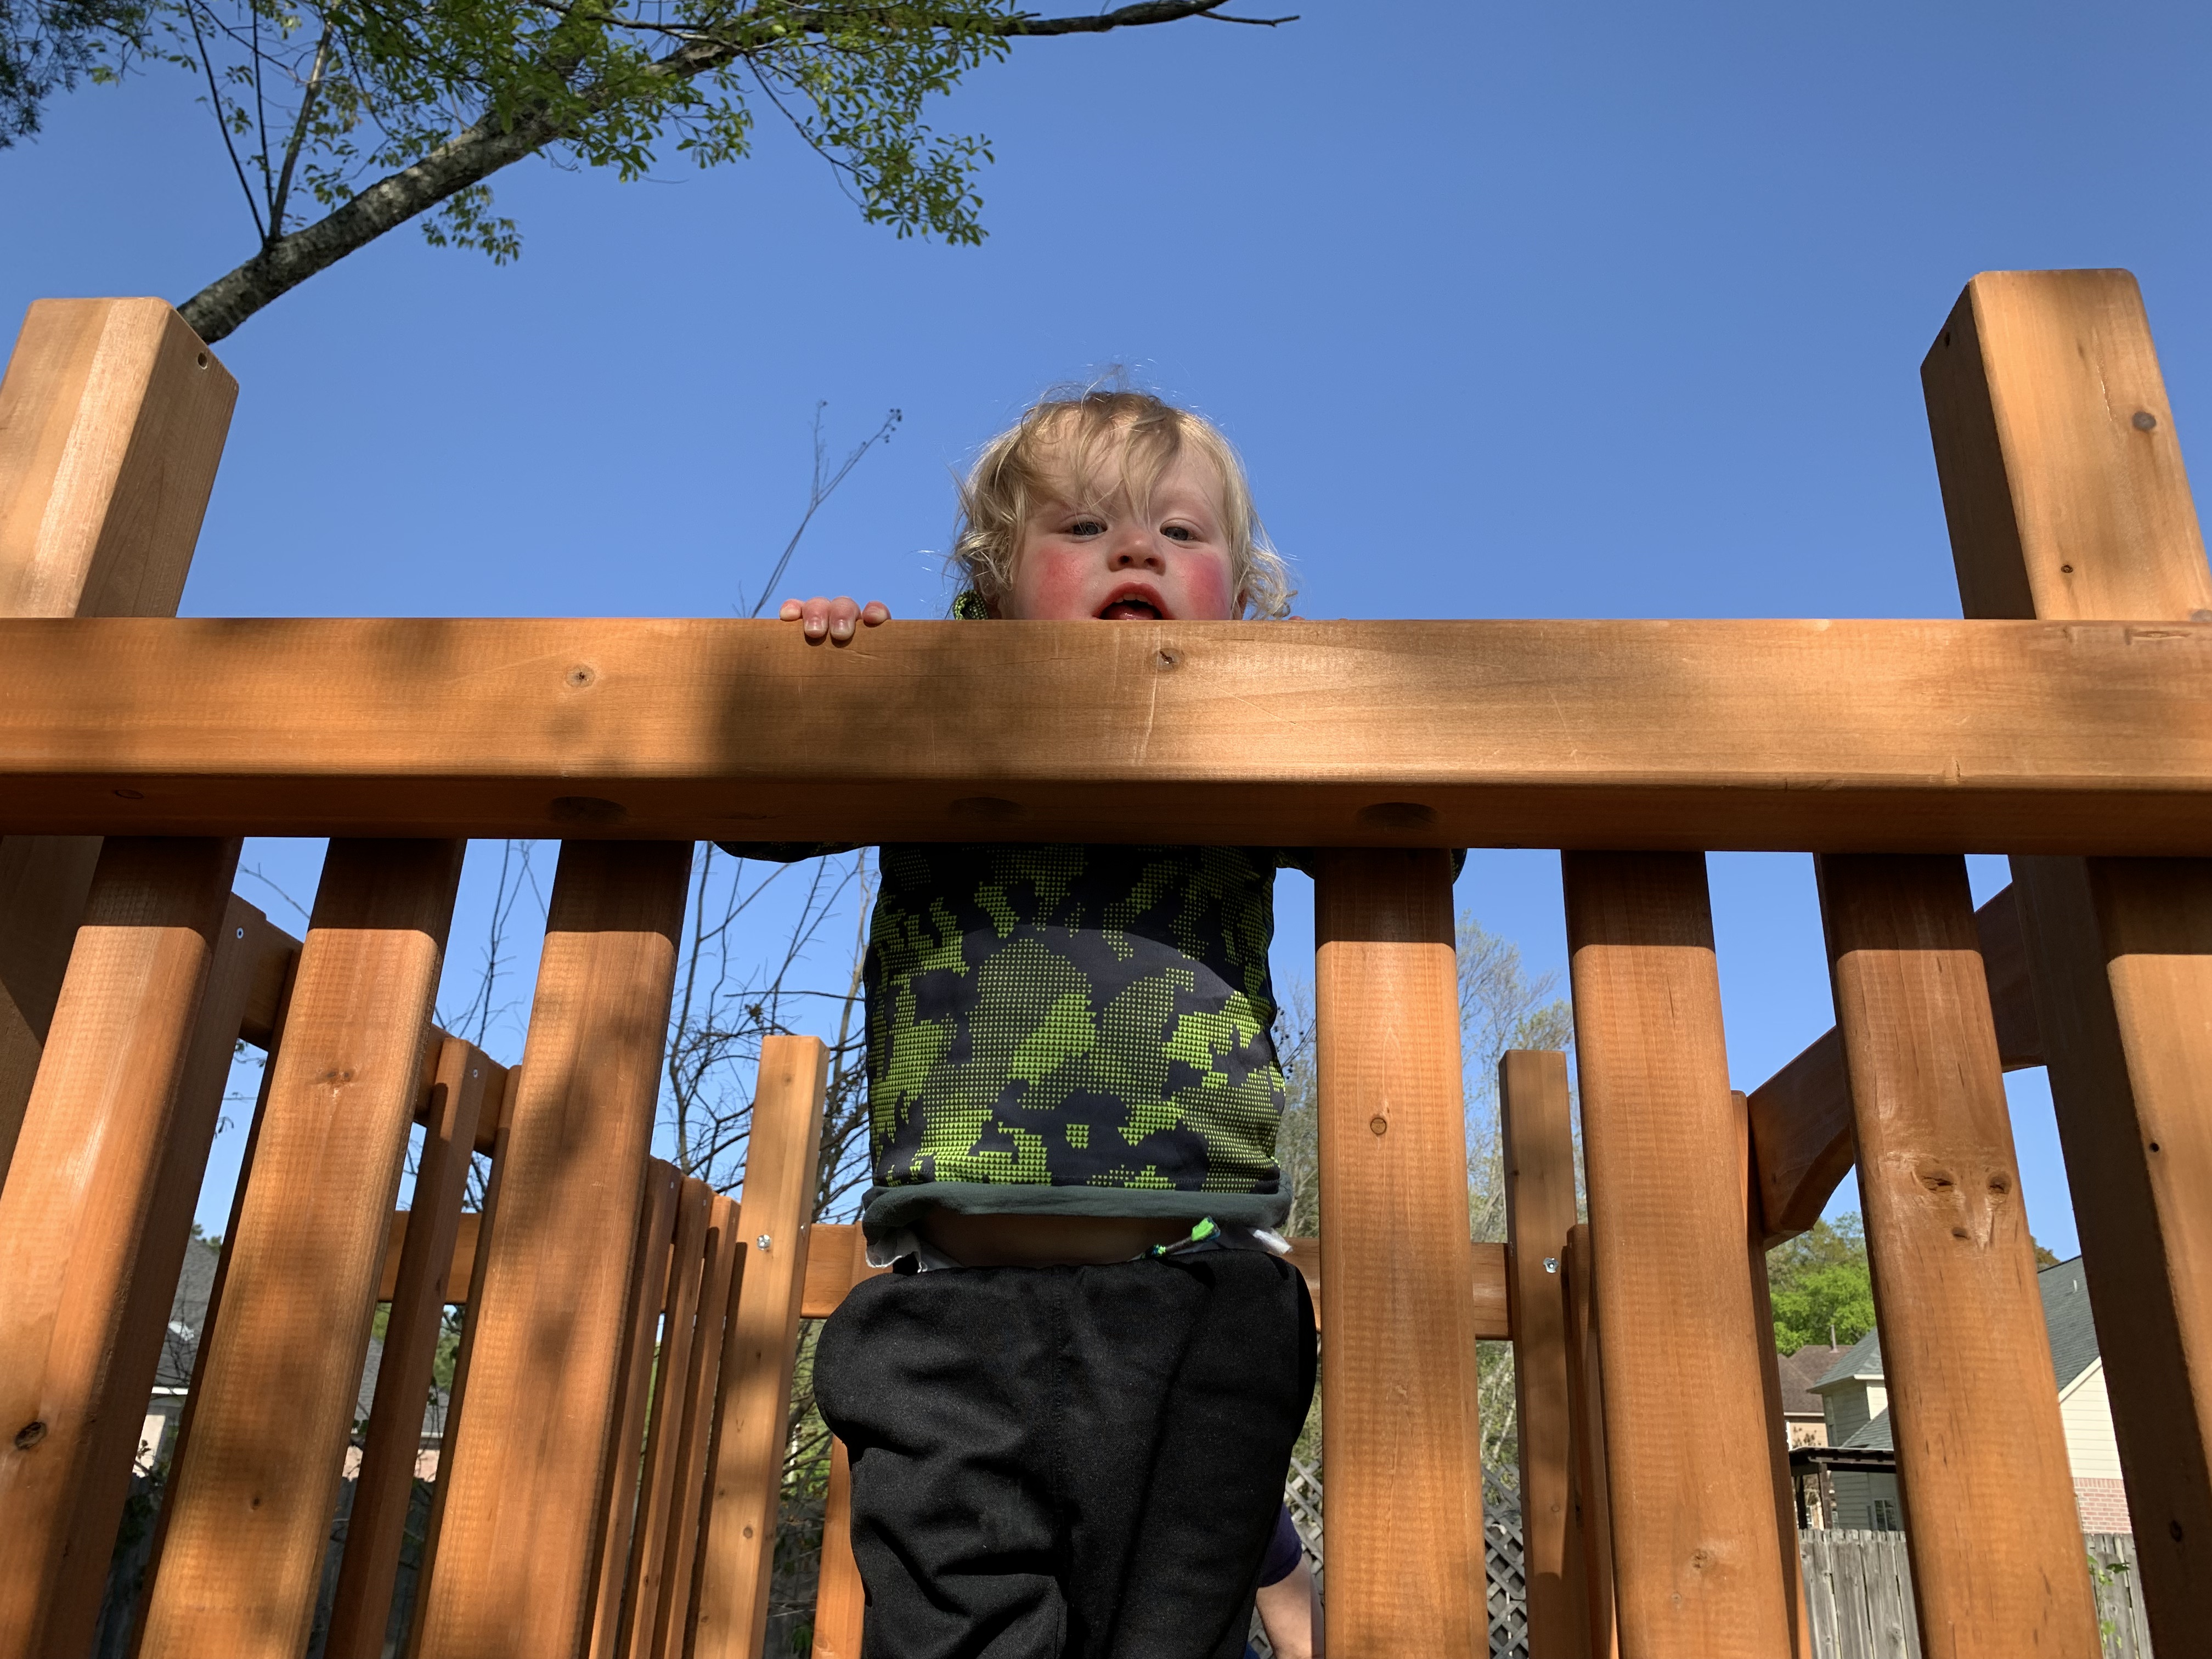
This still posed potential fall hazards with gaping holes where future parts would be installed. And as soon as little brother arrived home, he demonstrated this possibility by immediately climbing up the ladder. Although not speaking in sentences yet, to me his look said: “Hurry up granddaddy and get finished. I want my swing back.”
The next day I got rained out and on so on the fourth day, I really wanted to focus on trying to get the play set to a more safe and useable state. This involved installing the slide, the tic-tac-toe board, the telescope and of course, the steering wheel for my grandson who loves carrrrrs!
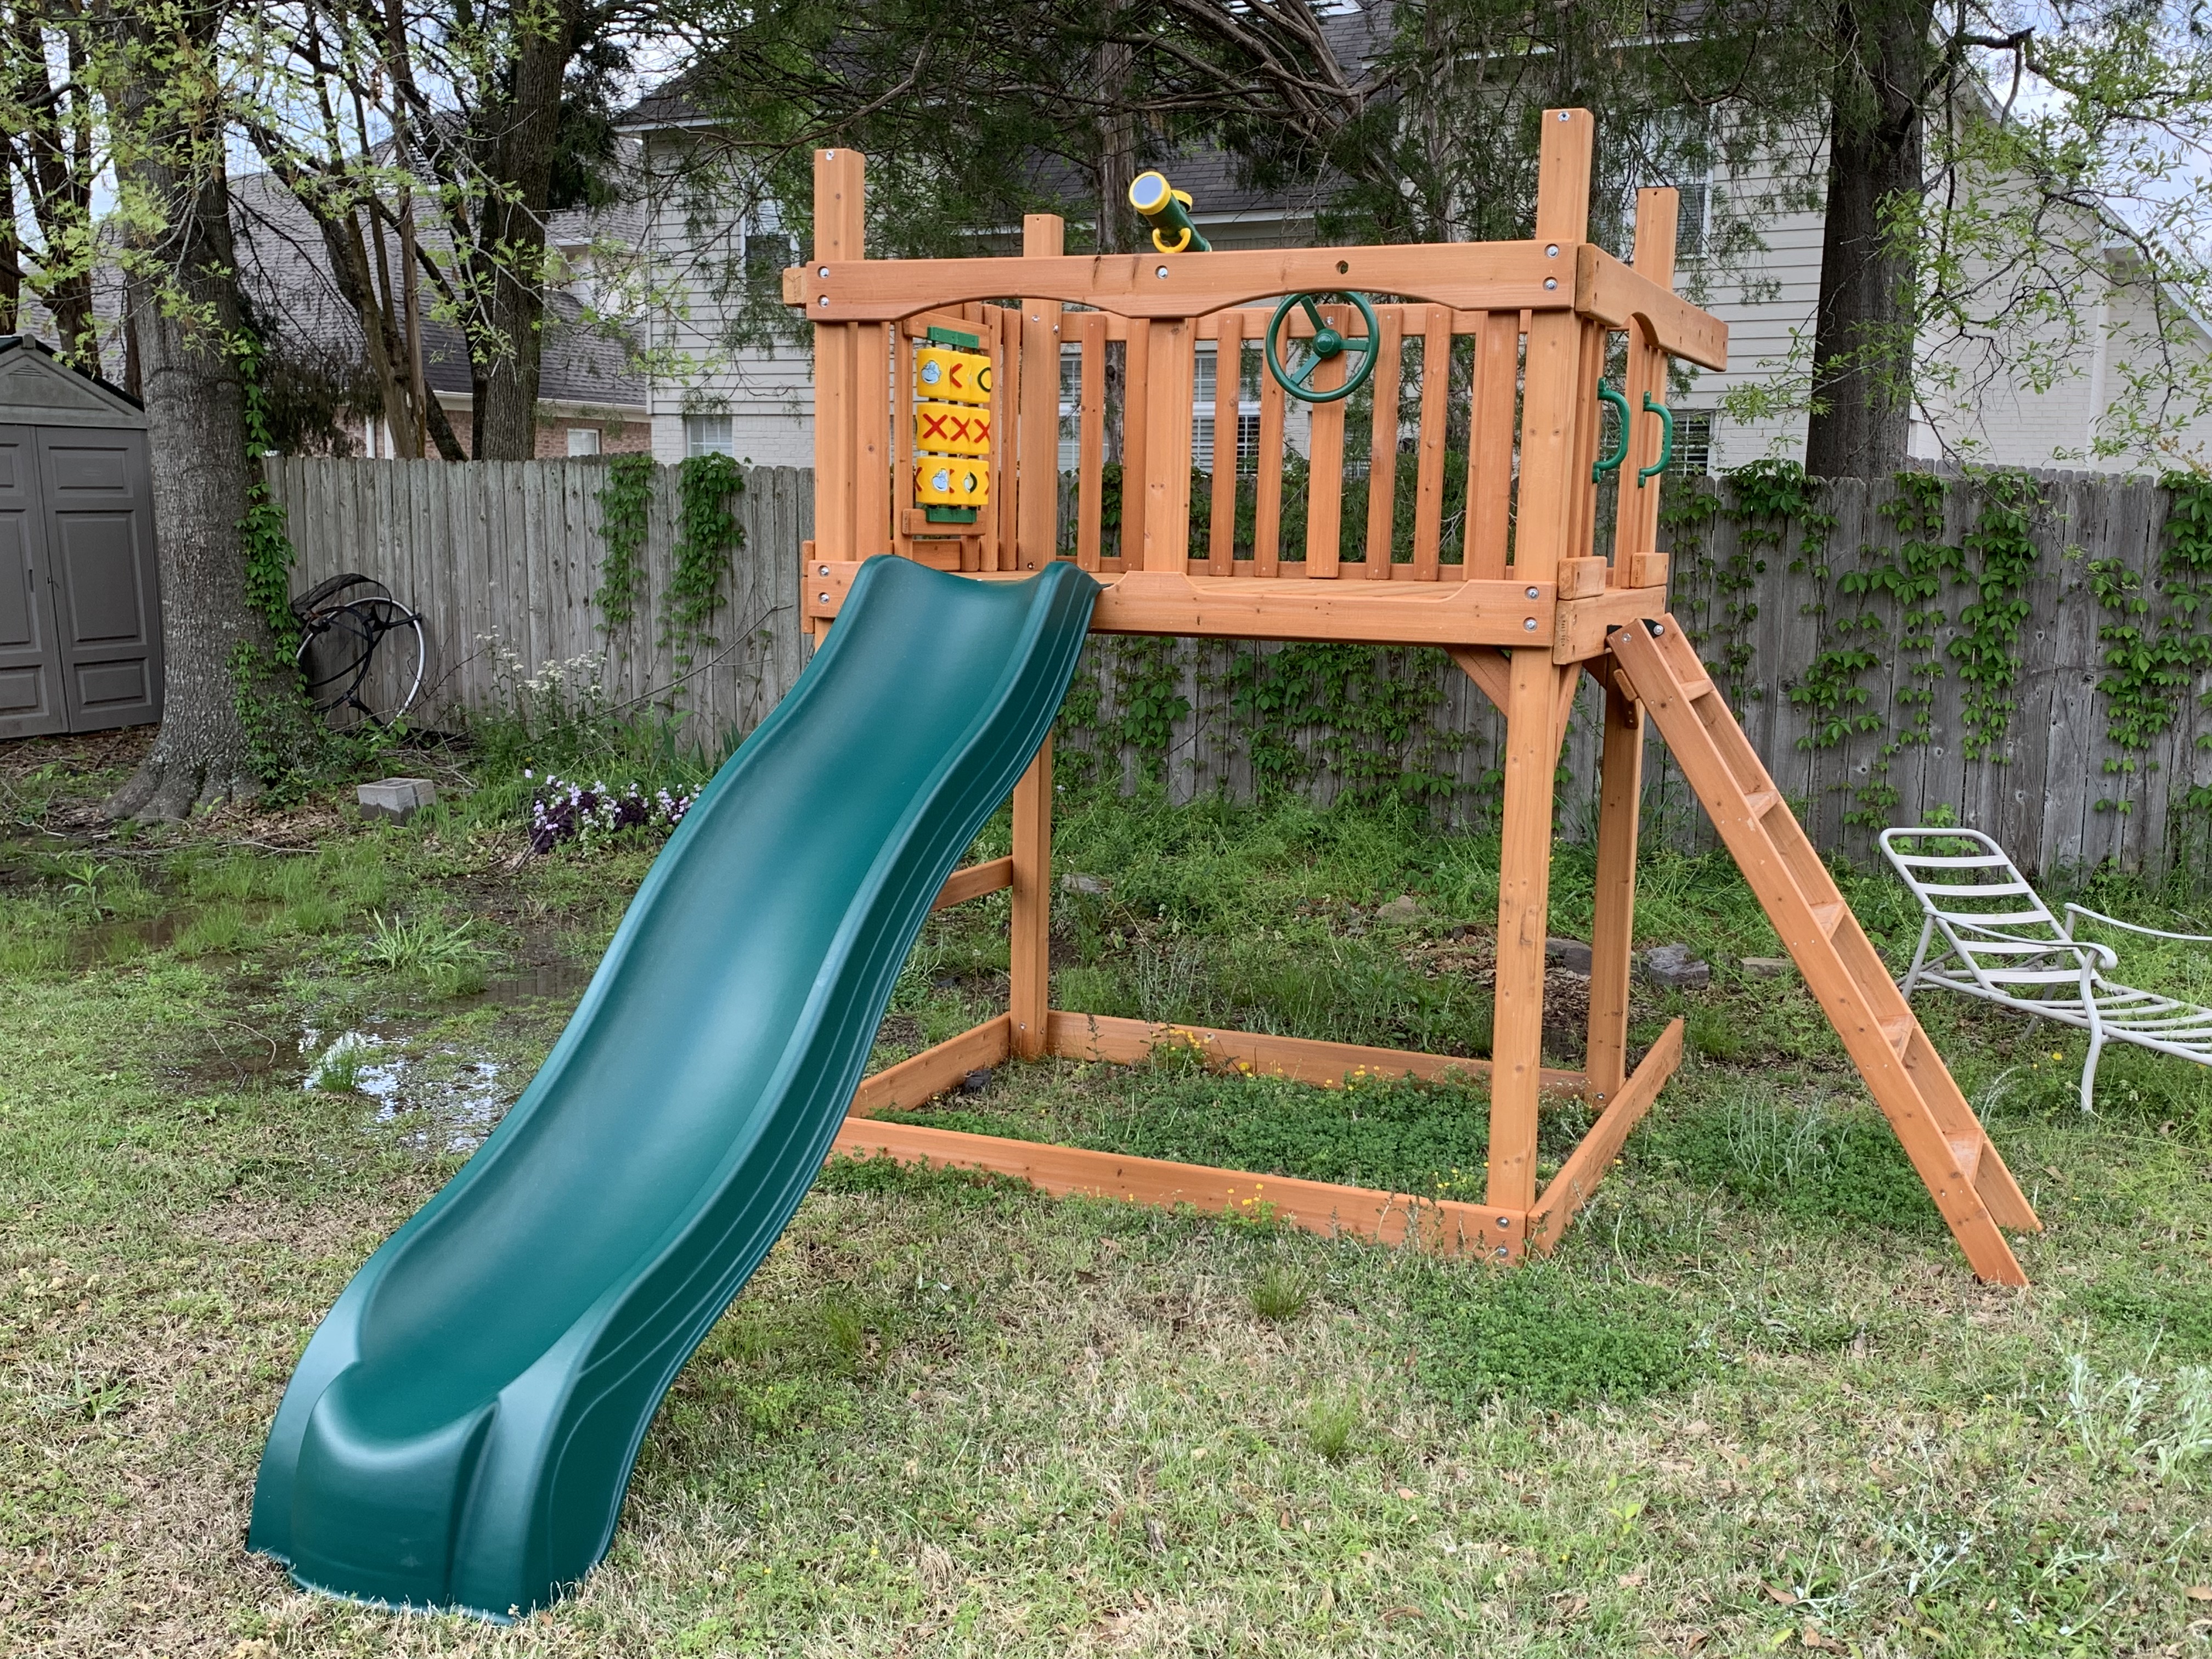
That day, I had just enough time to get the swing beam assembled but not installed.
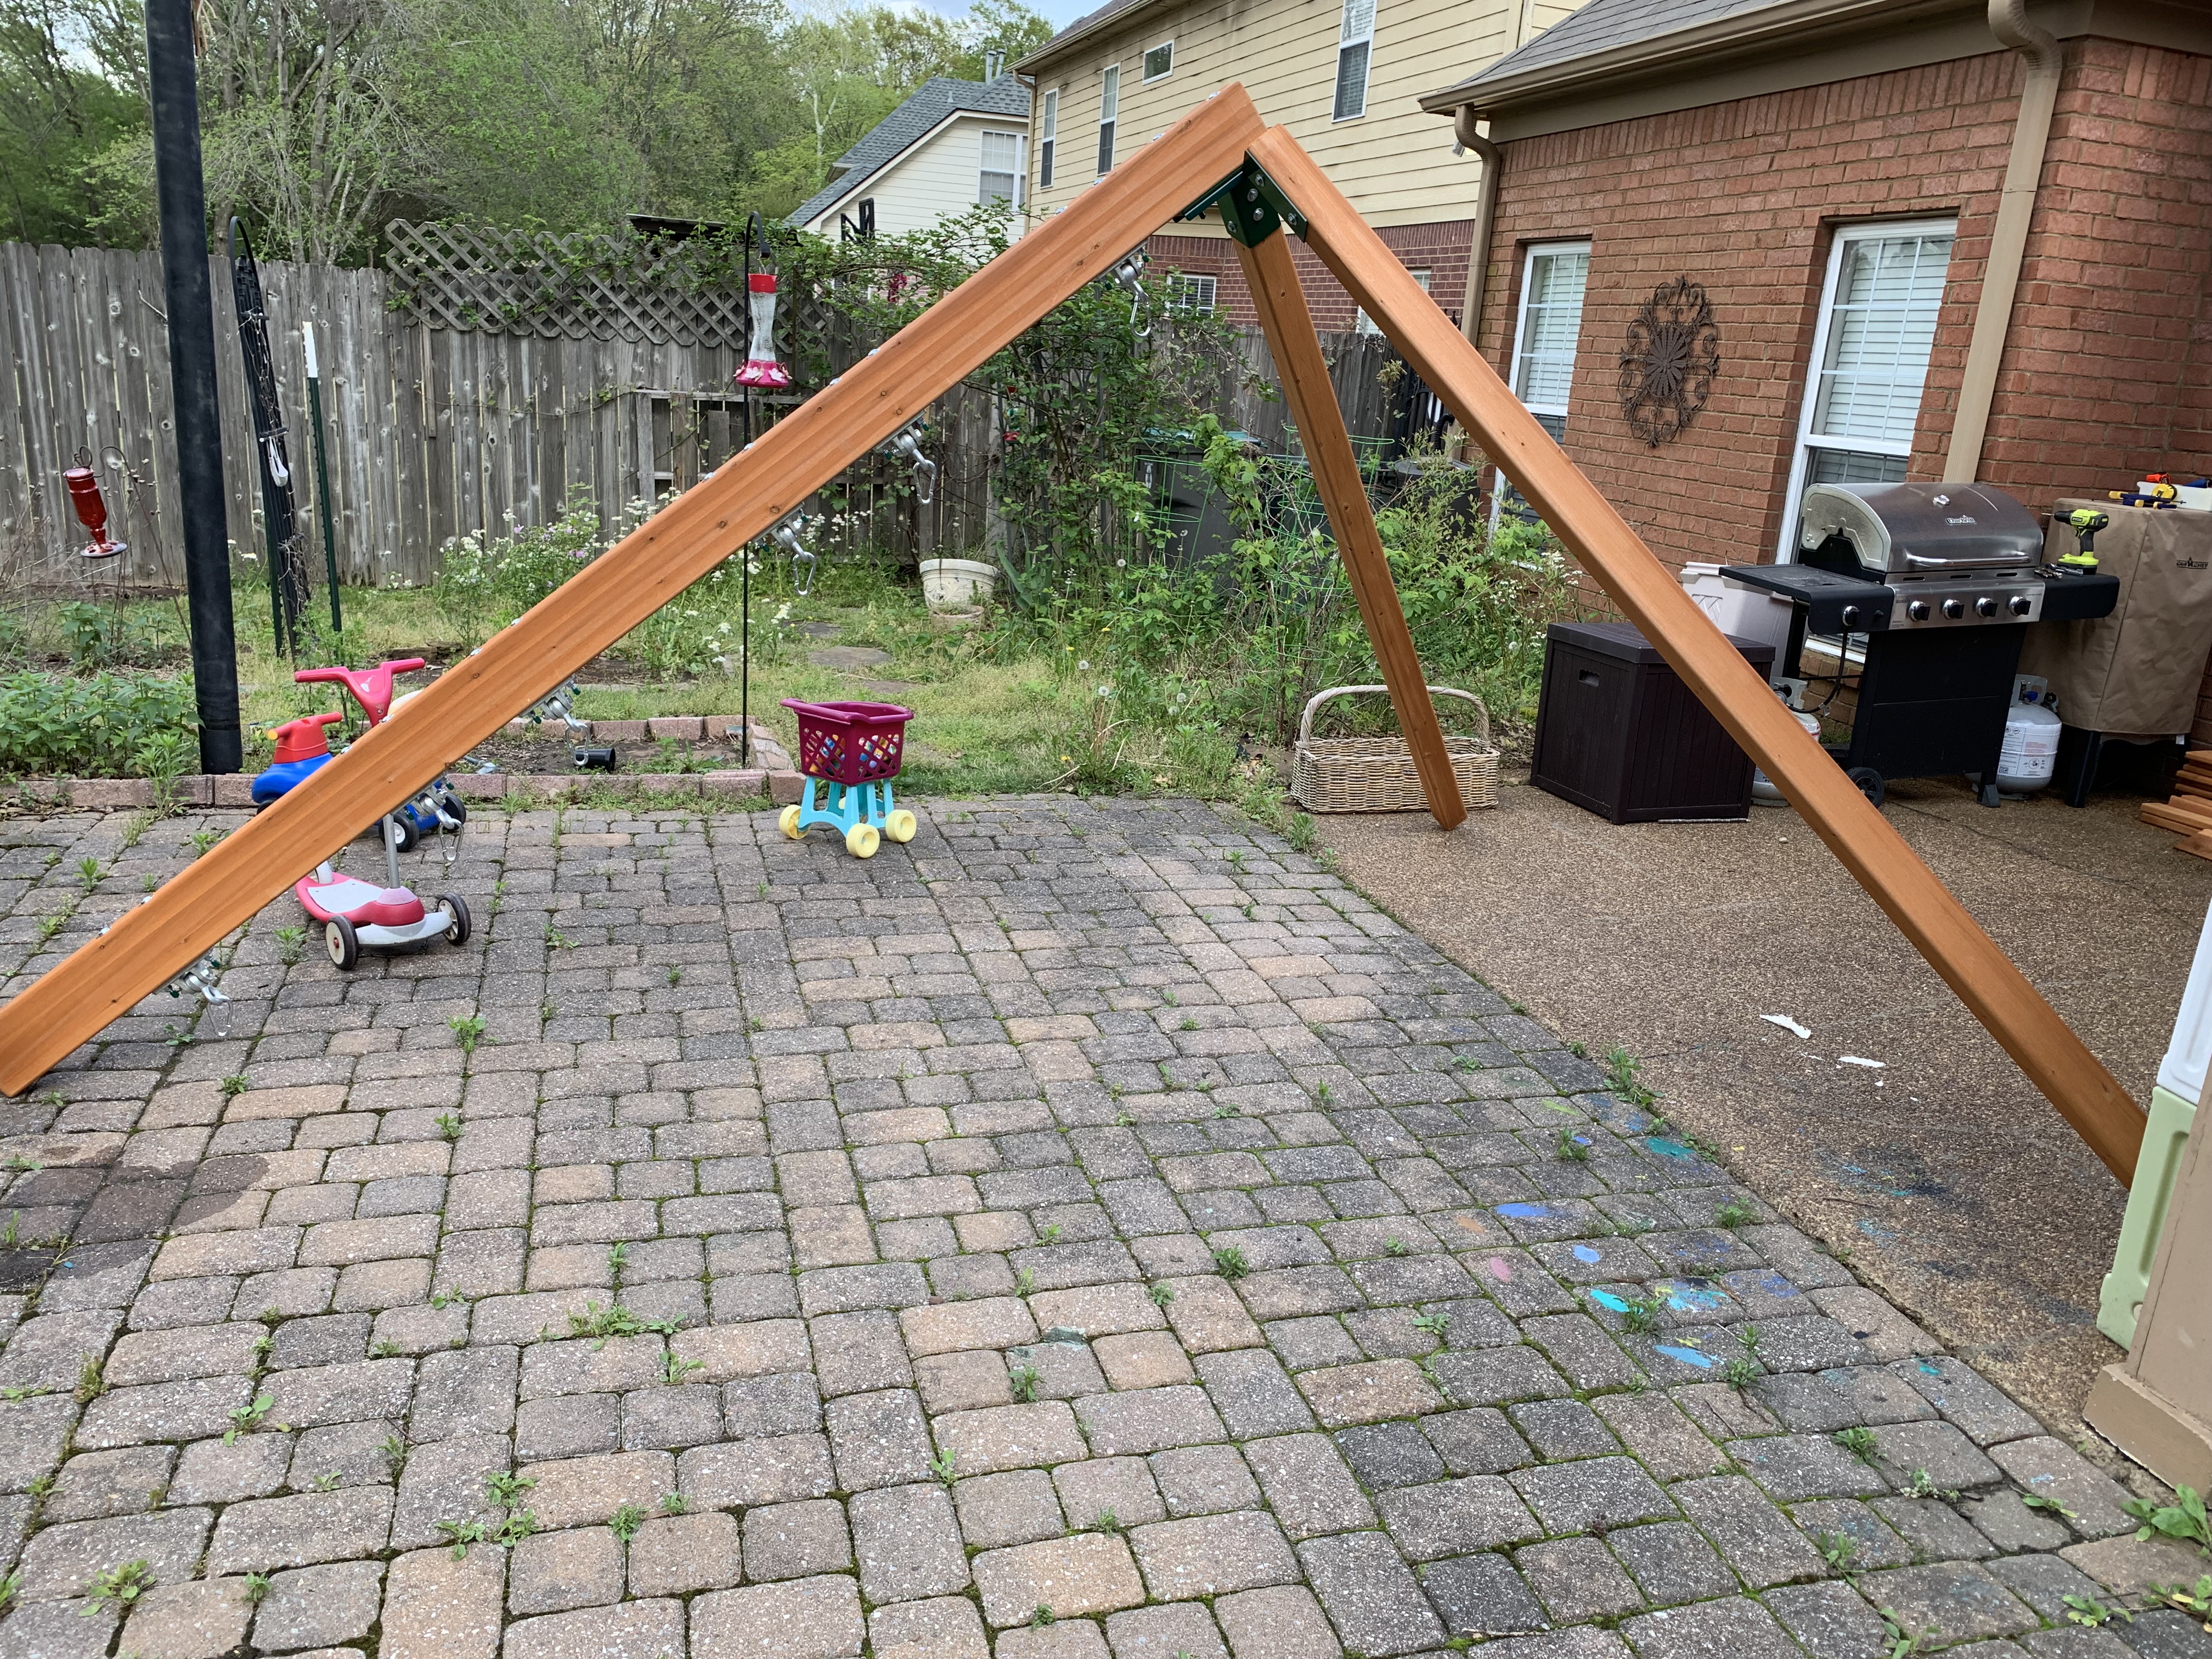
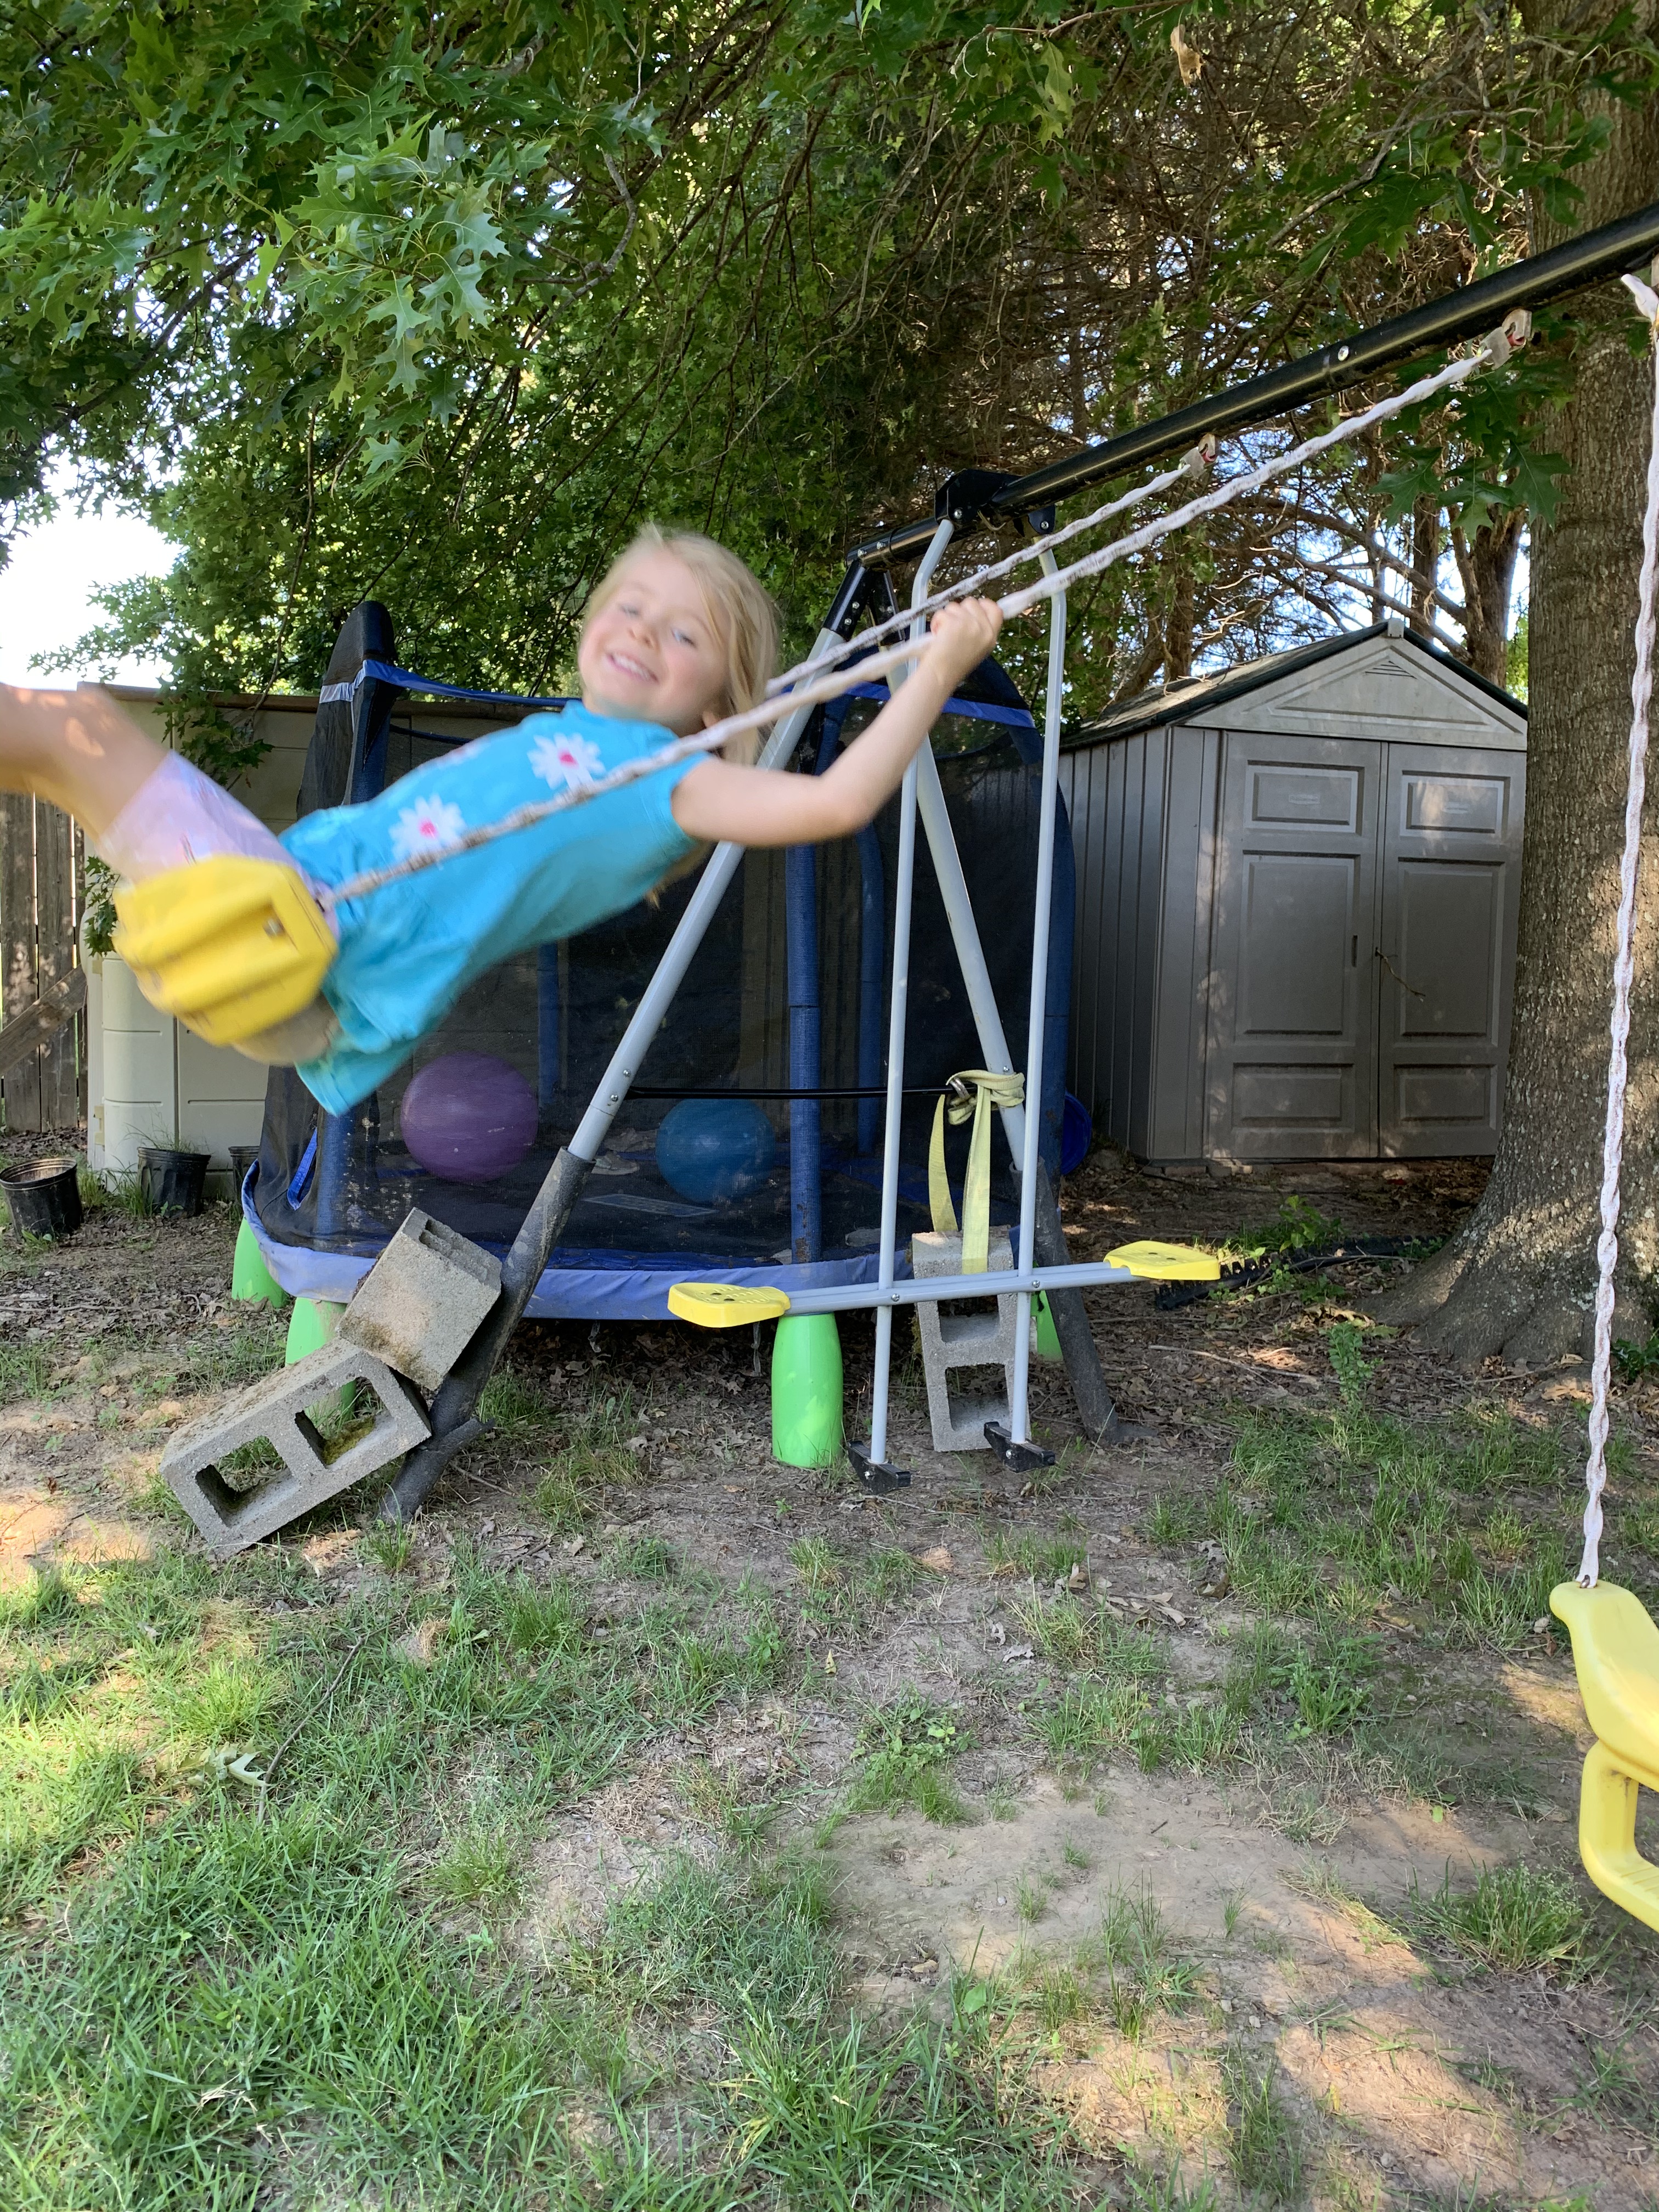
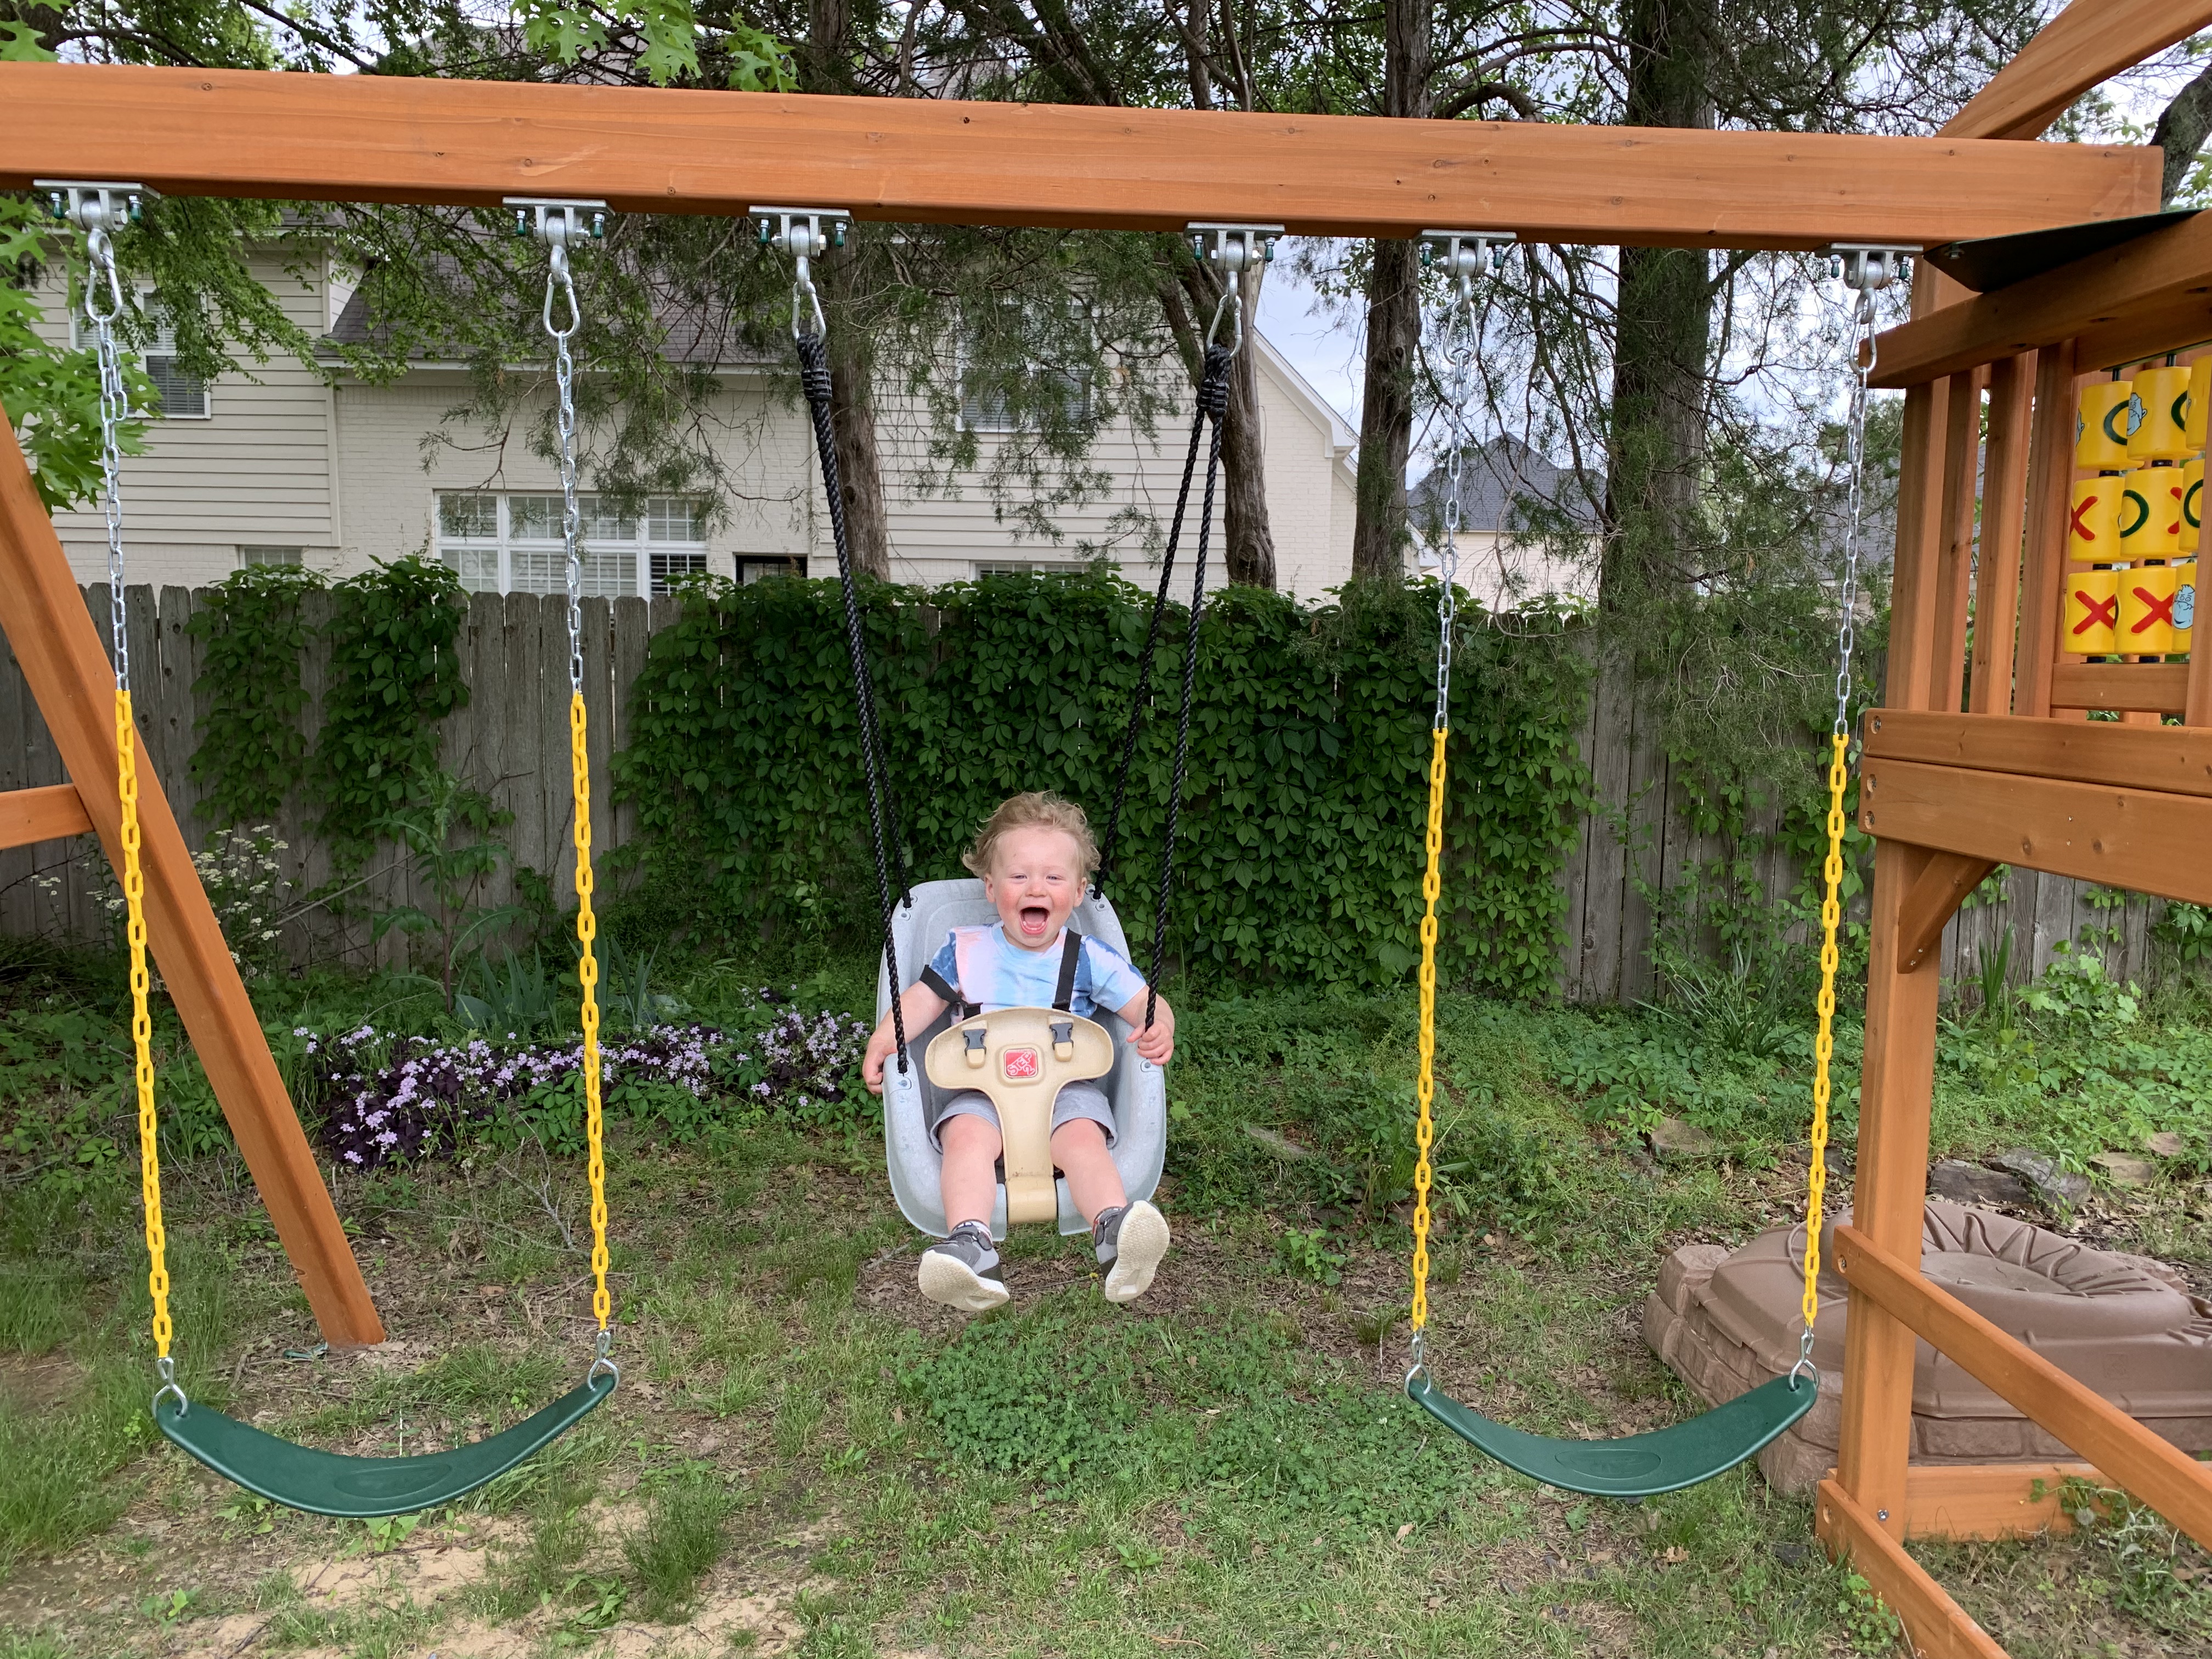
Friday afternoon, I was leaving to go out of town, so I didn’t have much time to work on it that day. But with my son’s help (definitely a 2-person job), I was able to get the swing bean installed along with the swings.
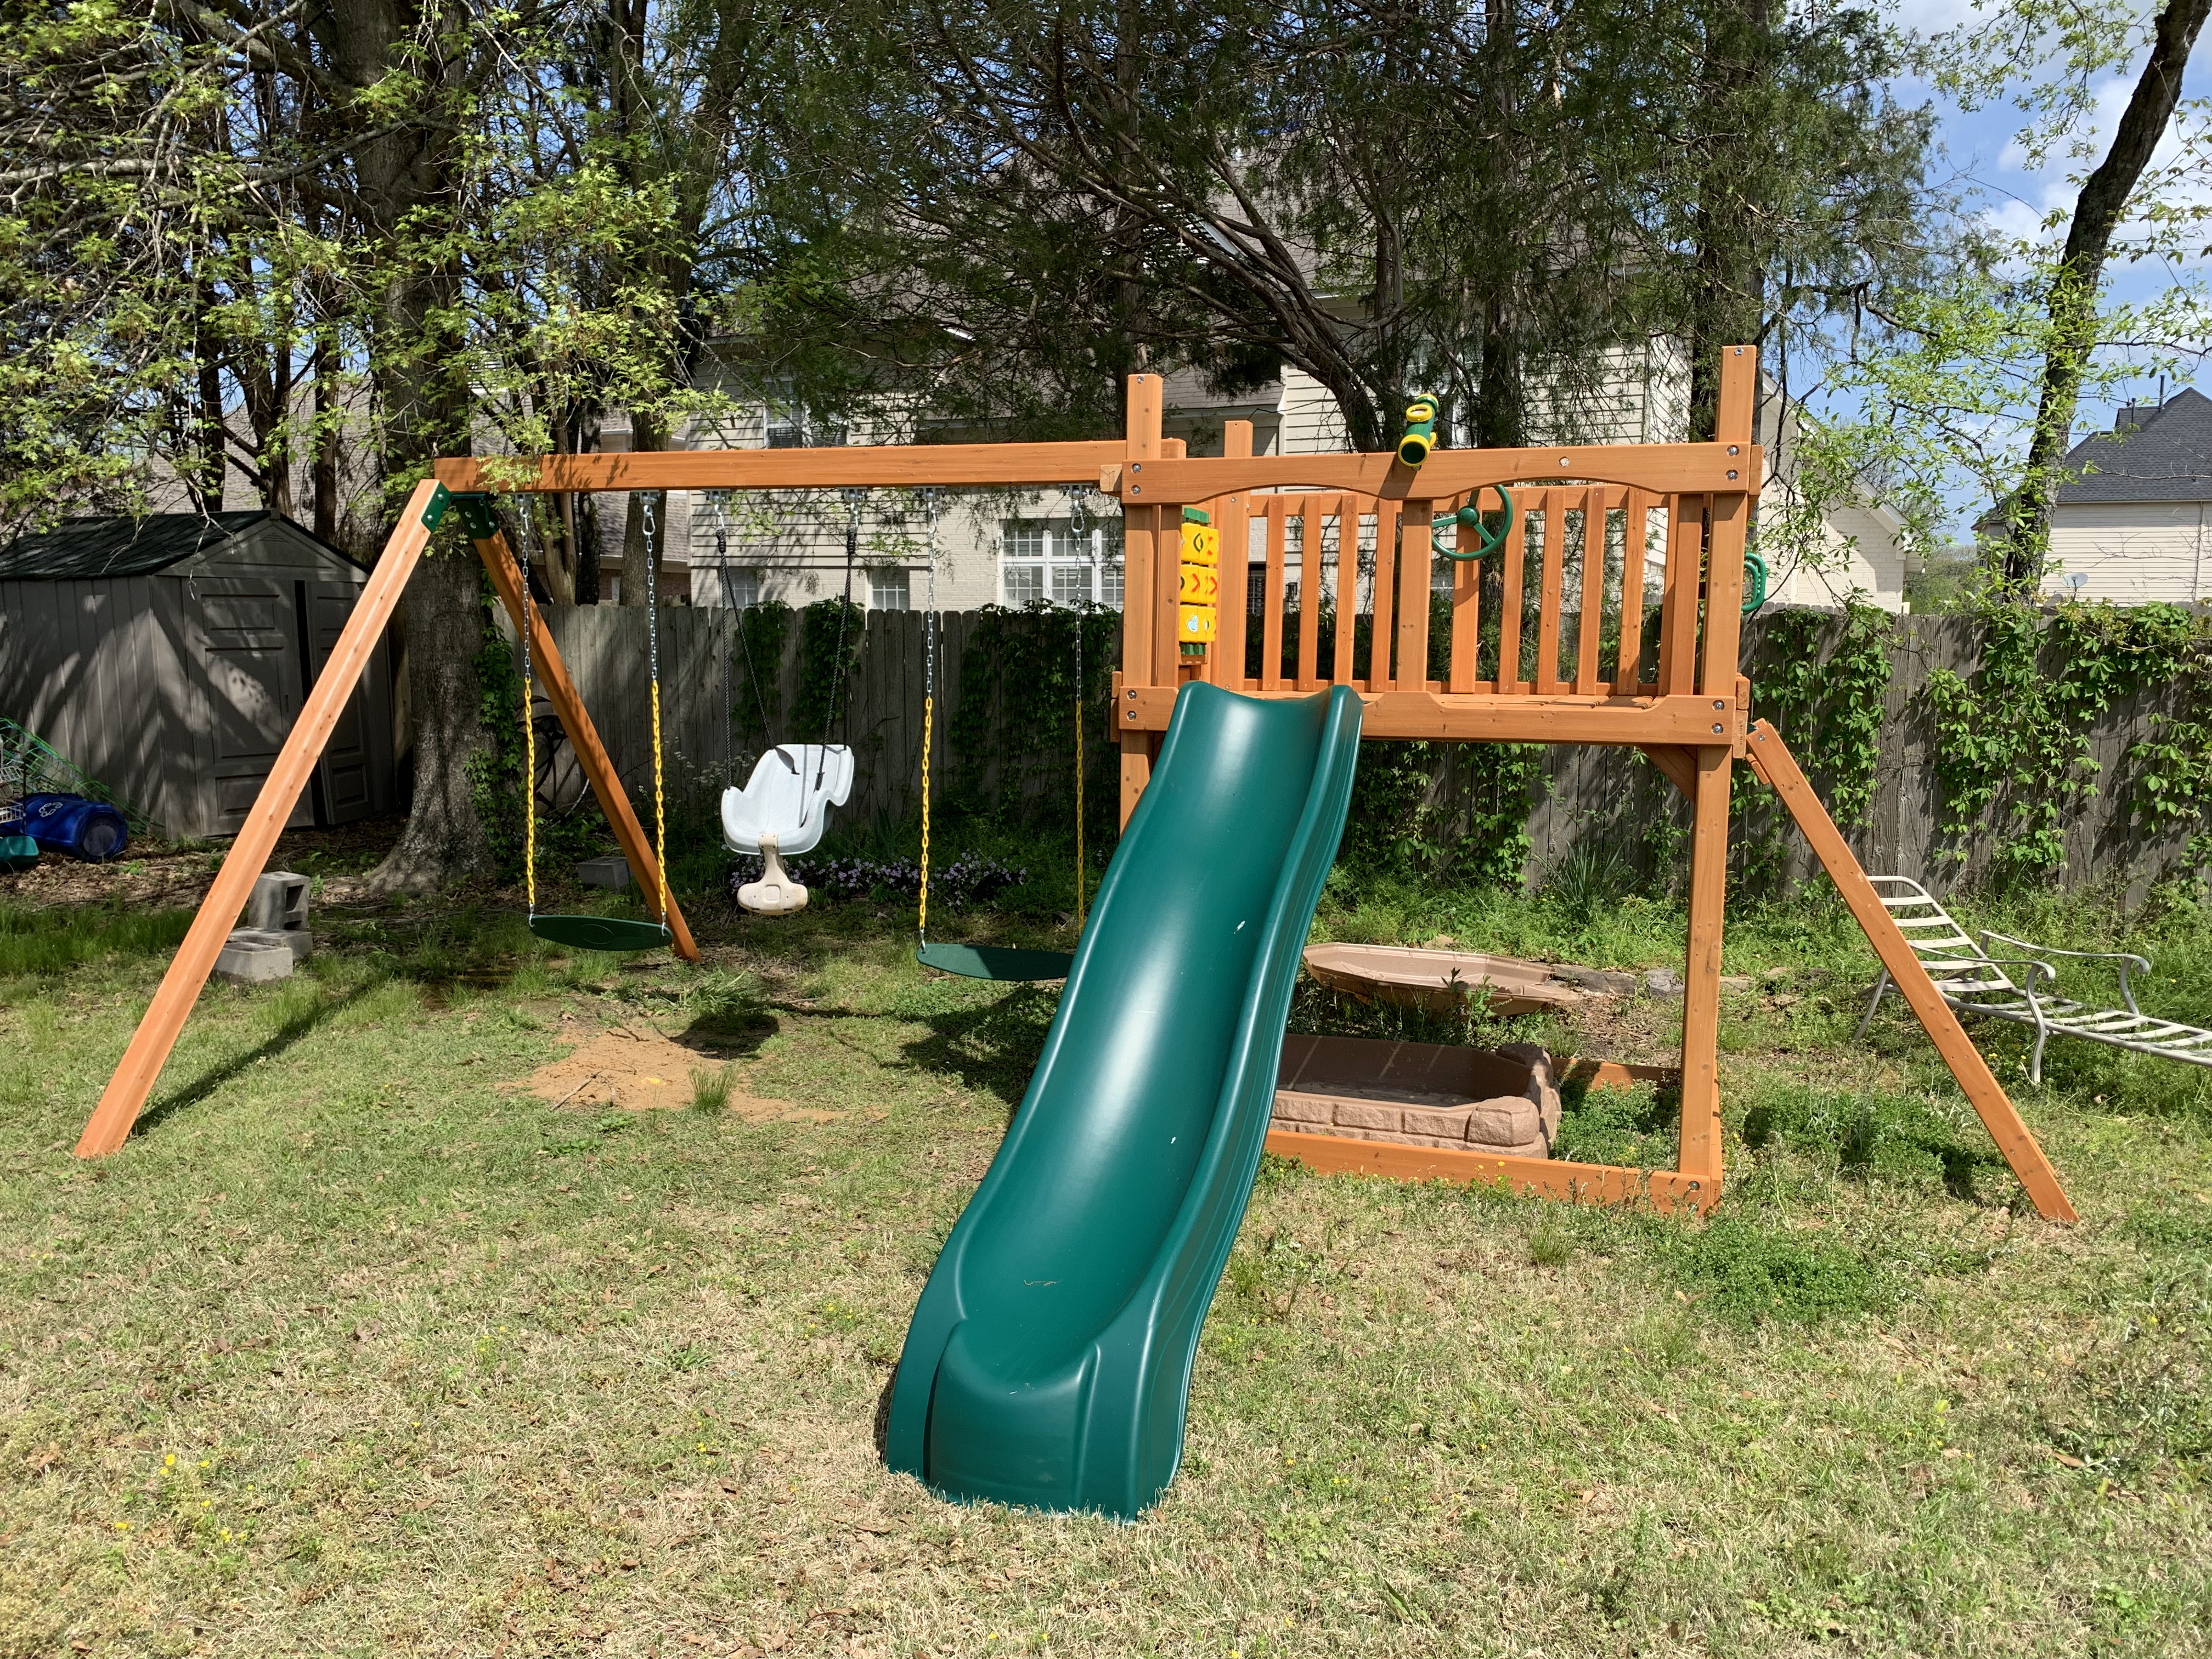
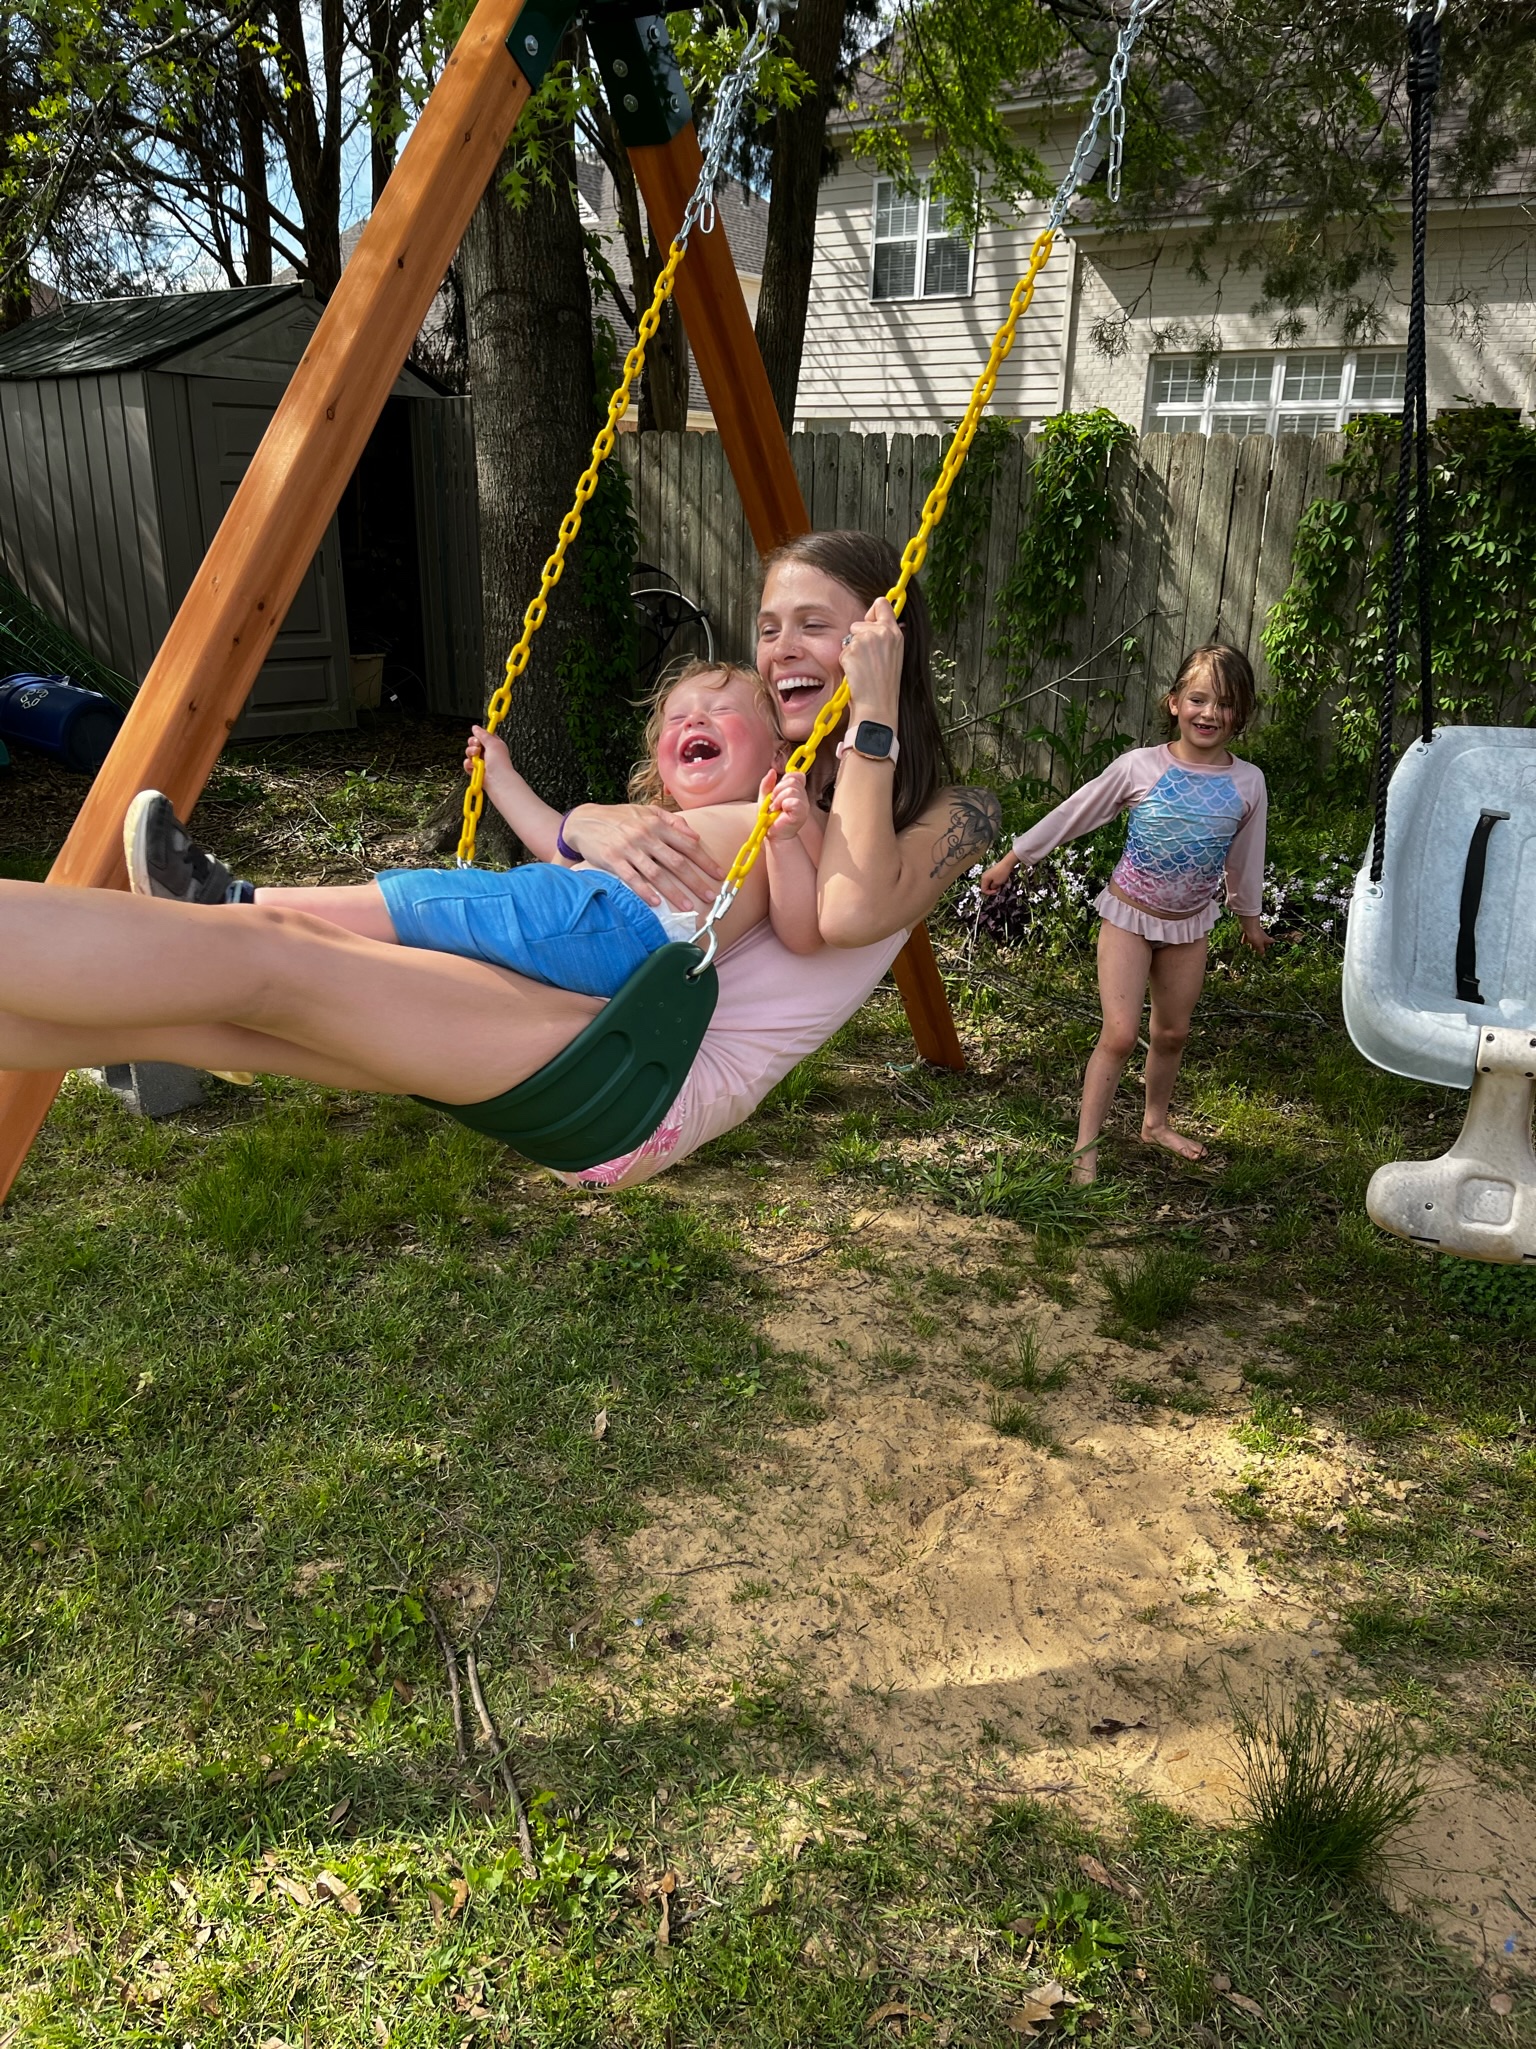
Although not a finished club house yet, it at least was a completed swing set and over the weekend while we were out of town, we got some great photos of the whole family enjoying it.
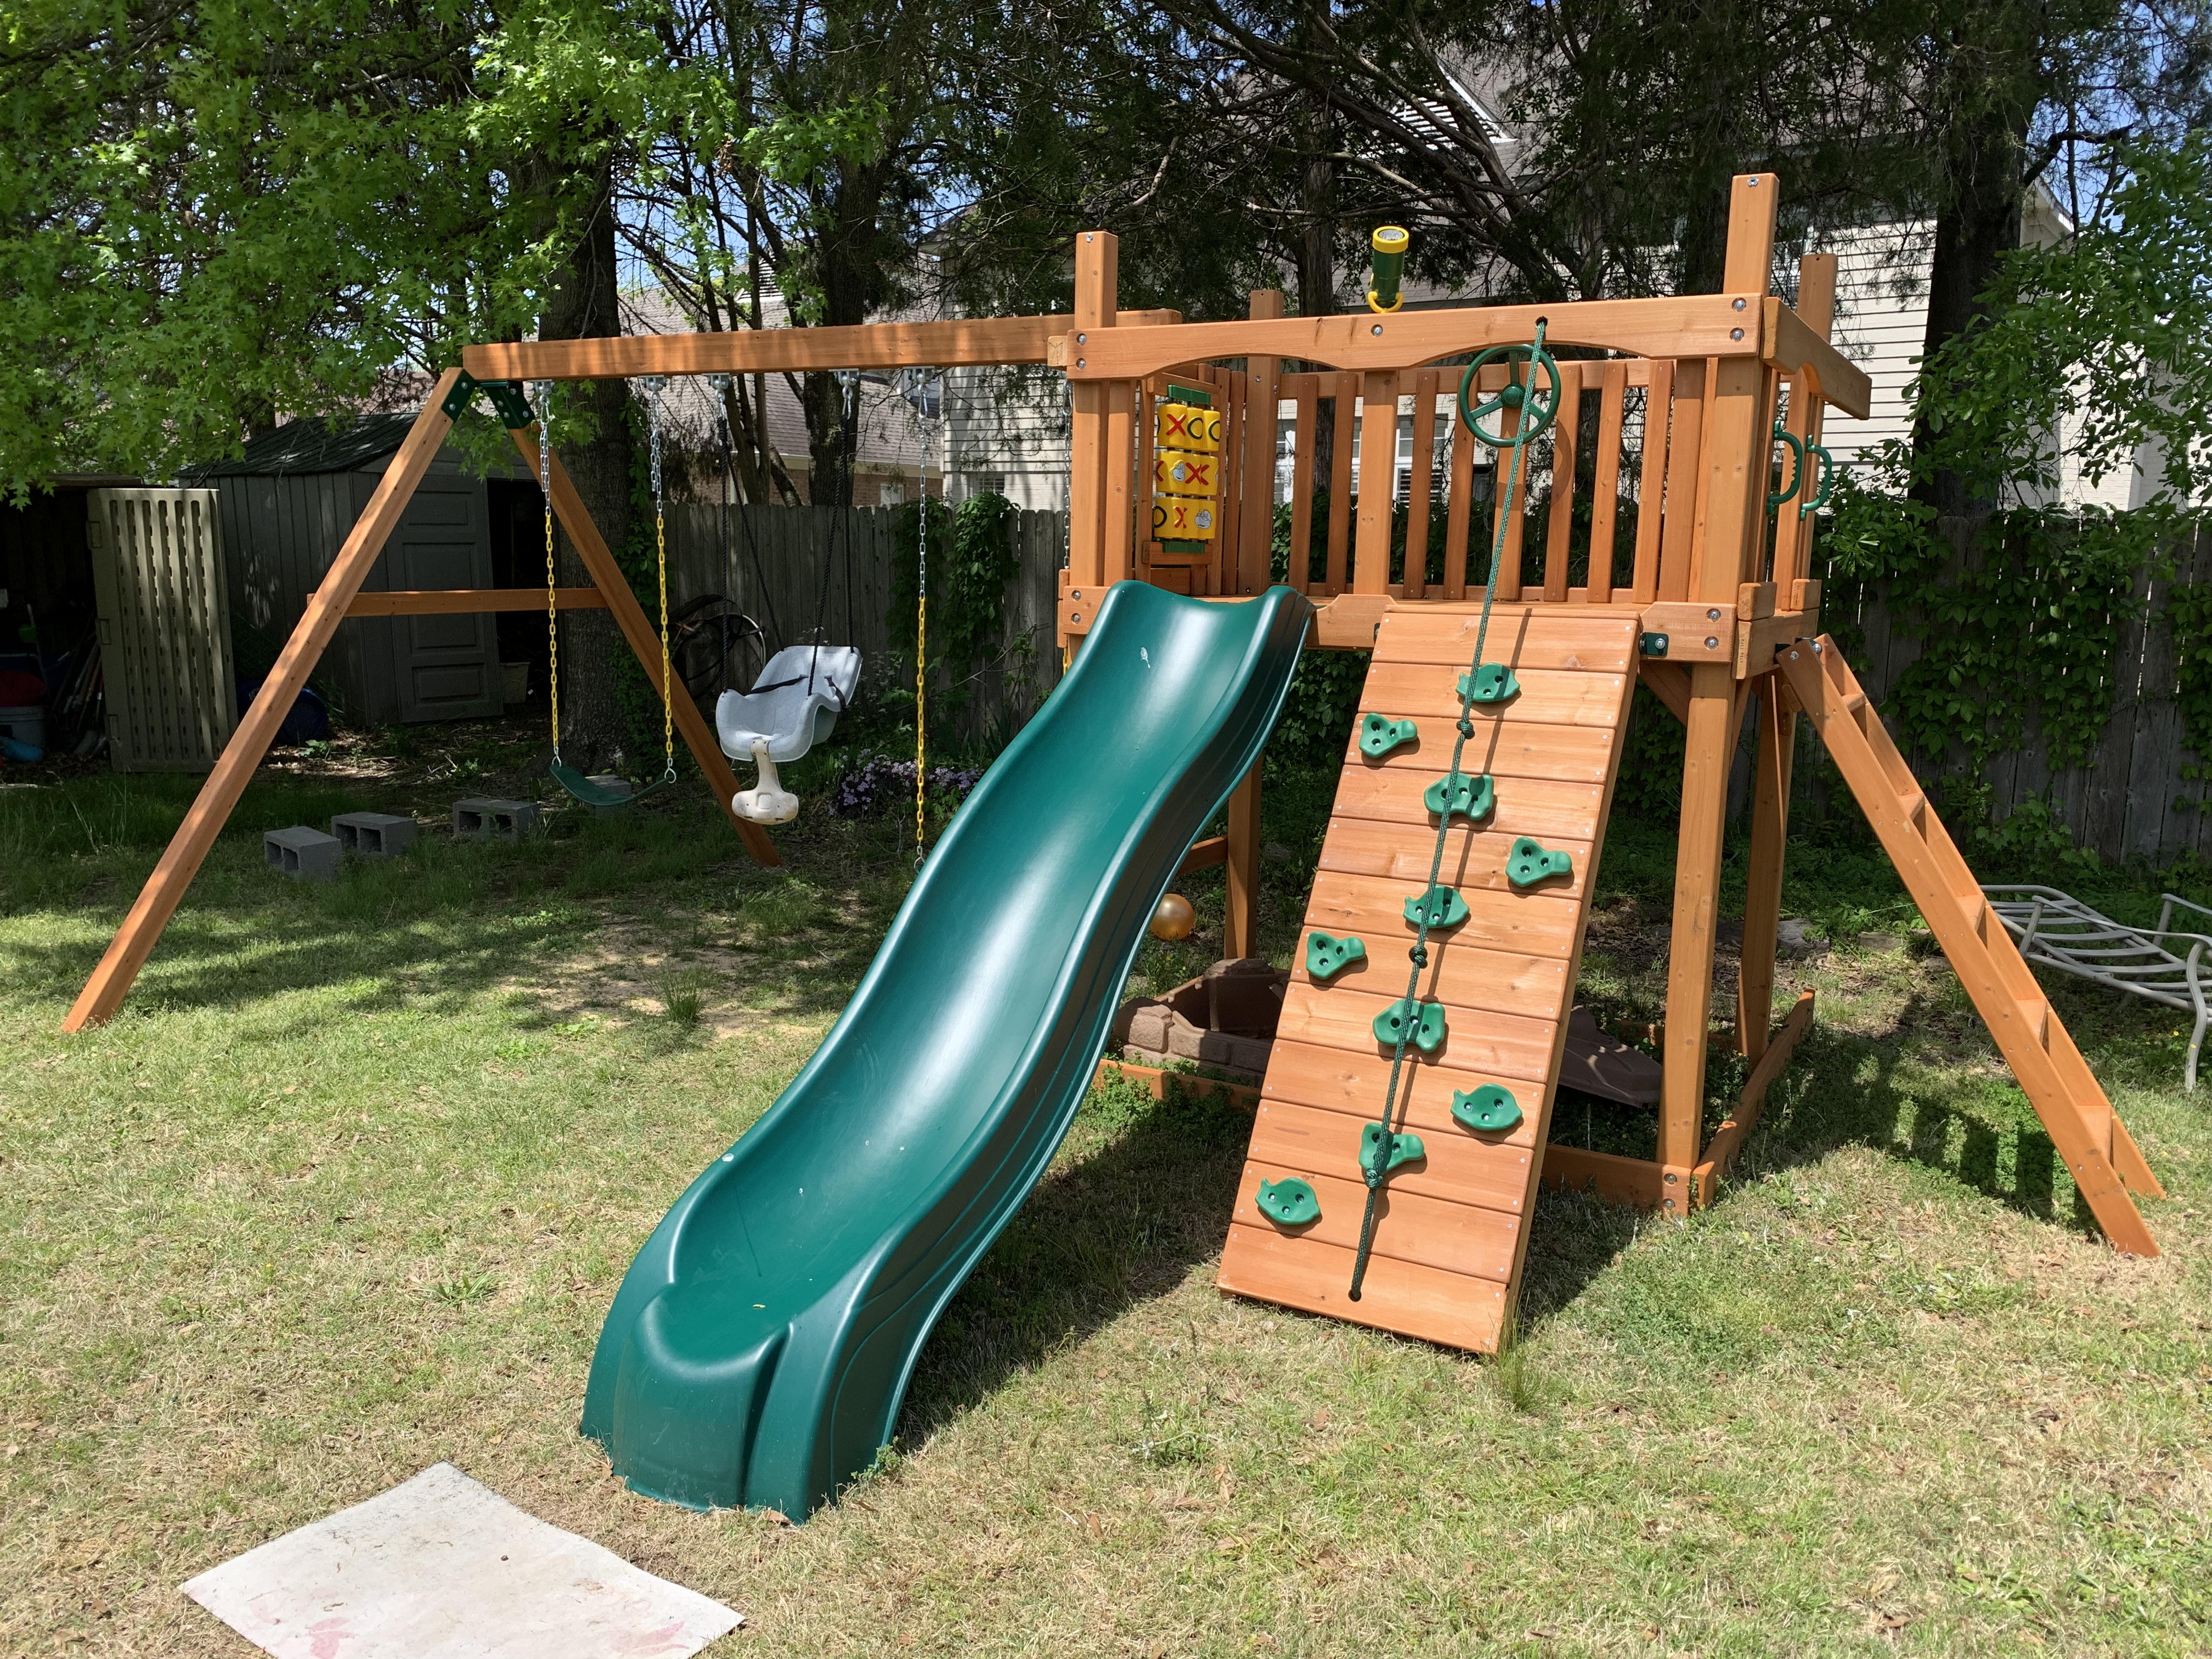
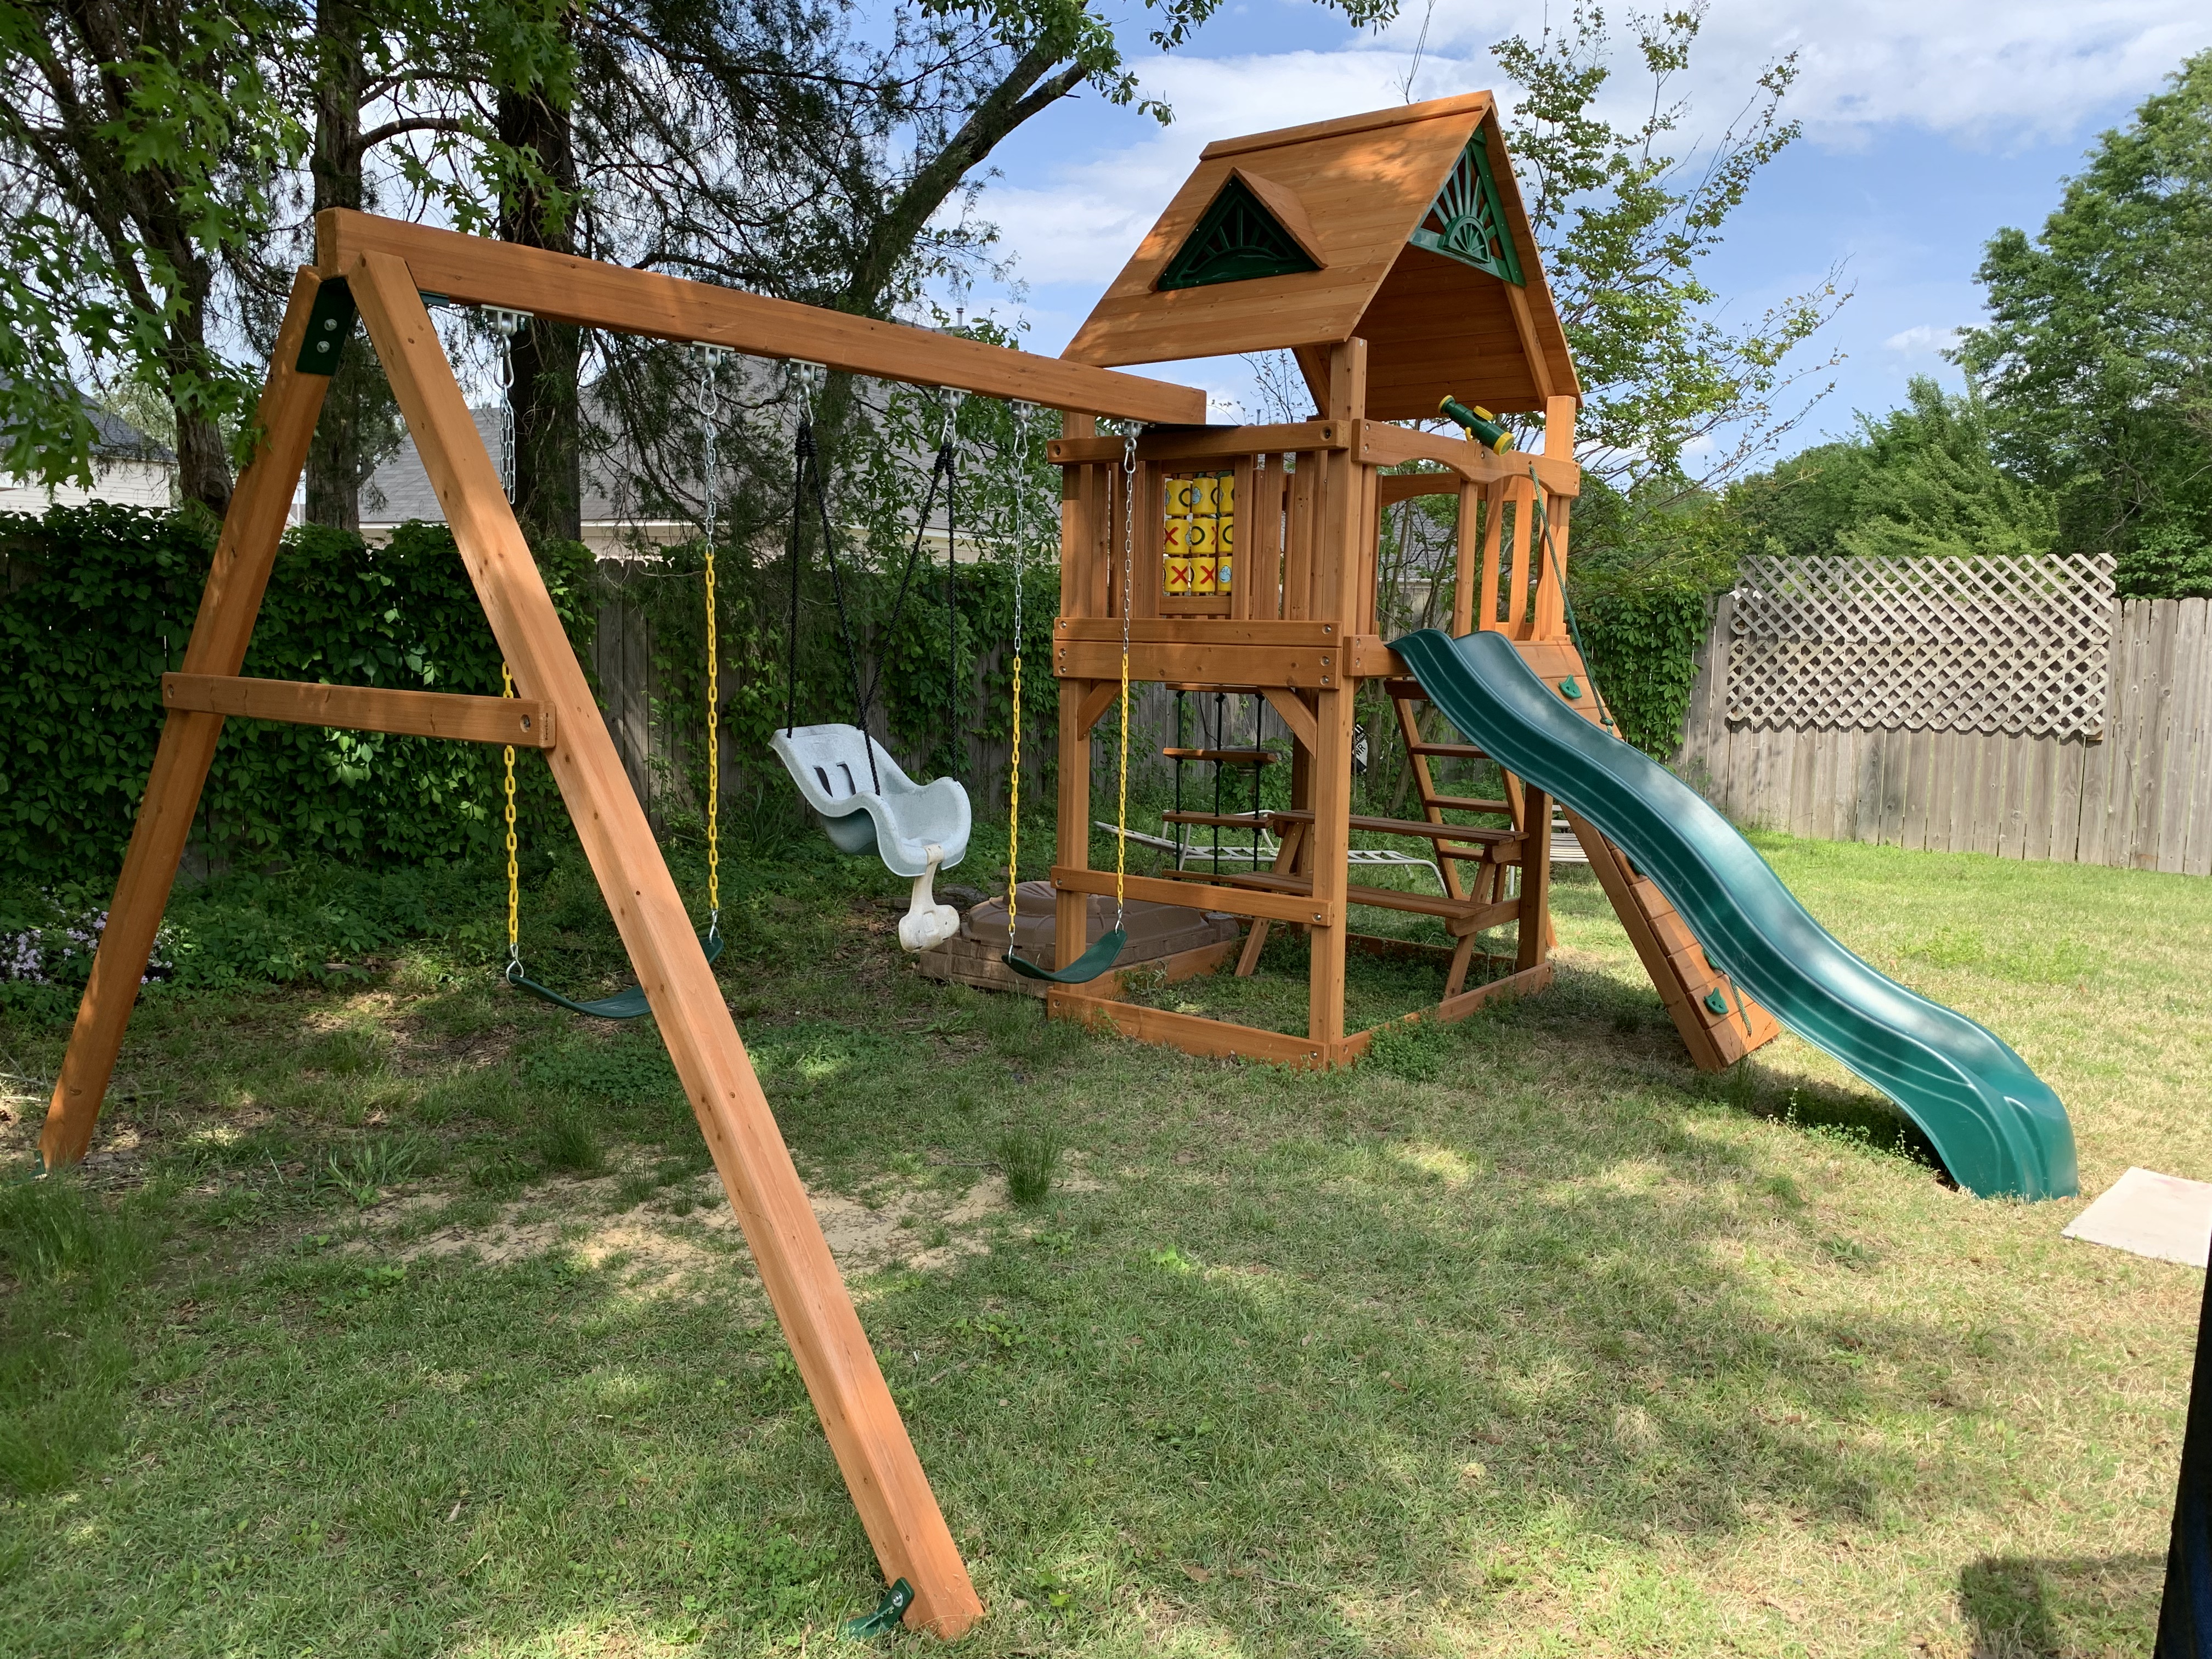
Upon our return, the arrival of the replacement boards allowed me to add the rock-climbing wall…
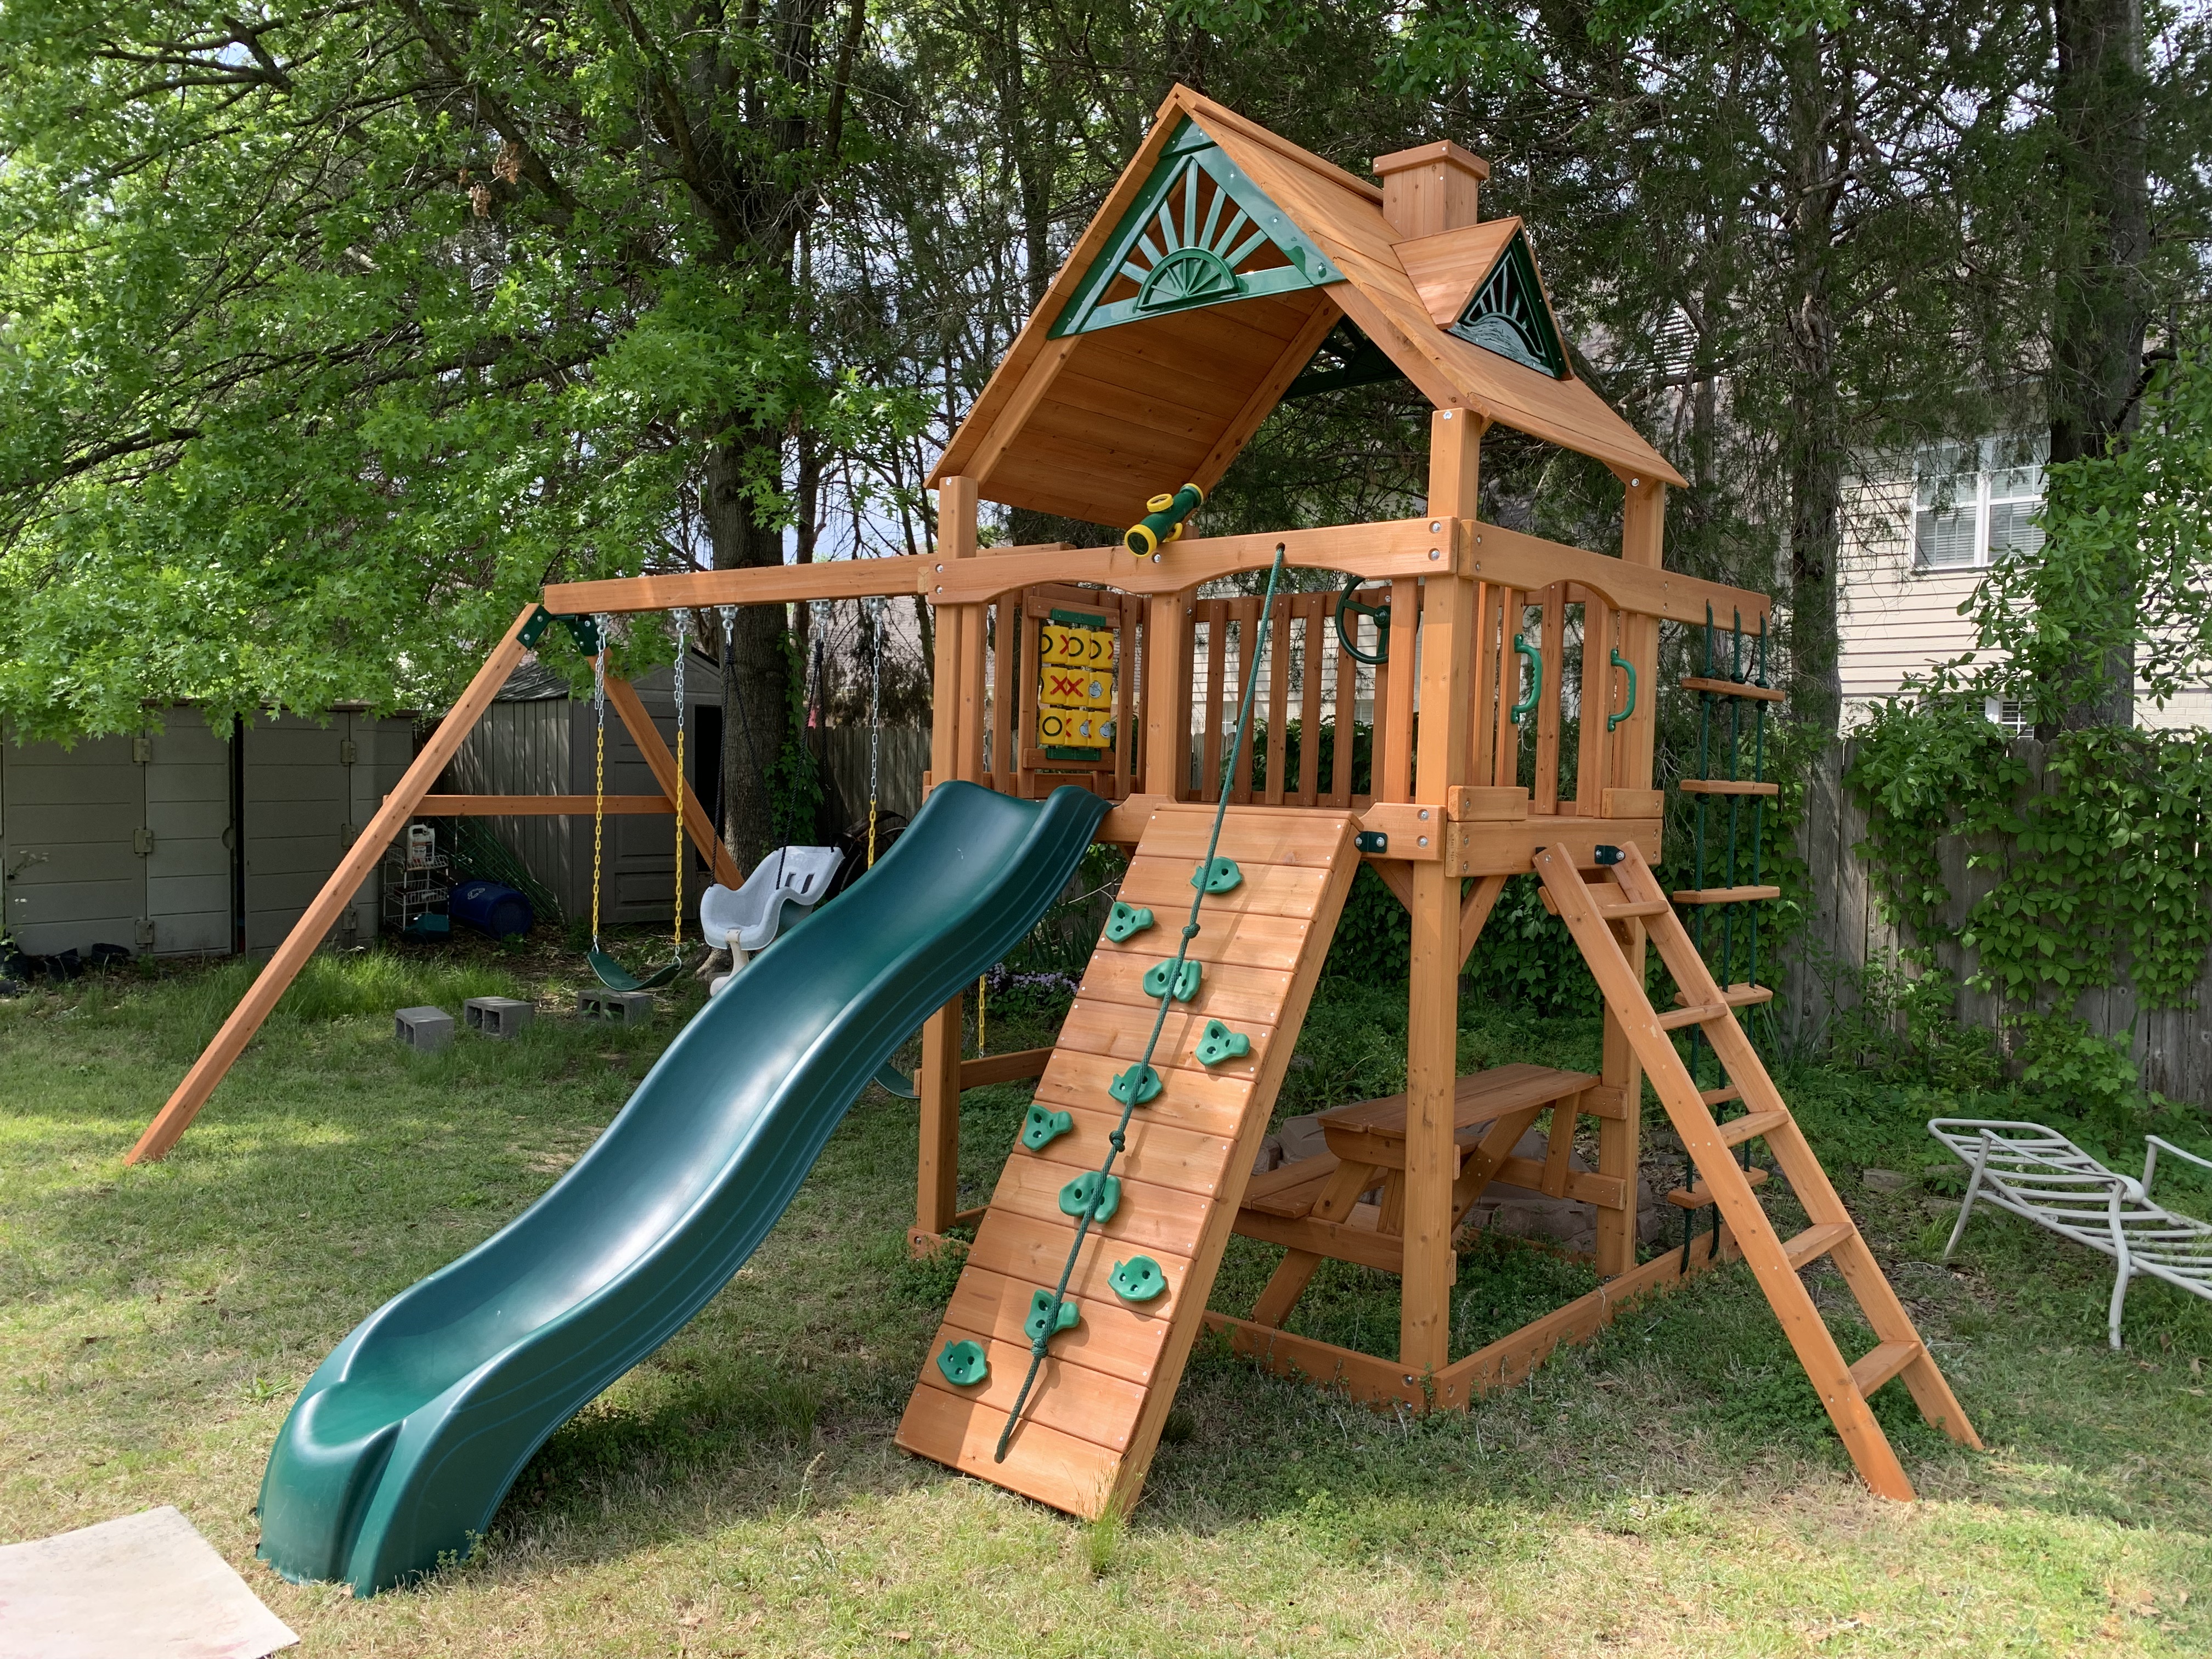
…the club house roof, complete with dormers and chimney…

…and finally, the picnic table and rope ladder.
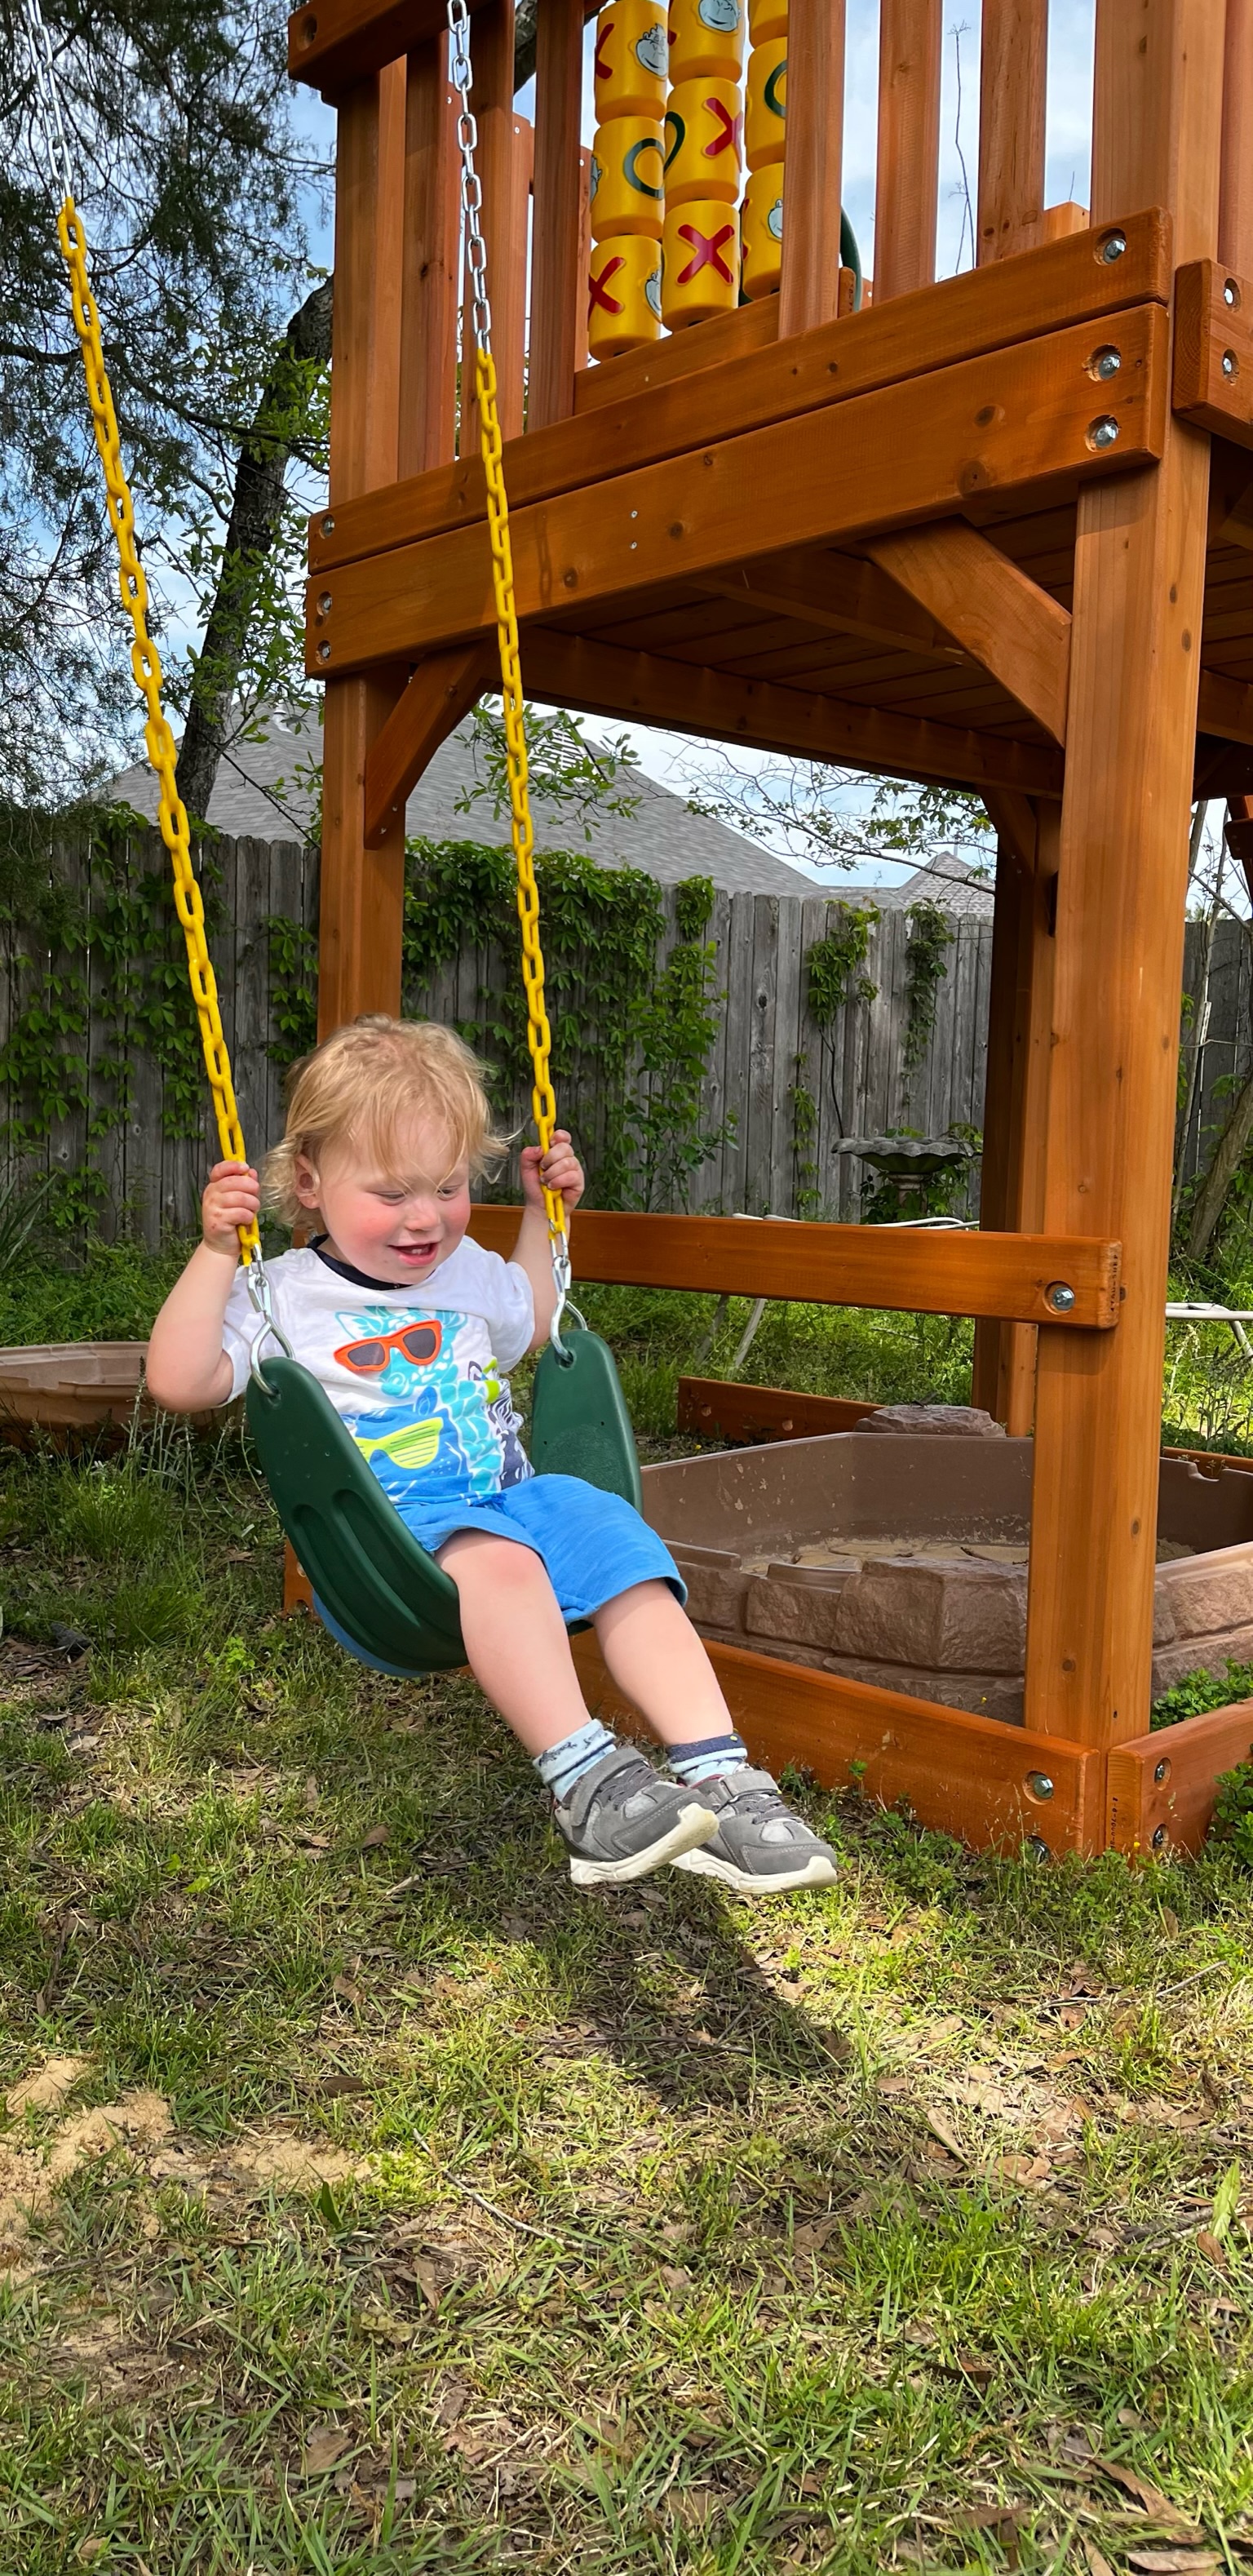
By the gleeful expression on his face, it is easy to tell that my grandson is enjoying to swing on the upgraded swing set!
I didn’t track how many hours it took me to assemble the play gym—who tracks how many hours they spend having fun? But for those individuals wanting some kind of a time accounting, the first two days, I put in a 9 to 5 hour day with a short lunch break. But all the other days, I only had a few hours to work on it. Over the course of two weeks, I worked on it for some amount of time on seven separate days. And throughout the assembly, I was most impressed with how well the kit was engineered and manufactured and how easy it was to assemble. And with all those individual parts, I was amazed that when I tied the last knot on the rope ladder, I only came up short one screw (which I probably lost myself).
Now with such an upgraded play set, we just need to wait for our other grandchildren who live on the west coast to visit this summer and enjoy the new play gym with their Memphis cousins. By then, this fella may have graduated to a big boy swing!
Categories

This is awesome!! Like their own private playground in the backyard! Can’t WAIT to see all our little ones playing on it!
It should be a blast!