
Doll House for My Sister’s Grandchildren – 4th Phase
For the top floor, my sister had decided that one room would be an art room and the other would be a bathroom (no outhouse for this classy farmhouse). To finalize the plans and make concrete interior design decisions, my sister said she would drive over the last weekend in February to have a working session like we had back in December. But two events canceled this trip.
First, where my sister lives in Northwest Arkansas, they had an ice storm on Wednesday and Thursday that left the roads impassable. Second, when we decided to have a virtual meeting Saturday morning, she told me that her son had decided that he would like to finish the top floor with help from his kids (he has done some impressive modeling himself). That left us with two choices.
We could either finish the house with the top floor interior looking just like the photo above or we could take the house out on its westward trip unfinished. I knew from past doll house building experience that it was much easier to paint or paper interior walls before the house was assembled since getting adult sized hands into 1/12-scale tiny spaces can be near impossible. We discussed the pros and cons of the two option and in the end decided to keep the house unfinished and not attach the top floor or roof. But then the question became how much of the exterior could I finish before assembly leaving my nephew’s job primarily interior work?
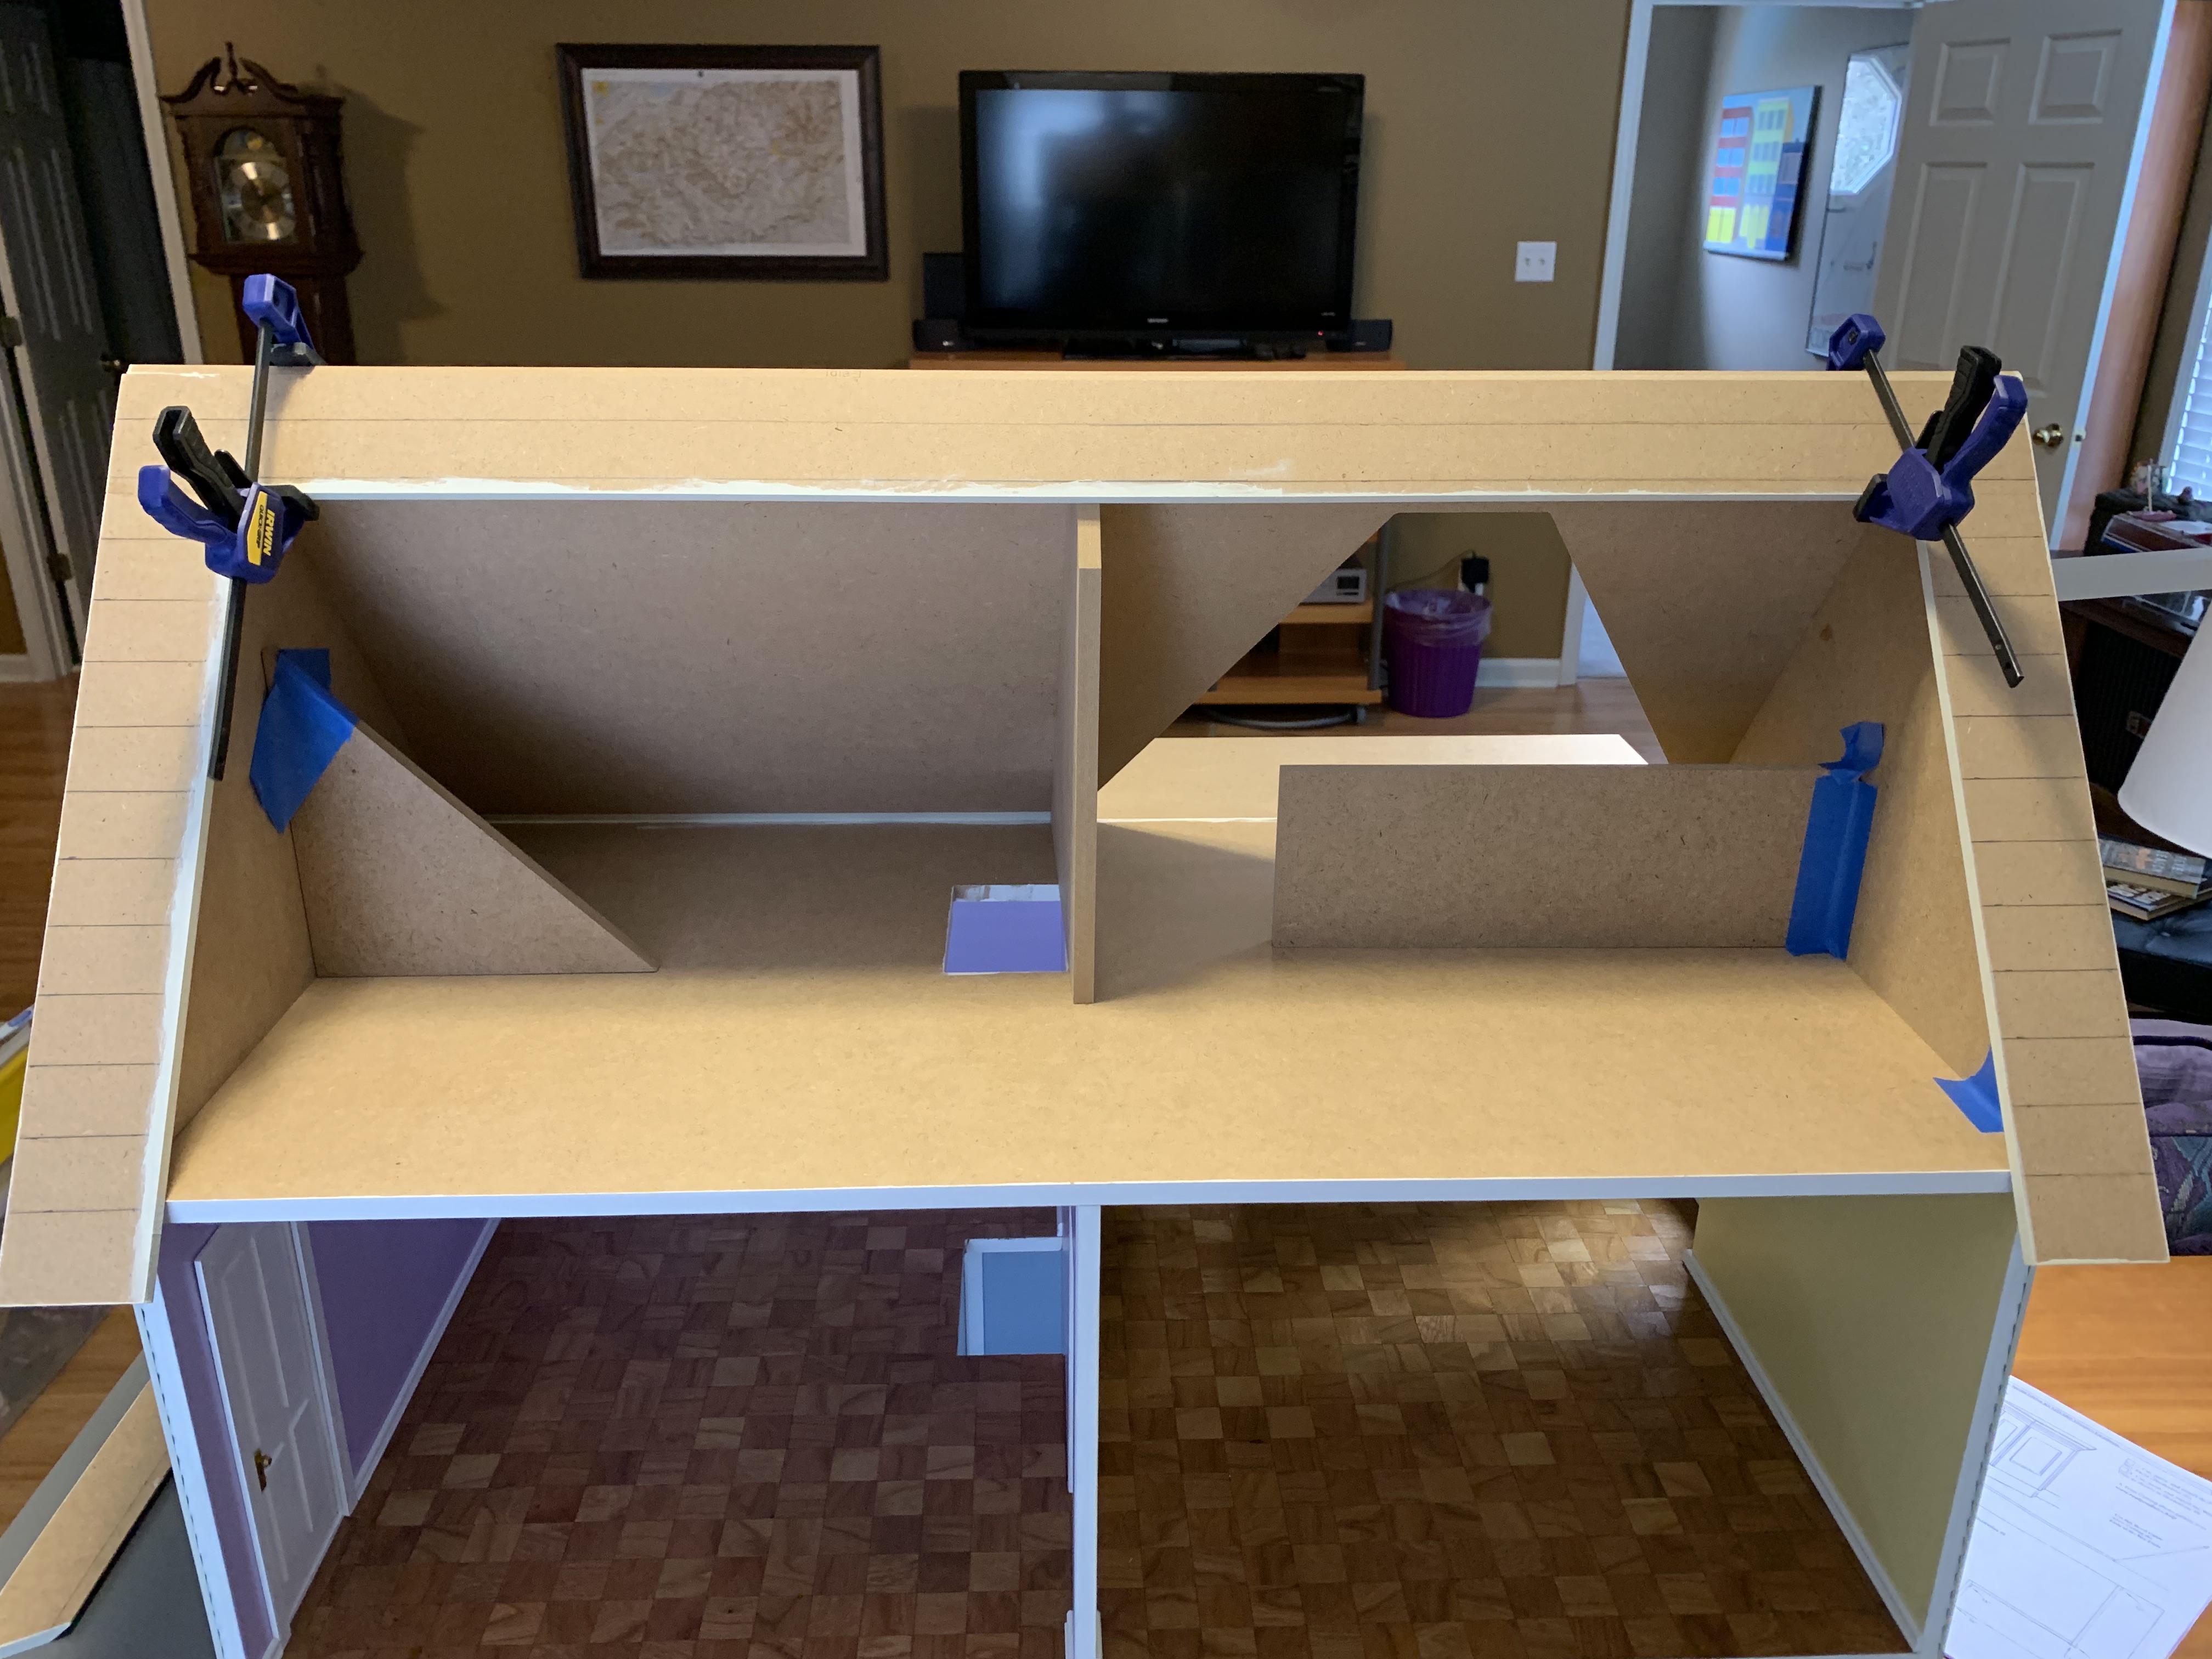
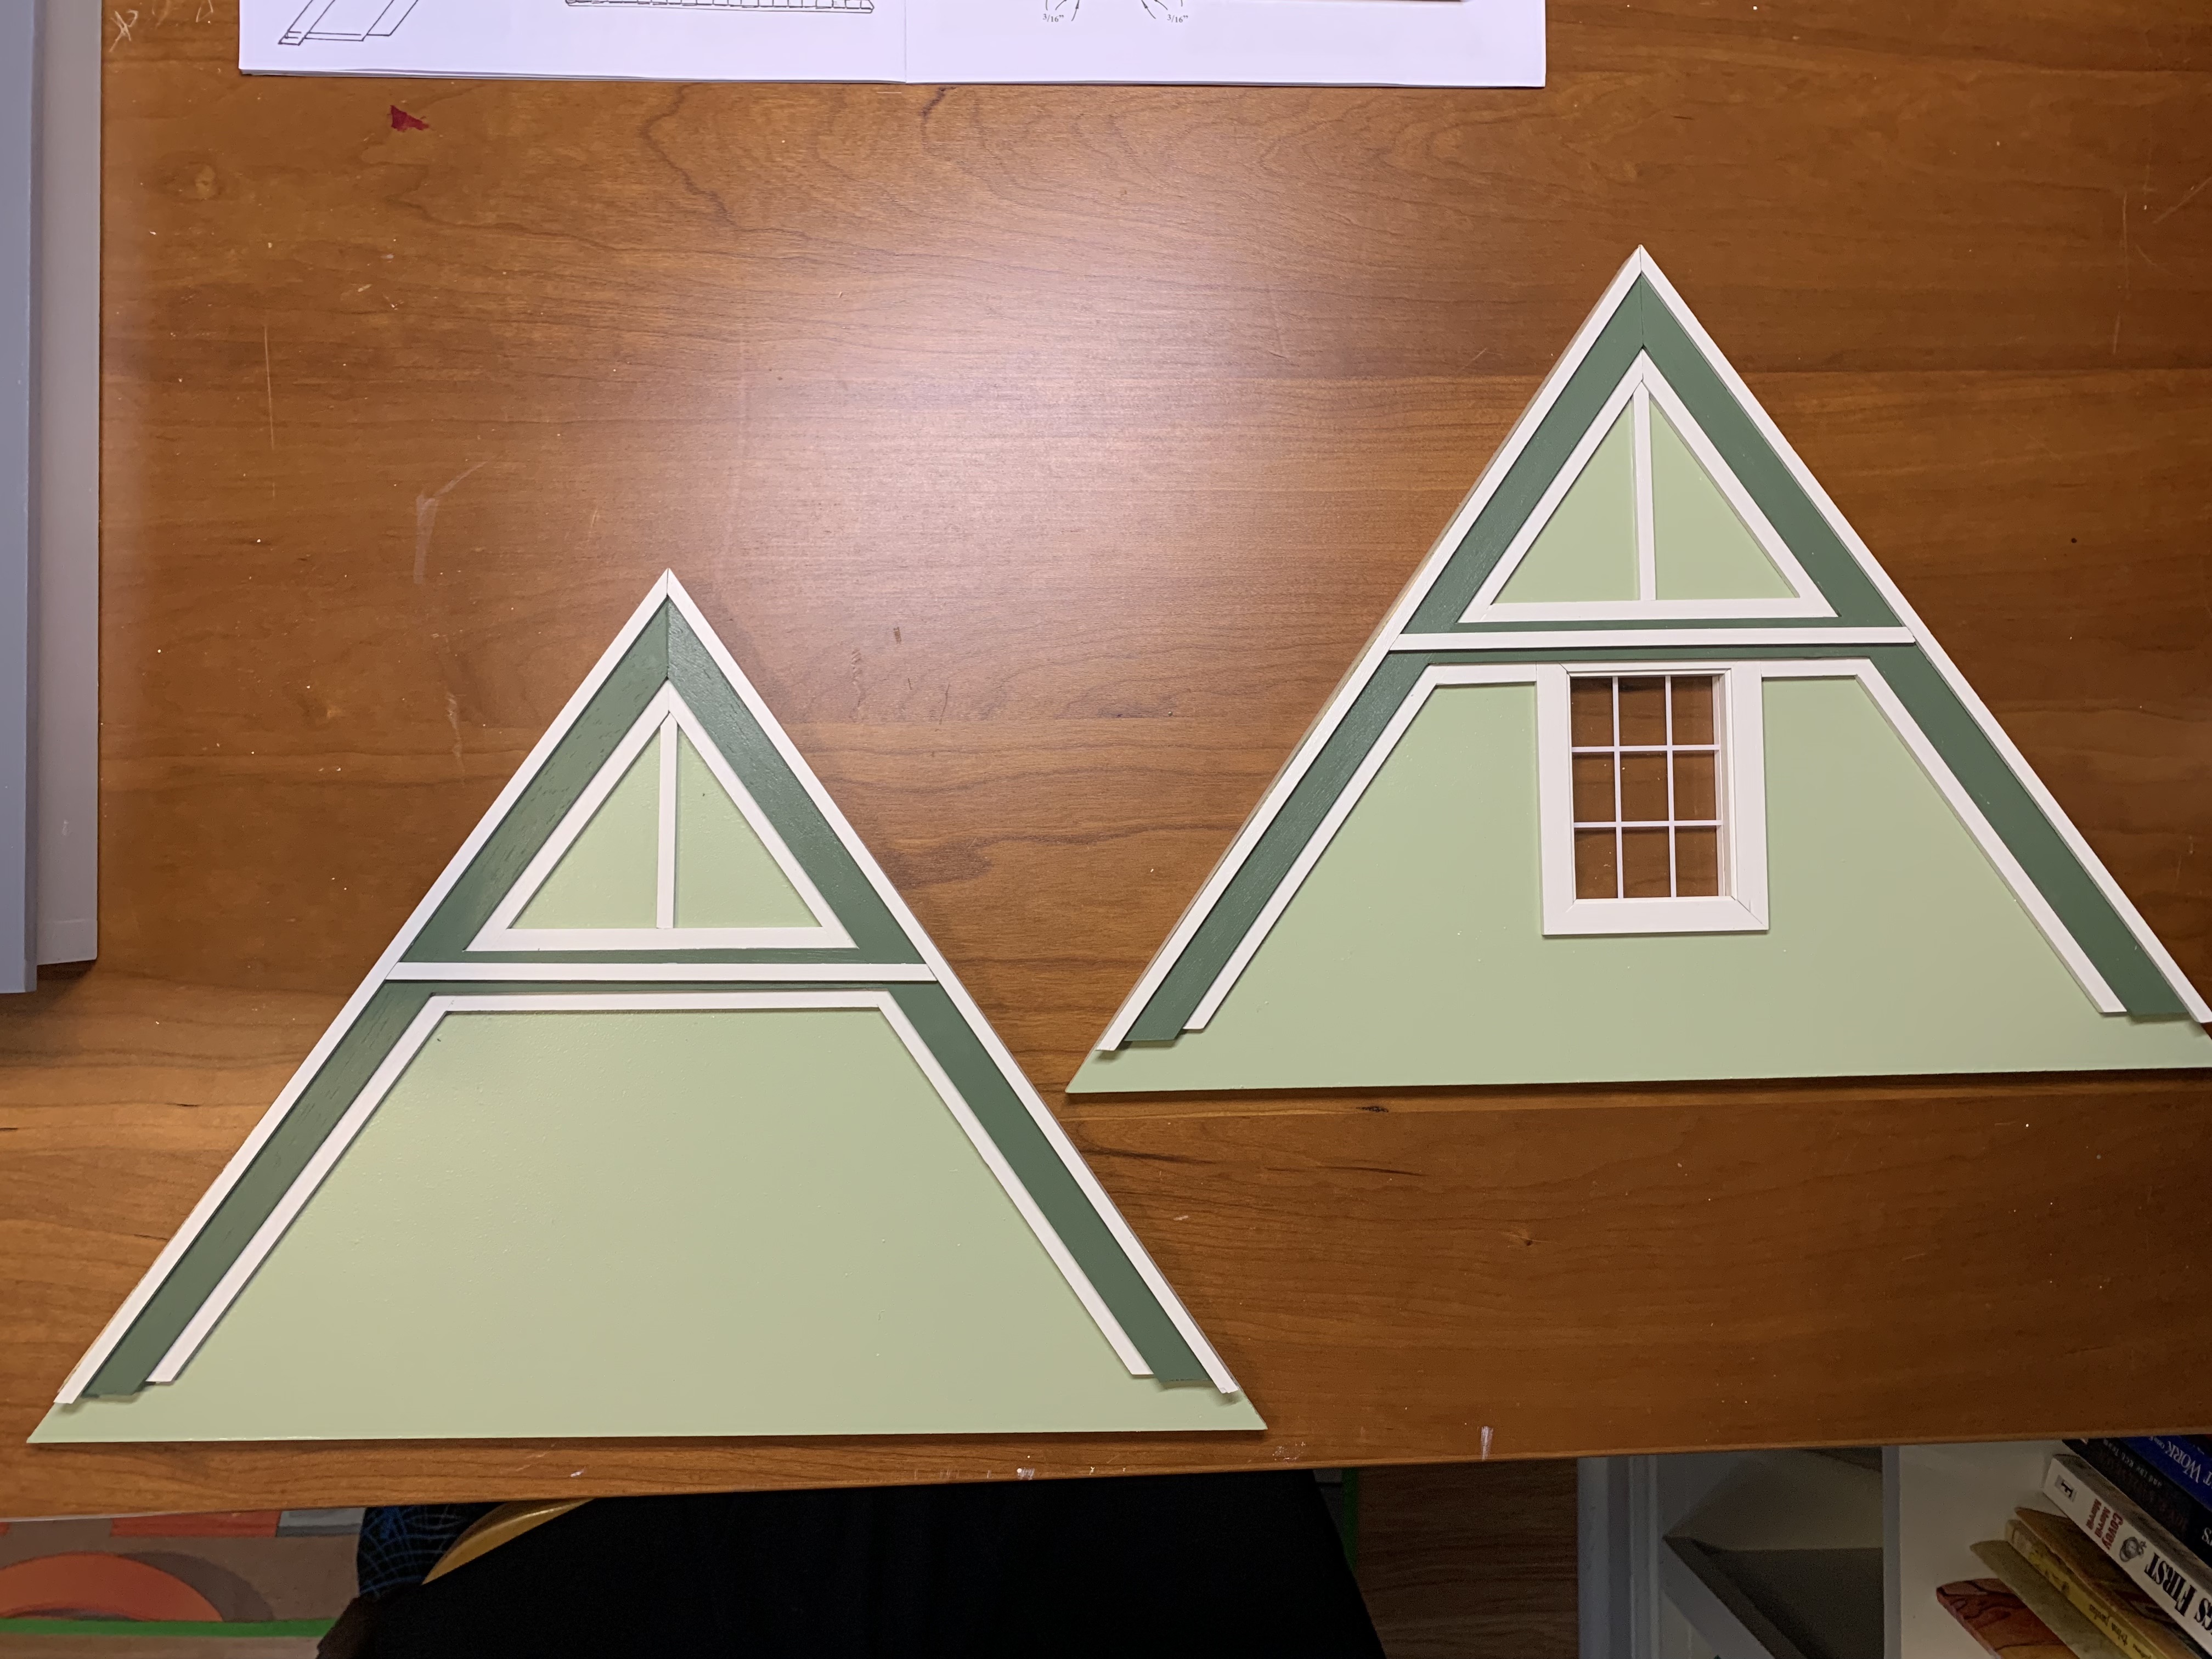
To this end, I taped together the top floor, walls, and roof pieces and explored what would be required. It seemed plausible but it really just meant that I would work ahead in the directions, sometimes completing steps well before they were scheduled. First up was getting the attic and gable trim pieces cut and painted.
Normally this step would be performed after the top floor had been assembled.
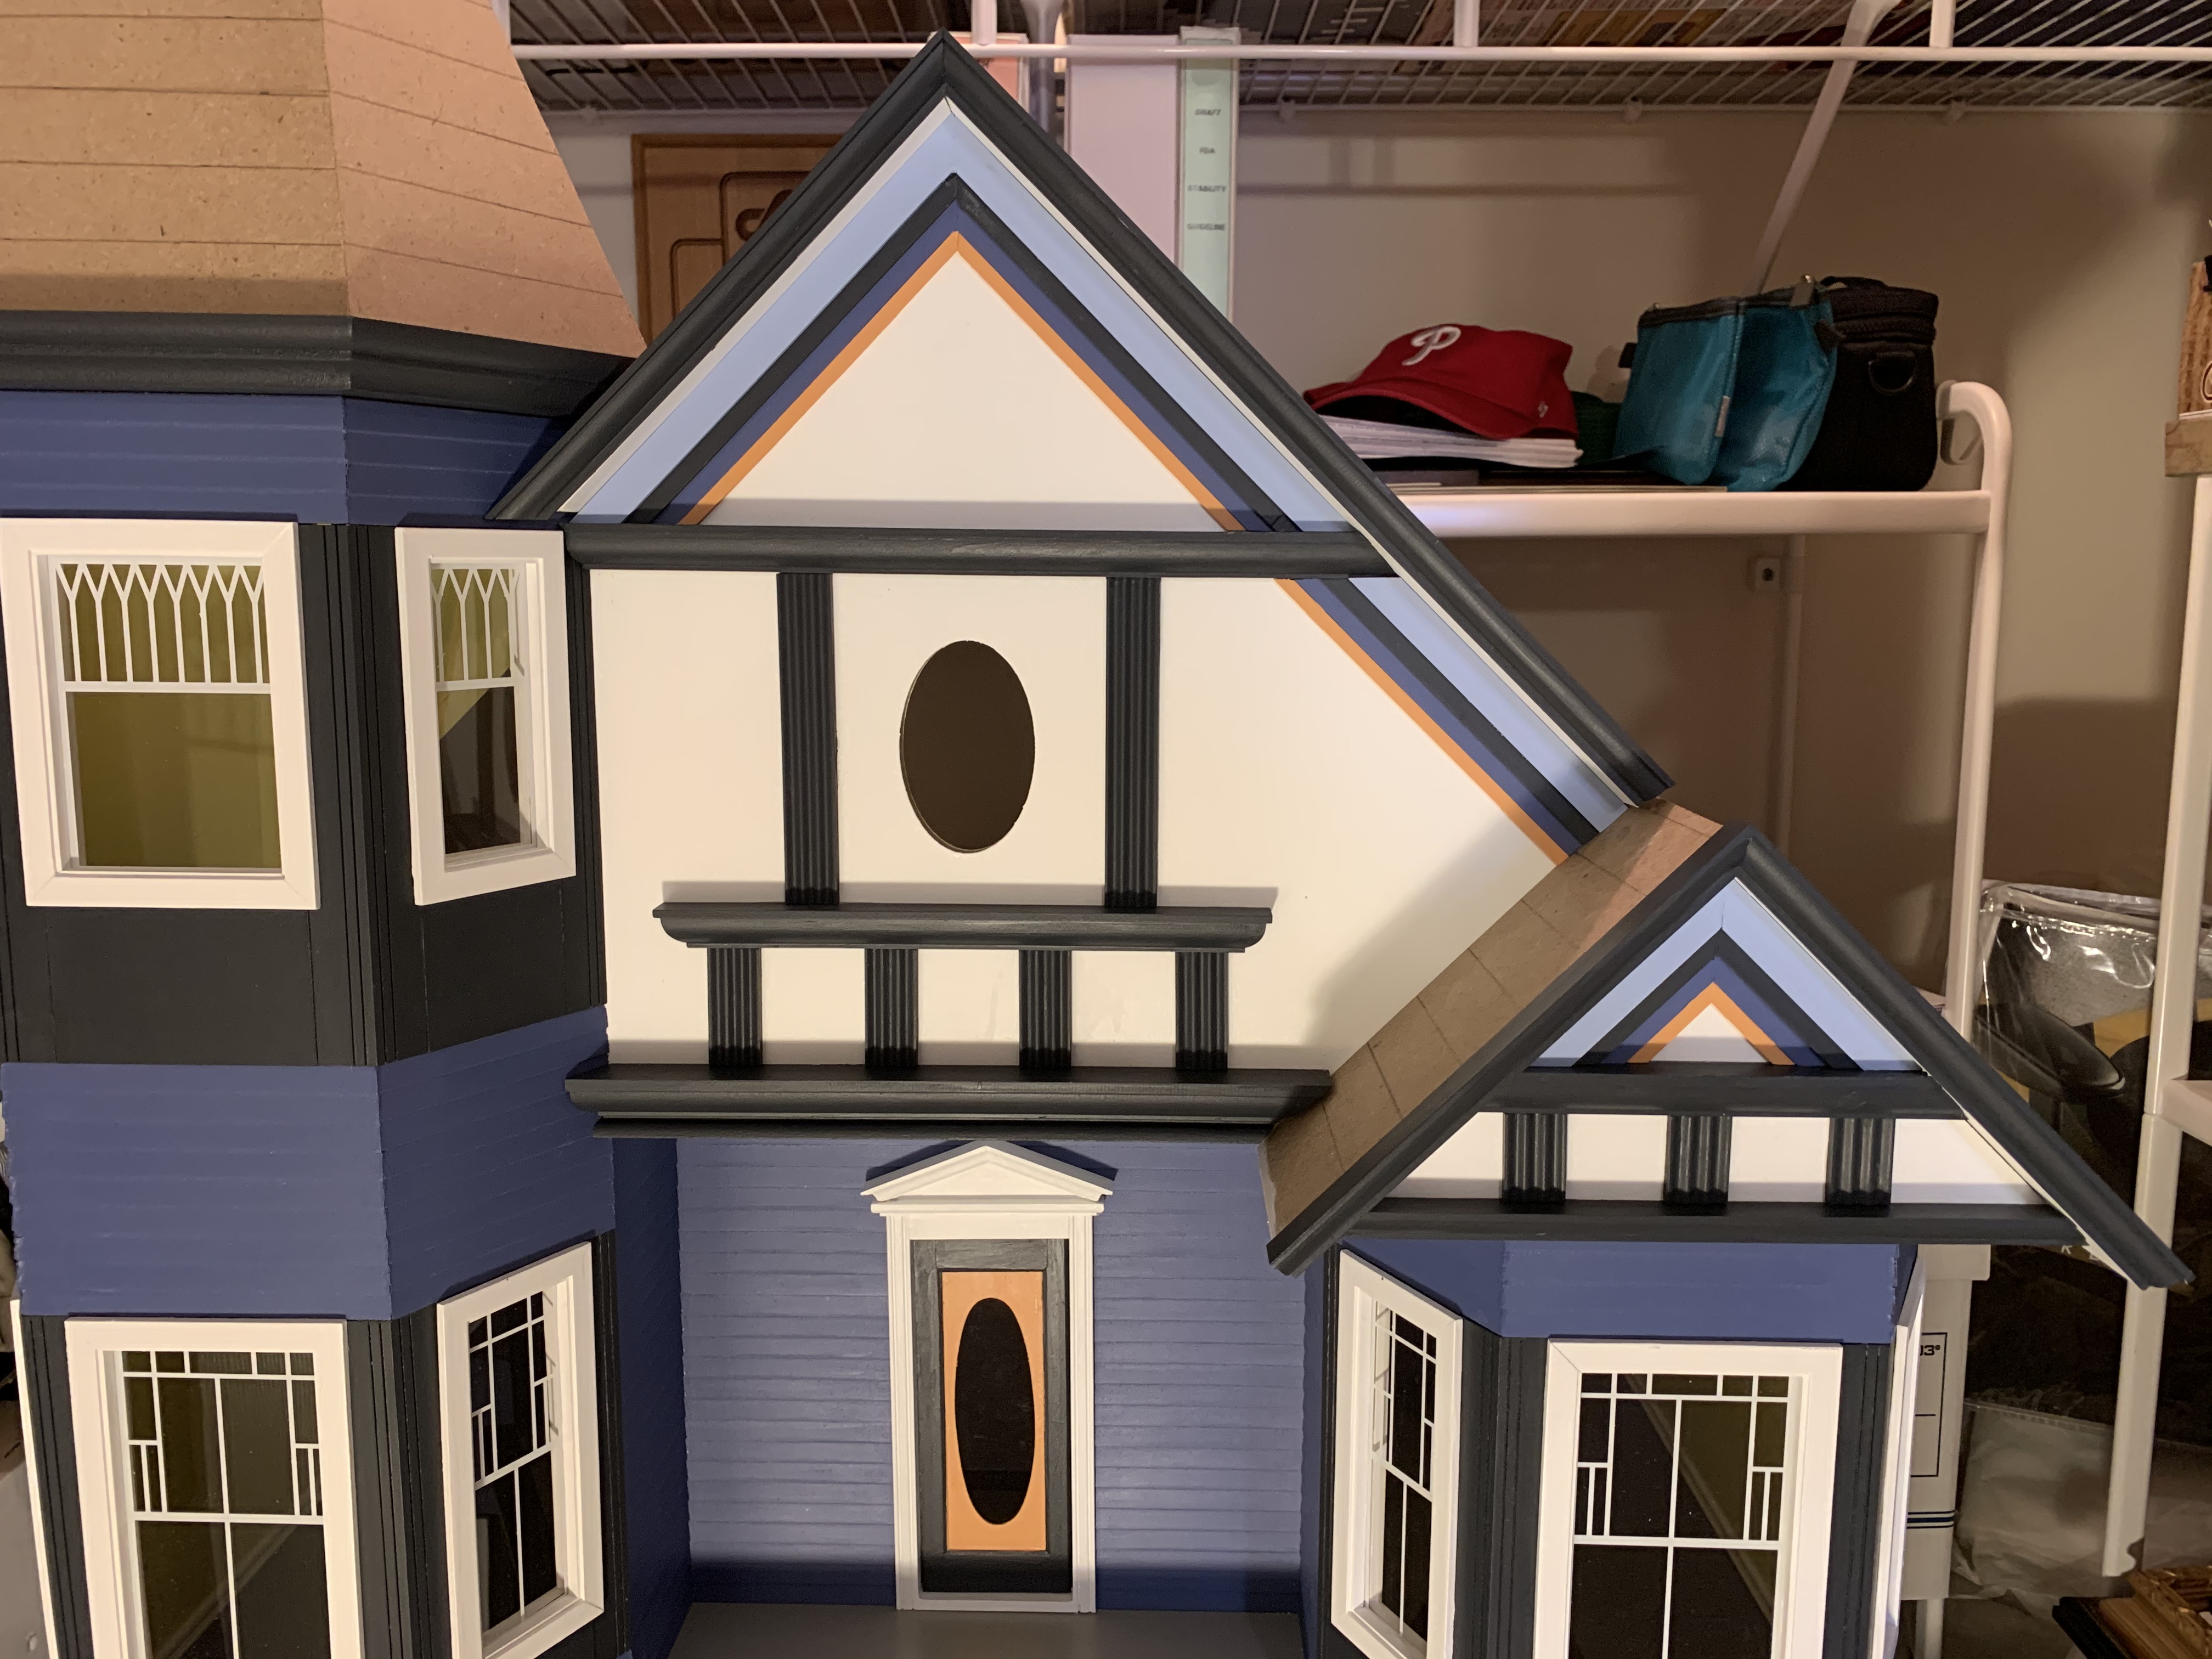
In fact, the last doll house I built had similar three-layered trim that I recalled was quite challenging to cut to the proper angle and length with the house assembled.
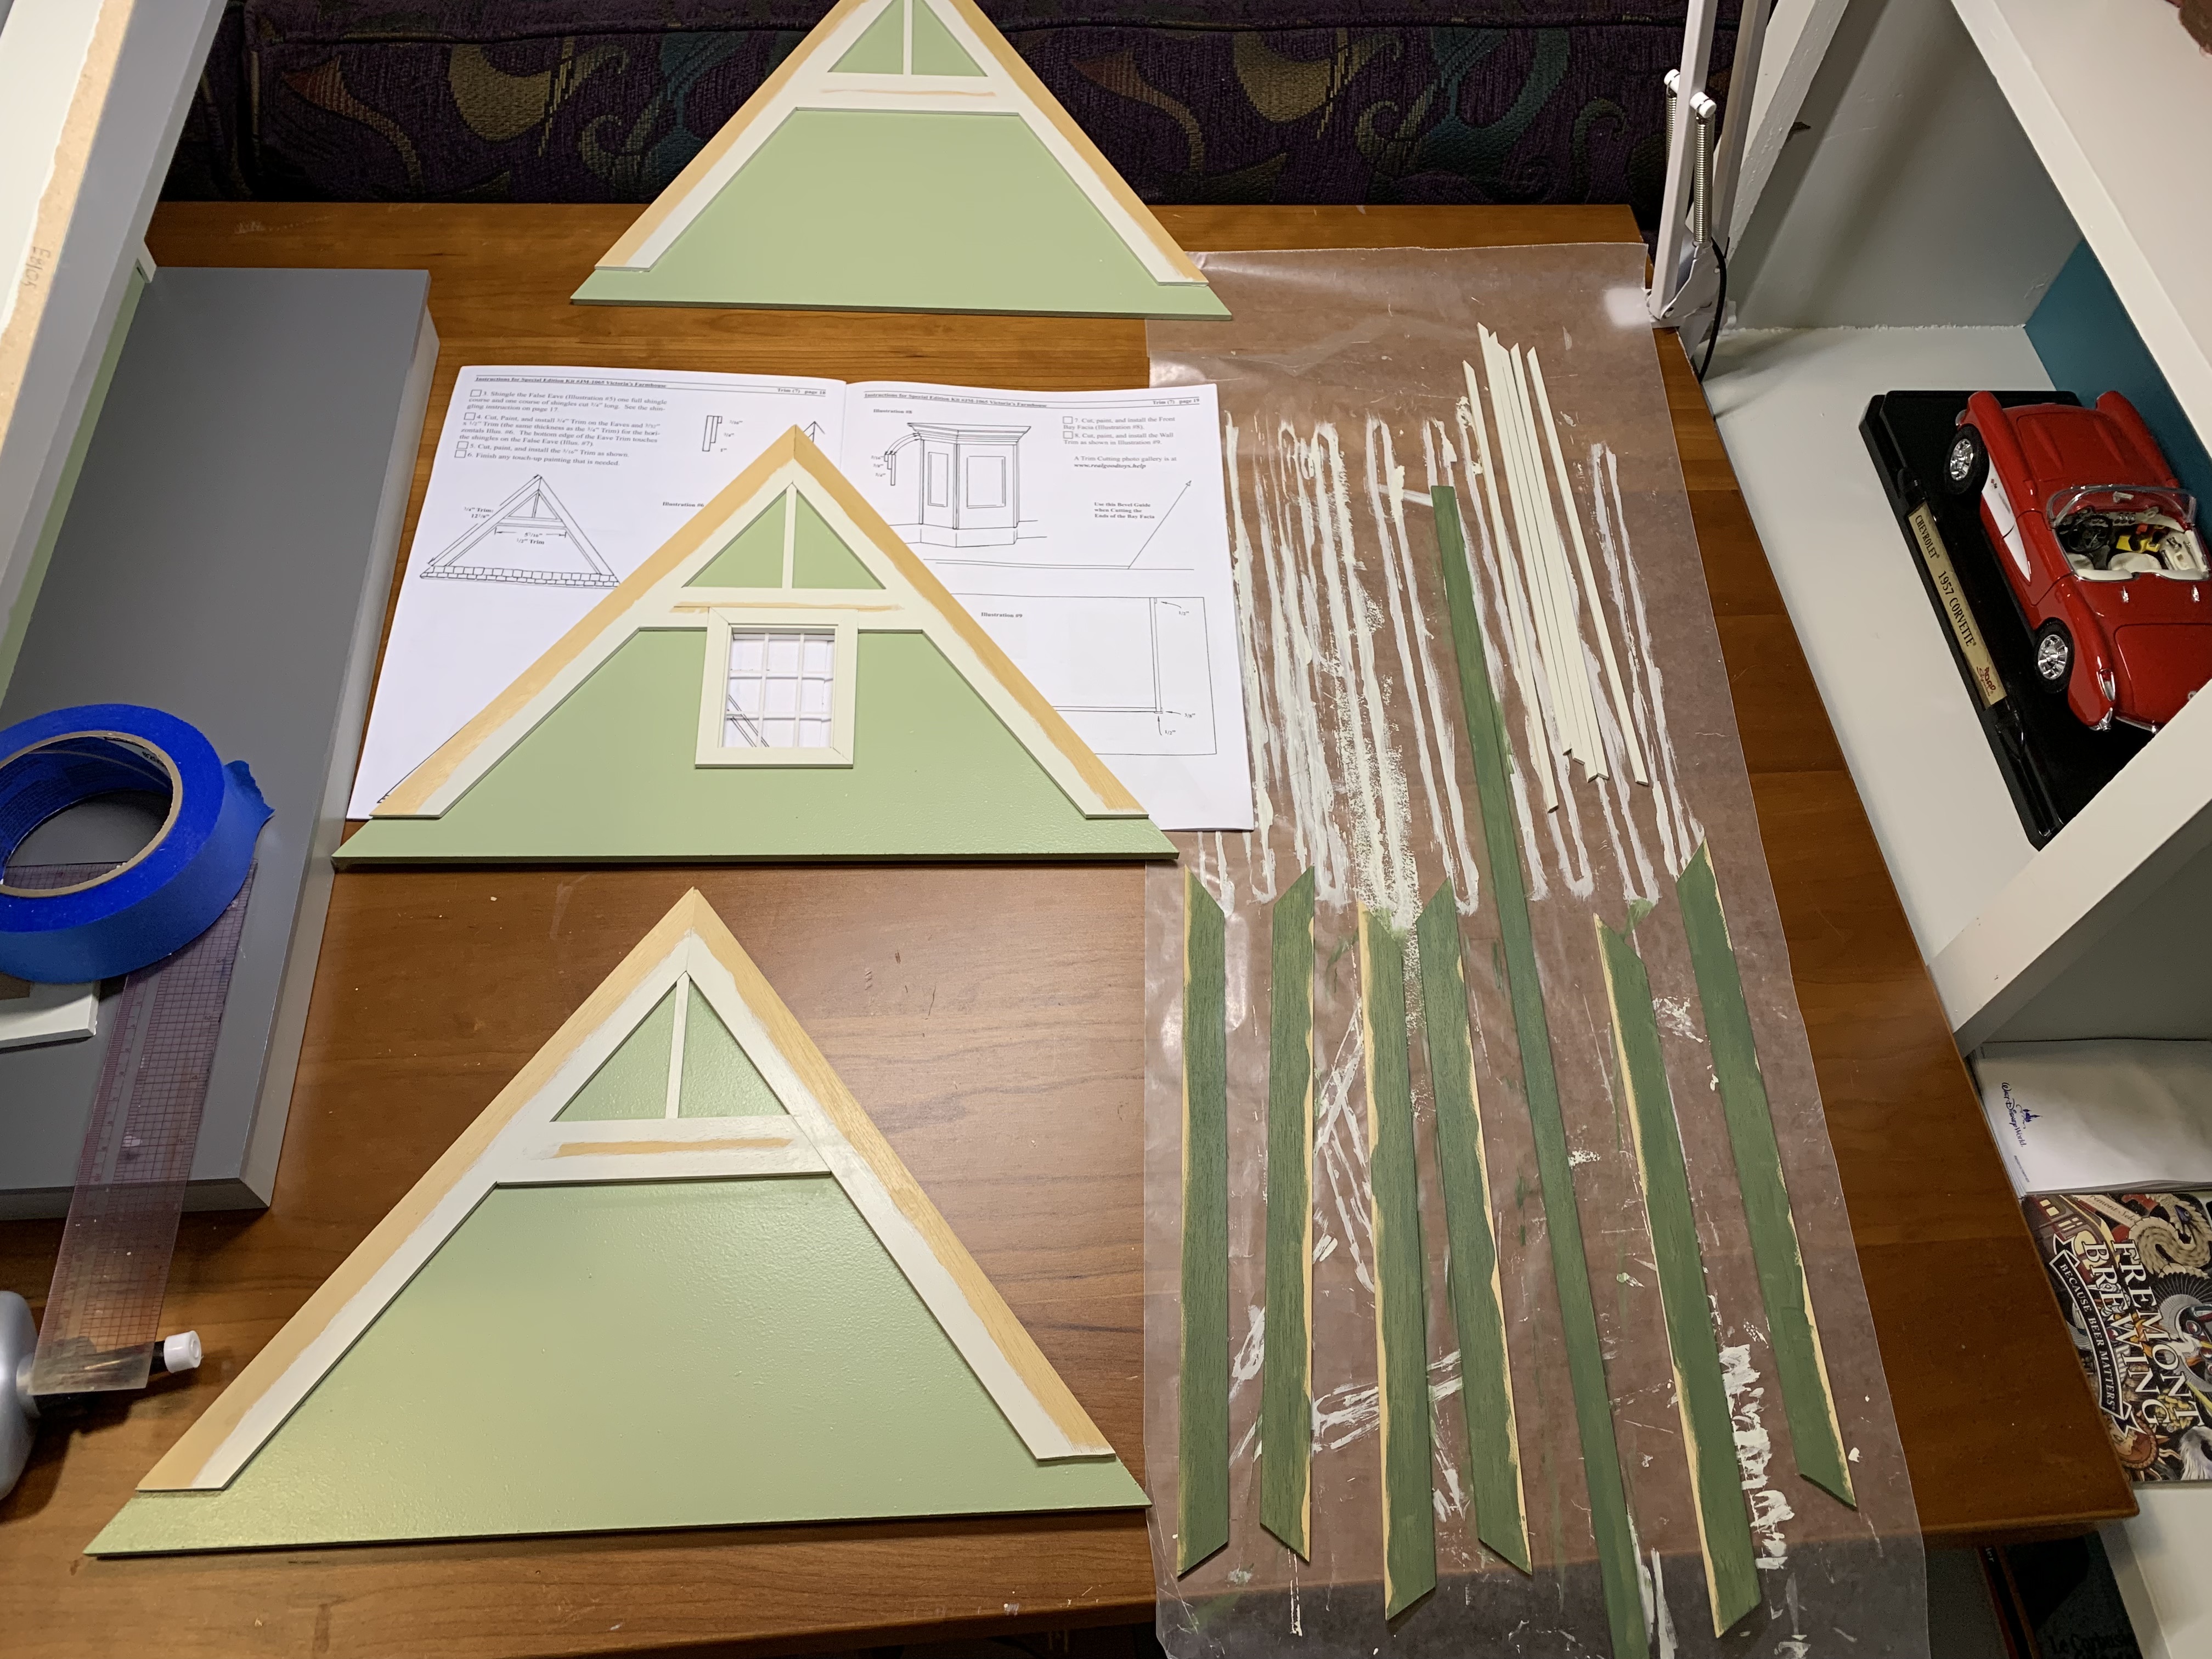
Working in an almost “offline” manner, the odd angles of the roofline of this house (70 degrees vertical and 55 degrees horizontal) still presented a challenge to cut the trim pieces. But I must say cutting and attaching the trim with the wall flat on my workspace was much easier and I will consider using this alternate technique in any future doll houses I build.
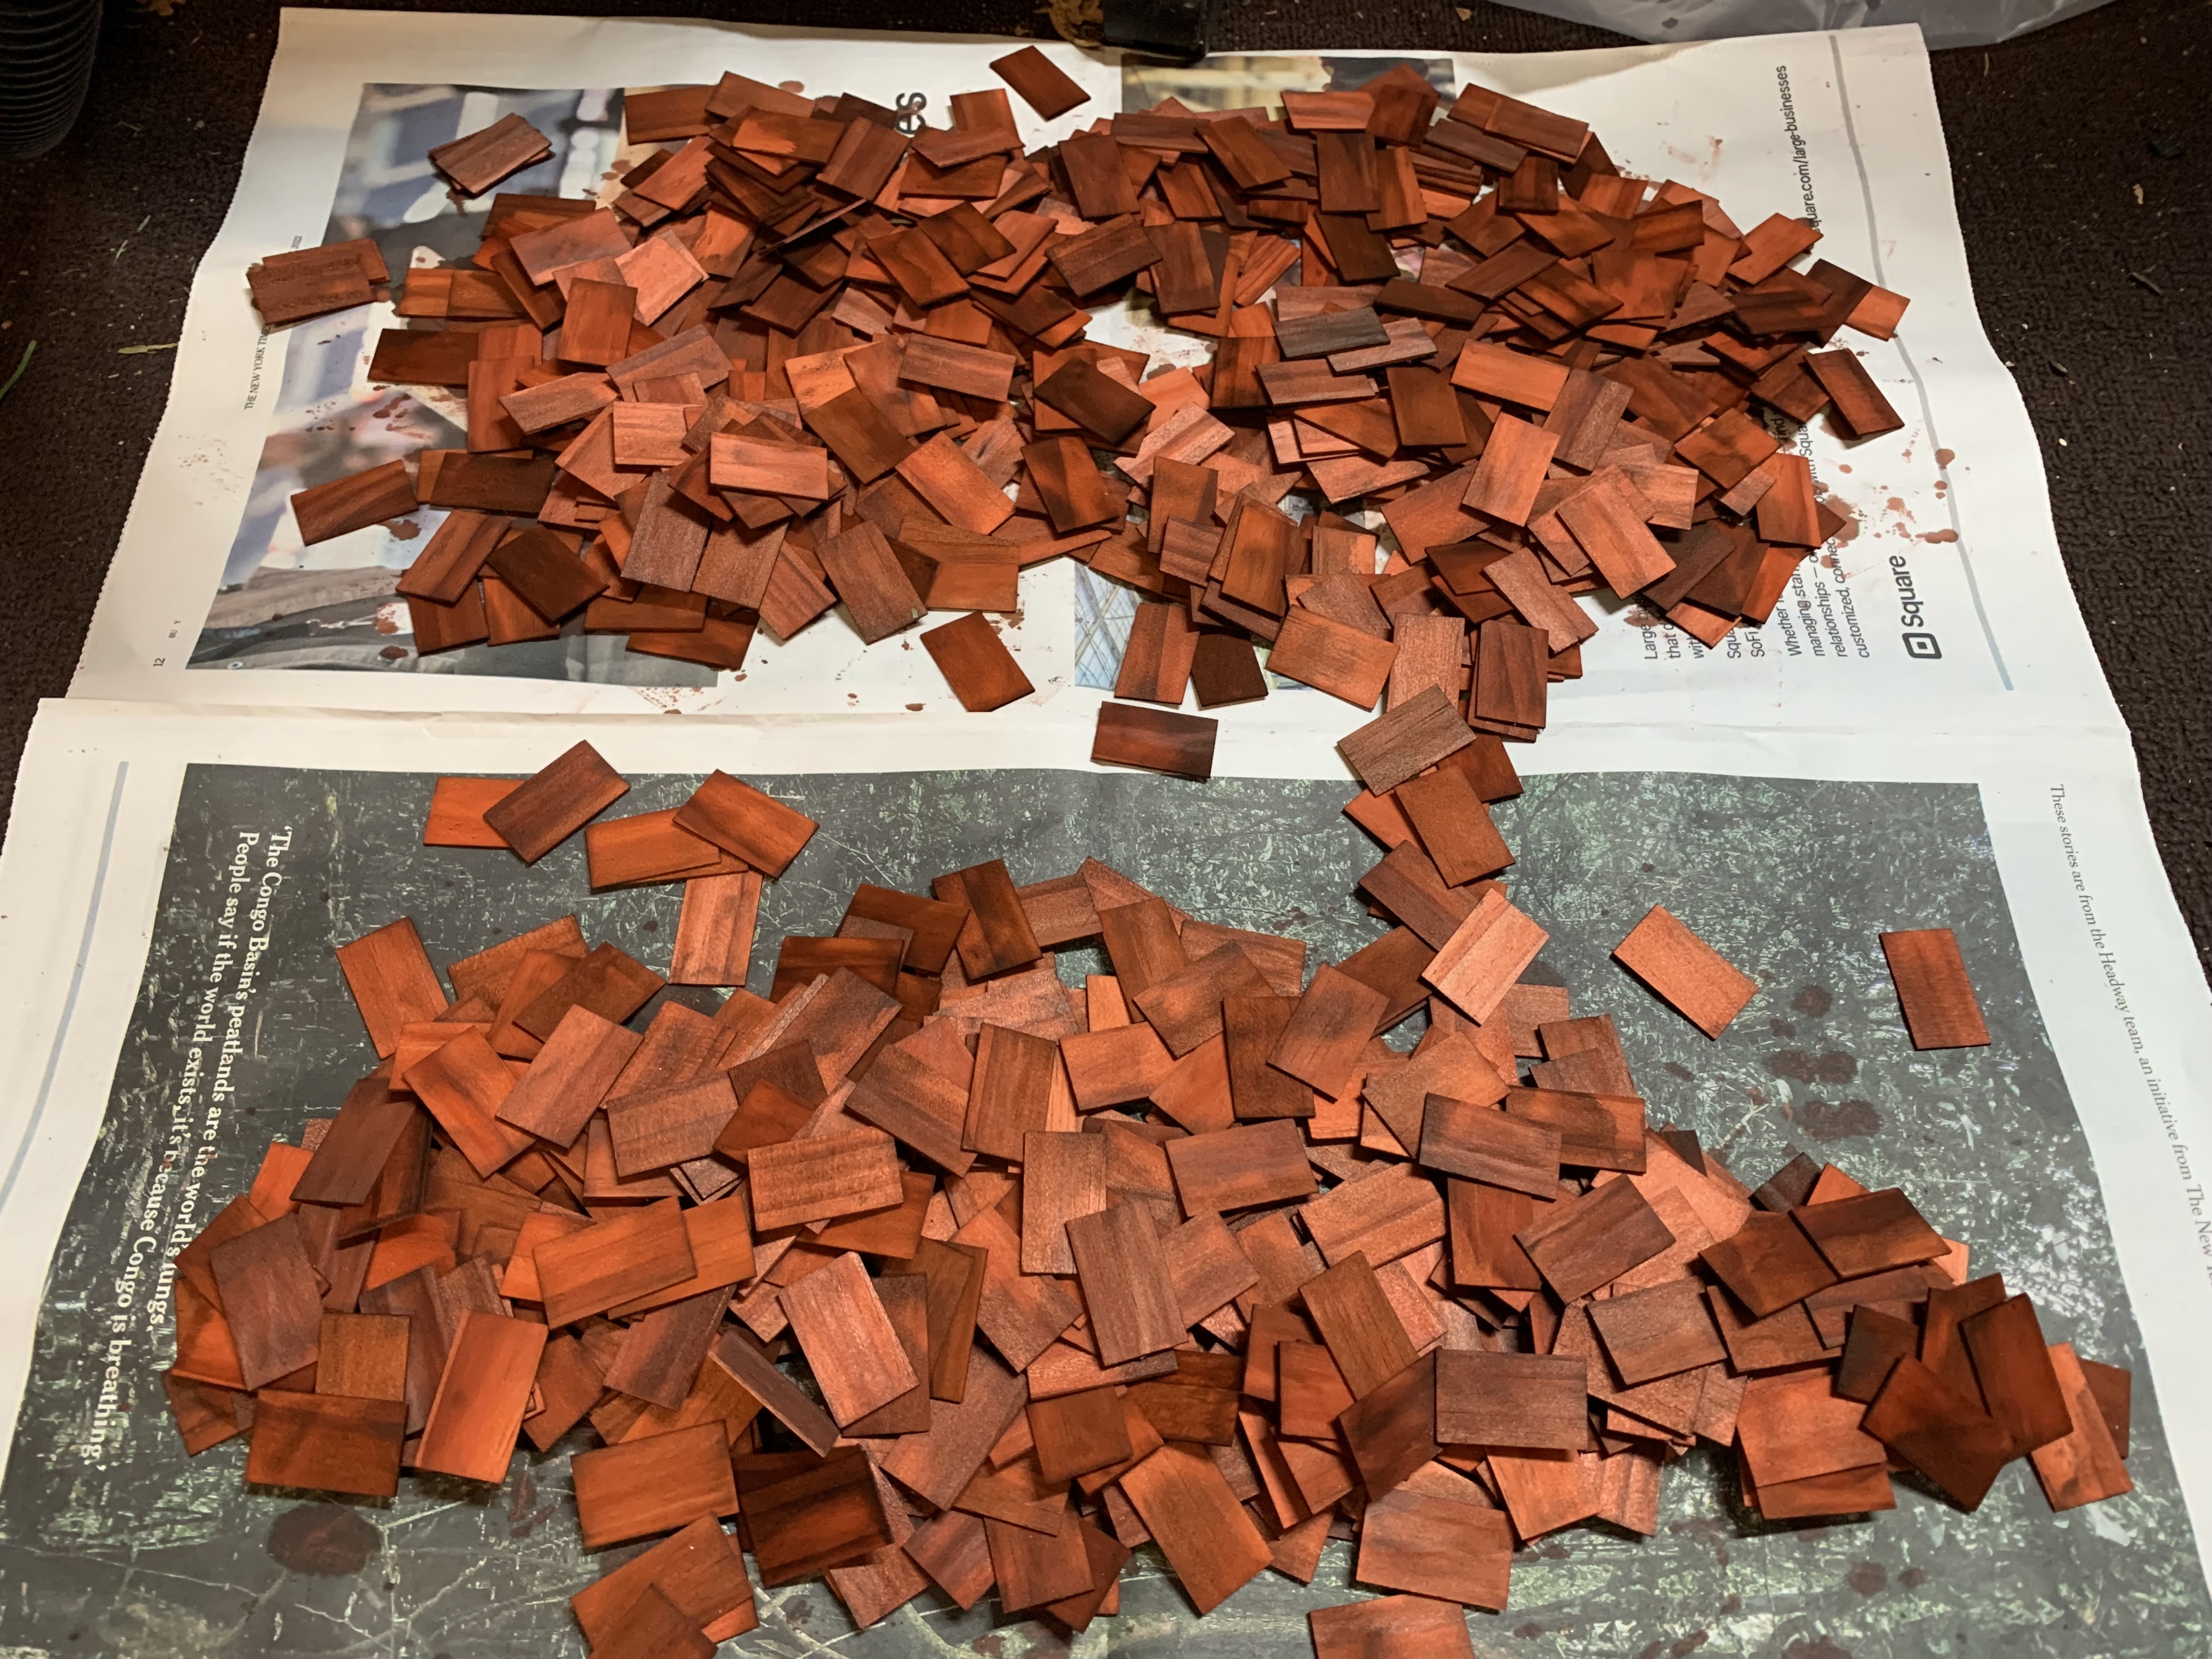
Next, I needed to dye the shingles. For my last two doll houses the shingle color was grey…
… but to go with the green exterior colors on this doll house, brown shingles was a better choice. I have covered the process to dye the shingles in previous posts so I will just provide you a photo of the finished shingles.
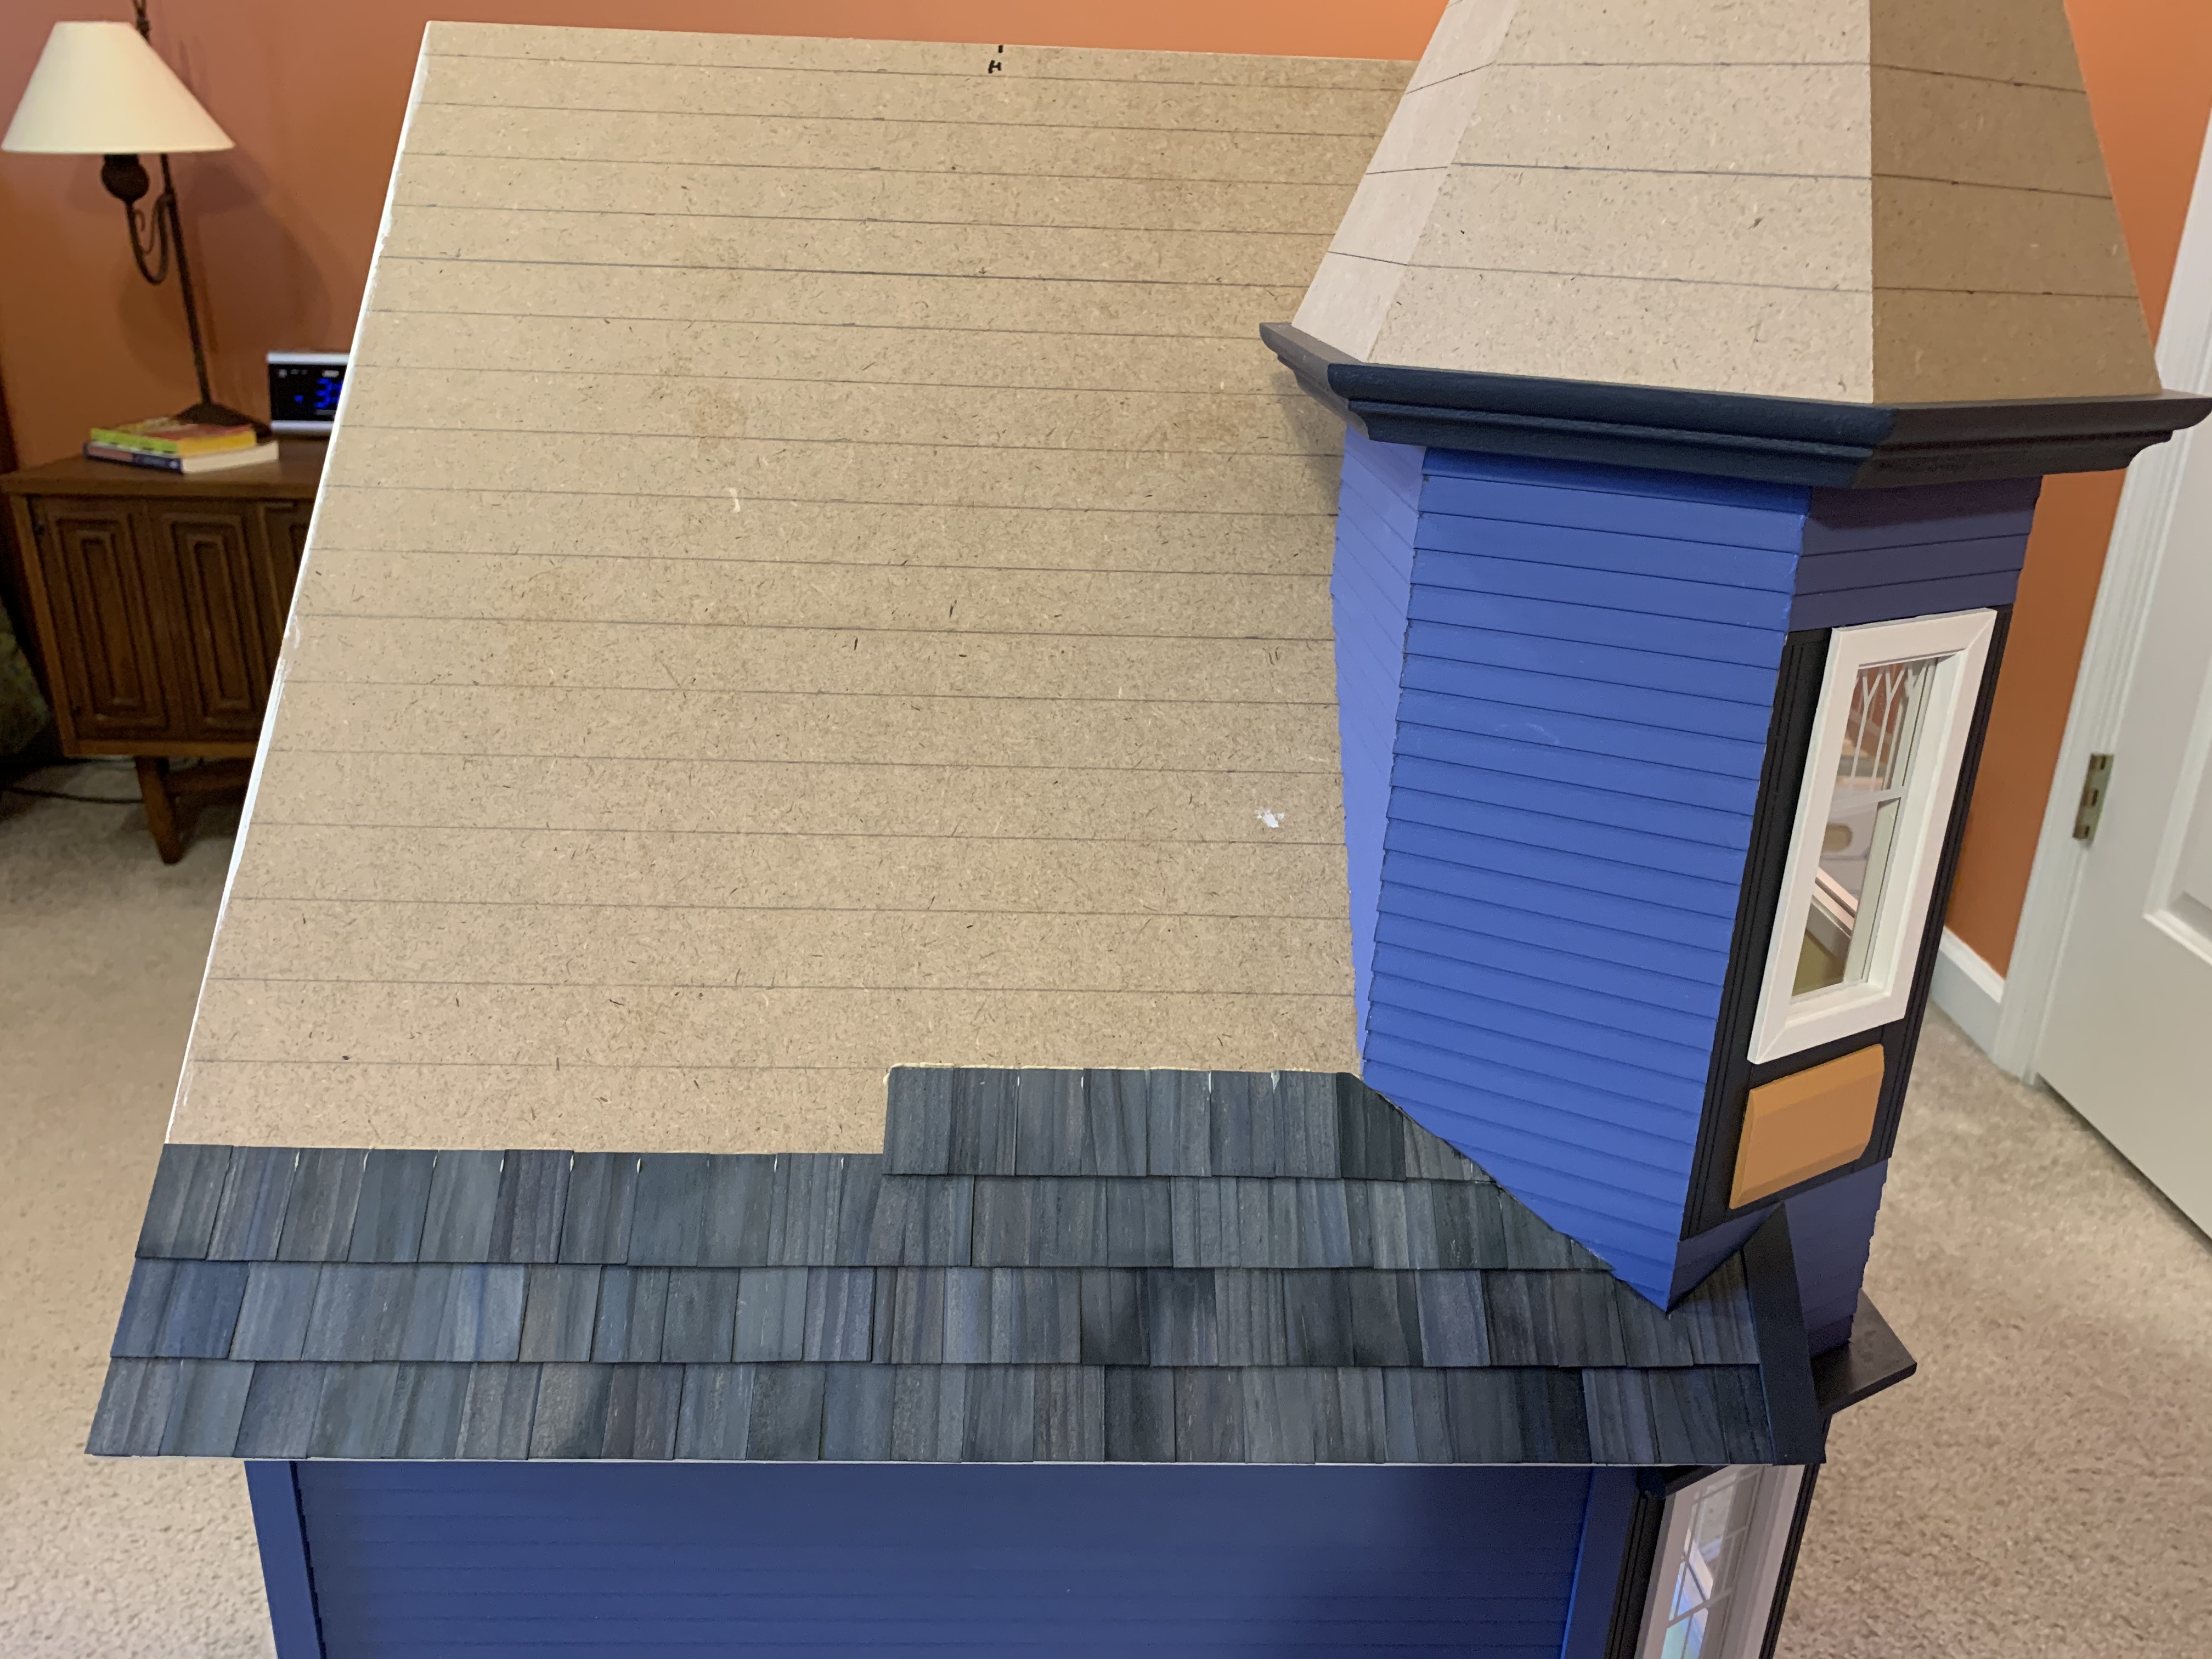
The attic and gable ends of this house had a false eave that required shingling. I knew I could do this again in my offline fashion and it turned out very nicely.

Because the gable roof had valleys that required triangular shaped shingles as a starter course, that shingling would first require the roof to be assembled, a step my nephew would need to complete once he has glued the roof pieces on.

One of my last steps to perform on the exterior was to paint the 148 dowel balusters required for the first and second floor porch rails.
Thankfully with so many to paint, the instructions included a unique technique (on right in photo above) whereby paint was spread on a small sponge and the dowels were squeezed between a second sponge and rolled to uniformly paint them. It worked out very well.

With those painted, the railings could then be assembled using templates included in the instructions before attaching them to the porch between the posts.

When my three siblings came to Memphis in March for a visit, I once again taped up the top floor and roof panels so that they could get a feel for what the finished house would look like.

My sister also brought over the furniture she had built as well as some pieces she had purchased for the house.
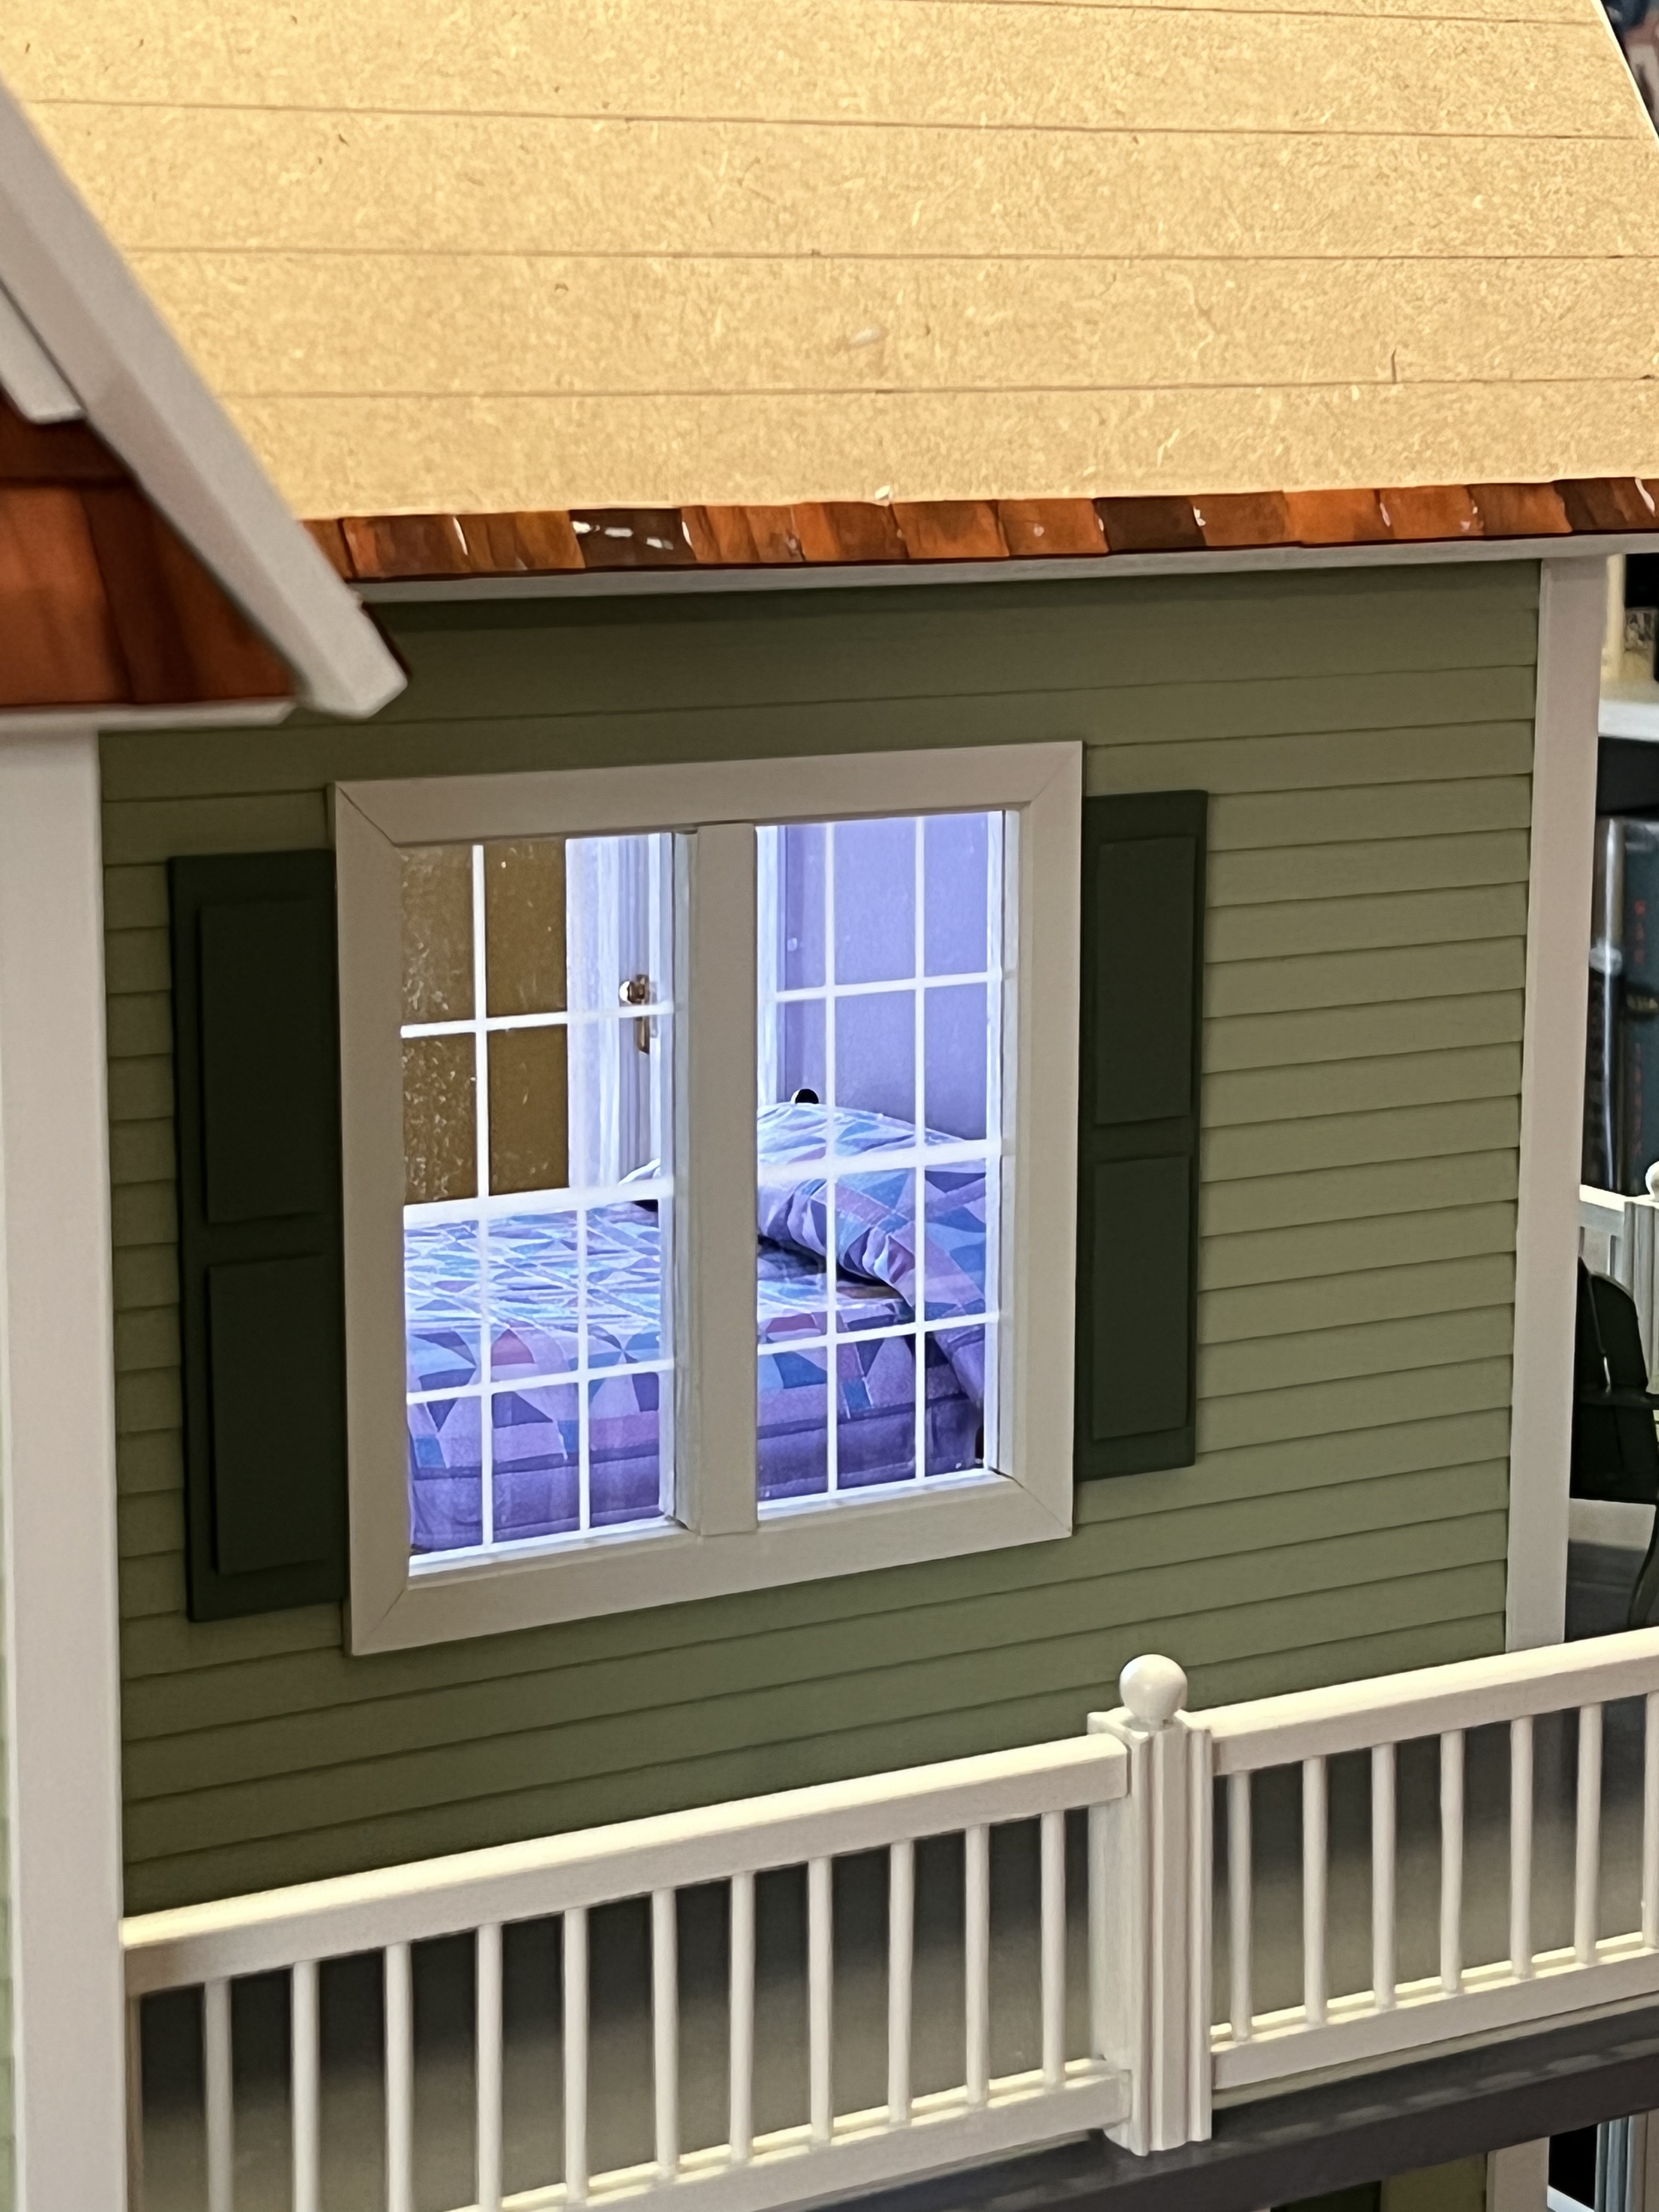
You can see how nicely the bed and quilt she made look in the house…
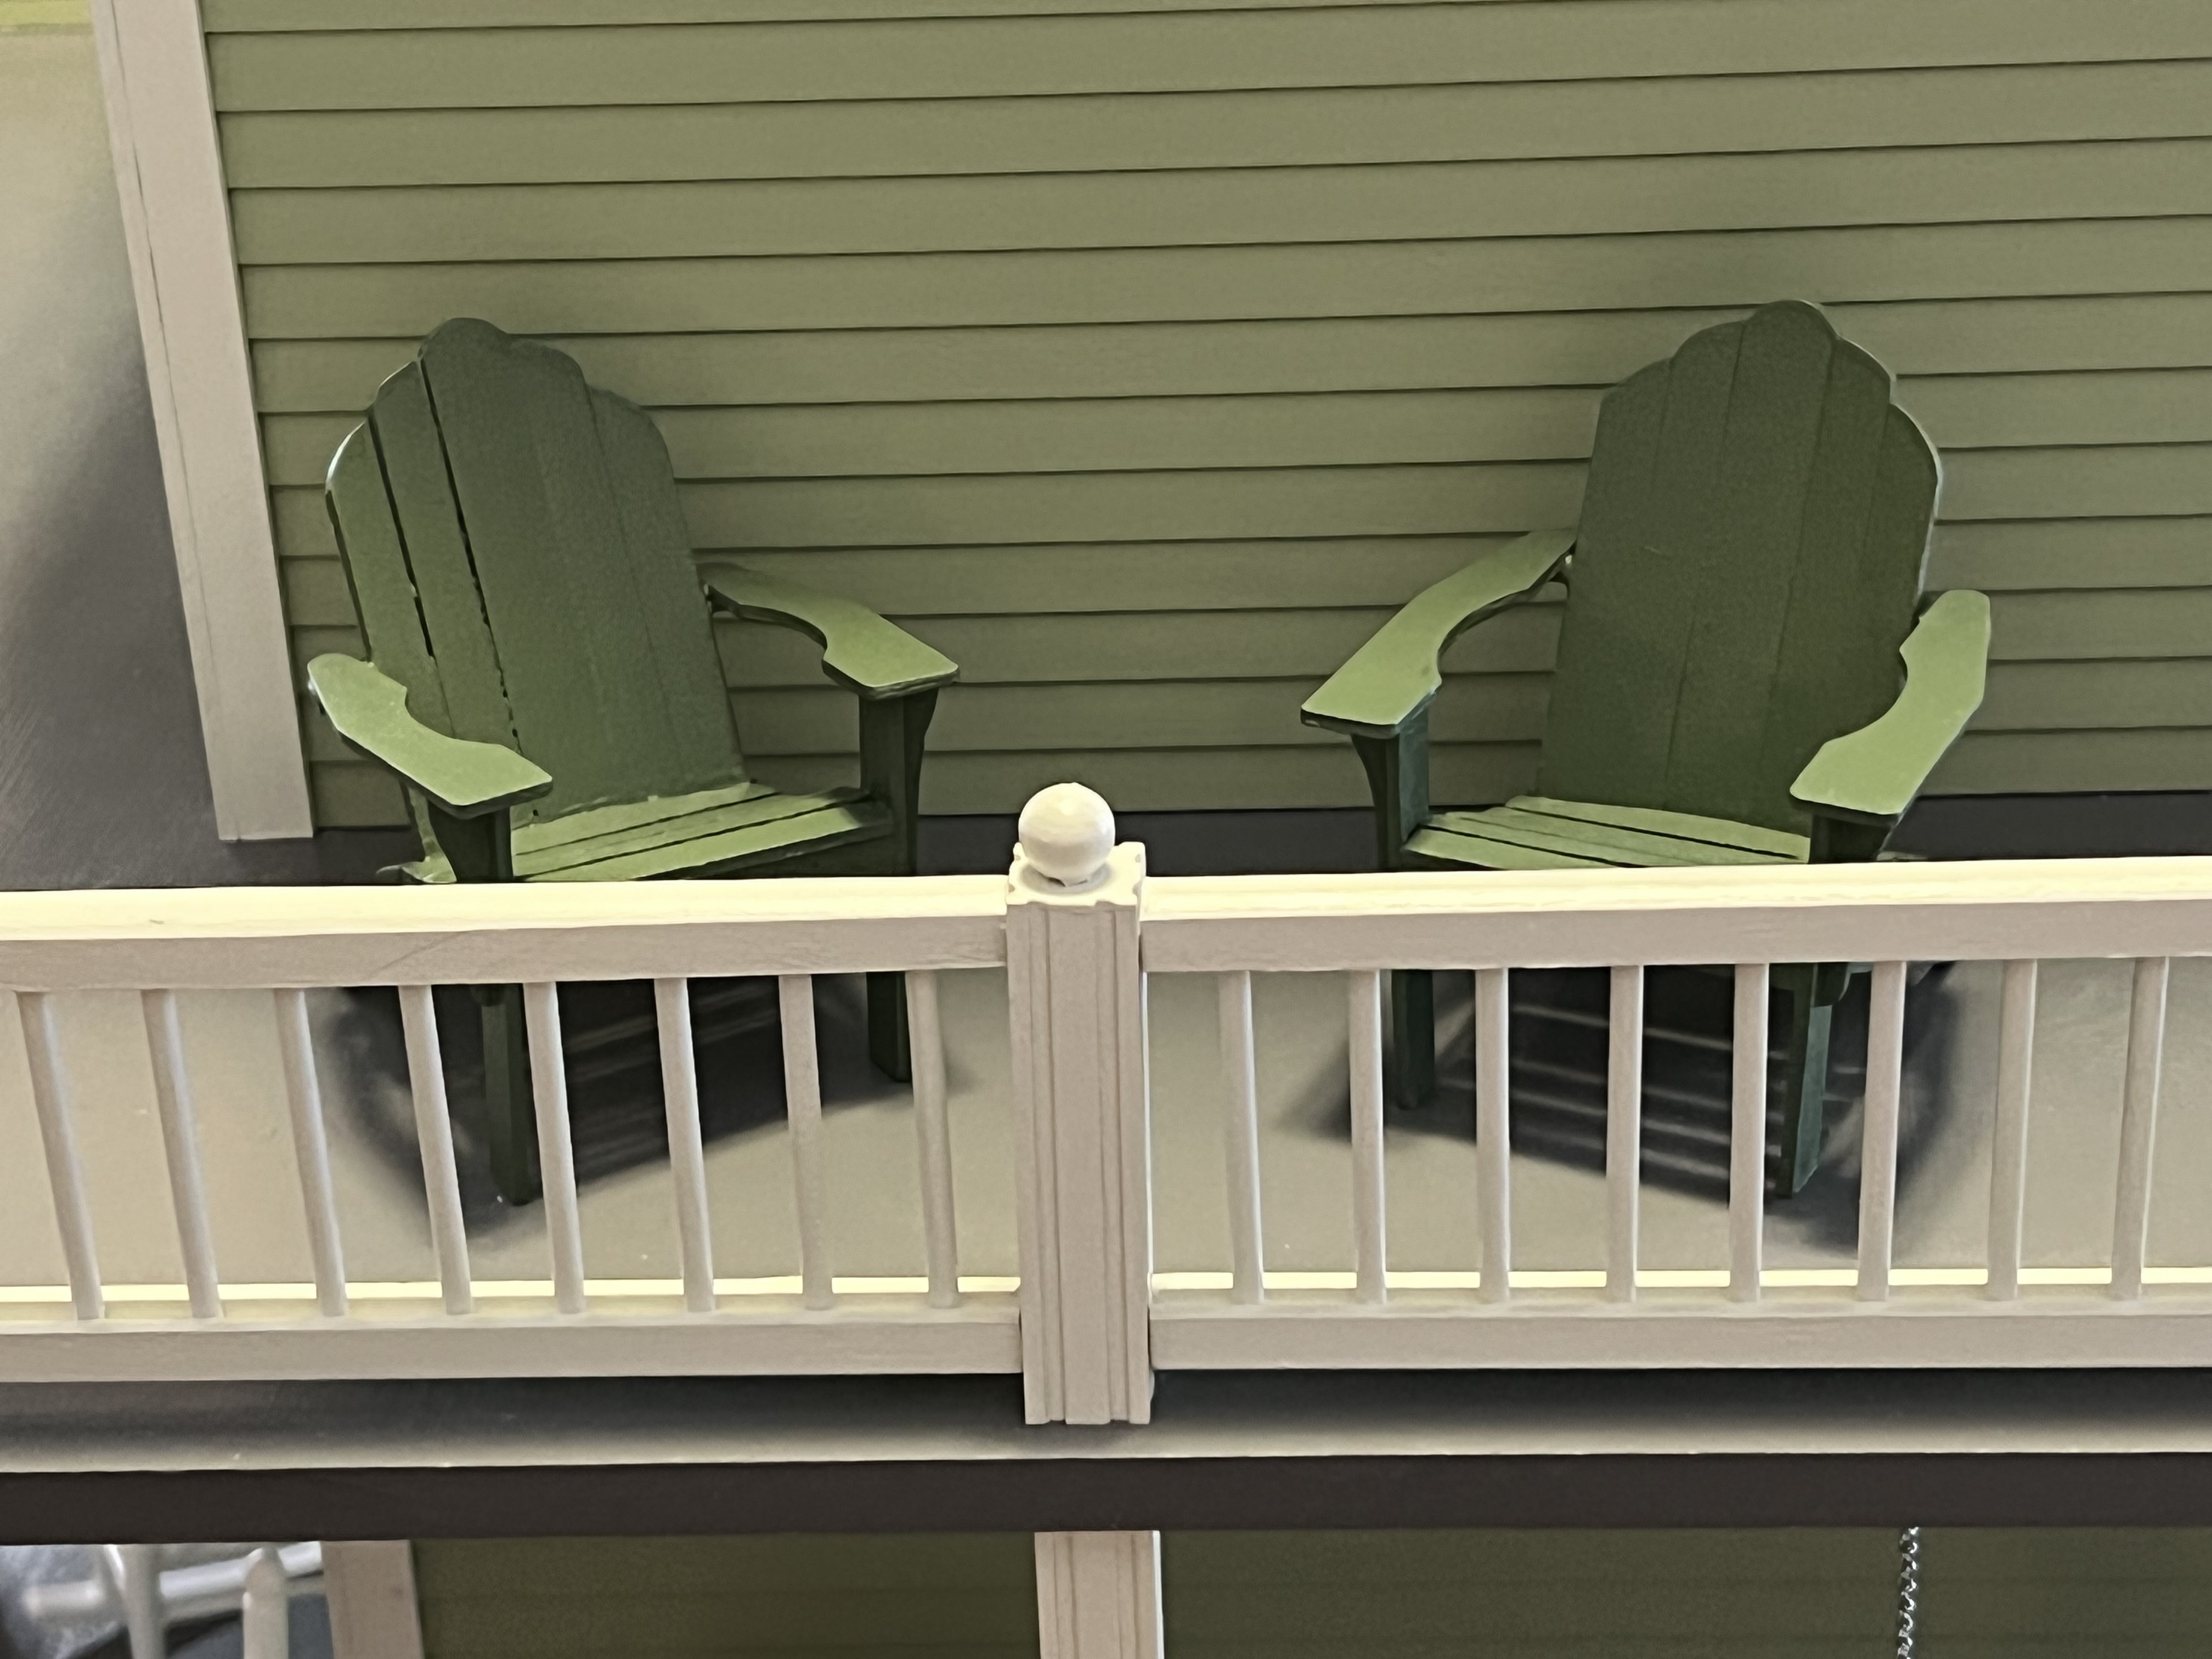
…along with her Adirondack chairs she made.
After my siblings left, the last steps I had to complete was to paint and install some additional three-layered trim on the porch and then permanently install the first-floor stairs so I could add the final baseboard pieces. With those steps complete, I had finished my portion of the house. Now it was ready for its trip out west.
But before loading it up, this also gives me a chance to show you the finished rooms.
First the kitchen where you enter from the front porch (note my sister upgraded the stairs for this house when compared to the ones the kit came with as seen in the photo at the top of this post)…
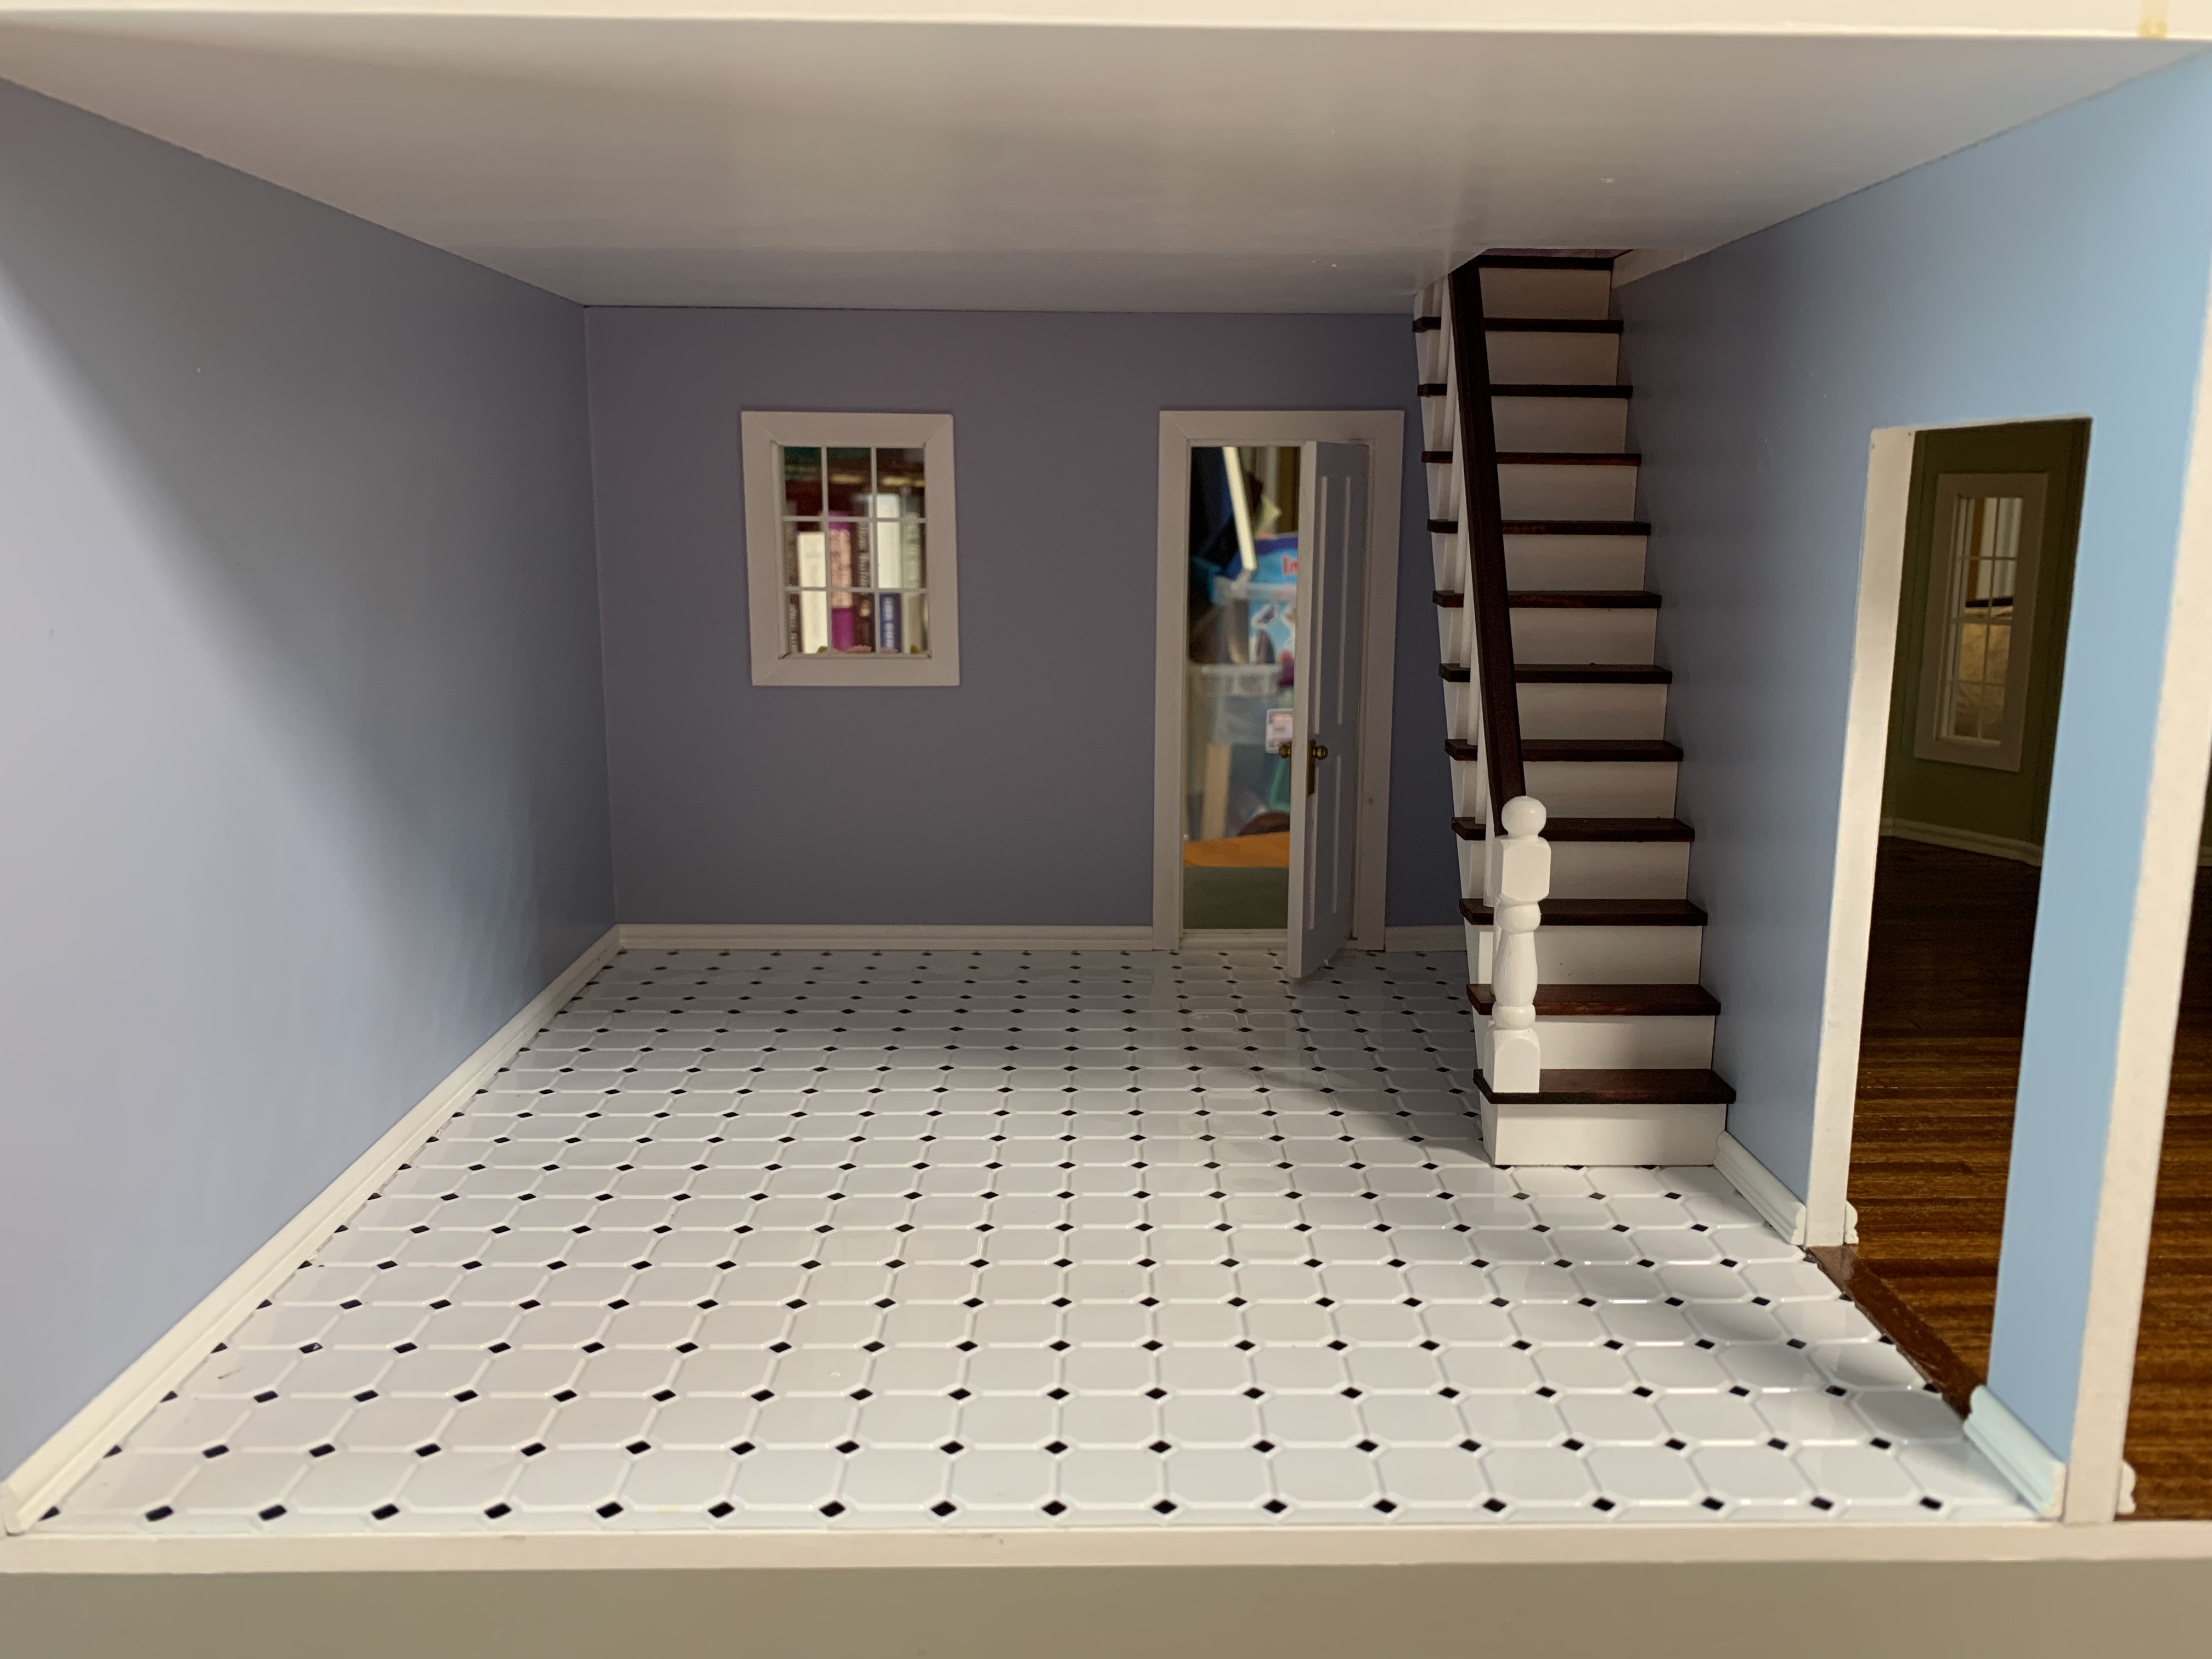
…and then the large first floor living room…
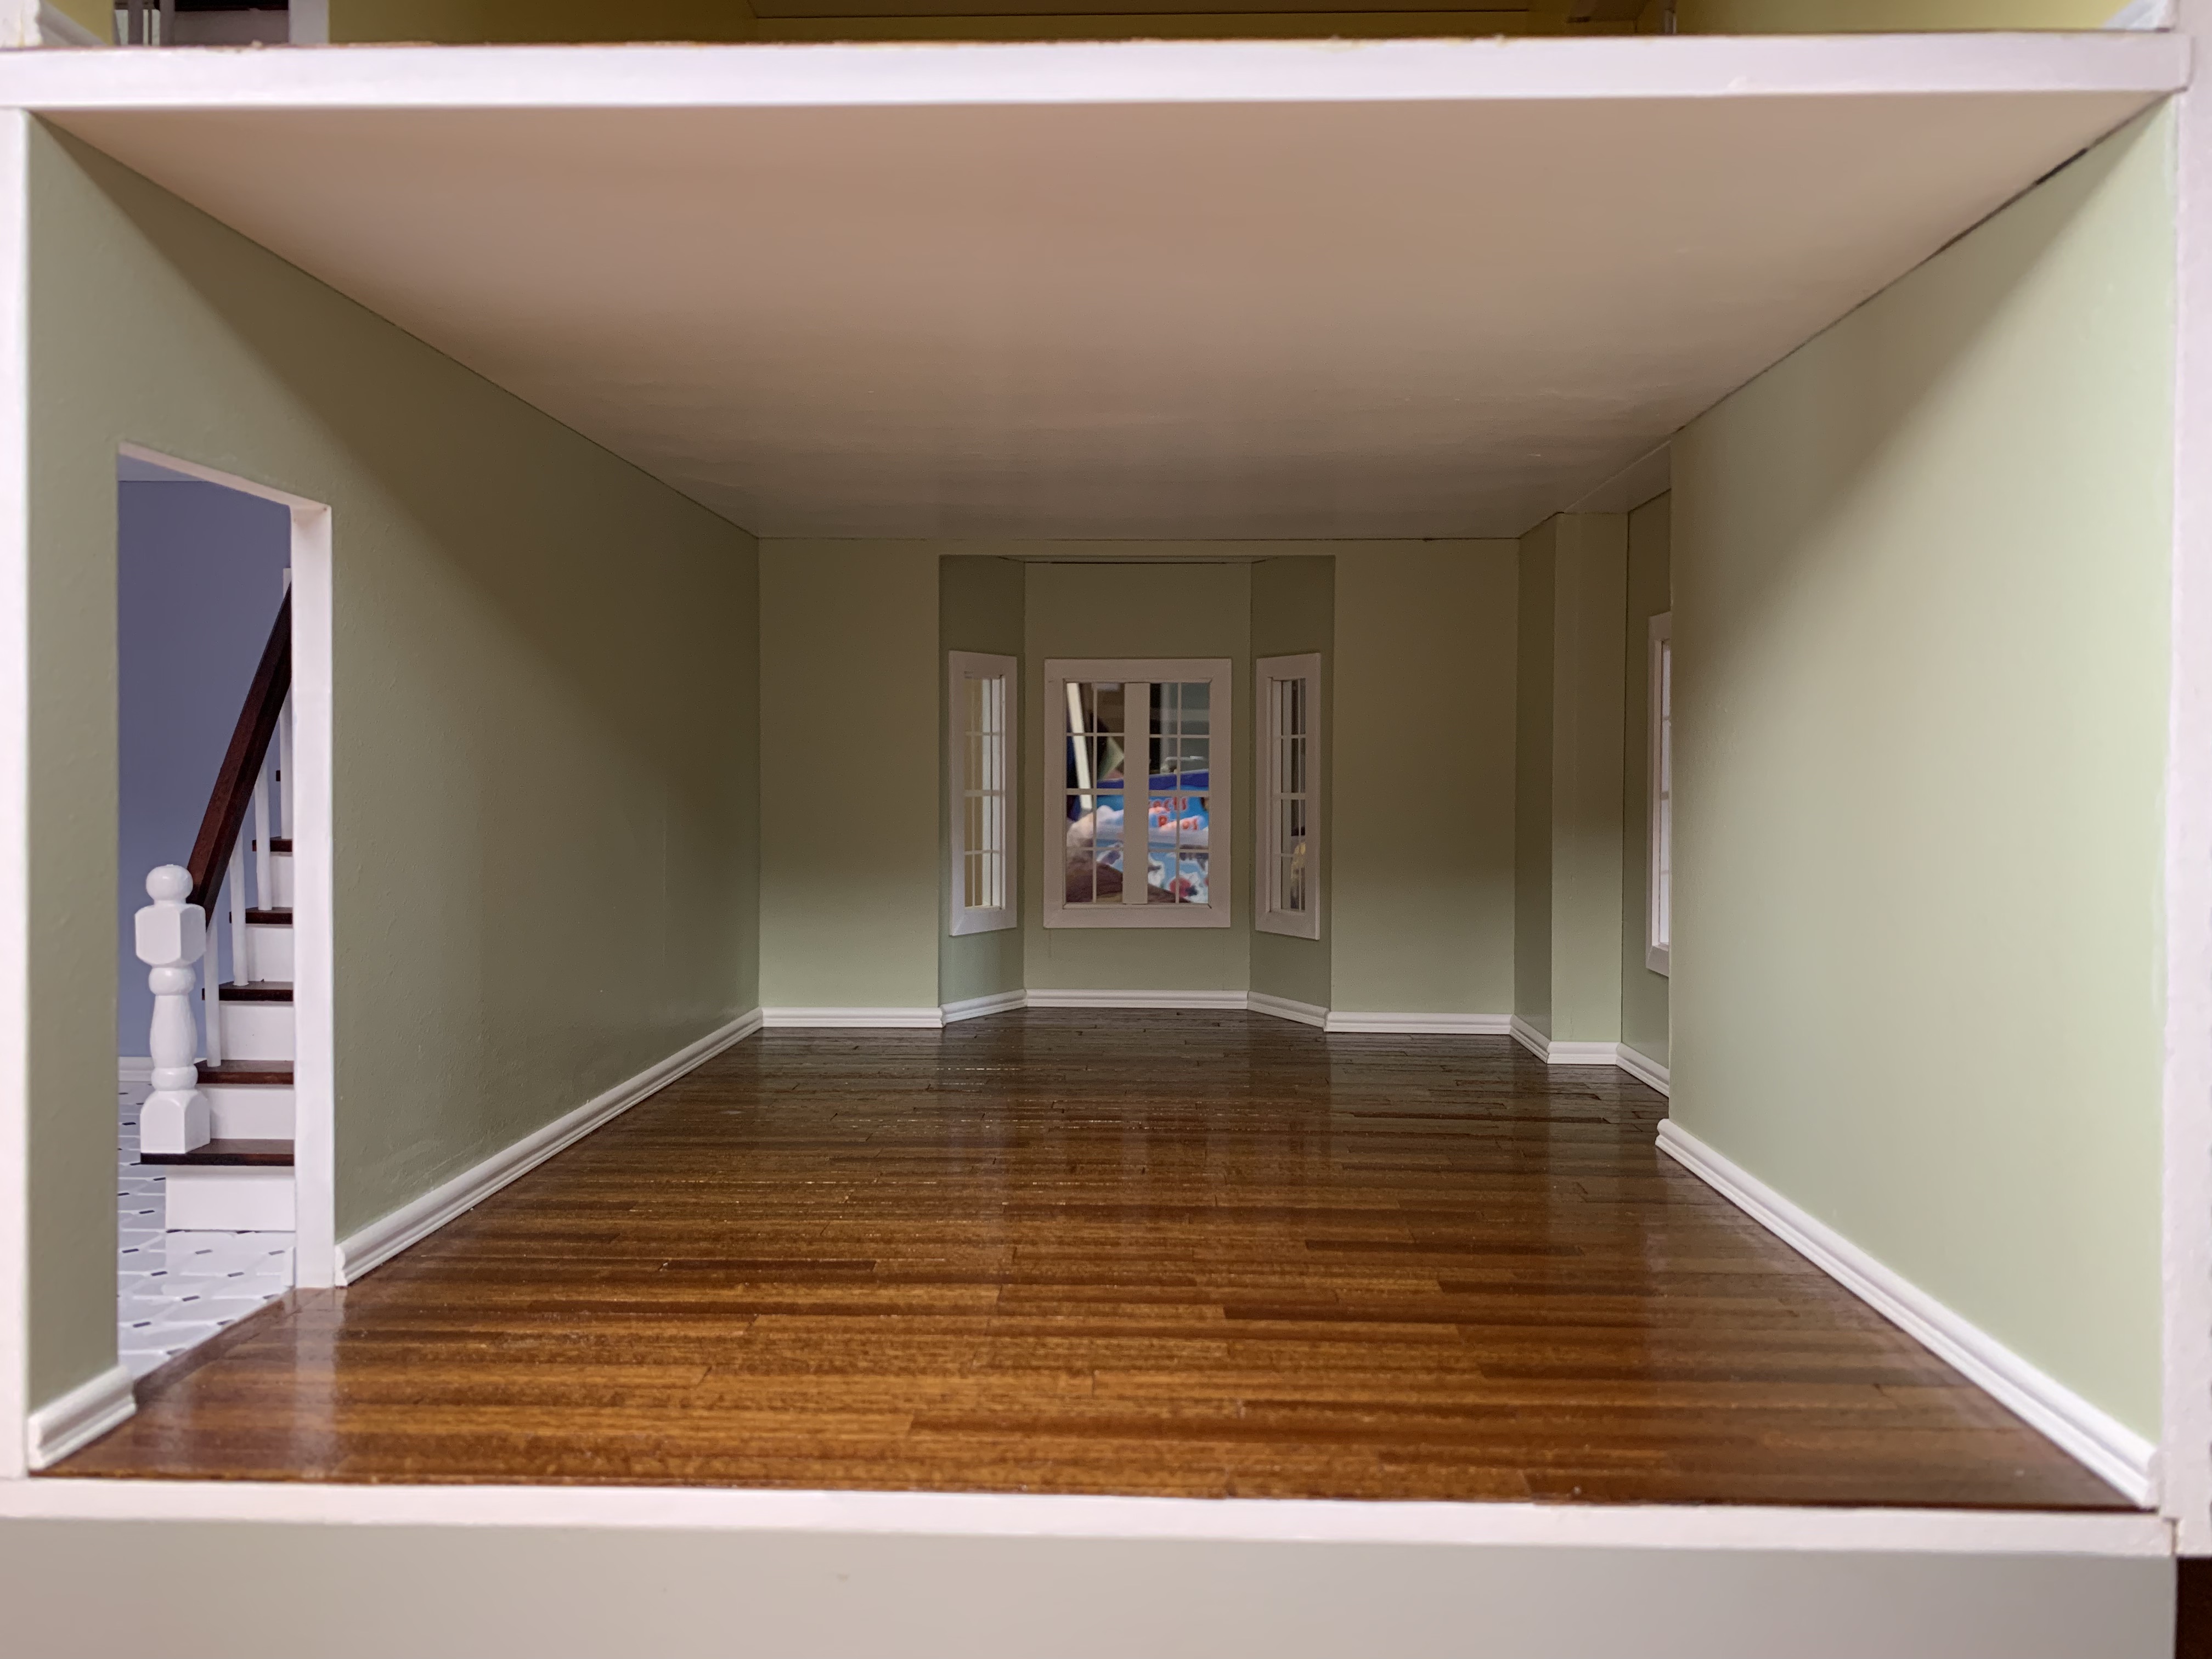
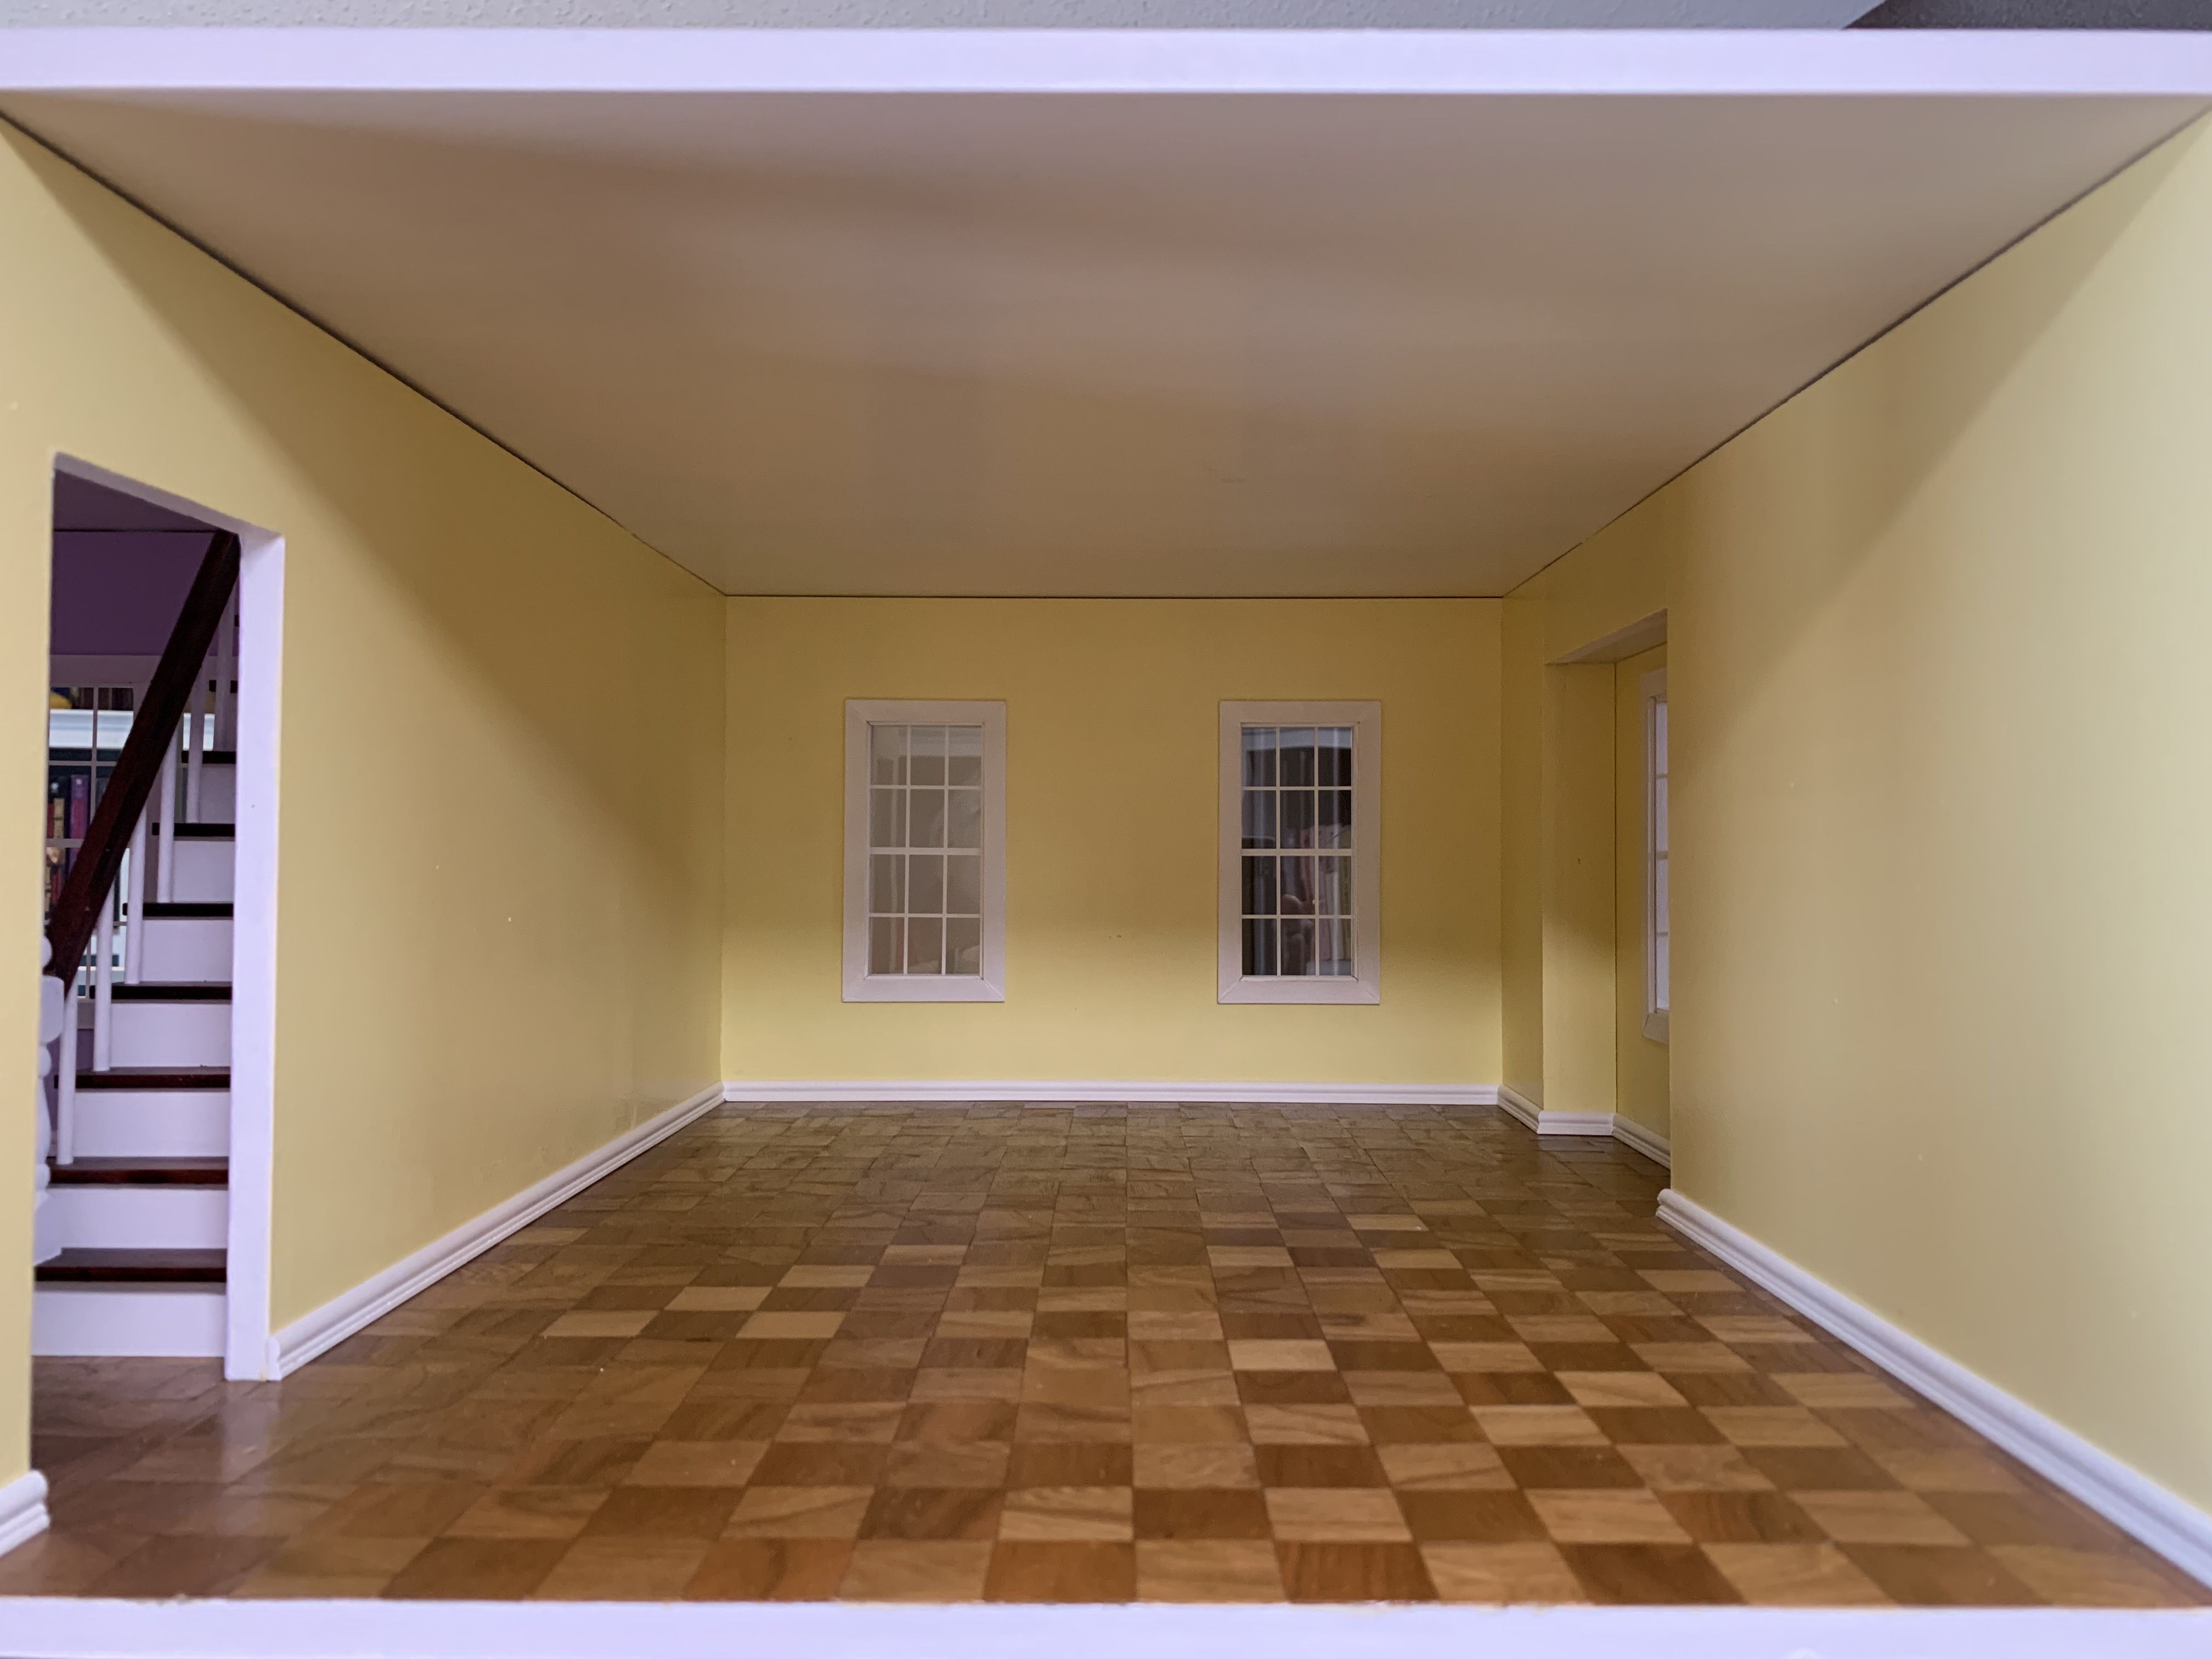
…following the stairs up to the purple bedroom…

…before finally entering the yellow bedroom.
My sister and I had such fun building this doll house together, that we decided to build another farmhouse just for us. We plan to keep the exterior the same but change up the interior. Besides deciding on how to do the interior differently, the only other decision to be made is will the doll house reside in Memphis or in Northwest Arkansas where she lives. And that will be a story for another future post.
Categories

Just beautiful, David! Even with the additional step of not completing the top floor which complicated finishing the dollhouse. I look forward to your next post!
Thanks so much Betty. I’m actually sitting at my sisters house in north west Arkansas with the house. We are starting our trek out west in the morning.
Safe travels!