
Doll House for My Sister’s Grandchildren – 3rd Phase
My idea turned out very nicely for this one room. But what about the other floors? For the other first floor room, what would become the kitchen, my sister decided she wanted the same faux tile I had used in my last dollhouse.
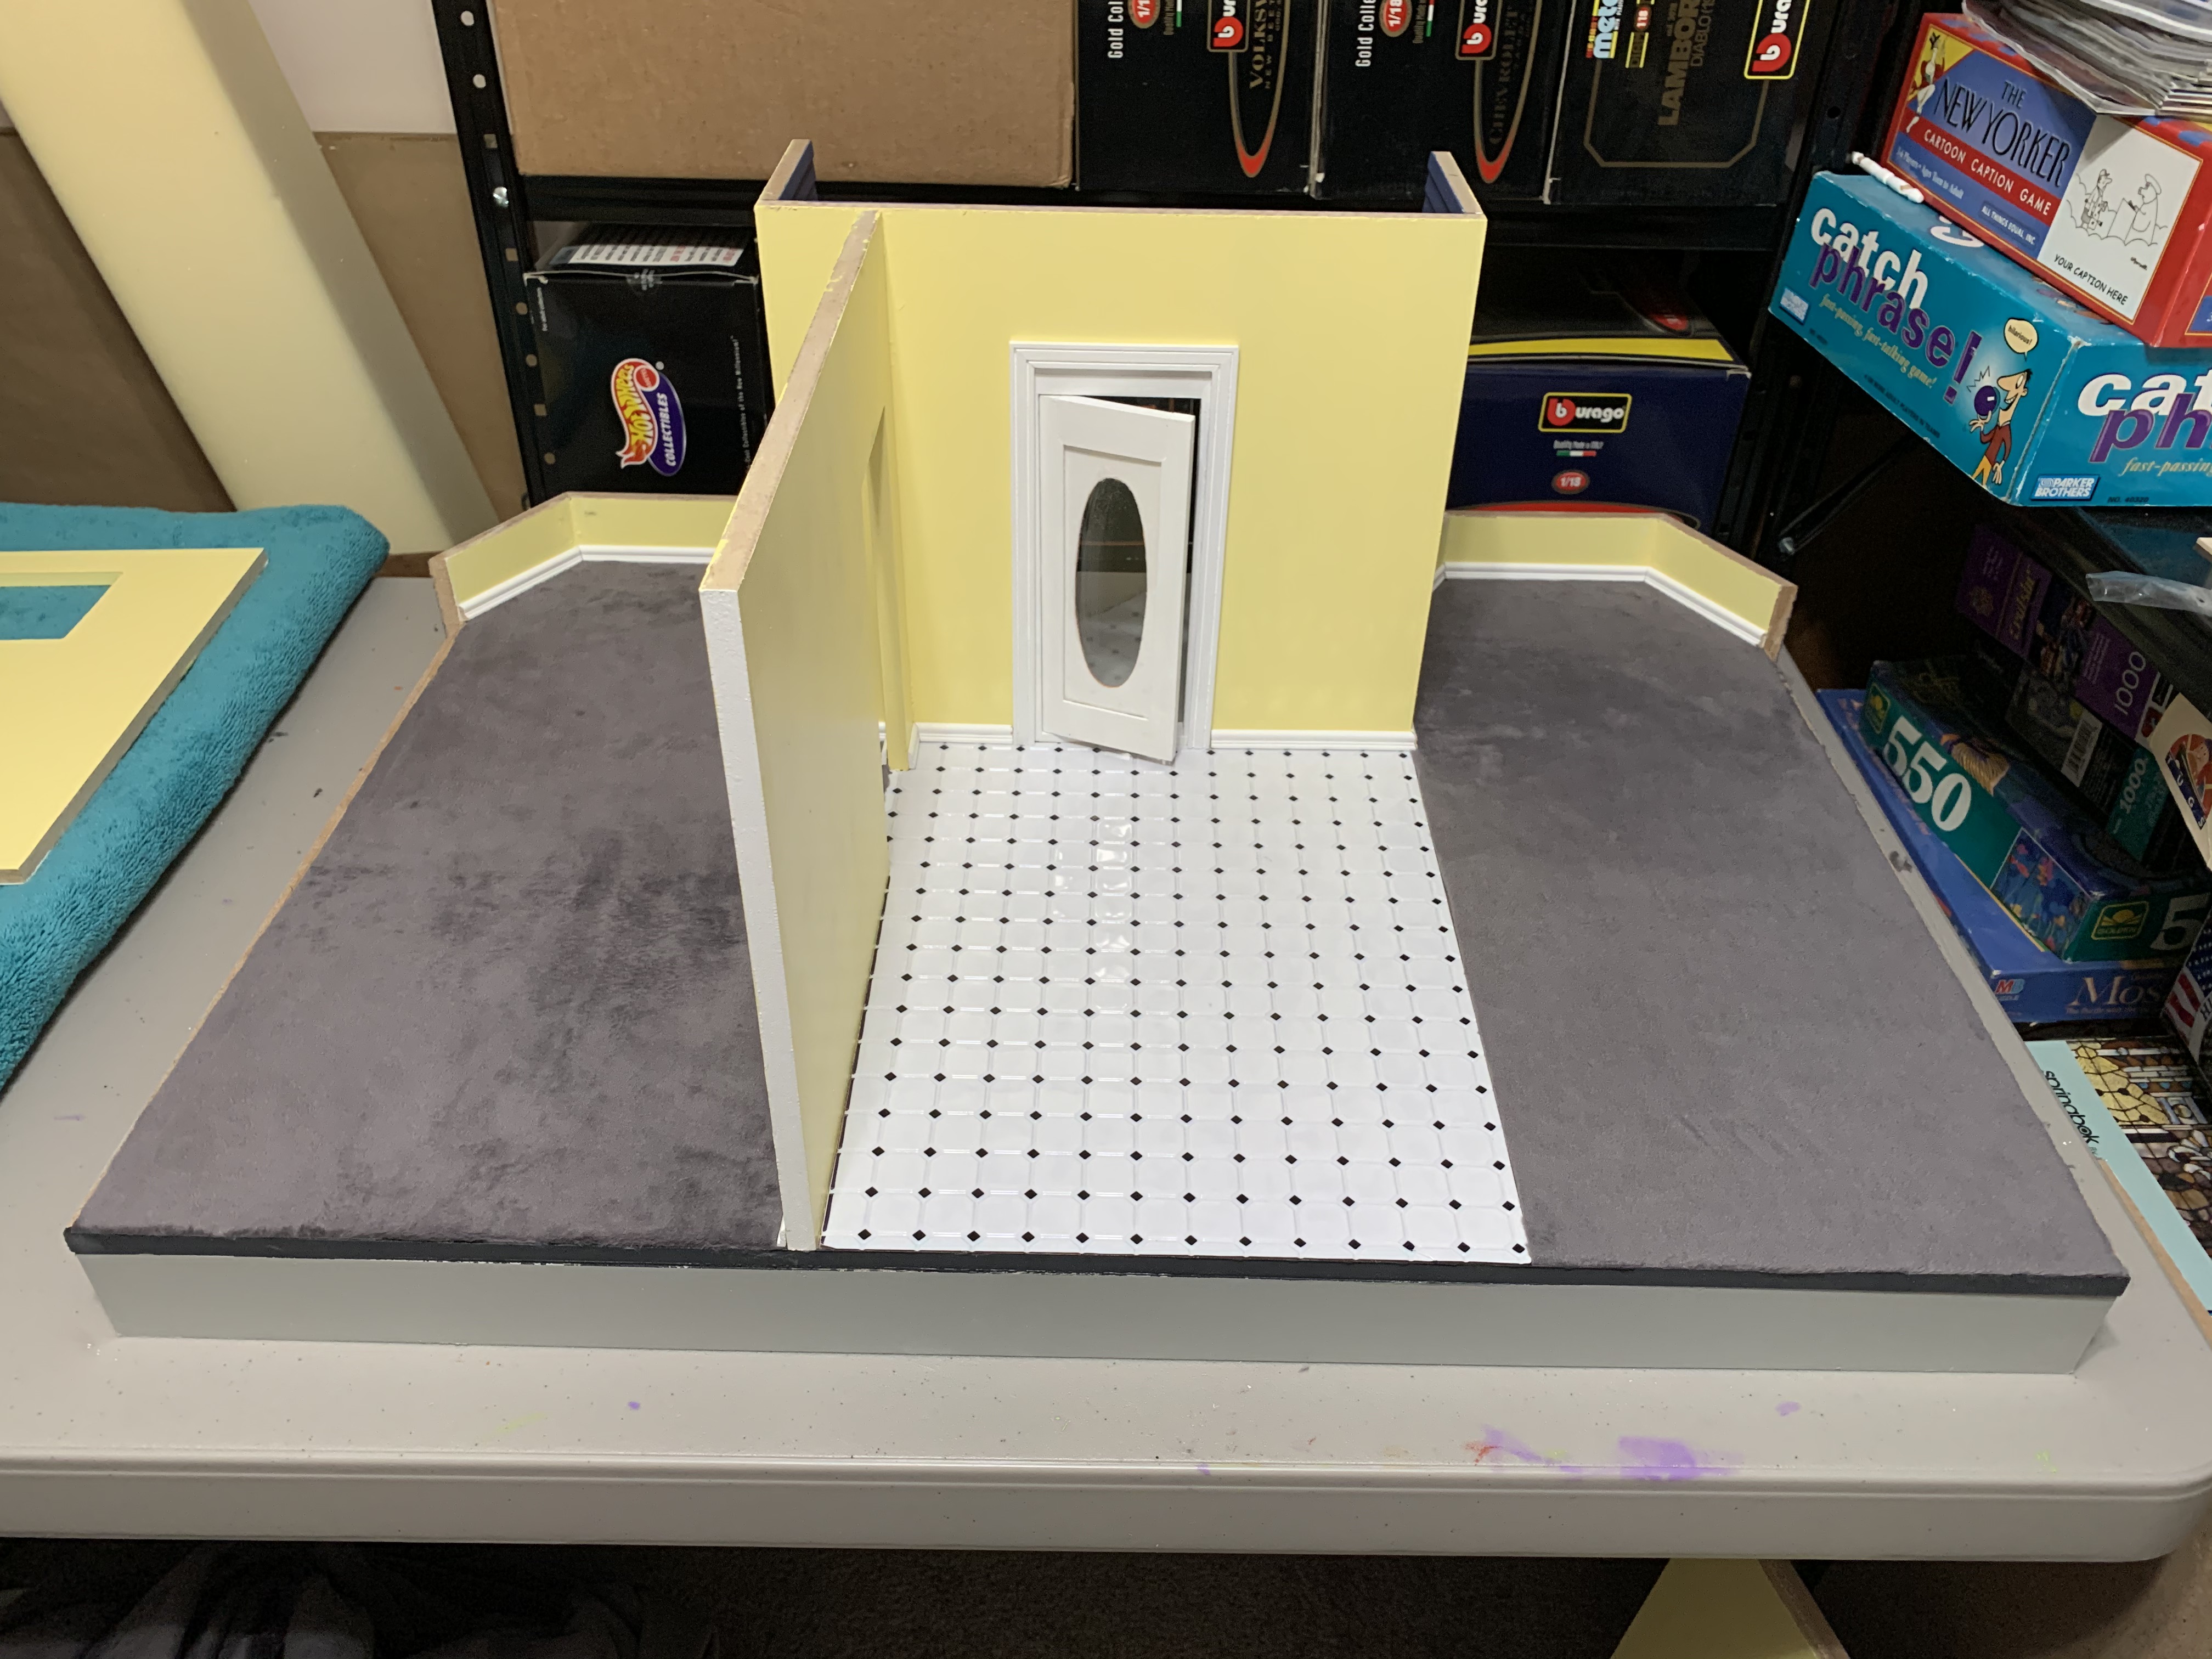
This made flooring this room a breeze.
For the two second floor bedrooms, we again explored several different flooring ideas, keeping in mind that it should be compatible with little rugs. I suggested I could get thin strips of basswood and lay them down like I did on the first floor and then stain them mahogany. But my sister had what turned out to be an outstanding idea.
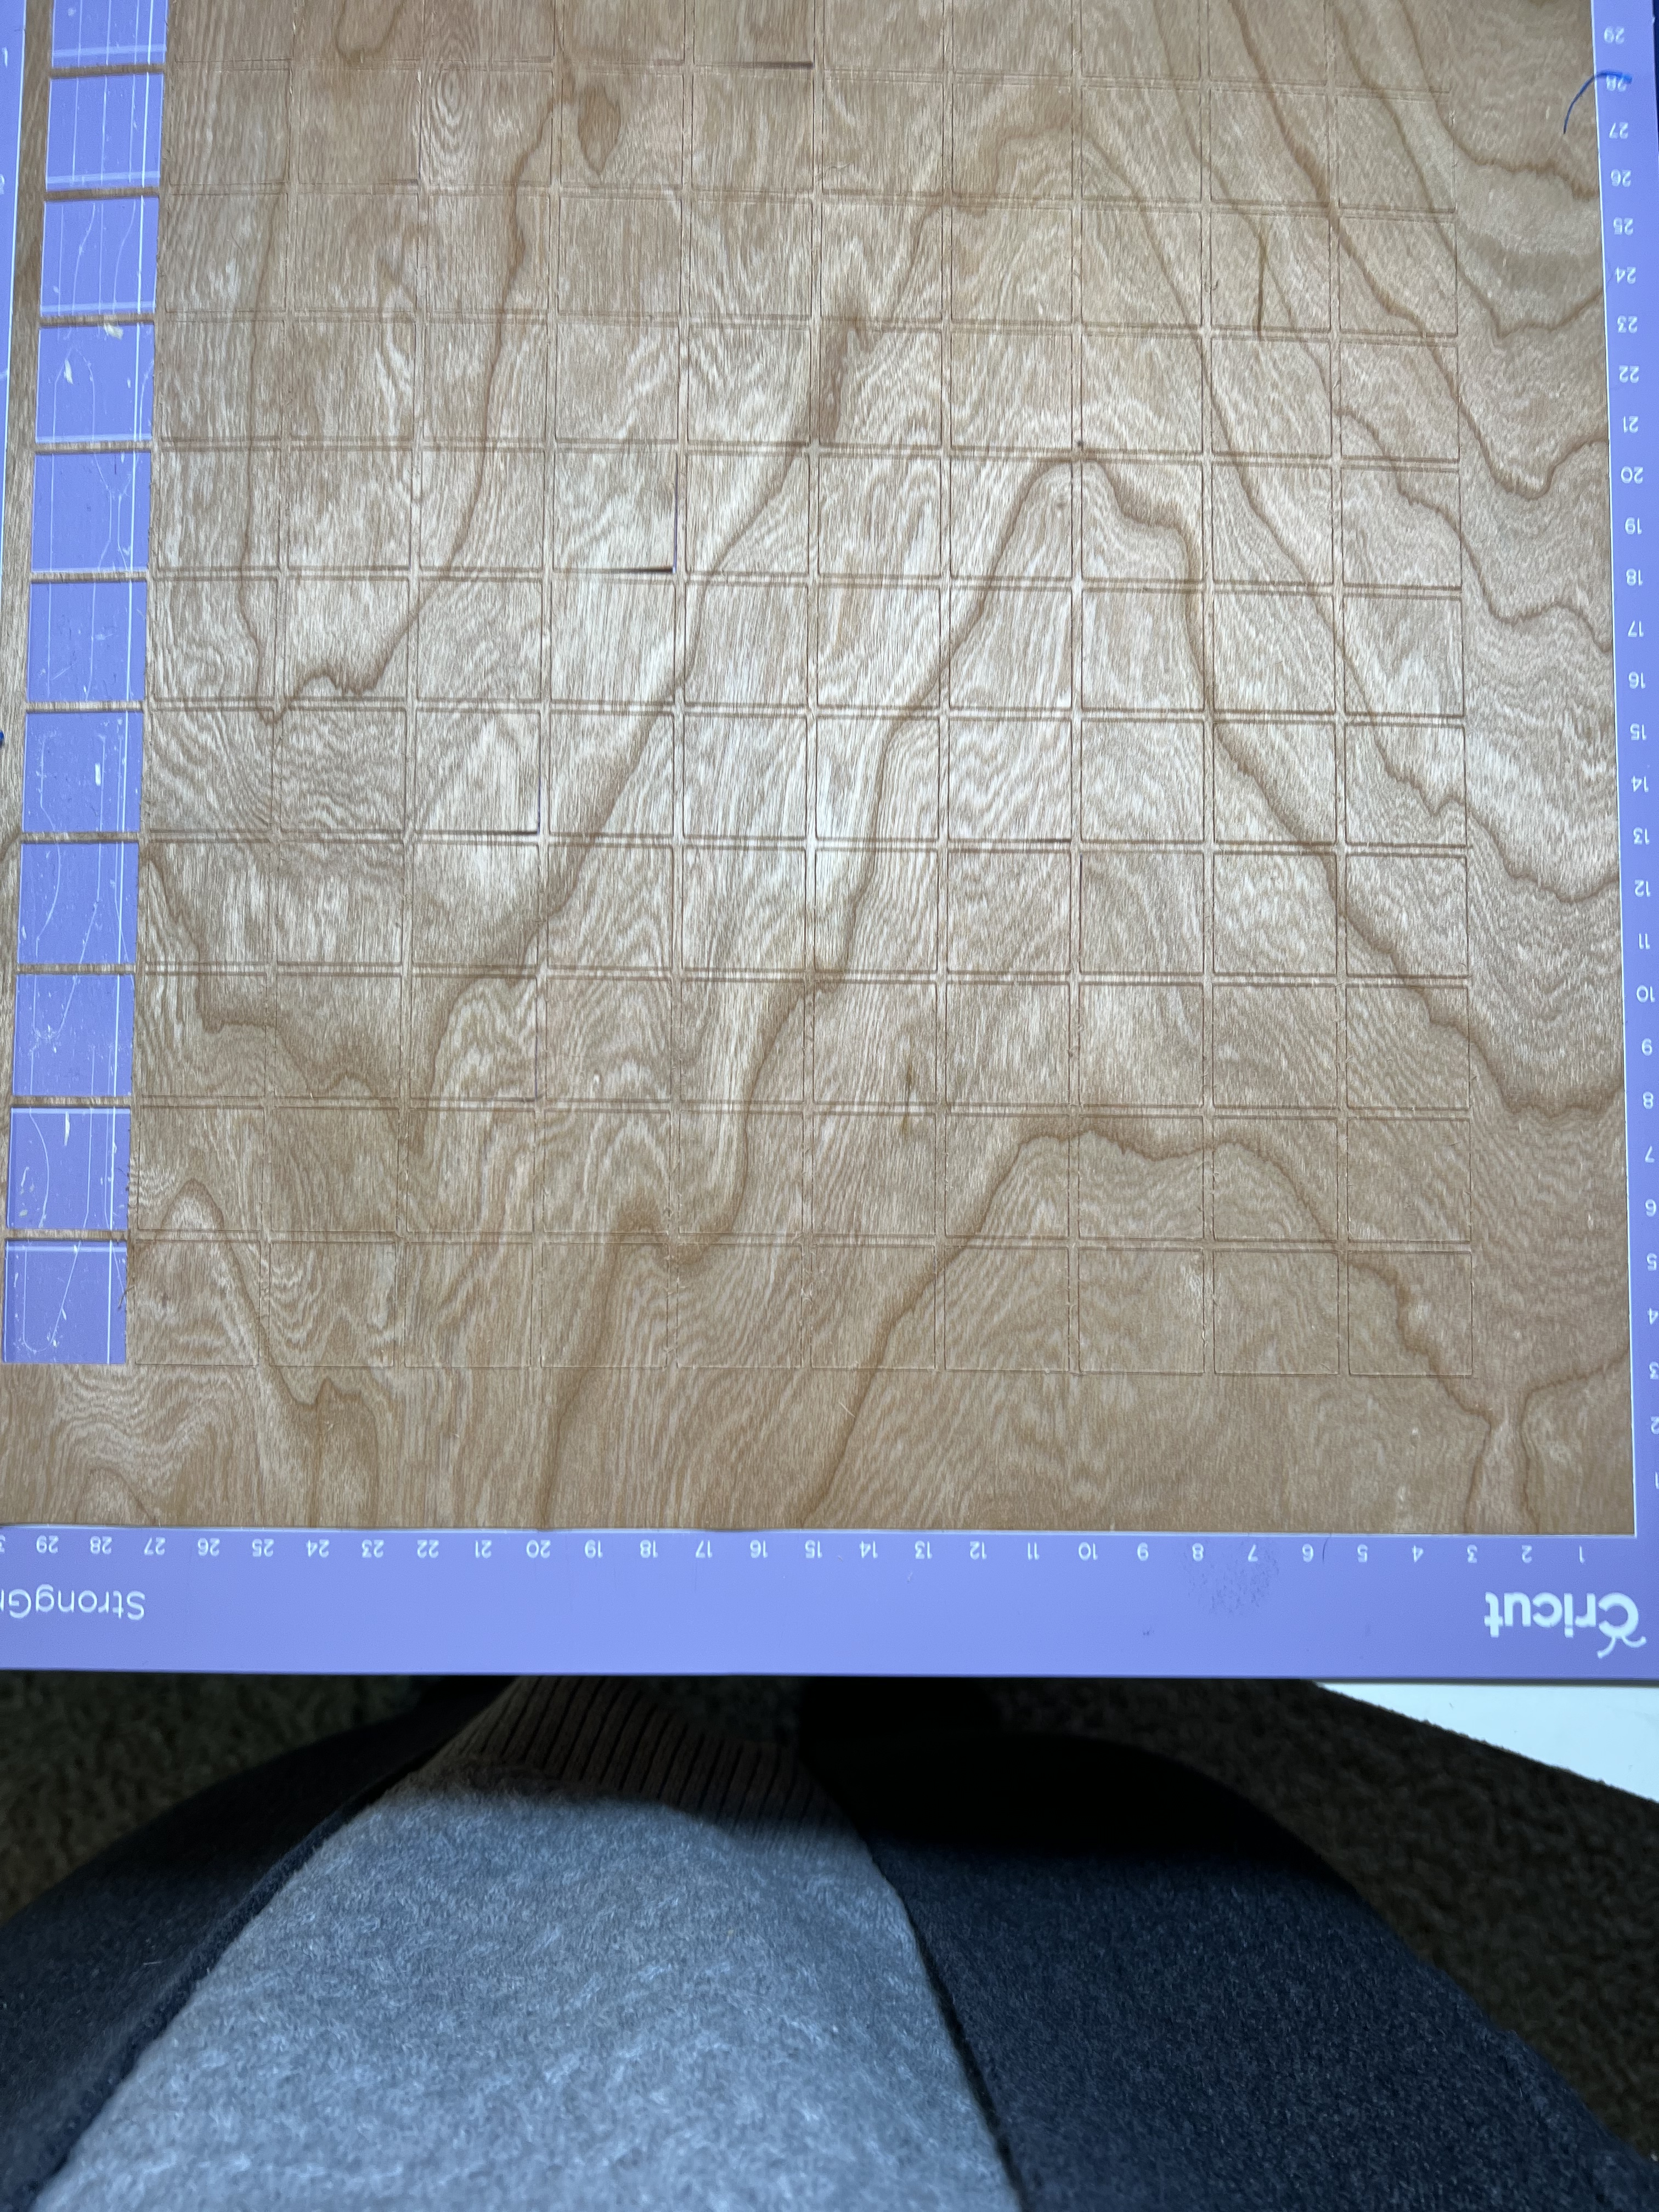
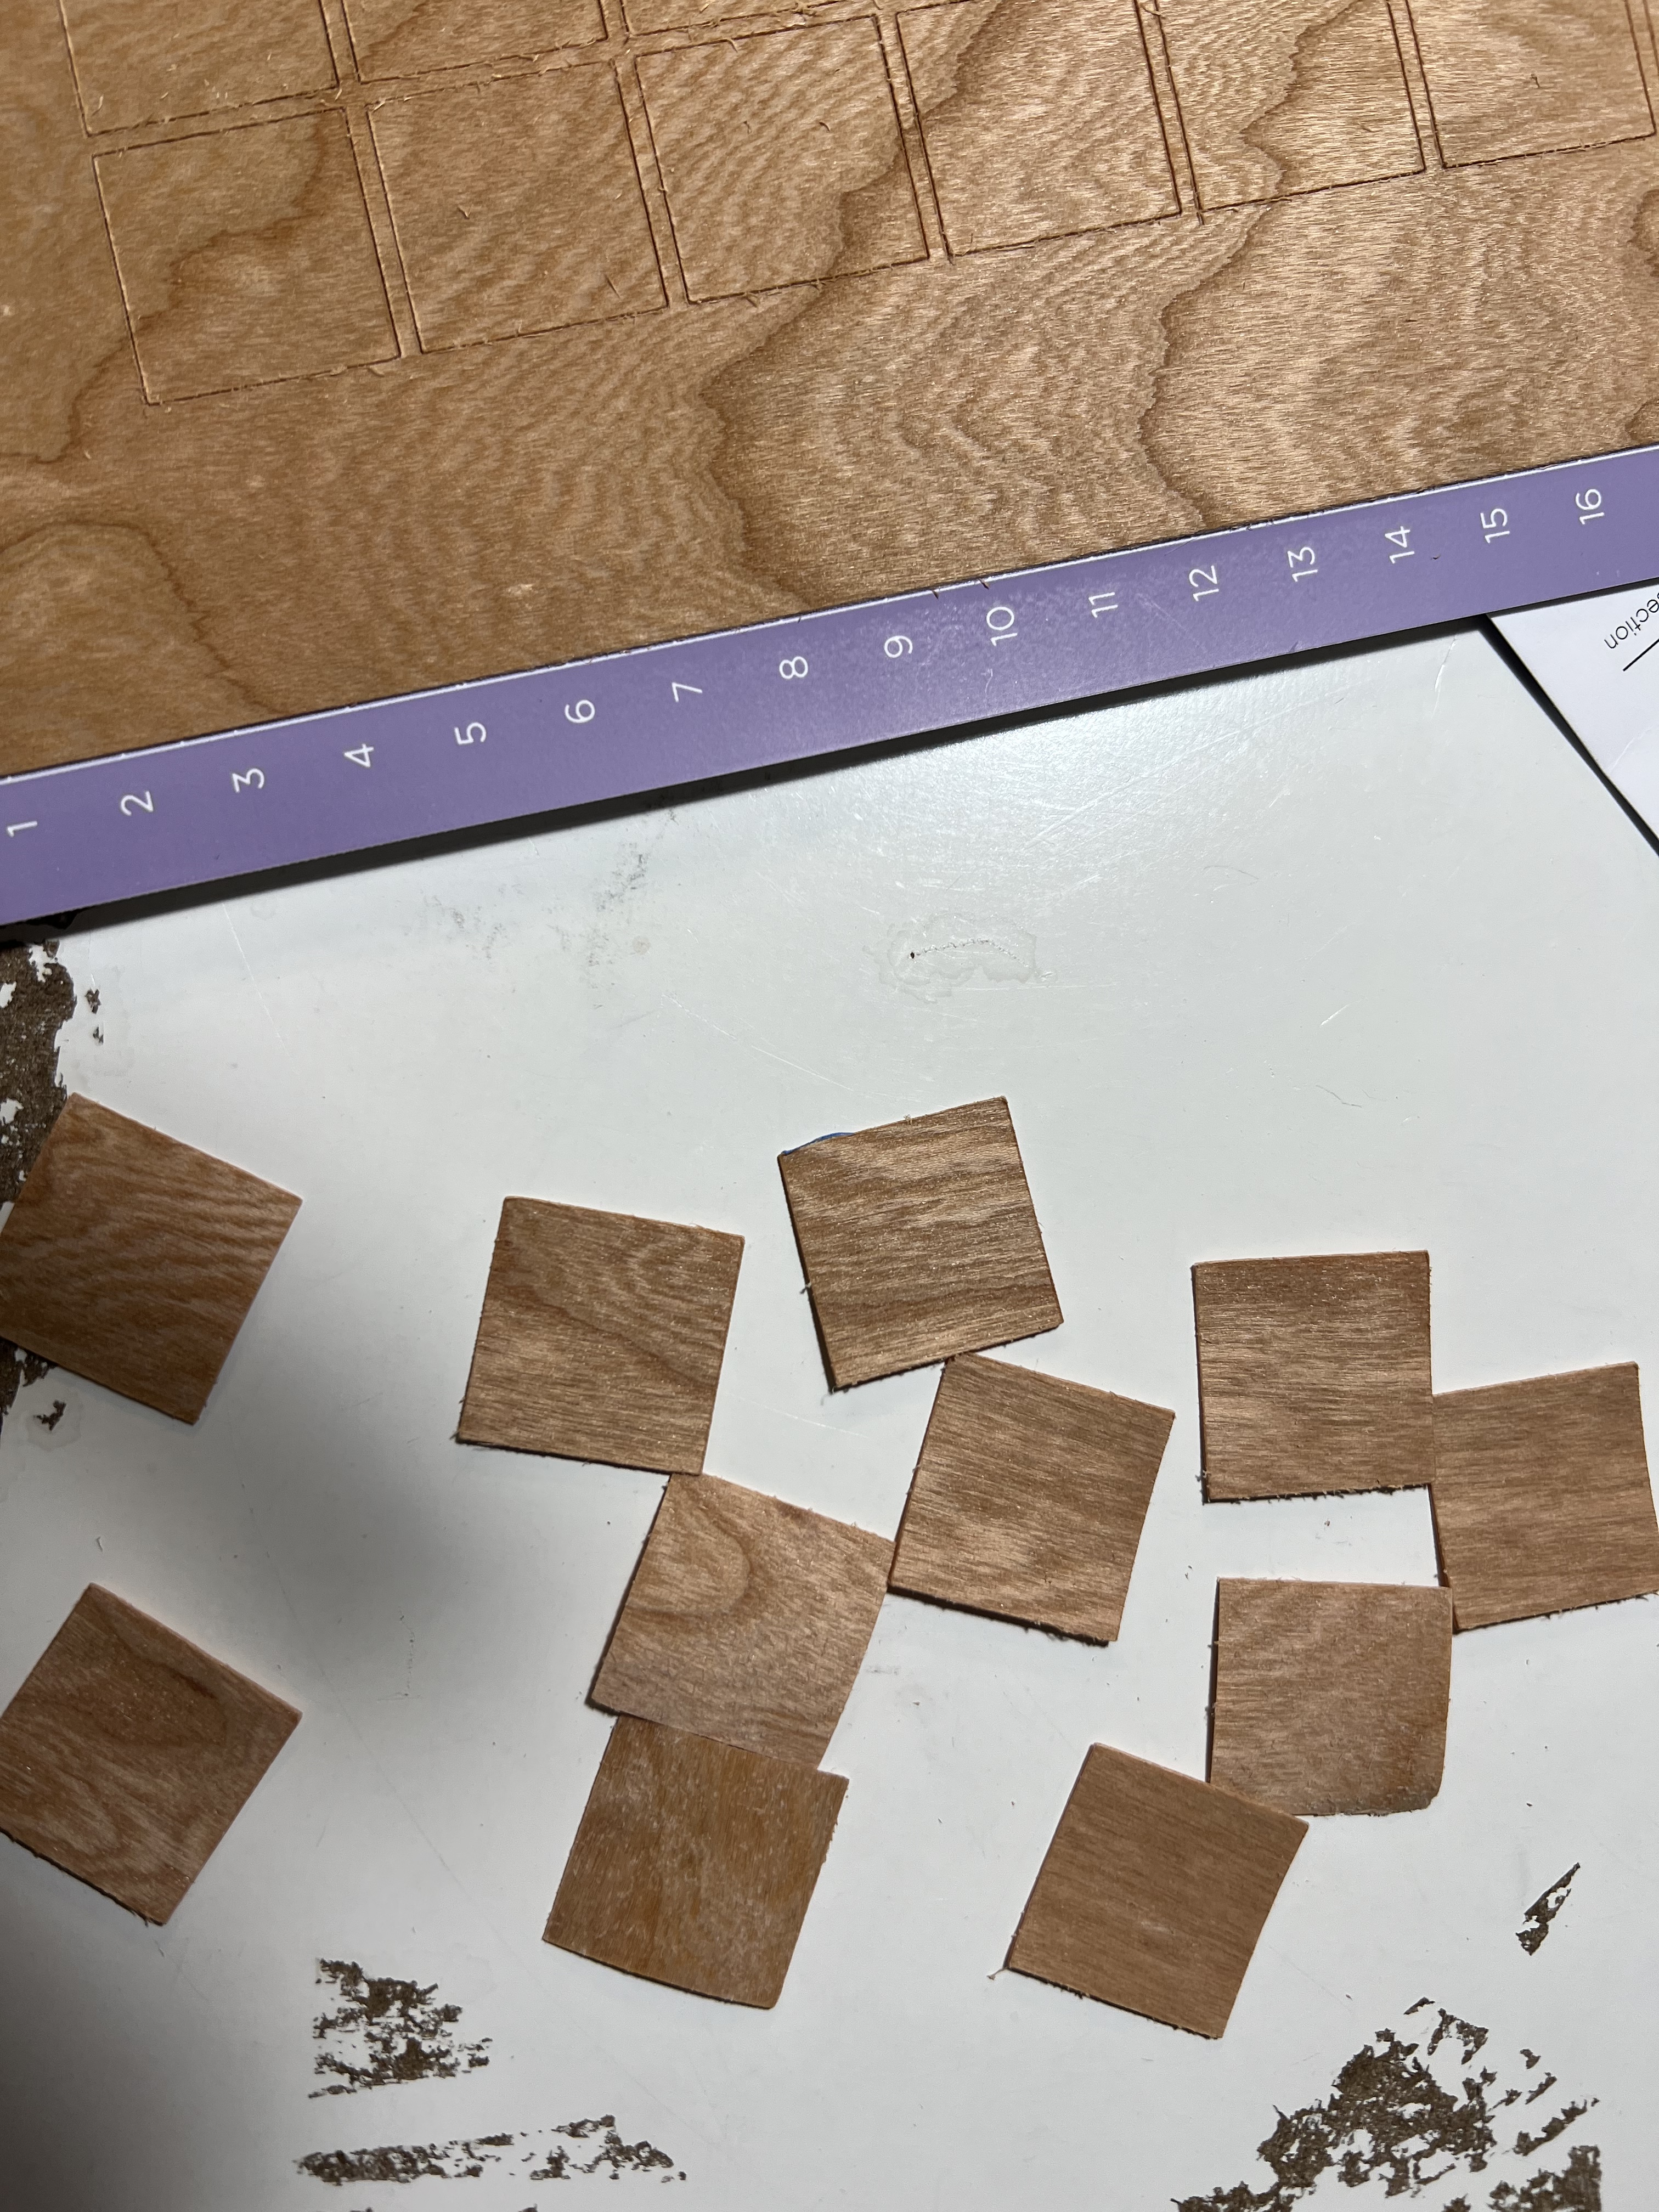
She figured out she could use her Cricut to cut 1/12 scale wood tiles from thin cherry veneer that could then be laid down in a parquet-like pattern. She scaled them down from a full-size tile making these about 7/8 of an inch square, 121 tiles per sheet of veneer. She sent me a sheet of cut tiles to see if it would work.
I also needed to figure out how to attach them to the floor. We discussed gluing them, but I was afraid the thin veneer edges might curl over time if I did not have a uniform layer of glue. My sister then suggested double-sided tape and exploring this idea, I came across the perfect adhesive tool—carpet tape.
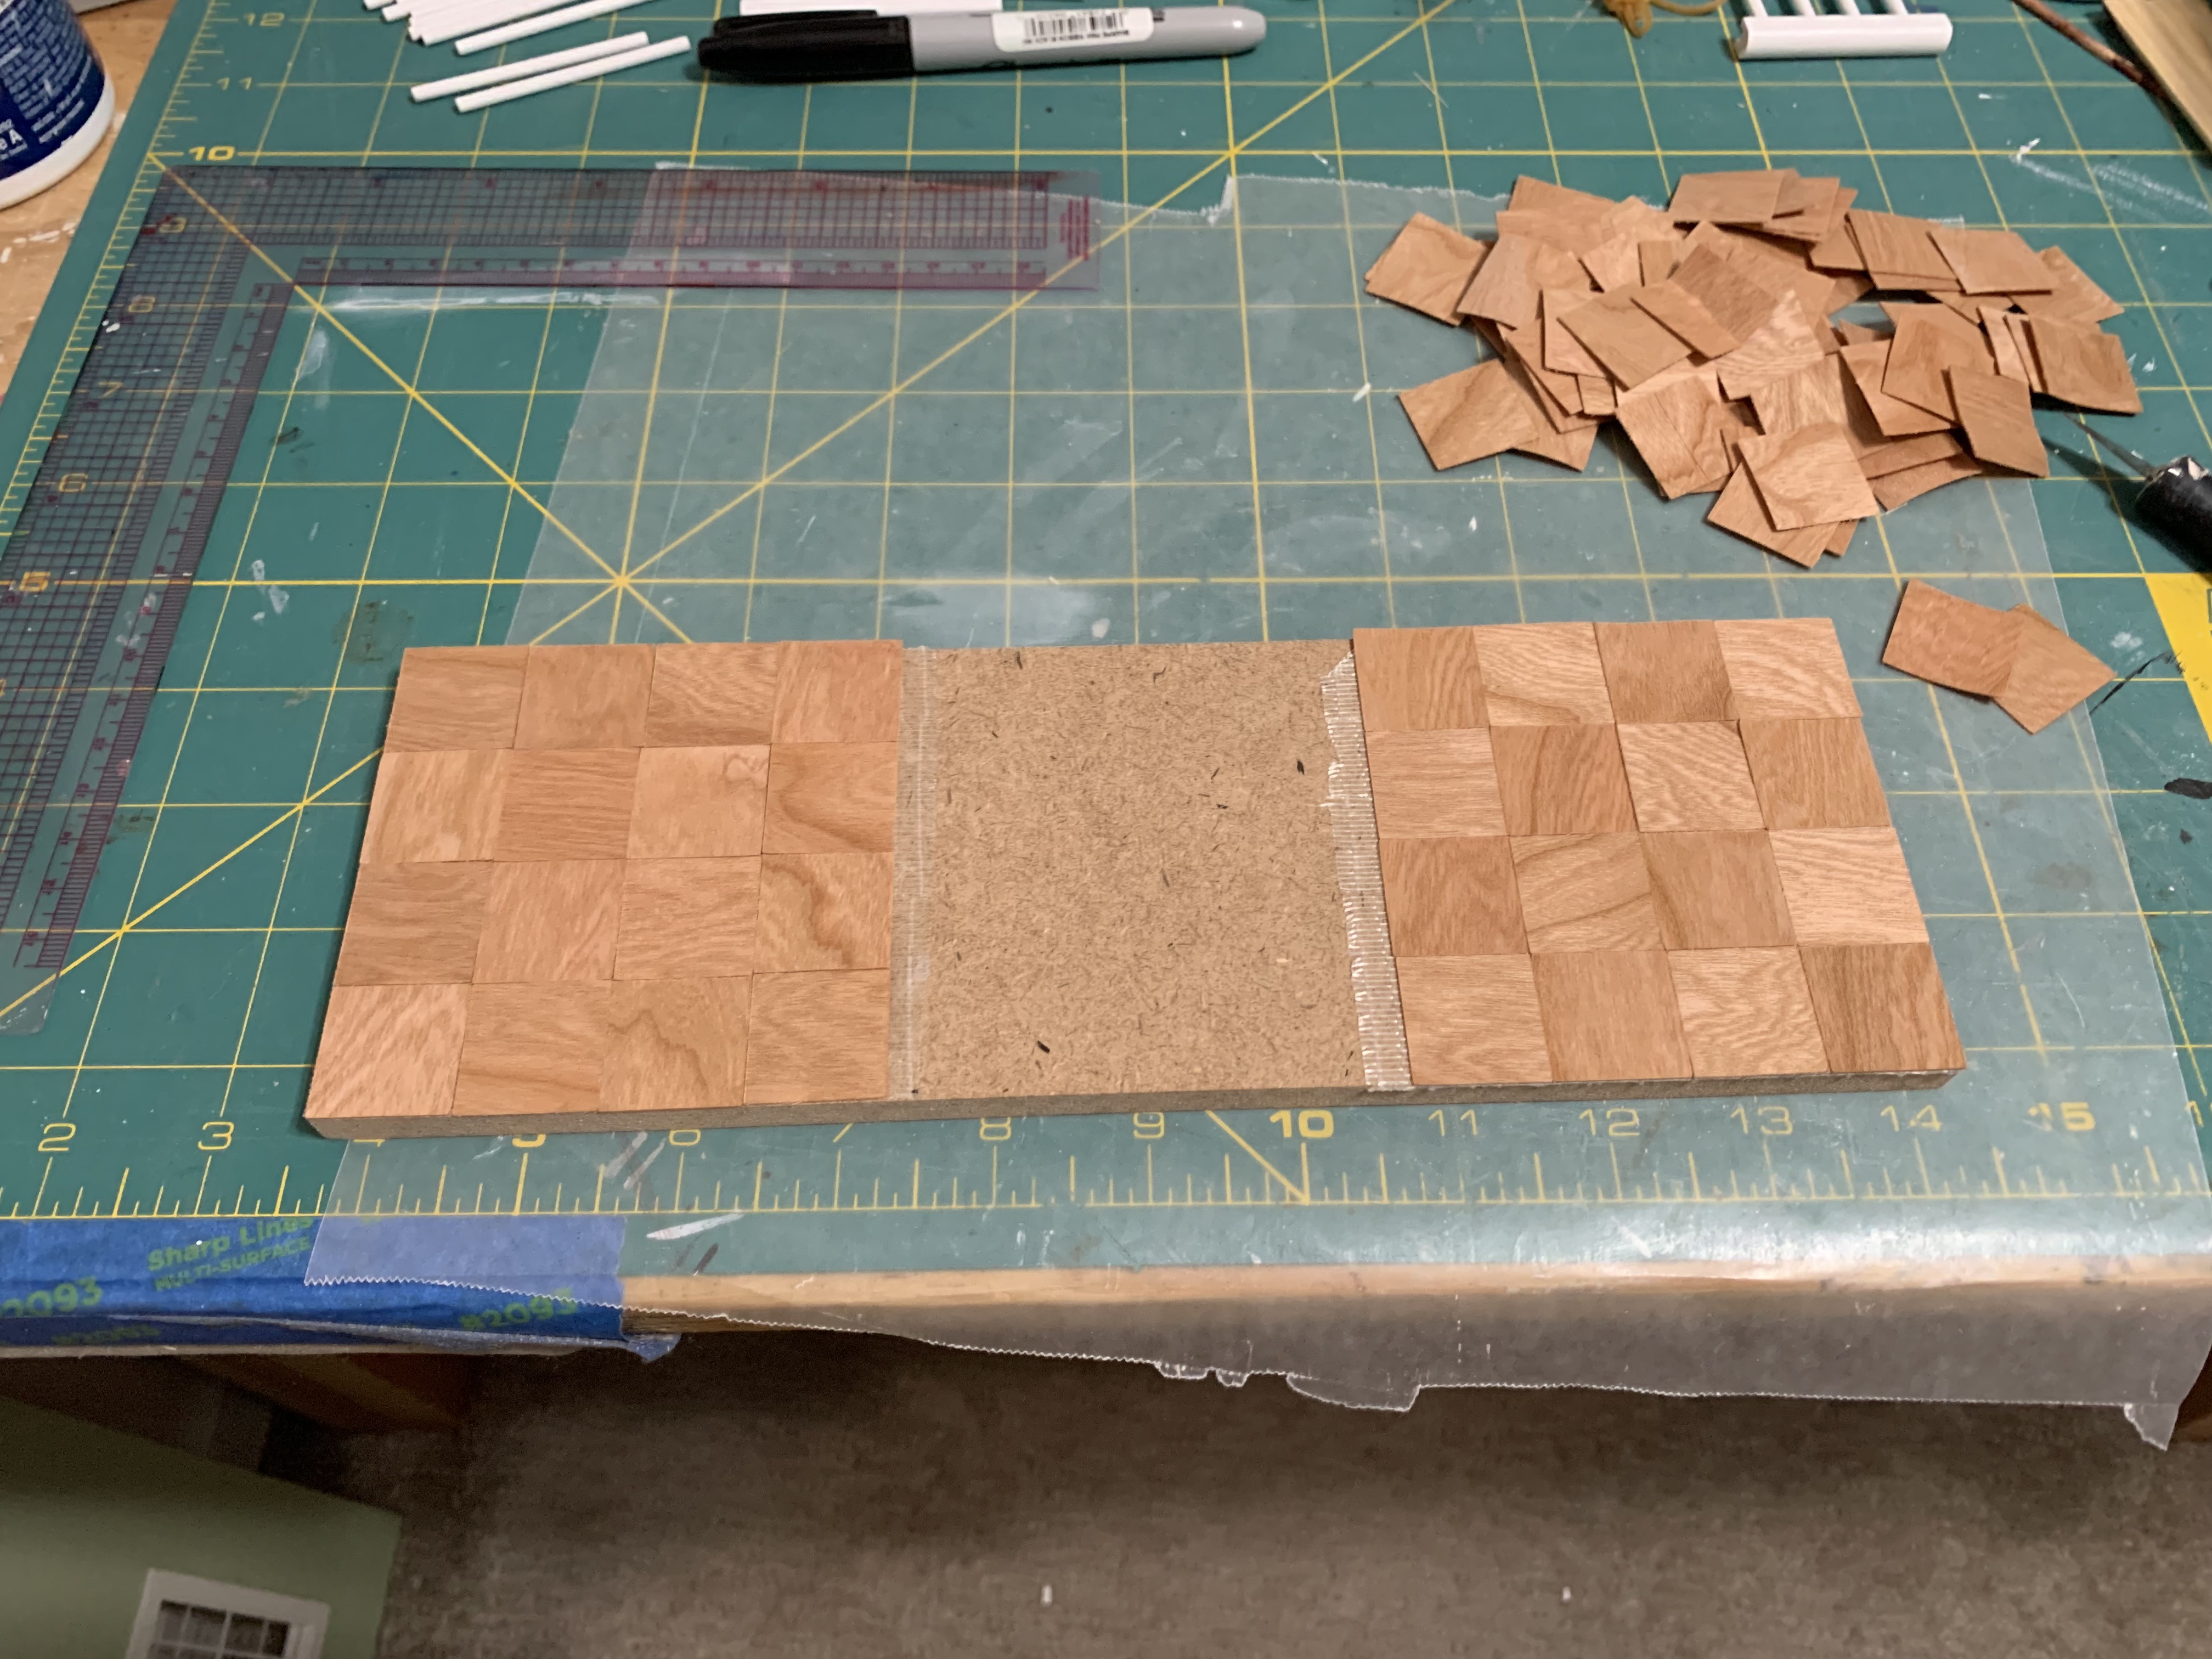
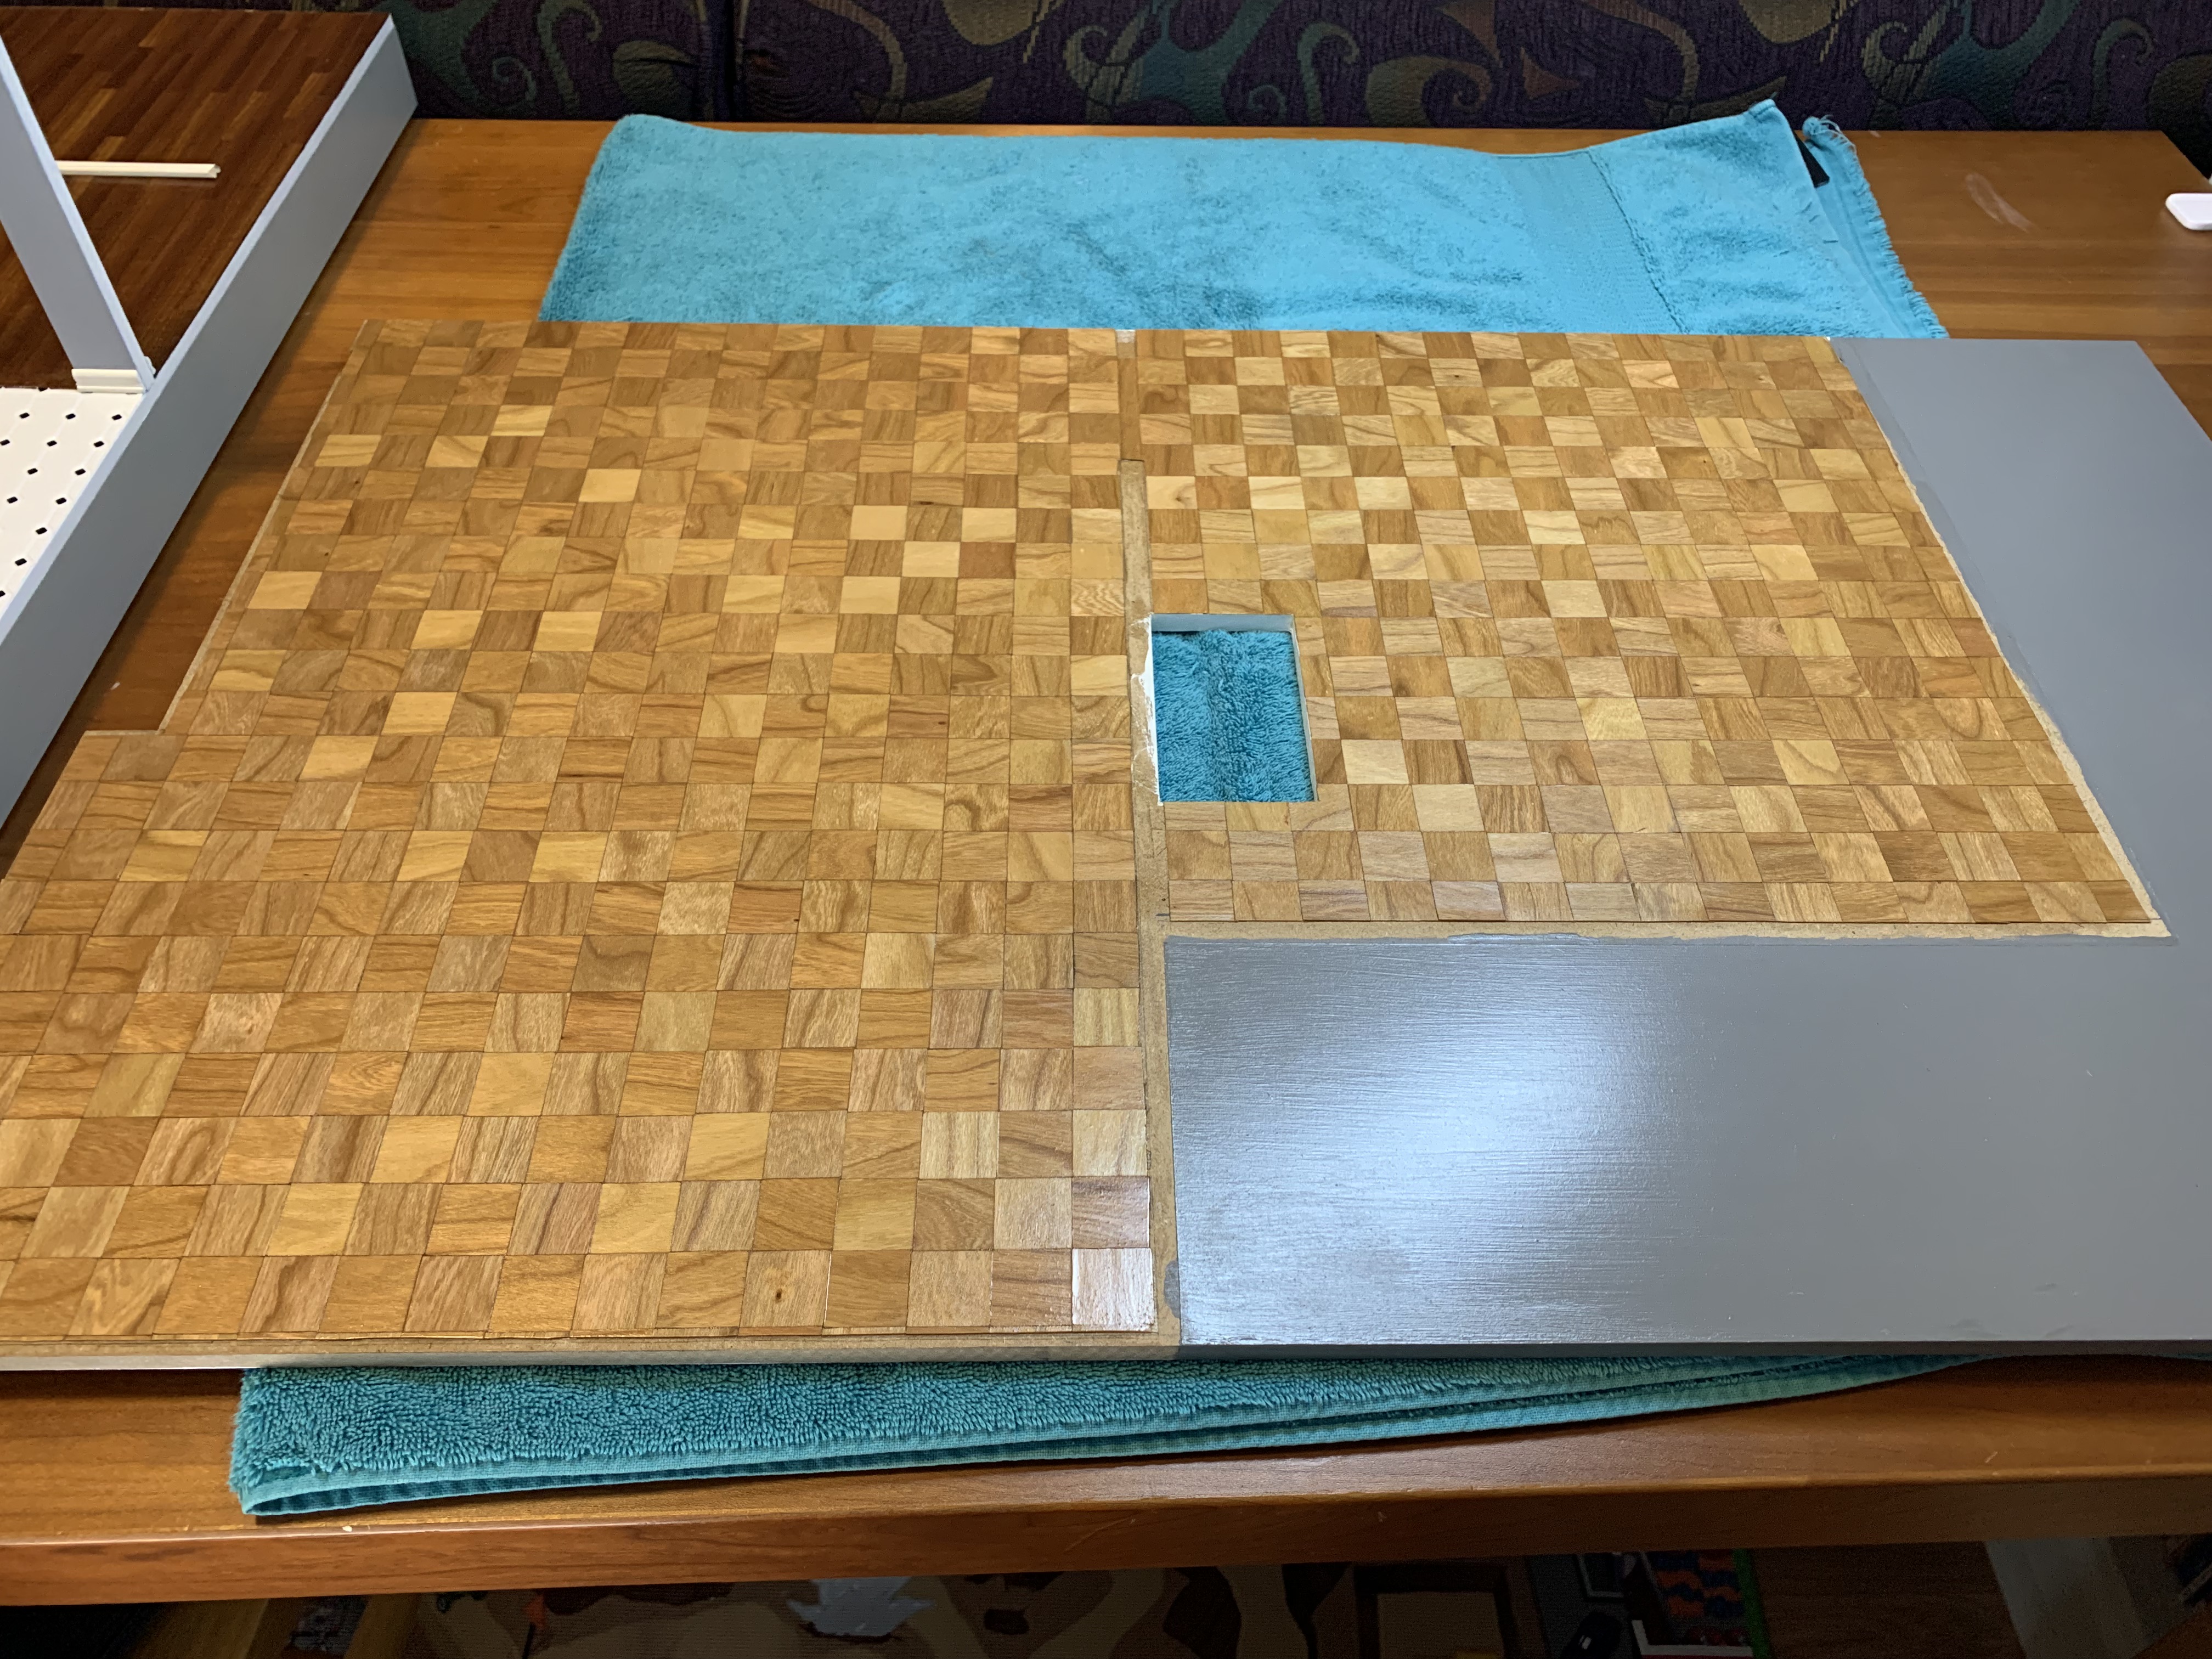
Once I got the tiles in the mail and had bought the tape, I mocked up a flooring sample to investigate the next question; how to finish them?
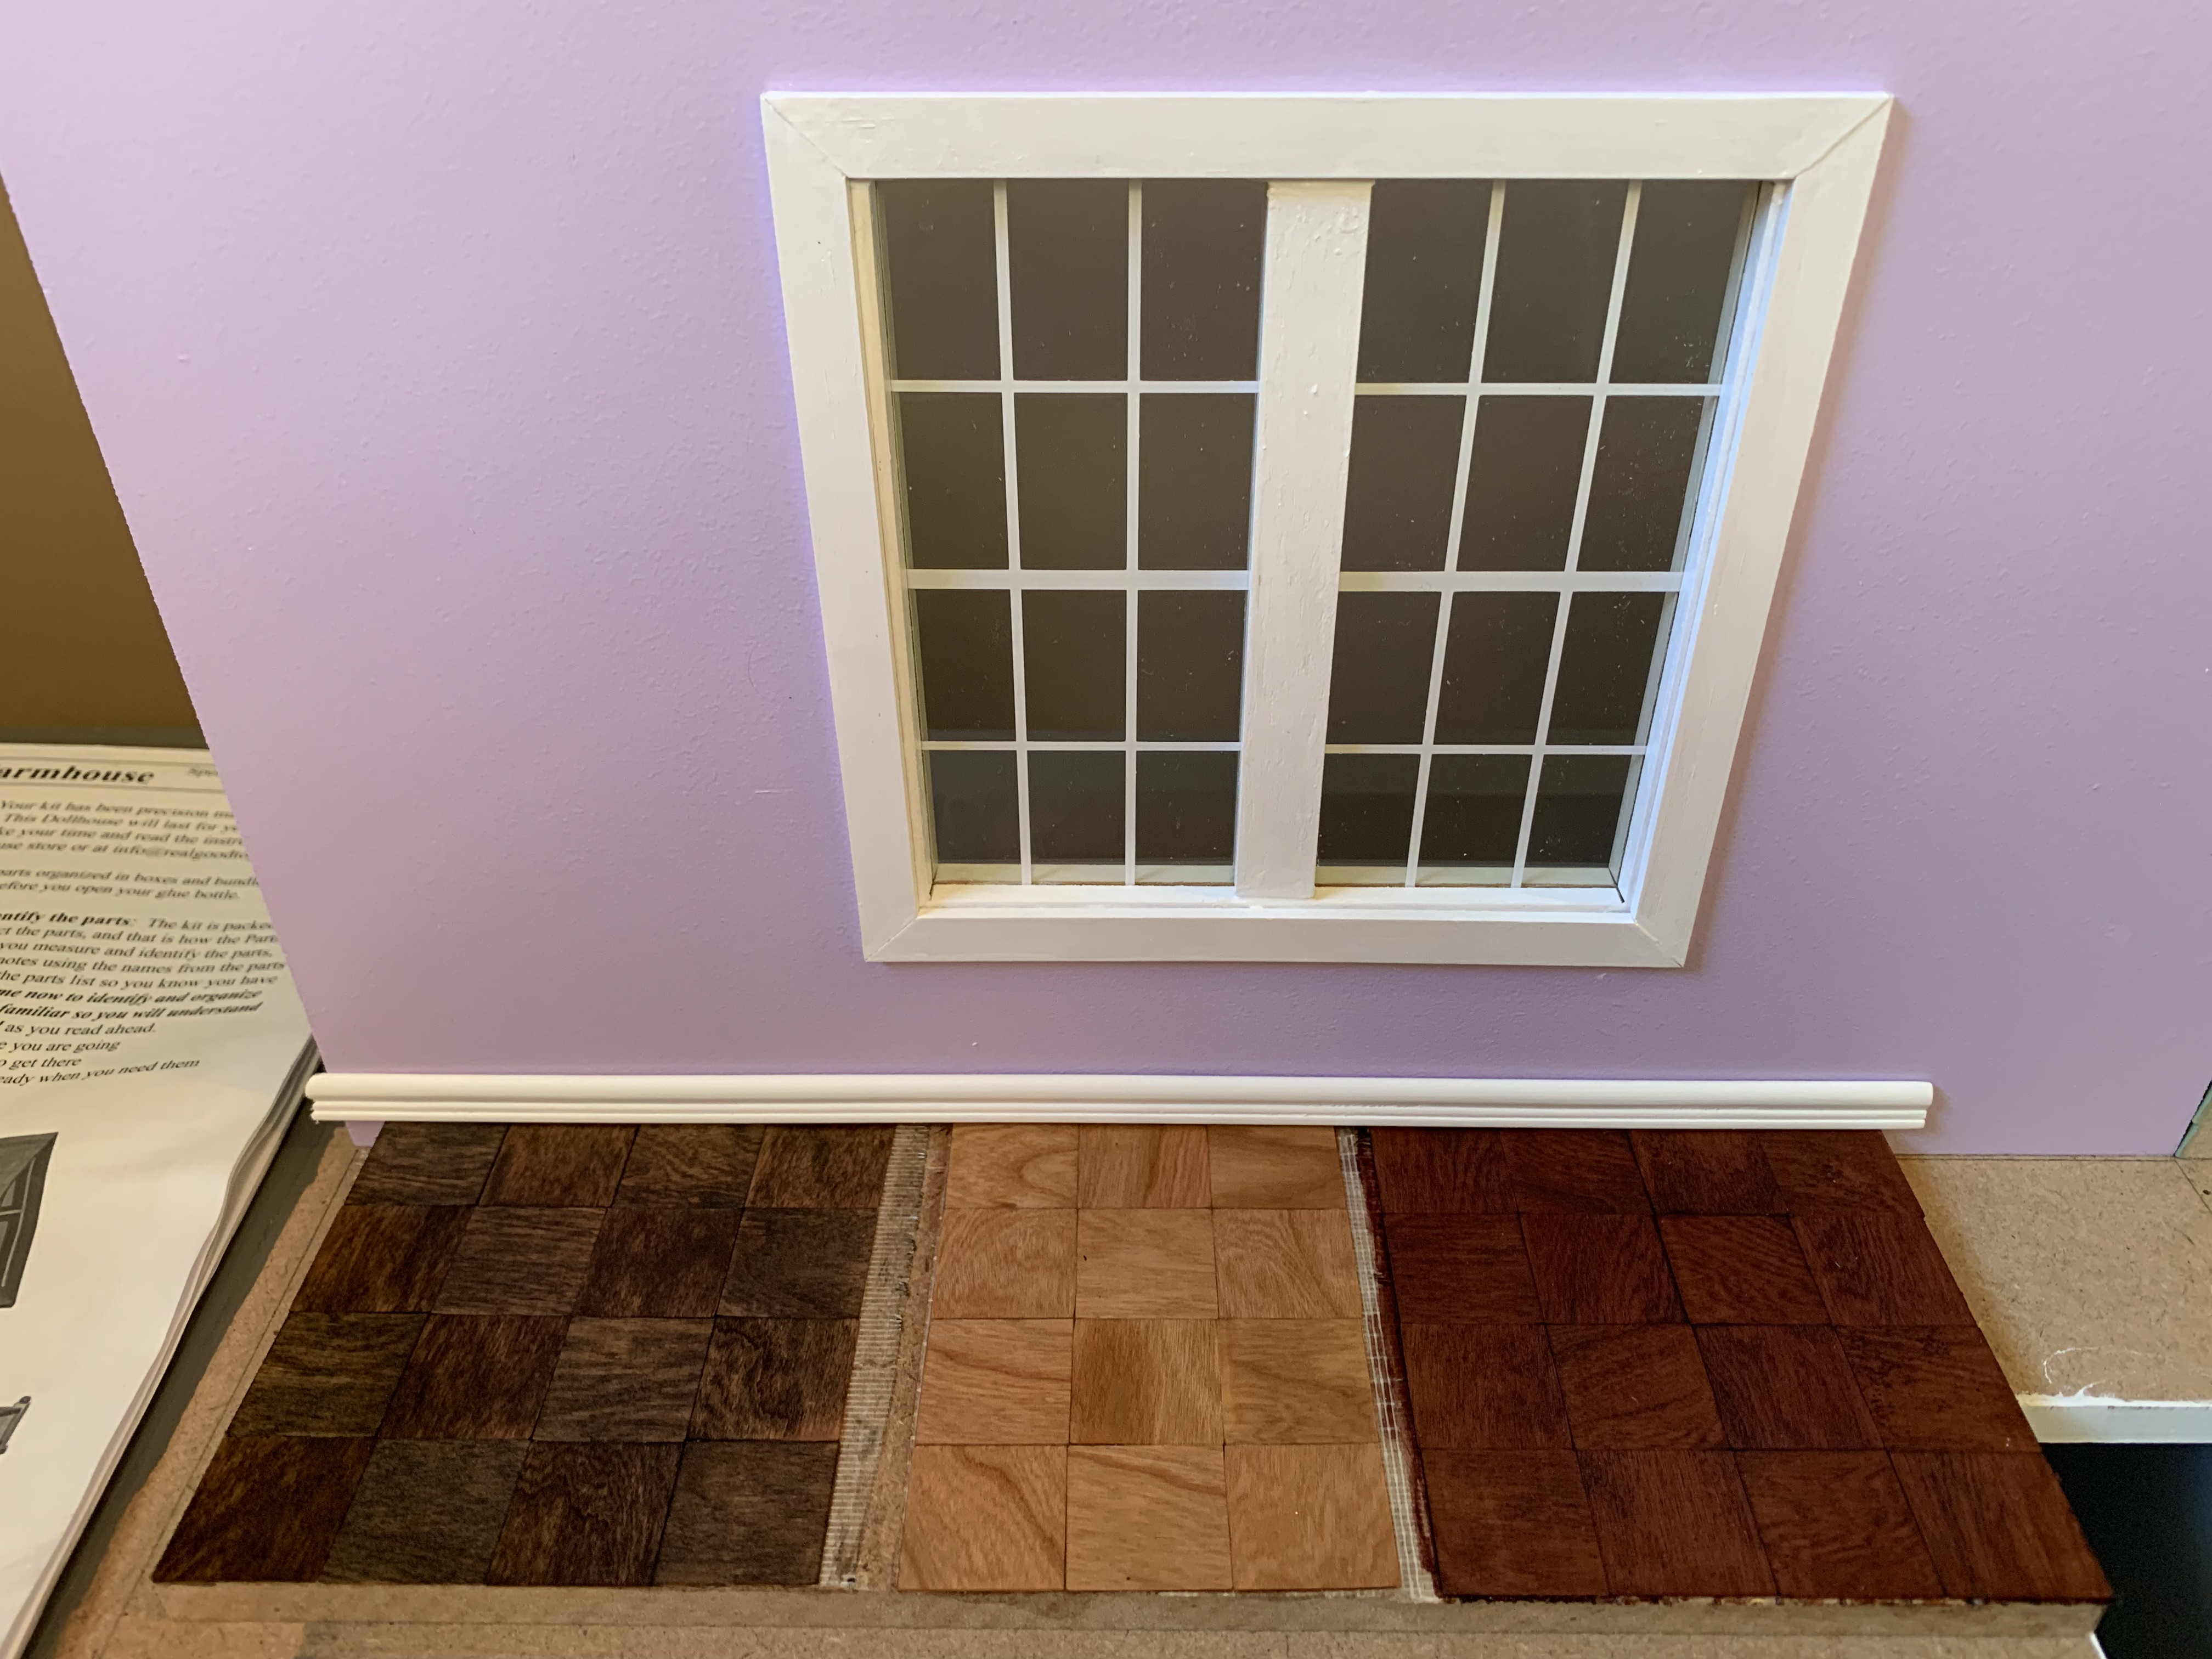
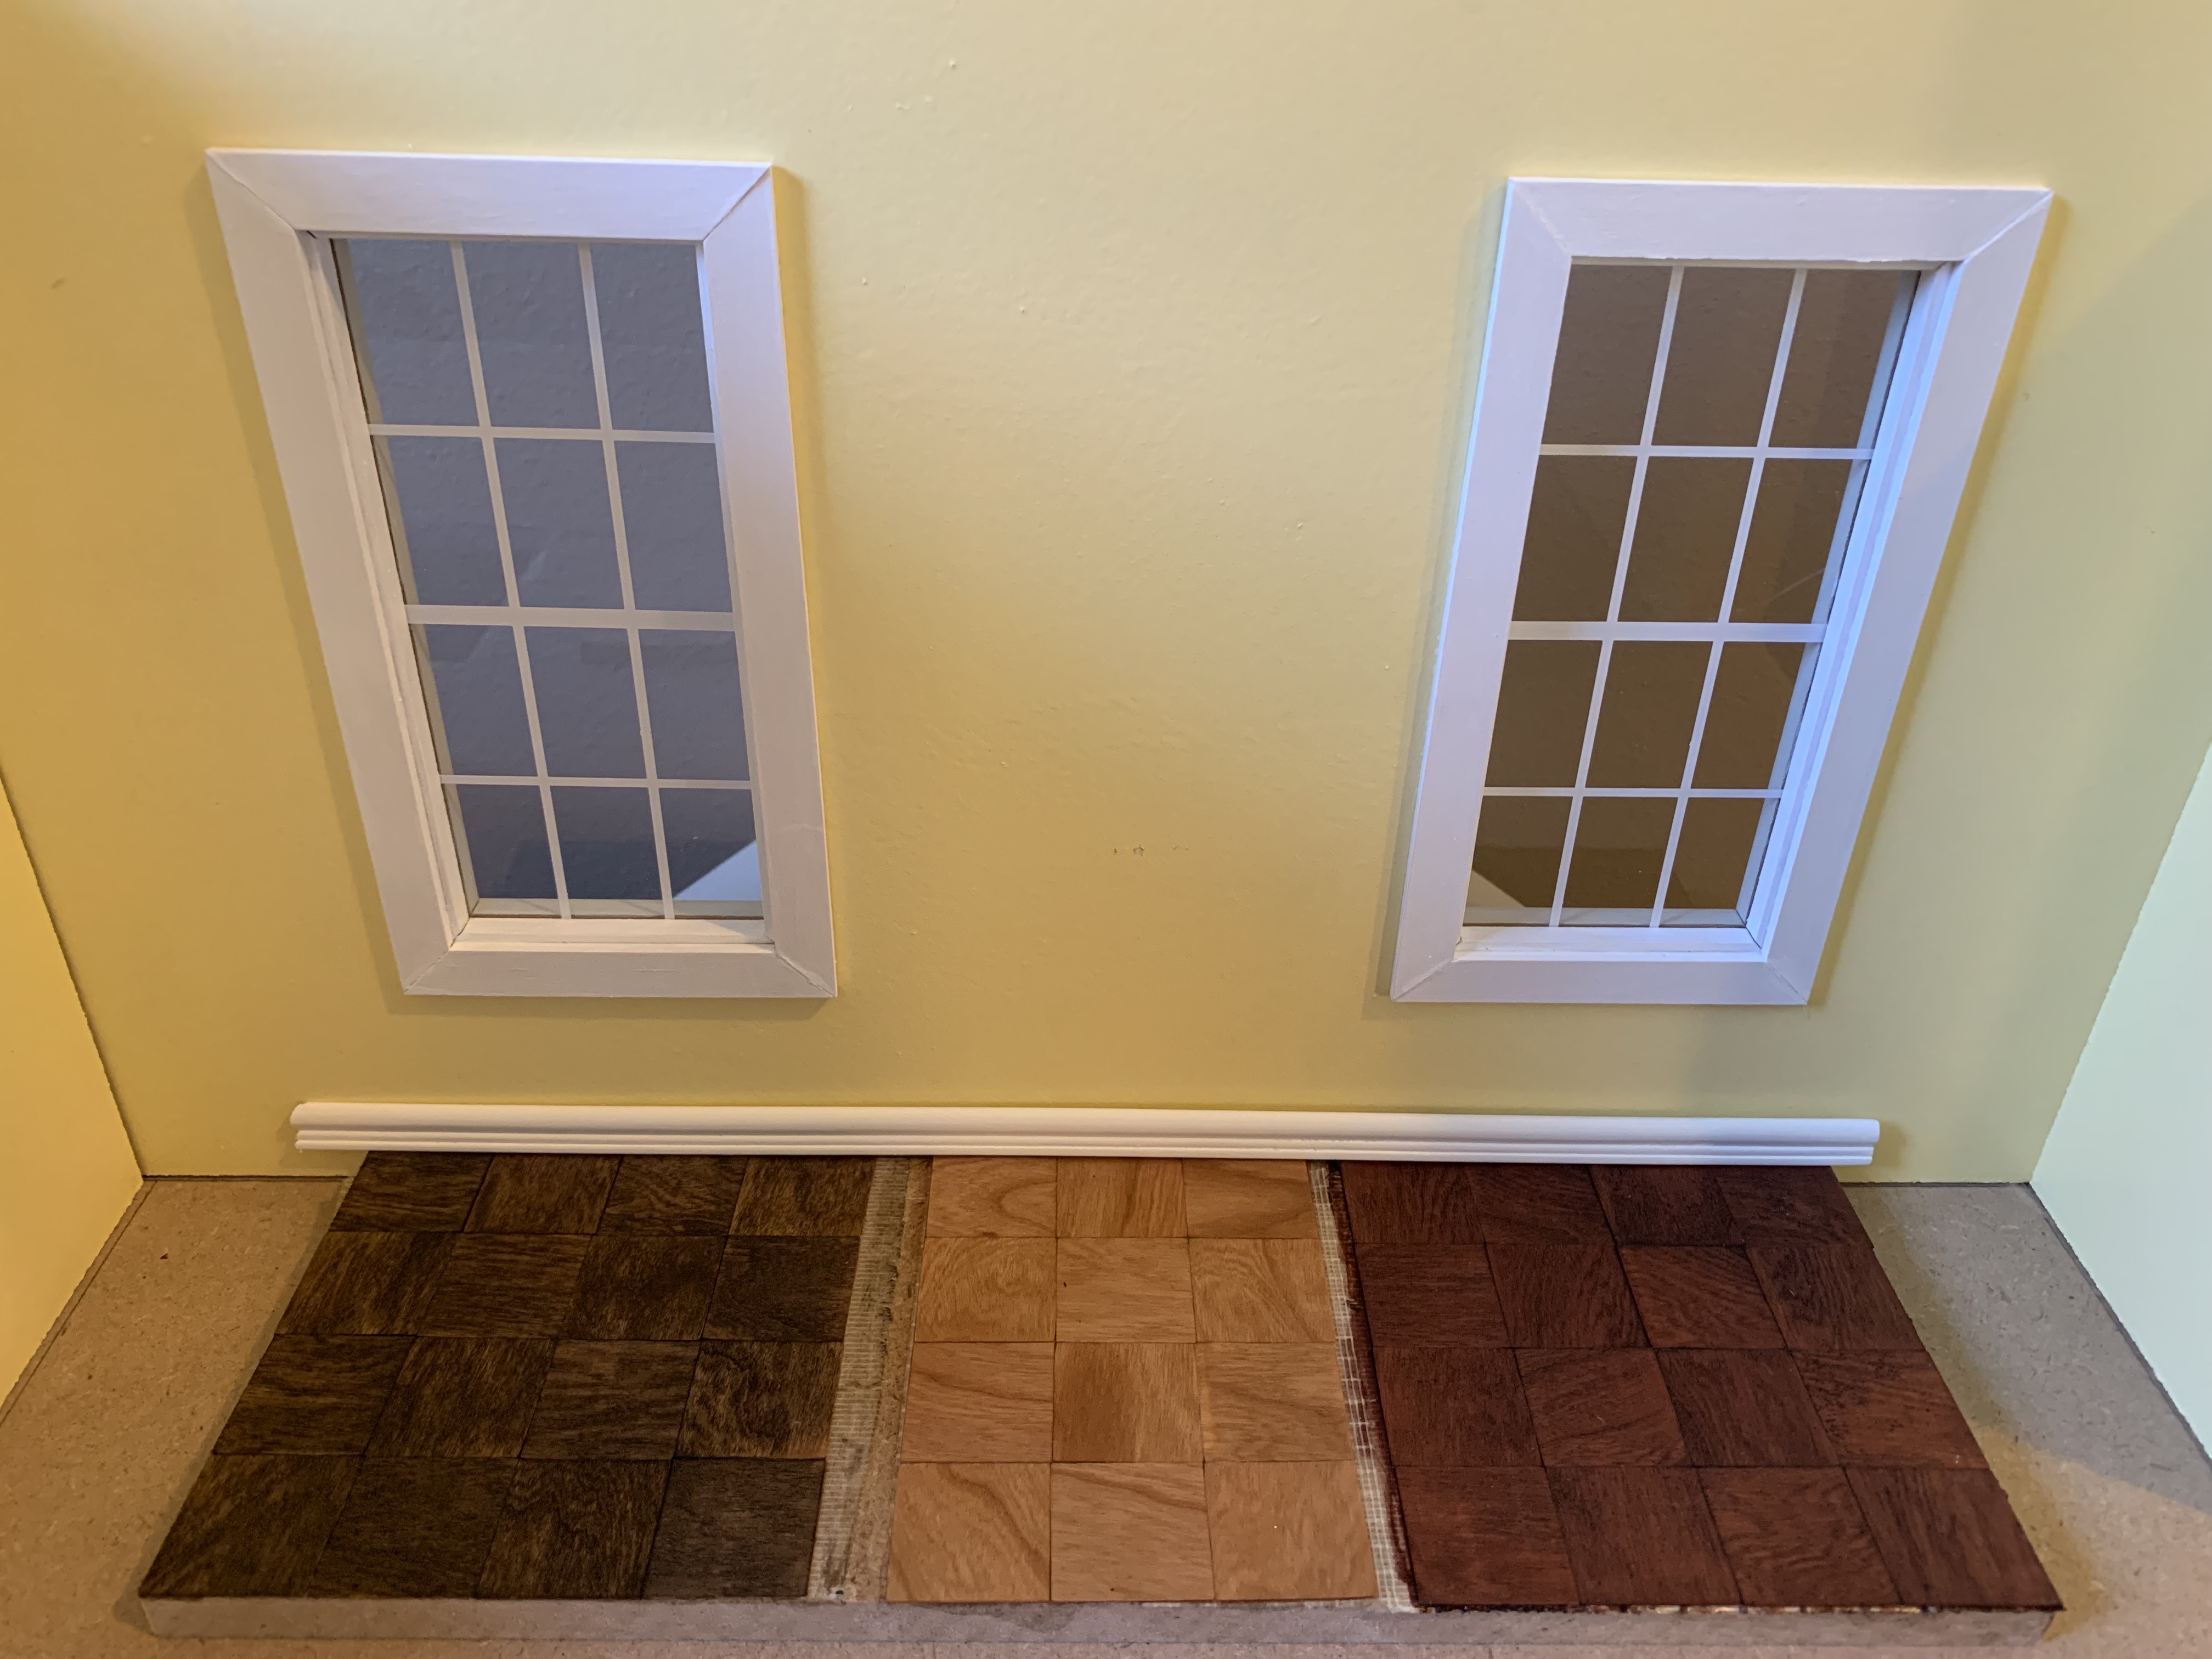
I obtained two different stains and sent this photo to my sister.
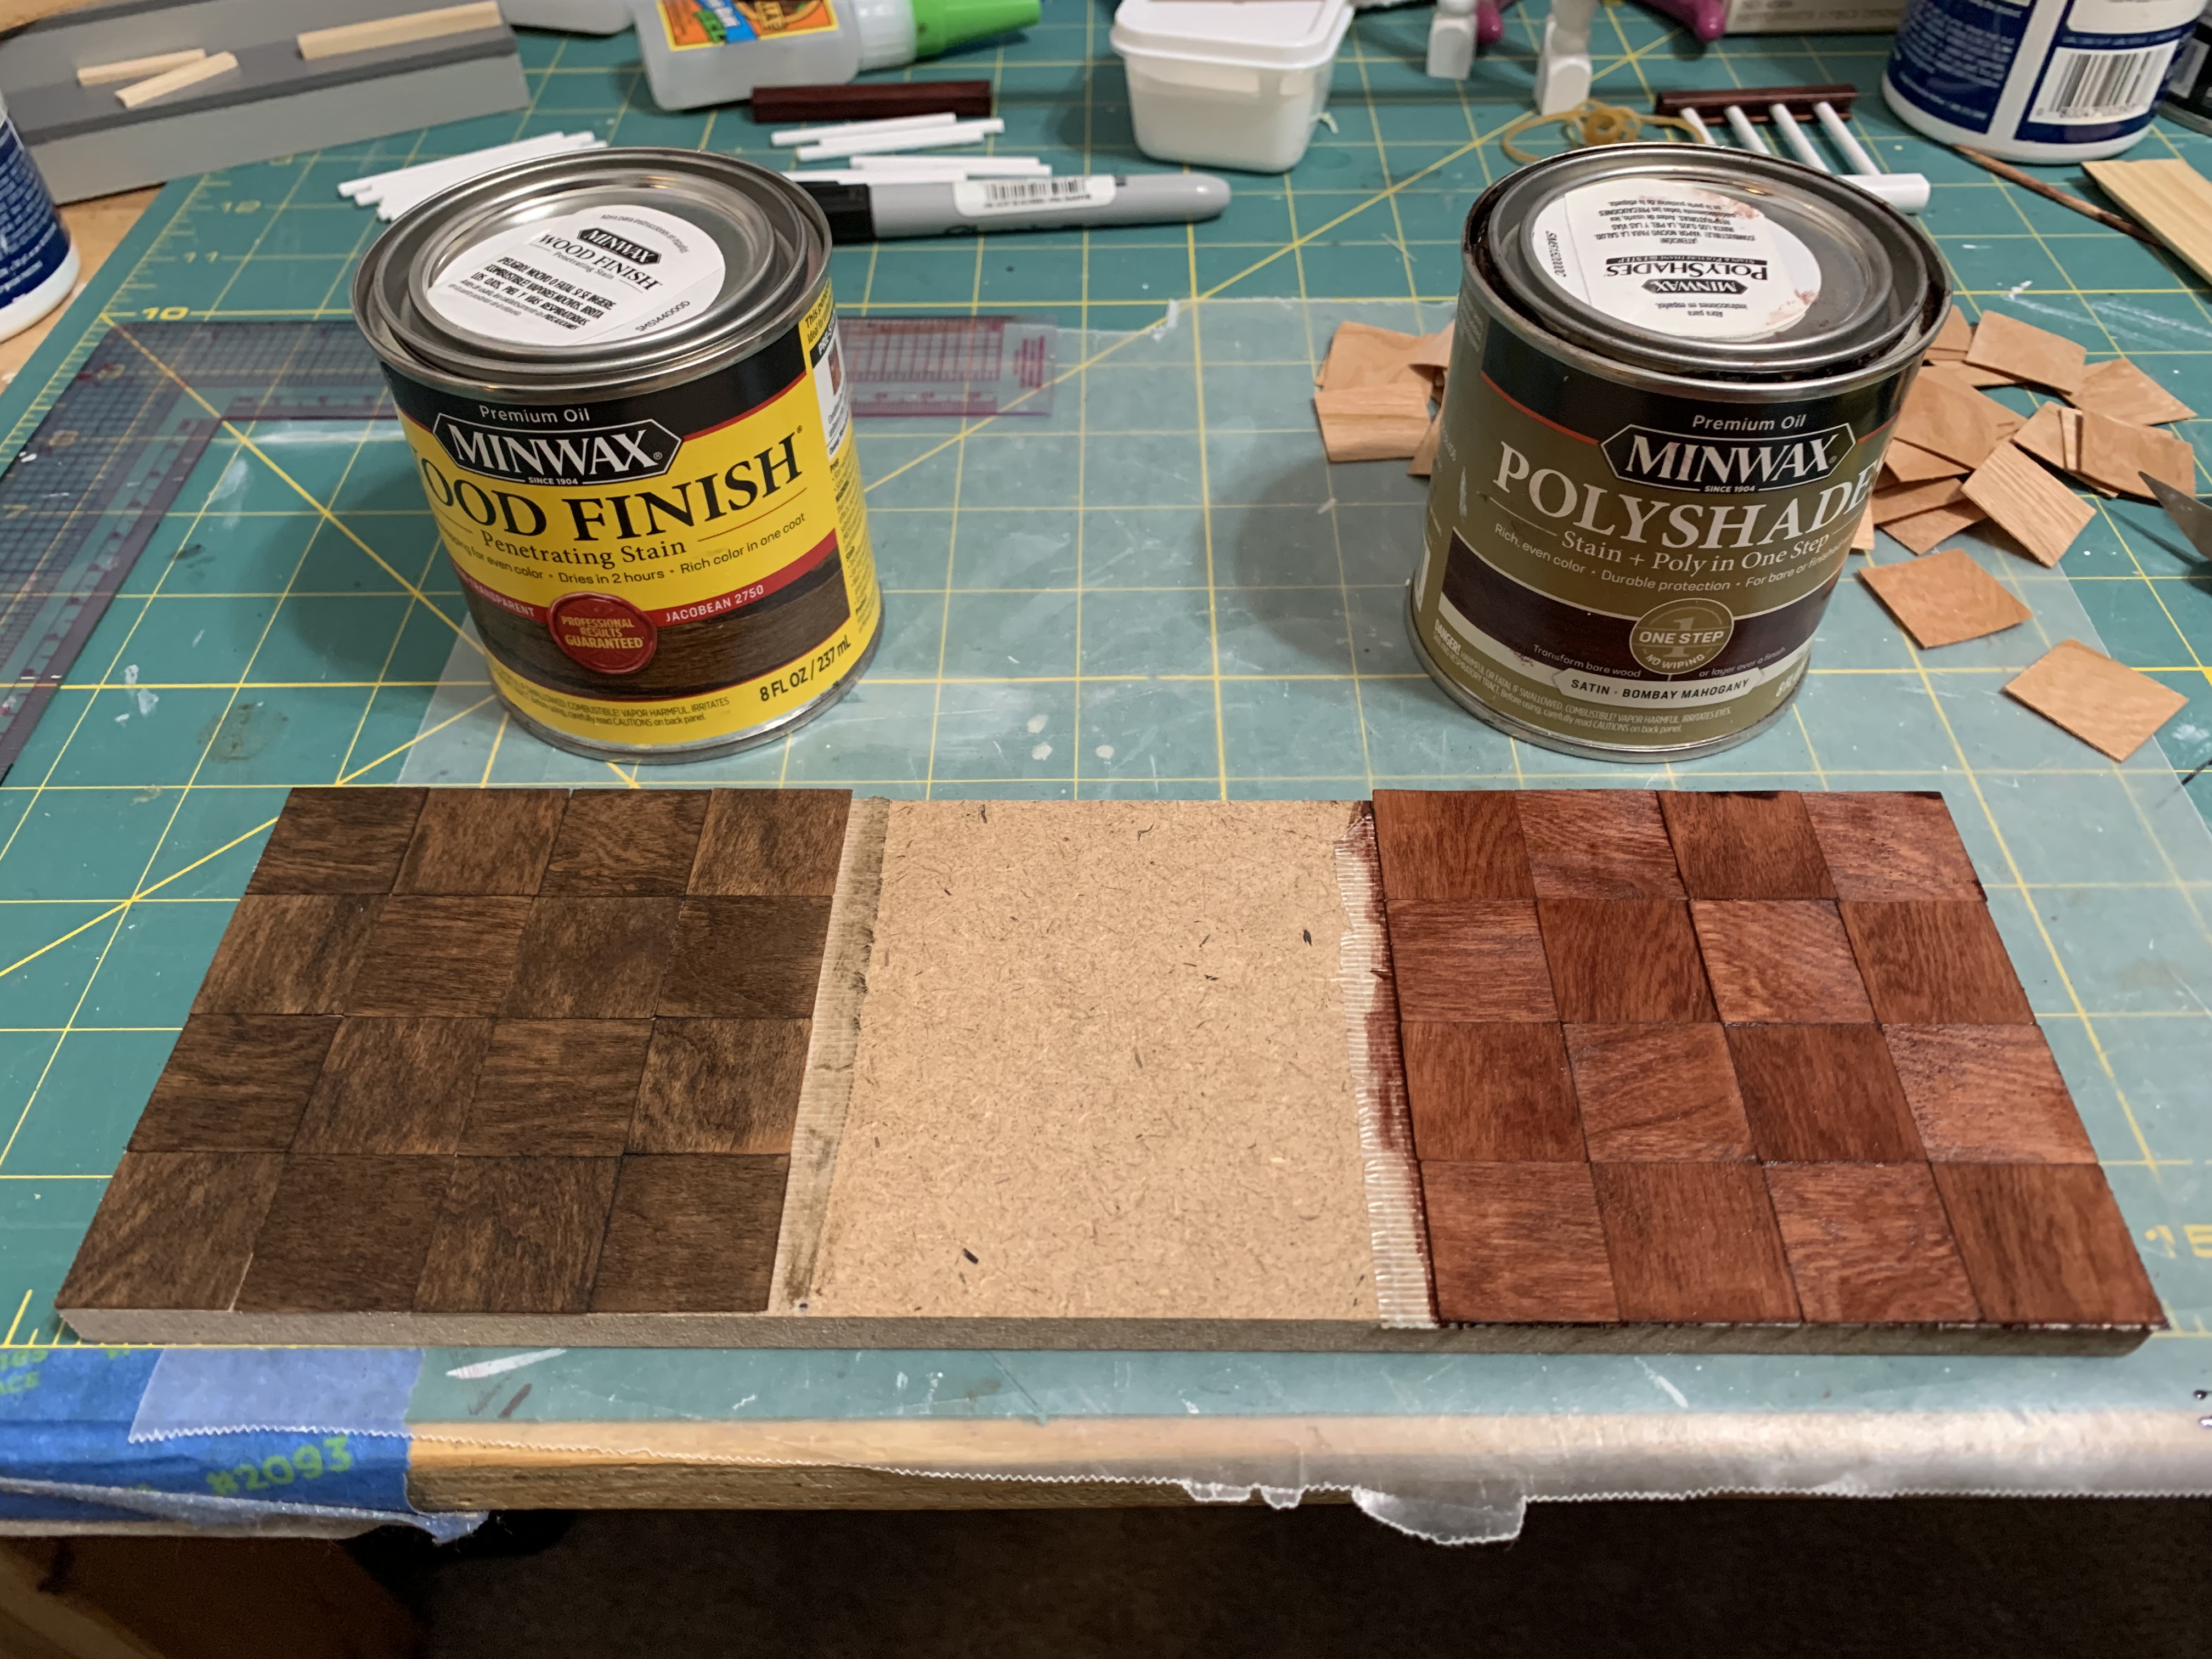
She asked what about natural, so I added a third middle section with just polyurethane applied. I then placed these “floor” samples in their two rooms so we could see how they would look with the paint schemes selected. Natural was the clear winner and it accentuated the “parquet-like” pattern.
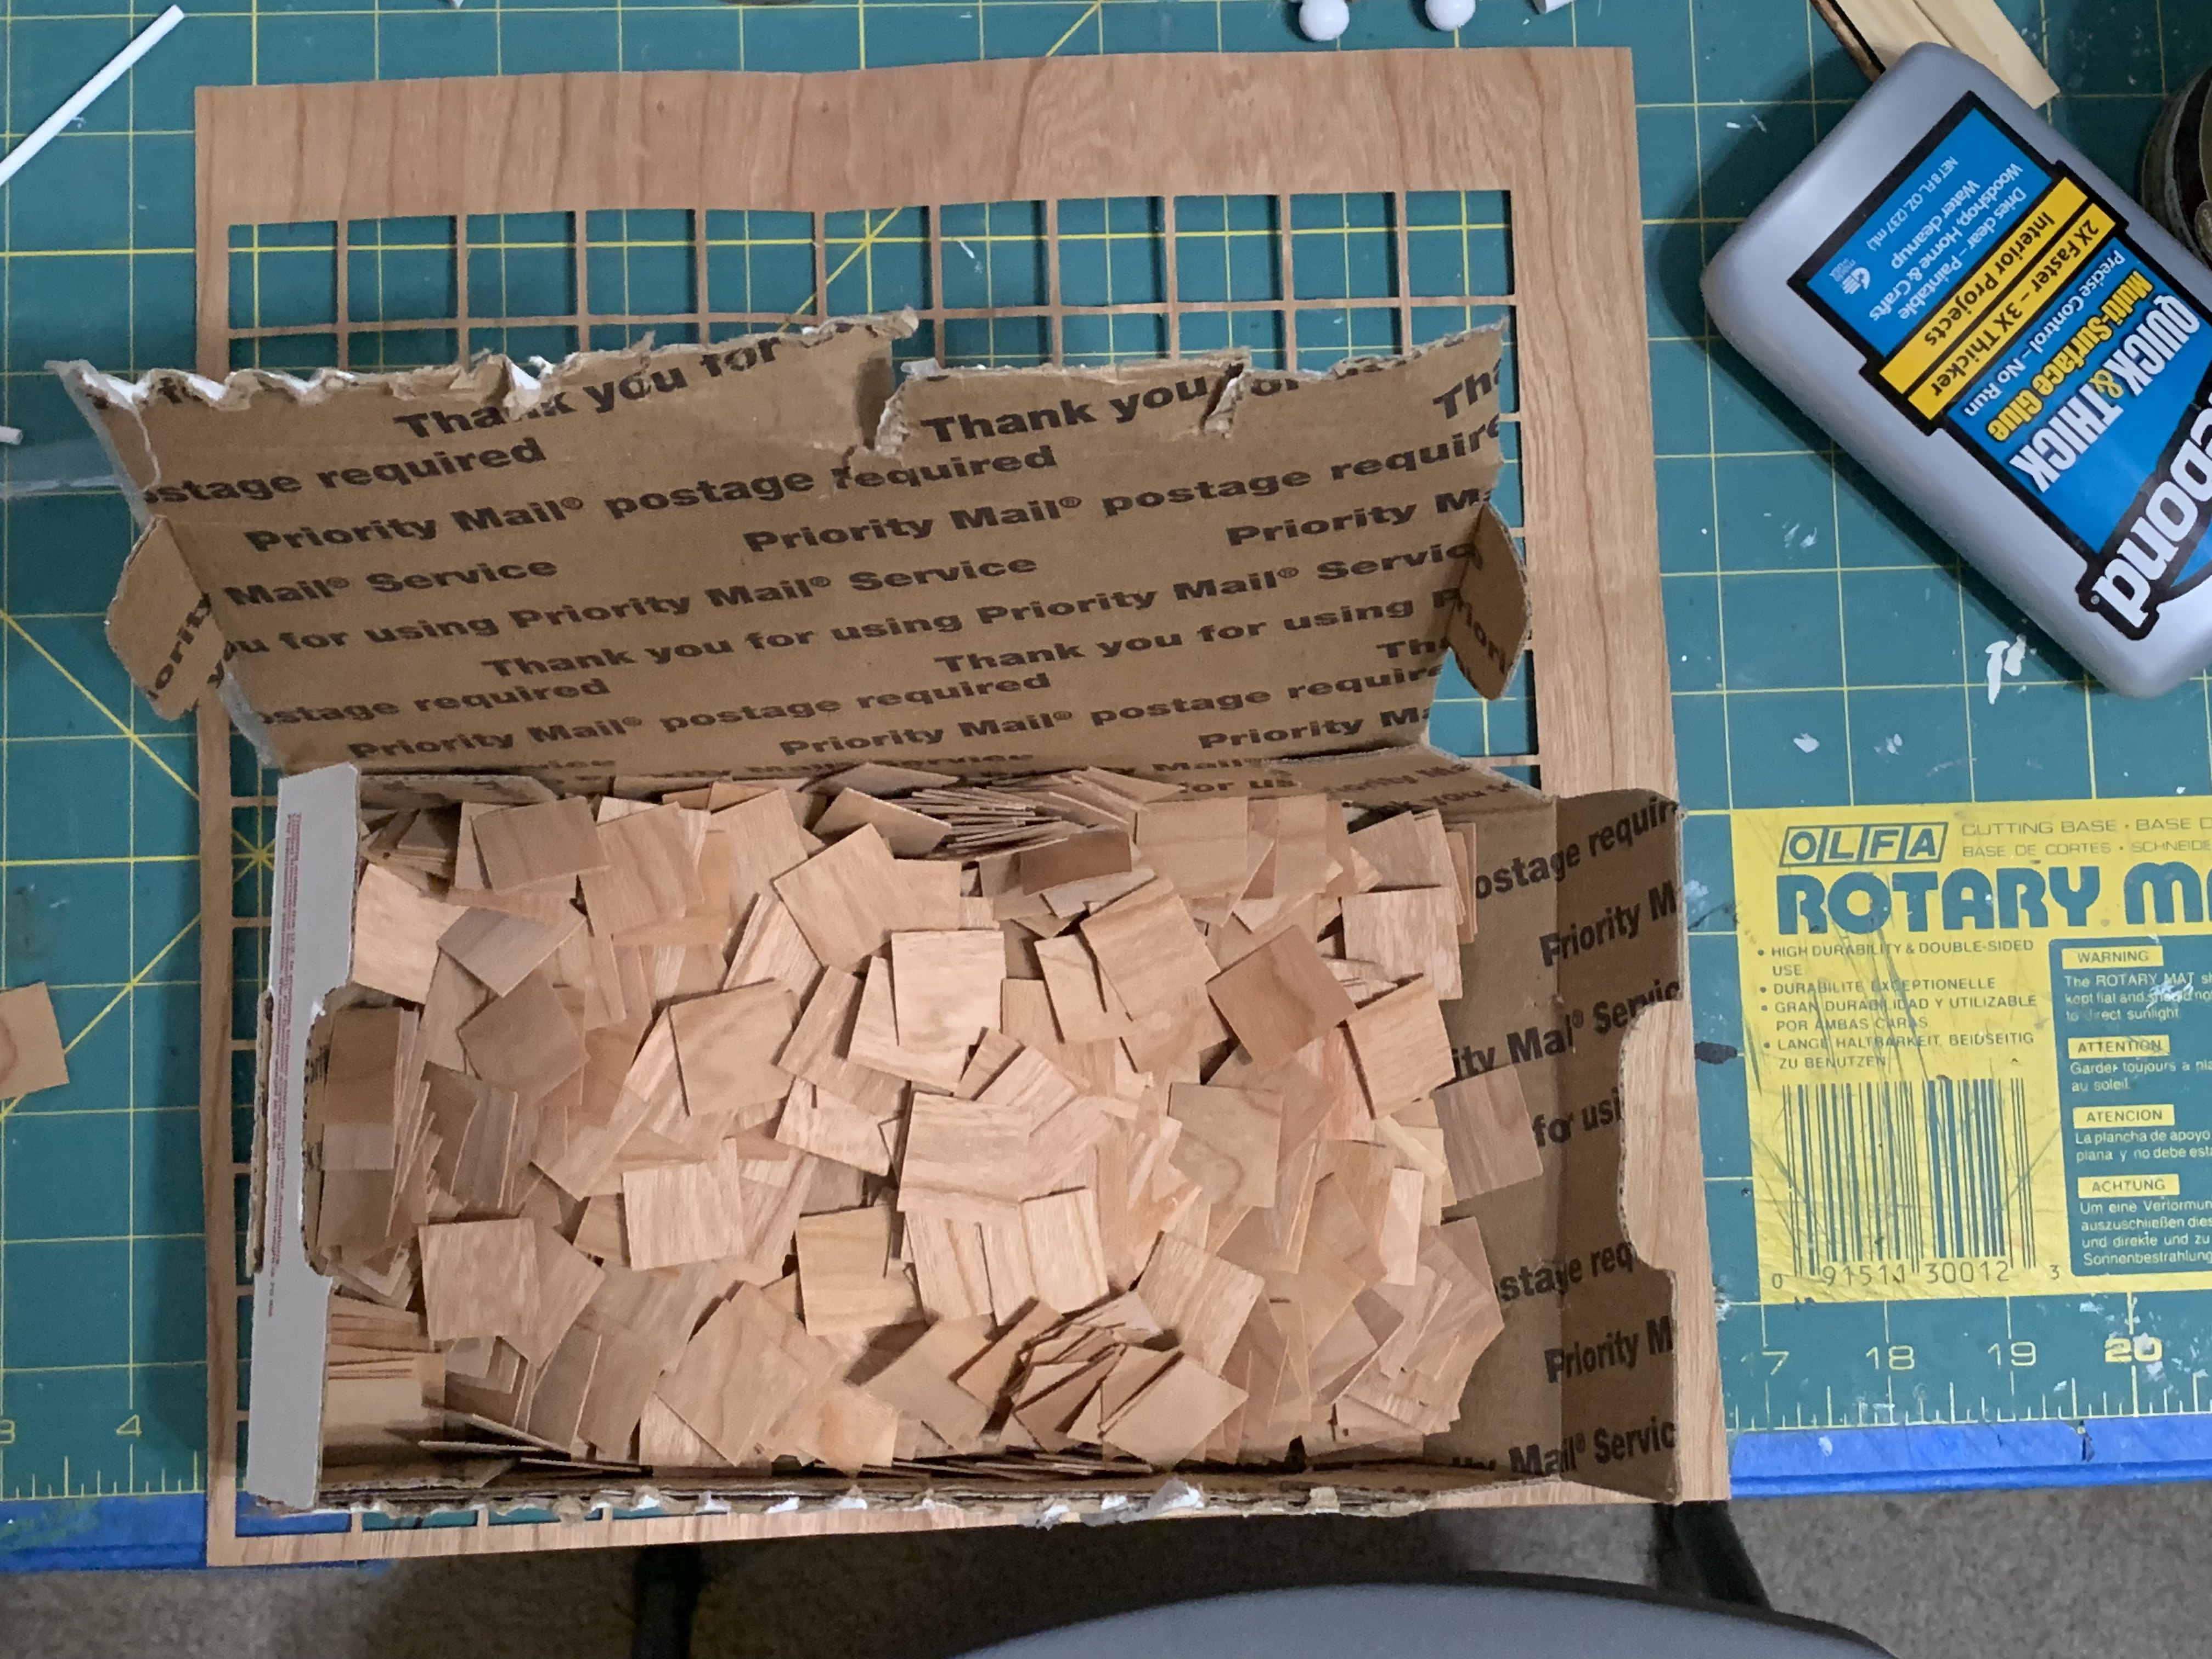
I then did some math and figured out between the two bedrooms that we needed approximately 463.15 sq. in. which translated to exactly 605 tiles (five sheets). She got busy cutting and once I received them in the mail…
…I got busy flooring.

The first step was to lay down strips of carpet tape. I initially wanted to buy three- or four-inch-wide carpet tape so I would not have to accurately align so many individual strips but all I could find was a roll that was less than 1.5 inches wide. This actually proved fortuitous as you will shortly learn.
At first, I temporarily placed the walls where they would be so I would know where the two rooms would meet and where the threshold would be. Then peeling off the protective backing one row at a time, I began to lay down tiles.
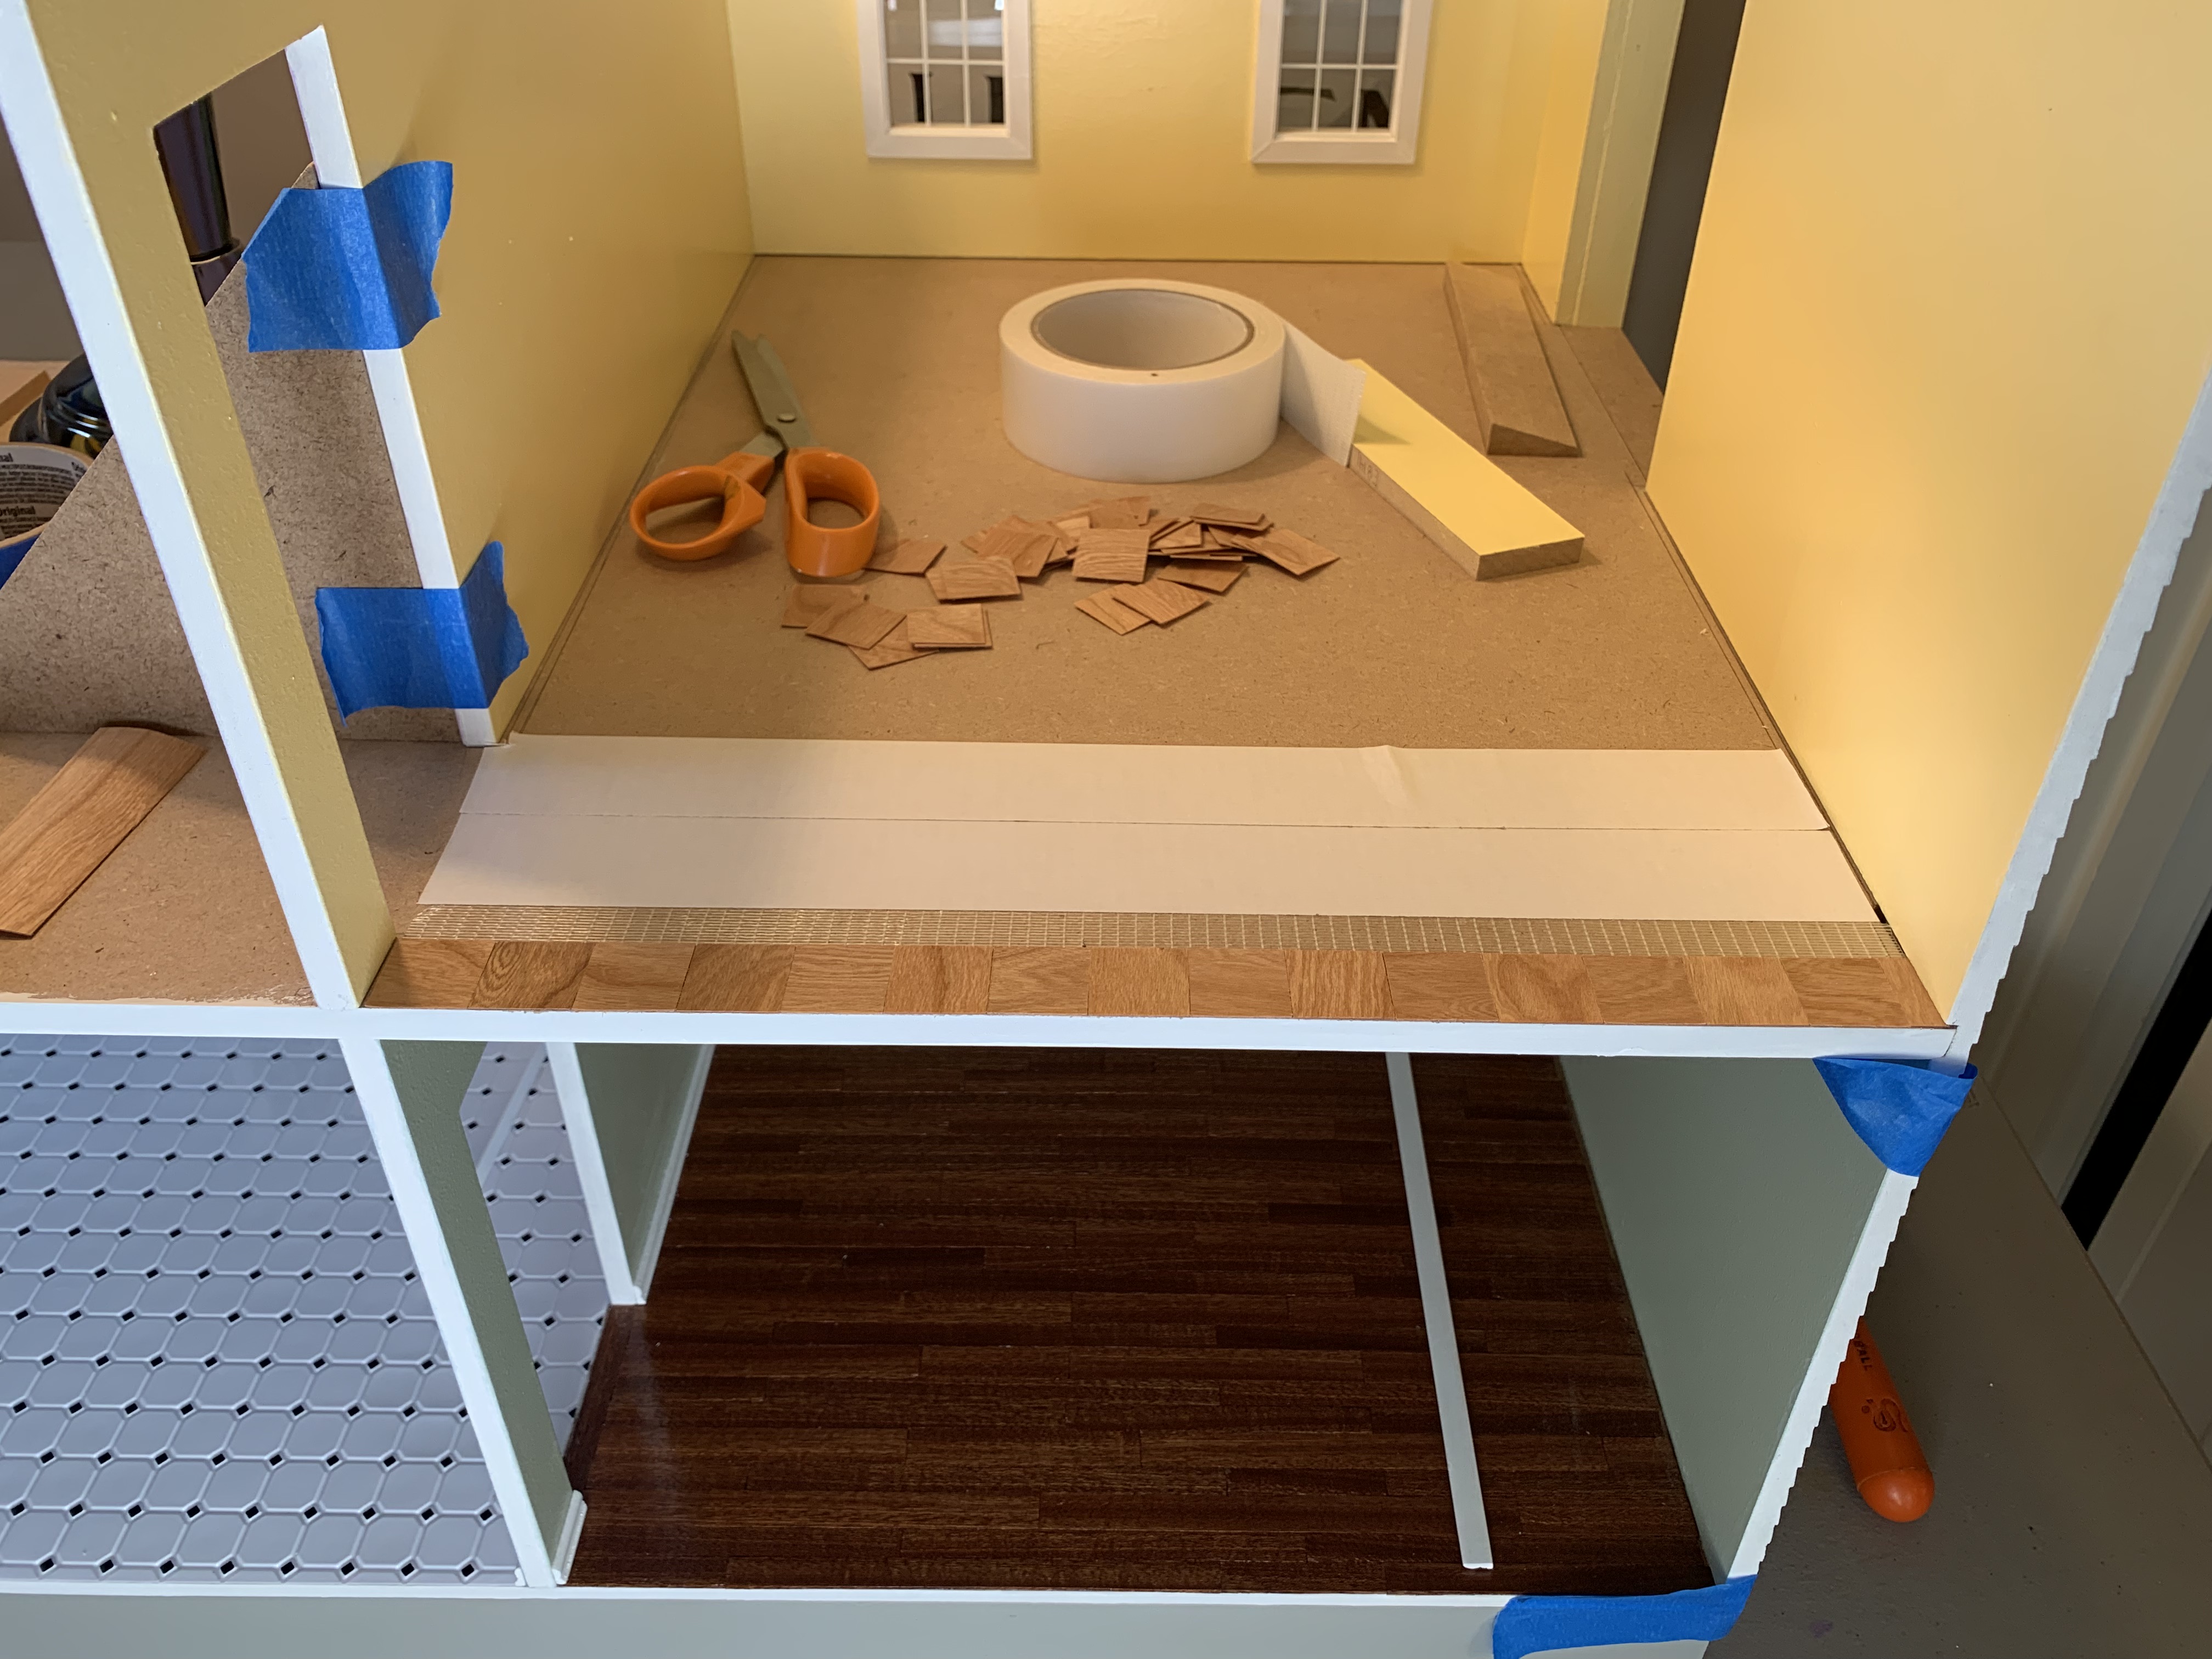
In no time, I had the first six rows and the threshold between rooms which I cut from some of the same veneer.
As I worked row by row, I did discover that it was hard to keep my fingers from sticking to the exposed portions of the tape while placing each tile. I realized if I had bought even three-inch-wide tape, I would have had a much harder time. So, I was actually glad that I had a narrower tape as it minimized the amount of exposed tape my fingers might get stuck to.
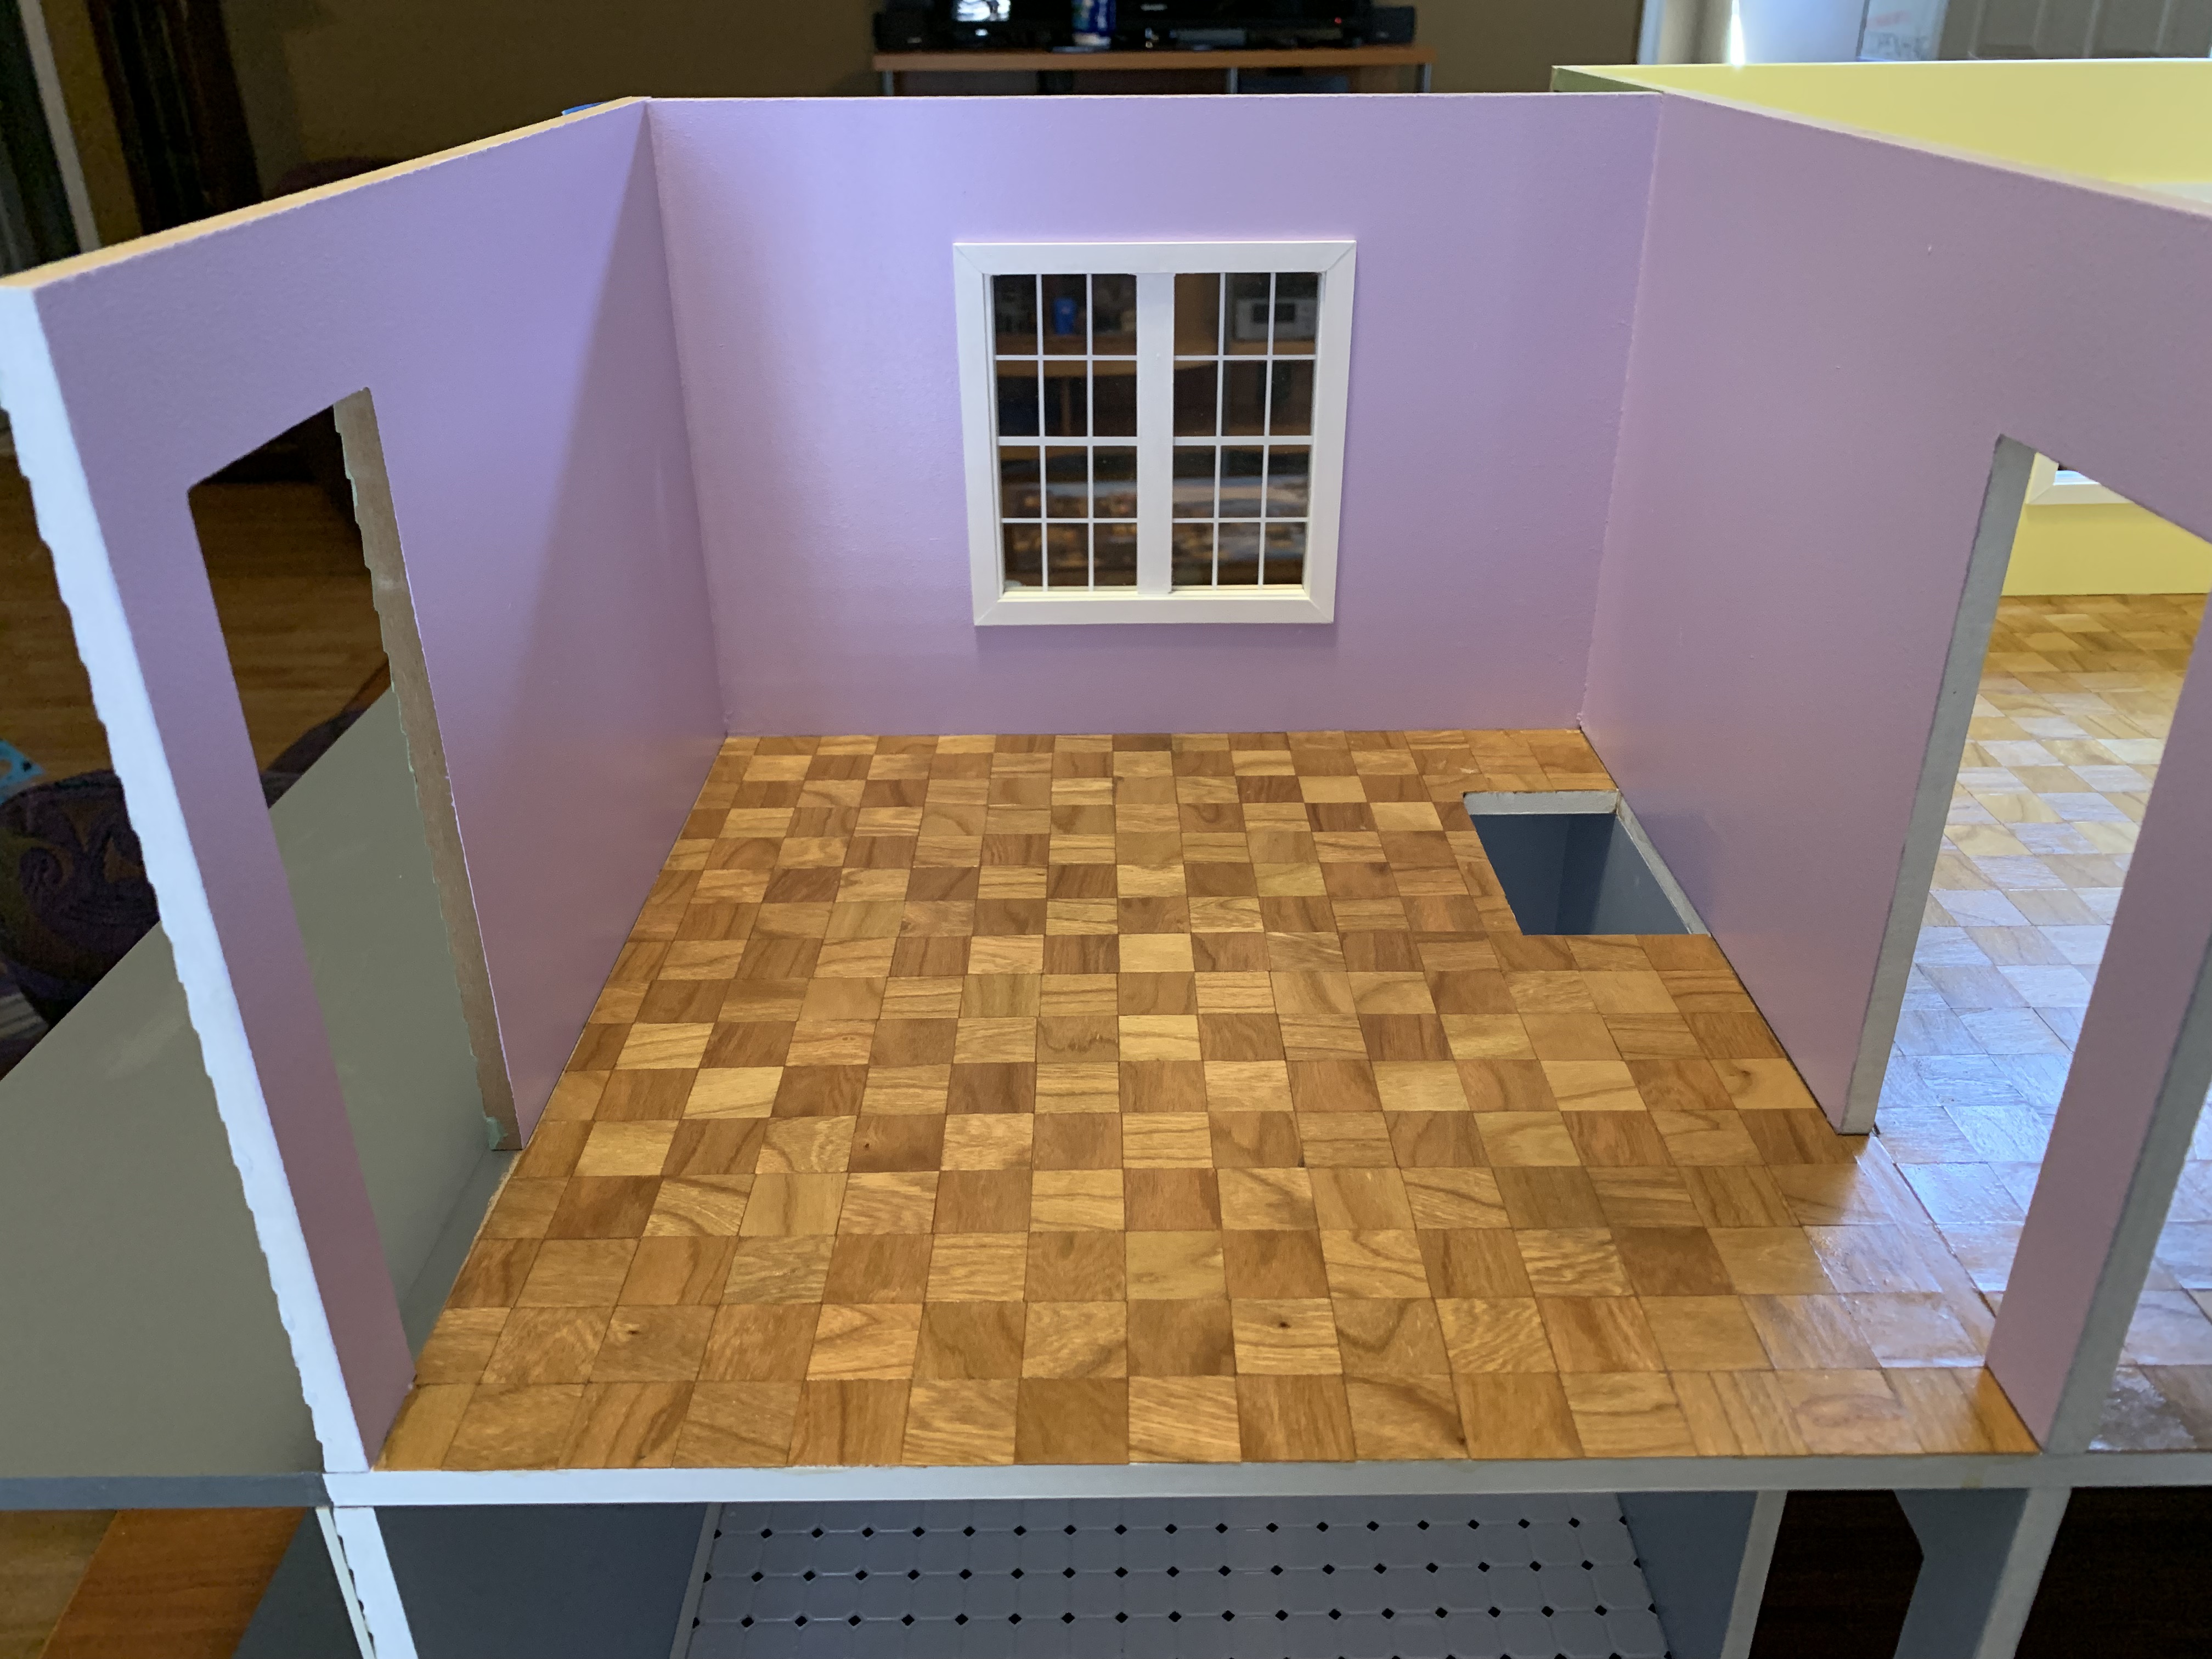
I decided to repeat the same process in the other room and once I got the six rows done, I decided to go ahead and finish it since it was a smaller room.
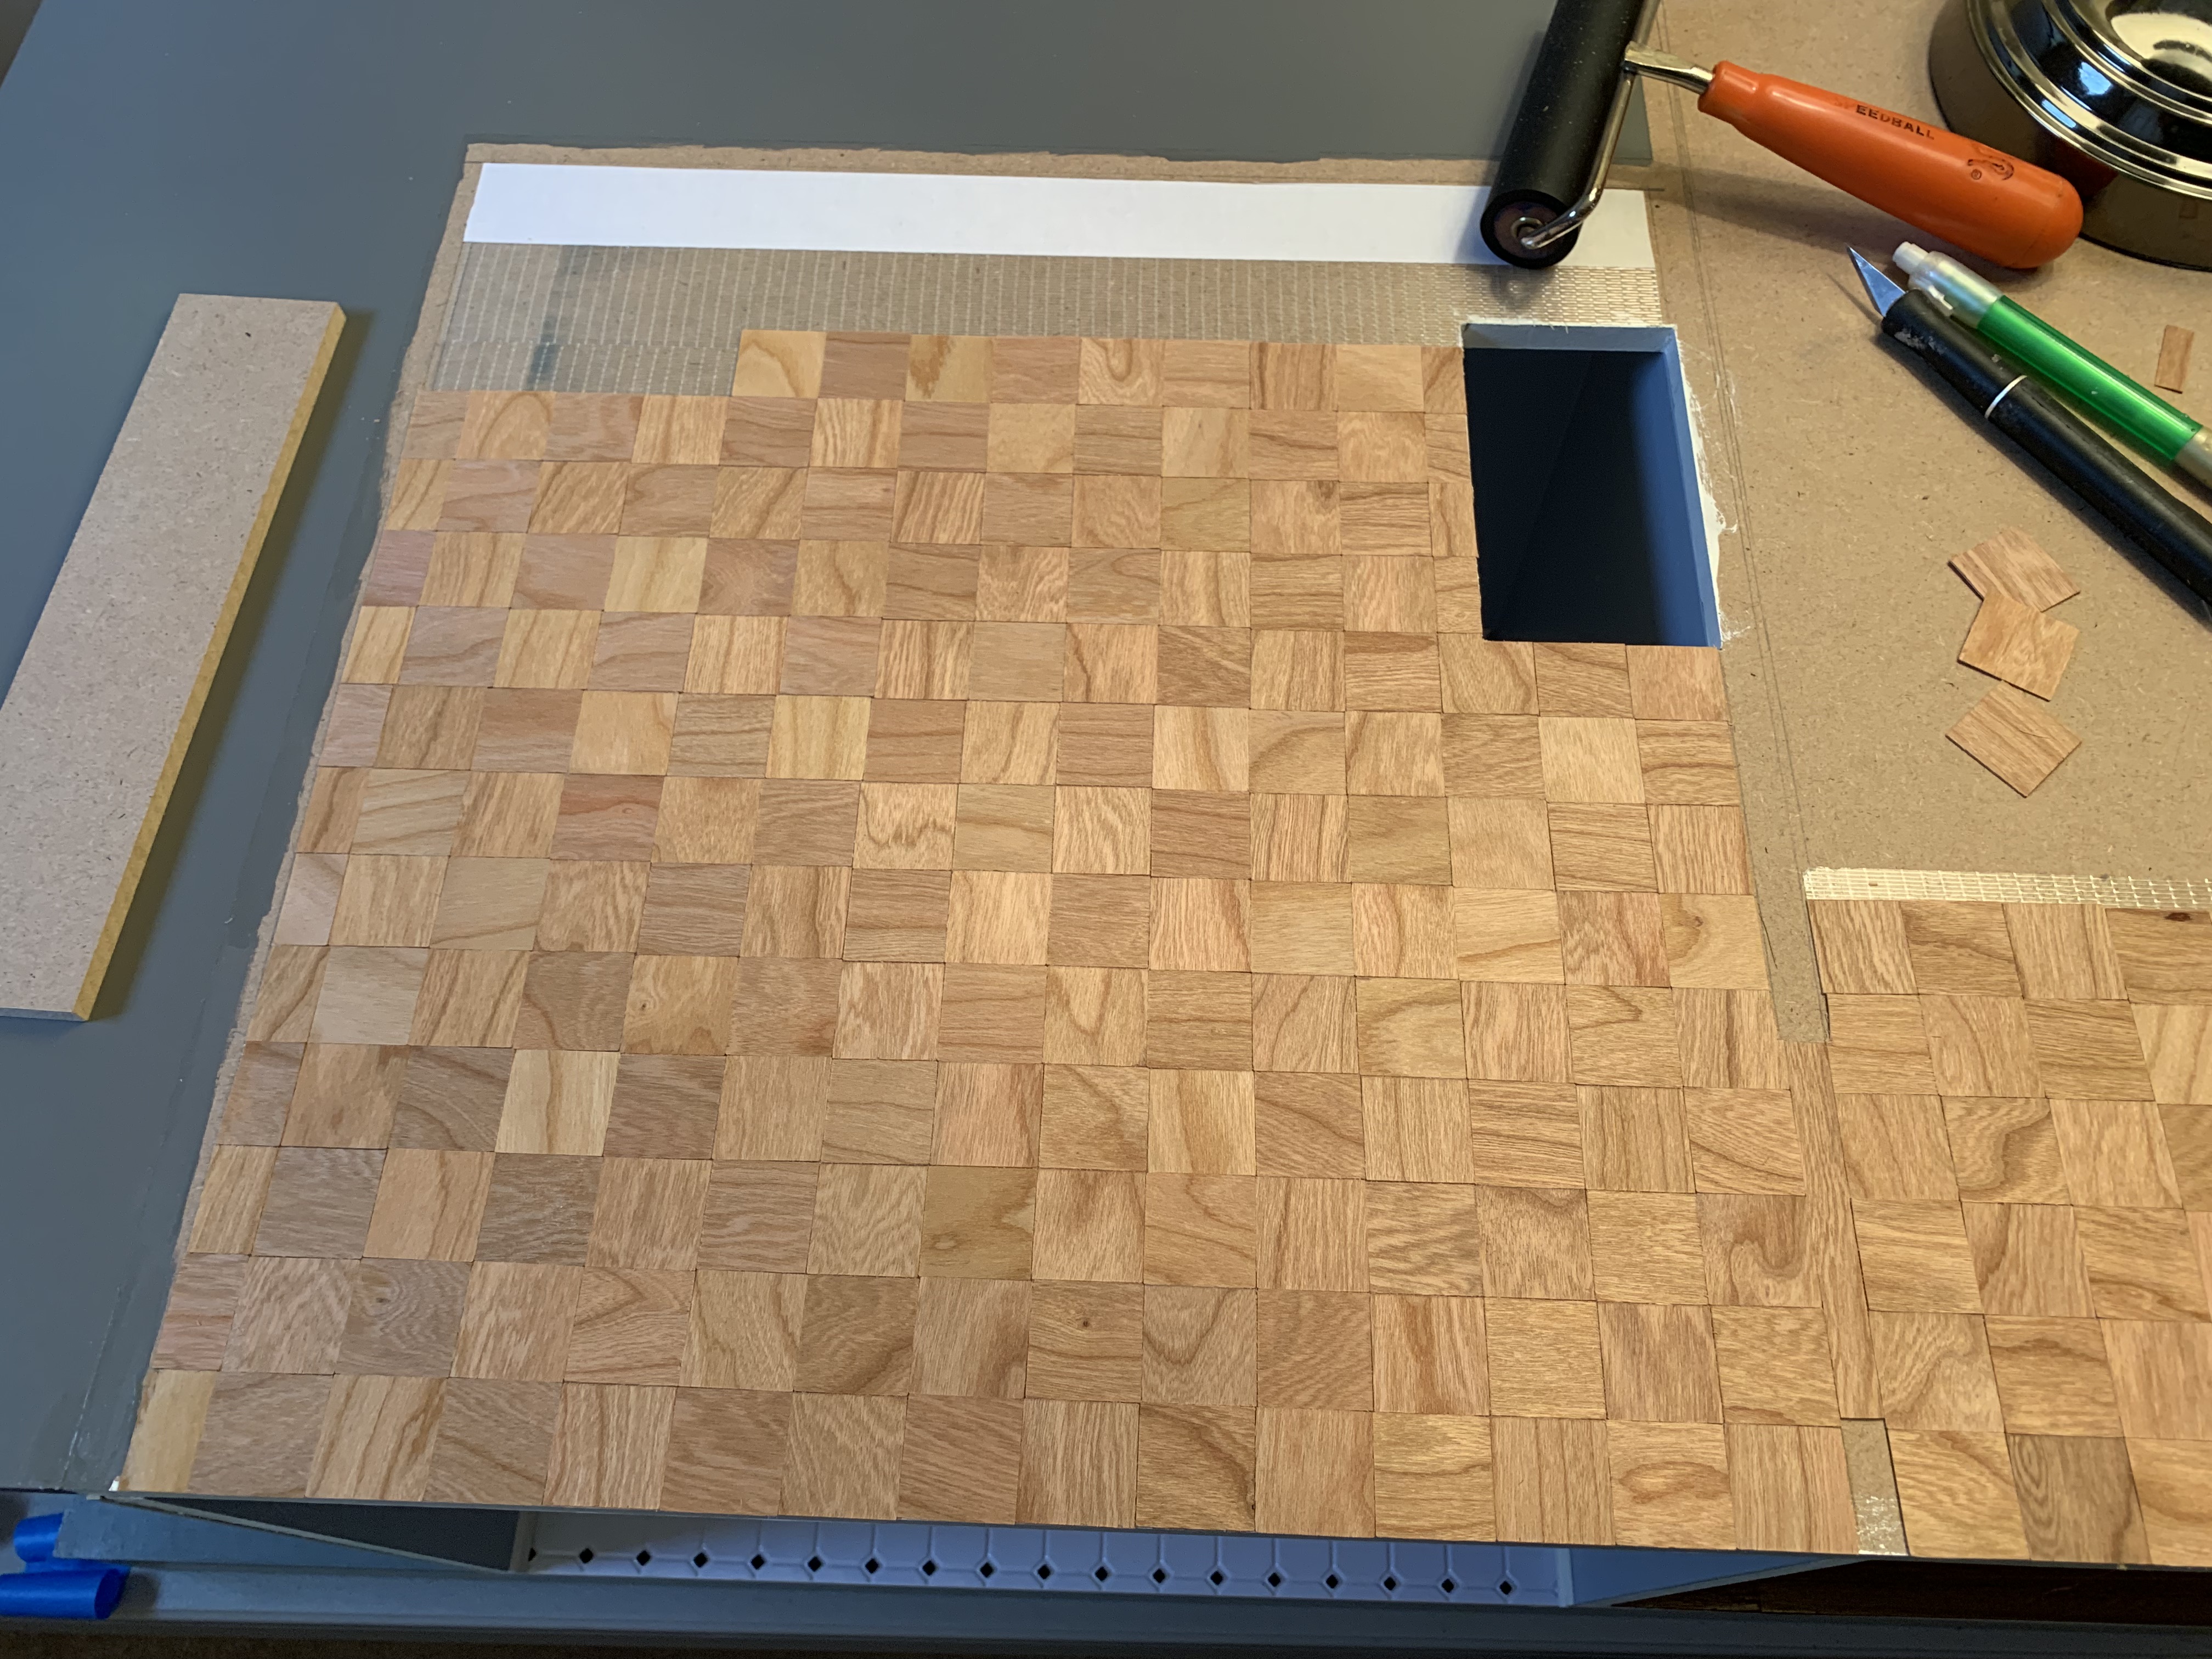
In case you do not know, the devise at the top is a brayer roller typically used in print making but for my uses, ensured the carpet tape was attached tightly and smoothly to the floor and then rolled over the tiles to ensure they were securely attached to the tape.
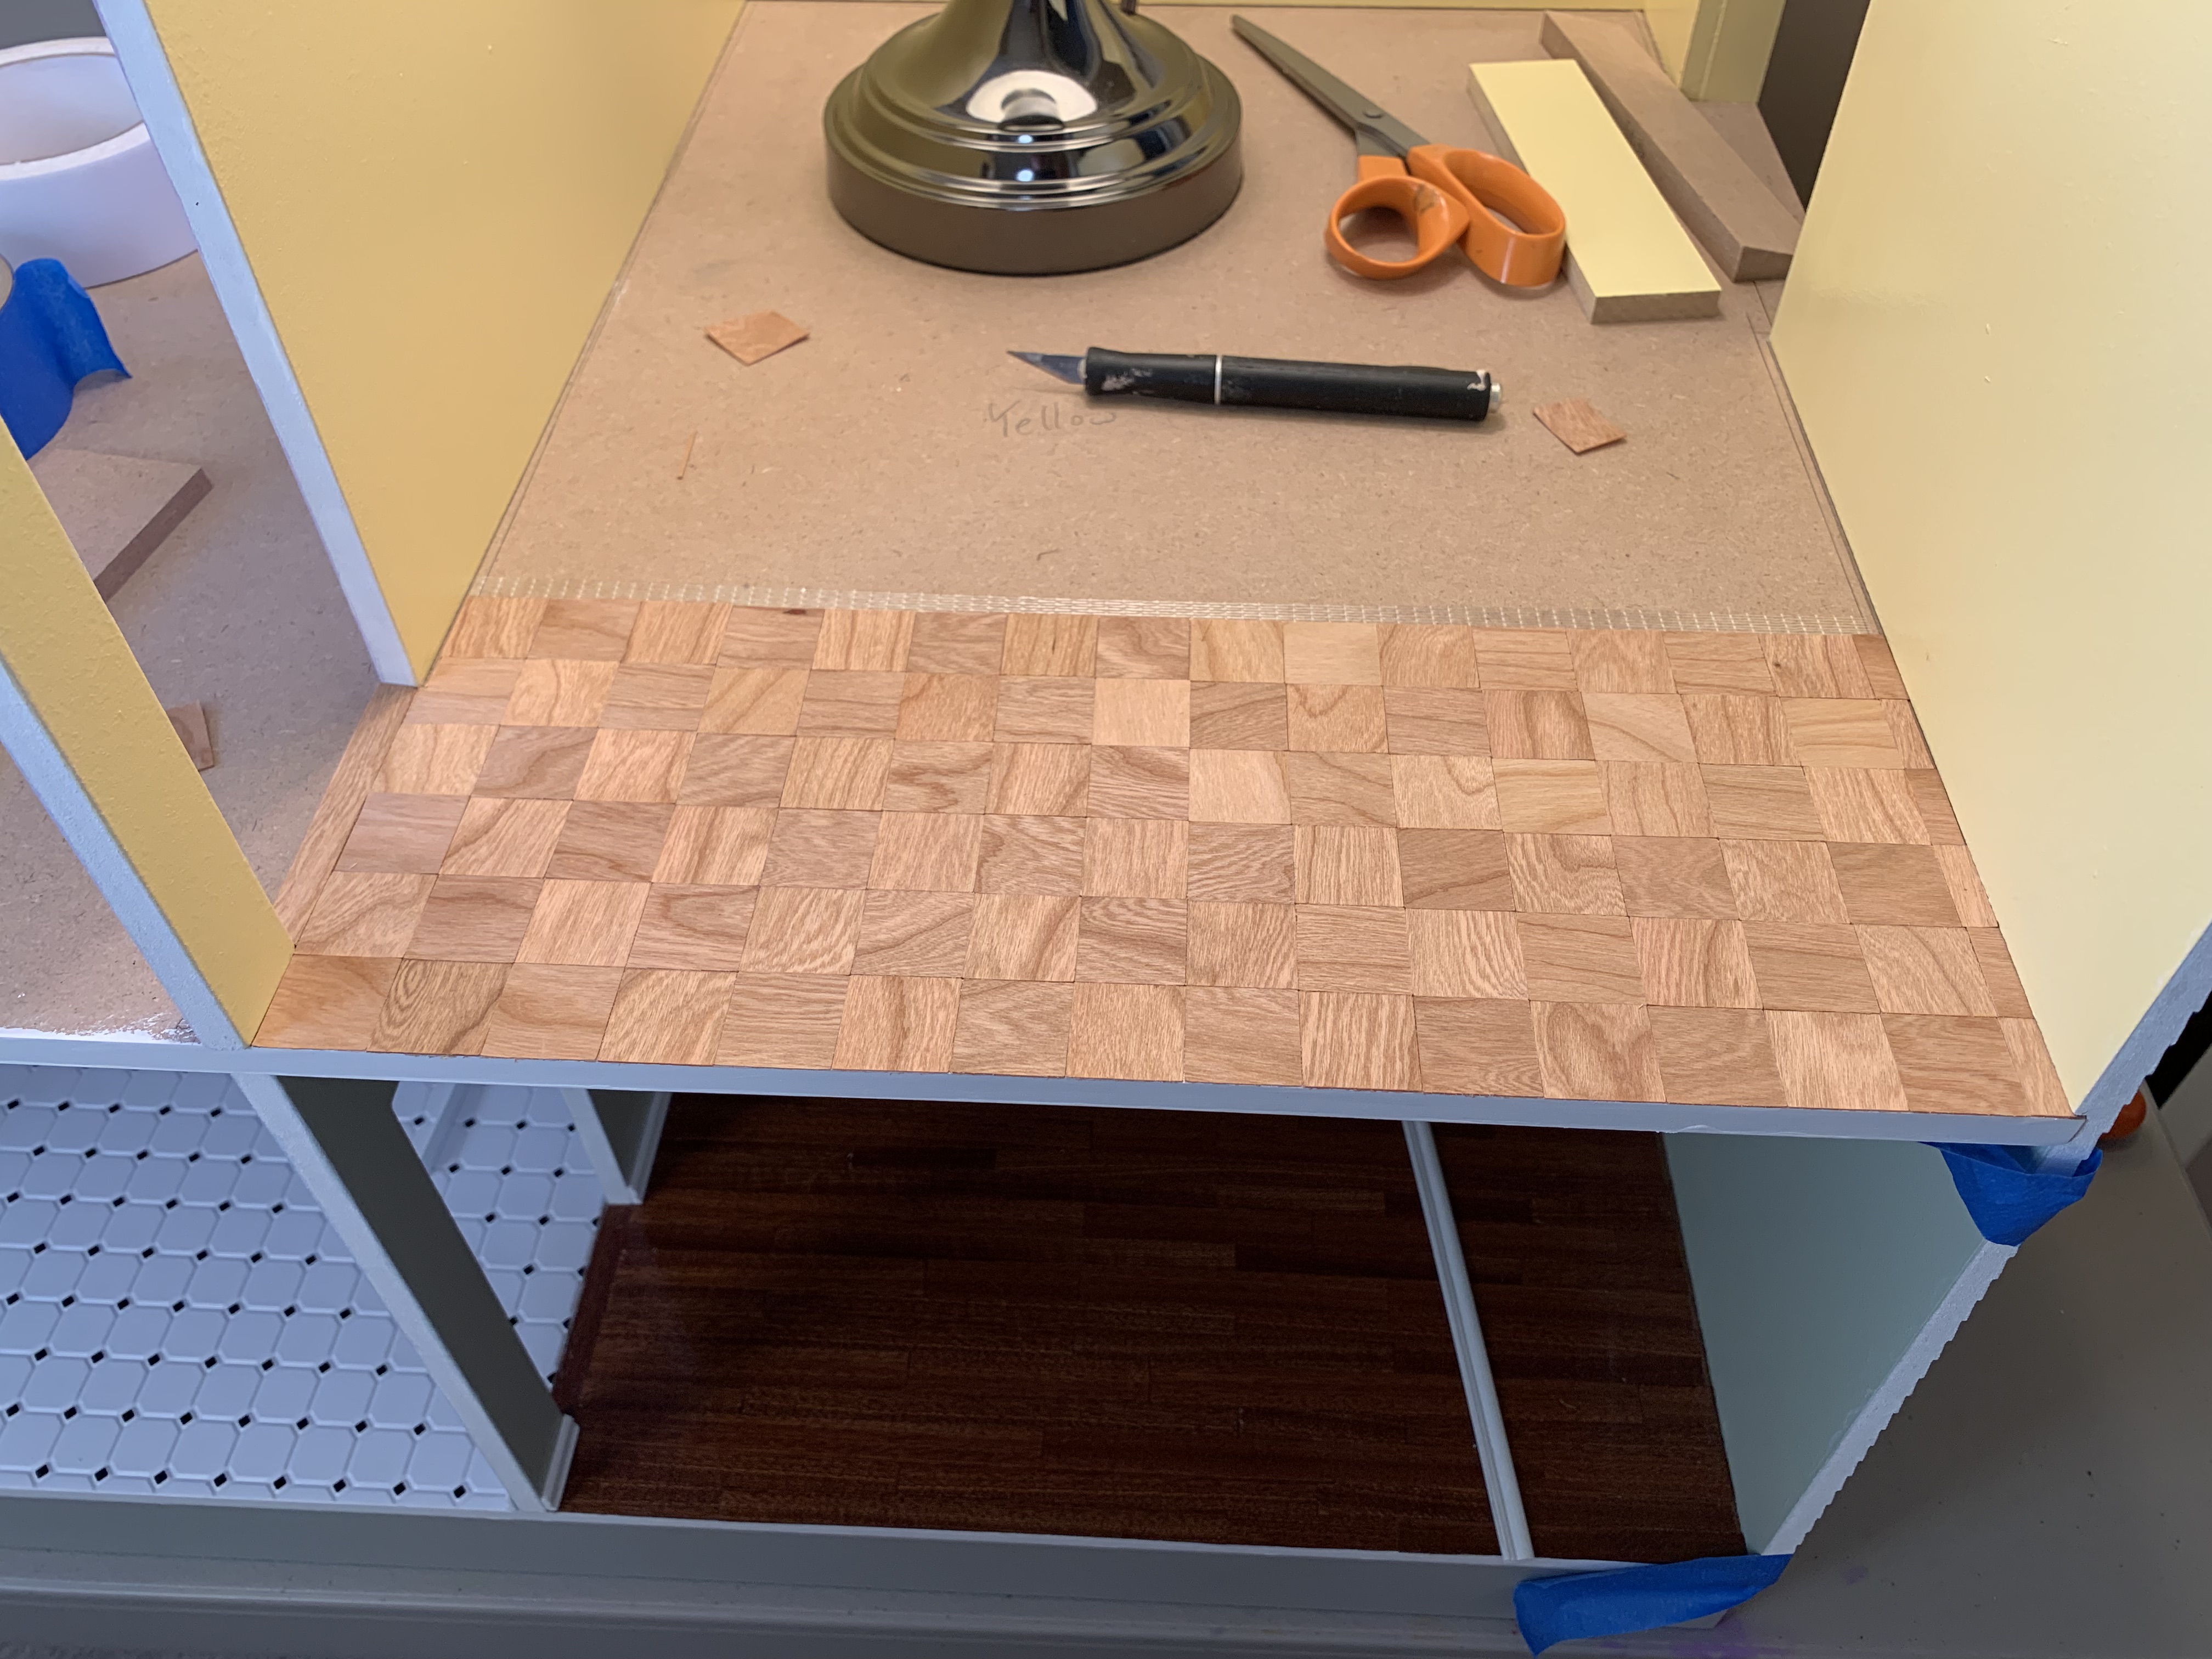
With the smaller room finished, I moved back to the larger room. At this point, I also regained my large worktable in the playroom after having finished my winter puzzling season. The first step was again to lay down the rows of carpet tape.

At this point, I had become fairly proficient at precisely laying down the tiles. However, in those instances where I either misaligned the tile slightly or found it constantly curling up from repeated repositionings, I figured out that I could carefully cut along the edge of the tile with my X-ACTO knife to remove the tile along with the tape. I then attached a new tile directly to the tape, ensured it was secure, then cut it from the tape, removed the backing, and then applied it to the spot where I had just removed the misaligned tile.

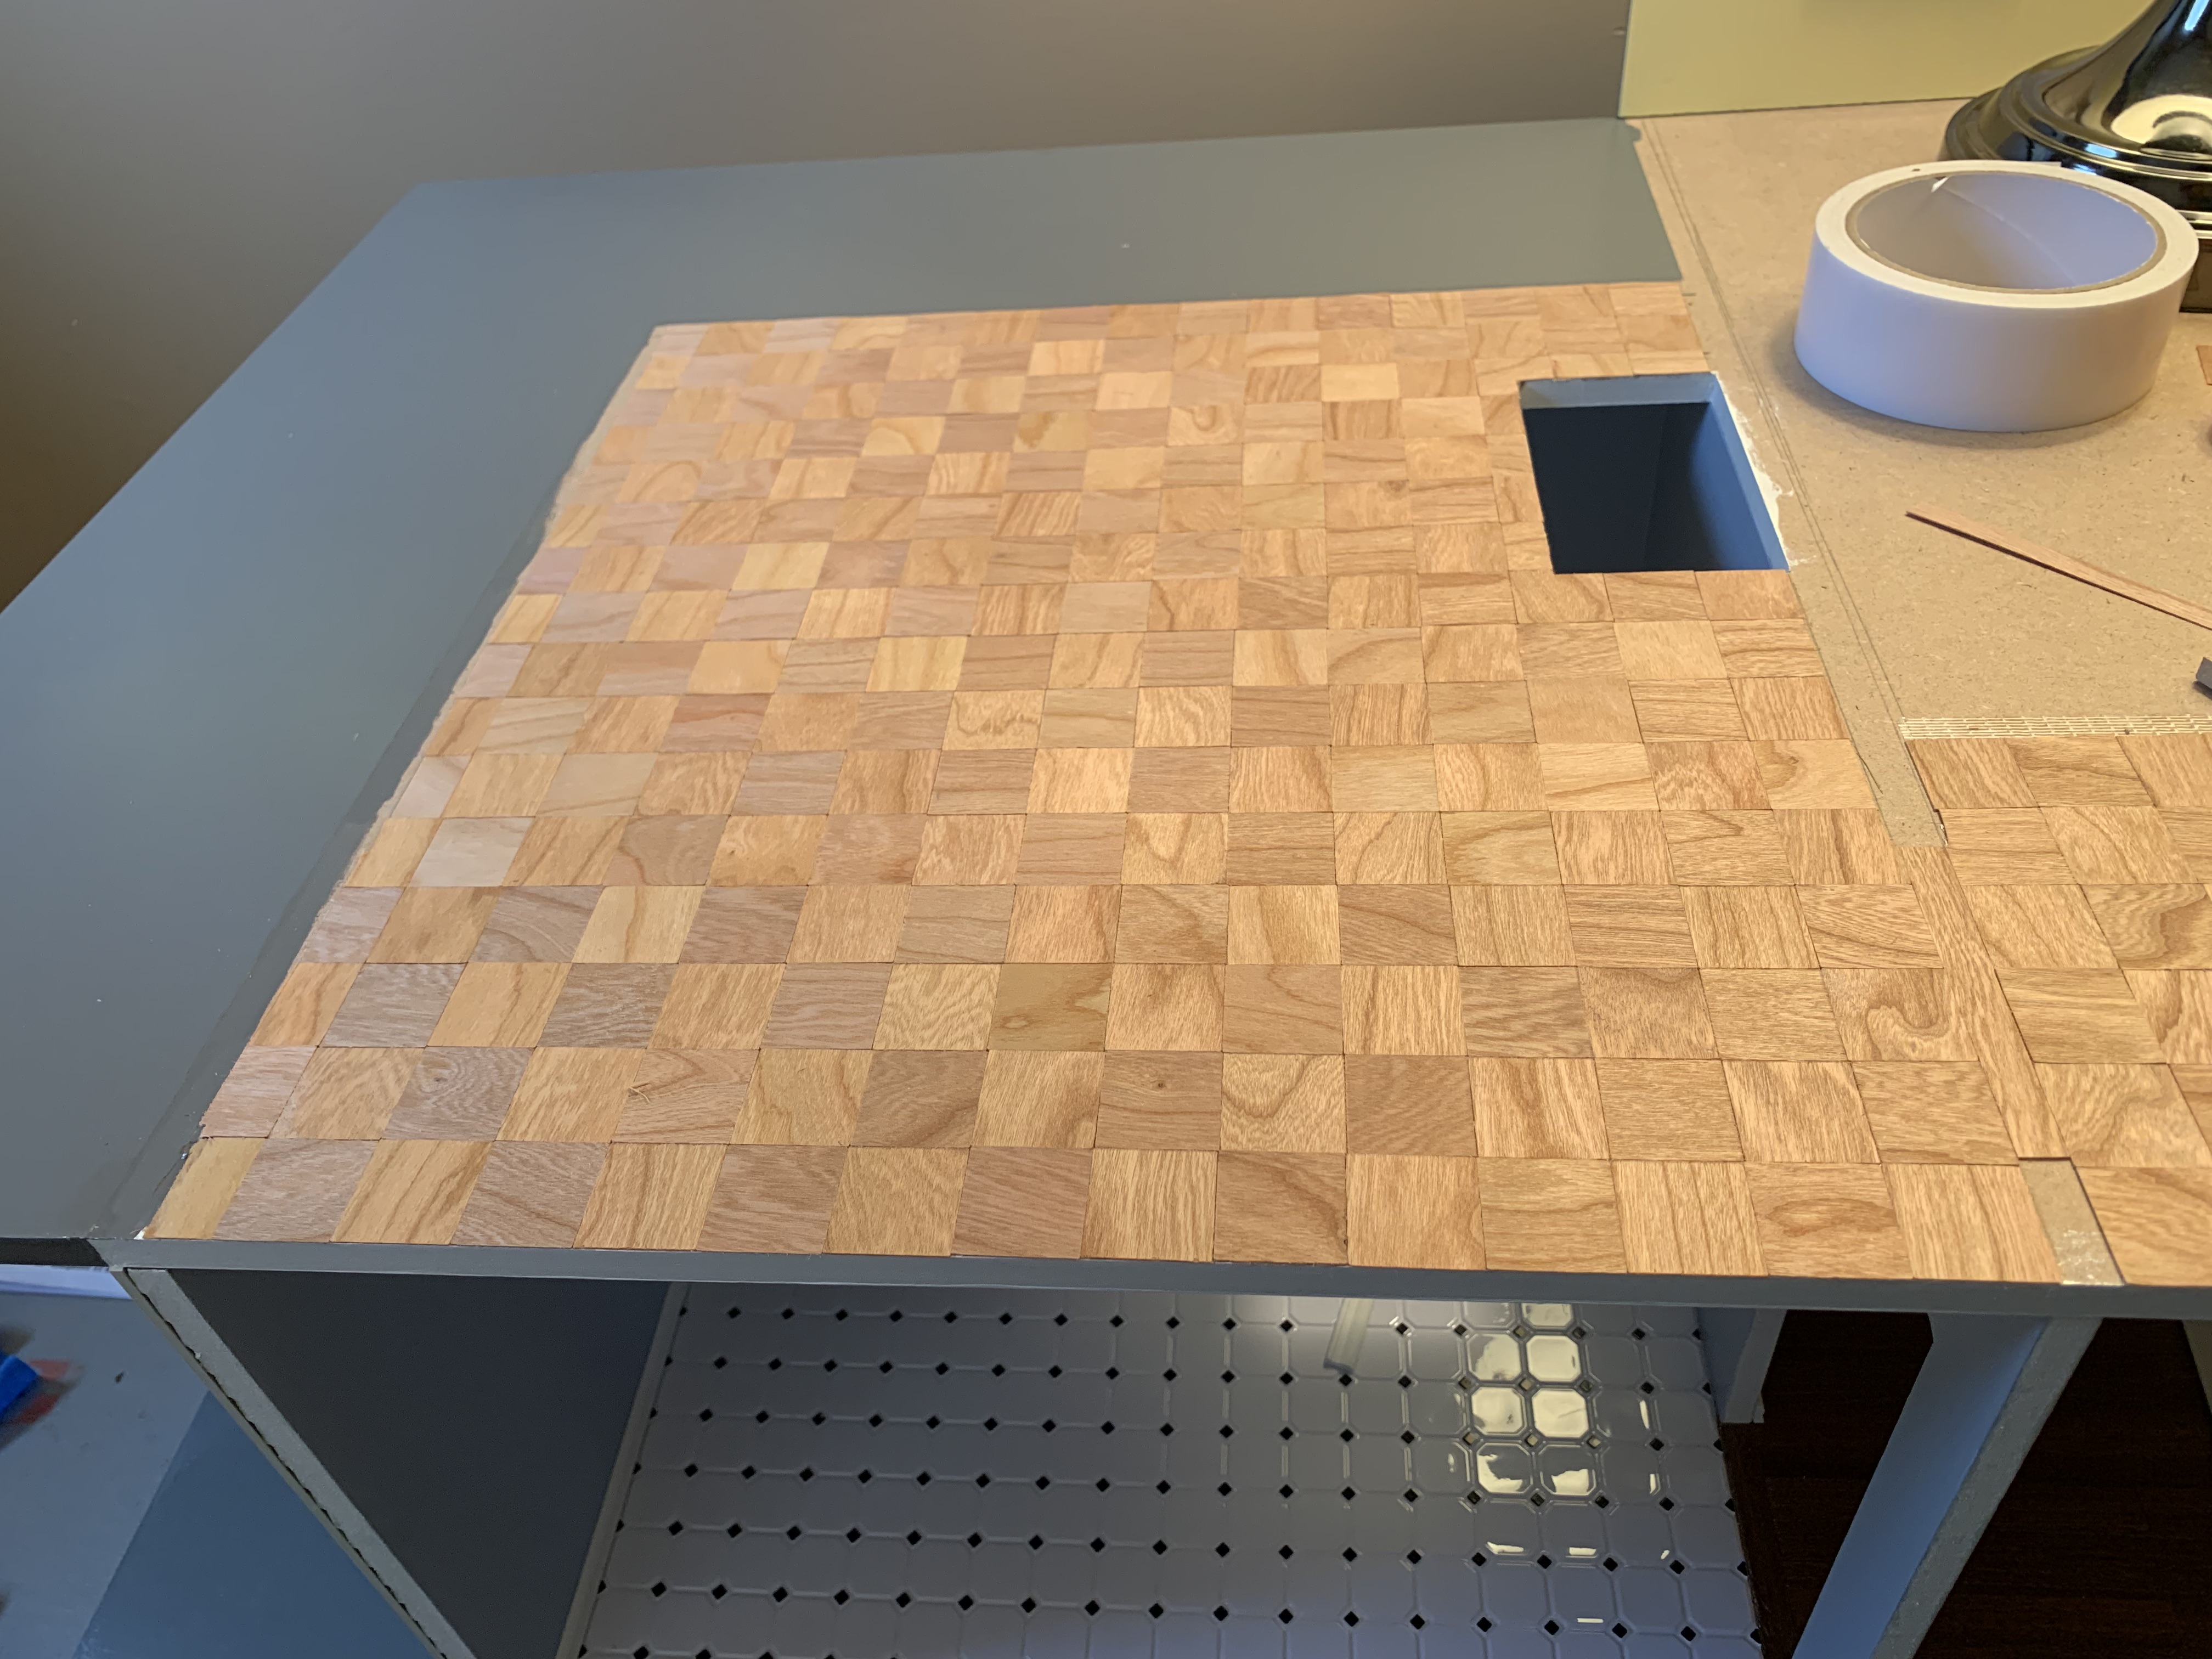
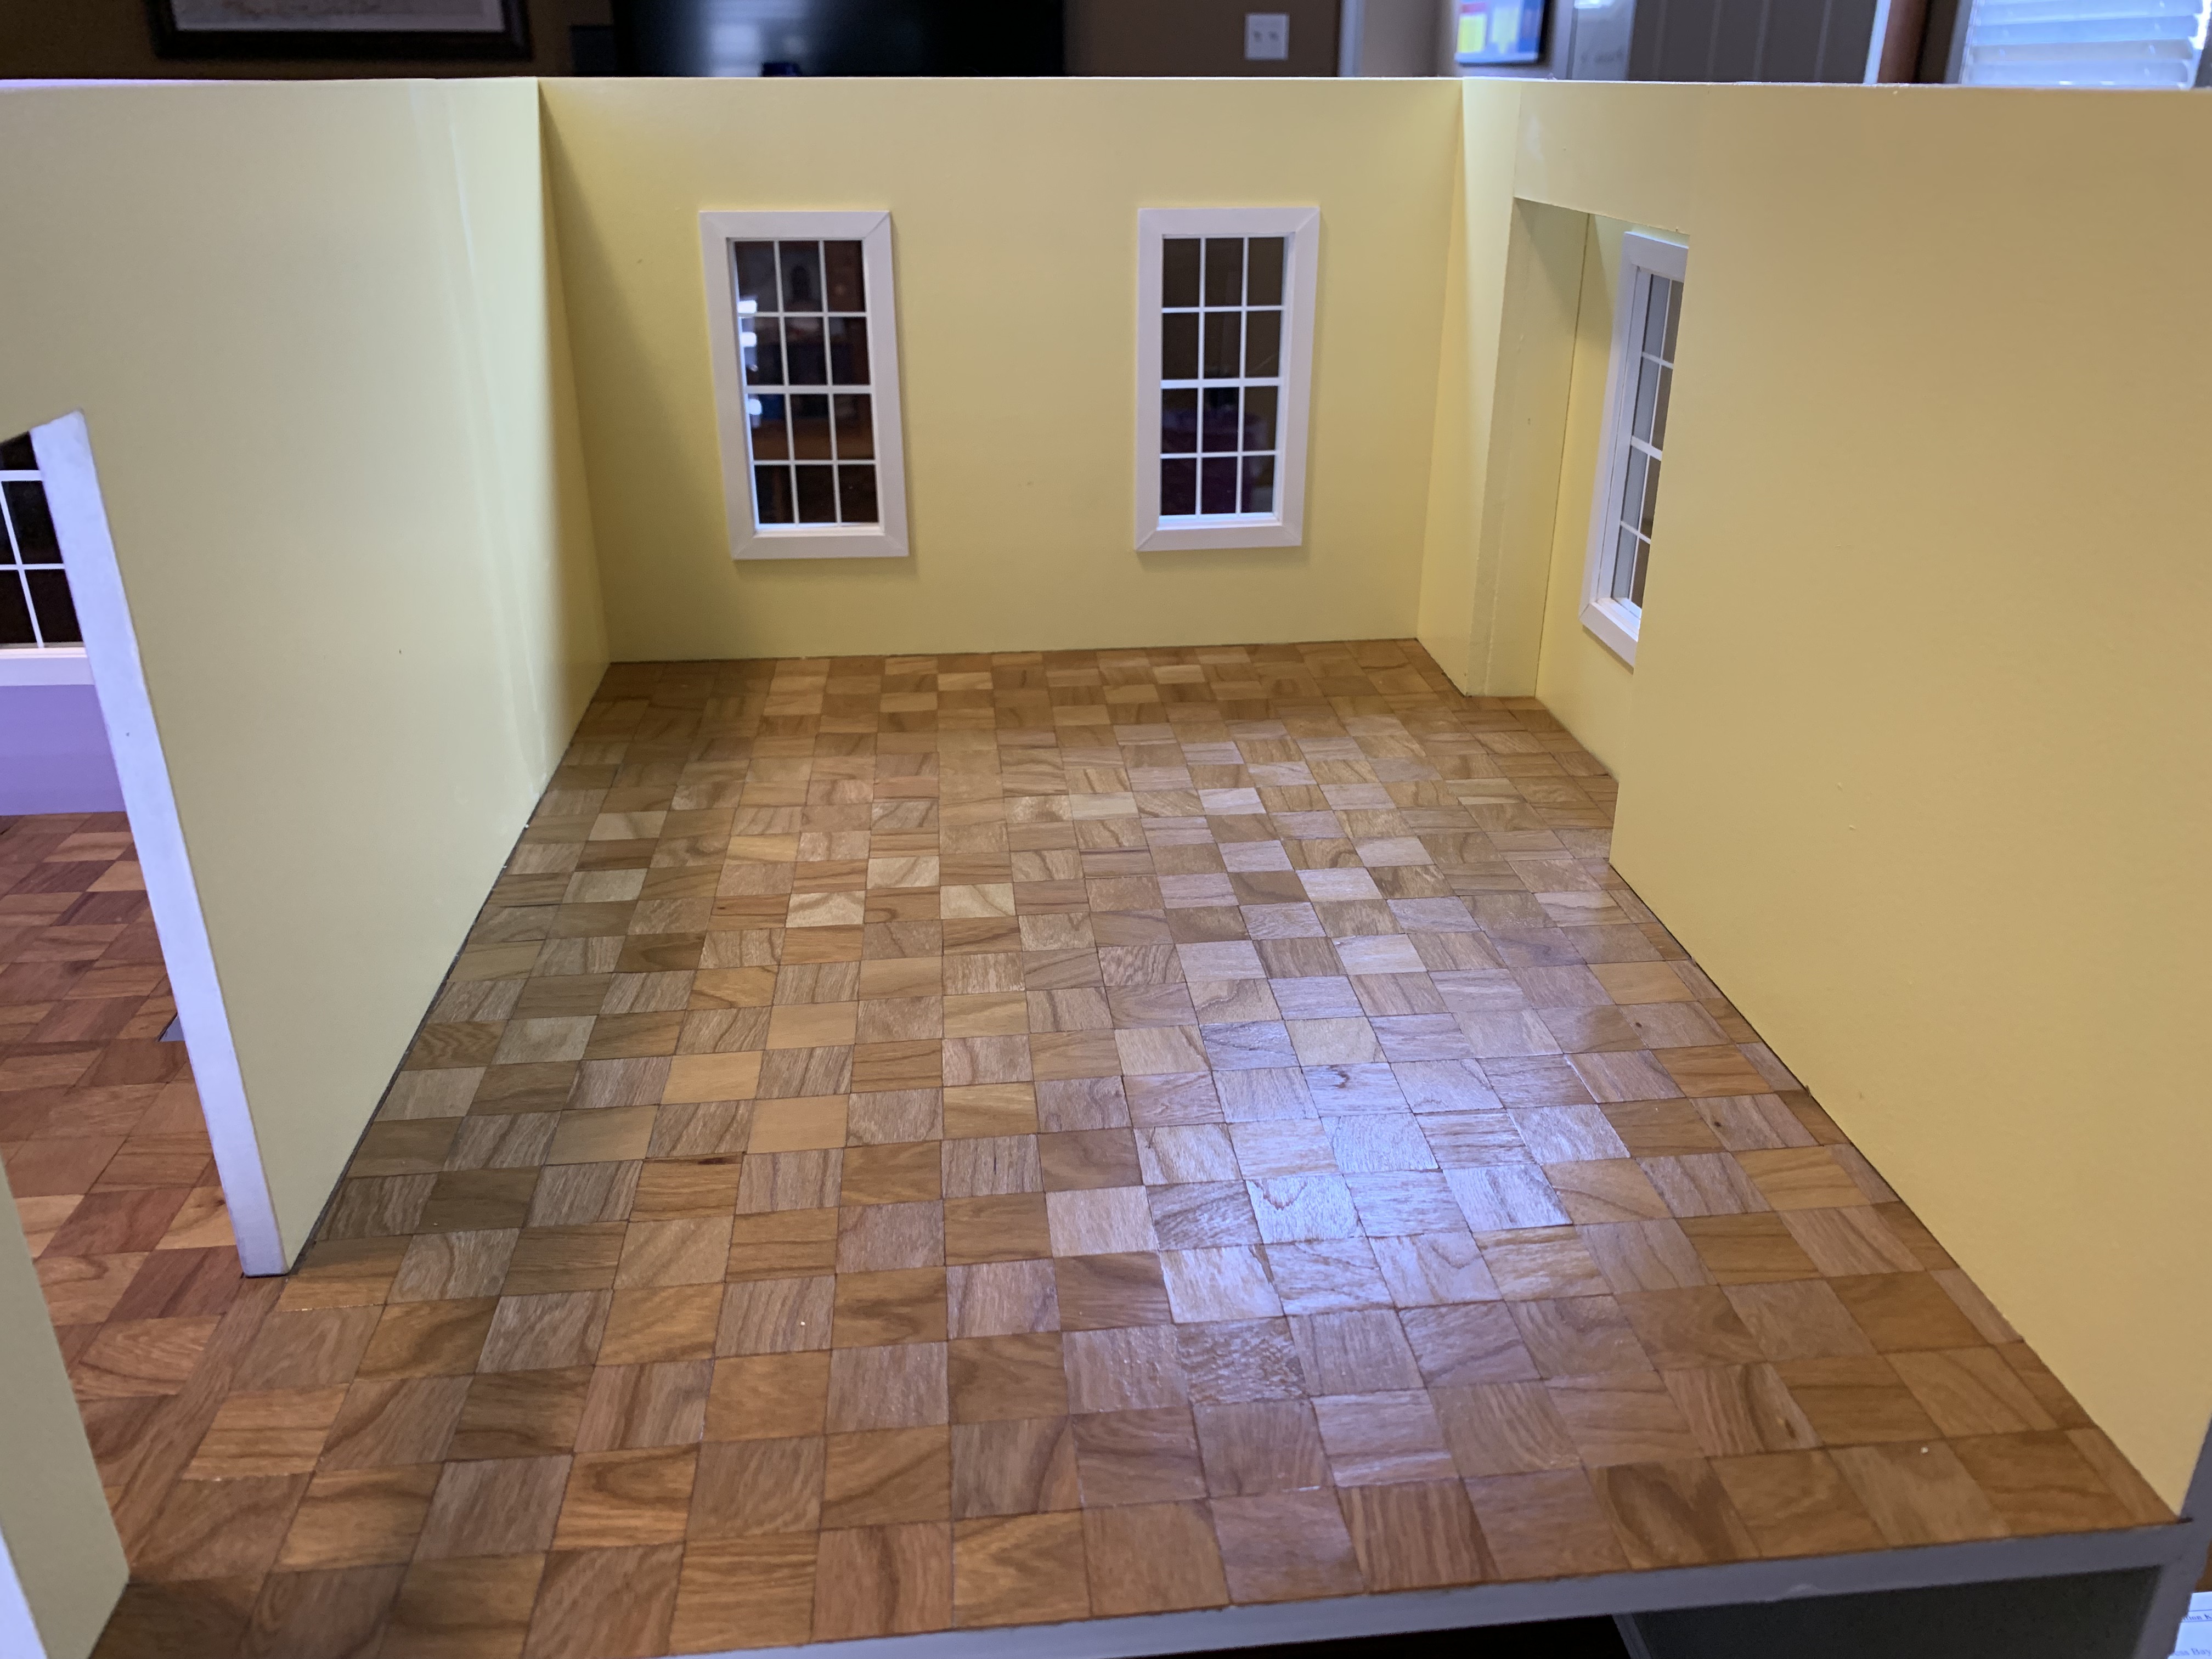
Before long, I had completed the second room.
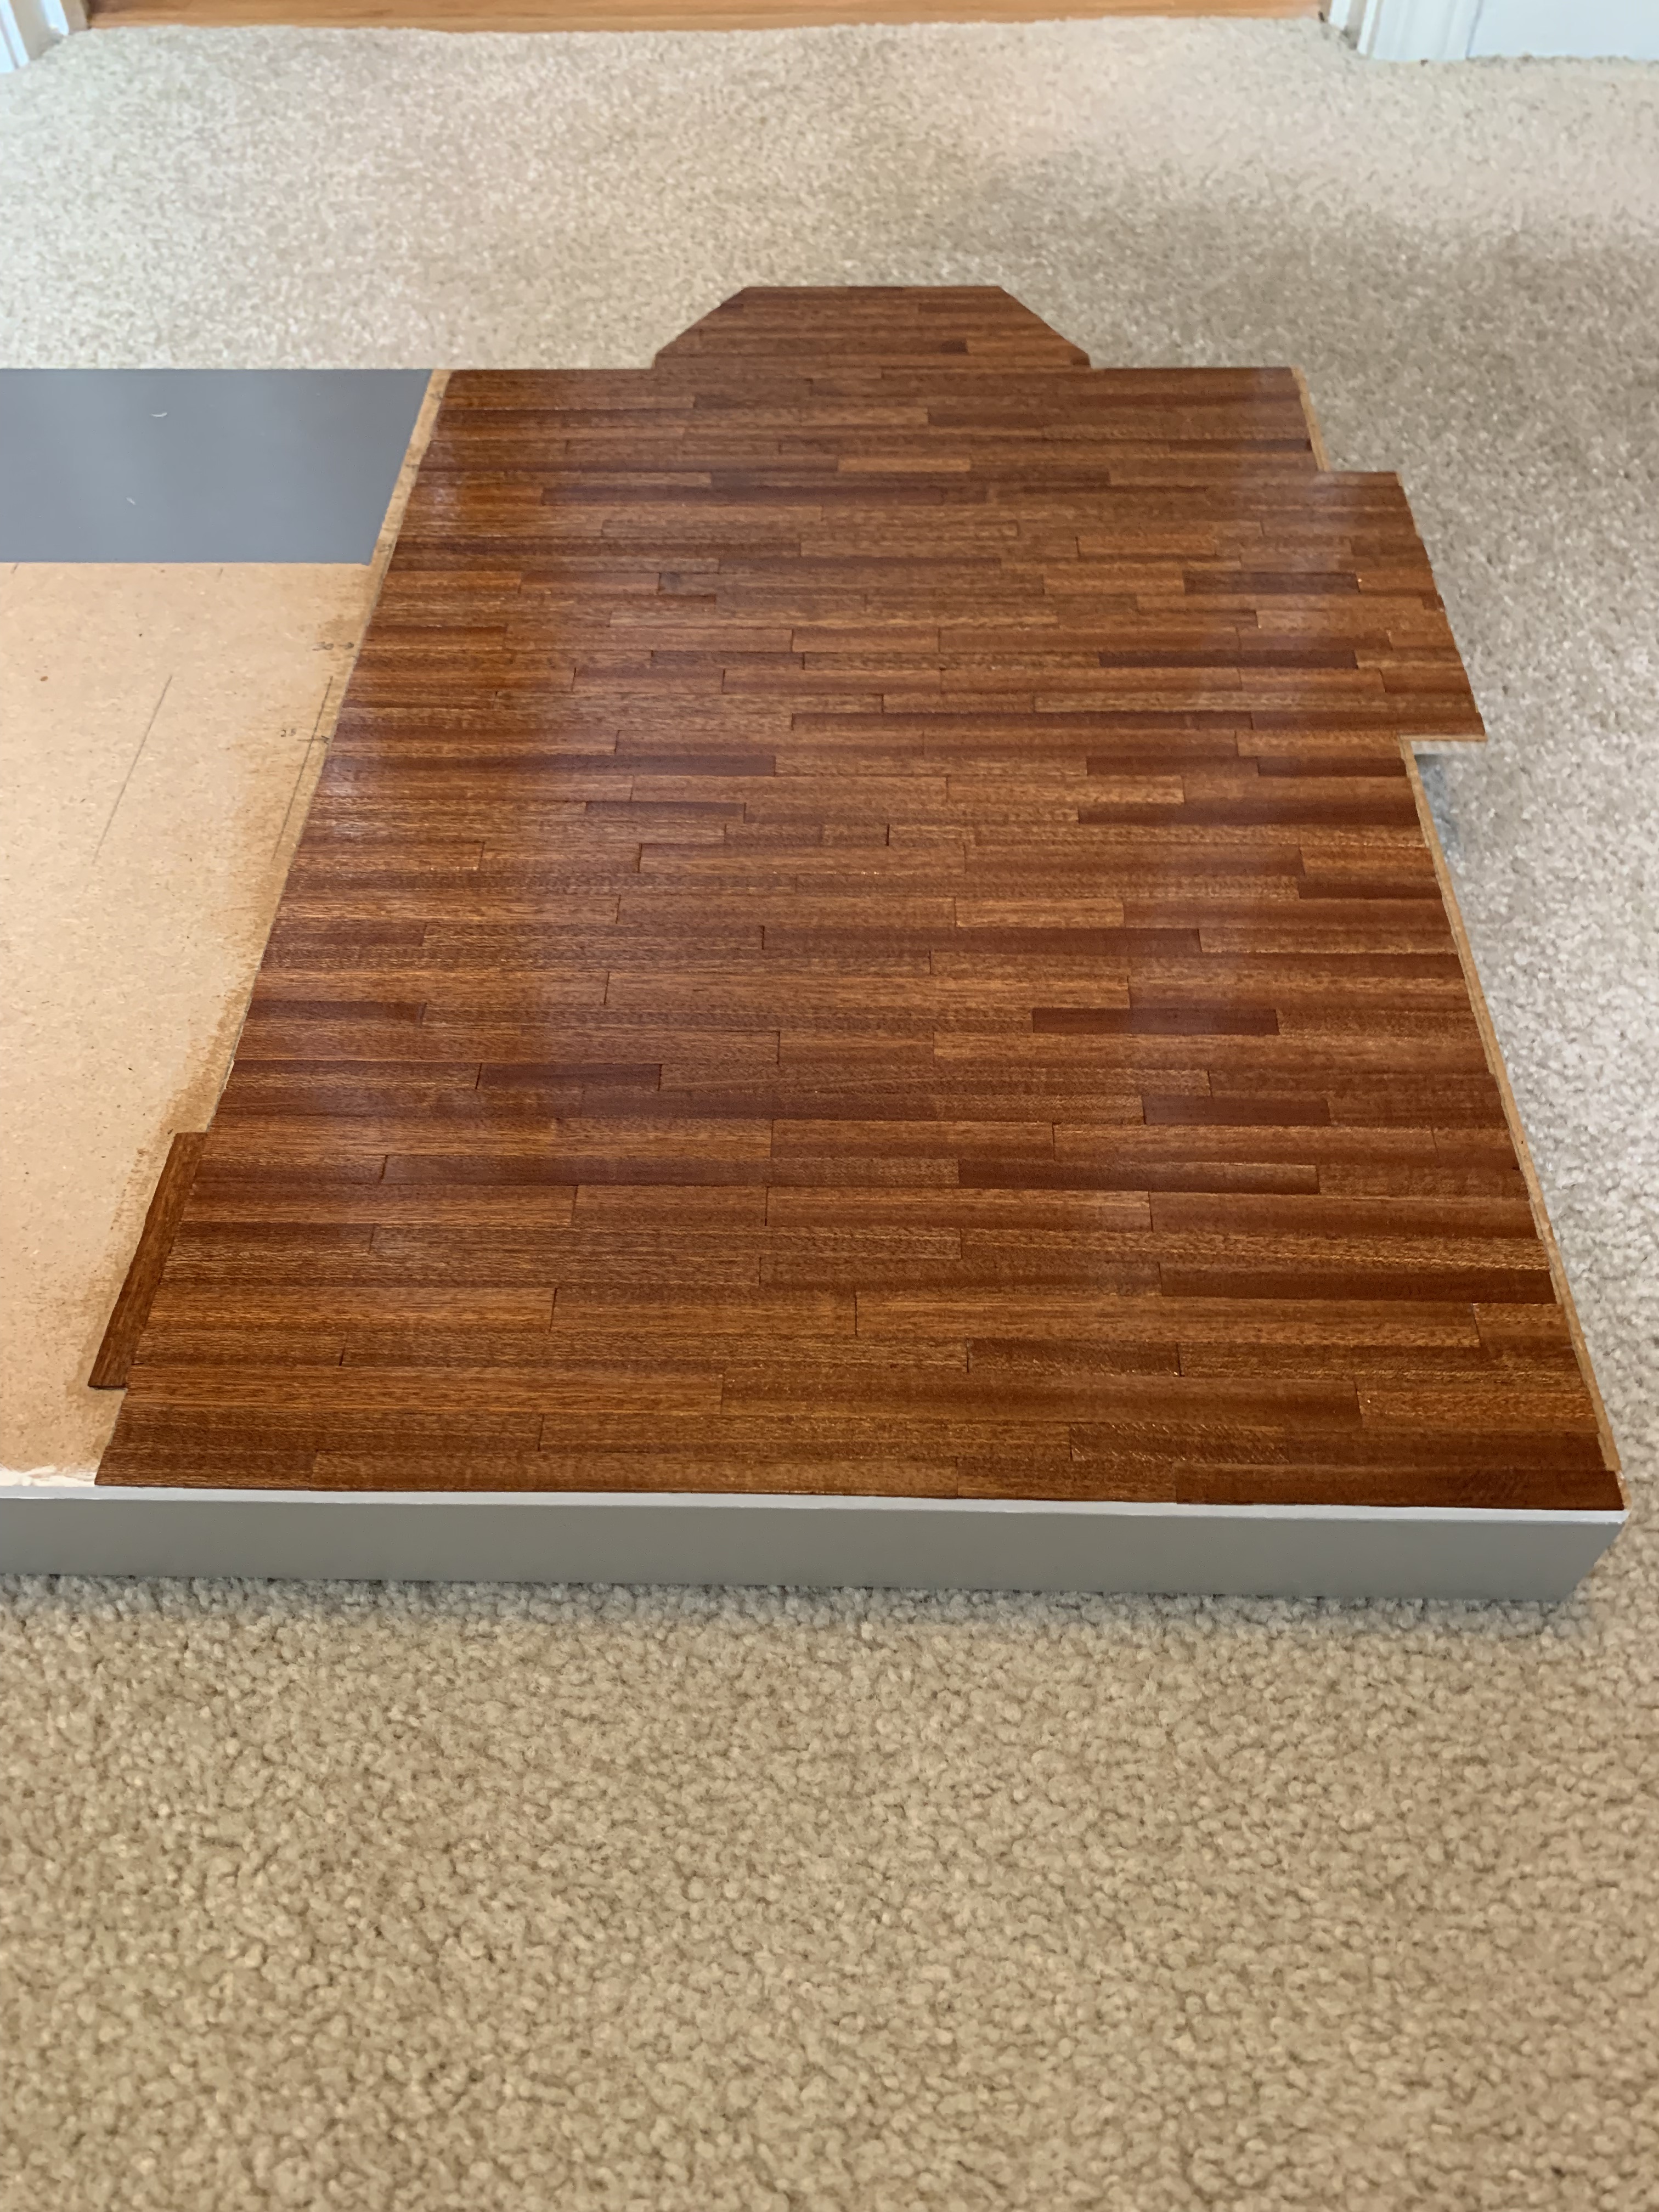
I then removed the floor from the doll house (I had not glued it down yet) and took it outside for the sanding step. This consisted of first sanding with the 220-grit sanding block followed by the 400-grit sanding block. As I removed the dust and ran my hands over the floor, I could tell I had a nice smooth surface.
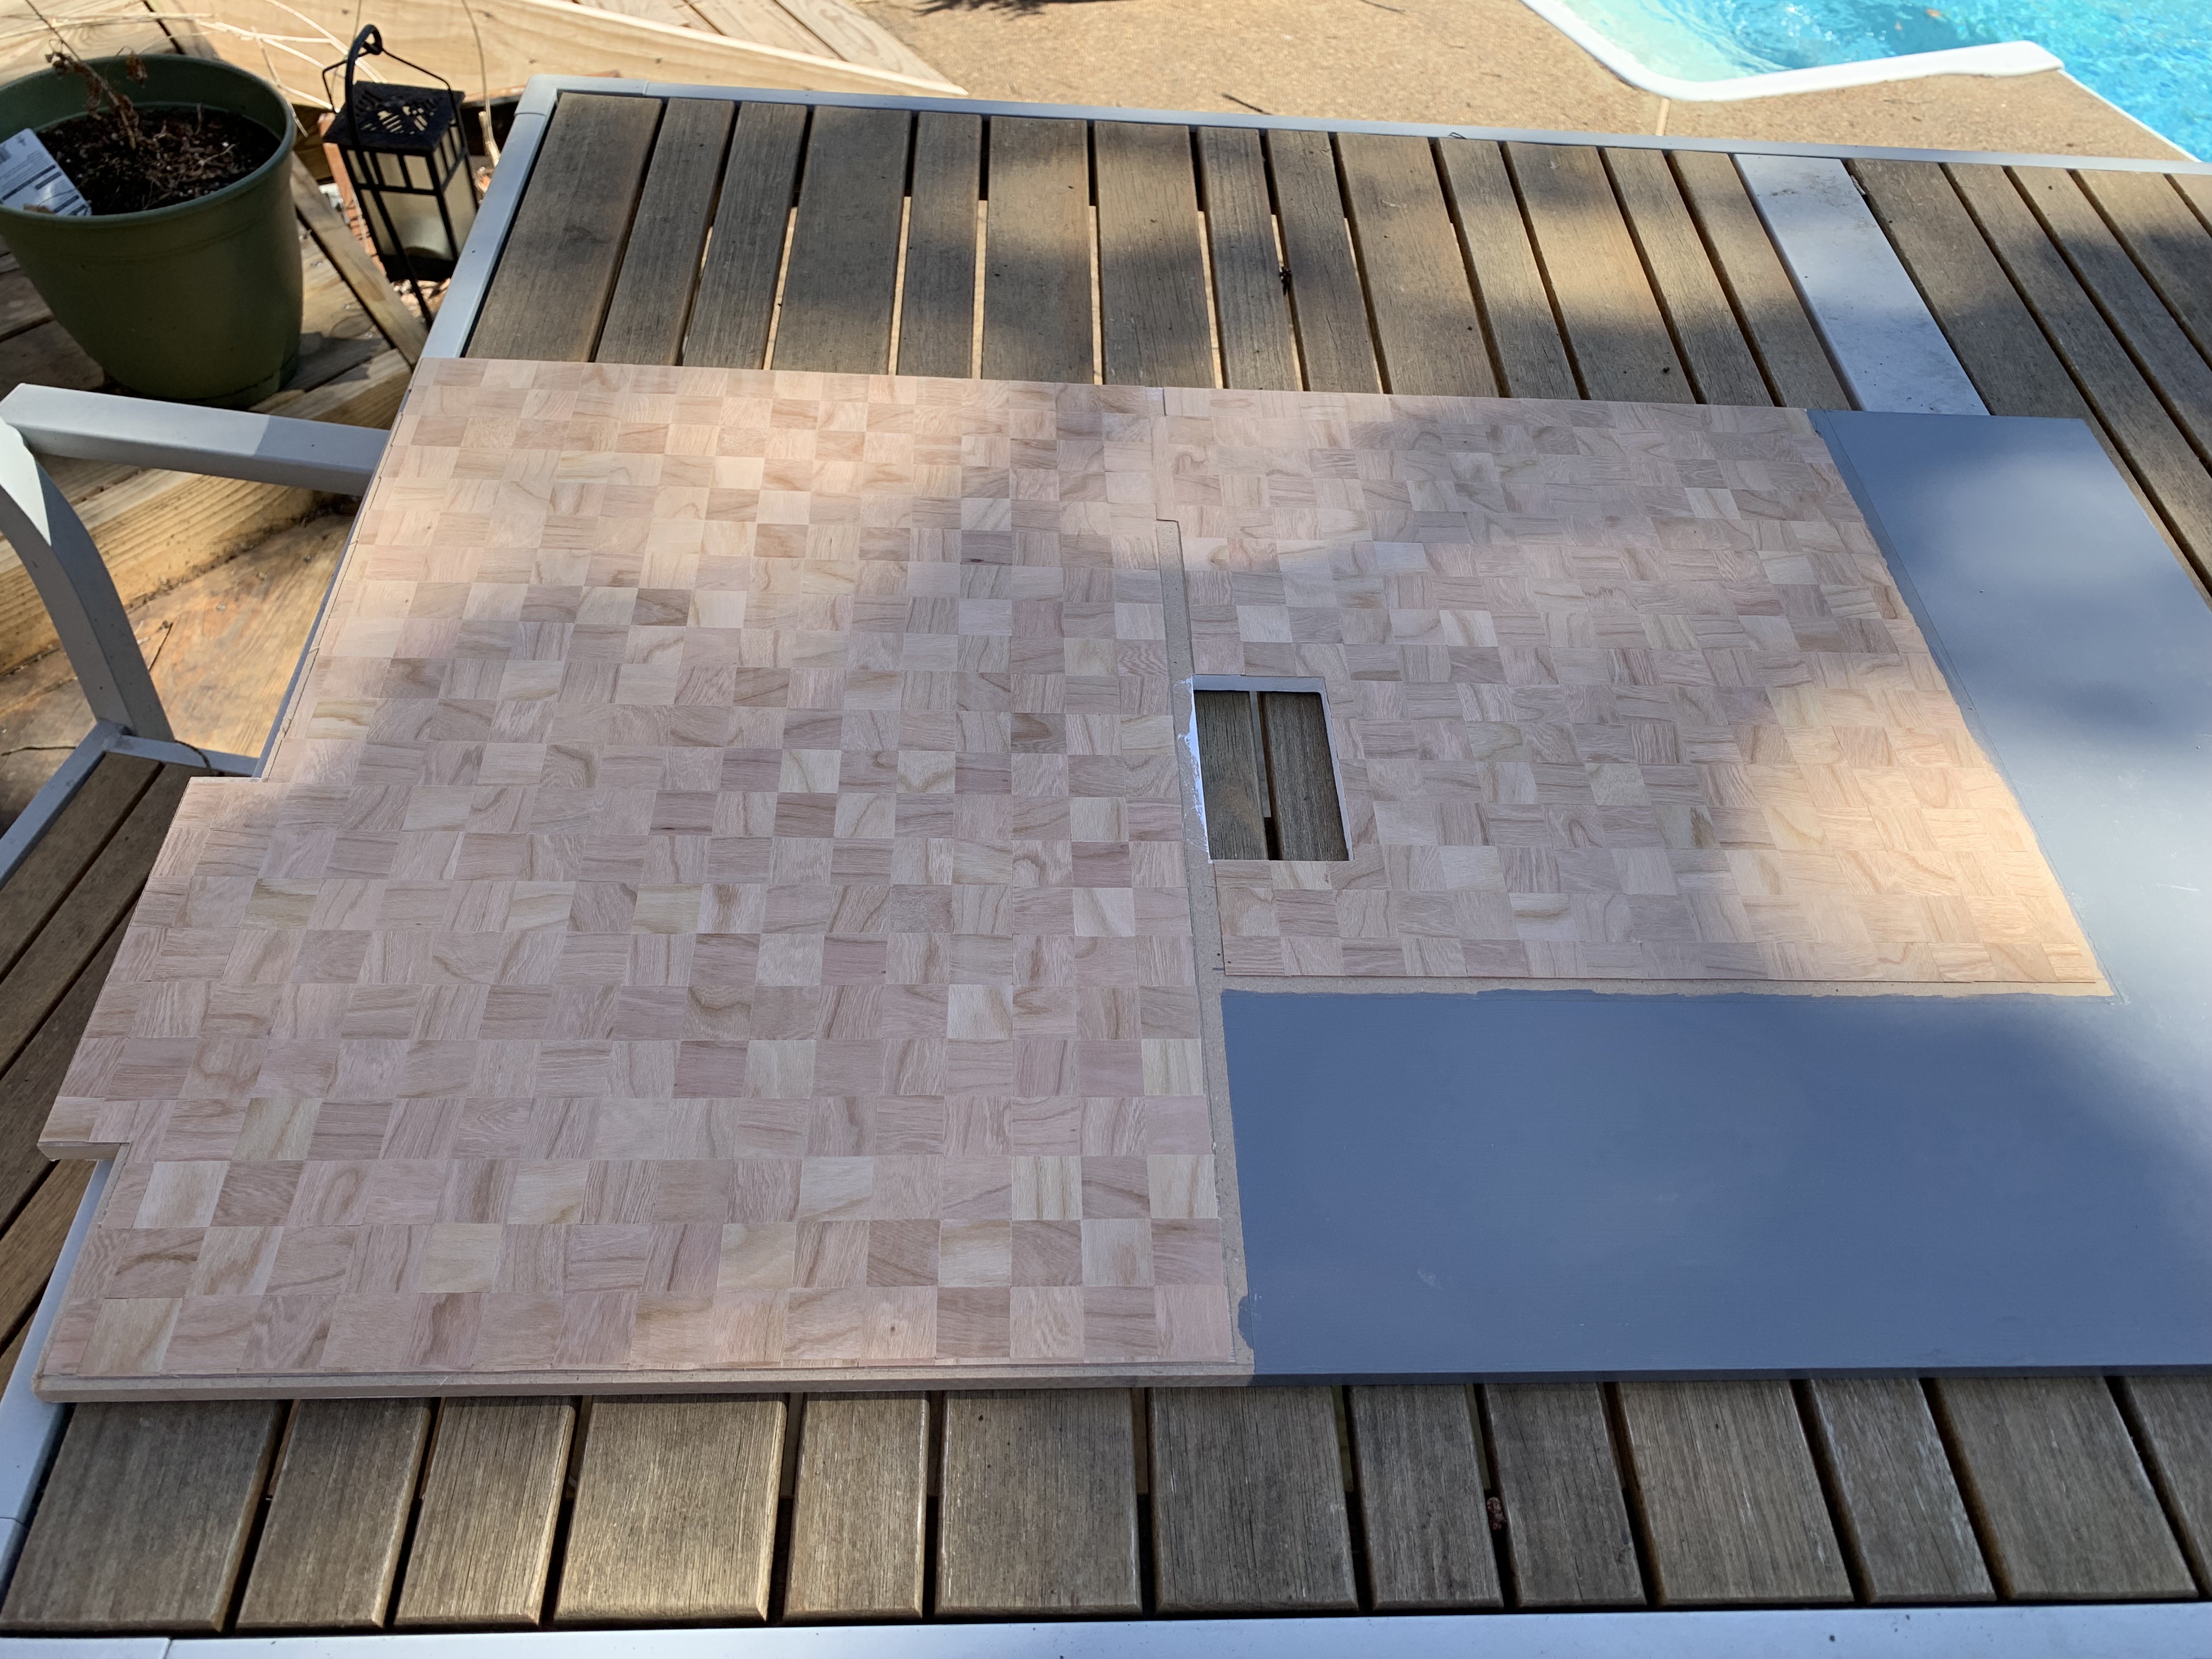
I then applied the first coat of polyurethane, sanded lightly with the 400-grit sanding block, then applied two more coats of polyurethane, for a total of three coats.
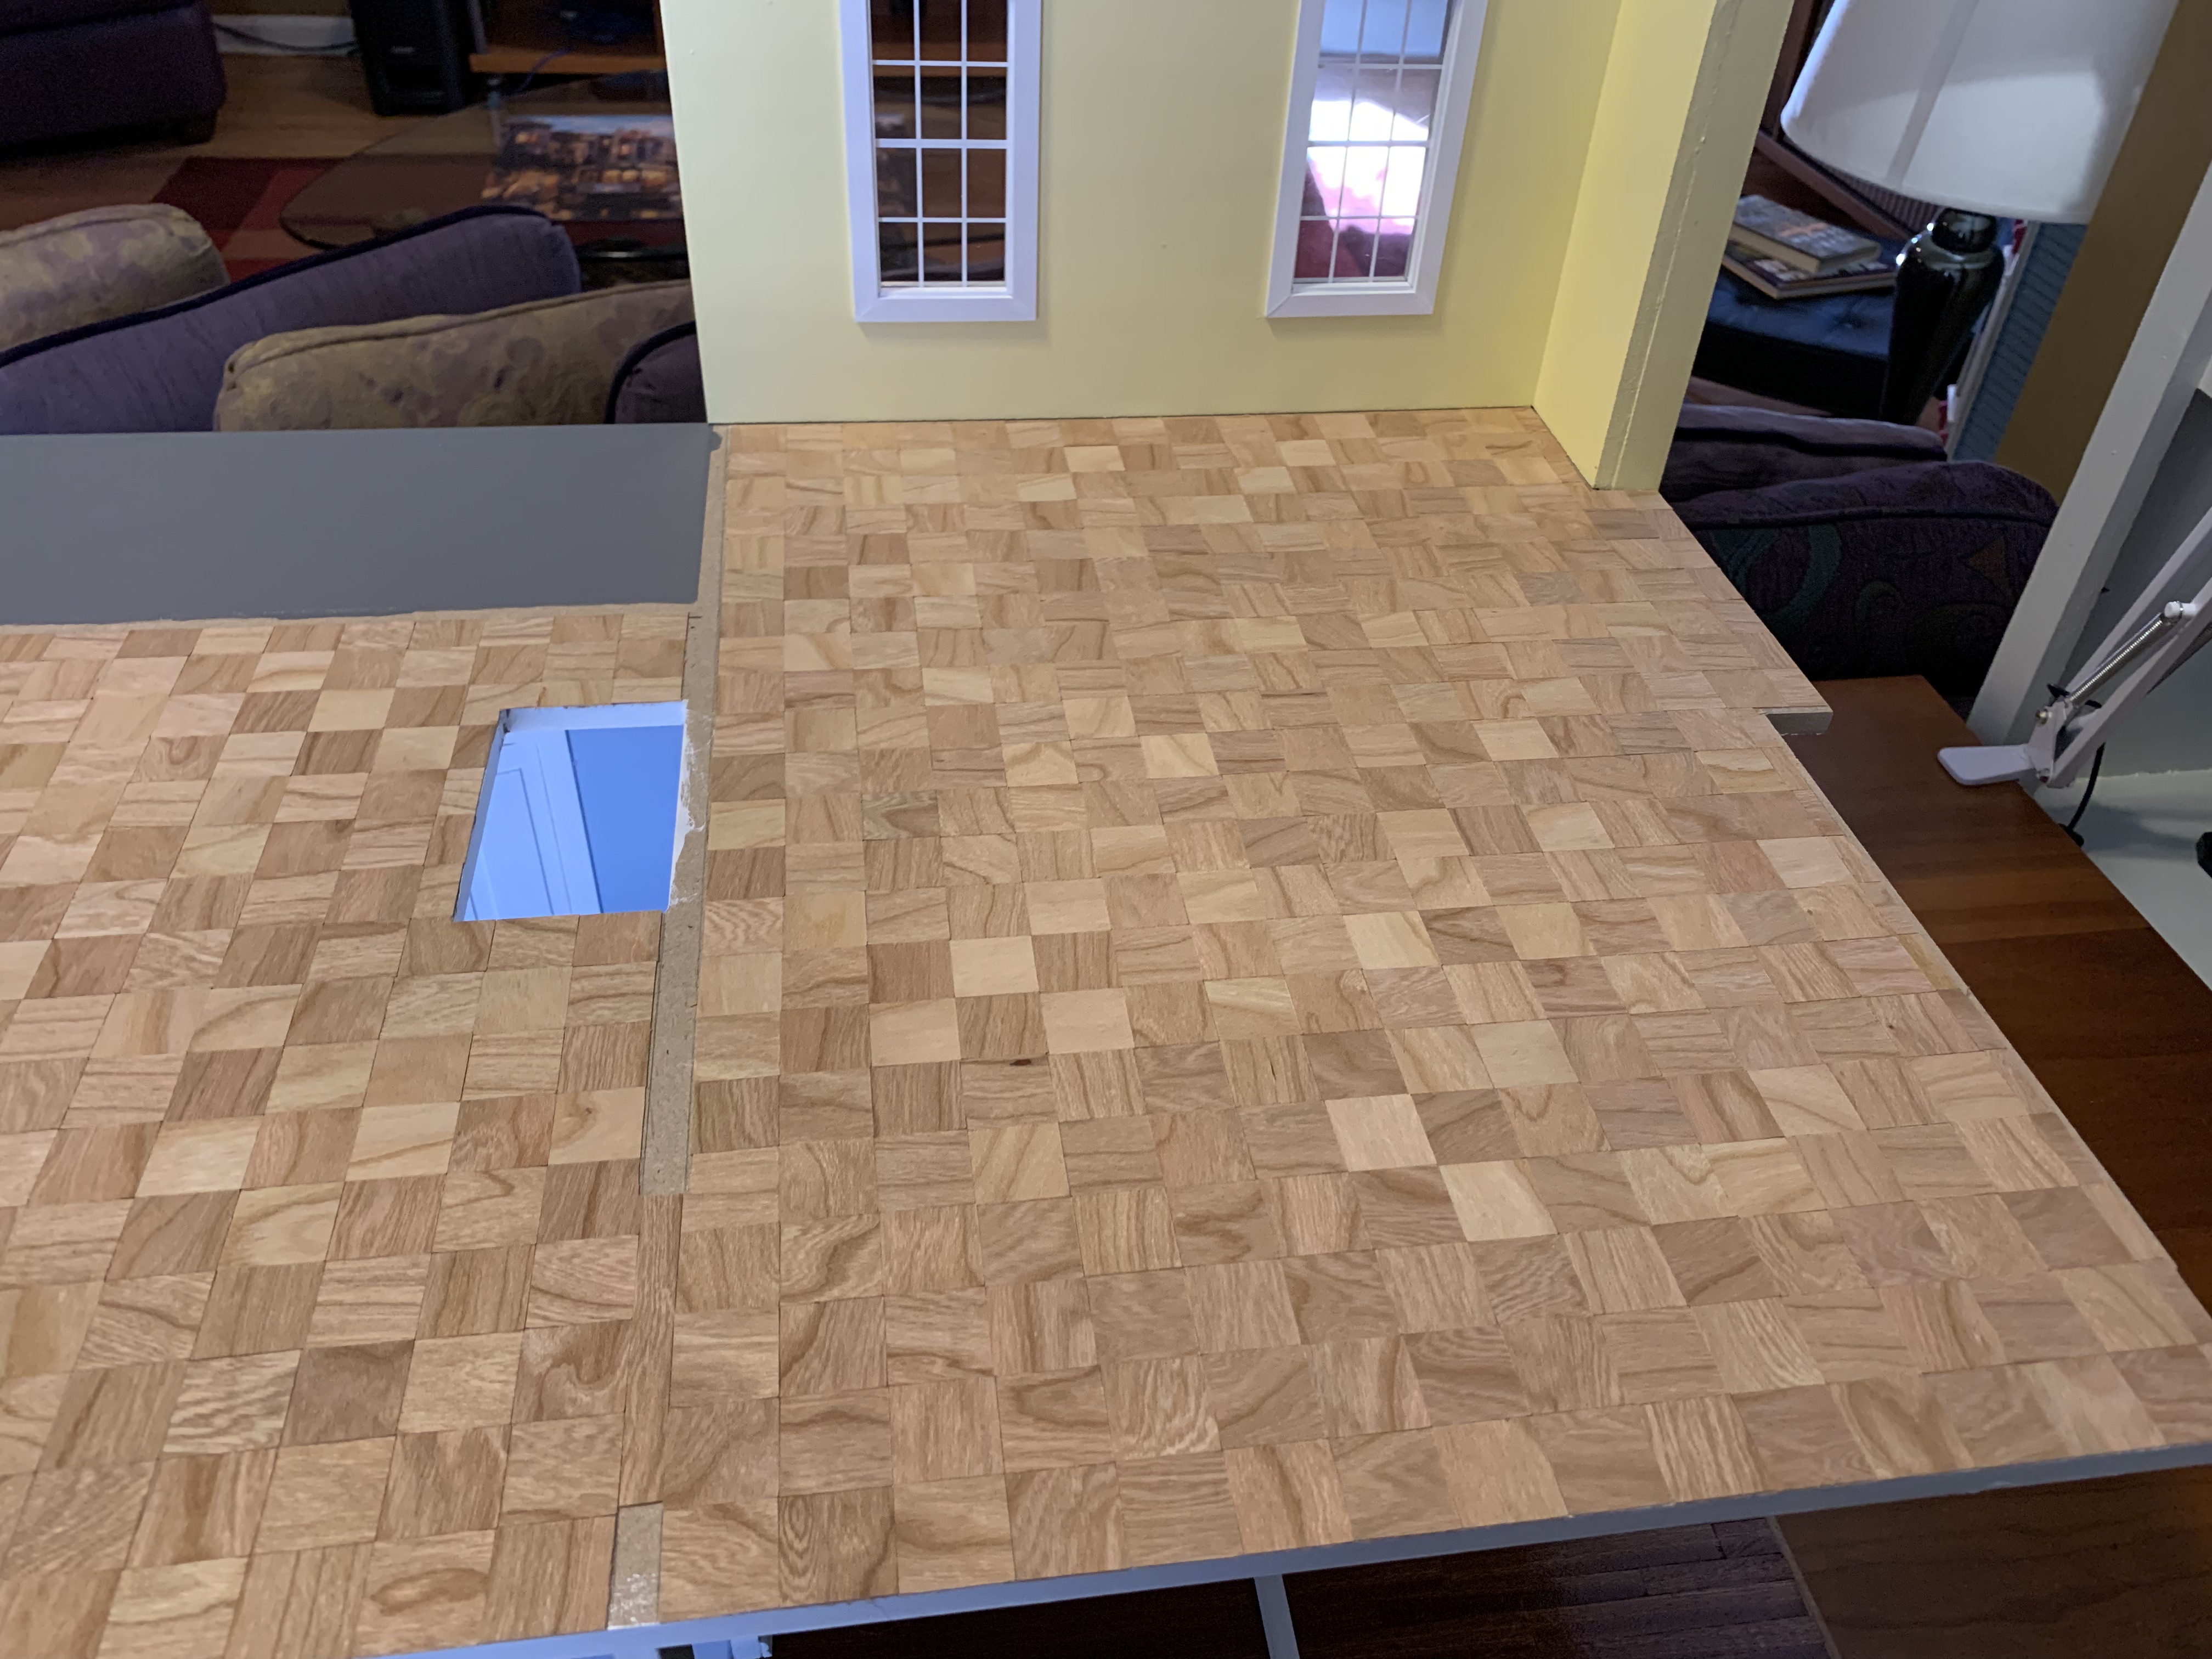
It seemed to turn out very nicely and once I reinstalled the floor, with glue this time, it seemed even nicer married to the previously painted walls.
Completing this step meant that we had covered two of the three floors. But what about the third floor?
To Be Continued…
Categories

David, this is beautiful! What a treasure this house will be. But, I am confused about something. The tiles were laid with carpet tape and later glued to the floor. Were the tiles taped to a piece of flooring, or was the back of the tape not peeled back on the bottom? Perhaps my confusion is because I’ve never used carpet tape. Is it sticky on both sides? While reading, I thought the use of carpet tape was the permanent adhesion to the floor. I am just trying to clarify, in case, in another lifetime, I attempt something like this. Your work is amazing. Thank you for this post! I do appreciate learning the details and seeing how precise you are in the craft. It inspires me to take it up a notch. 🙂
Thanks, Betty I always appreciate your complimentary comments. Yes carpet tape is sticky on both sides. When you peel it off the roll the bottom sticky side is exposed. I laid that down row by row of tape. Then when I was ready to stick down the wooden tiles, I peeled off the top backing which revealed the top sticky side. Then I carefully put the tiles down alternating the grain to give the parquet look. I had never done this before. It was my sisters idea and I think it was a good one.
Here is where my confusion is: It says after you sanded the floors, you reinstalled them and glued them this time. I thought the floors were already attached with the back side of the carpet tape. Sorry, I’m a stickler for understanding. Your sister did have a great idea. The parquet look is great.
Sorry for the confusion. Now I see what is not clear. Yes once I attached the wood tiles to the floor, I did not take them up again. The floor that I referred to that I glued was the entire second floor. I had not glued it to the first floor walls so I could take just the second floor outside to sand it. Hope that clarifies it.