
A Classic Boat Model – Laying Down the Keel

The first official step in building a large ship is the laying down of the keel, the spine or backbone to which the hull bulkheads will be attached. This event is often marked with a small celebration, as it documents the beginning date of the construction process or the “birth” of the ship. I do not know if this is also true when building a small pleasure craft but for building a model of one of these classic boats, there are steps that precede the assembly. This I learned when I began to read the assembly instructions in detail of the model I bought in the fall of 2020.
But before I could even begin to read through the instructions, I had to first clear my “dry dock”—my work closet—where construction would occur. Previously, this closet had been the construction site for the two doll houses I built in 2020 for my granddaughters.
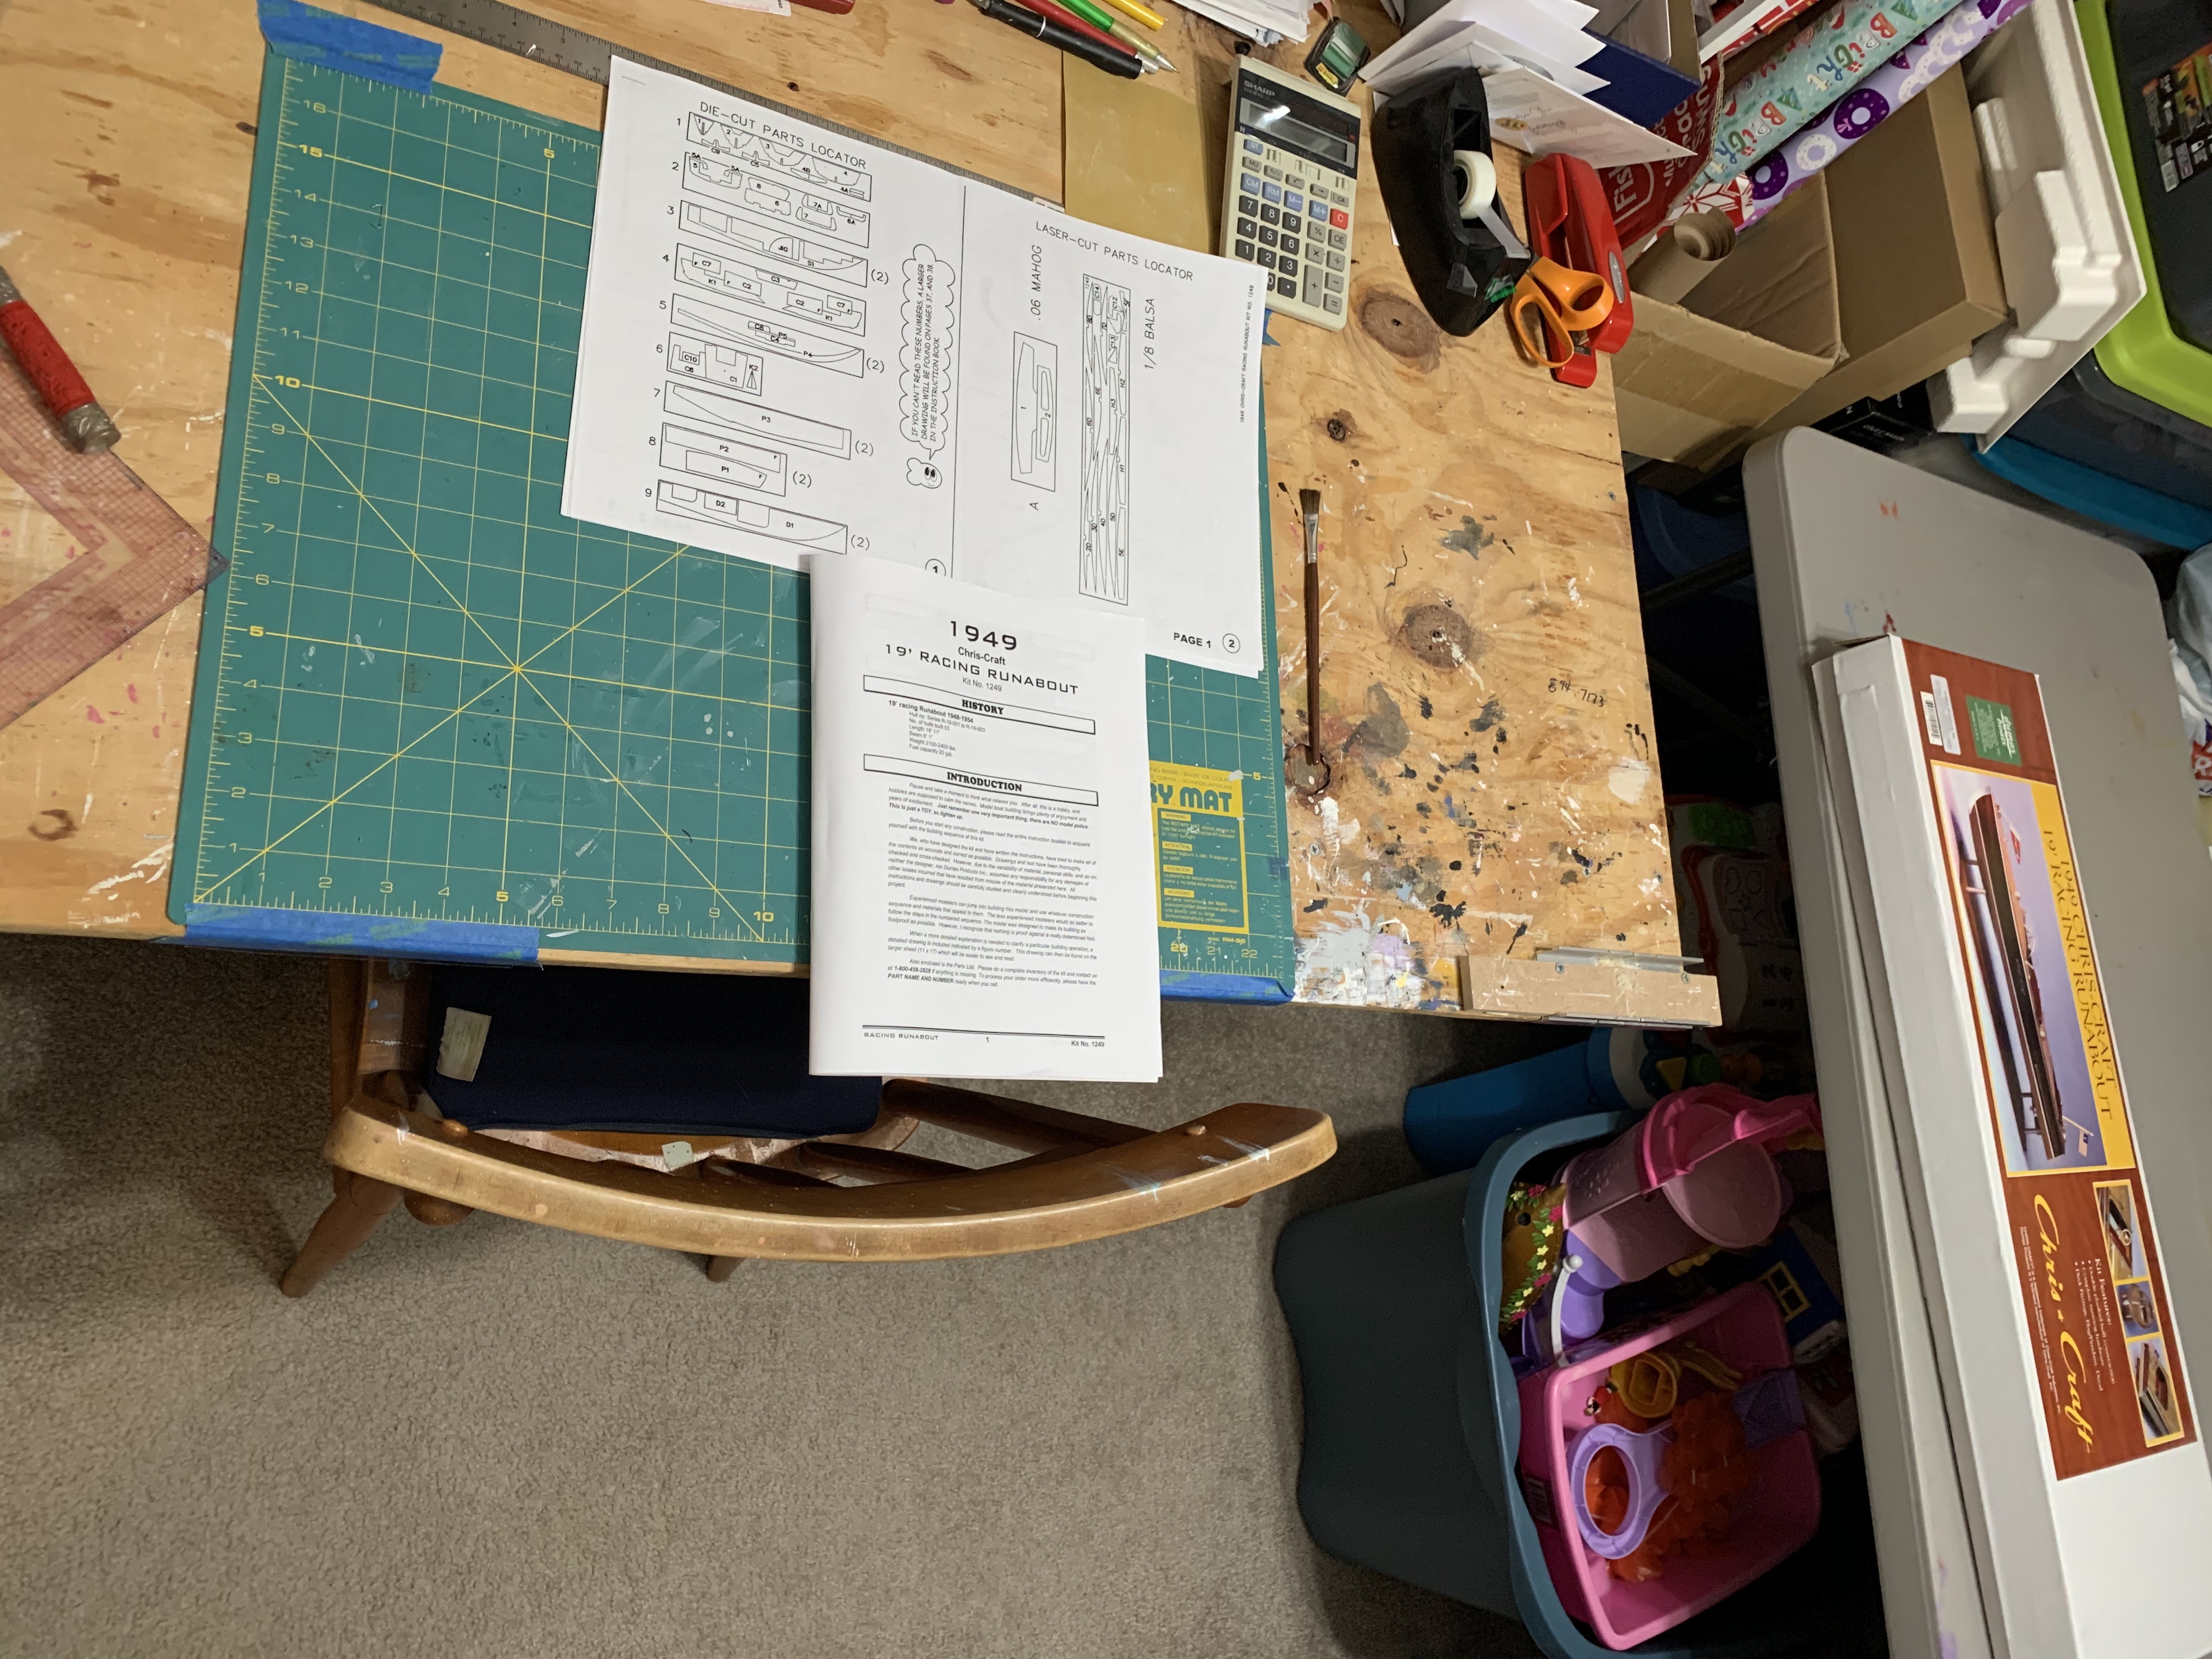
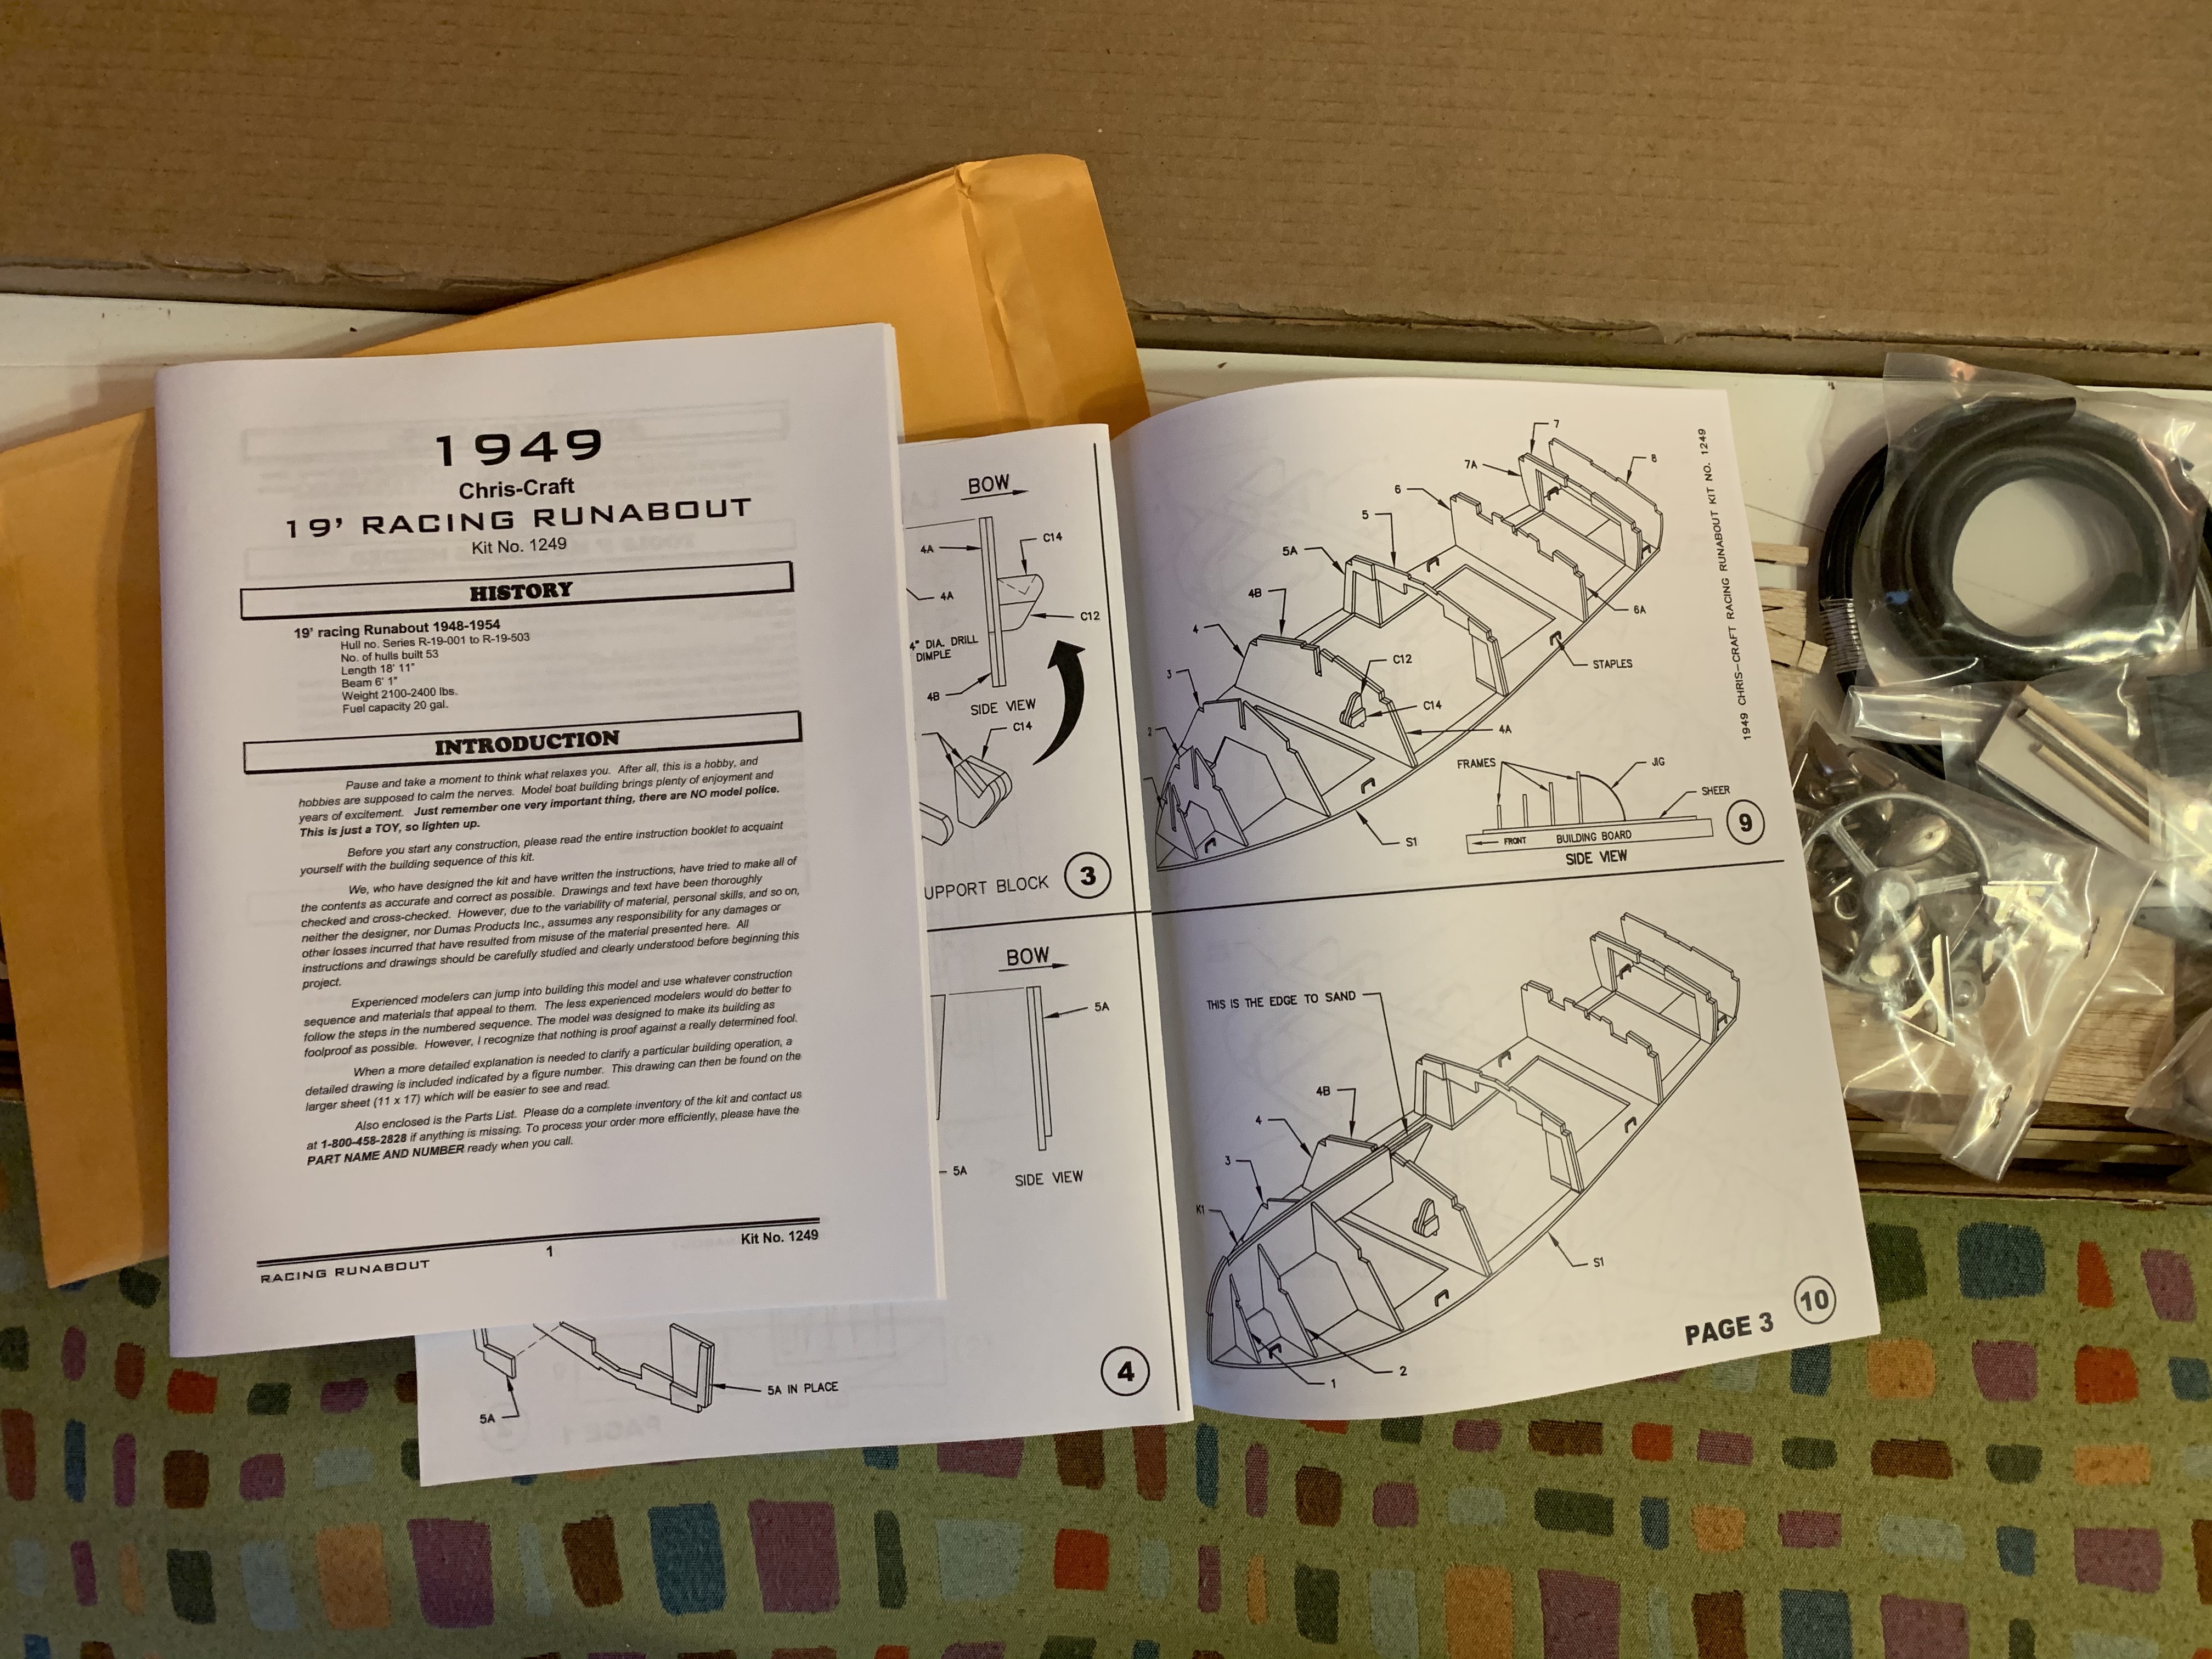
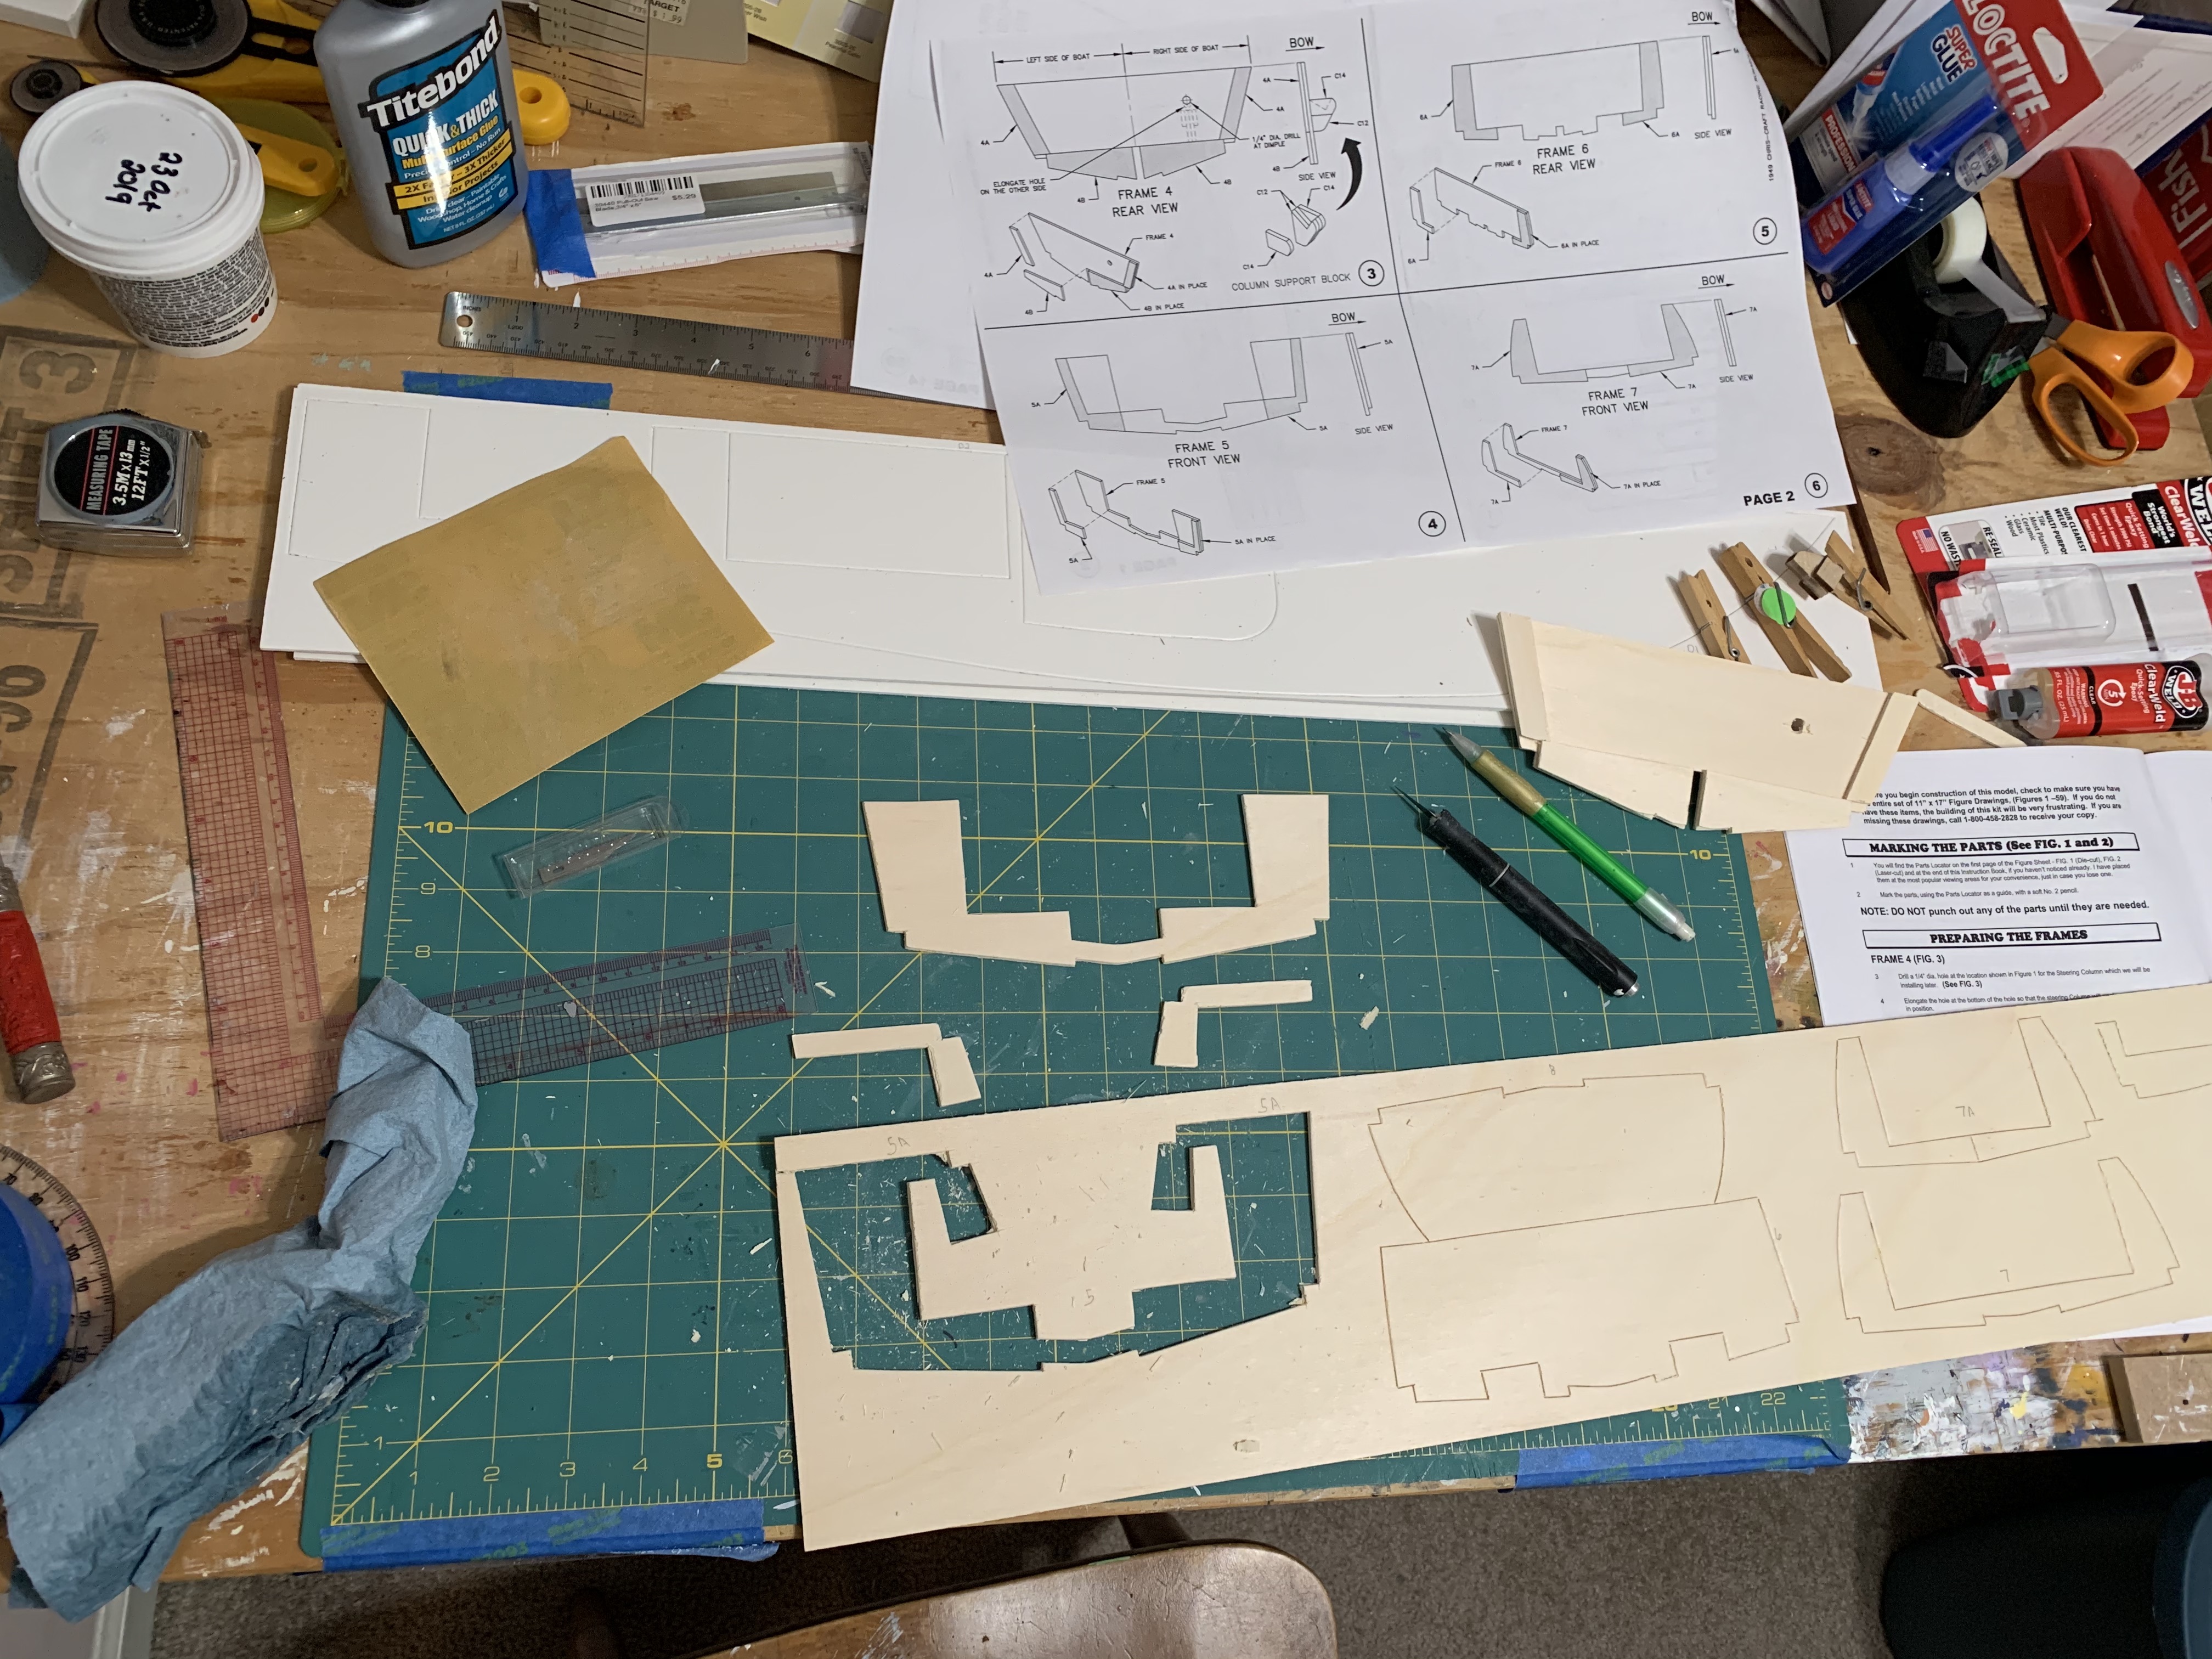
With dry dock ready, I could now focus on the instructions. After providing a detailed listing of all of the materials that would be needed, the instructions indicated the first assembly step was to inventory and label all of the model parts. For someone like myself who is not a “boat person,” I figured this step would be helpful as I didn’t know a transom from a gunwale nor even what were the port or starboard sides of the boat (I did at least know the difference between the bow (front) and the stern (back) of a boat).
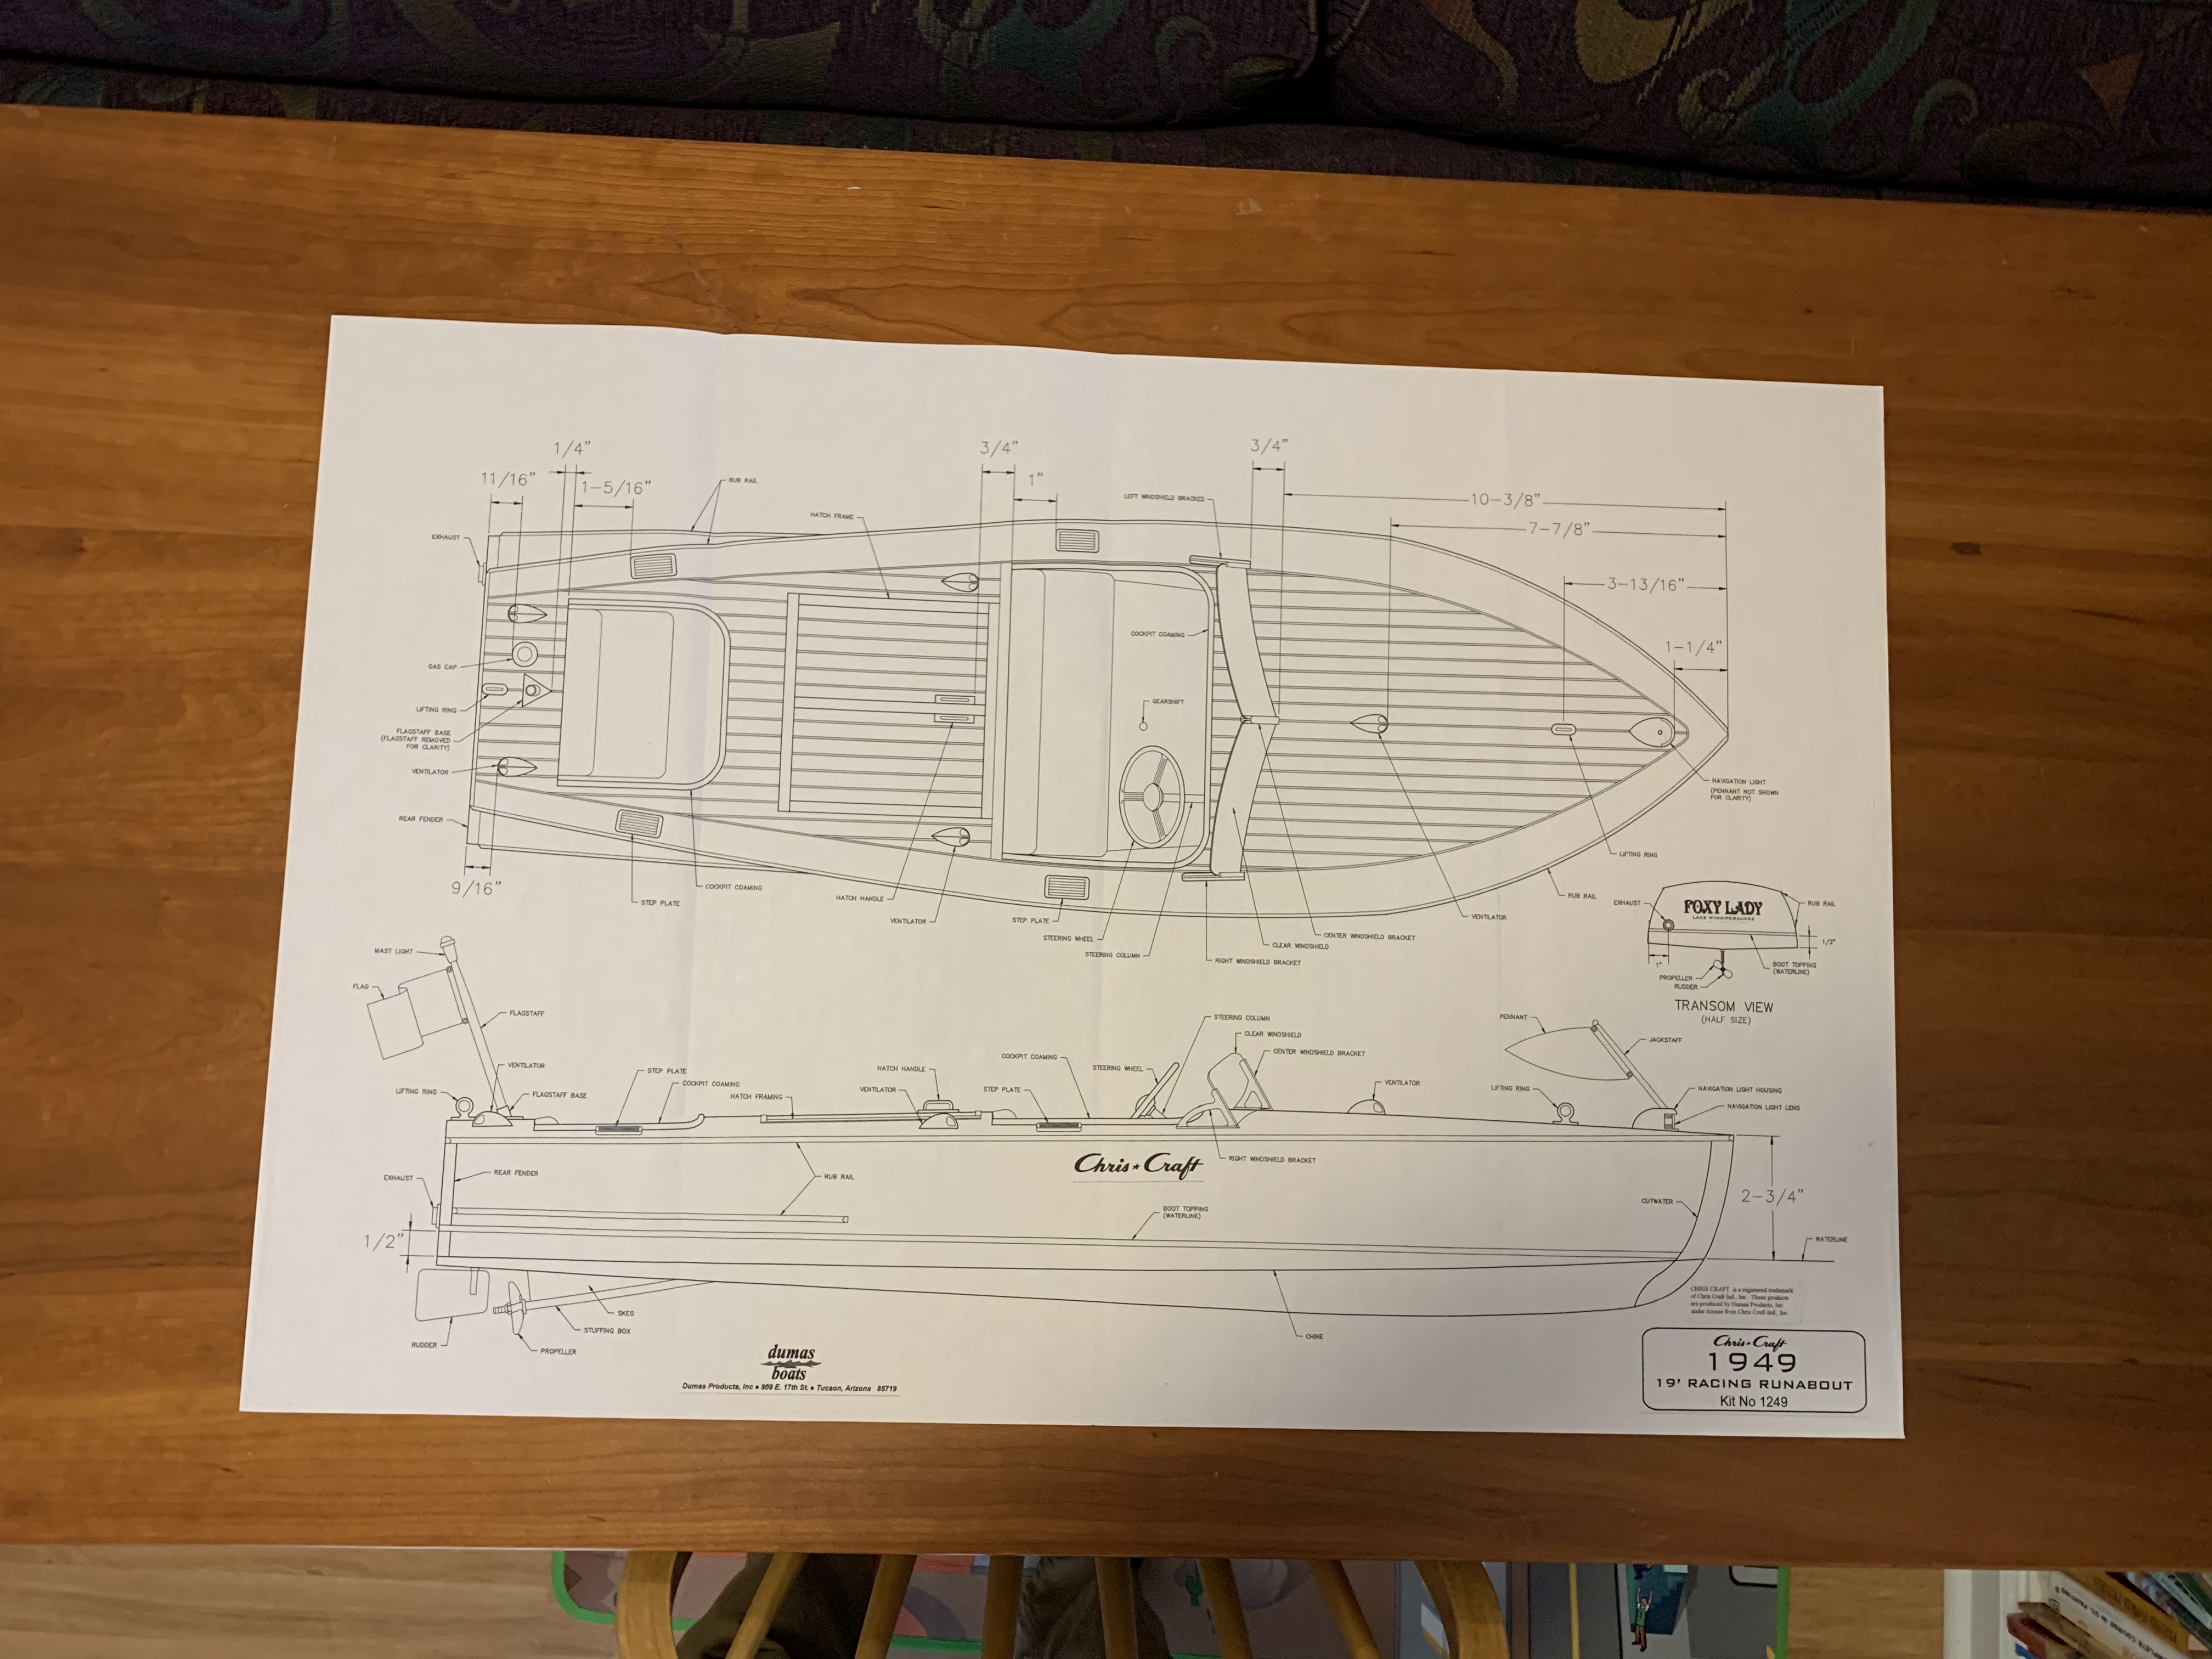
As I worked through the contents of the box pulling out the sheets of die-cut parts, I found a folded-up piece of paper at the bottom. When I opened it up, I discovered it was a full-scale diagram of the model. It looked huge! When I measured the distance from bow to stern, I found the finished boat would be almost 30 inches long (28.25” to be exact). This was going to be a really big boat! With the full-scale boat measuring nearly 19 feet long, this worked out to be a 1/8 scale model. What fun!
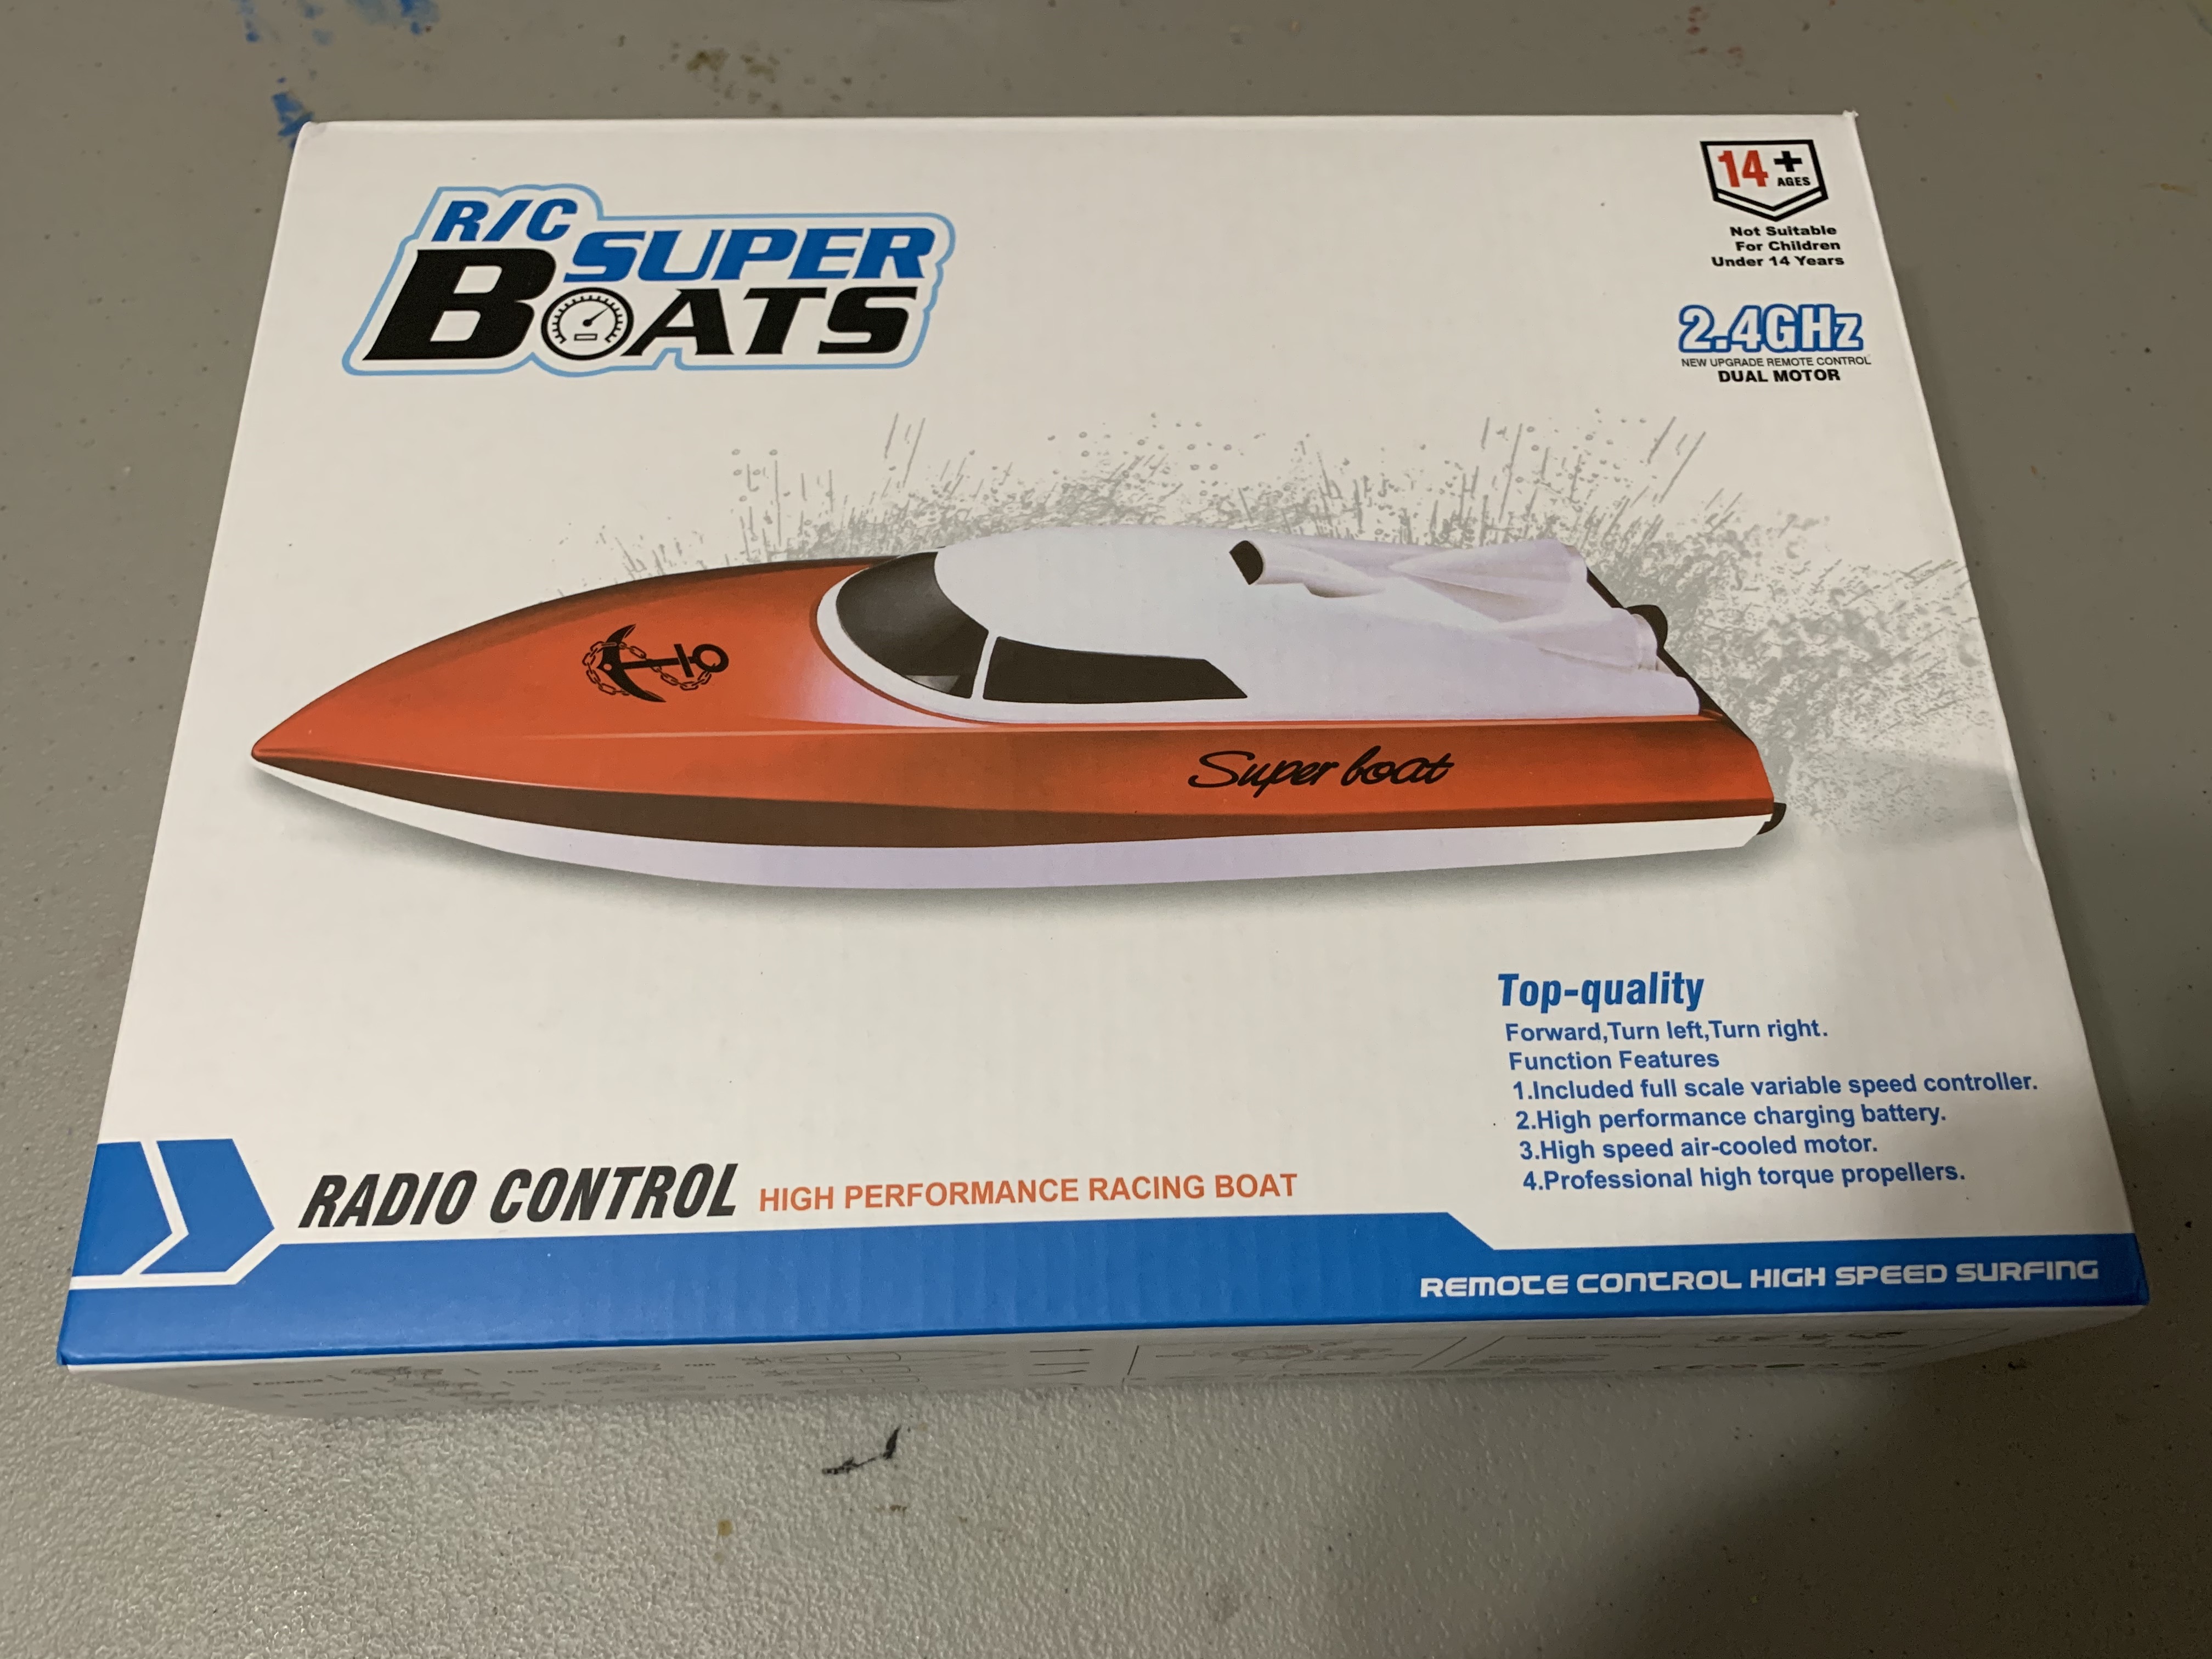
Originally, I had planned on building the boat with radio control (RC) thinking it would be fun to motor around in our backyard pool while sitting on our deck.
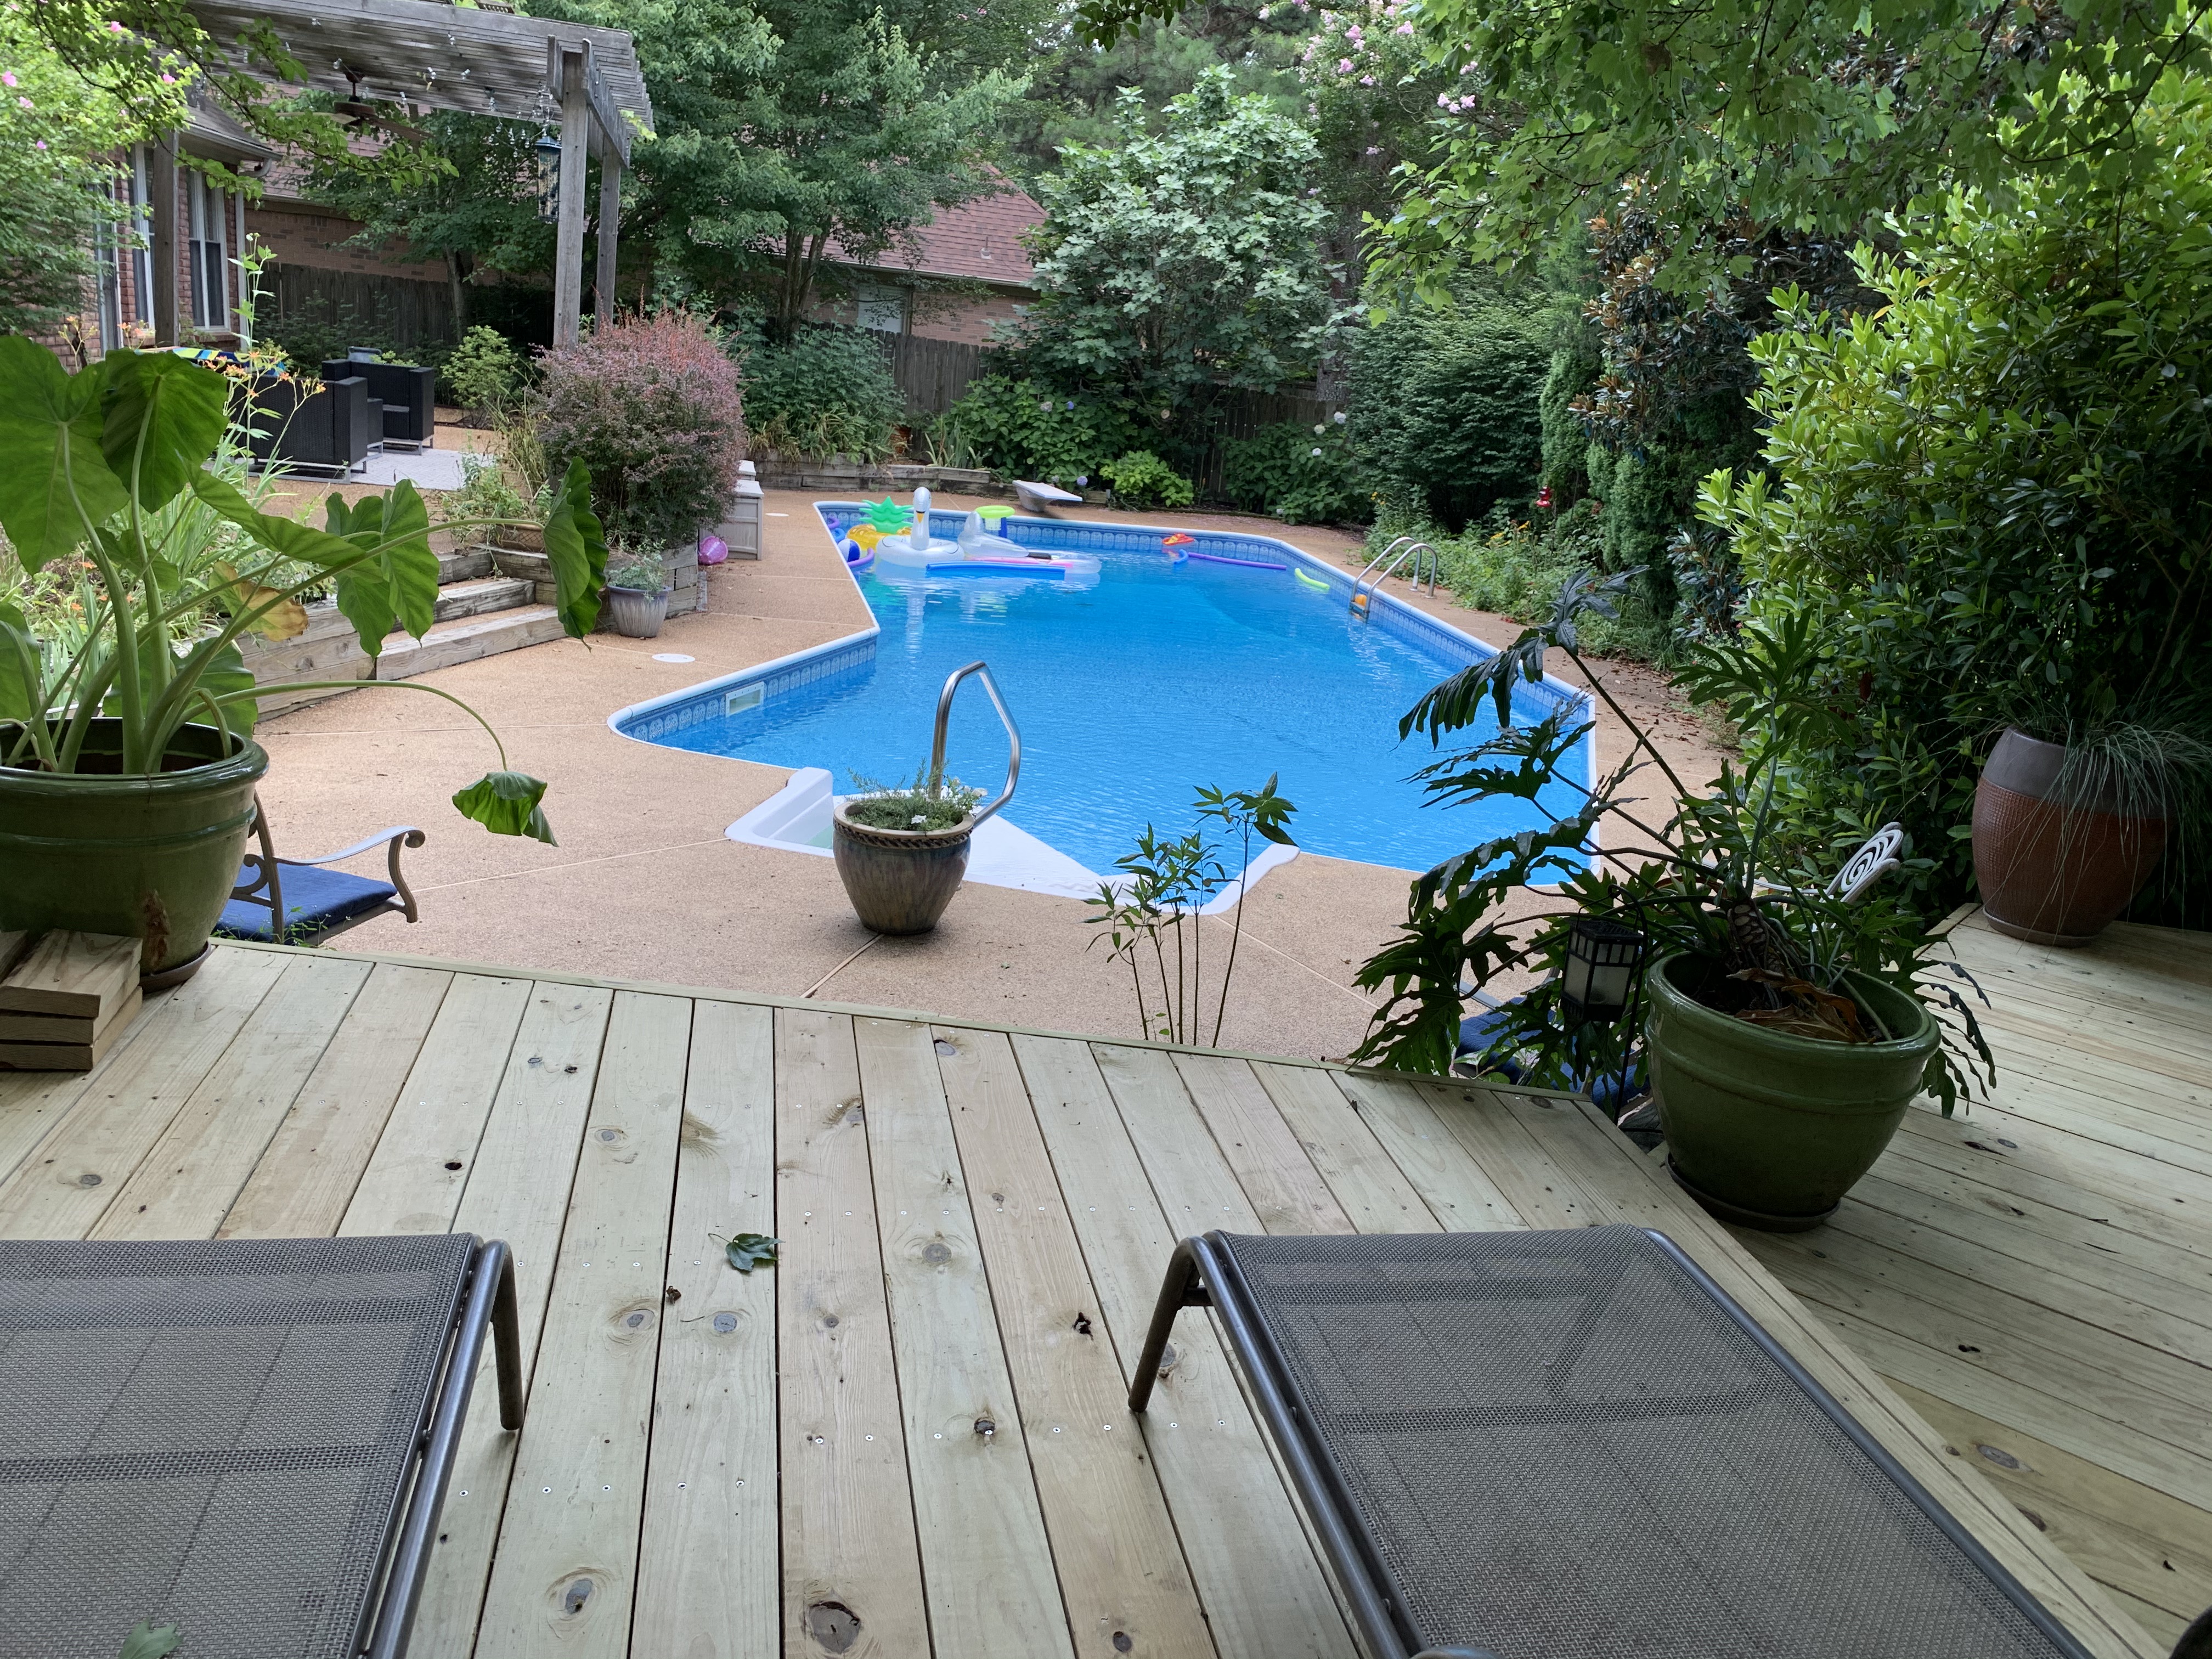
However, when I priced the additional hardware I would need to purchase, its price came to more than the cost of the boat kit itself which would push the total cost of the project to over $500. And when I read that the finished RC model’s turning radius was wider than the width of our pool—now all the more obvious learning the model was nearly 2.5-foot long—I was convinced the added RC expense was unnecessary. Instead, I bought a much smaller $25 radio control model that I could more easily navigate around our pool.
My official “laying of the keel” date was Valentine’s Day 2021 but rather than physically laying down a keel, my day started out at step #2 of the instructions with cutting, sanding, and gluing together individual hull frames.
Once these were completed, the next step was to glue together and staple something called the “sheer” to my “build board.” This gave a top-down (or bottom up) view of the outline of the boat.
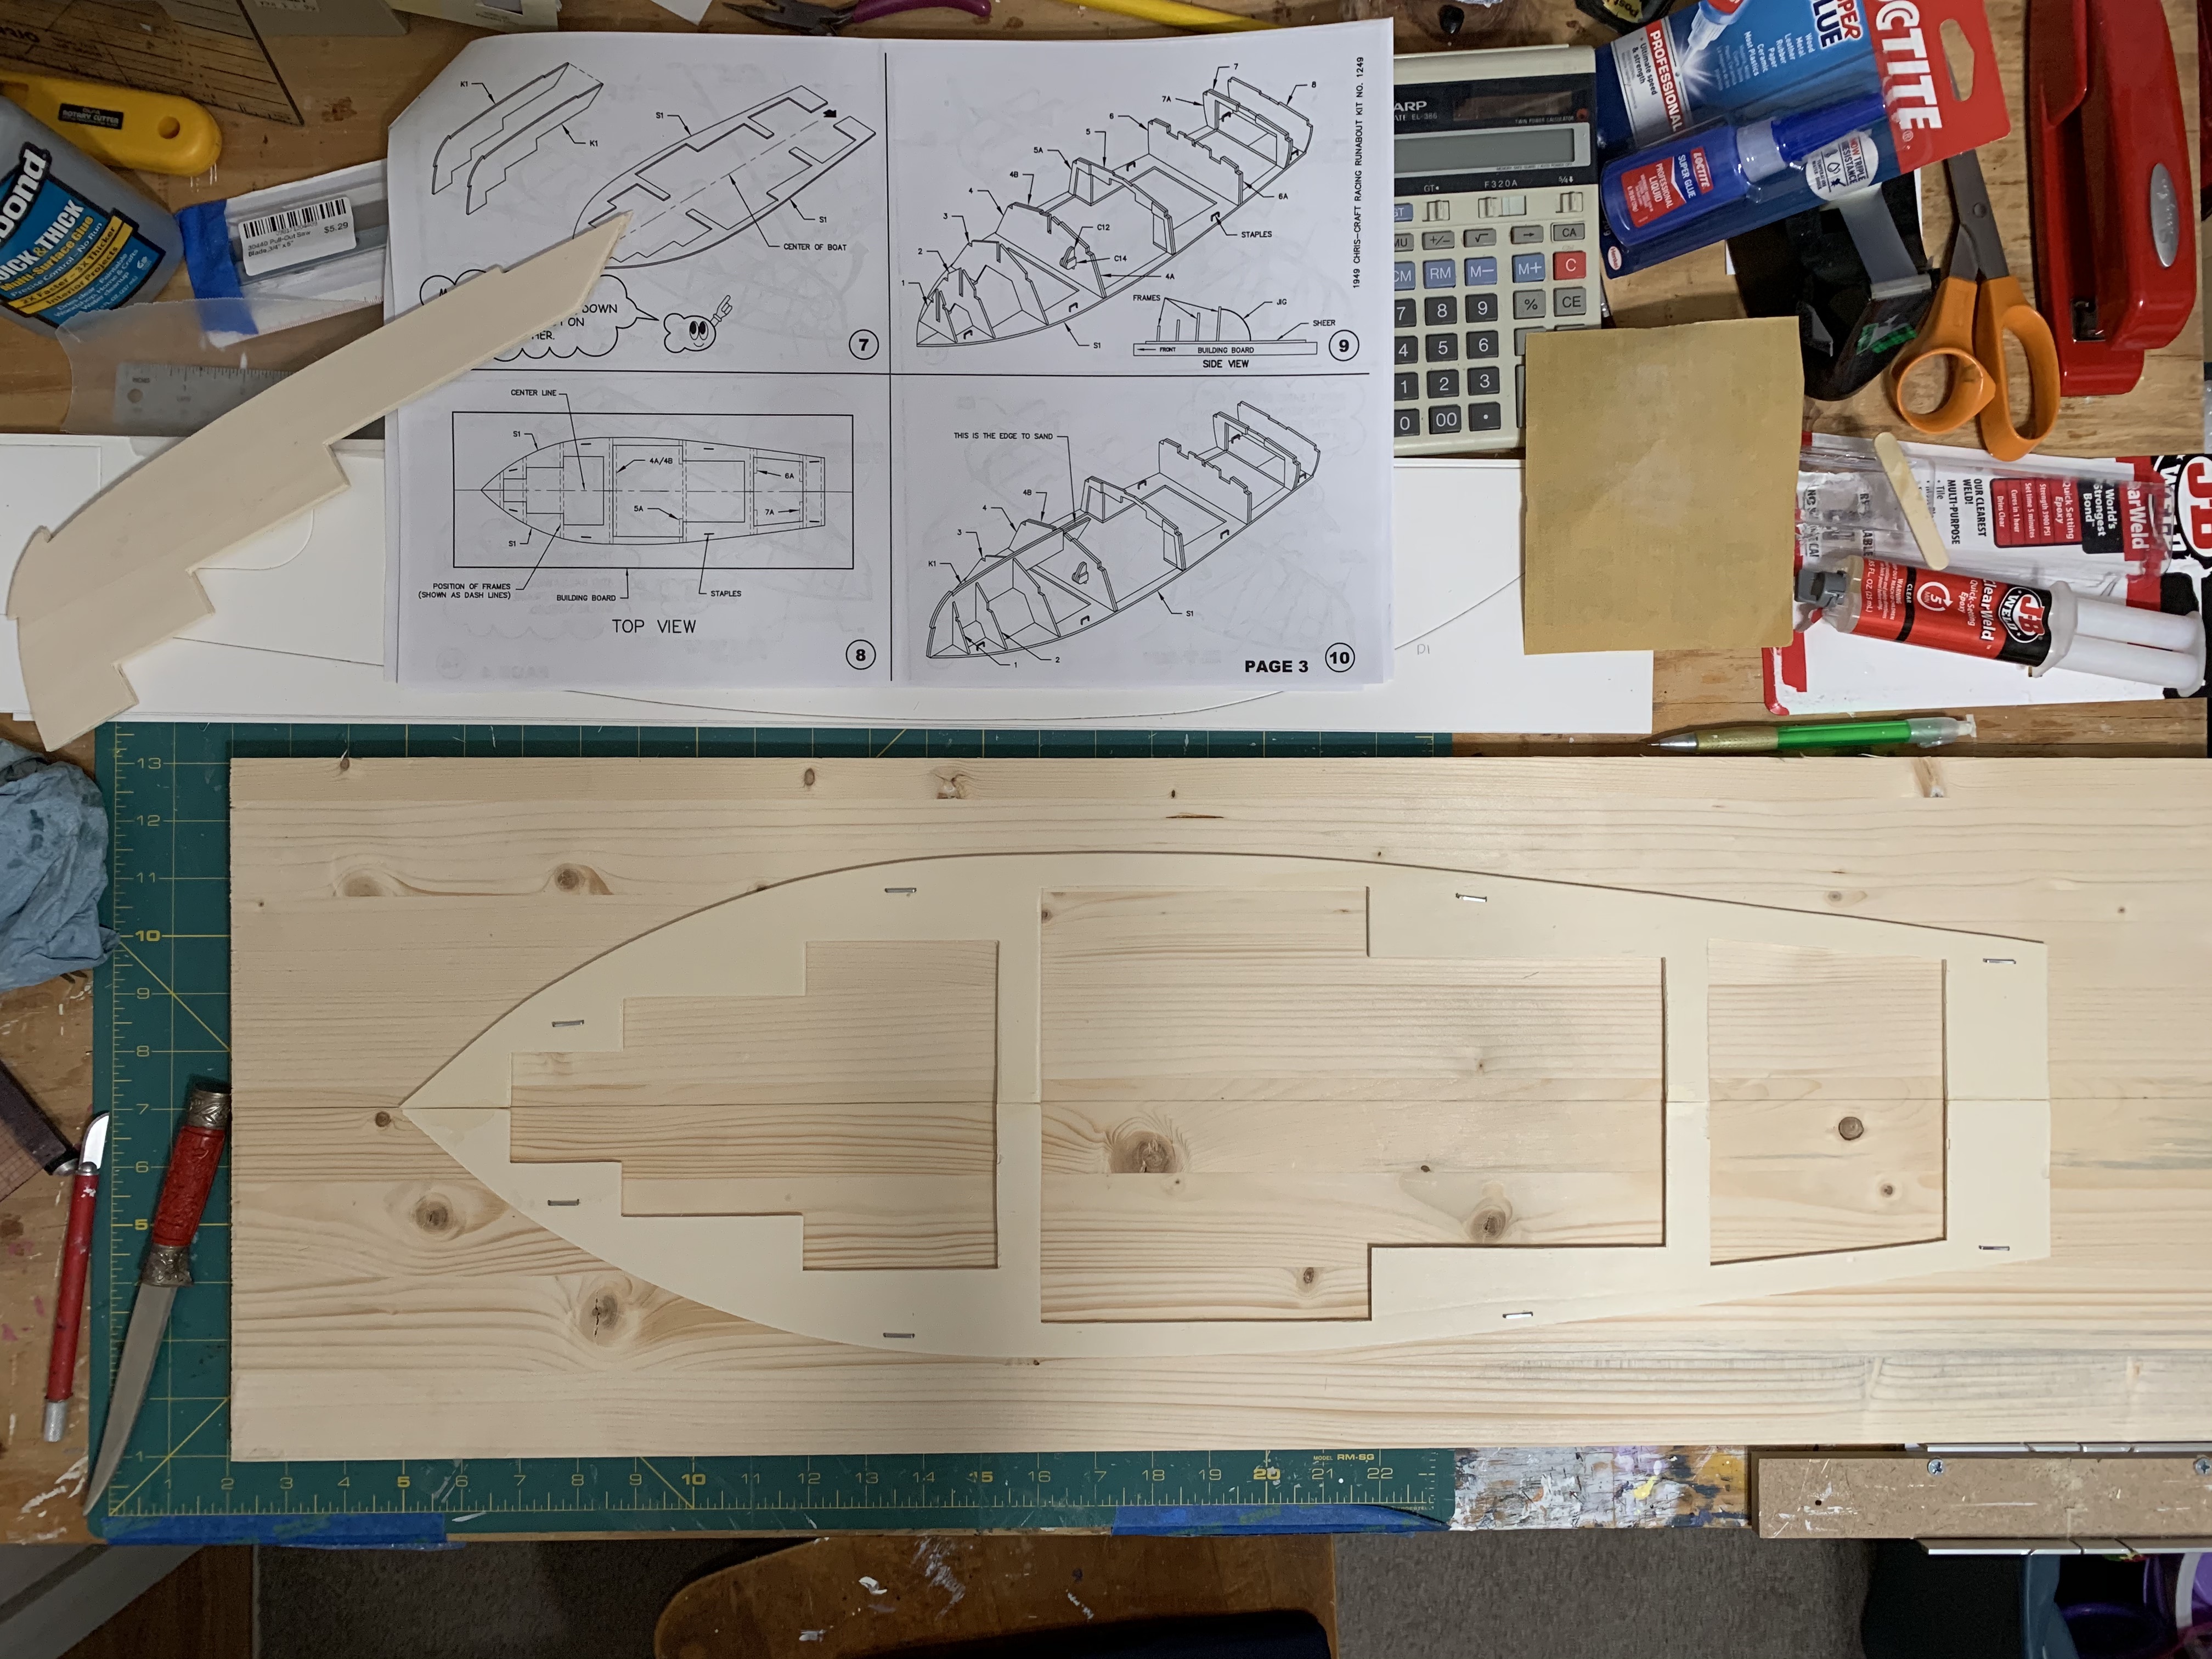
These steps all served as precursors to the steps I was really looking forward to, the ones that upon reviewing the instructions, had reminded me of the balsa model airplanes I had fun building growing up. With the sheer stapled to the build board to keep it flat, I began to glue, one at a time, the individual hull frames. By the time I had added these five frames the boat began to really take shape.
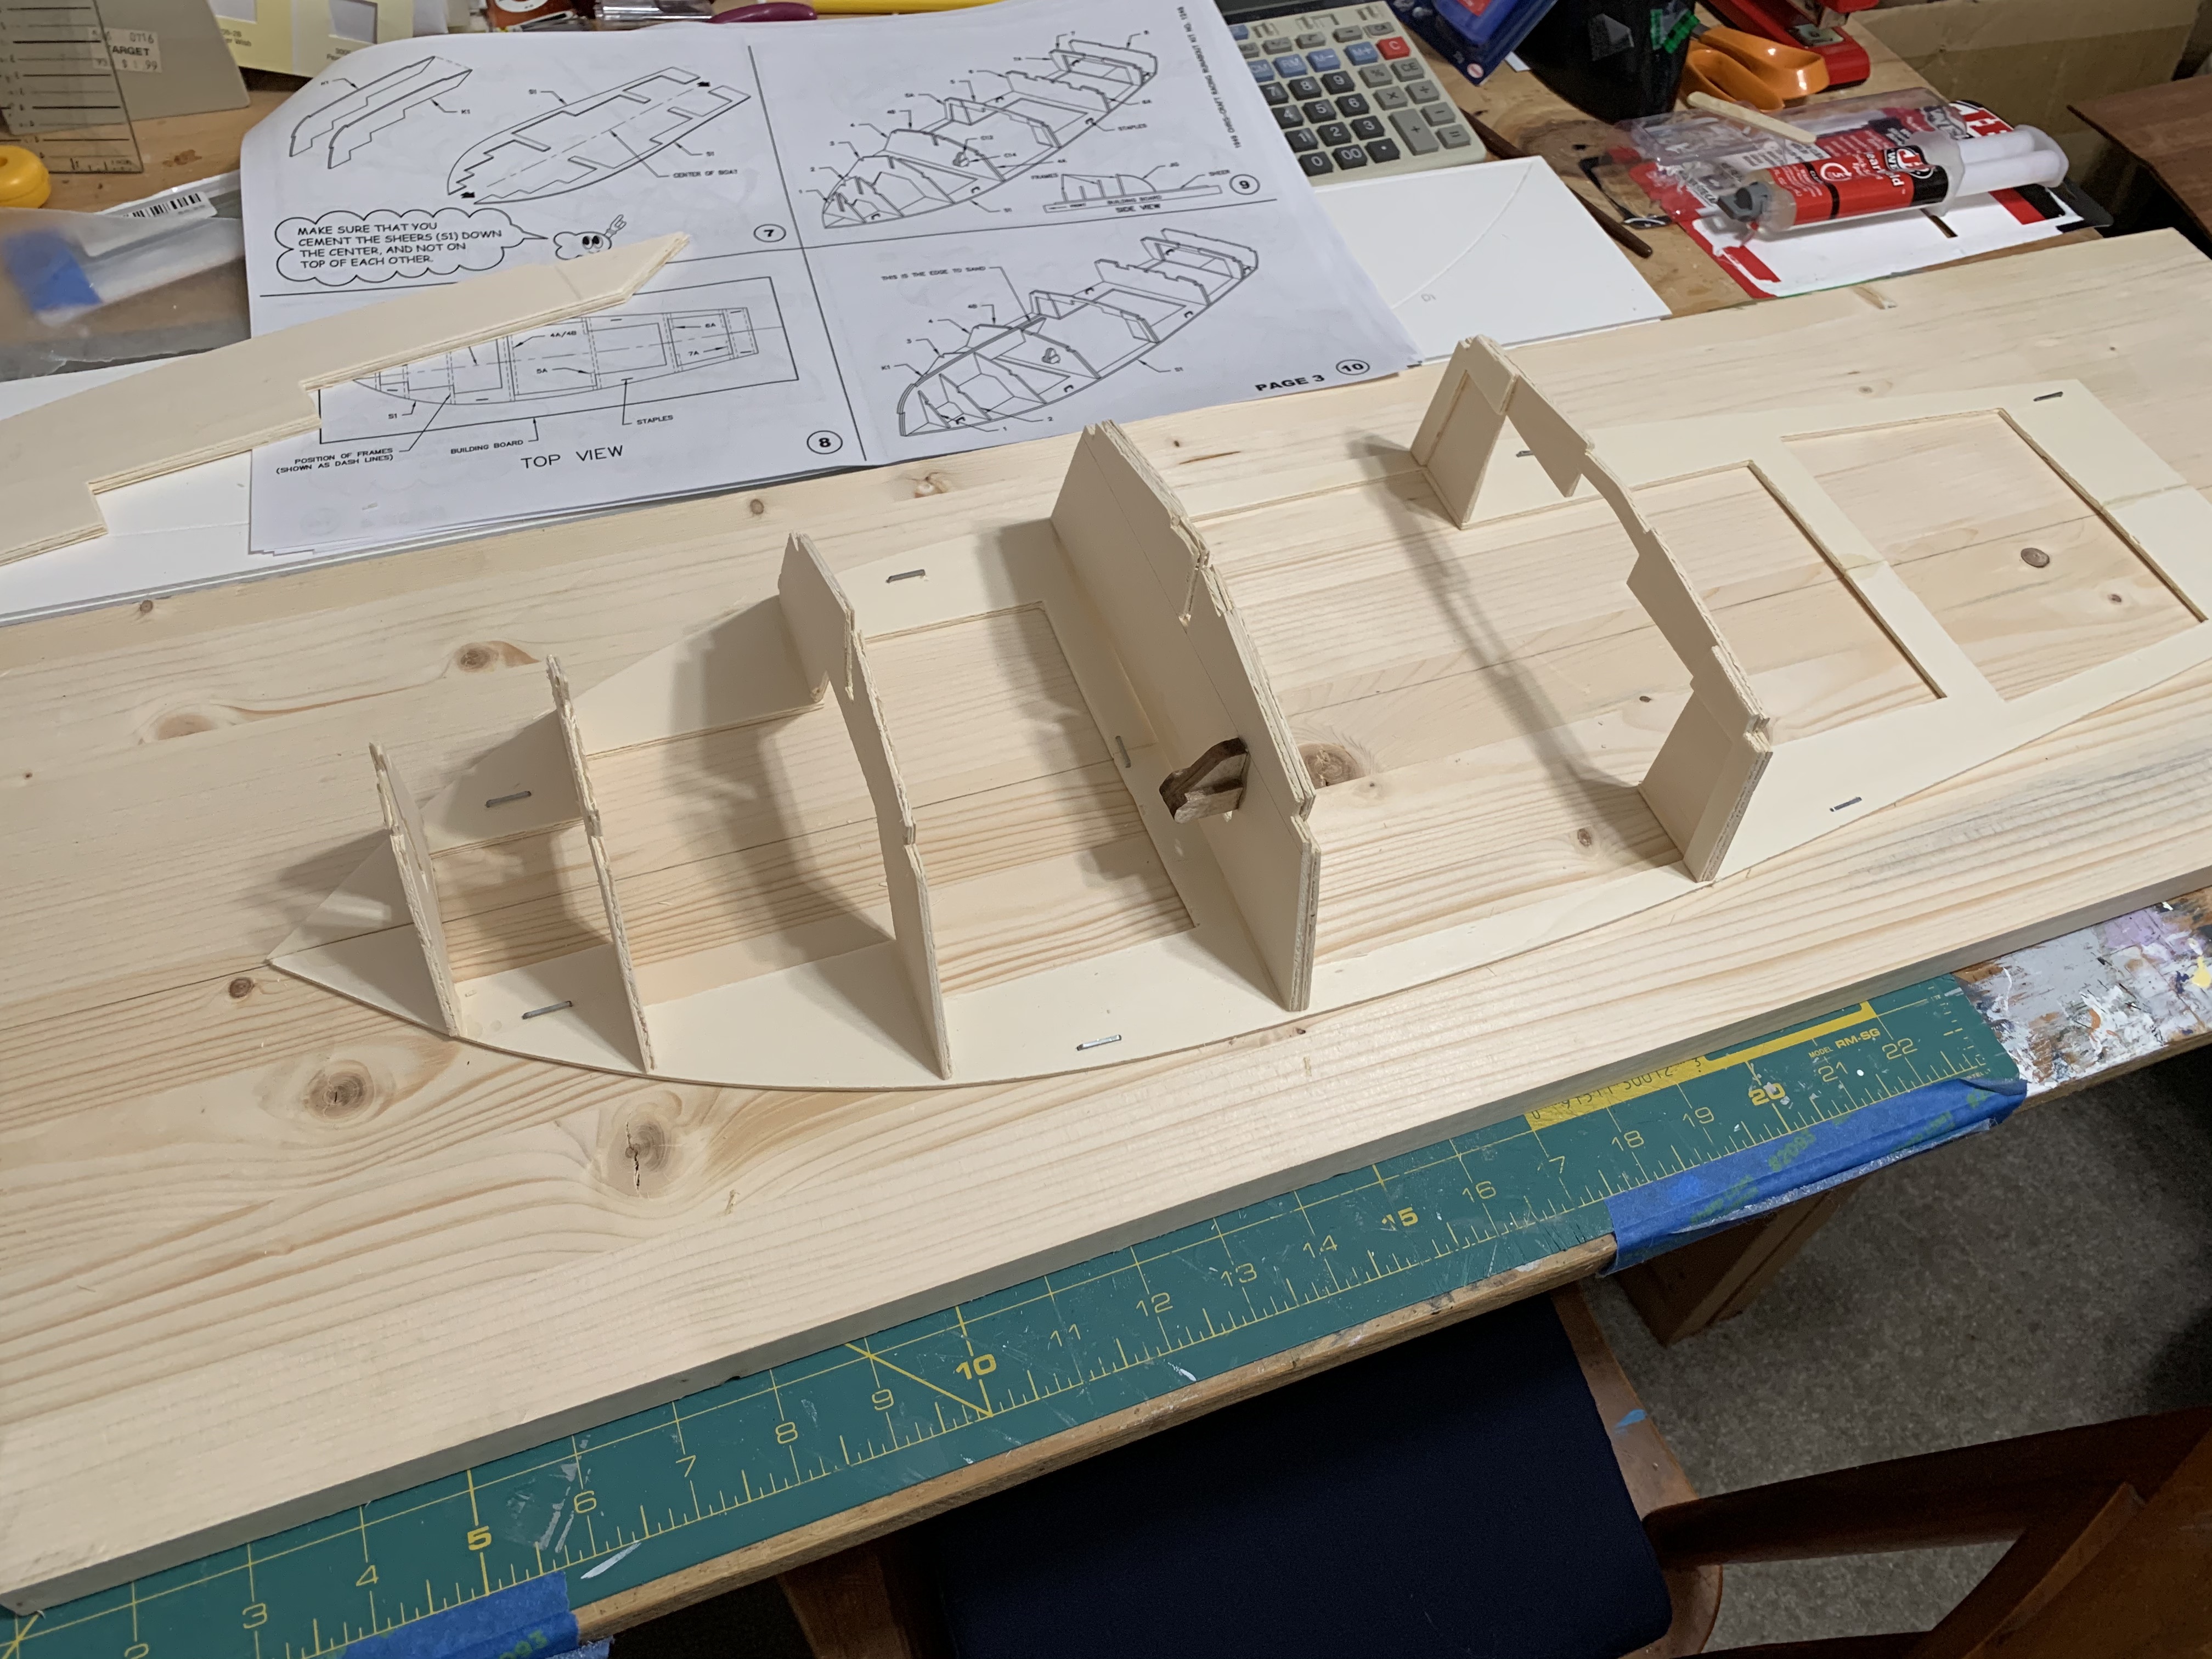
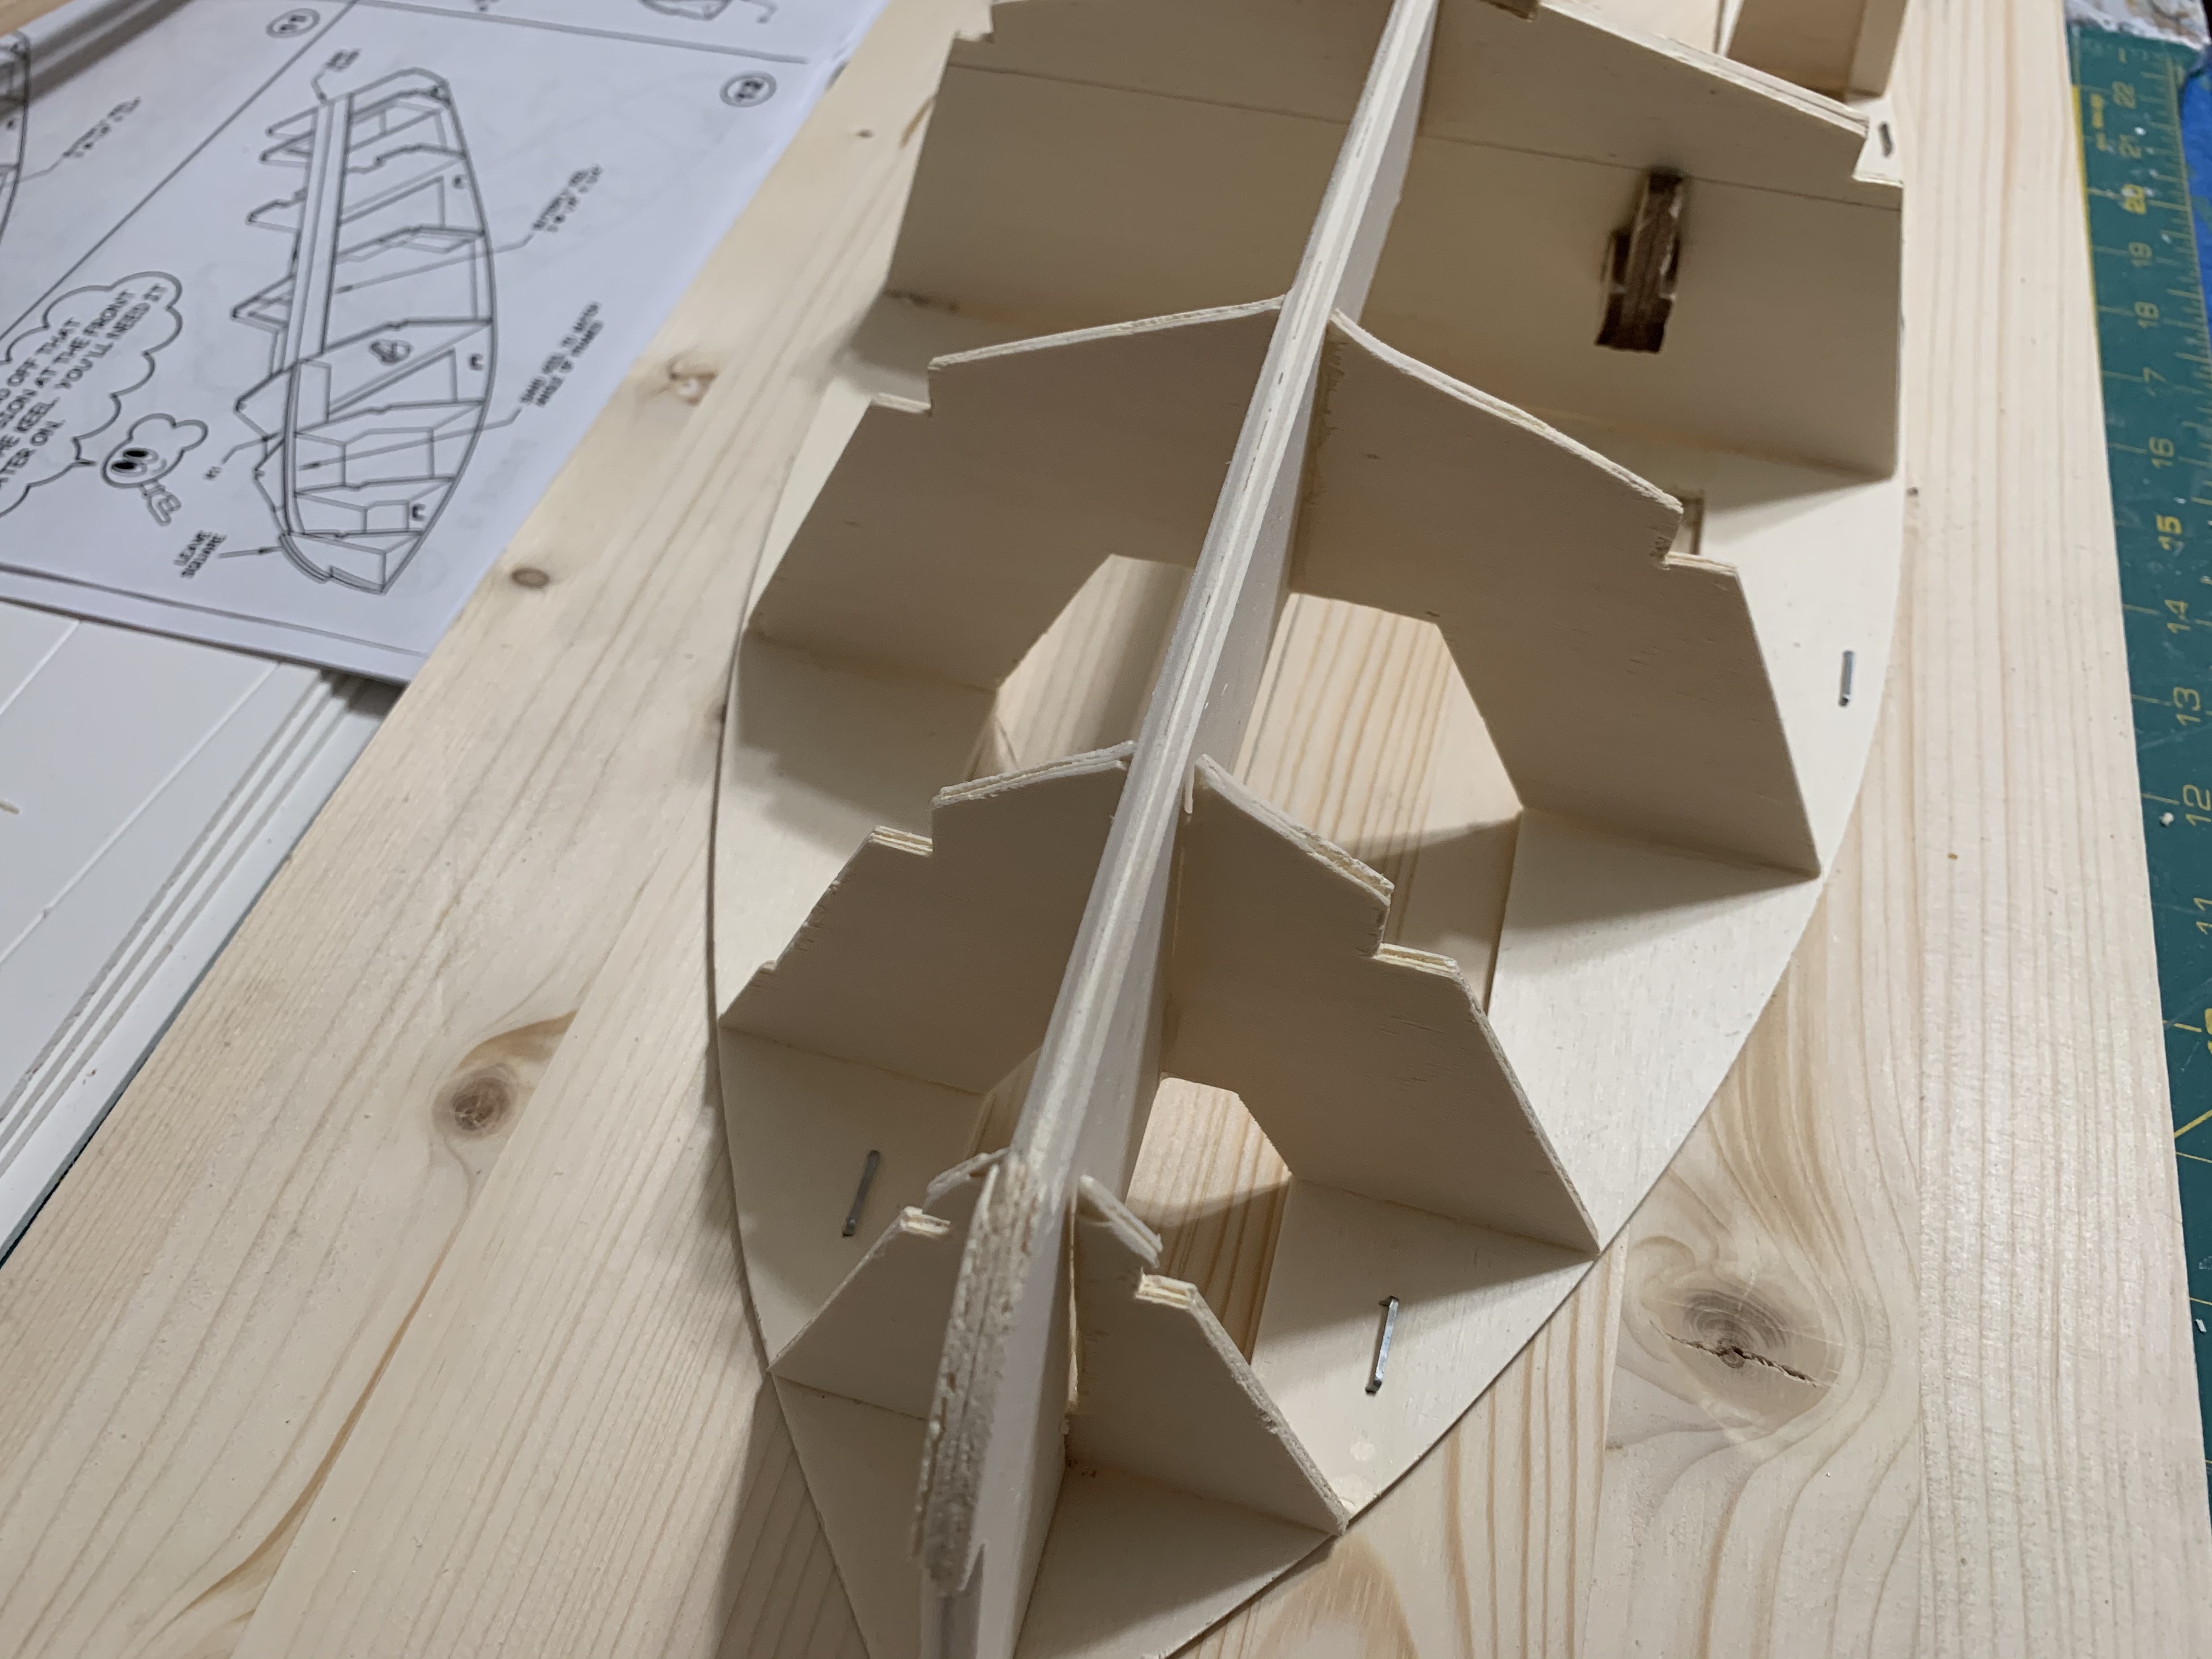
But it wasn’t until I had all eight hull frames attached that I actually got to the step of laying the keel, or in this case since I was building the boat upside down, dropping the keel in.
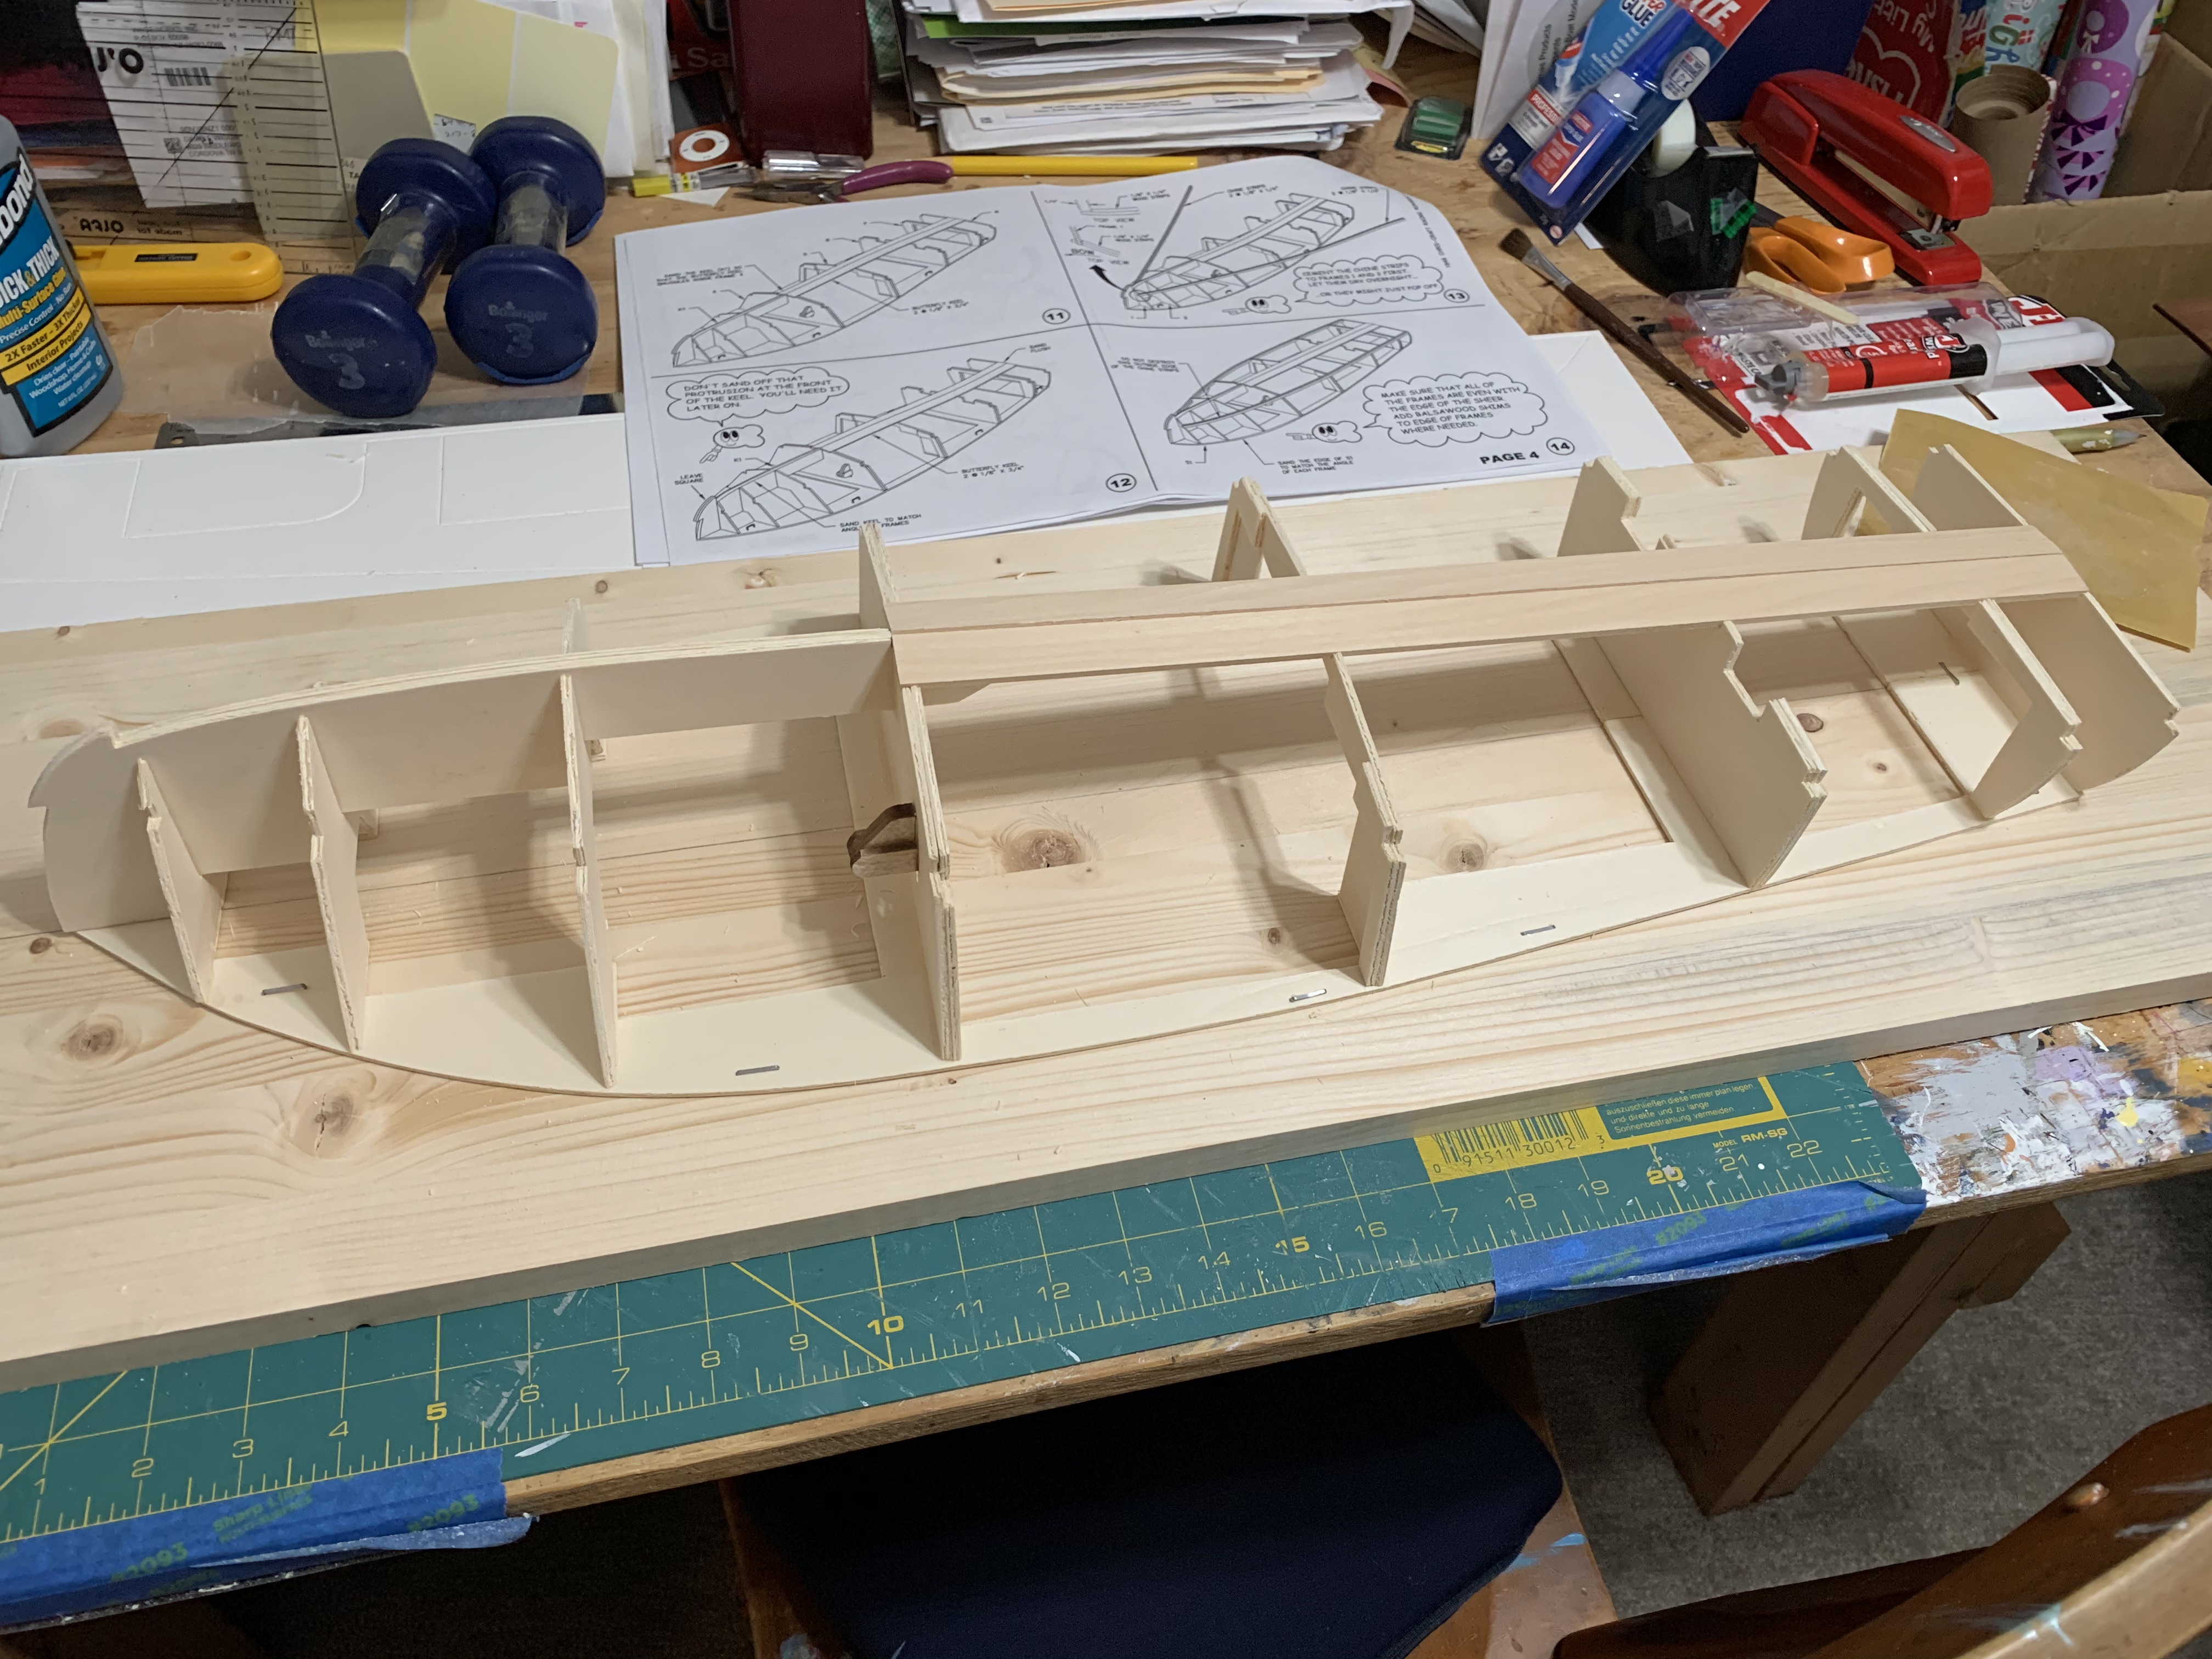
The keel was made from gluing four different pieces of wood together and in the front rose well above the frames with a particularly large protrusion at the bow. At first, I wondered why the front of the keel was so much taller than the hull frames but then looking ahead at the instructions, I found that I would be sanding it down to a knife edge. As reassurance, the instructions indicated I would be sanding more wood off at the bow and less at the point where the keel transitioned from a knife edge to a butterfly keel. Once I actually started to sand the front keel, I discovered that there wasn’t as much extra wood there as I thought since I had to sand the keel at an ever-sharper angle to match the ever-steeper frames at the bow (thus making an ever tighter inverted “V” as I moved towards the bow).

With the sanding complete (and the front protrusion still intact as per the instructions), the next step was to epoxy the chines to the front two frames.
The chine on each side was formed from two small bass wood strips and once fully attached to all eight frames would demarcate the transition from the bottom of the hull to the side of the hull.
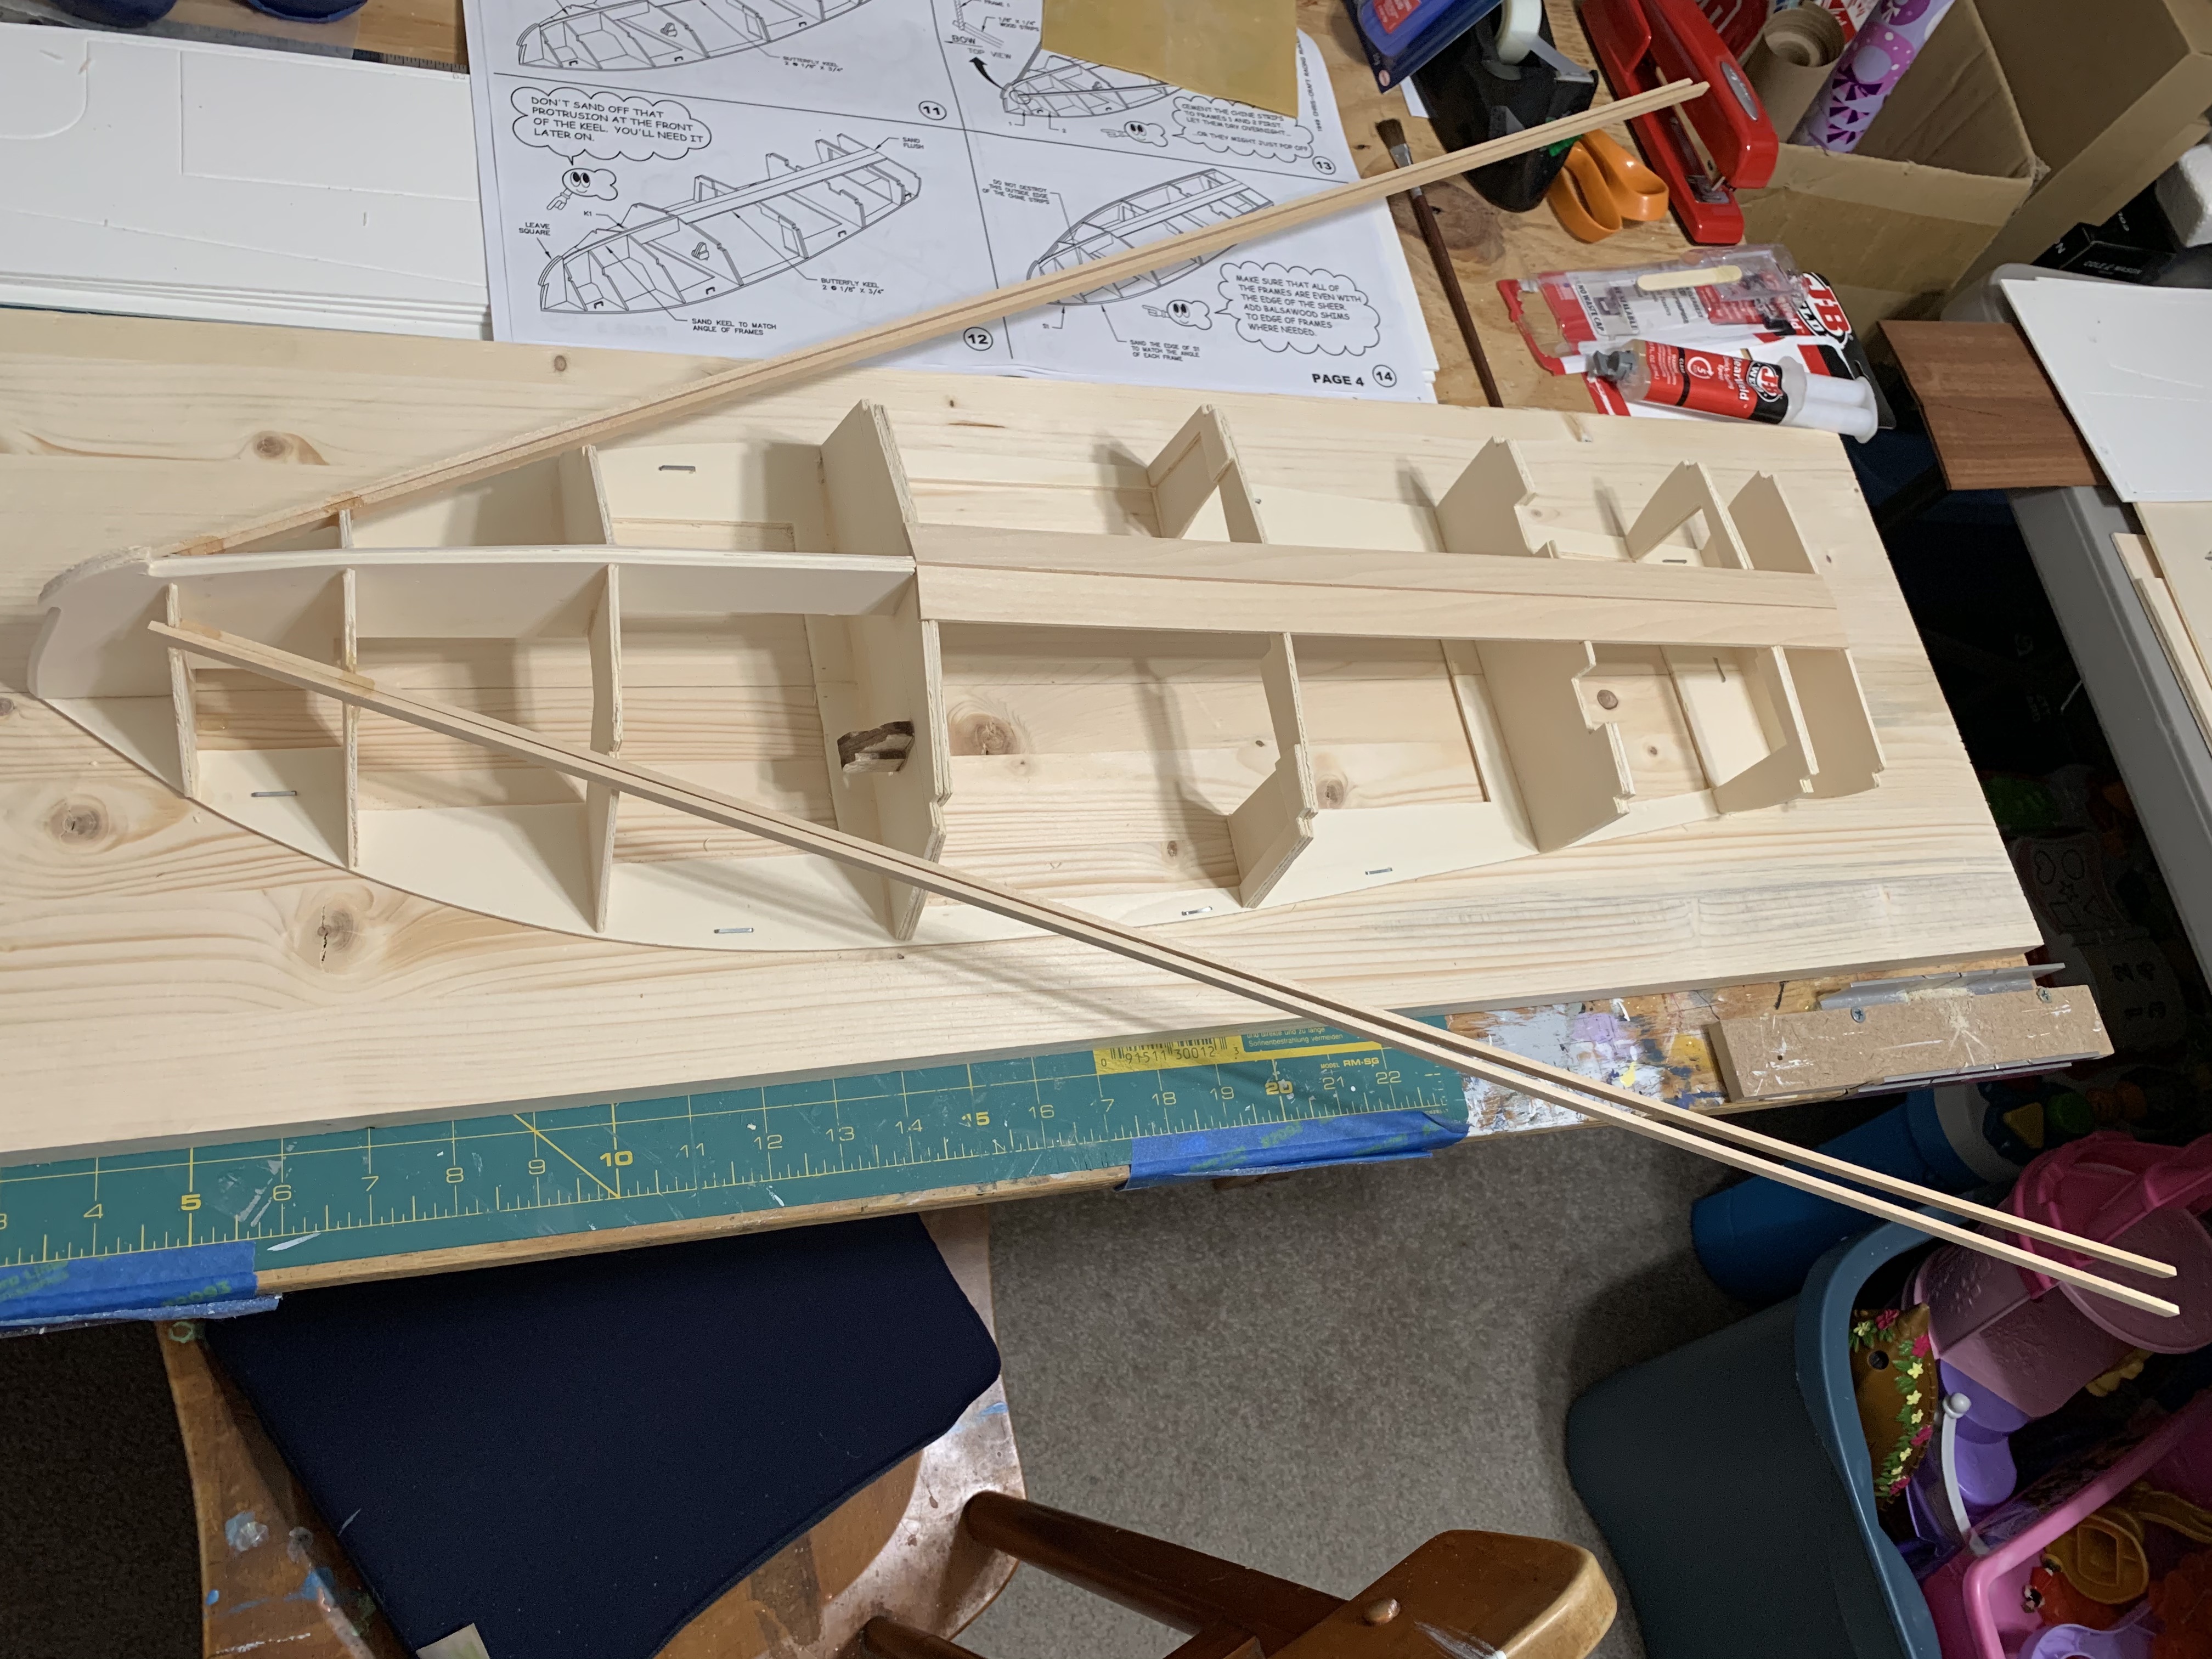
The natural tendency of these two strips of wood was to stick straight out so bending them and gluing them in place to the frames was working against this natural tendency. The instructions indicated that with all the right tools and materials, each chine could be attached to the remaining six hull frames in about five minutes. Not having one critical ingredient—the epoxy accelerator—which I could not find, I had to develop an alternative technique.
To put less stress on the epoxy while it set, I decided to use epoxy on just two frames at a time holding the chine in place with tape and a hand weight, aids that had come in handy while building the doll houses. The clothespins were needed to hold the two pieces of the chine together while that glue, which had been carefully placed between the two strips of wood, set as well.
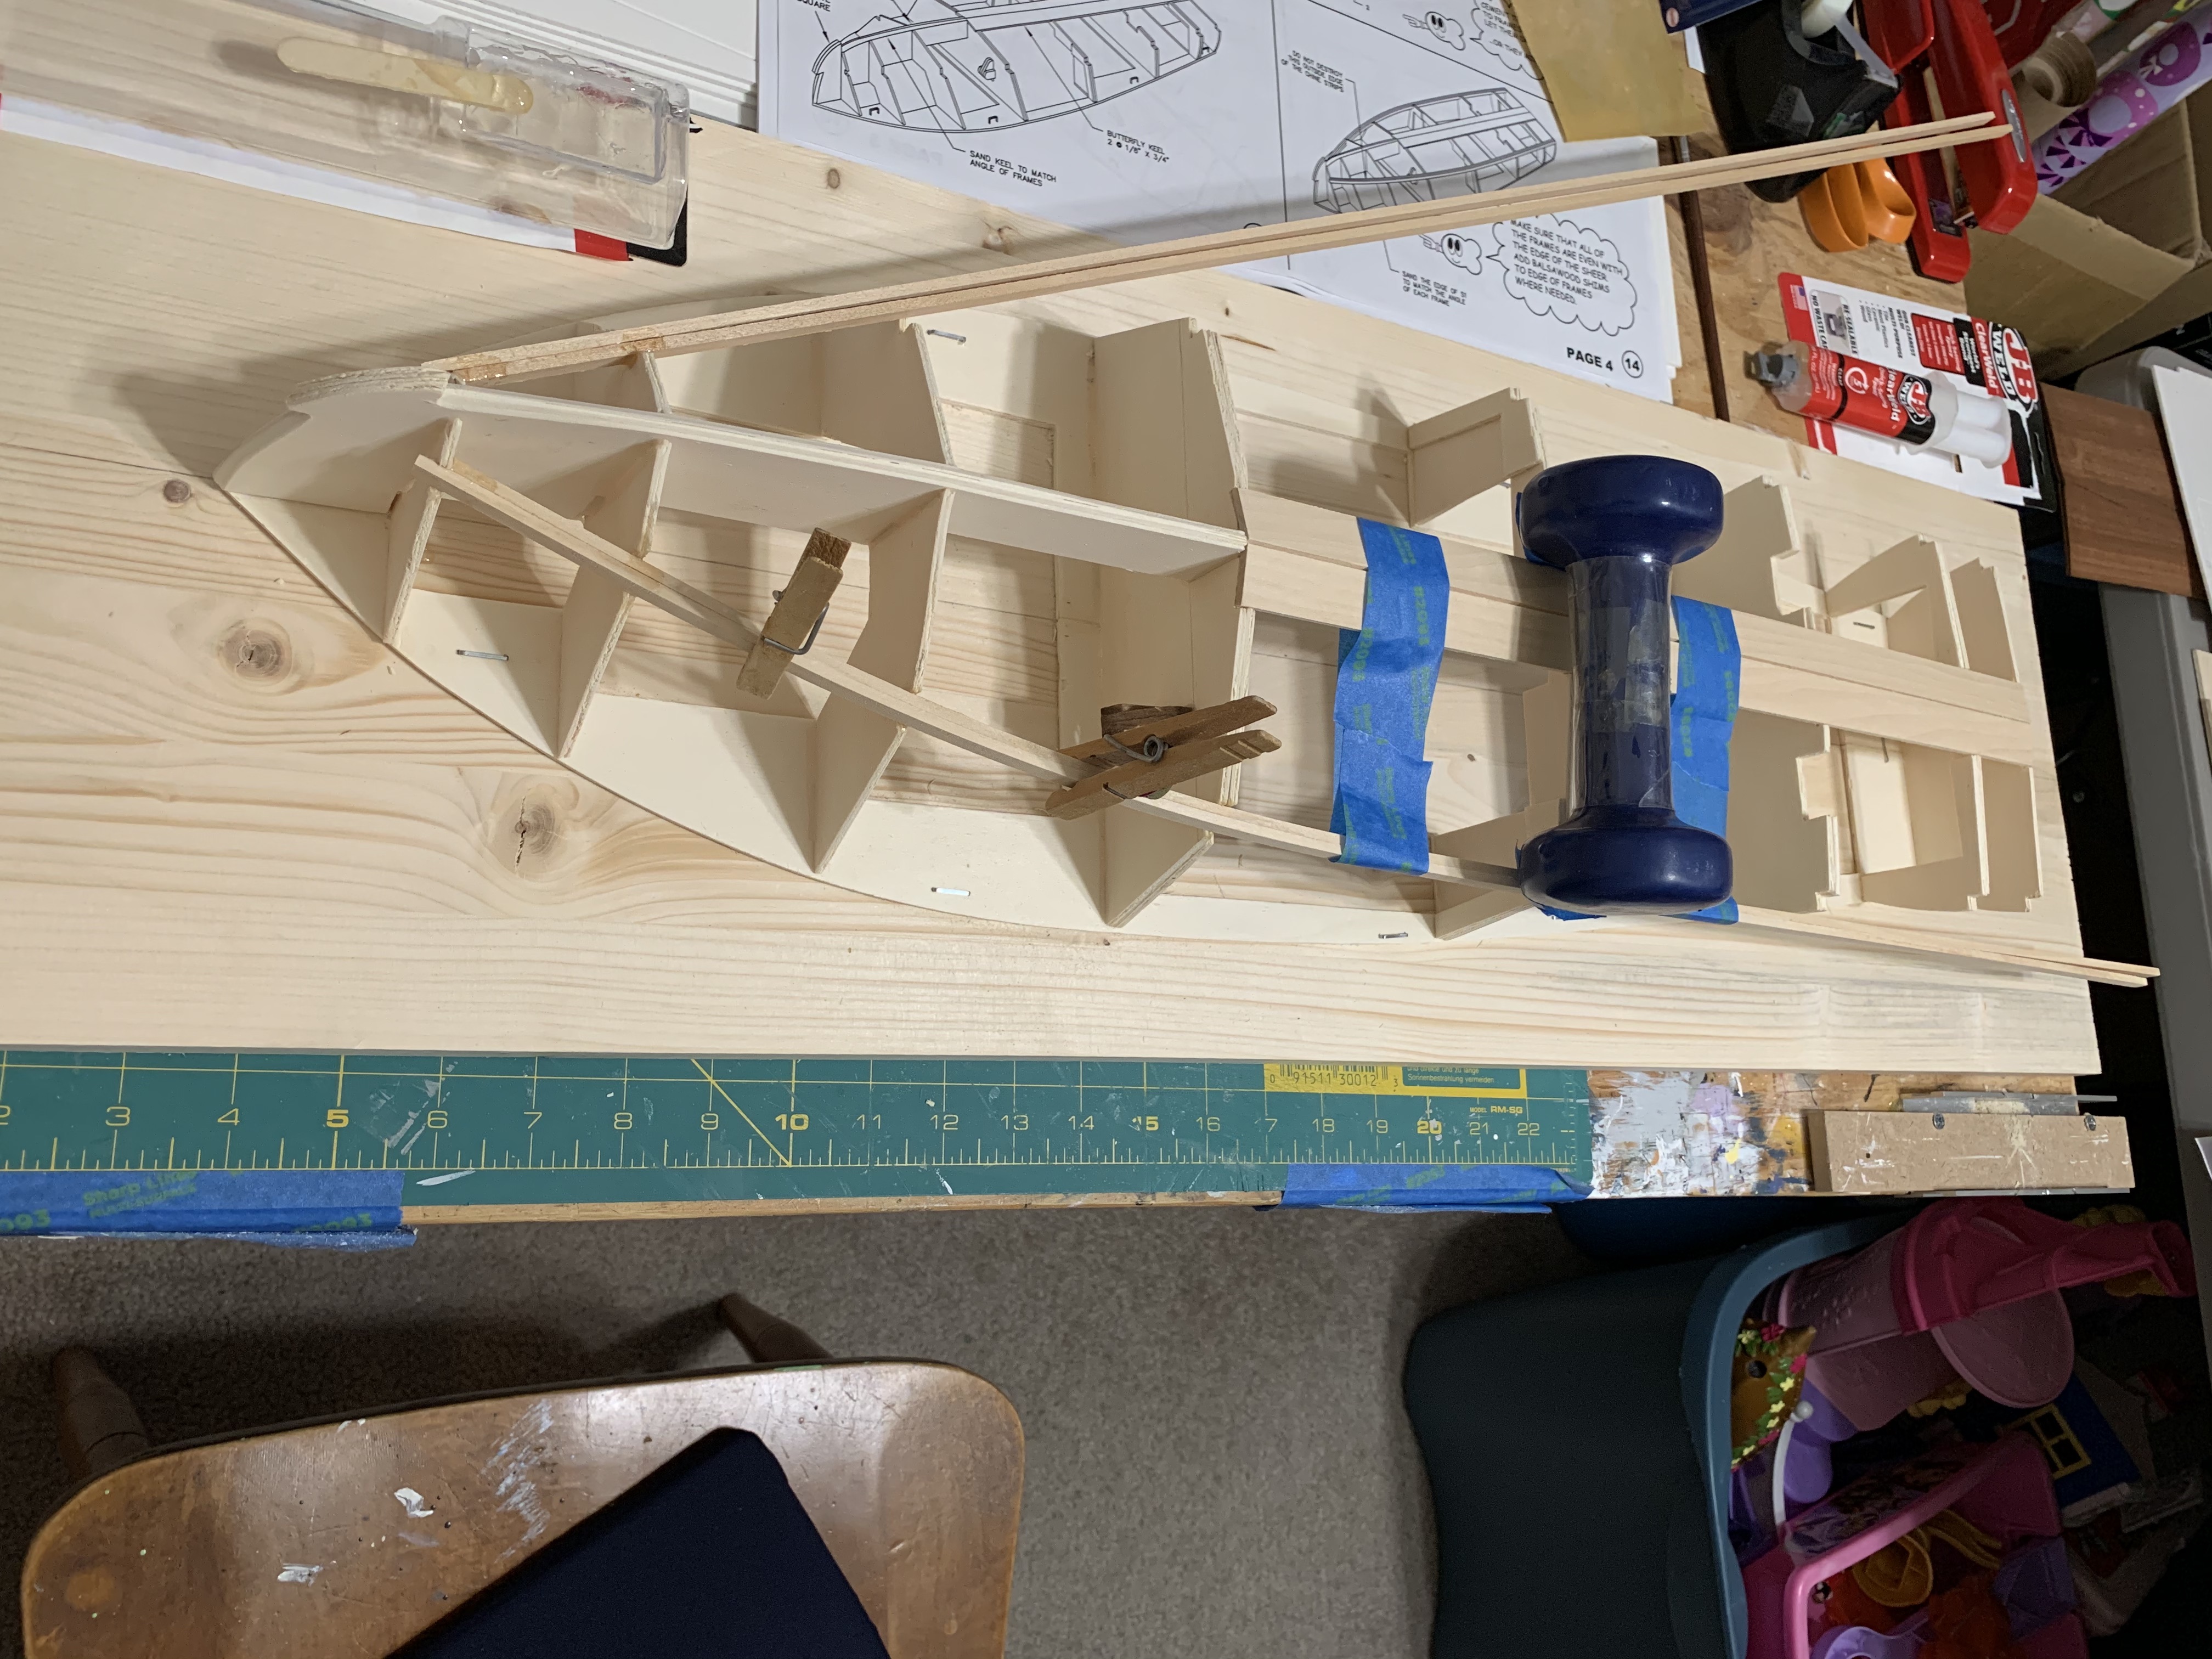
Unfortunately, the next day I discovered that sometime after adding the epoxy to the next two frames and taping the chine to them, the tape broke loose, and the weight fell off.
After this initial failure, I decided to bring out the “big guns.” I am not sure why I didn’t think of this first, but I figured I needed to securely clamp the chine to the frames while the epoxy set up. Four clamps and four clothespins seemed to be the right amount of “fire-power.”
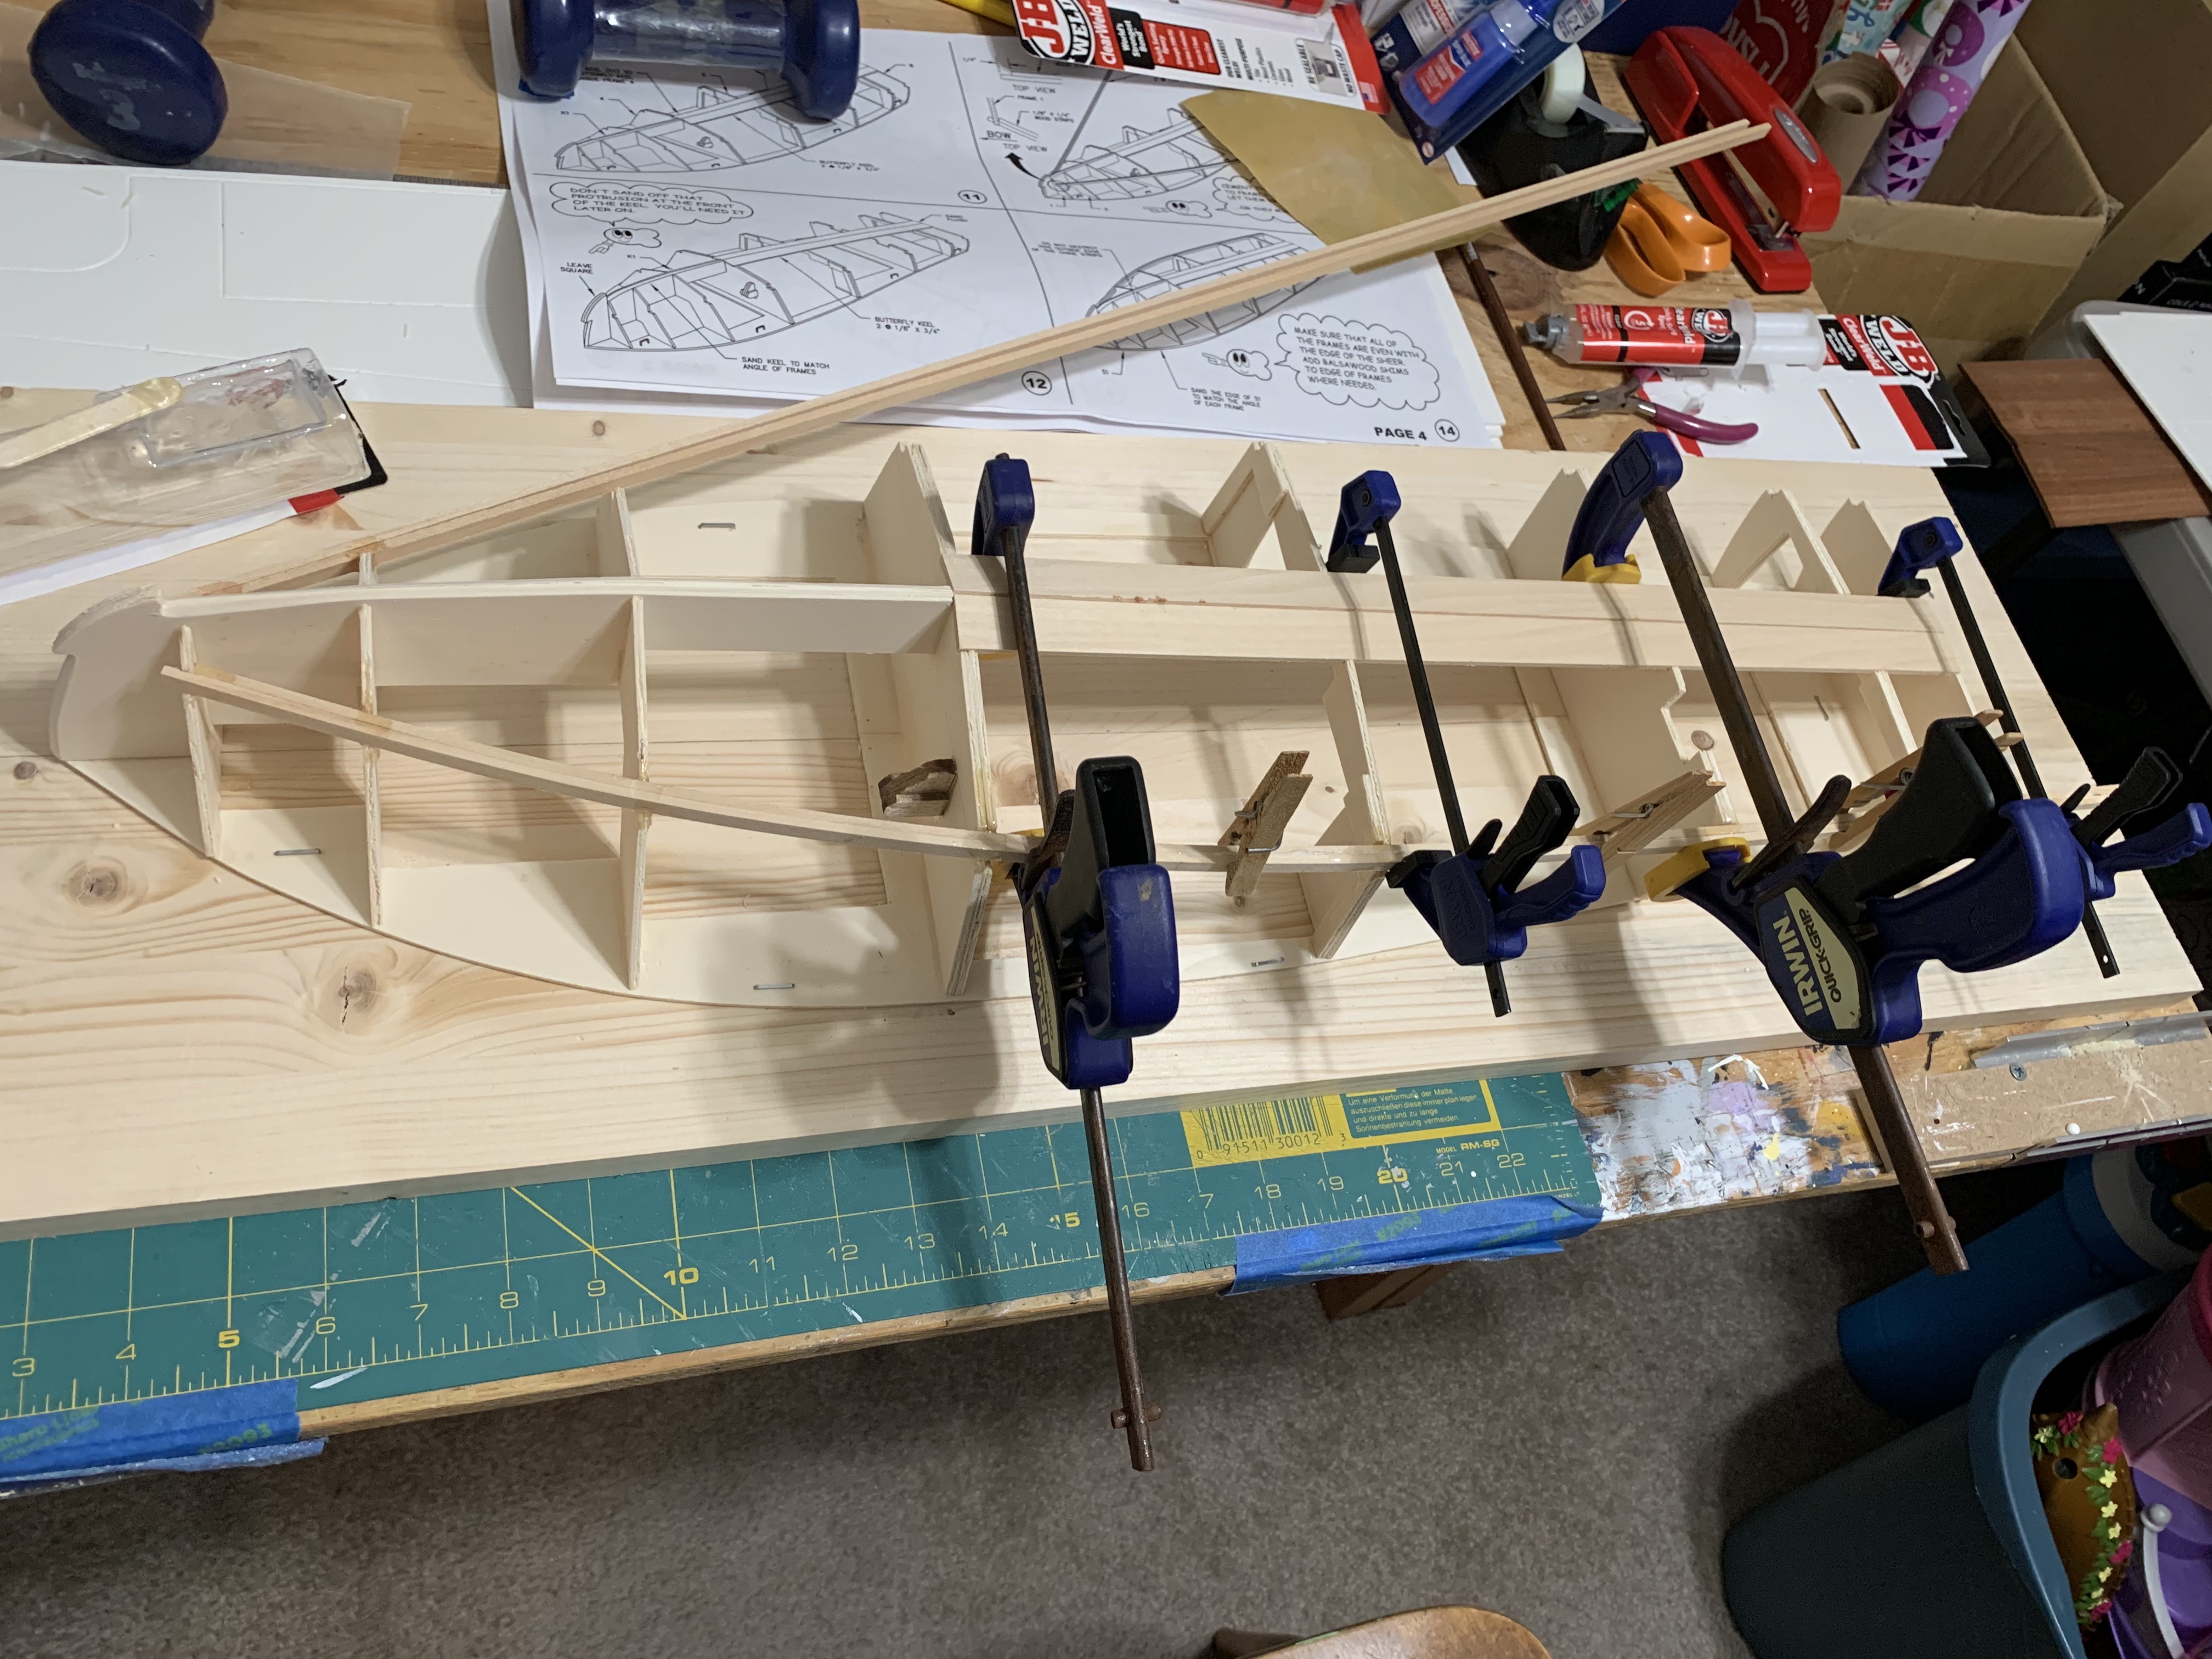
For added security, I decided to leave the clamps in place for at least two days to allow plenty of time for the epoxy to set up and the chine to “learn” its new curved shape. Turns out due to unexpected company, it actually remained clamped for six days. And when I did remove the clamps, the chine seemed quite secure.
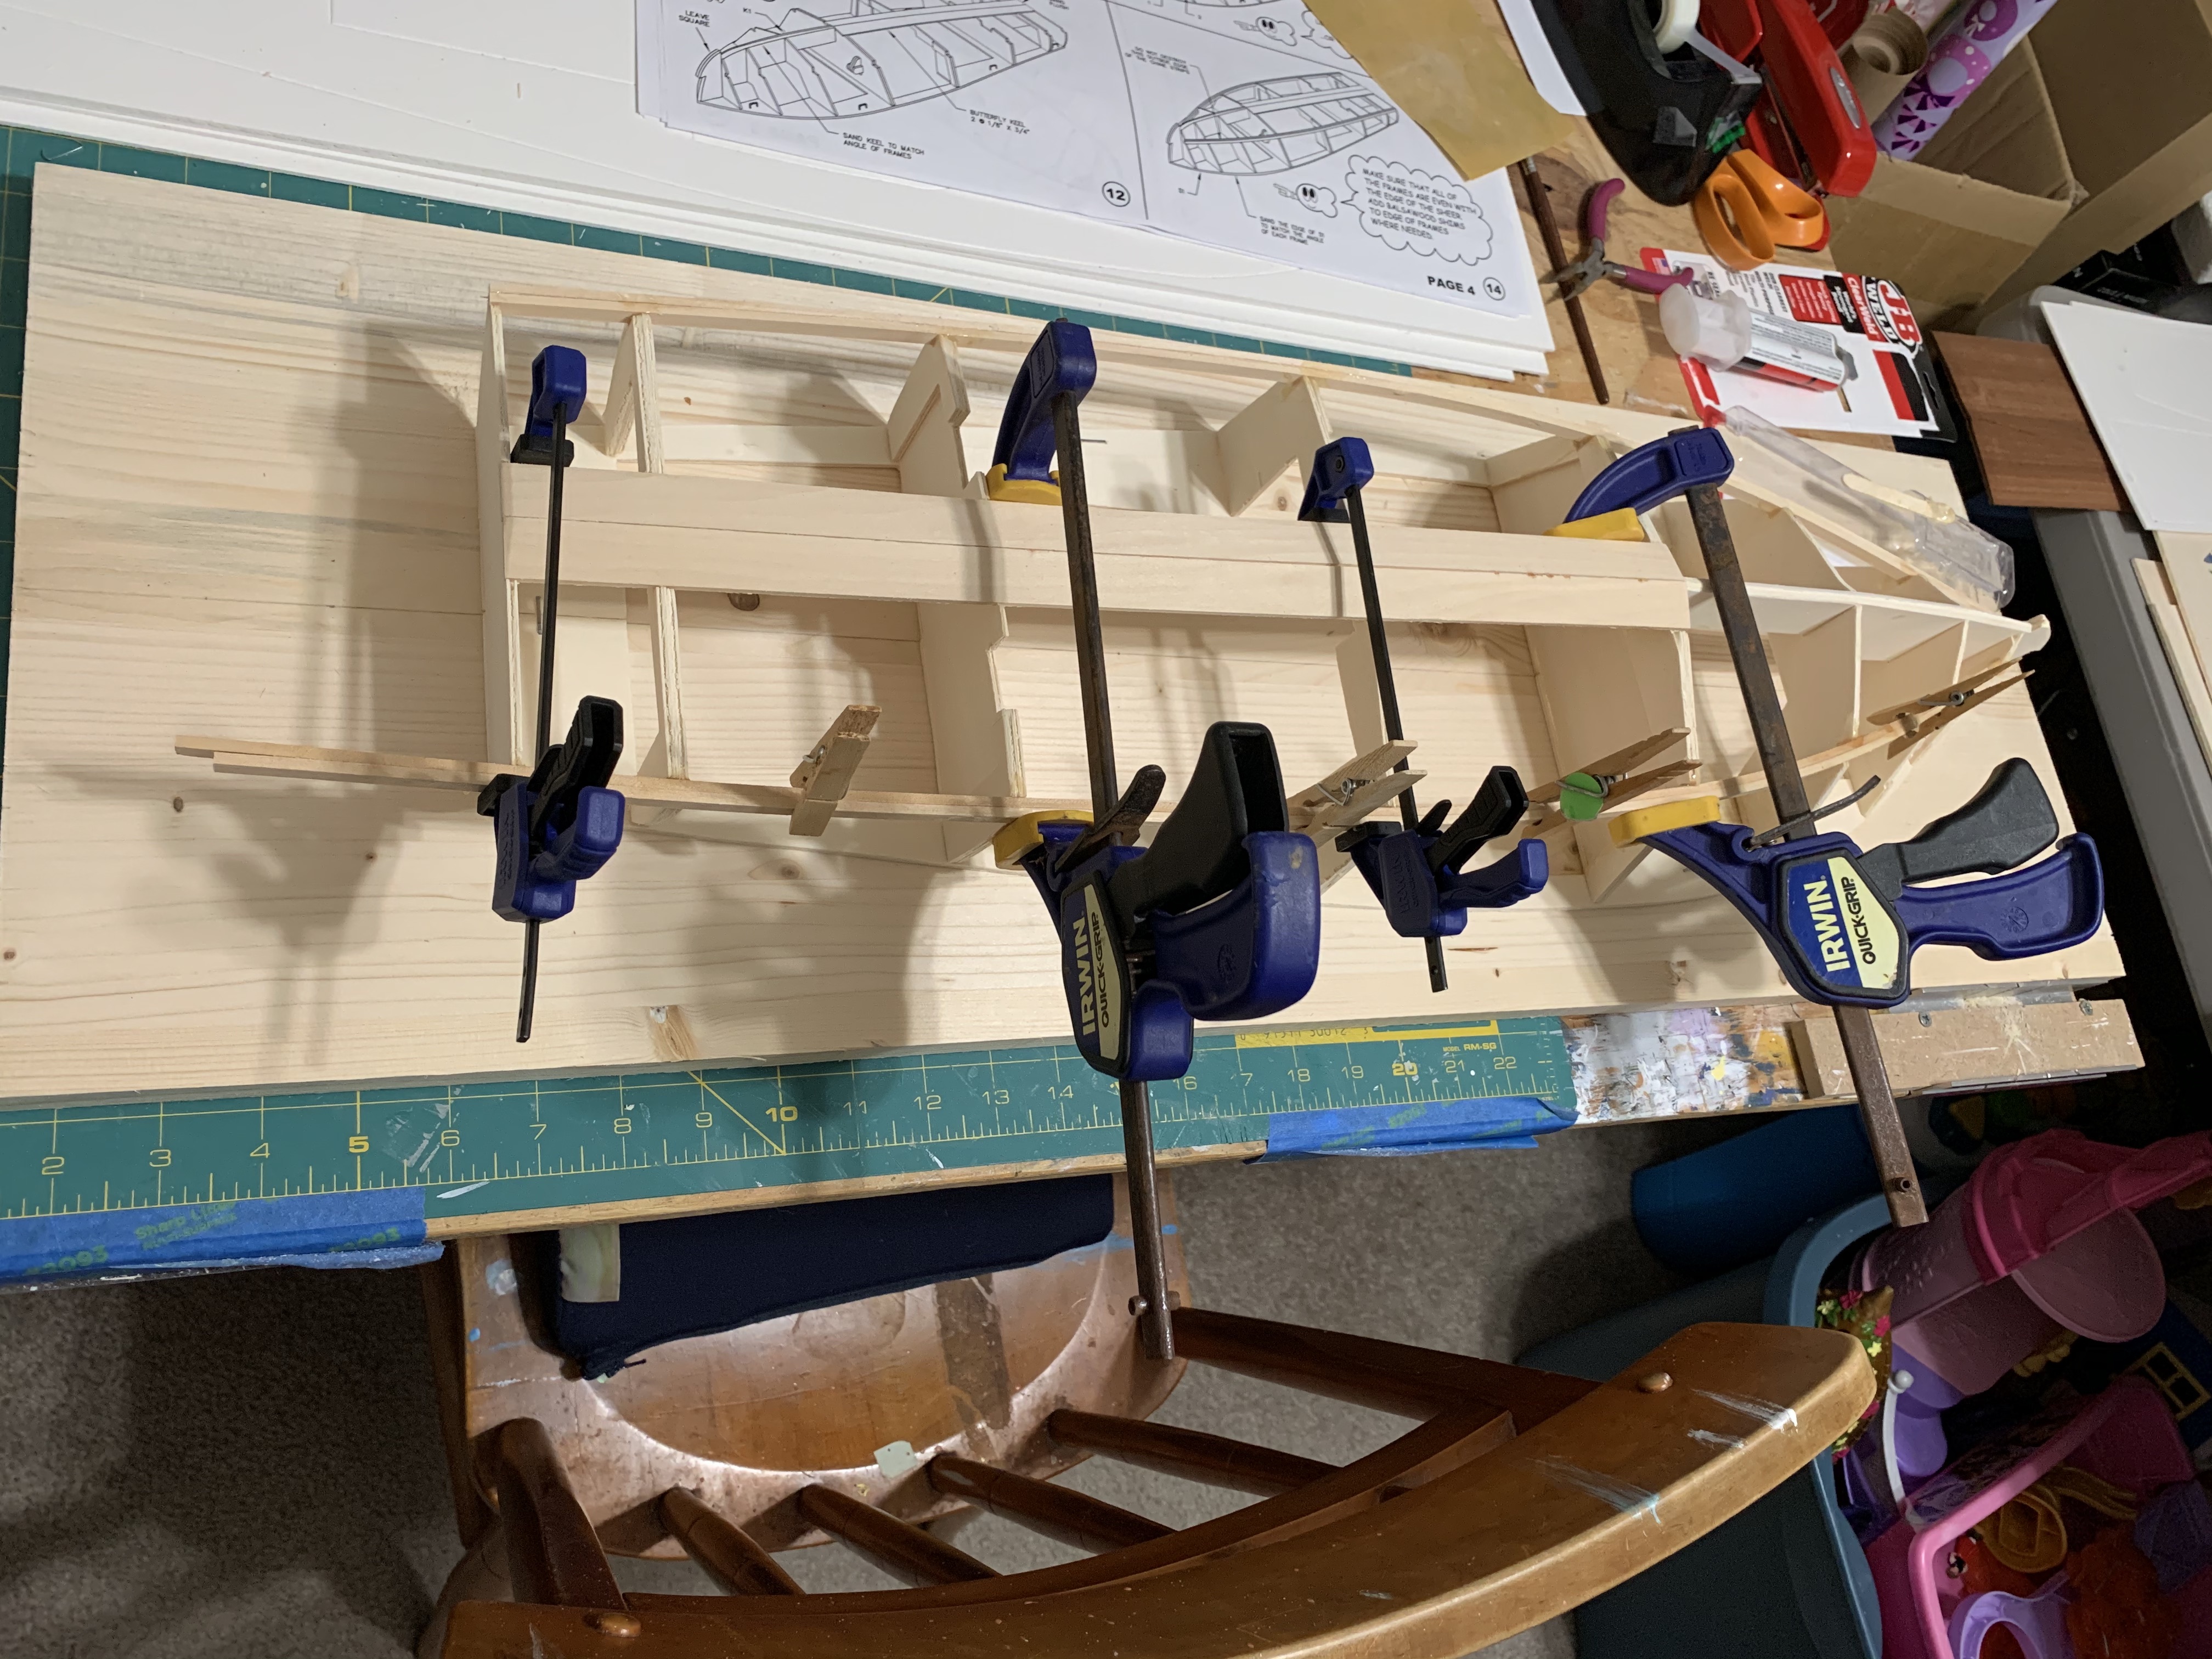
So, for the other side, I decided to repeat the same process.
To be continued…
Categories

One thought on “A Classic Boat Model – Laying Down the Keel” Leave a comment ›