
A Miniature Garage Loft – Phase 4
Continued from: A Miniature Garage Loft – Phase 3
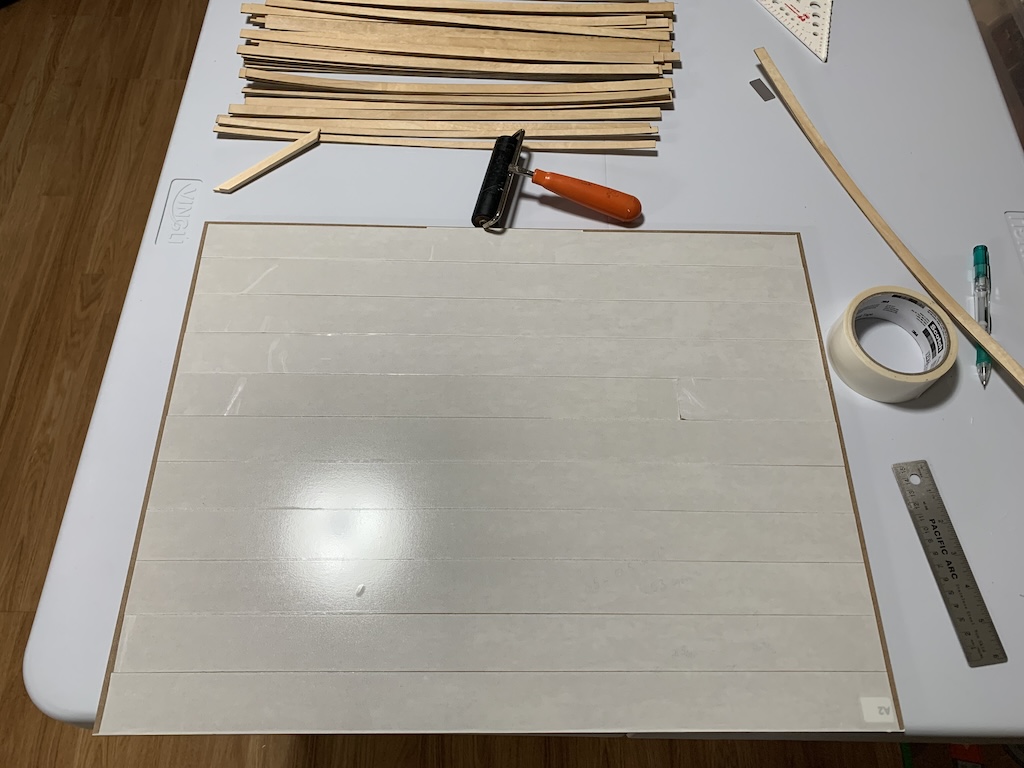
With the carpet tape down on the loft floor, I was ready to cut the 1/2-inch-wide birch strips into varying lengths of planks. But how long should they be? Looking back at the mahogany flooring I had installed in my Craftsman style doll house, I found that I had cut these strips into 2-, 3-, 4-, and 5-inch planks to give me a number of combinations to complete a row and avoid plank end joints lining up directly side-by-side.
I started out by cutting a few of each length plank and then beginning at the back of the loft, I began to lay down the first row, carefully making sure that the planks were aligned perfectly with the back edge of the loft floor.
With each strip of carpet tape being about 1.5” wide, I proceeded to lay down the next two rows of planks to fully cover the exposed carpet tape. In doing so, I found it was extremely critical to make sure each new plank was as tight against the previous row as possible. I discovered this when after testing a fourth row for fit with the third row, there was an unsightly gap between some of the planks. So, I had to go back and remove a few from the first three rows and place them back down more tightly.
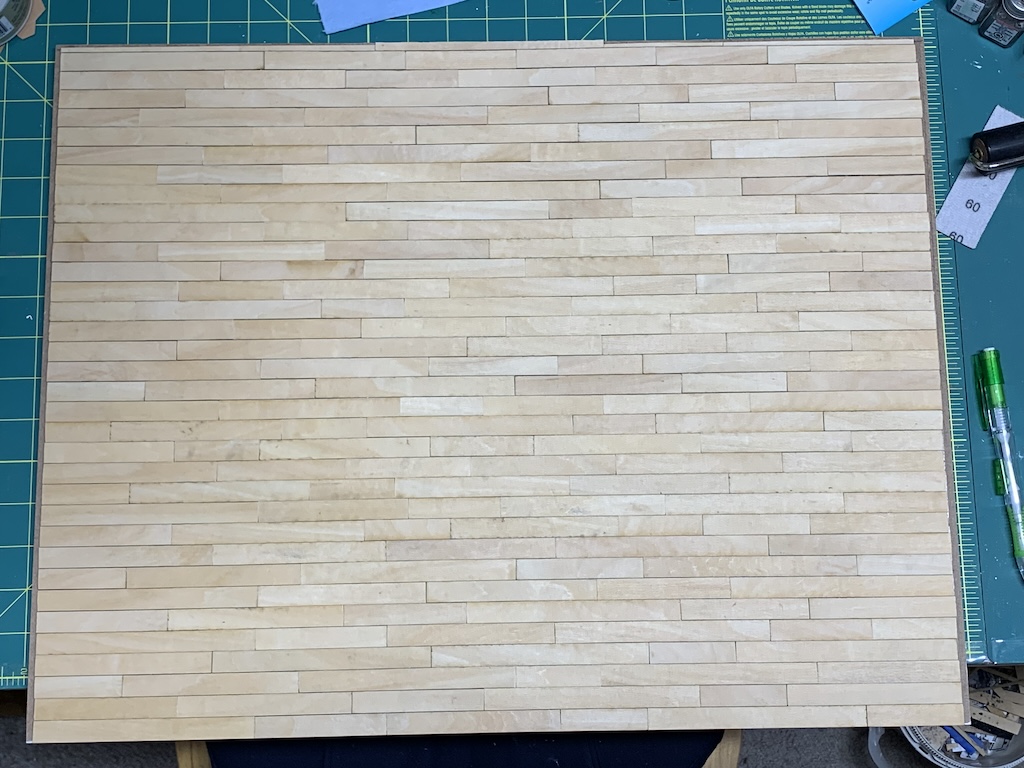
Again, to ensure I did not have end joints lining up too closely, I progressively figured out what plank length I needed, cutting that one, and then continuing down the row from left to right. I cut planks for a total of three rows and then pulled off the carpet tape liner and carefully laid down the new planks. After attaching six rows, I thought the flooring was looking nicely.

If you look closely, there are still a few small gaps between some of the planks. If I did this for a living, I might be able to achieve perfection with more experience. But I figured when I sanded the floor prior to applying polyurethane, some of the saw dust would possibly settle into these gaps rendering them much less noticeable.
I continued to progress across the floor, three rows of planks at a time and when I was halfway across, I again had an issue with some gaps between the rows. A few of these I was able to pull back up and sand slightly to reduce the gap but as I got closer to the front of the loft, I again had issues with gaps between rows. I figured if sanding did not hide some of the gaps, I could reason that strong rains had seeped through the double doors and warped the wood giving it a lived-in look. Once I laid down the final row, about one fourth of a plank, I was pleased to be finished with this tedious step and hopeful the next steps would improve its looks.
I sanded the floor with 400-, 800- and 1200-grit sandpaper and while the sawdust did fill the gaps somewhat, it just did not completely fill them. I then proceeded to go ahead and apply three coats of semi-gloss polyurethane sanding with 2000-grit sandpaper between the first and second coats. After the third coat dried, I could see unsightly brush streaks. Maybe because this was the first time I had ever worked with such a light-colored wood or maybe I had applied too much polyurethane. So, I repeated the three-step sanding process and then applied a fourth coat of polyurethane lightly stroking my brush across the wood to ensure an even application.
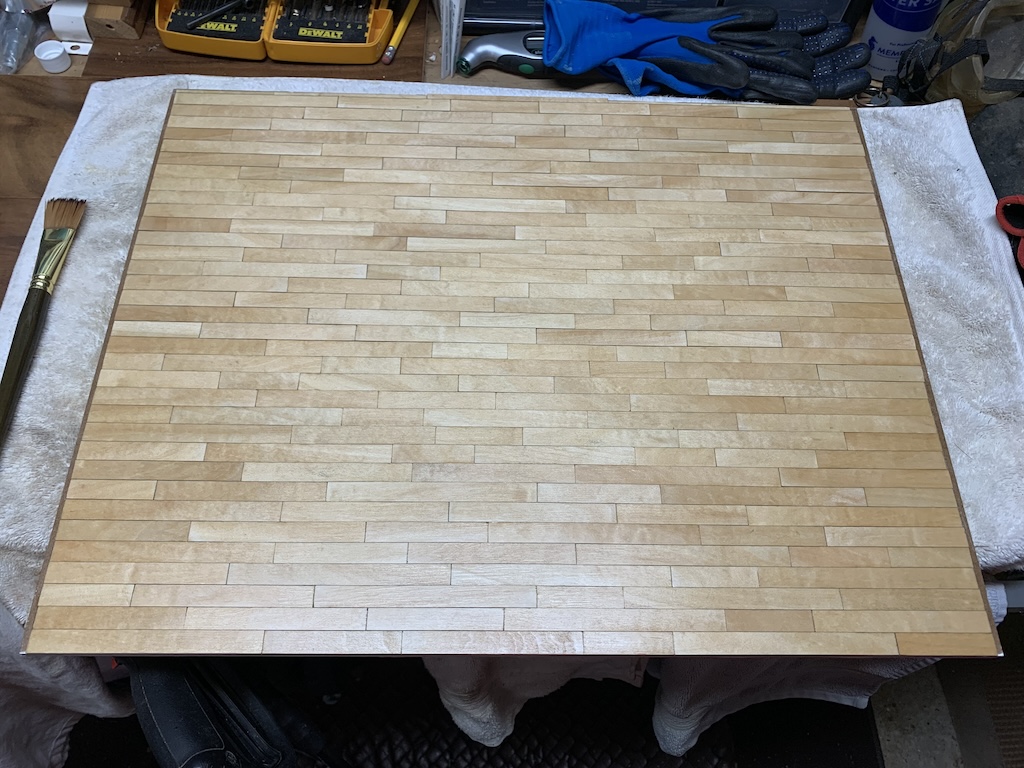
After it dried, I was very pleased with this final smooth finish. While I still had some visible gaps, overall, I thought the floor looked great. If anyone ever noticed the gaps, I would just go with that rainstorm story to explain some of the gaps between rows. And besides, the gaps gave the floor a more “lived-in” look.
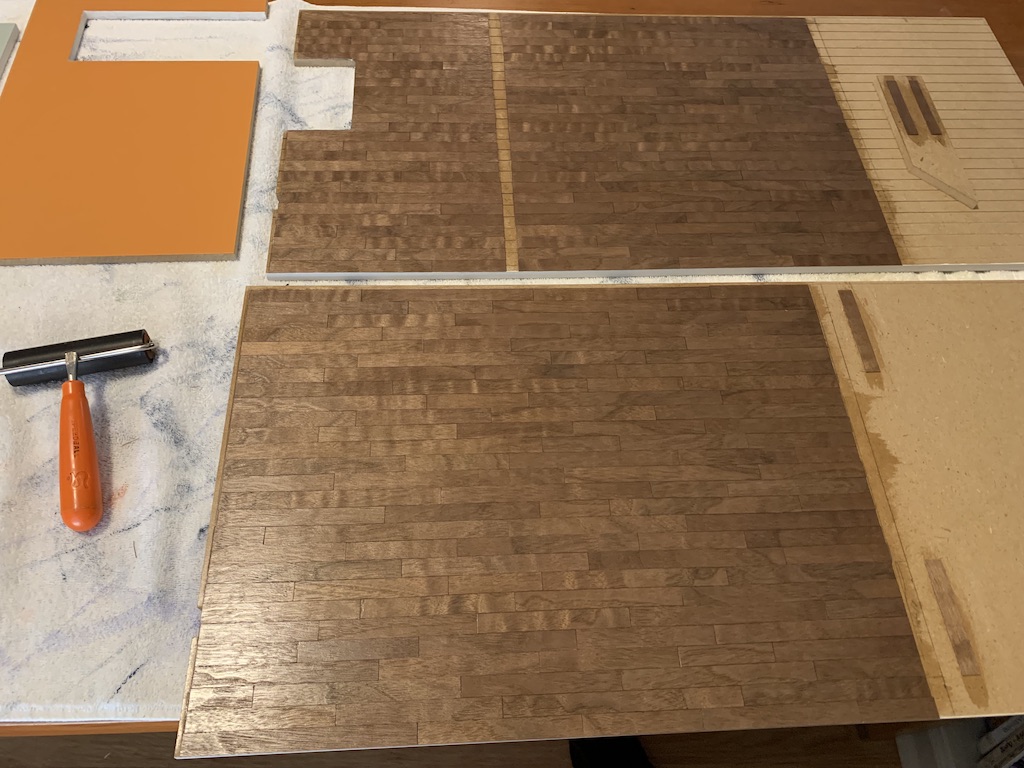
With the loft floor finished, I next needed to turn my attention to the base upon which the entire garage loft will be glued. This large piece of MDF will serve as the garage floor and the exterior ground around the garage. I painted the driveway and the walkway with a cement-colored paint. And where I planned to install my “artificial” grass, the same green fleece fabric I used when landscaping my Craftsman style doll house, I painted the base edges green.

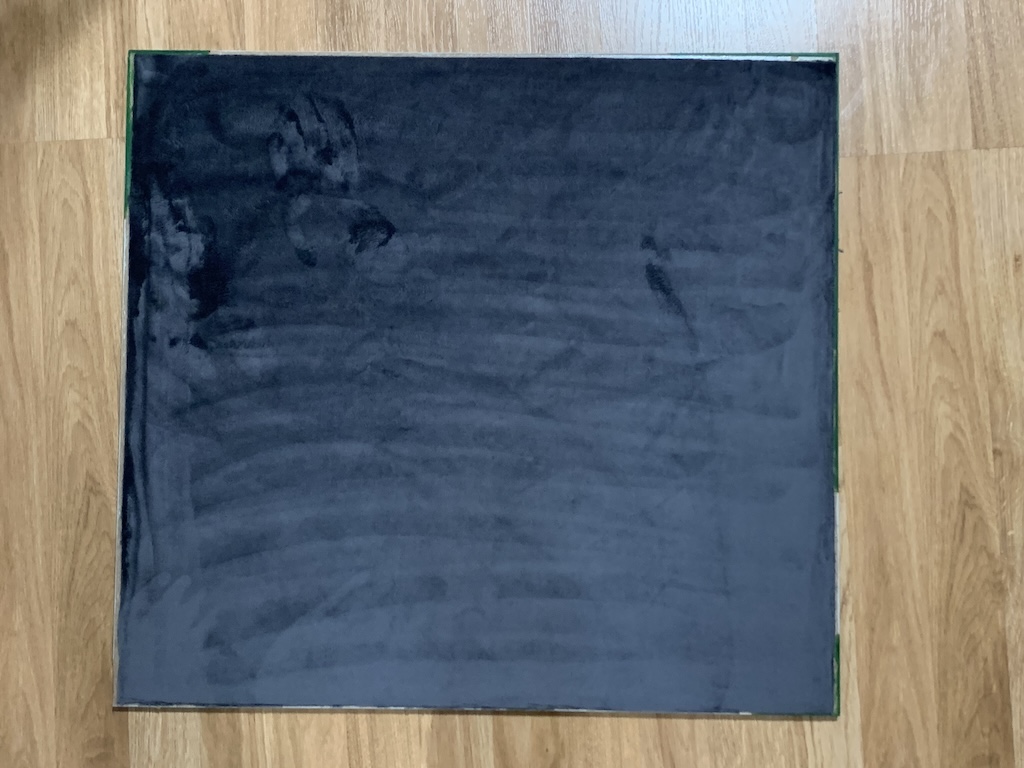
Also, since this kit does not include a foundation under which I have used to hide wheels for rotating the entire house, I needed to come up with another solution. My concern was if I turned the base to reveal the back of the doll house, the bottom of the MDF might scratch whatever table or desk it was sitting on. So, to provide a smooth surface, I attached the same grey velour fabric that I had used as “carpeting” in the doll house for my granddaughter who lives in California (you never know when something like that will come in handy one day).
For the garage floor, I decided something other than just painted concrete would look nice. One of the weekly miniature models e-mails I get highlights plastic models that consumers have purchased from that model store, all painted and assembled. The ones I particularly enjoy seeing are the ones where a completed car model is displayed in a miniature garage. The garage floor is typically covered with black and white tiles that simulates a checkered racing victory flag. That I decided was what I wanted for my garage floor.
While originally thinking my sister could cut me precisely sized squares with her Cricut cutter, given the trouble she was having with her cutter, I knew I needed to come up with an alternative solution. I first tried to find contact paper with the checkered pattern of the right size (a common size of these garage floor tiles is 12 inches which in my scale would be 1-inch squares) but everything I found, the squares were either way too big or way too small. Wandering the aisles of a hobby store I frequent, I came across a flat black poster board. Since the back of it was white, I would not have to buy a separate white one as well.
I first cut sections of the poster board and then drew 1-inch lines on the white side. Then using a 1-inch-wide piece of basswood, I cut 1-inch strips and then cut along the previously drawn pencil lines to create my 1-inch squares. I made a test pattern on my worksurface, and it seemed to look pretty good.
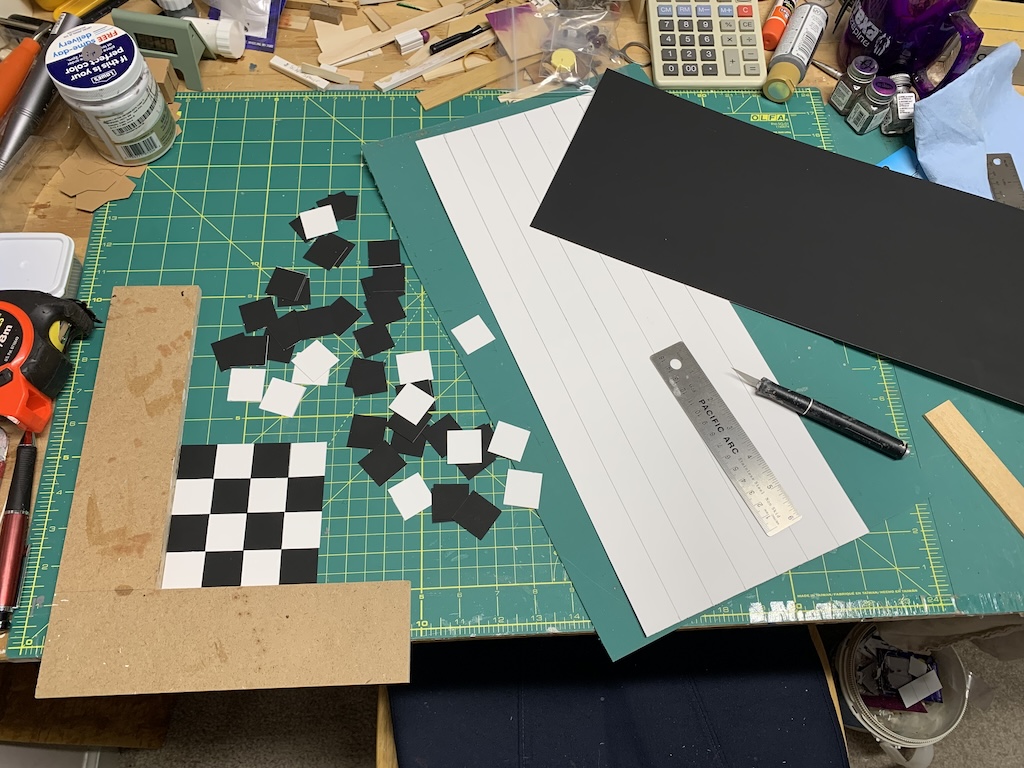
To prepare the garage floor, I first painted it black to hide any imprecision of my manual cutting and then laid down carpet tape. I measured the size of the garage floor and found it to be 353 square inches. Which means, I would need to manually cut at least 353 squares.
After cutting about 250, I decided to see how it was going to look before cutting more and so laid down two rows of 21 squares.
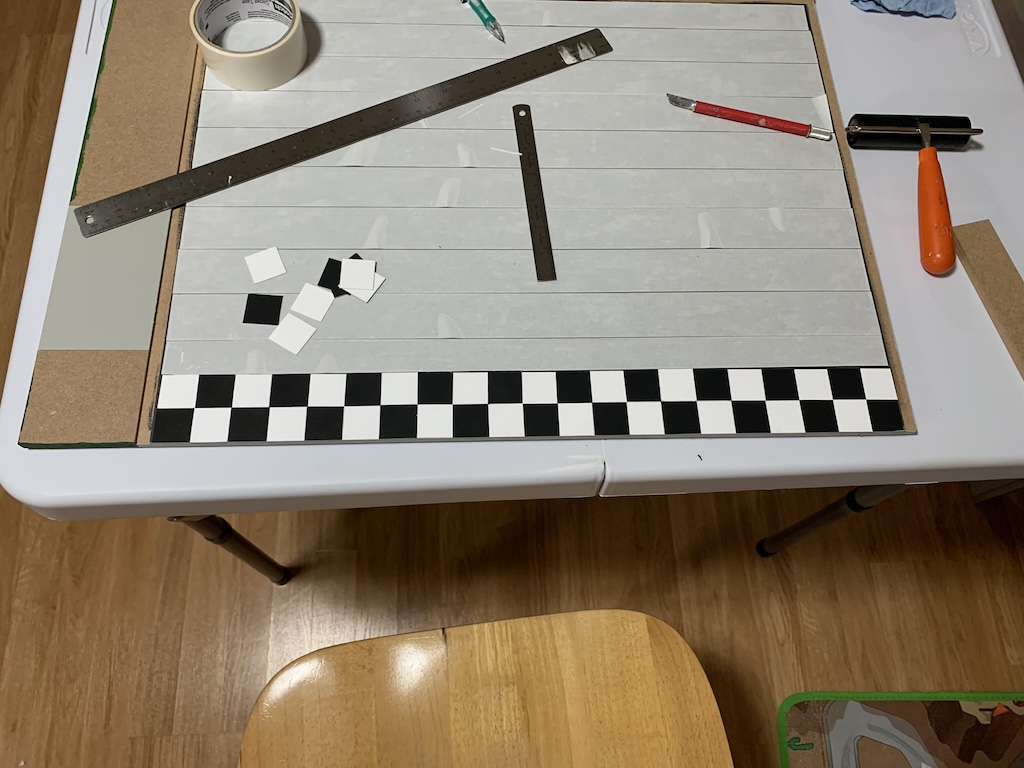
Once I did, I discovered I had two problems.
To be continued…
Categories

David, the loft floor looks amazing! You did such a great job! Now, do you really think someone will ask you about any imperfection that you (and likely no one else) will see? I am glad you have an explanation for why it looks that way (lived in), but I suspect this is mostly for you. I think it looks fabulous! The checkered floor is a great choice. I am curious as to your two problems. I know I have to wait until next week, but I look forward to reading about it. Have a great week!
Thanks Betty I appreciate all your very kind words. You’re right I didn’t realize it but the explanation is really for me. Sorry to make you wait a week but I hope you have a great week too!