
Doll House Furnishings – Phase 13
Continued from: Doll House Furnishings – Phase 12
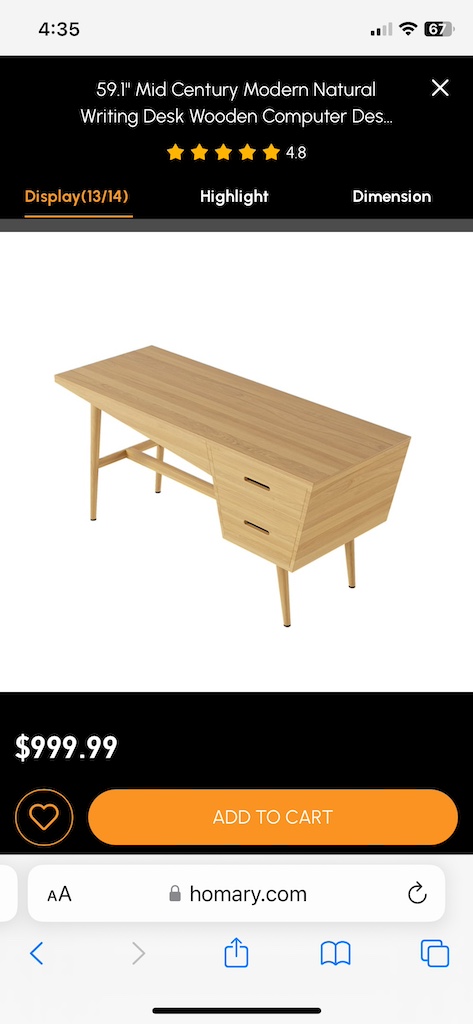
While we were together in October on our SibSab, I mentioned to my sister that we needed a Mid-Century Modern desk to go in the office with the bookcase. While there, I did a search online and a wonderful looking desk was the first to pop up. And better yet, my sister said she would be able to determine the programming necessary to cut it out.
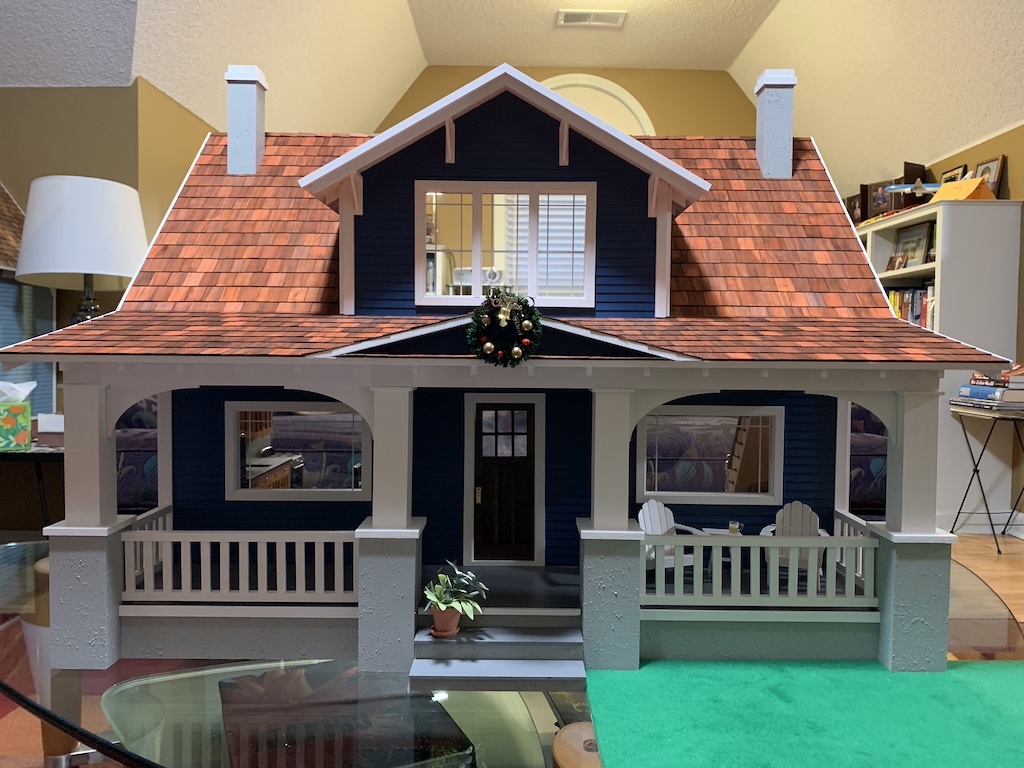
But until about a week or so before Christmas, my sister was busy teaching her two art classes and so did not have time to work on it. So, in the meantime, I thought of an idea I could work on myself. Why not landscape the outside of my doll house.
My thought was two-fold. First, I wanted to add enough yard so that I could take a photo and only have yard and house show (no photobombing from stuff in the playroom). I had moved the doll house to the coffee table to make room for Christmas present wrapping. So, I put a ruler up against the front foundation and with the camera on my phone, moved the image in and out to get the entire house in the photo (the clear square (right angle) ruler is on the right of the steps).
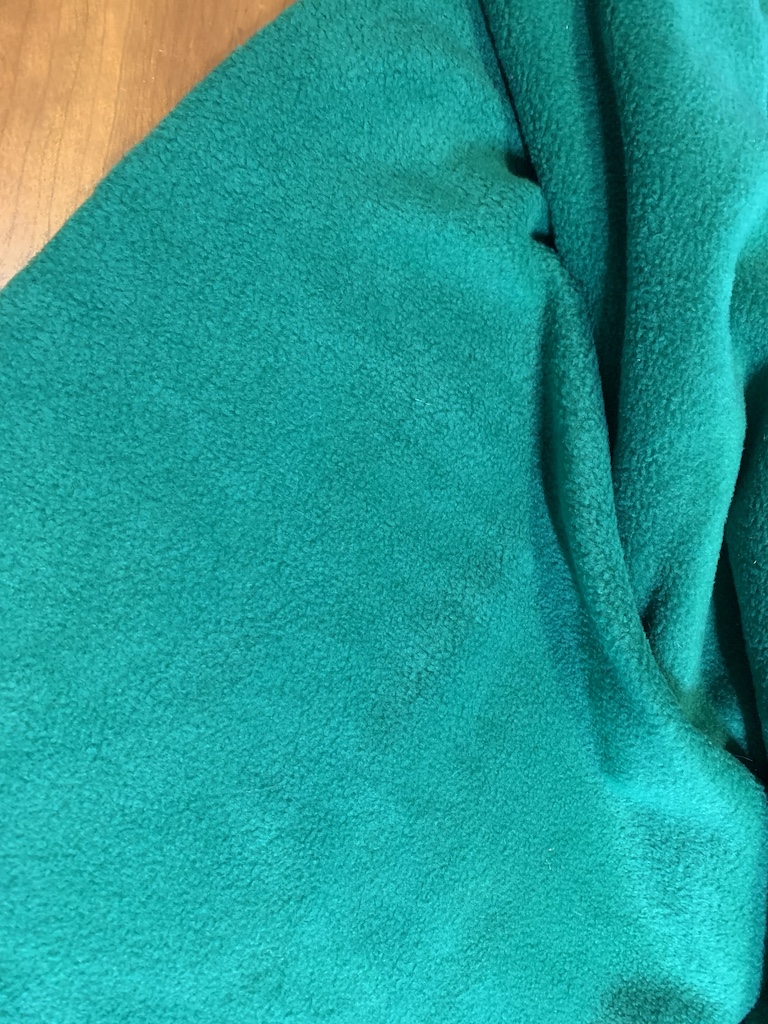
With this approach, I determined the front lawn needed to be eight (8) inches deep and extend 3.5 inches on either side of the corner porch posts. With these dimensions, I headed off to the hobby store. There I purchased 4-inch strips of 1/16” basswood. For the grass, I first thought of felt but when I went to the store, I found a better idea—green fleece fabric—which looked more like real grass.
Once back home, I cut the strips of basswood to fit between the porch posts. I then applied 2-sided carpet tape (I love that stuff). Once I had that in place on the basswood, I peeled off the film and then pressed the basswood into the fabric, rolling with a Brayer to ensure a wrinkle free bond. I then cut the excess fabric off with a roller cutter.
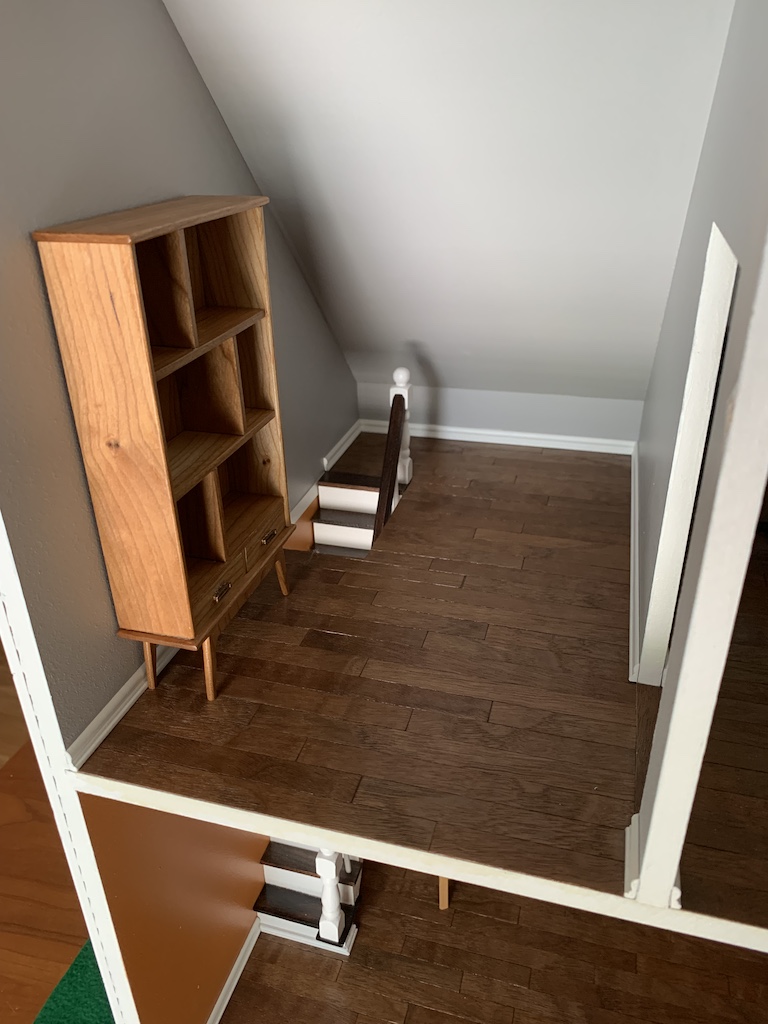
I built the left side yard the same way but then obviously I needed a walkway up to the doll house. Using some leftover basswood, I cut four squares, sanded the edges at a 45° angle to look like individual poured squares of concrete, and then painted them with cement-colored paint. I glued a thin strip of basswood on the backside to connect the four squares. Now I had my front lawn done.

I mentioned before my idea was two-fold. I knew that for my photo, the grass on either side of the doll house would need to get wider the further from the front of the house. But I thought that would look odd to someone just looking at the doll house with yard getting wider towards the back of the doll house. So, for the static, non-photo doll house display, I built two side yards the same width as the front yard.

And in the photo above, you can see how the side yards would need to be more triangular shaped for the photo.
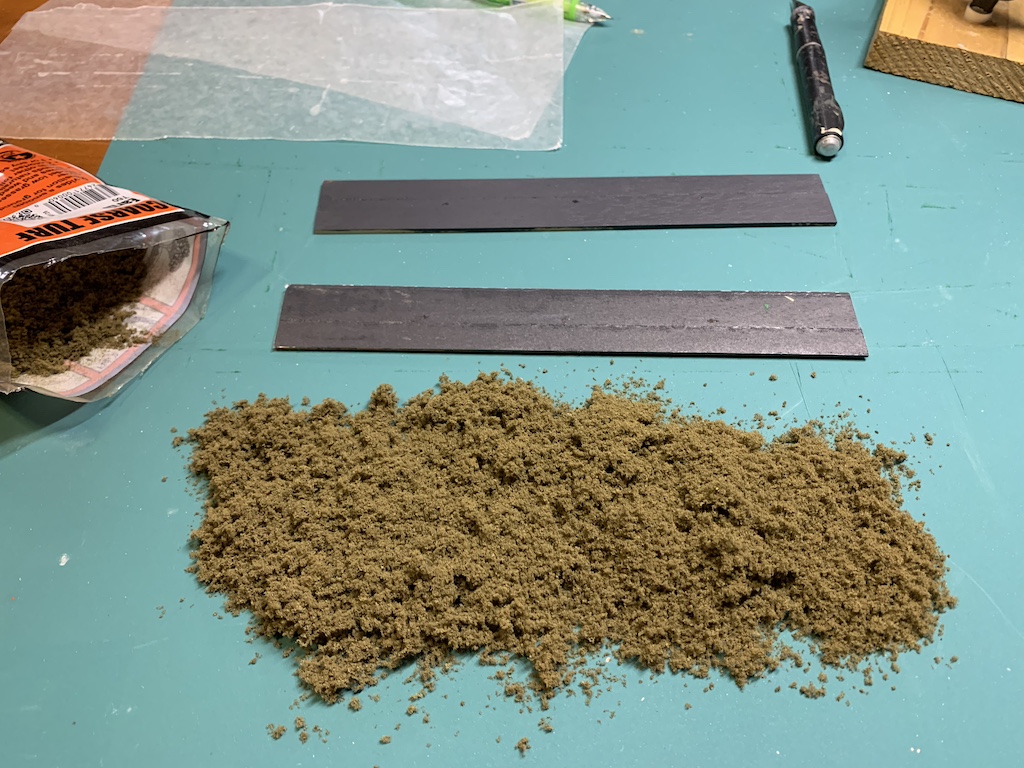
I liked what I saw but then I thought, why not add some bushes in a flowerbed and a couple of cedar trees. I bought some bushes and trees from an online doll house store. I tried to find some mulch for the bed but could not find any.
So, I went to another hobby store I frequent and in the model train landscaping aisle, I found some artificial earth (dirt) that I thought would work. It is a loose material that is supposed to be glued down using a thin glue from a sprayer. But the glue and sprayer bottle together cost three times as much as the artificial dirt. I decided to forgo that extra expense thinking some idea would come to me.
Not knowing how it would all come together, I painted what would be the edge of the bed with the same cement-colored paint.

That night, I woke up in the night and started thinking about my dilemma. I guess I just needed to sleep on it as while I was awake, I had one of those aha moments. I could attach the dirt to a bed of basswood using that same carpet tape.
The next day, I figured out that the bed needed to be about 1.25 inches deep (front to back) which I pieced together with some strips of basswood. I then painted them black and applied the carpet tape. I drilled equally spaced holes in the bottom of the bed for the nails that would hold the shrubs.
I spread the artificial dirt out…,
pressed the sticky side carpet tape into the dirt a couple of times and rolled it with the Brayer.
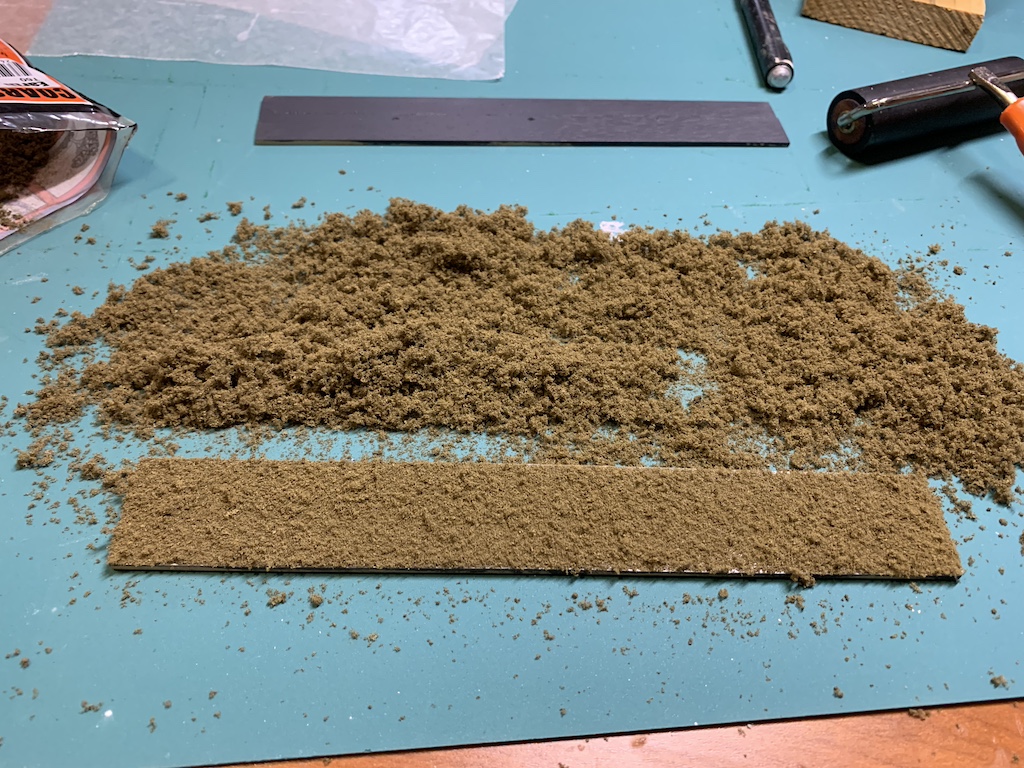
I thought it looked pretty good.
I made the first bed border, glued it to the bed, and then pushed the shrubs onto the nails I had previously installed.
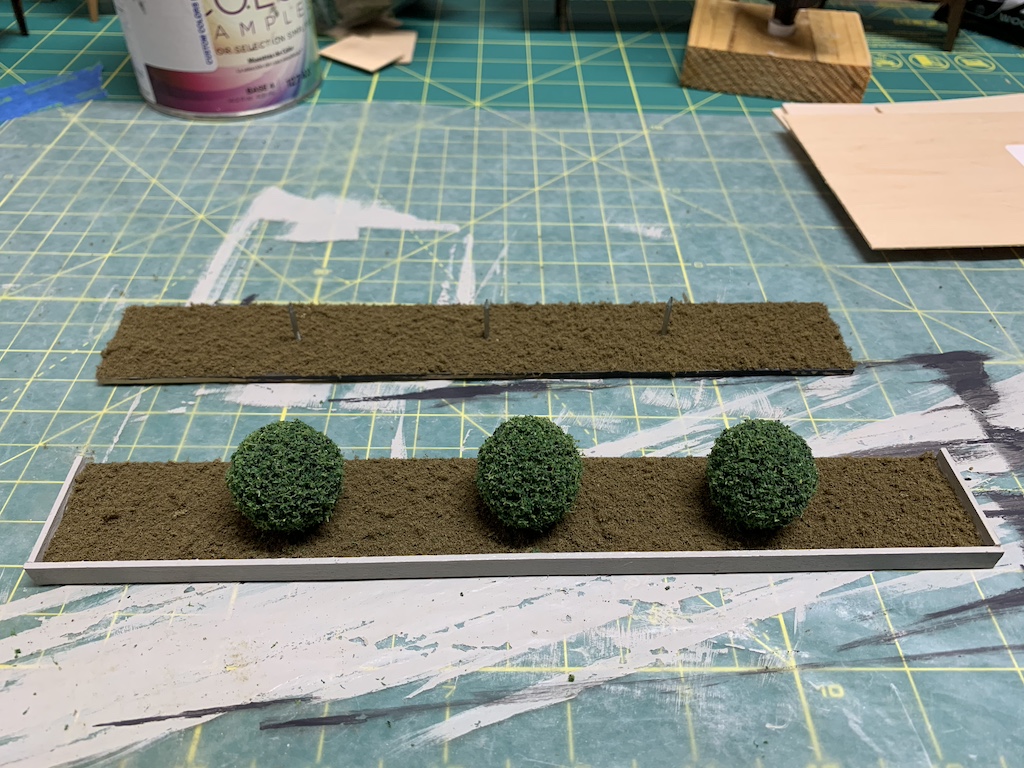
Once I had done the other bed…

… I turned my attention to the two cedar trees I had purchased. My plan was two create a circular mulch bed around the trees and put one on either side of the porch. I wondered how I was going to cut a perfect circle of basswood for the mulch. Then I found that my black paint can was just the exact size I needed.
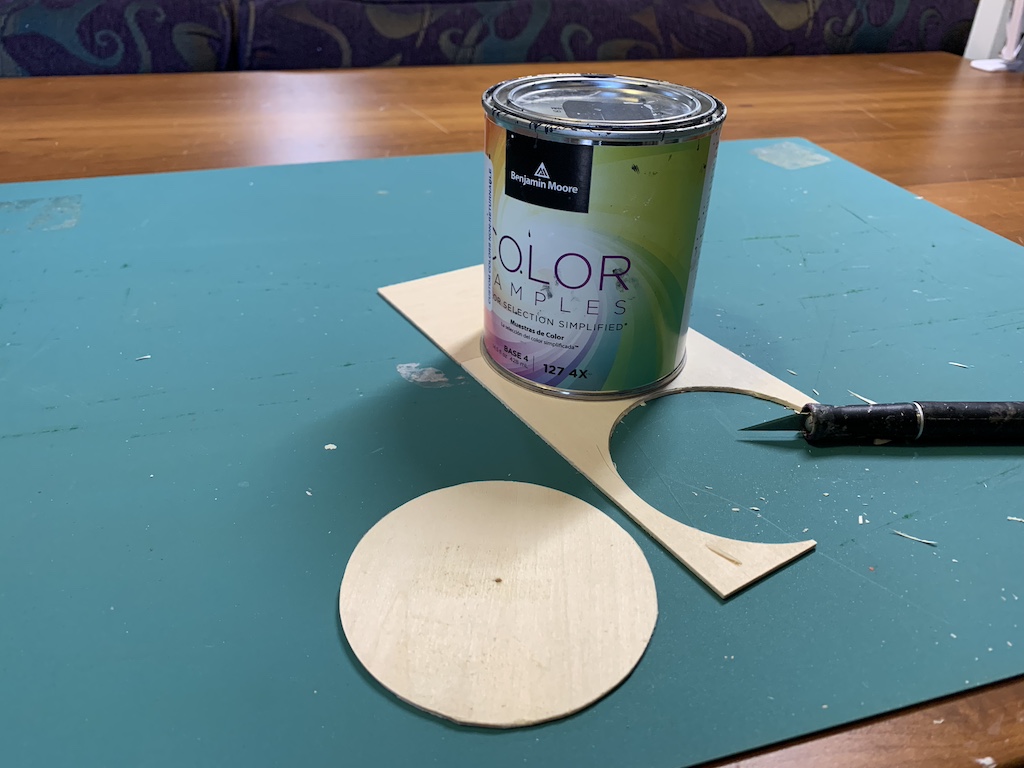
I followed the same approach as before with carpet tape and artificial dirt. The only difference was without an easy way to make a circular border, I simply applied clear glue around the exposed circumference of the basswood circle and then rolled it in the artificial dirt. I felt I had created a well-manicured tree bed.

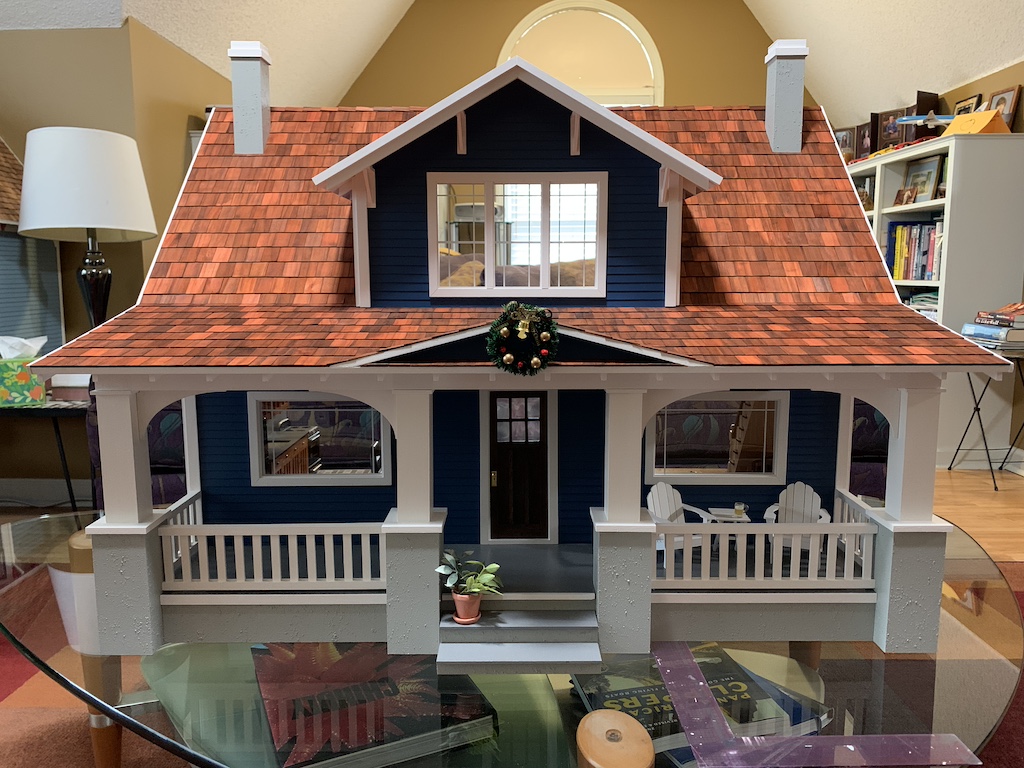
Once I had the doll house back on its display table, I was ready to take a picture of it with its newly landscaped lawn.

But when I did and I looked at the photo, I realized two things.
First, rather than just extending the yard to hide the table the doll house was sitting on, I would need to add some sort of sky backdrop to hide other things in the playroom. Second, I thought it would be nice to add some LED porch lighting to bring the porch out of the dark. I decided to address the second item first and leave creating a sky backdrop for another time.

To be continued after a short break…
Categories

Your landscaping creativity is amazing! The result looks fantastic! Can’t wait to read about the other problems you addressed. Well done and nicely described!
Thanks Bro! Sorry to extend your wait but after 4 doll house posts in a row, there will be a short break before returning to this story.
David, this looks absolutely fantastic! Your landscaping project reminds me of all home projects – they grow while they are being done. It’s funny how you woke in the night thinking about your project. Your creative solutions are fantastic! I look forward to the next post – even if it’s not about your dollhouse!
Thanks Betty you know how things grow bigger as you get in them. I often wake up in the night and figure out some solution to a problem I was having.