
Doll House Furnishings – Phase 12
Continued from: Doll House Furnishings – Phase 11

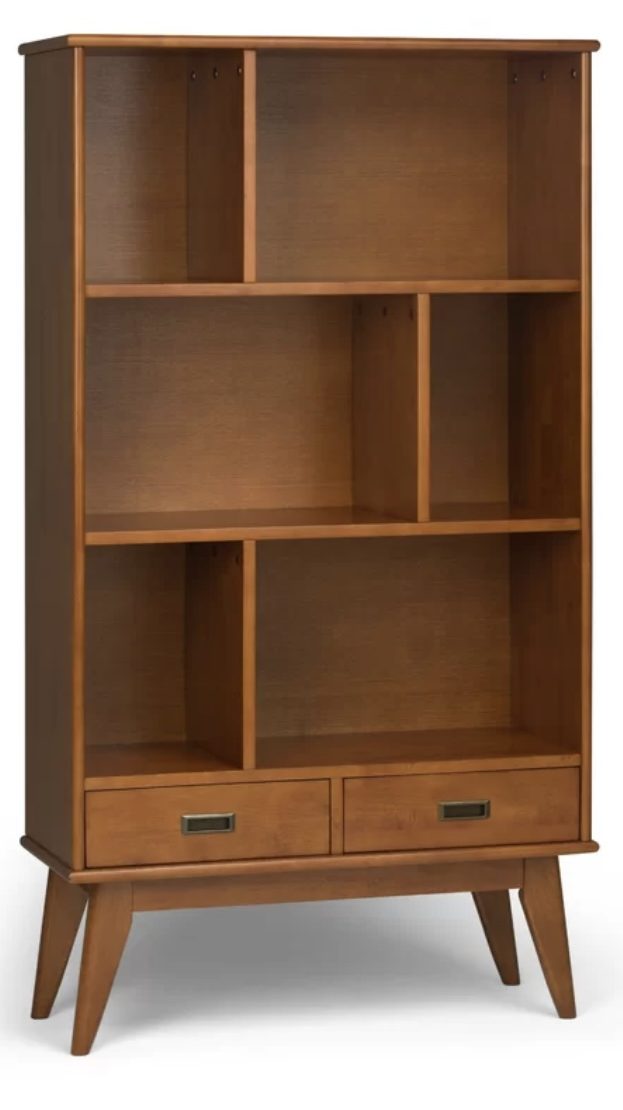
With the front room furniture done, it was now time to return to the second-floor office and first up was to remake the bookcase.

In case you are wondering why I am redoing the bookcase; it is because we used veneer plywood that cannot be sanded on the edges since the veneer is removed in the sanding process revealing the light-colored plywood underneath. What we needed was 1/8-inch solid wood. And rather than having all the furniture of the same dark walnut, I ordered some lighter woods as well. When I was over at my sister’s house in October, she said she could cut the pieces for my bookcase from the cherry plank that we had ordered.
First, I sanded the plank on both sides with first 400-grit, then 800-grit and finally with 1200-grit sandpaper attached to a little finger sander. This left a very smooth finish. My sister then applied the self-adhesive paper to the top and bottom of the plank that is needed to prevent the laser from scorching the upper and lower surface of the wood. Since this plank was not square as the veneer plywood we had used before, it was easy to know which direction the grain went after the paper was applied for proper cutting direction.
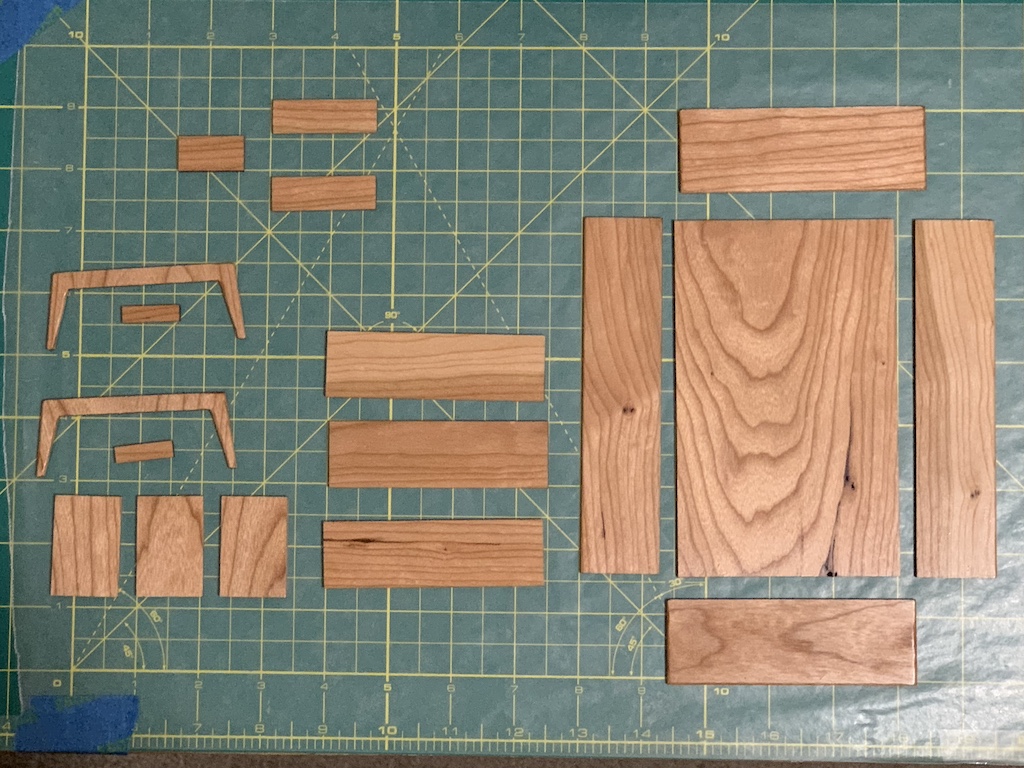
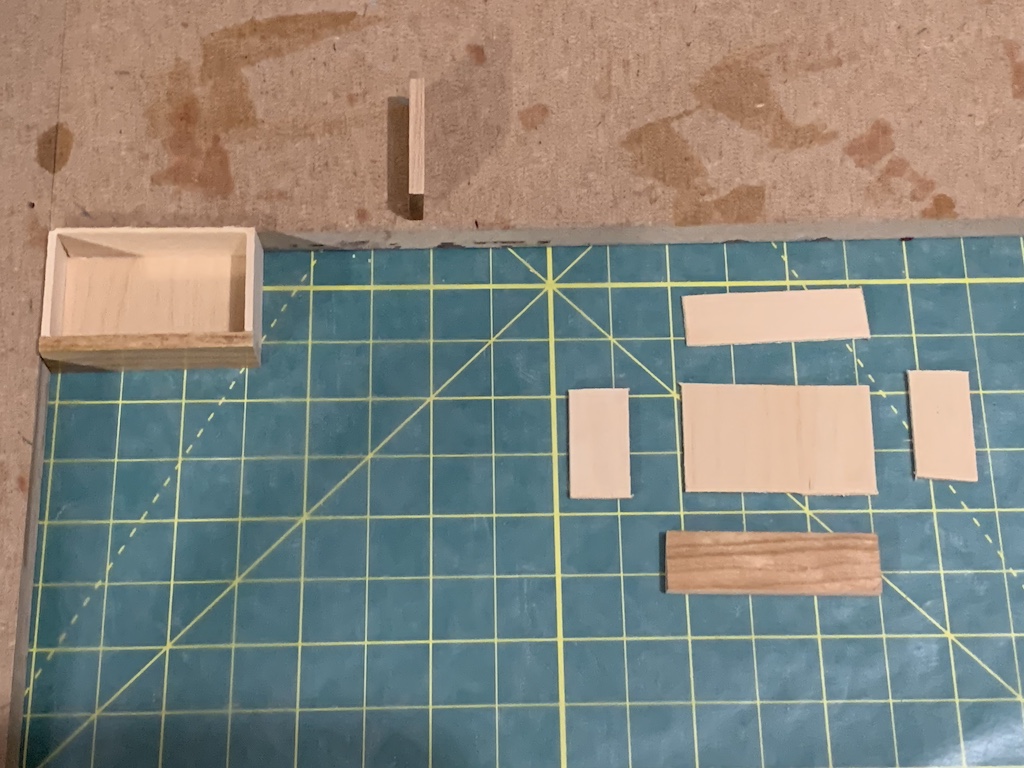
Once she had cut all of the pieces needed, I removed the paper and then bagged everything up to take home with me.
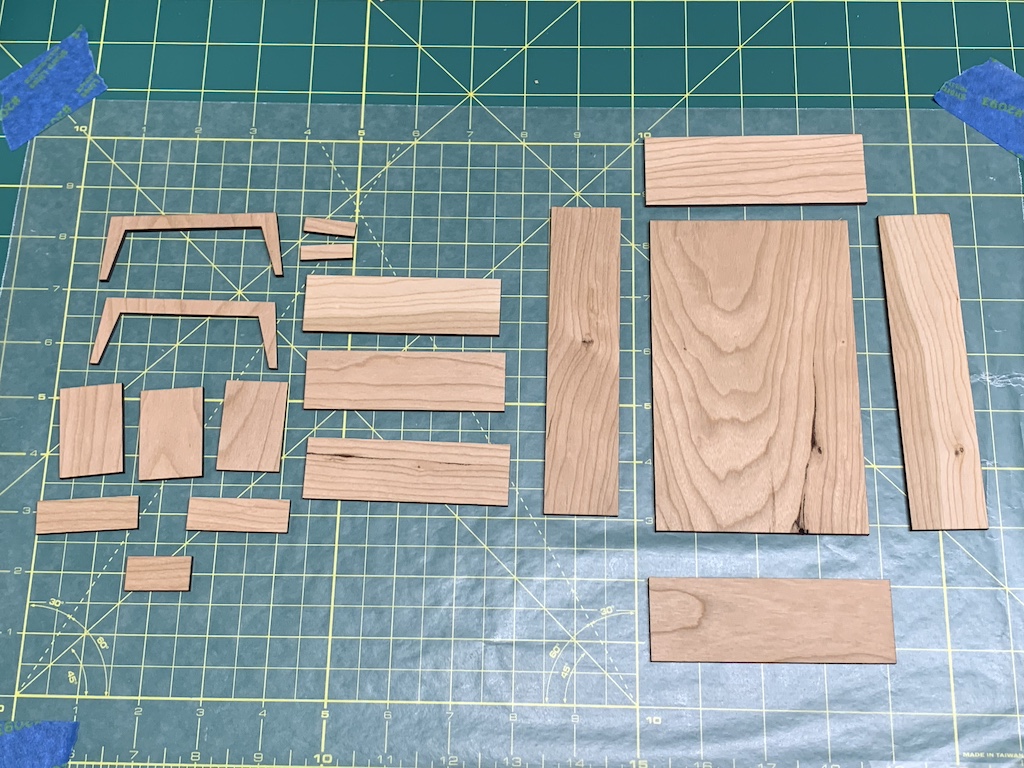
Once I laid everything out, the first step for me then was to sand the char from the edges of the pieces using a 120-grit sanding block. You may recall, I figured out this was much easier than trying to remove the char with a cotton ball soaked with isopropanol (i.e., rubbing alcohol but you know me, I had to sneak in a chemistry term). With the char removed, I then used my sanding drill to round the edges of the sides, top, bottom and legs to match the full-scale bookcase.
Since I could not tell much of a difference between the satin and semi-gloss polyurethane, I chose to use the semi-gloss type. Between the first and second coats, I sanded with a 2000-grit sandpaper which left an extremely smooth surface. But for some reason with this lighter wood, it took a total of three coats of polyurethane to get a nice glossy finish.
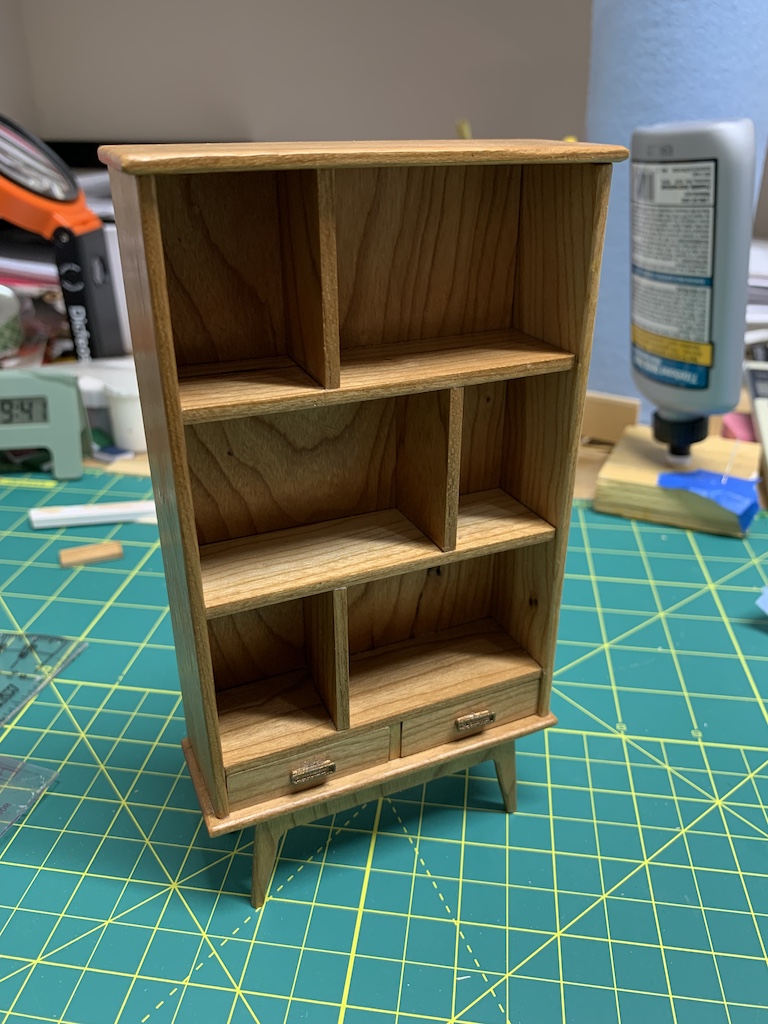
Once I had three coats on both sides of the pieces, I was ready for the assembly process.
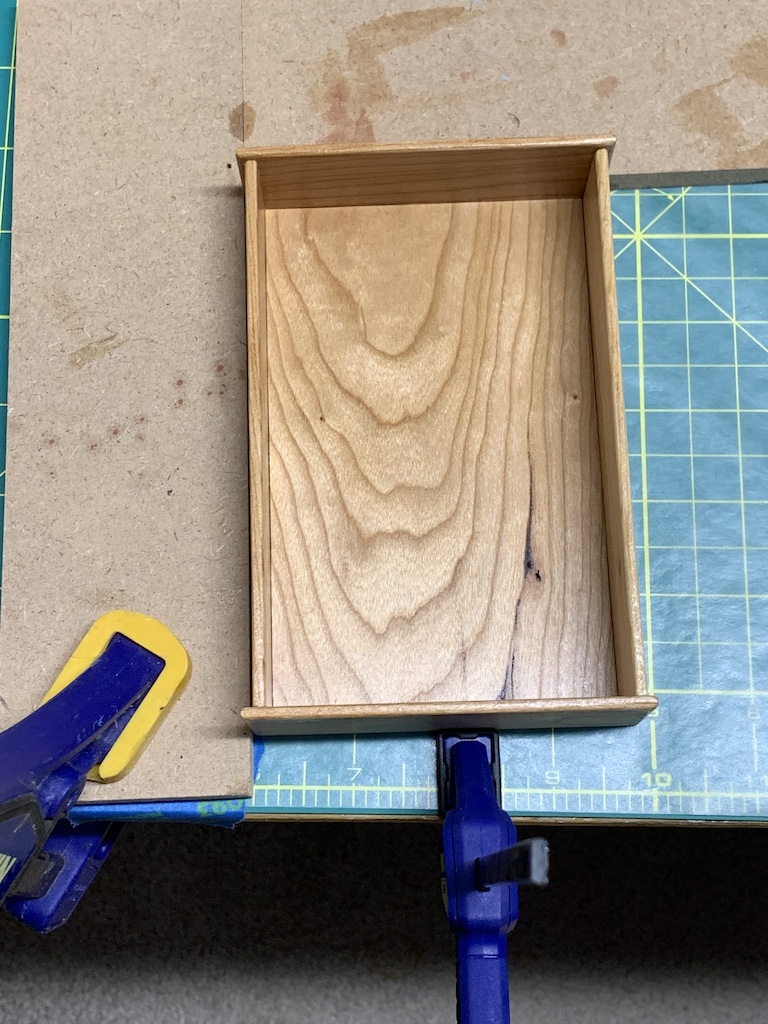
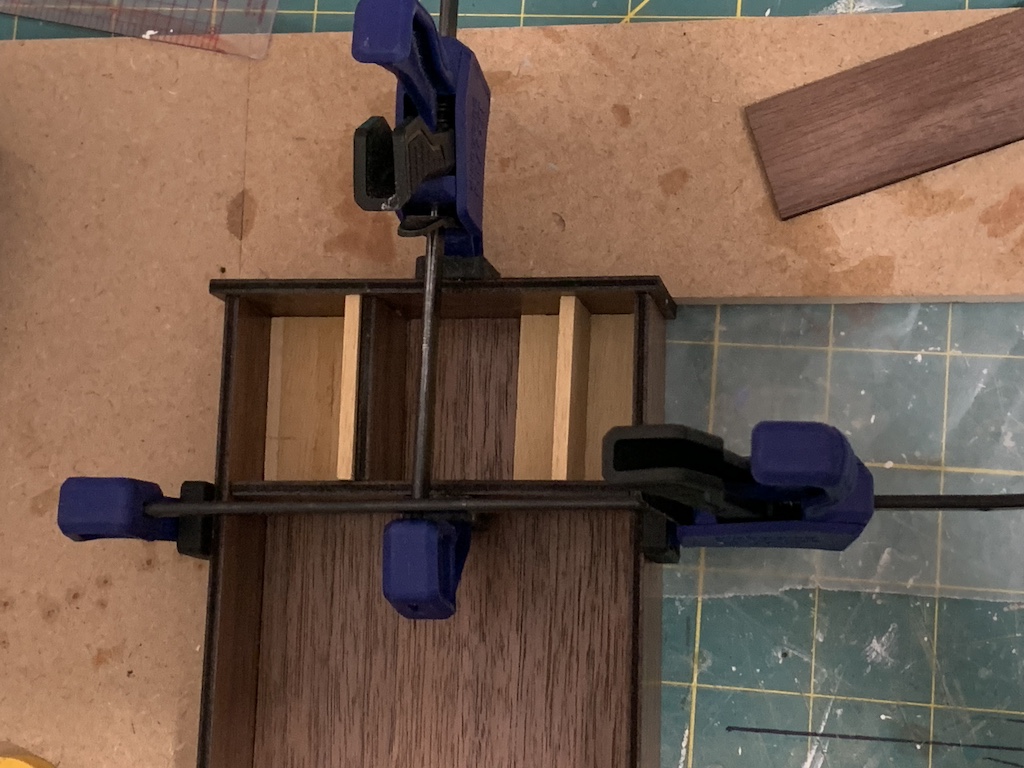
As before, I first glued the two sides to the back. But this time, rather than just clamping with one large clamp, I used three smaller clamps, one at the top, one at the bottom, and one in the middle to ensure the same pressure was applied to the whole assembly. The spacers are the three shelves that will eventually be glued in place.
Once the sides were glued in place, I then glued the top and bottom to the bookcase using the same technique as before.
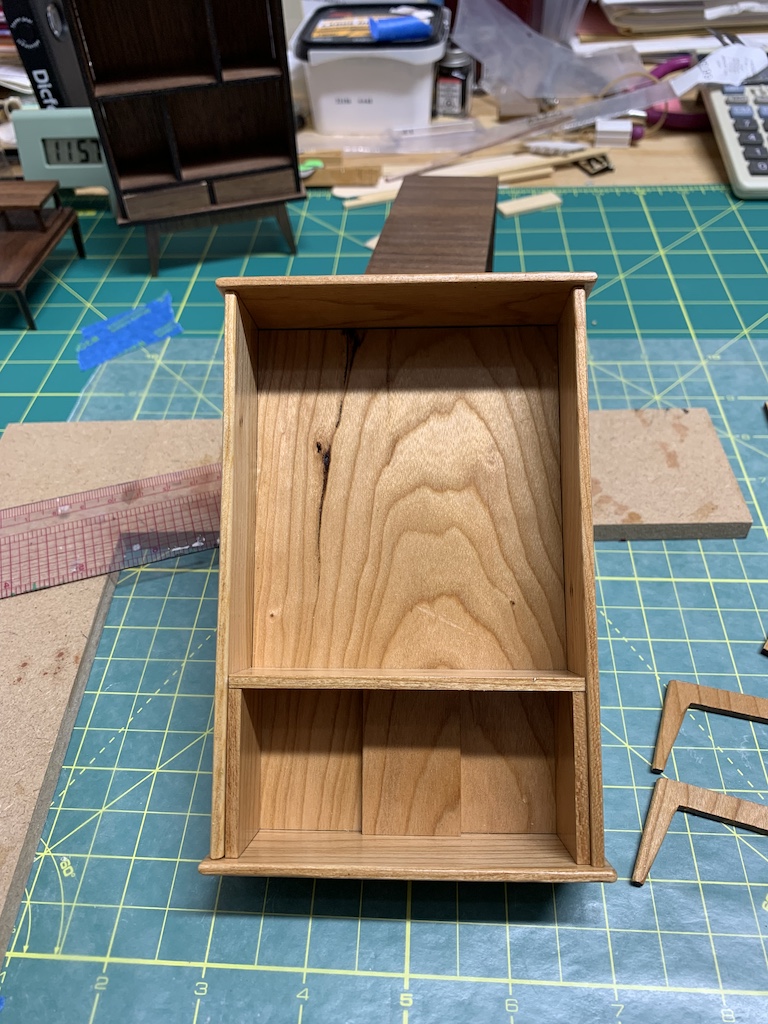
With those dry, I could now add the shelves and dividers.
The technique I used before was to build two little jigs and then using those as spacers, glue in the shelf and divider at the same time clamping them together for a tight fit. However, once I had glued all three shelves and dividers in place, I could tell that the shelves were not completely level side to side. So, I brainstormed and came up with another idea.
Rather than gluing the divider and shelf in at the same time, I would use the three dividers to make sure the shelf was level, one on each side up against the bookcase side and one in the middle.
I also did not use a clamp as that had been part of the problem before, compressing the basswood jigs more than the walnut veneer. Once each shelf was dry, I then added the next one using the three dividers in the same location. Once all three shelves were glued in place, then I could use just the 1- & 1/8-inch jig to glue the dividers in place.
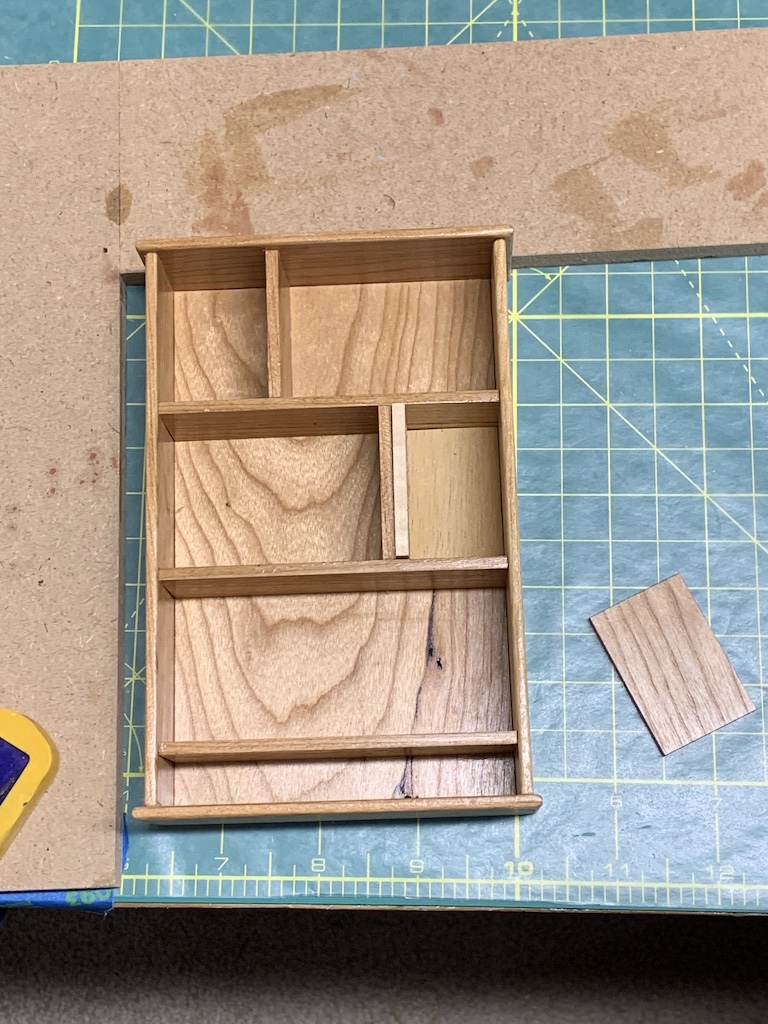
With the dividers in place, I could now check the fit of the drawer front between the bottom shelf and the bottom of the cabinet. As before, I immediately could see they were too tall. After this discovery the last time, I gave to my sister what I thought the reduction should be. Somehow it was still too tall.
I decided to sand down the drawer divider first to get it too fit. I then lined up the drawer front with the sanded divider. I placed a small strip of basswood at the bottom of the divider and determined that the drawers were again about 1/16 of inch too tall.
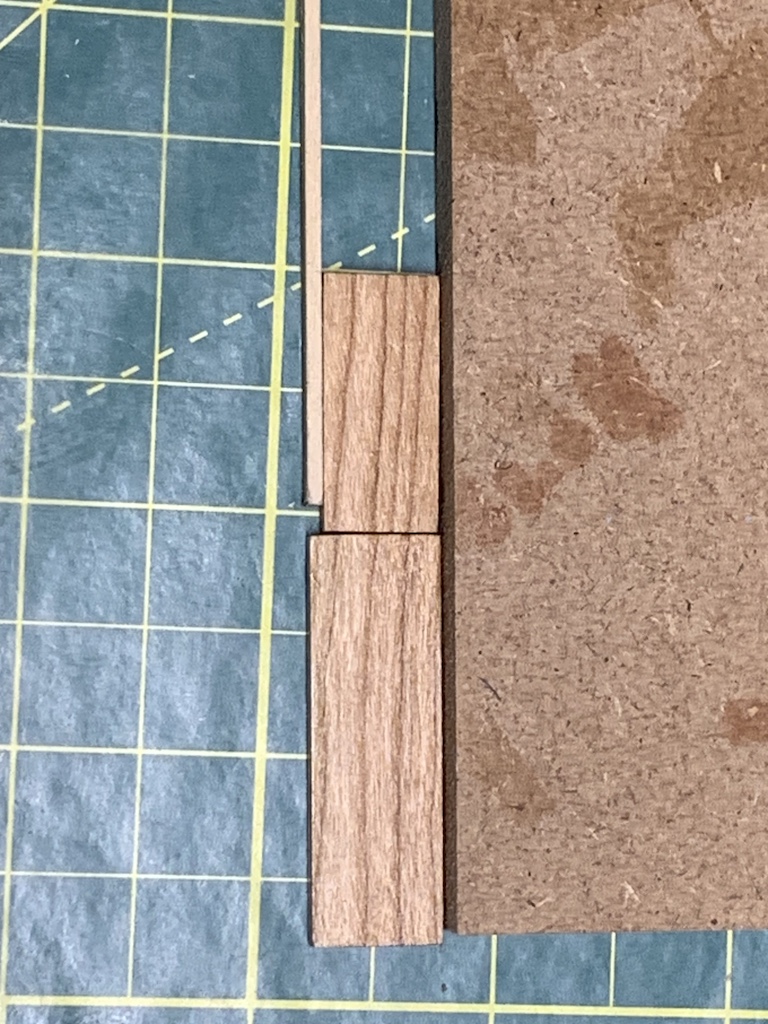
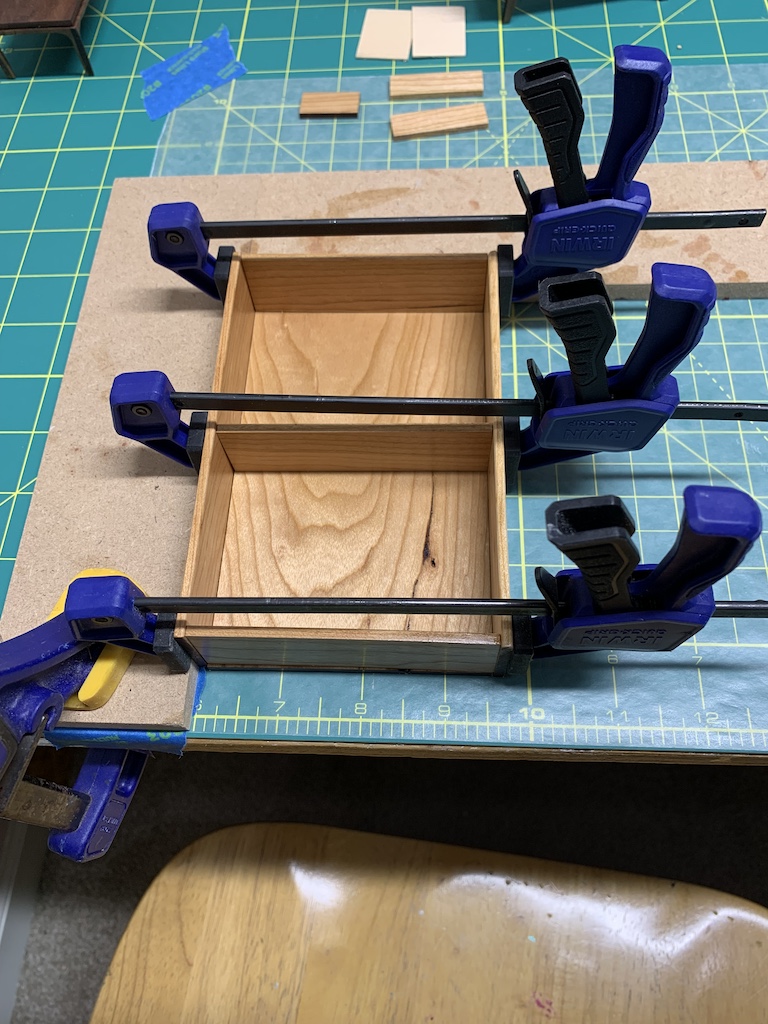
I next sanded both drawer fronts until they too fit and then built the drawer from the four small pieces of basswood.
With both drawers assembled, I continued to sand the bottom and sides of the drawer to get them to slide in and out easily.
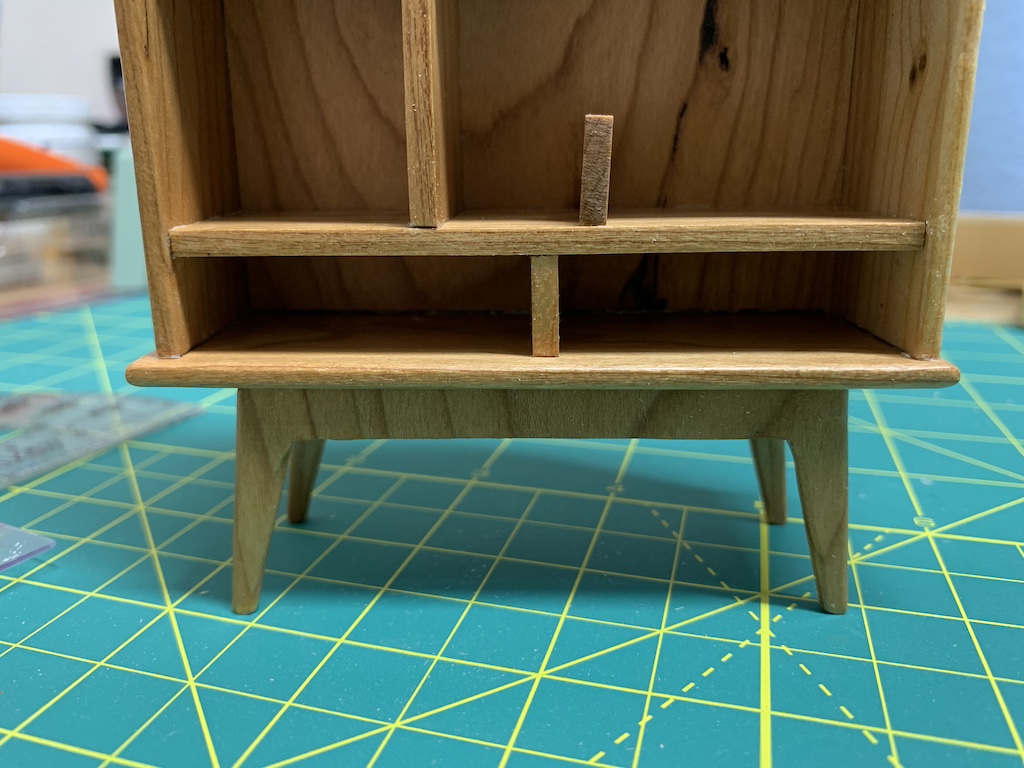
At this point, I had added the legs but I had not glued the drawer divider in. Try as I might, I could not sand and polyurethane the divider enough to get its finish to match the shelf dividers and shelves. The issue with this divider was the end of the wood was showing and not the side. I asked my sister to rotate the divider 90° and recut it so that, like the shelf dividers and shelves, the edge of the wood would show rather the end of the wood. After applying polyurethane to this new piece, I was able to glue it in place (original drawer divider above the new one).
Another issue that arose was one my sister had previously discovered and relayed to me. With three coats of polyurethane on the wood, the glue would not hold the pieces together very well. During my sanding and fitting of the drawers, the cabinet bottom came off multiple times and once even the bottom shelf came out. Each time I had to reglue them in place.
This happened because the water-based glue that I used needs to penetrate into the wood to create a strong bond. The oil-based polyurethane sealed the wood and prevented this from happening. A solvent based glue such as Super glue would hold the pieces more tightly together, but it is unforgiving, i.e., it bonds instantly so there is no chance to adjust the placement at all.
You may recall that the reason I had applied the polyurethane before assembly was so I could sand the flat pieces of wood between coats. This technique allowed me to achieve a super smooth finish much like a real piece of fine wood furniture. In the future, I will try applying the first coat of polyurethane, sand, and then assemble the furniture before applying the next two coats. Hopefully with this technique, the wood will still be porous enough for the glue to make a tight bond.
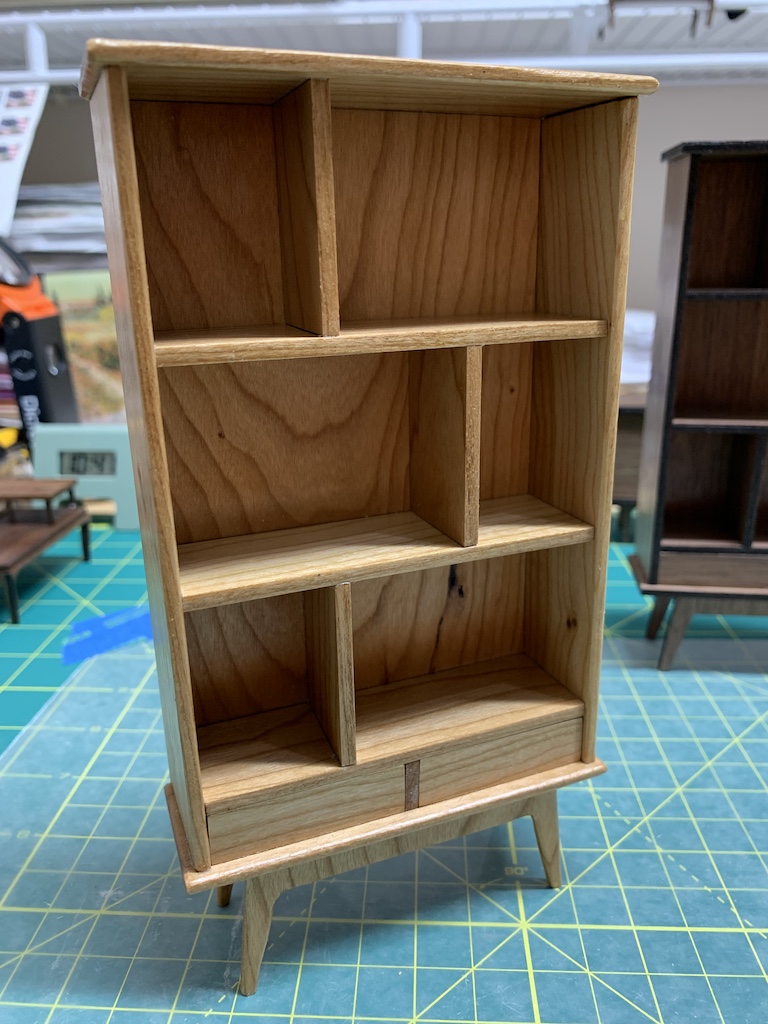
The last step for this bookcase was to glue on the drawer pulls which my sister 3-D printed and then painted with brass paint.
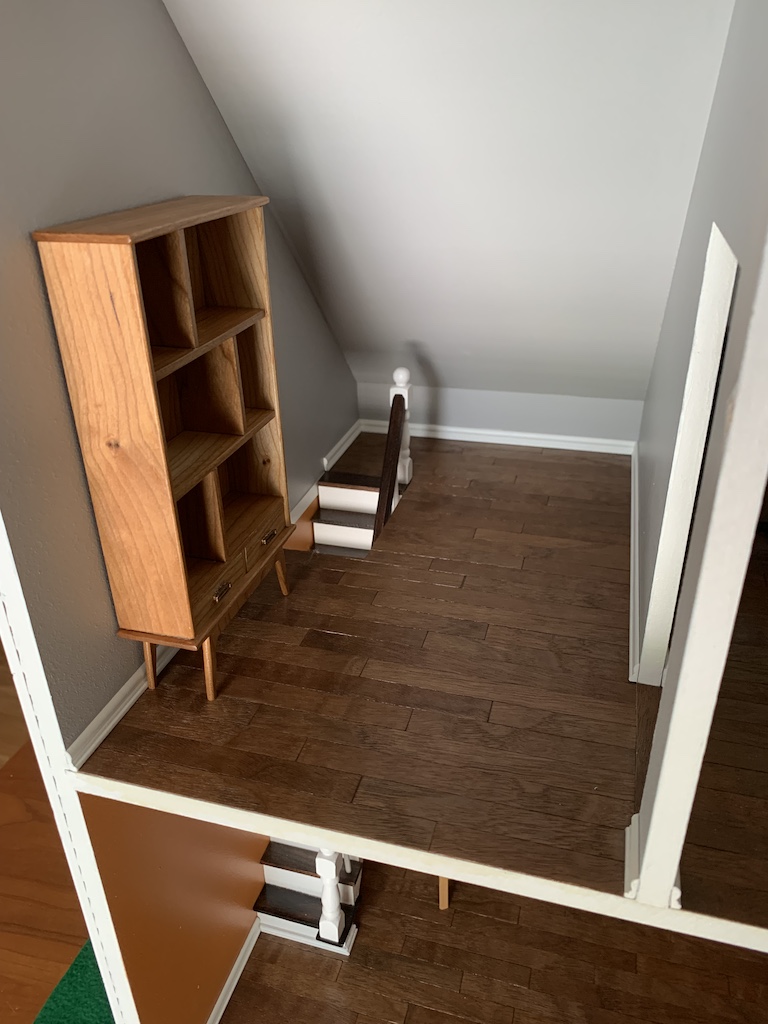
Now the office just needed a desk and chair to be complete.
To be continued…
Categories

David, this is a beautiful bookcase for your dollhouse. Your attention to detail is amazing – even to the point of re-cutting the shelf dividers to match. You are always learning a new way to solve issues that come up in the process. I look forward to your next post!
Thanks, Betty for the kind words! I thought you would enjoy this series of posts so I am glad you are.
I’m really enjoying reading about your furniture crafting! The attention to detail and focus on making each piece look real (full-scale) is admirable. And the success of your efforts is apparent in the finished products! Reminds me of the fun I had long ago making a few bookshelves and a stereo cabinet for our house. Although my work was nice, it was more functional than the artistic output you are creating. Well done, bro!
Thanks for the kind words Bro! I didn’t know if you would care for this series of posts so I’m glad you are.