
Doll House Furnishings – Phase 11
Continued from: Doll House Furnishings – Phase 10

Once I had glued the two sides and back to the bottom of the credenza, I decided to check the fit of the cabinet dividers.

I discovered that they were a bit too short (visible on divider on right). I just happened to have a 3/32” thick piece of basswood and placing it under the left divider found that was just about how short they were. Based on some of my feedback to my sister, I knew she had made a few tweaks to the dimensions (We had a FaceTime call later and could not figure out why they had been cut too short.).
When I placed the top onto the credenza, it was barely noticeable that they were too short. However, I decided to cut small 3/32” pieces of that basswood to glue on top. Once I stained and applied polyurethane, it was a close match and when I again placed the top on the credenza, it was barely discernable that I had patched them.
With that resolved, I also wanted to check the fit of the doors to make sure they slid easily in the top and bottom grooves. When I did, I discovered a second problem. After placing a door in the bottom grove and then holding the top in place, the door fell inside the cabinet. The door was too short and thus did not seat in the top grove at all.

This was actually an even easier fix than the dividers since the doors were painted white. I determined they were about 1/16” too short and so cut small strips to glue to the top. After painting the strip white, it was almost an invisible fix. And when I put the door in the bottom slot and then held the top in place, the little added strip was completely inside the top groove and the door slid back and forth very easily.
With these two minor problems solved, I moved on to build the four drawers.
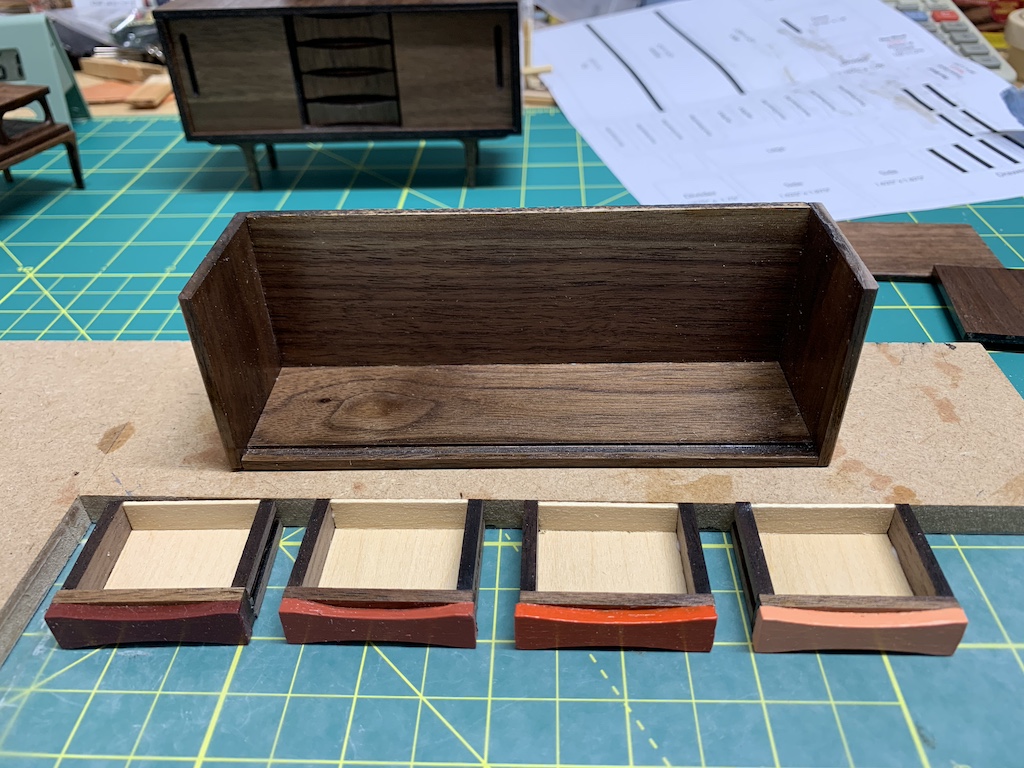
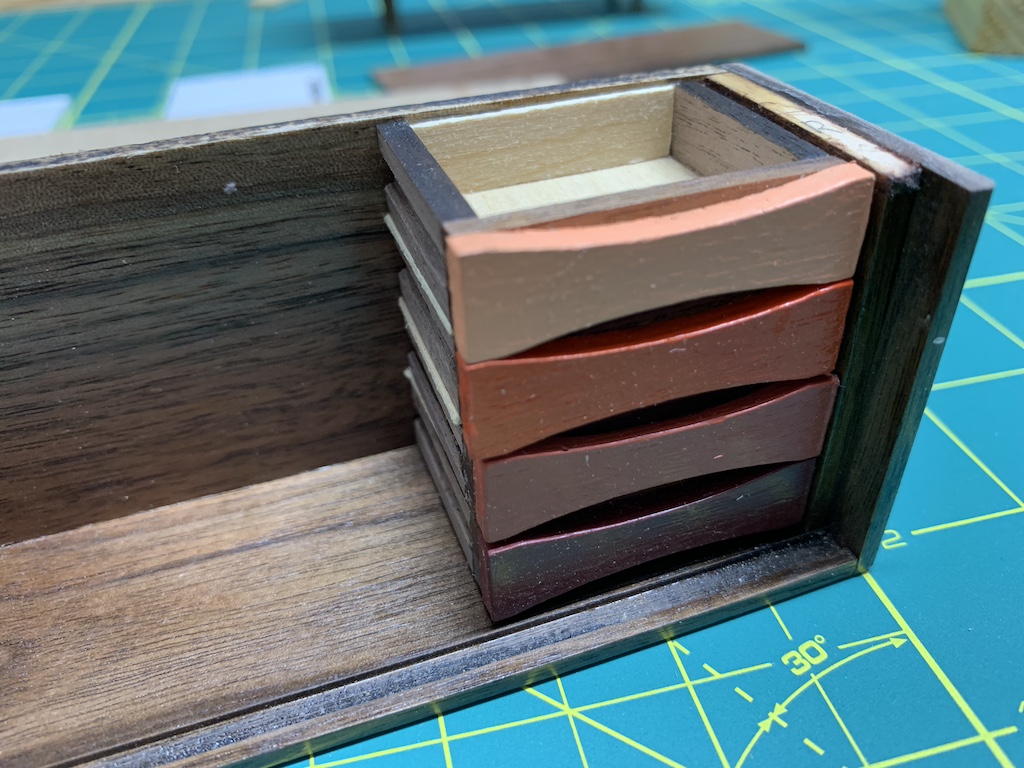
Now I was really ready for the assembly of the cabinet. But looking at the practice credenza, I noticed the drawer guides were most noticeable. These small strips of basswood are glued to the divider for the drawers to slide in and out.
I knew I could stain the strips (strip visible above the credenza) so they would at least match but then I had an “aha” moment.
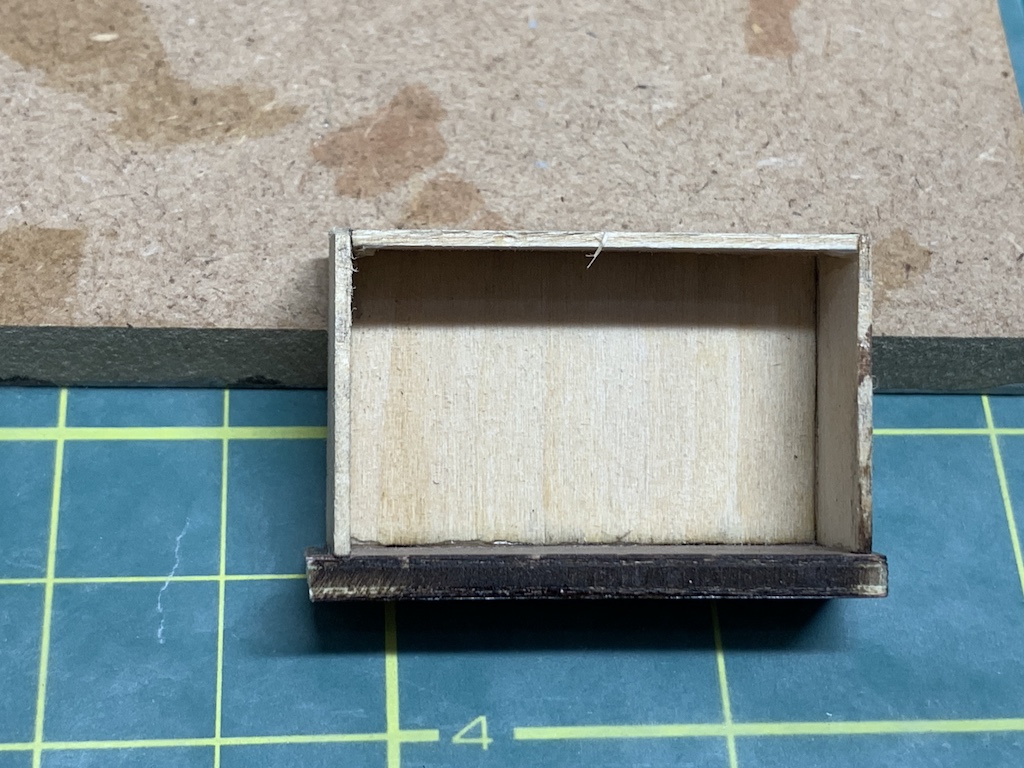
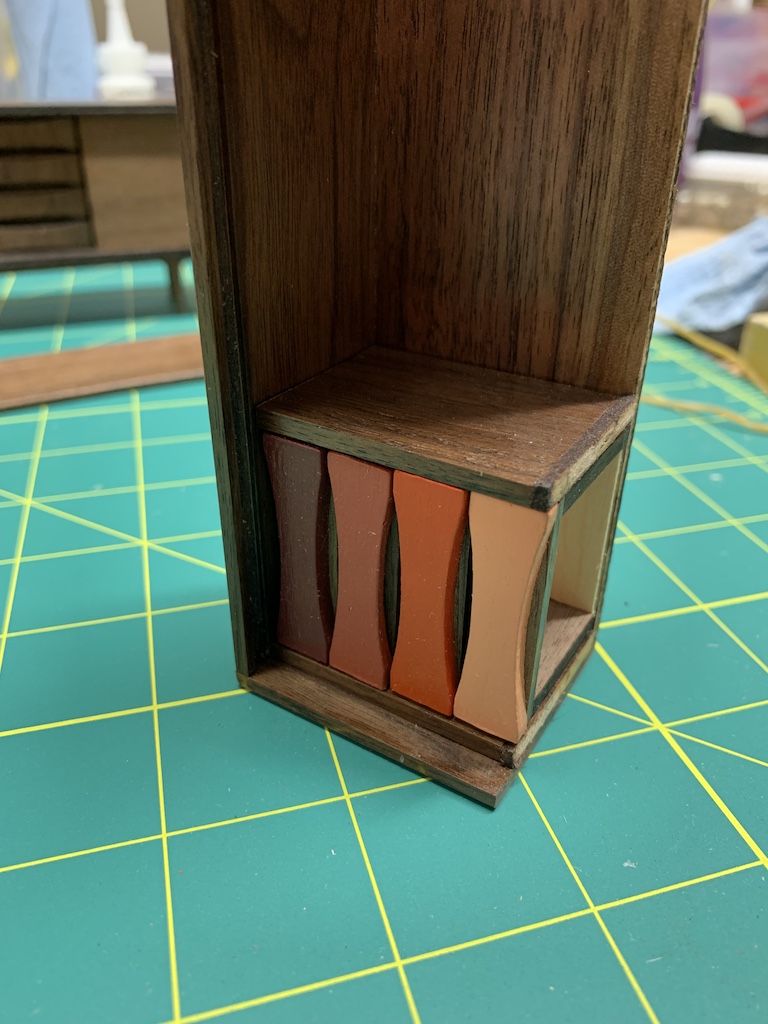
If the sides of the drawer were inset just a little like they were for the bookcase drawer pictured above, then the drawer guides would be completely hidden by the drawer front. I considered taking apart the completed credenza drawers and redoing them but then decided against it. I could still stain the guides to make them less visible and the modified drawer idea could be a future improvement on the next piece of furniture.
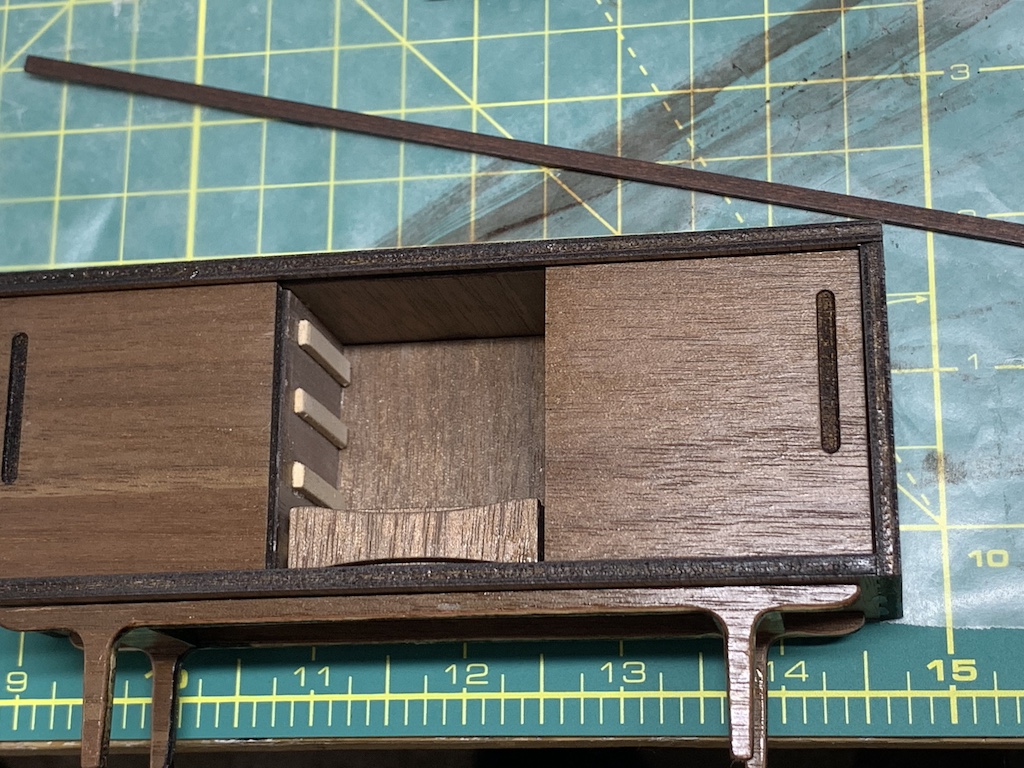
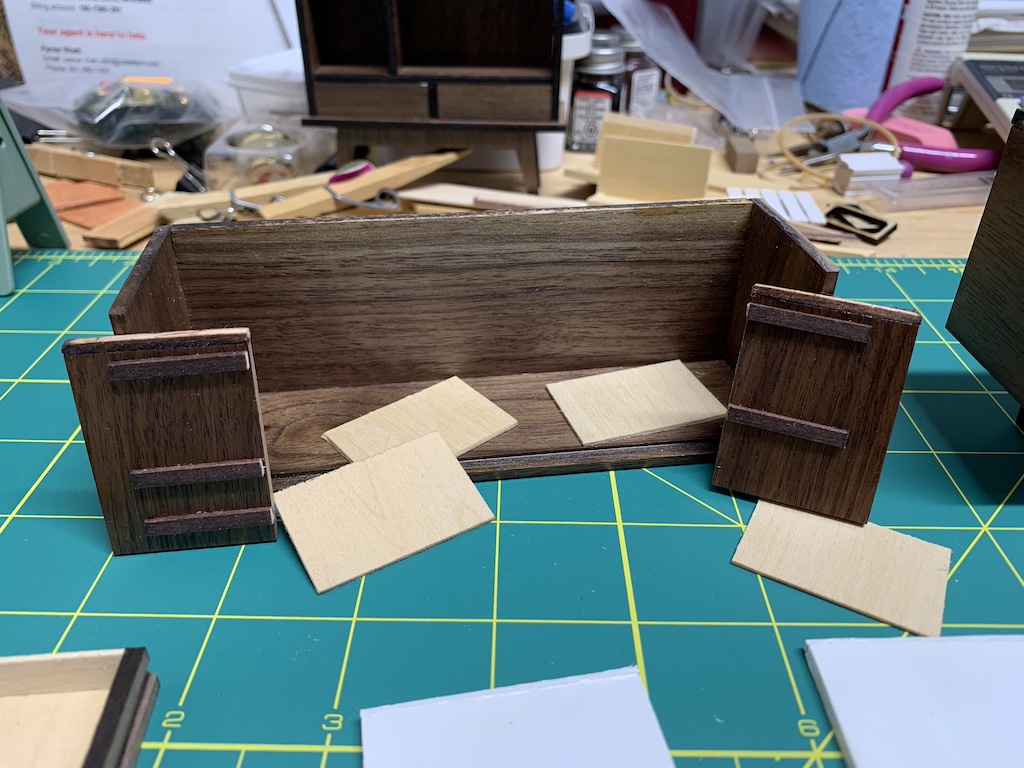
One improvement that I did implement was how I glued the drawer guides in. In the first credenza, I followed the technique from the video where the dividers were glued in place first and then progressively working from the bottom drawer to the top, the drawer guide was placed in the grove on both sides of the drawer, glue applied to each guide, and then the whole drawer/guide assembly inserted in the tight space between the two dividers. The problem was that as I slid the drawer in, most of the glue just built up on the front of the divider due to such a tight fit.

My new idea was to stack all four drawers and then insert the drawer guides on one side. I used spacers (unfinished piece of wood) in between the drawers to give each one room to slide in and out unobstructed. I placed glue on all four guides on the right side of the drawers and then pressed the drawer stack into the divider which was flush against the inside of the cabinet.
I then repeated the process for the left side.
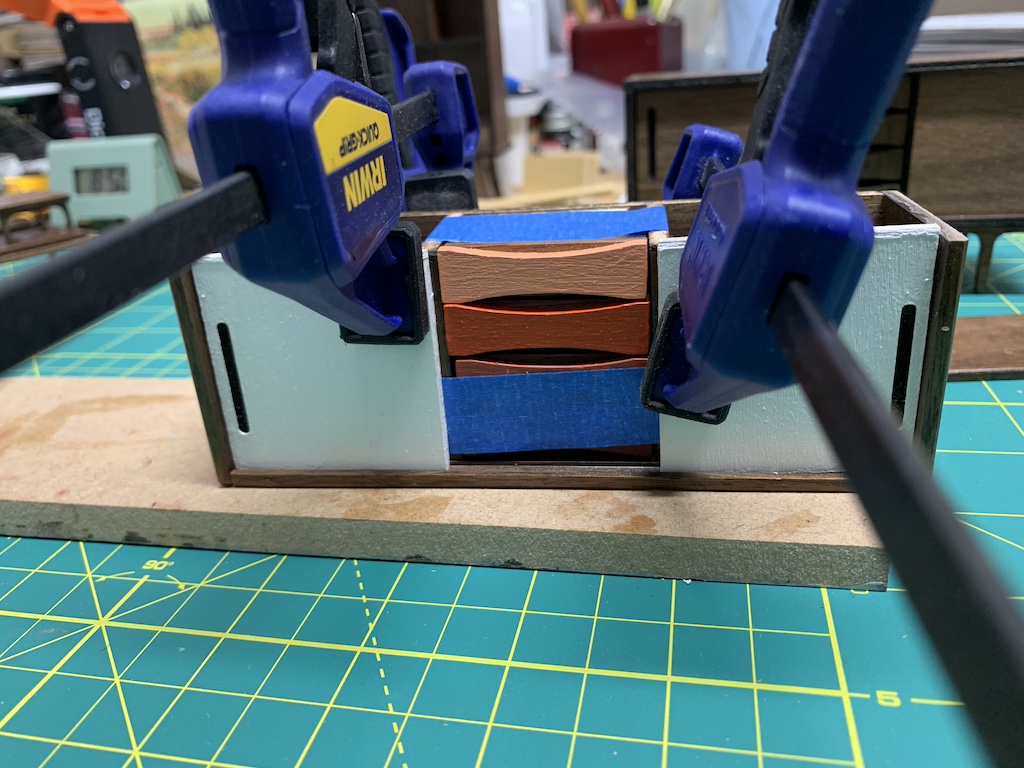
Close but no cigar.
Apparently, I did not put enough glue on some of the guides as two on the right side and one on the left side stuck to the drawer rather than the divider. I repeated the process for the three missing guides using a bit more glue and obtained success. Now I just needed to figure out where the dividers/drawers stack needed to be glued into the cabinet to ensure it was centered. I decided to use the doors to show the proper placement, applied glue to the bottom and back of the dividers, and then clamped everything together tightly.
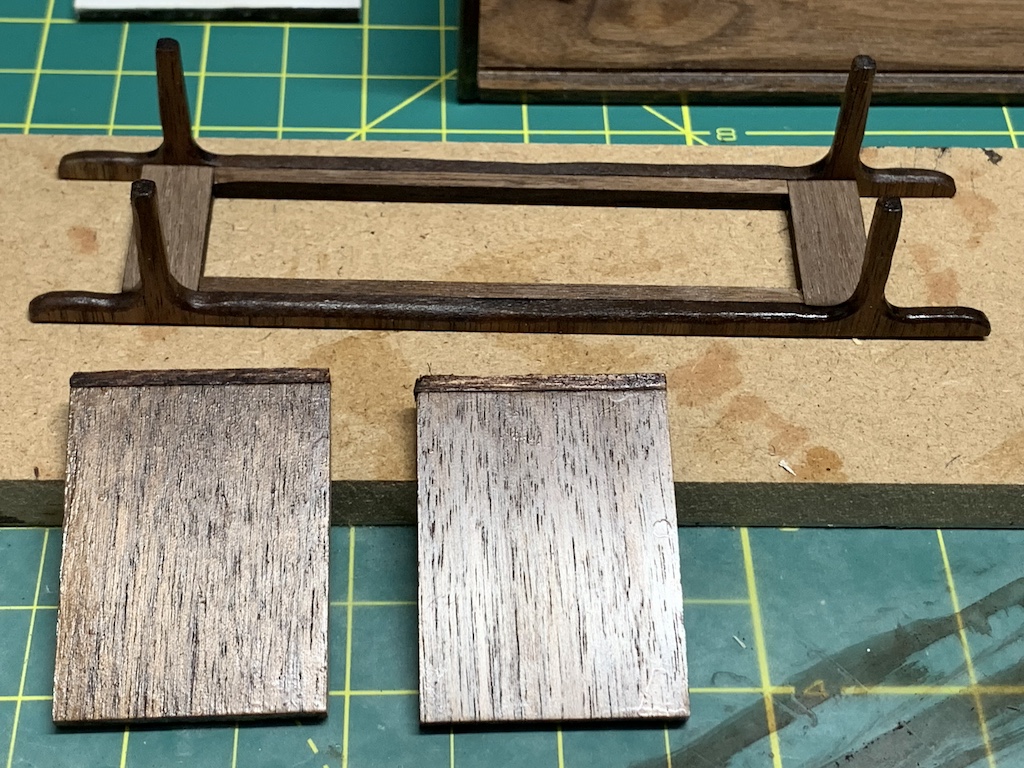
With the dividers glued in, now I just had to add the cabinet top and the pre-assembled legs to finish the credenza.

I thought it looked very nice!
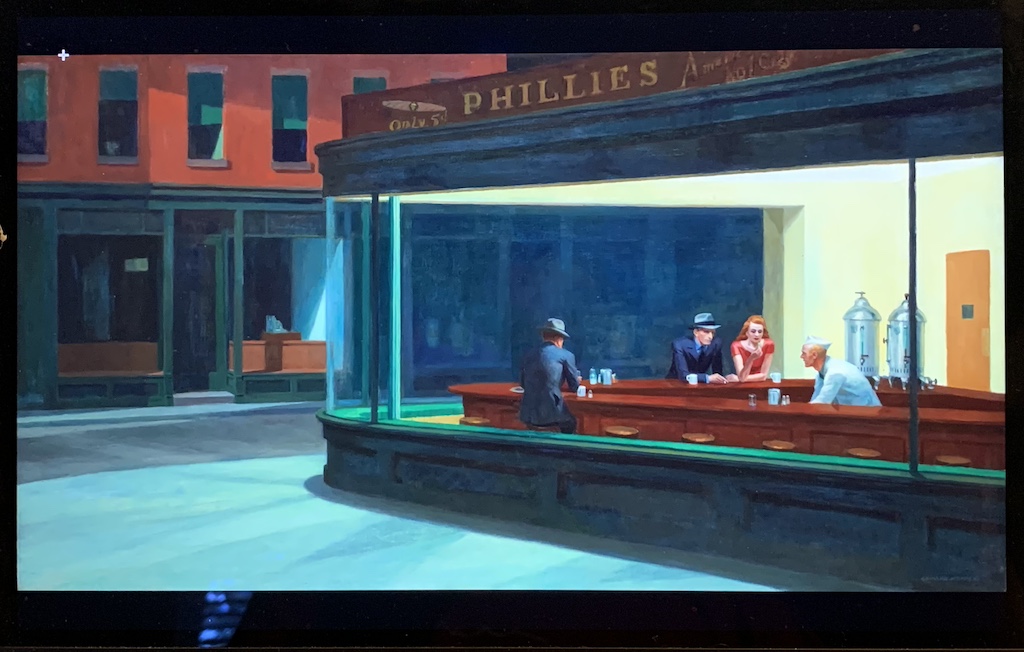
Recall that my sister said she could print out miniatures of Edward Hopper’s Nighthawks. Not knowing what size would work best, she printed several sizes. I checked the dimensions of the actual painting and learned it was 5 feet long.
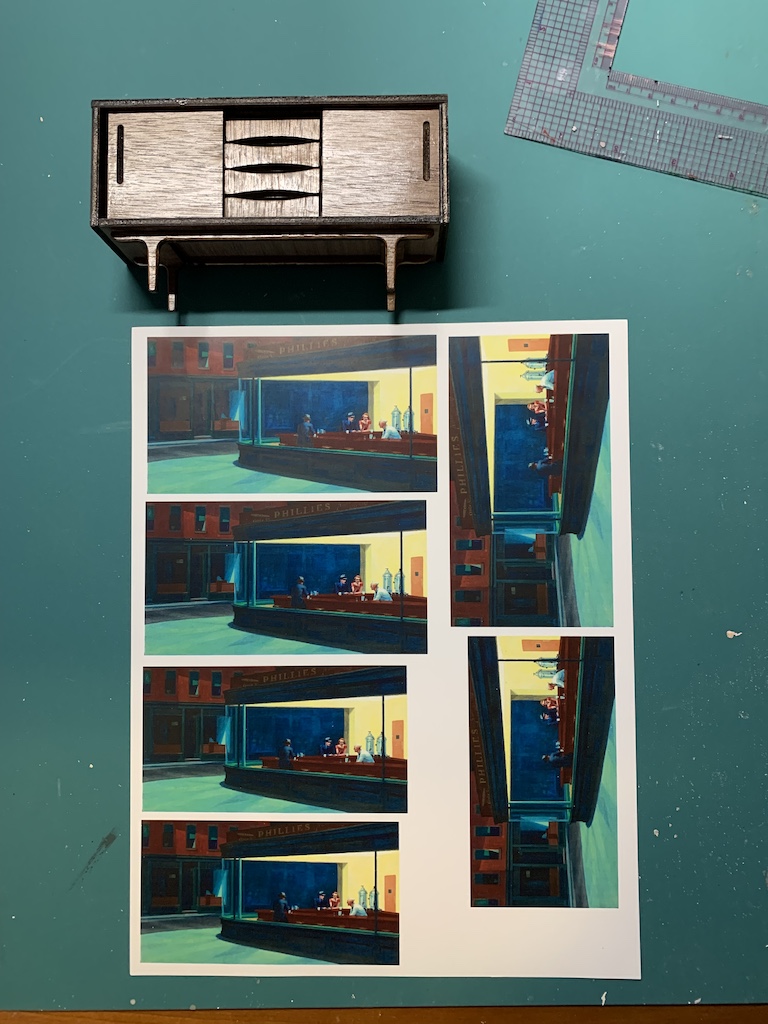
The largest miniature she printed was five inches long which makes it exactly 1/12 scale. But when I placed the credenza above it, that size painting seemed too large. She had suggested that I add a cream-colored mat since the painting was so dark, so I needed to accommodate that in my total width as well.
I decided to use the third painting from the top and based on looking at framed paintings we had in the house, I would need a full-scale mat of about 3.5 inches (about 5/16 inch in doll house scale). I found some of my wife’s buff-colored stationary and so began to cut my mat.

It took more than one cut to get it right (actually three). Meanwhile, I was painting the ¼ inch basswood that I was going to use to frame the painting. My sister suggested I pick one of the colors from the credenza and it seemed the darkest color looked best against my burnt orange painted well.
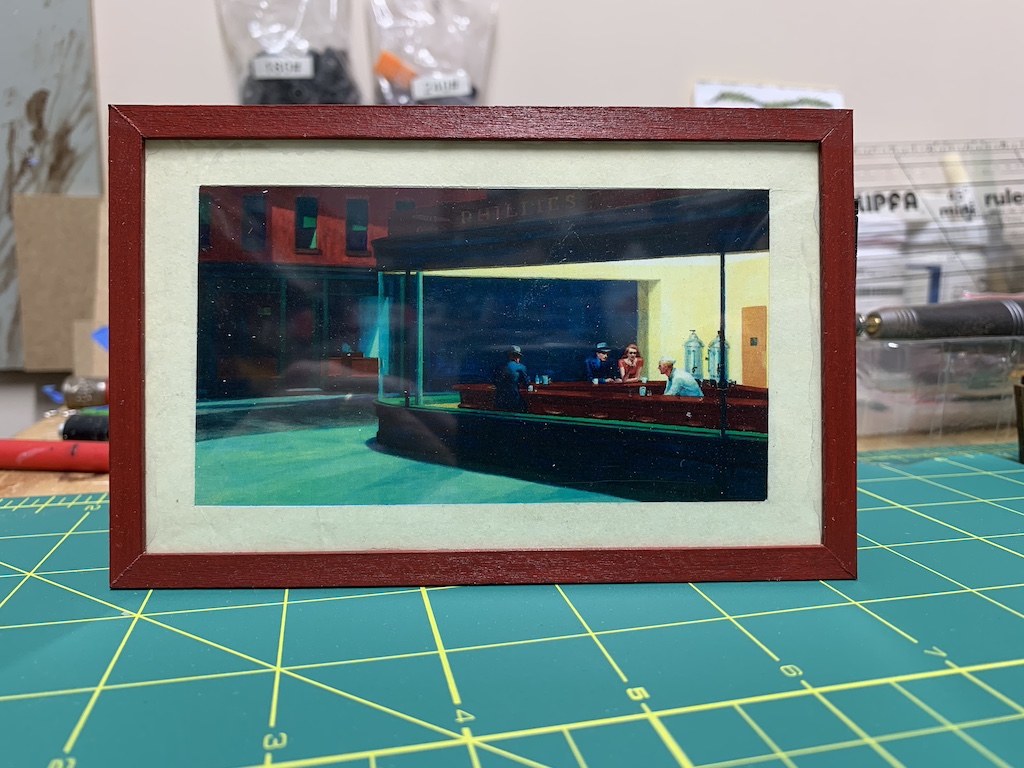
With the painting now framed, I could add everything to the front room of my doll house.
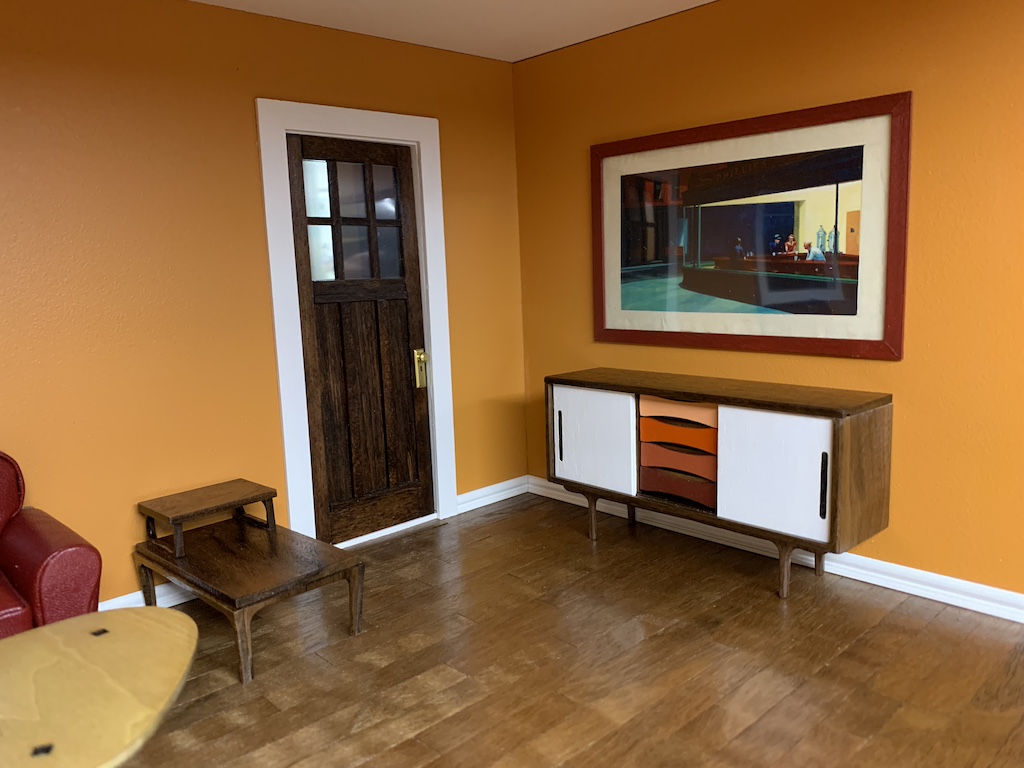
Just a few more items to add (lamp, books, coffee cup, etc.) and I would be done with this room.
To be continued…
Categories

I am not sure there are many people like us who are not having fun unless they are doing some kind of problem solving! Did I ever get the dimensions correct? I like seeing the way you put things together. When I make my new one, I am going to do it like you did. Brilliant as always. And I love seeing the furniture and picture in situ! Looks so real!
Thanks! And thanks for all you did to bring this piece to completion. If you make the adjustments I indicated in the dimensions, your next one should be just right.
David, you are an amazing artist! The credenza looks amazing, and the picture is the finishing touch! It is scaled perfectly. Just the right size over the credenza. Are you going to put anything in those drawers? Perhaps something for someone to find later? In any case, such beautiful work!
Thanks again Betty, for your praise! I had not thought about putting anything inside the credenza but that is a great idea. Hope you have a nice Sunday!