
A Pool Anniversary – Next Quarter Century
Continued from: A Pool Anniversary – First Quarter Century
Once I figured out that I could reduce the weight of the lift-out panel by cutting it down from twelve pickets to eight, I had been pondering how to attach the extra two pickets on each side (in the old fence, the single picket on each side of the lift out front section was simply nailed directly into the 4” X 4”). A simple idea came to me when I removed the cedar pickets from the old lift out panel (mainly to make their disposal easier). The pressure treated boards on the left and right sides were also in good shape.

They were slightly more than 36 inches long so cut in half (18 inches), each half could accommodate three nominal 1” X 6” pickets (below you can see them repurposed).
Now I was ready to start nailing up some pickets. But actually, to avoid the nail problem I had before, I decided to use exterior wood screws of the right length rather than nails. And to ensure the cedar pickets did not split, I would pre-drill the holes with my new cordless drill and then attach them with the screws using my new cordless impact driver (I did not know the difference between a drill and an impact driver until my sister showed me hers, and of course, I had to have both).
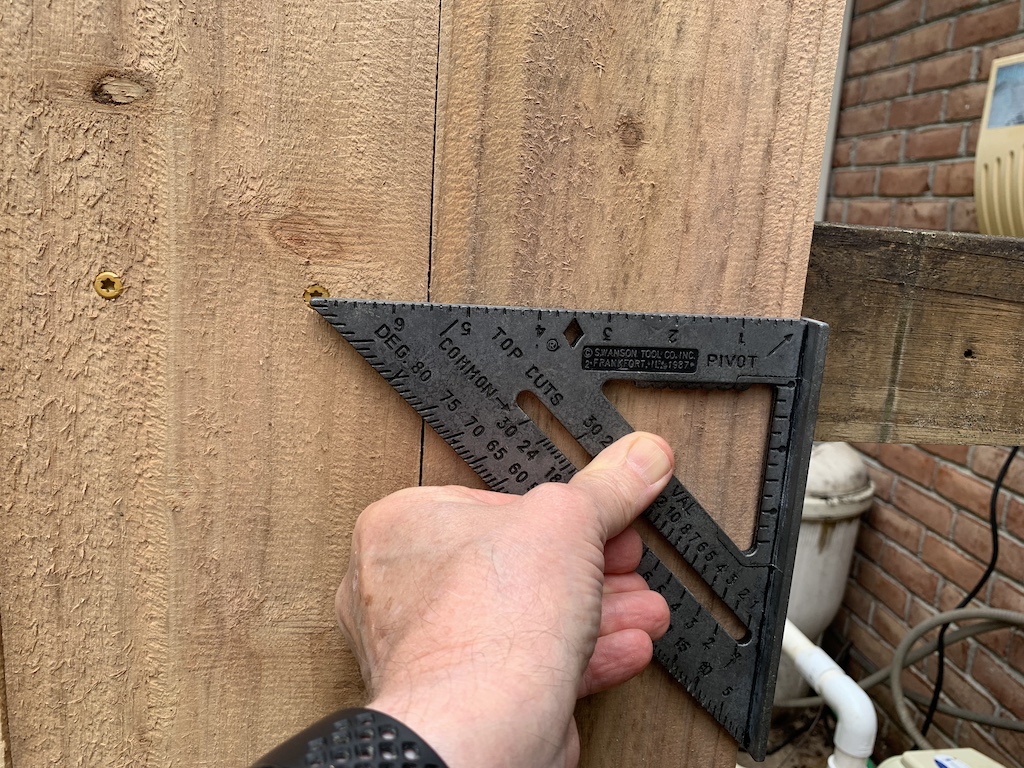
Before attaching any pickets, I had to revisit how far apart the pickets should be spaced. Looking back at my post from 2018 when I rebuilt part of our backyard fence, I decided to use the same plastic tile spacers. And this handy Swanson speed square helped in two ways.

First by flipping the picket-to-be-attached upside down, I could draw a line to know how much board to cut off the bottom to match the height of the already-attached-picket.
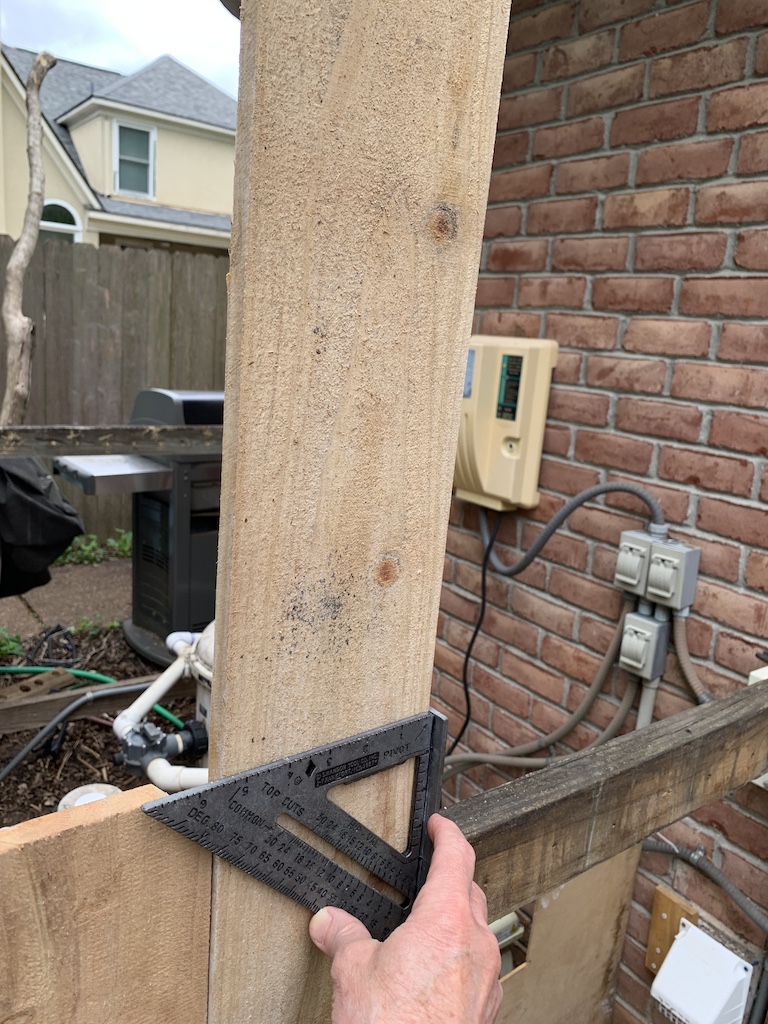
Second, I could line up the edge of the square to ensure the new screws were spaced evenly and lined up with the previous screws.
Attaching the first three pickets went quickly with the square and these wonderful power tools!
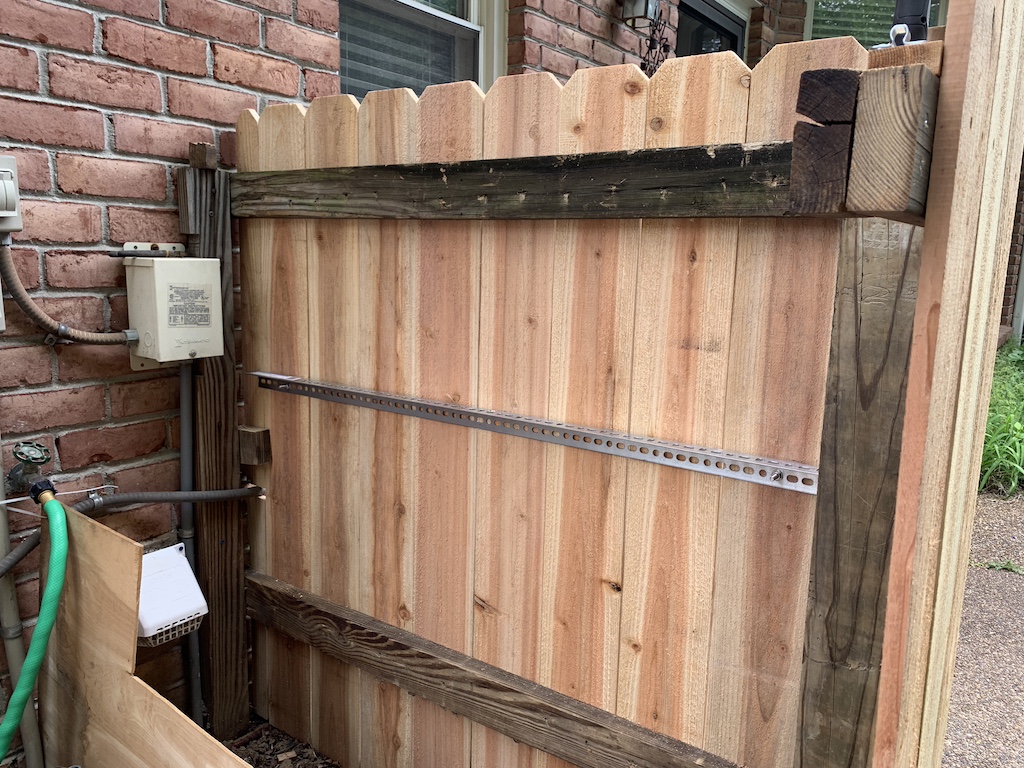
To keep the lift out section light weight, I chose to use a cedar 1” X 4” board rather than a heavy pressure-treated 2”X 4” stud. In the old fence, the top 2” X 4” of the lift out section rested on top of the 4” X 4” post on either side. In this new fence, this 1” X 4” would simply rest on the newly installed 18” long pressure-treated studs. Each picket in the lift out section would then be screwed into the top and bottom 1” X 4” cedar boards.

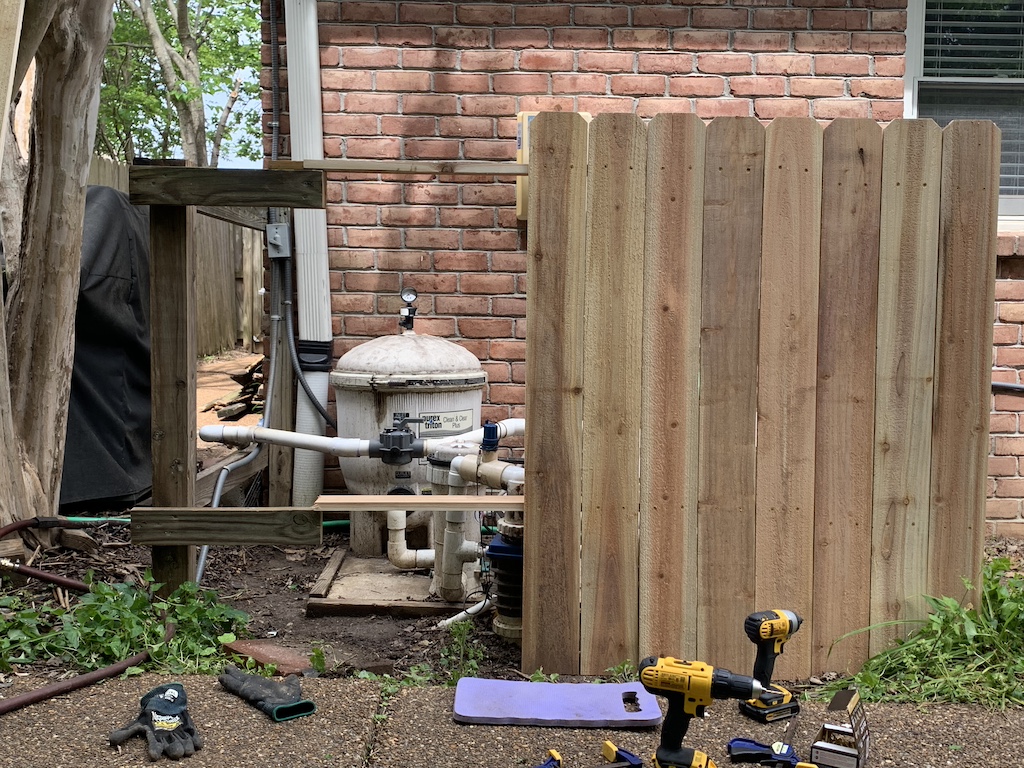
In the photo above, you can see the 1” X 4” boards resting on the 18” studs on the left side. And if you have done your math, you will see that I have attached five pickets to the 1” X 4” (the other three on the far right are attached to the 18” studs). What may be less obvious, is that it took five pickets to get past the halfway point on the 1” X 4” boards.
Once I had attached the planned eight pickets to the 1” X 4” boards, I still had some exposed 1” X 4” on the left and I wondered what had gone wrong.

Before disassembling the old fence, I had counted the number of pickets, and found it was 32 (14 on the front and 9 on each side). Since I was reusing the existing pressure-treated frame, I figured I would need the same number of pickets. But what I had failed to do was actually measure the width of the old cedar pickets and compare them to the new cedar pickets. When I did, I was in for a big surprise.
If you have ever bought stock lumber for any project, you know there is a difference between nominal dimensions versus actual dimensions. For example, a nominal 2’ X 4” stud is actually 1.5 inches by 3.5 inches. Sounds like we are getting cheated, but the difference is explained in the milling and drying process.
A nominal 1” X 6” cedar picket is actually 5.5 inches wide which I confirmed on the new ones I purchased. Fortunately, I had not disposed of the old cedar pickets and when I measured some of them, I found they were 5.75 inches wide. I Googled to see if the nominal vs. actual had changed over the 25 years but could not find that they had. My only guess was that I had somehow bought slightly oversized pickets 25 years ago.
The net of all this was I would now have nine pickets in my lift out section rather than eight but when I attached the ninth picket and lifted out the whole section, it was still very light weight (thus achieving my goal).

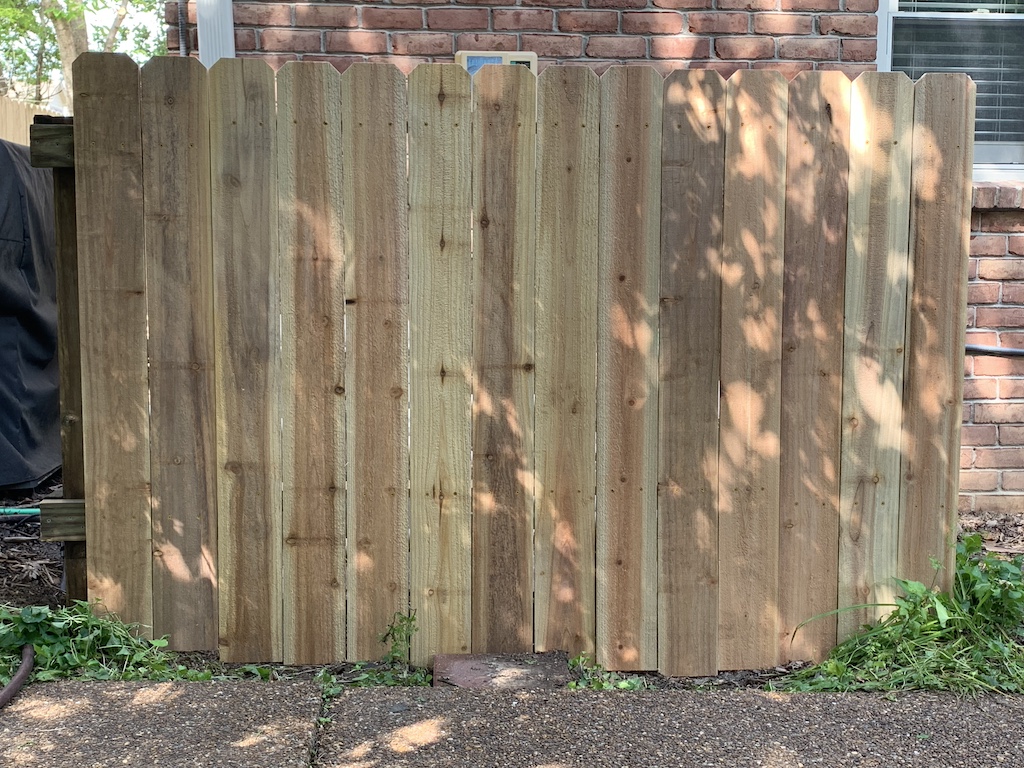
Also, this meant I would have to rip a full width picket on the left side to finish the front (essentially the right side where I started would have three pickets attached and the left side would have about two and a half, with the middle lift out section having nine instead of eight).
With the front section complete, I next worked on the right side of the fence which went smoothly. Once I finished that side and found out how many pickets it took (10), I then knew how many pickets I was short and would have to buy. Three more to be exact.

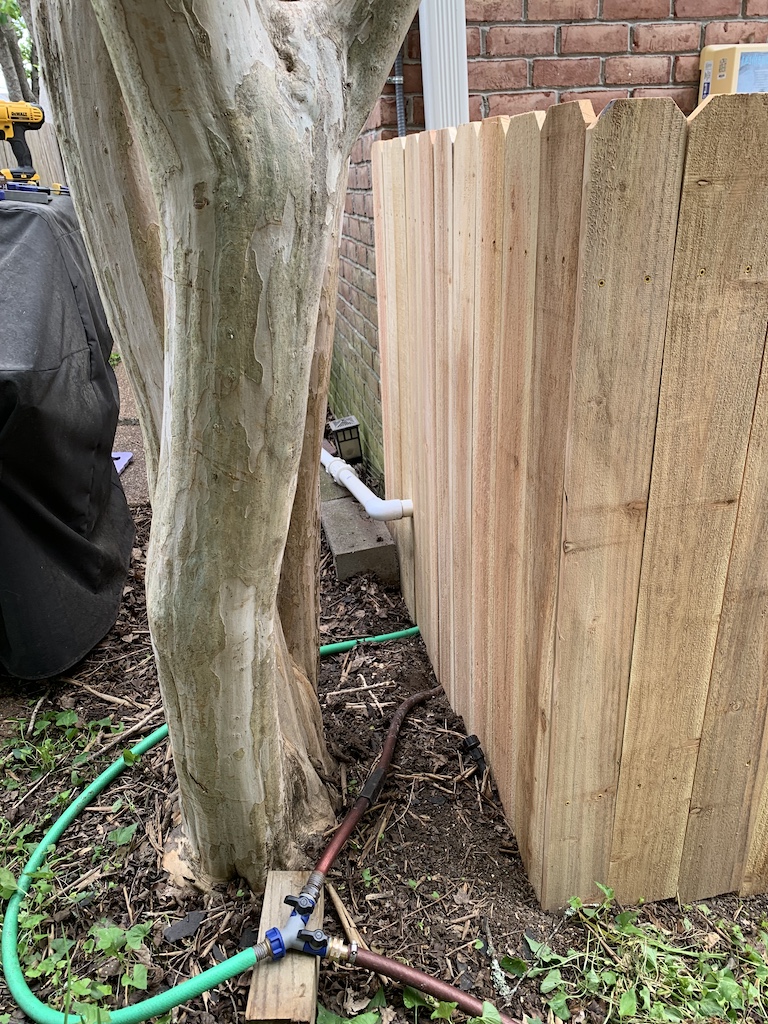
The left side went well also, and I got lucky that it was an easy cut into a single picket to accommodate the white drain-to-waste pipe.
Now all that was left was to add the supports for the top foam insulation panel.
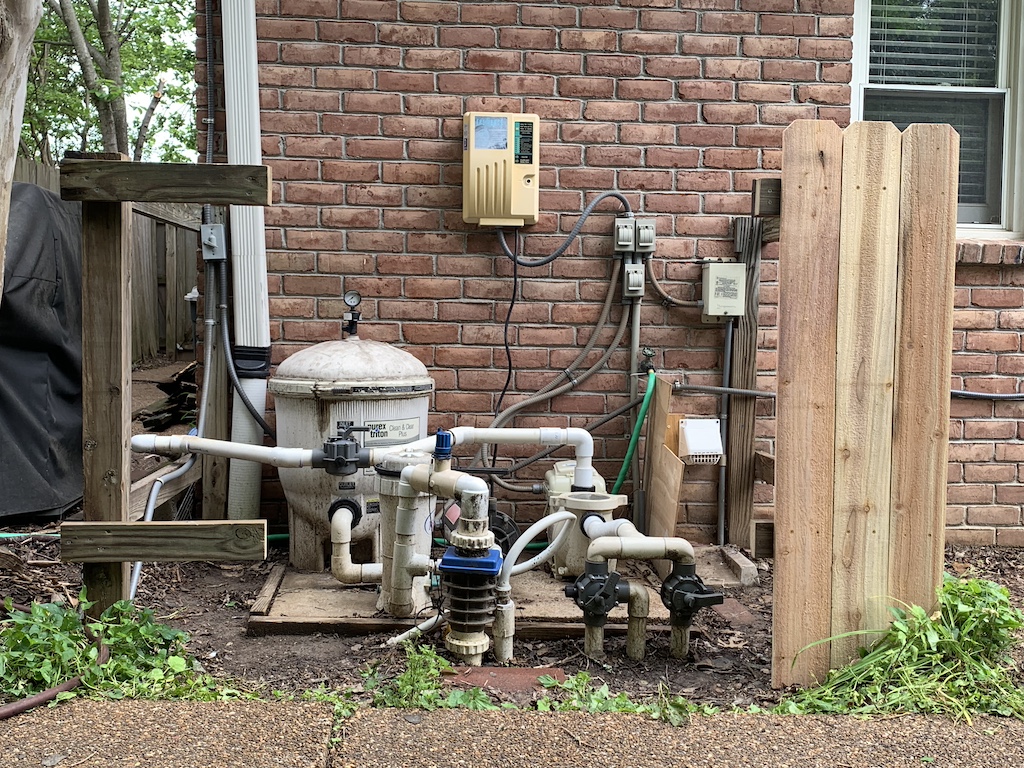
When I first added this sound deadening feature, I could not find 1.5” X 1.5” pressure treated or cedar studs to screw into the two fence sides to hold the panel up above the pool equipment. And so, I just used common 2” X 2” (nominal) wooden studs which over the 25 years, these did not weather well almost rotting away. So, I knew I wanted something else. When I first purchased all the materials, I thought I needed, the store did not have a more durable substitute. But when I went back to get those extra pickets, I found just what I wanted—a 4’ long 1.5” X 1.5” steel perforated-slotted angle (essentially an “L” shaped piece of metal with holes in it). This I then attached with carriage bolts.
With both of these installed, I could then lift the foam insulation panel back in place.
I then set in place the much lighter all cedar lift-out section completing my rebuild.

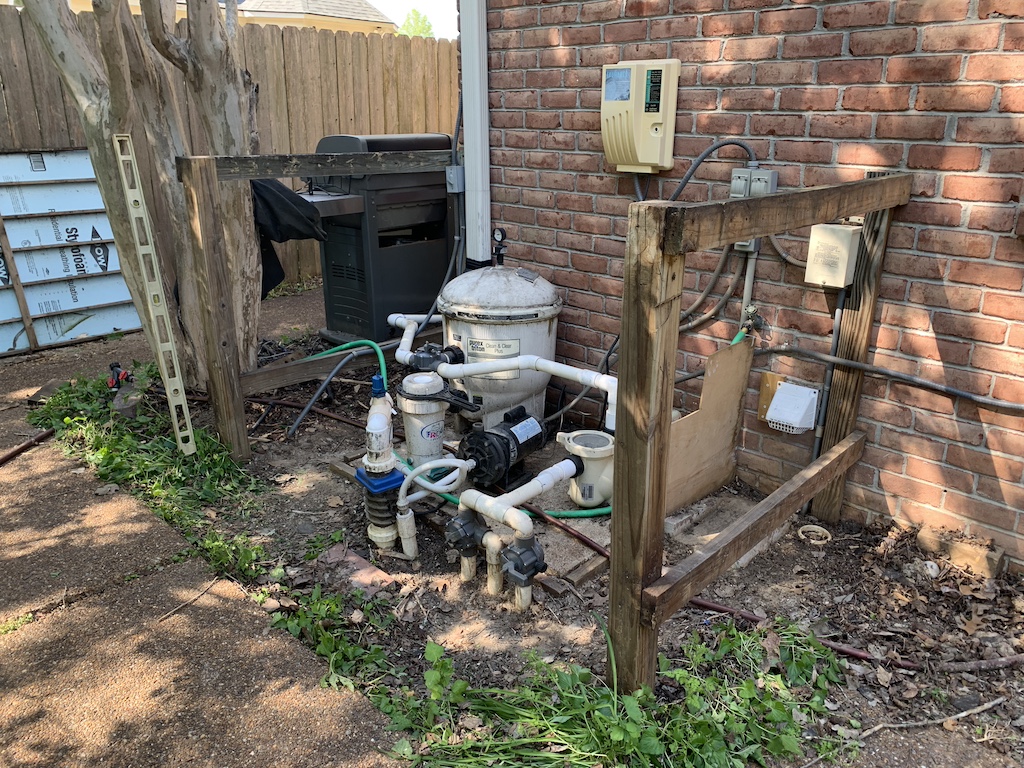
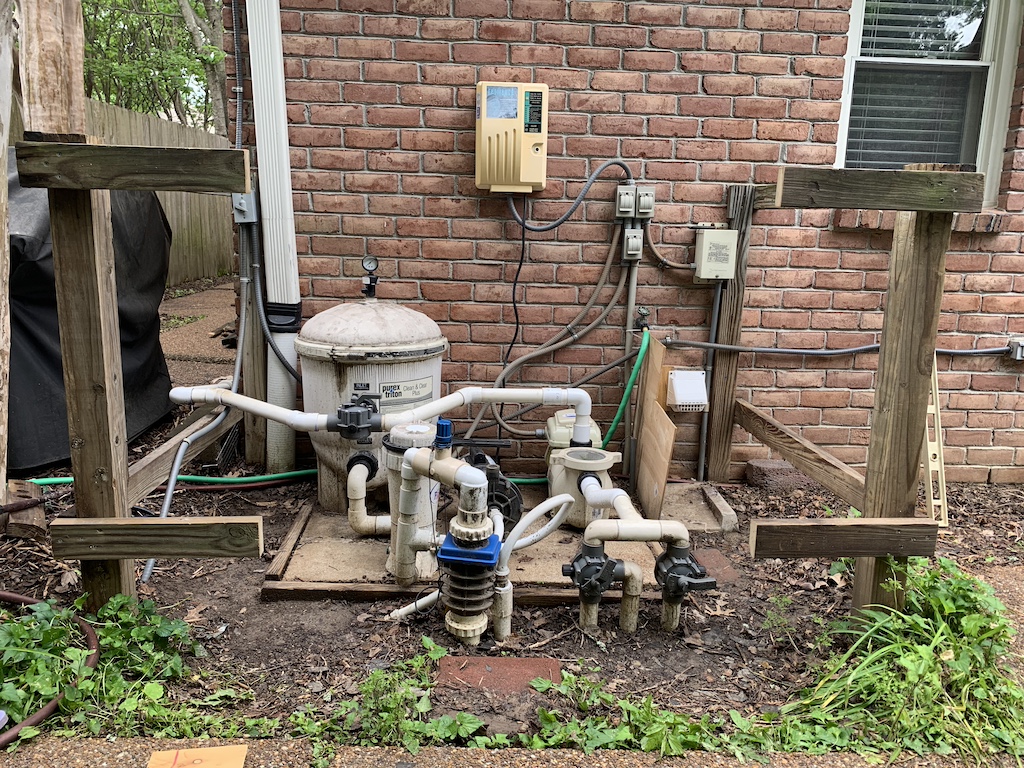
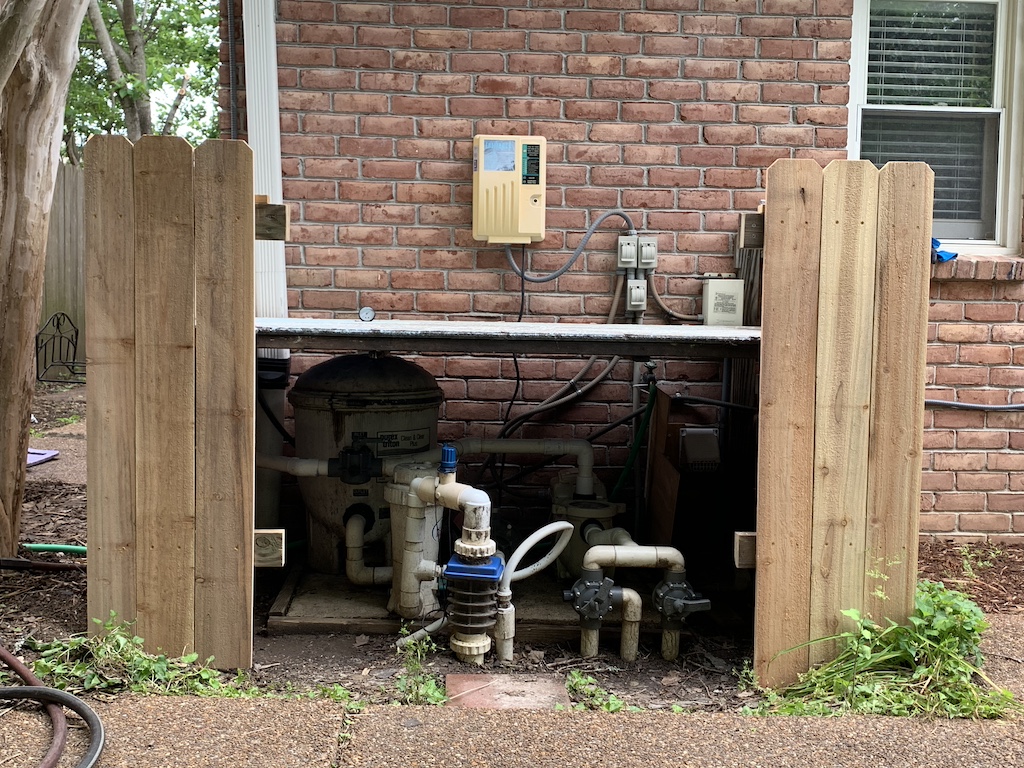
Compared to the before picture…

… this was a huge improvement. Hopefully this new fence will last for another quarter century. And the next heavy rain we get that necessitates me to pump water out of the pool, it will be a much easier task lifting out this new light-weight section!
Categories

Very nice job! The new fence looks great. I like how your sister teaches you some things! I am sure the new fence will last a long, long time!
Thanks Betty it is much nicer and should last a long time! And I appreciate all the things my sister teaches me.
Now I really want one of those Swanson triangles! How cool!
It is very useful. I think I got it when we built our deck.