
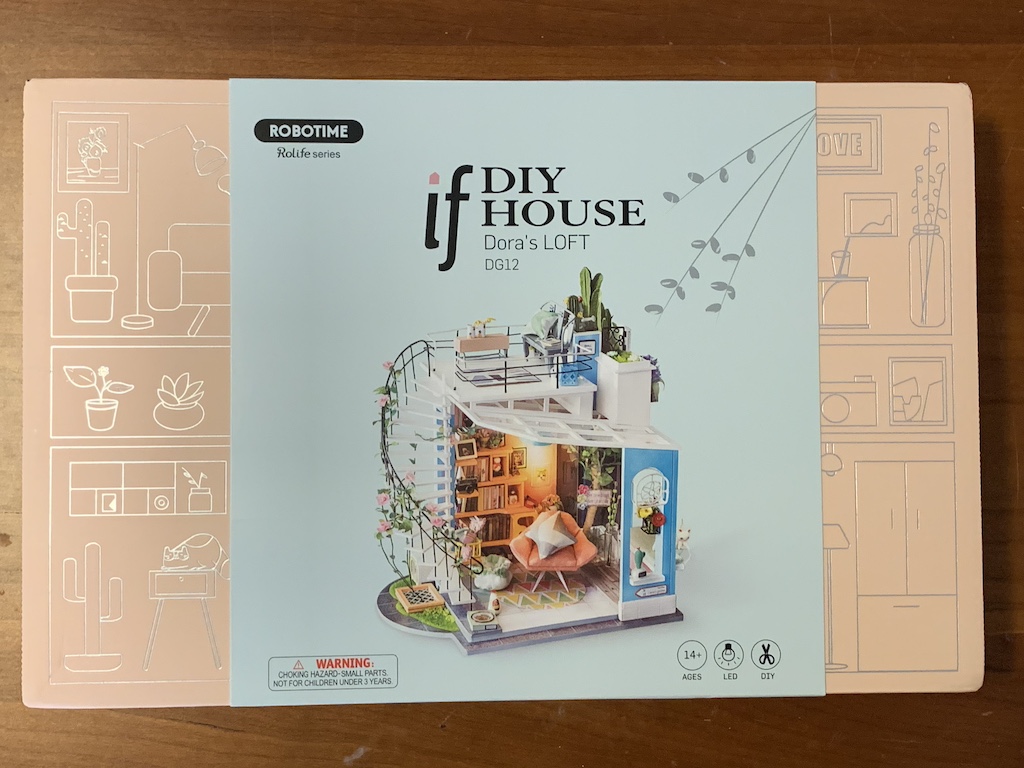
Miniature Bookshelf Loft – Finishing Off
Continued from: Miniature Bookshelf Loft – Getting Started
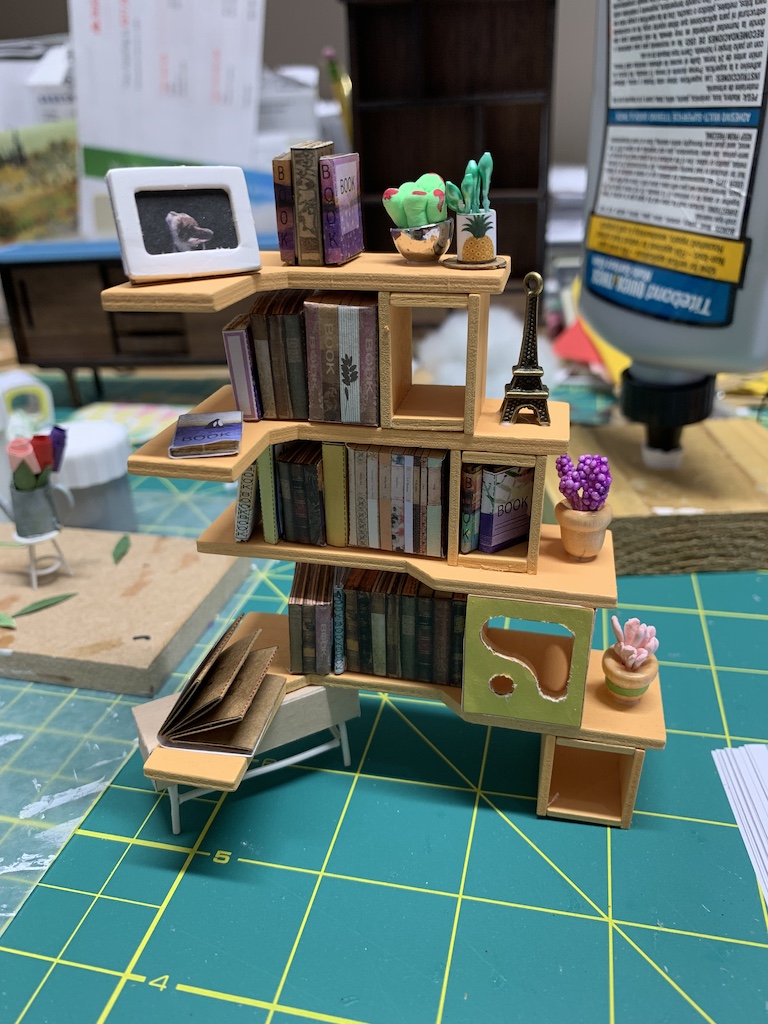
Next up was to make some books to place on that bookshelf I had previously assembled, and this kit used the same three approaches to making books—groups of books made from a single piece of paper (essentially a little box), paper books with actual pages, and book covers over small pieces of wood.

Then I got to make something new—flowers—a lot of different types of flowers mostly using colored paper and florist wire. Several had a unique pattern that was used to cut a multitude of flower petals or leaves. I would cut out the pattern and then affix it to the colored paper with a little swipe of a glue stick. Once I cut the colored paper to the same shape, I would then peel off the pattern. When I came across one flower arrangement that required 12 individual petals, I figured out that I could paste a stack of four or five pieces of colored paper together, affix the pattern to the top piece, and then cut to match the pattern with scissors. This really cut down on the number of times I had to cut around the pattern.

Each arrangement had a unique flowerpot, some made from wood or cardstock covered with paper while others were just small interesting-shaped beads. For those flower arrangements that required a wire basket, I just skipped all together. When done, I had quite a florist shop of flowers.

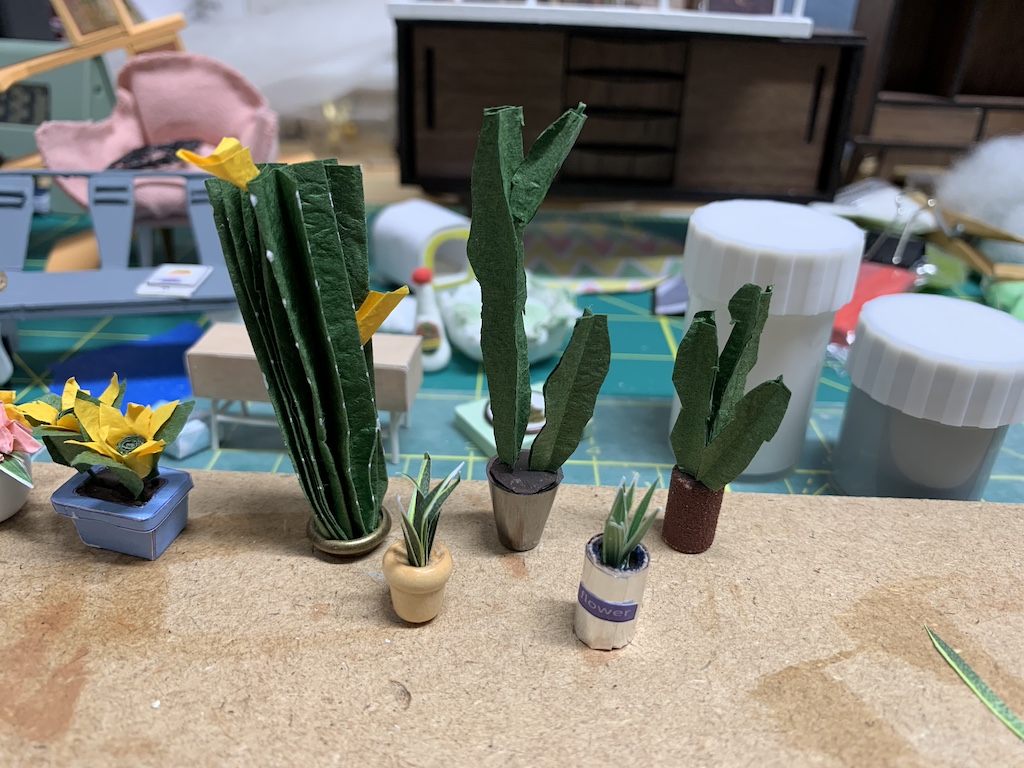
And then I moved onto making plants…
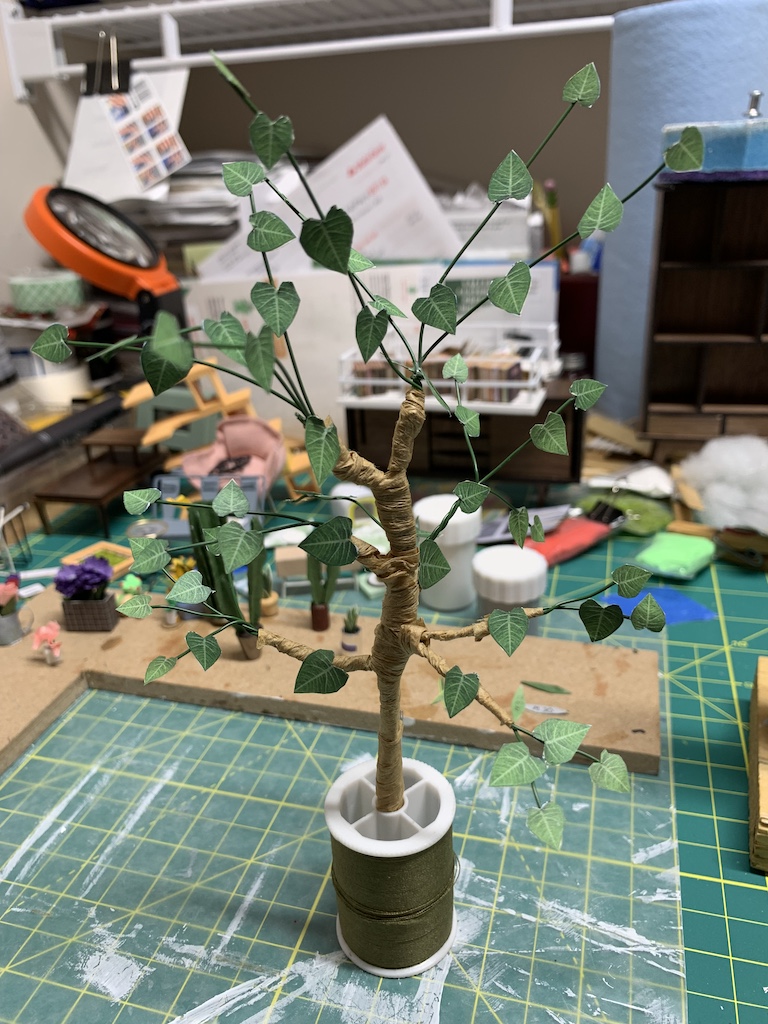
… before making a tree from wire, bark-colored paper, and printed paper leaves that each had to be individually cut out and glued to the wire.
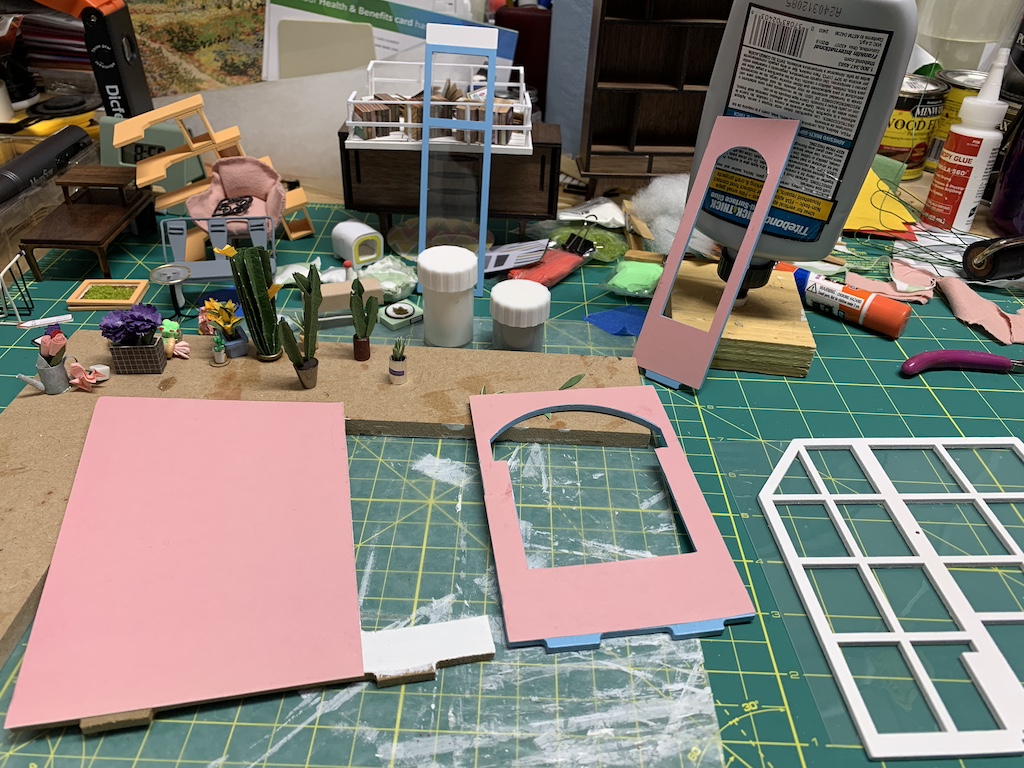
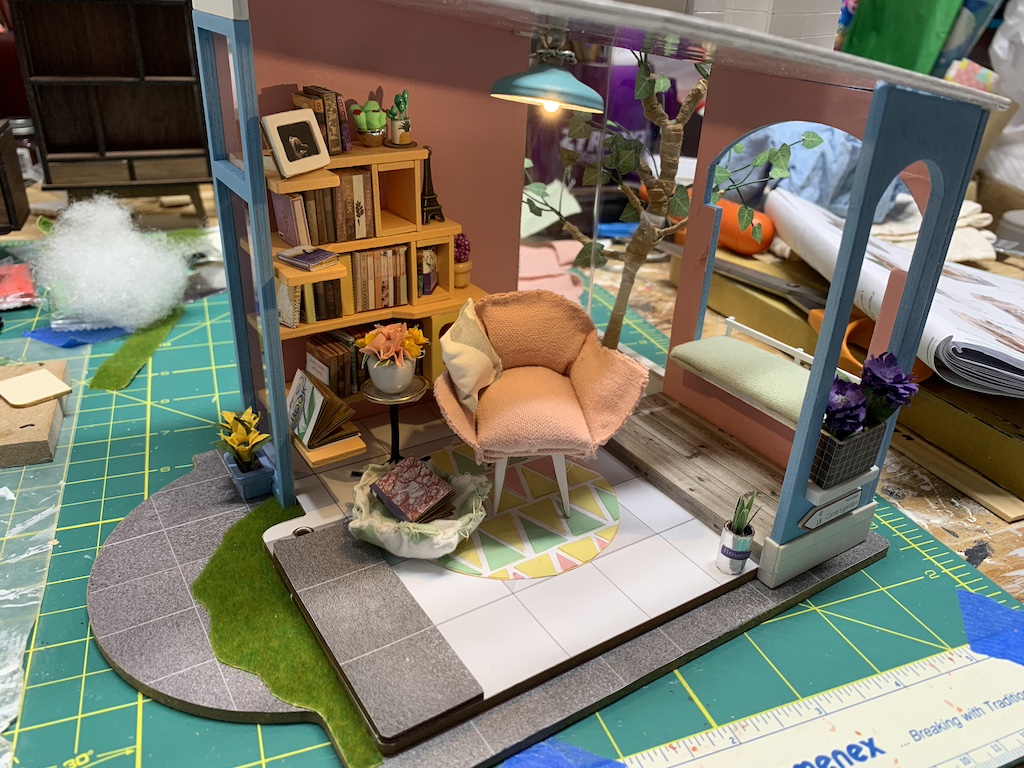
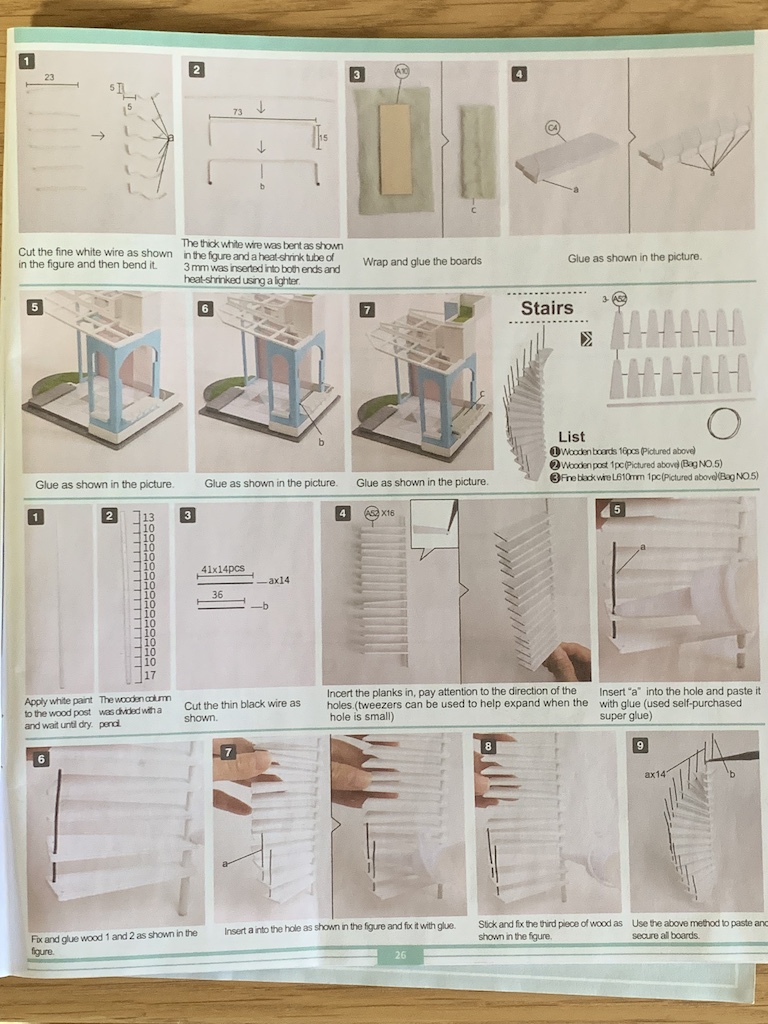
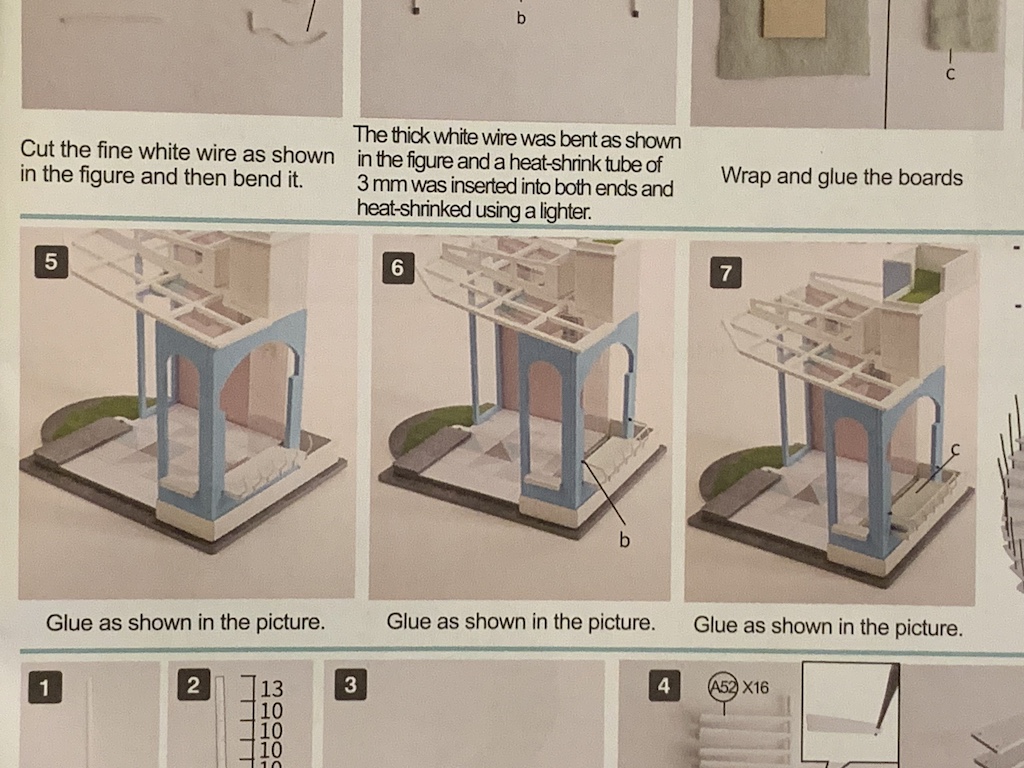
Now I could move onto the part of the kit I had been looking forward to the most: assembling the two-story building, starting with some wallpapering of the interior walls which worked best using a glue stick.
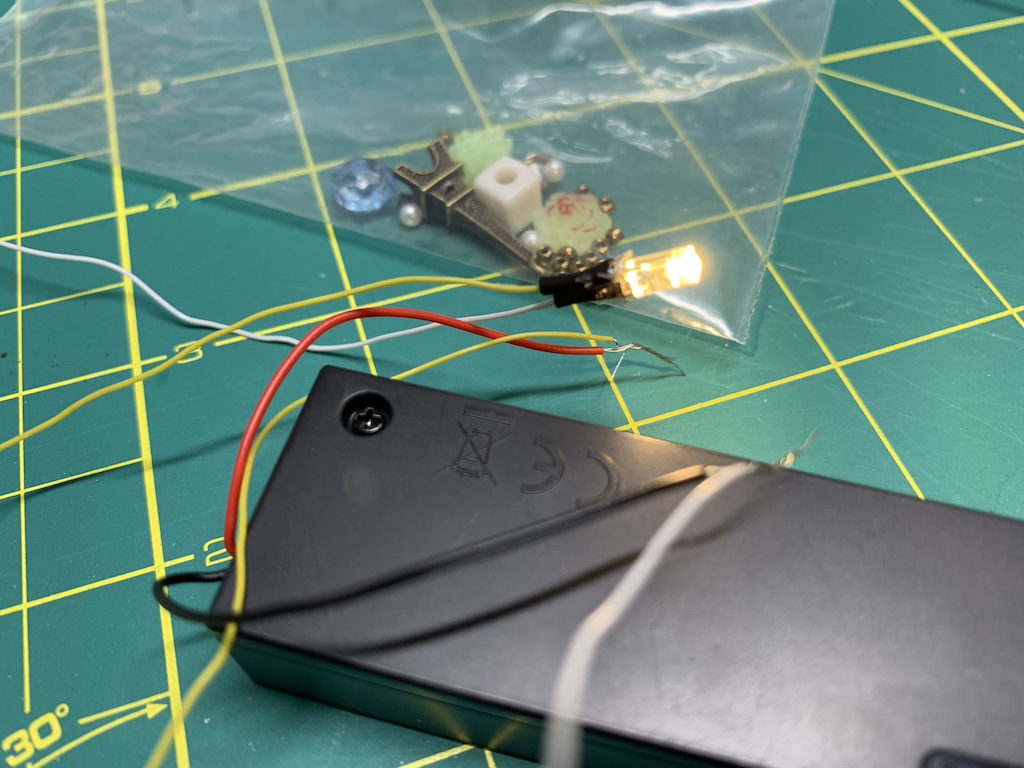
But then came the nemesis of these kits for me—building the light. The kit uses a teeny-tiny LED bulb that must be directly wired with thin electrical wires, followed by insulating with a heat shrink band. I previously had significant trouble trying to wind the exposed portion of the thin wire to the bulb and getting it to stay in place but this time, I thought of trying a new approach of soldering the wires to the bulb. The soldering iron I had belonged to my dad and when I got it out and tried, I quickly learned it was way too big for this tiny job. It was akin to me wanting to knockdown a wasp’s nest with a bazooka. Then I thought, why not use Super glue. It worked great and in no time, I had a working light.
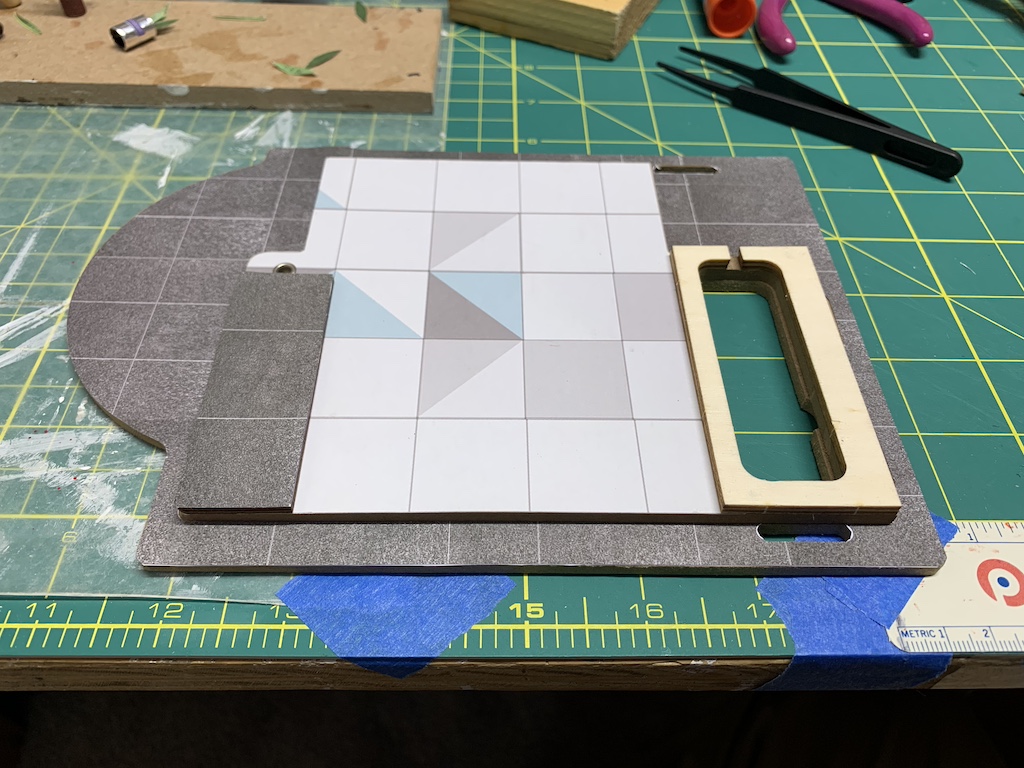
I now returned to the building of the structure starting with pasting the simulated flooring onto the wooden base.
I then filled the bookcase with all those books I made and placed some of the knick-knacks on it.
And then, the walls started going up when I began gluing them in place.

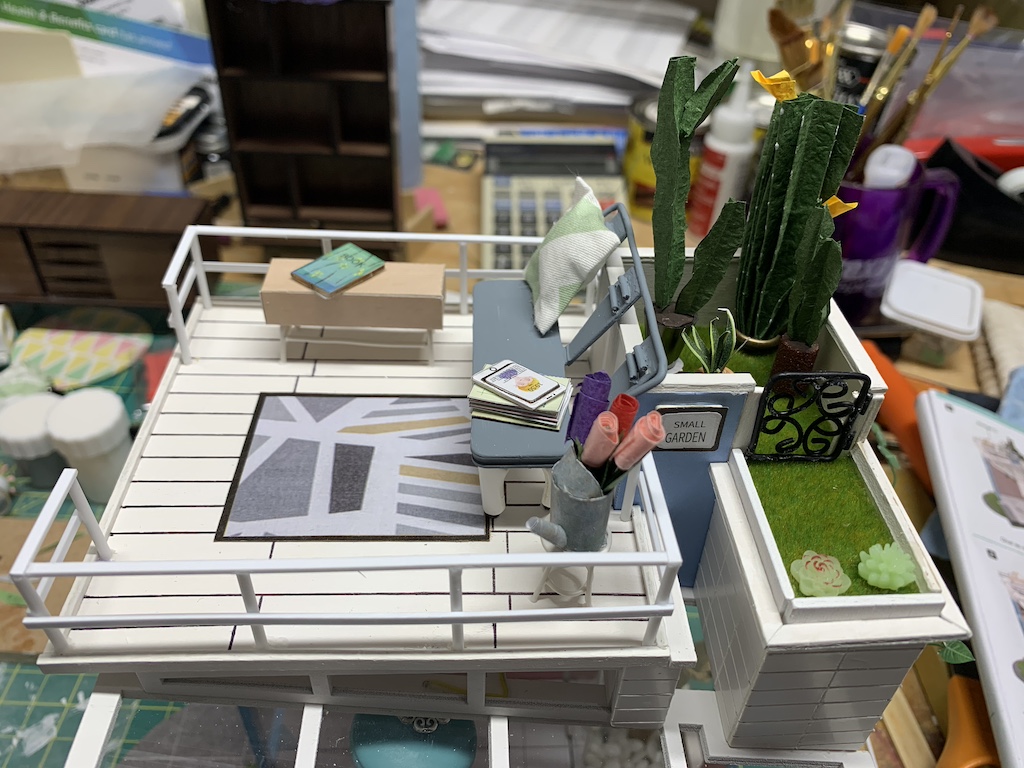
Once I added the roof, I was able to add the second-floor miniature garden where many of those plants I made will go.

When I completed this series of steps, I also finished connecting the light wiring to the battery box to make a working light.

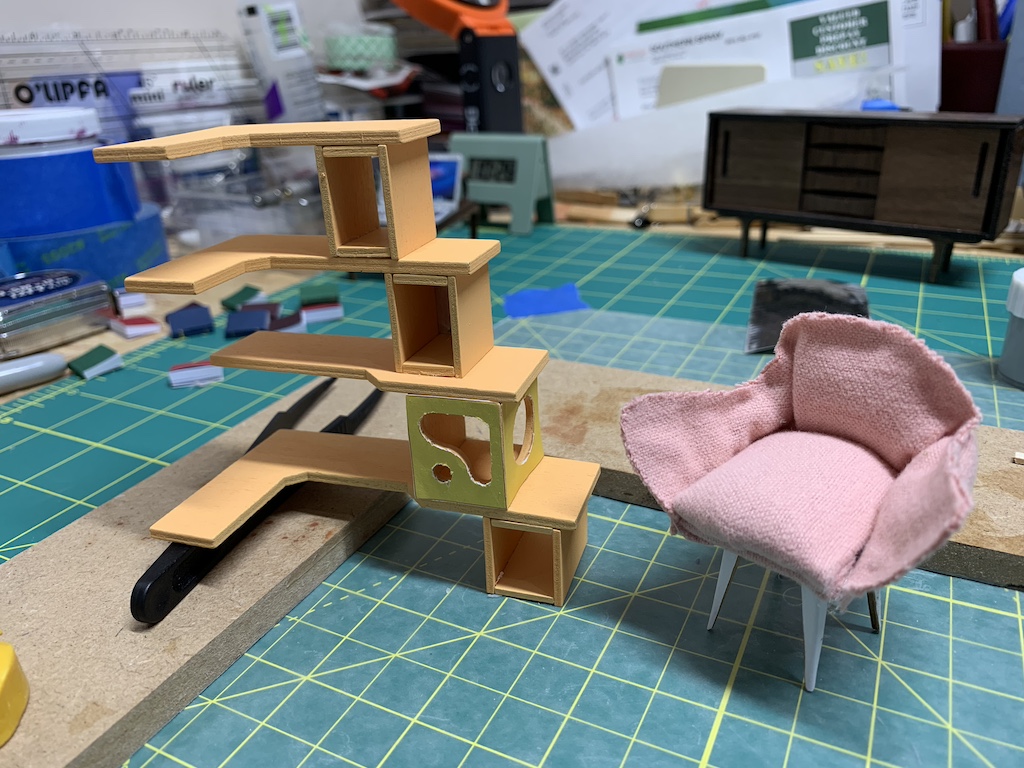
When it came to making the window seat, I once again skipped trying to glue together seven individual pieces of wire just to make the seat back and went with my alternate technique using small plastic pieces.

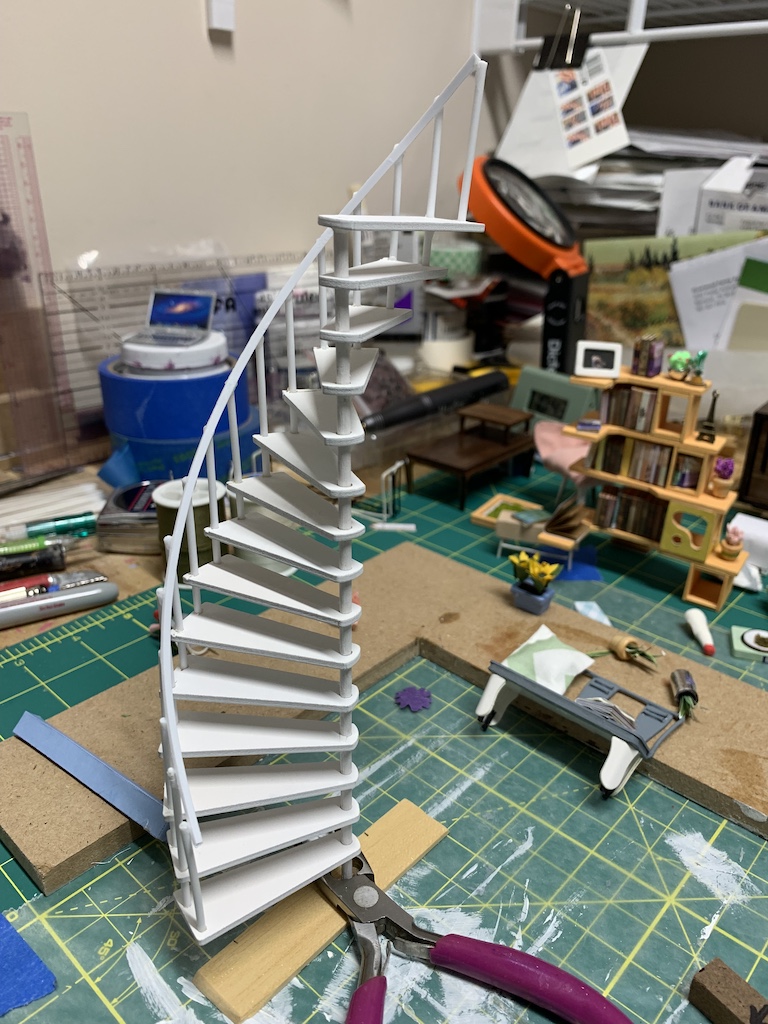
This approach worked particularly well for the spiral case that would have required gluing together 16 individual pieces of wire.
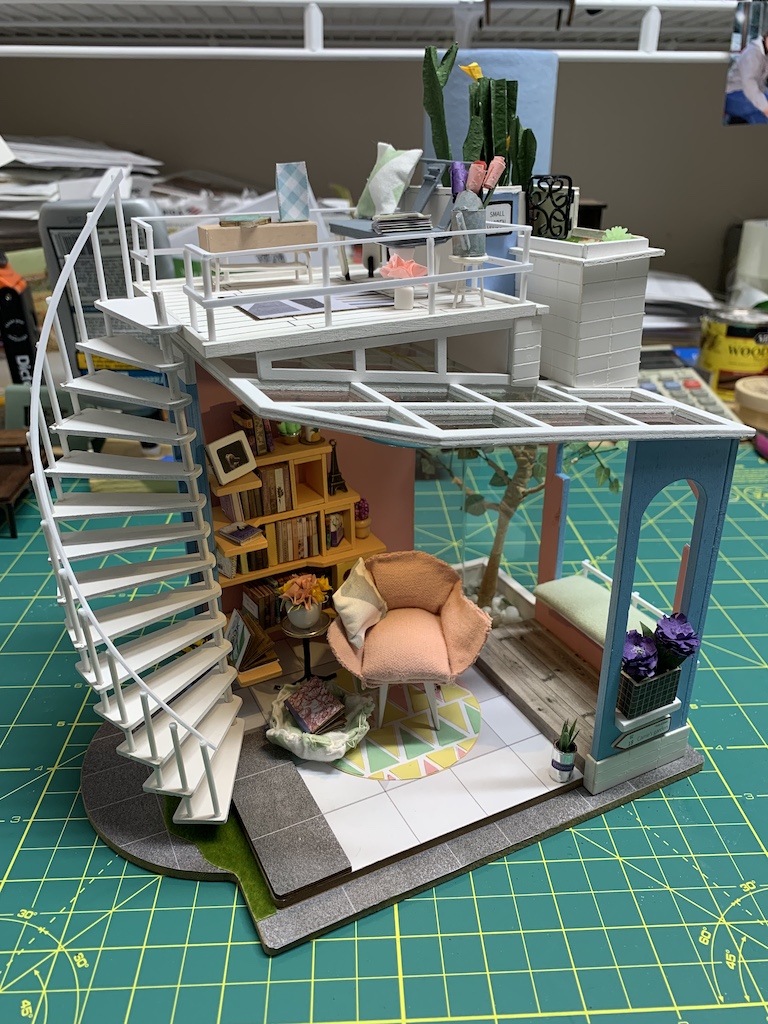
At this point, I was finished building subassemblies and was ready for the final assembly which involved 18 individual steps, most with no more instruction than “Glue as shown in the picture.” I first needed to glue the tree into the glass enclosed outdoor alcove. This proved challenging as many of those little leaves I had individually glued on kept falling off and required regluing (and for this reason, I chose to totally skip adding the rose vine that would climb the spiral staircase as it required cutting out and gluing to wire over 200 pieces of either rose petals or leaves).

Next up was to add the rooftop loft with its furnishings along with the succulent plants that I had made.
Then I glued in place all of the first-floor fixtures.
But then in the last step when I went to add the spiral staircase, I ran into a problem.
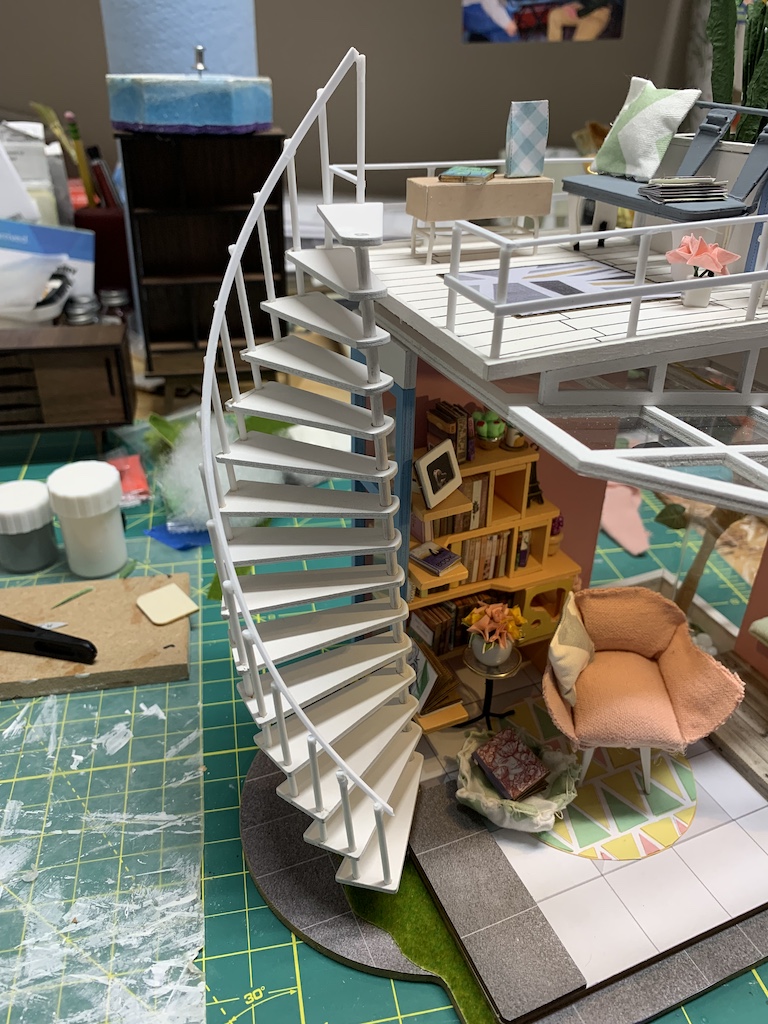
In the photo above, it is obvious that the staircase is too tall. In the instructions, it indicated that pencil lines should be drawn every 10 millimeters on the center pole for gluing the steps in place but was silent as to if the steps were centered on the line or above or below it. Instead of marking lines, I used a small 10-millimeter block to ensure the steps were level at both the center post and the balusters. In hindsight, I realized my approach did not take into account the thickness of the steps which led to the too tall steps. My fix rather than undoing all the work I had done was to cut a small piece off the bottom of the center pole and remove the top step. This fixed the problem easily finishing the kit.
Overall, I must say I had a lot of fun building this latest bookshelf kit.
However, I occasionally had difficulties interpreting the instructions, but not because of the language. The simple phrase would indicate: “Glue as shown in the picture.” …
… which with light colored parts against other white parts and a light-colored background made determining the proper placement quite challenging. In several instances, I had to look ahead in the instructions to other photos to better determine how to install the parts.
And as I mentioned, I omitted building a number of subassemblies that were too challenging and even some of which after building them, I decided to leave out as well.
Looking again at the kit box, you can see there is a recurring cat theme. Not being a cat person (sorry you cat lovers out there), I deleted these. I did not make or hang the cat photos, mold a cat from clay, or even include these cat essentials.
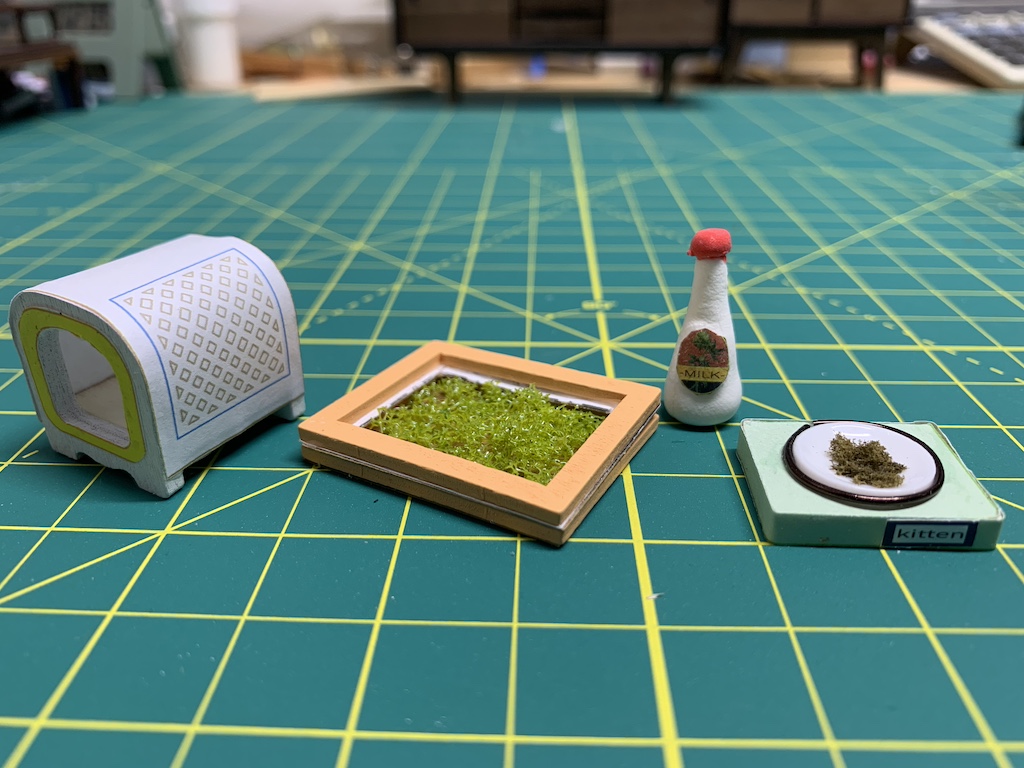
The one exception was the feline bed I had sewn which I placed next to the first-floor chair with a book in it making my loft a gardening and reading loft.
Categories

David, this was a lot of work! I think someone less skilled than you would be frustrated. But you did an excellent job with a great finished product. I bet a miniaturist somewhere would love the cat accessories. I can’t help but wonder what your next project will be!
Thanks, Betty. This kit did challenge me quite a bit. And since I almost always have some kind of project going on, you won’t have to wait long.
This is such a unique kit. The measuring of the stairs and the thickness of the steps is probably something I did (and forgot about the thickness of the wood steps) back in architecture school. I also know someone else in my house who will love this, thanks for sharing!
You are welcome and thanks for reading and commenting!
You have patience I will never possess! Looks wonderful!
Thank you and thanks for stopping by to read. If you are a miniature fan you should check out some of my doll house posts.