
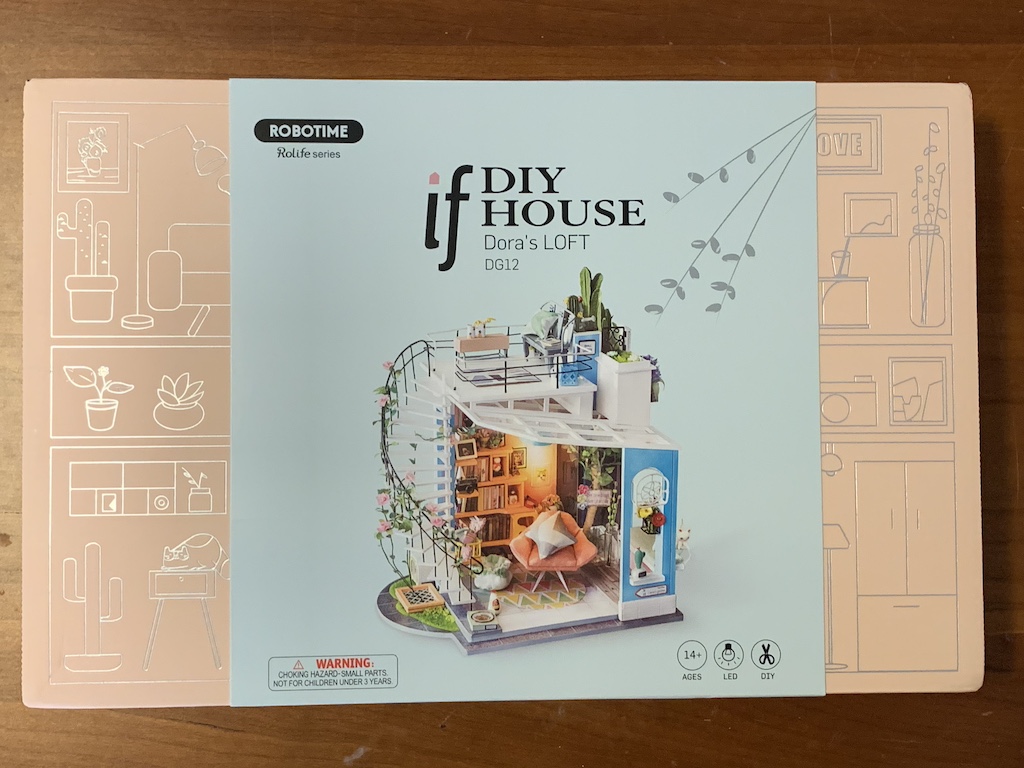
Miniature Bookshelf Loft – Getting Started

I was once again delighted to open this Christmas present from my daughter and son-in-law—another bookshelf miniature—the third they have given me!

And once I had finished my winter puzzling in January, I was ready to open it up.
As I pulled out the contents from the box, I could see I was going to be working with some of the same materials as the previous two kits—pre-painted wooden pieces, paper, and fabric.
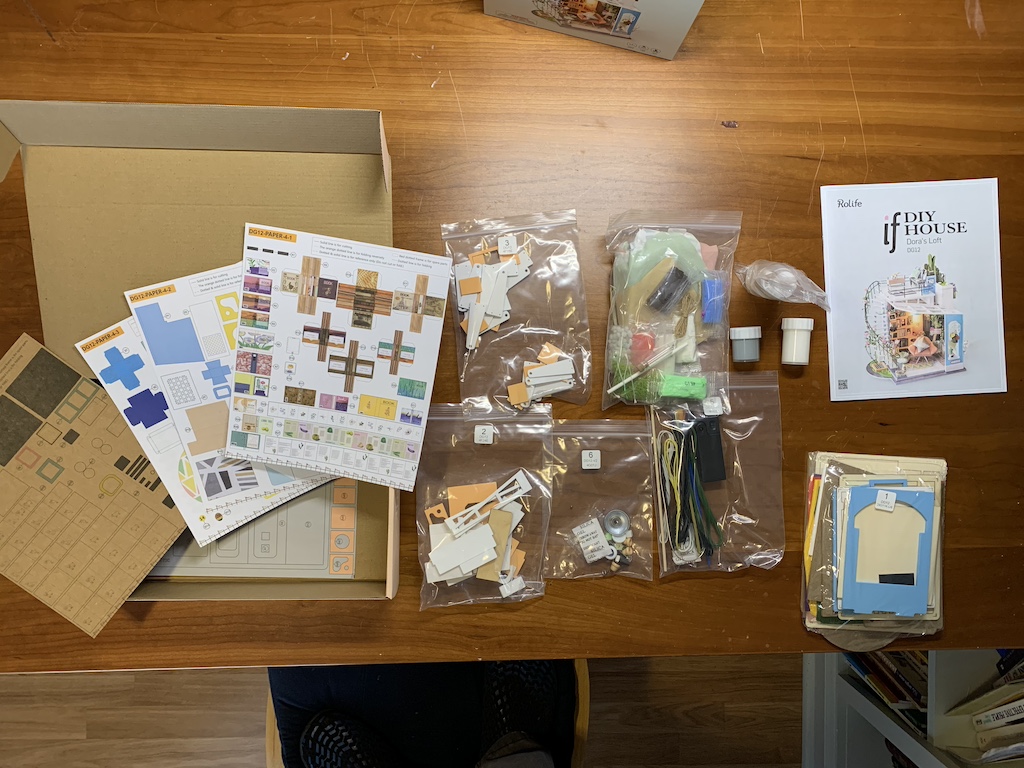
But I also noticed I would be working with a few new materials as well—clay, wire, and heavy cardstock. When I looked ahead through the instruction booklet at some of the different fixtures that I would be assembling, I could see that I was going to be building a lot of tiny components. And I could also see that this kit would probably challenge my senior-citizen miniaturist skills even more than those I had previously undertaken. Hopefully I was up to the challenge.
Reading the directions about the included glue, I was once again humored by the statement: “Glue is a gift not for sale. If it becomes dry or expired due to environmental problems, you can use your own glue to assemble.” I had tried their glue previously with less than satisfactory results. Therefore, I decided to follow their directions and not try to sell it, but rather to trash their glue and use the ones I had successfully used to assemble seven doll houses since 2020.
In my previous posts about the two bookshelf kits, I covered much detail about the assembly techniques required so, for this third in the series, I decided to just focus on describing the building of those fixtures that were new.
After starting out building fixtures like the ones I had previously built…
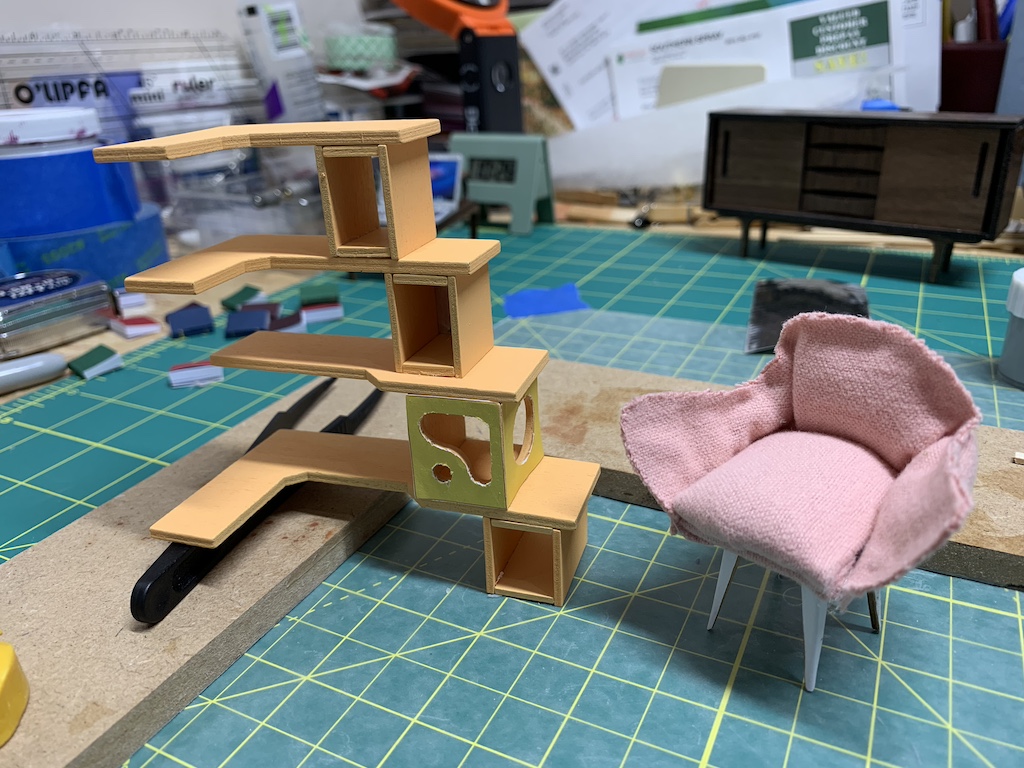
… I then met my first difficulties, making furniture out of cardstock and flexible electrical wire.
After cutting the right lengths of wire, I then had to carefully straighten it out or contour it into curves shapes. When I needed to glue one piece of wire to another, I used Super Glue to make a quick secure bond. Never having done this type of miniature furniture building before, I thought my first four attempts came out fairly nice.

But then I had to make the wire railings for the second-floor loft using the same flexible electrical wire. This step very nearly defeated me. Accurately measuring small millimeter lengths for each section of the railing and then requiring three to five different bends at 90° angles with straight lines in between, try as hard as I could, I was not able to get the wires straight between the bends. And gluing five different shaped wires altogether presented its own challenge. I was ultimately able to get the two railings glued to the loft floor (which I previously had to paint and draw board lines on) without them coming apart.
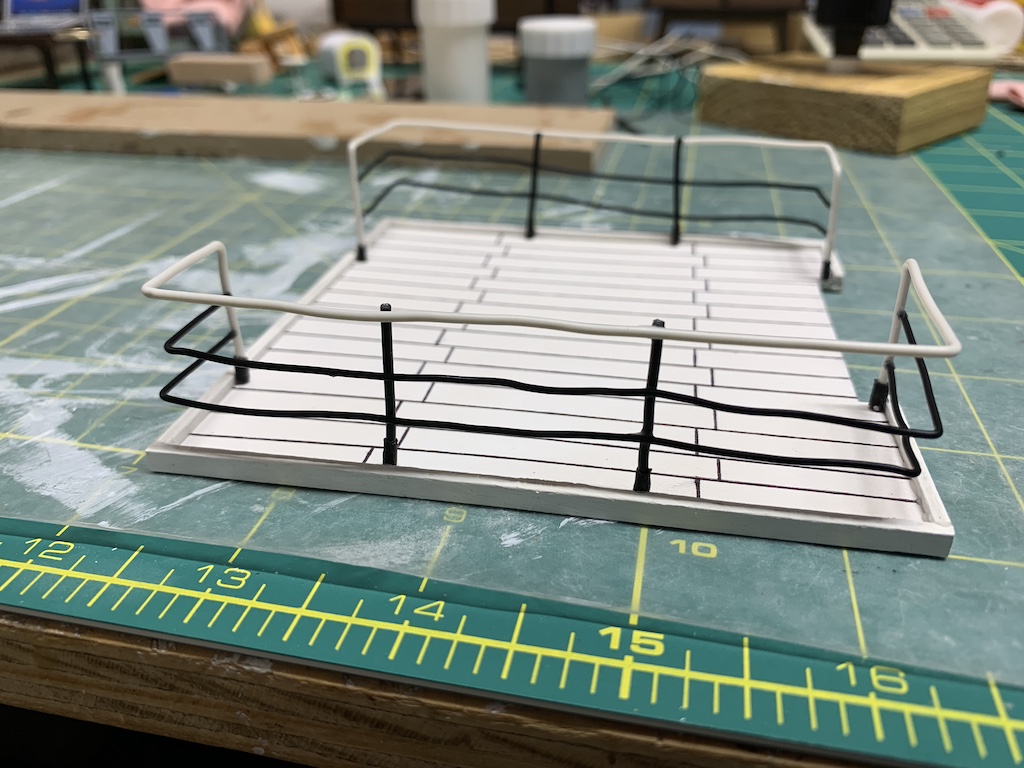
If I was grading myself, I would give myself a C- as the crooked railings reminded me of what the ones looked like in the underwater photos of the Titanic after it had hit the ocean floor with such tremendous force.
While the wire railings were completed, I was very much dissatisfied and when I came across another wire fixture to make, I was again less than satisfied with my finished piece (seen slightly above the photo in the instructions below).
Looking ahead in the instructions, I could see that I would have to make even more difficult wire fixtures. But once I flipped over in the instructions to the page that showed the spiral staircase from the first floor to the loft and saw that the balusters and railings were all made from the same flexible wire, I knew with the difficulties I had experienced so far, that I would never be satisfied with the finished kit knowing I would end up with even more crooked railings. At this point, I decided that I would not attempt bending or straightening any more wire.
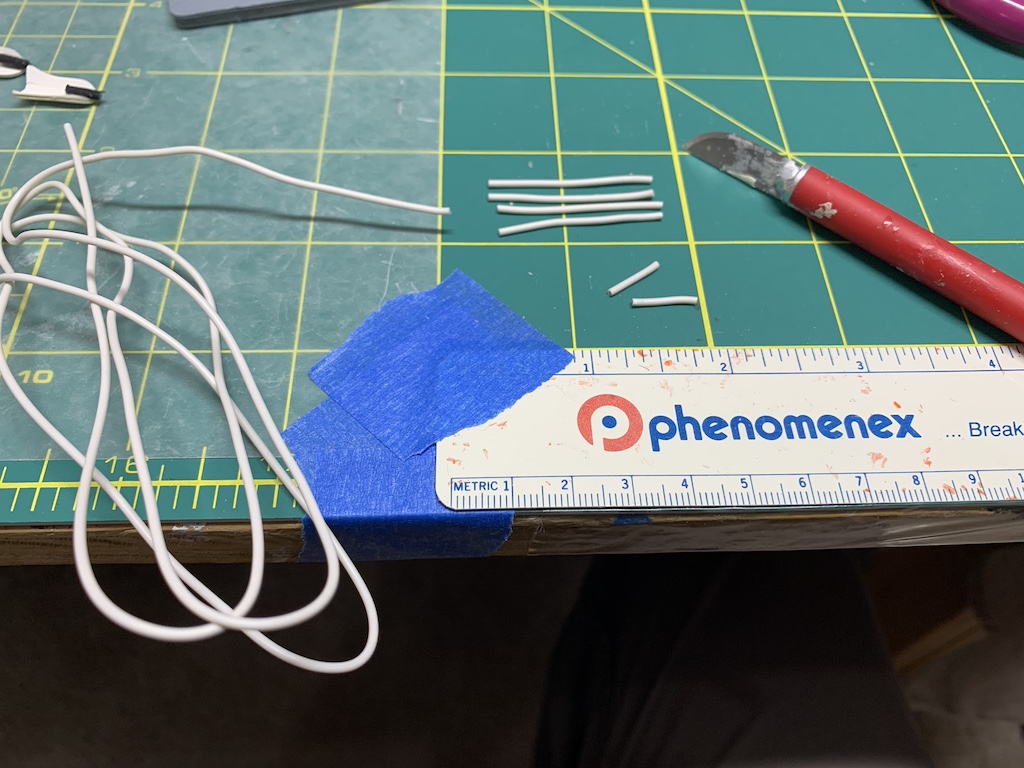
Some of you at this point may have just wanted to put everything back in the box and stuff it up on a shelf in a closet. But I was determined that it would not defeat me. I pondered how to fix the problem and decided to pay a visit to my local hobby shop. There I found a package of small white plastic rods (2 mm diameter).

I knew these would work as my balusters and I recalled I had some small white plastic strips left over from when I built my Chris-Craft boat which would serve as the hand rails. And it just so happened that I had a small hand drill bit that was the same diameter as the rods so I could drill holes in the floor of the loft to ensure the balusters stood up straight. I removed the first wire railing and started working with my new materials. I finished one side and left the old railing in the background for comparison.
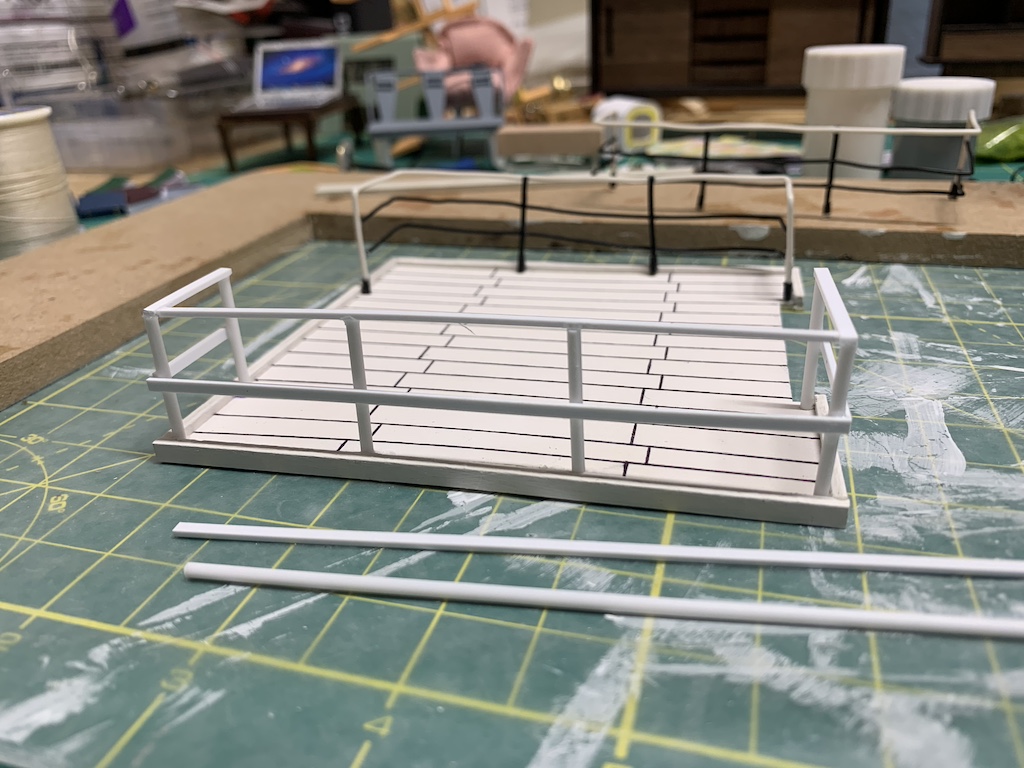
In the forefront of the photo above is the small plastic rod and between it and the loft is the leftover plastic rectangular strip I used for the railings. I decided to replace the two lower black railings in the original wire railings with the same flat railing. And I also knew I could use these same plastic pieces for the circular stairs later solving that problem as well

With what to me was a more elegant solution, I moved onto making other fixtures. And as I continued to work, if something seemed too complicated, or if it required the use of the flexible wire, I just skipped it. If you look back at the photo of the box, you can see there are a tremendous number of “knickknacks” that I figured no one would ever notice were missing. And I even got a chance to do some sewing although my cat nest was a bit more “free-form” than the picture in the instructions.

To be continued…
Categories

David, your comments about the glue and the Titanic railings made me laugh. This kit would defeat me for sure! Is there some kind of online resource where people discuss building these kits? I wonder what others do. In any case, your solution is brilliant. Much better than a wobbly look. I also noticed the bookshelf behind you in the first picture looks very similar to the bookshelf in the kit. Perhaps someday I will build a miniature RV. 🙂 I look forward to the next installment!
Thanks, Betty, and thanks for your great suggestion about an online resource. I never thought of that. If you find a model RV, I’ll be glad to offer my miniature advice.
Happy Mother’s Day! Hope you have a nice one.
I just bought another paint-by-number kit, so it’ll be awhile. But, I will keep your offer in mind.
I just bought another paint-by-number kit, so it’ll be awhile. But, I will keep your offer in mind. Have a good day, David!
Ingenious solution! I worried about those wires—they looked so tricky! But the railings you made look beautiful!
Thanks sweetie! Yes I was quite pleased with my alternative.