
Doll House Furnishings – Phase 9
Continued from: Doll House Furnishings – Phase 8
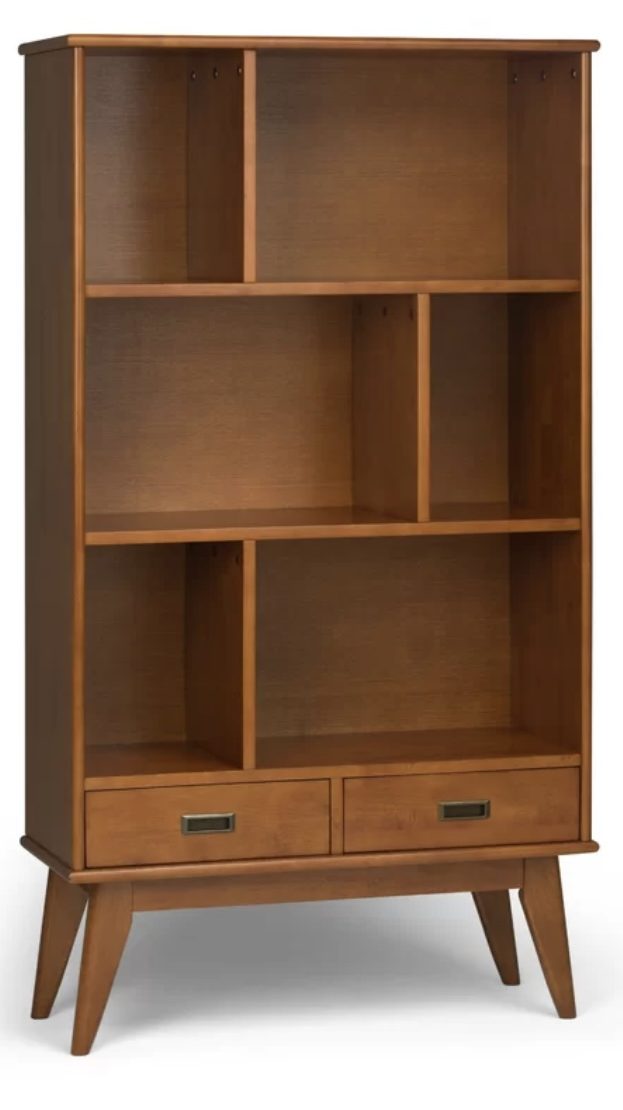
When my sister drove over for the 4th of July, I learned she had worked her magic on this bookcase as well.
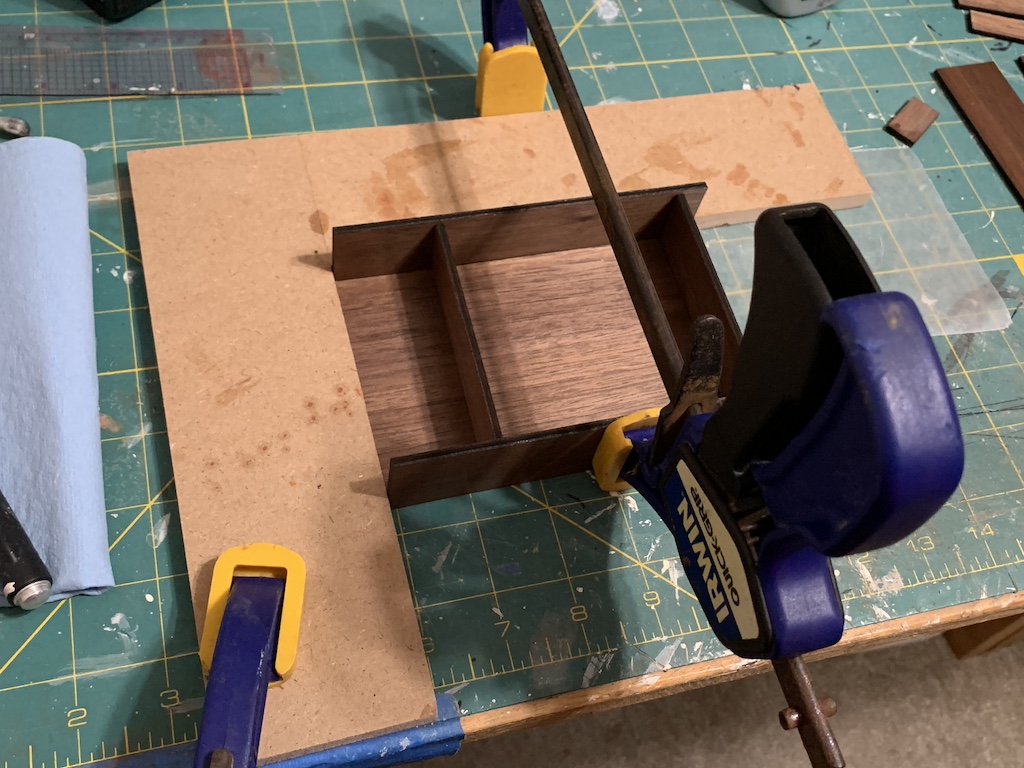
These are the pieces she “printed” with the paper still on them. I did my scrubbing and then peeled off the paper. When I did, I discovered the grain was going in the right direction.

These pieces were cut out from the same walnut veneer plywood so I still could not sand the edges round without losing the walnut veneer, but at least for this one, the wood grain was oriented correctly.
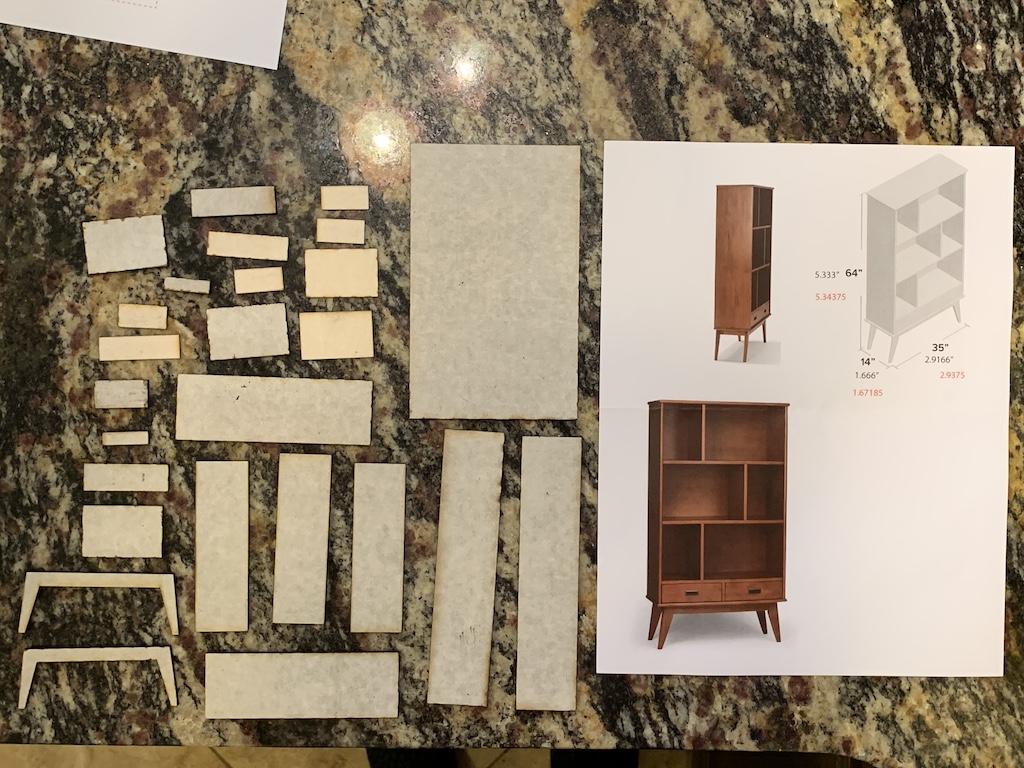
After my sister went through all the steps to create the digital file for the bookcase, she first cut out the pieces from basswood plywood. She then assembled it, stained it and applied polyurethane. Part of the purpose of this was, as she had done with the other two pieces, to verify the accuracy of the translation from full-scale to 1/12-scale 3-D cut-out pieces in the final assembled model.
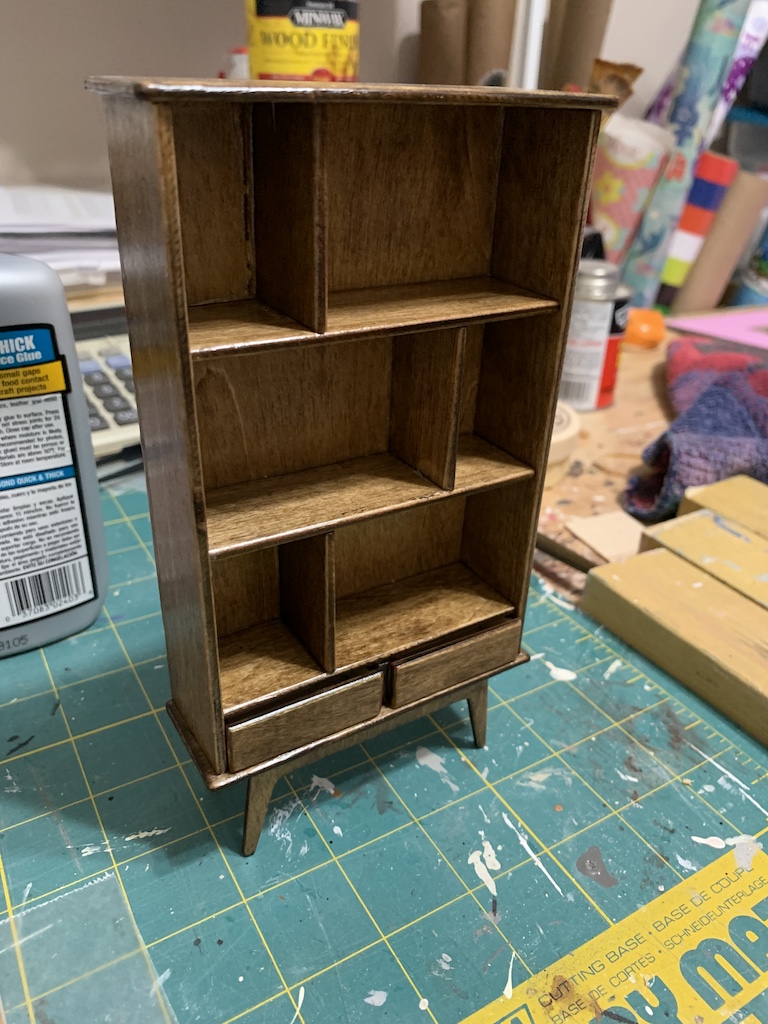
For this bookcase, there were two pieces that did not translate accurately in that process. In the photo above, it may be hard to see but the drawers do not slide fully into their openings. The drawer fronts are slightly too big and so cannot slide in flush with the shelf above or the divider in between them as seen in the image of the full-scale bookcase. So, as I assembled my bookcase, I would need to determine how much smaller these drawer fronts needed to be so that the drawers could slide in completely. Once that determination was made, my sister could then adjust the digital file accordingly so future cuttings would be correct (again I’m amazed she knows how to do all this).

Since it was so much easier to apply the polyurethane with the legs pre-assembled on the credenza, I started there. The same 3/16” strip of basswood that I used on the credenza provided the right placement of the leg braces, only this time on its 1/8” edge. I was able to glue both braces at the same time before adding the second leg.
On the last two furniture pieces I assembled, I used satin polyurethane which I thought gave a nice soft finish. For this bookcase, I decided to use the other type of polyurethane I had, semi-gloss, to see how that looked in comparison. This was the type of polyurethane I had used on the floors of my doll house.
Because I had not partially assembled the bookcase as I had the credenza, I was able to apply polyurethane to flat pieces of wood. This then allowed me to sand with 1200-grit sandpaper between the two coats of polyurethane. I really could not tell a difference in the level of sheen between the satin and semi-gloss finish. But when I ran my hands over the pieces of the bookcase and then over the top of the finished credenza (which had not been sanded), I could feel a big difference. Going forward, I would always apply polyurethane before assembly so I could add in this intermediate sanding step.
Once I had brushed two coats of polyurethane onto both sides of the wood, I was ready for assembly.
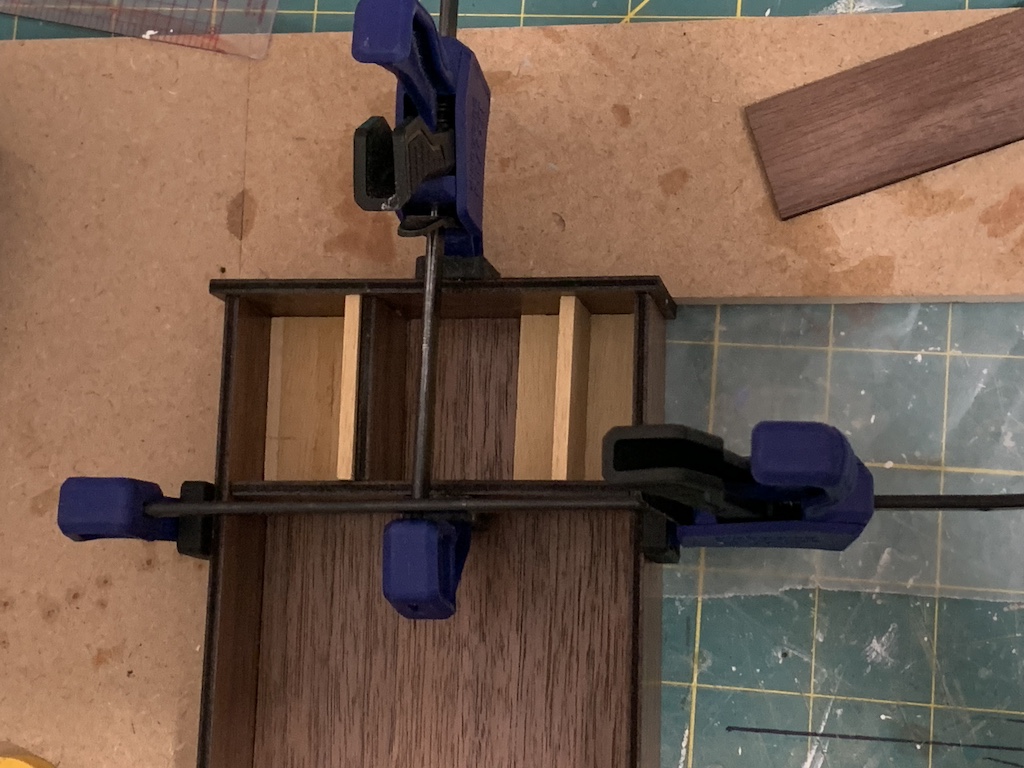
The first step was to glue the two bookcase sides to the back. I first glued one side and then the other. I clamped them together to ensure a tight fit and I used two shelves to make sure everything was square.
I then glued the top and bottom to the bookcase again using a clamp to ensure everything was tight.
The 1/12-scale drawing my sister had also brought me provided a convenient way to determine the placement of the vertical shelf dividers.
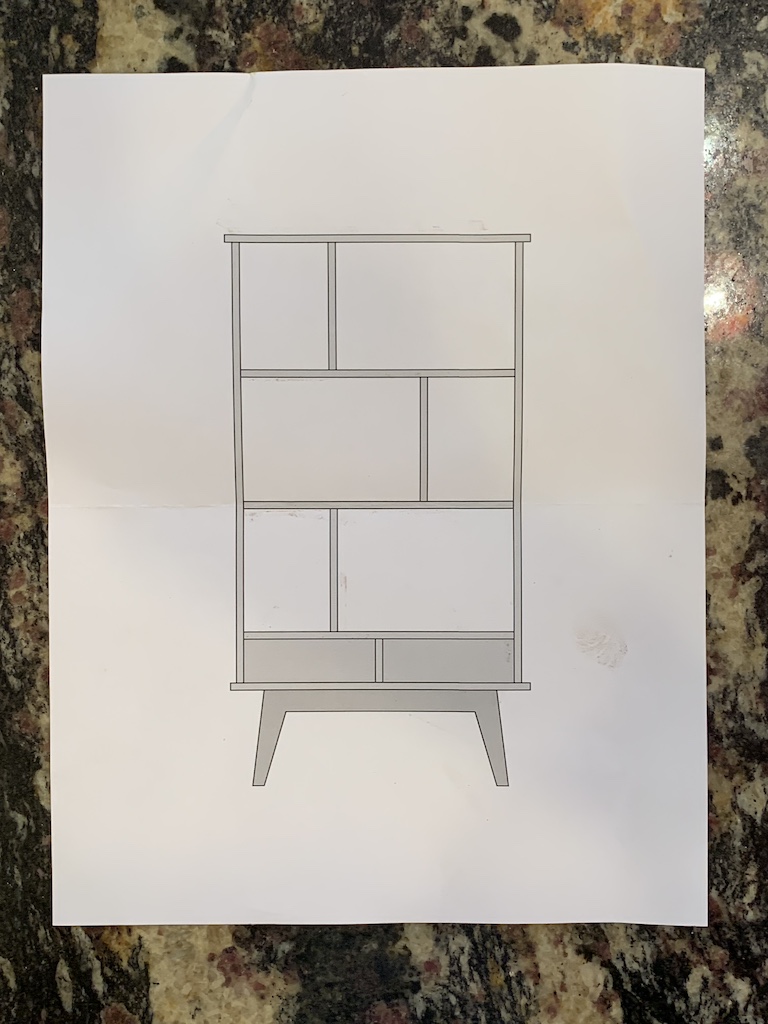
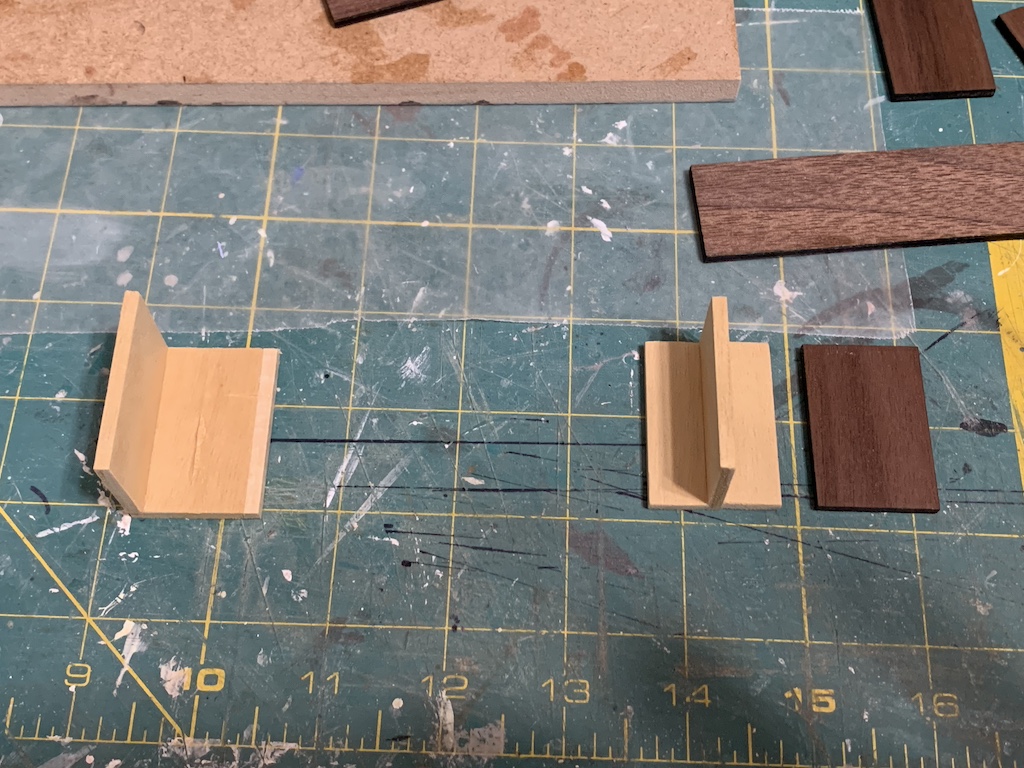
Measuring their placement, each one was 1 & 1/8 inch from the bookcase side. If you have read my doll house posts before, you know I am all about making a jig that simplifies the build and ensures consistent placement of multiple parts. I made two using left over 1” X 1/8” scraps of basswood, one to fit flush against the vertical divider being glued (the one on the left with the addition of the 1/8” strip) and the other to ensure the other side of the shelf without a divider was level.
As I glued in each shelf and divider, I used clamps to make sure the pieces fit tightly together so the glue would hold.
Once I had all three shelves glued in, I was ready to determine how much the drawer fronts needed to be sanded.
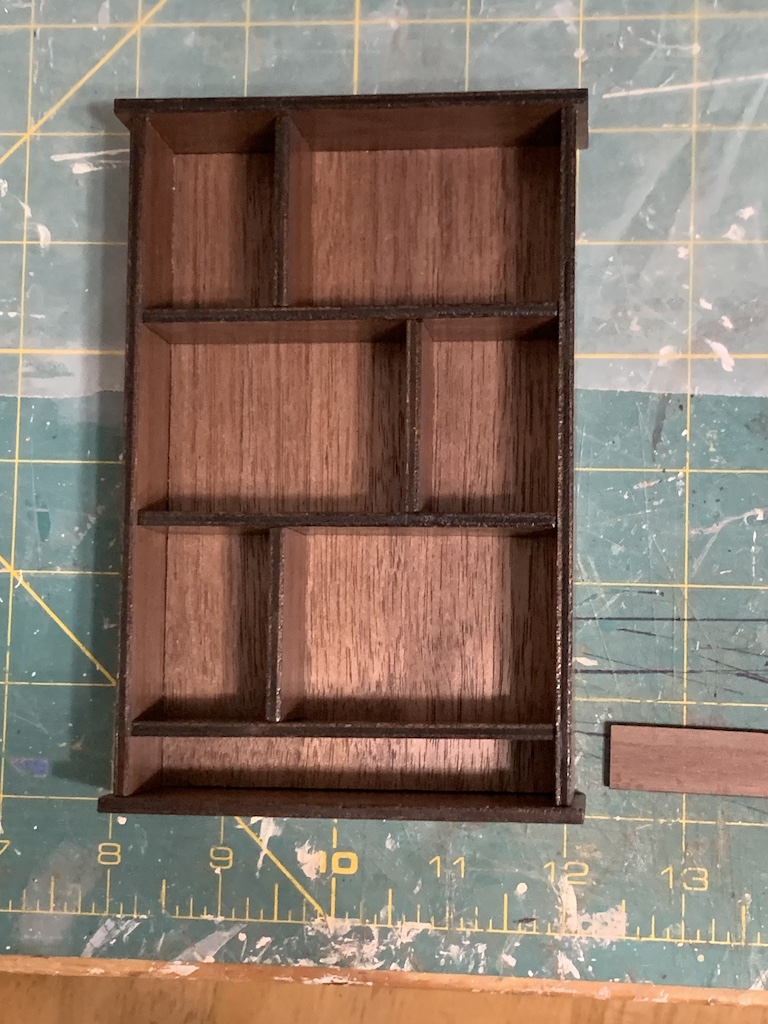
But then I noticed something unsettling. To my eye, it looked like the side of each shelf farthest away from the vertical divider seemed narrower. I confirmed this when I tried to insert the jig that had been flush against the divider being glued in; it would not fit. When I made the jigs, it seemed they both were the same height as the divider but maybe the clamp compressed the basswood ever so slightly more than the veneer plywood. Going forward, I asked my sister to cut five dividers rather than three so both new jigs I made, and the divider being glued in would be the same material (recall this was to be a practice build and this was an interesting learning).
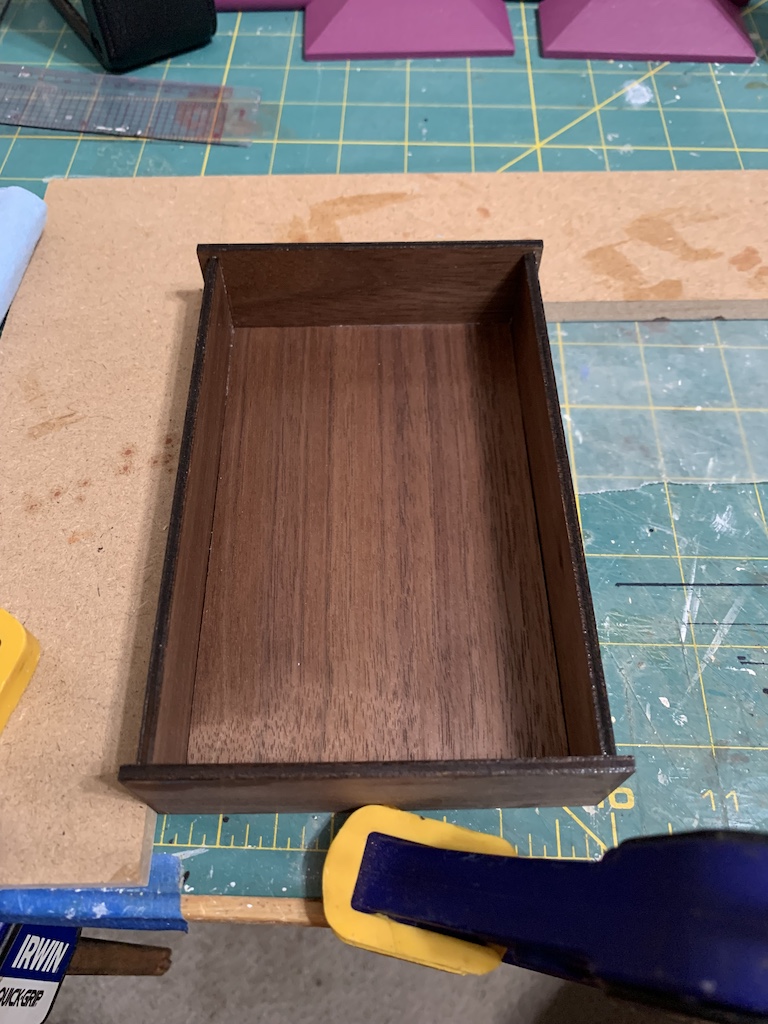
I began to sand the first drawer front and once it fit flush, I compared it to the unsanded one and found it to be a smidgen less than a 1/16” shorter.
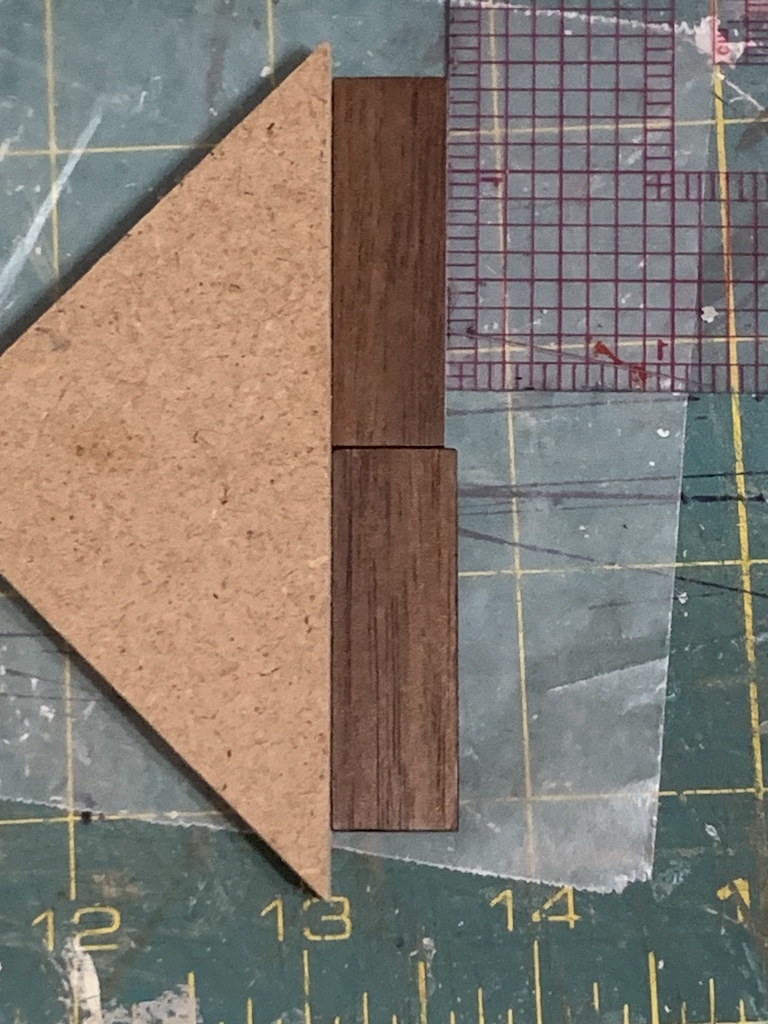
I then proceeded to sand the drawer divider and the other drawer front. Once I had everything sanded, I assembled the drawers (bottom, two sides and a back) and slid them in. The last step was to glue on the pre-assembled legs.

Side by side, the two bookcases looked pretty nice. My sister said she would 3-D print drawer pulls which, once glued on, would make both of them complete. Now we each just needed to make some books to shelve, and 3-D print some decorative knick-knacks to go with them.
To be continued…
Categories

David, this is absolutely beautiful! I admire your precision and skill. I look forward to reading about the books to shelve and the decorative knick-knacks!
Thanks Betty and these were just the practice builds. There’s more to come with the final pieces.