
Doll House for my Sister’s Granddaughter – Phase 1
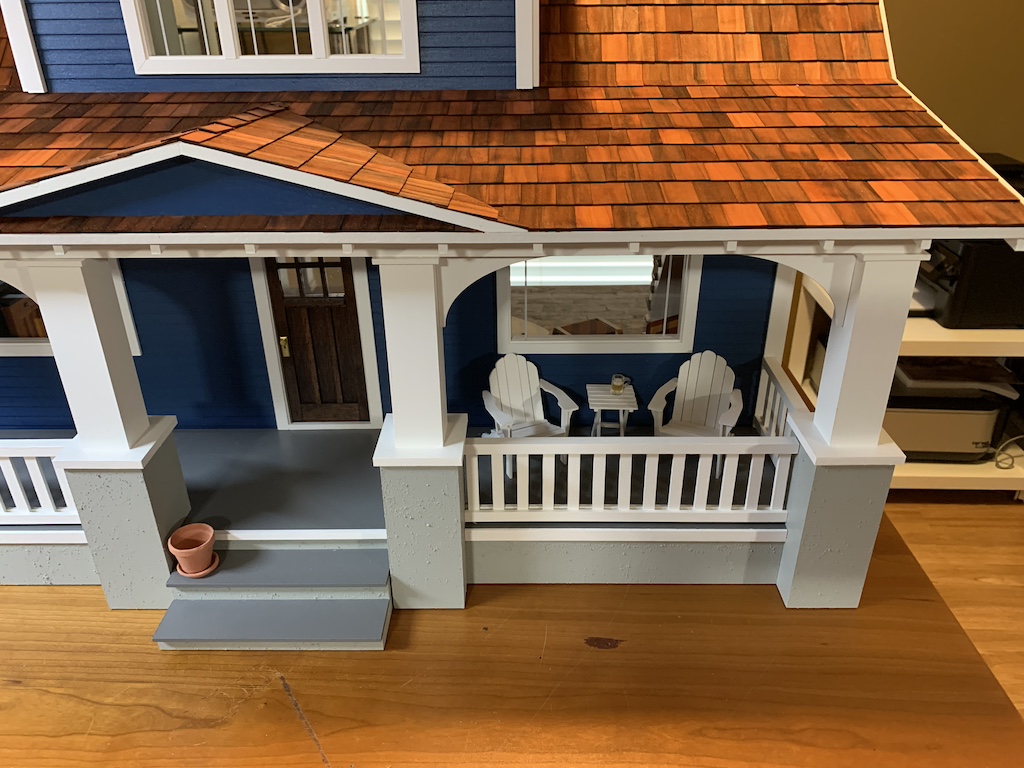
As I was sitting on my miniature porch enjoying a nice frosty beverage after all my hard work—I mean play—finishing my dollhouse and either building or purchasing many of its furnishings, I really started to miss having a dollhouse to work on fulltime. If you have been a reader of my blog at least since the beginning of the pandemic four years ago, then you already know that since then, I have built six different dollhouses, the last of which for myself as I am a lifelong fan of miniature models. And with the building of the ones for my two sisters and the one for myself, I have had an active dollhouse project going on for over 15 continuous months. So, it was a tremendous thrill for me to get a text from my sister mid-April of this year asking if I was ready to build one for her granddaughter.
But let me back up a bit to help you understand the context. It was in June of 2021 on a trip over to visit my two sisters and my niece’s family that I had posed the question to my niece and her husband if they would like for me to build a dollhouse for their daughter (my grandniece, the one smiling in the photo above). By then, I had already built a dollhouse for each of my two granddaughters, and I had had such fun, I was looking for potential recipients of other dollhouses. Her parents gave me an enthusiastic positive response with the caveat that she would need to get a little older before she got it. I gladly took their reply as a placeholder for a dollhouse project sometime in the future.
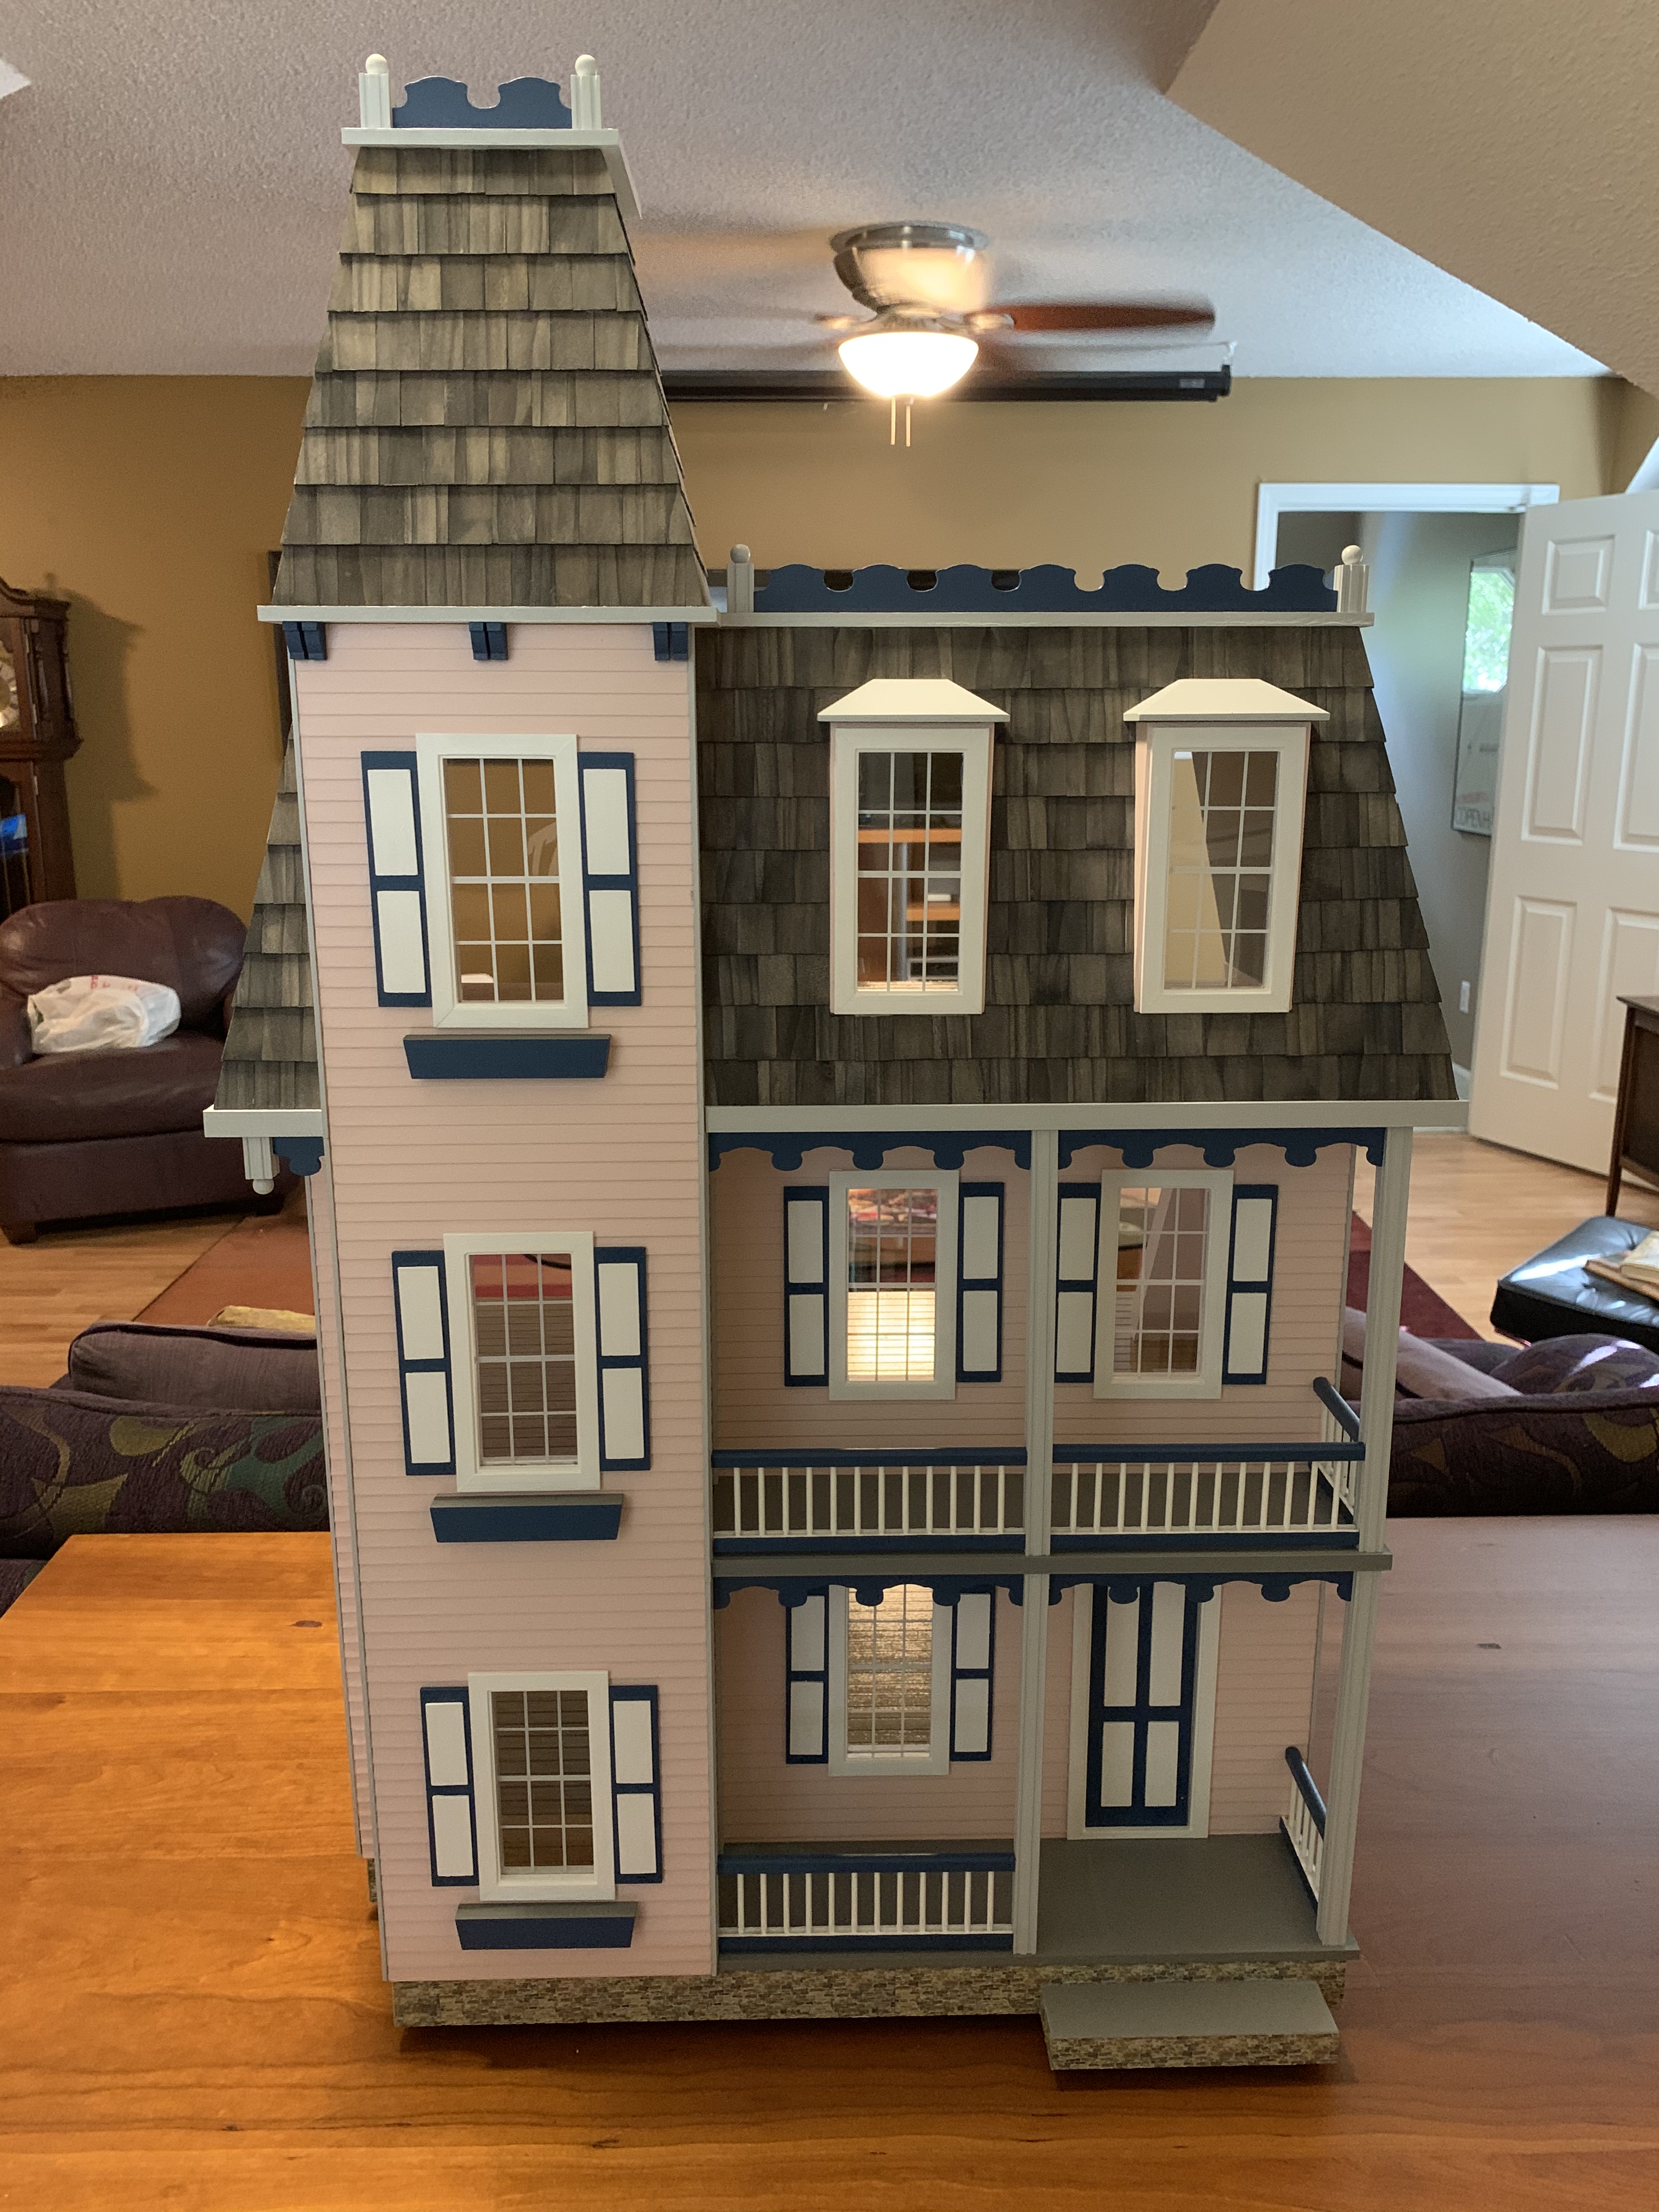
Fast forward to 2024, the year she will turn six and thus the genesis of my sister’s text. In her text, she also sent a picture of the kit she had picked out. How interesting I replied, that was the same one that I had built for my in-town granddaughter.
A few days later, I went to our local hobby store and purchased it texting this photo to my sister.
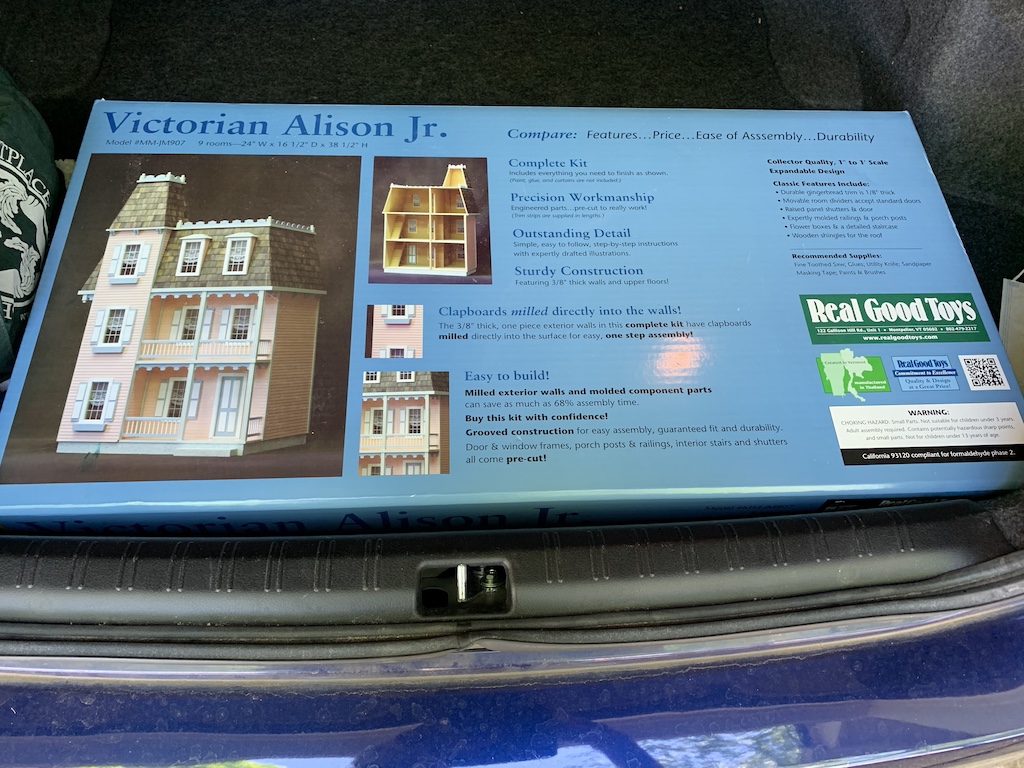
She was surprised that I had already bought it as she told me the intent was for this be a birthday present for her in December of 2024. I quickly replied that when I get a green light, I go! Which I always do while driving and building dollhouses.
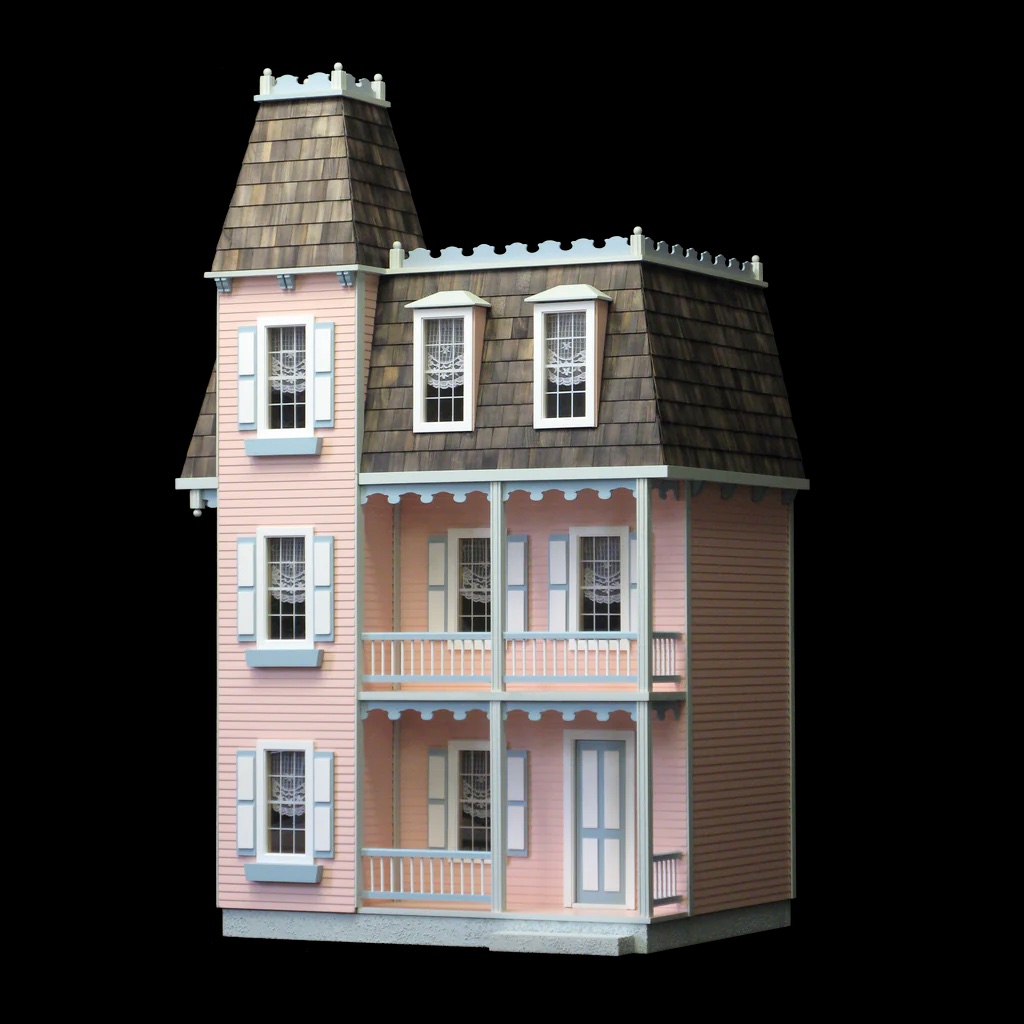
Since this is the same dollhouse I built four years ago, I thought it would be interesting to see how what all I had learned over the years would make this build easier. I knew that I would include many of the upgrades that I had added since this first one and use many of the improved building techniques I had discovered. And the first of which was applying a stucco finish to the foundation after it had been built.
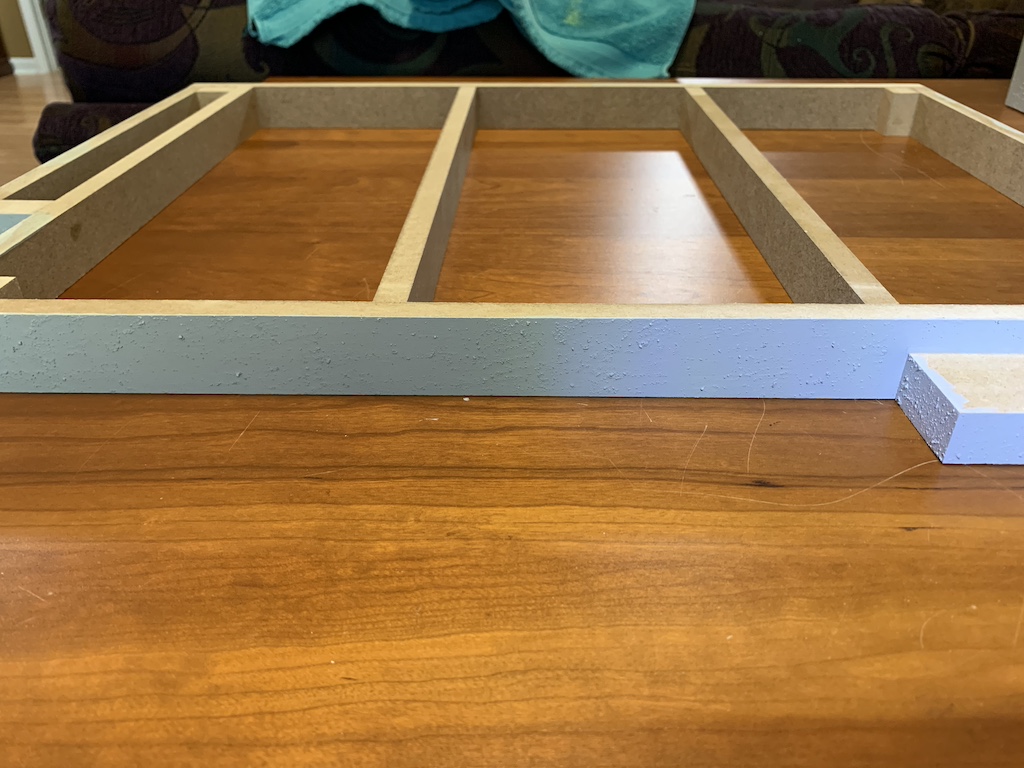
With the foundation completed, the next step was painting the exterior of the house. My niece took her daughter to a box hardware store in her town to pick out the exterior and trim colors. Her daughter enthusiastically selected a nice pink for the exterior and a nice purple for the exterior trim. I then made my way to the same chain store in Memphis and had paint samples mixed. Now I was ready to really get started.
With the six dollhouses that I have built since the beginning of the pandemic, I have employed six different painting techniques never finding one completely satisfying that left a very smooth finish on the milled clapboards. But since building that last one, my sister who is building dollhouses with me introduced me to a new sanding device. With it, I decided to try yet another technique.
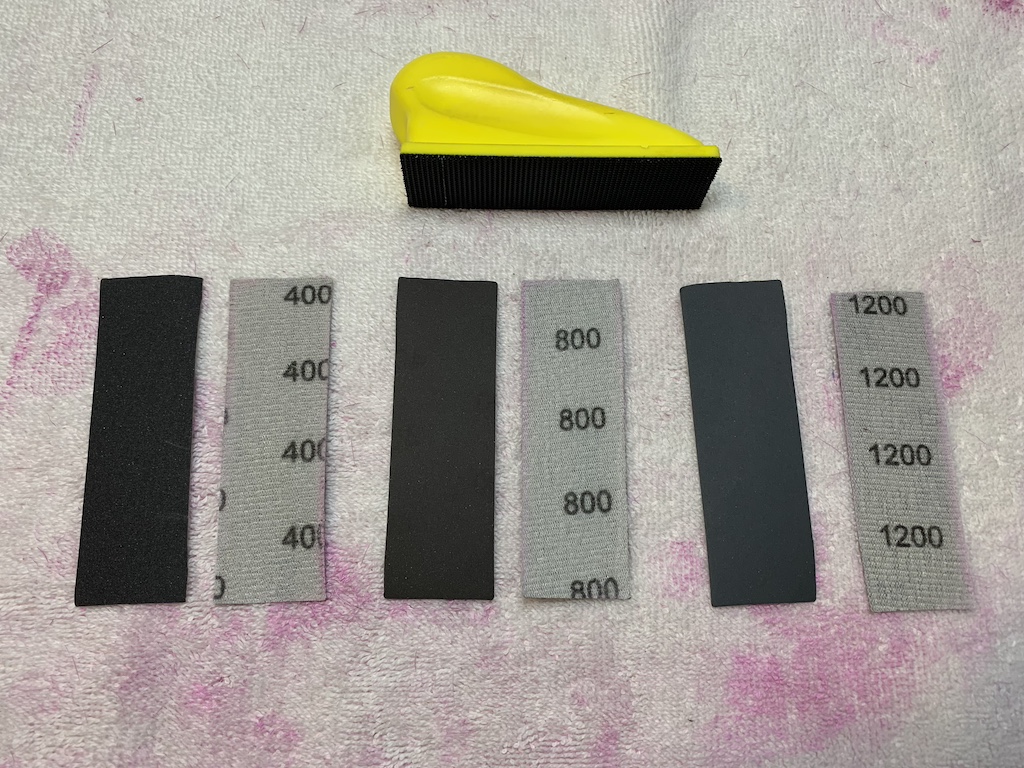
This hand sander is very useful as different grits of sandpaper from 60 to 10,000 can be attached with Velcro. After painting the first coat, I sanded each individual clapboard with a 400-grit sandpaper using three back and forth strokes. I then painted the second coat and sanded with a finer 800-grit sandpaper. Following the application of a third coat of paint, I sanded with a 1200-grit sandpaper. Once the fourth coat of paint had dried, I finally had the smooth, completely covered finish I had been hoping for.
They say the third time’s the charm but, in my case, it was the seventh time. I owe it to my sister for introducing me to this new tool. And being able to use two finer grades of sandpaper (800 and 1200) that I had never used before.
With exterior painting complete, I was ready to move onto painting the interior walls.
I texted my niece and suggested she and her daughter discuss interior paint colors.
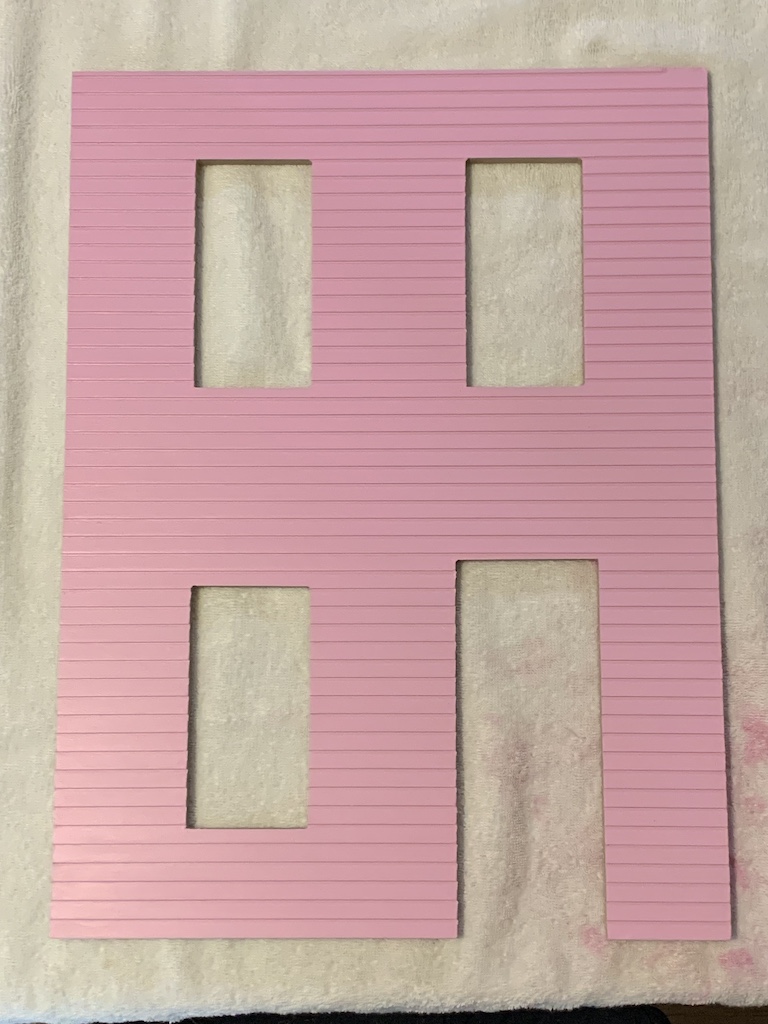
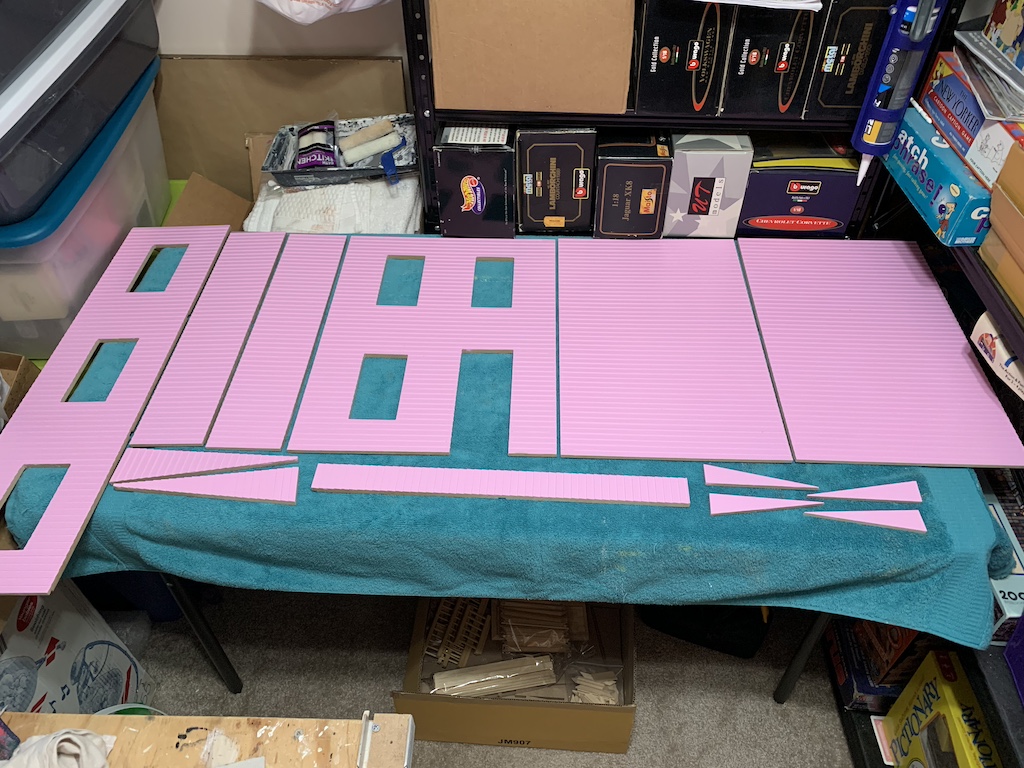
While I awaited their color selections, I decided to work ahead on some of the exterior trim pieces, with the first up being painting and then building the window frames.
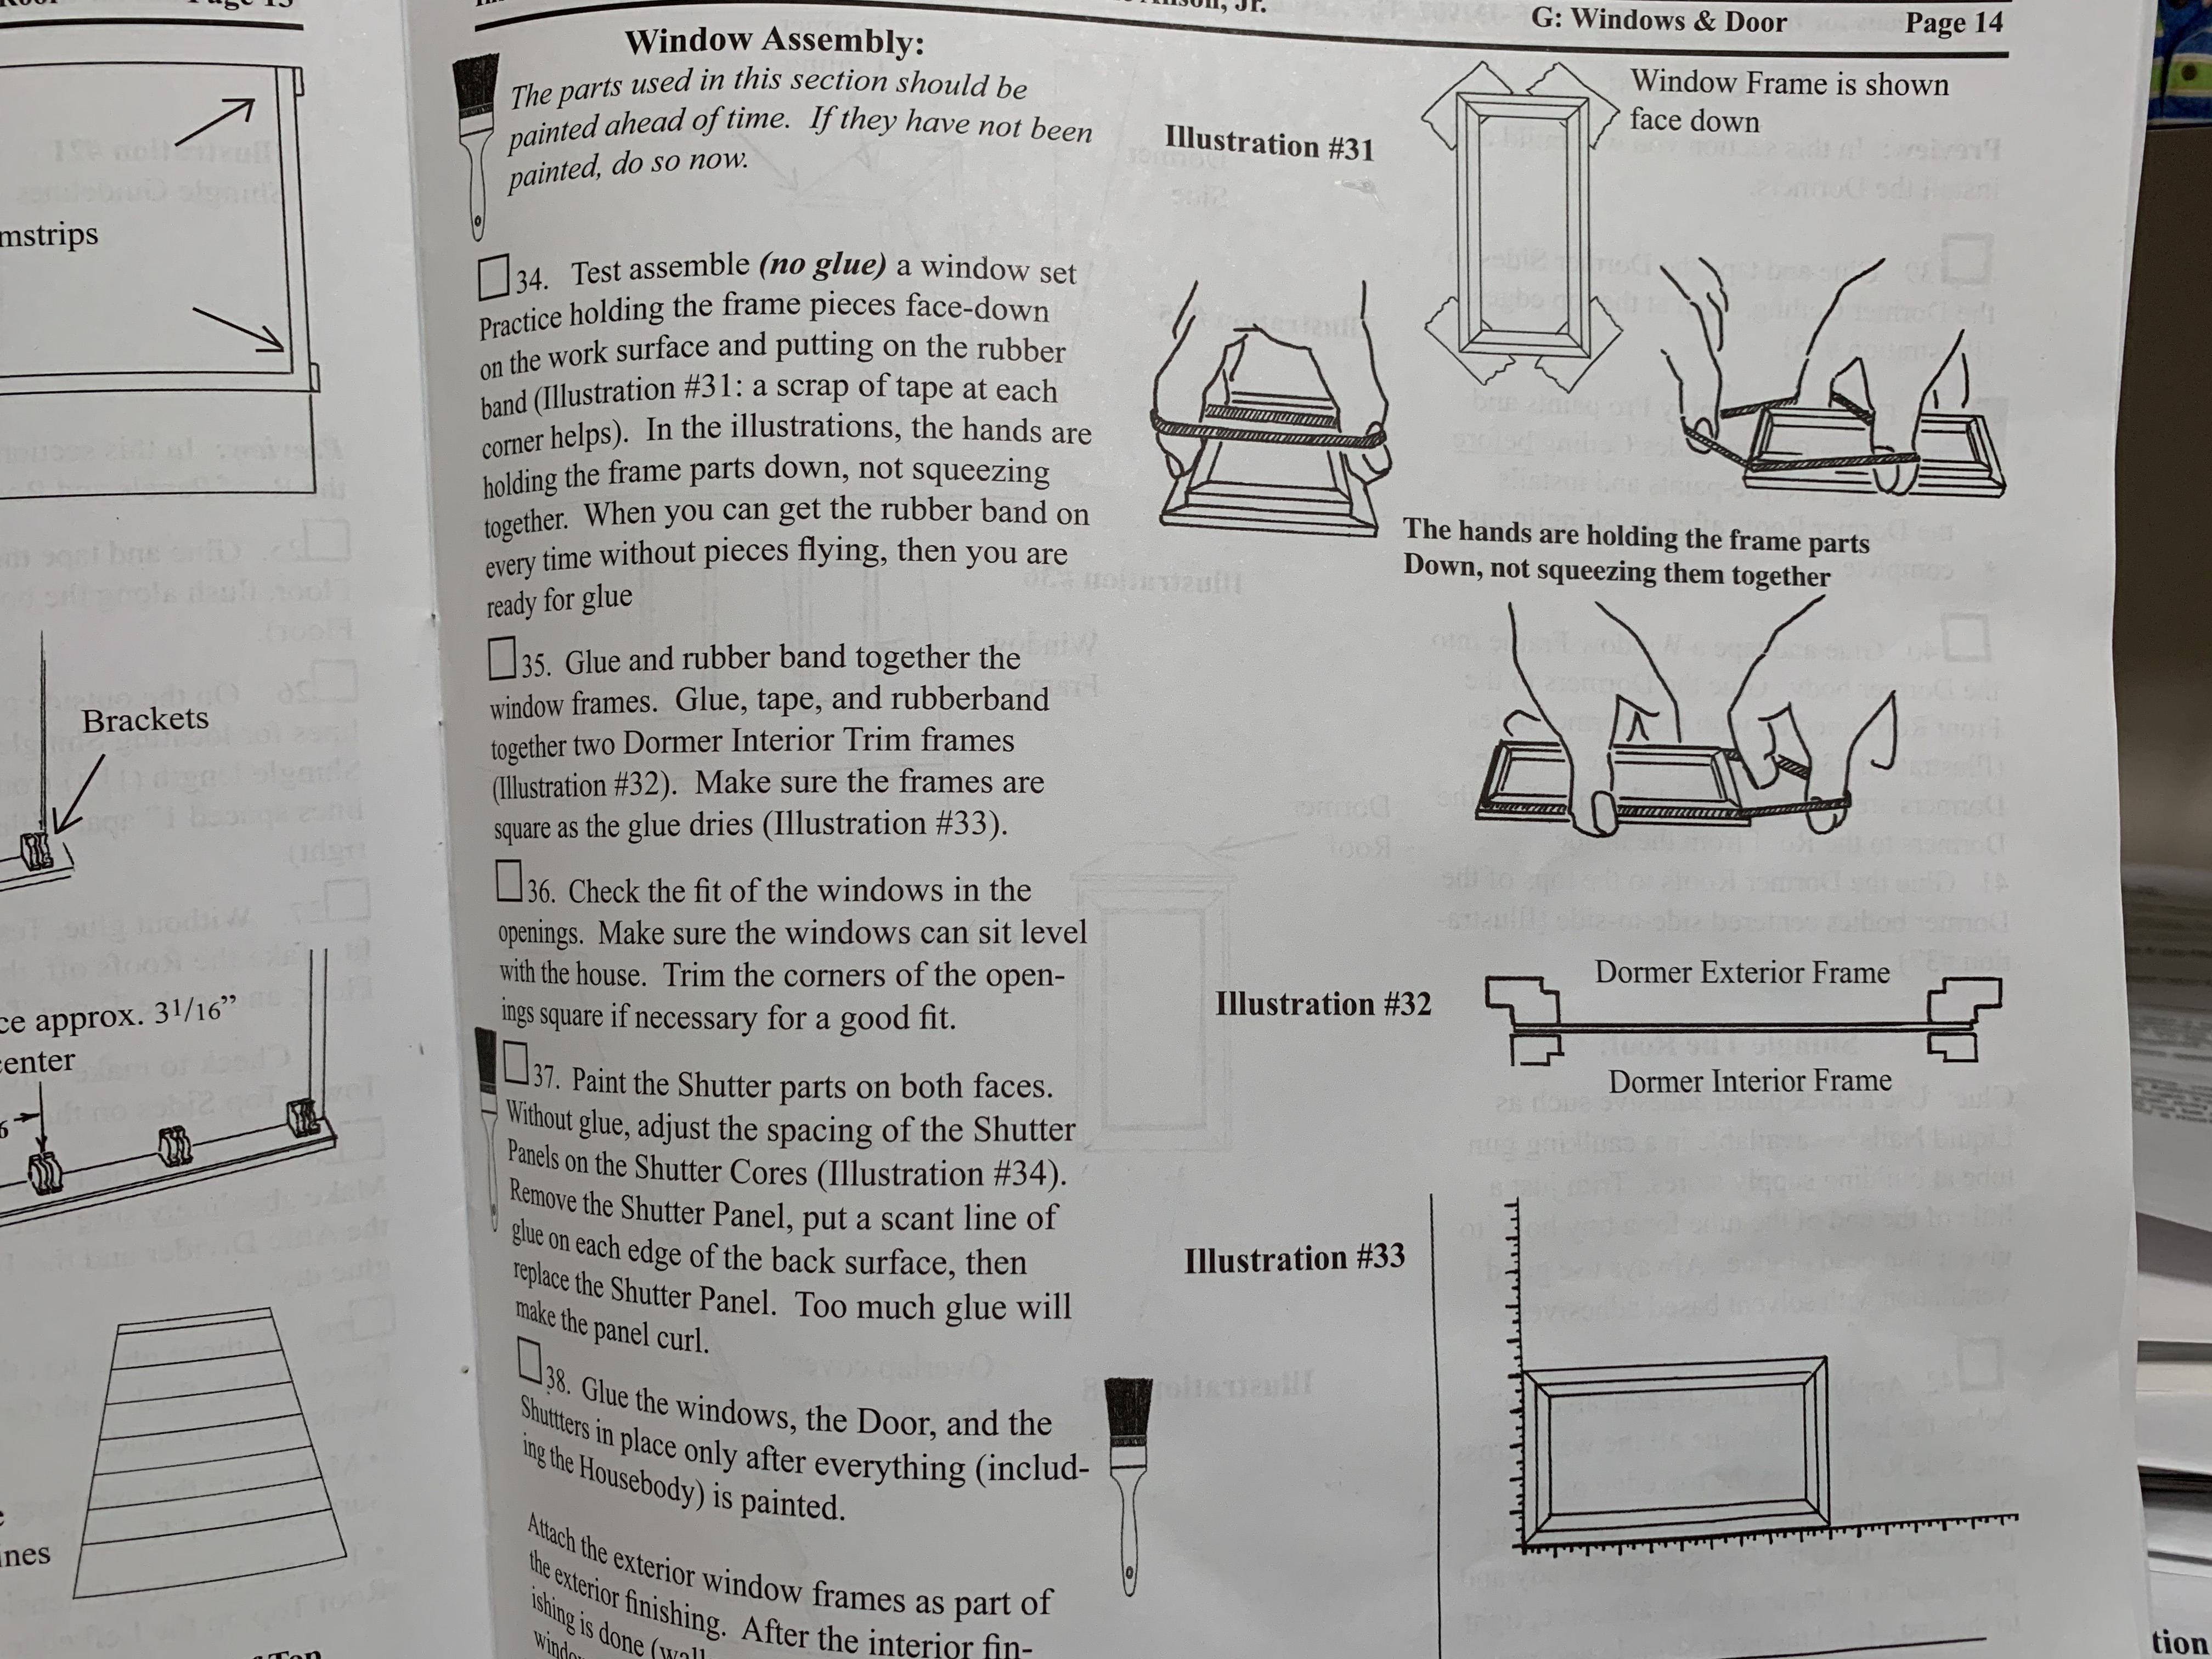
I have written before about the extremely challenging technique that is included in the instructions on how to tightly glue together the individual pieces of the window frame. The instructions indicate the four pieces are to be taped together, held down by several fingers from one hand while several fingers from the other hand wrap a rubber band around the whole assembly to ensure a tight fit.
The instructions include this statement: “When you can get the rubber band on every time without pieces flying, then you are ready for glue.”
On that first dollhouse that I built in 2020, I “practiced” this technique numerous times and concluded that my less than nimble senior citizen fingers would never get it to work even once, much less every time.
To remedy this, using some scrap pieces of basswood, I built a jig that was just the right size to ensure a tight fit for all four window frame pieces. On subsequent dollhouses that had different size windows, I discovered that I could actually use the window opening in the wall as a “pseudo-jig.” However, since I still had the custom jig from that first dollhouse, I decided to use it again (jig shown below with ½ of window frame).
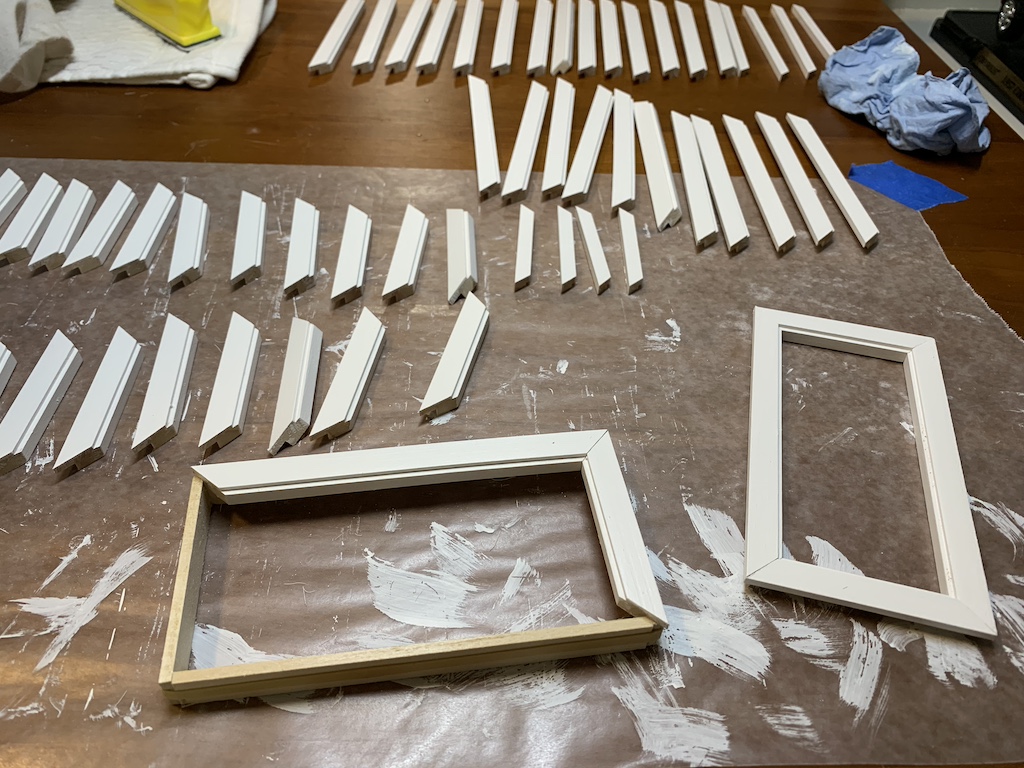
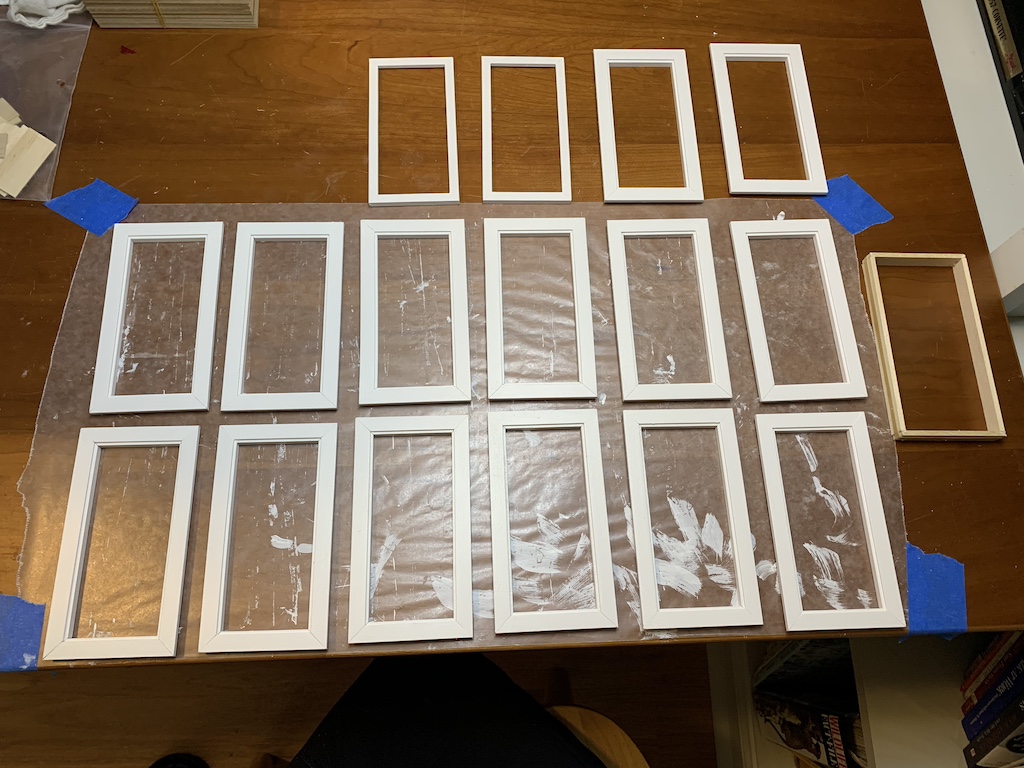
With this aid, I assembled the sixteen window frames from the 64 individual frame pieces without any trouble.
Next up, I decided to paint and build the dozen window shutters.
To be continued…
Categories

David, these are great tips. I have to believe there is a site or group somewhere where you could share this blog and be so helpful to others building these dollhouse kits. In any case, beautiful work. I am sure your sister’s granddaughter will be thrilled to receive this and will treasure it for many years.
Thanks Betty! I am actually at my sister’s house this weekend and delivered the dollhouse on Thursday. Her granddaughter was absolutely delighted. Hope you have a nice Sunday.