
Miniature Bookshelf Café – Order Up for a Cup of Joe
Continued from: Miniature Bookshelf Café – Preparing to Serve a Cup of Joe
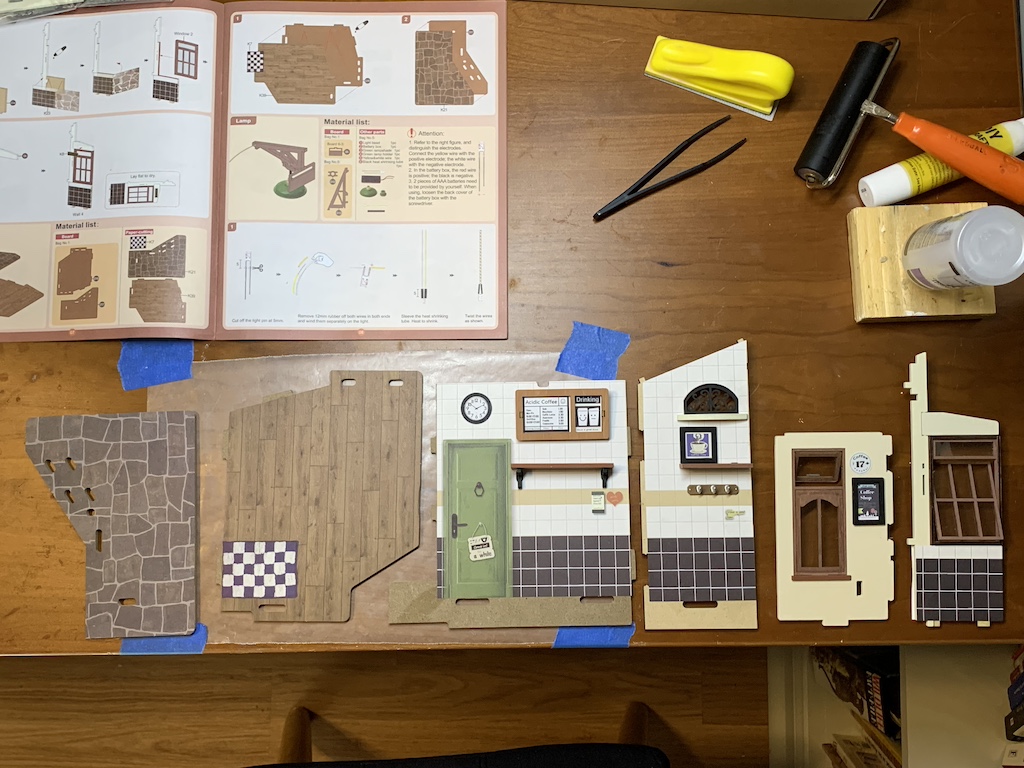
Continuing, the walls began to go up. Some of the tabs that slotted them together were so tight, I did have to sand some of them down. Once the walls were up and the glue dry, I added the clear roof. One of the trusses for the roof included the assembled light fixture. The last step was to finish the wiring of the light to the battery pack and to add decorative wall panels to the backside to hide everything.
At this point, I was not only rewarded with a coffee shop ready for fixtures…

… but one that had a working light!

Now I was ready to fill up the coffee shop. Flipping ahead in the instructions, I was amazed at how many pages of assembly steps there were. And first up was building the counter and corner shelf.

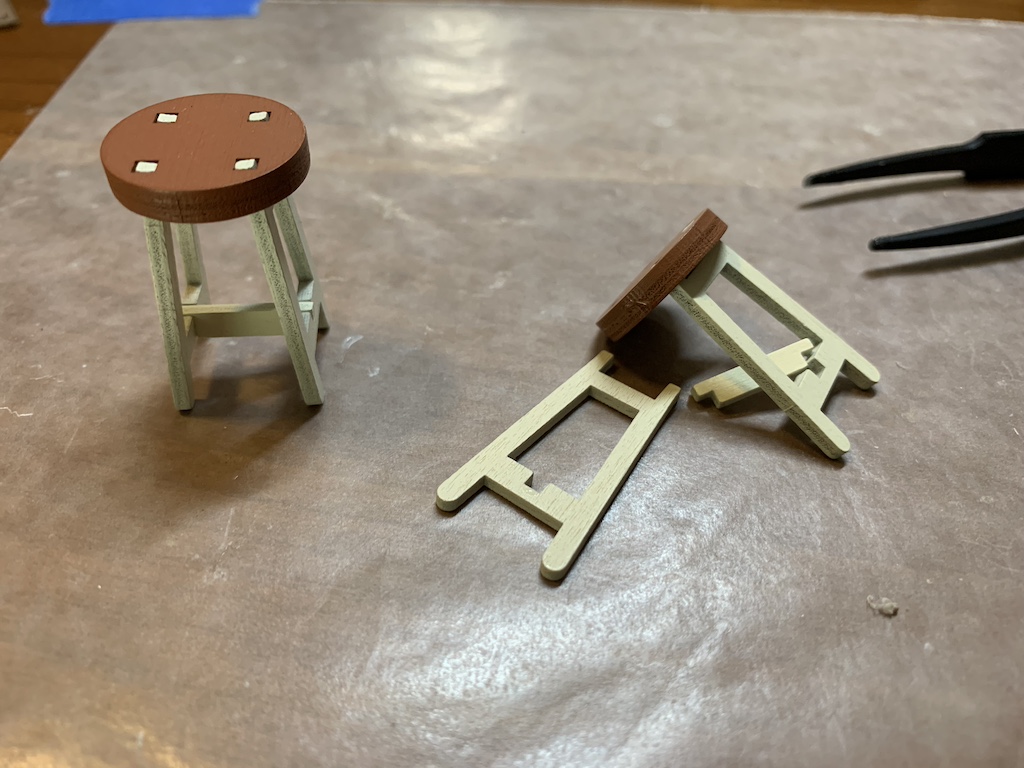
It went very smoothly with all the pieces fitting nicely together. But then when I went to build the two stools, I was surprised at how difficult it could be to assemble a single stool from just four pieces. The challenge arose in securing the little cross member between the two legs—it was a particularly tight fit.
I quickly found that just like when I am working on a puzzle and keep wanting to add one more piece, I kept assembling additional fixtures for the café. The work counter turned out very nicely and included working doors. And the newspaper rack is another common fixture in a café complete with tiny, printed papers.

After making a few more fixtures for the café, …

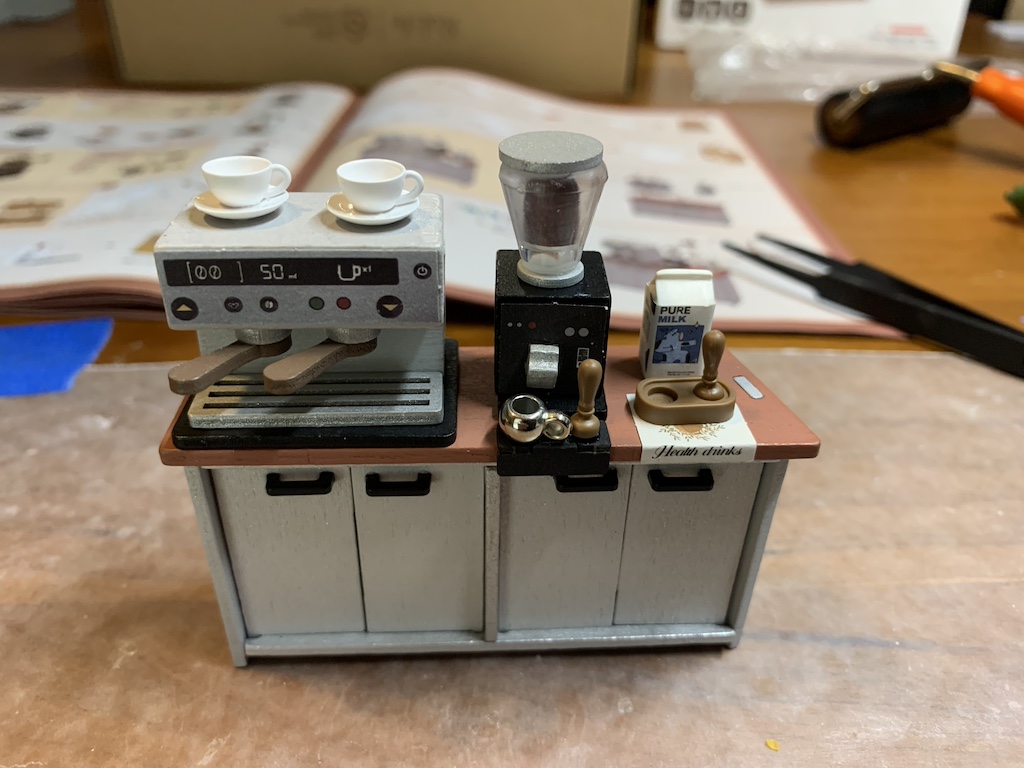
… I was ready to make the most important tools of the coffee trade. But it was obvious whoever wrote or proofed the instructions had never darkened the door of a Starbucks, or a Peet’s, or any other coffee shop for that matter. Or maybe it was just a mix up in the translation to English. In the instructions, I could easily see I was going to be making the ubiquitous espresso machine, but it was labeled the bean grinder (which was actually on the next page labeled as the coffeemaker).

Nonetheless, knowing what I was really making, I assembled the espresso machine, the coffee jars, the bean grinder, and a drip coffee maker.

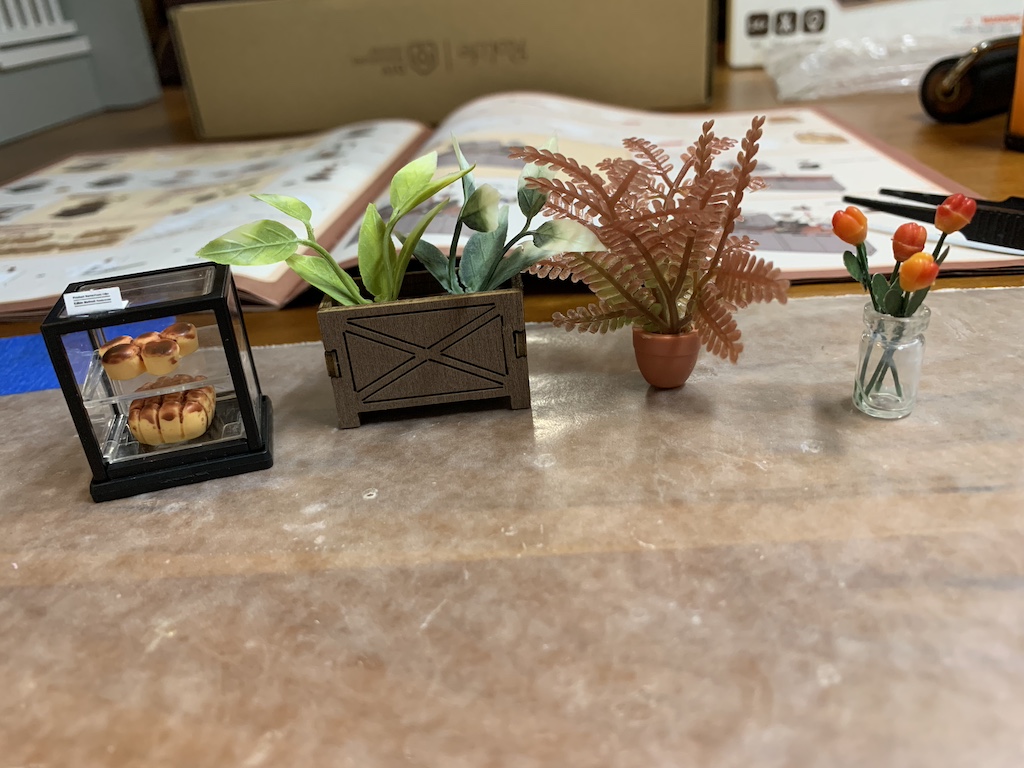
After baking some pastries and creating some plants and flowers for the café’ …
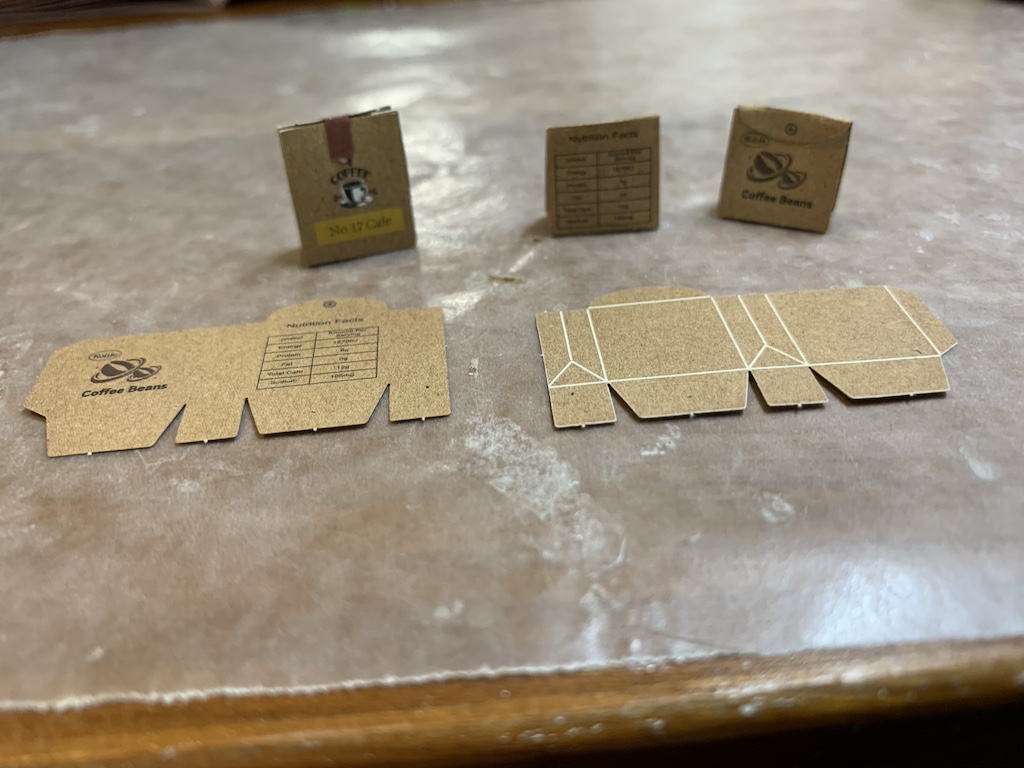
… I was ready to fill some coffee bags. I previously mentioned that in this kit, the paper fixtures were pre-laser cut which meant no cutting out with scissors. But an additional nice feature was that printed on the reverse side were fold lines that had been micro scored so that the pieces folded most easily along the white lines.
With just about all of the café fixtures assembled, it was now time to locate these items onto the work surfaces. First up was the coffee workstation. I was amazed at the level of detail included in this kit as it even had coffee tampers (little brown handles) for compressing the espresso ground coffee.
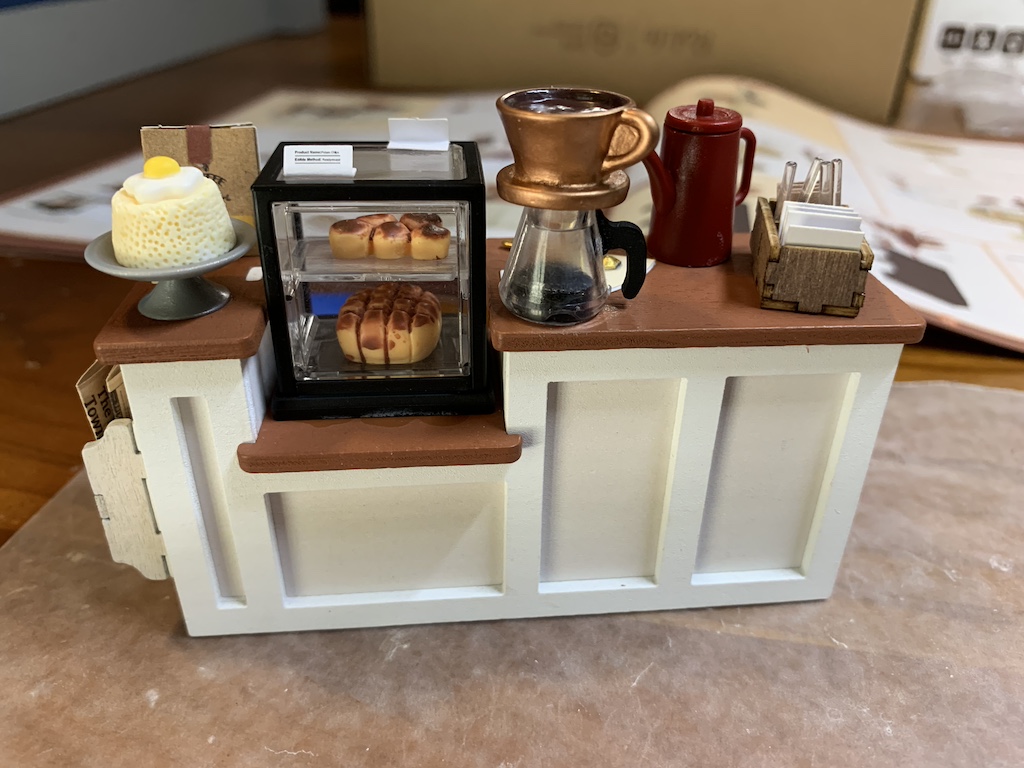
The sales counter was next which included the pastries, a single cup pour over coffee maker still brewing, a delicious looking cake, and assorted other coffee necessities.
With these complete, it was now time to outfit the café.
The coffee station went in…
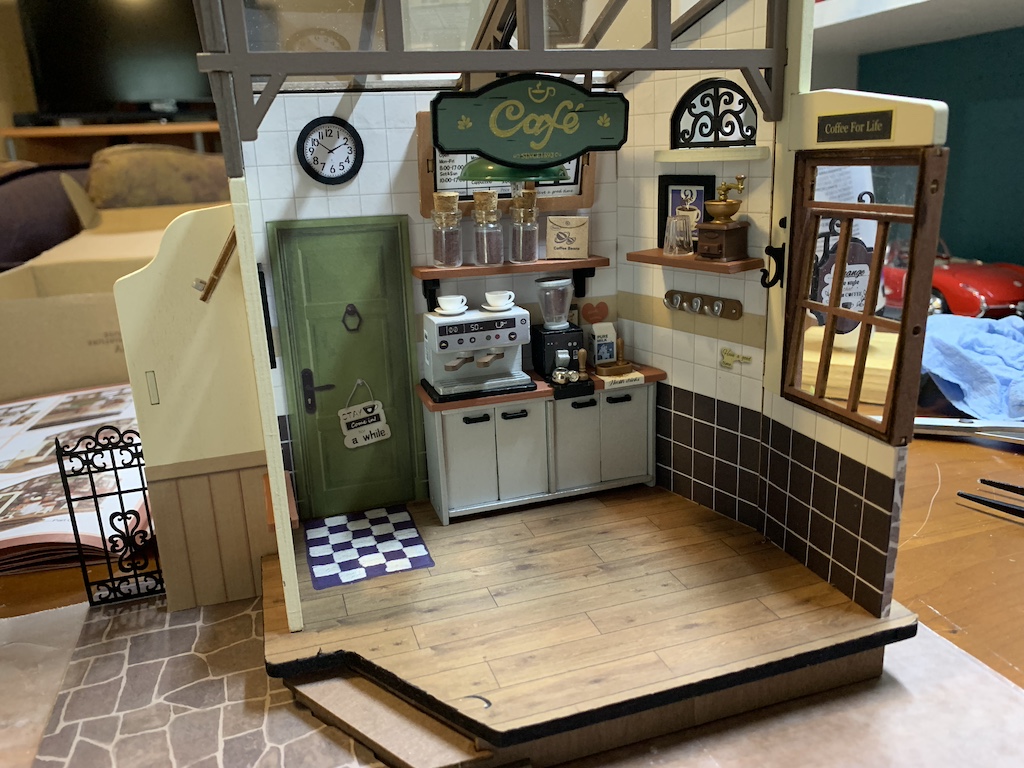
… and then the sales counter along with the take-out shelf.

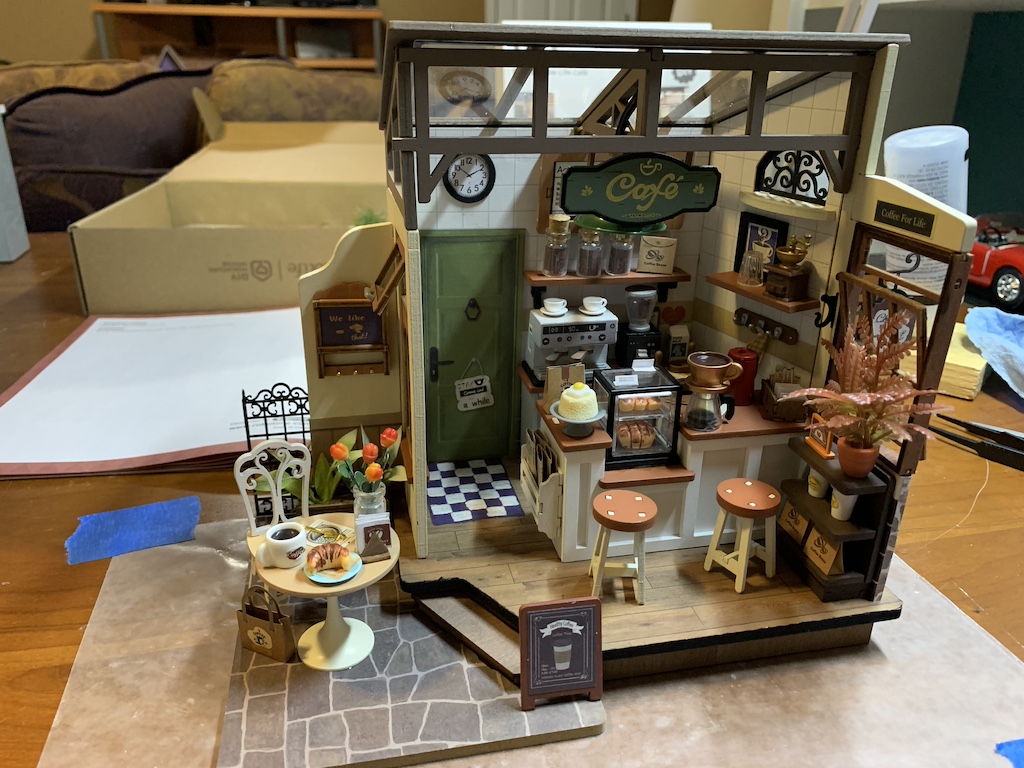
Adding the small table and chair along with the planter made the café complete.
And what added an intimate ambience to this little café was the addition of a working overhead light.

As with the previous kit, I had a blast building this one as well. I estimate the scale of the café at about 2/3 of the doll house scale (based on its chair seat height of 1 inch vs. 1.5 inches) so some of the tiny pieces were a little more challenging to work with than the doll house 1/12-scale I am used to working in. But the good news is this senior citizen managed to complete it.
So now, who’s ready for a cup of Joe? Order up!
Categories

Cutest. Thing. Ever.
Thanks, it really is.
David, you did a fantastic job! The light really adds to the display. I wonder if these kits have “ratings” – such as beginner, intermediate and expert. You would be the expert! Hope you have a great week ahead!
Thanks, Betty! Yes I agree the light really adds to it. Hope you have a great week also!
It’s so cute!!!! I zoomed in on all the pictures to see the tiny details. I’m so glad it was fun to build!
Yes it was and thank you!