
Miniature Bookshelf Café – Preparing to Serve a Cup of Joe
Fresh from their tremendous success in giving me a miniature bookshelf kit for Christmas, I was most pleased to unwrap another kit for my birthday this year.
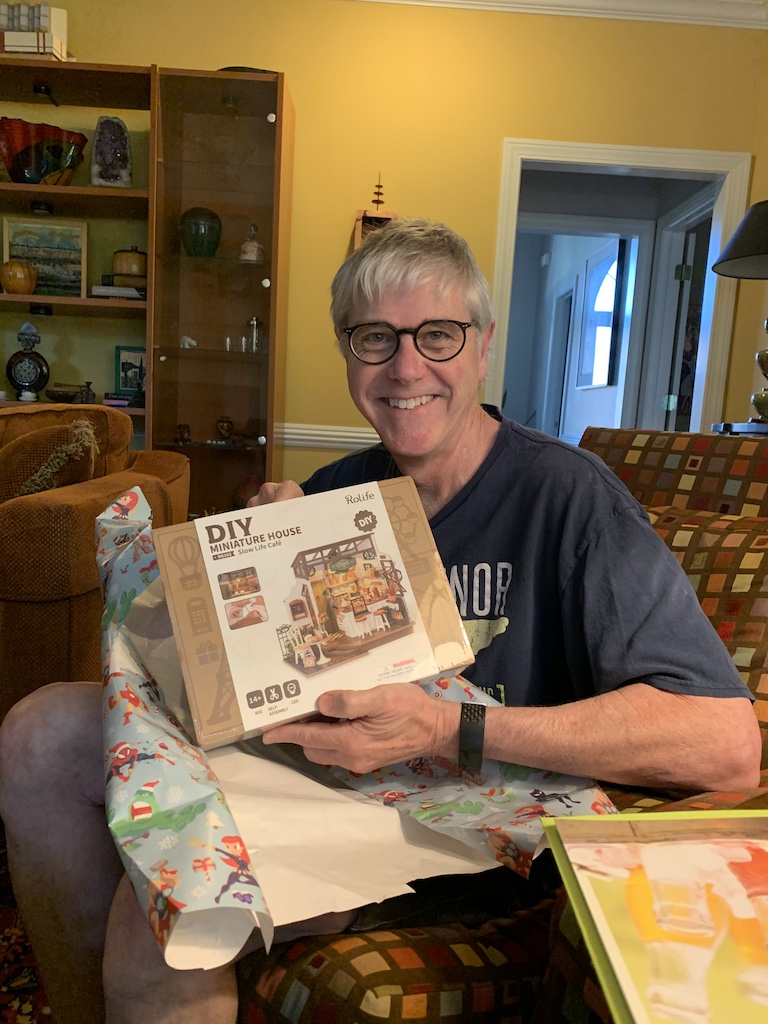
My daughter and son-in-law have always given much thought to giving me special and meaningful gifts and when I saw this one, it hit me that with this second kit, she has given me in miniature two of her loves—books and coffee (and with an extension to small independent coffee shops)—thus matching two of her loves with mine for miniature models.
At the time, I was working on another dollhouse, my seventh in five years, but once I got to a stopping point on that one, I eagerly got the box out of the closet to get started.
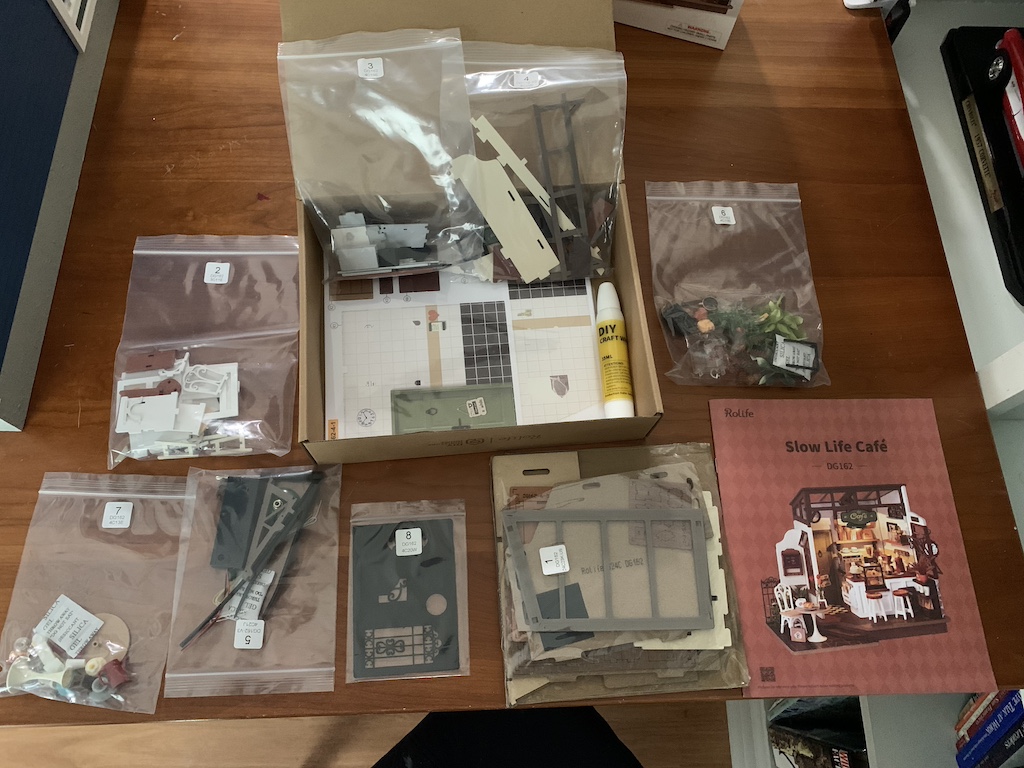
When I opened it up and set out the little bags, I was very pleased to see there was no paint included in this kit. After the debacle of requiring eight (8) coats of paint on the last kit to get a well-covered finish, I knew I would buy my own paint for this one if any painting was required. So, absent paint, I knew I would be working with only previously painted parts, thankful not to have to do any painting. I further noticed that I would be working with some of the same types of materials as before: wood, plastic, metal, and paper.

The kit did include a large tube of glue that included an ingenious fine dispenser on end and a broad dispenser on the other end. Reading the directions about the glue there was an intriguing statement. It stated: “Glue is a gift not for sale. If it becomes dry or expired due to environmental problems, you can use your own glue to assemble.” Looking at the tube, I could not find an expiration date or date of manufacture. Oh well, I thought I’d give it a try.
When I opened bag #1 and got out the parts, I saw I had a bit of a problem.
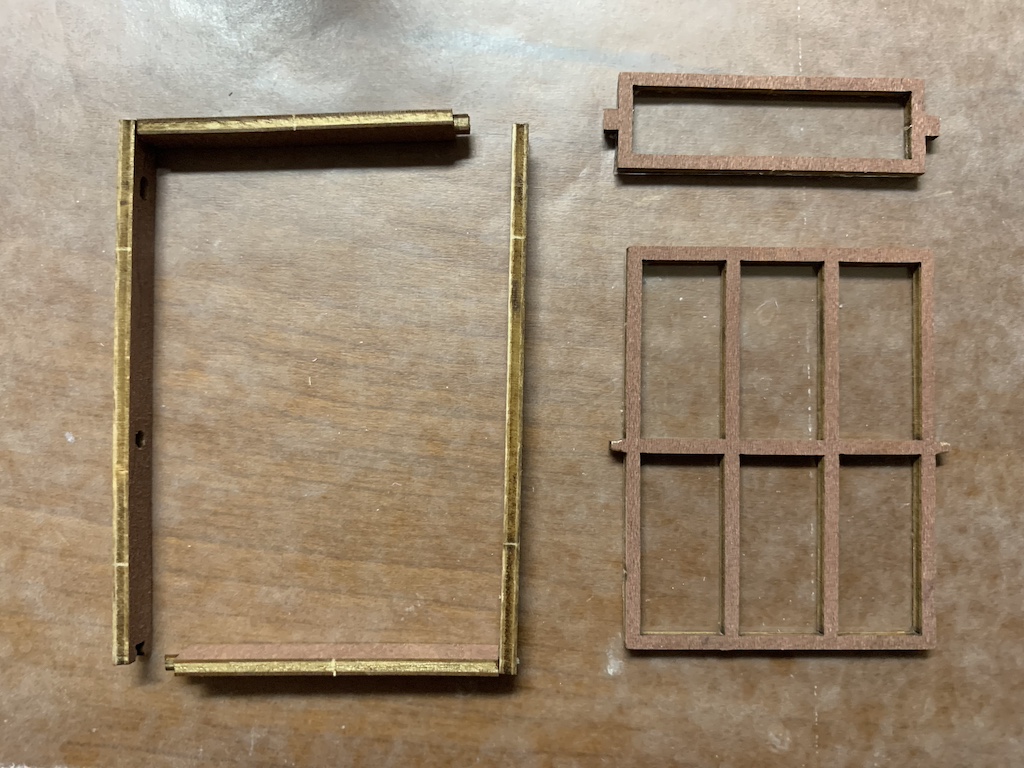
I noticed that the small piece to the left was missing as indicated by the full-scale part identifier sheet. Since these had, all been shrink wrapped together, I knew I would not find the piece loose in the box even though I looked. Well hopefully it was not a critical piece and if it was required, I could make one from the template.
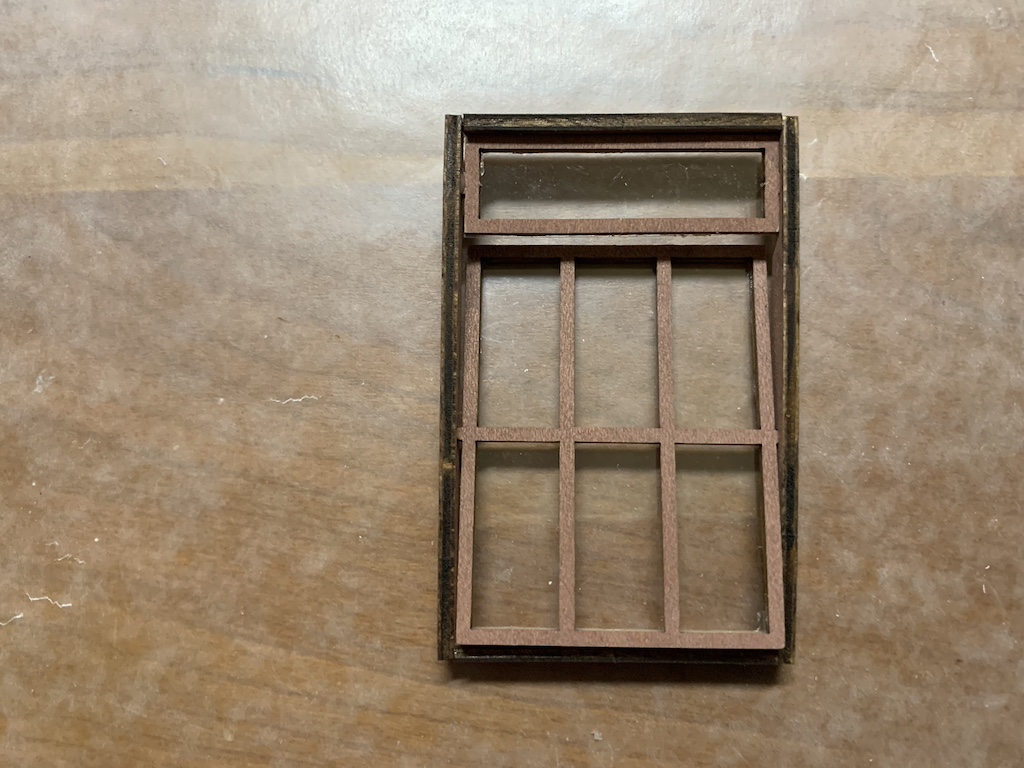
I got started with step one, gluing the plastic films to the café windows. Since I had previously purchased a special kind of glue that was specifically formulated not to “fog” clear plastic, I chose to use that instead. But when I went to assemble the windows, I discovered that the edges where the parts were cut from the plywood sheets did not have the pre-finish on them leaving light-colored wooden streaks.
To remedy this, I decided to stain the edges with a dark stain I had and although darker than the finish on the window itself, I thought it looked better.
Satisfied with my modification, I moved on. While the fine dispenser on the glue tube easily provided small amounts of glue, I discovered it did not dry very fast. So instead, I decided to use my own tried-and-true glues that I had been using successfully on all my dollhouses. And of course, as the instructions read, I would faithfully not try to sell the tube of glue.
When I got to a step requiring the first paper piece, I was pleased to see that all the paper parts had been laser cut with just a very tiny tab or two holding them in place. Removing them was a sinch. So, no paper doll cutting on this kit!
Continuing, in no time I had the precision cut paper pieces glued to the wooden backings creating the floors and the walls with the previously assembled windows installed.
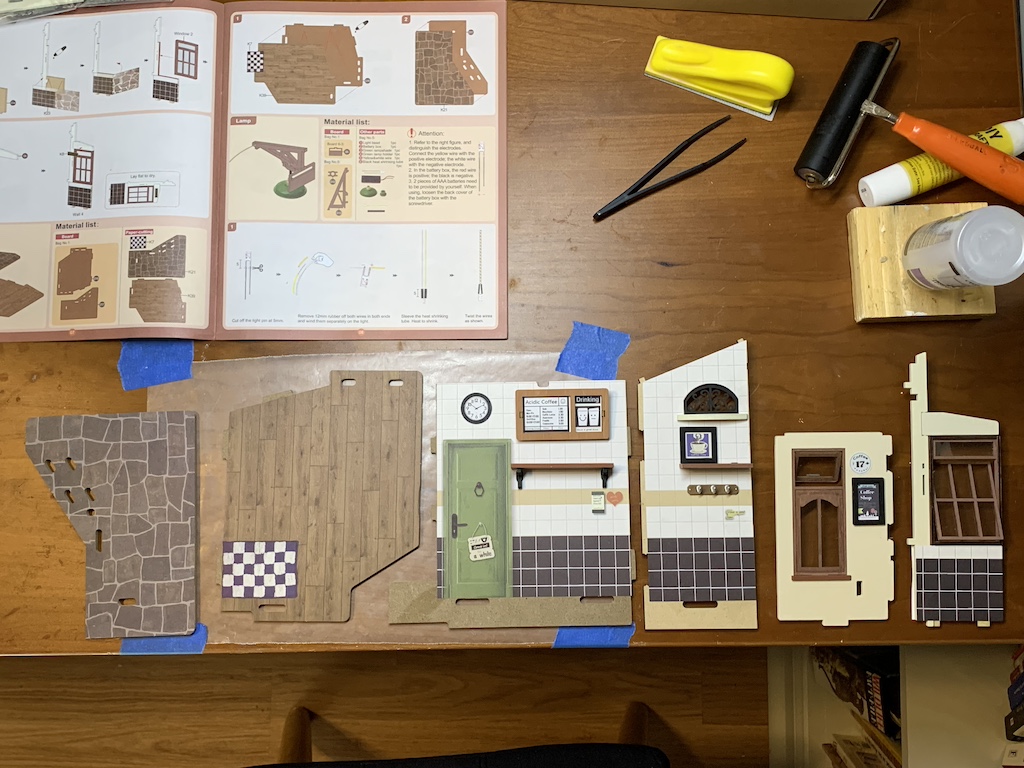
If you notice in the photo above the instruction page just above the floors, you will see the next step is the assembly of the LED light.

In the previous kit I built, this turned out to be an impossible step for me. After numerous frustrating attempts trying to get all four lights to work, I could not even get a non-functioning chandelier assembled and ultimately just left it out altogether. Thankfully, this light fixture just had a single bulb as opposed to four so hopefully its assembly would be easier.
It was late in the afternoon and knowing how much trouble I had had previously, I considered skipping this step and coming back to it the next morning with a fresh mind. Surely just having to affix two tiny wires to the short leads on a single LED bulb would not defeat me. But alas it did!
Once again thwarted, I considered adding a non-functioning light fixture, but then I had a bright idea (pun intended). I remembered I had at least gotten a couple of the LED lights on the previous kit properly wired and functional. Having saved those, I pulled them out from the box, found one that worked and then added it to this fixture. Voilà, a working light!

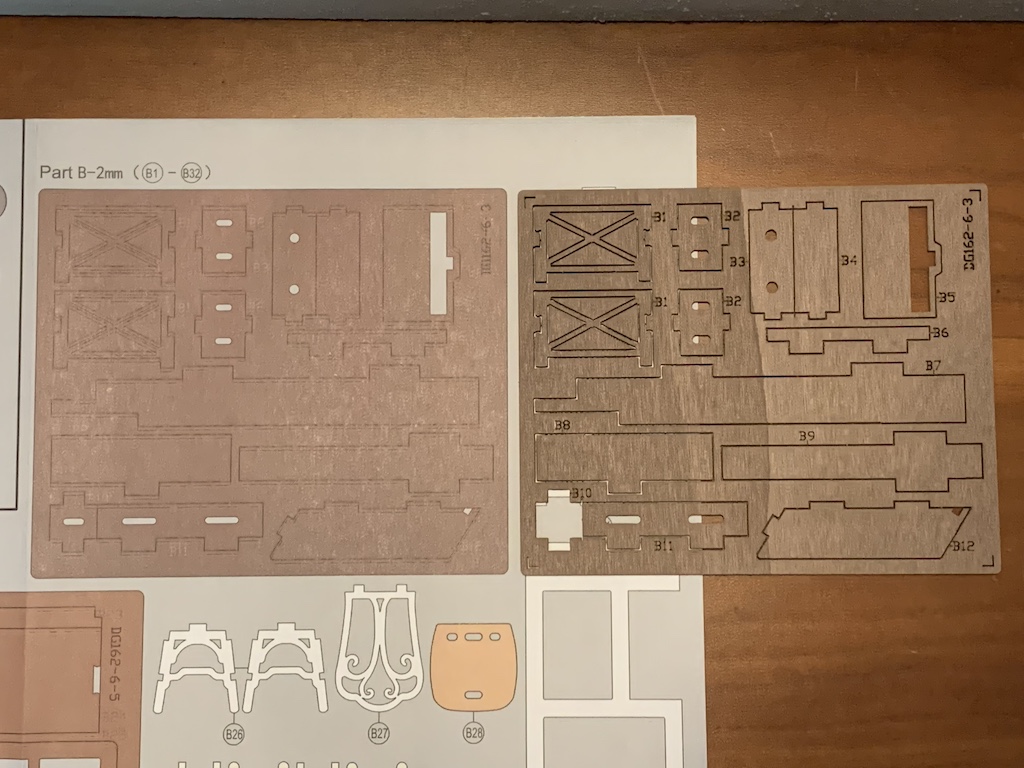
Happily, past this challenging step, I moved onto the next series of steps which once completed, would yield an empty café. Then I noticed that the missing piece, B10 was one of the first ones needed. I figured out what it was for, realized it would be visible if missing and decided to make my own.
I cut out the section of the plywood sheet where the missing piece should have been and using it as a template, traced its outline on a blank section of the same plywood sheet. I then cut along my traced lines and next cut the center groove into it. While it wasn’t as nice looking like the original piece would have been, it would serve its purpose.

To be continued…
Categories

David, I’m always impressed with your attention to detail. This was a great gift for you. I am surprised by the missing piece though! And I also wonder if there are reviews on these kits or some place online where hobbyists can share their experiences. I’m glad you got the light working. Lighting really adds to miniatures, in my opinion. I look forward to your next post!
Thanks again Betty for your kind words! I never thought about checking on reviews. Yes the dramatic effect of the working light will be revealed in the next post.
So cool! I hadn’t even realized it was books and coffee, but of course, two of our favorite things! I’m sorry there keep being missing pieces, but I’m glad you’ve got the skills and supplies to make your own!
Thanks sweetie! I figured it was your subconscious working to pick these two kits.