
Sopwith Camel – Building the Frames
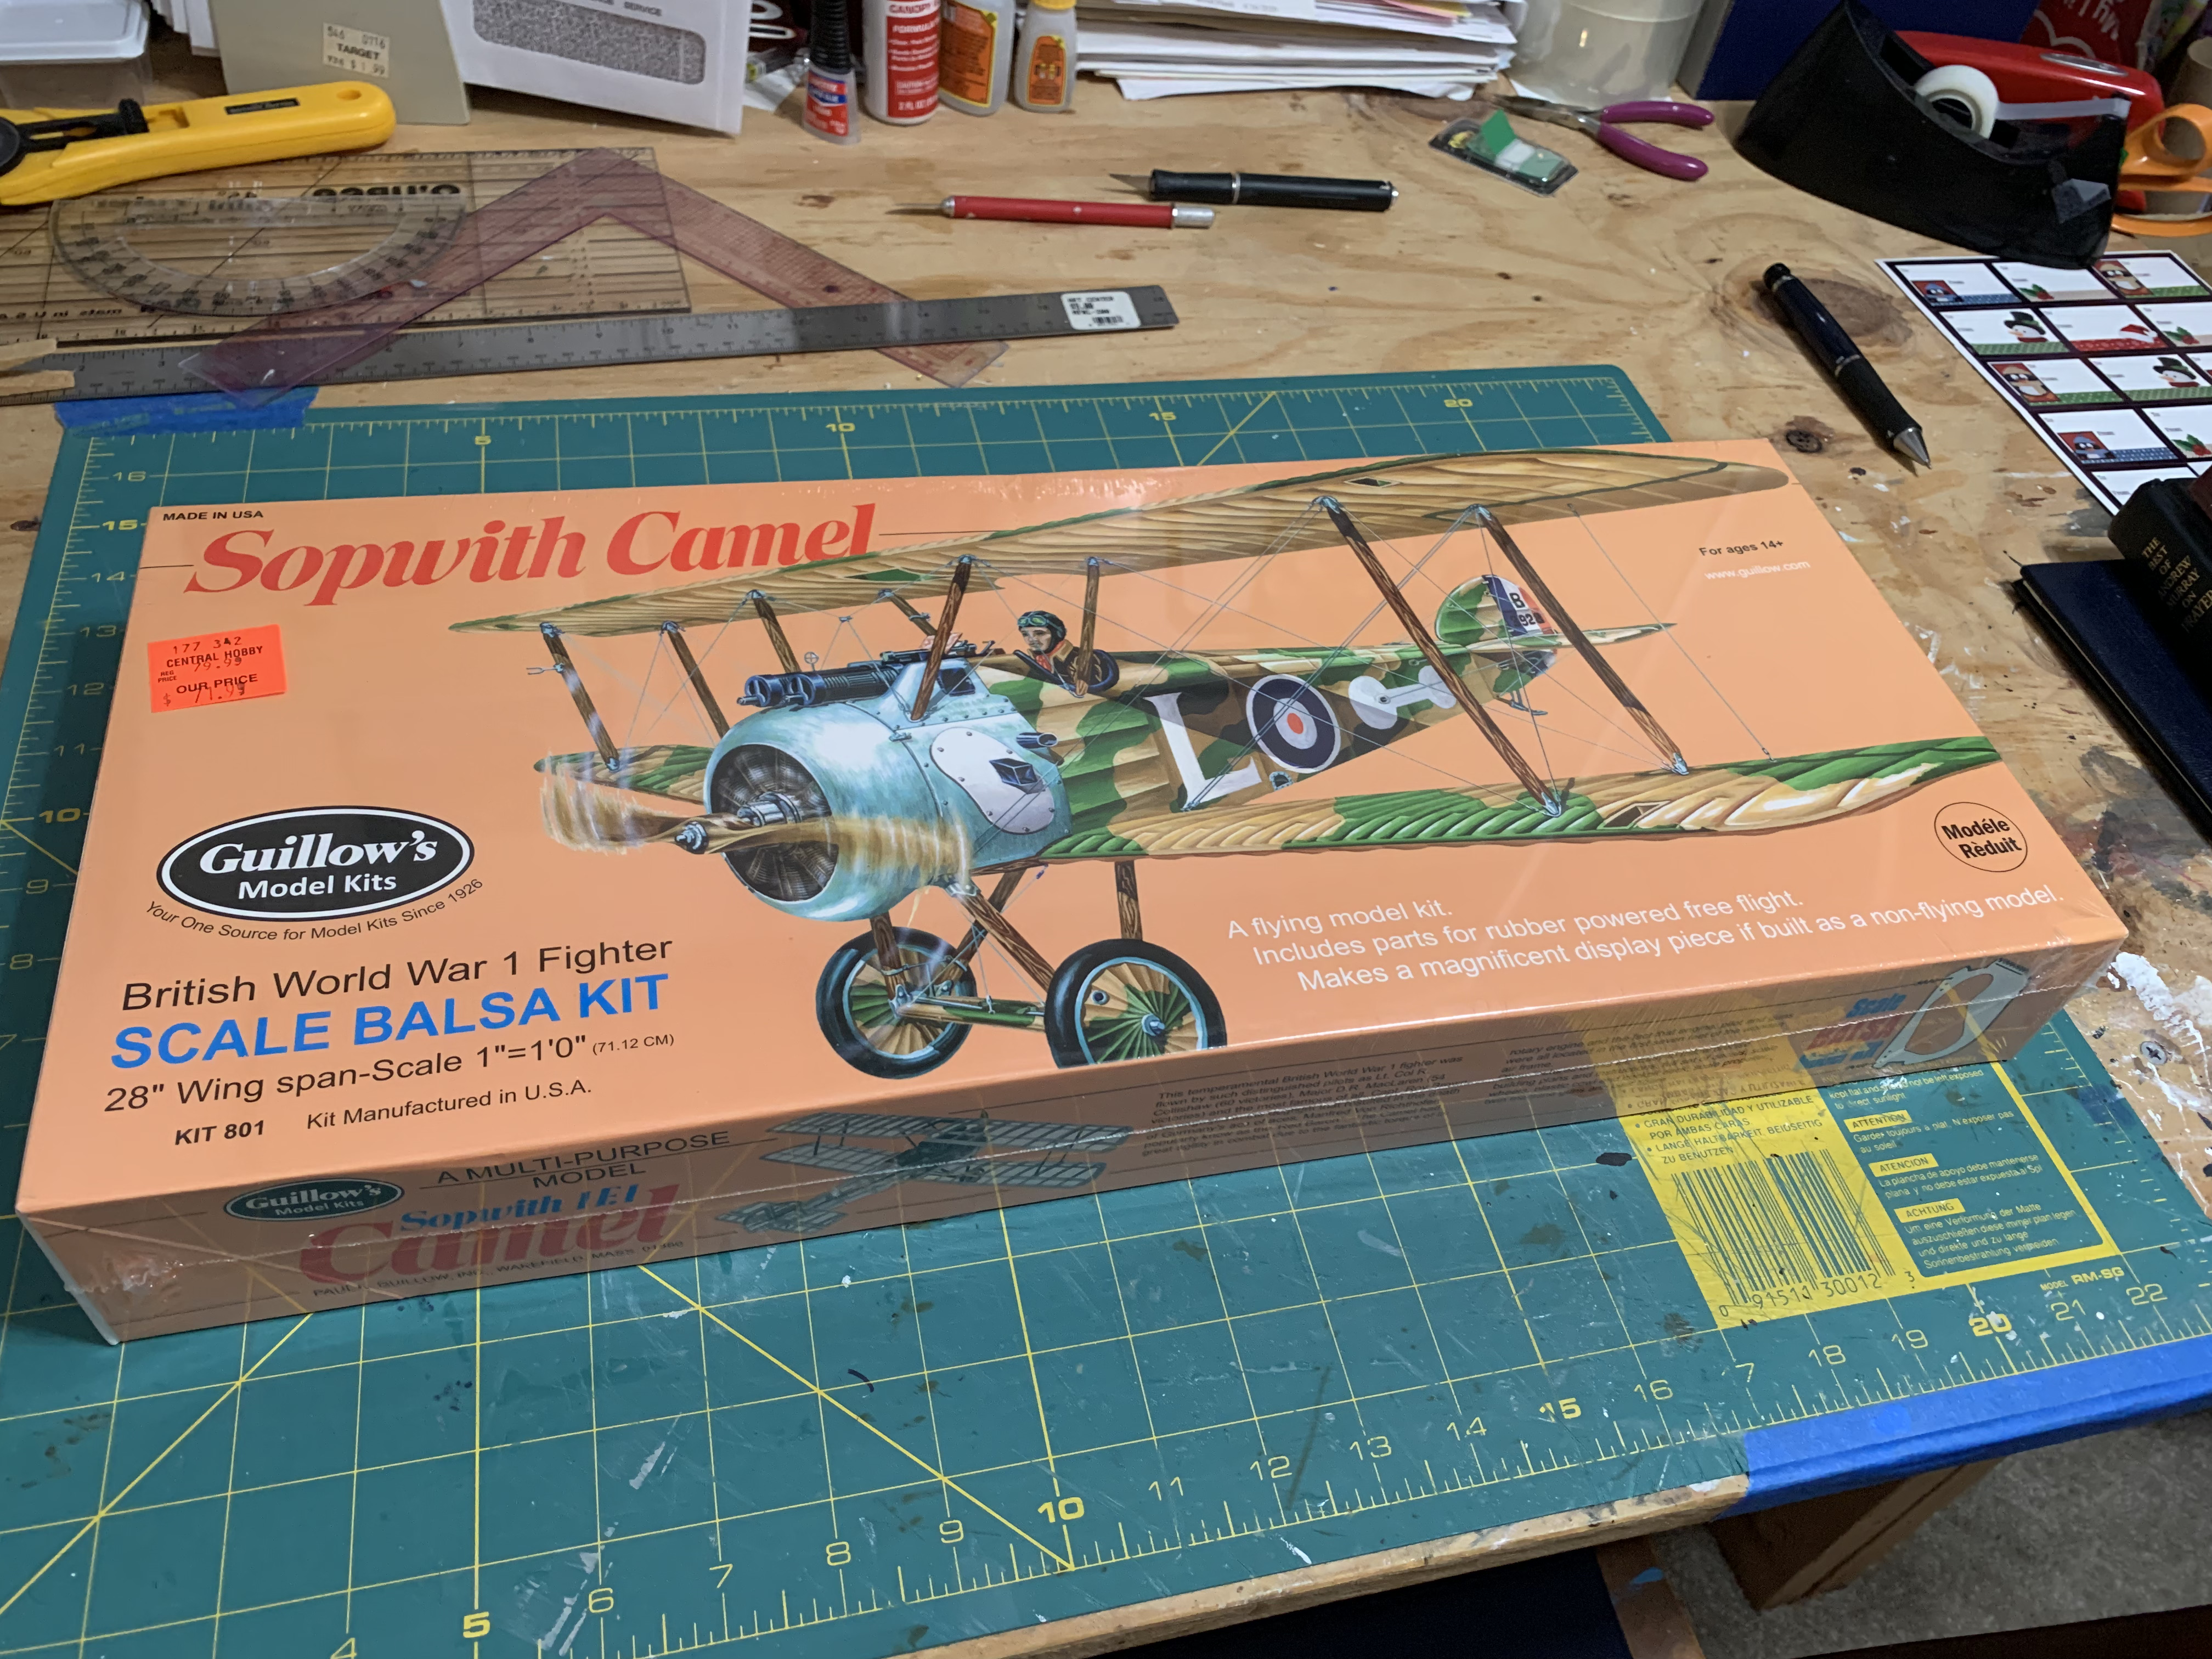
I was very excited to get started working on this balsa wood model airplane, the first one for me to build in at least 50 years.
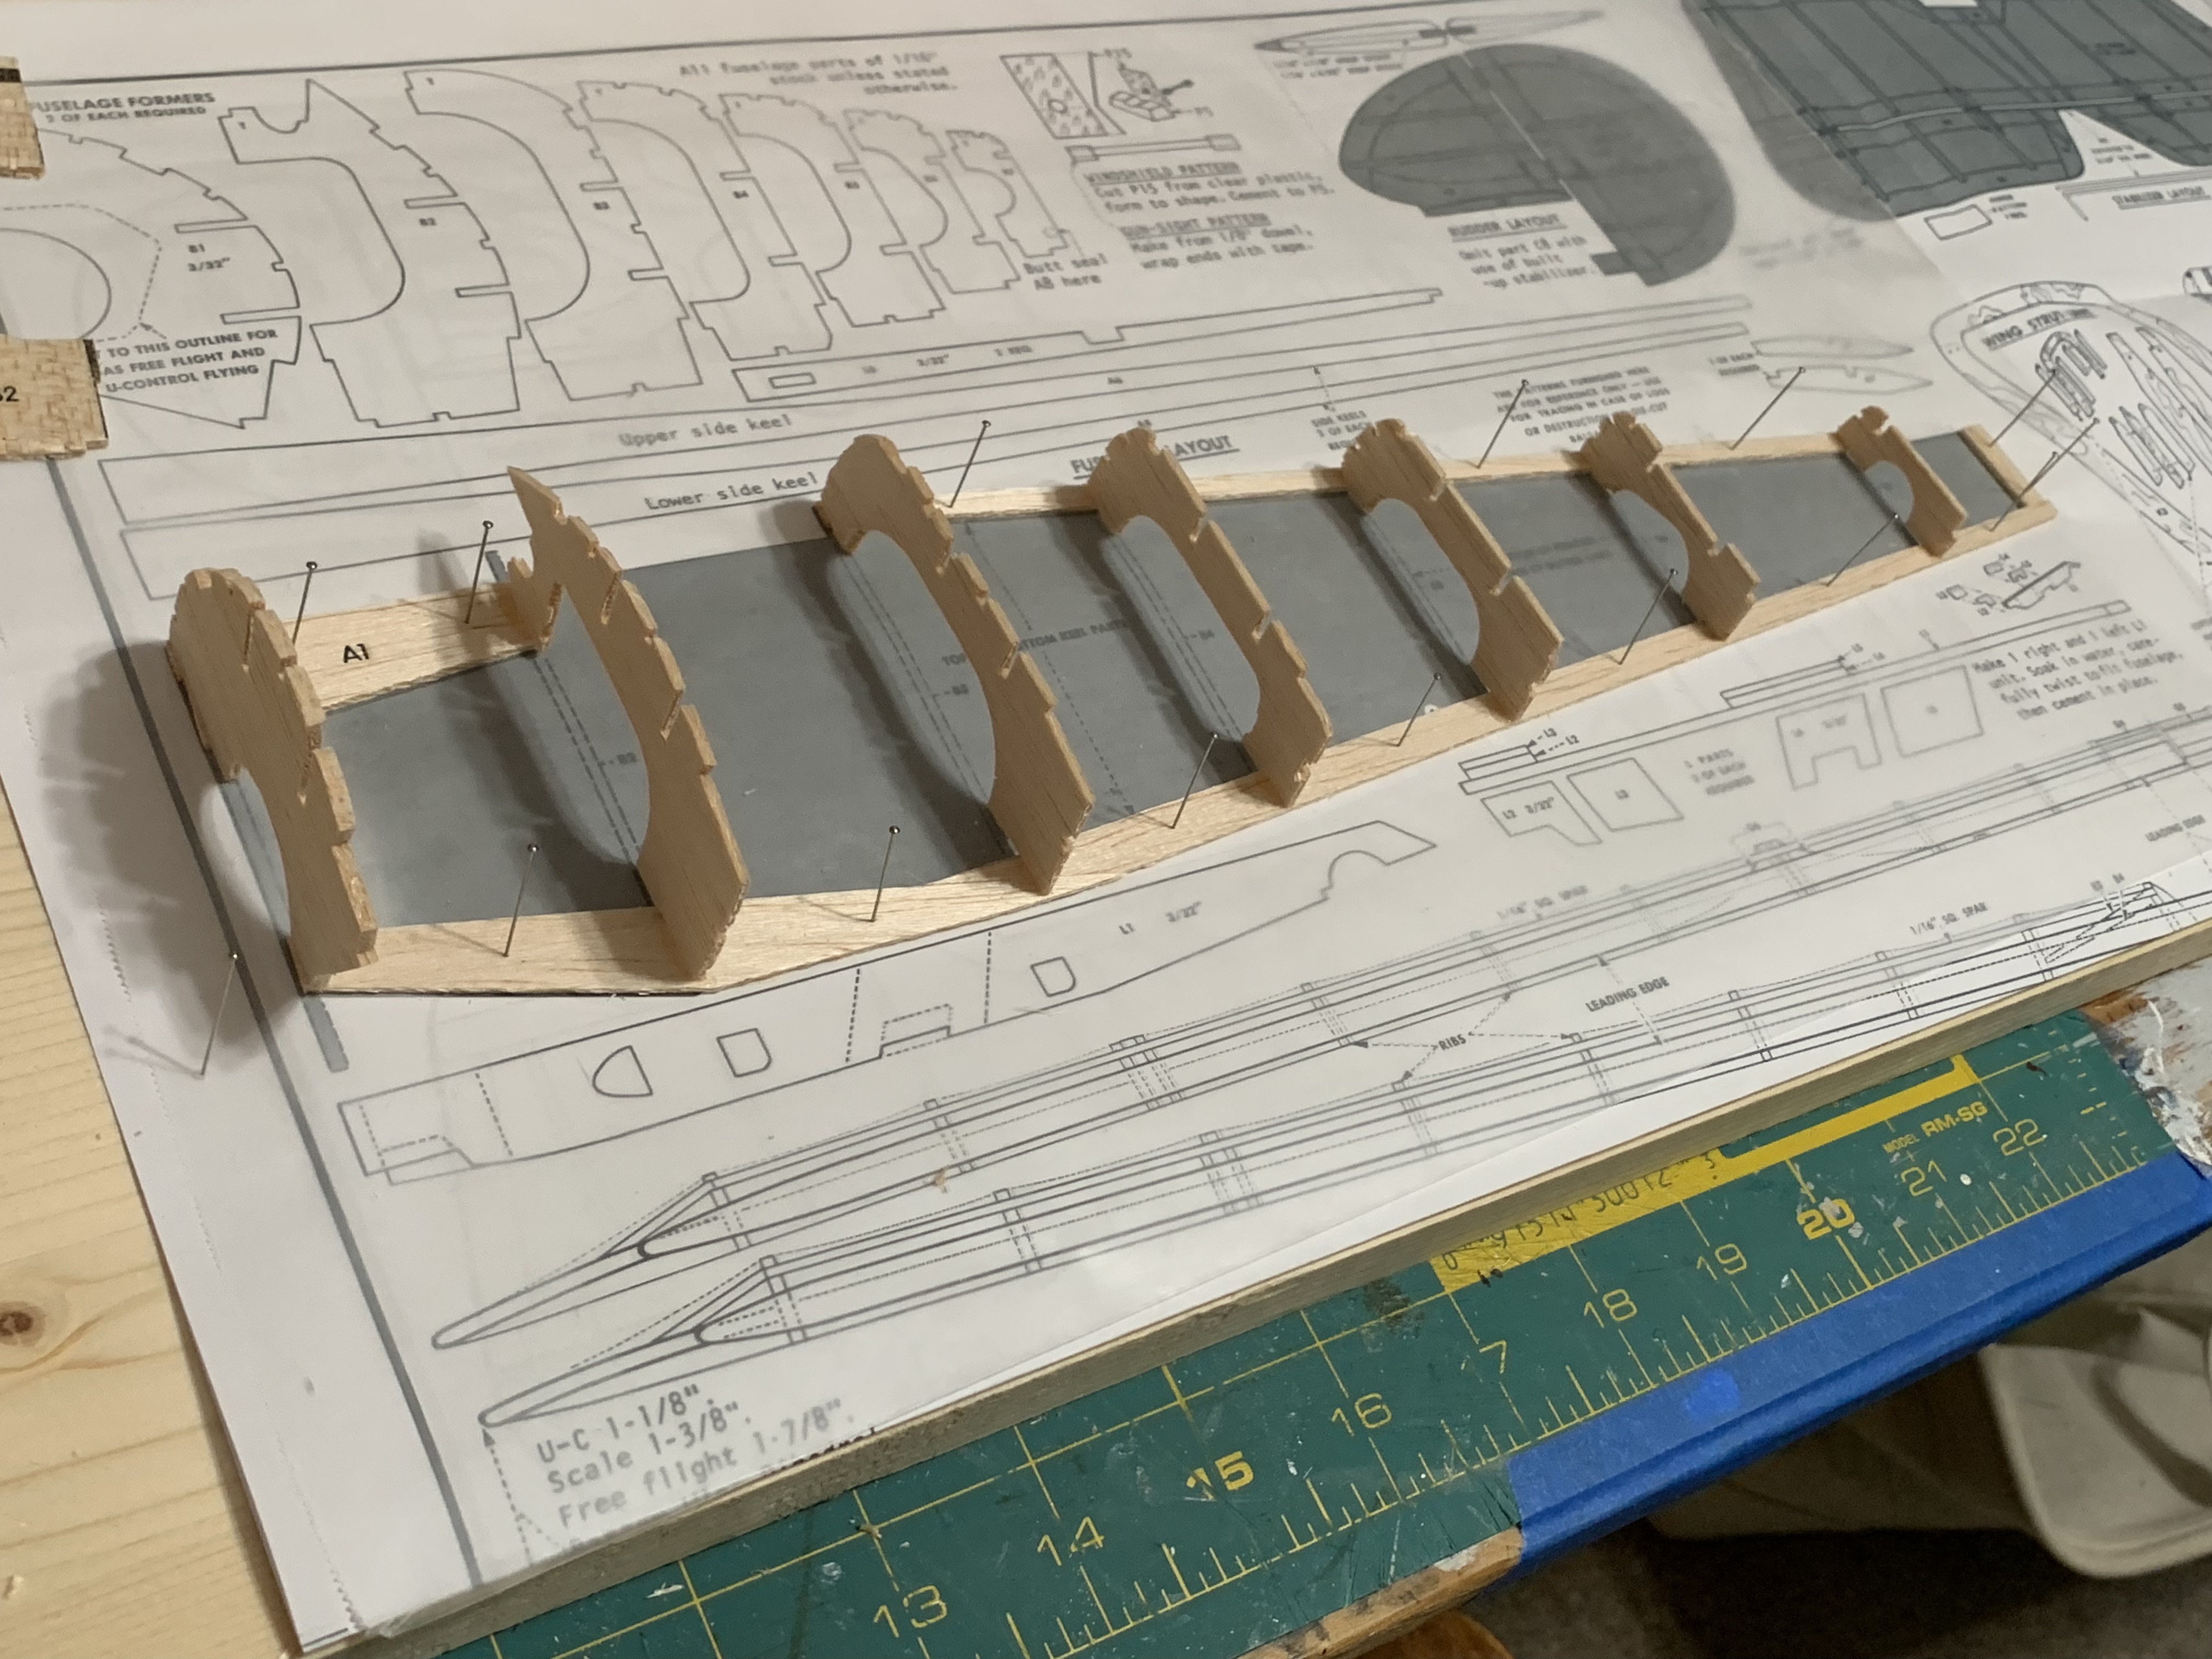
For anyone unfamiliar with this type of model, it all starts with building the frames. This basic process is to first carefully cut out the die-cut frame pieces from the different balsa wood sheets, pin them down to the diagrams in the instructions, and then glue them together. Once dry, strips of various sizes of balsa wood are then cut to length and glued to the frame pieces. And the build board I had used previously for building my Chris Craft boat just fit for this model as well.
The first major step was to glue the left side fuselage formers (akin to bulkheads in a ship) onto the upper and lower keel (I didn’t know airplanes had keels also).
This was the step during the build of my boat that prompted me to want to build another airplane.
After attaching the two side keels and small strips of wood called stringers, I removed the partially completed fuselage from the board to repeat the steps on the other side. However, it was at this point that I was reminded of the physical properties of balsa wood. It is very light weight which makes it ideal for an airplane, but the light weight comes at a price of strength.
Balsa wood is very fragile and is easily broken by hand. As I was gluing pieces on the right side of the fuselage, I occasionally broke a piece on the left side while applying pressure to secure the new piece. But after a few mishaps, I finished the fuselage and was ready to move onto the wings.
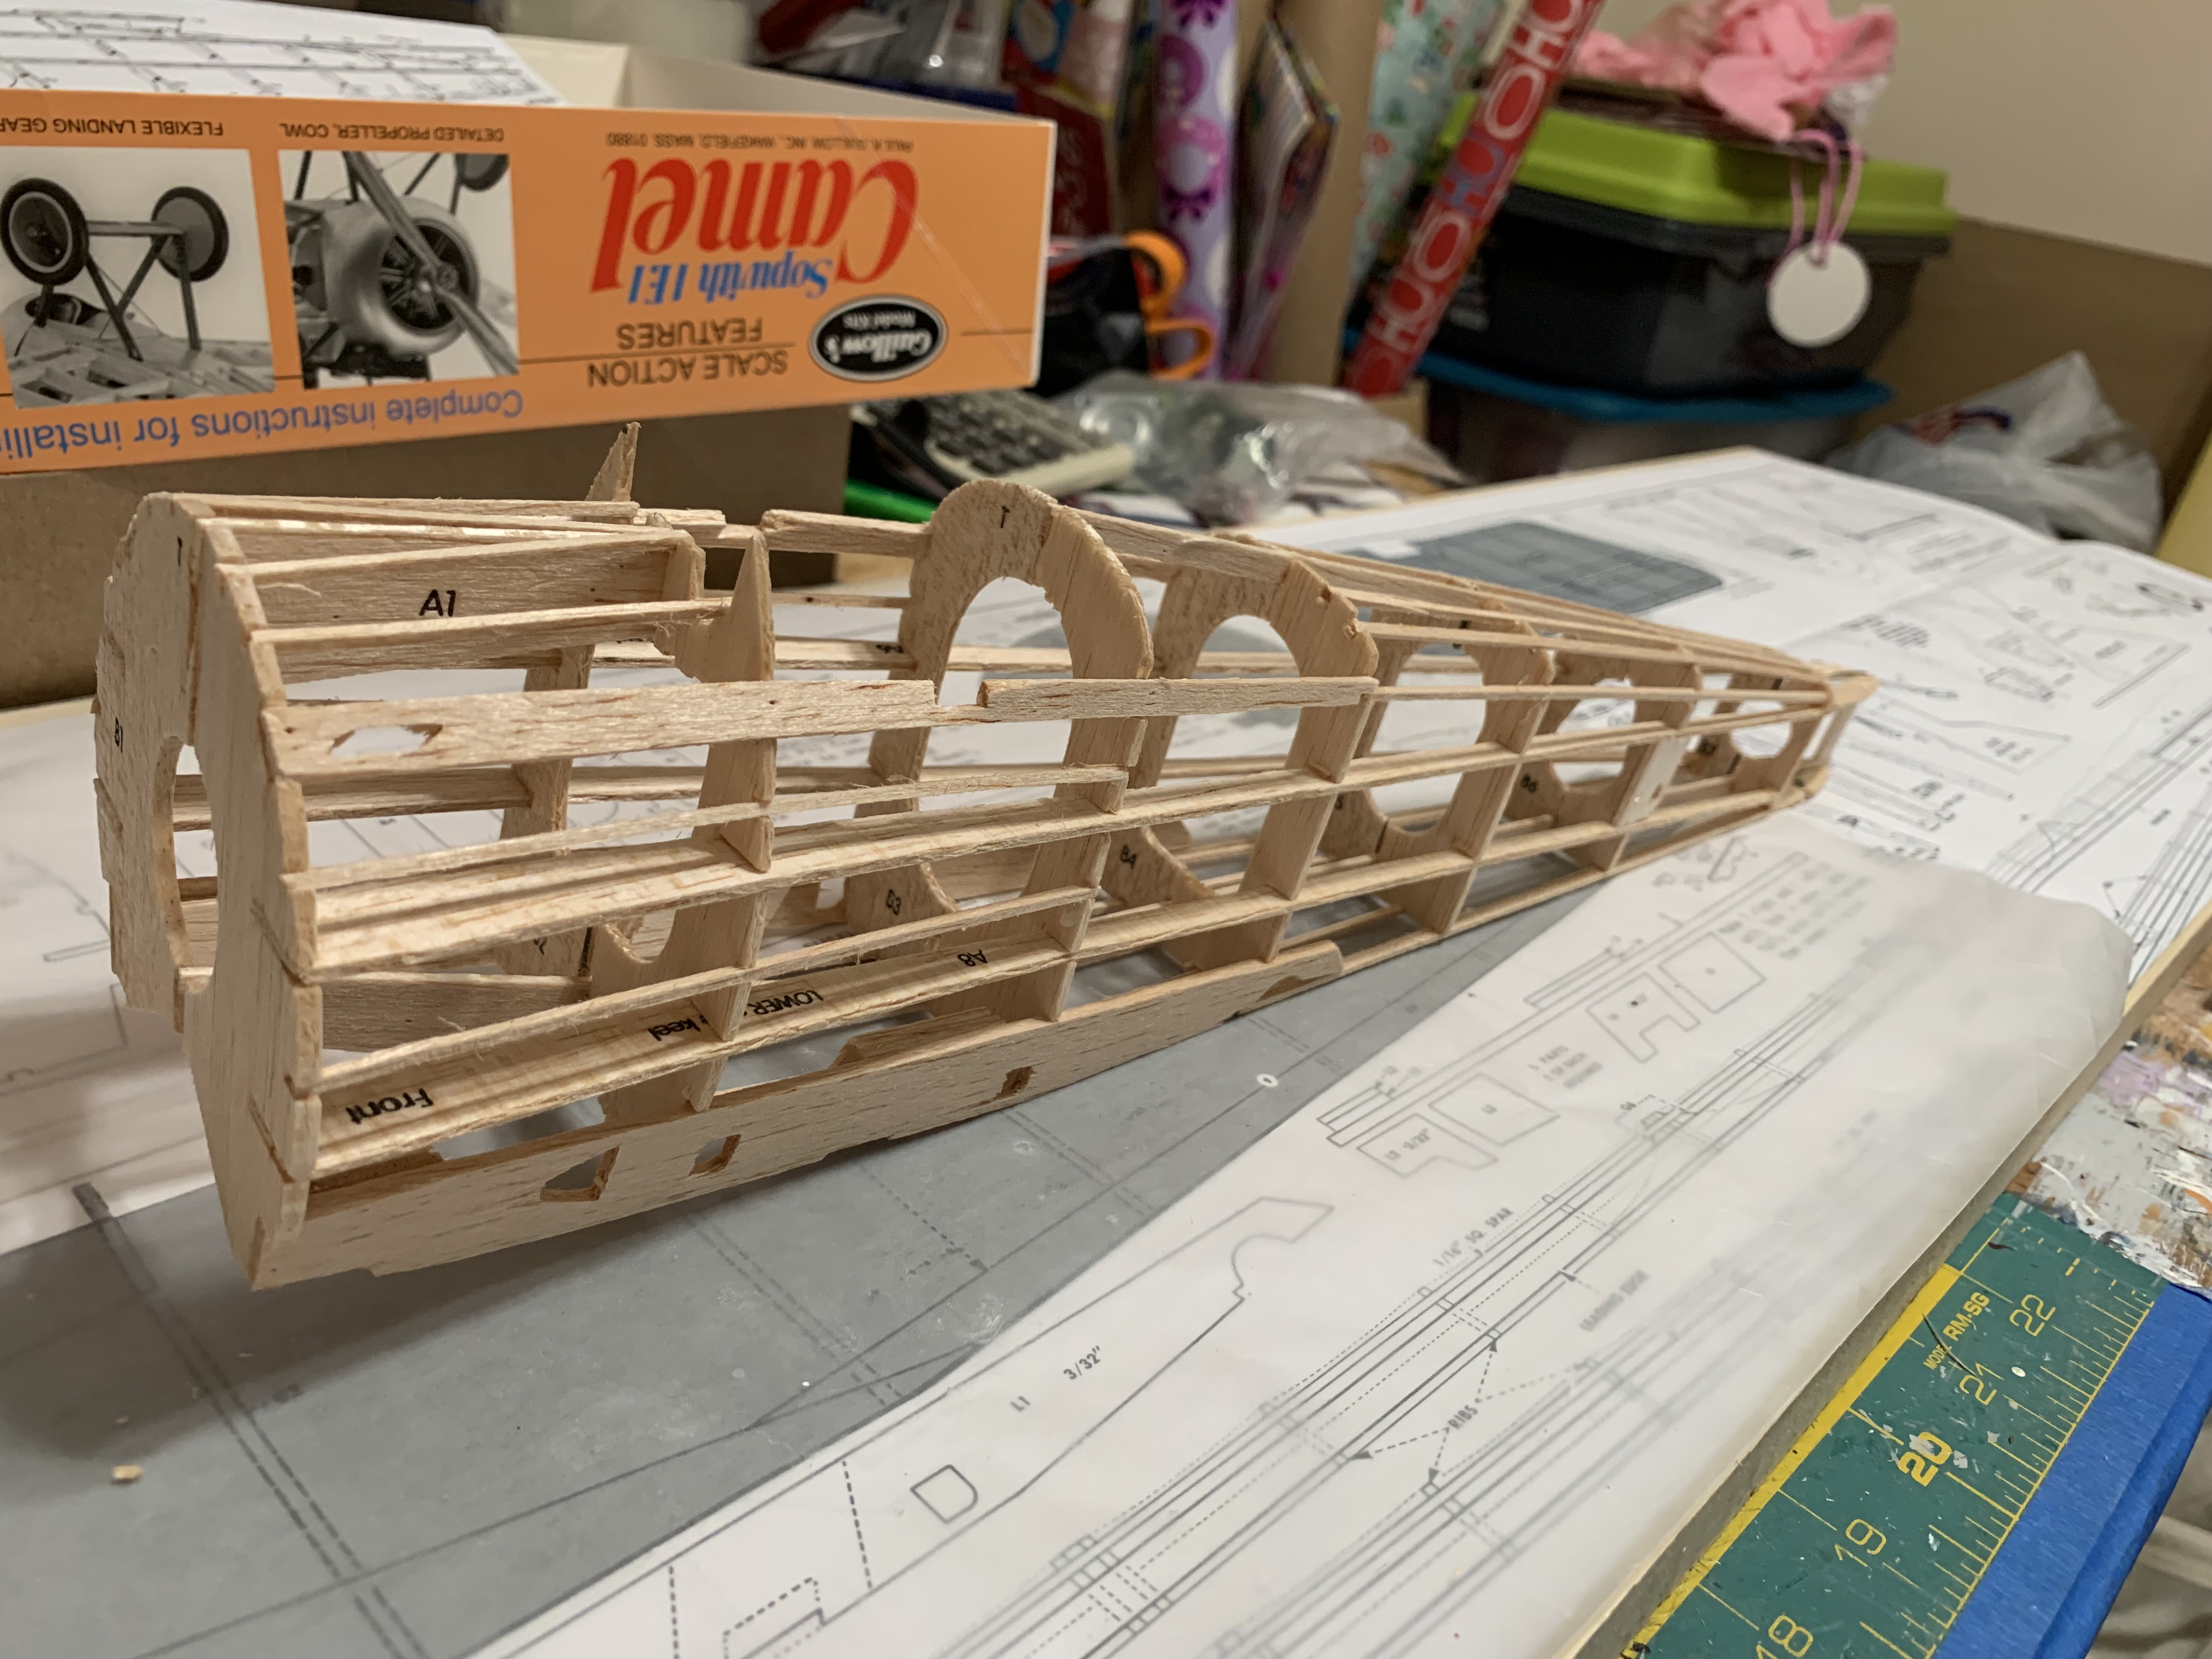
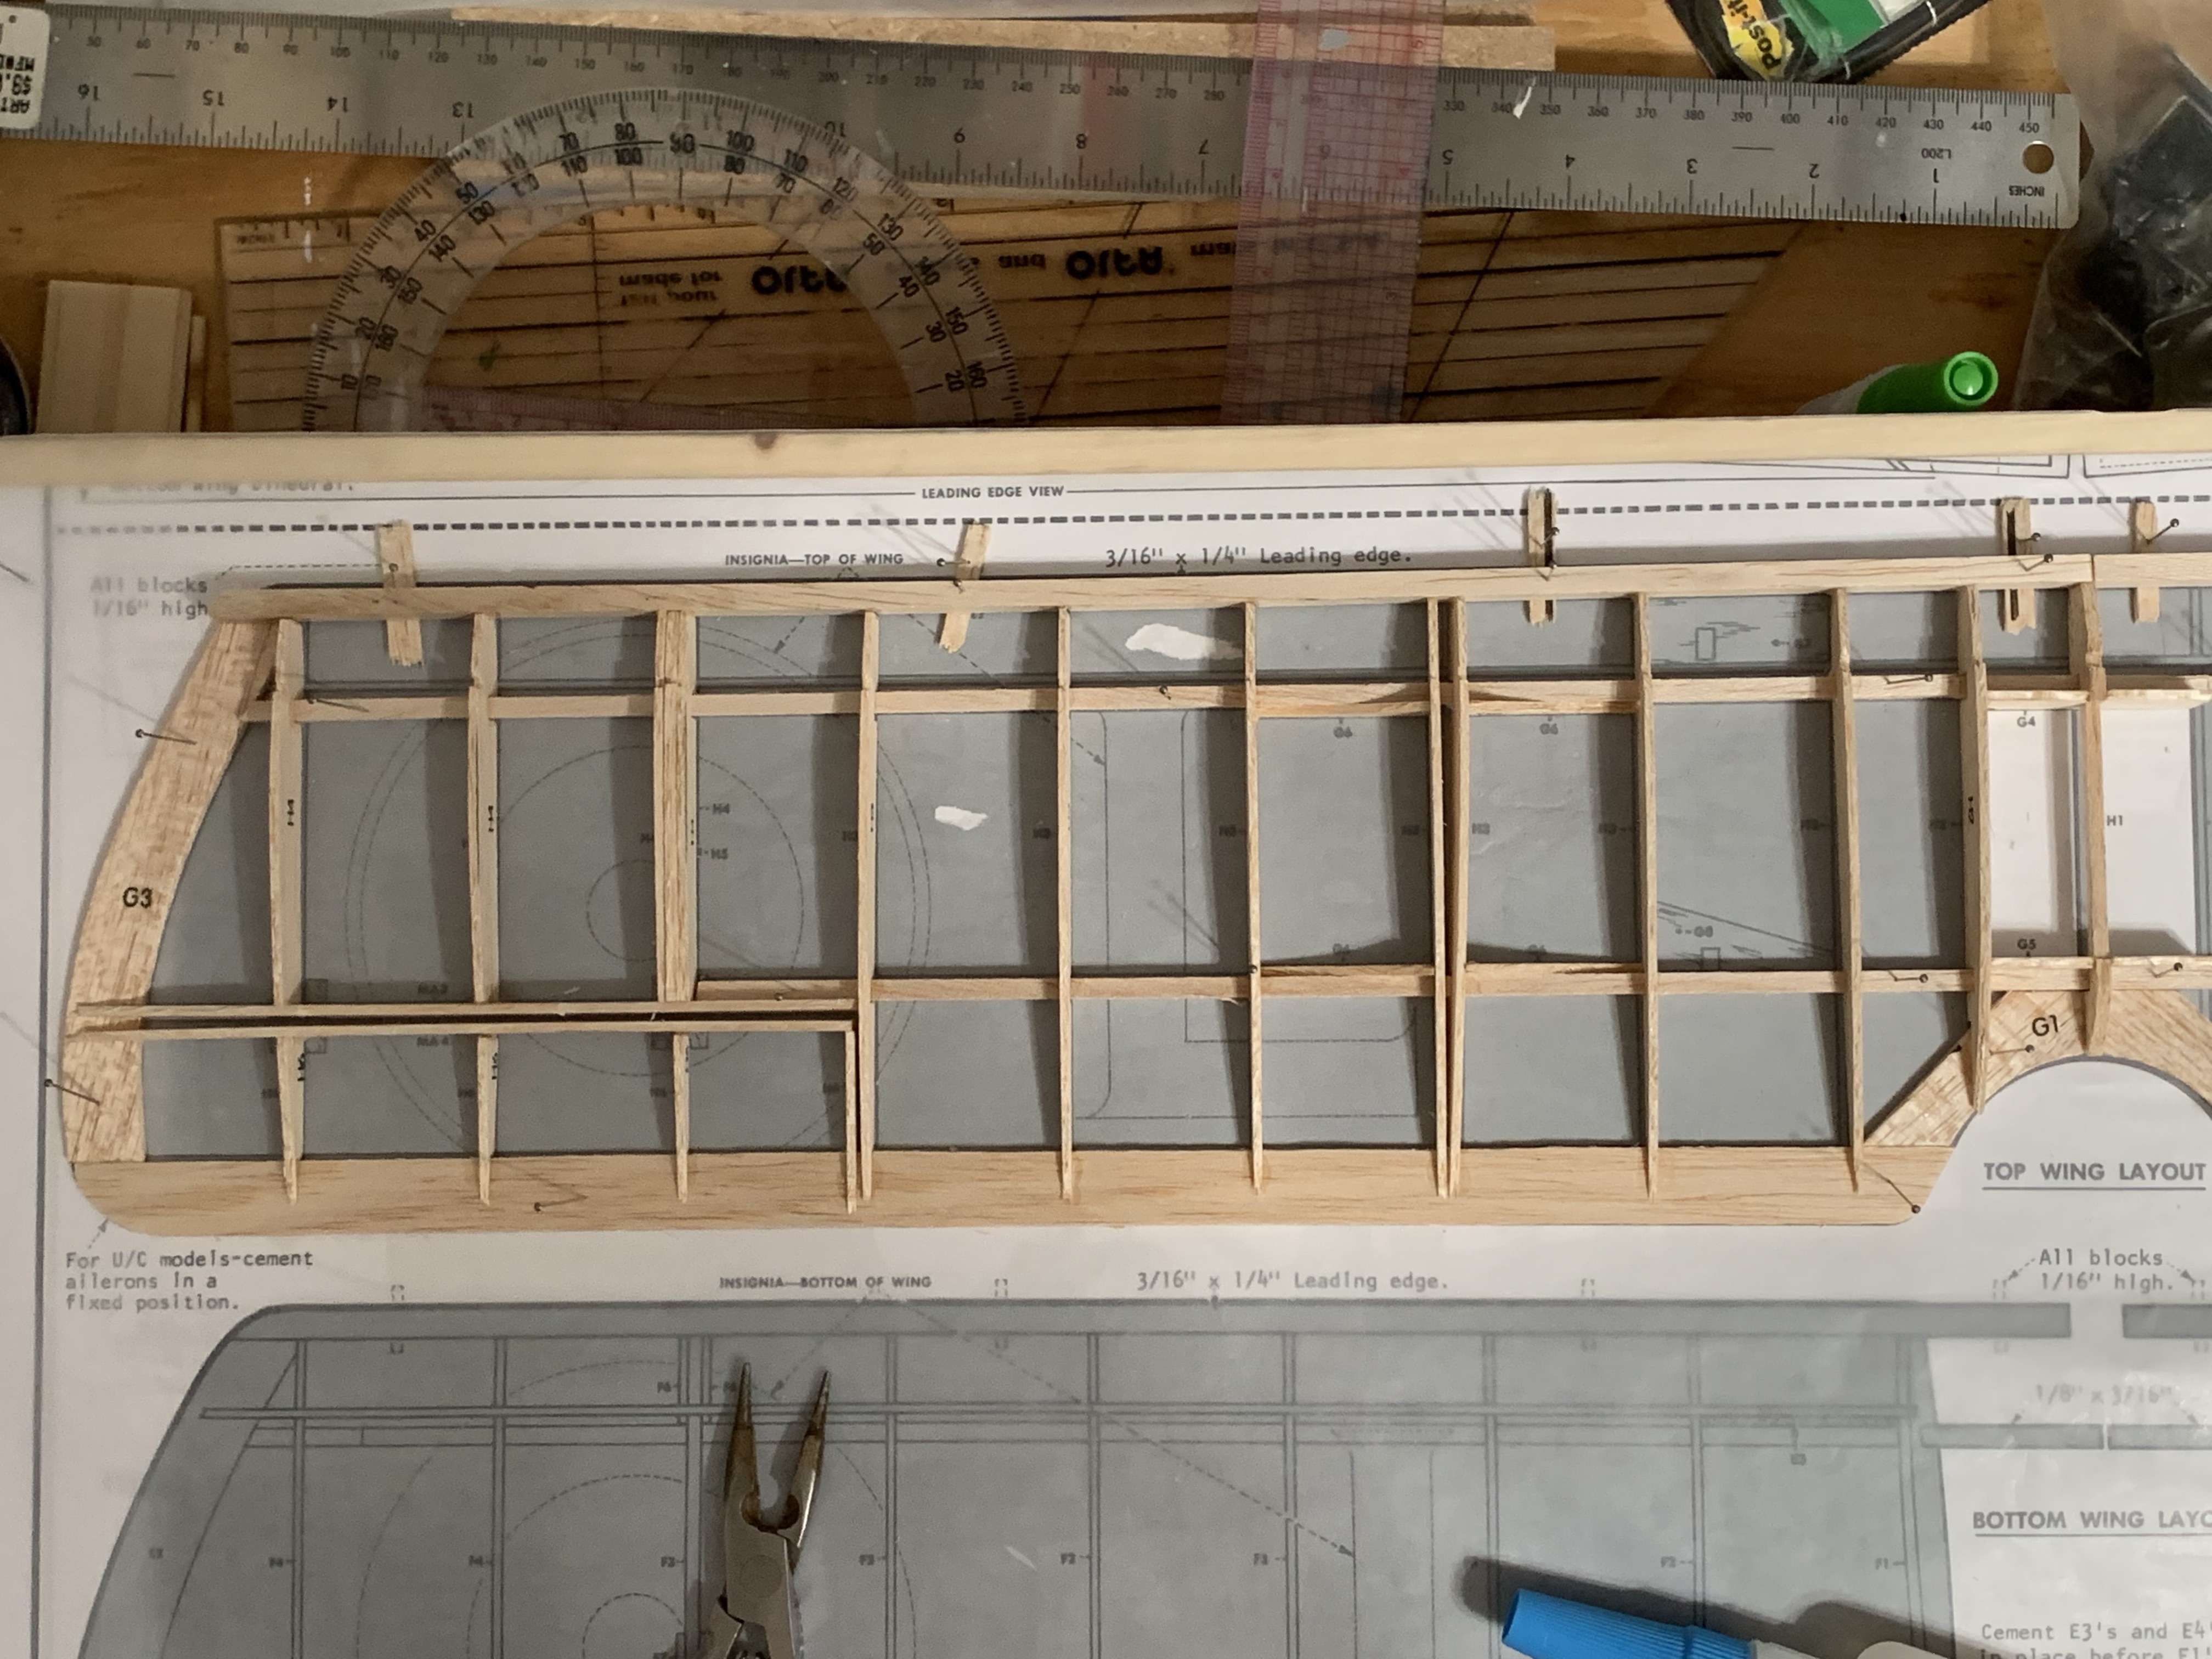
Being a biplane, there were two wings to build. For no particular reason, I decided to start with the top wing and the first step was to pin down and glue together the leading edge, the trailing edge, and the wing tips. Next up was to glue the two main spars in place. The spars provide the longitudinal strength of the wing.
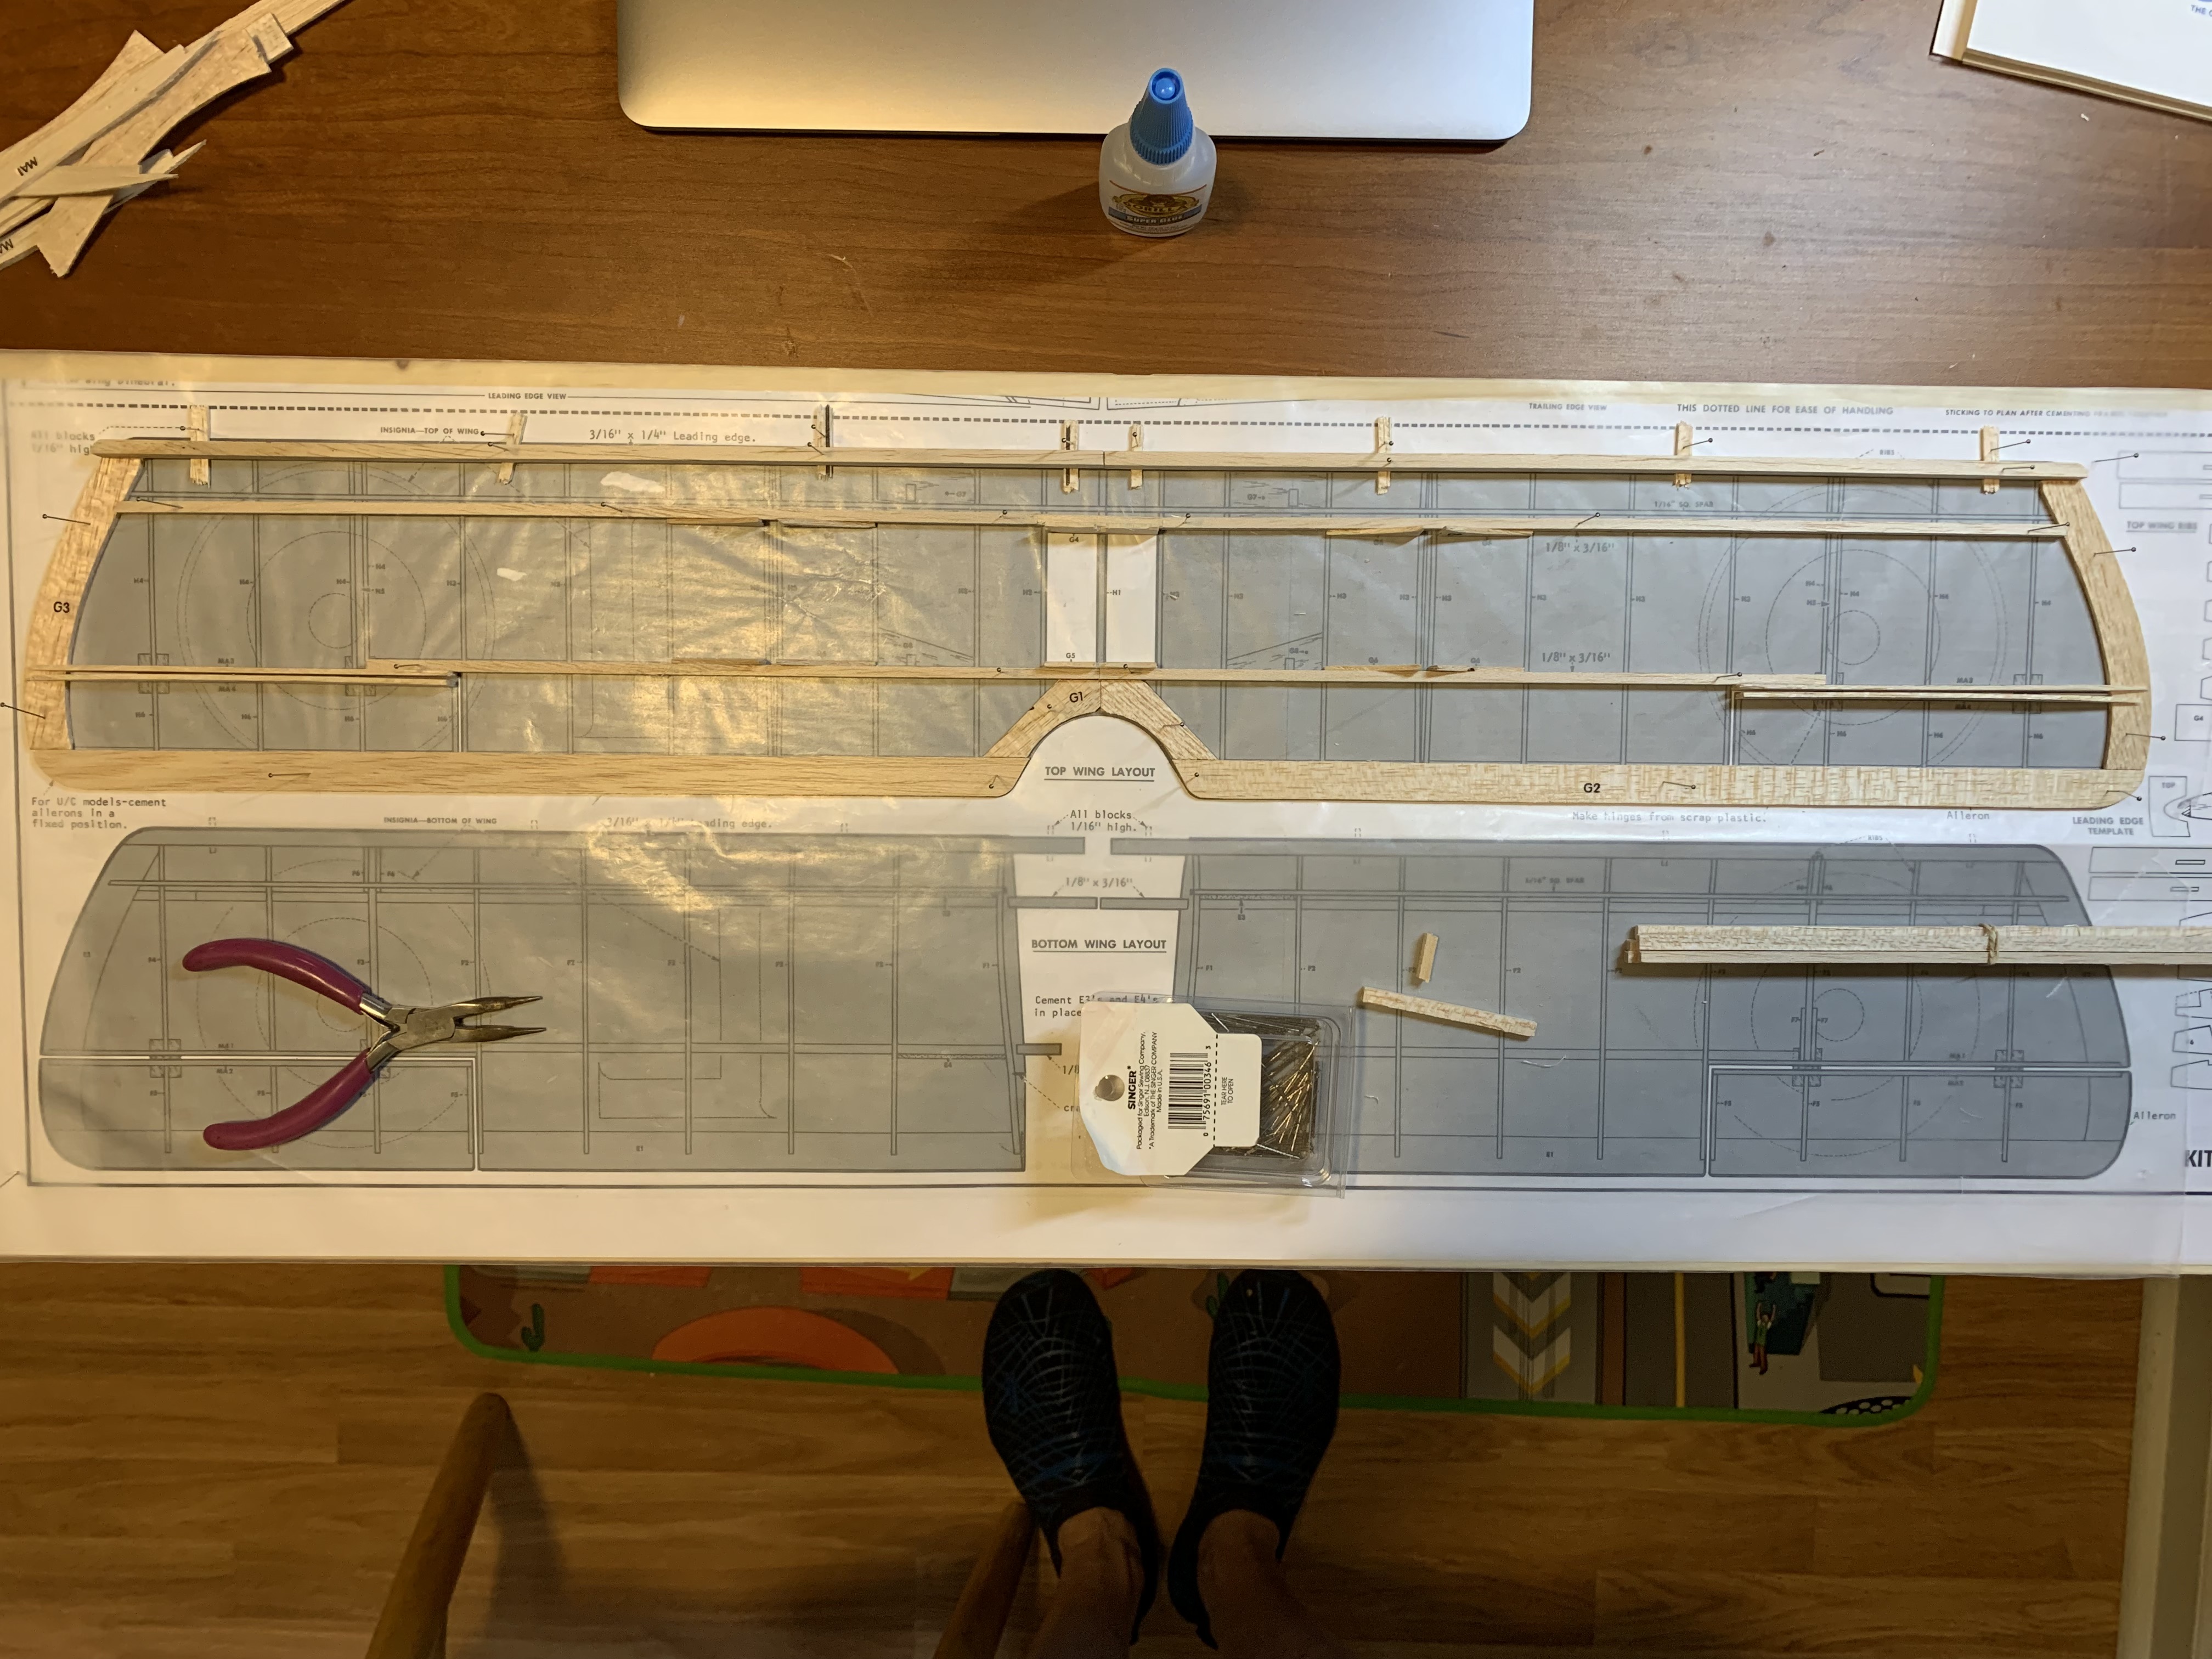
With these attached, the fun began adding the ribs which would form the concave and convex shape of the wing. But as I added these, I noticed occasionally the holes cut out in the rib to fit over the spars did not line up properly with the spars. Also, I sometimes had to sand down the front edge of the ribs to get them to fit between the spar and the leading edge. I know it has been over 50 years since I built one of these balsa planes, but I seemed to recall the pieces fit together quite nicely. I could only assume that I had mis-aligned the spars and leading edge. With some of these “field adjustments” made, I finished the left side of the top wing.
Working on the right side, they seemed to line up better so thankfully my misalignment had only occurred on the left side. With the experience of completing the left side under my belt, I finished the right side soon after. It felt like quite an accomplishment to remove the pins holding the wing down to the build-board and carefully pulling the finished wing from the wax paper.

But there was one step left to finish the top wing. It might not have been obvious from the previous top-down photos, but the leading edge was a large rectangular balsa strip.

To get the nice sharp leading edge of an airplane wing that you might be familiar with, it was necessary to carefully sand down the top and bottom edges to obtain a nice uniform curve that followed the angle of the ribs. Since there was so much wood to remove, I chose my 120-grit sanding block. Progressively sanding the top and then the bottom, I was able to get a nice leading edge while breaking only a couple of sections of stringers (visible at top of photo, the most fragile part being only 1/16-inch square).

When I started on the bottom left-side wing, I decided to use an alternative construction approach since I had trouble with alignment on the top wing. Rather than using the suggested 2-step approach of gluing the spars and front and back edges of the wing together before adding any ribs, I located the ribs in their proper place and then glued everything together at the same time.
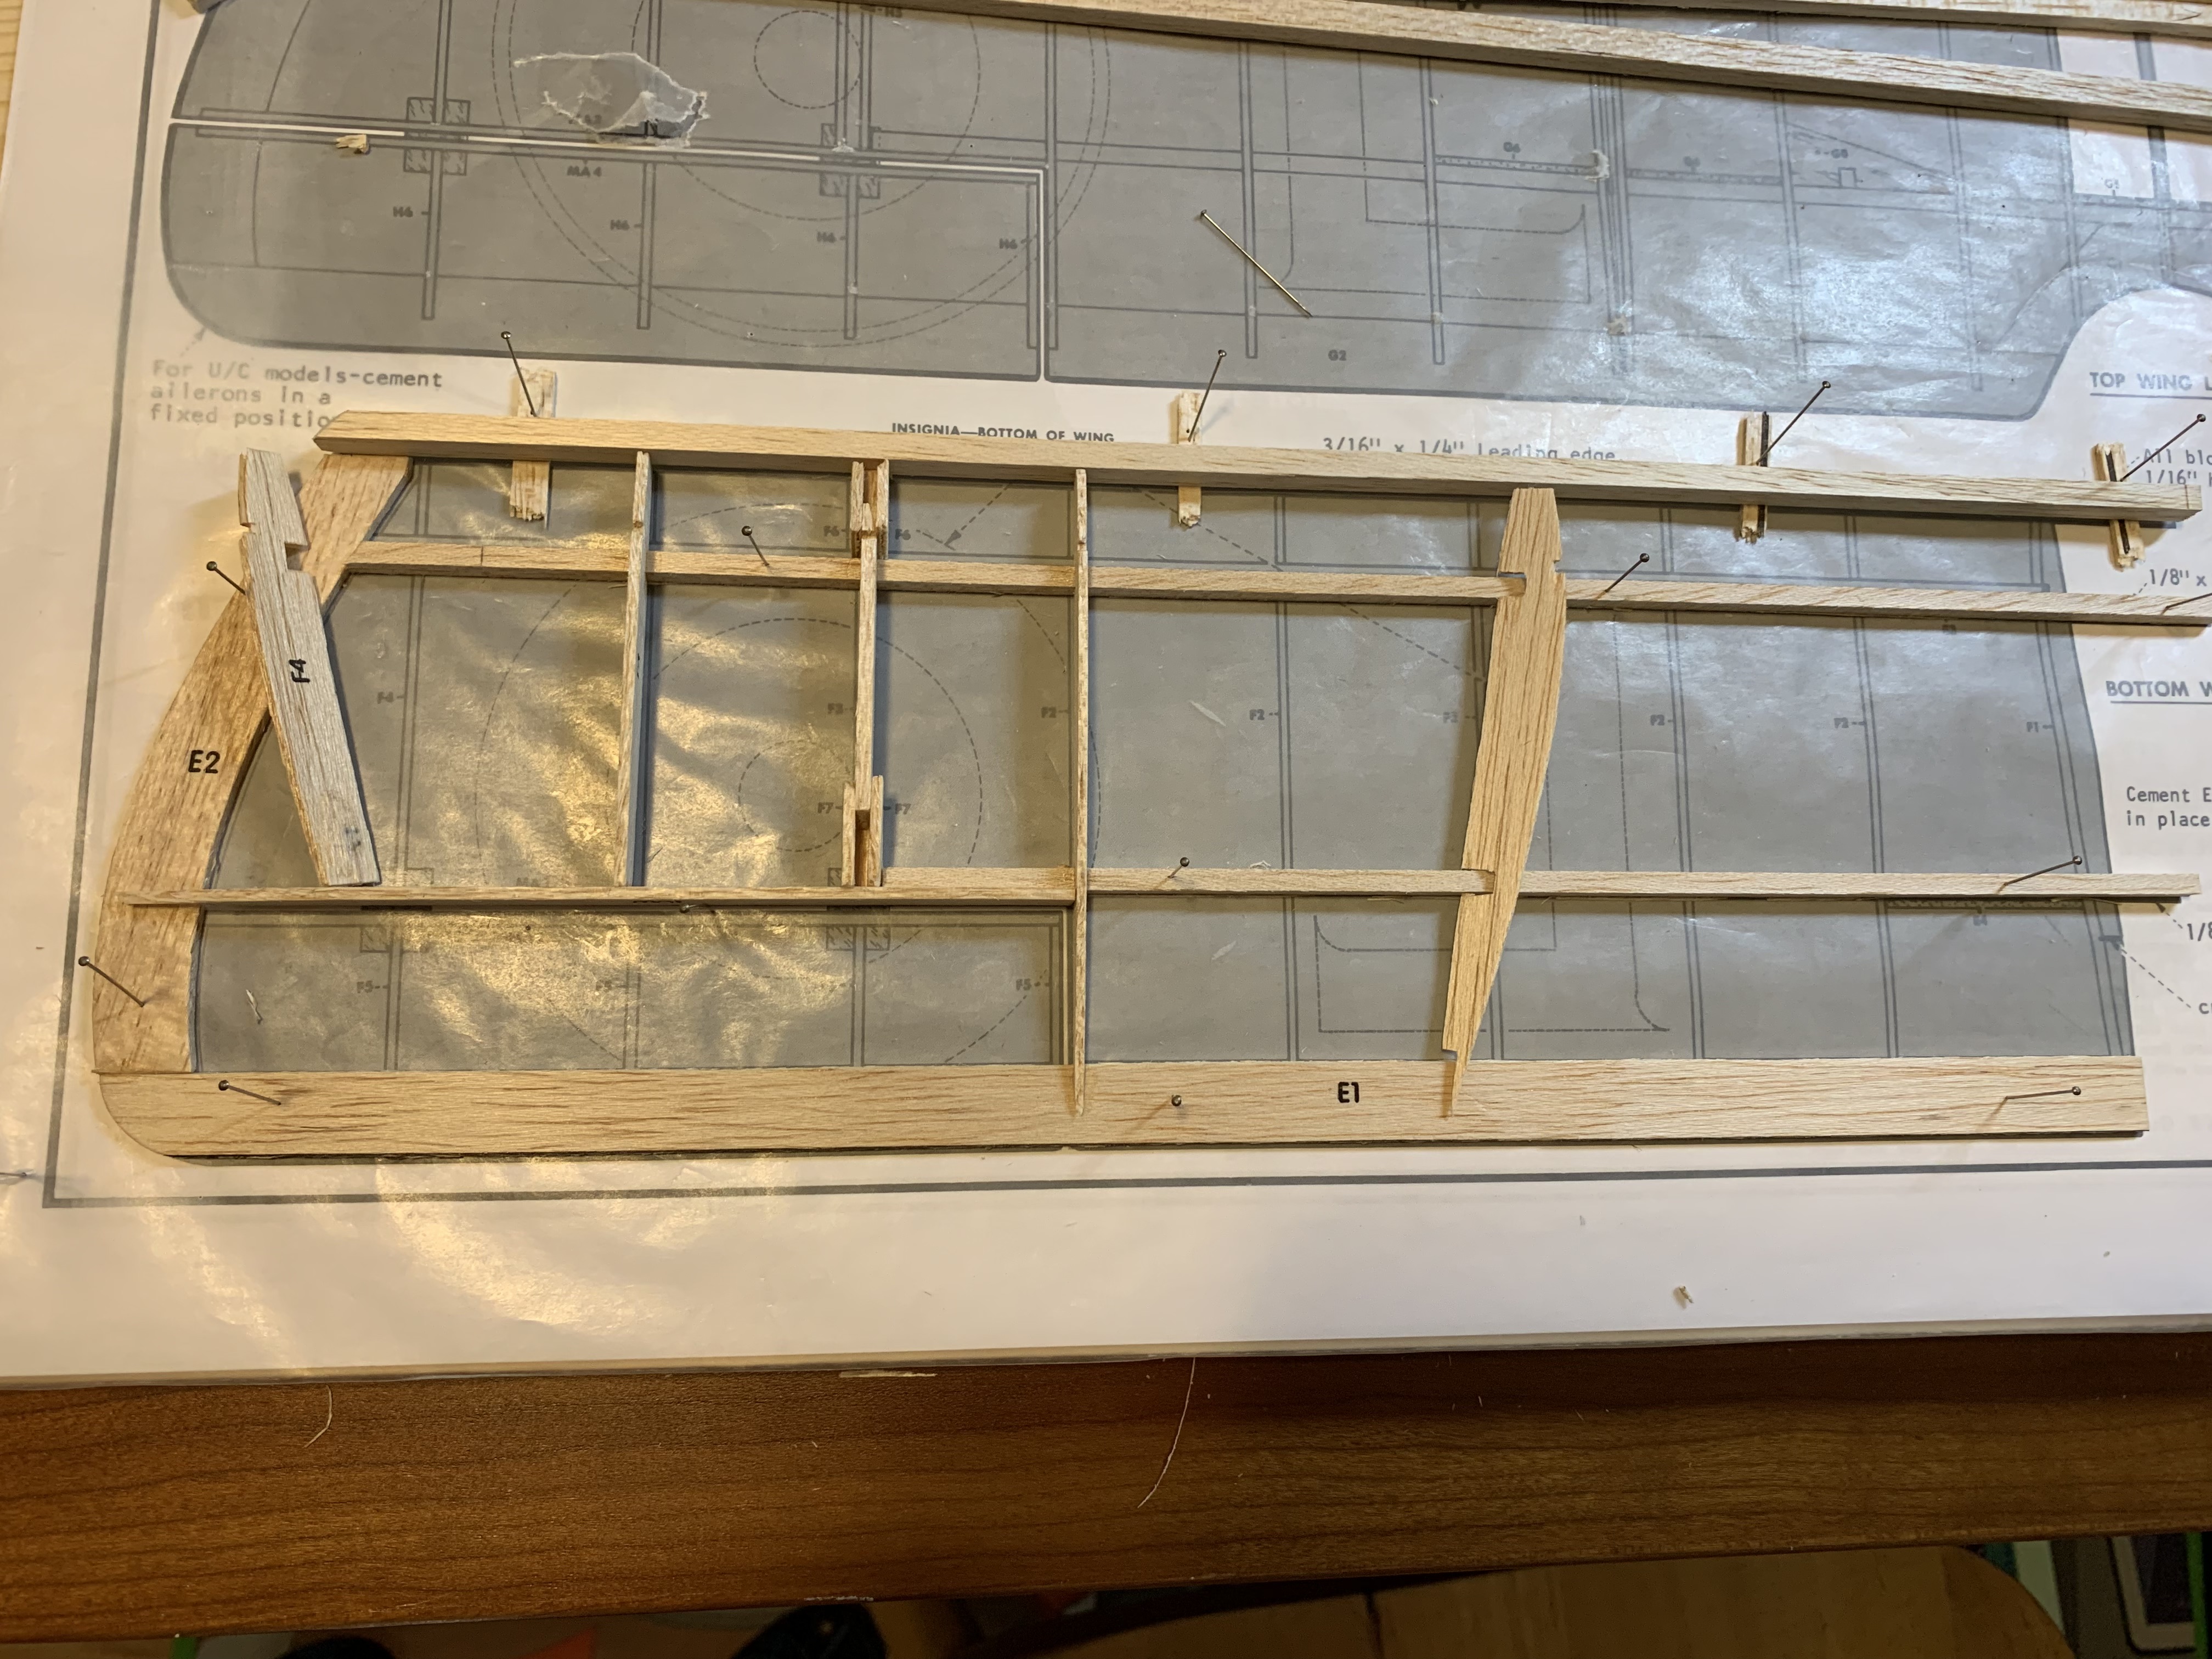
This then ensured all the pieces aligned properly without any adjustments. I also decided to not glue in the 1/16-inch stringers until AFTER I had sanded the leading edge so as to avoid breaking the stringers while sanding. With both the left- and right-side bottom wings complete, I then sanded the leading edge on both wings and sure enough I managed to not break any other parts of the wing. Once I glued in the 1/16-inch stringer, I had framed out most of the plane.
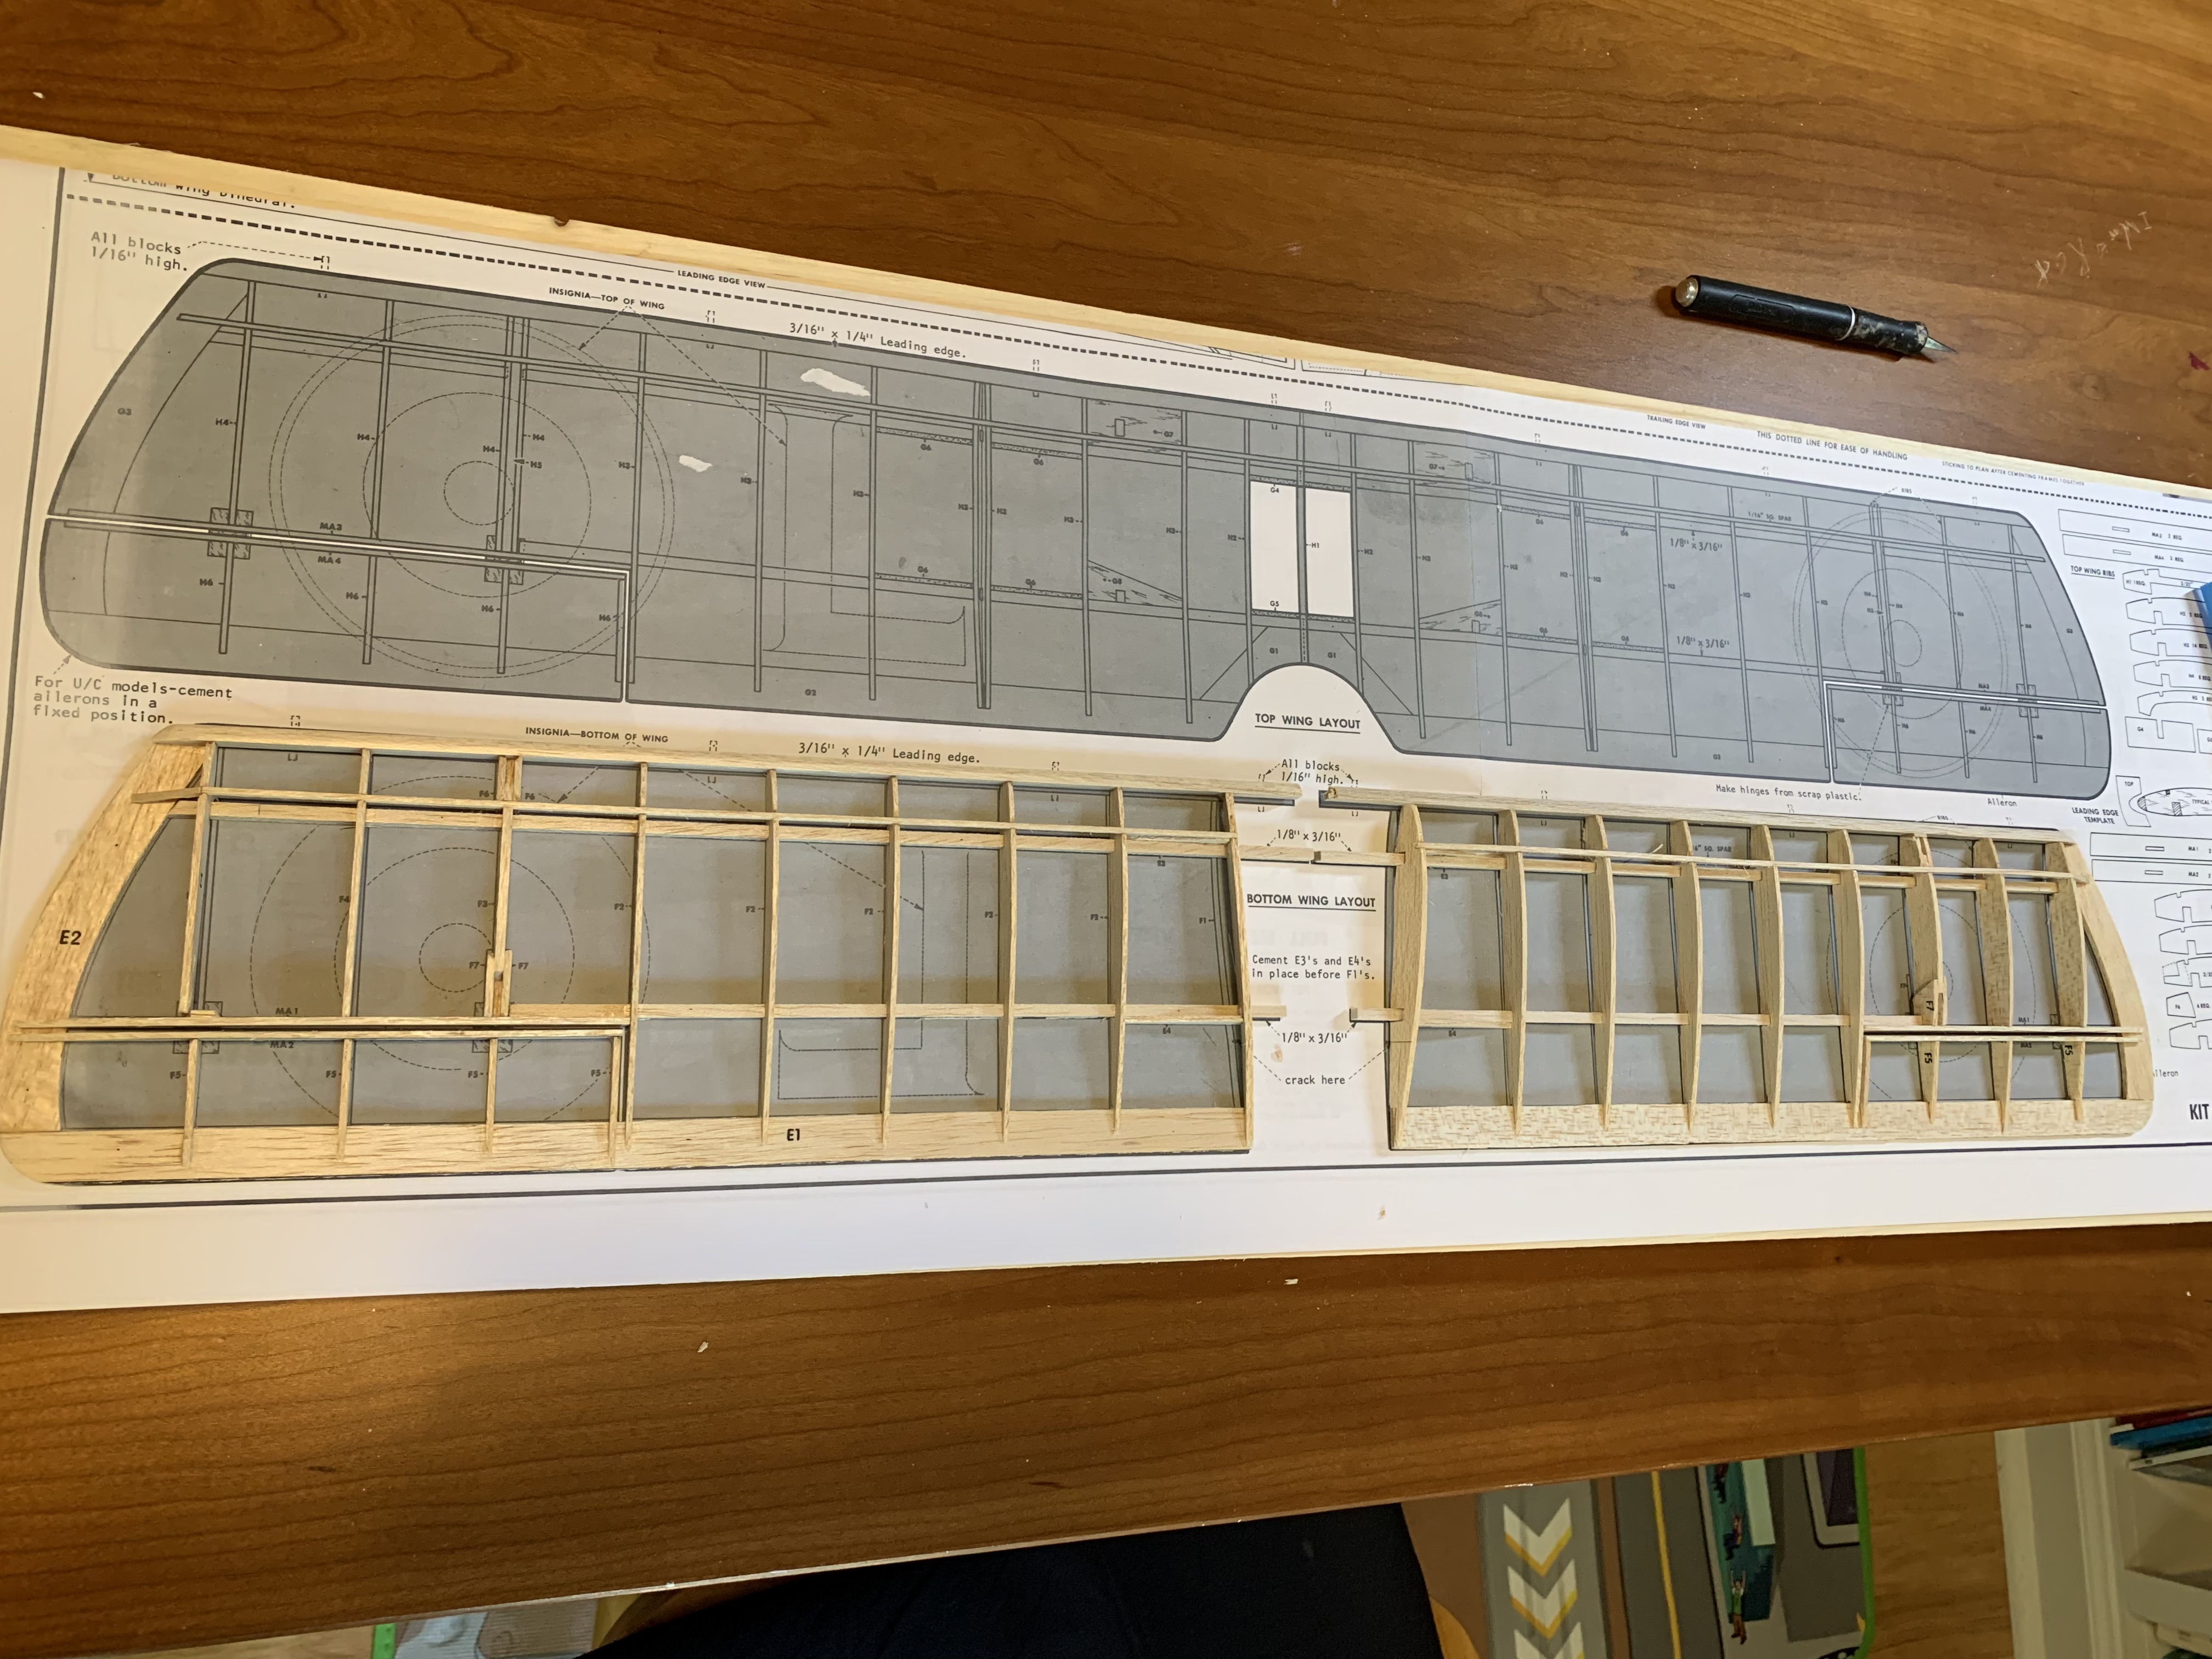
This gave me a chance to trial fit the frames together.
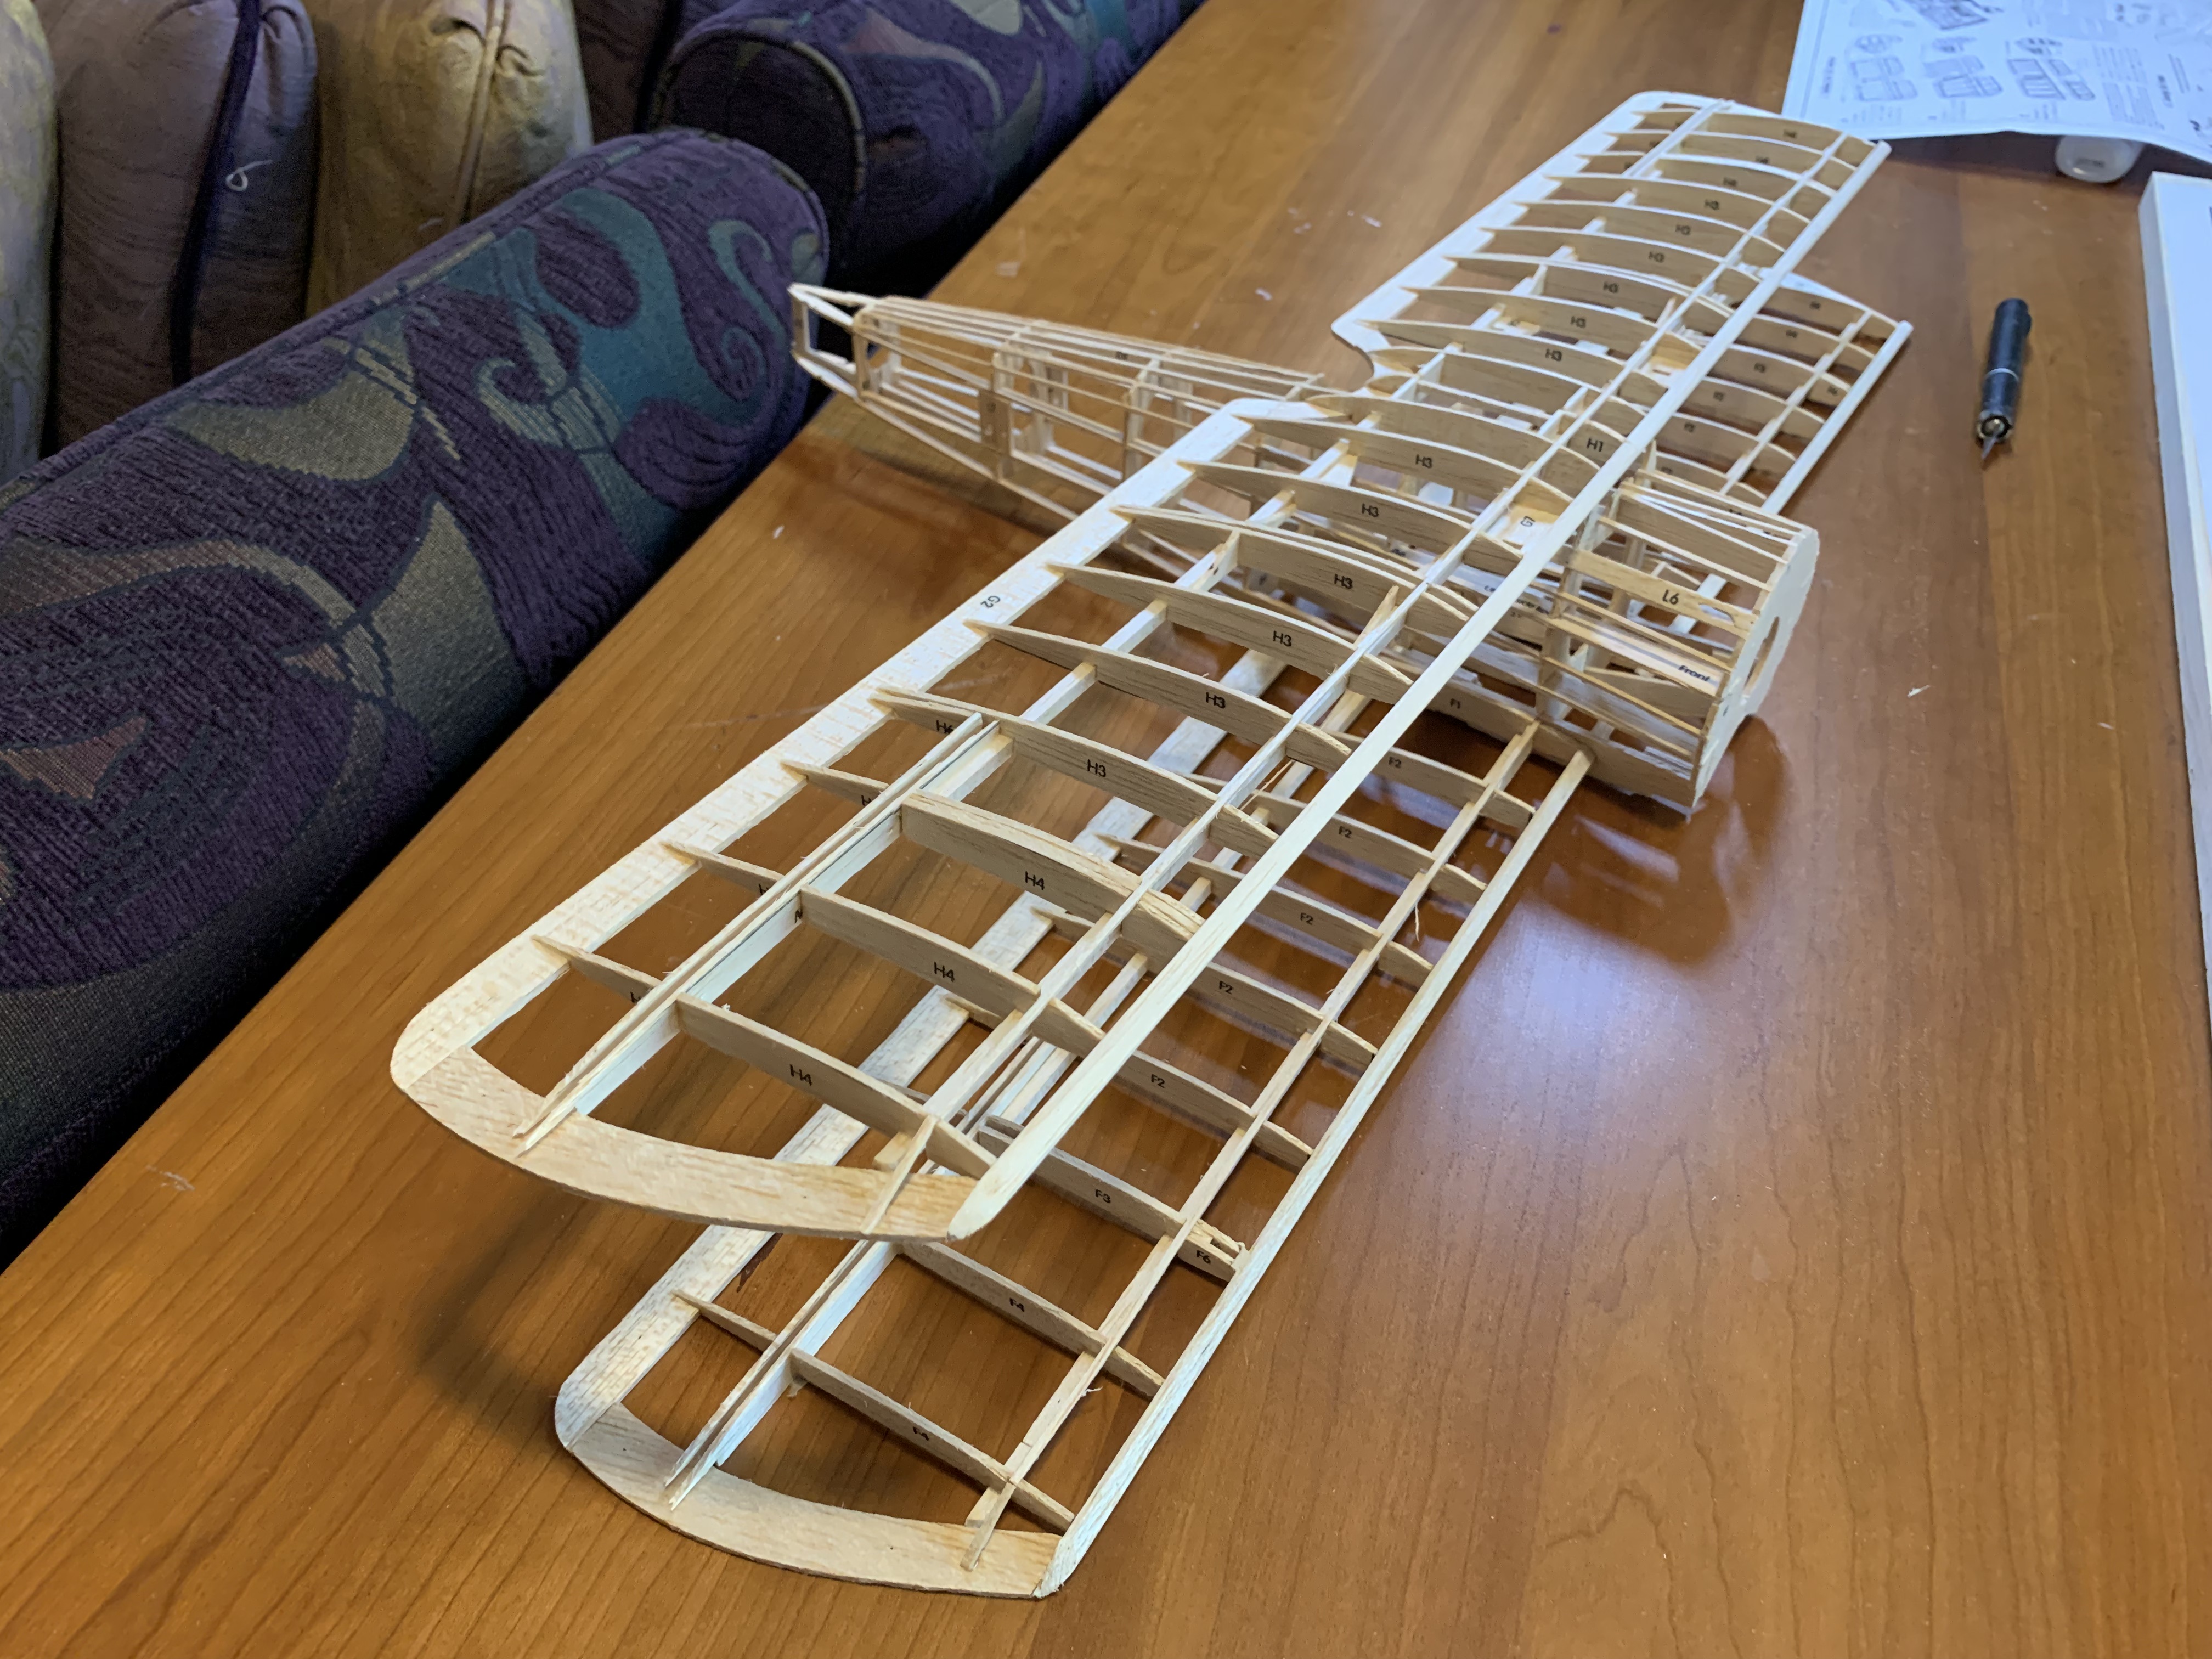
After gluing so many flat pieces of balsa wood together, the airplane was definitely starting to take shape.
The only pieces of the frame left to build were the horizontal and vertical stabilizers, the aerodynamic surfaces at the tail of the airplane.
As with all the previous frame builds, I cut the individual pieces from the balsa sheets and then pinned and glued them down along the pattern on the instructions. Then small spars were cut from balsa strips and glued between the tail frames.
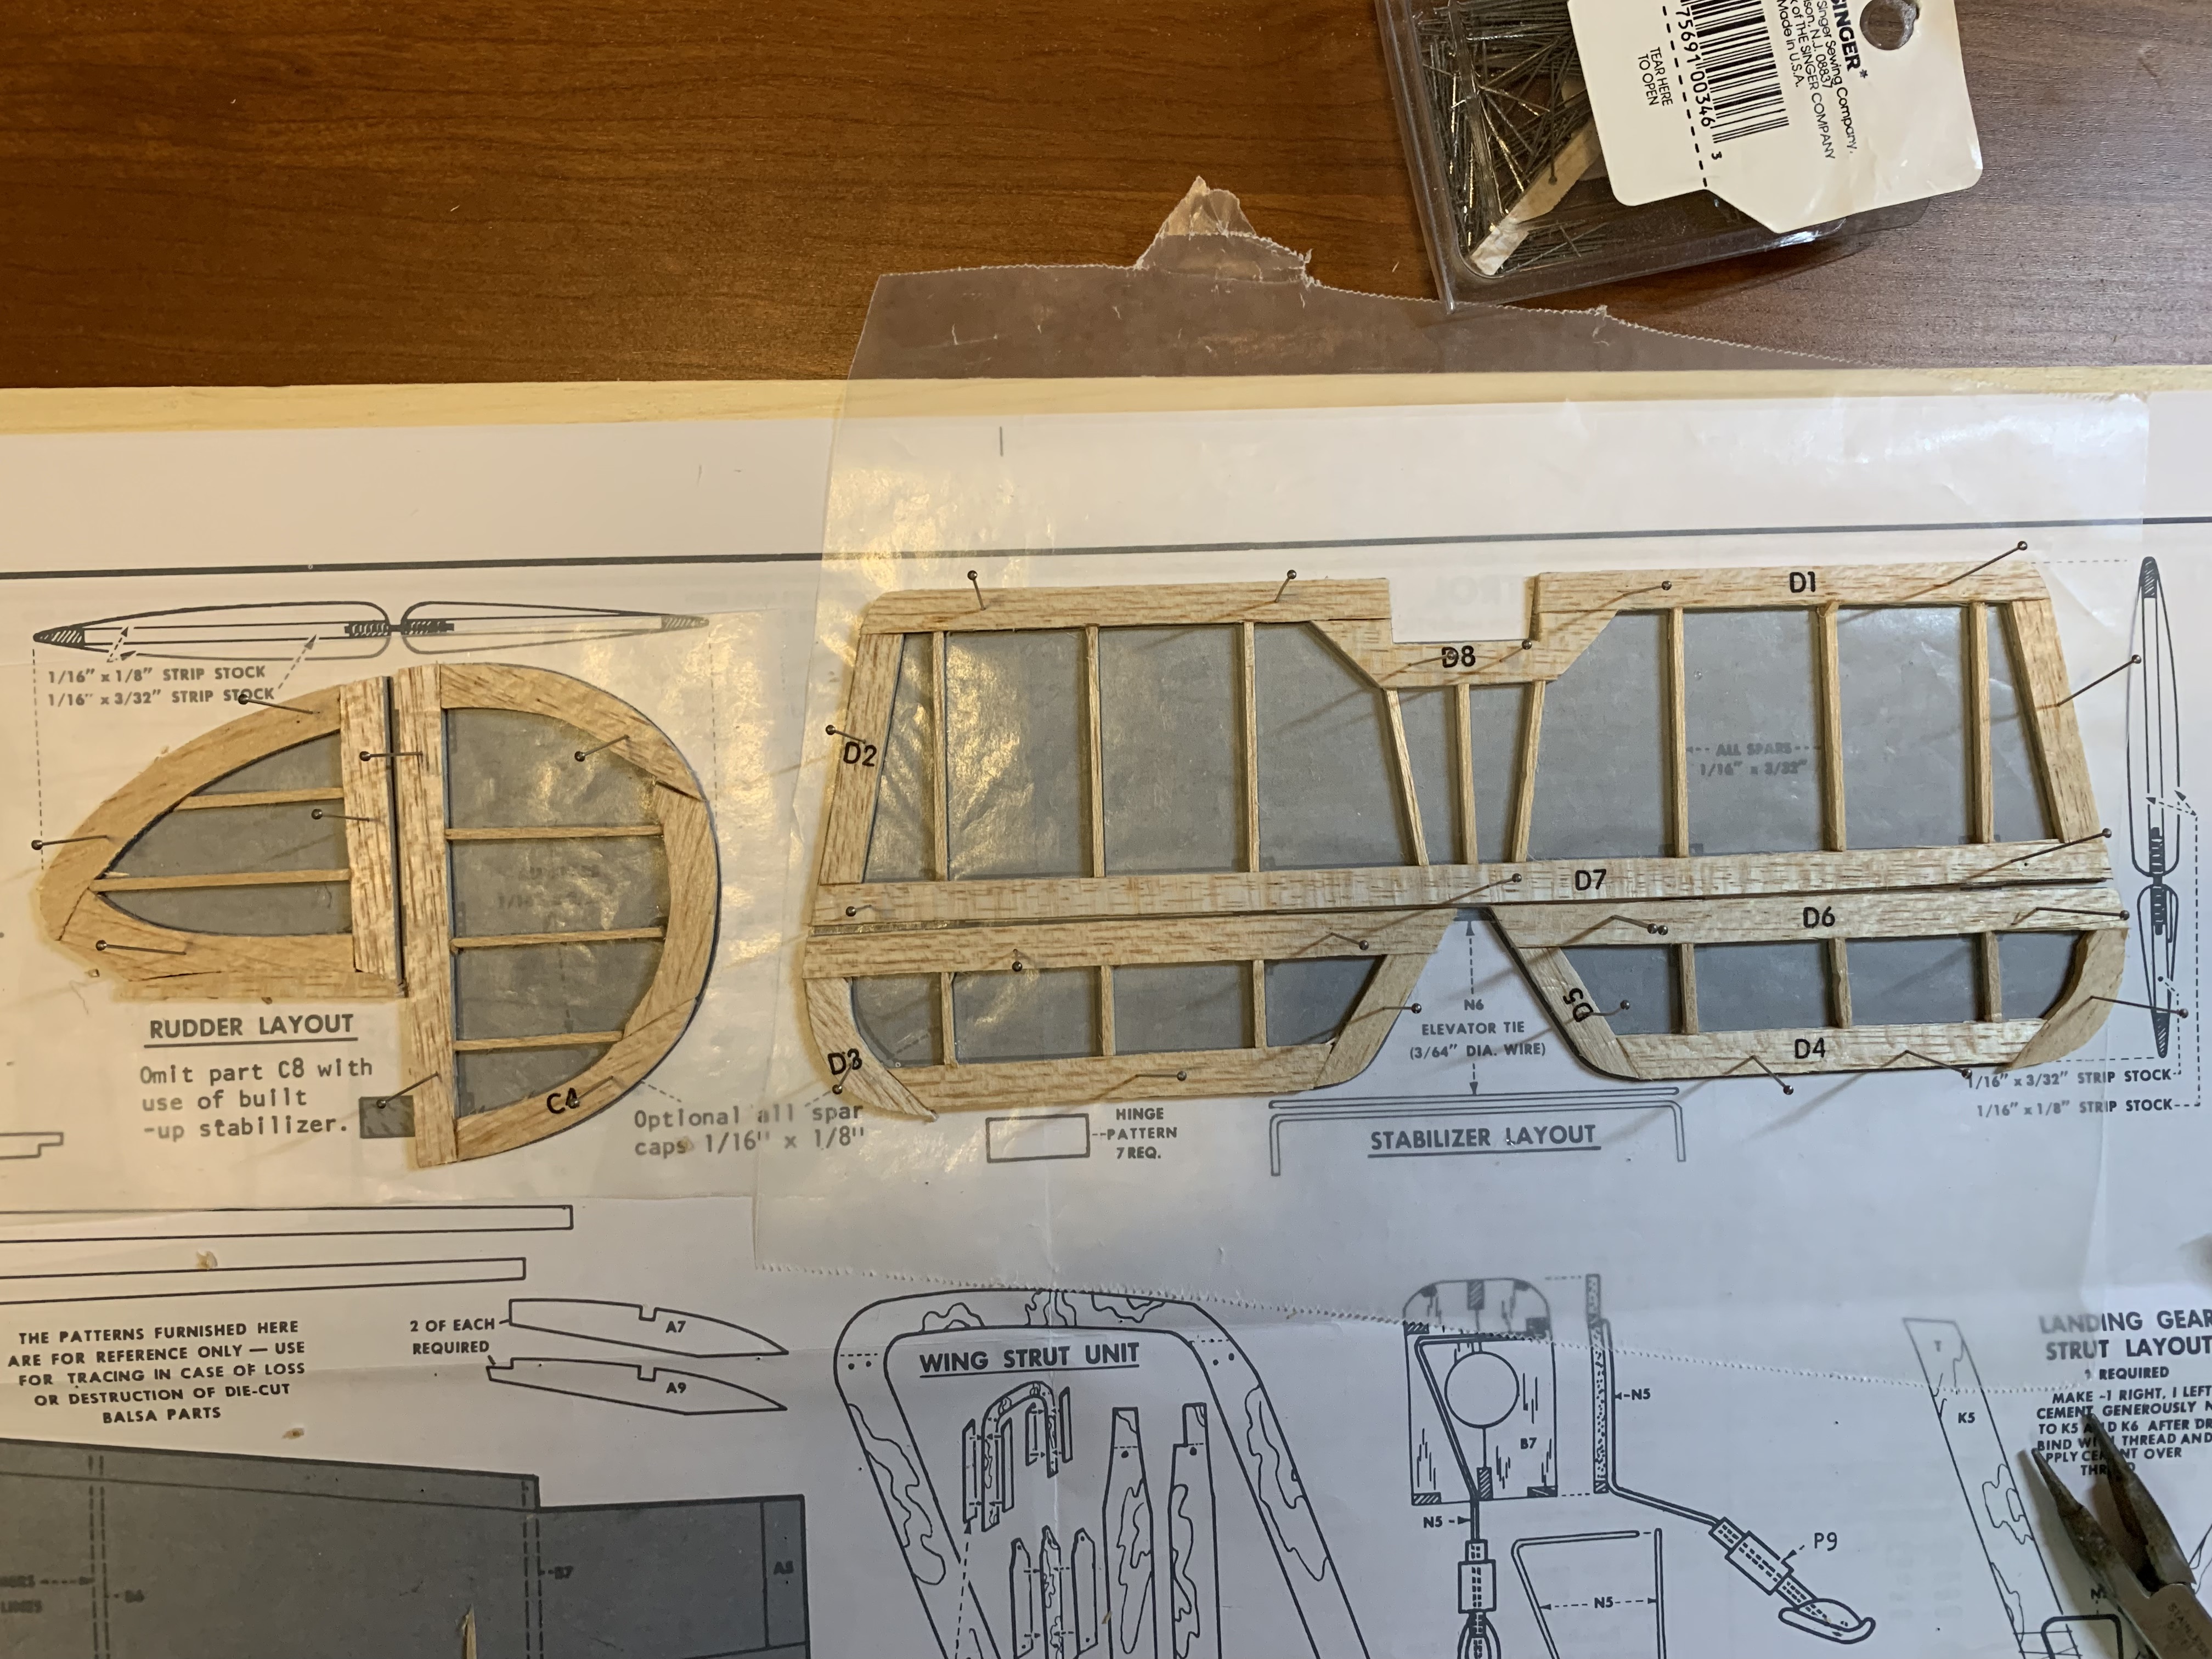
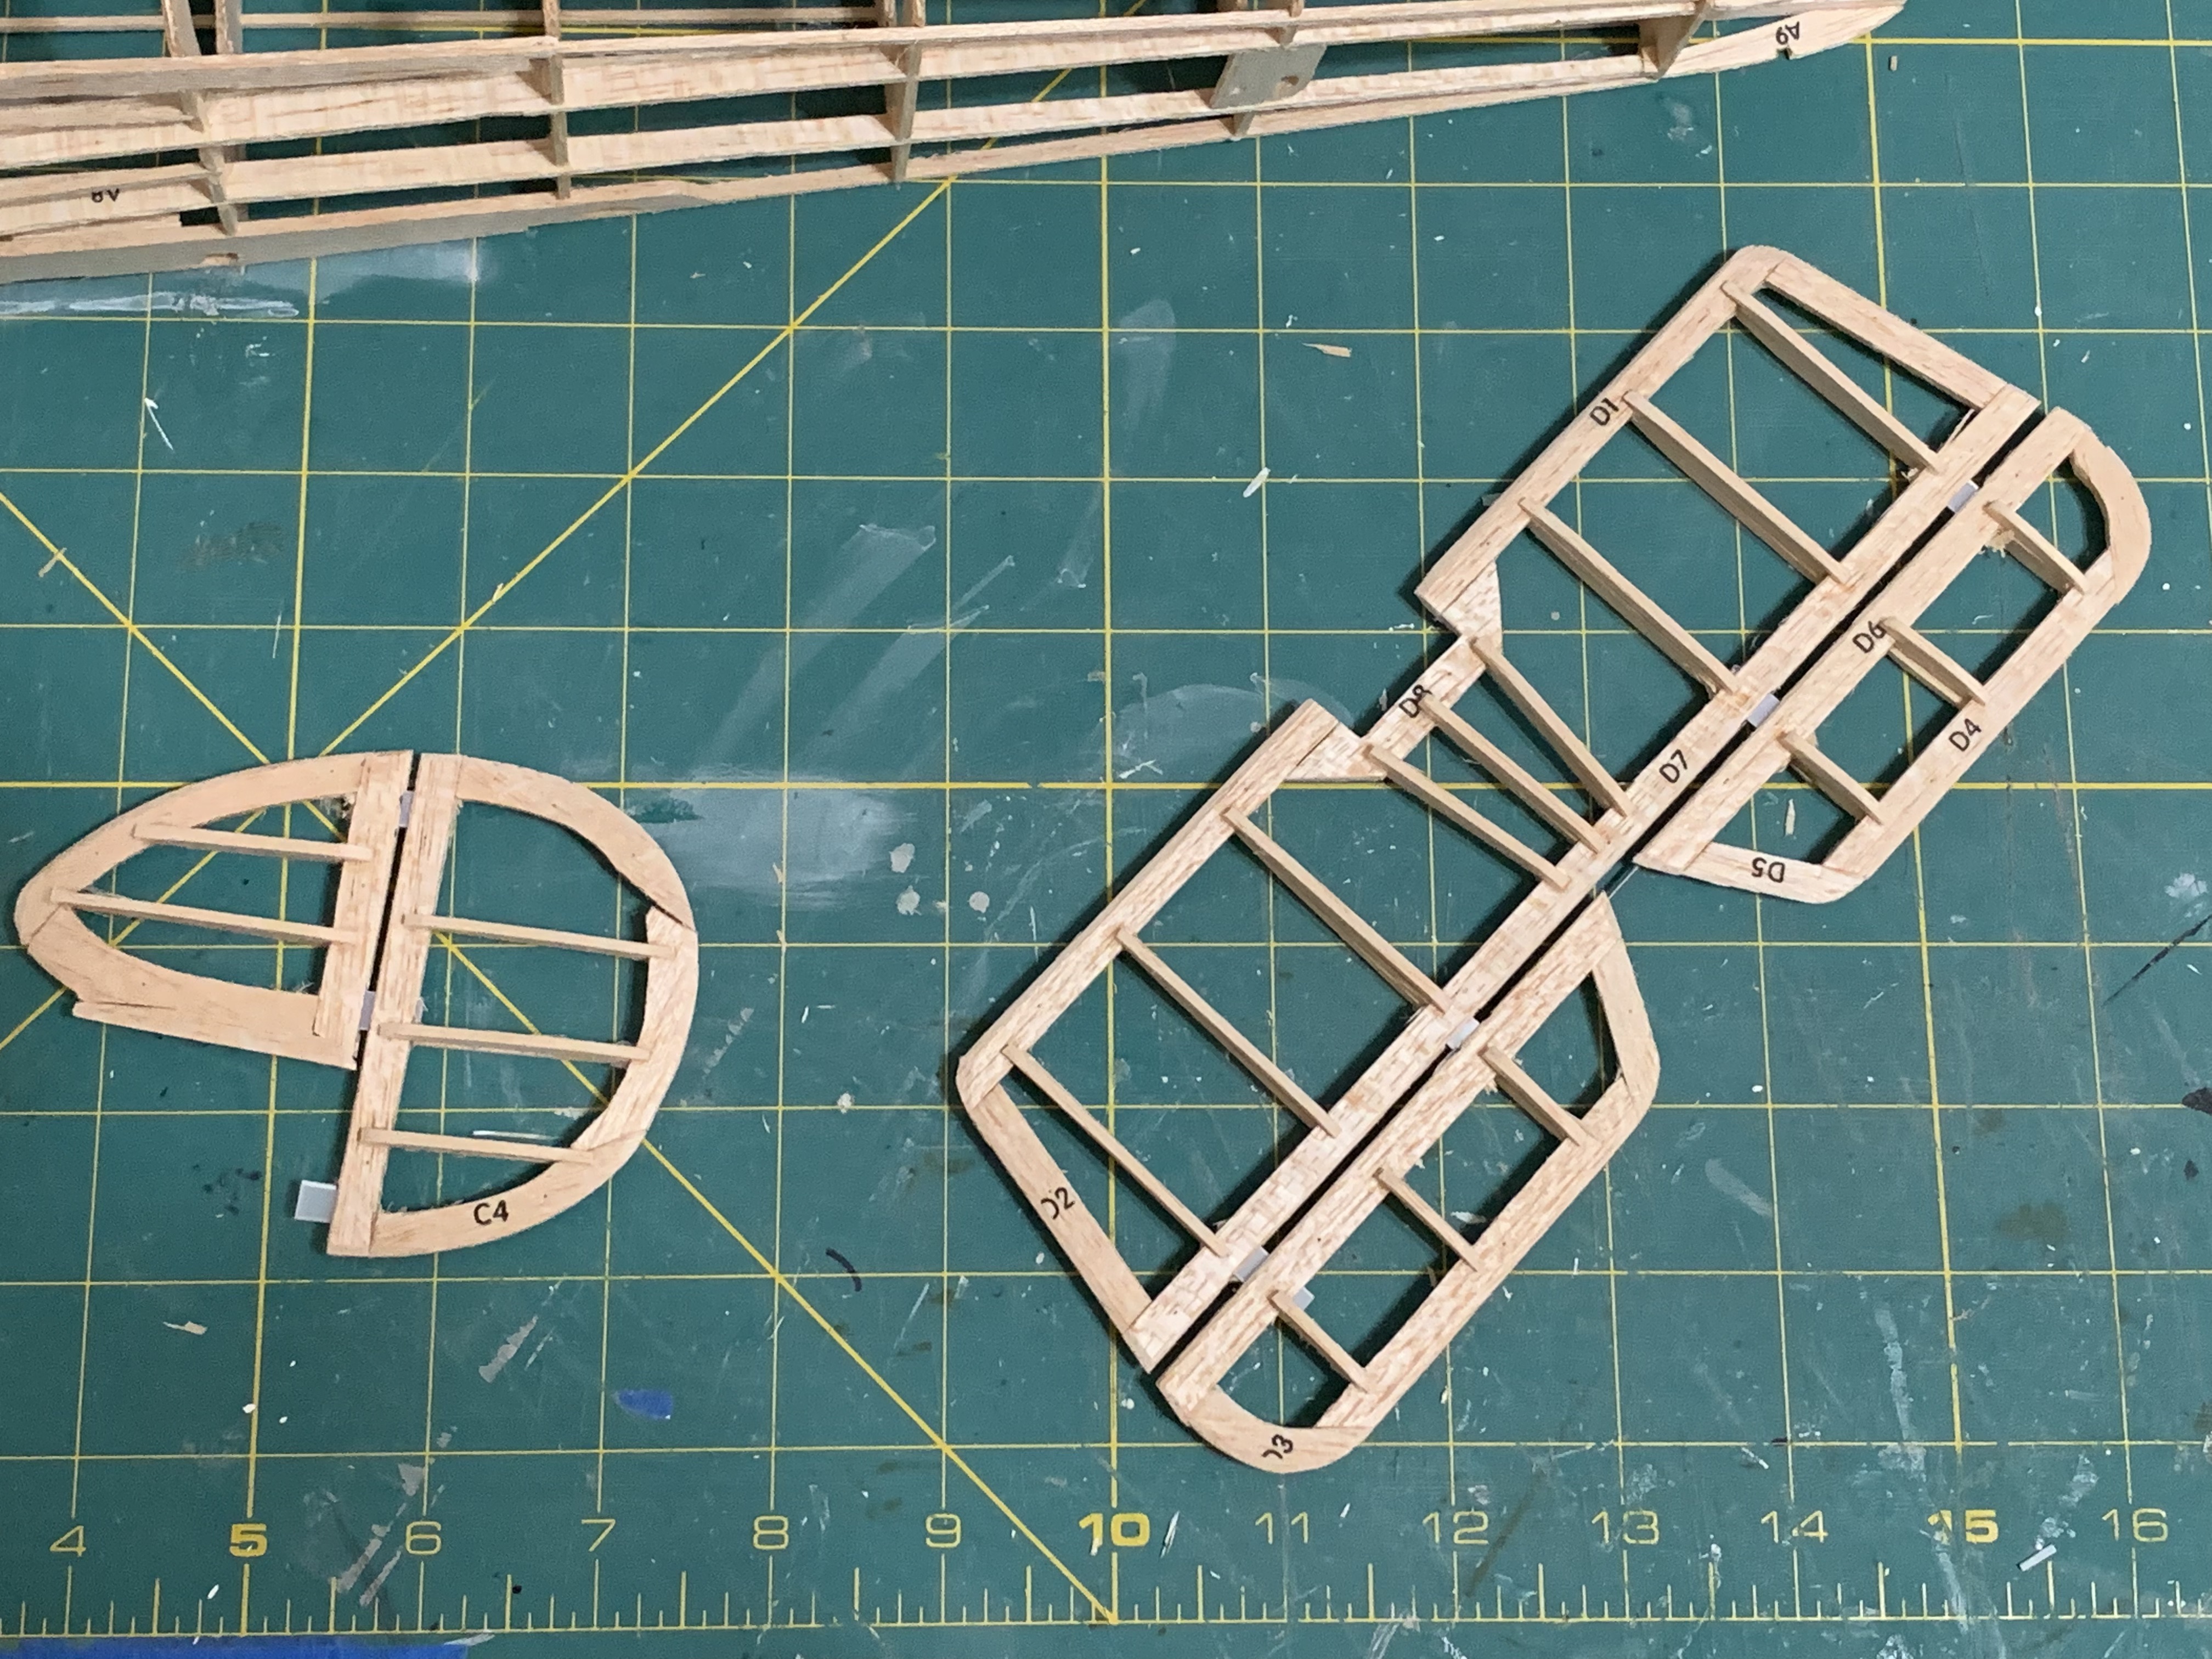
Once they had dried, I removed the tail sections from the build board and then glued wider strips of balsa wood on both sides aligned with the spars. These were then sanded down to create a nicely curved, airfoil shape.

The last step was to cut small strips of plastic to serve as hinges to tie the individual pieces together.
At this point, I had had a blast completing three of the eight major steps of building the model. Next up was another fun step—covering all of the previously built frames with tissue paper.
To be continued…
Categories

Wow, that’s a big model! Can’t wait to see the finished product!!
Yes it is big. When I finish it I’ll have to figure out where to display it.