
Doll House Furnishings – Phase 7
Continued from: Doll House Furnishings – Phase 6
Returning to that cliff hanger I left you at in the last update…
Two more critical details are important to remember. First, when you lay out the furniture to be cut, you want to orient the long pieces and side pieces to be cut with the grain. The other detail is once you adhere the paper to the wood, you need to remember which way the grain was running so you will know how to load the wood into the printer. A slip up in either case is…well a real problem.
So here is what happened on the credenza pieces that my sister cut out for me. After she applied the paper, she did not remember which direction the grain was running. She had a 50:50 chance of getting it right but unfortunately her luck ran out. She now marks on the paper which way the grain is going to avoid a repeat.

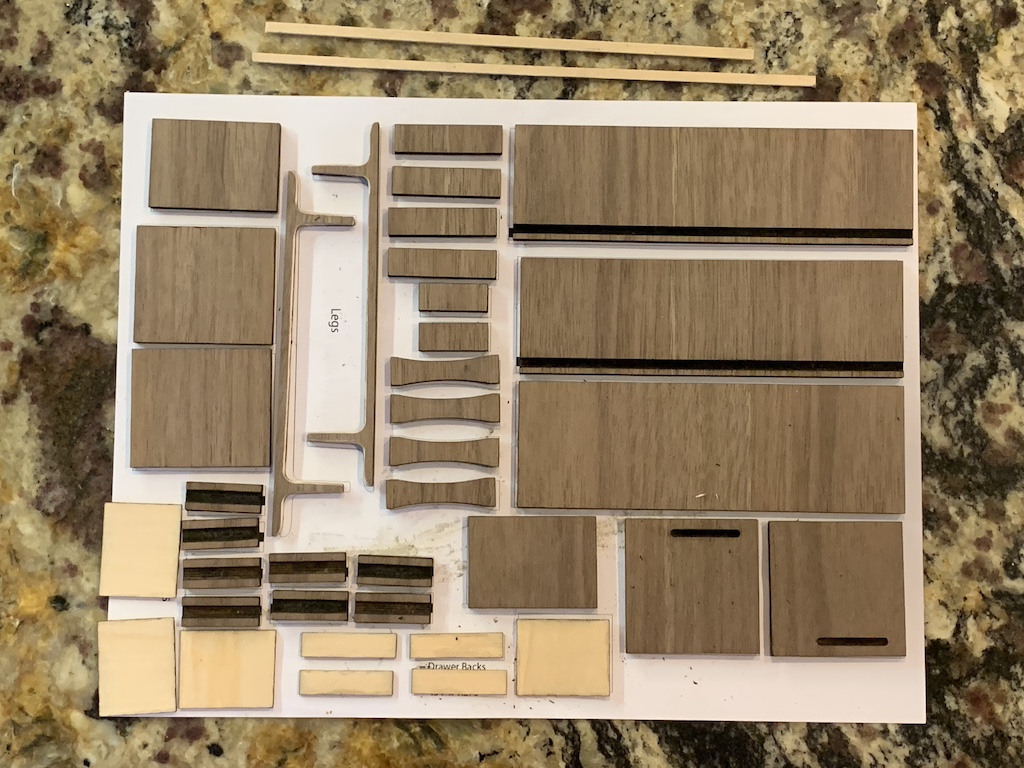
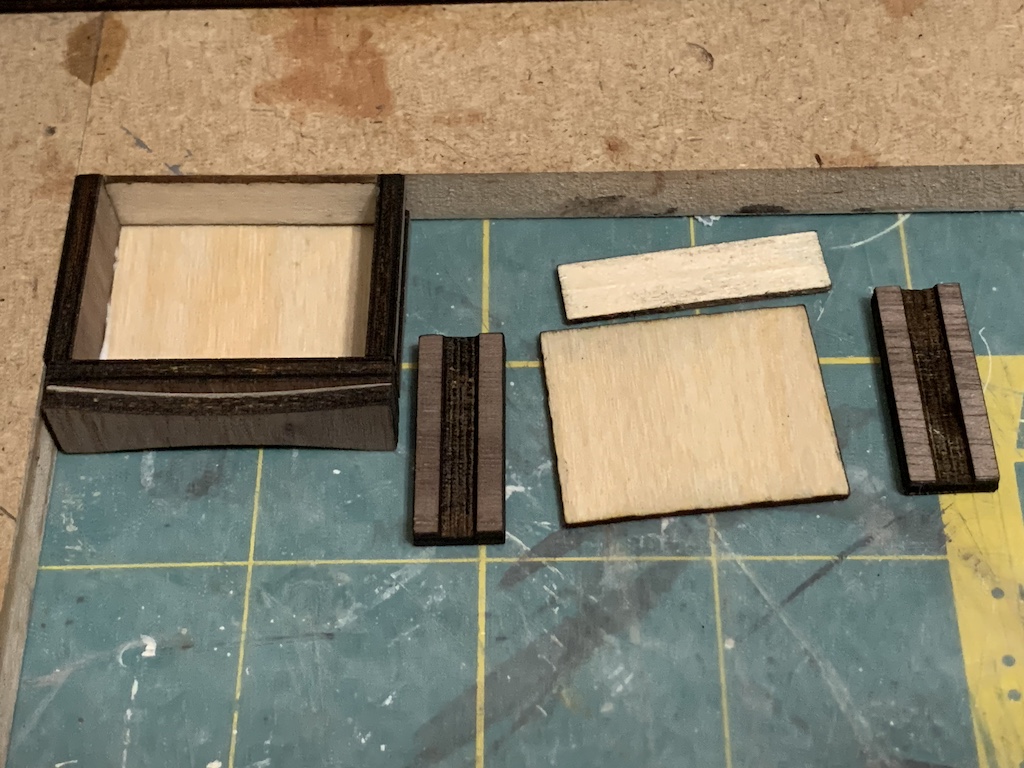
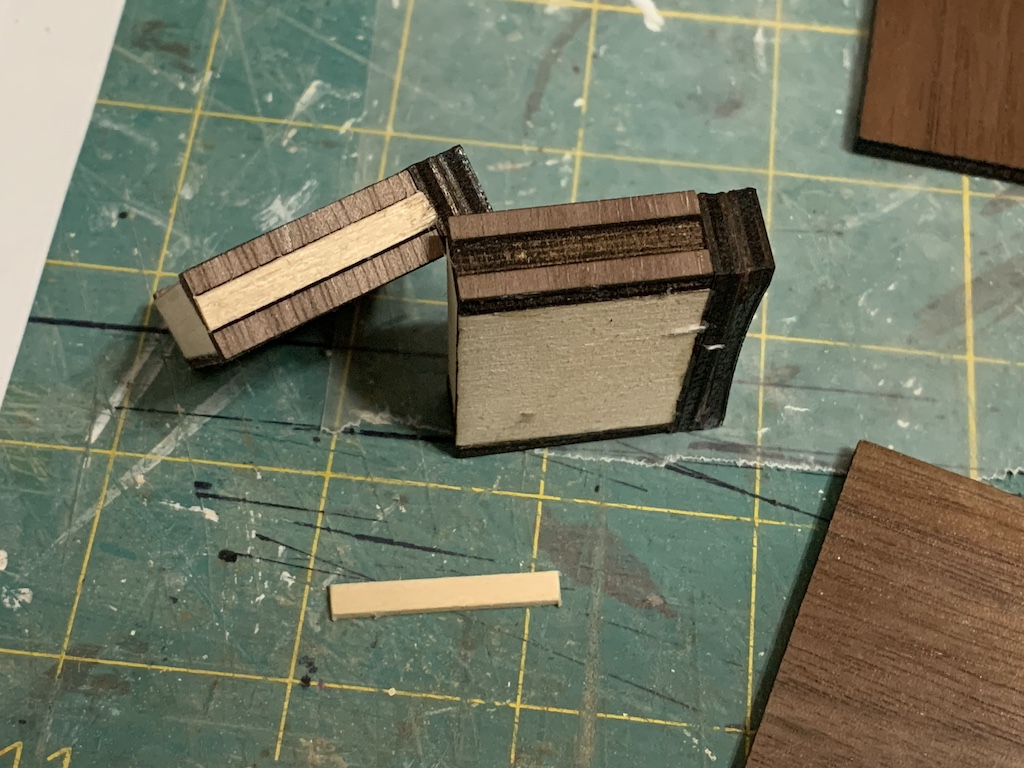
With the paper removed, you will notice that in addition to the grain going in the wrong direction, that this wood is darker than what we used to make the coffee table.

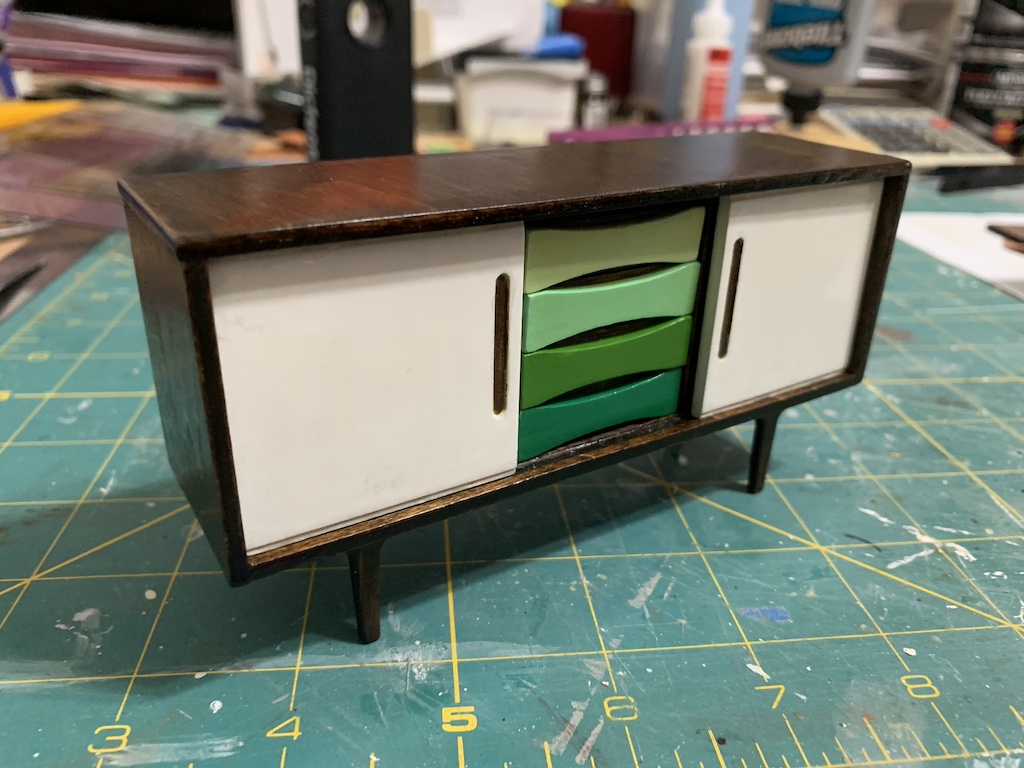
With the excellent finish that I had gotten on my doll house floors by using walnut strips that needed no wood stain (only polyurethane), I told my sister that rather than having to first stain the lighter basswood, I wanted to use a dark wood for my furniture. We found a dark walnut plywood veneer and ordered some. She cut the credenza out for me and then brought it to me when both my sisters drove over for the Fourth of July.
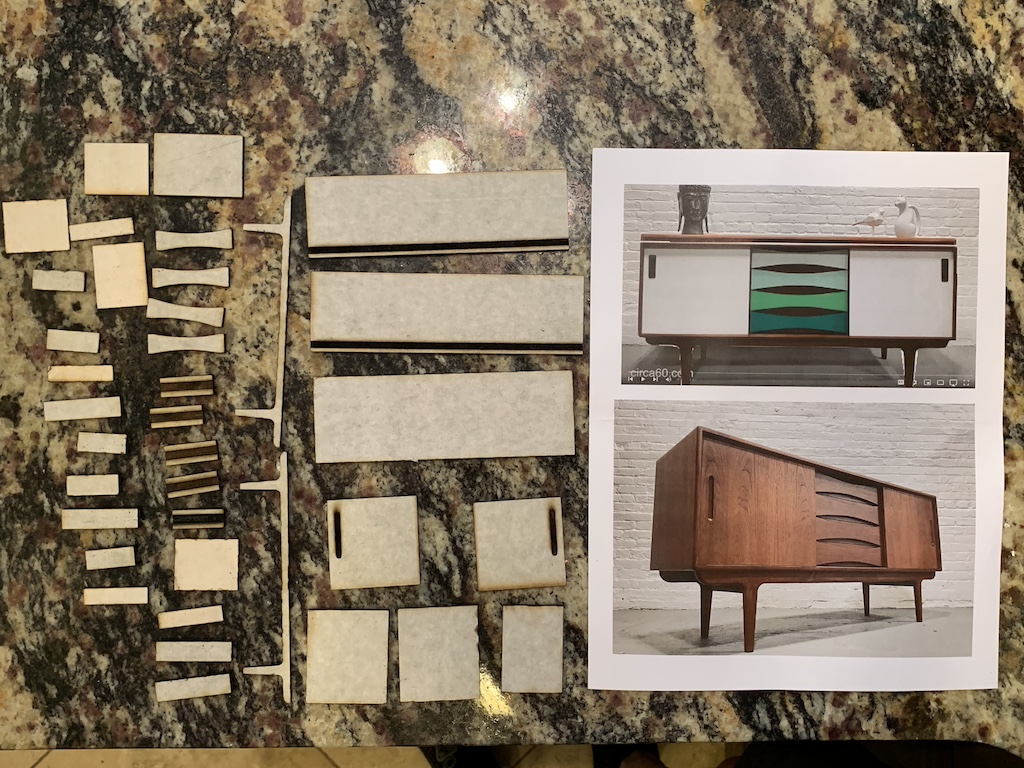
Above are all the pieces laid out prior to scrubbing and below are the pieces afterwards with the paper removed.
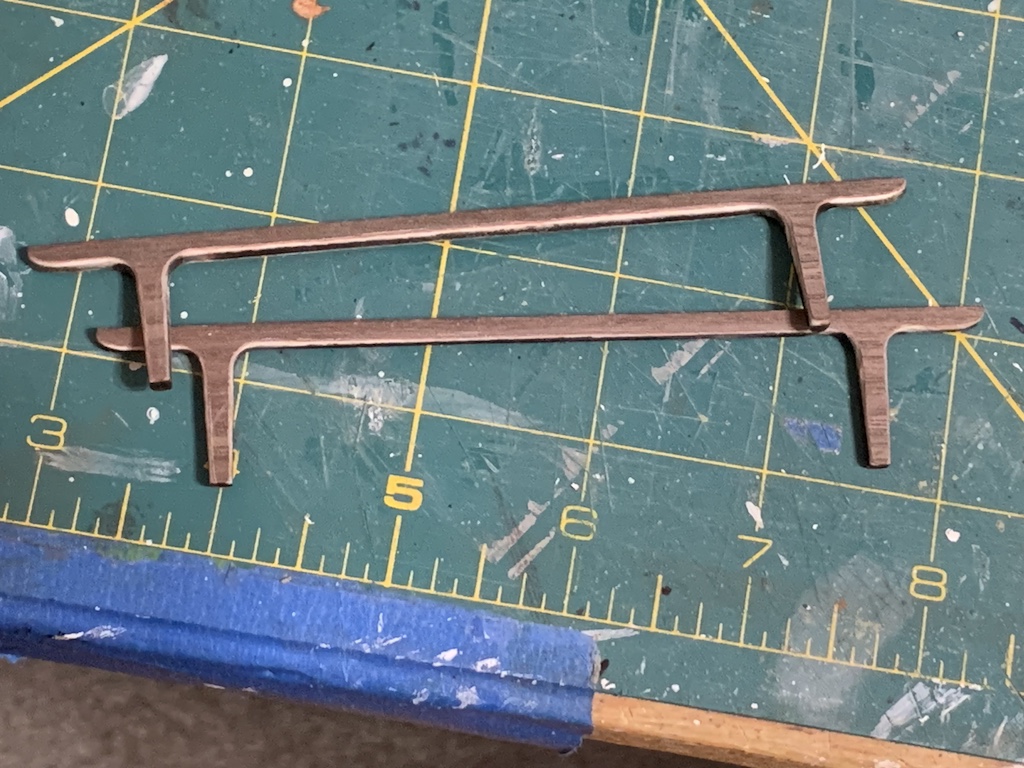
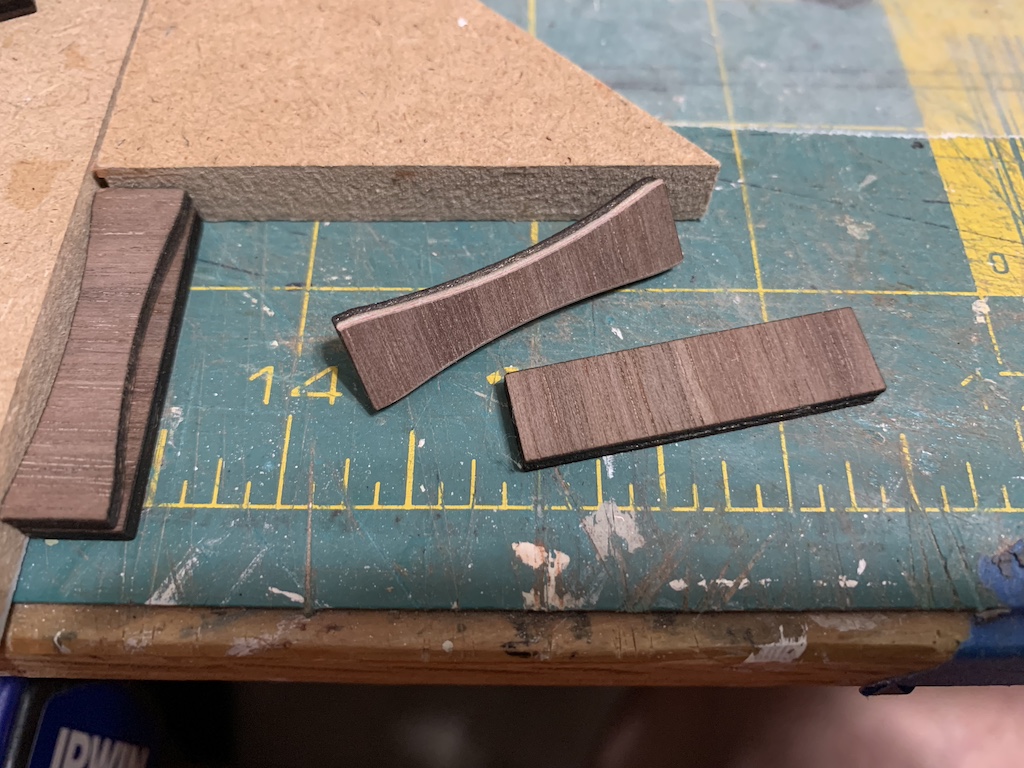
My sister previously discovered another drawback of using plywood veneer that she showed me on my credenza legs. Our preferred mid-century modern designed furniture has a lot of rounded edges. When you sand the edges round, in the process, you also remove the thin veneer which reveals virgin light-colored plywood.
Why use veneered plywood you might ask? Well, as we discovered, it is the most prevalent type you will find for sale. I think there may be at least two reasons why with the first being it makes the material less expensive since only thin pieces of the more expensive wood are required. But an even stronger reason may be it is less likely to warp sitting on the seller’s shelf since the veneer and plywood are glued together with their grains going in different directions. Anyone who has ever bought solid wood pieces knows you have to sort through the stack at the hardware store to find the boards that are not warped.
Searching again for solid 1/8” walnut, we could not find any that came in that same 12” X 12” size but we did find some of other smaller dimensions which would be usable and ordered some.
Even though these cut plywood parts would render a functional but less than desirable model, my sister suggested I still use them to practice putting a credenza together.
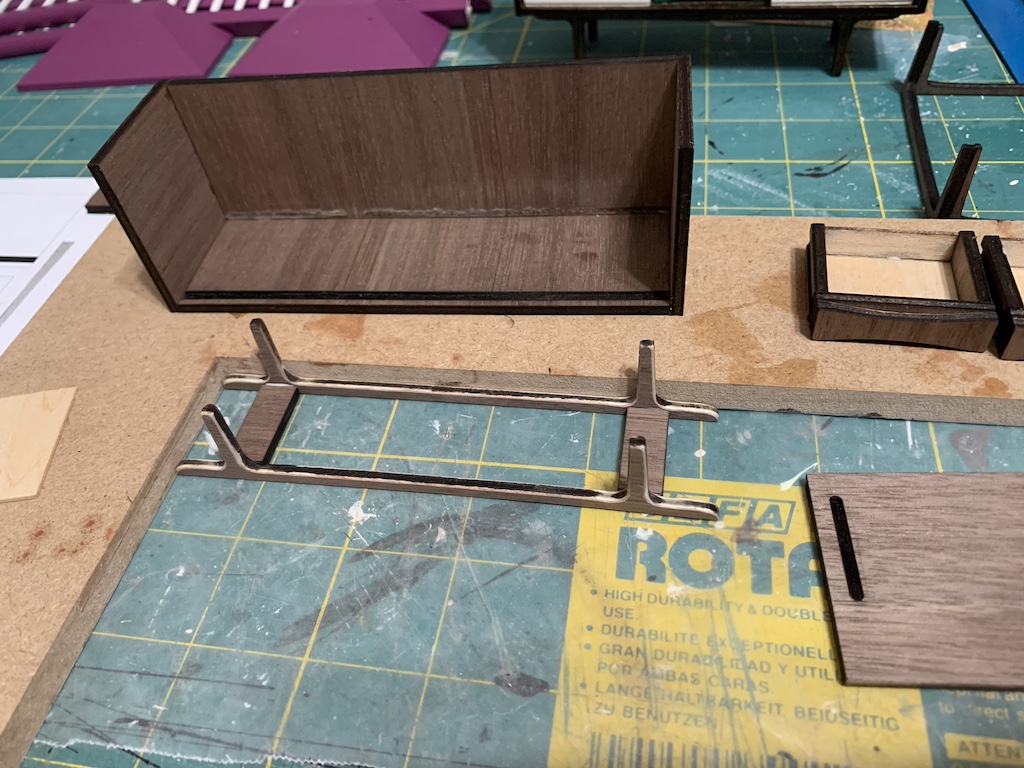
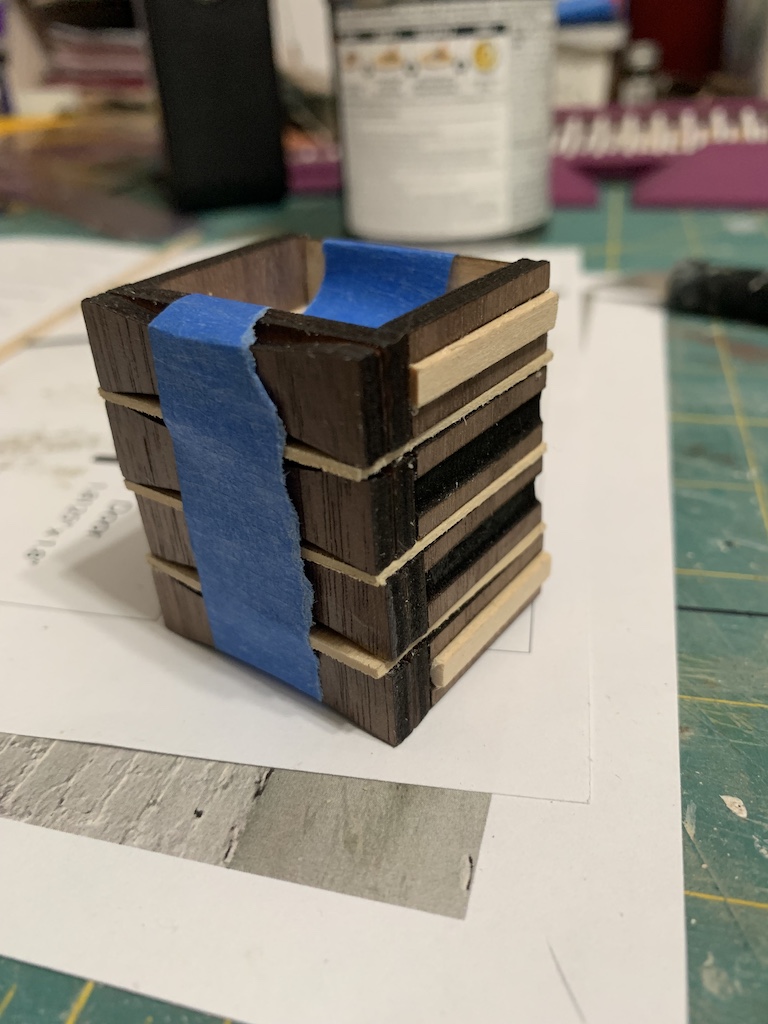
And so, I did. First, I rewatched the video my sister and I had seen back in February to familiarize myself with the assembly steps. Then I glued together the beginning of the cabinet using the bottom, the back, and one side.

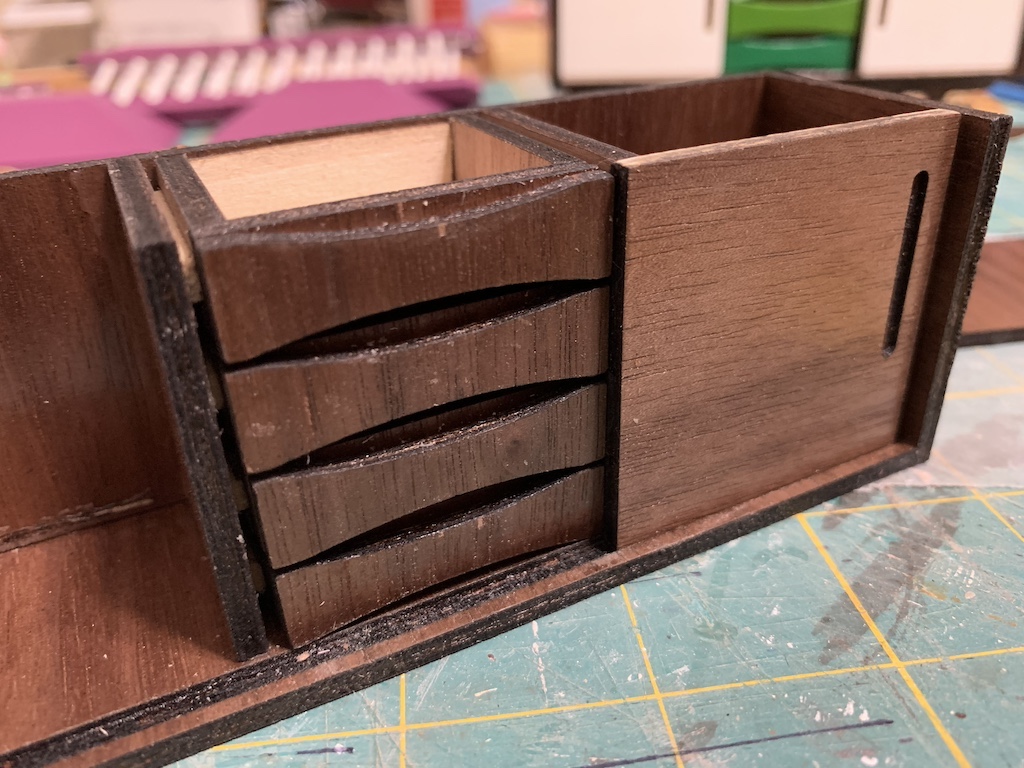
While that was drying, I began to work on the drawers. The first step is to glue the contoured drawer front to the rectangular piece. Here, my sister suggested I sand round the back edge so that your fingernail could more easily grasp the drawer front to pull it out.
Next, I assembled the drawers from the remaining four pieces…
… and glued the legs to their supports.
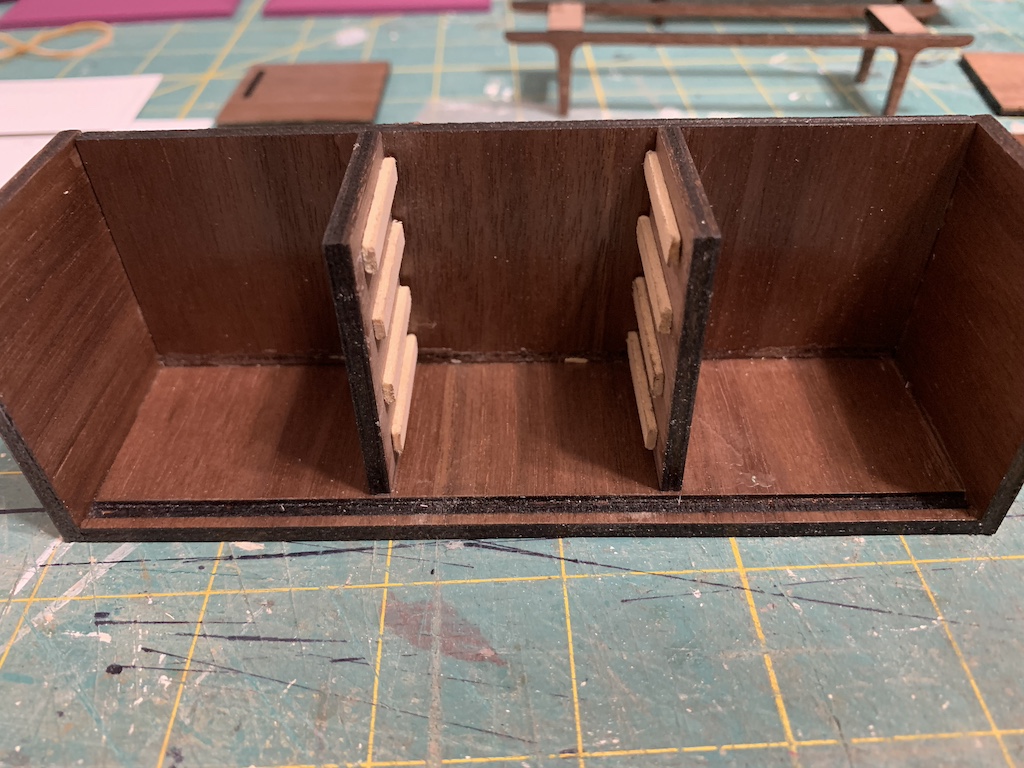
In the video, it was suggested that the sliding doors be used to draw a line where the cabinet dividers would go.
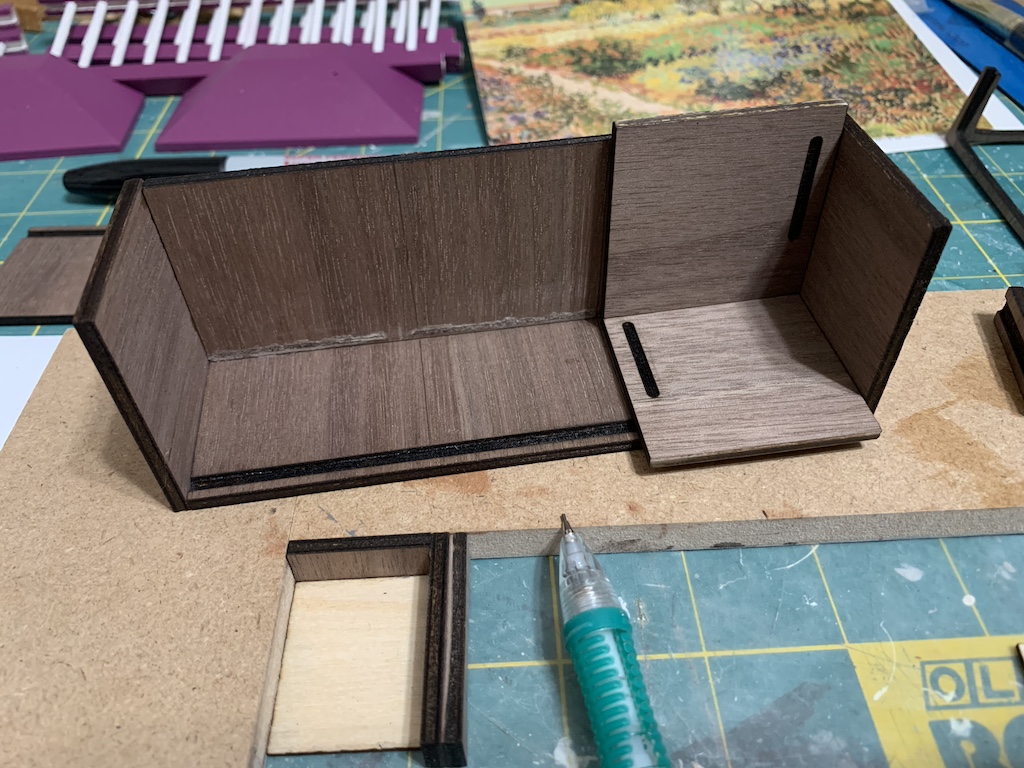
But when I placed a finished drawer between the two lines, they seemed too far apart for the width of the drawer. Not knowing if my sister’s rendering of the credenza might be slightly different than the one in the video, I decided to pause assembly at this point, to apply polyurethane while I pondered how to proceed. After adding two coats of a satin polyurethane, I thought I had a solution—to use the drawers themselves for the proper placing of the cabinet dividers.
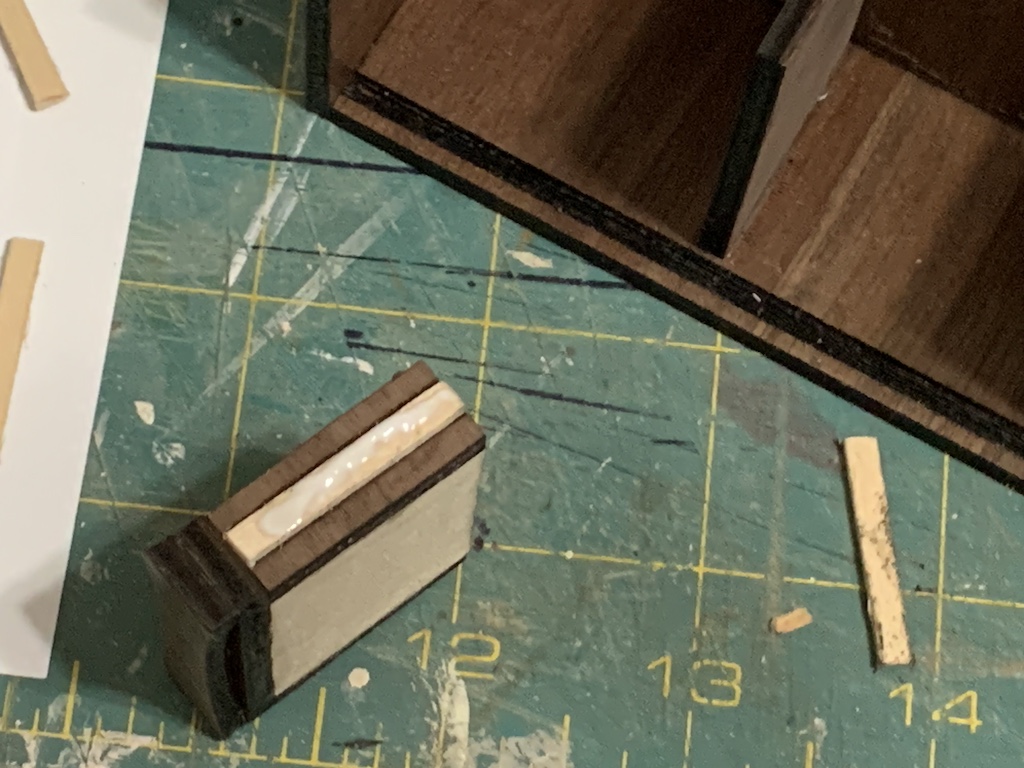
The sides of the drawers are slightly recessed to accommodate the small 1/16” thick wooden drawer guides that will be glued to the cabinet dividers. So, I needed to allow for the width of the drawer guide that extended outside the recessed drawer sides. I cut four of these and with the tiniest amount of glue in the drawer recess, I glued one on each side of two of the drawers. I then stacked the drawers and taped them together.
In the photo above, you will notice a thin 1/32” thickness piece of wood between the four drawers. In the video, one small piece of wood was used at the bottom but not between the drawers. I thought having this small amount of space between the drawers would allow them to slide in and out more easily. But if I used one beneath the bottom drawer, the stack was a tiny bit too tall. So, I decided to only use them between the drawers.
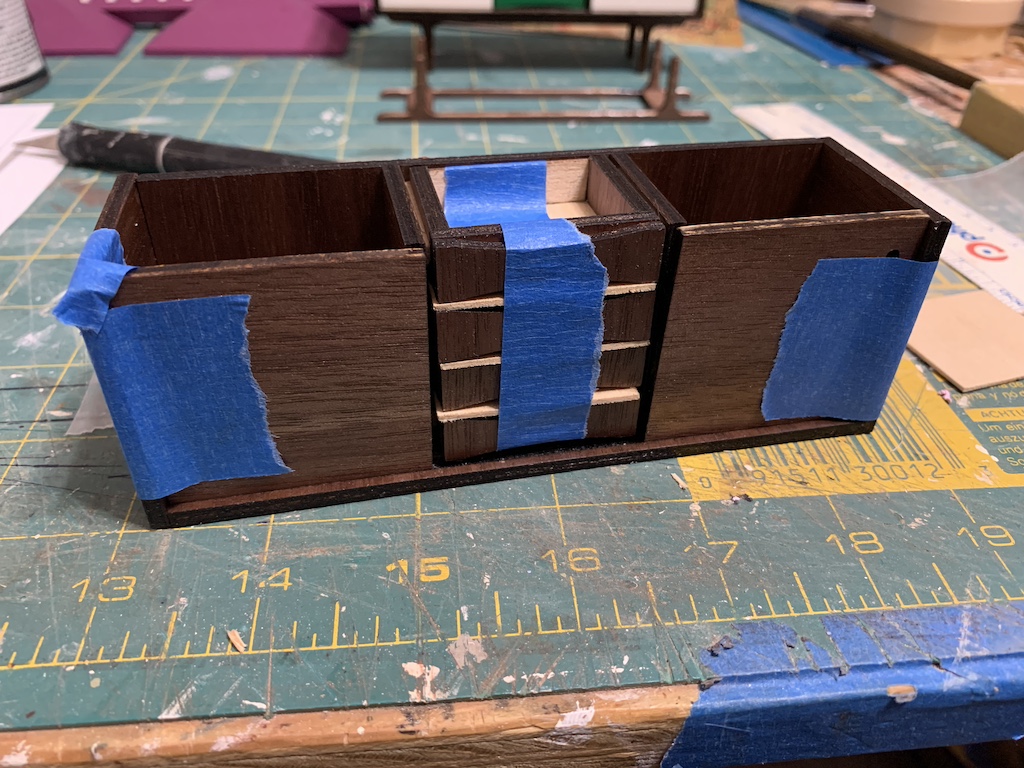
With my taped together drawer stack and the two sliding doors taped to the cabinet side to hold them in place, I glued the two dividers into the cabinet making sure the same amount of divider was still slightly visible on each side.
A cool feature of the assembly technique from the video was how the drawer guides were glued in. After inserting a drawer guide into the groove on both sides of the drawer, you add glue to the outside of the guide, and then simply slide the drawer into place. I must say it was a bit of a challenge getting just the right amount of glue onto the guide, enough to glue tightly but not so much that excessive glue accumulated on the edge of the cabinet divider as you slid the drawer in. Again, using the 1/32” spacers, I got all four drawers in place.
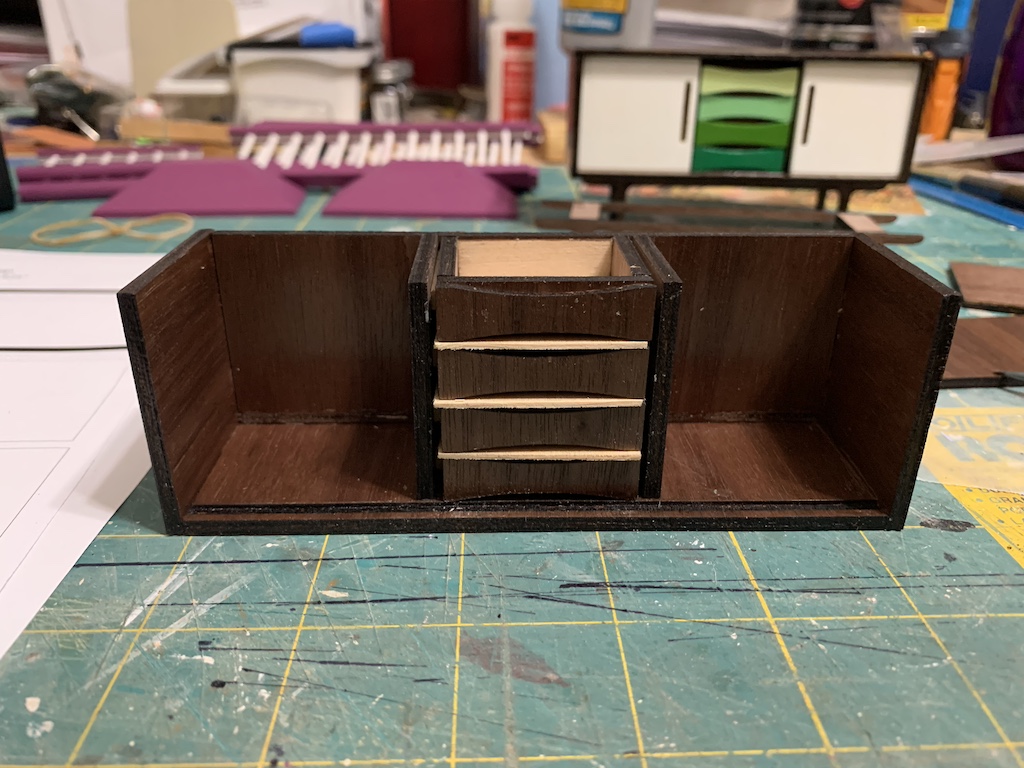
Once the glue dried, I slid the drawers out and voilà, I had the drawer guides correctly glued in place.
Before installing the sliding doors, I sanded the back side along the top and bottom edge to make the door slightly narrower than the grove so they would slide easily. I then reinserted the drawers and set the first sliding door in place. When I went to test and see if it slid easily as hoped, I realized I had another problem.
To be continued…
Categories

Now, I’m wondering what the next problem is! I have a guess, but I’ll just have to wait and see if I’m right. This credenza is a work of art, David. Another thing I like is that this is a process of learning and thinking – which is good for us! I look forward to your next post!
Thanks, Betty, I suspect you do know what the problem is. I agree it is a work of art but I must again give a ton of credit to my sister for finding the video in the first place and then doing all the calculations and programming to get it cut out. It is a continuing process of learning as you will find in future posts.
I certainly admire your sister’s skill and talent!