
LEGO Natural History Museum
If you read my post from earlier this year about my LEGO Boutique Hotel, you already know that even before I had finished building the hotel, I had decided to purchase the next in this “Modular Building” series, a Natural History Museum. The hotel was my fourth big LEGO kit that I had purchased and having had such a blast building all of them, I could easily identify myself as what LEGO refers to as an AFOL—an Adult Fan of LEGO. The new kits are released early each January and even though I had doll house activities keeping me busy at the time, I decided to go ahead and make my purchase just two weeks into the new year.
When I went to the LEGO website and pulled up the kit, I was surprised to find that this kit had a significant price increase over the two previous ones I had purchased (about 30% higher than the Boutique Hotel and the Jazz Club). Looking at the picture, I could see the museum had a wider footprint than the other two buildings which could explain the higher price. But undeterred, I made my purchase.

When it arrived and I opened the shipping case, I immediately saw the kit box was huge. When I read the number of pieces included (4,014) and compared it to the hotel (3,066), I knew a bigger box would be required for almost 1,000 more pieces (interestingly over 30% more). I put the big box in my play closet until the day I had the time to take it out.
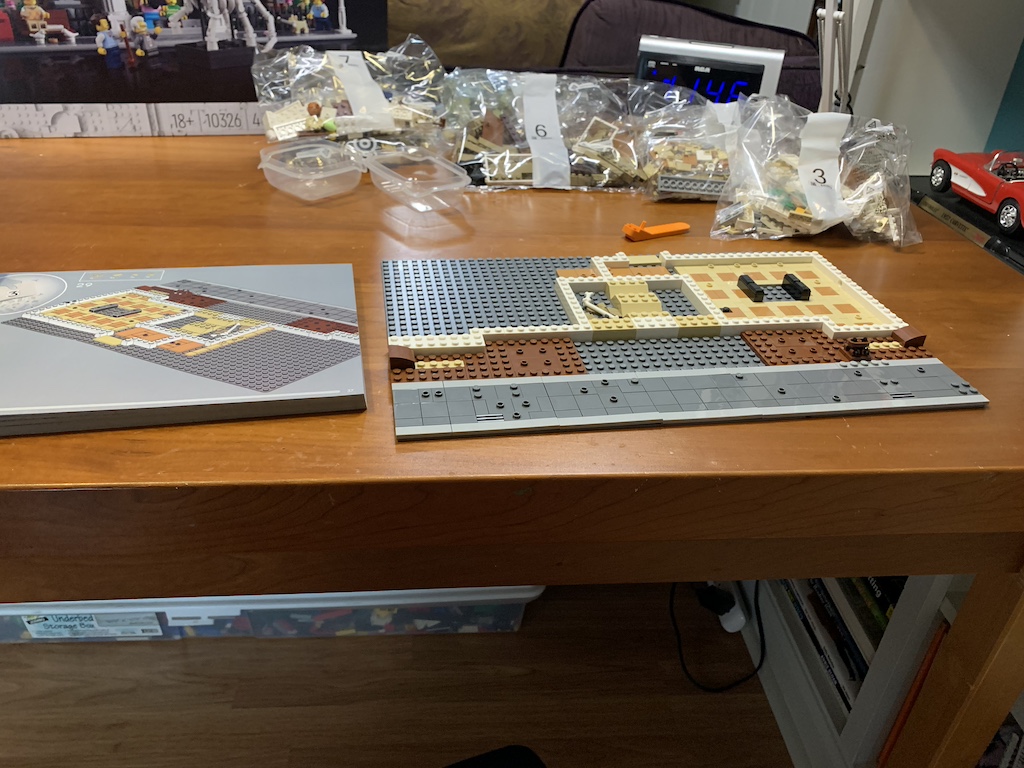
That day came on the Monday after Easter. When I opened the box and began to pull the bags from the box, I was surprised to find there were 33 individual bags (with the usual one or two smaller bags inside each one for very tiny pieces). They barely fit on my worktable even with my doll house pushed to the very edge.
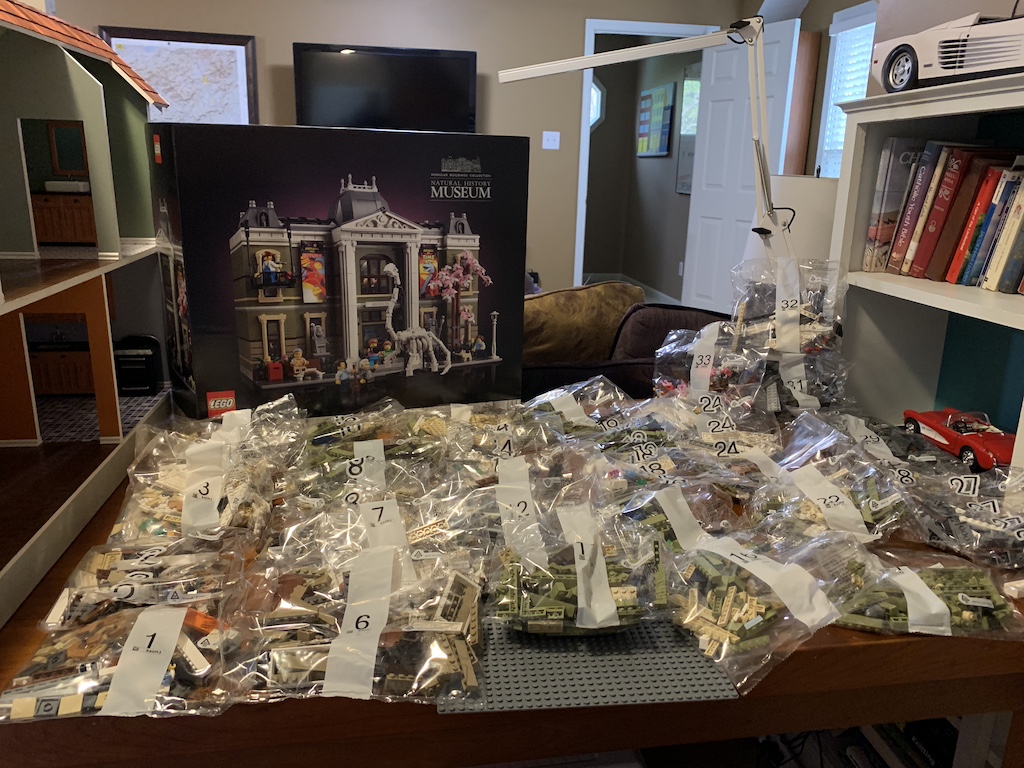
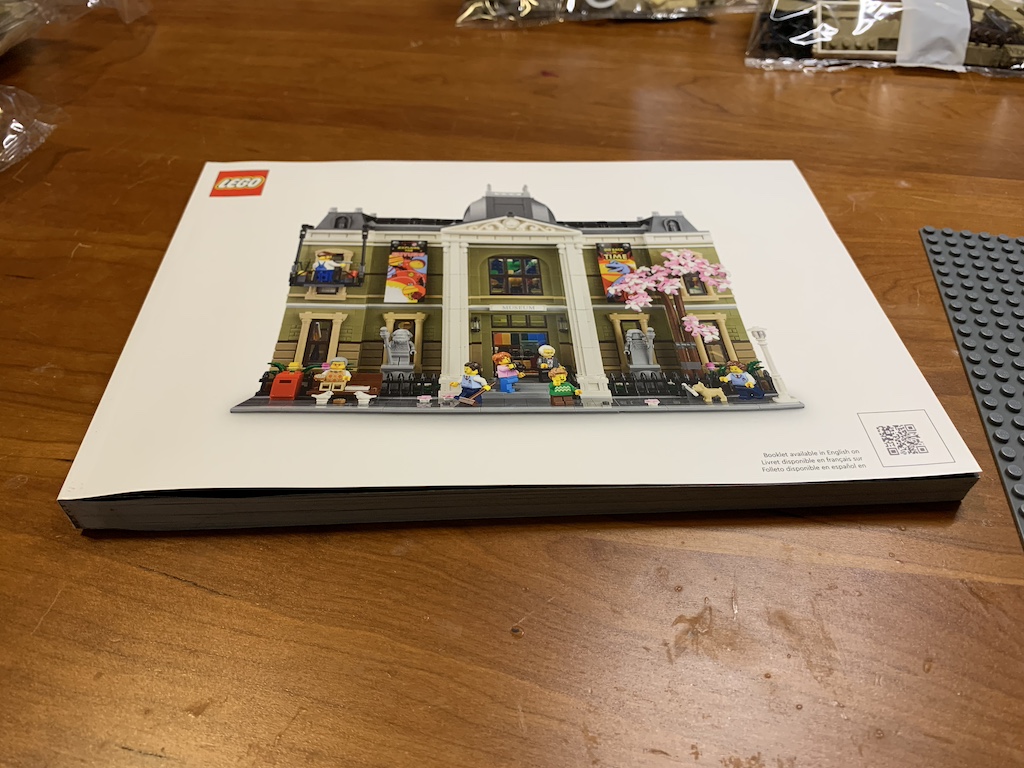
The thick instruction book had almost 400 pages and on the first page, there was a note that said this was only the second time in the 17-year history of these kits that the base had been extended (from 32 bricks to 48, a 50% increase, with a brick by LEGO definition being a single square with one round stud centered on top).
As I was anxious to get started, I boxed up bags 11 through 33 leaving plenty of room for me to work on my work surface.
I worked through the first bag…
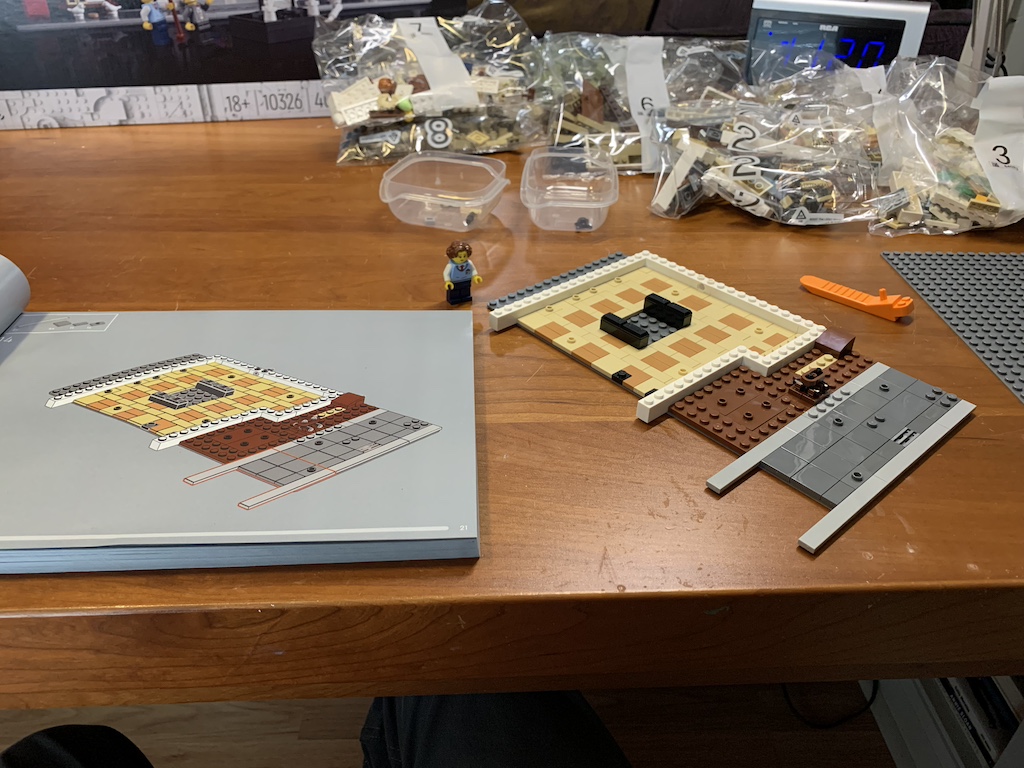
…and then the second bag joining the two bases together.
As I worked, I mean played, I made a few mistakes that were fortunately easily corrected. It had been a while since I had built a LEGO kit, so I reminded myself I had to pay attention to the pictures and ensure I had the right pieces. But in spite of minor setbacks, I was already having fun!
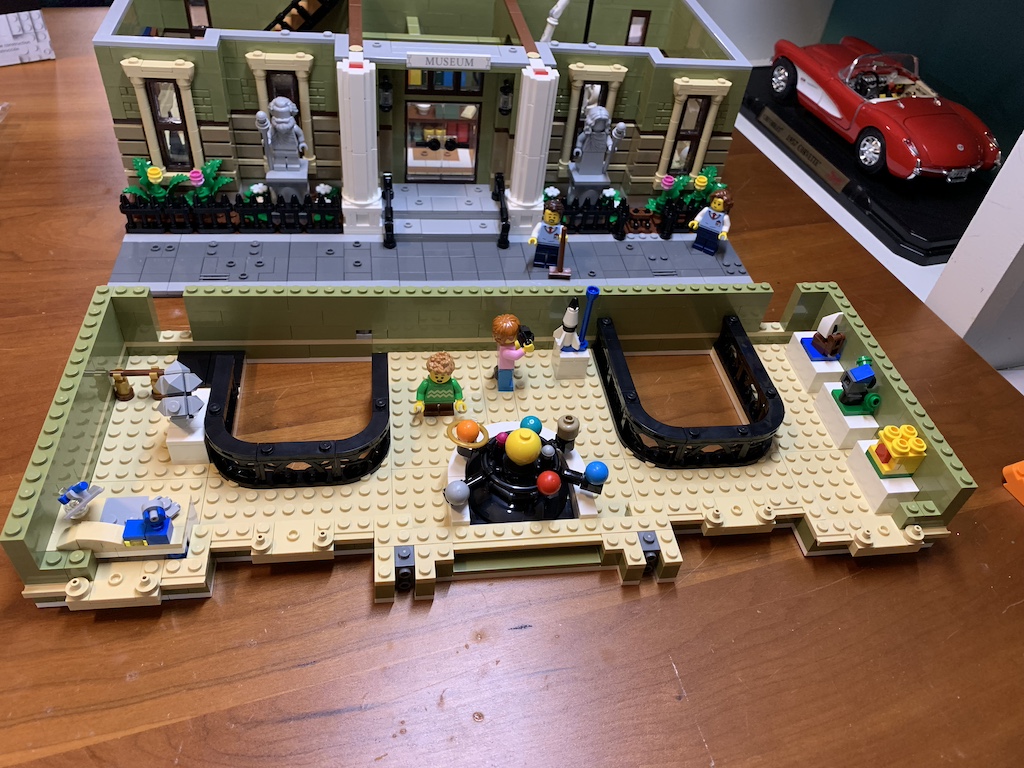
I continued adding pieces from bags 3 and 4 which mostly created the ornate first floor, but once I finished bag 5, I felt like I had something interesting to show for my efforts. At the back of the museum was a toilet complete with a roll of toilet paper. And backing up to that was a microscope on a desk. Oh, and if you notice the pink circle on the brown bench, according to the storyline in the instruction manual, someone had been to the police station’s donut shop (another building module from a prior year) and left a sticky donut on the bench. How inconsiderate!

Once I had finished bags 6 and 7, I had added many of the first-floor exhibits. At the back right is a saber-toothed tiger skull and at the front on the right are two dinosaur eggs. On the left side, there are two pieces of ancient pottery, a model of a volcano, and in the front window, some valuable rock crystals. And at the center is the check-out counter for the gift shop where souvenirs can be purchased and rung up on the cash register.
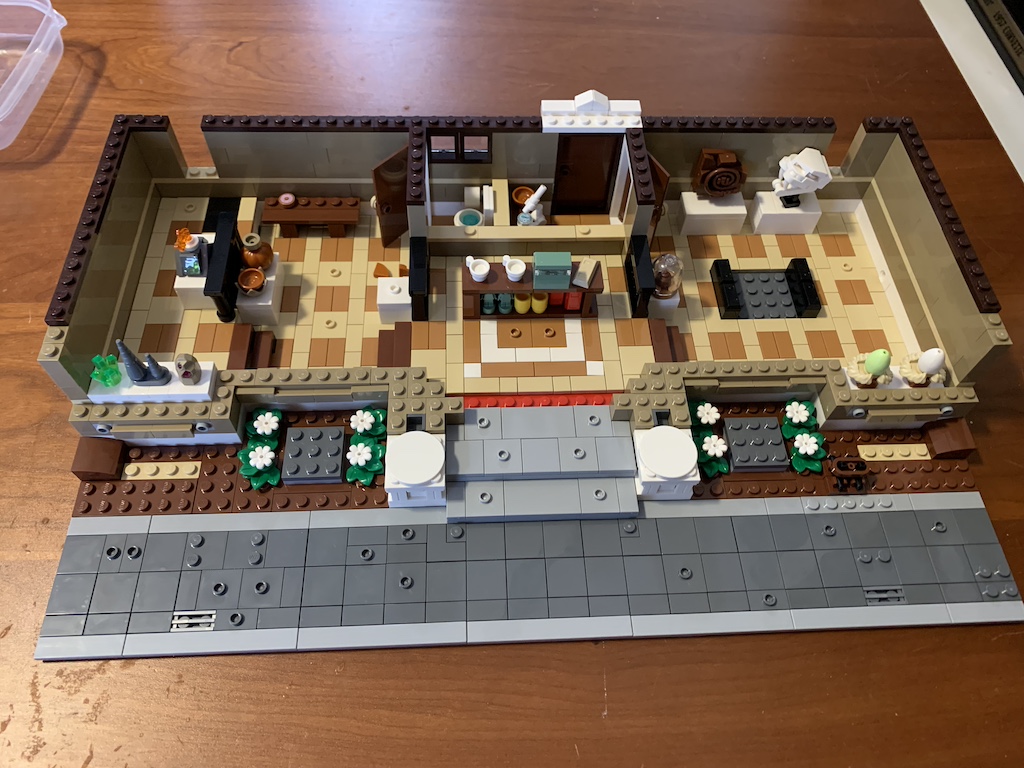
Just like when I am working on a 2-D puzzle and I don’t want to stop, I continued with my 3-D LEGO fun, and before I knew it, I had finished off the next five bags (through bag 12) which completed the interior of the first floor including the stairs up to the second-floor exhibits.
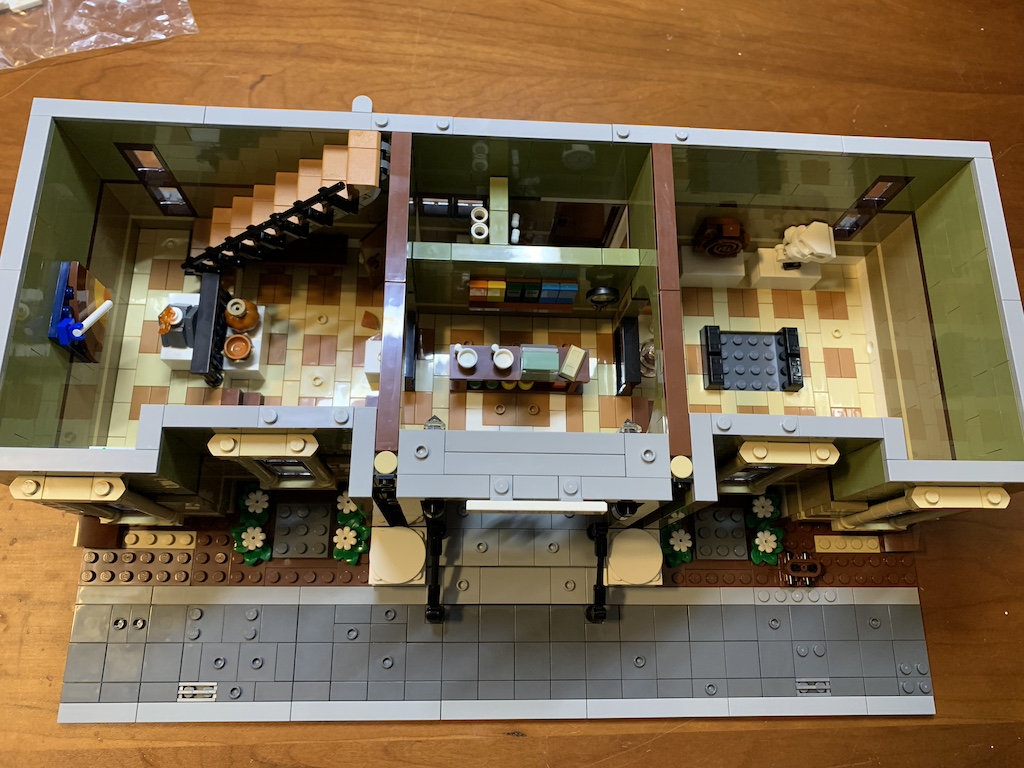
Once I had completed bags 13 and 14, not only had I finished the exterior of the first floor, but I had also assembled the premier feature of the museum, the Brachiosaurus skeleton (or in LEGO terminology, a Brick-iosaurus) …

… which would be displayed prominently just to the right of the museum gift shop.

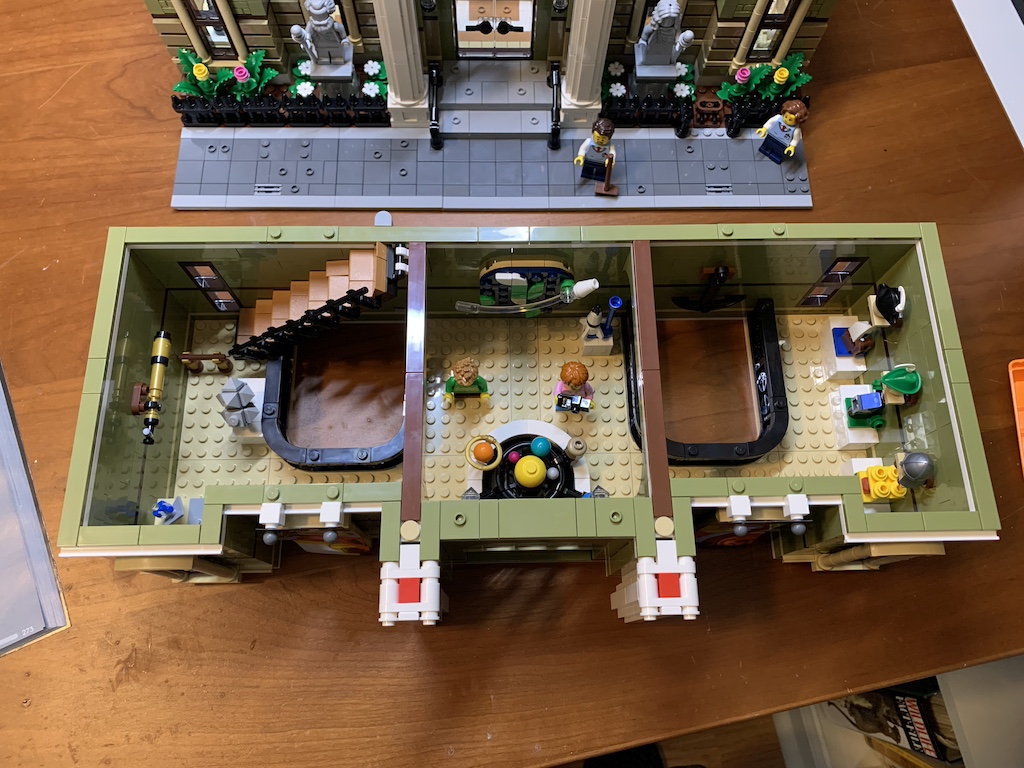
The next several bags formed the second-floor foundation along with partial walls before adding the space exploration exhibits, first the colorful orrery of the solar system…
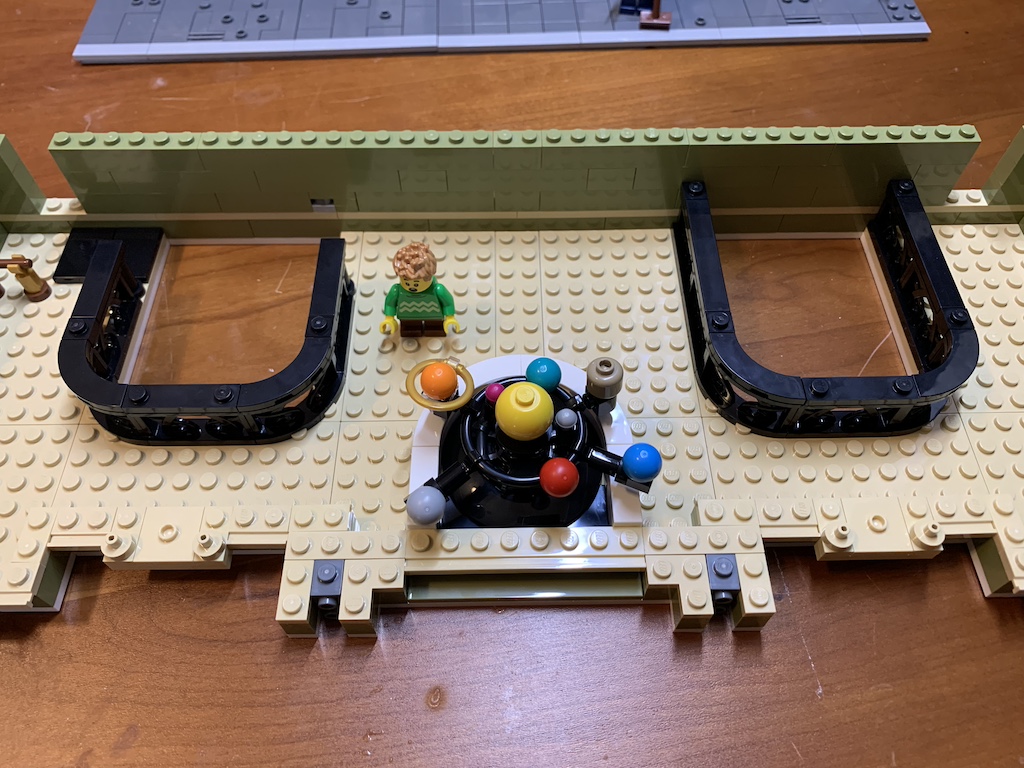
… and then other models of what would enable us to venture beyond our Earth and further into our galaxy.
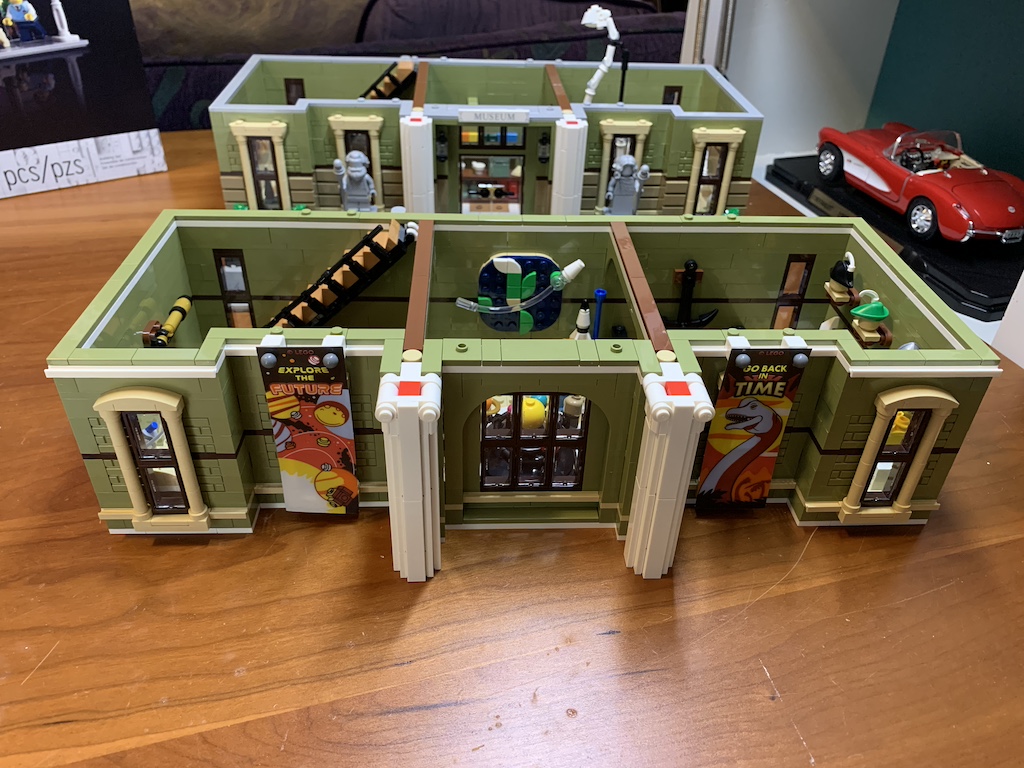
After adding a few more bags, I had not only finished building the walls and added some additional exploration exhibits…
… but I had completed the second floor.
This then allowed me to place the second floor on top of the first.

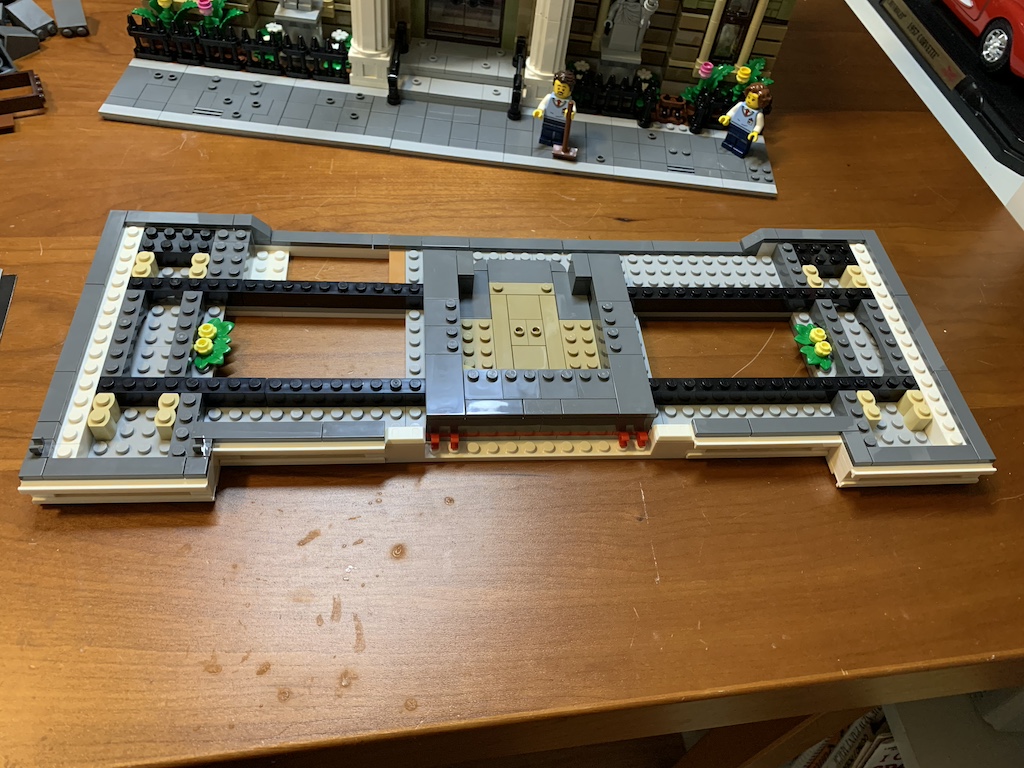
With nine bags left and over 2/3 of the way finished, I just had the roof section yet to complete—but this was not just any old roof.
The first few bags laid the foundation for the roof…
… and then I created the roof top office for the award-winning curator…
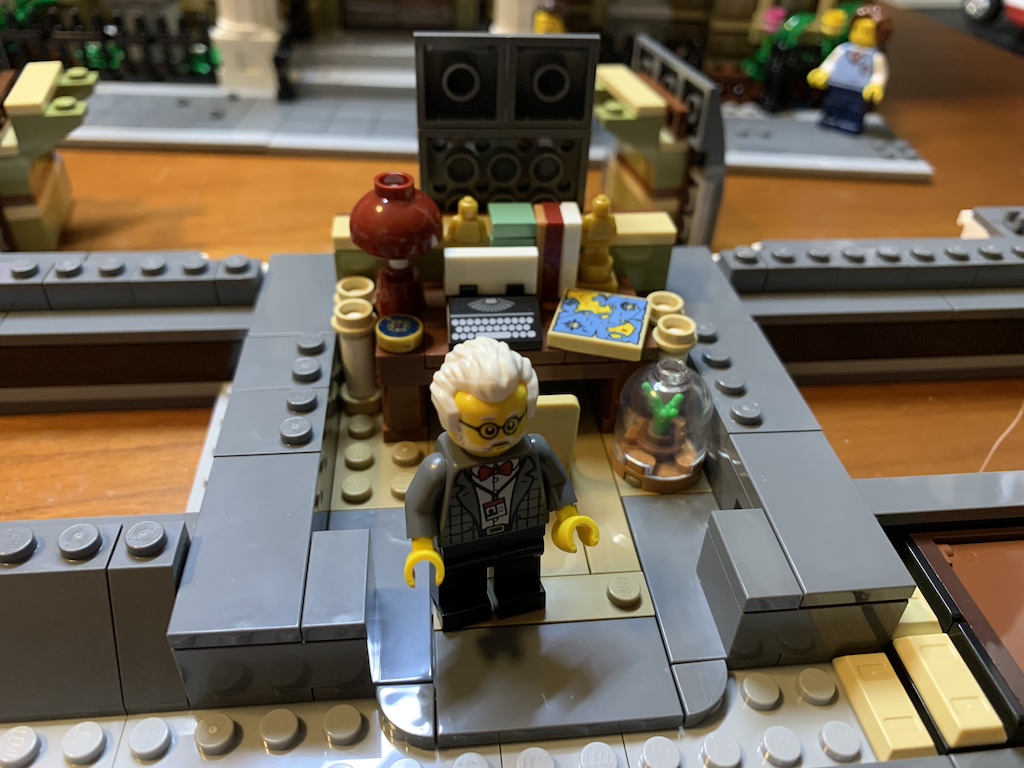
… that was then enclosed in a dome-like structure.

Bag 31 finished off the back side of the roof…
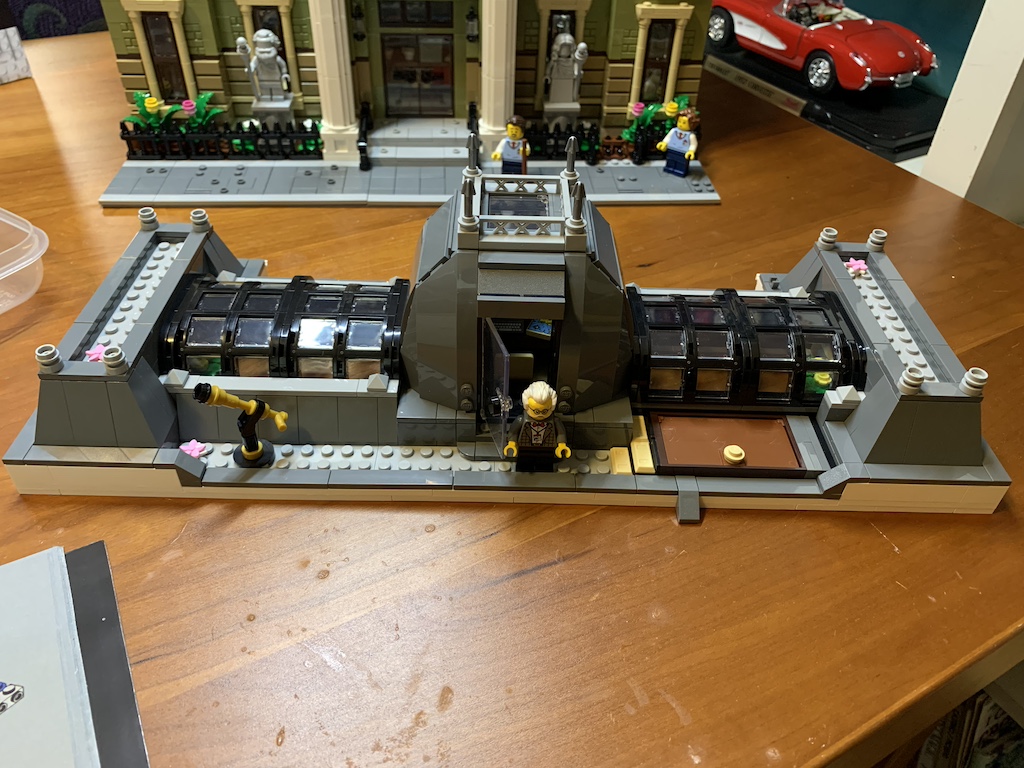
… complete with a telescope. I added this last feature just days after our lunar eclipse in the US on April 8th. I wonder when the telescope can be put to use for the next eclipse in the LEGO world.
Bag 32 added the front of the roof topping off the towering columns which allowed me to then place the roof on top of the museum.

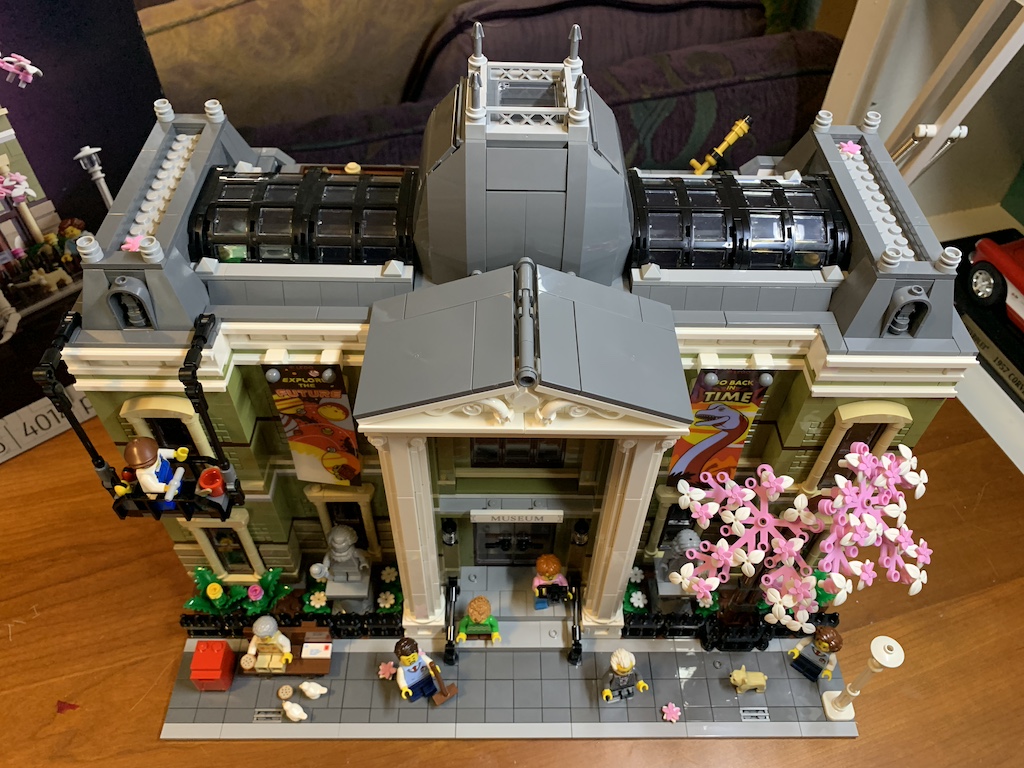
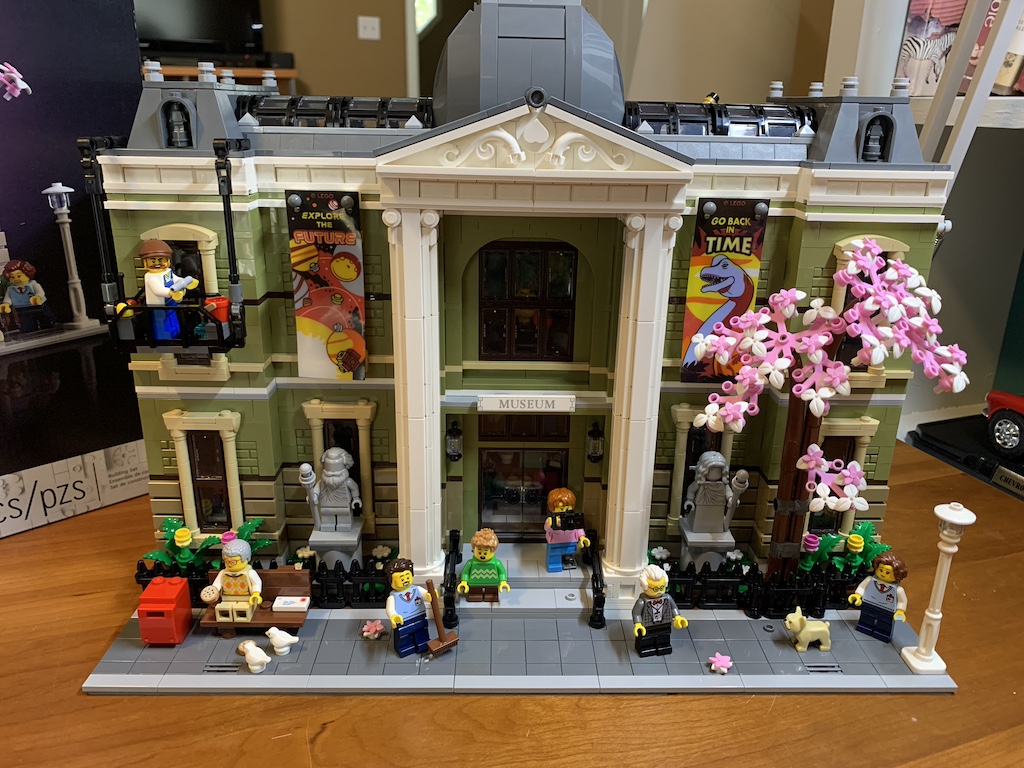
The last bag added a few additional nice features to the front of the museum.
I once again had a blast building this LEGO set and as on each of the previous sets I have built, not a single piece was missing further supporting the outstanding manufacturing prowess of the LEGO company.

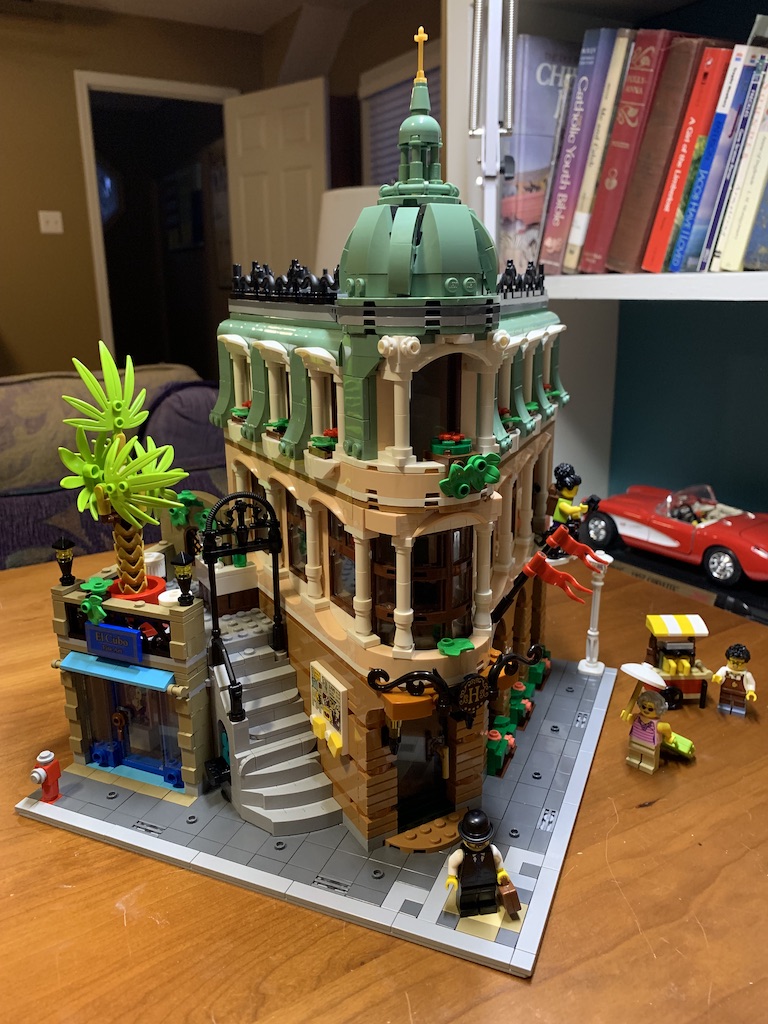
With the museum complete, I could now place it as the centerpiece of my little LEGO block and look forward to showing it off to my grandchildren upon their next visit, the youngest of whom has recently developed an extreme interest in dinosaurs!
Categories

What fun!
It really was!
What an amazing Lego kit! I enjoyed reading the story of your construction and the end product looks wonderful! I know you really enjoy working in the Lego world, but I think I might never have started if I found a 400-page instruction book! Great job!
Thanks Bro! I really like these large kits as the fun extends for s long time.
I so enjoyed this blog! Now that I am into Legos myself, I could vicariously enjoy you building this one. And all the intricacies!!! Great Dave!
Thanks and I’m glad you are into LEGOs now. It gives us something else in common.
What an amazing job! And a 400 page instruction booklet! LoL That is some project! I have to wonder though – are many of the tiny interesting features covered up by the next floor up? Great job, David. I can’t wait to see what you do next!
Thanks Betty! Yea you don’t see the interior with the building all assembled but there are just a few lugs that connect each floor together so the floors are easily removed one at a time to give a top down view of the interior.
This is so cool!! I love all the little details. The donut is so cute too. Can’t wait to see it next time I’m home!
Thanks, sweetie! I will have lots of cool LEGOs to show you when you come home.
Isn’t it fun you know
It certainly is. Thanks for stopping by to read.