
Doll House Furnishings – Phase 3
Continued from: Doll House Furnishings – Phase 2

With those kitchen fixtures purchased and, on their way, I was ready for the next step, drawing up an overall plan.
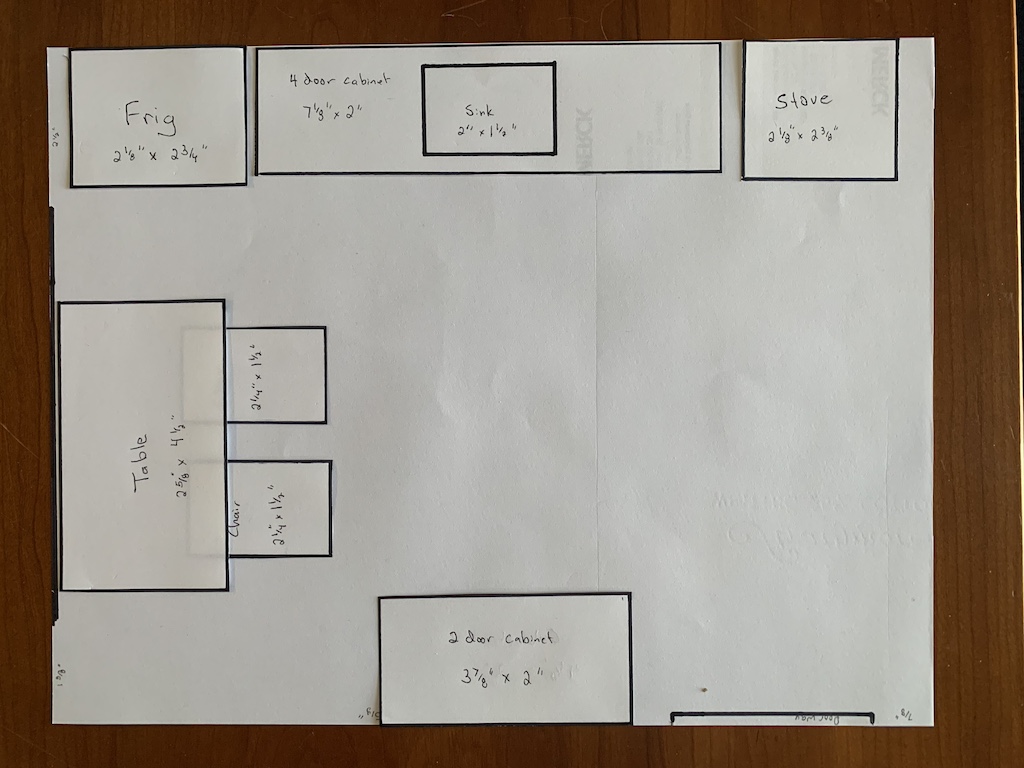
To this end, I cut out some paper to match the floorplan of the kitchen (10 1/2 inches wide and 13 9/16 inches deep). I also marked where the door and window were on the diagram to plan where cabinets could go. While measuring the room, I unfortunately discovered that the bottom of the window was less than the required three-inch height for the cabinets. I had originally thought I would put the kitchen sink beneath the window so one could look outside while washing dishes but that now would not work. So instead, I figured that would be where I would place the kitchen table and chairs so one could dine and see outside.
Before my purchases arrived, I was able to get the dimensions off the website and cut out little pieces of paper to represent their actual size on the plan. Now I could realistically figure out where everything would go and determine the length of the different cabinets. I played with several different lengths of cabinets before deciding to build a 2-door cabinet and a 4-door cabinet. Moving things around a bit and trying several different options, I came up with this final kitchen layout.
Now I was ready to build some cabinets. I gathered together some of the stock Basswood strips that I would need to use and cut out the two cabinet fronts and the three additional sides. I then sanded everything smooth.

I again applied two coats of stain but then discovered the first cabinet side I made did not match since it had two different stains on it. So, I had to make another one. Once I had added on two coats of polyurethane, I was ready to build the cabinets.

I cut the correct lengths of three different widths of strips and glued them on to make all four sides.

I cut some scraps of 3/8-inch square Basswood to give support in joining the front to the sides…
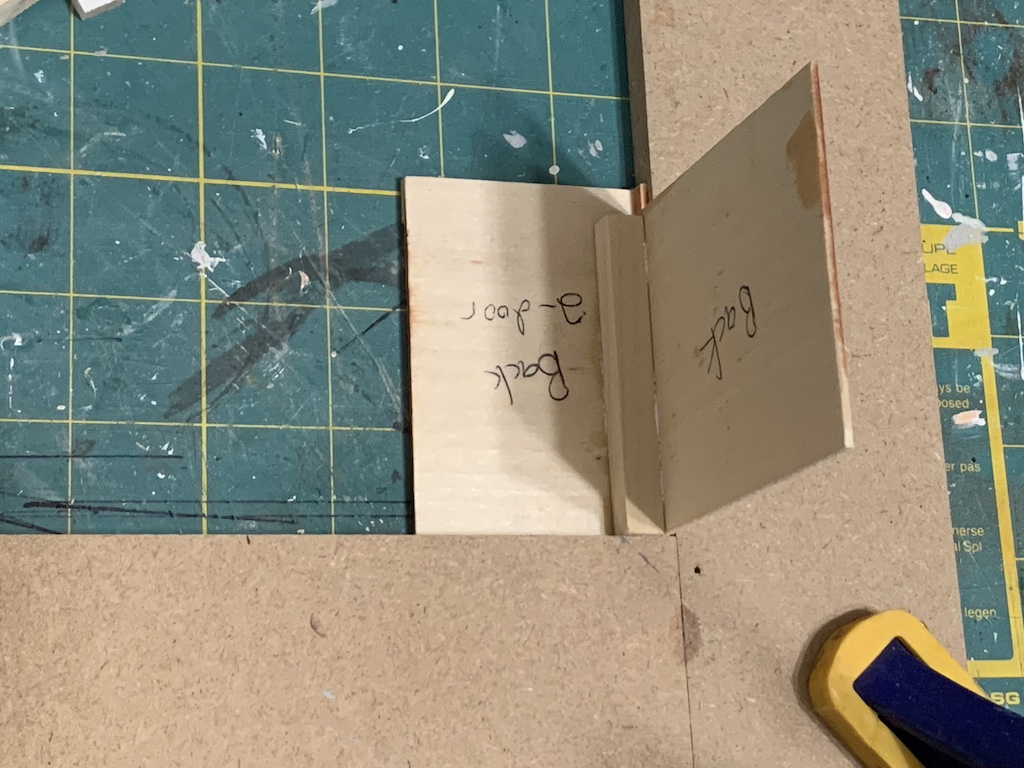
…and then some additional scraps to brace the back.
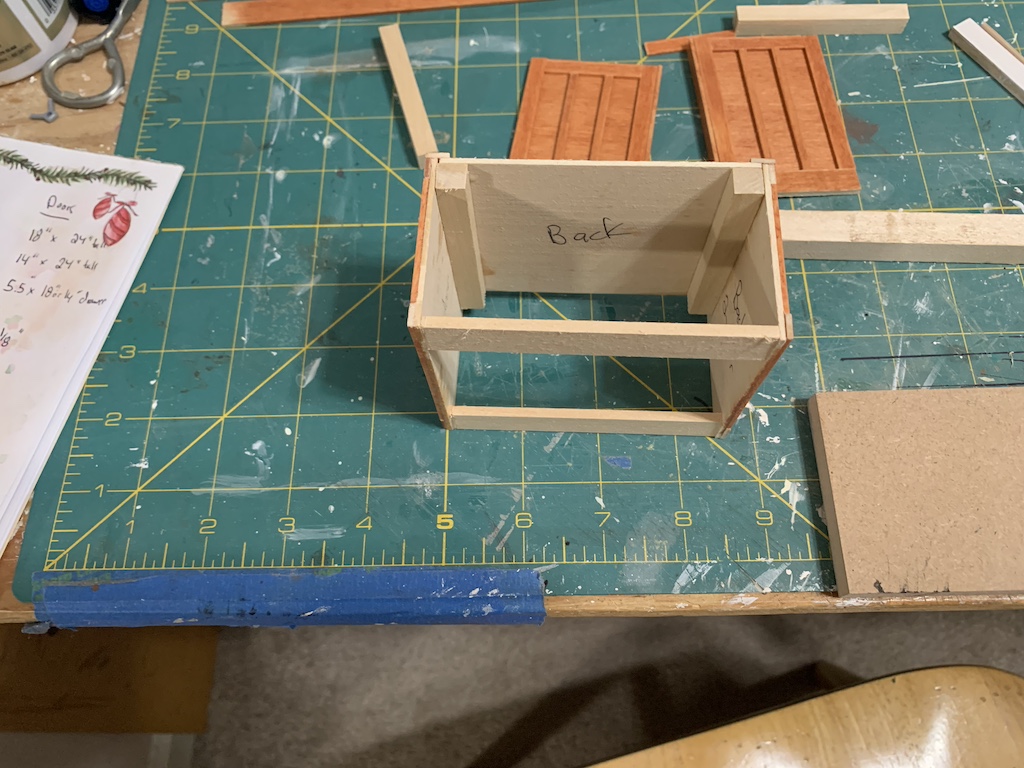
Once all the glue on that unit was dry, I could add the toe kick and begin working on the front trim.
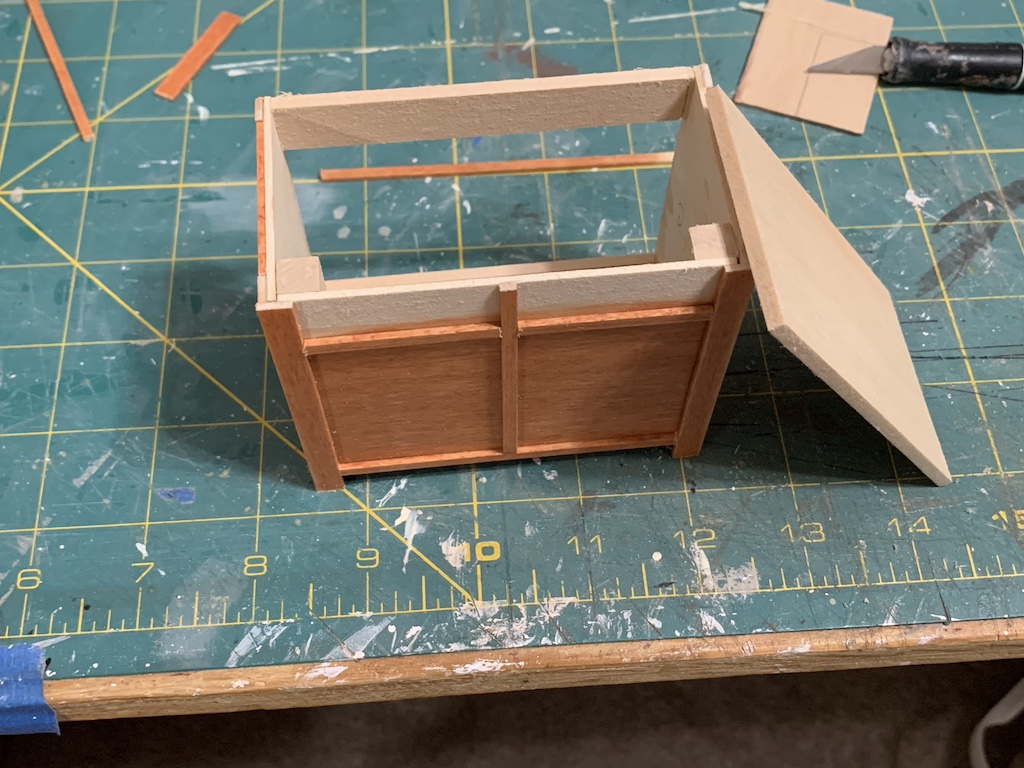
I also at that time cut the countertop from a sheet of 1/8-inch Basswood which I sanded and painted black (leaning against cabinet in photo above prior to painting).
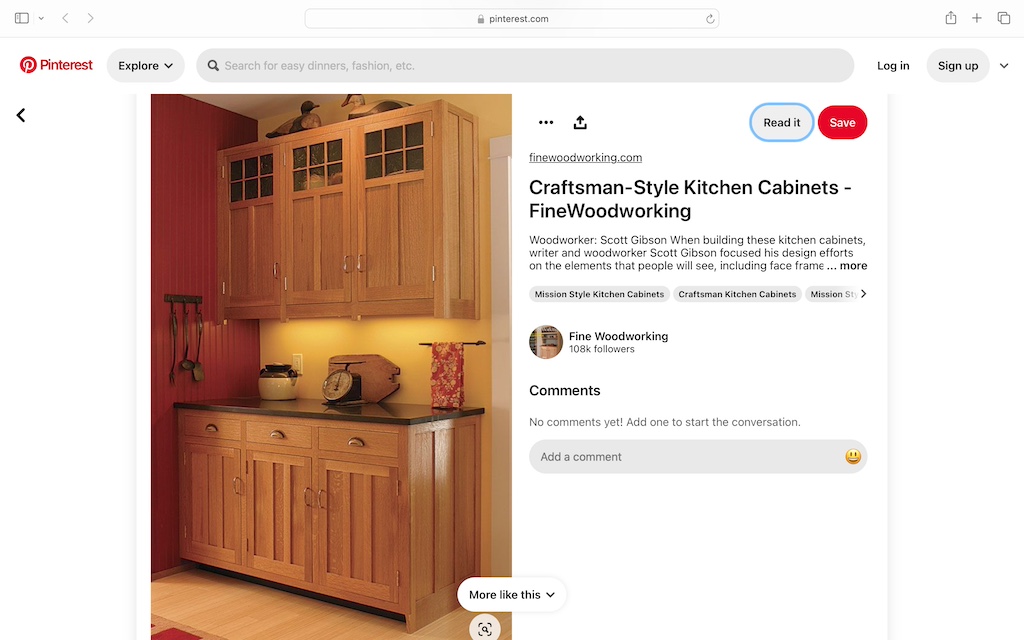
But before I could begin to add the Basswood pieces that would be the faux drawers and doors, I needed to figure out my hardware. In the photo of the actual cabinet, it had unique drawer pulls but simple rod door handles. I was actually able to find the drawer pulls at that same online store where I bought the kitchen appliances. However, they did not have similar door handles. But I knew I could make them myself if I had the right size metal wire.
I just happened to have some leftover wire from when I built my Balsa model airplane, but it was too thick of a gauge to fit the 1/8-inch strips of Basswood to which they would be attached. Another trip to a different hobby store yielded exactly what I needed.
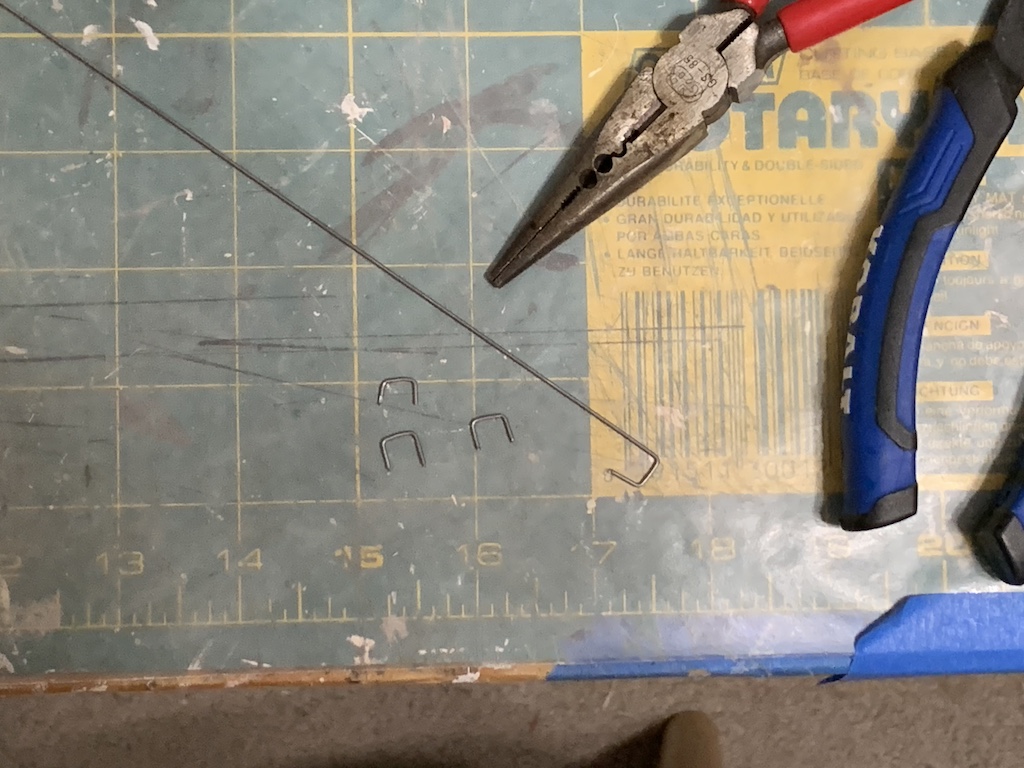
I was warned at the hobby store that I would need some heavy-duty pliers to bend the wire into the shapes I needed. They weren’t kidding. But after bending four into shape, I was happy with at least two of them.
It was a bit of a challenge figuring out where the door handles should go and how to pierce the Basswood with the wire without splitting it. I won’t bore you with the details but once I got it figured out, I could finish the cabinet. When I compared my completed 2-door cabinet with the full-size cabinet, I was most pleased with my miniature cabinetry.
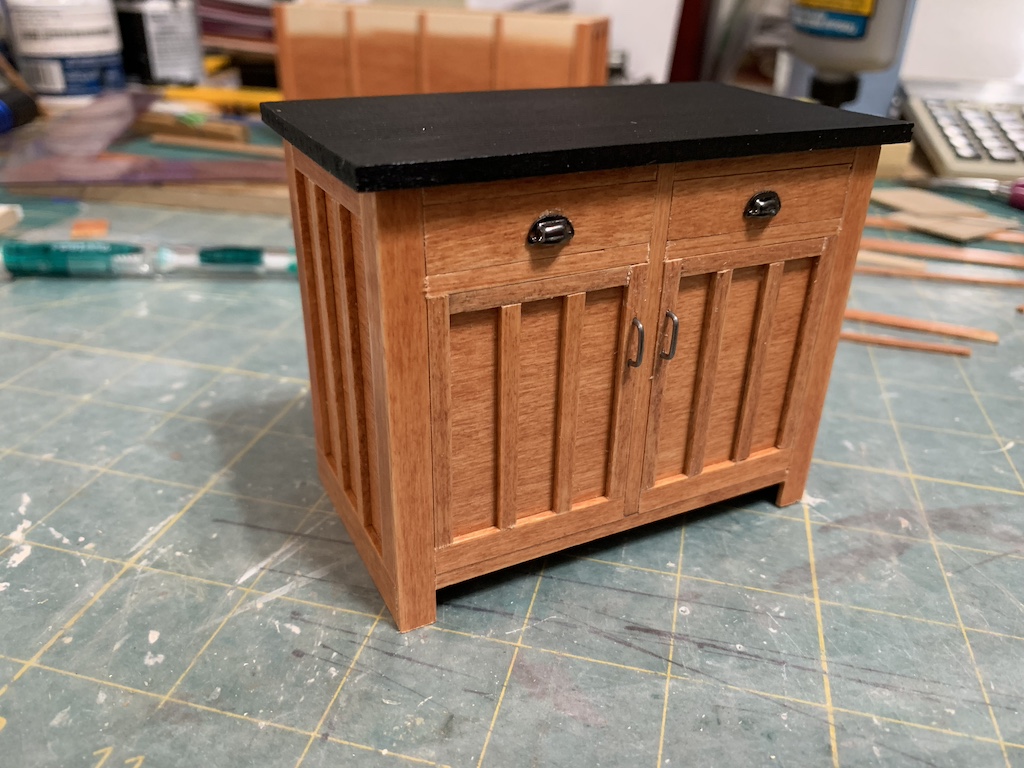
Finishing the 4-door cabinet followed a similar construction technique with the faux drawers and doors being added with the same sized Basswood strips.

But the difference was I needed to add a kitchen sink. I measured our sink, which was actually a double sink and estimated a single sink to be about 2 feet wide by 1.5 feet deep (making another easy conversion to 1/12-scale). I cut the whole for the sink and then made a wooden box with 1/2-inch Basswood for the sink.
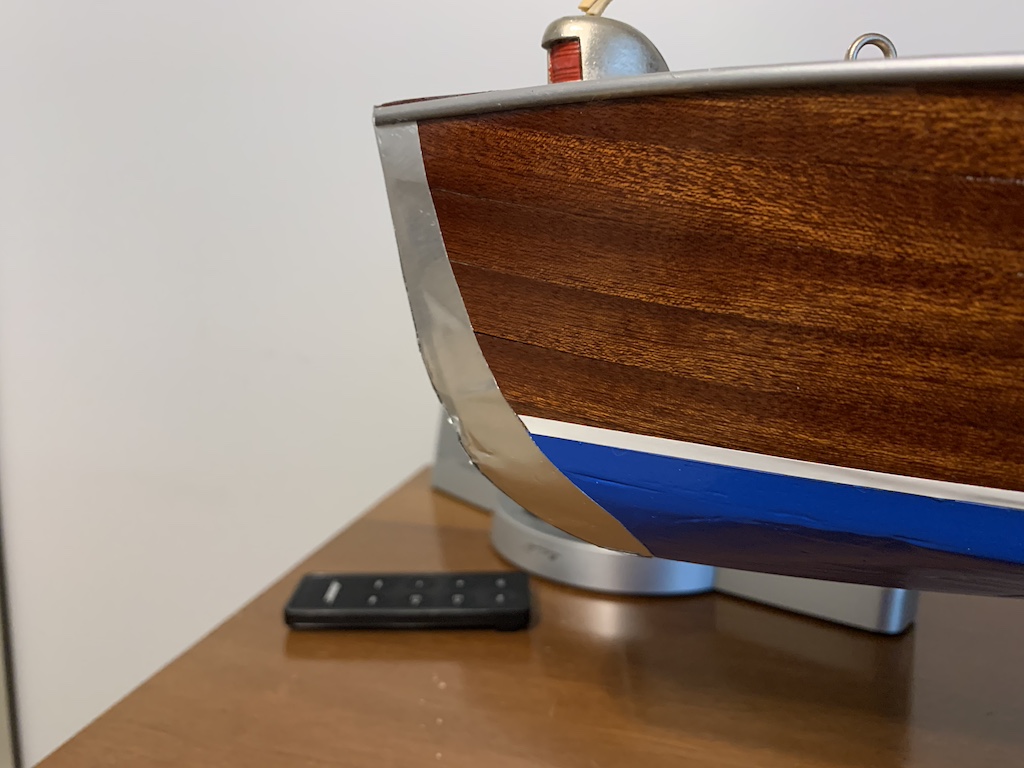
For the sink finish, I considered several options but decided the best was to use some self-adhesive 0.002-inch aluminum that I had left over from making the cutwater for my Chris-Craft boat (I’m not a pack rat but I tend to save scraps of modeling materials for possible future use).

This gave me what looked like a stainless-steel sink.
The last step was to add the faucet which I had also purchased along with the drawer pulls.
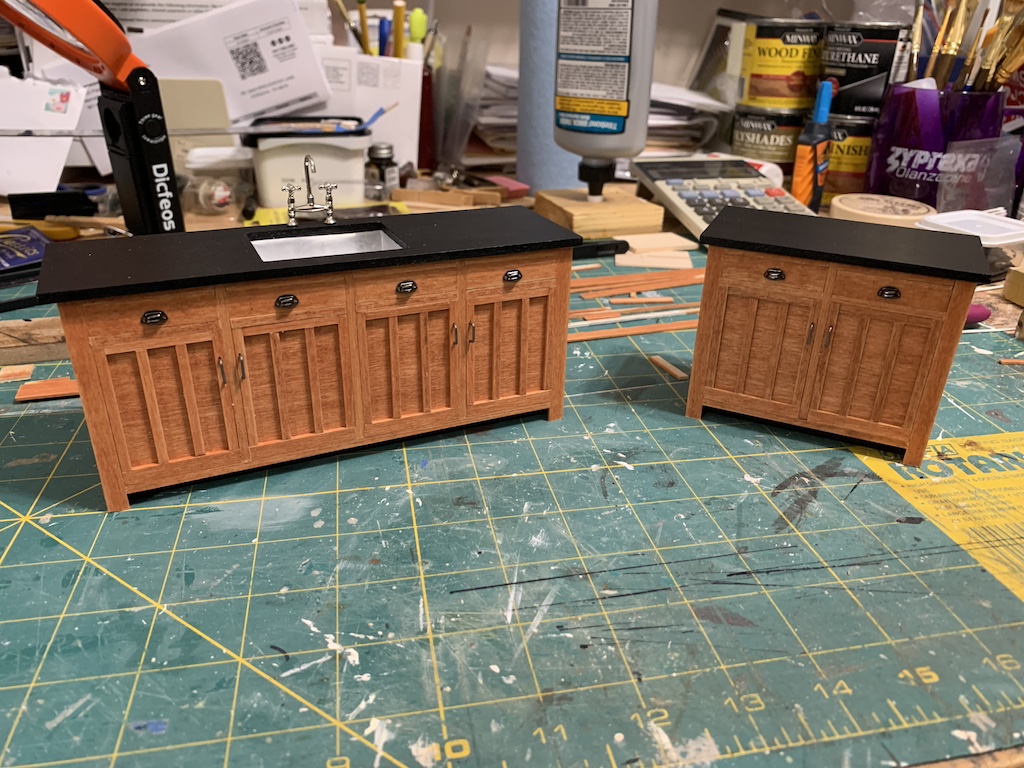
I was pleased with the finished cabinets and in spite of a few challenges I encountered along the way, was, without being boastful, a bit proud of myself for building these from scratch just using an idea from a photo.
Now I was ready to add everything to my paper floor plan to get a bird’s eye view before placing them in the kitchen. But as soon as I did, I immediately saw I had a problem. Oh no, what to do?
To be continued…
Categories

What gorgeous cabinets! Can’t wait to see the real deal.
Thanks, it won’t be long!
Beautiful job!
Thanks, Betty. Hope your cruise is going great!
We’re back home now, slowly catching up.