
Miniature Bookshelf Room – Getting Started

Last year for Christmas, my daughter and son-in-law gave me something new for Christmas. In years past, they have often given me books and occasionally puzzles which I have thoroughly enjoyed. But this year I was most surprised to open this miniature bookshelf room kit.
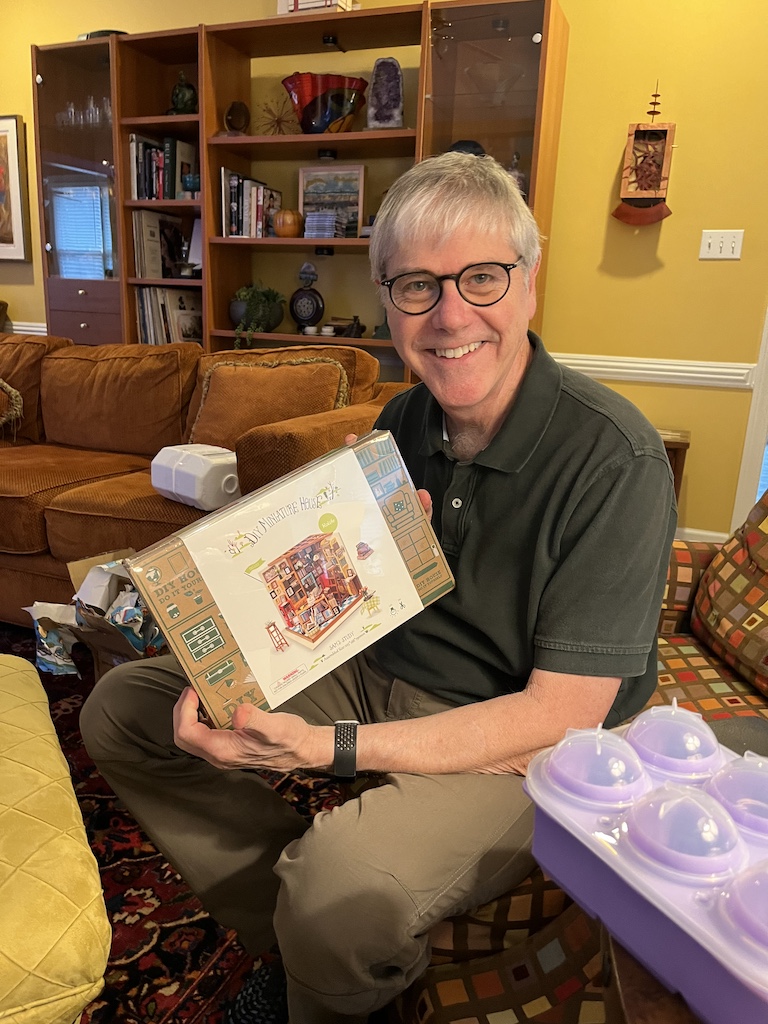
Since I had built six 1/12-scale doll houses since the start of the pandemic, I think spending a lot of my time in a miniature world inspired them to select this kit for me and in speaking with my daughter after Christmas, she said she had had a lot of fun just picking it out for me.
But it wasn’t until I had ended my winter puzzling season, that I got a chance to work on it (in my winter puzzling blog, this was the reason I had an abbreviated puzzle season as I knew this fun gift was awaiting me).
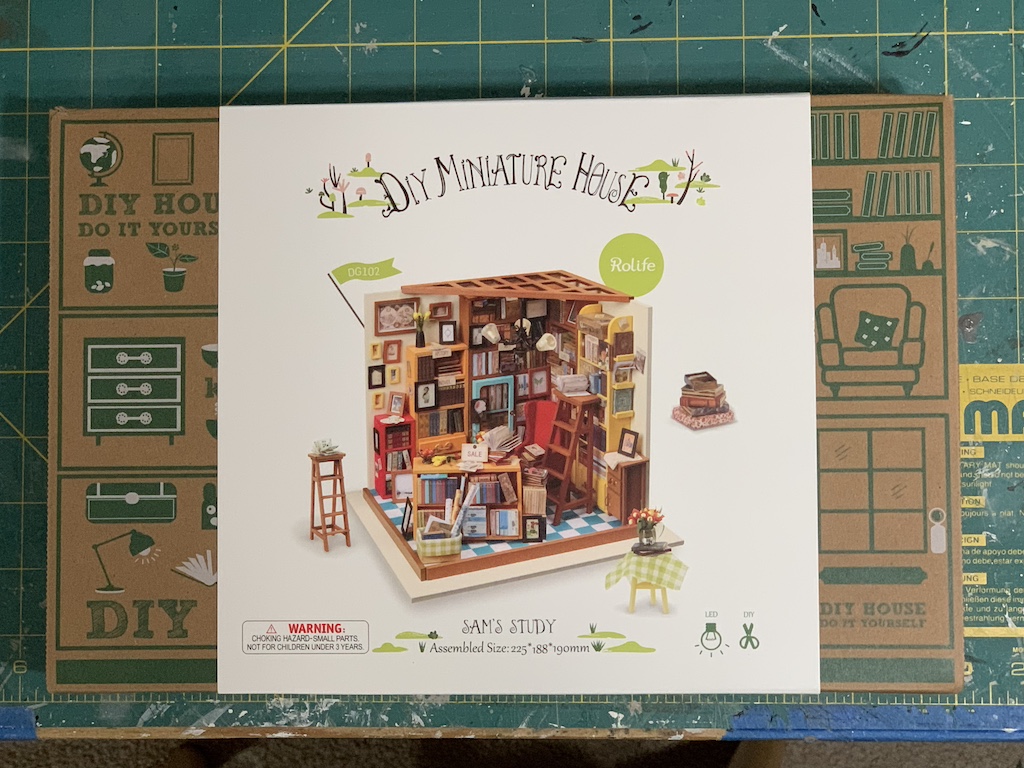
When I opened the box and took out the many clear plastic bags, I could immediately tell I was going to have a blast building this miniature, book-filled study. The kit included everything that was needed: pre-cut ready to assemble wooden pieces, real fabrics, pages of printed miniature books/paintings and even an electric light fixture. I was pleased to see that all of the wooden pieces were already painted. In all my dollhouse building over the last four years, painting was always the first major tedious step. I briefly flipped through the instruction booklet looking at the photos but then did discover that at the least, the base and two walls would need to be painted.
In fact, I discovered that the very first step was to paint the base and two walls. In the directions, it indicated that two coats should be sufficient to provide adequate coverage. I did note that the paint did appear quite thick but there were no instructions to dilute it. I dived in but after painting with three coats, I noted the brown wood still showed through. I decided to go ahead and dilute the paint with a little water to thin it out which made it much easier to spread, but still with three more coats, it still looked steaked.
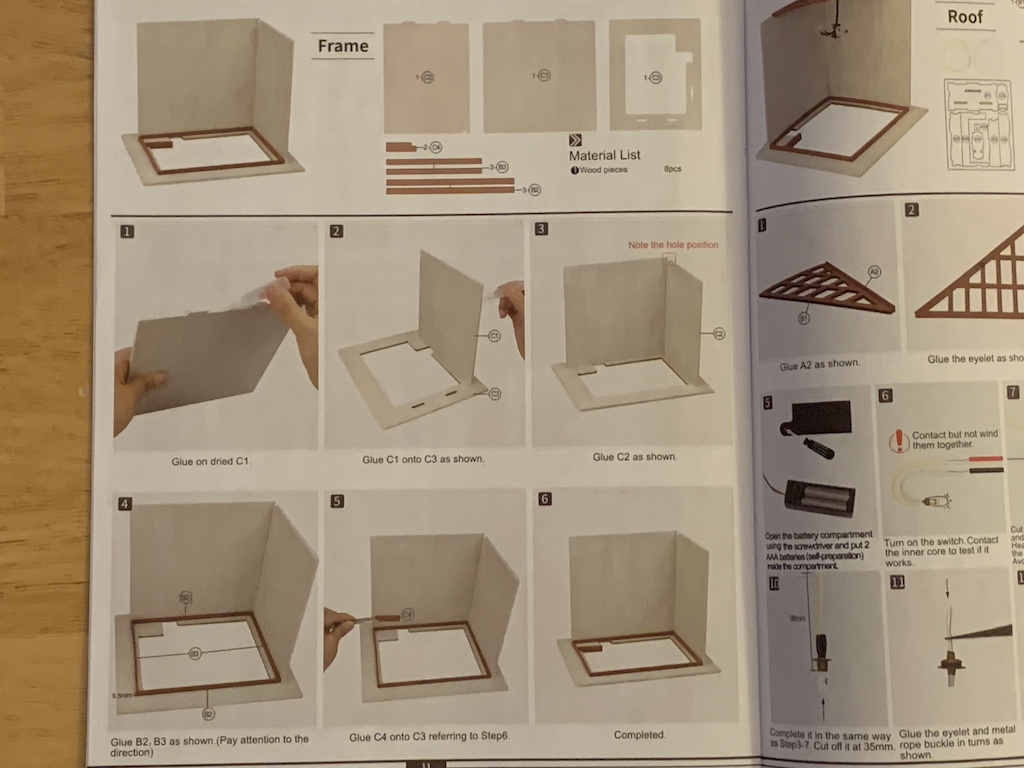
Looking at the section of the instruction booklet where the floor and walls are glued together, in the picture it looked as though their walls were streaked as well. I had painted all six coats in the same direction, so I decided to try painting at a 90-degree angle to those previous brush strokes to obtain better coverage. After two more coats, I was satisfied with the finish and happily done with all the painting.

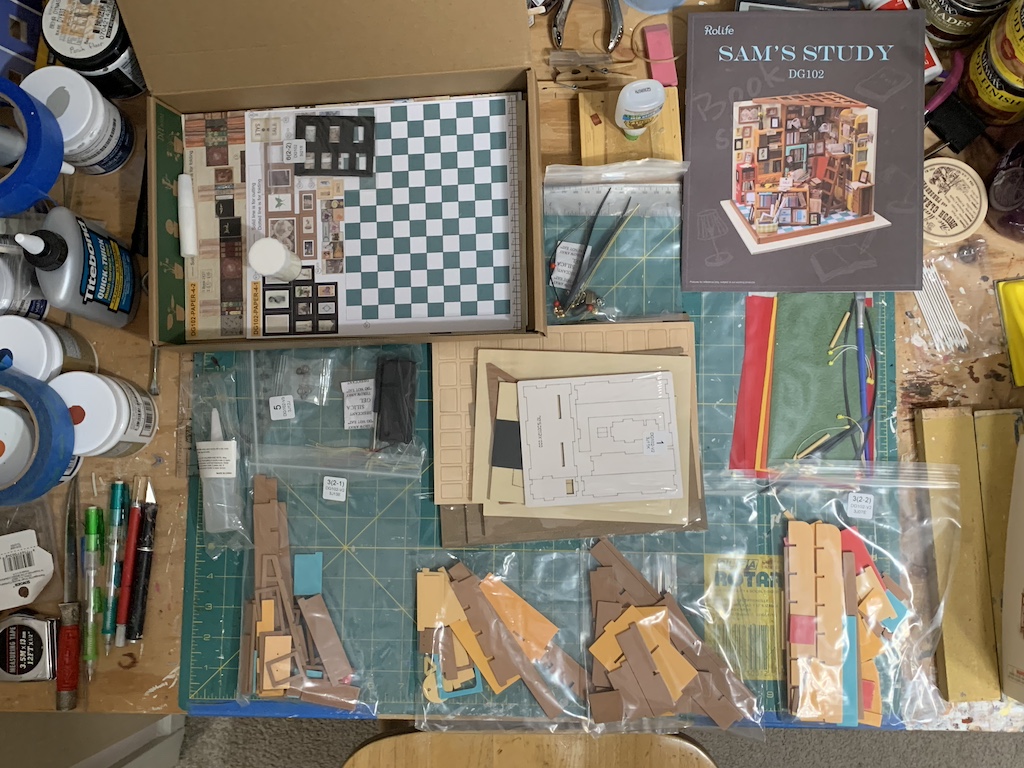
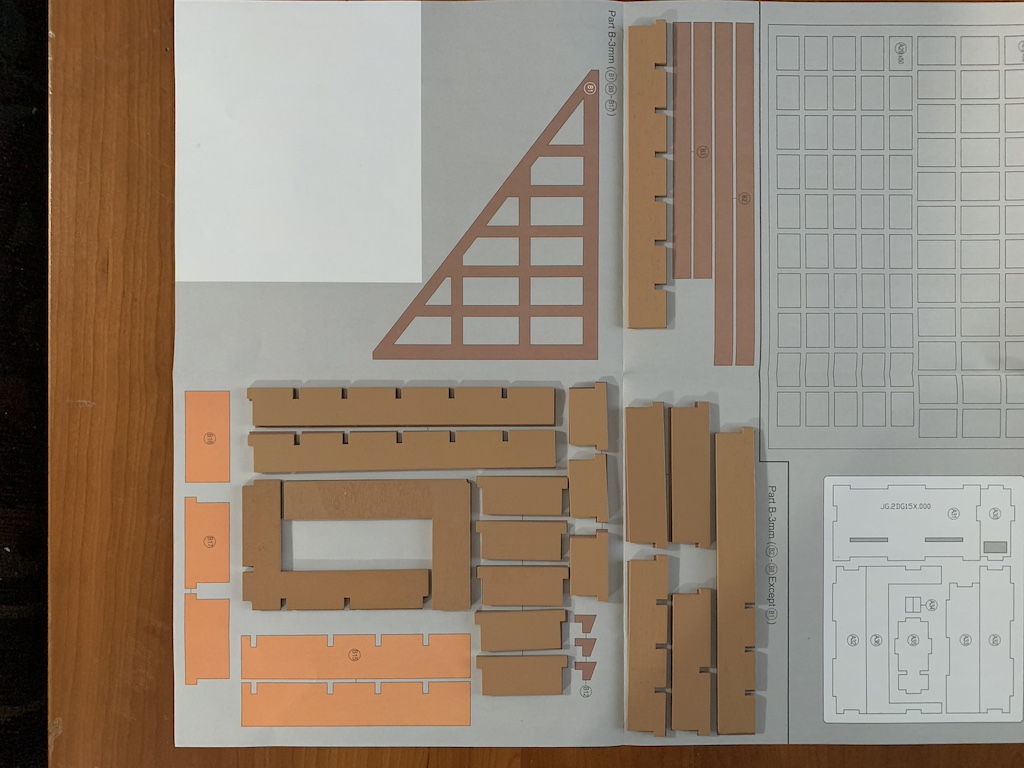
With that step complete, I was ready to start building the bookcases. The text in the instructions was very small, but thankfully I had a lighted magnifying glass that my wife had previously given me to better read the part numbers. To aid in identifying the correct pieces for each step, the kit came with a nice 1:1 scale template which I thought was a great idea.
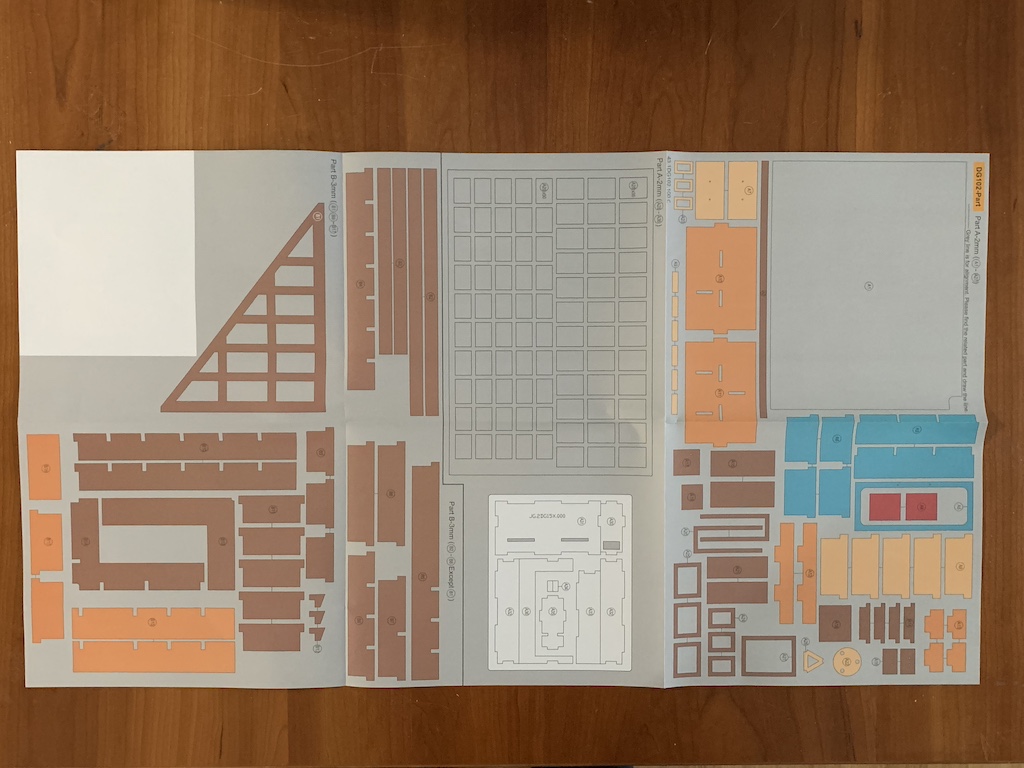
I figured the pieces needed for each bookcase might be organized like a LEGO kit where each bag included all the pieces for a single step. But no, they seemed to be randomly placed among different bags. I had to open three different bags just to get all the wooden pieces I needed to build the first corner bookcase.
The kit came with two different types of glue but after my less than satisfactory encounter with their paint, I decided to use my own glues which I was most familiar with as I had four different ones to choose from, depending upon what materials were being glued together.
I decided to use some of my handy tools from my dollhouse making years to ensure the bookcases were perfectly straight: clamps, right angles and straight blocks.

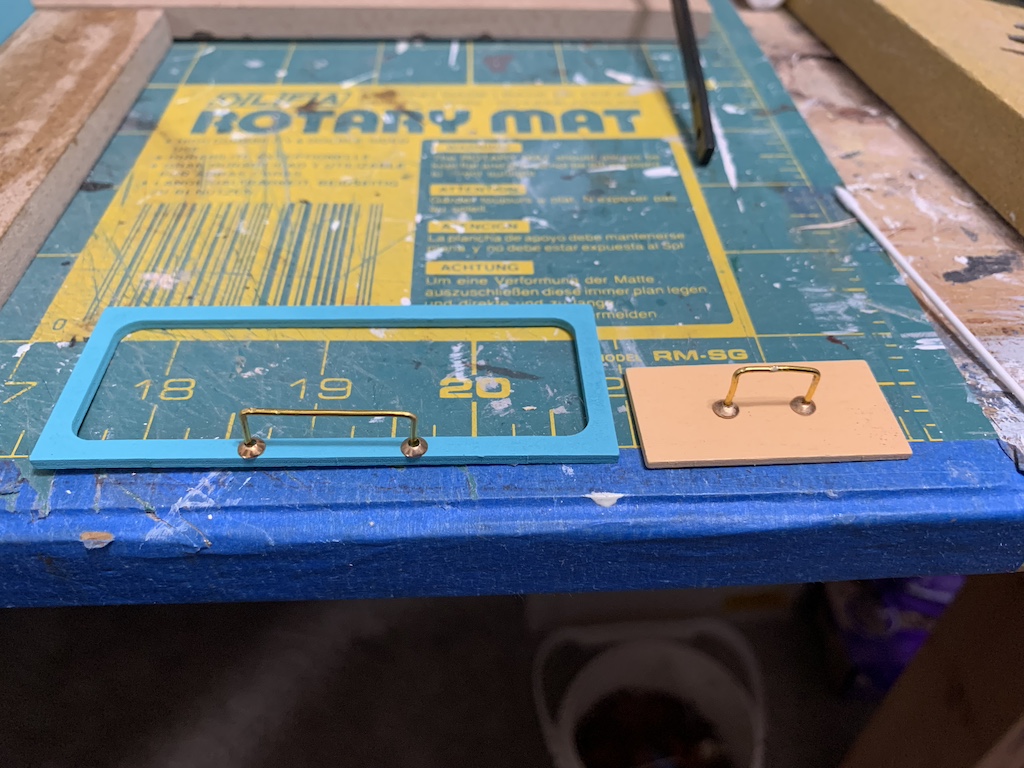
Making the drawer handles and door pulls proved a bit more challenging as the metal wire was extremely malleable. It did not take much to bend it even when I did not intend to. The first one (yellow drawer) didn’t turn out as nicely as I had hoped but after that experience, I got better and better with each one.
In spite of my inexperience with working with such small parts in such a long time, I think the first bookcase came out nicely.
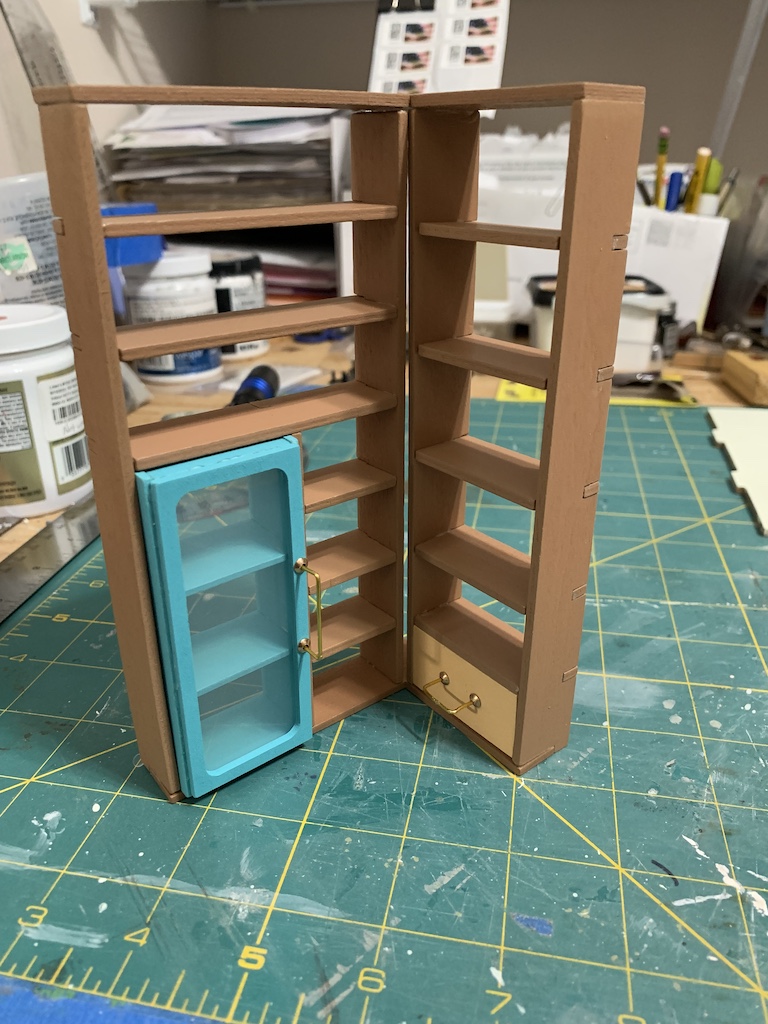
I then proceeded to make the other four bookcases. Some of the wooden parts were a bit warped, an issue I even had had in building the doll houses. But with my clamps, right angle, and blocks, I was able to straighten them out.
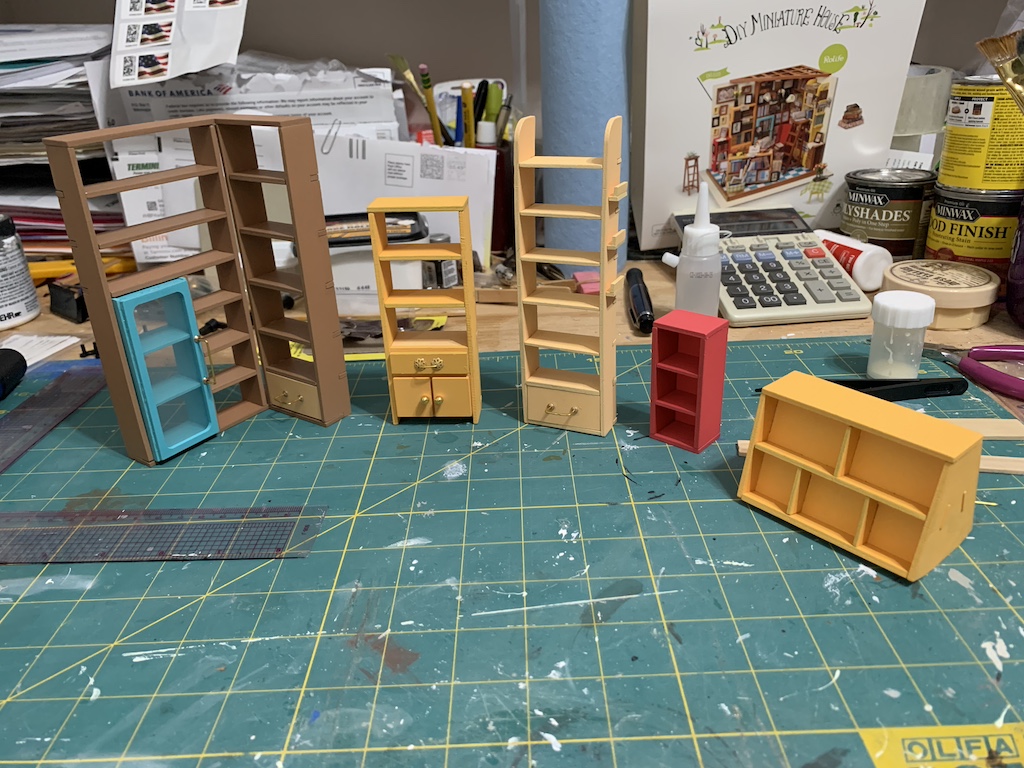
These aids came in handy even when I was building the drawered cabinet and step ladder.

The next step would be a bit different as I would be upholstering and assembling the sitting chair for the study, something I had never built before.
Having completed the bookcases, all made of pre-painted wood, I would next be working with several different materials for the sitting chair. The chair frame was made of wood, the fabric templates were paper, and the upholstery was red fabric. It was first necessary to cut out the three paper templates and then trace around them onto the fabric, twice for a front and back.
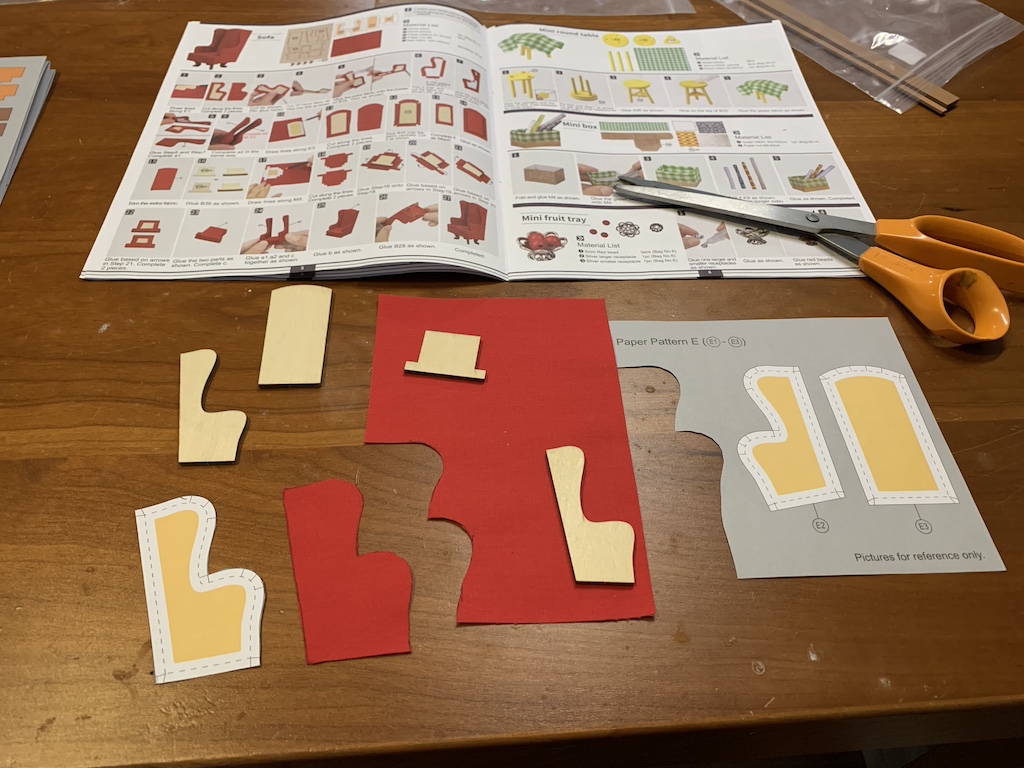
The first cut out fabric piece was then glued to the wooden frame and then the overlap fabric glued to the inside. To make the opposite side, the template was trimmed yielding just the yellow-colored center which was then glued to the second fabric piece with the fabric overlap again glued to the inside. Then the two pieces were glued together (a finished chair side is propped up on my pen in the photo below).

Once all the pieces were upholstered, I then glued them together using clamps to ensure a tight finish. The addition of the chair feet made the chair complete. Considering I never built something like this before, I didn’t think it turned out too badly.

To be continued…
Categories

David, this is quite the project! It seems the perfect gift for you. I am always impressed with your precise attention to detail. It looks great so far, as I’m sure it will when it is finished. Is the scale 1:12? Now, what would really impress me is if the books in the study were some of the ones featured in your annual book review post. 🙂 I look forward to the next post!
Thanks, Betty, it was a perfect gift for me. It did not list the scale but based on the 4 inch height of the step ladder, I would guess it is somewhere between 1/20 and 1/24 scale. And what an intriguing idea about the books. I never would have thought of that.
Hope you have a nice Sunday!
SO COOL! This looks like so much fun! I love how the chair turned out. Can’t wait to see it
Thanks and thanks for the great gift!